

Page 1
Page 2

Copyright 2013, Samson Technologies Corp.
v2
Samson Technologies Corp.
45 Gilpin Ave
Hauppauge, NY 11788
www.samsontech.com
Page 3

Introduction
Thank you for purchasing the Samson MTR231 multi-pattern studio condenser
microphone. Samson has a long history of developing high-quality microphones for
live and recording applications. The MTR series is our latest and most advanced
line of microphones featuring stunning sound reproduction and innovative design.
The MTR231 will quickly become your favorite tool in the studio, whether capturing vocals, acoustic or electric instruments. The microphone features a dual
1” gold sputtered diaphragm with three selectable polar patterns, providing an
extended flat frequency response ensuring accurate, linear reproduction of your
music. With its wide dynamic range and handling high sound pressure levels,
the MTR231 excels at picking up everything from very soft, to loud thunderous
sounds.
For additional isolation from unwanted noises, the microphone includes the
MSM1 shockmount. The revolutionary new design also allows for the MPF1 pop
filter to be mounted directly to the microphone making setup a breeze. A carry
case is included for transportation and storage of the microphone. It is recommended keep the microphone in the case when not being used.
In these pages, you’ll find a detailed description of the features of the MTR231,
as well as instructions for its setup and use, and full specifications. If your
microphone was purchased in the United States, you’ll also find a warranty card
enclosed—don’t forget to fill it out and mail it in so that you can receive online
technical support and so that we can send you updated information about this
and other Samson products in the future. Also, be sure to check out our website
(www.samsontech.com) for complete information about our full product line.
We recommend you keep the following records for reference, as well as a copy of
your sales receipt.
ENGLISH
Serial number: ________________________________________________
Date of purchase: ______________________________________________
Dealer name: __________________________________________________
With proper care and maintenance, your MTR231 will operate trouble-free for
many years. Should your microphone ever require servicing, a Return Authorization (RA) number must be obtained before shipping the microphone to Samson. Without this number, the unit will not be accepted. Please call Samson at
1-800-3SAMSON (1-800-372-6766) for an RA number prior to shipping your
unit. Please retain the original packing materials and, if possible, return the unit
in its original carton. If your MTR231 was purchased outside of the United States,
contact your local distributor for warranty details and service information.
MTR231 Multi-Pattern Studio Condenser Microphone
ESPAÑOLITALIANO FRANÇAISDEUTSCHE
3
Page 4
Features
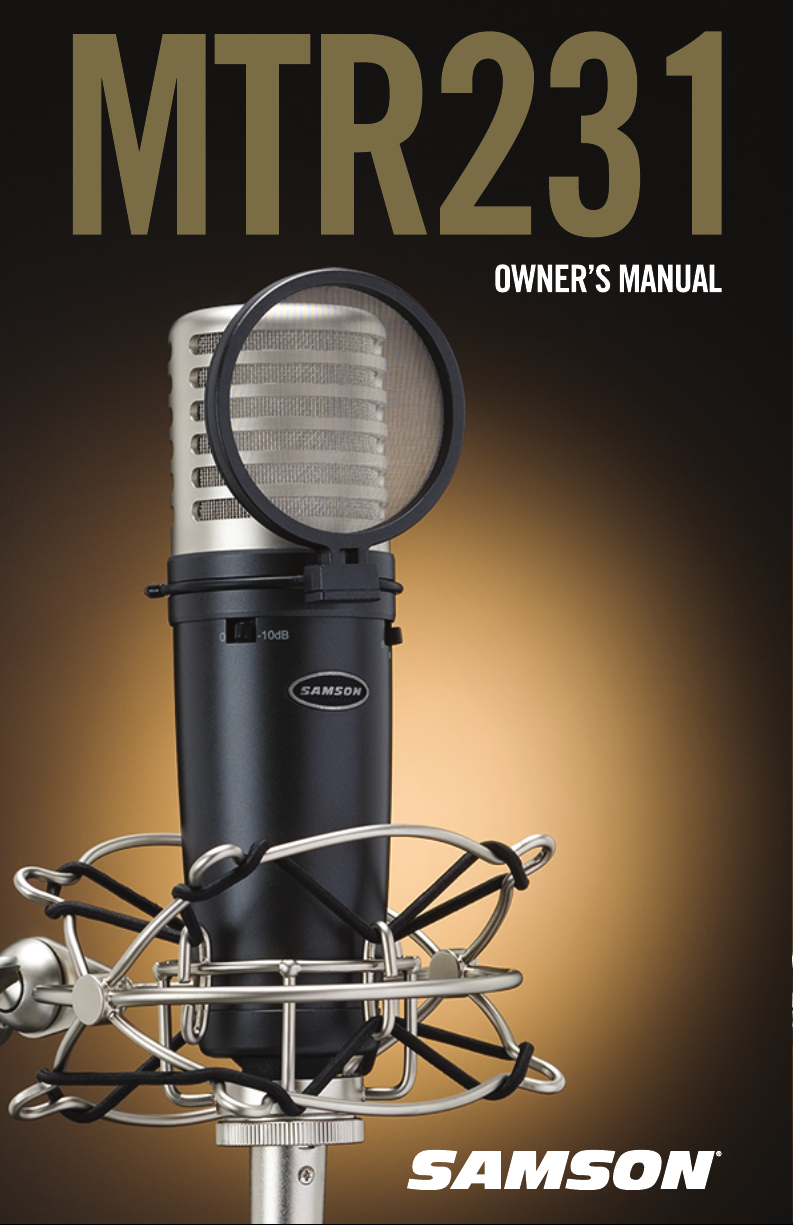
• Large diaphragm multi-pattern studio condenser
• Dual 1” gold-sputtered capsule
• Smooth and transparent sound reproduction
• Selectable pick-up pattern: Omnidirectional, Cardioid,
Figure-8
• 48 volt phantom power operation
• 10dB attenuation pad
• Internal capsule shock mounting
• Extended smooth frequency response
• Durable die cast construction
• Gold-plated XLR connector
Accessories
• MSM1 shockmount
• MPF1 Pop filter
• Carry case
4
Page 5

Powering
The MTR231 is a condenser microphone and therefore requires 48V phantom
power. Phantom power is provided by a mixer’s preamplifier channel or if necessary, an external phantom power supply and sent to the microphone along a balanced microphone cable.
To ensure the longevity of your equipment, and is good mixing etiquette, always
turn down the master fader and monitor controls to zero when switching the phantom power on or off.
Poor microphone performance can be attributed to phantom power issues. If you
notice that the microphone is exhibiting reduced signal output, increased noise, or
decreased headroom (distortion), there may be an issue with the phantom power
supply or the microphone cables.
Setting the Microphone Level
When connecting the MTR231 to a mixer, use a balanced cable and be sure that
the input is balanced and connected to a channel that is set for microphone level.
Also, be sure that the phantom power is engaged. Most mixers and recorders of
reasonable quality will offer a microphone input with mic trim (usually called Trim
or Gain) control. The purpose of the mic trim control is to optimize the amount of
good signal over any noise that may be associated with the mixer’s electronics. A
good mic pre with trim will have a peak or clip indicator. To set an optimal level
on the mic, place the MTR231 in front of the desired sound source and slowly
raise the mic trim control until you see the PEAK LED light up. Then, turn the mix
trim control down until the LED does not light any more. For most applications,
the ideal setting is to set the trim control as high as possible without lighting the
peak indicator.
ENGLISH
MTR231 Multi-Pattern Studio Condenser Microphone
ESPAÑOLITALIANO FRANÇAISDEUTSCHE
5
Page 6

Polar Pattern
An important characteristic of any microphone is its directionality or polar pattern.
The MTR231 features a dual-membrane capsule allowing for a choice of three
individual polar patterns: omnidirectional, unidirectional (cardioid), and bidirectional (figure-8). The microphone pattern can be selected using the three-position
slide switch below the right side of the grill. Each pattern has distinct pick-up
characteristics with respect to the sensitivity and frequency response to sounds
arriving from different directions. The following section discusses some of the
features of each pattern, to help you choose the best setting for you application.
Omnidirectional - The omnidirectional setting reproduces sound from all directions,
(including off-axis), with an even frequency response, which makes it resistant to
the phenomenon know as proximity effect. It captures a greater amount of ambient sound than the other settings, and thus will include more of the room sound
than when using a directional setting. The omnidirectional setting is great for
recording ensemble performances including group vocals, brass, woodwind, and
other instruments with the artists facing each other in a circle around the microphone. To select the omnidirectional pickup pattern, set the pattern selection
switch to the left position, indicated by the circle icon.
Unidirectional (cardioid) - The cardioid pickup pattern is the most widely used for
studio and live miking applications. It captures sound in front of the microphone
and rejects sound from the sides and back, which allows for better separation of
instruments in the studio, and picks up more of the instrument sound in relation
to the sound of the room. The separation also allows for more control and more
gain before feedback in live sound reinforcement situations. To select the cardioid
pickup pattern, set the pattern selection switch to the center position, indicated
by the “heart-shaped” icon.
Bidirectional (figure-8) - This setting captures sound directly in front and back of
the microphone while rejecting sound on the left and right sides, and has minimal
off-axis frequency response deterioration. It is very useful in a variety of stereo microphone techniques. The figure-8 pattern can be used to simultaneously capture
two instruments or vocalists by positioning the microphone directly between them,
so one is addressing the front of the microphone and the other the rear. To select
the figure-8 pickup pattern, set the pattern selection switch to the right position,
indicated by the “8” icon.
See the section on “Microphone Placement” on page 8 and the section on
“Stereo Microphone Techniques” on page 10 for some considerations when
placing the microphone in different recording applications.
6
Page 7

10dB Attenuation Pad
The MTR231 includes a 10dB attenuation pad that can be selected with the slide
switch located below the grill, which is used to prevent overloading the onboard
preamplifier by lowering the input sensitivity of the microphone preamplifier
circuit. Setting the switch to the left (0dB position) the control is bypassed and
there is no effect on the signal. When the switch is set to the right (-10dB position) the input sensitivity of the microphone will be lowered by 10dB. This is useful when close miking loud sound sources with very high transient sounds, such as
drums, cymbals or brass instruments.
Before setting the attenuation pad switch to the -10dB position, it is advisable to
perform a sound check and to optimize the input signal levels using proper gain
staging. If distortion is apparent when the performer is singing or playing their
instrument at maximum level, work backwards through the signal chain to find
out where the distortion exists. First check the microphone preamp level. If it is
set to the minimum position and there is distortion, activate the preamplifier pad
switch. If the signal level drops and the distortion goes away, then the microphone
preamp was overloaded. If the level drops but the distortion remains, then the
overload is happening at the microphone input. Set the attenuation switch to
the -10dB position. If the distortion still remains, then either have the performer
lower the level of their instrument or move the microphone further away from the
sound source.
ENGLISH
MTR231 Multi-Pattern Studio Condenser Microphone
ESPAÑOLITALIANO FRANÇAISDEUTSCHE
7
Page 8

Microphone Placement
In order to maximize the quality of the sound you are capturing, you must pay
careful attention to the placement of your MTR231 and how it is positioned for
the instrument or vocalist. When the MTR231 is set to the cardioid polar pattern,
it exhibits a phenomenon known as “proximity effect” which is a resulting change
in the frequency response of a microphone based on the position of the microphone capsule relative to the sound source. In order to get the best frequency
response, start by pointing the microphone directly on axis with the sound source.
You can change the sound characteristics that the microphone picks up by changing the position of the microphone. Rotating the microphone away (off-axis) from
the sound source will decrease the sensitivity to higher frequencies. Experimentation and experience is the best way to find out what sounds best for your recordings. Below are some tips for when setting up and using your MTR231 in typical
applications.
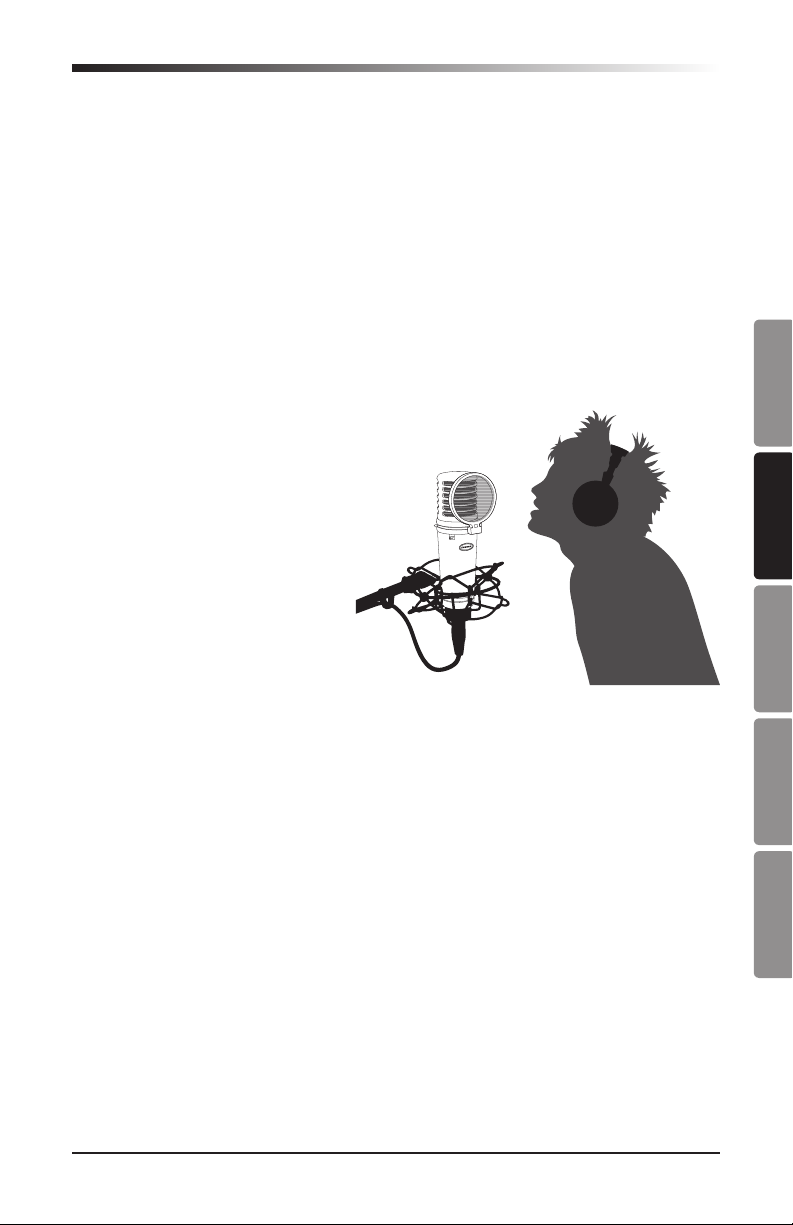
Vocals
With the microphone pattern switch
set to the cardioid position, place
the microphone directly in front of
the artist so that the microphone
grille is between 6 and 24 inches
away. The closer the vocalist moves
to the microphone, the more the
bass or low response increases.
As the vocalist moves away from
the microphone, the tone becomes
more natural as the low frequency
rolls off. To achieve the fullest sound, the vocalist should aim the microphone
center line towards their mouth. If some consonants such as ‘P’ and ‘S’ seem to
jump up in level, rotate the microphone a little bit away from the artist so that
sound arrives at the microphone slightly off-center. It is preferable to prevent
these peaks through the use of the MPF1 external pop filter. If recording a group
of singers, ensure that they position themselves around the front of the microphone close to one another.
Acoustic Guitar
There are a variety of ways that the MTR231 can be used to mike an acoustic
guitar. Optimal microphone placement will depend on the type of instrument, and
what kind of sound you’re looking to capture. It may be necessary to experiment
with various positions to achieve full and balanced tone. When miking a standard steel string acoustic, it is suggested that you begin with the microphone at
a distance of 6–12 inches from the sound hole, positioned slightly off-axis, and
pointing towards the edge of the fingerboard. From this position, moving the microphone towards the sound hole will cause the mic to capture more low frequencies. If, instead, you wish to capture more high-end, or to remove any unwanted
booming sound, move the microphone toward the fingerboard. Unlike a steel
string acoustic guitar, the sound of a nylon string acoustic guitar that is played by
8
Page 9

Microphone Placement
finger picking is usually naturally warmer. To record an even, full tone, it is suggested that you begin by positioning the microphone 3–6 inches above the center
of the bridge. This will help emphasize the higher frequencies and pick up the
attack sound of the finger picking. If the microphone is picking up too much low
frequency from the sound hole, move the microphone so that it is slightly off-axis
from the guitar. If you have a pair of MTR231 microphones, try one positioned at
the fingerboard and the second over the bridge of the guitar, or have one microphone positioned close to the guitar and the second a few feet away to pick up the
sound of the room, blending the two sources together.
Piano
The piano is a very challenging instrument to capture, and there are numerous
microphone techniques that can be used. For close-miking the piano, position
the MTR231 just inside the piano, centered between the soundboard and the
open lid. The closer you move the microphone toward the instrument the more low
frequencies the microphone will pick up. For an ambient recording like that used
in a classical performance, position the microphone outside the piano, facing
into the open lid. For a more contemporary ensemble sound, place two MTR231
microphones in the piano, positioning one over the bass strings and one over the
high strings at a distance of 6–12 inches apart. When miking an upright piano
with a single microphone, position the microphone just above and in front of
the piano with the top open, centered over the instrument. If you have a pair of
MTR231 microphones, position the microphones over the open top of the piano
with one microphone over the bass strings and one over the high strings. You can
also position two mics in front of the kickboard area approximately 8 inches over
the bass and high strings.
Overhead Drum Kit
Thanks to its extended high frequency response and fast transient response, the
MTR231 performs outstandingly when used as an overhead cymbal microphone.
You can position one MTR231 on a boom mic stand directly above the kit pointing from front to back. For stereo miking, use two MTR231 microphones placed
over the drum set at a distance of three to five feet. You can experiment with the
exact placement depending on the size of the room and whether you’re looking
for an ambient or close-miked sound. In general, when miking a drum kit, it’s a
good idea to start with the overhead mics. Even though you use the overhead mics
mostly for the cymbals, you can get the entire kit to sound great with just one
overhead. Using overhead mics, it is easier to simply turn up your individual mics
for more attack and thickness in the overall sound.
ENGLISH
ESPAÑOLITALIANO FRANÇAISDEUTSCHE
MTR231 Multi-Pattern Studio Condenser Microphone
9
Page 10

Stereo Microphone Techniques
The term “stereo” will be used here to describe different microphone techniques
using multiple channels of audio to create a reproduction of the sound stage over
a pair of loudspeakers. There are many approaches that can be used with two or
more microphones, but we will focus on three methods: spaced microphones, X/Y
coincident pairs and Mid-Side (MS).
Spaced Microphones - This technique utilizes two microphone placed 2-10 feet
apart (sometimes a third microphone is used in the center). Traditionally, engineers have chosen omnidirectional microphones for this method which have a flat
polar and frequency response, but include more of the reverberant sound of the
room compared to the direct signal. This approach works well for smaller performance groups, such as chamber music, where specific imaging of instruments on
the stereo plane is not crucial. The closer the two microphone are arranged, the
wider the stereo image appears. The figure-8 pattern can be used for this technique but in this case, the microphones need to be angled in the direction of the
sound source. Cardioid microphones are usually avoided due to the degradation of
its off-axis frequency response.
X/Y Coincident Pairs - This technique uses two cardioid microphones placed as
close as possible together with a splayed angle of 90°-135°. The closer the angle
between the microphones is to 90°, the more narrow, or mono, the soundstage
will appear. Since cardioid pickup patterns tend not to reproduce signals off-axis,
the result is a drier, more direct sound recording. A variation of the X/Y pairs,
is the Blumlein configuration which utilizes two crossed figure-8 patterns. This
technique can also be used as a variation to the Mid-Side method below. Using
this approach produces a more natural sound, because the polar and off-axis
frequency response is much better than the cardioid pattern, it captures more of
the room’s reverberant sound. The disadvantage using two figure-8 microphones
is that they will pick up sounds coming from behind the microphones, which may
not be desirable.
Mid-Side (MS) - The MS configuration might be the most versatile and powerful technique of the three discussed. This arrangement typically uses a forward
facing cardioid microphone for the “mid” portion, which is recorded equally to
the left and right channels, and a side facing figure-8 microphone for the “side”
component which is recorded to the left and right channel (with one of the channel’s polarity reversed). The MS method has the best stereo-to-mono compatibility,
because when the two channels are summed to mono, the side microphone is
completely cancelled. The width of the stereo field can be made wider or more
narrow by adjusting the level of the “side” component relative to the “mid” component.
10
Page 11
Shockmount
To isolate the MTR231 from external vibrations and prevent unwanted noises that
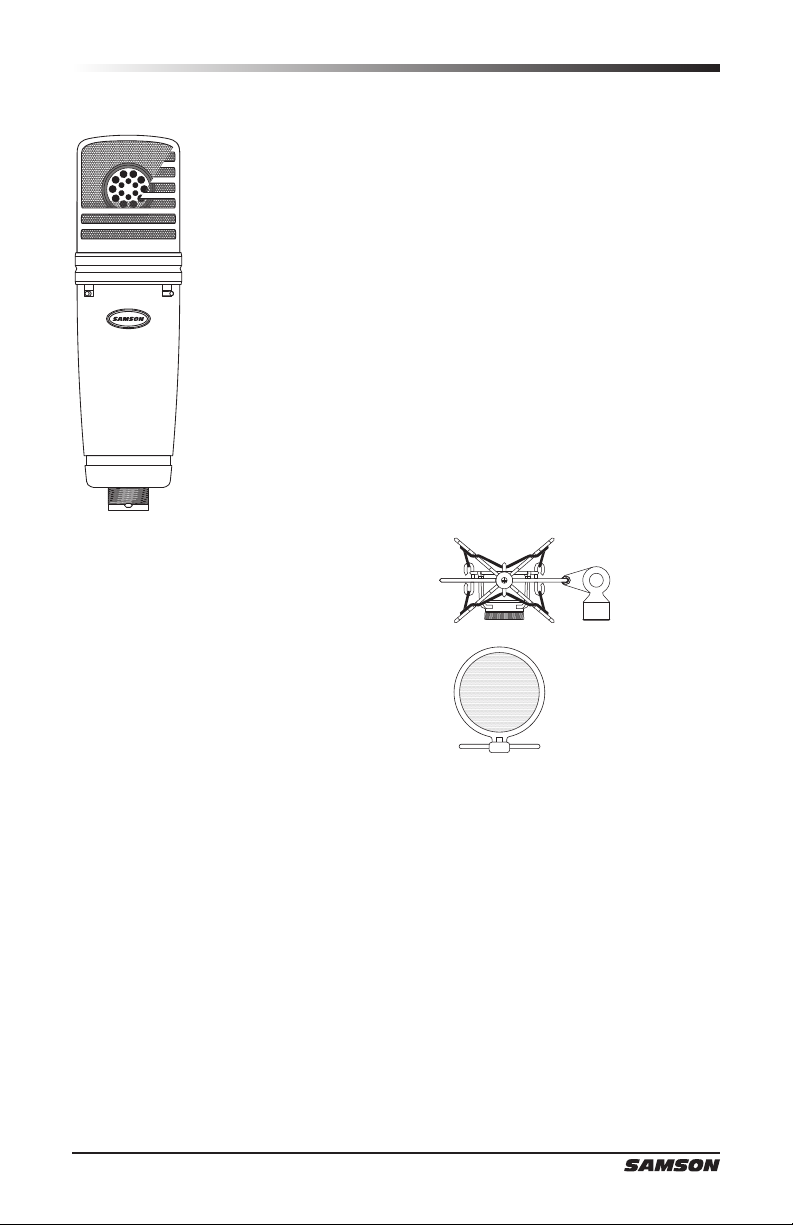
are transmitted through the stand, the microphone can be fitted on the customdesigned MSM1 spider shockmount. Follow the steps below to install the microphone into the shockmount.
• Affix the shockmount onto a microphone stand or boom arm. The
shockmount angle can be adjusted
by loosening the thumb screw near
the stand connection.
Note: Do not adjust the angle of
the shockmount without loosening
the thumb screw. If you do this, the
shockmount may be damaged and
you may void your warranty.
• Install the MTR231 into the MSM1
by fitting the microphone into the
center of the web, positioning the
MTR231 onto the bottom mounting
plate with the Samson logo facing
forward.
• Secure the MSM1 by rotating the
threaded collar clockwise until tight.
• Loosen the thumb screw to adjust
the angle of the microphone and
position the MTR231 to the desired
location. Once set, tighten the
thumbscrew to secure the microphone in place.
Note: Be careful not to cross-thread
or over-tighten the threaded collar or
thumb screw.
ENGLISH
ESPAÑOLITALIANO FRANÇAISDEUTSCHE
MTR231 Multi-Pattern Studio Condenser Microphone
11
Page 12
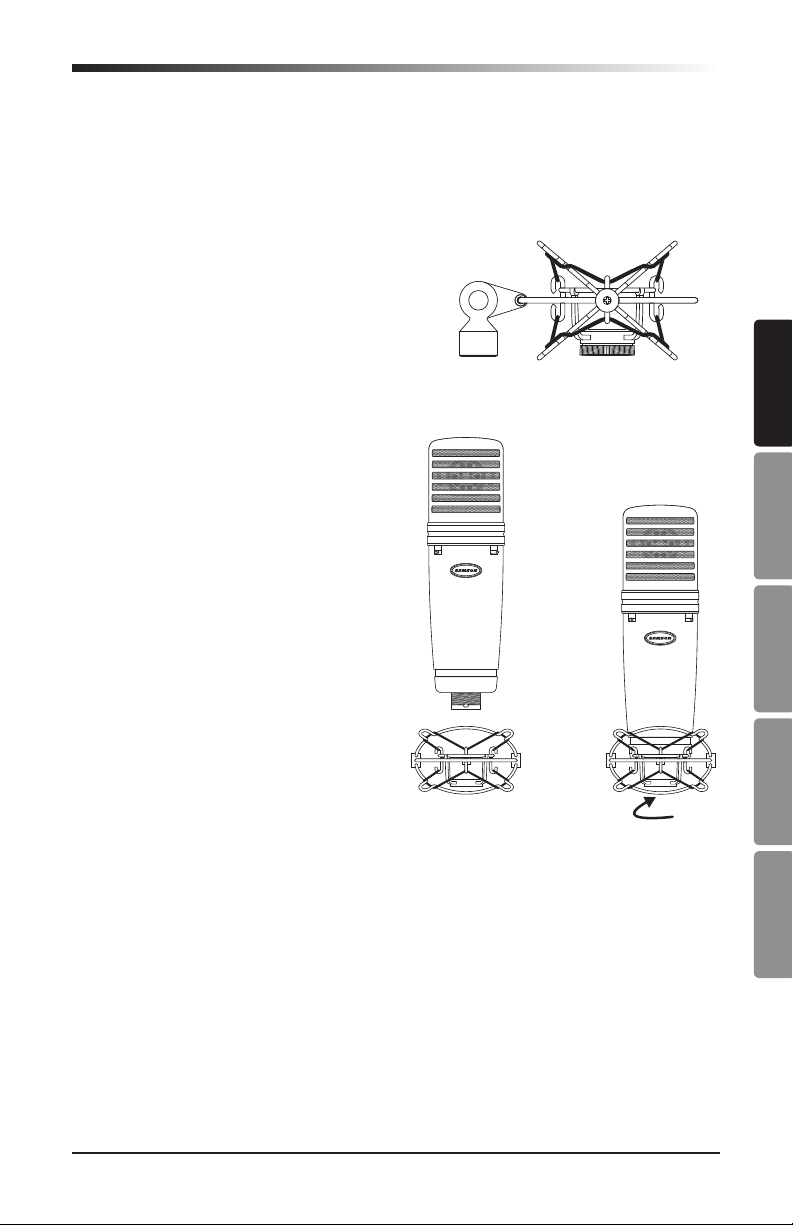
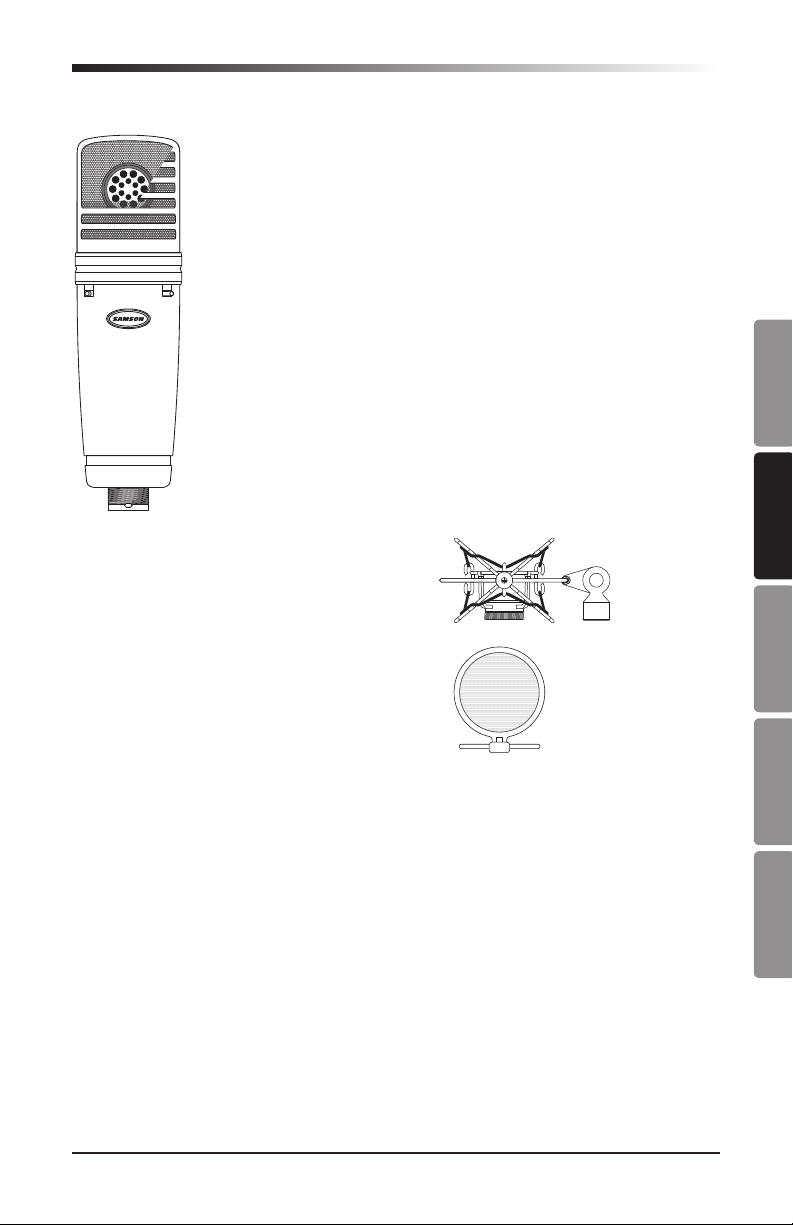
Pop Filter
Sometimes when recording vocals certain plosive consonants (like hard “P” and “B” sounds) overload the
input of the microphone which causes clipping and adds
distortion to your recording. It is advisable to use a pop
filter to reduce the effect of the blasts of air from vocalists when pronouncing words that include these hard
consonant sounds. The pop filter also helps to protect
the microphone element from moisture. The MTR231
features a unique design that enables the MPF1 pop
filter to be mounted directly to the microphone.
To attach the MPF1 pop filter to the microphone line up
the pop filter with the groove underneath the grill and
press on until the legs snap onto the microphone body.
12
Page 13

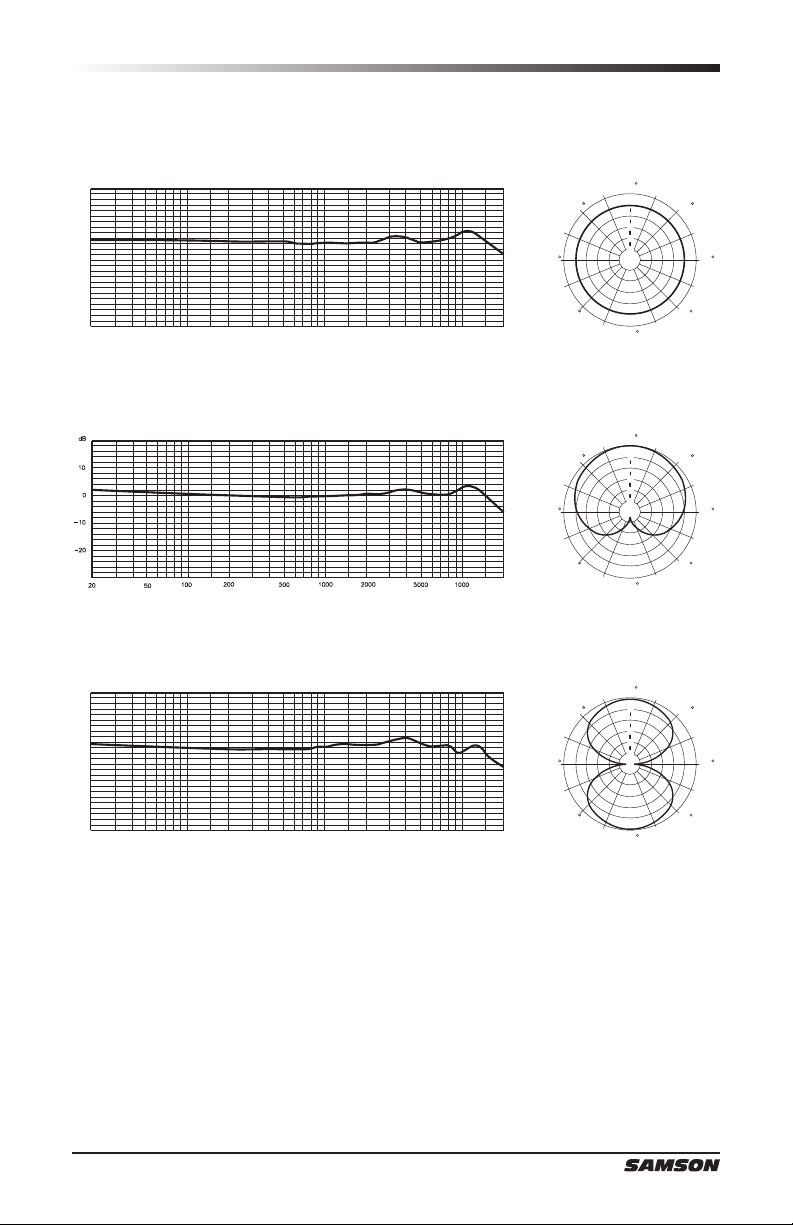
Technical Specifications
Transducer Type . . . . . . . . Condenser
Polar Pattern. . . . . . . . . .Omnidirectional, cardioid, figure-8
Frequency Response . . . . . . 20Hz–20kHz
Sensitivity . . . . . . . . . . . Omnidirectional: -39dB±3dB (0dB=1V/Pa 2kHz)
Cardioid: -37dB±3dB (0dB=1V/Pa 1kHz)
Figure-8: -33dB±3dB (0dB=1V/Pa 1kHz)
Equivalent self noise . . . . . . 16dB
Dynamic Range . . . . . . . . 118dB
Signal-to-noise . . . . . . . . .78dB
Output Impedance . . . . . . . 50Ω ±30% (at 1kHz)
Maximum SPL . . . . . . . . . 132dB
Powering. . . . . . . . . . . .48V phantom power
Connector . . . . . . . . . . . 3-pin, gold plated XLR
Dimensions . . . . . . . . . . ø54mm x 191.7mm
Weight. . . . . . . . . . . . .552g
ENGLISH
At Samson, we are continually improving our products, therefore specifications
and images are subject to change without notice.
MTR231 Multi-Pattern Studio Condenser Microphone
ESPAÑOLITALIANO FRANÇAISDEUTSCHE
13
Page 14
20000 Hz100005000200010005002001005020
20000 Hz100005000200010005002001005020
180
0
180
0
180
0
Technical Specifications
Omnidirectional
dB
10
0
-10
-20
5
45
10
15
20
25
dB
135 135
45
90 90
Frequency Response
Cardioid
dB
10
0
-10
-20
Frequency Response
Figure-8
dB
10
0
-10
-20
Frequency Response
Polar Pattern
5
45
135 135
20000 Hz100005000200010005002001005020
45
10
15
20
25
dB
90 90
Polar Pattern
5
45
135 135
45
10
15
20
25
dB
90 90
Polar Pattern
14
Page 15

Page 16

Introduction
Merci d’avoir choisi le micro studio multi-directivité à condensateur Samson
MTR231. Samson possède de nombreuses années d'expérience dans la création
de micros de la plus grande qualité pour les enregistrements ou les concerts. La
série MTR est notre gamme de micros la plus avancée, offrant une qualité sonore
exceptionnelle et une conception innovante.
Le MTR231 va rapidement devenir votre meilleur allié du studio, que vous souhaitiez enregistrer du chant, ou des instruments acoustiques ou électriques. Le
micro est muni d'un double diaphragme 1" à pellicule d'or et de trois directivités
différentes et offre une réponse étendue en fréquence plate pour assurer une
reproduction fidèle et linéaire de votre musique. Grâce à sa plage de fréquence
étendue et à sa capacité à traiter des niveaux sonores élevés, le MTR231 capture
parfaitement les sons, qu'ils soient faibles ou élevés.
Pour une meilleure isolation contre les bruits indésirables, utilisez la suspension
anti-chocs MSM1 incluse. Grâce à la nouvelle conception du micro, il est possible
d'installer le filtre anti-bruit MPF1 directement sur le micro, très facilement. Une
mallette est incluse pour transporter et ranger le micro. Il est recommandé de
laisser le micro dans la mallette lorsque vous ne l'utilisez pas.
Dans ce mode d’emploi, vous trouverez une description détaillée des fonctions
du MTR231, les instructions pour sa mise en œuvre, son utilisation, ainsi que
les caractéristiques techniques. Si vous avez acheté votre micro aux USA, vous
trouverez une carte de garantie — remplissez-la et renvoyez-la pour bénéficier de
l’assistance en ligne et pour recevoir les informations sur les produits Samson.
Pensez également à consulter notre site Internet (www.samsontech.com) pour
obtenir des informations détaillées sur toute notre gamme de produits.
Nous vous recommandons de garder les références suivantes pour toute référence
ultérieure ainsi qu'une copie de votre preuve d'achat.
Numéro de série: ___________________________________________
Date d'achat: ______________________________________________
Nom du revendeur: _________________________________________
Avec un entretien adapté et une ventilation suffisante, votre MTR231 vous donnera satisfaction pendant de très nombreuses années. Pour faire réparer votre micro,
vous devez tout d’abord obtenir un numéro de retour auprès de Samson. Sans
ce numéro, l’appareil ne sera pas accepté. Appelez Samson au : 1-800-3SAMSON (1-800-372-6766) pour obtenir ce numéro avant de renvoyer votre unité.
Conservez, si possible, l’emballage d’origine afin de l’utiliser en cas de retour. Si
vous avez acheté votre MTR231 hors des USA, contactez votre distributeur pour
obtenir les détails sur la garantie et le service après vente.
16
Page 17
Caractéristiques
• Micro de studio multi-directivité à condensateur et large
diaphragme
• Double capsule dorée de 1"
• Reproduction fidèle et transparente
• Directivités: Omni-directionnelle, cardioïde, figure-8
• Alimentation fantôme 48 Volts
• Pad d'atténuation 10dB
• Suspension interne anti-choc
• Réponse en fréquence étendue
• Fabrication en alliage robuste
• Connecteur XLR plaqué-or
ENGLISH
Accessoires
• Suspension anti-choc MSM1
• Filtre anti-bruit MPF1
• Malette
FRANÇAISDEUTSCHEESPAÑOLITALIANO
MTR231 Micro de studio multi-directivité à condensateur
17
Page 18

Mise sous tension
Le MTR231 est un micro à condensateur, ce qui implique qu’il nécessite une
alimentation fantôme de 48V. Les préamplificateurs de console de mixage dispose
d'une alimentation de ce type. Une alimentation fantôme externe peut également
être utilisée si nécessaire. Le MTR101 reçoit alors son alimentation par le câble
micro équilibré.
Pour maximiser la durée de vie de votre matériel et maintenir de bonnes performances, veillez à toujours éteindre le Fader principal et l'écran lorsque vous allumez ou éteignez l'alimentation fantôme.
Si les performances de votre micro ne sont pas satisfaisantes, cela peut être dû
à un problème au niveau de l'alimentation fantôme. Si vous remarquez que votre
micro présente une baisse sortie de signal, des bruits ou une plus petite marge
de sécurité (distorsion), cela peut être dû à un problème au niveau de l'alimentation fantôme ou des câbles du micro.
Réglage du niveau du signal
Lorsque vous connectez le MTR231 à l’entrée d’une console, utilisez un câble
équilibré et
assurez-vous que cette entrée est bien à niveau micro. Veillez également à ce que
l’alimentation fantôme soit activée. La plupart des consoles et des enregistreurs
de qualité sont équipés d’entrée micro avec réglage du gain (généralement appelé
Trim ou Gain) Ce réglage de gain vous permet d’optimiser le niveau du signal
micro par rapport au bruit de fond induit par l’électronique de la console. Un bon
préamplificateur micro est en outre équipé de témoins d’écrêtage. Pour obtenir un
niveau micro idéal, placez le MTR231 en face de la source à enregistrer et augmentez progressivement le gain jusqu’à ce que le témoin PEAK s’allume. Baissez
ensuite très légèrement le gain de telle sorte que le témoin reste éteint. Sur la
plupart des consoles, le résultat optimal est obtenu en réglant le gain le plus haut
possible sans que le témoin le témoin PEAK ne s’allume.
18
Page 19

Directivité
La caractéristique essentielle d’un micro est sa directivité. Le MTR231 est muni
d'une capsule à double membrane permettant de sélectionner trois directivité;
omnidirectionnelle, unidirectionnelle (cardioïde) et bidirectionnelle (figure 8).
Vous pouvez sélectionner la directivité du micro à l'aide de l'interrupteur coulissant à trois positions situé en-dessous du côté droit de la grille. Chaque directivité
possède des caractéristiques différentes en ce qui concerne la sensibilité et la
réponse en fréquence des sons émanant de directions différentes. Le chapitre suivant se penche sur les caractéristiques de chaque polarité, afin que vous puissiez
choisir le meilleur réglage pour votre application.
Omnidirectionnel - cette directivité reproduit le son venant de toutes les directions
(y compris hors axe), avec une fréquence de réponse homogène, protégeant du
phénomène que l'on appelle "l'effet de proximité". Le micro capture une plus
grande quantité de son ambiant, cela vous permet de capter davantage l'acoustique de la salle qu'avec la directivité directionnelle. La directivité omnidirectionnelle convient parfaitement aux performances d'ensemble, notamment pour
les groupes de chanteurs, les cuivres, les bois ou d'autres instruments lorsque les
artistes sont en face les uns des autres ou qu'ils sont placés en cercle autour du
micro. Pour sélectionner la directivité omnidirectionnelle, positionnez l'interrupteur coulissant vers la gauche, la position sera indiquée par un cercle.
Unidirectionnel (cardioïde) - La directivité cardioïde est généralement utilisée pour
les concerts ou les performances en studio. Le MTR231 capte le son venant de
l'avant du micro et émet les sons vers les côtés ou l'arrière, ce qui offre une meilleure séparation des instruments en studio et permet de faire ressortir ce que vous
souhaitez entendre en fonction de l'acoustique de la pièce. La séparation permet
un meilleur contrôle et une augmentation du gain pour contrôler le larsen pour les
applications de sonorisation. Pour sélectionner la directivité cardioïde, positionnez l'interrupteur coulissant au centre, la position sera indiquée par une icône en
forme de cœur.
Bidirectionnel (figure-8) - Ce réglage permet de capturer les sons provenant de
l’avant et de l’arrière du micro, d'atténuer les sons latéraux (gauche, droite) et
de minimiser la détérioration de la réponse en fréquence hors axe. Cette directivité est très utile lors de techniques micro stéréo. La directivité représentée sur
la figure 8 permet de capturer simultanément deux instruments ou deux voix en
plaçant le micro directement entre eux, de façon à ce que l'un se trouve face au
micro et l'autre derrière. Pour sélectionner la directivité figure 8, positionnez l'interrupteur coulissant vers la droite, la position sera indiquée par le chiffre "8"
Se référer aux chapitres de la page “Placement du micro” on page 21 et “Technique en Micro stéréo” on page 23 pour positionner correctement le micro lors
d'activités d'enregistrement différentes.
ENGLISH
FRANÇAISDEUTSCHEESPAÑOLITALIANO
MTR231 Micro de studio multi-directivité à condensateur
19
Page 20

Pad d'atténuation 10dB
Le MTR231 est muni d'un pad d'atténuation de 10db pouvant être sélectionné
avec l'interrupteur coulissant situé sous la grille, qui sert à prévenir toute surcharge du préamplificateur intégré en baissant la sensibilité de l'entrée du circuit
du préamplificateur du micro. Si vous faites glisser l'interrupteur vers la droite
(position 0dB), le contrôle est contourné et il n'y a aucun effet sur le signal. Si
vous faites glisser l'interrupteur vers la droite (position -10dB), la sensibilité
d'entrée du micro baissera de 10dB. Cela est très utile pour enregistrer des sons
rapprochés élevés avec des sons transitoires très élevés tels que des batteries, des
cymbales ou des instruments en cuivre.
Avant de positionner le pad d'atténuation sur -10dB, nous vous recommandons de
vérifier la qualité du son et d'optimiser les niveaux du signal d'entrée grâce à un
gain correct. Si une distorsion apparait lorsque l'artiste chante ou joue d'un instrument au volume maximal, vérifiez toute la chaine du signal pour trouver la cause
de la distorsion. Tout d'abord, vérifiez le niveau du préamplificateur du micro.
Si le niveau est au minimum et que la distorsion persiste, activez l'interrupteur
du préamplificateur. Si le niveau du signal chute et que la distorsion disparait,
cela signifie que le préamplificateur du micro était surchargé. Si le niveau chute
et que la distorsion persiste, cela signifie que la surcharge se situe à l'entrée du
micro. Positionnez l'interrupteur d'atténuation sur -10dB. Si la distorsion persiste,
demandez à l'artiste de baisser le son de son instrument ou d'éloigner le micro de
la source sonore.
20
Page 21
Placement du micro
Le positionnement du MTR231 par rapport à l’instrument ou au chanteur que
vous enregistrez influence directement la qualité sonore finale. Lorsque le
MTR231 est en mode de directivité cardioïde, il est très sensible à un phénomène
connu sous le nom “d’effet de proximité”, qui se caractérise par une variation
de la réponse en fréquence du micro en fonction de la position de la capsule par
rapport à la source sonore. Afin d'obtenir la meilleure réponse en fréquence, pointez un micro cardioïde en direction de la source sonore. Vous pouvez changer les
caractéristiques sonores du micro en modifiant sa position. Lorsque vous désaxez
le micro par rapport à la source, la sensibilité aux fréquences aiguës est particulièrement atténué. Rien ne saurait remplacer l’expérience dans le domaine de la
prise de son. Vous trouverez ci-dessous des conseils pour installer votre MTR231
pour des applications normales.
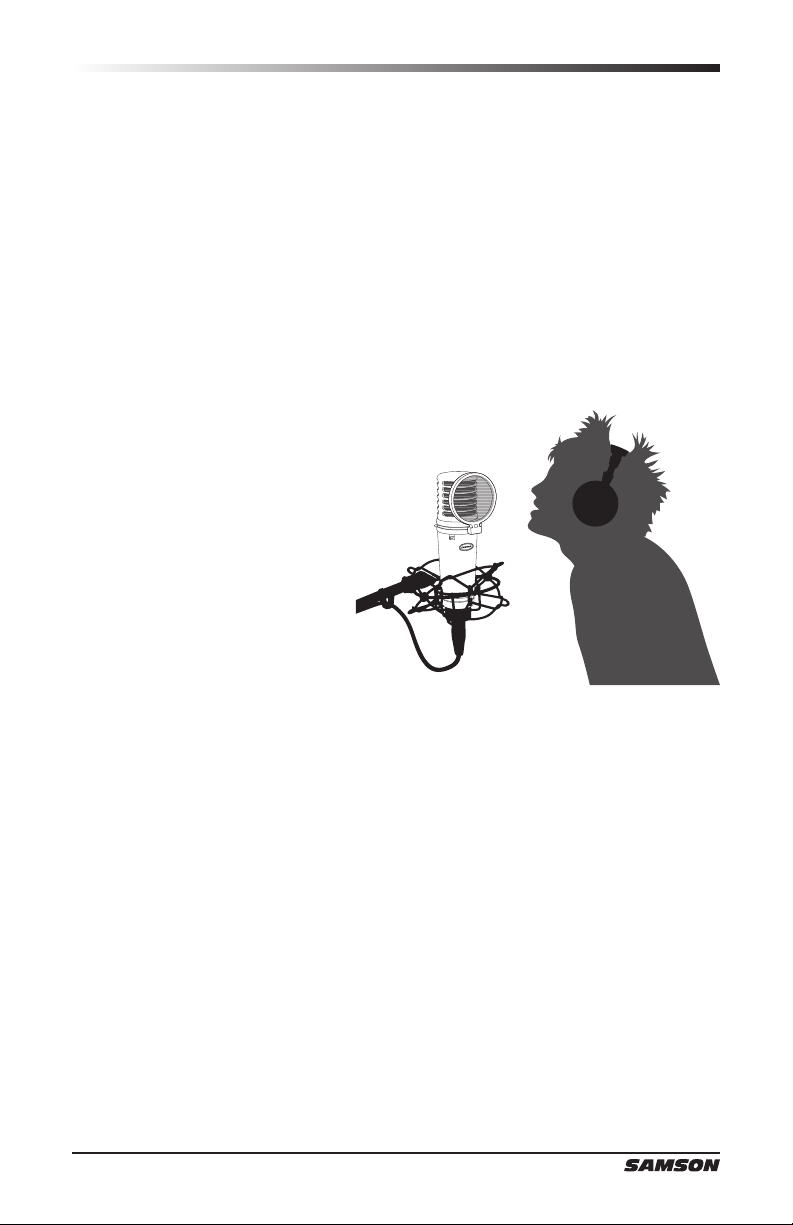
Chant
Lorsque la directivité du micro est
cardioïde, placez le micro devant
le chanteur de façon à ce que la
grille soit à une distance d'environ
6 à 24 pouces. Plus le chanteur se
rapproche du micro, plus les basses
augmentent. Lorsque le chanteur
s'éloigne du micro, le son devient
plus naturel avec l'atténuation des
basses fréquences. Pour un son
optimal,le chanteur doit diriger le
micro vers sa bouche et le tenir
couché. Si certaines consonnes, telles que P et S, ne sont pas claires, éloignez
légèrement le micro du chanteur de façon à ce que le son soit légèrement dévié
en arrivant dans le micro. Il est préférable de prévenir ces pics en utilisant le filtre
anti-bruit externe MPF1. Pour enregistrer un groupe de chanteurs, demandez-leur
de se placer devant et derrière le micro, tout près les uns des autres.
Guitare acoustique
Vous pouvez utiliser le MTR231 avec une guitare acoustique de différentes façons. Le positionnement du micro dépend du type d'instrument que vous utilisez
et de l'effet recherché. Il est peut-être nécessaire d'essayer différentes positions
pour obtenir un son clair et équilibré. Lorsque vous enregistrez un instrument à
cordes standard, placez le micro à une distance de 6-12" de l'instrument, légèrement désaxé et dirigez-le vers le bord du manche. Depuis cette position, si vous
rapprochez le micro de l'instrument, il capturera davantage de basses fréquences.
Si, en revanche, vous souhaitez capturer davantage de hautes fréquences, ou
supprimer les sons caverneux, rapprochez le micro du manche. Contrairement
aux acoustiques à cordes acier, les guitares classiques à cordes nylon jouées en
Picking offrent une sonorité naturellement plus chaude . Pour enregistrer un son
équilibré commencez par placer le micro 3-6 pouces au-dessus du chevalet. Ceci
vous permet d’accentuer les hautes fréquences et de saisir l’attaque des doigts
en Picking. Si les basses sont trop présentes, éloignez le micro de la rosace et
ENGLISH
FRANÇAISDEUTSCHEESPAÑOLITALIANO
MTR231 Micro de studio multi-directivité à condensateur
21
Page 22

Placement du micro
désaxez-le légèrement. Si vous disposez de deux MTR231, placez-en un en face
de la touche du manche et l’autre sur le chevalet de la guitare, ou encore placez
un micro près de la guitare et le second plus loin pour saisir le son de la pièce .
Le mélange entre les deux se fait ensuite au mixage.
Piano
Les pianos acoustiques sont complexes à enregistrer, et offrent plusieurs possibilités. En prise rapprochée, placez le MTR231 à l’intérieur du piano, entre
la table d’harmonie et le couvercle ouvert. Plus vous rapprocherez le micro de
l'instrument, plus il captera de basses fréquences. Pour enregistrer le son ambiant
(comme en enregistrement de musique classique), placez le micro hors du piano,
pointé vers le couvercle ouvert. Pour un son d'ensemble plus contemporain,
placez deux micros MTR231 dans le piano, l'un au-dessus des cordes des graves
et l'autre au-dessus des cordes des aigus, à 6-12 pouces l'un de l'autre. Lorsque
vous enregistrez un piano droit avec un seul micro, placez le micro juste au-dessus, en face du piano et centré, avec le couvercle ouvert Si vous disposez de deux
MTR231, placez l’un des deux micros au-dessus du couvercle ouvert et audessus
des cordes basses et l’autre micro au-dessus du couvercle ouvert et au-dessus des
cordes aiguës. Vous pouvez également placer deux micros devant la face avant du
meuble à environ 8 pouces au-dessus des cordes basses et aiguës.
Prise en Overhead de batterie
Grâce à sa réponse étendue dans les hautes fréquences et sa réponse ultra rapide
aux transitoires, le MTR231 est parfait en Overhead de batterie Vous pouvez
placer un MTR231 sur la perche du micro au-dessus de la batterie et positionné
vers l'arrière. Pour les enregistrements en stéréo, placez deux micro MTR231
au-dessus de la batterie à une distance de trois à cinq pieds. Vous devez essayer
plusieurs positions différentes pour trouver la bonne en fonction de la taille de la
pièce et de l'effet recherché (son d'ensemble ou prise rapprochée). En général,
lorsque vous enregistrer leson d'une batterie, il est recommander de commencer
par les micros overhead. Bien que les Overheads soient utilisés principalement
pour les cymbales, vous pouvez enregistrer toute la batterie, avec des résultats
excellents avec uniquement un micro. Avec les micros overheads, il est plus facile
de diriger votre micro individuel vers le haut pour plus d'attaque et de clarté.
22
Page 23

Technique en Micro stéréo
Le terme "stéréo" peut être utilisé pour décrire différentes techniques de micro
nécessitant plusieurs voies audio pour créer une image sonore dans les deux
enceintes. Plusieurs techniques peuvent être utilisées avec un ou deux micros,
mais nous ne nous pencherons que sur trois d'entre elles: micros espacés, couple
X/Y coïncident et Mid-side (MS).
Micros espacés - Deux micros sont placés à 2-10 pieds d'intervalle (un troisième
micro peut aussi être placé au centre). En général, les ingénieurs choisissent
des micros omnidirectionnels pour cette méthode car ils offrent une réponse en
fréquence et une directivité plates, toutefois, ils captent davantage de sons à
incidence non-frontale par rapport au signal direct. Cette technique est idéale
pour les plus petites performances, telles que la musique de chambre, qui ne
nécessite pas d'imagerie spécifique des instruments sur le plan stéréo. Plus les
micros sont proches, plus l'image stéréo est étendue. La directivité figure 8 peut
être utilisée pour cette technique mais les micros doivent alors être dirigés vers la
source sonore. Les micros cardioïdes ne sont, en général, par utilisés en raison de
la dégradation de sa réponse en fréquence hors-axe.
Couple X/Y coïncident - Deux micros cardioïdes sont placés aussi près que possible l'un de l'autre avec un angle de 90°-135°. Plus l'angle entre les micros se
rapproche de 90°, plus l'image sonore apparaitra étroite ou mono. La directivité
cardioïde tend à ne pas reproduire les signaux hors-axe, le son émis est donc plus
sec et plus direct. La configuration Blumlein est une variante des couples X/Y. Il
s'agit de deux directivités figure 8 croisées. Cette technique peut également être
utilisée comme variante de la méthode mid-side, ci-dessous. Cette technique permet d'obtenir un son plus naturel puisque la réponse en fréquence hors-axe et la
directivité sont meilleures qu'avec une directivité cardioïde puisqu'elles captent
davantage de son à incidence non-frontale. L'inconvénient lorsque l'on utilise
deux micros figure 8 est qu'ils captent les sons venant de derrière le micro, ce qui
peut être gênant.
Mid-Side (MS) - La configuration MS est peut-être la technique la plus polyvalente
et puissante des trois techniques citées. Cette configuration consiste en un micro
cardioïde dirigé vers l'avant pour l'élément central ("mid"), qui est enregistré par
les voies gauche et droite, ainsi qu'un côté situé face au micro figure 8 pour l'élément côté ("side") qui est enregistré par les voies gauche et droite (en inversant la
polarité de la voie). La méthode MS offre la meilleure comptabilité stéréo-mono
car, lorsque les deux voies sont additionnées en mono, le micro latéral s'annule
complètement. L'étendue du champ stéréo peut être plus ou moins large en ajustant le niveau de l'élément "côté", par rapport à l'élément "central".
ENGLISH
FRANÇAISDEUTSCHEESPAÑOLITALIANO
MTR231 Micro de studio multi-directivité à condensateur
23
Page 24

Suspension anti-choc
Afin de garantir une isolation optimale du micro, le MTR231 peut être installé sur
la suspension anti-choc SP01 “Spider” optionnelle. La procédure suivante vous
indique comment installer le micro sur sa suspension:
• Tout d’abord, vissez la suspension
sur le pied ou sur la perche micro.
L'angle de la suspension peut être
ajusté en déserrant la vis rapide
qui se trouve près du raccord de la
base.
Remarque : Ne réglez pas l'angle
de la suspension sans avoir préalablement déserré la vis rapide. Sans
quoi, vous pourriez endommager
la suspension, ce qui annulerait la
garantie.
• Installez le MTR231 sur le MSM1
en plaçant le micro au centre de la
toile et en veillant à le positionner
correctement sur la base, le logo
Samson doit être dirigé vers l'avant.
• Assurez la fixation du MSM1 en
tournant la bague filetée dans le
sens des aiguilles d'une montre.
• Desserrez la vis rapide de la
rotule pour régler l’angle du micro
MTR231. Une fois l’angle approprié
obtenu, serrez à nouveau la vis pour
maintenir le micro en place.
Remarque : Attention à ne pas
abîmer le filetage ou à trop serrer la
bague ou la vis rapide.
24
Page 25

Filtre anti-bruit
Lorsqu'un chanteur prononce certaines consonnes occlusives (comme le "P" ou le "B"), cela surcharge l'entrée
du micro, ce qui produit des coupures et déforme votre
enregistrement. Nous vous recommandons d'utiliser un
filtre anti-bruit pour réduire l'effet du souffle du chanteur lorsqu'il prononce ce type de consonnes. Le filtre
anti-bruit protège également le micro de l'humidité. Le
MTR231 présente une conception unique qui permet de
monter le filtre anti-bruit directement sur le micro.
Pour monter le filtre anti-bruit MPF1 sur le micro, alignez le filtre et la rainure située sous la grille et appuyez
jusqu'à enfoncer le corps du micro dans la rainure.
ENGLISH
FRANÇAISDEUTSCHEESPAÑOLITALIANO
MTR231 Micro de studio multi-directivité à condensateur
25
Page 26

Caractéristiques techniques
Type de transducteur . . . . . . Condensateur
Directivité . . . . . . . . . . . Omnidirectionnelle, cardioïde, figure 8
Réponse en fréquence . . . . . 20Hz–20kHz
Sensibilité . . . . . . . . . . .
Bruit propre . . . . . . . . . . 16dB
Plage dynamique . . . . . . . .118dB
Signal/bruit . . . . . . . . . . 78dB
Impédance de sortie . . . . . . 50Ω ±30% (at 1kHz)
SPL maximum . . . . . . . . . 132dB
Alimentation . . . . . . . . . .Fantôme 48V
Connecteur . . . . . . . . . . XLR plaqué or à 3 broches
Dimensions . . . . . . . . . . ø54mm x 191.7mm
Poids . . . . . . . . . . . . . 552g
Omnidirectionnelle: -39dB±3dB (0dB=1V/Pa 2kHz)
Cardioïde: -37dB±3dB (0dB=1V/Pa 1kHz)
Figure-8: -33dB±3dB (0dB=1V/Pa 1kHz)
Chez Samson, nous améliorons nos produits en permanence, certaines images et
spécifications sont donc susceptibles de changer sans notification préalable.
26
Page 27

20000 Hz100005000200010005002001005020
20000 Hz100005000200010005002001005020
180
0
180
0
180
0
Caractéristiques techniques
Omnidirectionnel
dB
10
0
-10
-20
5
45
10
15
20
25
dB
135 135
45
90 90
Réponse en fréquence
Cardioïde
dB
10
0
-10
-20
Réponse en fréquence
Figure-8
dB
10
0
-10
-20
Réponse en fréquence
Directivité
ENGLISH
5
45
135 135
20000 Hz100005000200010005002001005020
45
10
15
20
25
dB
90 90
FRANÇAISDEUTSCHEESPAÑOLITALIANO
Directivité
5
45
135 135
45
10
15
20
25
dB
90 90
Directivité
MTR231 Micro de studio multi-directivité à condensateur
27
Page 28

Page 29

Einführung
Vielen Dank für den Kauf des Samson MTR231 Multi-Pattern Studio Kondensatormikrofons.
Samson kann auf eine lange Geschichte und umfangreiche Erfahrung bei der Entwicklung hochwertiger Mikrofone für Live- und Recording- Anwendungen zurückblicken. Die MTR Serie ist unsere
neueste und modernste Reihe von Mikrofonen mit einer beeindruckenden Klangwiedergabe und
einem innovativen Design.
Das MTR231 wird schnell zu Ihrem Lieblings-Tool im Studio werden, unabhängig davon, ob Sie
nun Gesang, akustische oder elektrische Instrumente aufnehmen. Das Mikrofon verfügt über eine
goldbedampfte 1” Dual Membran mit drei auswählbaren Richtcharakteristiken, die einen erweiterten linearen Frequenzgang und eine präzise und lineare Wiedergabe Ihrer Musik gewährleisten.
Mit seinem breiten dynamischen Bereich und dem perfekten Handling von hohen Schalldrücken
zeichnet sich das MTR231 bei der Aufnahmen von sowohl sehr weichen als auch sehr lauten
Klängen aus.
Für eine zusätzliche Isolierung von unerwünschten Geräuschen wird mit dem Mikrofon der MSM1
Schwingungsdämpfer mitgeliefert. Das revolutionäre neue Design ermöglicht auch die Montage
des MPF1 Pop Filters, das direkt auf das Mikrofon aufgesetzt werden kann, wodurch das Setup
zu einem Kinderspiel wird. Ein Transportkoffer für den Transport und die Aufbewahrung des Mikrofons ist im Lieferumfang enthalten. Es wird empfohlen, das Mikrofon im Koffer aufzubewahren,
wenn es nicht verwendet wird.
Auf diesen Seiten werden Sie eine detaillierte Beschreibung der Eigenschaften und Funktionen
sowie Anweisungen zur Einstellung und Nutzung des MTR231 Mikrofons und eine vollständige
Liste seiner Funktionen und Eigenschaften finden. Wenn Sie Ihr Mikrofon in den Vereinigten
Staaten erworben haben, werden Sie ebenfalls im Lieferumfang eine Garantiekarte finden — vergessen Sie bitte nicht, sie auszufüllen und einzusenden, so dass Sie Online-Support in Anspruch
nehmen können und wir Ihnen aktualisierte Informationen über dieses und andere Samson
Produkte zusenden können. Besuchen Sie ebenfalls unsere Website (www.samsontech.com), um
Informationen über unser komplettes Produktangebot zu erhalten.
Wir empfehlen Ihnen, die folgenden Daten sowie eine Kopie der Kaufquittung gut aufzubewahren.
Seriennummer: ________________________________________________
ENGLISH
FRANÇAISDEUTSCHEESPAÑOLITALIANO
Kaufdatum: ___________________________________________________
Name des Händlers: ____________________________________________
Mit der richtigen Pflege und Wartung werden Sie Ihr MTR231 viele Jahre lang problemlos einsetzten können. Falls Ihr Mikrofon je eine Reparatur benötigen sollte, ist eine Return Authorization
(RA) Nummer [Rücksende-Genehmigungsnummer] erforderlich, bevor Sie Ihr Mikrofon an die
Samson schicken. Ohne diese Nummer wird das Gerät nicht angenommen. Bitte rufen Sie Samson unter 1-800-3SAMS0N (1-800-372-6766) an und erbitten Sie eine RA Nummer, bevor Sie
die Einheit einschicken. Bitte bewahren Sie das originale Verpackungsmaterial auf und schicken
Sie das Gerät wenn möglich in der originalen Verpackung ein. Wenn Ihr MTR231 außerhalb der
Vereinigten Staaten erworben wurde, kontaktieren Sie bitte Ihren lokalen Händler bezüglich der
Details zur Garantie und für Service- und Wartungsinformationen.
MTR231 Multi-Pattern Studio Kondensatormikrofon
29
Page 30

Funktionen
• Großes Multi-Pattern Studio Kondensatormikrofon
• Goldbedampfte 1” Dual Kapsel
• Weiche und transparente Klangwiedergabe
• Auswählbare Richtcharakteristik: Omnidirektional,
Niere, Achter Charakteristik
• Betrieb über eine 48 V Phantomspeisung
• 10dB Dämpfungsglied
• Interne gekapselte Schwingungsdämpfung
• Erweiterter weicher Frequenzgang
• Robuste Gusskonstruktion
• Vergoldeter XLR Stecker
Zubehör
• MSM1 Schwingungsdämpfer
• MPF1 Pop Filter
• Tragekoffer
30
Page 31

Stromversorgung
Das MTR231 ist ein Kondensatormikrofon und erfordert daher eine 48V
Phantomspeisung. Die Phantomspeisung erfolgt anhand eines Vorverstärkerkanals
eines Mixers oder, wenn erforderlich, über eine externe Phantom Stromversorgung
und wird über ein abgeglichenes Mikrofonkabel an das Mikrofon geleitet.
Um die Langlebigkeit Ihres Gerätes zu gewährleisten, drehen Sie beim Einoder Ausschalten der Phantomspeisung immer die Master Fader- und MonitorSteuerelemente auf Null. Dies ist beim Mixen allgemein eine zu empfehlende
Vorgehensweise.
Schlechte Mikrofon Performance kann durch Probleme bei der Phantomspeisung
verursacht werden. Wenn Sie bemerken, dass das Mikrofon einen reduzierten
Signal-Ausgang, erhöhtes Rauschen oder verringerte Aussteuerungsreserven
(Verzerrungen) aufweist, kann dies mit einem Problem mit der Phantomspeisung
oder dem Mikrofon-Kabel in Verbindung stehen.
Einstellen des Mikrofonlevels
ENGLISH
Beim Anschluss des MTR231 an ein Mischpult sollten Sie ein abgeglichenes
Kabel einsetzen und darauf achten, dass die Eingabe abgeglichen und an einen
Kanal angeschlossen ist, der für Mikrofon-Pegel eingestellt wurde. Vergewissern
Sie sich ebenfalls, dass die Phantomspeisung eingeschaltet ist. Die meisten
Mischer und Recorder von angemessener Qualität bieten einen Mikrofoneingang
mit Mic Trim Regler (in der Regel als Trim oder Verstärkung bezeichnet). Der
Zweck der Mic Trimmung ist, die Menge an guten Signalen über die Geräusche zu
optimieren, die mit der Elektronik des Mixers verbunden sind. Ein guter Mikrofon
Vorverstärker mit Trim wird eine Peak oder Clip Anzeige besitzen. Um einen optimalen Pegel am Mikrofon einzustellen, stellen Sie das MTR231 vor der gewünschten Schallquelle auf und erhöhen Sie langsam den Trim-Regler des Mikrofons,
bis Sie sehen, dass die PEAK LED aufleuchtet. Drehen Sie dann den Trim-Regler
nach unten, bis die LED nicht mehr leuchtet. Für die meisten Anwendungen ist
die ideale Einstellung, den Trim-Regler so hoch wie möglich zu stellen, ohne dass
die Peak-Anzeige aufleuchtet.
FRANÇAISDEUTSCHEESPAÑOLITALIANO
MTR231 Multi-Pattern Studio Kondensatormikrofon
31
Page 32

Richtcharakteristik
Ein wichtiges Merkmal eines jeden Mikrofons ist seine Richtwirkung oder Richtcharakteristik. Das MTR231 enthält eine Doppelmembran Kapsel, die eine
Auswahl aus drei individuellen Richtcharakteristiken ermöglicht: omnidirektional,
unidirektional (Niere) und bidirektional (Achter Charakteristik). Die Mikrofoncharakteristik kann durch das Einstellen eine der drei Positionen des Schalters
unter der rechten Seite des Gitters gewählt werden. Eine jede Option besitzt
eine individuelle Richtcharakteristik in Bezug auf die Empfindlichkeit und den
Frequenzgang des aus verschiedenen Richtungen ankommenden Schalls. Der folgende Abschnitt beschreibt einige der Funktionen einer jeden Charakteristik, um
Sie bei der Wahl der besten Einstellung für Ihre Anwendung zu unterstützen.
Omnidirektional - Die omnidirektionale Einstellung reproduziert Klang aus allen
Richtungen (einschließlich außerhalb der Achse) mit einem linearen Frequenzgang. Dadurch ist die Einstellung unempfindlich für das Phänomen, das als
Proximity Effekt bezeichnet wird. Es erfasst mehr vom Raumklang als die anderen
Optionen und somit wird mehr vom gesamten Klang im Raum als bei einer unidirektionalen Einstellung erfasst. Die omnidirektionale Einstellung ist ideal für die
Aufnahme von Ensembles, einschließlich Gruppengesang, Holzbläsern, Blechbläsern und anderen Instrumenten, bei denen die Musiker in einem Kreis um das
Mikrofon angeordnet sind. Um die omnidirektionale Richtcharakteristik zu wählen,
stellen Sie den Charakteristik-Wahlschalter auf die linke Position, die durch das
Kreis-Symbol gekennzeichnet ist.
Unidirektional (Niere) - Die Nierencharakteristik ist die am häufigsten für Studiound Live Aufnahmen verwendete Option. Sie fängt den Sound vor dem Mikrofon
auf und weist den Schall von den Seiten und der Rückseite ab. Dadurch wird eine
bessere Trennung der einzelnen Instrumente im Studio ermöglicht. Der Klang des
Instruments überwiegt bei der Aufnahme dem Klang des Raums. Die Trennung
ermöglicht auch mehr Kontrolle und mehr Rückkopplungssicherheit in Situationen
mit Live- Beschallung. Um die Nieren-Richtcharakteristik zu wählen, stellen Sie
den Charakteristik-Wahlschalter auf die mittlere Position, die durch das herzförmige Symbol gekennzeichnet ist.
Bidirektional (Achter Charakteristik) - Diese Einstellung nimmt unmittelbar vor
und hinter dem Mikrofon den Schall auf, während gleichzeitig der von der linken
und rechten Seite kommende Sound abgewiesen wird. Dabei entsteht nur eine
minimale Verschlechterung des außeraxialen Frequenzgangs. Dies ist bei einer
Vielzahl von Stereomikrofon Techniken sehr nützlich. Die Achter Charakteristik
kann verwendet werden, um gleichzeitig zwei Instrumente oder Sänger durch die
Positionierung des Mikrofons direkt zwischen ihnen zu erfassen, wobei einer zur
Vorderseite und der andere zur Rückseite gerichtet ist. Um die Achter Charakteristik zu wählen, stellen Sie den Charakteristik-Wahlschalter auf die recht Position,
die durch das Symbol “8” gekennzeichnet ist.
Sehen Sie den Abschnitt “Aufstellen des Mikrofons” auf Seite 8 und den Abschnitt über die “Stereomikrofon Techniken” auf Seite 10, wo einige Überlegungen und Tipps hinsichtlich der Platzierung des Mikrofons in verschiedenen
Aufnahme-Anwendungen beschrieben werden.
32
Page 33

10dB Dämpfungsglied
Das MTR231 verfügt über ein 10dB Dämpfungsglied, das mit dem Schiebeschalter unter dem Gitter gewählt werden kann. Dieses Dämpfungsglied wird dazu verwendet, um eine Überlastung des integrierten Vorverstärkers zu vermeiden, indem
die Eingangsempfindlichkeit des Vorverstärkers herabgesetzt wird. Wenn Sie den
Schalter auf die linke Seite (0dB Position) schalten, wird die Steuerung umgangen und das Signal wird unbeeinflusst weitergeleitet. Wenn sich der Schalter auf
der rechten Seite (-10dB Position) befindet, wird die Eingangsempfindlichkeit
des Mikrofons um 10 dB gesenkt. Dies ist nützlich, wenn sich das Mikrofon nahe
an Schallquellen mit sehr hohen transienten Klängen befindet, wie etwa Drums,
Becken oder Blechblasinstrumente.
Bevor Sie das Dämpfungsglied auf die -10dB Position schalten ist es ratsam,
einen Soundcheck durchzuführen und die Eingangssignalpegel unter Verwendung
der richtigen Verstärkungseinstellung zu optimieren. Wenn Verzerrung aufzutreten
scheinen, während die Künstler bei maximaler Stufe singen oder ihre Instrument spielen, gehen Sie in der Signalkette rückwärts, um herauszufinden, wo die
Verzerrung auftritt. Prüfen Sie zuerst das Vorverstärkerpegel des Mikrofons. Wenn
es auf die Minimum Position eingestellt ist und Verzerrungen auftreten, aktivieren Sie den Schalter des Vorverstärkers. Wenn der Pegel sinkt und die Verzerrung
nicht mehr auftritt, dann wurde der Vorverstärker des Mikrofons überlastet. Sinkt
der Pegel aber die Verzerrung bleibt, dann wird die Überlast am Mikrofoneingang
verursacht. Stellen Sie den Dämpfungsschalter auf die -10dB Position. Wenn die
Verzerrung bleibt, dann sollten entweder die Künstler den Pegel ihrer Instrumente
senken oder Sie sollten das Mikrofon von der Schallquelle weiter entfernt aufstellen.
ENGLISH
FRANÇAISDEUTSCHEESPAÑOLITALIANO
MTR231 Multi-Pattern Studio Kondensatormikrofon
33
Page 34
Aufstellen des Mikrofons
Um die Qualität des Klangs zu maximieren, müssen Sie sorgfältig auf die Platzierung
Ihres MTR231 achten und darauf, wie es hinsichtlich des Instruments oder des /
der Sänger(in) positioniert ist. Das MTR231 ist ein unidirektionales / Richtmikrofon.
Damit ist ein Phänomen verbunden, das als “Proximity Effekt” bekannt ist, woraus
sich eine Änderung im Frequenzgang des Mikrofons basierend auf der Position der
Mikrofonkapsel in Bezug auf die Schallquelle ergibt. Um den besten Frequenzgang
zu erhalten, beginnen Sie damit, das Mikrofon direkt auf die Achse mit der Schallquelle zu richten. Sie können die Klangeigenschaften ändern, mit denen das Mikrofon
aufnimmt, indem Sie die Position des Mikrofons ändern. Wenn Sie das Mikrofon
von der Schallquelle weg (aus der Achse) drehen, wird sich die Empfindlichkeit für
höhere Frequenzen verringern. Experimentieren und Erfahrung ist der beste Weg, um
herauszufinden, was für Ihre Aufnahmen am besten wirkt. Hier finden Sie einige Tipps
für das Einstellen und die Verwendung Ihres MTR231 bei typischen
Anwendungen.
Stimme
Stellen Sie den Schalter für die Richtcharakteristik auf die Niere Position.
Positionieren Sie das Mikrofon direkt
vor dem / der Künstler(in), so dass
das Mikrofongitter zwischen 15 und
60 von ihm / ihr Zentimeter entfernt
ist. Je näher sich der / die Sänger(in)
an das Mikrofon bewegt, desto stärker
steigt der Bass oder der niedrige
Frequenzgang an. Wenn sich der / die Sänger(in) vom Mikrofon weg bewegt, wird
der Klang natürlicher, da die niedrigeren Frequenzen zurückgehen. Um den vollen
Sound zu erreichen, sollte der / die Sänger(in) das Mikrofon in Richtung seines / ihres
Mundes richten. Wenn einige Konsonanten wie “P2 und “S” im Pegel stark ansteigen,
drehen Sie das Mikrofon ein wenig vom / von der Sänger(in) weg, so dass Klang am
Mikrofon leicht außerhalb der Mitte ankommt. Es ist vorzuziehen, diese Spitzen durch
den Einsatz des MPF1 Pop Filters zu nehmen. Wenn Sie einer Gruppe von Sängern
aufnehmen sollten Sie darauf achten, sie an der Vorderseite des Mikrofons und nahe
beieinander aufzustellen.
Akustische Gitarre
Es gibt eine Vielzahl von Möglichkeiten, mit dem MTR231 eine akustische Gitarre
aufzunehmen. Die optimale Positionierung des Mikrofons hängt von der Art des Instruments ab und davon, welche Art von Sound Sie aufnehmen möchten. Es kann notwendig sein, ein wenig mit verschiedenen Positionen zu experimentieren, um einen vollen
und ausgewogenen Klang zu erzielen. Bei Abnahme einer Standard Akustikgitarre mit
Stahlsaiten wird empfohlen, dass Sie das Mikrofon zu Anfang in einem Abstand von
15-30 cm vom Schallloch aufstellen, leicht aus der Achse heraus positioniert und
in Richtung des Griffbretts gerichtet Wenn Sie von dieser Position aus das Mikrofon
in Richtung Schallloch bewegen, wird das Mikrofon tiefere Frequenzen aufnehmen.
Wenn Sie stattdessen höhere Frequenzen erfassen oder unerwünschte Bewegungs-
34
Page 35

Aufstellen des Mikrofons
geräusche ausfiltern möchten, bewegen Sie das Mikrofon in Richtung Griffbrett.
Anders als bei einer Gitarre mit Stahlsaiten ist der Klang einer Gitarre mit Nylonsaiten,
die mit Fingerpicking gespielt werden. Er ist in der Regel natürlich wärmer. Um einen
gleichmäßigen, vollen Ton aufzunehmen, wird empfohlen, dass Sie das Mikrofon 7-15
cm über der Mitte der Brücke positionieren. Dies wird dabei helfen, die höheren Frequenzen hervorzuheben und den Klang der anschlagenden Finger aufzunehmen. Wenn
das Mikrofon zu sehr den Schwerpunkt auf die niedriger Frequenz am Schallloch
setzt, bewegen Sie das Mikrofon so, dass es leicht aus der Achse der Gitarre heraus
steht. Wenn Sie zwei MTR231 Mikrofone haben, versuchen Sie, eines am Griffbrett zu
positionieren und das andere an der Brücke der Gitarre, oder stellen Sie Mikrofon in
der Nähe der Gitarre und das zweite etwas weiter weg, um den Klang des Raumes zu
erfassen, und mischen Sie dann beide Quellen zusammen.
Klavier
Es ist eine sehr anspruchsvoll Aufgabe, den Klang eines Flügels zu erfassen, und es
können dabei zahlreiche Mikrofon Techniken verwendet werden. Für eine nahe Aufnahme des Klaviers positionieren Sie das MTR231 so gerade im Inneren des Klaviers,
zentriert zwischen dem Resonanzboden und dem offenen Deckel. Je näher Sie das
Mikrofon in Richtung des Instruments bewegen, desto mehr wird das Mikrofon die
tiefen Frequenzen aufnehmen. Für eine Aufnahme der Umgebung, wie es bei einer
klassischen Performance verwendet wird, positionieren Sie das Mikrofon außerhalb
des Klaviers in Richtung des offenen Deckels. Für den Klang eines eher zeitgenössischen Ensembles platzieren Sie zwei MTR231 Mikrofone am Klavier, eins über den
Bass-Saiten und eins über den hohen Saiten, wobei die Mikrofone untereinander einen
Abstand von 15 - 30 cm haben sollten. Wenn Sie ein aufrecht stehendes Klavier mit
einem einzelnen Mikrofon aufnehmen möchten, positionieren Sie das Mikrofon direkt
zentriert über und vor dem Klavier, wobei der obere Deckel offen sein sollte. Wenn Sie
zwei MTR231 Mikrofone haben, positionieren die Mikrofone über der offenen Oberseite des Klaviers mit einem Mikrofon über den Bass-Saiten und dem anderen über
den hohen Saiten. Sie können auch zwei Mikrofone vor der Kickboard Fläche positionieren, etwa 20 cm über den Bass- und den hohen Saiten.
Overhead Drumkit
Dank des erweiterten hohen Frequenzgangs und seiner schnellen transienten Reaktion ist das MTR231 hervorragend geeignet, als Mikrofon für die Overhead-Becken
eingesetzt zu werden. Sie können ein MTR231 auf einen Ständer direkt über dem Kit
aufstellen und von vorne nach hinten ausrichten. Für eine Stereoaufnahme stellen Sie
zwei MTR231 Mikrofone über dem Drumset in einem Abstand von etwa 90 - 150 cm
auf. Sie können mit der genauen Platzierung etwas experimentieren, da die ideale Position von der Größe des Raumes abhängig ist und davon, ob Sie eine räumliche oder
instrumentennahe Aufnahme möchten. Im Allgemeinen ist es bei der Aufnahme eines
Drumkits immer eine gute Idee, mit dem Overhead-Mikrofon zu beginnen. Auch wenn
man Overhead-Mikrofone meistens für die Becken verwendet kann man auch einen
guten Sound des gesamten Kits erhalten. Mit Overhead-Mikrofonen ist es leichter,
einfach die individuellen Mikrofone für eine stärkere “Attacke” oder höhere Dichte des
Gesamtklangs aufzudrehen.
ENGLISH
FRANÇAISDEUTSCHEESPAÑOLITALIANO
MTR231 Multi-Pattern Studio Kondensatormikrofon
35
Page 36

Aufstellen des Mikrofons
Der Begriff “Stereo” wird hier verwendet, um verschiedene Mikrofon Techniken
unter Verwendung mehrerer Audiokanäle zu beschreiben, um auf diese Weise eine
Reproduktion der Klangbühne über ein Lautsprecherpaar zu erzeugen. Es gibt
viele Ansätze, die mit zwei oder mehreren Mikrofonen verwendet werden können.
Wir werden uns aber hier auf drei Methoden konzentrieren: Spaced Microphones
/ in einer Distanz aufgestellte Mikrofone, X / Y Coincident Pairs / Zusammen stehende Paare und Mid-Side (MS).
Spaced Microphones - Bei dieser Technik werden zwei Mikrofone in einem Abstand
zueinander von 30 cm bis 3 m aufgestellt (manchmal wird ein drittes Mikrofon
in der Mitte aufgestellt). Traditionell haben die Techniker omnidirektionale
Mikrofone für diese Methode gewählt, die eine Kugelcharakteristik und einen
linearen Frequenzgang aufweisen, aber auch stärker der Nachhall des Raumes
gegenüber einem direkten Signal aufnehmen. Dieser Ansatz funktioniert gut für
kleinere Performance Gruppen, wie etwa Kammermusik, in denen eine spezifische
Abbildung von Instrumenten auf der Stereo-Ebene nicht entscheidend ist. Je
näher die beiden Mikrofon zueinander angeordnet sind, desto größer erscheint das
Stereobild. Die Achter Charakteristik kann für diese Technik verwendet werden. In
diesem Fall müssen jedoch die Mikrofone in der Richtung der Schallquelle ausgerichtet werden. Nierenmikrofone werden in der Regel vermieden aufgrund der
Verschlechterung ihres außeraxial liegenden Frequenzgang.
X/Y Coincident Pairs - Diese Technik verwendet zwei Nierenmikrofone, die so nahe
wie möglich und in einem Winkel zueinander von 90°-135° aufgestellt werden. Je
mehr sich der Winkel zwischen den Mikrofonen einem 90 ° nähert, desto schmaler oder “Mono” wird die Räumlichkeit erscheinen. Da die Nierencharakteristik
dazu tendiert, außeraxiale Signale nicht zu reproduzieren, ist das Ergebnis
eine trocknee, eher direkte Tonaufnahme. Eine Variation der X / Y Paare ist die
Blumlein Konfiguration, die zwei gekreuzte Achter Charakteristiken nutzt. Diese
Technik kann auch als eine Variante der unten beschriebenen Mid-Side Verfahren
verwendet werden. Mit diesem Ansatz erzeugt man einen natürlicheren Klang,
da der polare und außeraxiale Frequenzgang viel besser ist als die Niere, er fängt
mehr den Nachhall des Raumes auf. Der Nachteil von zwei Mikrofonen mit Achter
Charakteristik ist, dass sie Geräusche aufnehmen, die von der Rückseite der
Mikrofone kommen, was unter Umständen nicht wünschenswert ist.
Mid-Side (MS) - Die MS Konfiguration kann als die vielseitigste und mächtigste
Technik dieser drei angesehen werden. Diese Anordnung verwendet typischerweise
ein nach vorne gerichtetes Nierenmikrofon für den “Mid” Teil, der gleichmäßig
auf den linken und rechten Kanal aufgezeichnet wird, und ein zur Seite ausgerichtetes Mikrofon mit Achter Charakteristik für die “Side” Komponente, die auf
dem linken und rechten Kanal (bei umgekehrter Polarität eines der Kanäle) aufgezeichnet wird. Die MS-Methode hat die beste Stereo-zu-Mono Kompatibilität, da
das Seitenmikrofon komplett aufgehoben wird, wenn die beiden Kanäle zu Mono
summiert werden. Die Breite des Stereofelds kann durch Einstellen der Pegel der
“Side” Komponente relativ zur “Mid” Komponente breiter oder schmaler gestaltet
werden.
36
Page 37

Schwingungsdämpfer
Um das MTR231 von externen Schwingungen zu isolieren und zu verhindern, dass
unerwünschte Geräusche über den Ständer übertragen werden, kann das Mikrofon
auf einer individuell gestalteten MSM1 Spinne, einem Schwingungsdämpfer montiert werden. Folgen Sie den unten angegebenen Schritten, um das Mikrofon auf
der Spinne zu montieren.
• Befestigen Sie die Spinne auf
einem Mikrofonständer oder
einem Schwenkarm. Der Winkel
der Spinne kann durch Lösen der
Rändelschraube in der Nähe der
Ständerverbindung eingestellt
werden.
Anmerkung: Verstellen Sie den
Winkel der Spinne nicht, ohne
vorher die Rändelschraube gelöst zu
haben. Falls Sie dies tun, kann die
Spinne beschädigt werden und die
Garantie kann dadurch erlöschen.
• Installieren Sie das MTR231 in die
MSM1, indem Sie das Mikrofon in
der Mitte des Netzes einpassen.
Positionieren Sie das MTR231 auf
der unteren Montageplatte, wobei
das Samson-Logo nach vorne zeigen
sollte.
• Sichern Sie die MSM1 durch
Drehen des Gewindes im
Uhrzeigersinn, bis es fest sitzt.
• Lösen Sie die Rändelschraube,
um den Winkel des Mikrofons zu
verstellen und das MTR231 in die
gewünschte Position zu bringen.
Einmal eingestellt, ziehen Sie die
Rändelschraube fest, um das Mikrofon zu sichern.
Anmerkung: Achten Sie darauf, das Gewinde nicht zu verkanten und die
Rändelschraube nicht zu überdrehen.
ENGLISH
FRANÇAISDEUTSCHEESPAÑOLITALIANO
MTR231 Multi-Pattern Studio Kondensatormikrofon
37
Page 38

Öko-Filterpapier:
Manchmal, wenn Gesang aufgenommen wird, können
gewisse explosive Konsonanten (wie harte “P”s oder
“B”s) den Pegel des Mikrofons überlasten, was zum
Clipping führen und Verzerrung bei Ihrer Aufnahme
verursachen kann. Es ist ratsam, einen Pop Filter zu
verwenden, um die Wirkung der Pop- / Blasgeräusche des
Sängers beim Aussprechen bestimmter Worte, die harte
Konsonanten enthalten, zu reduzieren. Die Pop Filter
helfen ebenfalls dabei, das Mikrofon vor Feuchtigkeit zu
schützen. Das MTR231 verfügt über ein einzigartiges
Design, das es ermöglicht, das MPF1 Pop Filter direkt
auf das Mikrofon zu montieren.
Um das MPF1 Pop Filter an das Mikrofon zu montieren,
richten Sie das Pop Filter mit der Nut unter dem Gitter
aus und drücken Sie das Filter auf, bis die Beine auf den
Mikrofonkörper einrasten.
38
Page 39

Technische Daten
Übertragungsart . . . . . . . . Kondensator
Richtcharakteristik . . . . . . . Omnidirektional, Niere, Achter Charakteristik
Frequenzgang . . . . . . . . . 20Hz–20kHz
Empfindlichkeit . . . . . . . . Omnidirektional: -39dB±3dB (0dB=1V/Pa 2kHz)
Niere: -37dB±3dB (0dB=1V/Pa 1kHz)
Achter Charakteristik: -33dB±3dB (0dB=1V/Pa 1kHz)
Äquivalentes Eigenrauschen . . 16dB
Dynamikbereich . . . . . . . . 118dB
Signal-Rausch-Abstand . . . . .78dB
Ausgangsimpedanz . . . . . . .50Ω ±30% (at 1kHz)
Maximaler SPL. . . . . . . . .132dB
Stromversorgung . . . . . . . . 48V Phantomspeisung
Steuerfeder . . . . . . . . . . Vergoldeter XLR, 3 Kontakte
Abmessungen . . . . . . . . . ø54mm x 191.7mm
Gewicht . . . . . . . . . . . . 552g
ENGLISH
FRANÇAISDEUTSCHEESPAÑOLITALIANO
Wir bei Samson verbessern ständig unsere Produkte. Daher können
Spezifikationen und Bilder ohne vorherige Ankündigung geändert werden.
MTR231 Multi-Pattern Studio Kondensatormikrofon
39
Page 40

20000 Hz100005000200010005002001005020
20000 Hz100005000200010005002001005020
180
0
180
0
180
0
Technische Daten
Omnidirektional
dB
10
0
-10
-20
5
45
10
15
20
25
dB
135 135
45
90 90
Frequenzgang
Niere
dB
10
0
-10
-20
Frequenzgang
Achter Charakteristik
dB
10
0
-10
-20
Frequenzgang
Richtcharakteristik
45
135 135
20000 Hz100005000200010005002001005020
Richtcharakteristik
45
135 135
Richtcharakteristik
5
45
10
15
20
25
dB
5
10
15
20
25
dB
90 90
45
90 90
40
Page 41

Page 42

Introducción
Le agradecemos que haya decidido adquirir el micrófono condensador de estudio multipatrón
Samson MTR231. Samson cuenta con un largo historial en el desarrollo de micrófonos de alta
calidad para aplicaciones en vivo y de grabación. La serie MTR, nuestra línea de micrófonos más
reciente y avanzada, ofrece una reproducción del sonido extraordinaria y un diseño innovador.
El MTR231 se convertirá rápidamente en su herramienta favorita del estudio, tanto para la
captura de sonidos vocales como de instrumentos acústicos o eléctricos. El micrófono incluye
un diafragma bañado en oro de 2,5 cm doble que proporciona tres patrones polares seleccionables, lo que ofrece una respuesta de frecuencia plana ampliada que asegura una reproducción
precisa y lineal de su música. Con su amplio rango dinámico y capacidad para manejar niveles
de presión sonora elevados, el MTR231 ofrece una capacidad de captación extraordinaria, desde
los sonidos más suaves hasta los más atronadores.
Para un aislamiento adicional de los ruidos no deseados, el micrófono incluye una montura
anti-vibraciones MSM1. El revolucionario nuevo diseño también permite montar el filtro antipetardeos MPF1 directamente en el micrófono, simplificando el montaje al máximo. Se incluye
un maletín de transporte para el transporte y el almacenamiento del micrófono. Se recomienda
guardar el micrófono en el maletín cuando no se utilice.
En estas páginas, encontrará una descripción detallada de las características del micrófono
MTR231, así como instrucciones para su configuración y uso y las especificaciones técnicas
completas del dispositivo. Si ha adquirido su micrófono en los Estados Unidos, también encontrará una tarjeta de garantía – no olvide rellenarla y enviárnosla por correo para que pueda recibir
soporte técnico online y para que le podamos ofrecer información actualizada sobre éste y otros
productos de Samson en el futuro. Además, no deje de visitar nuestra web (www.samsontech.
com) para ver toda la información sobre nuestra línea de productos.
Le recomendamos que anote los datos indicados en las líneas siguientes y los conserve junto con
una copia de su factura de compra.
Número de serie: ______________________________________________________
Fecha de compra: _____________________________________________________
Nombre del distribuidor: _______________________________________________
Con unos cuidados y mantenimiento adecuados, su micrófono MTR231 funcionará sin ningún
problema durante muchos años. En el caso improbable de que en algún momento tuviera que
reparar su micrófono, deberá solicitarnos un número de Autorización de Devolución (RA) para
poder enviar el micrófono a Samson. Sin este número no se aceptará la unidad. Póngase en
contacto con Samson en el número 1-800- 3SAMSON (1-800-372-6766) para que le facilitemos este número de autorización de devolución antes de enviarnos la unidad. Si fuera posible,
conserve el embalaje original y los materiales de protección para devolvernos la unidad dentro de
ellos. Si compró su micrófono MTR231 fuera de los Estados Unidos, póngase en contacto con su
distribuidor en lo relativo a los detalles de la garantía y la información de servicio.
42
Page 43

Funciones y Características
• Micrófono condensador de estudio multipatrón con
diafragma de gran tamaño
• Cápsula bañada en oro de 2,5 cm doble
• Reproducción del sonido suave y transparente
• Patrón de captación seleccionable: Omnidireccional,
Cardioide, Figura 8
• Funcionamiento con potencia fantasma de 48 voltios
• Pad de atenuación de 10dB
• Montura anti-vibraciones de la cápsula interna
• Respuesta de frecuencia suave ampliada
• Robusta construcción fundida a presión
• Conector XLR chapado en oro
ENGLISH
Accesorios
• Montura anti-vibraciones MSM1
• Filtro anti-petardeos MPF1
• Maletín de transporte
FRANÇAISDEUTSCHEESPAÑOLITALIANO
MTR231 Micrófono Condensador de Estudio Multipatrón
43
Page 44

Alimentación
El MTR231 es un micrófono condensador y, por lo tanto, necesita alimentación fantasma de 48 voltios. La alimentación fantasma se proporciona mediante un canal
de preamplificador del mezclador o, si fuera necesario, una fuente de potencia fantasma externa y se envía al micrófono mediante un cable de micrófono balanceado.
Con el fin de asegurar la duración de su equipo, y además es un buen procedimiento para la mezcla, sitúe siempre los controles del master fader en cero antes de
encender o pagar la potencia fantasma.
El funcionamiento deficiente del micrófono podría deberse a problemas con la
potencia fantasma. Si observa que el micrófono presenta una reducción de la salida
de señal, incremento del ruido o reducción del headroom (distorsión), podría haber
algún problema con la alimentación fantasma o con los cables del micrófono.
Ajuste del Nivel del Micrófono
Cuando conecte el MTR231 a un mezclador, utilice un cable balanceado y asegúrese de que la entrada esté balanceada y conectada a un canal que esté ajustado
para nivel de micrófono. Asegúrese también de que la alimentación fantasma está
aplicada. La mayoría de los mezcladores de una calidad razonable
ofrecen una entrada de micrófono con control de recorte para micrófono
(normalmente denominada Trim o Gain). La finalidad del control de recorte
consiste en optimizar la cantidad de señal buena con relación a cualquier ruido
asociado a los mezcladores electrónicos. Un buen preamplificador de micrófono
con recorte también tendrá un indicador LED de PICO o RECORTE. Para ajustar
un nivel óptimo en el micrófono, coloque el MTR231 delante de la fuente de
sonido y suba lentamente el control de recorte del micrófono hasta que el LED de
PICO se ilumine. A continuación, baje el control de recorte hasta que el LED deje
de iluminarse. En la mayoría de los aplicaciones, el ajuste ideal es que el control
de recorte esté al nivel más alto posible sin que se ilumine el LED de PICO.
44
Page 45

Patrón Polar
Una característica importante de cualquier micrófono es su direccionalidad o
patrón polar. El MTR231 incluye una cápsula de membrana doble que permite
seleccionar tres patrones polares individuales: omnidireccional, unidireccional
(cardioide) y bidireccional (figura 8). El patrón del micrófono puede seleccionarse
utilizando el interruptor deslizante de tres posiciones situado en el lado derecho
de la rejilla. Cada patrón tiene unas características de captación distintas en lo
relativo a la sensibilidad y la respuesta de frecuencia con respecto a los sonidos
que llegan de diferentes direcciones. En la siguiente sección se discuten algunas
de las características de cada patrón con el fin de ayudarle a seleccionar la mejor
configuración para su aplicación.
Omnidireccional - El ajuste omnidireccional reproduce el sonido procedente de
todas las direcciones con una respuesta de frecuencia uniforme, lo que elimina
el fenómeno denominado efecto de proximidad. Captura una cantidad de sonido
ambiente mayor que la de las otras configuraciones e incluirá por lo tanto más
sonido de la sala que cuando se utiliza un ajuste direccional. El ajuste omnidireccional resulta excelente para la grabación de actuaciones de grupos pequeños,
incluyendo conjuntos vocales e instrumentos de metal, de viento y de otro tipo,
con los artistas situados en círculo alrededor del micrófono. Para seleccionar
patrón de captación omnidireccional, ajuste el interruptor de selección de patrón
en la posición izquierda, indicada por el icono en forma de círculo.
Unidireccional (cardioide) - El patrón de captación cardioide es el que más se utiliza para aplicaciones de estudio y en vivo. Captura el sonido delante del micrófono
y rechaza el sonido procedente de los lados y de la parte de atrás, lo que permite una mejor separación de los instrumentos en el estudio y capta una mayor
cantidad del sonido de los instrumentos en relación con el sonido de la sala. La
separación también permite un mayor control y una mayor ganancia antes de la
retroalimentación en situaciones de refuerzo del sonido en vivo. Para seleccionar
patrón de captación cardioide, ajuste el interruptor de selección de patrón en la
posición central, indicada por el icono en forma de corazón.
Bidireccional (figura 8) - Este ajuste capta el sonido directamente delante y detrás
del micrófono y rechaza el sonido de la derecha y la izquierda, con un deterioro
mínimo de la respuesta de frecuencia fuera de eje. Resulta muy útil en diversas
técnicas de microfonía estéreo. El patrón de la figura 8 puede utilizarse para captar simultáneamente el sonido de dos instrumentos o dos vocalistas colocando el
micrófono directamente entre ellos, de manera que uno de ellos se capte delante
del micrófono y el otro detrás. Para seleccionar patrón de captación de la figura
8, ajuste el interruptor de selección de patrón en la posición derecha, indicada
por el icono en forma de "8".
Consulte la sección “Microphone Placement” on page 8 y la sección “Stereo
Microphone Techniques” on page 10 en lo relativo a los aspectos a tener en
cuenta a la hora de ubicar el micrófono en diferentes aplicaciones de grabación.
ENGLISH
FRANÇAISDEUTSCHEESPAÑOLITALIANO
MTR231 Micrófono Condensador de Estudio Multipatrón
45
Page 46

Pad de Atenuación de 10dB
El micrófono MTR231 incluye un pad de atenuación de 10dB que puede seleccionarse mediante el interruptor deslizante situado debajo de la rejilla y que se
utiliza para evitar la sobrecarga del preamplificador integrado reduciendo la sensibilidad de entrada del circuito del preamplificador del micrófono.. Si se ajusta el
interruptor a la izquierda (posición 0dB), se anula el control y no hay efecto sobre
la señal. Si se ajusta el interruptor a la derecha (posición -10dB), la sensibilidad
de entrada del micrófono se reducirá 10dB. Esto es útil cuando se captan fuentes
de sonido de alta intensidad con transitorios altos, como por ejemplo baterías,
platillos o instrumentos de metal.
Antes de ajustar el interruptor del pad de atenuación en la posición -10dB, es
aconsejable efectuar una comprobación del sonido y optimizar los niveles de señal
de entrada utilizando la ganancia por etapas apropiada. Si se produce distorsión
cuando el artista canta o toca su instrumento al máximo nivel, retroceda a través
de la cadena de señal para localizar dónde se produce la distorsión. Compruebe
en primer lugar el nivel de preamplificación del micrófono. SI está ajustado en la
posición mínima y se produce distorsión, active el interruptor del pad del preamplificador. Si el nivel de señal cae y la distorsión desaparece, el preamplificador
del micrófono estaba sobrecargado. Si el nivel de señal cae pero la distorsión no
desaparece, la sobrecarga se está produciendo en la entrada del micrófono. Ajuste
el interruptor de atenuación en la posición -10dB. Si sigue habiendo distorsión,
haga que el artista reduzca el nivel de su instrumento o aleje el micrófono de la
fuente de sonido.
46
Page 47

Ubicación del Micrófono
Para maximizar la calidad del sonido, es necesario prestar una gran atención a
la ubicación del MTR231 y a cómo está situado con respecto al instrumento o
vocalista que va a captar con el micrófono. Cuando el MTR231 se ajusta en el
patrón polar cardioide, presenta un fenómeno denominado "efecto de proximidad".
Este efecto es el cambio resultante en la respuesta de frecuencia de un micrófono
según la posición de la cápsula del micrófono con relación a la fuente de sonido.
Para obtener la mejor respuesta de frecuencia, comience apuntando el micrófono
cardioide hacia la fuente de sonido (en eje). Puede modificar las características
del sonido que capta el micrófono cambiando su posición. Si gira el micrófono alejándolo de la fuente de sonido (fuera de eje), la sensibilidad a las frecuencias más
altas se reducirá. La experimentación y la experiencia son la mejor manera para
conseguir el mejor sonido para sus grabaciones. A continuación le ofrecemos algunos consejos para la configuración y
el uso de su micrófono MTR231 en
aplicaciones típicas.
Aplicaciones Vocales
Con el interruptor de patrón del
micrófono ajustado en la posición
cardioide, coloque el micrófono
directamente delante del cantante
de manera que la rejilla del micrófono se sitúe a una distancia de entre
15 y 60 cm. Cuanto más se acerque
el vocalista al micrófono, mayor será
el incremento de la respuesta de
graves o bajos. Si el vocalista se aleja del micrófono, el tono se vuelve más natural
al reducirse la frecuencia de bajos. Para conseguir el sonido más completo, el
vocalista debe colocar su boca delante de la línea central del micrófono. Si se produce un efecto “p-pop” (ráfagas bruscas de aire producidas al pronunciar ciertas
consonantes como la "P" y la "S"), gire el micrófono alejándolo ligeramente del cantante para que el sonido llegue al micrófono ligeramente descentrado. Es preferible
evitar estos picos mediante el uso del filtro anti-petardeos externo MPF1. Si va a
grabar un grupo de cantantes, asegúrese de que se coloquen alrededor de la parte
frontal del micro y lo más juntos entre sí que sea posible.
Guitarra Acústica
Existen varias maneras de utilizar el micrófono MTR231 para captar el sonido de
una guitarra acústica. La colocación óptima dependerá del tipo de instrumento
y del tipo de sonido que quiera conseguir. Podría ser necesario experimentar con
varias posiciones hasta conseguir un tono completo y equilibrado. Cuando vaya a
captar una guitarra acústica de cuerdas metálicas estándar, le recomendamos que
comience con el micro colocado a unos 15-30 cm de la boca de la guitarra, colocada ligeramente fuera del eje y apuntando hacia el extremo del diapasón. Desde
esa posición, el acercar más el micrófono hacia la boca de la guitarra hará que se
capturen más frecuencias graves. Si, por el contrario, desea captar más agudos o
ENGLISH
FRANÇAISDEUTSCHEESPAÑOLITALIANO
MTR231 Micrófono Condensador de Estudio Multipatrón
47
Page 48

Ubicación del Micrófono
evitar murmullos no deseados, desplace el micrófono hacia el diapasón. Al contrario de lo que ocurre con una guitarra acústica con cuerdas metálicas, el sonido de
una con cuerdas de nylon tocada con los dedos suele ser más cálido. Para capturar
pues un sonido más nivelado y completo, le recomendamos que comience colocando el micrófono a unos 7 - 15 cm sobre el centro del puente. Esto ayudará a
enfatizar las frecuencias agudas y capturar el sonido de ataque del punteo con los
dedos. Si el micrófono capta demasiados graves de la boca de la guitarra, desplace
el micro para que quede ligeramente fuera del eje de la guitarra. Si dispone de un
par de micrófonos MTR231, pruebe con uno colocado en el diapasón y el segundo
sobre el puente de la guitarra, o con uno colocado cerca de la guitarra y el otro a
un metro o así para captar el sonido de la sala, mezclando después las dos fuentes
sonoras juntas.
Piano
El piano es un instrumento realmente complejo de capturar con micrófono y
pueden utilizarse un gran número de técnicas con el micrófono. Para una captura
cercana del piano, coloque el micrófono MTR231 justo en el interior del piano, a
media altura entre las cuerdas y la tapa abierta. Cuanto más acerque el micrófono
hacia el instrumento, éste captará una mayor cantidad de frecuencias graves. Para
una grabación del ambiente general como la que se utiliza en una interpretación
clásica, coloque el micrófono fuera del piano, apuntando hacia la tapa abierta.
Para un sonido más moderno, coloque dos micrófonos MTR231 en el piano, uno
sobre las cuerdas graves y otro sobre las agudas a una separación de entre 15 - 30
cm. Cuando vaya a captar el sonido de un piano vertical con un solo micrófono,
colóquelo justo encima y delante del piano con la tapa superior abierta, centrado
sobre el instrumento. Si dispone de dos micrófonos MTR231, colóquelos por encima de la tapa abierta del piano, con uno de ellos situado sobre las cuerdas graves
y el otro sobre las agudas. También puede colocar dos micrófonos delante de la
zona del arpa a una distancia de aproximadamente 20 cm sobre las cuerdas graves
y agudas.
En una jirafa sobre un kit de batería
Debido a su respuesta ampliada a las altas frecuencias y a su rápida respuesta a
los transitorios, el micrófono MTR231 ofrece unos resultados excelentes cuando se
utiliza instalado en una jirafa sobre un kit de batería. Puede colocar un micrófono
MTR231 en una jirafa directamente encima del kit apuntando desde delante hacia
atrás. Para la captura en estéreo, utilice dos micrófonos MTR231 colocados sobre
la batería y separados entre 1 y 1,5 m. Experimente hasta conseguir la ubicación
idónea dependiendo del tamaño de la sala y de si quiere conseguir un sonido más
cercano o más de tipo ambiental. En términos generales, cuando se vaya a captar
el sonido de una batería es preferible comenzar con los micrófonos colocados en
una jirafa. Aunque los micrófonos colocados en jirafa se suelen utilizar sobre todo
para los platillos, también puede captar un muy buen sonido de toda la batería con
tan solo un micrófono instalado en una jirafa. Utilizando micrófonos colocados en
una jirafa, es más fácil ajustar los micrófonos individuales para un mayor ataque y
espesor en el sonido global.
48
Page 49

Técnicas de Microfonía en Estéreo
El término "estéreo" se utilizará en esta sección para describir diferentes técnicas de microfonía utilizando múltiples canales de audio con el fin de crear una
reproducción del sonido a través de un par de altavoces. Cuando se utilizan dos o
más micrófono pueden adoptarse muchos enfoques, pero en esta sección nos centraremos en tres métodos: micrófonos espaciados, pares coincidentes X/Y y Lado
Medio (LM).
Micrófonos Espaciados - Esta técnica utiliza dos micrófonos colocados a una distancia aproximada entre ellos de entre 60 cm y 3,5 metros (a veces se utiliza un
tercer micrófono situado en el centro). Tradicionalmente los ingenieros y técnicos
de sonido han utilizado para este método micrófonos omnidireccionales, que tienen una respuesta polar y de frecuencia plana pero incluyen una mayor cantidad
del sonido reverberante de la sala en comparación con la señal directa. Este enfoque funciona bien en el caso de actuaciones de grupos más reducidos, como por
ejemplo música de cámara, en la imagen de los instrumentos en el plano estéreo
no es crucial. Cuanto menor es la distancia entre los micrófonos, mayor es la
amplitud que presenta la imagen estéreo. El patrón de la figura 8 puede utilizarse para esta técnica, aunque en ese caso es necesario posicionar los micrófonos
en ángulo en la dirección de la fuente del sonido. Normalmente se evita utilizar
micrófonos cardioides debido a la degradación de su respuesta de frecuencia
fuera de eje.
Pares Coincidentes X/Y - Esta técnica utiliza dos micrófonos cardioides colocados
lo más cerca posible entre sí con un ángulo de 90°-135°. Cuanto más aproxime el
ángulo entre los micrófonos a 90°, mayor será la sensación de estrechez (mono)
del entorno acústico. Puesto que los patrones de captación cardioides tienen a
no reproducir las señales fuera de eje, el resultado es una grabación de sonido
más seca y más directa. La configuración Blumlein es una variación de los pares
X/Y que utiliza dos patrones de la figura 8 cruzados. Esta técnica también puede
utilizarse como una variación del método del Lado Medio que se describe a continuación. Utilizando este enfoque se obtiene un sonido más natural, ya que la
respuesta de frecuencia polar y fuera de eje es mucho mejor que con el patrón
cardioide, capturando una mayor cantidad del sonido reverberante de la sala. La
desventaja del uso de dos micrófonos de la figura 8 consiste en que captarán
sonidos procedentes de detrás de los micrófonos, lo que podría no ser deseable.
Lado Medio (LM) - Es posible que la configuración LM sea la más versátil y potente
de las tres que se cubren en esta sección. Esta configuración incluye normalmente un micrófono cardioide orientado hacia delante para la parte "media", que se
graba por igual en los canales izquierdo y derecho, y un micrófono de la figura
8 orientado lateralmente para el componente "lateral" que se graba en el canal
izquierdo y derecho (con la polaridad de uno de los canales invertida). El método
LM es el que tiene una mayor compatibilidad mono a estéreo, ya que cuando los
dos canales se combinan en mono el micrófono lateral se cancela por completo.
La anchura del campo estéreo pueden incrementarse o reducirse ajustando el
nivel del componente "lateral" en relación con el componente "medio".
ENGLISH
FRANÇAISDEUTSCHEESPAÑOLITALIANO
MTR231 Micrófono Condensador de Estudio Multipatrón
49
Page 50

Montura Anti-vibraciones
Para aislar el micrófono MTR301 de las vibraciones externas y evitar los ruidos
no deseados que se transmiten a través del pie, el micrófono puede instalarse en
la montura anti-vibraciones tipo araña MSM1 diseñada específicamente. Siga los
pasos que se indican a continuación para instalar el micrófono en la montura antivibraciones.
• Fije la montura anti-vibraciones en
el soporte para micrófono o en el
brazo de jirafa. El ángulo de la montura anti-vibraciones puede ajustarse aflojando el tornillo manual situado cerca de la conexión del soporte.
Nota: No ajuste el ángulo de la
montura anti-vibraciones sin aflojar
el tornillo manual. En ese caso, la
montura anti-vibraciones podría
resultar dañada y la garantía podría
quedar anulada.
• Instale el micrófono MTR231 en la
montura anti-vibraciones MSM1,
introduciendo el micrófono en el
centro de la telaraña, colocando el
MTR231 sobre la placa de montaje
inferior con el logotipo de Samson
orientado hacia delante.
• Fije firmemente la montura MSM1
girando el collar roscado en el sentido de las agujas del reloj.
• Afloje el tornillo manual para ajustar
el ángulo del micrófono y colóquelo
en la posición deseada. Una vez
situado en su posición, apriete el
tornillo manual para fijarlo firmemente.
Nota: Tenga cuidado de no dañar o apretar en exceso el cuello roscado o el
tornillo manual.
50
Page 51
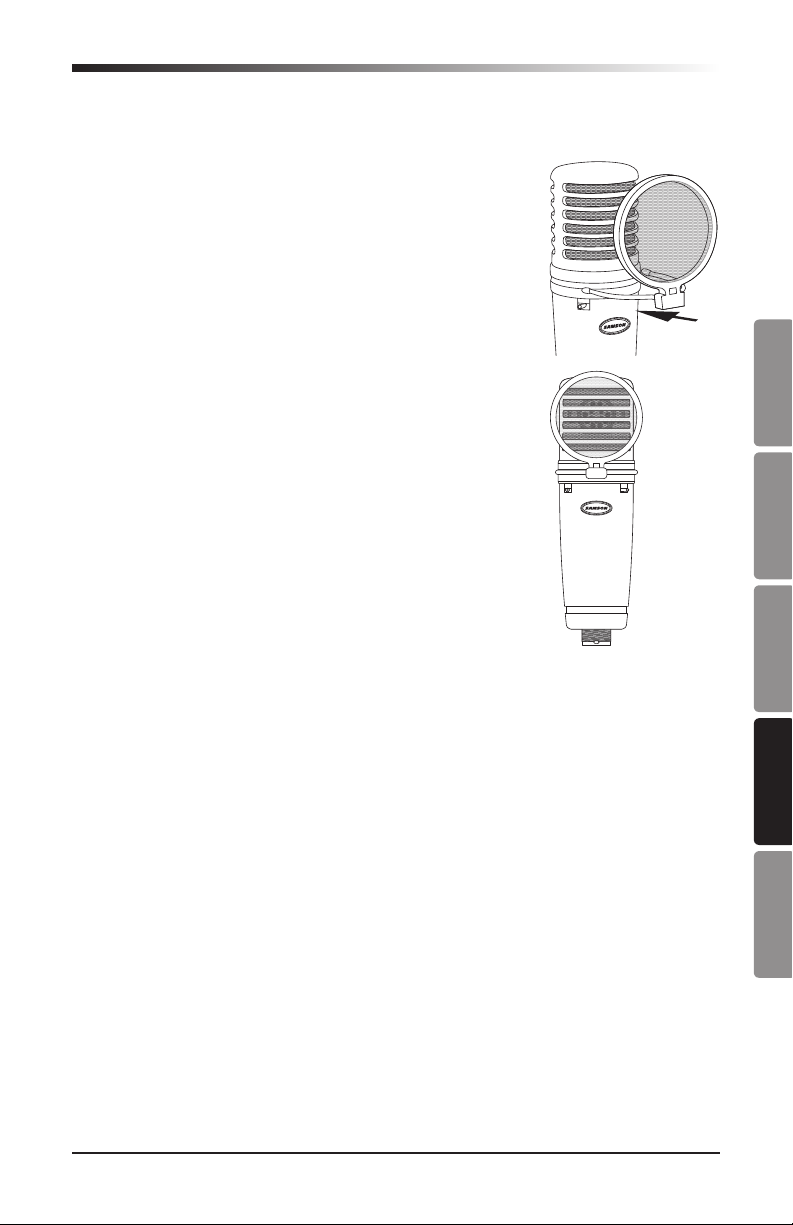
Filtro Anti-petardeos
En algunas ocasiones, cuando se graban sonidos vocales
ciertas consonantes plosivas (como por ejemplo los sonidos de la "P" y la "B" duros) sobrecargan la entrada del
micrófono distorsionando la grabación. Es aconsejable
utilizar un filtro anti-petardeos con el fin de reducir el
efecto de las ráfagas de aire al pronunciar palabras que
incluyan estos sonidos consonánticos duros. El filtro antipetardeos también ayuda a proteger el micrófono contra
la humedad. El MTR231 tiene un diseño único que permite montar el filtro anti-petardeos MPF1 directamente
en el micrófono.
Para instalar el filtro anti-petardeos en el micrófono, alinee el filtro anti-petardeos con la ranura situada debajo
de la rejilla y ejerza presión hasta que las patas queden
encajadas en el cuerpo del micrófono.
ENGLISH
FRANÇAISDEUTSCHEESPAÑOLITALIANO
MTR231 Micrófono Condensador de Estudio Multipatrón
51
Page 52

Especificaciones Técnicas
Tipo de Transductor. . . . . . .Condensador
Patrón Polar . . . . . . . . . . Omnidireccional, cardioide, figura 8
Respuesta de Frecuencia . . . . 20Hz–20kHz
Sensibilidad . . . . . . . . . . Omnidireccional: -39dB±3dB (0dB=1V/Pa
2kHz)
Cardioide: -37dB±3dB (0dB=1V/Pa 1kHz)
Figura 8: -33dB±3dB (0dB=1V/Pa 1kHz)
Ruido propio equivalente . . . . 16dB
Rango Dinámico . . . . . . . . 118dB
Relación Señal / Ruido . . . . . 78dB
Impedancia de Salida . . . . . 50Ω ±30% (a 1kHz)
SPL Máximo . . . . . . . . . . 132dB
Alimentación. . . . . . . . . .Potencia fantasma de 48V
Conector. . . . . . . . . . . .XLR, 3 clavijas, chapado en oro
Dimensiones . . . . . . . . . .ø54mm x 191,7mm
Peso. . . . . . . . . . . . . .552g
En Samson mejoramos continuamente nuestros productos y debido a ello las
especificaciones y las imágenes podrían ser objeto de cambios sin previo aviso.
52
Page 53

20000 Hz100005000200010005002001005020
20000 Hz100005000200010005002001005020
180
0
180
0
180
0
Especificaciones Técnicas
Omnidireccional
dB
10
0
-10
-20
5
45
10
15
20
25
dB
135 135
45
90 90
Respuesta de Frecuencia
Cardioide
dB
10
0
-10
-20
Respuesta de Frecuencia
Figura 8
dB
10
0
-10
-20
Respuesta de Frecuencia
Patrón Polar
ENGLISH
5
45
135 135
20000 Hz100005000200010005002001005020
45
10
15
20
25
dB
90 90
FRANÇAISDEUTSCHEESPAÑOLITALIANO
Patrón Polar
5
45
135 135
45
10
15
20
25
dB
90 90
Patrón Polar
MTR231 Micrófono Condensador de Estudio Multipatrón
53
Page 54

Page 55

Introduzione
Vi ringraziamo per aver acquistato il microfono a condensatore da studio multi-pattern Samson
modello MTR231. Samson possiede una lunga esperienza nello sviluppo di microfoni di
elevata qualità per applicazioni dal vivo e di registrazione. La serie MTR è la nostra linea più
recente e moderna di microfoni dotati di sorprendenti caratteristiche di riproduzione del suono
e design innovativo.
I microfoni modello MTR231 diverranno presto il vostro strumento preferito in studio, per
cogliere tanto il suono della voce quanto quello di strumenti acustici o elettrici. Il microfono è
dotato di un doppio diaframma placcato oro da 1" (25 mm) con tre pattern polari selezionabili
e fornisce un'estesa risposta in frequenza piatta, garantendo una riproduzione precisa e lineare
della musica. Con la sua ampia gamma dinamica e la capacità di gestire elevati livelli di pressione sonora, il modello MTR231 eccelle nel cogliere ogni sfumatura di suono, dalla più lieve
alla più alta e assordante.
Per un ulteriore isolamento da rumori indesiderati, il microfono comprende il supporto antivibrazioni MSM1. Il nuovo rivoluzionario design consente inoltre di montare direttamente sul
microfono il filtro anti-pop MPF1 semplificando al massimo la configurazione. La confezione
comprende anche un astuccio per il trasporto e la custodia del microfono. Quando non lo si
usa si consiglia di conservare il microfono nella sua custodia.
In queste pagine troverete una descrizione dettagliata delle caratteristiche del microfono
MTR231, istruzioni riguardo alla sua configurazione e al suo utilizzo e le specifiche complete
dell'apparecchio. Se il microfono è stato acquistato negli Stati Uniti, troverete anche un certificato di garanzia — vi preghiamo di compilarlo e spedirlo in modo da poter ricevere assistenza
tecnica on-line e da permetterci di inviarvi informazioni aggiornate su questo e altri prodotti
Samson in futuro. Vi invitiamo inoltre a consultare il nostro sito web
(www.samsontech.com) per ottenere informazioni complete su tutta la nostra linea di prodotti.
Vi consigliamo di conservare come riferimento i seguenti dati, oltre a una copia dello scontrino
certificante l'acquisto.
ENGLISH
FRANÇAISDEUTSCHEESPAÑOLITALIANO
Numero di serie:
Data di acquisto:
Nome del rivenditore:
Con le dovute cure e manutenzione, i microfoni MTR231 funzioneranno senza problemi per
molti anni. Se il microfono dovesse necessitare riparazioni, bisognerà ottenere un numero di
autorizzazione al reso (RA) prima di spedirlo a Samson. Senza questo numero, l'unità non sarà
accettata. Vi preghiamo di contattare Samson allo 1-800-3SAMSON (1-800-372-6766) per
ottenere un numero RA prima di spedire la vostra unità. Conservare la confezione originale
e, se possibile, effettuare il reso dell'unità nel suo imballaggio originario. Se il microfono
MTR231 è stato acquistato fuori dal territorio degli Stati Uniti, contattare il distributore locale
per dettagli sulla garanzia e informazioni sull'assistenza.
MTR231 Microfono a condensatore da studio multi-pattern
________________________________________________
________________________________________________
_____________________________________________
55
Page 56

Caratteristiche
• Condensatore da studio multi-pattern a diaframma largo
• Doppia capsula con placcatura in oro da 1" (25 mm)
• Riproduzione del suono uniforme e cristallina
• Pattern di pick-up selezionabile: omnidirezionale,
cardioide, a figura di 8
• Alimentazione phantom da 48 Volt
• Pad di attenuazione da 10 dB
• Supporto antivibrazioni interno alla capsula
• Risposta in frequenza estesa ed uniforme
• Resistente struttura pressofusa
• Connettore XLR placcato oro
Accessori
• Supporto antivibrazioni MSM1
• Filtro anti-pop MPF1
• Custodia per il trasporto
56
Page 57

Alimentazione
Il modello MTR231 è un microfono a condensatore e pertanto richiede un'alimentazione phantom da 48 V. L'alimentazione phantom viene fornita dal preamplificatore di
canale di un mixer oppure, se necessario, mediante un alimentatore phantom esterno
e inviata al microfono attraverso un cavo bilanciato per microfono.
Per garantire longevità all'attrezzatura e un buon mixaggio, azzerare sempre i comandi
del master fader e del monitor quando si attiva o si disattiva l'alimentazione phantom.
Delle cattive prestazioni del microfono possono essere imputate a problemi legati
all'alimentazione phantom. Se si riscontra che il microfono mostra una riduzione
nell'uscita del segnale, un rumore maggiore, o una diminuzione dell'headroom (distorsione), potrebbero esserci problematiche legate all'alimentazione phantom o ai cavi
del microfono.
Impostazione del livello del microfono
Quando si collega il microfono MTR231 a un mixer fare ricorso a un cavo bilanciato e accertarsi che l'ingresso sia bilanciato e collegato a un canale configurato
per il livello del microfono. Assicurarsi inoltre che l'alimentazione phantom sia
attiva. Moltissimi mixer e registratori di discreta qualità saranno dotati di un ingresso per microfono con comando di "regolazione microfono (mic trim)" (di solito
denominato Regolazione o Guadagno (Trim o Gain). La finalità del comando mic
trim è quella di ottimizzare la quantità di segnale corretta rispetto al rumore che
potrebbe essere associato con l'elettronica del mixer. Un buon preamplificatore
per microfono dotato di regolazione disporrà di un indicatore di picco o clip. Per
impostare un livello ottimale sul microfono, posizionare il microfono MTR231 di
fronte alla sorgente sonora desiderata e alzare leggermente il comando "mic trim"
fino a che non si riscontra l'accensione del LED indicante il raggiungimento del
PICCO. A questo punto ruotare verso il basso il comando di regolazione del mixaggio fino a che il LED non rimane più acceso. Nella maggior parte delle applicazioni, l'impostazione ideale è posizionare il comando di regolazione il più in alto
possibile senza che ciò provochi l'accensione della spia indicante il raggiungimento del valore di picco.
ENGLISH
FRANÇAISDEUTSCHEESPAÑOLITALIANO
MTR231 Microfono a condensatore da studio multi-pattern
57
Page 58

Pattern polare
Una caratteristica importante di qualsiasi microfono è la sua direzionalità o pattern
polare. Il modello MTR231 presenta una capsula a doppia membrana che consente di effettuare una scelta tra tre distinti pattern polari: omnidirezionale, unidirezionale (cardioide) e bidirezionale (a figura di 8). Il pattern del microfono può essere selezionato utilizzando l'interruttore a scorrimento a tre posizioni situato sotto il
lato destro della griglia. Ogni pattern ha delle caratteristiche di pick-up distinte per
quanto concerne sensibilità e risposta in frequenza rispetto a suoni provenienti da
direzioni diverse. Nel paragrafo seguente vengono esposte alcune delle caratteristiche di ciascun pattern, per aiutare il cliente a scegliere l'impostazione migliore per
la propria applicazione.
Omnidirezionale - L'impostazione omnidirezionale riproduce suoni provenienti da
qualsiasi direzione, (compresi quelli fuori asse), con una risposta in frequenza
uniforme, che li rende resistenti al fenomeno conosciuto come effetto di prossimità. Consente di catturare una quantità di suono ambiente maggiore che con le
altre impostazioni, pertanto includerà una maggior quantità di suoni della stanza rispetto a quando si fa ricorso a un'impostazione direzionale. L'impostazione
omnidirezionale è fantastica per registrare performance d'ensemble, ivi comprese
quelle di complessi, ottoni, fiati e altri strumenti con gli artisti collocati l'uno di
fronte all'altro e disposti in cerchio attorno al microfono. Per selezionare il pattern di
pick-up omnidirezionale, portare l'interruttore di selezione del pattern sulla posizione a sinistra, indicata dall'icona circolare.
Unidirezionale (cardioide) - Il pattern di pick-up cardioide è quello più ampiamente
usato per applicazioni che necessitano di microfoni tanto in studio quanto in manifestazioni dal vivo. Cattura il suono sulla parte frontale del microfono e respinge
quello proveniente dai lati e dal retro, ciò consente una miglior separazione degli
strumenti in studio e coglie il suono dello strumento in misura preponderante
rispetto al suono della stanza. Inoltre la separazione consente di avere un controllo e un guadagno maggiore prima del feedback in situazioni in cui è necessario
potenziare i suoni dal vivo. Per selezionare il pattern di pick-up cardioide, portare
l'interruttore di selezione del pattern sulla posizione centrale, indicata dall'icona "a
forma di cuore".
Bidirezionale (a figura di 8) - Questa impostazione cattura il suono direttamente sul
fronte e sul retro del microfono, respingendo nel contempo il suono sul lato destro
e sinistro e presenta un deterioramento minimo della risposta in frequenza fuori
asse. È un'impostazione molto utile in svariate tecniche microfoniche stereo. Il
pattern a figura di 8 può essere utilizzato per catturare simultaneamente il suono
prodotto da due strumenti o cantanti posizionando il microfono direttamente tra
loro, in modo che uno sia rivolto verso la parte frontale e l'altro verso quella posteriore del microfono. Per selezionare il pattern di pick-up a figura di 8, portare l'interruttore di selezione del pattern sulla posizione a destra, indicata dall'icona "8".
Si leggano i paragrafi “Posizionamento del microfono” a pagina 8 e “Tecniche
microfoniche stereo” a pagina 10, vi vengono esposte alcune considerazioni
relativamente ai casi di posizionamento del microfono in diverse applicazioni di
registrazione.
58
Page 59

Pad di attenuazione da 10 dB
Il modello MTR231 comprende un pad di attenuazione da 10 dB che può essere selezionato con l'interruttore scorrevole posizionato sotto la griglia e viene
utilizzato per evitare il sovraccarico del preamplificatore incorporato abbassando
la sensibilità di ingresso del circuito del preamplificatore del microfono. Posizionando l'interruttore sulla sinistra (posizione 0 dB) il comando viene aggirato e non
si hanno effetti sul segnale. Quando l'interruttore viene posizionato sulla destra
(posizione -10 dB) la sensibilità di ingresso del microfono sarà abbassata di 10
dB. Ciò è utile quando si posiziona un microfono vicino a sorgenti sonore ad alto
volume con suoni transitori molto alti, come tamburi, piatti od ottoni.
Prima di mettere lo switch del pad di attenuazione sulla posizione -10 dB, è
consigliabile effettuare un controllo del suono ed ottimizzare i livelli del segnale
d'ingresso facendo ricorso a un corretto gain staging. Se la distorsione è evidente
quando l'artista sta cantando o suonando il proprio strumento al massimo livello,
procedere a ritroso attraverso la catena del segnale per individuare dove si trova la
distorsione. Controllare per prima cosa il livello di preamplificazione del microfono. Se è impostato sul minimo e si ha una distorsione, attivare lo switch del
pad del preamplificatore Se il livello del segnale scende e la distorsione viene
eliminata ciò significa che il preamplificatore del microfono era sovraccarico. Se
il livello scende, ma la distorsione rimane, il sovraccarico sta avendo luogo in
corrispondenza dell'ingresso del microfono. Impostare lo switch di attenuazione
sulla posizione -10 dB. Se la distorsione continua a rimanere, fare in modo che
l'artista abbassi il livello del proprio strumento oppure allontanare il microfono
dalla sorgente sonora.
ENGLISH
FRANÇAISDEUTSCHEESPAÑOLITALIANO
MTR231 Microfono a condensatore da studio multi-pattern
59
Page 60

Posizionamento del microfono
Per elevare al massimo la qualità del suono che si sta catturando, bisogna prestare
un'accurata attenzione alla localizzazione del microfono MTR231 e a come viene
posizionato in relazione allo strumento o al cantante. Quando il microfono MTR231
è impostato sul pattern polare cardioide, mostra un fenomeno conosciuto con la denominazione di "effetto di prossimità" che è una variazione di risultato nella risposta
in frequenza di un microfono sulla base della posizione della capsula del microfono
relativamente alla sorgente sonora. Per ottenere la miglior risposta in frequenza,
iniziare con il collocare il microfono direttamente sull'asse della sorgente sonora. È
possibile modificare le caratteristiche del suono che il microfono coglie cambiando la
posizione di quest'ultimo. Ruotare il microfono per allontanarlo dalla sorgente sonora
(ponendolo fuori asse) farà diminuire la sensibilità alle frequenze più alte. Per rinvenire la qualità di suono migliore per le proprie registrazioni la soluzione più adeguata
consiste nello sperimentare e nel
fare delle prove. Di seguito vengono
riportati alcuni consigli per configurare e utilizzare il microfono MTR231
in applicazioni tipiche.
Suono della voce
Con il commutatore di pattern per
microfono impostato sulla posizione
cardioide, posizionare il microfono
direttamente di fronte all'artista in
modo che la griglia del microfono si
trovi a una distanza compresa tra 6
e 24 pollici (152 - 610 mm). Più il
cantante si avvicina al microfono, più aumenta la risposta dei bassi. Man mano che il
cantante si allontana dal microfono, il tono diviene più naturale mentre le frequenze
basse si smorzano. Per ottenere il massimo della pienezza del suono, un cantante
dovrebbe puntare la linea centrale del microfono verso la propria bocca. Se alcune
consonanti come "P" e "S" sembrano effettuare un salto di livello, ruotare il microfono
allontanandolo di poco dall'artista in modo che il suono arrivi al microfono leggermente decentrato. È preferibile evitare questi picchi attraverso l'uso del filtro anti-pop
esterno MPF1. Se si sta registrando un complesso, accertarsi che i cantanti si posizionino attorno alla parte frontale del microfono, l'uno accanto all'altro.
Chitarra acustica
Svariati sono i modi in cui il modello MTR231 può essere utilizzato come microfono
per una chitarra acustica. Il posizionamento ottimale del microfono dipenderà dal
tipo di strumento e dal tipo di suono che si sta cercando di catturare. Potrebbe essere
necessario provarne l'utilizzo in diverse posizioni prima di ottenere un tono pieno e
bilanciato. Quando si usa un microfono con una chitarra acustica con corde in acciaio
standard, si consiglia di iniziare ponendo il microfono a una distanza di 6 - 12 pollici (152 - 305 mm) dal foro di risonanza, leggermente fuori asse e puntato verso il
bordo della tastiera. Da questa posizione, uno spostamento del microfono verso il foro
di risonanza farà sì che il microfono catturi un maggior numero di frequenze basse.
Se, invece, si desidera catturare una maggior risposta degli alti o eliminare rimbombi
60
Page 61

Posizionamento del microfono
indesiderati, spostare il microfono verso la tastiera. Diversamente da una chitarra
acustica con corde di acciaio, il suono di una chitarra acustica con corde di nylon
pizzicate con le dita, di norma risulta naturalmente più caldo. Per registrazioni in cui
il tono sia pieno e regolare, si consiglia di iniziare con il posizionamento del microfono a 3 - 6 pollici (76 - 152 mm) sopra il centro del ponte. Ciò contribuirà ad enfatizzare le frequenze più alte e a cogliere l'attacco del pizzicato. Se il microfono coglie
frequenze troppo basse dal foro di risonanza, spostarlo in modo che sia leggermente
fuori asse rispetto alla chitarra. In presenza di una coppia di microfoni MTR231,
provare a posizionarne uno in corrispondenza della tastiera e il secondo sopra il ponte
della chitarra, oppure posizionare un microfono accanto alla chitarra e l'altro a pochi
passi di distanza per cogliere il suono della stanza, in modo da amalgamare il suono
proveniente dalle due sorgenti.
Piano
Il piano è uno strumento di cui è molto impegnativo riuscire a catturare il suono,
pertanto è possibile fare ricorso a numerose tecniche di ripresa microfonica. Per una
registrazione microfonica ravvicinata del suono del piano, mettere il modello MTR231
proprio all'interno del piano, centrato tra la tavola acustica e il coperchio aperto. Più
si avvicina il microfono allo strumento più saranno le basse frequenze che verranno
colte dal microfono. Per registrazioni in ambienti come quelli utilizzati per performance di musica classica, posizionare il microfono fuori dal piano, rivolto verso l'interno
del coperchio aperto. Per suoni di ensemble più contemporanei, posizionare due
microfoni MTR231 nel piano, uno sopra le corde dei bassi e uno sopra quelle degli
alti a una distanza di 6 - 12 pollici (152 - 305 mm). Dotando un pianoforte verticale
di un solo microfono, posizionare quest'ultimo appena sopra e di fronte al piano con
la parte superiore aperta, centrato sopra lo strumento. Se si dispone di una coppia di
microfoni MTR231, posizionare i microfoni sopra la parte superiore aperta del piano,
mettendo un microfono sopra le corde dei bassi e uno sopra quelle degli alti. È inoltre
possibile posizionare due microfoni di fronte alla parte bassa dello strumento a circa
8 pollici (203 mm) al di sopra delle corde dei bassi e degli alti.
Overhead per kit batteria
Grazie all'estesa risposta in alta frequenza e alla rapida risposta al transiente, il modello MTR231 ha delle eccezionali prestazioni quando viene utilizzato come microfono overhead per i piatti. È possibile posizionare un MTR231 su un'asta direttamente
sopra il kit, puntato dal fronte verso il retro. Per ottenere un effetto stereofonico,
utilizzare due microfoni MTR231 posizionati sopra la batteria a una distanza di 3 - 5
piedi (914 - 1.524 mm). Si possono fare delle prove per individuare il posizionamento più corretto, a seconda della dimensione della stanza e del fatto se si desideri un
suono con effetto ambiente o con microfono ravvicinato. In linea generale, quando
si devono utilizzare dei microfoni con una batteria, è una buona idea iniziare con
dei microfoni overhead. Benché gli overhead vengano utilizzati principalmente per i
piatti, anche uno solo di essi può far ottenere un suono fantastico dall'intera batteria.
Facendo ricorso a dei microfoni overhead è più semplice limitarsi ad alzare il volume
dei singoli microfoni per ottenere attacchi più decisi e maggior consistenza del suono
nel suo complesso.
ENGLISH
FRANÇAISDEUTSCHEESPAÑOLITALIANO
MTR231 Microfono a condensatore da studio multi-pattern
61
Page 62

Tecniche microfoniche stereo
Il termine "stereo" verrà utilizzato in questa sede per descrivere diverse tecniche
microfoniche che fanno uso di molteplici canali audio in modo da creare una
riproduzione del soundstage con una coppia di altoparlanti. Ci sono molti approcci utilizzabili con due o più microfoni, ci concentreremo tuttavia su tre metodi:
microfoni distanziati, coppie X/Y coincidenti e ripresa microfonica Mid-Side (MS).
Microfoni distanziati - Questa tecnica utilizza due microfoni posizionati a una
distanza di 2-10 piedi (610 - 3.048 mm) (talvolta si fa ricorso a un terzo microfono collocato al centro). Per questo metodo i tecnici hanno tradizionalmente sempre scelto microfoni omnidirezionali, che hanno uno schema polare e una risposta
in frequenza piatti, ma includono più suono riverberato della stanza rispetto a
quando si opera con segnale diretto. Questo approccio dà buoni risultati con
gruppi dalle performance più contenute, come per esempio nel caso della musica
da camera, dove non è fondamentale una specifica immagine degli strumenti sul
piano stereo. Quanto più vicini sono disposti i due microfoni, tanto più ampia
appare l'immagine stereo. Il pattern a figura di 8 può essere utilizzato per questa
tecnica, ma in questo caso i microfoni devono essere angolati nella direzione della
sorgente sonora. I microfoni cardioidi vengono di solito evitati a causa del degrado
dovuto alla risposta in frequenza fuori asse.
Coppie X/Y coincidenti - Questa tecnica utilizza due microfoni cardioidi posizionati
il più vicino possibile con un angolo obliquo di 90°-135°. Quanto più l'angolo tra i
microfoni si avvicina a 90°, tanto più stretto, o mono, apparirà il soundstage. Dal
momento che i pattern di pick-up del microfono cardioide tendono a non riprodurre i segnali fuori asse, il risultato è una registrazione del suono più asciutta, più
diretta. Una variazione della tecnica fondata sulle coppie X/Y è la configurazione
Blumlein che utilizza due pattern a figura di 8 incrociati. Questa tecnica può
essere utilizzata anche come variazione del metodo Mid-Side illustrato di seguito.
L'utilizzo di questo approccio produce un suono più naturale, dal momento che la
risposta in frequenza polare e fuori asse è di gran lunga migliore rispetto al pattern del microfono cardioide, esso consente di catturare un quantitativo maggiore
di suono riverberato della stanza. Lo svantaggio insito nell'uso di due microfoni a
figura di 8 consiste nel fatto che essi cattureranno suoni provenienti dal retro dei
microfoni e ciò potrebbe non essere desiderabile.
Mid-Side (MS) - La configurazione MS potrebbe essere la tecnica più versatile ed
efficace delle tre esposte. Questa disposizione di norma utilizza un microfono
cardioide rivolto in avanti per la parte "intermedia", che viene registrata in egual
misura per i canali sinistro e destro, e un microfono a figura di 8 rivolto di lato
per il componente "laterale" che viene registrato per i canali sinistro e destro (con
polarità inversa di uno dei canali). Il metodo MS ha la miglior compatibilità da
stereo a mono, perché quando i due canali sono sommati in mono il microfono
laterale viene completamente silenziato. La larghezza del campo stereo può essere
resa più ampia o più stretta regolando il livello del componente "laterale" rispetto
a quello "intermedio".
62
Page 63

Supporto antivibrazioni
Per isolare il microfono MTR231 dalle vibrazioni esterne ed evitare la trasmissione di rumori indesiderati attraverso il piedistallo, il microfono può essere montato
sull'apposito supporto antivibrazioni "a forma di ragno" MSM1. Per montare il
microfono sul supporto antivibrazioni eseguire le operazioni riportate di seguito.
• Fissare il supporto antivibrazioni al
piedistallo o al braccio dell'asta del
microfono. L'angolo del supporto
antivibrazioni può essere regolato
allentando la vite con testa ad alette
accanto al collegamento con il piedistallo.
Nota: non regolare l'angolo del supporto antivibrazioni senza aver allentato la vite con testa ad alette. Se
si fa ciò, il supporto antivibrazioni
potrebbe rimanere danneggiato e si
potrebbe invalidare la garanzia.
• Installare il microfono MTR231 sul
supporto MSM1 inserendo il microfono al centro del reticolato, posizionando il MTR231 sulla piastra
di montaggio inferiore con il logo
Samson rivolto in avanti.
• Fissare il supporto MSM1 ruotando
la fascetta filettata in senso orario
fino a che non è serrata.
• Allentare la vite con testa ad alette
per regolare l'angolo del microfono e
collocare il MTR231 nella posizione
desiderata. Una volta messo in loco,
serrare la vite con testa ad alette per
fissare il microfono in sede.
Nota: fare attenzione a non danneggiare la filettatura e a non serrare eccessivamente la fascetta filettata o la vite
con testa ad alette.
ENGLISH
FRANÇAISDEUTSCHEESPAÑOLITALIANO
MTR231 Microfono a condensatore da studio multi-pattern
63
Page 64

Filtro anti-pop
Talvolta, durante la registrazione della voce, alcune
consonanti occlusive (come le "P" e le "B" dure) sovraccaricano l'ingresso del microfono e ciò causa fenomeni
di clipping e aggiunge distorsione alla registrazione. È
consigliabile fare uso di un filtro anti-pop per ridurre
gli effetti delle emissioni di aria dei cantanti quando
pronunciano parole che contengano queste consonanti
dal suono duro. Inoltre il filtro anti-pop contribuisce a
proteggere dall'umidità gli elementi che compongono il
microfono. Il microfono MTR231 è caratterizzato da un
design speciale che consente di montare direttamente al
microfono il filtro anti-pop modello MPF1.
Per collegare il filtro anti-pop MPF1 al microfono allinearlo con la scanalatura posta sotto la griglia e premere
fino a che gli elementi laterali entrino con uno scatto in
sede sul corpo del microfono.
64
Page 65

Specifiche tecniche
Tipo di trasduttore . . . . . . . Condensatore
Pattern polare . . . . . . . . . Omnidirezionale, cardioide, a figura di 8
Risposta in frequenza. . . . . .20Hz–20kHz
Sensibilità . . . . . . . . . . .
Self-noise . . . . . . . . . . . 16 dB
Gamma dinamica . . . . . . . 118 dB
Rapporto segnale-rumore . . . . 78 dB
Impedenza di uscita . . . . . . 50 Ω ± 30% (a 1 kHz)
Livello di pressione sonora max. 132 dB
Alimentazione . . . . . . . . . phantom 48 V
Connettore . . . . . . . . . . .XRL a 3 pin, placcato oro
Dimensioni. . . . . . . . . . .ø 54 mm x 191,7mm
Peso. . . . . . . . . . . . . .552 g
Omnidirezionale: -39 dB ± 3 dB (0 dB = 1 V/Pa 2kHz)
Cardioide: -37 dB ± 3 dB (0 dB = 1 V/Pa 1kHz)
A figura di 8: -33 dB ± 3 dB (0 dB = 1 V/Pa 1kHz)
ENGLISH
FRANÇAISDEUTSCHEESPAÑOLITALIANO
In Samson, il miglioramento dei prodotti è ininterrotto, pertanto specifiche e
immagini sono soggette a modifica senza preavviso.
MTR231 Microfono a condensatore da studio multi-pattern
65
Page 66

20000 Hz100005000200010005002001005020
20000 Hz100005000200010005002001005020
180
0
180
0
180
0
Specifiche tecniche
Omnidirezionale
dB
10
0
-10
-20
5
45
10
15
20
25
dB
135 135
45
90 90
Risposta in frequenza
Cardioide
dB
10
0
-10
-20
Risposta in frequenza
A figura di 8
dB
10
0
-10
-20
Risposta in frequenza
Pattern polare
5
45
135 135
20000 Hz100005000200010005002001005020
45
10
15
20
25
dB
90 90
Pattern polare
5
45
135 135
45
10
15
20
25
dB
90 90
Pattern polare
66
Page 67

Page 68

Samson Technologies
45 Gilpin Avenue
Hauppauge, New York 11788-8816
Phone: 1-800-3-SAMSON (1-800-372-6766)
Fax: 631-784-2201
www.samsontech.com
 Loading...