

Page 1
SV-S
INSTRUCCIONES - USERS MANUAL - GEBRAUCHSANWEISUNG MODE D’EMPLOI - INSTRUZIONI PER L’USO - MANUAL DE INSTRUÇÕES
Envasadoras al vacío
Vacuum packaging machines
Vakuumverpackungsmaschinen
Machines a emballer sous-vide
Machine per il sottovuoto
Embaladoras de vácuo
Page 2

Indicaciones para el marcado CE
Cada máquina lleva los siguientes
identificadores:
- Nombre y dirección del fabricante: SAMMIC,
S.L. Basarte, 1 Azkoitia Gipuzkoa (SPAIN)
- Marca "CE"
- Se Indica el modelo de máquina en el
apartado siguiente.
- El número de serie se indica en la hoja de
garantía y en la declaración de conformidad.
MODELOS
Este manual describe la instalación,
funcionamiento y mantenimiento de las
envasadoras de vacío controlado por sensor:
• modelos de sobremesa: SV-306S, SV-310S,
SV-410S, SV-420S, SV-520S
• modelos de pie: SV-604S, SV-606S, SV-806S,
SV-810S .
• modelos de campana basculante: SV-6100,
SV-6160
La referencia del modelo y sus características
se indican en la placa de identificación
colocada en la máquina.
Estas envasadoras están diseñadas y
fabricadas de acuerdo con las directivas
Europeas 89 / 392 / CEE, 93 / 68 CEE, 73 / 23
/ CEE y a la normativa NSF de higiene y
sanidad.
INSTALACIÓN
Para conseguir las mejores prestaciones, así
como una buena conservación de la máquina,
hay que seguir cuidadosamente las
instrucciones contenidas en este manual.
Emplazamiento
Colocar la máquina de tal manera que quede
debidamente nivelada. Para evitar daños, la
máquina no debe apoyarse nunca sobre uno
de sus lados.
Las máquinas de sobremesa deben instalarse
sobre una superficie lisa, ya que las patas
están fabricadas en material deslizante para
poder mover la máquina sin esfuerzo y limpiar
la superficie sobre la que se apoya.
Conexión Eléctrica
1. C
ARACTERÍSTICAS DE LA MÁQUINA
-Las máquinas monofásicas se suministran
para tensión de 230V.
-Las máquinas trifásicas se suministran para
tensiones de 230V ó 400V (conectadas a
400V).
Antes de conectar la envasadora a la red,
comprobar la máquina está preparada para el
mismo voltaje que el de la red.
Para el cambio de voltaje (solo máquinas
trifásicas):
1.Conectar los transformadores a la tensión
adecuada, según se indica en su regleta de
conexiones.
2.Cambiar si es necesario las conexiones en el
motor según se indica en su caja de bornes.
3.Ajustar, si es necesario, el relé térmico
según se indica en el esquema eléctrico.
2. C
ARACTERÍSTICAS DEL CABLE
Las envasadoras SAMMIC se suministran con
un cable eléctrico de 1,5 m de largo, con
recubrimiento termo plástico.
ES OBLIGATORIA LA CONEXION CON TIERRA.
El hilo de toma-tierra de la máquina está
señalizado. Además la maquina está provista
de un tornillo externo para la conexión a un
sistema equipotencial de tierra.
- Máquinas trifásicas: Preparar una toma de
corriente mural con protección magnetotérmica y diferencial de 3P+N+T de 20 A, y
una clavija estanca para conectarla al cable
de alimentación de la envasadora.
- Máquinas monofásicas: Preparar una toma
de corriente mural con protección magnetotérmica y diferencial de 2P +T de 20 A. La
clavija que forma parte del cable de
alimentación debe ser accesible.
Para cualquier operación de reparación la
máquina debe ser desconectada de la red,
bien desconectando el interruptor
magnetotérmico, o bien desenchufando la
toma de conexión.
3. C
AMBIO SENTIDO GIRO BOMBA DE VACÍO
(únicamente en máquinas trifásicas)
Si al arrancar la máquina se produce un ruido
anormal en el motor de la bomba de vacío, es
debido a que está girando en sentido inverso.
En tal caso, parar inmediatamente la máquina
e intercambiar dos hilos en la alimentación.
PUESTA EN MARCHA
En los modelos SV-410S, SV-420S, SV-520S,
SV-600S, SV-800S y SV-6000 la bomba ya
contiene aceite.
En los modelos SV-310S llenar de aceite la
bomba a través de la toma, hasta completar ¾
partes de la mirilla. Se debe emplear aceite sin
detergentes:
-Aceite SAE10 (sin detergente) para las
bombas hasta 20 m³/h.
-Aceite SAE30 (sin detergente) para las
bombas superiores a 20m³/h.
Se recomienda que los aceites empleados
sean parafínicos.
Una vez accionado el interruptor general, al
objeto de que el aceite se caliente y permita
un vacío correcto, es necesario realizar varios
ciclos en vacío antes de proceder al primer
envasado.
Vacío por sensor en %
Son los modelos en los cuáles todas las
funciones (programación, vacío, entrada de
gas inerte y soldadura) son controladas por un
microprocesador que realiza el control a
través de un sensor de gran precisión (0,2%) y
permite alcanzar un vacío de hasta el 99,5%
de manera fiable y segura. Ofrece la
posibilidad de un vacío extra por tiempo.
Principales características
-Programación rápida y sencilla.
-Memorización de 10 programas.
-Contador automático de las horas de trabajo
de la máquina, avisando de los cambios de
aceite.
-Memorización automática del último
programa ejecutado.
-Memorización de los programas sin pila
desechable.
-Visualización mediante LEDS de cada etapa
ejecutada en el ciclo.
-La tecla de “Stop- avance ciclo” interrumpe la
función en ejecución, activando la siguiente
función hasta finalizar el ciclo.
-Sistema VAC-NORM. Permite realizar el vacío
exterior en recipientes.
-Sistema de secado de la bomba.
Recomendable cuando la bomba se usa para
envasar líquidos, productos cocinados en
caliente o entornos con mucha humedad.
Descripción técnica del panel de mandos
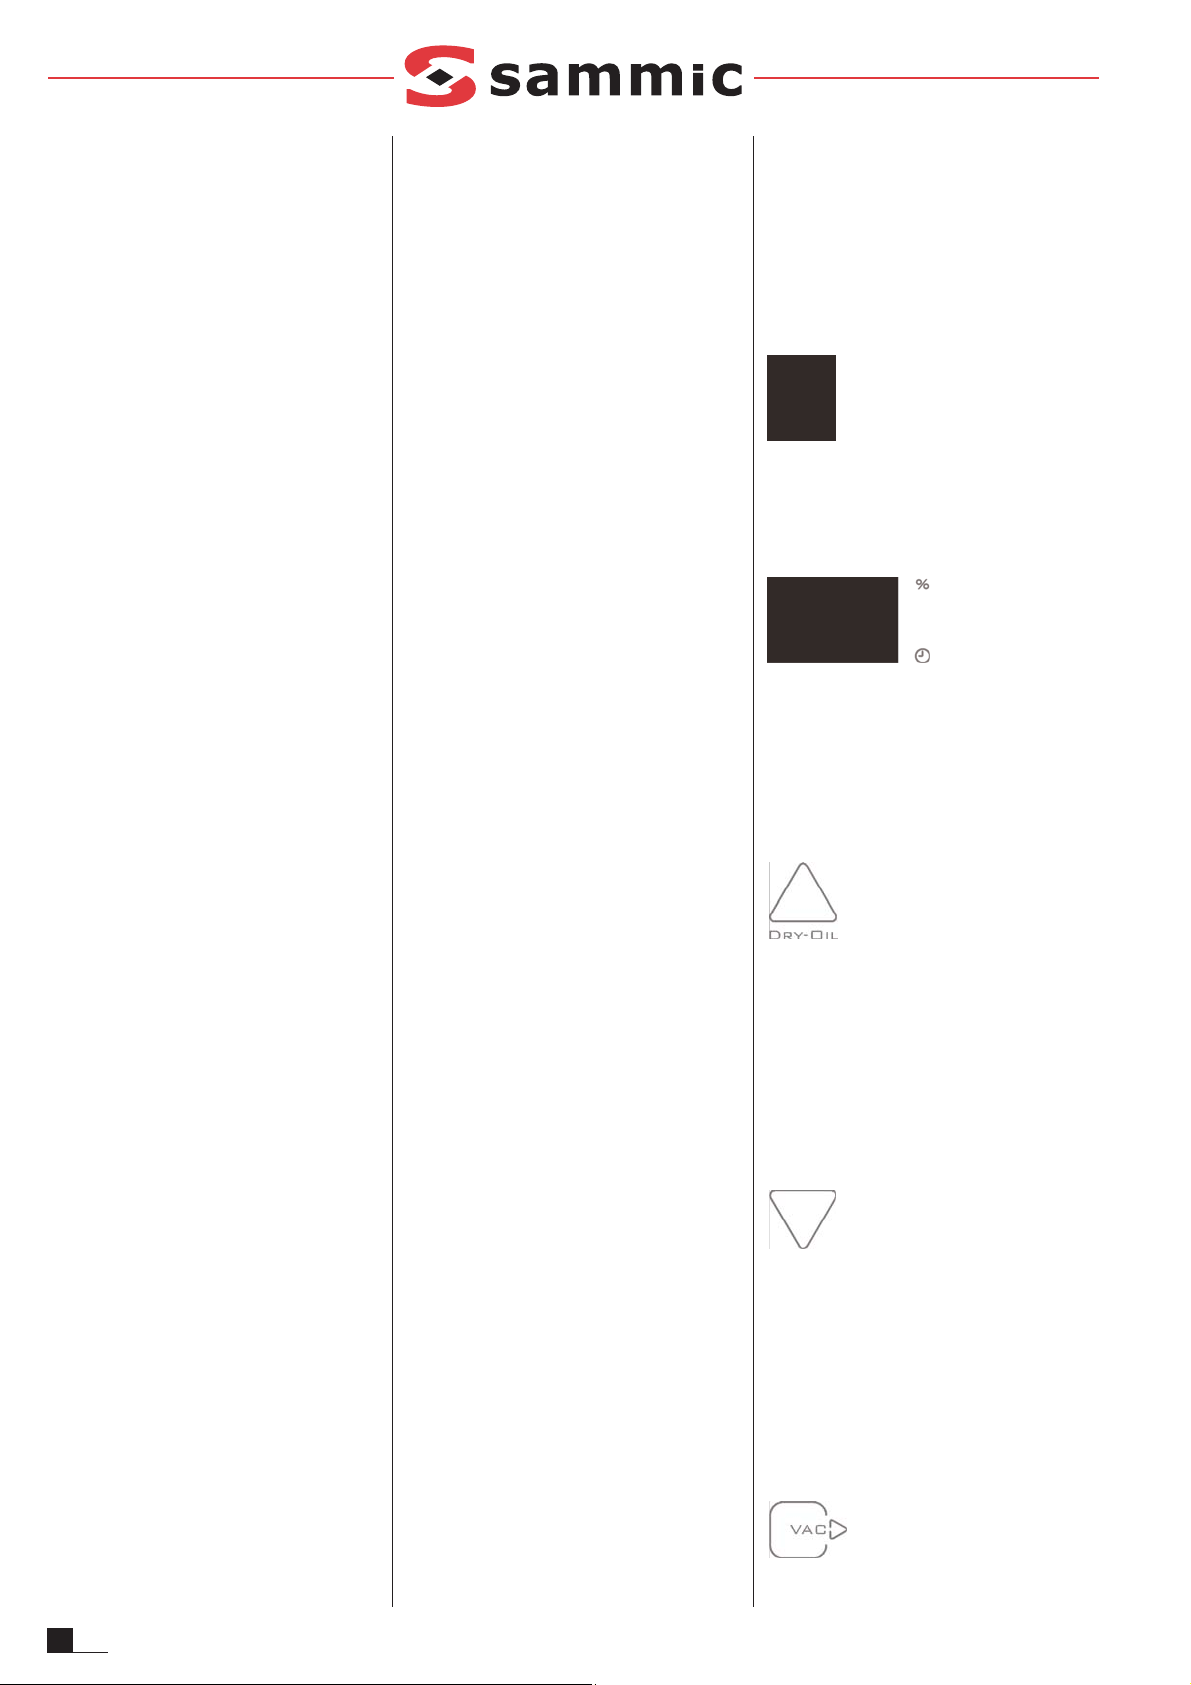
Al encender la máquina por medio del
interruptor general, visualiza durante 2
segundos un número que representa la
configuración de la máquina. Sirve asimismo
para visualizar el número del programa
elegido (entre 0 y 9).
Al encender la máquina por medio del
interruptor general, visualiza durante 2
segundos un número que representa las horas
de funcionamiento de la bomba de vacío,
expresado en decenas. Si se visualiza el
número 10, significa que tiene 100 horas de
trabajo acumuladas. A continuación se
pueden visualizar los valores de vacío,
soldadura, etc., pulsando la tecla
correspondiente.
- Permite aumentar cualquier valor que se
visualiza en el visor. Manteniendo constante
la pulsación se consigue alcanzar
rápidamente el valor deseado.
- Después del encendido de la máquina se
muestra en el display dos rayas centrales de
espera que indica ninguna función
seleccionada (vacío, gas o soldadura).
Pulsando esta tecla durante 3s se accede al
ciclo de secado del aceite (Dry oil).
2
ES
Subir - Dry-oil
Bajar
Visor 1
Visor 2
Page 3
- Permite disminuir cualquier valor que se
visualizan en el visor. Manteniendo
constante la pulsación se consigue alcanzar
rápidamente el valor deseado.
- Después del encendido de la máquina se
muestra en el display dos rayas centrales de
espera que indica ninguna función
seleccionada (vacío, gas o soldadura).
Pulsando esta tecla durante 3s se accede a la
visualización de las horas de
funcionamiento.
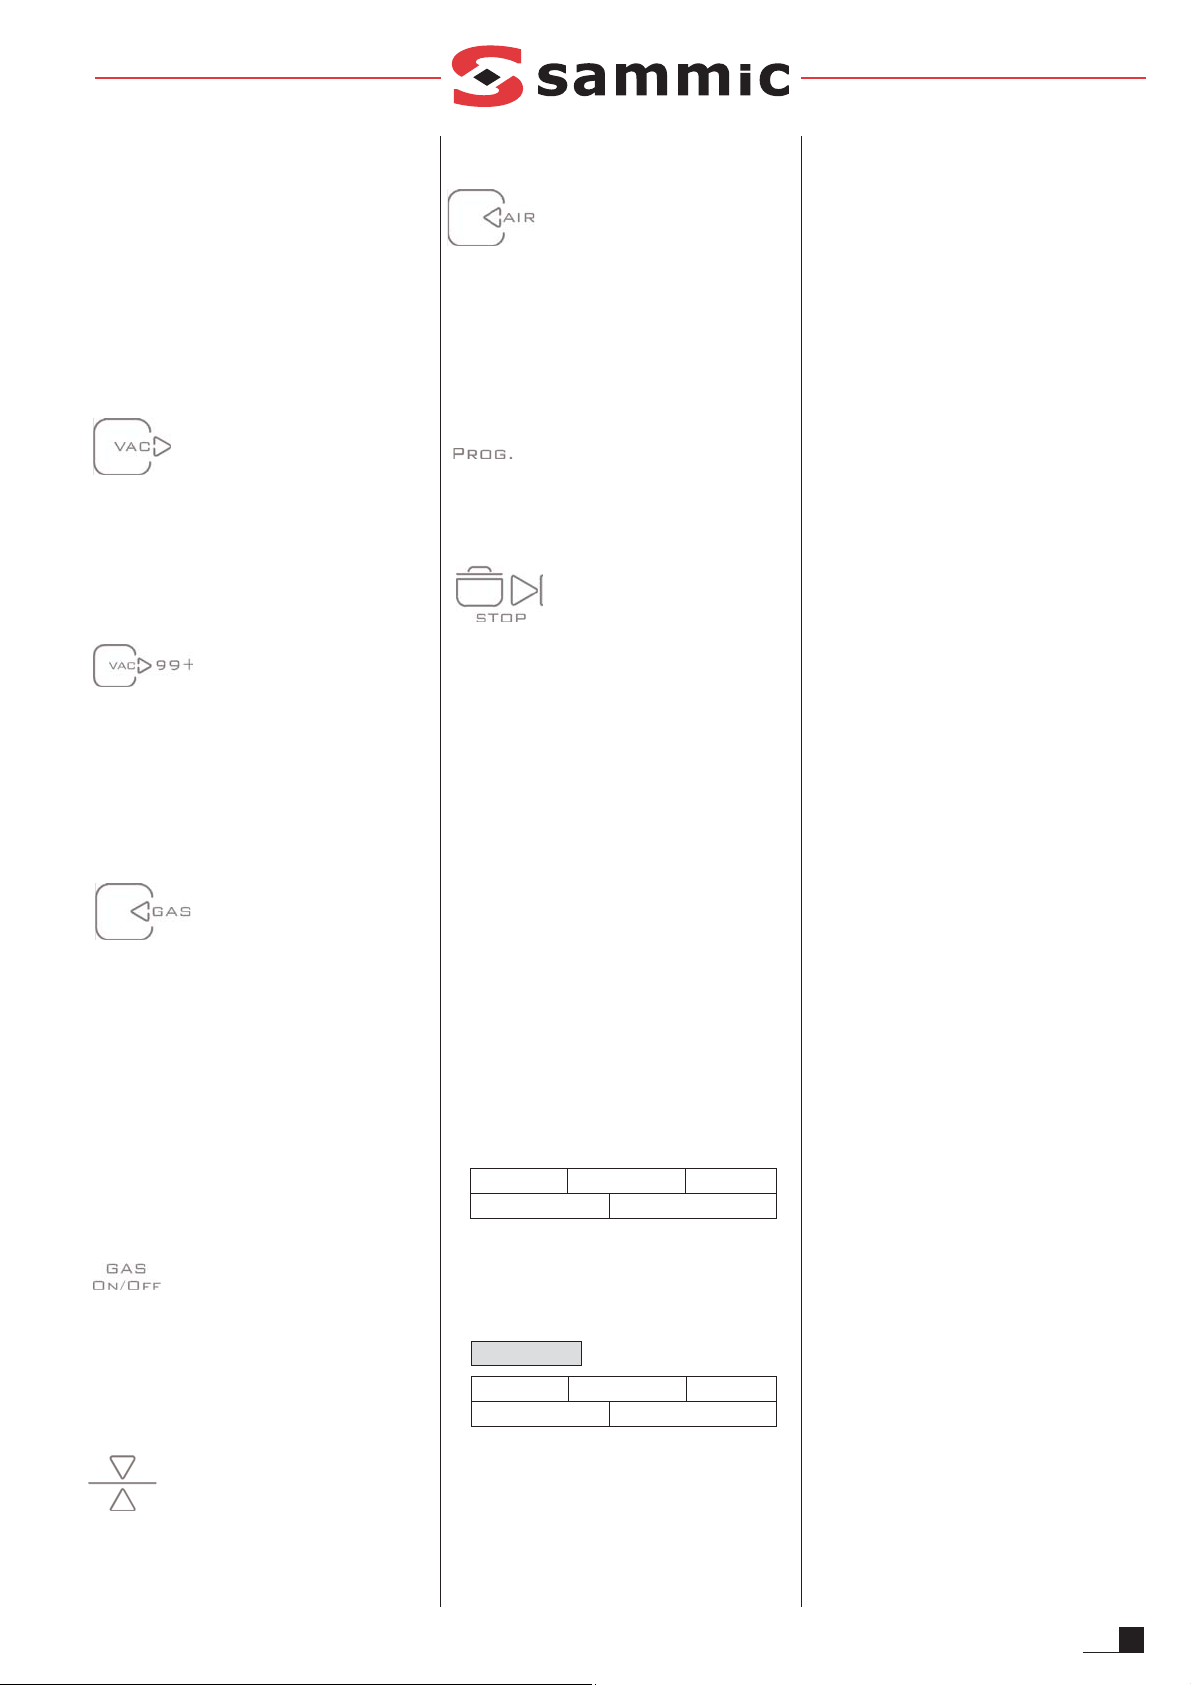
Esta tecla sirve para seleccionar el % de vacío,
entre 0 y 99 %. El LED de esta tecla se
enciende en el momento de seleccionar el %
de vacío y durante la fase de ejecución del
vacío.
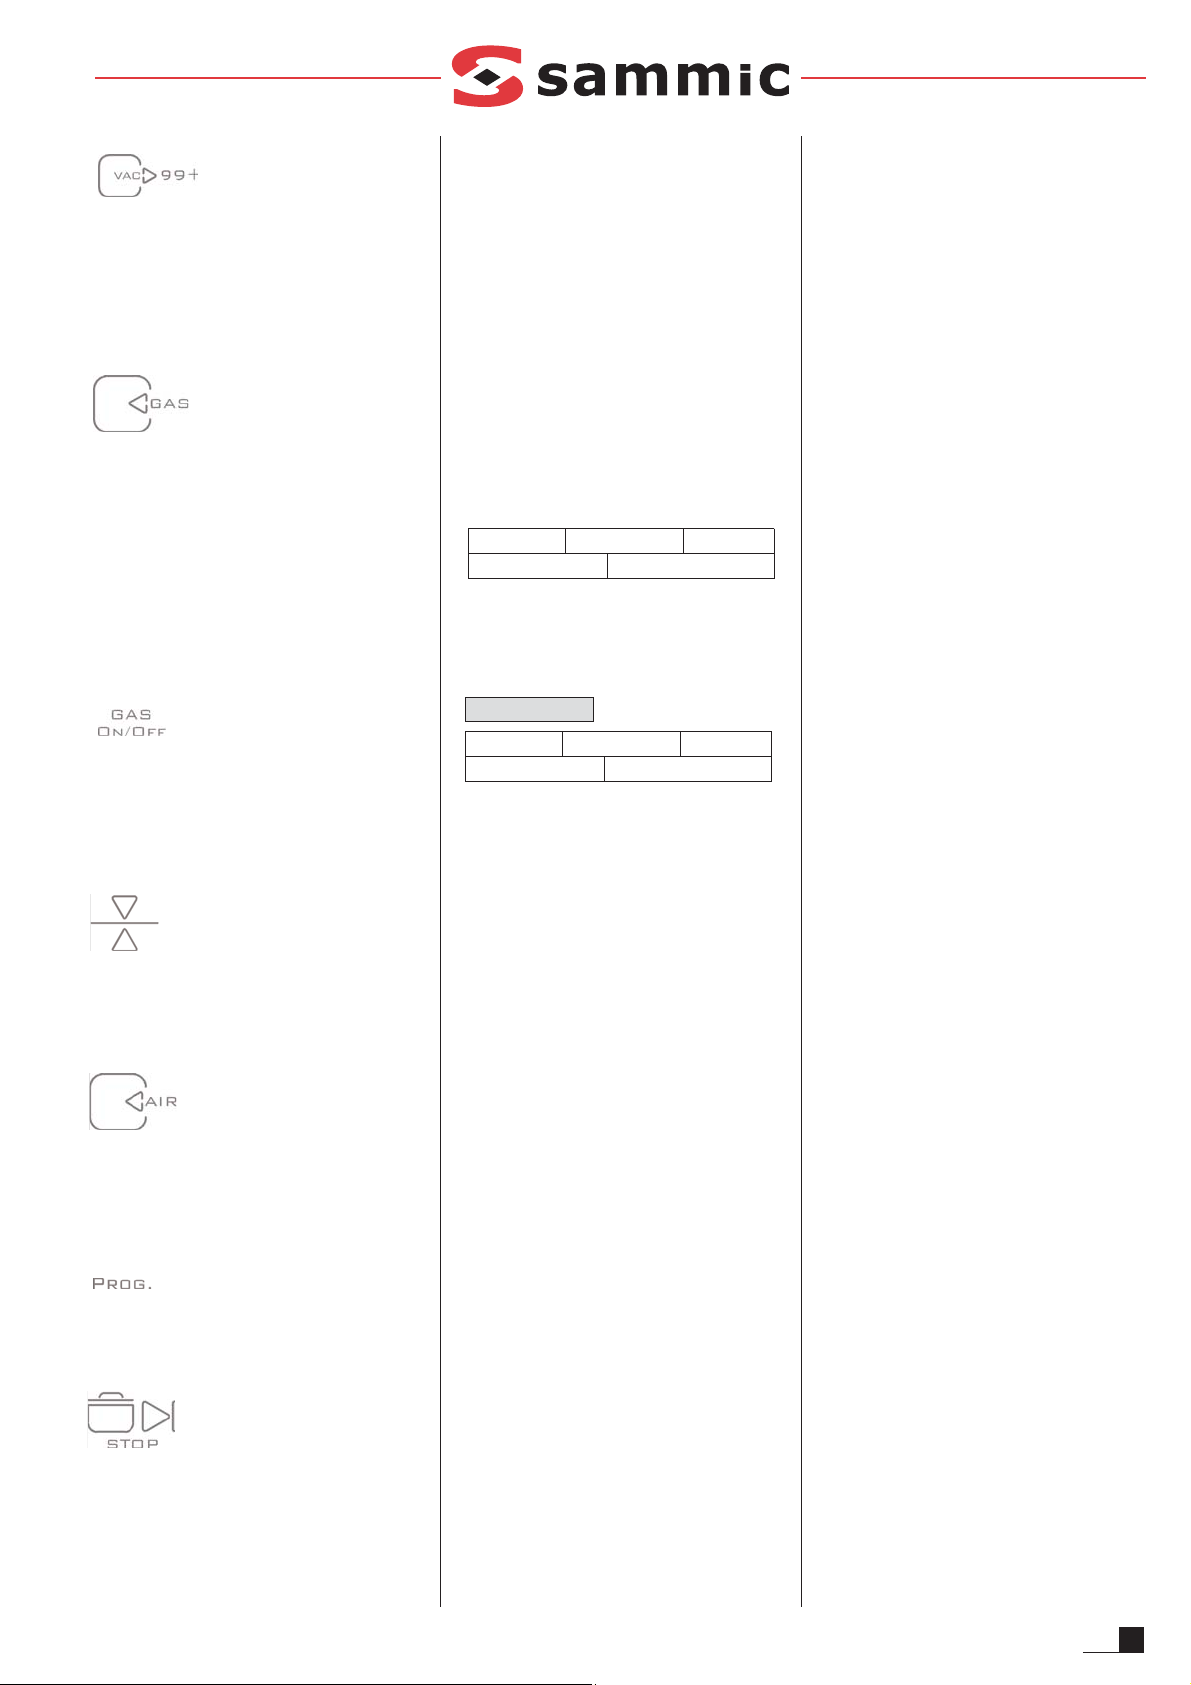
Esta tecla sirve para seleccionar/visualizar el
tiempo del vacío extra, entre 0 y 15 seg. Para
poder utilizar esta opción hay que programar
previamente un vacío del 99%. El LED de esta
tecla se enciende en el momento de
seleccionar el tiempo de vacío extra y durante
la fase de su ejecución.
Esta tecla sirve para visualizar el % de vacío
que quedará en la cámara después de
introducir el gas. La selección del % de gas se
realiza pulsando la tecla decrementadora,
entre 99 y 0. Por ejemplo, si queremos
introducir un 20% de gas en la cámara, se
debe programar un 80% con la tecla de gas.
Esta es la presión que quedará en la cámara
después de haber introducido el gas. El LED
de esta tecla se enciende en el momento de
seleccionar el % de vacío restante y durante la
fase de introducción del gas.
Activa/desactiva la opción de
gas. Si al pulsar dicha tecla se enciende su LED
es que se ha activado la opción. Cuando se
efectúa la operación inversa, se apaga el LED
y la opción de entrada de gas queda
desactivada.
Selecciona/visualiza el tiempo de soldadura,
entre 0 y 7 segundos. El LED de esta tecla se
enciende en el momento de seleccionar el
tiempo de soldadura y durante la fase de su
ejecución.
Selecciona/visualiza el tiempo de entrada
lenta de aire, entre 0 y 30 segundos. El LED
de esta tecla se enciende en el momento de
seleccionar el tiempo y durante la fase de su
ejecución.
Permite acceder a la selección del programa.
Esta tecla tiene tres funciones dependiendo de
si la tapa esta abierta o cerrada.
Tapa cerrada → Stop - avance ciclo
Con cada pulsación se interrumpe la acción en
curso y pasamos siguiente fase del ciclo.
Pulsando la tecla repetidamente se llega al
final del ciclo y se activa la entrada de aire.
Tapa abierta → VAC-NORM
Si pulsamos la tecla cuando la tapa está
abierta, la máquina empieza a aspirar,
permitiendo realizar el vacío exterior en
recipientes. Pulsando de nuevo esta tecla se
vuelve al modo de funcionamiento normal.
Con la tapa abierta y visualizando “oil” se
puede hacer el reset horas de funcionamiento
de la bomba. Pulsando 3 sg la tecla
“Stop”pone a cero el contador de horas de
funcionamiento y desaparece el aviso de “oil”.
Programación de las funciones
La unidad electrónica permite memorizar 10
programas distintos. El programa 0 es fijo, sin
posibilidad de cambio.
Para realizar un programa es CONDICION
INDISPENSABLE tener la TAPA ABIERTA. Los
pasos para la programación se describen a
continuación, tomando como ejemplo un
posible programa:
1.Pulsar tecla Prog: se ilumina el LED de esta
tecla. Accionar la tecla Incrementador o
Decrementador hasta visualizar el valor 4 en
el visor 1.
2.Pulsar tecla Vacío en %: se iluminan el LED
de esta tecla y el LED % del visor 2,
indicativo de que se está programando en %.
A continuación pulsar la tecla
Incrementador hasta llegar a 99, que
representa el % de vacío seleccionado.
3.Pulsar la tecla Vacío extra: se encienden el
propio LED y el LEDSeg del Visor 2. Accionar
la tecla Incrementador o tecla Decrementador
hasta que en el Visor 2 aparezca el valor 6,
que representa los segundos que va a durar
el vacío plus.
4. Pulsar la tecla entrada de Gas (superior): se
iluminan el LED de esta tecla. Accionar
Incrementador o tecla Decrementador hasta
que en el Visor 2 aparezca la cifra 79, que
representa el % de vacío que quedará en la
cámara después de introducir el gas (20%).
5.Pulsar la tecla Interruptor Gas (inferior): si el
LED está encendido quiere decir que la
opción ya está activada. Si pulsamos
nuevamente esta tecla, se apaga el LED,
desactivando momentáneamente la opción,
de modo que a pesar de haber un
porcentaje de gas programado no entrará
gas en la cámara hasta activarlo de nuevo.
6.Pulsar la tecla Soldadura: se encienden el
propio LED y el LED Seg del Visor 2. Accionar
la tecla Incrementador o tecla
Decrementador hasta que en el Visor 2
aparezca el valor 3.5 que representa, en
segundos, la duración de la soldadura de la
bolsa.
7.Pulsar la tecla Aire progresivo: se encienden
el propio LED y el LED Seg del Visor 2.
Accionar la tecla Incrementador o tecla
Decrementador hasta que el Visor 2
aparezca el valor 8, que indica los segundos
que va a durar la entrada lenta de aire en la
cámara.
8.Una vez determinados todos los valores si
en cualquier momento se quiere rectificar
uno de ellos, basta con pulsar la tecla
correspondiente y accionar la tecla
Incrementador o tecla Decrementador hasta
obtener el nuevo valor deseado.
9.Cerrar la tapa inmediatamente después de
haber terminado de fijar todos los valores
del programa. El programa se memoriza
automáticamente.
Atención: Esta última operación es
fundamental para que el programa quede
grabado en la memoria del microprocesador.
Al cerrar la tapa, el ciclo comienza
automáticamente. En el transcurso del mismo
se van encendiendo sucesivamente los LED de
las teclas, indicando así la fase del ciclo que
está en curso.
FUNCION VAC-NORM
La función VAC-NORM permite hacer el vacío
en cubetas. Para poder utilizar esta función es
necesario adquirir el kit VAC-NORM, que
incorpora la manguera y la adaptación a la
cuba de la envasadora.
1-Antes de activar la función VAC-NORM,
colocar el adaptador y la manguera en la
aspiración de la máquina.
2-Para activar la función VAC-NORM, es
necesario pulsar la tecla STOP con la tapa de
la envasadora abierta. En ese momento la
máquina empezará a aspirar.
3-Colocar el extremo de la manguera en la
cubeta. En ese momento comenzará a hacer
3
ES
Soldadura: 3,5 s
Vacío: 99 %
Aire progresivo: 0 s
Gas: 0 %
Soldadura: 3 s
Vacío: 99 % 99+: 0 seg
PROGRAMA 4
Aire progresivo: 8 s
99+: 6 seg Gas: 20 %
Prog
Stop - Avance ciclo
Vacío extra
Gas
Gas on /off
Soldadura
Descompresión progresiva
Vacío
Page 4

el vacío dentro de la cubeta. El vacuómetro
indica el grado de vacío alcanzado. Una vez
alcanzado el vacío deseado, retirar la
manguera de la cubeta.
4-Pulsando de nuevo el botón STOP o
apagando la máquina, se vuelve al modo de
funcionamiento normal.
Advertencia: Es recomendable apagar la
función VAC-NORM mientras no se esté
utilizando, ya que de lo contrario la
máquina está aspirando aire
continuamente, lo cual es perjudicial
para la bomba. Si no se realiza el
apagado manualmente la placa
desconecta la bomba automáticamente.
SECADO ACEITE
Después encender la máquina con el
interruptor general, visualizando las dos rayas
centrales, y manteniendo la tecla pulsada
”subir” durante 3sg, se visualiza en el display
“do” ciclo de Secado del aceite (“dry-oil”).
Con “do” visualizado y cerrando la tapa
arranca el ciclo de secado del aceite del motor
que tiene una duración de 15 minutos.
Durante el ciclo se visualiza el parpadeo “do”
y el tiempo (en minutos) que falta para
terminar el ciclo.
CORTE DE BOLSA
Las barras que incluyen el hilo para el corte de
bolsa se suministran como kits.
La instalación se efectúa cambiando la barra
de soldadura por la barra que contiene el hilo
de corte y cambiando la conexión de uno de
los cables en el transformador de soldadura a
la tensión que se indica en el esquema
eléctrico:
Para realizar el corte de la bolsa, basta con
programar el tiempo adecuado de soldadura
en la placa de control y una vez soldada la
bolsa se rasga manualmente por la línea
marcada por el hilo de corte.
UTILIZACIÓN Y MANTENIMIENTO
Muy importante:
-No envasar productos en caliente, ya que el
vapor que producen, daña la bomba de
vacío.
-Nunca envasar productos empleando gas
con un contenido en oxígeno mayor del
20% sin antes consultar a su proveedor o
servicio reconocido por SAMMIC. Esto
podría causar explosiones fatales.
Envasado de líquidos:
Para el envasado de líquidos se debe emplear
el accesorio que mantiene la bolsa con una
inclinación para evitar la salida del líquido. Si
aparecen burbujas durante el envasado
entonces se ha alcanzado el punto de
saturación y se debe pulsar la tecla de STOP,
para evitar que el líquido pueda estropear el
aceite. El punto de saturación es similar al
punto de evaporación-ebullición que se
produce a distintas temperaturas en función
de la presión.
El punto de saturación se alcanza antes
cuanto más alta es la temperatura del líquido
durante el proceso de vacío. Se recomienda
primeramente enfriar el líquido antes de
envasarlo para obtener el óptimo vacío del
producto.
Se indica una tabla del punto de saturación del
agua con la relación entre la temperatura y la
presión
-Es importante limpiar cada día el interior y
bordes de la cámara, así como la junta del
cierre.
-El exterior de la máquina no se debe limpiar
con un chorro directo de agua. Emplear para
su limpieza un paño húmedo y cualquier
detergente habitual. Nunca limpiar la tapa
con alcohol, disolventes o productos
limpiacristales puesto que puede afectar a las
propiedades mecánicas del material y
provocar su rotura. En caso de observar una
fisura en la tapa, no continuar trabajando con
la máquina y avisar al servicio técnico
autorizado para su reparación, hay riesgo de
rotura de la tapa.
-Si el cable de alimentación se deteriora y es
preciso instalar uno nuevo, dicho recambio
sólo podrá ser realizado por un servicio
técnico reconocido por SAMMIC.
-Antes de cualquier intervención para la
limpieza, revisión o reparación de la
máquina, es obligatorio desconectar la
máquina de la red.
-El nivel de ruido de la máquina, en marcha
colocada a 1.6 m de altura y 1 m de distancia
es 75 dß (A). Ruido de fondo: 32 dß (A).
Cambio de aceite
Es necesario controlar semanalmente el nivel
de aceite, que debe cubrir 3/4 de la mirilla.
Completarlo si es preciso.
El aceite debe ser cambiado tras las primeras
100 horas de funcionamiento. Posteriormente
cambiar el aceite:
• Modelos de sobremesa; Número de modelo
2: 150horas
• Modelos de pie; Bomba funcionamiento
intermitente, Número de modelo 1:
300horas
• Modelos de pie; Bomba funcionamiento
continuo, Número de modelo 0: 300horas
Cuando la bomba haya trabajado las horas
indicadas, al encender la máquina el visor
marcará “oil” y parpadeará durante 10 seg
para avisar de que hay que cambiar el aceite.
También se debe cambiar el aceite si se
observa que está emulsionado. La cantidad de
horas de trabajo acumuladas se puede
visualizar al encender la máquina o
manteniendo pulsado la tecla “bajar” durante
3 sg. Para efectuar el cambio, soltar el tapón
de vaciado y dejar que salga el aceite usado.
Para el llenado seguir las instrucciones dadas
en el apartado correspondiente.
En las bombas de 40m³/h y superiores,
simultáneamente se debe cambiar el filtro de
aceite. Este filtro es del tipo empleado en el
automóvil según referencia: AWS2, rosca 3/4.
El filtro de escape se debe sustituir cada 4
cambios de aceite o cuando se observen
pérdidas de aceite o bien niebla de aceite en
el escape.
RESET HORAS BOMBA
Una vez cambiado el aceite hay que
resetear las horas de funcionamiento,
para ello hay que seguir la siguiente
secuencia:
Con la tapa abierta visualizando las dos
rayas centrales, y pulsando la tecla ”bajar”
durante 3s, en el display se visualiza el
parpadeo de “oil” y el nº de horas del motor.
Se pulsa la tecla “Stop” durante 3sg y el nº se
pone a cero.
Esperando 10 s, pulsando “subir”, pulsando
“bajar”, o “Stop” para salir del RESET HORAS
BOMBA.
CAMBIO DE CONFIGURACION Y TEST DE
FUNCIONES
Hay tres configuraciones para la placa
electrónica dependiendo de la máquina en la
esté montada. El número se muestra, al
encender la máquina, durante 2s. en el visor 1
Modelos equipados con sistema de
inyección de Gas:
Configuración "0": Máquinas de pie y
funcionamiento continuo. (SV-604, SV-606, SV806, SV-810, SV-6000). La bomba está en
marcha desde el momento que se acciona el
interruptor general. Esta configuración está
pensada para las máquinas que están instaladas
en lugares fríos o cámaras frigoríficas. Al estar
la bomba en marcha continuamente, la máquina
se mantiene caliente asegurando su buen
funcionamiento.
Configuración "1": Máquinas de pie y
funcionamiento intermitente. (SV-604, SV606, SV-806, SV-6000). La bomba está en
marcha durante la fase de vacío y soldadura.
Configuración"2": Máquinas sobremesa y
funcionamiento intermitente. (SV-310, SV410, SV-420 y SV-520). La bomba está en
marcha en la fase de vacío.
Modelos sin sistema de inyección de Gas
Con el mismo modo de funcionamiento de la
bomba que los anteriores se configuran los
mismos modelos pero sin sistema de
inyección de Gas
Configuración “3”: SV-600, SV-800, SV-6000
Configuración “4”: SV-600, SV-800, SV-6000
Configuración “5”: SV-300, SV-400, SV-500
Parada automática de la bomba:
En los modelos con funcionamiento continuo
de la bomba si la máquina NO se utiliza
durante 10min la bomba se detiene
automáticamente. Esto impide un
sobrecalentamiento del aceite, y reduce la
4
ES
Presión vacío
(mbar)
1000 100 50 31,36 20 10 6,09 5 2
Presión vacío
(%)
0 90,1 95 96,87 98 99 99,4 99,5 99,8
Temp.
Evaporación
(ºC)
100 45 33 25 18 7 0 -2 -13
Page 5

cantidad de aceite depositada en los filtros de
expulsión, además de ahorrar energía.
Cerrando la tapa, la bomba y el ciclo arrancan
simultáneamente.
Para cambiar la configuración de la máquina
hay que seguir los siguientes pasos:
1- Desmontar el panel de mandos.
2- Accionar el interruptor general.
3- Buscar en la placa electrónica dos patillas
situadas al lado de la palabra TEST y
cortocircuitarlas con un destornillador o
algo similar. En ese momento comenzará el
proceso de test, que consiste en que la
placa electrónica acciona durante 1 seg.
cada una de las salidas (Motor,
Electroválvula de soldadura, etc.)
encendiéndose a su vez el LED
correspondiente en la placa. Al lado de
cada LED aparece un texto que identifica el
componente que acciona en cada
momento.
4- Una vez acabada la secuencia del test, en el
visor aparecerá la configuración de la
máquina.
5- Pulsar “Prog”
6- Para cambiar la configuración pulsar la
tecla Incrementador o tecla Decrementador
hasta que en el visor 1 aparezca el valor de
configuración deseado.
7- Pulsar Prog para memorizar la
configuración: se apaga su LED.
8- Para salir del modo test y memorizar la
nueva configuración hay que apagar la
máquina. Si se baja la tapa sin haber salido
del modo test la máquina no se pondrá en
marcha. En el caso de que hayamos
reseteado las horas de funcionamiento, al
volver a encender la máquina
comprobaremos en el visor el nuevo valor.
En el caso de que la máquina presente una
avería, la placa electrónica dispone de un
sistema para testear las distintas funciones:
Seguir los pasos 1,2 y 3 del apartado anterior.
Si durante el test alguno de los componentes
no se acciona seguir los siguientes pasos:
-Comprobar que el componente está bien
conectado y le llega tensión. Si el
componente sigue fallando sustituirlo por
uno nuevo.
-Si no le llega tensión al componente,
comprobar la tensión a la salida de la placa
cuando el led correspondiente esté
encendido. Si no hay tensión, entonces
sustituir la placa electrónica.
OBSERVACIONES:
Estando la maquina en el ciclo de vacío si el
sensor detecta que la presión de vacío no
llega a la consigna programada, tras un
tiempo de espera, se detiene el ciclo pasando
a descompresión.
Si al hacer la descompresión la tapa no se
abre, después de un tiempo la electroválvula
de descompresión se desconecta para evitar
daños en la misma o en la placa electrónica.
Otras indicaciones importantes
Este aparato no está destinado para ser usado
por personas (incluidos niños) cuyas
capacidades físicas, sensoriales o mentales
estén reducidas, o carezcan de experiencia o
conocimiento, salvo si han tenido supervisión
o instrucciones relativas al uso del aparato por
una persona responsable de su seguridad.
Los niños deberían ser supervisados para
asegurar que no juegan con el aparato.
El vacío es un sistema de conservación natural que
consiste en la extracción del aire del interior de la
bolsa eliminando el oxígeno, principal factor del
deterioro de los alimentos.
Ventajas del envasado al vacío:
1-Reduce al máximo las mermas de los productos.
2-Rentabiliza al máximo las horas de personal, al
aprovechar los tiempos muertos que se pueden
dar a lo largo de la semana para adelantar trabajo
y aligerar el flujo de trabajo de las cocinas.
3-Racionaliza el almacenamiento de los productos
en las cámaras:
-No hay mezcla de olores.
-Los productos se presentan etiquetados, lo que
permite una rotación de materias primas.
-Mejora el control de stock ya que se puede
calcular con precisión las compras necesarias
para cada momento.
4-Aprovechamiento de los mejores días de compra:
-Permite comprar cuando los precios son
mejores.
-Reducción de desplazamientos.
5-Reduce el lavado de utensilios.
Envasado productos curados (embutidos,
jamones, etc)
Siendo de por sí productos de una vida prolongada,
el envasado al vacío duplica como mínimo la vida
de estos productos, evitando que se resequen y
que pierdan peso con el consiguiente perjuicio
económico. Estos productos no es necesario
envasarlos con gas, salvo algunos productos de
textura frágil.
Envasado de productos cocinados
Este es el caso de productos como los asados,
estofados, canelones, etc. Una vez cocinados es
indispensable enfriar dichos alimentos de +65ºC a
+10ºC en menos de dos horas en el corazón del
producto para impedir desarrollo de
microorganismos.
Este es le método más práctico para mantener la
cocina tradicional con las siguientes ventajas:
-Facilitar el trabajo en las preparaciones sin
necesidad de correr riesgos de pérdida del
producto.
-Alargar la vida del producto.
Cocción de productos envasados
Consiste en colocar un alimento dentro de un
envase que sea estanco y termoresistente. Extraer
el aire de su interior, sellarlo y someterlo a la acción
de una fuente de calor para cocerlo. La cocción se
realiza a baja temperatura (entre 65ºC y 100ºC)
consiguiendo un efecto de pasteurización. Este
sistema tiene muchas ventajas como son:
-Preserva las cualidades nutricionales.
-Preserva las condiciones higiénicas al reducirse la
manipulación.
-Reduce las pérdidas de peso en la cocción, al evitar
la evaporación y la desecación.
-Racionaliza la planificación del trabajo.
Preparación y cocción fuera del período de
servicio, anticipación de la preparación de
banquetes, etc.
-Prolonga el tiempo de conservación.
Posteriormente a la cocción el producto, este debe
ser enfriado rápidamente para detener el proceso
de cocción e impedir el desarrollo de
microorganismos. Este proceso se lleva a cabo
mediante un abatidor de temperatura.
Platos refrigerados: Se debe rebajar la temperatura
de +65ºC a +10ºC en menos de 2 horas en el
corazón del producto.
Platos congelados: Se debe rebajar la temperatura
de +65ºC a -18ºC en menos de 4,5 horas en el
corazón del producto.
El posterior almacenamiento debe mantener una
temperatura 0ºC a 3ºC para los platos refrigerados
y de -18ºC para los platos congelados.
Para poder poner los alimentos en condiciones de
degustarlo, el proceso de regeneración se debe
realizar de forma inmediata una vez fuera del
refrigerador en el que ha sido almacenado.
Básicamente, son tres las técnicas de regeneración:
el horno a vapor a baja presión, el baño maría y el
horno microondas. En los dos primeros casos, la
regeneración se lleva a cabo con el material dentro
del propio envase, mientras que en el caso del
microondas, es necesario perforar la bolsa para que
el vapor pueda escapar sin que explote el envase o
bien regenerar el producto fuera del mismo.
Si un producto regenerado no llega a consumirse,
no puede volver a almacenarse y hay que
deshacerse del mismo.
El tiempo de almacenamiento de los platos
refrigerados no debe exceder 6-21 días.
Envasado bajo atmósfera protectora
Consiste en la sustitución en el envase del aire que
rodea al alimento, con una mezcla de gases en
proporción diferente a la del aire, con dos
objetivos:
-Prolongar la vida del producto, sin precisar aditivos
ni conservantes, inhibiendo procesos de deterioro
que se producen durante el almacenamiento.
-Evitar el aplastamiento de productos tales como
bolleria, ensaladas, etc.
Se emplean principalmente tres gases: 02, CO2 y
N2, o mezclas de ellos. Como idea general puede
considerarse que una mayor concentración de CO2
(controlada) alargará la vida del producto, mientras
que cierta cantidad de N2 evitará la ruptura del
envase en aquellos productos de alto nivel
metabólico, y una pequeña proporción de O2
asegura el buen estado y presencia de algunos
alimentos.
Se recomienda consultar con los fabricantes
especialistas en gases para alimentación, a fin de
que nos asesoren sobre la combinación de gases
adecuada para cada producto.
Congelación de productos envasados al vacío
Las técnicas de congelación tradicionales
conservan el producto pero no así su calidad. La
congelación de productos envasados al vacío tiene
muchas ventajas:
-No hay quemado exterior
-No hay cristalización superficial
-No hay pérdida de gusto y aroma
-No hay desecación
-No hay oxidación de grasas
NOCIONES BÁSICAS SOBRE EL ENVASADO AL VACÍO
5
ES
Page 6

CE Marking Indications
Each appliance is identified by the following
data:
• Manufacturer's name and address: SAMMIC,
S.L. Basarte, 1 Azkoitia Gipuzkoa (SPAIN).
• "CE" mark.
• The machine model as stated in the next
section.
• The serial number as indicated on the
guarantee slip and the Declaration of
Conformity.
MODELS
This manual describes the installation,
operation and maintenance of the sensor
controlled vacuum packing machines:
•tabletop models: SV-306S, SV-310S, SV-410S,
SV-420S, SV-520S
•free-standing models: SV-604S, SV-606S, SV-
806S, SV-810S
· Hinged hood models: SV-6100, SV-6160
The model reference and its specifications are
shown on the nameplate affixed to the
machine.
These vacuum packaging machines have been
designed and manufactured in accordance
with the following European directives:
89/392/EEC, 93/68/EEC, 73/23/EEC and to
the NSF Hygiene and Public Health standards.
INSTALLATION
For optimum performance and long service
life of the machine, follow the instructions
contained in this manual rigorously.
Location
Place the machine so that it stands perfectly
levelled. To avoid damages, never lean the
machine on one of its sides.
The tabletop machines must be installed on a
smooth surface, since their legs are made of a
sliding material for easy removal of the
machine in order to clean the support surface.
Electric connection
1. M
OTOR SPECIFICATIONS
-Single-phase motors are supplied for feeding
at 230V.
-Three-phase motors are suitable for 230V or
400V (connection to 400V).
Before connecting the vacuum packing
machine to the mains, check if the machine is
prepared for the same voltage as the mains.
To change the voltage (only three-phase
machines):
1.Connect the transformers to the suitable
voltage, as shown in the terminal strip.
2. If necessary, change the motor connections
as shown in the terminal box.
3. If necessary, adjust the temperature relay
as shown on the electric diagram.
2. C
ABLE SPECIFICATIONS
The SAMMIC vacuum packaging machines are
supplied with one thermoplastic-sheathed
cable 1.5m in length.
THEY MUST BE EARTHED. The grounding wire
of the machine is identified. Furthermore, the
machine is fitted with an external screw for
the connection to an equipotential earthing
system.
- Three.phase machines: Prepare a wallmounted mains socket with 20 A, 3P+N+T
magneto-thermal and differential protection,
and a sealed plug to connect it to the power
supply cord of the packing machine.
- Single-phase machines: Prepare a wallmounted mains socket with 20 A, 2P+T
magneto-thermal and differential protection.
The plug which is part of the power supply
cord must be accessible.
For any repair work, the machine must be
disconnected from the grid, either by
disconnecting the magnetothermic switch, or
unplugging the connection.
3. T
O CHANGE THE VACUUM PUMP DIRECTION OF
ROTATION
(three-phase machines only):
If the vacuum pump motor generates unusual
noise on starting the machine, this means that
the motor rotates in the wrong direction. In
this event, immediately stop the machine and
invert two feed wires.
STARTING
In models SV-410S, SV-420S, SV-520S, SV600S, SV-800S and SV-6000 the pump already
contains oil.
In models SV-310S fill the pump with oil
through the inlet, until oil reaches ¾ of the oil
sight. Detergent-free oils are to be used :
-SAE10 oil (detergent-free) for pumps with
outputs up to 20m³/h.
-SAE30 oil (detergent-free) for pumps with
outputs over 20m³/h.
Paraffin oils are recommended.
After pressing the general switch, it is
necessary to perform a few cycles on no load
before proceeding with the first packing, so
that the oil can heat up and provide the right
vacuum.
Sensor controlled vacuum %
This concerns the models in which all the
functions (programming, vacuum, gasflush
and sealing) are controlled by a
microprocessor which uses a high-precision
sensor (0,2%), enabling a vacuum of up to
99,5% reliably and safely. It offers the
possibility of creating an additional timecontrolled vacuum.
Main features
-Fast and simple programming.
-Storage of 10 programmes.
-Automatic counter of the machine running
hours, with oil change warning signal.
-Automatic storage of the last executed
programme.
-Storage of programmes without a disposable
cell.
-LED-display of every stage executed within
the cycle.
-The "Stop- cycle switch" key interrupts the
function currently in operation and activates
the next function until the cycle is finished.
- VAC-NORM system. This permits the external
vacuum packaging of containers.
-Pump drying system. Recommended when
the pump is used to vacuum pack liquids, hot
cooked products or in very humid
environments.
Technical description of the control panel
When the operator switches on the main
switch of the machine, the display shows, for
two seconds, the number identifying the
machine configuration. Besides, it serves to
indicate the number of the selected
programme (from 0 to 9).
When the machine is switched on with the
main switch, a number representing the
number of hours the vacuum pump has been
operating, expressed in tens, is displayed for
2 seconds. If number 10 is displayed, it means
the pump has accumulated 100 hours of
operation. Afterwards, the vacuum, gas,
sealing time and other values can be displayed
by pressing the corresponding key.
- It serves to increase any of the values shown
in either display. Keep the key depressed to
reach the required value faster.
- After switching the machine on, two central
standby lines are displayed indicating that
no function has been selected (vacuum, gas
or sealing). Press this key for 3 seconds to
start the oil drying cycle (Dry oil).
- It serves to decrease any of the values shown
in either display. Keep the key depressed to
reach the required value faster.
- After switching the machine on, two central
standby lines are displayed indicating that
no function has been selected (vacuum, gas
or sealing). Press this key for 3 seconds to
display the number of hours of operation.
This key is used to select the vacuum
percentage, from 0 to 99 %. The LED in this
key lights up when the vacuum percentage is
selected and during the vacuuming stage.
Up - Dry-oil
Down
Display 1
Display 2
Vacuum
6
EN
Page 7
This key serves to select/display the extra
vacuum time, from 0 to 15 seconds. To use
this option, it is necessary to previously
program a 99% vacuum. The key LED turns on
while the operator selects the extra vacuum
time and during the performance of this
process.
This key allows displaying the vacuum
percentage left in the chamber when gas has
flushed in. Selecting the gas percentage,
between 99 and 0, is done by pressing the
decrementing key. For example, if 20% of gas
should flush in we must programme 80% with
the gas key. This is the pressure remaining in
the chamber after flushing the gas. The key
LED turns on while the operator selects the
percentage of vacuum left and during the gas
flushing process.
It activates/deactivates the gas option. If the
key LED turns on when the key is depressed,
the option is activated. If on pressing the key
again, the LED turns off, the gas flushing
option is deactivated.
This key is meant to select/display the sealing
time, from 0 to 7 seconds. The key LED turns
on while the operator selects the sealing time
and during the sealing operation.
This is to select/display the soft air inlet time,
from 0 to 30 seconds. The key LED turns on
while the operator selects this time and during
the execution of this function.
This key gives access to the programme
selection.
This key has three functions depending on
whether the lid is open or closed.
Lid closed- Stop – cycle switch
Each time it is pressed the cycle is interrupted
and switches to the next stage. By pressing
the key several times the end of the cycle is
reached and the air inlet is activated.
Lid open → VAC-NORM
If you press the key, when the lid is open, the
machine starts extacting air, producing the
vacuum in external containers. Pressing the key
again restores the normal operating mode.
With the lid open and displaying "oil" we can
reset the hours of operation of the pump. By
pressing the "stop" key for 3 seconds the
counter resets and the “oil” indicator
disappears.
Programming the functions
The electronic unit allows to store 10 different
programmes. Programme 0 is fixed and and
cannot be changed.
The cover should be OPEN, as an ESSENTIAL
REQUIREMENT for programming. The
programming steps are described below,
taking a possible programme as an example:
1.Press the Prog key: its built-in LED turns on.
Press the Incrementer or Decrementer key
until display 1 shows value 4.
2. Press the Vacuum % key. The LED of this
key and the % LED of display 2 turn on,
showing that the vacuum percentage is
being programmed. Then, press the
incrementer key till 99 is displayed, which
corresponds to the selected vacuum
percentage.
3. Press the Additional Vacuum key. The key
built-in LED and the "Seg" LED of display #2
turn on. Press either the Incrementer or
Decrementer key until value 6
corresponding to the duration, in seconds,
of the extra vacuum operation is shown on
display 2.
4. By pressing the Gas inlet key (top): this
key's LED lights up. With the Incrementer or
Decrementer key, make value 79 appear in
display 2, as it corresponds to the vacuum
percentage to be left in the chamber, once
gas (20%) has flushed in.
5. Press the Gas Switch key (Bottom). If the
LED is on, this means that the option is
already activated. By pressing the key
again, the LED turns off and the option is
temporarily deactivated. In this event,
although there is a percentage of gas
programmed, no gas would flow into the
chamber, until the function is reactivated.
6. Press the Sealing key. The LED of the key and
the "Seg" LED of display 2 turn on. Using the
Incrementer or Decrementer key, have value
3.5 being the duration in seconds of bag
sealing, displayed in display 2.
7. Press the Soft Air key. The built-in LED and
the "Seg" LED of display 2 turn on. With the
Incrementer or Decrementer key have value
8, being the duration in seconds of soft air
inlet into the chamber, displayed in display 2.
8. In order to change any of the entered
values at any time, it is as simple as to
press the relevant function key and to
select the new value with the Incrementer
or Decrementer key.
9. Close the cover immediately after having
selected all the values of the programme.
The programme is stored automatically.
Warning: The last described operation is
essential to have the programme stored in the
microprocessor memory.
On closing the cover, the working cycle starts
automatically. As the cycle is carried out, the
key built-in LEDs successively turn on,
showing the stage of the cycle in progress.
VAC-NORM FUNCTION
The VAC-NORM function enables creating a
vacuum in trays. To be able to use this
function, you need to purchase the VACNORM kit that includes a hose and connector
to the chamber of the vacuum packing
machine.
1- Before activating the VAC-NORM function,
fit the connector and hose into the machine
suction inlet.
2- Activate the VAC-NORM function, by
pressing the STOP button with the lid of the
vacuum packer open. Now, the machine
starts extracting air.
3- Place the free end of the hose into the tray.
Now, a vacuum is created inside the tray. A
vacuum gauge shows the amount of
vacuum produced. On reaching the desired
vacuum, remove the hose from the tray.
4- Press the STOP button again or switch the
machine off; this restores the normal mode
of operation.
Warning! It is advisable to disable the VACNORM function when not in use; otherwise the
machine would be extracting air continuously,
which is harmful to the pump. If it is not
switched off manually the board automatically
disconnects the pump.
DRY OIL
After switching the machine on with the
general switch, displaying the two central
lines, and pressing the "up" key for 3 secs,
the display shows “do” Dry oil cycle (“dry-oil”).
With “do” on the display and by closing the lid,
the dry oil cycle starts, which lasts 15
minutes.
During the cycle the “do” text flashes and the
time remaining (in minutes) to finish the cycle
is displayed.
BAG CUTTING
The bars including bag cutting threads are
supplied as an optional kit.
To install them, the sealing bar must be
replaced by the new bar provided with the
cutting thread and one of the wires in the
sealing transformer must be changed to the
Program
Stop - cycle switch
Gas
Gas on/of
Sealing
Progressive decompression
Sealing: 3,5 s
Vacuum: 99 %
Soft air: 0 s
Gas: 0 %
Sealing: 3 s
Vacuum: 99 % 99+: 0 seg
PROGRAMME 4
Softair: 8 s
99+: 6 seg Gas: 20 %
Extra vacuum
7
EN
Page 8

power indicated on the electric layout:
For the bag cutting operation, it is enough to
programme the suitable sealing time in the
control panel and, once the bag is sealed, it is
separated manually along the line marked by
the cutting thread.
DIRECTIONS FOR USE AND MAINTENANCE
Very important:
-Never pack products if they are still hot,
since the vapour generated by them
damages the vacuum pump.
-Never pack products using gas with an
oxygen content greater than 20% without
previously consulting your supplier or a
SAMMIC-approved TAS. This could cause
fatal explosions.
Packaging liquids:
To package liquids, use the accessory that
keeps the bag at an angle to avoid spilling the
liquid. If bubbles appear during packaging,
the saturation point has been reached and you
must press the STOP button, to prevent the
liquid spoiling the oil. The saturation point is
similar to the evaporation or boiling point that
occurs at different temperatures depending
on the pressure.
The saturation point is reached sooner the
higher the temperature of the liquid during
the vacuum process. We recommend cooling
the liquid before packaging to obtain an
optimum vacuum for the product.
The table indicates the saturation point for
water with the relationship between
temperature and pressure.
- It is important to clean the interior and
edges of the chamber, as well as the locking
joint, every day.
- The outside of the machine must not be
washed under a direct water jet; instead you
can use a wet cloth and an ordinary
detergent. Never clean the cover with
alcohol, solvent or glass-cleaners since they
can affect the mechanical properties of the
material and break it. If you appreciate a
crack in the cover, stop the machine and call
the authorised technical service for repairs;
there is a risk of cover breaking.
- In the event the power cable should get
damaged and have to be replaced, the repair
may only be done by a SAMMIC approved
assistance service.
- Before cleaning, repairing or checking the
machine, you must unplug the machine from
the mains.
- The noise level of a machine in operation, as
measured at a height of 1.6m and a distance
of 1 metre, is 75 dB(A). Background noise:
32 dB(A).
Oil change
The oil level must be checked weekly. It
should not be below 3/4 of the oil indicator.
Complete the level, if necessary.
Oil must be changed after the first 100
working hours. Afterwards, change oil:
• Tabletop models; Model number 2: 150
hours
• Free-standing models; Intermittent pump
operation, Model number 1: 300hours
• Free-standing models; Continuous pump
operation, Model number o: 300hours
When the pump has been operating during the
hours indicated, when switching on the machine
the display will show “oil” and will flash for 10
secs to warn that the oil must be changed.
The oil must be changed as well as each time
it is found to be emulsified. The accumulated
working hours are displayed when the
machine is switched on or by pressing the
"down" key for 3 secs. To change oil, unscrew
the draining plug and let the used oil drain
out. To fill the pump with oil, follow the
instructions given in the relevant section.
On pumps with outputs from 40m³/h
upwards, replace the oil filter at the same
time. This filter is of the type used in cars, as
per ref: AWS2, thread 3/4.
The exhaust filtre must be changed every 4 oil
changes or on detecting either oil leaks or oil
mist at the escape.
RESET PUMP HOURSç
Once oil has been changed, reset the pump
working time by observing the following
sequence:
With the lid open and the two central
lines on the display, and pressing
the "down" key for 3 secs, the
display flashes “oil” and displays the
number of hours of the motor.
Press the "Stop" key for 3 secs and
the number resets to zero.
Wait 10 secs, by pressing “up”, pressing
“down”, or “Stop” to exit RESET PUMP HOURS.
CHANGE OF CONFIGURATION AND TESTING
OF FUNCTIONS
There are three possible configurations of the
electronic board, according to the machine in
which it is fitted. The number is shown for 2
seconds when the machine is turned on. in
viewer 1
Model equipped with the gas injection
system:
Configuration "0": Free-standing and
continuous operation machines. (SV-604, SV606, SV-806, SV-810 and SV-6000). The pump
starts operating from the moment the main
switch is pressed. This configuration is
intended for machines installed in cold rooms
or refrigerating chambers. As the pump is
continuously operating, the machine is kept
hot, guaranteeing its proper operation.
Configuration "1": Free-standing and
intermittent operation machines. (SV-604, SV606, SV-806 and SV-6000). The pump is in
operation during the vacuuming and sealing
stage.
Configuration"2": Tabletop and intermittent
operation machines. (SV-310, SV-410, SV-420
and SV-520). The pump is in operation during
the vacuuming stage.
Model without gas injection systems
The same models are configured with the
same pump operation mode as the previous
ones, but without the gas injection system.
Configuration “3”: SV-600, SV-800, SV-6000
Configuration “4”: SV-600, SV-800, SV-6000
Configuration “5”: SV-300, SV-400, SV-500
Automatic pump shutdown
In models with continuous pump operation, if
the machine is not used for 10 minutes the
pump stops automatically. These prevents the
oil overheating, and reduces the amount of oil
deposited in the drainage filters, in addition to
saving energy. When the cover is closed, the
pump and the cycle start up simultaneously.
In order to change the machine configuration,
follow the procedure described below:
1- Take off the control panel.
2- Press the general switch.
3- Locate two lugs near the word "TEST" on
the electronic board and short-circuit them
with a screwdriver or similar object. At this
moment, the test process starts: the
electronic board activates each output
(Motor, Vacuum solenoid valve, Sealing
solenoid valve, etc.) for one (1) second and
its associated LED on the board should then
turn on. Next to each LED, there is a text
identifying the component being tested.
4- Once the test sequence is finished, the
configuration of the machine will be
displayed.
5- Press the Prog key.
6- In order to change the machine
configuration, press the Incrementer or
Decrementer key until the required
configuration value is shown in display 1.
7- Press Prog in order to save the
configuration. Its LED turns off.
8- To exit the test mode and save the new
configuration, switch the machine off. If the
lid is closed before exiting the test mode,
the machine will not start. After having
changed the configuration or resetting the
working time counter, you can read the new
value on the corresponding display when
the machine is switched on again.
The electronic board has a function testing
feature as an aid to troubleshooting in the
event of a machine failure.
Execute steps 1 and 2 described in the
previous section. If any component fails to
work during the test, proceed as follows:
-Verify that the component is connected
correctly and is energised. If this is OK and
the component still fails, replace it by a new
8
EN
Vacuum
pressure
(mbar)
1000 100 50 31,36 20 10 6,09 5 2
Vacuum
pressure (%)
0 90,1 95 96,87 98 99 99,4 99,5 99,8
Temp.
Evaporation
(°C)
100 45 33 25 18 7 0 -2 -13
Page 9

one.
-If the component is not energised, check the
voltage at the output of the electronic board
when the associated LED is on. If there is no
voltage, change the electronical print.
OBSERVATIONS
If, when the machine is in the vacuum cycle,
the sensor detects that the vacuum pressure
does not reach the programmed setpoint,
after a waiting time the cycle is stopped and
changed to the decompression process.
If, upon initiating the decompression process,
the lid does not open, after a time the
decompression electrovalve disconnects to
prevent damage to the valve or to the
electronic board.
Other important indications:
This machine is not designed for use by
people (including children) with reduced
physical, sensory or mental capabilities or
lacking the necessary experience or
knowledge, unless they have received
supervision or instructions from a health and
safety expert.
Children must be supervised to ensure that
they do not play with the device.
Vacuum is a method of natural food
preservation that consists in removing air
from the pack, eliminating oxygen, the
principal food spoilage agent.
Advantages of vacuum-packing
1- Maximum reduction of product wastage.
2- Maximum return from labour hours by
making good use of any idle times
occurring within the week in order to speed
up work and to quicken the process flow in
the kitchen.
3- Rational storage of products in cold rooms:
- Odors will not mix up.
- Products can be labelled, which facilitates
the turnover of raw materials.
- Improvement of inventory control, since
anything to be purchased at a given time
can be determined with greater accuracy.
4- Exploitation of the best-to-buy days:
- Shopping can be made when prices are
lower.
- Less travels are needed.
5- Less washing-up.
Packing of cured products (sausages, hams,
etc.)
These per se durable products can see their
shelf-life at least doubled when vacuumpacked. Vacuum-packing also prevents them
from drying up or losing weight, which would
entail an economic loss. Except for some that
are fragile in texture, these products require
no gas injection.
Packing of cooked food
This concerns such food as roast meats,
stews, cannelloni, etc. Once cooked, these
products must be cooled down to the core
from +65ºC to +10ºC in less than two hours,
in order to prevent microorganisms from
developing.
Vacuum-packing is perhaps the most practical
method of maintaining traditional cooking
with these advantages:
- Easy food processing, without risk of
product spoilage.
- Longer product life.
Cooking of vacuum-packed food
Put food into a tight and heat-resistant
container. Remove any air from the inside,
seal the container and heat it to cook the food
inside. Cooking is done at low temperatures
(65ºC to 100ºC), producing a pasteurising
effect. This process has many advantages.
Indeed, among others:
- it maintains the nutritional values.
- It safeguards hygiene, as there is less
handling.
- It reduces weight loss, by preventing
evaporation and drying.
- It allows rational work planning. Food
processing and cooking outside service
hours; preparation of banquets in advance,
etc.
- It increases the storage time.
Food must be cooled down immediately after
cooking, in order to stop the cooking process
and to prevent the growth of microorganisms.
Cooling is achieved with a temperature
reducer.
Refrigerated foods: Temperature at the core
of the product must descend from +65ºC to
+10ºC in less than 2 hours.
Frozen foods: Temperature at the core of the
product must descend from +65ºC to -18ºC in
less than 4.5 hours..
Thereafter, food is to be kept at a temperature
of 0ºC to 3ºC as for refrigerated dishes and of
-18ºC if frozen.
When so-packed food is to be prepared to be
savoured, the reconstitution process must
start immediately after taking the pack out of
the fridge or freezer. Basically, there are three
reconstitution techniques: the low-pressure
steam oven, a bain-marie, and a microwave
oven. In the first two cases, food can be
reconstituted within their packing, while the
bag must be perforated or removed for
reconstitution in a microwave oven, so that
steam can escape without the bag bursting.
Any reconstituted product that is not
consumed may not be stored again.
Refrigerated food should not be stored for
more than 6-21 days.
Gas-packing
The process consists in replacing the air
surrounding food in a bag by a gas mixture in
a proportion different to the air quantity, with
a double objective:
- to prolong the life of food without additives
or preservatives, by inhibiting degradation
processes that develop during storage; and
- to prevent the crushing of products like
salads, bread rolls, etc.
Mainly three gases or their mixtures are used:
O2, CO2 and N2. As a general guide, it can be
assumed that a greater (controlled)
concentration of CO2 increases the product
life, while a given amount of N2 prevents the
container of quick metabolising food from
breaking and a small quantity of O2 ensures
that some types of food keep their good
condition and aspect.
It is recommended that specialist gas
manufacturers should be consulted on what
combination of gases is adequate for a given
product.
Freezing of vacuum-packed food.
Conventional freezing techniques allow
keeping the product, but not all of its
qualities. Freezing vacuum-packed food has
many advantages:
- No external frostbiting
- No surface frosting
- No loss of taste or aroma
- No drying
- No oxidation of fats
THE BASICS OF VACUUM-PACKING TECHNOLOGY
9
EN
Page 10
Hinweise für die CE-Kennzeichnung
Jede einzelne Maschine ist mit folgenden
Angaben gekennzeichnet:
-Name und Anschrift des Herstellers: SAMMIC,
S.L., Basarte, 1, Azkoitia, Gipuzkoa (Spanien).
-"CE" - Zeichen.
-Modellangabe im folgenden Abschnitt.
-Serien-Nr. auf dem Garantieschein und in der
Konformitätserklärung.
MODELLE
Dieses Handbuch enthält die Beschreibung für
die Aufstellung, den Betrieb und die Wartung der
Vakuum-Verpackungsmaschinen mit
Sensorsteuerung:
• Tischmodelle: SV-306S, SV-310S, SV-410S, SV-
420S, SV-520S
• Ständermodelle: SV-604S, SV-606S, SV-806S,
SV-810S.
· Modelle mit Schwenkglocke: SV-6100, SV-6160
Die Referenz des Modells und seine Merkmale sind
auf dem Typenschild der Maschine angebracht.
Diese Verpackungsmaschinen sind entsprechend
den Europäischen Richtlinien 89 / 392 / EWG, 93 /
68 EWG, 73 / 23 / EWG und der NSF Vorschrift für
Gesundheit und Hygiene konstruiert und gebaut
worden.
AUFSTELLUNG
Um die bestmögliche Leistung und eine lange
Lebensdauer der Maschine sicherzustellen
befolgen Sie bitte genau die Hinweise dieser
Betriebsanleitung.
Standort
Die Maschine muss einwandfrei nivelliert
aufgestellt werden. Um Schäden zu vermeiden,
darf die Maschine niemals auf einer ihrer
Seitenflächen abgestellt werden.
Installieren Sie die Tischmodelle auf einer
ebenen Fläche, denn die Füße sind aus
gleitfähigem Material hergestellt, damit man die
Maschine mühelos verschieben und so die
Aufstellfläche besser reinigen kann.
Elektrischer Anschluss
1. E
IGENSCHAFTEN DER MASCHINE
- Die Maschinen für Einphasenstrom werden für
eine Spannung von 230 V geliefert.
- Die Maschinen für Drehstrom werden für eine
Spannung von 230 V oder 400 V
(angeschlossen an 400 V) geliefert.
Prüfen Sie vor dem Anschluss der
Verpackungsmaschine an das Netz, ob die
Netzspannung mit dem auf dem Typenschild des
Gerätes angegebenen Wert übereinstimmt.
Zum Spannungswechsel (nur Maschinen mit
Dreiphasenmotor):
1. Transformatoren an die geeignete Spannung,
wie auf der Anschlussleiste angegeben,
anschließen.
2. Falls erforderlich die Anschlüsse am Motor
gemäß den Angaben am Klemmenkasten
ändern.
3. Falls erforderlich das Thermorelais wie auf
dem Schaltplan angegeben einstellen.
2. E
IGENSCHAFTEN DES KABELS
Die SAMMIC-Verpackungsmaschinen sind mit
einem 1,5 m langen thermoplastisch
beschichteten Kabel bestückt.
DIE MASCHINE MUSS UNBEDINGT GEERDET
WERDEN. Der Erdungsdraht der Maschine ist
entsprechend gekennzeichnet. Außerdem
besitzt das Gerät eine externe Schraube für den
Anschluss an ein System mit Erdpotenzial.
- Maschinen mit Dreiphasenmotor: Sehen Sie
eine Wandsteckdose mit thermo-magnetischem
Schutzschalter und Fehlerstromschutz mit
3P+N+T, 20 A und einen wasserdichten
Stecker für das Netzkabel der
Verpackungsmaschine vor.
- Maschinen mit Einphasenmotor: Sehen Sie eine
Wandsteckdose mit thermo-magnetischem
Schutzschalter und Fehlerstromschutz mit
2P+T, 20 A vor. Der Stecker des Netzkabels
muss zugänglich sein.
Vor der Ausführung von Reparaturarbeiten ist
das Gerät durch Ausschalten des
Leitungsschutzschalters oder Ziehen des
Netzsteckers vom Netz zu trennen.
3. D
REHRICHTUNGSWECHSEL DER VAKUUMPUMPE (nur
bei Dreiphasenmaschinen)
Wenn der Motor der Vakuumpumpe beim
Anlassen der Maschine ein ungewöhnliches
Geräusch abgibt, so ist dies auf die falsche
Drehrichtung des Motors zurückzuführen. Die
Maschine muss in diesem Fall sofort angehalten
und zwei Drähte in der Zuleitung umgewechselt
werden.
INBETRIEBNAHME
Bei den Modellen SV-410S, SV-420S, SV-520S,
SV-600S, SV-800S, und SV-6000 ist die Pumpe
werkseitig mit Öl gefüllt.
Bei den Modellen SV-310S ist die Pumpe über die
zu diesem Zweck vorgesehene Öffnung zu ¾ mit
Öl zu füllen. Zu verwenden ist ein
detergensfreies Öl.
-SAE10 (detergensfrei) für Pumpen bis 20 m3/h.
-AE30 (detergensfrei) für Pumpen mit über 20
m3/h.
Wir empfehlen die Verwendung von
paraffinhaltigen Ölen.
Nach Betätigen des Hauptschalters und vor
Arbeitsbeginn sollte man das Gerät mehrmals im
Leerlauf arbeiten lassen, damit das Öl sich
erwärmen und so ein einwandfreies Vakuum
hergestellt werden kann.
Vakuum über Sensor in %
Bei diesen Modellen werden sämtliche
Funktionen (Programmierung, Vakuum, EdelgasEintritt und Verschweißen) über einen
Mikroprozessor mit einem hochpräzisen Sensor
(0,2 %) gesteuert, der auf zuverlässige und
sichere Art ein Vakuum von bis zu 99,5 %
ermöglicht. Darüber hinaus besteht die
Möglichkeit der Erzeugung eines zeitabhängigen
Extra-Vakuums.
Wichtigste Merkmale
-Schnelle und einfache Programmierung.
-Speicherung von 10 Programmen.
-Automatischer Betriebsstundenzähler der
Maschine mit Ölwechsel-Überwachung.
-Automatische Speicherung des zuletzt
durchgeführten Programms.
-Speicherung der Programme ohne
Einwegbatterie.
-Anzeige jeder im Zyklus ausgeführten Etappe
anhand von LEDs.
-Die Taste “Stop – Weiter Zyklus" unterbricht die
laufende Funktion und aktiviert die nächste
Funktion bis zum Zyklusende.
-VAC-NORM System. Ermöglicht das
Vakuumverpacken der Behältnisse von außen.
-System zur Pumpentrocknung. Empfehlenswert
bei Einsatz der Pumpe zum Verpacken von
Flüssigkeiten, warm zubereiteten Produkten oder
Umgebungen mit hoher Feuchtigkeit.
Technische Beschreibung der Schalttafel
Wenn die Maschine mit dem Hauptschalter
eingeschaltet wird, erscheint hier 2 Sekunden
lang eine Ziffer, die die Konfiguration der
Maschine darstellt. Es kann ebenfalls die
Nummer des gewählten Programms angezeigt
werden (von 0 bis 9).
Wenn die Maschine mit dem Hauptschalter
eingeschaltet wird, erscheint 2 Sekunden lang
eine Ziffer, die die Gesamt-Betriebsstunden der
Vakuumpumpe in Zehnern darstellt. Wenn z.B.
die Zahl 10 angezeigt wird, so sind 100
Betriebsstunden angefallen. Anschließend
können Sie durch Betätigen der entsprechenden
Tasten die Werte für Vakuum, Verschweißen
usw. aufrufen.
-Hiermit kann jeder der auf den beiden
Anzeigen vorhandenen Werte erhöht werden.
Durch Gedrückthalten der Taste ist der
gewünschte Wert schnell erreicht.
-Nach dem Einschalten der Maschine erscheinen
in der Mitte des Displays zwei Striche als
Platzhalter, die angeben, dass keine Funktion
gewählt wurde (Vakuum, Gas oder
Verschweißen). Wenn Sie diese Taste 3 s
gedrückt halten, gelangen Sie in den
Öltrocknungszyklus (Dry oil).
- Hiermit kann jeder der auf den beiden
Anzeigen vorhandenen Werte verringert
werden. Durch Gedrückthalten der Taste ist der
gewünschte Wert schnell erreicht.
- Nach dem Einschalten der Maschine erscheinen
in der Mitte des Displays zwei Striche als
Platzhalter, die angeben, dass keine Funktion
gewählt wurde (Vakuum, Gas oder
Verschweißen). Wenn Sie diese Taste 3 s lang
gedrückt halten, haben Sie Zugriff auf die
Anzeige der Betriebsstunden.
Mit dieser Taste kann der Prozentsatz des
Nach oben – Dry-oil
Nach unten
Vakuum
Anzeige 1
Anzeige 2
10
DE
Page 11

Vakuums zwischen 0 und 99 % gewählt werden.
Die LED dieser Taste leuchtet bei der Wahl des
Vakuum-Prozentsatzes und während der Phase
der Vakuumanwendung auf.
Mit dieser Taste kann man die Zeit für das ExtraVakuum, zwischen 0 und 15 Sekunden,
wählen/auf die Anzeige rufen. Vorbedingung für
diese Option ist das vorherige
Einprogrammieren eines 99%-igen Vakuums. Die
LED dieser Taste leuchtet beim Wählen der ExtraVakuumzeit sowie während der Auspumpphase.
Mit dieser Taste wird der Vakuum-Prozentsatz
auf die Anzeige gerufen, der nach der
Gaseinführung noch in der Kammer verbleibt.
Der Prozentsatz an Gas wird durch Betätigen der
Minus-Taste von 99 bis 0 gewählt. Wenn 20 %
Gas in die Kammer eingeführt werden sollen,
müssen mit der Gas-Taste 80 % programmiert
werden. Dies ist der Druck, der nach dem
Einführen des Gases in der Kammer verbleibt.
Die LED dieser Taste leuchtet beim Wählen des
Restvakuum-% sowie während der
Gaseinführungsphase.
Hiermit wird die Option für Gas
ein- und ausgeschaltet. Wenn bei Drücken der
Taste die LED aufleuchtet, so ist das Gas
eingeschaltet. Andernfalls erlischt die LED und
die Gaszufuhr wird unterbrochen.
Zum Wählen/Anzeigen der Schweißzeit von 0 bis
7 Sekunden. Die LED dieser Taste leuchtet beim
Wählen der Schweißzeit sowie während der
Ausführungsphase.
Zum Wählen/Anzeigen der Zeit der
Softbelüftung von 0 bis 30 Sekunden. Die LED
dieser Taste leuchtet beim Wählen der Zeit sowie
während der Ausführungsphase.
Zum Wählen der Programmnummer.
Diese Taste hat drei Funktionen, je nachdem, ob
der Deckel geöffnet oder geschlossen ist.
Deckel geschlossen → Stop – Weiter Zyklus
Durch Drücken dieser Taste können Sie den
laufenden Betrieb unterbrechen und in die
nächste Zyklusphase übergehen. Durch
wiederholtes Drücken gelangen Sie zum
Zyklusende und der Lufteintritt wird aktiviert.
Deckel offen → VAC-NORM
Wenn Sie bei offenem Deckel auf die Taste
drücken, beginnt die Maschine zu saugen und
stellt an äusseren Behältnissen das Vakuum her.
Ein erneuter Druck auf diese Taste bringt das
Gerät in den Normalbetrieb zurück.
Bei offenem Deckel und der Anzeige “oil” können
Sie die Betriebsstunden der Pumpe
zurücksetzen. Wenn Sie die “Stop”-Taste 3 s lang
gedrückt halten, wird der Betriebsstundenzähler
auf Null zurückgesetzt und der Hinweis “oil”
erlischt.
Programmierung der Funktionen
Die elektronische Einheit ermöglicht das
Speichern von 10 verschiedenen Programmen.
Das Programm 0 ist fest eingestellt und kann
nicht geändert werden.
Zur Ausführung eines Programms ist es
UNBEDINGT ERFORDERLICH, dass der DECKEL
OFFEN ist. Um die verschiedenen Schritte zur
Programmierung zu beschreiben, wird als
Beispiel ein mögliches Programm gewählt:
1. Drücken Sie auf die Taste Prog: Die LED der
Taste leuchtet auf. Drücken Sie nun auf die
Plus- oder die Minus-Taste bis auf der Anzeige
1 der Wert 4 erscheint.
2. Drücken Sie auf die Taste Vakuum in %; die
LED dieser Taste und die LED % auf der
Anzeige 2 leuchten auf und dies bedeutet,
dass in % programmiert wird. Anschließend
drücken Sie bitte auf die Plus-Taste, bis Sie bei
99 angelangt sind. Dies ist der gewählte
Vakuum-Prozentsatz.
3. Drücken Sie auf die Taste Extra Vakuum; es
leuchtet nun die LED dieser Taste und die LED
Seg auf der Anzeige 2. Drücken Sie nun auf
die Plus- oder auf die Minus-Taste, bis auf der
Anzeige 2 der Wert 6 erscheint. Er stellt die
Zeit in Sekunden dar, die das Erzeugen des
Extra-Vakuums dauern soll.
4. Drücken Sie die Taste für den Gaseintritt
(oben): die LEDs dieser Taste leuchten.
Drücken Sie nun auf die Plus- oder auf die
Minus-Taste, bis auf der Anzeige 2 der Wert
79 erscheint. Er stellt den Prozentsatz an
Vakuum dar, der nach dem Einführen des
Gases (20 %) noch in der Kammer verbleibt.
5. Drücken Sie auf die Taste Gas (unten); wenn
die LED leuchtet bedeutet dies, dass die
Option bereits aktiviert ist. Wenn wir erneut
die Taste betätigen, so erlischt die LED und
die Option wird momentan deaktiviert, so
dass - auch wenn ein Prozentsatz an Gas
einprogrammiert ist - kein Gas mehr eintreten
kann, bis die Option wieder aktiviert worden
ist.
6. Drücken Sie auf die Taste Schweißung: Es
leuchtet nun die LED dieser Taste und die LED
Seg auf der Anzeige 2. Drücken Sie nun auf
die Plus- oder auf die Minus-Taste, bis auf der
Anzeige 2 der Wert 3,5 erscheint. Er stellt die
Zeit in Sekunden dar, die das Verschweißen
des Beutels dauern soll.
7. Drücken Sie auf die Taste Softbelüftung: Es
leuchtet nun die LED dieser Taste und die LED
Seg auf der Anzeige 2. Drücken Sie nun auf
die Plus- oder auf die Minus-Taste, bis auf der
Anzeige 2 der Wert 8 erscheint. Er stellt die
Zeit in Sekunden dar, die der langsame Eintritt
von Luft in die Kammer dauern soll.
8. Wenn sämtliche Werte eingegeben worden
sind und zu irgendeinem Zeitpunkt einer der
Werte verändert werden soll, so genügt es, auf
die entsprechende Taste und anschließend
auf die Plus- oder Minus-Taste zu drücken, bis
der gewünschte neue Wert erreicht ist.
9. Sobald Sie sämtliche Programmwerte
festgelegt haben, schließen Sie bitte sofort
den Deckel. Das Programm wird dann
automatisch gespeichert.
Achtung: Dieser letzte Schritt ist unerlässlich,
damit das Programm in den Speicher des
Mikroprozessors aufgenommen wird.
Der Zyklus beginnt automatisch beim Schließen
des Deckels. Im Verlauf des Zyklus leuchten
nach und nach die LEDs der einzelnen Tasten
auf, so dass man genau verfolgen kann, in
welcher Etappe des Zyklus sich die Maschine
jeweils befindet.
VAC-NORM FUNKTION
Die Funktion “VAC-NORM“ ermöglicht die
Vakuumerzeugung in Verpackungsschalen. Sie
benötigen hierzu das entsprechende VACNORM-Set, in dem ein Schlauch und ein Adapter
für den Anschluss an die Kammer der
Verpackungsmaschine enthalten sind.
1-Bevor Sie die VAC-NORM Funktion einschalten
befestigen Sie bitte den Adapter und den
Schlauch an der Ansaugvorrichtung der
Maschine.
2-Zum Einschalten der VAC-NORM Funktion
drücken Sie bitte bei offenem Deckel auf die
Taste STOP. Das Gerät beginnt dann sofort zu
saugen.
3-Stecken Sie das freie Schlauchende in die
Schale. Nun wird die Luft aus der Schale
abgesaugt. Der Vakuumsensor gibt den jeweils
vorhandenen Vakuumgrad an. Nehmen Sie den
Schlauch von der Schale ab, wenn das
gewünschte Vakuum erreicht ist.
4-Zur Rückkehr in den Normalbetrieb genügt ein
weiterer Druck auf STOP oder das Ausschalten
des Gerätes.
Hinweis: Schalten Sie die VAC-NORM Funktion
nach dem Gebrauch möglichst sofort wieder aus,
denn sonst würde das Gerät ständig weiter Luft
ansaugen und die Pumpe unnötig belasten. Falls
das Abschalten nicht manuell erfolgt, schaltet
die Steuerkarte die Pumpe automatisch ab.
ÖLTROCKNUNG
Auf dem Display wird “do” für die Öltrocknung
(“dry oil”) angezeigt, wenn nach dem Einschalten
der Maschine über den Hauptschalter die
Anzeige der zwei zentralen Striche erscheint und
die "Nach oben"-Taste 3 s lang gedrückt
gehalten wird.
Wird der Hinweis “do” bei geschlossenem Deckel
angezeigt, beginnt der Öltrocknungszyklus, der
15 Minuten dauert.
Programm
Stop – Weiter Zyklus
Gas
Gas on/off
Verschweißen
Softbelüftung
Schweissung: 3,5 s
Vakuum: 99 %
Softbelüftung
: 0 s
Gas: 0 %
Schweissung: 3 s
Vakuum: 99 % 99+: 0
Sek
PROGRAMM
4
Softbelüftung:
8 s
99+: 6
Sek.
Gas: 20 %
Extra Vakuum
11
DE
Page 12

Während es Zyklus blinken der Hinweis “do” (in
Minuten) und die Zeit bis Zyklusende.
ABTRENNEN DES BEUTELS
Die Stäbe mit dem Faden zum Abtrennen der
Beutel werden als Sets mitgeliefert.
Der Einbau erfolgt, indem man den Schweißstab
durch den Stab mit dem Schneidfaden ersetzt.
Außerdem muss eines der Kabel im
Schweißungstransformator an die im
Schaltschema angegebene Spannung
angeschlossen werden.
Zum Abtrennen des Beutels muss man nur auf
der Kontrollplatte die geeignete Schweißzeit
programmieren. Nach dem Verschweißen des
Beutels trennt man diesen von Hand an der mit
dem Schneidfaden gekennzeichneten Linie ab.
BENUTZUNG UND WARTUNG
Wichtiger Hinweis:
- Wichtiger Hinweis: Produkte nicht warm
verpacken, da der entstehende Dampf die
Vakuumpumpe beschädigt.
- NIEMALS Produkte mit einem Gas verpacken,
das mehr als 20% Sauerstoff enthält, ohne
zuvor von Ihrem Lieferanten oder dem von
SAMMIC zugelassenen Kundendienst die
Bestätigung einzuholen, dass dieses Gas
geeignet ist. Anderenfalls besteht die Gefahr
ernsthafter Explosionen.
Verpacken von Flüssigkeiten:
Zum Verpacken von Flüssigkeiten ist die als
Zubehör erhältliche Einlage zu verwenden, die
den Beutel so neigt, dass die Flüssigkeit während
des Verpackens nicht ausläuft. Falls sich beim
Verpacken Blasen bilden, ist der Sättigungspunkt
erreicht. In diesem Fall ist die STOP-Taste zu
drücken, damit die Flüssigkeit das Öl nicht
verdirbt. Der Sättigungspunkt ist ähnlich wie der
Siedepunkt, der je nach Druck bei
unterschiedlichen Temperaturen auftritt.
Je höher die Temperatur der Flüssigkeit beim
Vakuumverpacken, desto eher wird der
Sättigungspunkt erreicht. Es wird daher
empfohlen, die Flüssigkeit vor dem Verpacken
abzukühlen, um optimales Vakuum im Produkt
zu erzielen.
In der Tabelle ist der Sättigungspunkt von
Wasser mit der Beziehung zwischen Temperatur
und Druck dargestellt
- Der Innenraum und der Rand der Kammer
sowie die Verschlussdichtung müssen täglich
gereinigt werden.
- Das Äußere des Gerätes darf nicht unter
fließendem Wasser gereinigt werden.
Verwenden Sie bitte ein feuchtes Tuch und ein
normales Putzmittel. Der Deckel darf nicht mit
Alkohol, Lösemitteln oder Fensterputzmitteln
gereinigt werden, da diese die mechanischen
Eigenschaften des Materials angreifen und
dieses zerstören können. Falls Sie einen Riss im
Deckel feststellen, arbeiten Sie bitte nicht
weiter mit der Maschine. Rufen Sie eine für die
Reparatur zugelassene technische Dienststelle
an, denn der Deckel könnte zerbrechen.
- Wenn das Zuleitungskabel beschädigt ist und
erneuert werden muss, so darf dieser Wechsel
nur von einer von SAMMIC anerkannten
Technischen Dienststelle vorgenommen
werden.
- Vor jedem Eingriff in die Maschine zwecks
Reinigung, Überprüfung oder zur Reparatur
muss unbedingt die Netzleitung zur Maschine
unterbrochen werden.
- Der Geräuschpegel der laufenden Maschine,
gemessen in 1,6 m Höhe und 1 m Abstand,
beträgt 75 dß(A). Grundrauschen: 32 dß(A).
Ölwechsel
Einmal pro Woche muss der Ölstand geprüft
werden, der ¾ des Schauglases bedecken muss.
Falls erforderlich, Öl nachfüllen.
Nach den ersten 100 Betriebsstunden muss das
Öl gewechselt werden. Anschließend wird das Öl
wie folgt gewechselt:
• Tischmodelle; Modell-Nr. 2: 150 Stunden
• Ständermodelle; intermittierender Betrieb der
Pumpe, Modell-Nr. 1: 300 Stunden
• Ständermodelle; intermittierender Betrieb der
Pumpe, Modell-Nr. 0: 300 Stunden
Sobald die Maschine die genannten
Betriebsstunden erreicht hat, leuchtet beim
Einschalten der Maschine “oil” auf und blinkt 10
s als Hinweis auf einen anstehenden Ölwechsel.
Das Wechsel findet auch statt, wenn das Öl
emulgiert ist. Die Höhe der GesamtBetriebsstunden kann beim Einschalten der
Maschine angezeigt werden oder aber durch 3 s
langes Drücken der “Nach unten”-Taste. Zum
Ölwechsel wird der Entleerungsstopfen
abgenommen und das gebrauchte Öl
abgelassen. Zum Einfüllen des Öls sind die in
dem entsprechenden Abschnitt aufgeführten
Hinweise zu befolgen.
Bei Pumpen mit einer Leistung von mehr als 40
m3/h muss gleichzeitig der Ölfilter ausgetauscht
werden. Dieser Filter gleicht denen der
Automobile und seine Referenz lautet: AWS2,
Gewinde 3/4.
Der Ablassfilter muss alle 4 Ölwechsel erneuert
werden, oder wenn man Ölverluste oder Ölnebel
im Ablass bemerkt.
RESET STUNDEN PUMPE
Nach dem Ölwechsel müssen die
Betriebsstunden zurückgesetzt
werden; dabei sind folgende Schritte
zu beachten:
Auf dem Display blinkt “oil” für die
Öltrocknung und es wird die Zahl der
Motorstunden angezeigt, wenn mit
offenem Deckel die Anzeige der zwei
zentralen Striche erscheint und die
"Nach unten"-Taste 3 s lang gedrückt gehalten
wird.
Halten Sie die “Stop“-Taste 3 s lang gedrückt und
die Zahl wird auf Null zurückgesetzt.
Warten Sie 10 s, danach kann die Funktion RESET
STUNDEN PUMPE durch Drücken der Tasten
“Nach oben”, “Nach unten”, oder “Stop” verlassen
werden.
ÄNDERN DER KONFIGURATION UND
FUNKTIONSTEST
Für die elektronische Platte bestehen drei
Konfigurationsmöglichkeiten, je nach der
Maschine in die die Platte eingebaut ist.Beim
Einschalten des Geräts erscheint die Nummer 2
Sekunden lang auf der Anzeige 1
Modelle mit Gaseinspeisung:
Konfiguration “0”: Ständermaschinen und
Dauerbetrieb. (SV-604, SV-606, SV-806, SV-810
und SV-6000). Die Pumpe ist ab dem Zeitpunkt
in Betrieb, in dem der Hauptschalter betätigt
wird. Diese Konfiguration ist für Maschinen
bestimmt, die in kalten Umgebungen oder
Kühlkammern installiert werden. Da die Pumpe
kontinuierlich in Betrieb ist, bleibt die Maschine
warm und gewährleistet so einen
ordnungsgemäßen Betrieb.
Konfiguration “1”: Ständermaschinen und
intermittierender Betrieb. (SV-604, SV-606, SV806 und SV-6000). Die Pumpe ist während der
Vakuum- und Schweißphasen in Betrieb.
Konfiguration “2“: Tischmaschine und
intermittierender Betrieb. (SV-310, SV-410, SV420 und SV-520). Die Pumpe ist während der
Vakuumphase in Betrieb.
Modelle ohne Gaseinspeisung
Mit demselben Pumpenbetriebsmodus wie zuvor
werden dieselben Modelle konfiguriert,
allerdings ohne Gaseinspeisung.
Konfiguration „3“: SV-600, SV-800, SV-6000
Konfiguration „4“: SV-600, SV-800, SV-6000
Konfiguration „5“: SV-300, SV-400, SV-500
Automatischer Pumpenstopp
Wird bei den Modellen mit Dauerbetrieb der
Pumpe das Gerät 10 Minuten lang NICHT
verwendet, hält die Pumpe automatisch an.
Dadurch wird verhindert, dass sich das Öl
überhitzt, außerdem wird die in den
Absaugfiltern abgelagerte Ölmenge verringert
und es wird Energie gespart. Durch Schließen
des Deckels werden die Pumpe und der Zyklus
erneut gestartet.
Wenn die Maschinenkonfiguration geändert
werden soll, sind folgende Schritte zu befolgen:
1- Schalttafel demontieren.
2- Hauptschalter betätigen.
3- Auf der elektronischen Platte zwei
Kontaktpratzen neben dem Wort TEST suchen
und diese mit einem Schraubenzieher o.Ä.
kurzschließen. In diesem Augenblick beginnt
der Testvorgang, d.h. die elektronische Platte
aktiviert eine Sekunde lang jeden einzelnen
der Ausgänge (Motor, E-Ventil für Vakuum, EVentil für Verschweißung etc.) wobei auf der
Platte jeweils die entsprechende LED
aufleuchtet. Neben jeder LED erscheint ein
Text der das jeweils aktivierte Bauteil
identifiziert.
4- Nach abgelaufener Testfolge erscheint auf der
Anzeige die Konfiguration der Maschine.
5- Auf “Prog“ drücken.
6- Um die Konfiguration zu verändern drücken
Sie bitte auf die Plus- oder auf die Minustaste,
bis auf der Anzeige 1 der gewünschte Wert
erzielt ist.
7- Mit einem Druck auf Prog wird die
Konfiguration gespeichert und die
entsprechende LED erlischt.
8- Um den Testmodus zu verlassen und die neue
Konfiguration zu speichern muss die
Maschine ausgeschaltet werden. Wenn wir
den Deckel absenken ohne den Testmodus
12
DE
Druck
Vakuum
(mbar)
1000 100 50 31,36 20 10 6,09 5 2
Druck
Vakuum (%)
0 90,1 95 96,87 98 99 99,4 99,5 99,8
Temp.
Verdampfung
(°C)
100 45 33 25 18 7 0 -2 -13
Page 13

verlassen zu haben, setzt sich die Maschine
nicht in Gang. Wenn wir den
Betriebsstundenzähler auf Null gestellt
haben, können wir beim Wiedereinschalten
der Maschine den neuen Wert auf der
entsprechenden Anzeige nachprüfen.
Wird der Deckel geschlossen, ohne den
Testmodus verlassen zu haben, setzt sich die
Maschine nicht in Gang
Für den Fall einer Störung an der Maschine ist
die elektronische Platte mit einem System zur
Überprüfung der einzelnen Funktionen
ausgerüstet:
Führen Sie die oben erwähnen Schritte 1 bis 3
aus. Wenn irgendein Bauteil beim Test nicht
anläuft, so ist folgendes zu tun:
- Prüfen, ob das Bauteil richtig angeschlossen ist
und Strom erhält. Wenn es trotzdem nicht
funktioniert, so muss es durch ein neues
ersetzt werden.
- Wenn das Bauteil keinen Strom erhält, prüfen
Sie bitte die Spannung am Ausgang der Platte
wenn die entsprechende LED leuchtet. Wird
keine Spannung gemessen, so muss die Platte
ausgetauscht werden.
ANMERKUNGEN
Erkennt der Sensor des Geräts im
Vakuumzyklus, dass der Vakuumdruck den
eingestellten Sollwert nicht erreicht, wird der
Zyklus nach einer bestimmten Wartezeit
angehalten und die Kammer wieder belüftet.
Wird der Deckel beim Belüften nicht geöffnet,
schaltet das elektrische Belüftungsventil nach
einer gewissen Zeit ab, um Schäden am Ventil
oder an der Platine zu verhindern.
Weitere wichtige Hinweise
Dieses Gerät darf weder von Kindern noch von
Personen mit körperlichen, sensorischen oder
geistigen Einschränkungen bedient werden oder
von Personen, die nicht über die nötige
Erfahrung und Qualifikation verfügen, außer
letztere wurden in Bezug auf die Bedienung des
Gerätes von der für ihre Sicherheit
verantwortlichen Person überwacht und
eingewiesen.
Kinder sind stets zu beaufsichtigen und dürfen
nicht mit dem Gerät spielen.
Das Vakuumverpacken ist ein natürliches
Konservierungssystem bei dem die Luft aus dem
Inneren des Beutels gesogen und damit der
Sauerstoff entfernt wird, der als wichtigster
Faktor zum Verderben der Nahrungsmittel gilt.
Vorteile der Vakuumverpackung
1- Reduziert das Schwinden der Produkte auf
ein Minimum.
2- Rentabilisiert die Arbeitsstunden des
Personals, denn die im Verlauf der Woche
auftretenden Leerzeiten werden genutzt um
vorzuarbeiten und den Arbeitsfluss der
Küchen zu beschleunigen.
3- Rationalisiert die Lagerung der Produkte in
den Kühlkammern:
-Keine Geruchsvermischung
-Die Produkte sind mit Etiketten versehen, so
dass ein Materialumlauf möglich ist.
-Bessere Vorratskontrolle, denn man kann die
jeweils erforderlichen Einkäufe genau
berechnen.
4- Nutzung der besten Einkaufstage:
-Man kann kaufen, wenn die Preise am
günstigsten sind.
-Weniger Verlagerungen.
5- Verringert das Abwaschen von Utensilien.
Abpacken von getrockneten Produkten
(Wurstwaren, Schinken usw.)
Die Haltbarkeit dieser bereits langlebigen Produkte
wird durch die Vakuumverpackung mindestens
verdoppelt. Die Produkte trocknen nicht aus und
verlieren nicht an Gewicht, was einen
wirtschaftlichen Schaden bedeuten würde. Mit
Ausnahme einiger Produkte mit empfindlicher
Textur ist es nicht erforderlich, diese Waren mit
Inertgas abzupacken.
Abpacken von gekochten Speisen
Dieses Kapitel bezieht sich auf Braten,
Schmorfleisch, Cannelloni usw. Nach dem
Zubereiten müssen diese Speisen in ihrem Kern
innerhalb von weniger als zwei Stunden von
+65ºC auf +10ºC abkühlt werden, um so die
Entwicklung von Mkroorganismen zu
verhindern.
Dies ist die praktischste Art und Weise, die
traditionelle Kochkunst zu erhalten, und bietet
folgende Vorteile:
-Erleichtert die Arbeit beim Kochen ohne das
Risiko, dass das Produkt verderben könnte.
-Verlängert die Produkthaltbarkeit.
Kochen von abgepackten Produkten
Hierzu wird die Speise in ein wasserdichtes und
wärmebeständiges Gefäss gefüllt.
Anschliessend wird die Luft aus dem Inneren
abgesogen, das Gefäss versiegelt und zum
Kochen wird es einer Wärmequelle ausgesetzt.
Das Kochen erfolgt bei niedriger Temperatur
(zwischen 65ºC und 100ºC) und hat die
Wirkung der Pasteurisierung. Dieses System
bietet zahlreiche Vorteile, darunter folgende:
- Erhalt der Nährstoffe.
- Bewahrung der Hygiene durch geringere
Manipulation.
- Weniger Gewichtsverluste beim Kochen, weil
ein Verdampfen und Austrocknen vermieden
wird.
- Rationalisiert die Arbeitsplanung.
Vorbereitung und Abkochen ausserhalb der
Dienstzeiten, Vorausarbeit bei der
Vorbereitung von Banketten usw.
- Verlängert die Konservierungszeit.
Nach dem Kochen muss das Produkt schnell
abgekühlt werden, damit der Garprozess
unterbrochen und die Entwicklung von
Mikroorganismen verhindert wird. Dieser
Vorgang erfolgt mit einem Abkühlgerät.
Gekühlte Speisen: Die Temperatur im Kern des
Produktes muss innerhalb von weniger als zwei
Stunden von +65ºC auf +10ºC abgesenkt
werden.
Tiefgekühlte Speisen. : Die Temperatur im Kern
des Produktes muss innerhalb von weniger als
4,5 Stunden von +65ºC auf -18ºC abgesenkt
werden.
Bei der nachfolgenden Lagerung muss für die
gekühlten Speisen eine Temperatur von 0ºC bis
3ºC und für die tiefgekühlten Speisen von -18ºC
beibehalten werden.
Um die Speisen genussfertig zu machen sollte
der Aufbereitungsvorgang sofort nach der
Entnahme aus dem Kühlgerät, in dem die
Speisen gelagert waren, stattfinden.
Grundsätzlich gibt es drei verschiedene
Aufbereitungstechniken, nämlich: der
Dampfofen bei niedrigem Druck, das Wasserbad
oder das Mikrowellengerät. Bei den beiden
ersten Methofen findet die Aufbereitung in dem
gleichen Behältnis statt, während man im Fall der
Mikrowelle den Beutel durchstechen muss, damit
der Dampf entweichen kann ohne dass das
Behältnis explodiert, oder man füllt das Produkt
zum Aufbereiten in ein anderes
mikrowellengeeignetes Gefäss um.
Wenn ein einmal aufbereitetes Produkt nicht
aufgebraucht wird, so kann man es nicht erneut
einlagern sondern man muss es vernichten.
Die Lagerungszeit der gekühlten Gerichte sollte
nicht mehr als 6 - 21 Tage betragen.
Abfüllen unter Schutzatmosphäre
Hierbei wird die Luft, die die Speisen im
Behälter umgibt, durch eine Gasmischung
ersetzt die anders ist als die Luftmischung.
Hierdurch wird folgendes bewirkt:
- Ohne Zugabe von Konservierungsstoffen wird
die Haltbarkeit des Produktes verlängert und
die Verfallprozesse während der Lagerung
unterbunden.
- Ein Zerquetschen der Produkte wie Gebäck,
Salate usw. wird verhindert.
Verwendet werden hauptsächlich drei Gase: O2,
CO2 und N2, oder auch Mischungen dieser drei
Sorten. Als allgemeiner Hinweis gilt, dass eine
stärkere Konzentration an CO2 (gesteuert) die
Haltbarkeit des Produktes verlängert, während
bei stark veränderlichen Produkten ein
bestimmte Menge an N2 den Riss der
Verpackung verhindert und eine kleine
Beimischung von O2 den Zustand und das
Aussehen einiger Speisen günstig beeinflusst.
Wir empfehlen eine Rücksprache mit Herstellern,
die auf nahrungsmittelgeeignete Gase
spezialisiert sind, damit sie uns über die für jedes
Produkt am besten geeignete Kombination an
Gasen beraten können.
Einfrieren von vakuumverpackten Produkten
Die herkömmlichen Gefriertechniken bewahren
zwar das Produkt aber nicht seine Qualität. Das
Einfrieren von vakuumverpackten Produkten
bietet folgende Vorteile:
- Keine äusseren Brennstellen
- Keine Oberflächenkristallisierung
- Kein Geschmacks- oder Aromaverlust
- Kein Austrocknen
- Keine Oxydierung von Fetten.
GRUNDKENNTNISSE ÜBER DAS VAKUUMABPACKEN
13
DE
Page 14

Indications pour le marquage CE
Chaque machine est identifiée par les indications
suivantes:
- Le nom et l'adresse du fabricant : SAMMIC, S.L.,
Basarte, 1, Azkoitia, Gipuzkoa (ESPAGNE).
- Le marquage «CE ».
- Le modèle de machine, qui est indiqué au
paragraphe suivant.
- Le numéro de série de la machine, qui est
indiqué sur le bon de garantie et sur la
déclaration de conformité.
MODÈLES
La présente notice décrit l'installation, le
fonctionnement et l'entretien machines de
conditionnement sous vide contrôlées par
capteur :
• modèles sur table : SV-306S, SV-310S, SV-410S,
SV-420S, SV-520S
• modèles sur pied : SV-604S, SV-606S, SV-806S,
SV-810S
· Modèles à cloche basculante : SV-6100, SV6160
La référence et les caractéristiques du modèle
sont indiquées sur la plaque signalétique
apposée sur la machine.
La conception et la fabrication de ces machines
de conditionnement sous vide sont conformes
aux normes européennes 89/392/CEE,
93/68/CEE et 73/23/CEE et à la norme NSF
d'hygiène et santé.
INSTALLATION
Afin d'obtenir les performances optimales et
assurer une bonne conservation de la machine, il
est important de suivre attentivement les
instructions données dans cette notice.
Emplacement
Poser la machine sur une surface parfaitement
plane. Afin d'éviter tout risque, la machine ne
doit jamais être appuyée sur l'un de ses côtés.
Les machines de table doivent être posées sur un
support lisse, car leurs pieds sont fabriqués en
matière glissante pour permettre le déplacement
sans effort de l'appareil et le nettoyage de la
surface où il est installé.
Branchement électrique
1. C
ARACTÉRISTIQUES DE LA MACHINE
- Les machines monophasées sont prévues pour
une tension de 230V.
- Les machines triphasées sont prévues pour une
tension de 230V ou 400V (branchement
effectué en 400 V).
Avant de brancher la machine de
conditionnement sur le réseau électrique, vérifier
que la tension de la machine est bien la même
que la tension du réseau électrique.
Pour le changement de tension (machines
triphasées uniquement) :
1. Brancher les transformateurs à la tension
voulue, comme indiqué sur leur barrette de
connexion.
2. Modifier, si nécessaire, les connexions du
moteur comme indiqué sur sa plaque à
bornes.
3. Adapter, si nécessaire, le relais thermique,
comme indiqué sur le schéma électrique.
2. C
ARACTÉRISTIQUES DU CORDON
Les machines de conditionnement sous vide
SAMMIC sont livrées équipées d'un cordon
électrique de 1,5 m de longueur, à gainage
thermoplastique.
LA MISE À LA TERRE EST OBLIGATOIRE. Le fil de
terre de la machine est convenablement repéré.
De plus, la machine est pourvue d'une vis externe
pour la connexion à un système équipotentiel de
terre.
- Machines triphasées : Préparer une prise de
courant murale avec protection
magnétothermique et différentiel de 3P+N+T de
20 A et une fiche étanche à connecter au câble
d'alimentation de la machine de
conditionnement.
- Machines monophasées : Préparer une prise de
courant murale avec protection
magnétothermique et différentiel de 2P+T de 20
A. La fiche qui fait partie du câble d'alimentation
doit être accessible.
Pour toute opération de réparation, la machine
doit être débranchée du réseau : soit en
déconnectant l'interrupteur magnétothermique,
soit en débranchant la prise de connexion.
3. I
NVERSION DU SENS DE ROTATION DU MOTEUR DE LA
POMPE À VIDE
(uniquement sur les machines
triphasées)
Si le moteur de la pompe à vide fait un bruit
anormal à la mise en marche de la machine, c'est
qu'il tourne dans le mauvais sens. Dans ce cas,
arrêter immédiatement la machine et inverser
deux des fils de phase.
MISE EN MARCHE
Sur les modèles SV-410S, SV-420S, SV-520S, SV600S, SV-800S et SV-6000 la pompe contient déjà
de l'huile.
Sur les modèles SV-310S remplissez d'huile la
pompe par la prise, jusqu'aux ¾ du niveau
visible. L'huile utilisée doit être sans détergent :
- Huile SAE10 (sans détergent) pour les pompes
jusqu'à 20 m³/h.
- Huile SAE30 (sans détergent) pour les pompes
de plus de 20m³/h.
Il est recommandé d'utiliser des huiles
paraffiniques.
Après basculement de l'interrupteur général pour
mettre la machine en marche, il convient
d'effectuer plusieurs cycles à blanc avant de
commencer à conditionner des produits, afin de
laisser chauffer l'huile et assurer une bonne mise
sous vide.
Conditionnement sous vide contrôlé par
capteur en %
Ce sont les modèles sur lesquels toutes les
fonctions (programmation, vide, entrée de gaz
inerte et soudure) sont contrôlées par un
microprocesseur qui réalise le contrôle par un
capteur de grande précision (0,2%) et permet
d'atteindre un vide de 99,5% max. en toute
fiabilité et en toute sécurité. Permet de faire un
vide supplémentaire par durée.
Caractéristiques générales
- Rapidité et simplicité de la programmation.
- Mise en mémoire de 10 programmes.
- Compteur automatique des heures de
fonctionnement de la machine, avertissant des
vidanges d'huile à réaliser.
- Mise en mémoire automatique du dernier
programme exécuté.
- Stockage permanent des programmes (sans
pile).
- Affichage par LEDS de l'étape du cycle en cours
d'exécution.
- La touche de "Stop-avance cycle" interrompt la
fonction en cours d'exécution, en activant la
fonction suivante jusqu'à ce que le cycle soit
terminé.
- Système VAC-NORM. Permet de faire le vide
dans les récipients.
- Système de séchage de la pompe. Conseillé
lorsque la pompe est utilisée pour conditionner
des liquides, des produits pré-cuisinés à chaud
ou des environnements à fort taux d'humidité.
Description technique du tableau de
commande
A l'allumage de la machine par basculement de
l'interrupteur général, cet affichage montre pendant
2 secondes un nombre représentant la
configuration de la machine. Ensuite, il sert à
montrer le numéro de programme choisi (de 0 à 9).
Lorsque la machine est allumée par l'interrupteur
principal, elle affiche pendant 2 secondes un
numéro qui représente la durée de
fonctionnement de la pompe à vide, exprimée en
dizaines. Si la machine affiche le numéro 10, cela
signifie qu’elle a accumulé 100 heures de travail.
Puis s’affichent les valeurs de vide, de soudure,
etc., en appuyant sur la touche correspondante.
Permet d'augmenter la valeur visualisée sur l'un
ou l'autre affichage. Une pression prolongée
sur la touche permet d'atteindre rapidement la
valeur souhaitée.
- Lorsque la machine est allumée, l'écran
affiche deux rayures centrales en attente qui
indiquent qu'aucune fonction n'a été
sélectionnée (vide, gaz ou soudure). Appuyer
sur cette touche pendant 3 sec pour accéder
au cycle de séchage de l'huile (Dry oil).
Permet de diminuer la valeur visualisée sur l'un
ou l'autre affichage. Une pression prolongée
sur la touche permet d'atteindre rapidement la
valeur souhaitée.
- Lorsque la machine est allumée, l'écran
affiche deux rayures centrales en attente qui
indiquent qu'aucune fonction n'a été
sélectionnée (vide, gaz ou soudure). Appuyer
sur cette touche pendant 3s pour accéder à
l'affichage des heures de fonctionnement.
Cette touche sert à sélectionner le % de vide,
entre 0 et 99 %. La LED s'allume lorsqu’on
sélectionne le % de vide et pendant la phase
d'exécution du vide.
Incrémenter – Dry-oil
Décrémenter
Viseur 1
Viseur 2
Vide
14
FR
Page 15

Cette touche sert à sélectionner / afficher la
durée de vide extra, entre 0 et 15 secondes. Cette
touche n'est utilisable qu'à condition d'avoir
préalablement programmé un vide à 99 %. La LED
associée à cette touche s'allume lors de la
sélection du temps de vide extra et pendant la
phase d'obtention du vide extra.
Cette touche sert à afficher le % de vide qui doit
rester dans la chambre après injection du gaz
inerte. La sélection du % de gaz se fait en
appuyant sur la touche décrémentale (entre 99 et
0). Par exemple, pour introduire 20 % de gaz,
programmer 80% avec la touche de gaz. Il s'agit
de la pression qui restera dans la chambre après
avoir introduit le gaz. La LED associée à cette
touche s'allume lors de la sélection du % de vide
qui doit rester dans la chambre et pendant la
phase d'injection du gaz.
Valide / Annule l'option injection gaz. L'option
est active lorsqu'à la pression sur la touche, la
LED qui y est associée s'allume. Si on appuie de
nouveau sur la touche, la LED s'éteint et l'option
injection gaz est alors annulée.
Permet de sélectionner / afficher le temps de
soudure (entre 0 et 7 secondes). La LED associée
à cette touche s'allume lors de la sélection du
temps de soudure et pendant sa phase
d'exécution.
Permet de sélectionner / afficher le temps de
remise à l'atmosphère, entre 0 et 30 secondes. La
LED associée à cette touche s'allume lors de la
sélection de ce temps et pendant toute sa durée
d'exécution.
Permet d'accéder à la sélection du programme.
Cette touche a trois fonctions, selon que le
couvercle est ouvert ou fermé.
Couvercle fermé - Stop - avance cycle
Avec chaque pulsation nous interrompons
l'action en cours et nous passons à la phase
suivante du cycle. Appuyer sur la touche à
plusieurs reprises pour arriver à la fin du cycle et
activer l'entrée d'air.
Couvercle ouvert - VAC-NORM
Lorsqu'on appuie sur cette touche le couvercle
étant ouvert, la machine commence à aspirer, ce
qui permet de faire le vide dans les récipients.
Une nouvelle pression sur la touche fait revenir
au mode de fonctionnement normal.
Avec le couvercle ouvert et lorsque "oil" est
affiché, il est possible de réinitialiser les heures
de fonctionnement de la pompe. Appuyer
pendant 3 sec sur la touche "Stop" pour remettre
le compteur d'heures de fonctionnement à zéro
et faire disparaître l'avertissement d' "oil".
Programmation des fonctions
L'unité électronique permet la mise en mémoire
de 10 programmes différents. Le programme 0
est fixe et ne peut pas être modifié.
Pour la programmation, il est
INDISPENSABLE que le COUVERCLE soit OUVERT.
Le mode de programmation est décrit ci-après,
en prenant comme exemple un programme
possible :
1. Appuyer sur la touche Prog : la LED associée à
la touche s'allume. Maintenir appuyée la
touche Incrémenter ou Décrémenter jusqu'à la
visualisation de "4" sur l'affichage 1.
2. Appuyer sur la touche Vide en % : la LED
associée à cette touche s'allume. La LED % de
l'affichage 2 est également allumée pour la
programmation du % de vide. Appuyer ensuite
sur la touche Incrémenter jusqu'à la
visualisation de "99" qui représente le % de
vide sélectionné.
3. Appuyer sur la touche Vide extra : la LED
associée à cette touche et la LED Sec de
l'Affichage 2 s'allument. Appuyer sur la touche
Incrémenter ou Décrémenter jusqu'à la
visualisation sur l'Affichage 2 de "6" qui
représente la durée en secondes de la phase
de Vide extra.
4. Appuyer sur la touche d'entrée de Gaz
(supérieur) : la LED associée à cette touche et
la LED % de l'Affichage 2 s'allument. Appuyer
sur la touche Incrémenter ou Décrémenter
pour faire apparaître sur l'Affichage 2 le
nombre "79" qui représente le % de vide devant
rester dans la chambre après l'injection du gaz
(20%).
5. Appuyer sur la touche Interrupteur Gaz (bas) :
si la LED est allumée, c'est que l'option est
activée. Si on appuie une nouvelle fois sur la
touche, la LED s'éteint et l'option Gaz se trouve
momentanément annulée, interdisant
l'injection de gaz dans la chambre même s'il y
a un % de gaz programmé, tant que la touche
n'est pas pressée de nouveau pour remettre en
marche l'option.
6. Appuyer sur la touche Soudure : la LED
associée à la touche et la LED Sec de
l'Affichage 2 s'allument. Appuyer sur la touche
Incrémenter ou Décrémenter pour faire
apparaître sur l'Affichage 2 le nombre 3,5 qui
représente la durée (en secondes) de la
soudure du sac.
7. Appuyer sur la touche Remise à l'atmosphère :
la LED associée à la touche et la LED Sec de
l'Affichage 2 s'allument. Appuyer sur la touche
Incrémenter ou Décrémenter pour faire
apparaître sur l'Affichage 2 la valeur 8 qui
représente la durée (en secondes) de l'entrée
progressive de l'air dans la chambre.
8. Après réglage de toutes les valeurs, il est
possible de modifier celles-ci à tout moment
en appuyant sur la touche correspondante et
en fixant la nouvelle valeur voulue à l'aide de
la touche Incrémenter ou Décrémenter.
9. Au terme de la programmation, fermer
immédiatement le couvercle. La mise en
mémoire du programme s'effectue
automatiquement.
Avertissement : Cette dernière opération est
indispensable pour que le programme reste
stocké dans la mémoire du microprocesseur.
Le cycle démarre automatiquement à la
fermeture du couvercle. Les LED associées aux
touches s'allument successivement pour indiquer
la phase du cycle qui est en cours.
FONCTION VAC-NORM
La fonction VAC-NORM permet de faire le vide
dans des récipients. Pour pouvoir utiliser cette
fonction il est nécessaire d'acquérir le kit VACNORM qui comporte le tuyau et l'adaptation à la
cuve de la machine de conditionnement.
1-Avant de mettre en marche la fonction VAC-
NORM, monter l'adaptateur et le tuyau à la
prise d'aspiration de la machine.
2-Pour mettre en route la fonction VAC-NORM,
il faut appuyer sur STOP en ayant le couvercle
de la machine de conditionnement sous vide
ouvert. La machine commence alors à aspirer.
3-Placer l'extrémité du tuyau dans le récipient
pour y faire le vide. Le senseur de vide
indique le pourcentage de vide atteint.
Lorsque le pourcentage de vide désiré est
atteint, enlever le tuyau du récipient.
4-Pour repasser au mode de fonctionnement
normal, appuyer de nouveau sur le bouton de
STOP ou éteindre la machine.
Attention : Il est recommandé d'éteindre la
fonction VAC-NORM lorsqu'on ne l'utilise pas,
car la machine est continuellement en train
d'aspirer tant qu'elle est en marche, ce qui
risque d'endommager la pompe. Si la machine
n'est pas éteinte manuellement, la plaque
déconnecte automatiquement la pompe.
SÉCHAGE HUILE
Après avoir allumé la machine par l'interrupteur
principal, lorsque les deux rayures centrales sont
affichées, et en appuyant sans cesse sur la
touche "incrémenter" pendant 3 sec, l'écran
affiche "do" cycle de Séchage de l'huile ("dry-oil").
Lorsque "do" est affiché et le couvercle fermé, le
cycle de séchage de l'huile du moteur démarre; il
dure 15 minutes.
Pendant le cycle le message clignotant “do”
s'affiche, ainsi que la durée (en minutes) qu'il
manque pour terminer le cycle.
COUPURE DU SAC
Les barres munies de fil pour la coupure des sacs
sont fournies en kits.
Leur montage s'effectue en remplaçant la barre
de soudure par la barre pourvue du fil de coupure
et en transférant la connexion de l'un des fils
dans le transformateur de soudure sur la tension
indiquée sur le schéma électrique :
Pour couper le sac, il suffit de programmer le
temps de soudure voulu sur le tableau de
commande, puis le sac une fois soudé, le
détacher manuellement en tirant le long de la
ligne marquée par le fil de coupure.
Programme
Stop - Avance cycle
Gas
Gaz on / off
Soudure
Décompression progressive
Soudure: 3,5 s
Vide:
99 %
Atmosphère progressive
: 0 s
Gaz
: 0 %
Soudure : 3 s
Vide
: 99 % 99+: 0
Sec
PROGRAMME
4
Atmosphère progressive
: 8s
99+: 6
Sec.
Gaz: 20 %
Vide supplémentaire
15
FR
Page 16

UTILISATION ET ENTRETIEN
Très important :
- Ne pas conditionner de produits à chaud
puisque la vapeur qu'ils produisent
endommagerait la pompe à vide.
- NE JAMAIS conditionner des produits sous
un gaz contenant plus de 20 % d'oxygène,
sans consulter préalablement votre
fournisseur ou un service agréé par SAMMIC.
Cela peut provoquer des explosions fatals.
Emballage sous vide de liquides
Pour l'emballage sous vide de liquides, il convient
d'utiliser l'accessoire qui maintient le sachet
incliné pour éviter la fuite de liquide. Si des bulles
apparaissent lors du conditionnement, cela
signifie que le point de saturation a été atteint et
il faut appuyer sur la touche STOP, afin d'éviter
que le liquide vienne abîmer l'huile. Le point de
saturation est similaire au point d'évaporationébullition se produisant à différentes
températures en fonction de la pression.
Plus la température du liquide lors du processus
de vide est élevée, plus le point de saturation est
atteint rapidement. Nous recommandons avant
toute chose de laisser refroidir le liquide avant de
le conditionner, afin d'obtenir un vide optimal du
produit.
Un tableau du point de saturation de l'eau est
présenté, indiquant le rapport entre la
température et la pression
- Il est important de nettoyer tous les jours
l'intérieur et les bords de la chambre, de même
que le joint de fermeture.
- Ne pas nettoyer l'extérieur de la machine au jet
d'eau. Utiliser pour son nettoyage un chiffon
humide imprégné d'un détergent courant. Ne
jamais utiliser d'alcool, de solvants ni de
produits pour les vitres pour nettoyer le
couvercle, ces produits pouvant altérer les
propriétés mécaniques du matériel et
provoquer son endommagement. Si vous
observez une fissure sur le couvercle, arrêtez la
machine et contactez le service technique agréé
pour le faire réparer car il pourrait arriver à se
casser.
- Si le cordon d'alimentation est endommagé et
qu'il a besoin d'être changé, son remplacement
doit être impérativement effectué par un service
technique agréé par SAMMIC.
- Avant le nettoyage, la révision ou la réparation
de la machine, il est impératif de la débrancher
de son alimentation électrique.
- Le niveau de bruit émis par la machine en
marche, mesuré à 1,6 m de hauteur et 1 m de
distance, est de 75 dß (A). Bruit de fond : 32 dß
(A).
Changement d’huile
Il convient de contrôler toutes les semaines le
niveau d'huile qui doit couvrir les 3/4 du niveau
visible. Le compléter si nécessaire.
L'huile doit être changée après les 100 premières
heures de fonctionnement. Par la suite, la
vidange doit être faite aux fréquences suivantes :
• Modèles sur table ; Numéro de modèle 2 : 150
heures
• Modèles sur pied ; Pompe fonctionnement
intermittent, Numéro de modèle 1 : 300 heures
• Modèles sur pied ; Pompe fonctionnement
continu, Numéro de modèle 0 : 300 heures
Lorsque la pompe a travaillé pendant la durée
indiquée, lors de l’allumage de la machine l'écran
indique "oil" et clignotera pendant 10 sec pour
avertir qu'il est nécessaire de changer l'huile.
Il convient également de vidanger l’huile si l'on
observe qu’elle est émulsionnée. Le total
accumulé d'heures de fonctionnement peut être
visualisé à la mise sous tension de la machine ou
en gardant enfoncée la touche "Décrémenter"
pendant 3 sec. Pour changer l'huile, déposer le
bouchon de vidange et laisser s'écouler l'huile
usagée. Remplir ensuite la pompe d'huile selon
les instructions indiquées au paragraphe
correspondant.
Pour les pompes de 40m³/h et plus, le filtre à
huile doit être changé à chaque vidange. Ce filtre
est du type utilisé dans l'automobile. Référence :
AWS2, filetage 3/4.
Le filtre d'échappement est à changer toutes les
4 vidanges ou avant, en cas de pertes d'huile ou
de brouillard d'huile à l'échappement.
RÉINITIALISATION HEURES POMPE
Lorsque vous avez changé l'huile, il faut
réinitialiser les heures de fonctionnement. Pour
ce faire procédez comme suit :
Avec le couvercle ouvert et les deux
rayures centrales affichée, et en
appuyant sur la touche "décrémenter"
pendant 3 sec, l'écran clignote et affiche
"oil"et le nombre d'heures du moteur.
Si vous appuyez sur la touche "Stop"
pendant 3 sec le nº revient à zéro.
Attendez 10 sec, appuyez sur
"incrémenter", appuyez sur
"décrémenter", ou "Stop" pour sortir de
la RÉINITIALISATION HEURES POMPE.
CHANGEMENT DE CONFIGURATION ET TEST
DES FONCTIONS
La plaque électronique peut avoir trois
configurations possibles suivant la machine où
elle est montée.
Le numéro est affiché au démarrage de la
machine pendant 2s. sur l'écran 1
Modèles équipés du système d'injection de
Gaz :
Configuration "0" : Machines sur pied et
fonctionnement continu. (SV-604, SV-606, SV806, SV-810 et SV-6000). La pompe est en
marche dès le moment où l'interrupteur
principal est actionné. Cette configuration est
pensée pour les machines qui sont installées
dans des endroits froids ou des chambres
frigorifiques. Lorsque la pompe est en marche
en continu, la machine reste chaude et assure
son bon fonctionnement.
Configuration "1" : Machines sur pied et
fonctionnement intermittent. (SV-604, SV-606 ,
SV-806 et SV-6000). La pompe est en marche
pendant la phase de vide et de soudure.
Configuration "2" : Machines de table et
fonctionnement intermittent. (SV-310, SV-410,
SV-420 et SV-520). La pompe est en marche
pendant la phase de vide.
Modèles sans système d'injection de Gaz :
Les mêmes modèles sont configurés selon le
même mode de fonctionnement de la pompe
que les précédents, mais sans système
d'injection de Gaz
Configuration “3”: SV-600, SV-800, SV-6000
Configuration “4”: SV-600, SV-800, SV-6000
Configuration “5”: SV-300, SV-400, SV-500
Arrêt automatique de la pompe :
Sur les modèles avec fonctionnement en
continu de la pompe, si la machine N'EST PAS
utilisée pendant 10 min, la pompe s'arrête
automatiquement. Cela évite une surchauffe de
l'huile et réduit la quantité d'huile déposée sur
les filtres d'expulsion, tout en économisant de
l'énergie. En refermant le couvercle, la pompe
et le cycle démarrent simultanément.
Pour changer la configuration de la machine,
procéder comme suit :
1- Démonter le panneau de commandes.
2- Actionner l'interrupteur général.
3- Chercher sur la plaque électronique les deux
pattes situées à côté de l'indication TEST et les
court-circuiter à l'aide d'un tournevis ou d'un
outil similaire, afin de lancer la séquence de
test. Au cours de celle-ci, la plaque
électronique active pendant 1 seconde
chacune des sorties (Moteur, Électrovanne de
vide, Électrovanne de soudure, etc.), en
allumant la LED correspondante sur la plaque.
L'identification du composant actionné
apparaît en regard de chaque LED.
4- Lorsque la séquence de test est terminée,
l'écran affiche la configuration de la machine.
5- Appuyer sur la touche « Prog »
6- Pour changer la configuration, appuyer alors
sur la touche Incrémenter ou Décrémenter
pour visualiser la valeur de configuration
voulue sur l'Affichage 1.
7- Appuyer sur Prog pour mémoriser la
configuration. La LED associée à la touche
s'éteint.
8- Pour quitter le mode test, il faut éteindre la
machine. Si le couvercle est descendu sans
être sorti du mode test, la machine ne se met
pas en marche. Si l'on a changé la
configuration ou remis à zéro le compteur
d'heures de fonctionnement, on peut lire sur
l'affichage correspondant la nouvelle valeur
courante.
En cas d'anomalie de fonctionnement de la
machine, la plaque électronique possède un
système permettant de tester les différentes
fonctions :
Suivre les points 1 à 3 ci-dessus. Si pendant la
séquence de test, il y a des composants qui ne
sont pas activés, procéder comme suit :
- Vérifier que le composant est bien raccordé et
sous tension. Si le composant ne marche
toujours pas, le remplacer par un neuf.
- Si le composant ne reçoit pas de courant,
vérifier la présence de tension à la sortie de la
plaque lorsque la LED correspondante est
allumée. Remplacer la plaque électronique s'il
n'y a pas de tension.
OBSERVATIONS :
Lorsque la machine est en cours de cycle de vide,
si le capteur détecte que la pression de vide ne
parvient pas à la consigne programmée, après un
temps d'attente, le cycle s'arrête et passe à la
décompression.
Si lorsque la décompression est effectuée, le
couvercle ne s'ouvre pas, après un temps
l'électrovanne de décompression se déconnecte
16
FR
Pression vide
(mbar)
1000 100 50 31,36 20 10 6,09 5 2
Pression vide
(%)
0 90,1 95 96,87 98 99 99,4 99,5 99,8
Temp.
Évaporation
(°C)
100 45 33 25 18 7 0 -2 -13
Page 17

afin d'éviter son endommagement ou celui de la
plaque électronique.
Autres observations importantes :
- Cet appareil n’est pas destiné à être utilisé par
des personnes (enfants inclus) dont les
capacités physiques, sensorielles ou mentales
sont réduites, ou n’ayant pas les connaissances
et l’expérience nécessaires, sauf si elles ont
reçu des instructions concernant l’usage de
l’appareil et si elles sont sous la supervision
d’une personne responsable de leur sécurité.
Les enfants doivent être surveillés afin de
garantir qu’ils ne jouent pas avec l’appareil.
Le vide est une technique de conservation
naturelle consistant à extraire l'air de
l'intérieur de l'emballage en éliminant
l'oxygène, principal facteur d'altération des
aliments.
Avantages du conditionnement sous vide
1- Il réduit au minimum les pertes de poids
des produits.
2- Il rentabilise au mieux les heures de travail
du personnel grâce à l'utilisation des temps
morts pouvant se produire pendant la
semaine pour avancer le travail et mieux
répartir la charge de travail dans les
cuisines.
3- Il rationnalise le stockage des produits
dans les chambres froides :
- Il n'y a pas de mélange des odeurs.
- Les produits sont étiquetés, ce qui permet
une bonne rotation des matières
premières.
- Le contrôle des stocks est facilité car les
achats nécessaires à chaque moment
peuvent être calculés avec précision.
4- Il permet une meilleure gestion des achats
:
- Groupement des achats lorsque les prix
sont les plus intéressants.
- Réduction des déplacements.
5- Il réduit le lavage des ustensiles de cuisine.
Conditionnement de produits séchés
(charcuterie, jambon, etc.)
Ces produits qui ont déjà naturellement une
date limite de consommation élevée, voient
leur durée de vie doublée grâce au
conditionnement sous vide qui évite
également leur dessèchement ou les pertes de
poids (et donc les pertes économiques). Ces
produits n'ont pas besoin d'être conditionnés
sous atmosphère contrôlée, sauf ceux de
texture fragile.
Conditionnement de produits cuisinés
C'est le cas des produits comme les rôtis,
ragoûts, cannelonis, etc. Une fois cuisinés, ces
aliments doivent impérativement passer de +
65ºC à + 10ºC à coeur en moins de deux
heures, afin d'éviter le développement de
micro-organismes. C'est le moyen le plus
pratique de maintenir une cuisine traditionnelle
avec les avantages suivants :
- Plus grande facilité de travail au niveau des
préparations, sans risque de perte du
produit.
- Augmentation de la durée de vie du produit.
Cuisson de produits conditionnés sous vide
Cette technique consiste à introduire un
aliment dans un sac étanche et
thermorésistant, à extraire l'air de l'intérieur
du sac, puis de le souder et de le soumettre à
l'action d'une source de chaleur pour cuire
l'aliment. La cuisson est réalisée à basse
température (entre 65ºC et 100ºC), opérant un
effet de pasteurisation. Ce système offre de
nombreux avantages tels que :
- Préservation des qualités nutritionnelles.
- Optimisation des conditions d'hygiène grâce
à la réduction des manipulations.
- Réduction des pertes de poids à la cuisson,
en limitant l'évaporation et le dessèchement.
- Rationalisation de la planification du travail.
Préparation et cuisson en dehors des heures
de service, préparation à l'avance des
banquets, etc.
- Augmentation de la durée de conservation.
Le produit doit être refroidi rapidement au
terme de la cuisson, afin de stopper la cuisson
et d'empêcher le développement de microorganismes. Pour cette opération, on utilise
un abaisseur de température.
Plats réfrigérés : Passage de la température
des aliments de + 65ºC à + 10ºC à coeur en
moins de 2 heures.
Plats surgelés : Passage de la température des
aliments de + 65ºC à -18ºC à coeur en moins
de 4h 1/2.
Le stockage ultérieur doit maintenir les plats
réfrigérés à une température de 0ºC à 3ºC et
les plats surgelés à -18ºC.
Pour la remise en température des aliments au
moment de leur consommation, le processus
de régénération doit intervenir
immédiatement après la sortie du produit du
réfrigérateur où il était stocké. Les matériels
de remise en température sont
essentiellement trois : le four vapeur à basse
pression, le bain-marie et le micro-ondes.
Dans les deux premiers cas, les produits sont
réchauffés dans leurs emballages, tandis que
dans le cas du four à micro-ondes, il faut soit
percer l'emballage pour que la vapeur puisse
sortir sans faire éclater le sac, soit réchauffer
le produit hors de son emballage.
Les produits réchauffés n'ayant pas été
consommés ne peuvent pas être stockés de
nouveau. Ils doivent être impérativement
jetés.
Le temps de stockage des plats réfrigérés ne
doit pas dépasser 6-21 jours.
Conditionnement sous atmosphère
contrôlée
Cette technique consiste à remplacer l'air
environnant l'aliment par un mélange de gaz
de proportion différente à celui de l'air, dans
deux objectifs :
- Prolonger la vie du produit, sans mettre
d'additifs ni de conservateurs, en inhibant
les phénomènes de dégradation ayant lieu
pendant le stockage.
- Eviter l'écrasement de produits tels que
viennoiseries, salades, etc.
On utilise essentiellement trois gaz : 02, CO2
et N2, ou un mélange de ceux-ci. D'une
manière générale, une plus grande
concentration de CO2 (contrôlée) augmente la
durée de vie du produit, tandis qu'une
certaine quantité de N2 évite la rupture des
emballages dans le cas des produits à niveau
métabolique élevé et qu'une petite proportion
d'O2 assure le maintien du bon état et de
l'aspect de certains aliments.
Il est recommandé de consulter les fabricants
de gaz pour produits alimentaires qui vous
aideront à choisir le mélange de gaz
convenant le mieux à chaque produit.
Surgélation des produits conditionnés sous
vide
Les techniques traditionnelles de surgélation
conservent bien le produit mais non sa
qualité. La surgélation des produits
conditionnés sous vide présente de nombreux
avantages :
- Pas de croûte extérieure
- Pas de cristallisation de la surface
- Pas de perte de goût ni d'arôme
- Pas de dessèchement
- Pas d'oxydation des matières grasses
GENERALITES CONCERNANT LE CONDITIONNEMENT SOUS VIDE
17
FR
Page 18

Indicazioni per la marcatura CE
Ogni macchina ha i seguenti identificatori:
- Nome e indirizzo del costruttore: SAMMIC, S.L.
Basarte, 1, Azkoitia, Gipuzkoa (SPAIN)
- Marca "CE"
- Il modello della macchina è indicato nel
paragrafo seguente.
- Il numero di serie è riportato sul foglio della
garanzia e sulla dichiarazione di conformità.
MODELLI
In questo manuale sono descritti l'installazione,
il funzionamento e la manutenzione delle
confezionatrici sottovuoto controllato mediante
sensore:
•modelli da tavola: SV-306S, SV-310S, SV-410S,
SV-420S, SV-520S
•modelli a stativo: SV-604S, SV-606S, SV-806S,
SV-810S .
· Modelli di campana basculante: SV-6100, SV6160
Il riferimento del modello e le sue caratteristiche
sono riportati sulla targhetta di identificazione
apposta sulla macchina.
Queste confezionatrici state progettate e
costruite secondo le direttive europee 89 / 392
/ CEE, 93 / 68 CEE, 73 / 23 / CEE la normativa
NSF sull'igiene e sanità.
INSTALLAZIONE
Per ottenere le migliori prestazioni, nonché per
la conservazione ottimale della macchina,
bisogna seguire accuratamente le istruzioni
contenute in questo manuale.
Piazzamento
Piazzare la macchina in modo che risulti
adeguatamente livellata. Onde evitare danni,
non appoggiare mai la macchina su un fianco.
Le macchine da tavola si devono installare su
una superficie liscia, poiché i piedi sono
fabbricati con materiale sdrucciolevole per
poter muovere la macchina senza sforzo e
pulire la superficie su cui si appoggia.
Connessione Eletrica
1. C
ARATTERISTICHE DELLA MACCHINA
- Le macchine monofase sono fornite per una
tensione di 230 V.
- Le macchine trifase sono fornite per tensioni di
230 V o 400 V (collegate a 400 V).
Prima di collegare la confezionatrice alla rete,
assicurarsi che la macchina sia predisposta per
lo stesso voltaggio di rete.
Per il cambio di voltaggio (solo macchine
trifase):
1. Collegare i trasformatori alla tensione adatta,
in base a quanto indicato sulla morsettiera.
2. Se fosse necessario, cambiare le connessioni
sul motore come indicato nella relativa
morsettiera.
3. Se fosse necessario, regolare il relè termico in
base a quanto indicato sullo schema
elettrico.
2. C
ARATTERISTICHE DEL CAVO
Le confezionatrici SAMMIC vengono fornite con
un cavo elettrico di 1,5 m di lunghezza, con
rivestimento termoplastico.
È OBBLIGATORIO IL COLLEGAMENTO A TERRA. Il
filo di presa-terra della macchina è segnalato.
La macchina è dotata anche di una vite esterna
per il collegamento a un sistema equipotenziale
di terra.
- Macchine trifase: predisporre una presa di
corrente a muro con protezione
magnetotermica e differenziale 3P+N+T da 20
A e una spina a tenuta da collegare al cavo di
alimentazione della confezionatrice.
- Macchine monofase: predisporre una presa di
corrente a muro con protezione
magnetotermica e differenziale 2P+T da 20 A.
La spina che fa parte del cavo di alimentazione
deve essere accessibile.
Per qualsiasi intervento di riparazione, la
macchina deve essere scollegata dalla corrente
elettrica, scollegando l'interruttore
magnetotermico o staccando la presa di
corrente.
3. C
AMBIO DEL SENSO DI ROTAZIONE DELLA POMPA DEL
VUOTO
(esclusivamente sulle macchine trifase)
Se quando si mette in moto la macchina il
motore della pompa del vuoto fa un rumore
anomalo, significa che sta girando in senso
contrario. In tal caso, arrestare immediatamente
la macchina e scambiare due fili
nell'alimentazione.
AVVIO
Nei modelli SV-410S, SV-420S, SV-520S, SV600S, SV-800S e SV-6000 la pompa contiene già
l’olio.
Nei modelli SV-310S riempire d’olio la pompa
dalla bocchetta fino a ¾ della spia. Usare olio
privo senza detergenti:
- Olio SAE10 (senza detergente) per le pompe
fino a 20 m³/h.
- Olio SAE30 (senza detergente) per le pompe di
più di 20m³/h.
Si consiglia di usare oli paraffinici.
Una volta azionato l'interruttore generale, allo
scopo di scaldare l'olio e di ottenere un
sottovuoto corretto, è necessario effettuare vari
cicli a vuoto prima di fare il primo
confezionamento.
Sottovuoto mediante sensore in %
Si tratta di modelli in cui tutte le funzioni
(programmazione, vuoto, ingresso di gas inerte
e sigillatura) sono controllate da un
microprocessore che effettua il controllo
mediante un sensore di grande precisione
(0,2%) permettendo di ottenere un vuoto del
99,5% in modo affidabile e sicuro. Offre la
possibilità di un vuoto extra impostandone il
tempo.
Principali caratteristiche
- Programmazione rapida e semplice.
- Memorizzazione di 10 programmi.
- Contatore automatico delle ore di lavoro della
macchina, con avvertenza della necessità di
cambiare l'olio.
- Memorizzazione automatica dell'ultimo
programma eseguito.
- Memorizzazione dei programmi senza pila a
perdere.
- Visualizzazione mediante LED di ogni fase del
ciclo eseguita.
- Il tasto “Stop-avanzamento ciclo” interrompe la
funzione in corso, attivando la funzione
successiva fino alla fine del ciclo.
- Sistema VAC-NORM. Permette di realizzare il
vuoto esterno nei recipienti.
-Sistema di asciugatura della pompa.
Consigliabile quando la pompa viene usata per
confezionare liquidi, prodotti cotti a caldo o in
ambienti molto umidi.
Descrizione tecnica del quadro comandi
All'accensione della macchina mediante
l'interruttore generale, per 2 secondi viene
visualizzato un numero che indica la
configurazione della macchina. Serve inoltre a
visualizzare il numero del programma prescelto
(tra 0 e 9).
Accendendo la macchina mediante l’interruttore
generale viene visualizzato per 2 secondi un
numero che rappresenta le ore di
funzionamento della pompa del vuoto, espresse
in decine. Se appare il numero 10 significa che
sono state accumulate 100 ore di lavoro. Qui di
seguito è possibile visualizzare i valori di vuoto,
sigillatura, etc. premendo il tasto
corrispondente.
- Permette di aumentare qualunque valore
visualizzato sul display. Mantenendo costante
la pressione sul tasto si raggiunge
velocemente il valore richiesto.
- Una volta accesa la macchina, sul display
appaiono due righe centrali di attesa, indicanti
che nessuna funzione è stata selezionata
(vuoto, gas o sigillatura). Premendo questo
tasto per 3 sec. si avvia il ciclo di asciugatura
dell’olio (Dry oil).
- Permette di diminuire qualunque valore
visualizzato sul visore. Mantenendo costante
la pressione sul tasto si raggiunge
velocemente il valore richiesto.
- Una volta accesa la macchina, sul display
appaiono due righe centrali di attesa, indicanti
che nessuna funzione è stata selezionata
(vuoto, gas o sigillatura). Premendo questo
tasto per 3 sec. si accede alla visualizzazione
delle ore di funzionamento.
Questo tasto serve per selezionare la % di
sottovuoto, tra 0 e 99%. Il LED di questo tasto si
accende selezionando la % di sottovuoto e
durante la fase di esecuzione dello stesso.
Più – Dry-oil
Meno
Sottovuoto
Display 1
Display 2
18
IT
Page 19

Questo tasto serve a selezionare/visualizzare il
tempo del sottovuoto extra, tra 0 e 15 secondi.
Per poter utilizzare questa opzione occorre
programmare prima un sottovuoto del 99%. Il
LED di questo tasto si accende quando si
imposta il tempo di sottovuoto extra e durante
la fase di esecuzione dello stesso.
Questo tasto serve a visualizzare la percentuale
di sottovuoto che resterà nella cella dopo aver
immesso il gas. L'impostazione della % di gas si
esegue premendo il tasto meno, tra 99 e 0. Ad
esempio, per introdurre il 20% di gas nella
camera, è necessario programmare l’80% con il
tasto del gas. Questa è la pressione che rimarrà
nella camera dopo aver introdotto il gas. Il LED
di questo tasto si accende quando si imposta la
% di sottovuoto restante e durante la fase di
immissione del gas.
Attiva/disattiva l'opzione del gas. Se premendo
questo tasto si accende il relativo LED, significa
che si è attivata l'opzione. Quando si esegue
l'operazione contraria si spegne il LED e
l'opzione di entrata del gas resta disattivata.
Imposta/visualizza il tempo di sigillatura, tra 0
e 7 secondi. Il LED di questo tasto si accende
quando si imposta il tempo di sigillatura e
durante la fase della relativa esecuzione.
Imposta/visualizza il tempo di entrata lenta
dell'aria, tra 0 e 30 secondi. Il LED di questo
tasto si accende quando si imposta il tempo e
durante la fase della relativa esecuzione.
Permette di accedere alla selezione del
programma.
Questo tasto ha tre funzioni, in base alla
posizione aperta o chiusa del coperchio.
Coperchio chiuso → Stop-avanzamento ciclo
Ad ogni pressione l’azione in corso viene
interrotta e si passa alla seguente fase del ciclo.
Premendo il tasto ripetutamente si arriva a fine
ciclo e si attiva l’ingresso dell’aria.
Coperchio aperto → VAC-NORM
Se premiamo il tasto quando il coperchio è
aperto, la macchina comincia ad aspirare,
permettendo di realizzare il vuoto esterno nei
cubetti. Premendo di nuovo questo tasto si
torna al modo di funzionamento normale.
Con il coperchio aperto e visualizzando “oil” è
possibile resettare le ore di funzionamento della
pompa. Premendo per 3 sec. il tasto “Stop” il
contatore delle ore di funzionamento si azzera
e scompare l’avviso “oil”.
Programmazione delle funzioni.
L'unità elettronica permette di memorizzare 10
programmi diversi. Il Il programma 0 è fisso,
quindi non modificabile.
Per eseguire un programma È INDISPENSABILE
CHE IL COPERCHIO SIA APERTO. La procedura
per la programmazione è descritta di seguito,
prendendo come esempio un eventuale
programma:
1. Premere il tasto Prog: si accende il LED di
questo tasto. Azionare il tasto Più o Meno
fino a visualizzare il valore 4 sul display 1.
2. Premere il tasto Sottovuoto in %: si
accendono il LED di questo tasto e il LED %
del display 2, che indica che si sta
programmando in %. Premere quindi il tasto
Più fino a raggiungere 99, che rappresenta
la % di sottovuoto impostata.
3. Premere il tasto Sottovuoto extra: si
accendono lo stesso LED e il LED Sec del
Display 2. Azionare il tasto Più o il tasto
Meno finché sul Display 2 non compare il
valore 6 che indica, in secondi, la durata del
sottovuoto extra.
4. Premere il tasto entrata gas (superiore): il
LED di questo tasto si illumina. Azionare il
tasto Più o il tasto Meno finché sul Display 2
non compare la cifra 79, che rappresenta la
% del sottovuoto che resterà nella cella dopo
aver immesso il gas (20%).
5. Premere il tasto Interruttore Gas (inferiore):
se il LED è acceso significa che l'opzione è
già attivata. Se si preme di nuovo questo
tasto, si spegne il LED e si disattiva
momentaneamente l'opzione, in modo che
nonostante vi sia una percentuale di gas
programmata, il gas non entra nella cella
finché non si attiva di nuovo.
6. Premere il tasto Sigillatura: si accendono lo
stesso LED e il LED Sec del Display 2.
Azionare il tasto Più o il tasto Meno finché sul
Display 2 non compare il valore 3,5 che
rappresenta, in secondi, la durata della
sigillatura del sacchetto.
7. Premere il tasto Aria progressiva: si
accendono lo stesso LED e il LED Sec del
Display 2. Azionare il tasto Più o il tasto Meno
finché sul Display 2 non compare il valore 8
che indica, in secondi, la durata dell'entrata
lenta dell'aria nella cella.
8. Una volta impostati tutti i valori, se fosse
necessario modificarne qualcuno, basta
premere il relativo tasto ed azionare il tasto
Più o il tasto Meno fino ad ottenere il nuovo
valore richiesto.
9. Chiudere il coperchio subito dopo aver
concluso l'impostazione di tutti i valori del
programma, che viene memorizzato
automaticamente.
Attenzione: quest'ultima operazione è
fondamentale affinché il programma venga
registrato nella memoria del microprocessore.
Quando si chiude il coperchio, il ciclo si avvia
automaticamente. Nel corso dello stesso si
accendono in successione i LED dei tasti, che
indicano così la fase del ciclo in cui si trova la
macchina.
FUNZIONE VAC-NORM
La funzione VAC-NORM permette di realizzare il
vuoto nelle vaschette. Per poter utilizzare questa
funzione è necessario disporre del kit VACNORM, contenente il manicotto e l’adattatore alla
vaschetta della confezionatrice.
1- Prima di attivare la funzione VAC-NORM,
collocare l'adattatore del manicotto
nell'aspirazione della macchina.
2- Per attivare la funzione VAC-NORM, è
necessario premere il tasto STOP con il
coperchio della confezionatrice aperto. A
questo punto la macchina comincerà ad
aspirare.
3- Collocare l'estremo del manicotto nella
vaschetta. A questo punto comincerà a
realizzare il vuoto dentro la vaschetta. Il
sensore di vuoto indica il grado di vuoto
raggiunto. Una volta raggiunto il vuoto
desiderato, ritirare il manicotto dalla
vaschetta.
4- Premendo di nuovo il bottone STOP o
spegnendo la macchina si torna al
funzionamento normale.
Avvertenza: È raccomandabile spegnere la
funzione VAC-NORM fino a che non si utilizza,
poiché in caso contrario la macchina starà
aspirando aria continuamente, cosa che può
danneggiare la pompa. Se lo spegnimento non
viene effettuato manualmente, la piastra
scollega la pompa automaticamente.
ASCIUGATURA OLIO
Dopo aver acceso la macchina con l’interruttore
generale, visualizzando le due righe centrali e
tenendo premuto il tasto “più” per 3 sec., sul
display appare “do”, ovvero ciclo di asciugatura
dell’olio (“dry-oil”).
Quando appare “do” e si chiude il coperchio,
inizia il ciclo di asciugatura dell’olio del motore,
il quale dura 15 minuti.
Durante il ciclo viene visualizzato “do”
lampeggiante e il tempo (in minuti) restante per
terminare il ciclo.
TAGLIO DEL SACCHETTO
Le barre con il filo per il taglio del sacchetto
sono fornite in kit.
L'installazione si esegue cambiando la barra di
sigillatura con la barra che contiene il filo per il
taglio e cambiando la connessione di uno dei
cavi sul trasformatore di sigillatura alla tensione
indicata sullo schema elettrico:
Per eseguire il taglio del sacchetto, basta
programmare il tempo di sigillatura richiesto sul
Programma
Stop - Avanzamento ciclo
Gas
Gas On/Off
Sigillatura
Decompressione progressiva
Saldatura:3,5 s
Vuoto:
99 %
Aira progressiva
: 0 s
Gas
: 0 %
Saldatura : 3 s
Vuoto
: 99 % 99+: 0
Sec
PROGRAMMA
4
Aira progressiva
: 8s
99+: 6
Sec.
Gas: 20 %
Stottovuoto extra
19
IT
Page 20

quadro di controllo e, una volta sigillato il
sacchetto, si strappa manualmente lungo la
linea segnata dal filo di taglio.
USO E MANUTENZIONE
Molto importante:
- Non confezionare prodotti a caldo, dato che
il vapore che sprigionano danneggia la
pompa per vuoto.
- NON CONFEZIONARE MAI prodotti usando
gas che abbia un contenuto in ossigeno
superiore al 20% senza aver previamente
consultato il fornitore o il servizio di
assistenza autorizzato da SAMMIC. Si
potrebbero verificare esplosioni fatali.
Confezionamento di liquidi:
Per confezionare i liquidi è necessario utilizzare
l'accessorio che mantiene il sacchetto a una
determinata inclinazione per evitare la
fuoriuscita del liquido. Nel caso in cui si formino
delle bolle durante il confezionamento, significa
che è stato raggiunto il grado di saturazione e
bisogna premere il tasto STOP per evitare che il
liquido possa rovinare l'olio. Il punto di
saturazione è simile al punto di evaporazioneebollizione che si verifica a varie temperature in
funzione della pressione.
Il punto di saturazione viene raggiunto tanto
prima quanto maggiore è la temperatura del
liquido durante l'elaborazione del vuoto. Si
raccomanda innanzitutto di lasciar raffreddare il
liquido prima di confezionarlo per ottenere il
vuoto ottimale del prodotto.
Si indica una tabella relativa al punto di
saturazione dell'acqua con il rapporto tra la
temperatura e la pressione
- È importante pulire ogni giorno l'interno e i
bordi della cella, nonché la guarnizione di
chiusura.
- Non pulire l'esterno della macchina con un
getto d'acqua diretto, ma usare un panno
umido e un normale detersivo. Non pulire mai
il coperchio con alcool, solventi o prodotti per
pulire i vetri che possono alterare le proprietà
meccaniche del materiale e provocarne la
rottura. Qualora si riscontrasse una lesione sul
coperchio, arrestare la macchina ed avvertire il
servizio tecnico autorizzato per farlo riparare,
dato che potrebbe rompersi.
- In caso di danneggiamento del cavo di
alimentazione, la sostituzione deve essere
eseguita esclusivamente da un servizio tecnico
autorizzato dalla SAMMIC.
- Prima di qualunque intervento per la pulizia, la
revisione o la riparazione della macchina, è
obbligatorio disinserire la macchina dalla rete.
- La rumorosità della macchina in moto,
sistemata a 1,6 m di altezza e a 1 m di
distanza è di 75 dß (A). Rumore di fondo: 32
dß (A).
Cambio dell’olio
È necessario controllare settimanalmente il
livello dell'olio, che deve raggiungere i 3/4 della
spia. Rabboccare se fosse necessario.
L'olio deve essere cambiato dopo le prime 100
ore di funzionamento. Successivamente,
cambiare l'olio:
• Modelli da tavola; numero di modello 2: 150
ore
• Modelli a stativo; pompa funzionamento
intermittente, numero di modello 1: 300 ore
• Modelli a stativo; pompa funzionamento
continuo, numero di modello 0: 300 ore
Quando la pompa ha funzionato le ore indicate,
accendendo la macchina il display indicherà “oil”
e lampeggerà per 10 sec. per avvisare che è
necessario cambiare l’olio.
L'olio deve anche essere se si osserva che è
emulsionato. La quantità di ore di lavoro
accumulate si può visualizzare quando si
accende la macchina o tenendo premuto il tasto
“meno” per 3 sec. Per eseguire il cambio,
togliere il tappo e lasciare uscire l'olio esausto.
Riempire d'olio la pompa attraverso la
bocchetta, fino ad arrivare a ¾ della spia. Usare
un tipo di olio privo di detergenti:
Nelle pompe di 40m³/h e oltre, occorre
cambiare contemporaneamente il filtro dell'olio.
Questo filtro è del tipo usato per le automobili,
con il riferimento: AWS2, filetto 3/4.
Il filtro di scarico deve essere sostituito ogni 4
cambi dell'olio o quando si osservano perdite
d'olio o nebbia d'olio nello scarico.
Quando la pompa ha raggiunto 500 ore di
lavoro, accendendo la macchina il display
mostra la cifra 50 e lampeggia per 10 secondi
per avvertire che è necessario cambiare l'olio. In
queste condizioni la macchina non può essere
avviata, anche si abbassa il coperchio.
RESET ORE POMPA
Una volta cambiato l’olio, è necessario
resettare le ore di funzionamento. A tal
fine eseguire la seguente sequenza:
Con il coperchio aperto e le due righe
centrali visualizzate, premendo il tasto
“meno” per 3 sec. sul display appare
“oil” lampeggiante e il nº di ore del
motore.
Premendo il tasto “Stop” per 3 sec. il nº si
azzera.
Attendere 10 secondi, premere “più”, quindi
“meno” o “Stop” per uscire da RESET ORE
POMPA.
MODIFICA DELLA CONFIGURAZIONE E TEST
DELLE FUNZIONI
Vi sono tre possibili configurazioni della scheda
elettronica a seconda della macchina su cui è
montata.Il numero viene mostrato,
all'accensione della macchina, per 2 sec. sul
display 1
Modelli dotati di sistema di iniezione a Gas:
Configurazione "0": macchine a stativo e
funzionamento continuo (SV-604, SV-606, SV806, SV-810 e SV-6000). La pompa è in funzione
dal momento in cui viene azionato l’interruttore
generale. Questa configurazione è pensata per
le macchine installate in luoghi freddi o camere
frigorifere. Quando la pompa funziona in modo
continuo, la macchina rimane calda assicurando
un perfetto funzionamento.
Configurazione "1": macchine a stativo e
funzionamento intermittente (SV-604, SV-606,
SV-806 e SV-6000).La pompa è in funzione
durante la fase di vuoto e sigillatura.
Configurazione "2": macchine da tavola e
funzionamento intermittente (SV-310, SV-410,
SV-420 e SV-520). La pompa è in funzione
durante la fase di vuoto.
Modelli senza sistema con iniezione a Gas
Con la stessa modalità di funzionamento della
pompa rispetto ai modelli precedenti, si
configurano i medesimi modelli ma senza
sistema di iniezione a gas
Configurazione “3”: SV-600, SV-800, SV-6000
Configurazione “4”: SV-600, SV-800, SV-6000
Configurazione “5”: SV-300, SV-400, SV-500
Arresto automatico della pompa:
Nei modelli con funzionamento continuo della
pompa, se la macchina NON viene utilizzata per
10 min la pompa si arresta automaticamente.
Ciò impedisce un surriscaldamento dell'olio,
riducendo il quantitativo di olio depositato nei
filtri di espulsione e risparmiando energia.
Chiudendo il coperchio, la pompa e il ciclo
partono contemporaneamente.
Per modificare la configurazione della
macchina, procedere come segue:
1- Smontare il quadro comandi.
2- Azionare l'interruttore generale.
3- Individuare sulla scheda elettronica due
linguette situate a lato della parola TEST e
cortocircuitarle con un cacciavite o qualcosa
di simile. Inizia così il processo di test, per
cui la scheda elettronica aziona per 1
secondo ciascuna uscita (motore,
elettrovalvola del sottovuoto, elettrovalvola
della sigillatura, ecc.) mentre sulla scheda si
accende il relativo LED. Vicino ad ogni LED
appare un testo che identifica il componente
azionato.
4- Una volta terminata la sequenza del test, nel
visore appare la configurazione della
macchina.
5- Premere il tasto “Prog”.
6- Per modificare la configurazione, premere il
tasto Più o il tasto Meno finché sul Display 1
non compare il valore richiesto per la
configurazione.
7- Premere Prog per memorizzare la
configurazione: si spegne il LED.
8- Per uscire dal modo test e memorizzare la
nuova configurazione occorre spegnere la
macchina. Se si abbassa il coperchio senza
essere usciti dal modo test, la macchina non
verrà avviata. Se è stata modificata la
configurazione o sono state azzerate le ore
di funzionamento, quando si riaccende la
macchina occorre verificare il nuovo valore
sul display.
Se la macchina presentasse un guasto, la
scheda elettronica dispone di un sistema per
testare le varie funzioni:
Procedere come indicato nei punti 1,2 e 3 del
paragrafo precedente.
Se durante il test non si attiva un componente,
procedere come segue:
- Assicurarsi che il componente sia collegato
correttamente e che sia in tensione. Se il
20
IT
Pressione
vuoto (mbar)
1000 100 50 31,36 20 10 6,09 5 2
Pressione
vuoto (%)
0 90,1 95 96,87 98 99 99,4 99,5 99,8
Temp.
Evaporazione
(°C)
100 45 33 25 18 7 0 -2 -13
Page 21

componente continua a non funzionare,
sostituirlo con uno nuovo.
- Se non arriva tensione al componente,
verificare la tensione in uscita dalla scheda
quando è acceso il relativo LED. Se non c'è
tensione, occorre sostituire la scheda
elettronica.
OSSERVAZION
Quando la macchina esegue il ciclo di vuoto, se
il sensore rileva che la pressione del vuoto non
arriva al set-point programmato dopo un
determinato tempo di attesa, il ciclo si arresta e
passa alla fase di decompressione.
Se durante la fase di decompressione il
coperchio non si apre, trascorso un determinato
tempo l'elettrovalvola di decompressione si
disconnette per evitare danni alla medesima o
alla piastra elettronica.
Altre indicazioni importanti
- Questo apparecchio non è destinato all'uso da
parte di persone (bambini compresi) le cui
capacità fisiche, sensoriali o mentali sono
ridotte o che non hanno esperienza o
competenze, salvo se sono sottoposte alla
supervisione o alle istruzioni relative all'uso
dell'apparecchio di un responsabile della
sicurezza.
I bambini devono essere controllati per essere
sicuri che non giochino con l'apparecchio.
Il sottovuoto è un sistema di conservazione
naturale che consiste nell'estrazione dell'aria
dall'interno del sacchetto eliminando l'ossigeno,
cioè il principale fattore che causa la
decomposizione dei cibi.
Vantaggi del confezionamento sottovuoto
1- Riduce al massimo la perdita di peso dei
prodotti.
2- Permette di approfittare dei tempi morti
che si possono verificare nel corso della
settimana per anticipare alcune attività e
quindi di alleggerire il flusso di lavoro in
cucina.
3- Si razionalizza lo stoccaggio dei prodotti
nei frigoriferi:
- Gli odori non si mescolano.
- I prodotti sono etichettati, il che permette
la rotazione delle materie prime.
- Migliora il controllo dello stock, dato che
si possono calcolare con precisione gli
acquisti necessari.
4- Possibilità di approfittare delle offerte:
- Permette di fare gli acquisti quando i
prezzi sono più convenienti.
- Riduzione degli spostamenti necessari.
5- Riduce la necessità di lavaggio degli
utensili.
Confezionamento di prodotti stagionati
(salumi, prosciutti, ecc.)
Trattandosi di prodotti che di per sé si
conservano a lungo, con il confezionamento
sottovuoto si duplica, come minimo, la durata
di questi prodotti evitando che si secchino e
che perdano peso con il conseguente danno
economico. Non è necessario confezionare
questi prodotti con il gas, salvo alcuni
prodotti dalla struttura fragile.
Confezionamento di cibi cotti
Questo è il caso di prodotti come arrosti,
stufati, cannelloni, ecc. Una volta cotti, è
indispensabile raffreddare il nucleo dei cibi da
+65º C a +10º C in meno di due ore per
impedire lo sviluppo di microrganismi.
Questo è il metodo più pratico per la
conservazione dei prodotti della cucina
tradizionale con i seguenti vantaggi:
- Facilitare l'elaborazione del prodotto
senza correre il rischio che vada a male.
- Allungare la durata del prodotto.
Cottura dei prodotti confezionati
Consiste nel sistemare un alimento in un
recipiente a tenuta e resistente al calore.
Estrarre l'aria dall'interno, sigillarlo e
sottoporlo all'azione di una fonte di calore per
cuocerlo. La cottura si svolge a bassa
temperatura (tra 65º C e 100º C) ottenendo
un effetto di pastorizzazione. Questo sistema
presenta molti vantaggi, ad esempio:
- Conserva le qualità nutritive.
- Conserva le condizioni igieniche riducendo
la manipolazione dei cibi.
- Riduce le perdite di peso in cottura, evitando
l'evaporazione e l'essiccazione.
- Razionalizza la pianificazione del lavoro: i
piatti si possono elaborare e cucinare nei
momenti liberi dal servizio, si anticipa il
lavoro necessario per l'allestimento di grandi
pranzi, ecc.
- Prolunga il periodo di conservazione.
Dopo la cottura, il prodotto deve essere
raffreddato rapidamente per arrestare il
processo di cottura e per impedire lo sviluppo
dei microrganismi. Questo processo si svolge
con un apparecchio di raffreddamento rapido.
Piatti refrigerati: occorre abbassare la
temperatura del nucleo del prodotto da +65º
C a +10º C in meno di 2 ore.
Piatti surgelati: occorre abbassare la
temperatura del nucleo del prodotto da +65º
C a -18º C in meno di 4,5 ore.
Per lo stoccaggio successivo occorre
mantenere una temperatura da 0º C a 3º C per
i piatti refrigerati e di -18º C per quelli
surgelati.
Per degustare al meglio gli alimenti, il
processo di rigenerazione deve essere
effettuato subito dopo l'estrazione dal
frigorifero. Fondamentalmente, le tecniche di
rigenerazione sono tre: il forno a vapore a
bassa pressione, il bagnomaria e il forno a
microonde. Nei primi due casi, la
rigenerazione si svolge con il prodotto nella
confezione stessa, mentre nel caso del
microonde, è necessario perforare il sacchetto
per fare fuoriuscire il vapore, oppure
riscaldare il prodotto dopo averlo
disimballato.
Se il prodotto rigenerato non viene
consumato, non è possibile stoccarlo di nuovo
e bisogna buttarlo via.
Il tempo di stoccaggio dei piatti refrigerati
non deve superare i 6-21 giorni.
Confezionamento in atmosfera protettiva
Consiste nel sostituire l'aria che circonda il
cibo con una miscela di gas con una
proporzione diversa da quella dell'aria, con
due obiettivi:
- Prolungare la durata del prodotto, senza che
sia necessario l'impiego di additivi né di
conservanti, inibendo processi di alterazione
che si verificano durante lo stoccaggio.
- Evitare di schiacciare prodotti come dolci,
insalate, ecc.
Si usano principalmente tre gas: 02, CO2 e
N2, o miscele degli stessi. In generale, una
maggiore concentrazione di CO2 (controllata)
prolunga la durata del prodotto, mentre una
certa quantità di N2 evita la rottura della
confezione dei prodotti con un elevato livello
metabolico ed una piccola proporzione di O2
assicura la conservazione in ottimo stato e il
mantenimento dell'aspetto di alcuni alimenti.
Per la combinazione di gas più adatta a
ciascun prodotto, si consiglia di consultare le
ditte specializzate nei gas destinati
all'alimentazione.
Surgelamento dei prodotti sottovuoto
Le tecniche di surgelamento tradizionali
conservano il prodotto, ma non la qualità. Il
surgelamento dei prodotti sottovuoto
presenta molti vantaggi:
- Assenza di bruciature esterne
- Non c'è cristallizzazione superficiale
- Il gusto e l'aroma restano inalterati
- Non c'è essiccazione
- I grassi non si ossidano
21
IT
NOZIONI BASILARI PER IL CONFEZIONAMENTO SOTTOVUOTO
Page 22

Indicações para a marcação CE
Cada máquina inclui a seguinte identificação:
- Nome e morada do fabricante: SAMMIC, S.L.
Basarte, 1, Azkoitia, Gipuzkoa (SPAIN)
- Marca "CE"
- O modelo da máquina está indicado na alinha
seguinte.
- O número de série da máquina está indicado
no certificado de garantia e na declaração de
conformidade.
MODELOS
Este manual descreve a instalação, o
funcionamento e a manutenção das embaladoras
de vácuo controlado por sensor:
• modelos de mesa: SV-306S, SV-310S, SV-
410S, SV-420S, SV-520S
• modelos de pé : SV-604S, SV-606S, SV-806S,
SV-810S.
· Modelos de campânula basculante: SV-6100,
SV-6160
A referência do modelo e as respectivas
características estão indicadas na placa de
identificação colocada na máquina.
Estas embaladoras estão desenhadas e
fabricadas de acordo com as directivas
europeias 89 / 392 / CEE, 93 / 68 CEE, 73 / 23
/ CEE e a normativa NSF de higiene e saúde.
INSTALAÇÃO
Para obter os melhores resultados assim como
uma boa conservação da máquina deve seguir
cuidadosamente as instruções contidas neste
manual.
Localização
Colocar a máquina de maneira a que fique
devidamente nivelada. Para evitar danos, a
máquina não deve ficar apoiada sobre um dos
lados.
As máquinas de mesa devem ser instaladas
sobre uma superfície lisa já que os pés estão
fabricados com material deslizante para poder
deslocar a máquina sem esforço e limpar a
superfície sobre a qual se apoia.
Ligação Eléctrica
1. C
ARACTERÍSTICAS DA MÁQUINA
-As máquinas monofásicas são fornecidas para
corrente de 230 V.
-As máquinas trifásicas são fornecidas para
corrente de 230 V ou 400 V (ligadas a 400 V).
Antes de ligar a embaladora à rede eléctrica,
verificar se a máquina está preparada para a
mesma voltagem que a da rede eléctrica.
Para a mudança de voltagem (só máquinas
trifásicas):
1. Conectar os transformadores à tensão
adequada tal como se indica na régua de
bornes.
2. Mudar, se necessário, as ligações no motor
conforme se indica na caixa de bornes.
3. Ajustar, se necessário, o relé térmico
conforme se indica no esquema eléctrico.
2. C
ARACTERÍSTICAS DO CABO
As embaladoras SAMMIC são fornecidas com
um cabo eléctrico de 1,5 m de comprimento
com revestimento termo plástico.
É OBRIGATÓRIA A LIGAÇÃO A TERRA. O fio de
terra da máquina está sinalizado. Além disso, a
máquina está equipada com um parafuso
externo para a ligação a um sistema
equipotencial de terra.
- Máquinas trifásicas: Preparar uma tomada de
corrente de parede com protecção magnetotérmica e diferencial de 3P+N+T de 20 A, e
uma ficha estanque para ligá-la ao cabo de
alimentação da embaladora.
- Máquinas monofásicas: Preparar uma tomada
de corrente de parede com protecção
magneto-térmica e diferencial de 2P+T de 20
A. A ficha que faz parte do cabo de
alimentação deve estar acessível.
Para qualquer operação de reparação, a
máquina deve ser desligada da rede, seja
desligando o interruptor magnetotérmico, ou
desligando a tomada de ligação.
3. M
UDANÇA DO SENTIDO DE ROTAÇÃO DA BOMBA DE
VÁCUO
(unicamente em máquinas trifásicas)
Se a máquina ao arrancar emitir um ruído anormal
no motor da bomba de vácuo, isso deve-se ao
facto de estar a girar no sentido inverso. Neste
caso, parar imediatamente a máquina e
intercambiar dois cabos na alimentação.
ENTRADA EM FUNCIONAMENTO
Nos modelos SV-410S, SV-420S, SV-520S, SV600S, SV-800S je SV-6000 a bomba já contém
óleo.
Nos modelos SV-310S encher a bomba de óleo
através da tomada, até completar ¾ partes do
indicador visual. Utilizar apenas óleo sem
detergentes:
- Óleo SAE10 (sem detergente) para as bombas
até 20 m³/h.
- Óleo SAE30 (sem detergente) para as bombas
superiores a 20 m³/h.
Recomenda-se que os óleos utilizados sejam
parafínicos.
Após accionar o interruptor geral, e com o
objectivo de que o óleo aqueça e permita fazer
um vácuo correcto, é necessário realizar vários
ciclos em vácuo antes de proceder à primeira
embalagem.
Vácuo por sensor em %
São os modelos nos quais todas as funções
(programação, vácuo, entrada de gás inerte e
soldadura) são controladas por um
microprocessador que realiza o controlo
através de um sensor de grande precisão
(0,2%) e permite alcançar um vácuo de até
99,5% de forma fiável e segura. Oferece a
possibilidade de um vácuo extra por tempo.
Principais características
-Programação rápida e simples.
-Memorização de 10 programas.
-Contador automático das horas de trabalho da
máquina, com aviso das mudanças de óleo.
-Memorização automática do último programa
executado.
-Memorização dos programas sem pilha
descartável.
-Visualização mediante LEDS de cada etapa
executada no ciclo.
- A tecla de “Stop- avanço ciclo” interrompe a
função em execução, activando a seguinte
função até à finalização do ciclo.
- Sistema VAC-NORM. Permite realizar o vácuo
exterior em recipientes.
- Sistema de secagem da bomba. Recomendável
quando a bomba é utilizada para embalar
líquidos, produtos cozinhados a quente ou em
ambientes com muita humidade.
Descrição técnica do painel de comandos
Ao ligar a máquina no interruptor geral,
visualiza-se durante 2 segundos um número
que representa a configuração da máquina.
Serve igualmente para visualizar o número do
programa escolhido (entre 0 e 9).
Quando ligar a máquina no interruptor geral, vai
visualizar durante 2 segundos um número que
representa as horas de funcionamento da
bomba de vácuo, expresso em dezenas. Se
visualizar o número 10, significa que tem 100
horas de trabalho acumuladas. A seguir pode
visualizar os valores de vácuo, soldadura, etc.,
premindo a tecla correspondente.
- Permite aumentar qualquer dos valores que se
visualizam em ambos os visores. Mantendo
constante a pressão, consegue-se atingir
rapidamente o valor desejado.
- Depois de ligar a máquina aparecem no visor
duas riscas centrais de espera que indicam
que não há uma função seleccionada (vácuo,
gás ou soldadura). Se premir esta tecla durante
3 s vai aceder ao ciclo de secagem do óleo (Dry
oil).
- Permite diminuir qualquer um dos valores que
se visualizam no visor. Mantendo constante a
pressão, consegue-se atingir rapidamente o
valor desejado.
- Depois de ligar a máquina aparecem no visor
duas riscas centrais de espera que indicam
que não há uma função seleccionada (vácuo,
gás ou soldadura). Se premir esta tecla durante
3 s vai aceder à visualização das horas de
funcionamento.
Esta tecla serve para seleccionar a % de vácuo,
entre 0 e 99 %. O LED desta tecla acende-se no
momento de seleccionar a % de vácuo e durante
a fase de execução do vácuo.
Esta tecla serve para seleccionar/visualizar o
tempo de vácuo extra, entre 0 e 15 s. Para
Aumentar – Dry-oil
Diminuir
Vácuo
Visor 1
Visor 2
22
PT
Vácuo
Page 23

poder utilizar esta opção deve-se programar
previamente um vácuo de 99%. O LED desta
tecla acende-se no momento de seleccionar o
tempo de vácuo extra e durante a fase da sua
execução.
Esta tecla serve para visualizar a % de vácuo que
permanecerá na câmara depois de introduzir o
gás. A selecção da % de gás realiza-se premindo
a tecla de diminuir, entre 99 e 0. Por exemplo,
se pretendemos introduzir 20% de gás, deve
programar-se 80% com a tecla de gás. Esta é a
pressão que vai ficar na câmara depois de ter
introduzido o gás. O LED desta tecla acende-se
no momento de seleccionar a % de vácuo
restante e durante a fase de introdução do gás.
Activa/desactiva a opção de gás. Se ao premir
esta tecla se acender o LED é porque a opção
está activada. Quando se efectua a operação
inversa, apaga-se o LED e a opção de entrada de
gás fica desactivada.
Selecciona/visualiza o tempo de soldadura
entre 0 e 7 segundos. O LED desta tecla acendese no momento de seleccionar o tempo de
soldadura e durante a fase da sua execução.
Selecciona/visualiza o tempo de entrada lenta
de ar entre 0 e 30 segundos. O LED desta tecla
acende-se no momento de seleccionar o tempo
e durante a fase da sua execução.
Permite ter acesso à selecção do programa.
Esta tecla tem três funções dependendo de a
tampa estar aberta ou fechada.
Tampa fechada → Stop - avanço ciclo
Sempre que premir esta tecla vai interromper a
acção em curso e passar para a fase seguinte do
ciclo. Se premir a tecla repetidamente vai chegar
ao final do ciclo e activar a entrada de ar.
Tampa aberta → VAC-NORM
Se premirmos a tecla quando a tampa está
aberta, a máquina começa a aspirar, permitindo
realizar o vácuo exterior em recipientes.
Premindo de novo esta tecla, retoma-se o modo
de funcionamento normal.
Com a tampa aberta e visualizando “oil” pode
fazer o reset das horas de funcionamento da
bomba. Se premir durante 3 s a tecla “Stop” vai
colocar a zeros o contador de horas de
funcionamento e desaparece o aviso de “oil”.
Programação das funções
A unidade electrónica permite memorizar 10
programas diferentes. O programa 0 é fixo, sem
possibilidade proceder a alterações.
Para realizar um programa é CONDIÇÃO
INDISPENSÁVEL ter a TAMPA ABERTA. Indica-se
de seguida os passos para a programação
tomando como exemplo um possível programa:
1. Premir a tecla Prog: ilumina-se o LED desta
tecla. Accionar a tecla Aumentar ou a tecla
Diminuir até visualizar o valor 4 no visor 1.
2. Premir a tecla Vácuo em %: ilumina-se o LED
desta tecla e o LED % do visor 2, indicativo de
que se está a programar em %. Seguidamente
premir a tecla Aumentar até atingir 99 que
representa a % de vácuo seleccionado.
3. Premir a tecla Vácuo extra: acende-se o
próprio LED e o LED Seg do Visor 2. Accionar
a tecla Aumentar ou a tecla Diminuir até que
no Visor 2 surja o valor 6 que representa os
segundos que vai durar o vácuo plus.
4. Premir a tecla entrada de Gás (superior):
ilumina-se o LED desta tecla. Accionar a tecla
Aumentar ou a tecla Diminuir até que no
Visor 2 apareça o número 79 que representa
a % de vácuo que ficará na câmara depois de
introduzir o gás (20%).
5. Premir a tecla Interruptor Gás (inferior): se o
LED estiver aceso significa que a opção já
está activada. Se carregarmos novamente
nesta tecla, o LED apaga-se desactivando
momentaneamente a opção de modo que,
apesar de haver uma percentagem de gás
programada, não entraria gás na câmara até
activá-lo de novo.
6. Premir a tecla Soldadura: acende-se o próprio
LED e o LED Seg do Visor 2. Accionar a tecla
Aumentar ou a tecla Diminuir até que no
Visor 2 apareça o valor 3.5 que representa,
em segundos, a duração da soldadura da
bolsa.
7. Premir a tecla Ar progressivo: acende-se o
próprio LED e o LED Seg do Visor 2. Accionar
a tecla Aumentar ou a tecla Diminuir até que
no Visor 2 surja o valor 8 que indica os
segundos que vai durar a entrada lenta de ar
na câmara.
8. Uma vez determinados todos os valores, se
em qualquer momento se quiser rectificar
um deles, basta premir a tecla
correspondente e accionar a tecla Aumentar
ou a tecla Diminuir até obter o novo valor
desejado.
9. Fechar a tampa imediatamente após ter
terminado de fixar todos os valores do
programa. O programa é memorizado
automaticamente.
Atenção: Esta última operação é fundamental
para que o programa fique gravado na memória
do microprocessador.
Ao fechar a tampa, o ciclo começa
automaticamente. No decorrer do ciclo acendese sucessivamente os LED das teclas
assinalando assim a fase do ciclo que está em
curso.
FUNÇÃO VAC-NORM
A função VAC-NORM permite fazer o vácuo em
recipientes. Para poder utilizar esta função é
necessário adquirir o kit VAC-NORM que
incorpora a mangueira e a adaptação ao
recipiente da embaladora.
1- Antes de activar a função VAC-NORM, colocar
o adaptador e a mangueira na aspiração da
máquina.
2- Para activar a função VAC-NORM, é
necessário premir a tecla STOP com a tampa
da máquina de envasar aberta. Nesse
momento a máquina começará a aspirar.
3- Colocar o extremo da mangueira no
recipiente. Nesse momento inicia-se a
operação de vácuo dentro do recipiente. O
sensor de vácuo indica o grau de vácuo
atingido. Ao atingir o vácuo pretendido,
retirar a mangueira do recipiente.
4- Premindo novamente o botão STOP ou
apagando a máquina, volta-se ao modo de
funcionamento normal.
Advertência: É recomendável apagar a função
VAC-NORM enquanto não estiver a ser utilizada
já que, caso contrário, a máquina aspiraria ar
continuamente, sendo prejudicial para a
bomba. Se não for feito o desligamento
manualmente, a placa desliga a bomba
automaticamente.
SECAGEM ÓLEO
Depois de ligar a máquina com o interruptor
geral, visualizar as duas riscas centrais e manter
a tecla ”aumentar” premida durante 3sg vai
visualizar no ecrã “do” ciclo de Secagem do óleo
(“dry-oil”).
Com “do” no visor e fechando a tampa vai
arrancar o ciclo de secagem do óleo do motor
que tem uma duração de 15 minutos.
Durante o ciclo visualiza-se “do” a piscar e o
tempo (em minutos) que falta para terminar o
ciclo.
CORTE DA BOLSA
As barras que incluem o fio para o corte da
bolsa são fornecidas como kits.
A instalação efectua-se substituindo a barra de
soldadura pela barra que contém o fio de corte
e mudando a ligação de um dos cabos no
transformador de soldadura para a corrente que
se indica no esquema eléctrico:
Para realizar o corte da bolsa, basta programar
o tempo adequado de soldadura na placa de
controlo. Soldada a bolsa, rasga-se
manualmente pela linha marcada pelo fio de
corte.
UTILIZAÇÃO E MANUTENÇÃO
Muito importante:
- Não embalar produtos quentes visto que
exalam vapor que danifica a bomba de
Soldadura: 3,5 s
Vácuo: 99 %
Ar progressivo: 0 s
Gás: 0 %
Soldadura: 3 s
Vácuo: 99 % 99+: 0 seg
PROGRAMA 4
Ar progressivo: 8 s
99+: 6 seg Gás: 20 %
Programa
Stop - Avance ciclo
Gas
Gas On/Off
Soldadura
Descompresión progresiva
23
PT
Page 24

vácuo.
- NUNCA embalar produtos usando gás com
um conteúdo em oxigénio superior a 20%
sem antes consultar o seu fornecedor ou
serviço reconhecido pela SAMMIC. Isto
poderá causar explosões fatais.
Embalamento de líquidos:
Para o embalamento de líquidos, deve-se usar o
acessório que mantém o saco com uma
inclinação para evitar a saída do líquido. Se
aparecerem bolhas durante o embalamento,
alcançaram o ponto de saturação e deve-se
premir a tecla de STOP, para evitar que o líquido
estrague o óleo. O ponto de saturação é
semelhante ao ponto de evaporação-ebulição
que se produz a diferentes temperaturas em
função da pressão.
O ponto de saturação é alcançado antes quanto
mais alta for a temperatura do líquido durante o
processo de vácuo. Recomenda-se arrefecer o
líquido primeiramente antes de o embalar para
obter o ótimo vácuo do produto.
Indica-se uma tabela do ponto de saturação da
água com a relação entre a temperatura e a
pressão.
- É importante limpar diariamente o interior e as
beiras da câmara assim como a junta de fecho.
- O exterior da máquina não deve ser limpo com
jacto directo de água. Limpar com um pano
húmido e qualquer detergente habitual. Nunca
limpar a tampa com álcool, dissolventes ou
produtos limpa-vidros porque pode afectar as
propriedades mecânicas do material e
provocar a sua ruptura. Se detectar alguma
fissura na tampa, não continuar a trabalhar
com a máquina e avisar o serviço técnico
autorizado visto que existe perigo de ruptura
da tampa.
- Se o cabo de alimentação se deteriorar,
proceder à sua substituição que só deverá ser
feita por um serviço técnico reconhecido por
SAMMIC.
- Antes de efectuar qualquer operação de
limpeza, revisão ou reparação da máquina, é
obrigatório desligar a máquina da corrente
eléctrica.
- O nível de ruído da máquina em
funcionamento, colocada a 1.6 m de altura e a
1 m de distância, é de 75 dß (A). Ruído de
fundo: 32 dß (A).
Mudança de óleo
É necessário controlar semanalmente o nível de
óleo que deve cobrir 3/4 do indicador visual.
Encher se necessário.
O óleo deve ser mudado após as primeiras 100
horas de funcionamento. Posteriormente mudar
o óleo:
• Modelos de mesa; Número de modelo 2: 150
horas
• Modelos de pé; Bomba funcionamento
intermitente, Número de modelo 1: 300 horas
• Modelos de pé; Bomba funcionamento
contínuo, Número de modelo 0: 300 horas
Quando a bomba tiver trabalhado as horas
indicadas, ao ligar a máquina o visor apresenta
“oil” e fica a piscar durante 10 s para avisar que
tem de substituir o óleo.
Também se deve mudar o óleo se notar que
está emulsionado. Pode-se visualizar a
quantidade de horas de trabalho acumuladas ao
acender a máquina ou mantendo premida a
tecla “diminuir” durante 3 s. Para proceder à
mudança de óleo, soltar o tampão de
escoamento e deixar sair o óleo usado. Para
encher, seguir as instruções dadas na secção
correspondente.
Nas bombas de 40 m³/h e superiores deve-se
mudar simultaneamente o filtro de óleo. Este
filtro é do tipo que se usa nos automóveis
conforme a referência: AWS2, rosca 3/4.
O filtro do escape deve ser substituído por cada
4 mudanças de óleo ou quando se detectar
perdas de óleo ou vapor de óleo no escape.
RESET HORAS BOMBA
Uma vez substituído o óleo tem de repor as
horas de funcionamento, para isso
tem de realizar a seguinte
sequência:
Com a tampa aberta, visualizando
as duas riscas centrais e premindo a
tecla “diminuir” durante 3 s, vai
aparecer no visor “oil” a piscar e o nº
de horas do motor.
Se premir a tecla “Stop” durante 3 s
o nº fica a zero.
Aguarde 10 s e prima “aumentar”, “diminuir” ou
“Stop” para sair de RESET HORAS BOMBA.
MUDANÇA DE CONFIGURAÇÃO E TESTE DE
FUNÇÕES
Há três configurações para a placa electrónica
dependendo da máquina em que está
montada.O número aparece, ao acender a
máquina, durante 2 seg. no visor 1
Modelos equipados com sistema de injeção
de Gás:
Configuração "0": Máquinas de pé e
funcionamento contínuo. (SV-604, SV-606, SV806, SV-810 e SV-6000). A bomba está a
funcionar desde o momento em que foi
accionado o interruptor geral. Esta configuração
foi pensada para as máquinas que estão
instaladas em lugares frios ou câmaras
frigoríficas. Quando a bomba estiver a funcionar
continuamente, a máquina mantém-se quente
assegurando o seu bom funcionamento.
Configuração "1": Máquinas de pé e
funcionamento intermitente. (SV-604, SV-606,
SV-806 e SV-6000). A bomba está a funcionar
durante a fase de vácuo e soldadura.
Configuração "2": Máquinas de mesa e
funcionamento intermitente. (SV-310, SV-410,
SV-420 e SV-520). A bomba está a funcionar
durante a fase de vácuo.
Modelos sem sistema de injeção de Gás:
Com o mesmo modo de funcionamento da
bomba que os anteriores, configuram-se os
mesmos modelos mas sim sistema de injeção
de Gás
Configuração “3”: SV-600, SV-800, SV-6000
Configuração “4”: SV-600, SV-800, SV-6000
Configuração “5”: SV-300, SV-400, SV-500
Paragem automática da bomba:
Nos modelos com funcionamento contínuo da
bomba, se a máquina NÃO se utilizar durante
10 min, a bomba para automaticamente. Isto
impede um sobreaquecimento do óleo, e reduz
a quantidade de óleo depositada nos filtros de
expulsão, além de poupar energia. Fechando a
tampa, a bomba e o ciclo arrancam
simultaneamente.
Para mudar a configuração da máquina, seguir
os seguintes passos:
1- Desmontar o painel de comandos.
2- Accionar o interruptor geral.
3- Localizar na placa electrónica duas palhetas
situadas ao lado da palavra TEST e provocarlhes um curto-circuito com uma chave de
parafusos ou algo similar. Nesse momento
começará o teste: a placa electrónica acciona
durante 1 s cada uma das saídas (Motor,
Electroválvula de vácuo, Electroválvula de
soldadura, etc.) acendendo-se por sua vez o
LED correspondente na placa. Ao lado de
cada LED surge um texto que identifica o
componente que acciona em cada momento.
4- Uma vez concluída a sequência do teste,
aparece no visor a configuração da máquina.
5- Premir a tecla “Prog”.
6- Para mudar a configuração, premir a tecla
Aumentar ou a tecla Diminuir até que surja a
configuração desejada no visor.
7- Premir Prog para memorizar a configuração:
apaga-se o respectivo LED.
8- Para sair do modo test e memorizar a nova
configuração deve-se apagar a máquina. Se
fechar a tampa sem ter saído do modo test, a
máquina não entrará em funcionamento. Se
se voltou a marcar as horas de
funcionamento, comprovar o novo valor no
visor ao ligar novamente a máquina.
Se a máquina apresentar alguma avaria, a placa
electrónica dispõe de um sistema para testar as
diferentes funções:
Seguir os passos 1, 2 e 3 da enumeração
anterior. Se durante o teste algum dos
componentes não for accionado, actuar da
seguinte maneira:
- Verificar se o componente está bem ligado e
com corrente. Se o componente continuar a
falhar, substituí-lo por um novo.
- Se a corrente não chega ao componente, testar
a tensão à saída da placa quando o LED
correspondente se encontra aceso. Se não
houver corrente, substituir então a placa
electrónica.
OBSERVAÇÕES:
Estando a máquina no ciclo de vácuo se o
sensor detetar que a pressão de vácuo não
chega à referência programada, após um tempo
de espera, o ciclo para passando à
descompressão.
Se, ao fazer a descompressão a tampa não se
abrir, depois de um tempo a eletroválvula de
descompressão desliga-se para evitar danos na
24
PT
Pressão
vácuo (mbar)
1000 100 50 31,36 20 10 6,09 5 2
Pressão
vácuo (%)
0 90,1 95 96,87 98 99 99,4 99,5 99,8
Temp.
Evaporação
(°C)
100 45 33 25 18 7 0 -2 -13
Page 25

mesma ou na placa eletrónica
Outras indicações importantes:
- Este aparelho não se destina a ser utilizado
por pessoas (incluindo crianças) cujas
capacidades físicas, sensoriais ou mentais são
diminuídas, ou que têm falta de experiência
ou conhecimentos, excepto sob supervisão,
ou após receberem instruções sobre a
utilização do aparelho, por uma pessoa
responsável pela sua segurança.
As crianças devem ser supervisionadas para
garantir que não brincam com o aparelho.
O vácuo é um sistema de conservação natural
que consiste na extracção de ar do interior da
bolsa eliminando o oxigénio, principal
responsável pelo deterioro dos alimentos.
Vantagens da embalagem em vácuo
1-Reduz ao máximo a perda de qualidade dos
produtos.
2-Rentabiliza as horas do pessoal ao
aproveitar eventuais tempos mortos ao
longo da semana, para adiantar o trabalho e
aligeirar o fluxo de trabalho das cozinhas.
3-Racionaliza o armazenamento dos produtos
nas câmaras:
-Não há mistura de cheiros.
-Os produtos são apresentados etiquetados
o que permite a rotação de matériasprimas.
-Melhora o controle dos stocks já que se
pode calcular com precisão as compras
necessárias para cada momento.
4-Aproveitamento dos melhores dias para a
compra:
-Permite comprar quando os preços são
melhores.
-Reduz-se a número de deslocações.
5-Reduz a lavagem de utensílios.
Embalagem de produtos curados (enchidos,
presuntos, etc)
Tratado-se por si só de produtos com uma
vida prolongada, a embalagem em vácuo
duplica, no mínimo, a vida destes produtos
evitando que se ressequem e que percam
peso com o prejuício económico que tal
implica. Estes produtos não necessitam ser
embalados com gás, excepto alguns produtos
de textura frágil.
Embalagem de produtos cozinhados
Refere-se a produtos como os assados,
estofados, canelones, etc. Uma vez
cozinhados é indispensável arrefecer esses
alimentos de +65ºC a +10ºC em menos de
duas horas no centro do produto para impedir
o desenvolvimento de microorganismos.
Este é o método más prático para manter a
cozinha tradicional com as seguintes
vantagens:
-Facilitar o trabalho nas preparações sem
necessidade de correr riscos de perda de
qualidade do produto.
-Alongar a vida do produto.
Cozedura de produtos embalados
Consiste em colocar um alimento dentro de
uma embalagem estanque e termoresistente.
Extrair o ar do seu interior, selar e submeter à
acção de uma fonte de calor para cozinhar o
alimento. A cozedura realiza-se a baixa
temperatura (entre 65ºC e 100ºC) conseguindo
um efeito de pasteurização. Este sistema tem
muitas vantagens:
-Preserva as qualidades nutricionais.
-Preserva as condições higiénicas ao diminuir
a manipulação.
-Reduz as perdas de peso na cozedura ao
evitar a evaporação e a dessecação.
-Racionaliza a planificação do trabalho:
preparação e cozedura fora do período de
serviço, antecipação da preparação de
banquetes, etc.
-Prolonga o tempo de conservação.
Após a cozedura do produto, este deve ser
arrefecido rapidamente para deter o processo
de cozedura e impedir o desenvolvimento de
microorganismos. Este processo é levado a
cabo mediante um redutor de temperatura.
Pratos refrigerados: Deve-se reduzir a
temperatura de +65ºC a +10ºC em menos de
2 horas no interior do produto.
Pratos congelados: Deve-se reduzir a
temperatura de +65ºC a -18ºC em menos de
4,5 horas no interior do produto.
O posterior armazenamento deve manter-se a
uma temperatura entre 0ºC a 3ºC para os
pratos refrigerados e -18ºC para os pratos
congelados.
Para pôr os alimentos em condições de serem
degustados, o processo de recuperação do
produto deve processar-se de forma imediata
depois de retirado do refrigerador no qual foi
armazenado. Basicamente são três as técnicas
de regeneração: o forno a vapor a baixa pressão,
banho- maria e o forno microondas. Nos dois
primeiros casos, a regeneração do produto fazse com o material dentro da própria embalagem
enquanto que no caso do microondas é
necessário perfurar a bolsa para que o vapor
possa escapar sem que a embalagem rebente ou
então retirar totalmente o produto da
embalagem.
Se um produto regenerado não chegar a ser
consumido, não pode voltar a ser embalado
devendo desfazer-se dele.
O tempo de armazenamento dos pratos
refrigerados não deve exceder os 6-21 dias.
Embalado sob atmosfera protectora
Consiste na substituição do ar que rodeia o
alimento na embalagem, com uma mistura de
gases em proporção diferente à do ar, com
dois objectivos:
-Prolongar a vida do produto sem recorrer a
aditivos nem conservantes, inibindo os
processos de deterioro que ocorrem durante
o armazenamento.
-Evitar o esmagamento de produtos tais
como bolos, saladas, etc.
Utiliza-se principalmente três gases: 02, CO2
e N2 ou misturas entre eles. Como ideia geral
pode considerar-se que uma maior
concentração de CO2 (controlada) alargará a
vida do produto enquanto que uma certa
quantidade de N2 evitará a ruptura da
embalagem nos produtos com alto nível
metabólico e uma pequena proporção de O2
garante o bom estado e a presença de alguns
alimentos.
Recomenda-se consultar os fabricantes
especialistas em gases para alimentação para
pedir aconselhamento sobre a combinação de
gases adequada para cada produto.
Congelação de produtos embalados em
vácuo
As técnicas de congelação tradicionais
conservam o produto mas não a qualidade. A
congelação de produtos embalados em vácuo
tem muitas vantagens:
-Não se queimam exteriormente
-Não há cristalização superficial
-Não há perda de sabor nem de cheiro
-Não há dessecação
-Não há oxidação de gorduras
25
PT
NOÇÕES BÁSICAS SOBRE A EMBALAGEM EM VÁCUO
Page 26

SV-310
SV-410
26
Page 27

SV-420
SV-520
448
27
Page 28

SV-604/606
SV-806/810
28
Page 29

SV-6000
29
Page 30

30
SPECIFICATIONS
VACUUM PUMP
SEALING TYPE
SEALING STRIP USABLE LENGTH
ELECTRICAL SUPPLY
PUMP LOADING
VACUUM PRESSURE (MAXIMUM)
CHAMBER DIMENSIONS
- Width
- Depth
- Height
E
XTERNAL DIMENSIONS
- Width
- Depth
- Height
N
ET WEIGHT
CARACTERISTICAS
CAPACIDAD BOMBA
TIPO SOLDADURA
LONGITUD BARRA SOLDADURA ÚTIL
ALIMENTACIÓN ELÉCTRICA
POTENCIA BOMBA
PRESIÓN VACÍO (MÁXIMA)
D
IMENSIONES DE LA CÁMARA
Ancho
Fondo
Alto
D
IMENSIONES EXTERIORES
Ancho
Fondo
Alto
P
ESO NETO
SV-310
Busch
10 m3/h
Simple/Single
314 mm
370 W
2 hPa (mbar)
330 mm
360 mm
140 mm
384 mm
455 mm
405 mm
34 kg
SV-410
Busch 10 m3/h
Doble/Double
414 mm
370 W
2
hPa (mbar)
430 mm
415 mm
145 mm
500 mm
500 mm
413 mm
64 kg
SV-420
230 V / 50-60 Hz / 1
~
SPECIFICATIONS
VACUUM PUMP
SEALING TYPE
SEALING STRIP USABLE LENGTH
ELECTRICAL SUPPLY
PUMP LOADING
VACUUM PRESSURE (MAXIMUM)
CHAMBER DIMENSIONS
- Width
- Depth
- Height
E
XTERNAL DIMENSIONS
- Width
- Depth
- Height
N
ET WEIGHT
CARACTERISTICAS
CAPACIDAD BOMBA
TIPO SOLDADURA
LONGITUD BARRA SOLDADURA ÚTIL
ALIMENTACIÓN ELÉCTRICA
POTENCIA BOMBA
PRESIÓN VACÍO (MÁXIMA)
D
IMENSIONES DE LA CÁMARA
Ancho
Fondo
Alto
D
IMENSIONES EXTERIORES
Ancho
Fondo
Alto
P
ESO NETO
SV-806 / 810
Busch 63 / 100 m3/h
Doble/Double
842+524 mm
1.500/2.200 W
0.5
hPa (mbar)
864 mm
603 mm
210 mm
990 mm
760 mm
995 mm
232 / 250 kg
SV-806LL / 810LL
Busch 63 / 100 m3/h
Doble/Double
842+842 mm
1.500/2.200W
0.5
hPa (mbar)
864 mm
603 mm
210 mm
990 mm
760 mm
995 mm
232 / 250 kg
SV-604 / 606
Busch 40 / 63 m3/h
Doble/Double
650+407 mm
1.100/1.500 W
0.5
hPa (mbar)
672 mm
481 mm
185 mm
740 mm
553 mm
1.035 mm
145 / 159kg
Busch 40 / 63 m
3
/h
Doble/Double
407+407 mm
1.100/1.500 W
0.5
hPa (mbar)
672 mm
481 mm
185 mm
740 mm
553 mm
1.035 mm
145 / 159kg
SV-604CC / 606CC
230 - 400 V / 50 Hz / 3N
~
Busch 20 m3/h
Doble/Double
414 mm
750 W
2
hPa (mbar)
430 mm
415 mm
180 mm
500 mm
500 mm
448 mm
70 kg
SV-520
Busch 20 m3/h
Doble/Double
414 mm
750 W
2
hPa (mbar)
560 mm
422 mm
180 mm
642 mm
481 mm
455 mm
80 kg
CARACTERISTIQUES
CAPACITÉ POMPE
SOUDURE
L
ONGUEUR DE SOUDURE UTILE
ALIMENTATION ÉLECTRIQUE
POMPE PUISSANCE
PRESSION VIDE (MAX.)
D
IMENSIONS DE LA CHAMBRE
- Largeur
- Profondeur
- Hauteur
D
IMENSIONS EXTÉRIEURES
- Largeur
- Profondeur
- Hauteur
P
OIDS NET
EIGENSCHAFTEN
VAKUUMPUMPE
VERSCHWEIßUNG
NÜTZLICHE SCHWEIßSTABLÄNGE
ELEKTROANSCHLUß
PUMPENLEISTUNG
MAXIMALER DRUCK
KAMMERABMESSUGEN
- Breite
- Tiefe
- Höhe
A
UßENABMESSUGEN
- Breite
- Tiefe
- Höhe
N
ETTOGEWICHT
SV-310
Busch
10 m3/h
Einfach / Simple
314 mm
370 W
2 hPa (mbar)
330 mm
360 mm
140 mm
384 mm
455 mm
405 mm
34 kg
SV-410
Busch 10 m3/h
Doppelt / Double
414 mm
370 W
2
hPa (mbar)
430 mm
415 mm
145 mm
500 mm
500 mm
413 mm
64 kg
SV-420
230 V / 50-60 Hz / 1
~
CARACTERISTIQUES
CAPACITÉ POMPE
SOUDURE
LONGUEUR DE SOUDURE UTILE
ALIMENTATION ÉLECTRIQUE
POMPE PUISSANCE
PRESSION
DIMENSIONS DE LA CHAMBRE
- Largeur
- Profondeur
- Hauteur
D
IMENSIONS EXTÉRIEURES
- Largeur
- Profondeur
- Hauteur
P
OIDS NET
EIGENSCHAFTEN
VAKUUMPUMPE
VERSCHWEIßUNG
NÜTZLICHE SCHWEIßSTABLÄNGE
ELEKTROANSCHLUß
PUMPENLEISTUNG
MAXIMALER DRUCK
KAMMERABMESSUGEN
- Breite
- Tiefe
- Höhe
A
UßENABMESSUGEN
- Breite
- Tiefe
- Höhe
N
ETTOGEWICHT
SV-806 / 810
Busch 63 / 100 m3/h
Doppelt / Double
842+524 mm
1.500/2.200 W
0.5
hPa (mbar)
864 mm
603 mm
210 mm
990 mm
760 mm
995 mm
232 / 250 kg
SV-806LL / 810LL
Busch 63 / 100 m3/h
Doppelt / Double
842+842 mm
1.500/2.200W
0.5
hPa (mbar)
864 mm
603 mm
210 mm
990 mm
760 mm
995 mm
232 / 250 kg
SV-604 / 606
Busch 40 / 63 m3/h
Doppelt / Double
650+407 mm
1.100/1.500 W
0.5
hPa (mbar)
672 mm
481 mm
185 mm
740 mm
553 mm
1.035 mm
145 / 159kg
Busch 40 / 63 m
3
/h
Doppelt / Double
407+407 mm
1.100/1.500 W
0.5
hPa (mbar)
672 mm
481 mm
185 mm
740 mm
553 mm
1.035 mm
145 / 159kg
SV-604CC / 606CC
230 - 400 V / 50 Hz / 3N
~
Busch 20 m3/h
Doppelt / Double
414 mm
750 W
2
hPa (mbar)
430 mm
415 mm
180 mm
500 mm
500 mm
448 mm
70 kg
SV-520
Busch 20 m3/h
Doppelt / Double
414 mm
750 W
2
hPa (mbar)
560 mm
422 mm
180 mm
642 mm
481 mm
455 mm
80 kg
Page 31

CARACTERÍSTICAS
CAPACIDADE BOMBA
TIPO SODADURA
COMPRIMENTO BARRA SOLDADURA ÚTIL
ALIMENTAÇÃO ELÉCTRICA
POTÊNCIA BOMBA
PRESSÃO VÁCUO (MÁXIMA)
D
IMENSÕES DA CÂMARA
- Largura
- Fundo
- Altura
D
IMENSÕES EXTERIORES
- Largura
- Fundo
- Altura
P
ESO LÍQUIDO
CARATTERISTICHE
CAPACITÁ POMPA
TIPO DI SALDATURA
LUNGHEZZA UTILE BARRA DI SALDATURA
ALIMENTAZIONE ELETTRICA
POTENZA POMPA
PRESSIONE VUOTO
DIMENSIONI CAMERA
- Larghezza
- Profondità
- Altezza
D
IMENSIONI ESTERNE
- Larghezza
- Profondità
- Altezza
P
ESO NETTO
SV-310
Busch
10 m3/h
Semplice / Simples
314 mm
370 W
2 hPa (mbar)
330 mm
360 mm
140 mm
384 mm
455 mm
405 mm
34 kg
SV-410
Busch 10 m3/h
Doppio / Duplo
414 mm
370 W
2
hPa (mbar)
430 mm
415 mm
145 mm
500 mm
500 mm
413 mm
64 kg
SV-420
230 V / 50-60 Hz / 1
~
CARACTERÍSTICAS
CAPACIDADE BOMBA
TIPO SODADURA
COMPRIMENTO BARRA SOLDADURA ÚTIL
ALIMENTAÇÃO ELÉCTRICA
POTÊNCIA POMPA
PRESSÃO VÁCUO (MÁXIMA)
D
IMENSÕES DA CÂMARA
- Largura
- Fundo
- Altura
D
IMENSÕES EXTERIORES
- Largura
- Fundo
- Altura
P
ESO LÍQUIDO
CARATTERISTICHE
CAPACITÁ POMPA
TIPO DI SALDATURA
LUNGHEZZA UTILE BARRA DI SALDATURA
ALIMENTAZIONE ELETTRICA
POTENZA POMPA
PRESSIONE VUOTO
DIMENSIONI CAMERA
- Larghezza
- Profondità
- Altezza
D
IMENSIONI ESTERNE
- Larghezza
- Profondità
- Altezza
P
ESO NETTO
SV-806 / 810
Busch 63 / 100 m3/h
Doppio / Duplo
842+524 mm
1.500/2.200 W
0.5
hPa (mbar)
864 mm
603 mm
210 mm
990 mm
760 mm
995 mm
232 / 250 kg
SV-806LL / 810LL
Busch 63 / 100 m3/h
Doppio / Duplo
842+842 mm
1.500/2.200W
0.5
hPa (mbar)
864 mm
603 mm
210 mm
990 mm
760 mm
995 mm
232 / 250 kg
SV-604 / 606
Busch 40 / 63 m3/h
Doppio / Duplo
650+407 mm
1.100/1.500 W
0.5
hPa (mbar)
672 mm
481 mm
185 mm
740 mm
553 mm
1.035 mm
145 / 159kg
Busch 40 / 63 m
3
/h
Doppio / Duplo
407+407 mm
1.100/1.500 W
0.5
hPa (mbar)
672 mm
481 mm
185 mm
740 mm
553 mm
1.035 mm
145 / 159kg
SV-604CC / 606CC
230 - 400 V / 50 Hz / 3N
~
Busch 20 m3/h
Doppio / Duplo
414 mm
750 W
2
hPa (mbar)
430 mm
415 mm
180 mm
500 mm
500 mm
448 mm
70 kg
SV-520
Busch 20 m3/h
Doppio / Duplo
414 mm
750 W
2
hPa (mbar)
560 mm
422 mm
180 mm
642 mm
481 mm
455 mm
80 kg
31
SPECIFICATIONS
VACUUM PUMP
SEALING TYPE
SEALING STRIP USABLE LENGTH
ELECTRICAL SUPPLY
PUMP LOADING
VACUUM PRESSURE (MAXIMUM)
CHAMBER DIMENSIONS
- Width
- Depth
- Height
E
XTERNAL DIMENSIONS
- Width
- Depth
- Height
N
ET WEIGHT
EIGENSCHAFTEN
VAKUUMPUMPE
VERSCHWEIßUNG
NÜTZLICHE SCHWEIßSTABLÄNGE
ELEKTROANSCHLUß
PUMPENLEISTUNG
MAXIMALER DRUCK
KAMMERABMESSUGEN
- Breite
- Tiefe
- Höhe
A
UßENABMESSUGEN
- Breite
- Tiefe
- Höhe
N
ETTOGEWICHT
CARACTERISTICAS
CAPACIDAD BOMBA
TIPO SOLDADURA
LONGITUD BARRA SOLDADURA ÚTIL
ALIMENTACIÓN ELÉCTRICA
POTENCIA BOMBA
PRESIÓN VACÍO (MÁXIMA)
D
IMENSIONES DE LA CÁMARA
Ancho
Fondo
Alto
D
IMENSIONES EXTERIORES
Ancho
Fondo
Alto
P
ESO NETO
SV-6100
Busch 100 m3/h
Doble/Double/Doppelt
662+662 mm
2.2 kW
0.5
hPa (mbar)
662 mm
656 mm
205 mm
1640 mm
874 mm
1370 mm
360 kg
SV-6160
Busch 155 m3/h
Doble/Double/Doppelt
662+662 mm
4 kW
0.5
hPa (mbar)
662 mm
656 mm
205 mm
1640 mm
874 mm
1370 mm
360 kg
230V / 50Hz / 3
~
400V / 50Hz / 3N
~
CARATTERISTICHE
VACUUM PUMP
SEALING TYPE
SEALING STRIP USABLE LENGTH
ELECTRICAL SUPPLY
PUMP LOADING
VACUUM PRESSURE (MAXIMUM)
CHAMBER DIMENSIONS
- Width
- Depth
- Height
E
XTERNAL DIMENSIONS
- Width
- Depth
- Height
N
ET WEIGHT
CARACTERÍSTICAS
VAKUUMPUMPE
VERSCHWEIßUNG
NÜTZLICHE SCHWEIßSTABLÄNGE
ELEKTROANSCHLUß
PUMPENLEISTUNG
MAXIMALER DRUCK
KAMMERABMESSUGEN
- Breite
- Tiefe
- Höhe
A
UßENABMESSUGEN
- Breite
- Tiefe
- Höhe
N
ETTOGEWICHT
CARACTERISTIQUES
CAPACIDAD BOMBA
TIPO SOLDADURA
LONGITUD BARRA SOLDADURA ÚTIL
ALIMENTACIÓN ELÉCTRICA
POTENCIA BOMBA
PRESIÓN VACÍO (MÁXIMA)
D
IMENSIONES DE LA CÁMARA
Ancho
Fondo
Alto
D
IMENSIONES EXTERIORES
Ancho
Fondo
Alto
P
ESO NETO
SV-6100
Busch 100 m3/h
Double/Doppio/Duplo
662+662 mm
2.2 kW
0.5
hPa (mbar)
662 mm
656 mm
205 mm
1640 mm
874 mm
1370 mm
360 kg
SV-6160
Busch 155 m3/h
Double/Doppio/Duplo
662+662 mm
4 kW
0.5
hPa (mbar)
662 mm
656 mm
205 mm
1640 mm
874 mm
1370 mm
360 kg
230V / 50Hz / 3
~
400V / 50Hz / 3N
~
Page 32

ER-0437/1/96
UNE-EN ISO 9001
SAMMIC, S.L. Basarte, 1 - 20720 AZKOITIA - www.sammic.com
03-14 - 2900201/2
 Loading...