

Page 1

065 001 057 460
GEBRUIKSAANWIJZING
LCD 1520TNBL-DVD
065001057460 15"LCDVD LOC1 HOLL 13/2/07 10:47 Page 1
Page 2

2
WAT TE DOEN VOOR VEILIGHEID VAN UW TV. . . . . . . . . . . . . . . . . . . . . . . . . . . . . . . . . . . . . . . . . . . . . . . . . . . . . . . .3
WELK GEDEELTE VAN UW TV VERRICHT WELKE FUNCTIE . . . . . . . . . . . . . . . . . . . . . . . . . . . . . . . . . . . . . . . . . . . . . .5
AFSTANDSBEDIENING . . . . . . . . . . . . . . . . . . . . . . . . . . . . . . . . . . . . . . . . . . . . . . . . . . . . . . . . . . . . . . . . . . . . . . . . . . . .6
AANSLUITING VAN DE ANTENNE . . . . . . . . . . . . . . . . . . . . . . . . . . . . . . . . . . . . . . . . . . . . . . . . . . . . . . . . . . . . . . . . . . .8
AANSLUITINGEN VAN DE VCR, DVD, COMPUTER EN SATELLIETDECODER . . . . . . . . . . . . . . . . . . . . . . . . . . . . . . . . .9
AUDIO/VIDEO-AANSLUITINGEN . . . . . . . . . . . . . . . . . . . . . . . . . . . . . . . . . . . . . . . . . . . . . . . . . . . . . . . . . . . . . . . . . . .10
TV-FUNCTIES . . . . . . . . . . . . . . . . . . . . . . . . . . . . . . . . . . . . . . . . . . . . . . . . . . . . . . . . . . . . . . . . . . . . . . . . . . . . . . . .11
INSTELLEN . . . . . . . . . . . . . . . . . . . . . . . . . . . . . . . . . . . . . . . . . . . . . . . . . . . . . . . . . . . . . . . . . . . . . . . . . . . . . . . . . . . .13
TV-FUNCTIES (MENU’S) . . . . . . . . . . . . . . . . . . . . . . . . . . . . . . . . . . . . . . . . . . . . . . . . . . . . . . . . . .15
VOLUMEREGELINGSMENU, EQUALIZER, HOOFDTELEFOON . . . . . . . . . . . . . . . . . . . . . . . . . . . . . . . . . . . . . . . . . . . .15
BEELDINSTELLINGSMENU, PROGRAMMATABEL . . . . . . . . . . . . . . . . . . . . . . . . . . . . . . . . . . . . . . . . . . . . . . . . . . . .15
INSTELLINGENMENU . . . . . . . . . . . . . . . . . . . . . . . . . . . . . . . . . . . . . . . . . . . . . . . . . . . . . . . . . . . . . . . . . . . . . . . . . . . .16
PROGRAMMA-INSTELLINGEN . . . . . . . . . . . . . . . . . . . . . . . . . . . . . . . . . . . . . . . . .. . . . . . . . . . . . . . . . . . . . . . . . . . . . .17
MODI VOOR EXTERN TOESTEL . . . . . . . . . . . . . . . . . . . . . . . . . . . . . . . . . . . . . . . . . . . . . . . . . . . . . . . . . . . . . . . . . . .18
TELETEKST . . . . . . . . . . . . . . . . . . . . . . . . . . . . . . . . . . . . . . . . . . . . . . . . . . . . . . . . . . . . . . . . . . . . . . . . . . . . . . . . . . . . .22
DVD-SPELER . . . . . . . . . . . . . . . . . . . . . . . . . . . . . . . . . . . . . . . . . . . . . . . . . . . . . . . . . . . . . . . . . . . . . . . . . . . . . . . . . . .24
AFSTANDSBEDIENING (DVD FUNCTIES) . . . . . . . . . . . . . . . . . . . . . . . . . . . . . . . . . . . . . . . . . . . . . . . . . . . . . . . . . . . . .25
WEERGAVE ZVAN CDS (DVD) . . . . . . . . . . . . . . . . . . . . . . . . . . . . . . . . . . . . . . . . . . . . . . . . . . . . . . . . . . . . . . . . . . . . .26
INSTELLINGEN DVD . . . . . . . . . . . . . . . . . . . . . . . . . . . . . . . . . . . . . . . . . . . . . . . . . . . . . . . . . . . . . . . . . . . . . . . . . . . . .27
BASIS FUNCTIES . . . . . . . . . . . . . . . . . . . . . . . . . . . . . . . . . . . . . . . . . . . . . . . . . . . . . . . . . . . . . . . . . . . . . . . . . . . . . . . .31
CD, MP3 CD . . . . . . . . . . . . . . . . . . . . . . . . . . . . . . . . . . . . . . . . . . . . . . . . . . . . . . . . . . . . . . . . . . . . . . . . . . . . . . . . . . .33
PROBLEMEN OPLOSSEN . . . . . . . . . . . . . . . . . . . . . . . . . . . . . . . . . . . . . . . . . . . . . . . . . . . . . . . . . . . . . . . . . . . . .34
TECHNISCHE KENMERKEN . . . . . . . . . . . . . . . . . . . . . . . . . . . . . . . . . . . . . . . . . . . . . . . . . . . . . . . . . . . . . . . . . . .35
INHOUD
065001057460 15"LCDVD LOC1 HOLL 13/2/07 10:47 Page 2
Page 3
WAT TE DOEN VOOR VEILIGHEID VAN UW TV.
3
VVOOEEDDIINNGG
U mag deze TV alleen aansluiten op een stopcontact van 230240V AC 50Hz.
VVOOEEDDIINNGGSSKKAABBEELL EENN AANNDDEERREE KKAABBEELLSS
Leg de voedingskabel en andere kabels zo dat er niet
gemakkelijk op gelopen kan worden, dat er geen voorwerpen
tegen of op kunnen geplaatst worden. Kijk vooral naar de
stopcontacten en de punten waar de kabels uit de TV komen.
VVOOCCHHTT EENN WWAATTEERR
Gebruik de TV niet op vochtige plekken. Het toestel mag niet
blootgesteld worden aan druppels of waterspatten aangezien dat
heel gevaarlijk kan zijn. Plaats geen voorwerpen gevuld met
water, zoals vazen, op het toestel.
WWEEGG VVAANN VVUUUURR
U mag geen hittebronnen zoals kandelaars in de buurt of op het
toestel plaatsen.
OONNDDEERRHHOOUUDD
Trek de TV altijd uit vooraleer u deze begint schoon te maken.
Gebruik geen vloeibare reinigingsmiddelen of spuitbussen.
Maak uw toestel schoon met een zachte schone doek.
BBAATTTTEERRIIJJEENN WWEEGGGGOOOOIIEENN
Neem de waarschuwingen voor het milieu in acht ivm het
weggooien van batterijen van een infrarood afstandsbediening.
Geef de batterijen af aan een erkend verdeelpunt en volg de
instructies die op de batterij geschreven staan.
VVEENNTTIILLAATTIIEE
De openingen en gaatjes in de TV dienen als verluchting.
Zorg ervoor dat er rondom de TV genoeg ruimte is voor
verluchting (minstens 10 cm).
Bedek deze openingen niet aangezien het toestel zo oververhit
kan raken.
VVEERRVVAANNGGSSTTUUKKKKEENN
De persoon die delan aan het toestel wil vervangen, moet
onderdelen gebruiken zoals gespecificeerd door de fabrikant, of
de onderdelen moeten dezelfde technische kenmerken hebben
als de originele stukken. Het gebruik van andere stukken kan
brand, elektrische schok of andere problemen veroorzaken.
SSEERRVVIICCEE
Enkel gekwalificeerd personeel mag herstellingen aan het TVtoeste uitvoeren. Kijk hiervoor bij het onderdeel service in de
handleiding die bij het toestel wordt meegeleverd. Verwijder de
behuizing nooit zelf aangezien er zich gevaarlijke spanningen in
het toestel bevinden en u zo een elektrische schok kan
ondervinden.
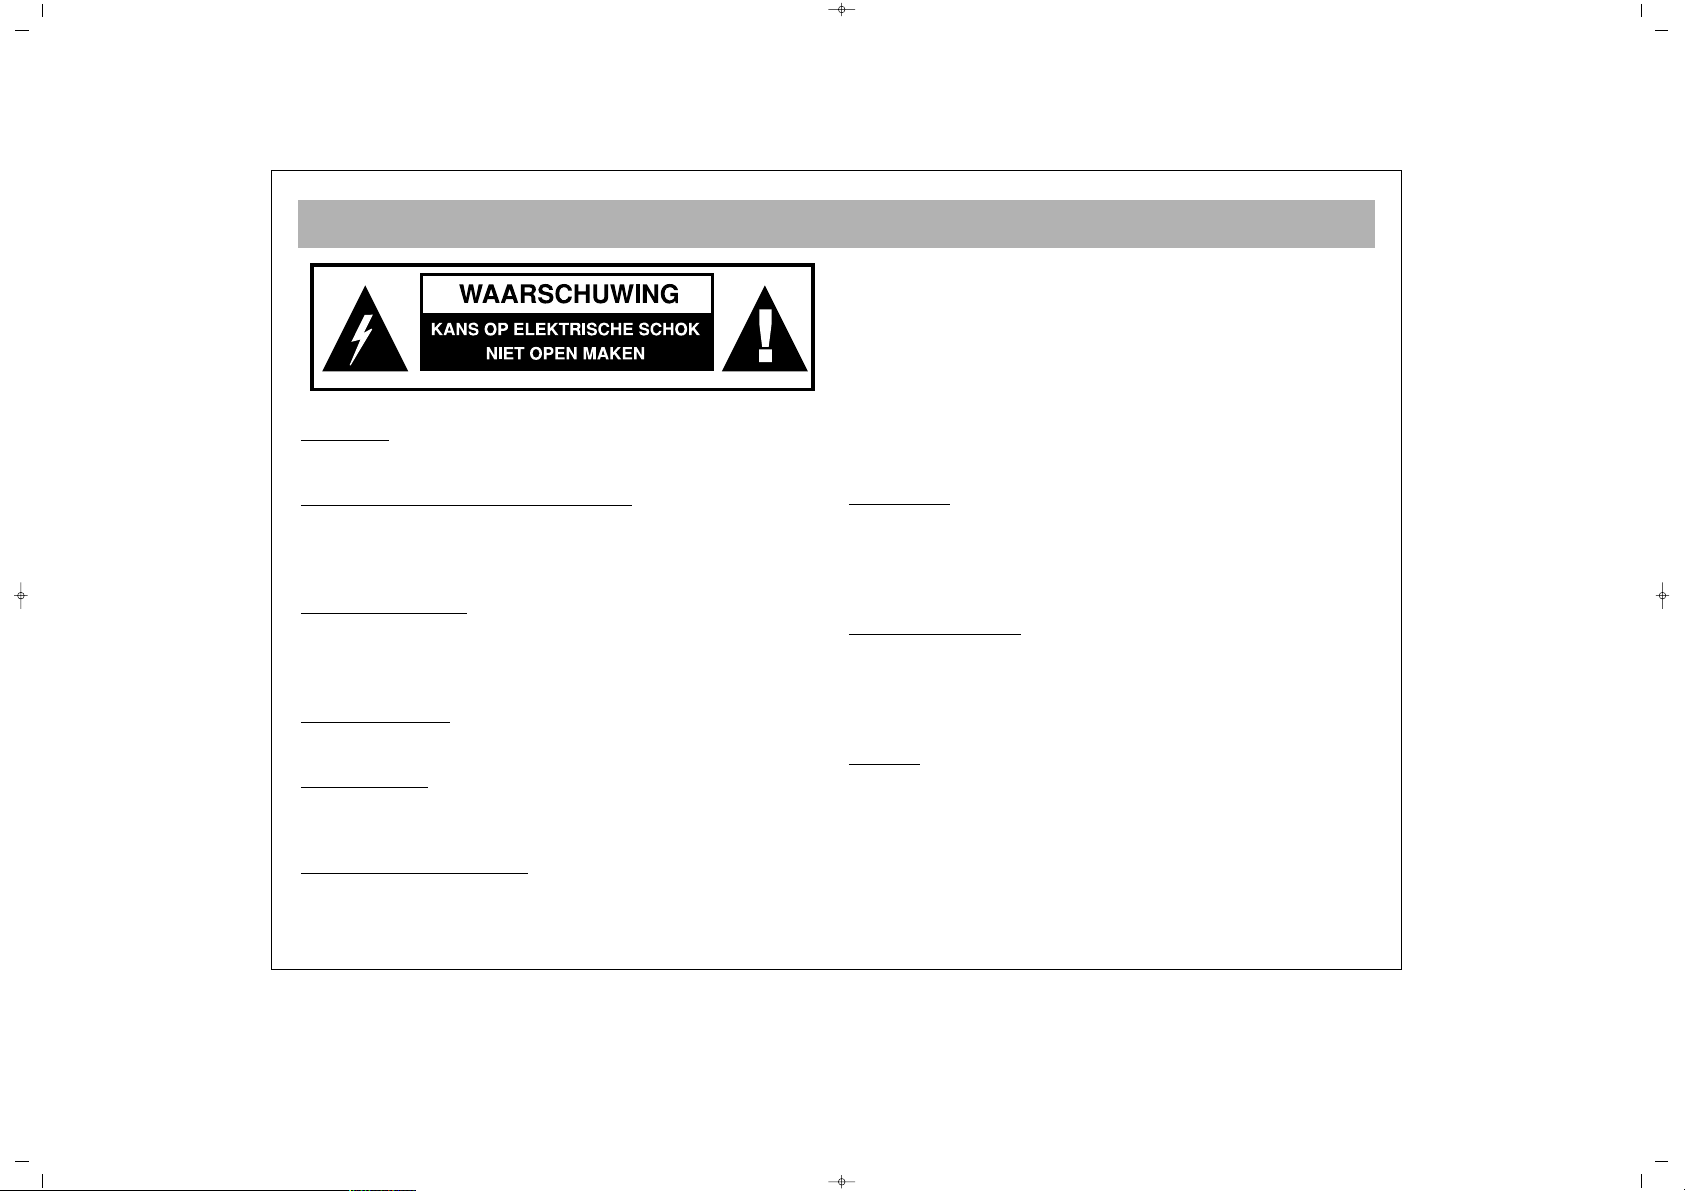
WWAAAARRSSCCHHUUWWIINNGG:: OOMM HHEETT RRIISSIICCOO VVAANN EELLEEKKTTRRIISSCCHHEE
SSCCHHOOKK TTEE VVEERRKKLLEEIINNEENN,, MMAAGG UU HHEETT DDEEKKSSEELL ((OOFF
AACCHHTTEERRPPAANNEEEELL)) NNIIEETT AAFFNNEEMMEENN.. GGEEEENN DDOOOORR GGEEBBRRUUIIKKEERR
ZZEELLFF HHEERRSSTTEELLBBAARREE OONNDDEERRDDEELLEENN AAAANNWWEEZZIIGG.. LLAAAATT
EEVVEENNTTUUEELLEE WWEERRKKZZAAAAMMHHEEDDEENN OOVVEERR AAAANN EERRVVAARREENN
VVAAKKMMEENNSSEENN..
065001057460 15"LCDVD LOC1 HOLL 13/2/07 10:47 Page 3
Page 4
VEILIGHEIDSINFORMATIE (vervolg)
4
BBLLIIKKSSEEMM
In geval van onweer moet u de stekker van het toestel uit het
stopcontact trekken.
Trek het toestel altijd uit als u op vakantie gaat.
AALLGGEEMMEEEENN
• Trek geen kabels uit en werk er ook niet aan als het toestel in
het stopcontact steekt.
• Laat je TV niet op een hete, koude of vochtige plaats staan.
• Batterijen in afstandsbedieningen kunnen lekken. Controleer
de batterijen regelmatig als ze reeds enige tijd niet meer werden
vervangen.
• Zorg ervoor dat niemand – vooral opgelet voor kinderen –
objecten in de openingen en ventilatiegaatjes duwt.
• Gebruik het toestel niet langer als u er een vloeistof over
gemorst hebt, als het beschadigd is of als het niet normaal werkt.
Koppel het toestel meteen los en vraag advies aan een expert.
• Dit product is enkel gemaakt voor huishoudelijk of
gelijkaardig gebruik. Als u het toestel niet volgens de
handleiding gebruikt, kan de garantie vervallen.
• Wij kunnen u met trots dit kwaliteitsproduct aanbieden. Om
de kwaliteit van dit toestel te kunnen garanderen mag het enkel
in een erkend servicecentrum hersteld worden.
""VVEERRPPAAKKTT VVAANN HHEETT GGEEBBRREEKK VVAANN TTEE WWIIJJTTEENN WWEERRKKIINNGG
AAAANN DDEE EELLEEKKTTRROOSSTTAATTIISSCCHHEE KKWWIIJJTTIINNGGEENN,, VVEERREEIISSTT
OOPPNNIIEEUUWW LLAANNCCEERREENN VVAANN DDVVDD--PPLLAAYYEERR..""
065001057460 15"LCDVD LOC1 HOLL 13/2/07 10:47 Page 4
Page 5
WELK GEDEELTE VAN UW TV VERRICHT WELKE FUNCTIE
5
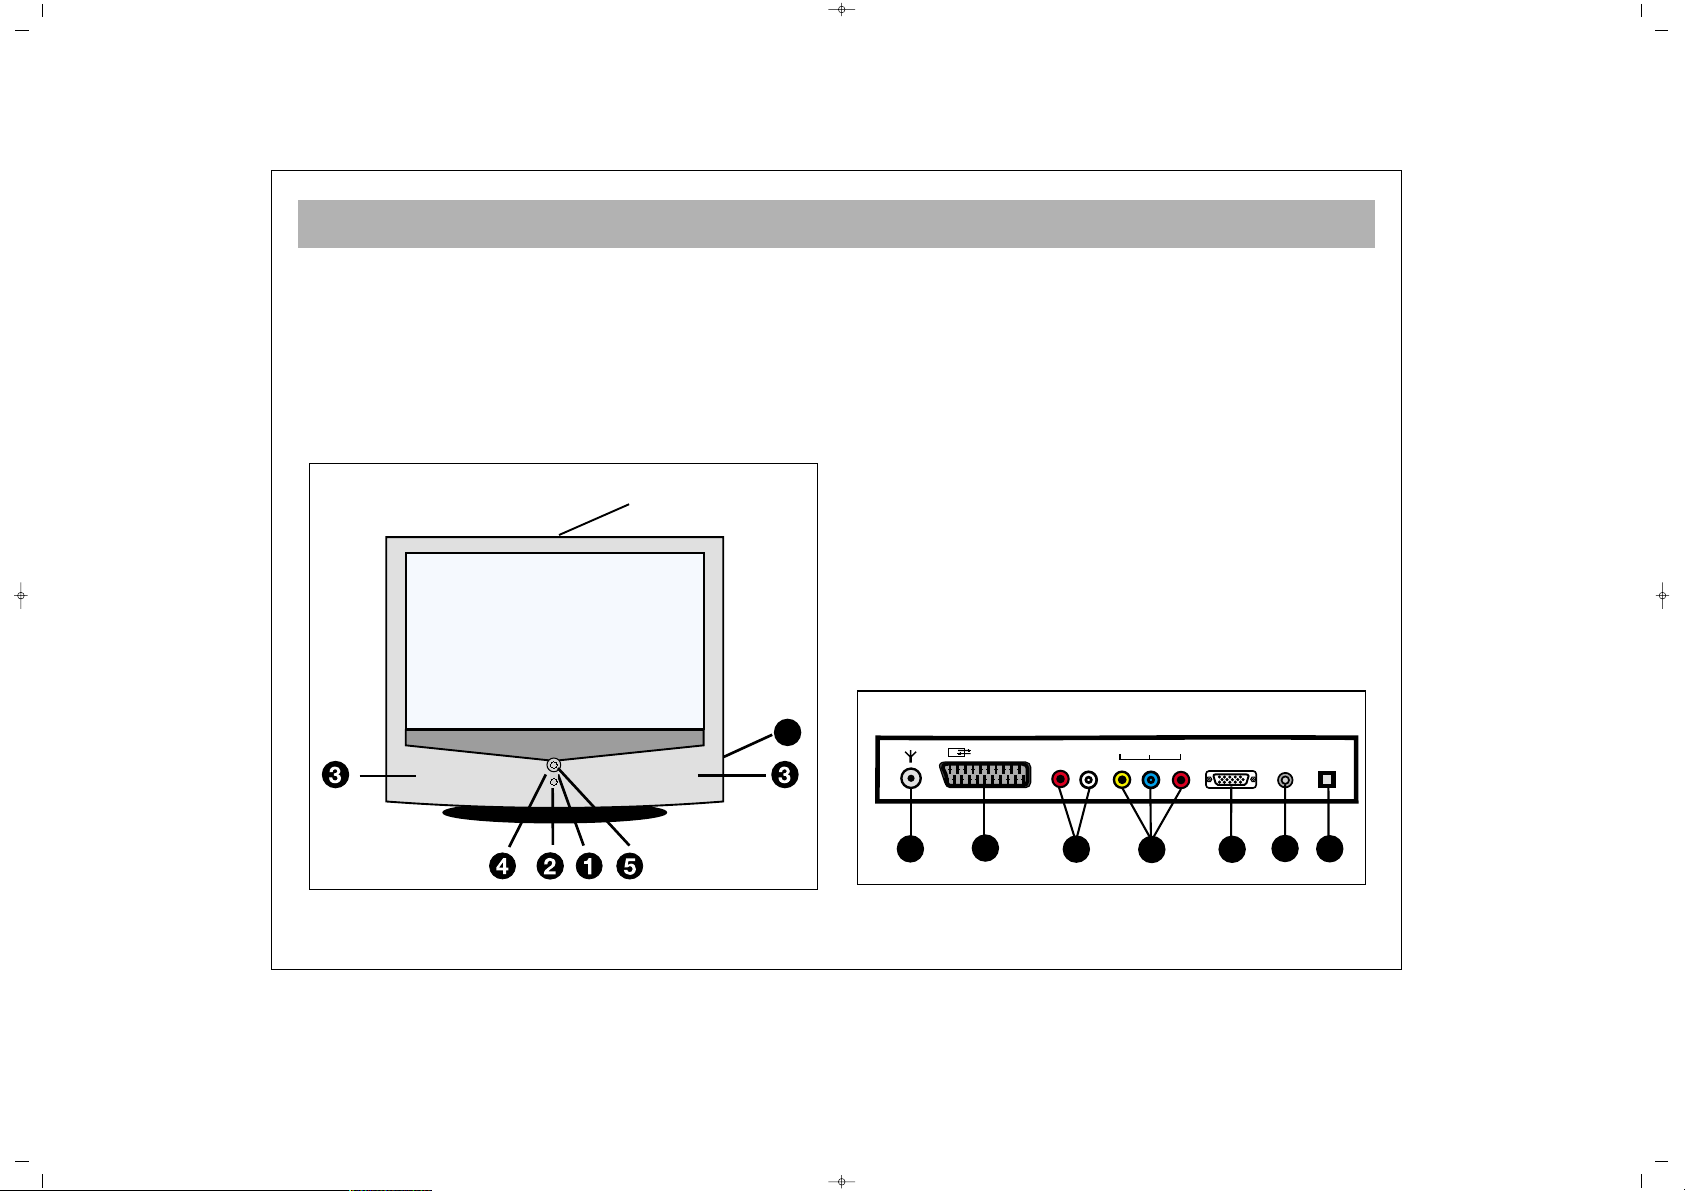
VVOOOORRKKAANNTT::
1 Standby toets
2 Sensor voor de afstandsbediening
3 Luidspreker(s)
4 P+ / – Programma op/neer-toetsen
5 V + / – Volume op/neer-toetsen
6 AV2- S-Video ingang-Hoofdtelefooningang
AACCHHTTEERRKKAANNTT::
7 Antenne-ingang
8 Scart-ingang (als u deze ingang gebruikt, kan u toestellen
zoals een computer, een decoder en een VCR op uw TV
aansluiten)
9 Component Audio-ingang (L+R)
10 Component YpbPr-ingang
11 PC-ingang
12 PC Audio-ingang
13 DC 12V-ingang
DC 12V
EURO AV
Y
PC INPUT
PC
AUDIO IN
8
10
11
12
13
RL
AUDIO IN
9
Pb Pr
IN
7
6
DDVVDD EEjjeecctt // DDVVDD TTrraayy
065001057460 15"LCDVD LOC1 HOLL 13/2/07 10:47 Page 5
Page 6
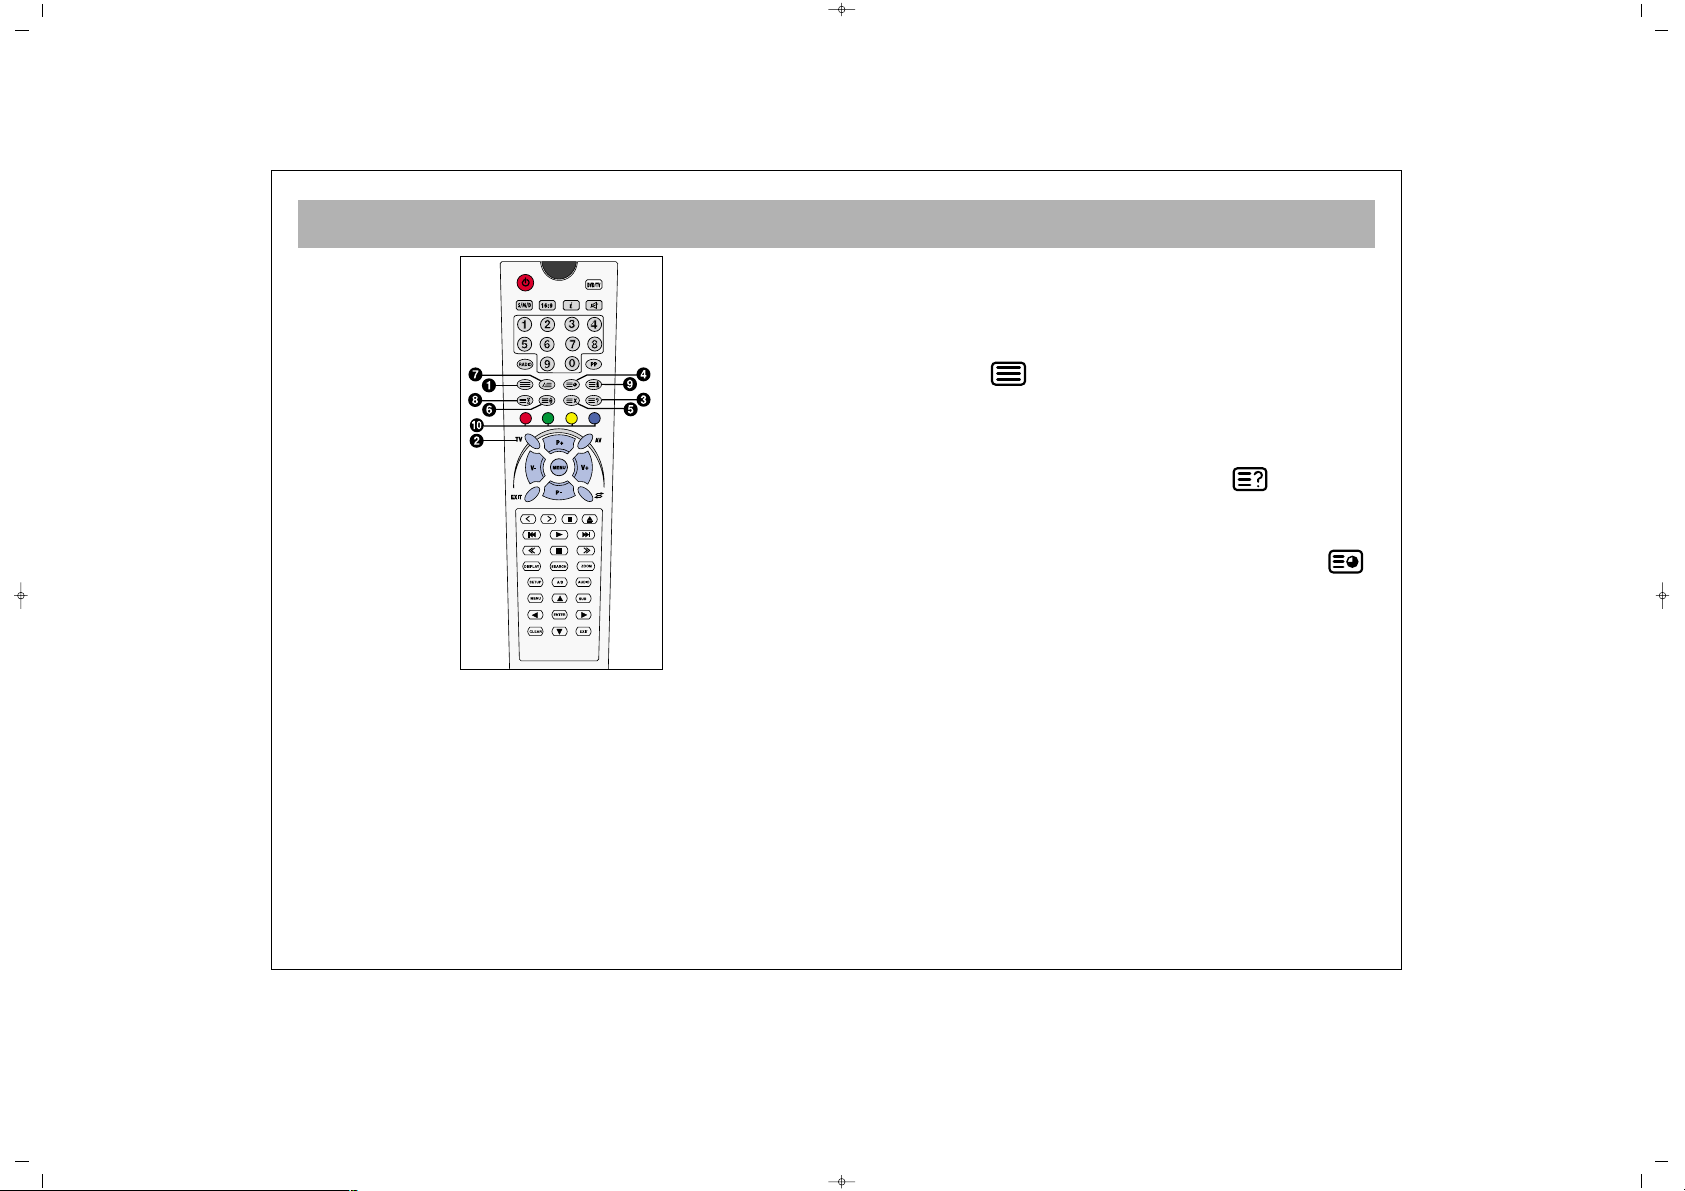
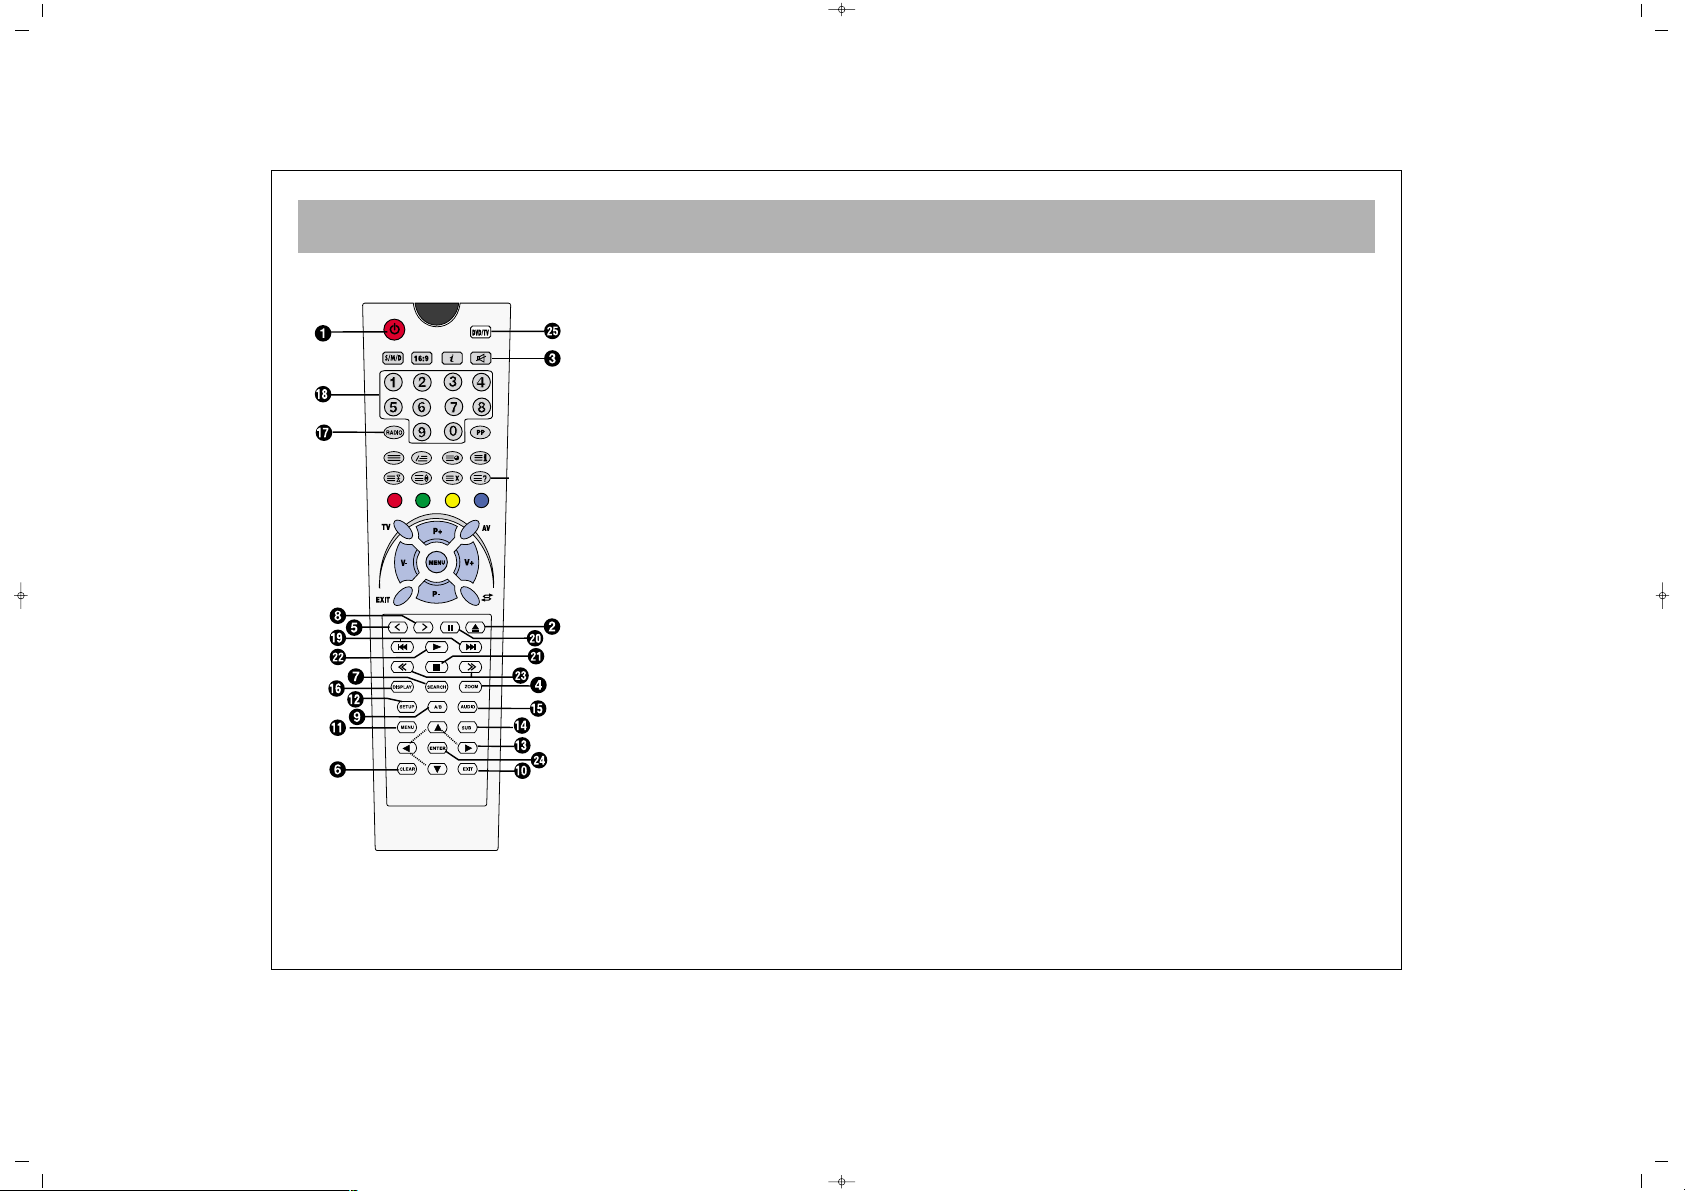
AFSTANDSBEDIENING
6
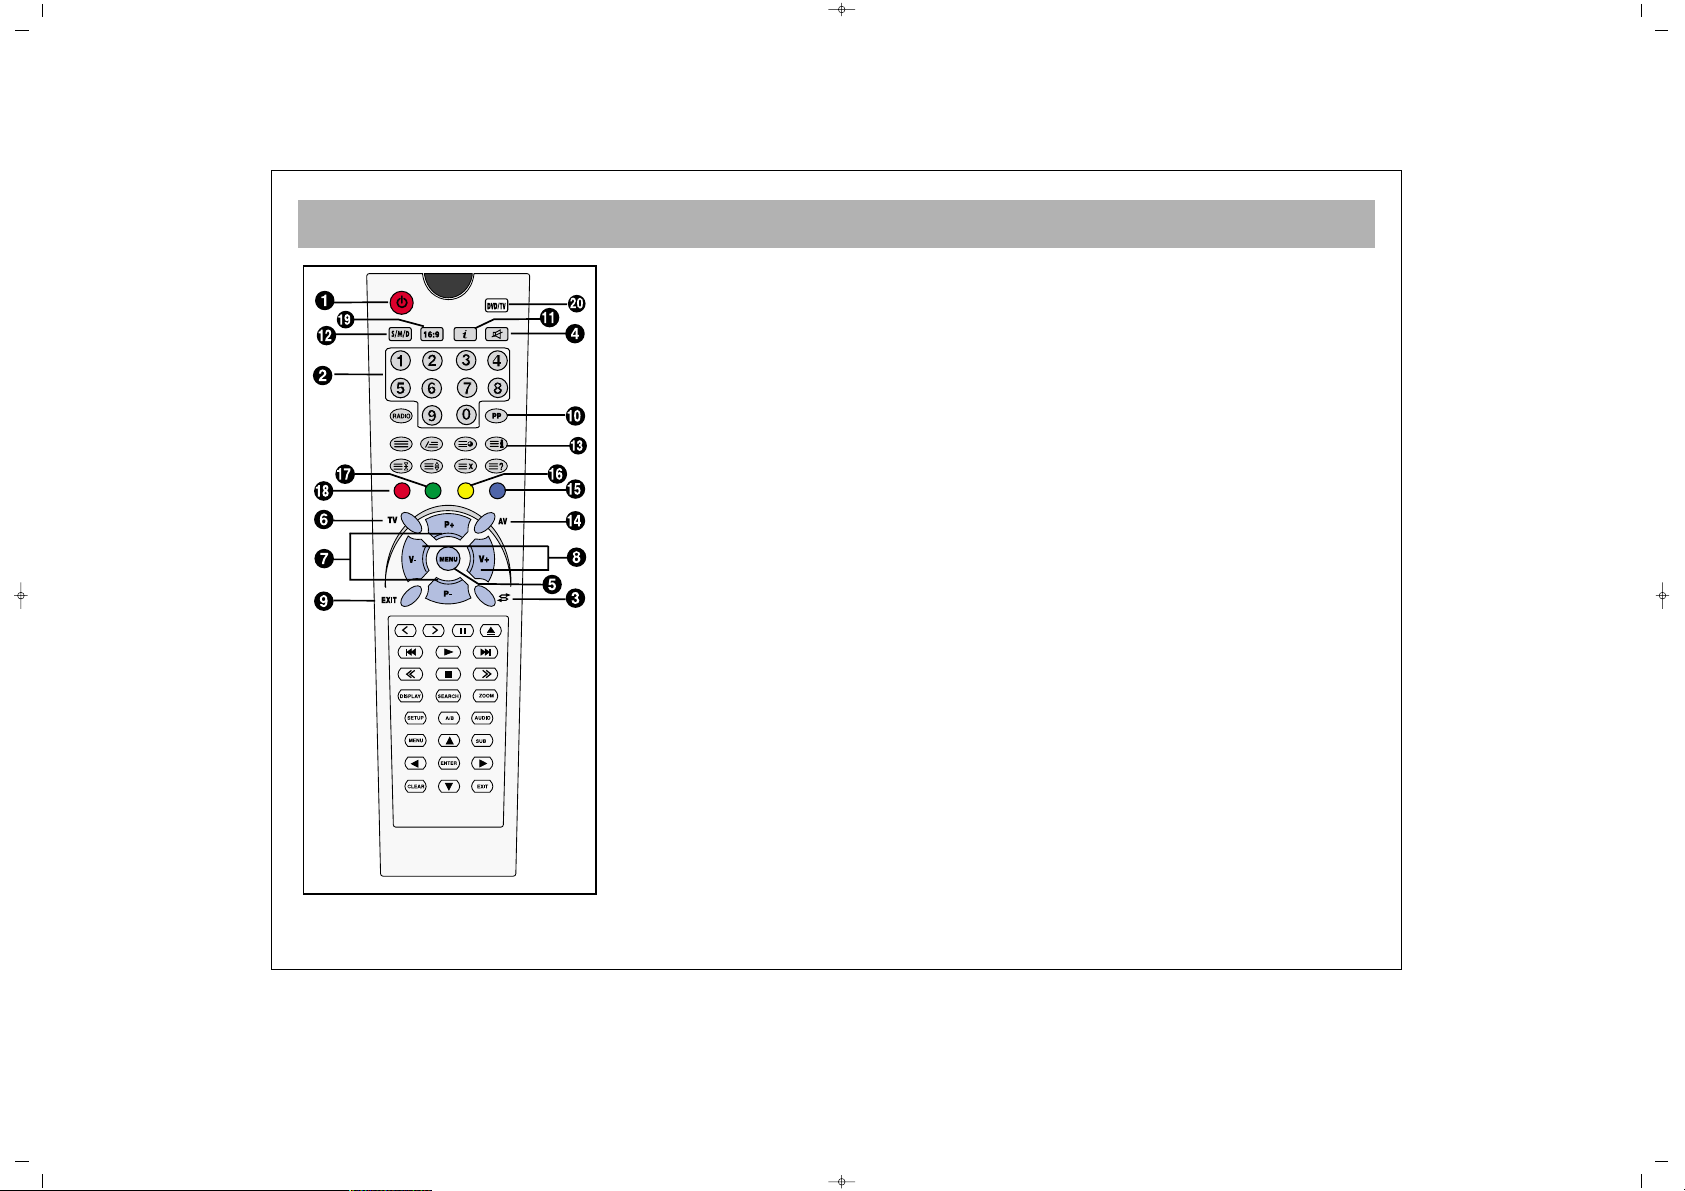
1. Uit (standby)-toets
2. Toetsen voor rechtstreekse programmaselectie
3. Swap-toets
4. Dempingstoets
5. Hoofdmenutoets
6. TV-toets (om naar TV te gaan vanuit AV)
7. Navigatietoetsen: op/neer zoeken van TV-programma’s, paginanummers in
teletekstmodus, op/neer zoeken in menu’s
8. Volume op/neer en menu aanpassen-toetsen
9. Menu afsluiten-toets (EXIT- of TV-toets om het menu te verlaten)
10. Gebruikernormalisatietoets
11. Statustoets (i)
12. Geluidinstellingstoets DUAL I, DUAL II, Stereo, Mono (DUAL I, II, ST/MONO)
(Geheugentoets bij Mono- modellen)
13. Instelmenu bereiken
14. A/V-toets (Bij sommige modellen)
15. (Blauwe toets) selectie van incred.stereo/mono – normale Audio
16. (Gele toets)
17. (Groene toets) Beginwaarden beeldinstelling
18. (Rode toets) Beginwaarden volume-instelling
19. Beeldformaatselectie (Bij sommige modellen)
20. DVD/TV (pour les téléviseurs avec reproducteur DVD)
NNoottee ::
Pour utiliser les autres fonctions de votre télécommande décrites dans le ménu,
veuillez vous rapporter aux pages avec la figurine télécommande dans les parties
TELETEXTE ou DVD Player.
065001057460 15"LCDVD LOC1 HOLL 13/2/07 10:47 Page 6
Page 7
AFSTANDSBEDIENING
7
Laat uw afstandsbediening nooit vallen.
Probeer uw afstandsbediening nooit te openen.
Druk op uw afstandsbediening nooit op twee toetsen
tegelijkertijd.
Verwijder de batterijen van de afstandsbediening indien u
deze voor lange tijd niet zult gebruiken.
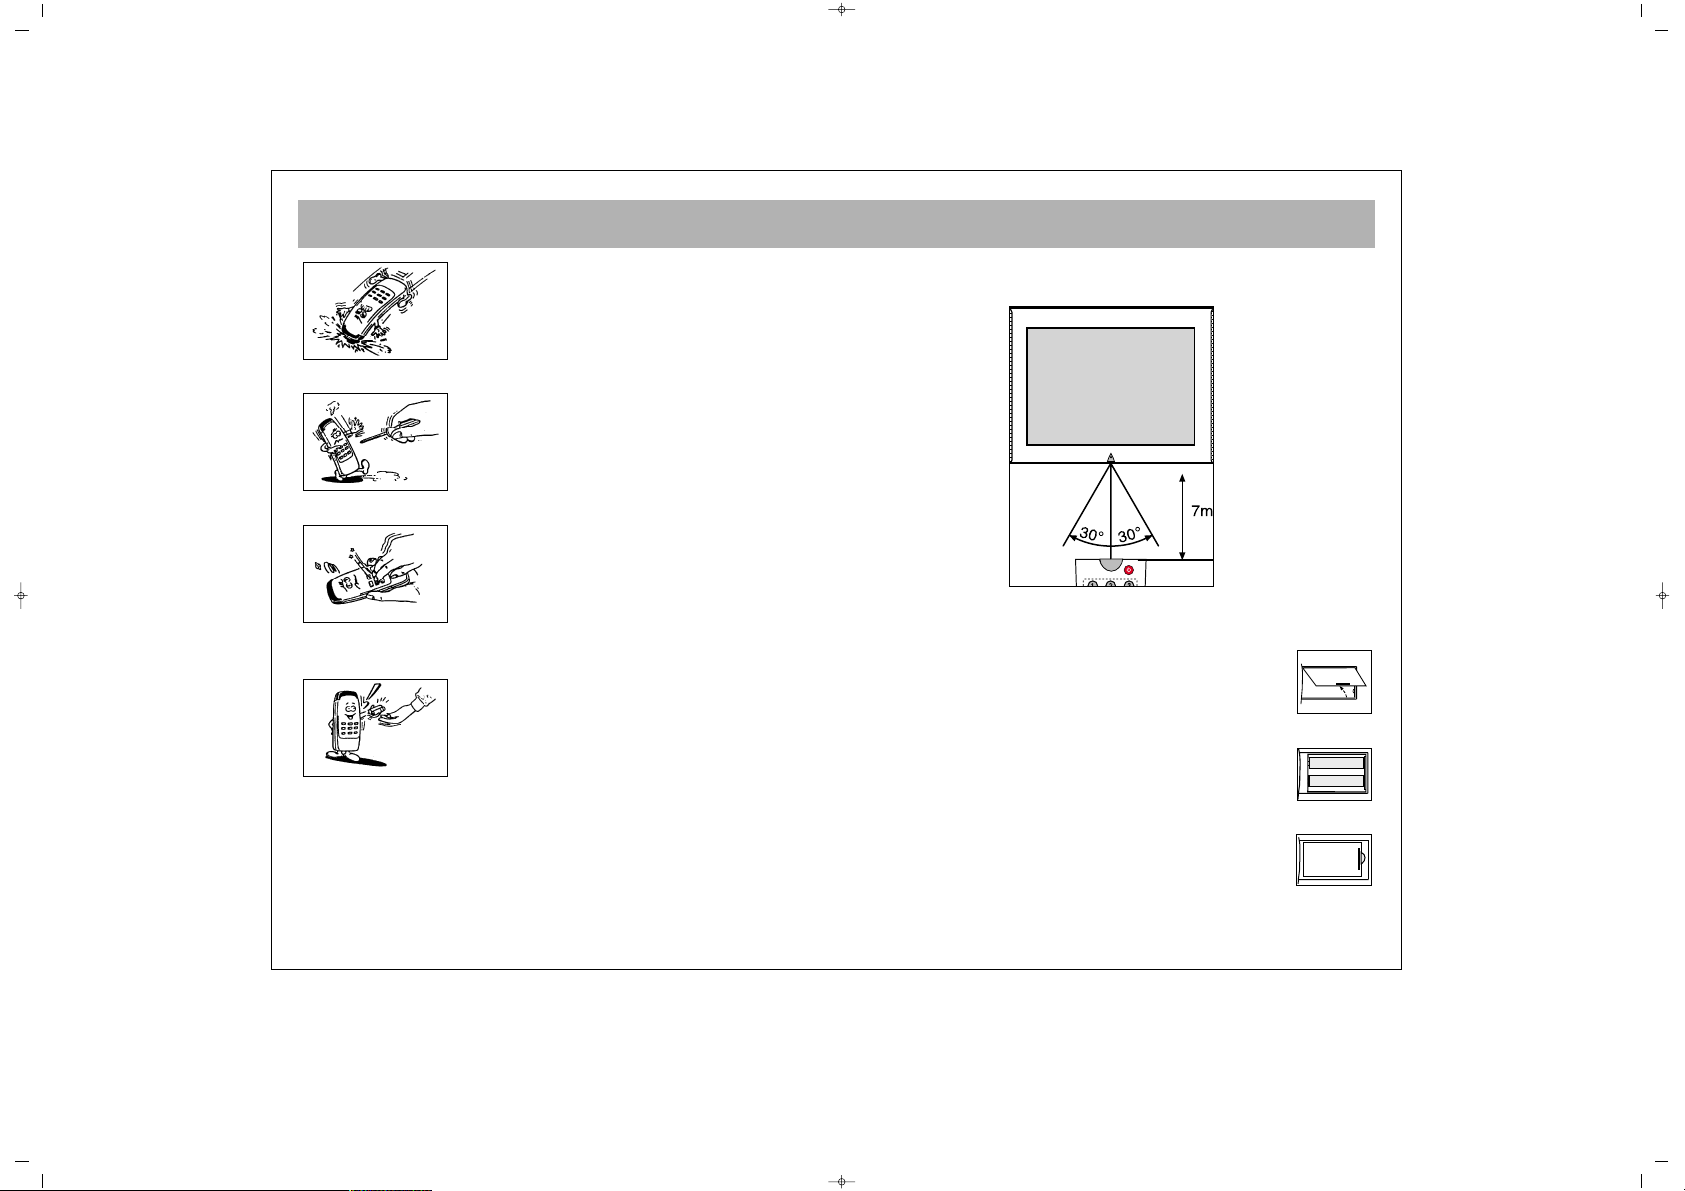
NNoottaa::
U moet uw afstandsbediening binnen een straal van 7
meter rond de TV gebruiken en in een hoek van max. 30°.
DDEE BBAATTTTEERRIIJJEENN AAAANNBBRREENNGGEENN ((22 AAAAAA--bbaatttteerriijjeenn vvaann 11,,55VV))
• Open het deksel.
• Stop de batterijen in het vak, zoals aangegeven.
• Sluit het deksel.
065001057460 15"LCDVD LOC1 HOLL 13/2/07 10:47 Page 7
Page 8
AANSLUITING VAN DE ANTENNE
8
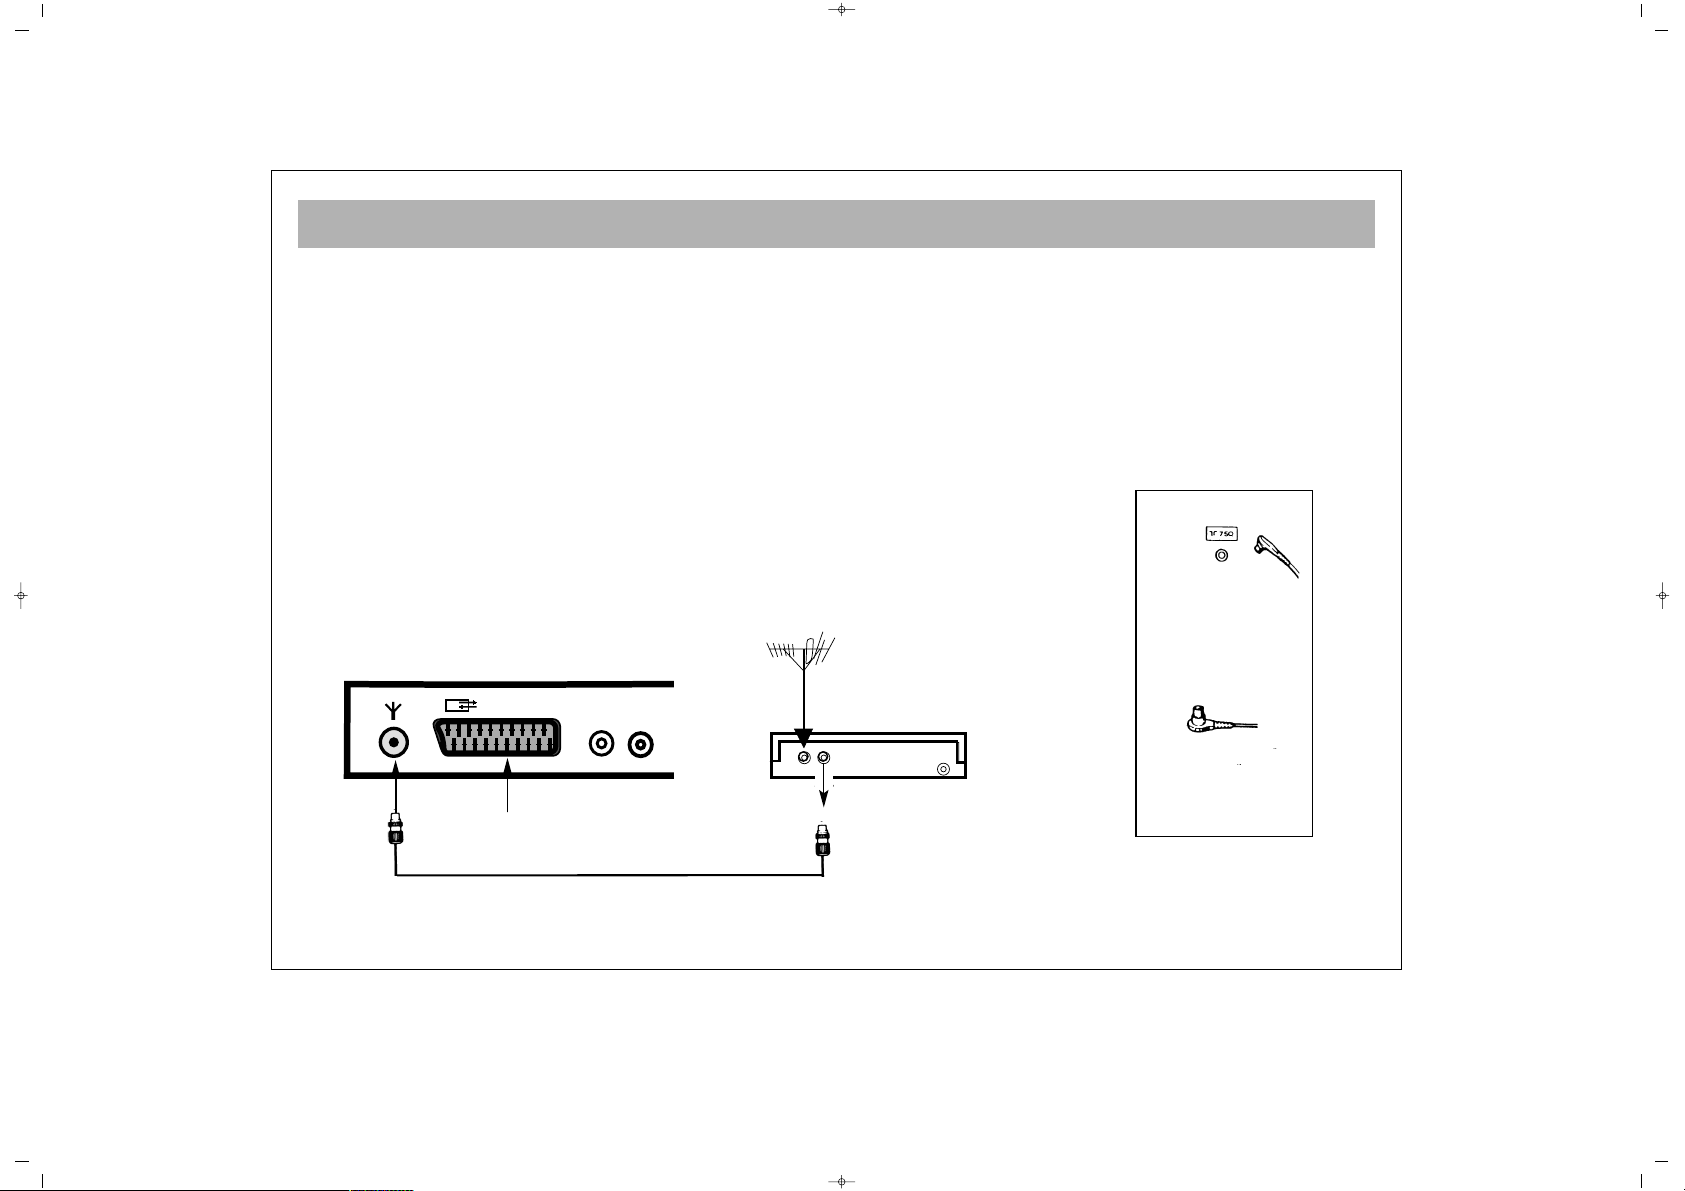
AAAANNSSLLUUIITTEENN VVAANN DDEE AANNTTEENNNNEE BBUUIITTEENNSSHHUUIISS
Als u de antenne op de juiste manier buitenshuis aansluit, zal u van een optimale
beeldkwaliteit kunnen genietenl.
Gebruik een coaxiale kabel (75 ohm Fig A-2) voor een antennel, steek de stekker
(zie Fig. A-1) in de antenne-ingang van het toestel.
U kan de antenne ook aansluiten via een videorecorder door gebruik te maken
van de videorecorder Rf-ingang en Rf-uitgang zoals getoond.
Antenneplug
(Schema A-1)
Coaxkabel
(Schema A-2)
Deksel achterkant
Antenne Aansluiting videorecorder
RF-ingang
RF-uitgang
RF-ingang
Scart socket
065001057460 15"LCDVD LOC1 HOLL 13/2/07 10:47 Page 8
EURO AV
AUDIO IN
RL
Page 9
AANSLUITING VAN EEN VIDEORECORDER, EEN COMPUTER OF EEN DECODER
9
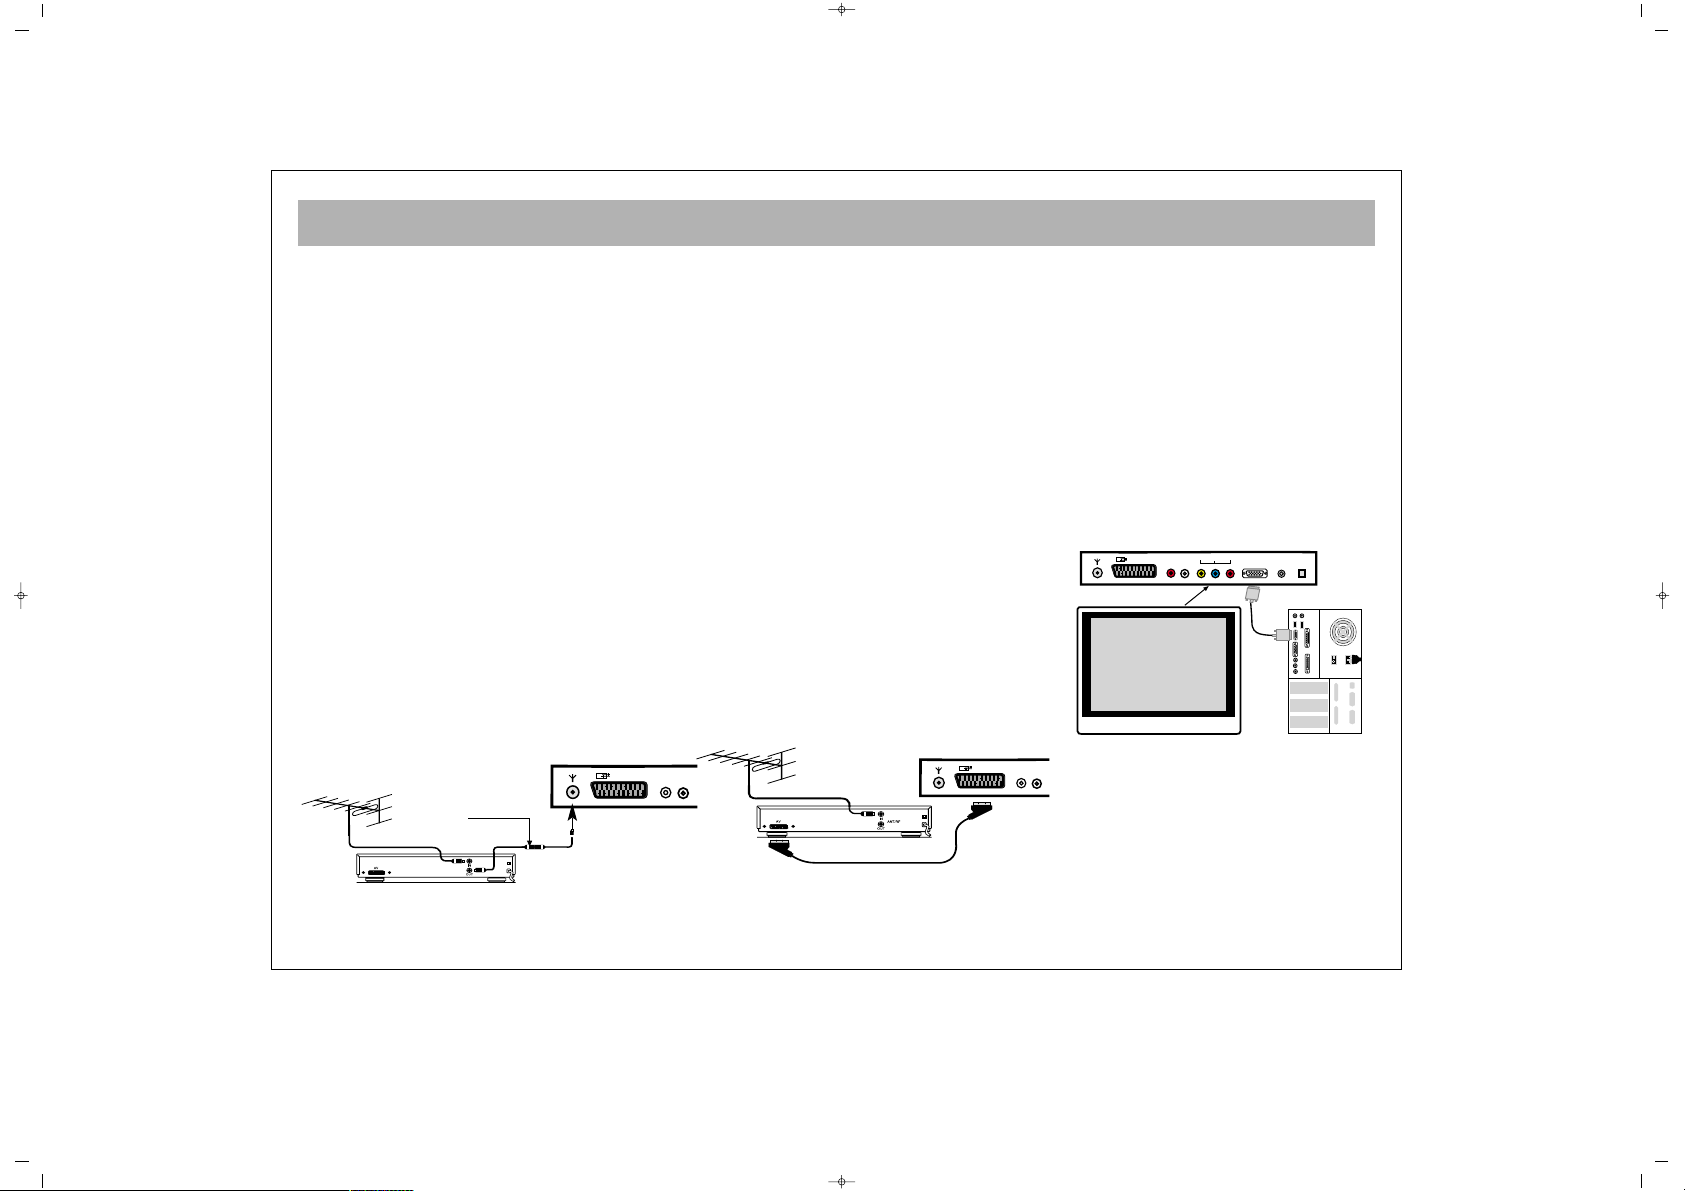
VVCCRR--WWEERRKKIINNGG VVIIAA DDEE RRFF--
UUIITTGGAANNGG
• Als u een VCR op uw LCD TV wilt
aansluiten, moet u een coaxiale kabel
vanaf de RF Uit-stekker van uw VCR
verbinden met de antenne-ingang van uw
TV. Sluit dan de coaxiale kabel aan op de
TV-antenne en de RF-ingang van de VCR.
• Selecteer het programma nr. 0 op uw
LCD TV.
• Steek een videocassette in de VCR en
druk op de toets “Afspelen”.
• Kijk in het hoofdstuk Manueel
programmeren (zie verder in de
Handleiding) om de VCR RFuitgangskanalen te zoeken en op te slaan
op kanaal 0 van uw LCD TV.
VVCCRR-- EENN DDVVDD--WWEERRKKIINNGG VVIIAA DDEE
SSCCAARRTT--UUIITTGGAANNGG
• Sluit de SCART-stekker aan op uw VCR
of DVD-speler en aan de andere kant op
de SCART-stekker van uw LCD TV.
• Selecteer het A/V-kanaal op uw LCD TV
door op de A/V-selectietoets te drukken
van uw afstandsbediening.
• Druk op de toets PLAY van uw VCR of
DVD-speler
• Door deze aansluitingen zal u van een
betere geluids- en beeldkwaliteit kunnen
genieten.
PPCC--AAAANNSSLLUUIITTIINNGG ((OOppttiioonneeeell))
U kan uw LCD TV als PC-scherm
gebruiken door de VGA-kabel van uw PC
in de PC-stekker van de LCD TV te steken.
Ondersteunde PC-resoluties:
VGA 640 x 480
AC230V~
50Hz/30W
AC230V~
50Hz/30W
EEUURROO--SSCCAARRTT SSTTEEKKKKEERR
U kan een videorecorder, DVD-speler, spelconsole of satellietdecoder aansluiten op de SCART-stekker met de juiste
verbindingskabel. Selecteer daarvoor de AV-modus om het signaal via de SCART-stekker te kunnen ontvangen.
naar RF IN
Coaxkabel
van de RF OUT
Antenne
naar de antenne-uitgang
naar de RF IN
EUROSCART-kabel (naar de videorecorder)
EUROSCART-kabel naar de tv
065001057460 15"LCDVD LOC1 HOLL 13/2/07 10:47 Page 9
EURO AV
RL
AUDIO IN
AUDIO IN
RL
EURO AV
EURO AV
TV
AUDIO IN
TV
Y
Pb Pr
RL
IN
PC INPUT
AUDIO IN
PC
DC 12V
PC
Page 10
AUDIO/VIDEO-AANSLUITINGEN
10
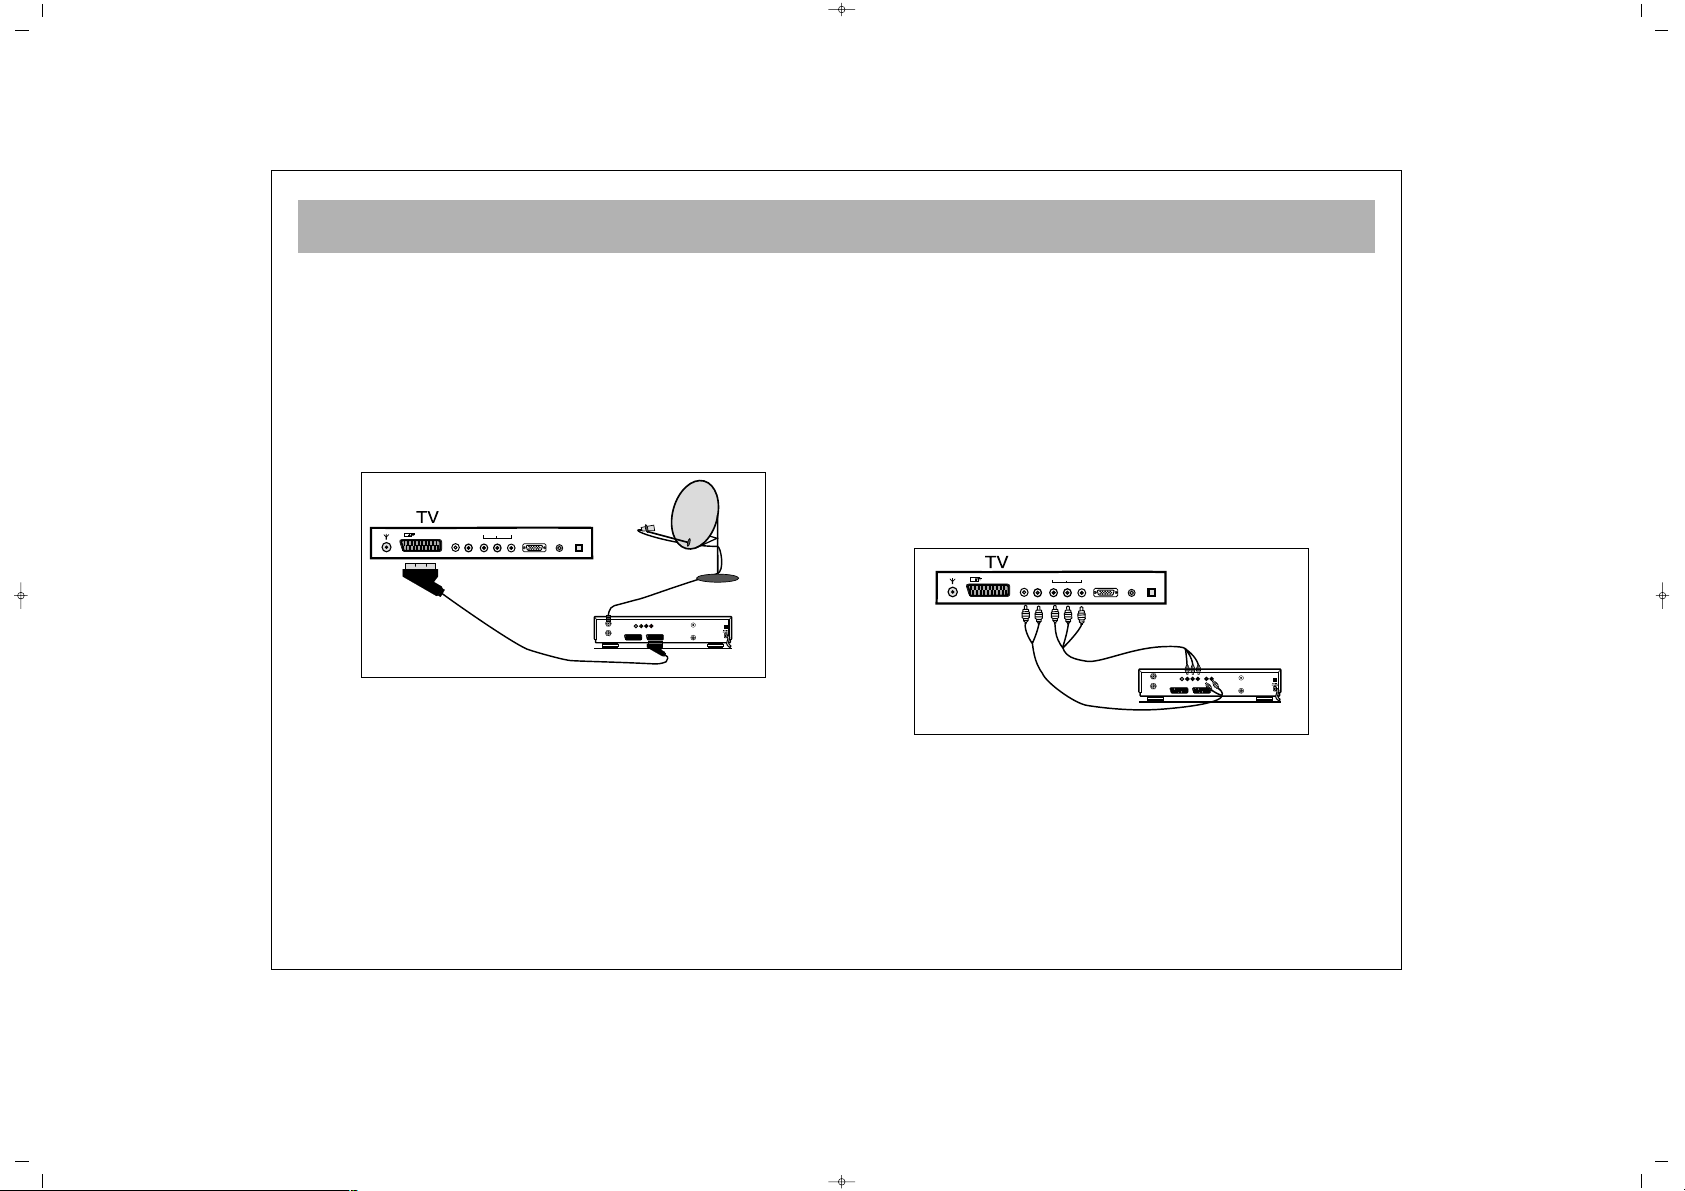
aa)) MMeett SSCCAARRTT--aaaannsslluuiittiinngg
• Sluit de SCART-aansluitbus op de receiver aan op de SCARTaansluitbus op uw LCD TV met behulp van de gepaste SCARTaansluitkabel.
• Selecteer A/V-kanaal op uw LCD TV door op de A/Vkeuzetoets op uw afstandsbediening te drukken. Uw LCD TV zal
nu het signaal van uw Satelliet- of Kabelontvanger weergeven.
bb)) CCoommppoonneenntt YYPPbbPPrr--iinnggaanngg::
• Als uw Videobron een YPbPr componentvideo-uitgang heeft,
kunt u deze aansluiten op de YpbPr-ingang van uw LCD TV via een
3-weg cinchkabel via overeenkomstige stekkerkleuren. Deze
methode zal het beeld naar uw LCD TV overbrengen.
• Voor audio-aansluiting een 2-weg A/V-aansluitkabel gebruiken
om linker en rechter audio-uitgangen aan te sluiten op de linker en
rechter audio-ingangen van uw LCD TV.
• Selecteer het YPbPr-kanaal op uw LCD TV door op de A/Vselectietoets te drukken van uw afstandsbediening.
L
DC 12V
EURO AV
Y
PC INPUT
PC
AUDIO IN
RL
AUDIO IN
Pb Pr
IN
DECODER SCART TV SCART
OUT
SVSH V L R
TV
AERIAL
DISH
LNB
AUDIO OUT
RL
DC 12V
EURO AV
Y
PC INPUT
PC
AUDIO IN
RL
AUDIO IN
Pb Pr
IN
DECODER SCART TV SCART
OUT
SVSH V L R
TV
AERIAL
DISH
LNB
RECEIVER
065001057460 15"LCDVD LOC1 HOLL 13/2/07 10:47 Page 10
Page 11
TV-FUNCTIES
11
11.. BBEEDDIIEENNIINNGG
aa.. DDee TTVV aaaannzzeetttteenn
Sluit de voedingskabel van uw TV aan op het
wandstopcontact.
* Uw toestel werkt op 12V DC voeding. Voor dit doel
de met uw TV meegeleverde adapter gebruiken.
bb.. SSttaannddbbyy--mmoodduuss
Als de TV in standby-modus staat, kan u de TV
inschakelen door op een toets van de
afstandsbediening te drukken, zoals een toets van 0 tot
9 of de P+/P- toetsen op het toestel zelf.
22.. UUIITTSSCCHHAAKKEELLEENN
aa.. DDee TTVV uuiittzzeetttteenn
Als u de TV wilt uitschakelen, moet u de voedingskabel
uit het wandstopcontact trekken.
bb.. SSttaannddbbyy--mmoodduuss
Als u de TV voor een kortere periode wilt uitschakelen,
moet u op de toets Standby van de afstandsbediening
drukken.
NNoottaa:: RRCC bbeetteekkeenntt aaffssttaannddssbbeeddiieenniinngg
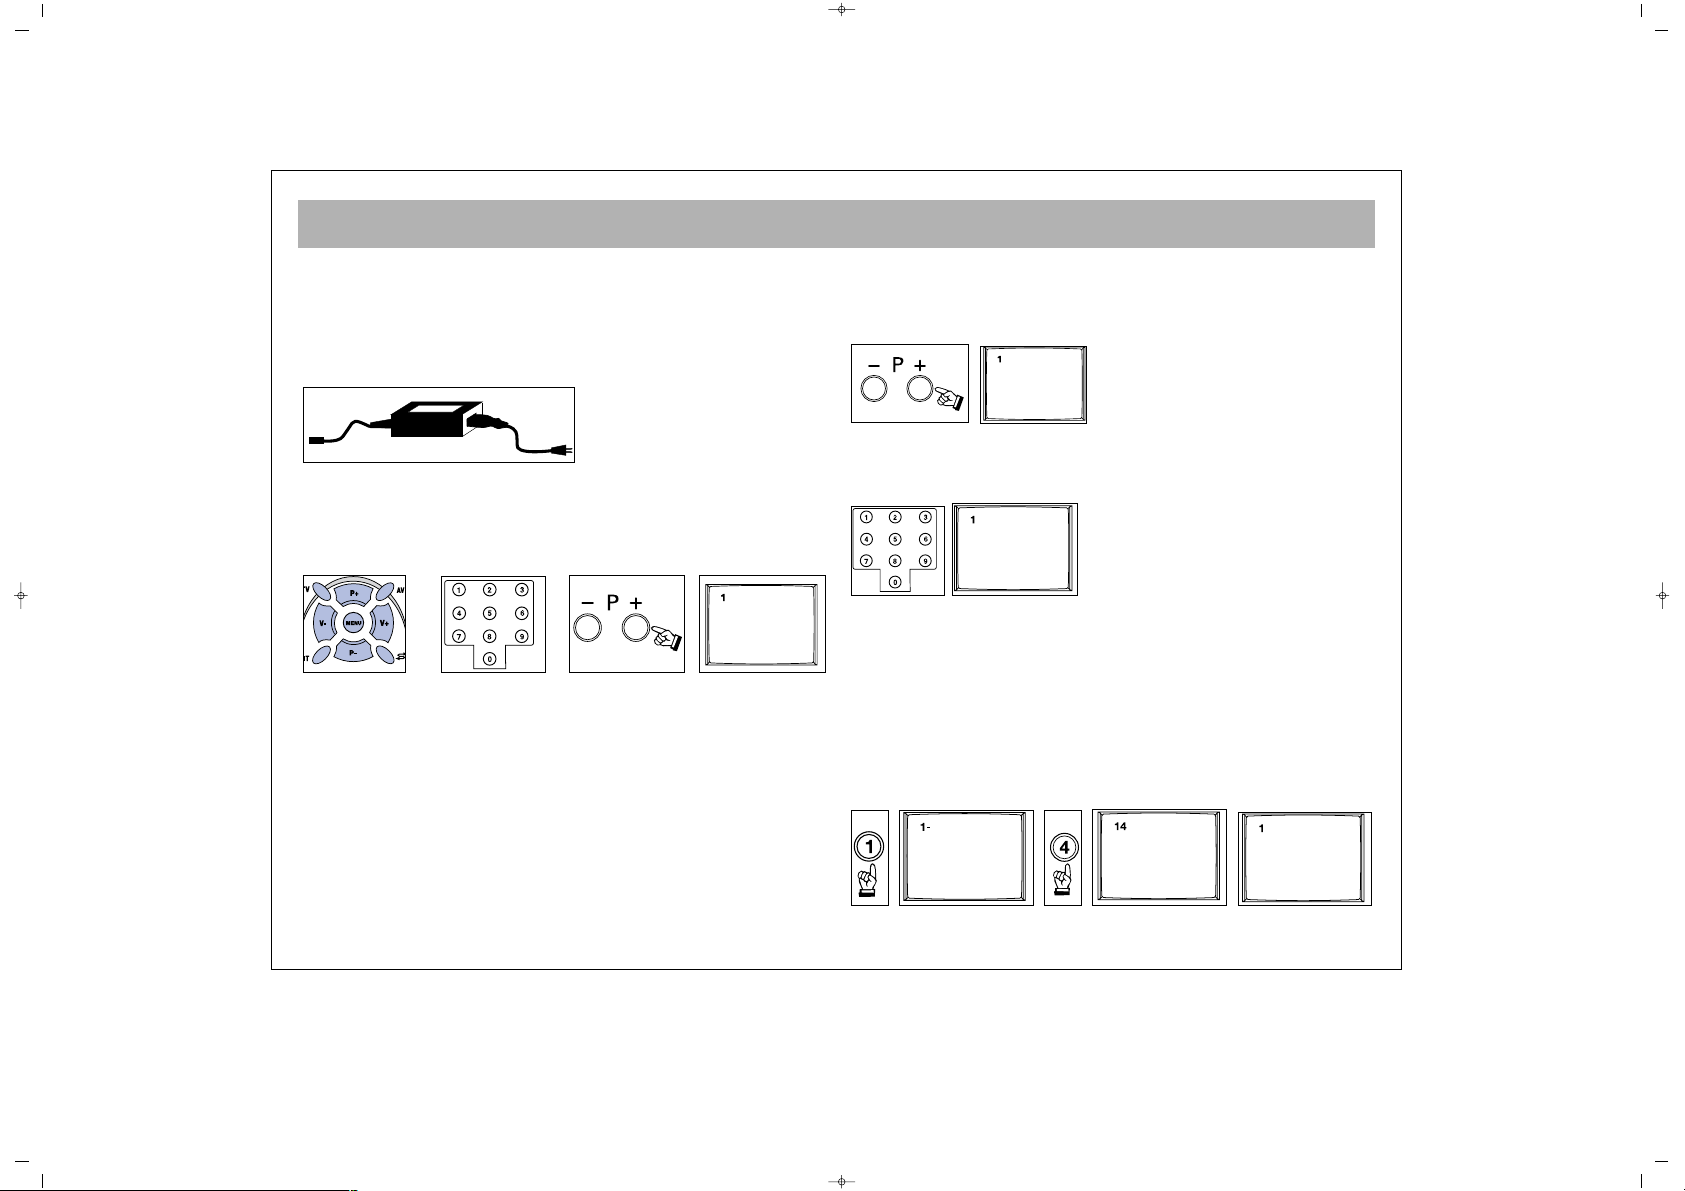
11.. DDEE PPRROOGGRRAAMMMMAANNUUMMMMEERRSS SSEELLEECCTTEERREENN
**
Gebruik de toetsen P+/P- om het programmanummer
te verhogen of te verlagen en zo het gewenste
programma te verkrijgen.
* Als u een programma van 0 tot 9 wilt selecteren, moet
u op de overeenkomstige toets op de afstandsbediening
drukken.
* Als u een programma van 10 tot 99 wilt selecteren,
moet u de twee cijfers onmiddellijk na elkaar intikken.
VVoooorrbbeeeelldd::
Als u het programmanummer 14 wilt
selecteren, moet u eerst de 1 intikken. Zo zal de “1-“boodschap in de linker hoek van het scherm
verschijnen. Als u de toets ingedrukt houdt, zald e TV
omschakelen naar programma 1. Zolang dit bericht op
het scherm blijft (3 seconden) zonder dat u op 4 drukt,
zal de TV terugkeren naar proramma 1.
065001057460 15"LCDVD LOC1 HOLL 13/2/07 10:47 Page 11
Page 12
TV-FUNCTIES
12
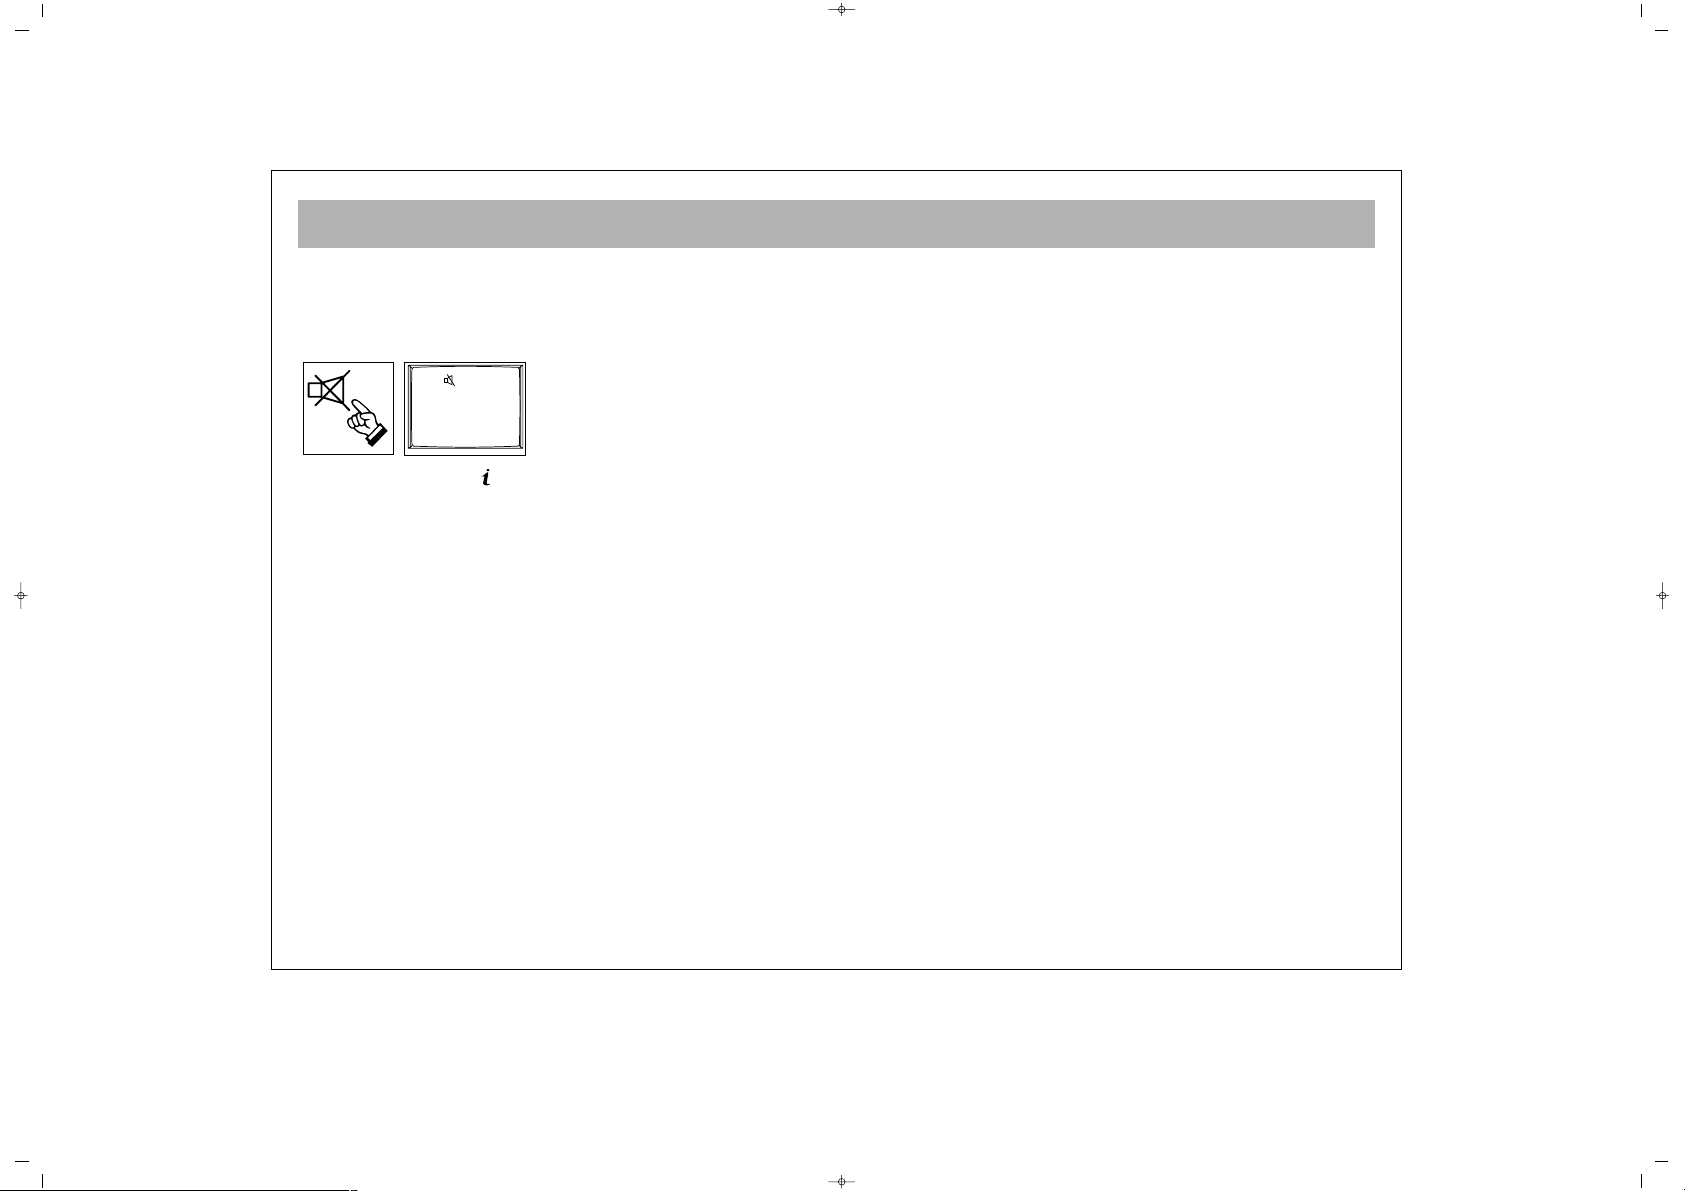
22.. DDEEMMPPEENN
Om het geluid onmiddellijk te dempen drukt u op de
Mute-toets van de afstandsbediening. Druk nogmaals op
deze toets en u zult het geluid horen vooraleer u op Mute
drukt.
33.. SSTTAATTUUSS--ttooeettss::
( ) Toont het programmanummer, het
volumeniveau en audiosysteeminfo gedurende 3
seconden op het scherm
44.. PPPP--ttooeettss::
Met deze toets kunt u zien welke
vooringestelde beeldwaarde werd ingesteld op uw TV.
55.. SSWWAAPP--ttooeettss::
Zo kunt u terugkeren naar de zender die u
net bekeken hebt
66.. SSMMDD--ttooeettss::
MMoonnoo::
Deze toets werkt niet op mono TV’s of mono
uitzendingen
SStteerreeoo::
Deze toets wordt gebruikt om mono of DUAL
volume-uitgangen in TV-toestellen te selecteren
77.. AA//VV--ttooeettss::
Om de A/V-modus te selecteren drukt u op de
A/V-toets van de afstandsbediening. Om terug te keren naar
de TV-modus het programmanummer invoeren of op de
TV-toets drukken. Zolang er een menu op het scherm staat,
kunt u het TV-toestel niet omschakelen op A/V-modus. Van
in A/V-modus kunt u niet omschakelen naar het
Programmatabelmenu. In de A/V-modus kunt u de externe
toestellen aangesloten via de SCART bekijken (Video, DVD,
VCD enz.). Telkens u op de A/V-toets drukt worden de
modi weergegeven die u op uw toestel kunt aansluiten.
88.. AAUUTTOOMMAATTIISSCCHHEE UUIITTSSCCHHAAKKEELLIINNGG..
Als de TV geen signaal ontvangt gedurende 5 minuten,
schakelt deze automatisch over op Standby. Deze functie is
niet geactiveerd in A/V-modus.
99.. MMEENNUU--ttooeettss::
Als u deze toets indrukt, gaat u naar het
Hoofdmenu. Als u nogmaals drukt, verlaat u het
Hoofdmenu opnieuw. Naast voor terugkeer naar het
voorgaande menu vanuit de submenu’s, moet u deze toets
gebruiken.
1100.. TTVV ((EEXXIITT))--ttooeettss::
Indrukken om de menu’s af te sluiten
1111.. 1166::99--ttooeettss::
Deze wordt gebruikt om het
schermformaat te veranderen van 4: 3 naar 16: 9
1122.. AAUUTTOO ZZAAPP::
Als u P+ of P- gedurende 3 tot 4 seconden
indrukt en deze weer loslaat, worden de kanalen
automatisch gezocht. In de rechter bovenhoek verschijnt
“Auto Zap”.
1133..
RRooddee KKnnoooopp::
U kunt de vooraf ingestelde "Correcte"
waarden selecteren door de Rode knoop te gebruiken. De
"Persoonlijke" waarde is de aanpassingen die u op uw
apparaten werd gemaakt.
1144..
GGrrooeennee KKnnoooopp::
U kunt de vooraf ingestelde waarden
van het "Beeld" selecteren door de groene knoop te
gebruiken. De "Persoonlijke" waarde is de aanpassingen
die u op uw apparaten werd gemaakt.
065001057460 15"LCDVD LOC1 HOLL 13/2/07 10:47 Page 12
Page 13
INSTELLEN
13
Als u uw toestel instelt volgens de uitleg op de vorige
pagina's verschijnt "Automatic Search" (Welcome) op het
scherm.
11--
Gebruik de “P+/P-“-toets voor “Land”-optie en kies de
landafkorting met de “V+/V-“-toets.
22--
Gebruik de "P+/P-" –toets voor "Taal"-optie en stel de
menutaal in met de "V+/V-"-toets.
33--
Gebruik "P+/P-"-toets voor "Automatisch opslaan" en start
de automatische opzoeking met de "V+"-toets. Gelieve op
geen enkele toets te drukken tijdens automatisch zoeken.
Uw toestel zal de kanalen vinden en het geheugen
automatisch registreren.
Als het “Welkom”-menu niet verschijnt, kunt u de kanalen
zoals hieronder zoeken:
11--
Druk op de "Menu"-toets
22--
Gebruik "P+/P-" voor "Instellingen" en ga naar het menu
met "V+"-toets.
33--
Kies de “Taal”-optie met de "P+/P-" –toets voor "Taal"optie en stel de gewenste menutaal in met de "V+/V-"-toets.
44--
Gebruik de “P+/P-“-toets voor “Land”-optie en kies de
landafkorting met de “V+/V-“-toets.
55--
Druk op de “MENU”-toets en keer terug naar het
hoofdmenu.
66--
Gebruik de "P+/P-" –toets voor "Programmainstellingen"-optie en ga naar het menu met de de
"V+/V-"-toets.
77--
Gebruik "P+/P-"-toets voor "Automatisch opslaan"
en start de automatische opzoeking met de "V+"-toets.
Programmanummer 2
Programmanaam
Sys. standaard Europa
Auto. Opslaan
Frequentie 182.25 MHz
Fijnafstemmen
Bron OSD Uit
Taal Nederlands
Land NL
Kinderslot
Tijdsinstel.
Teleteksttaal Latijns
Land NL
Taal Nederlands
Auto. Opslaan
065001057460 15"LCDVD LOC1 HOLL 13/2/07 10:47 Page 13
Page 14

INSTELLEN
14
Gelieve op geen enkele toets te drukken tijdens
automatisch zoeken. Uw toestel zal de kanalen vinden
en het geheugen automatisch registreren.
Gebruik P-,P-,V+,V-" om de menutaal te wijzigen in de
manuele instelprocessen van het Programmainstelmenu.
Gebruik P-,P-,V+,V-" voor veranderen van de
programmavolgorde, het benoemen van het
programma, wissen van het programma en proces
overslaan in het Programmatabelmenu. Deze
processen werden reeds vermeld in vorige pagina’s.
Sluit dit menu door op de “TV”-toets te drukken.
065001057460 15"LCDVD LOC1 HOLL 13/2/07 10:47 Page 14
Page 15

TV-FUNCTIES (MENU’S)
15
HHooooffddmmeennuu::
Voor toegang tot dit menu de menutoets
indrukken. U kunt naar de opties in het hoofdmenu
gaan met de P+/P-toetsen en de opties activeren door
op de toetsen V+/V- te drukken.
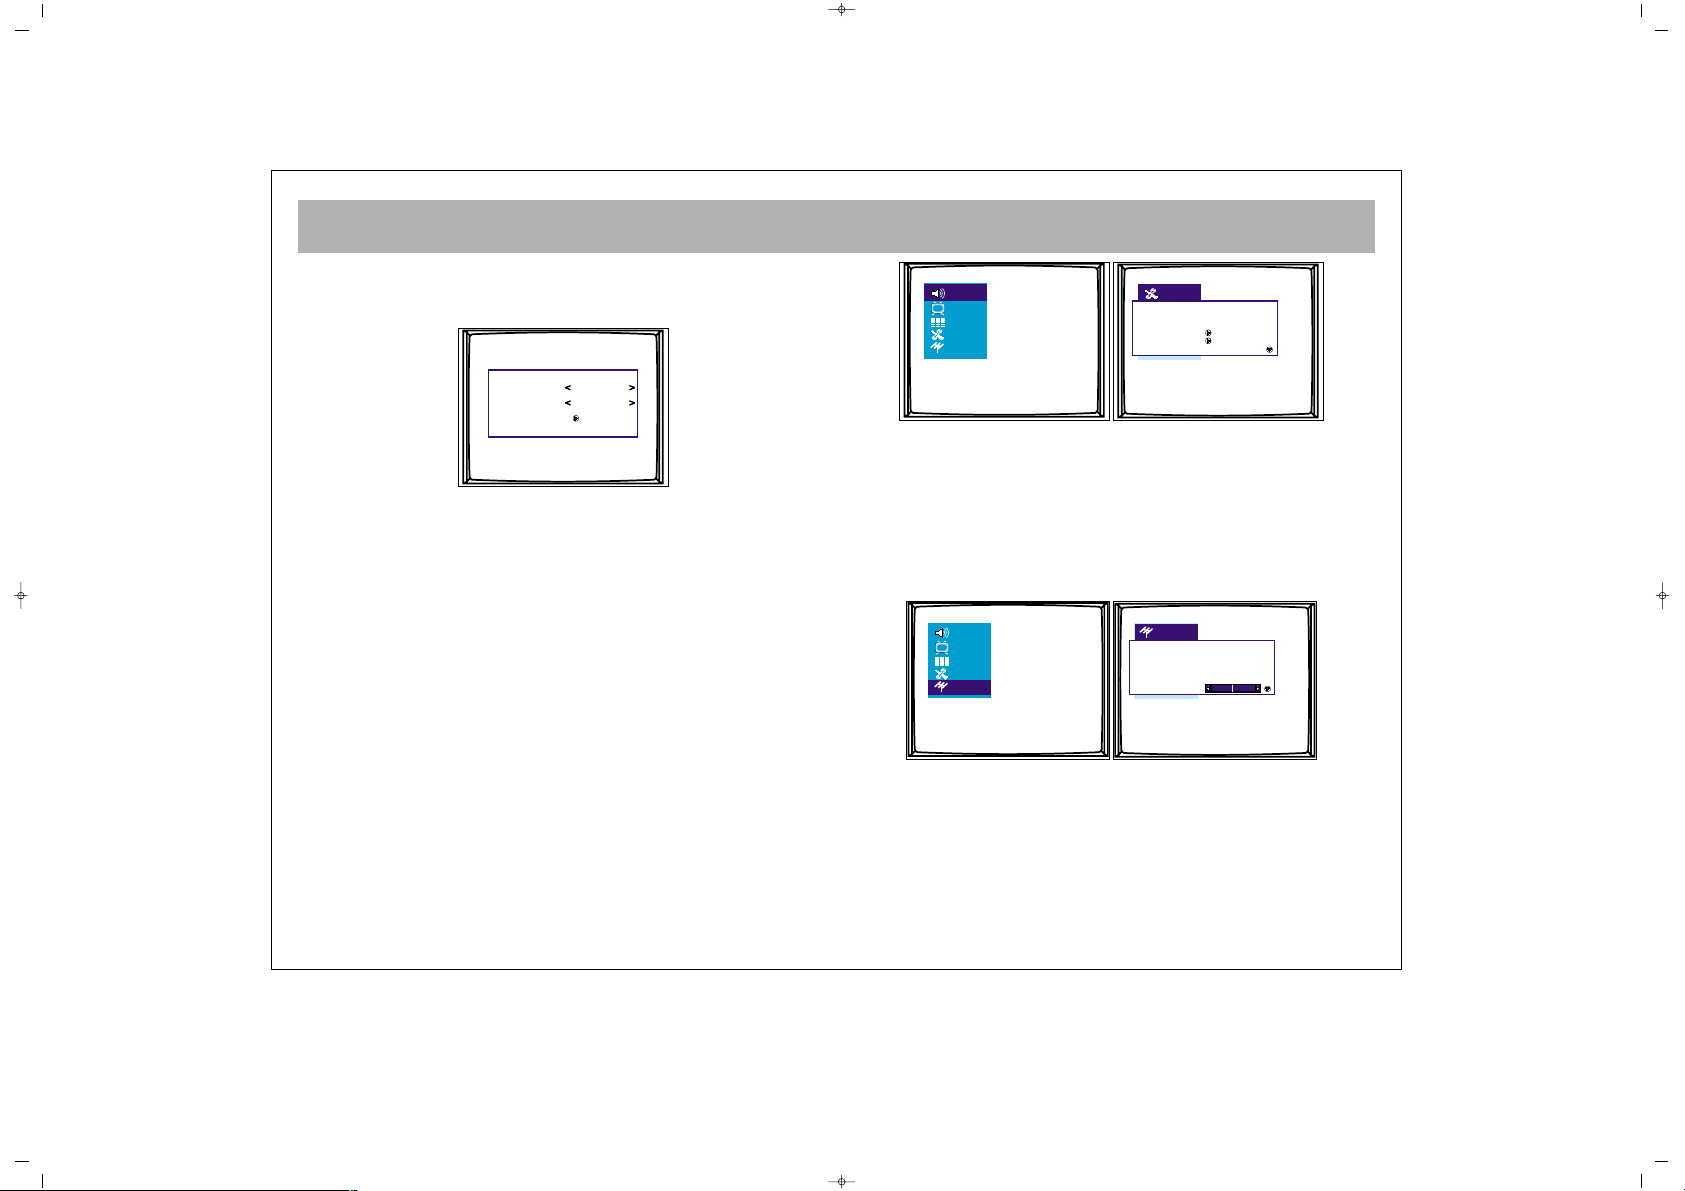
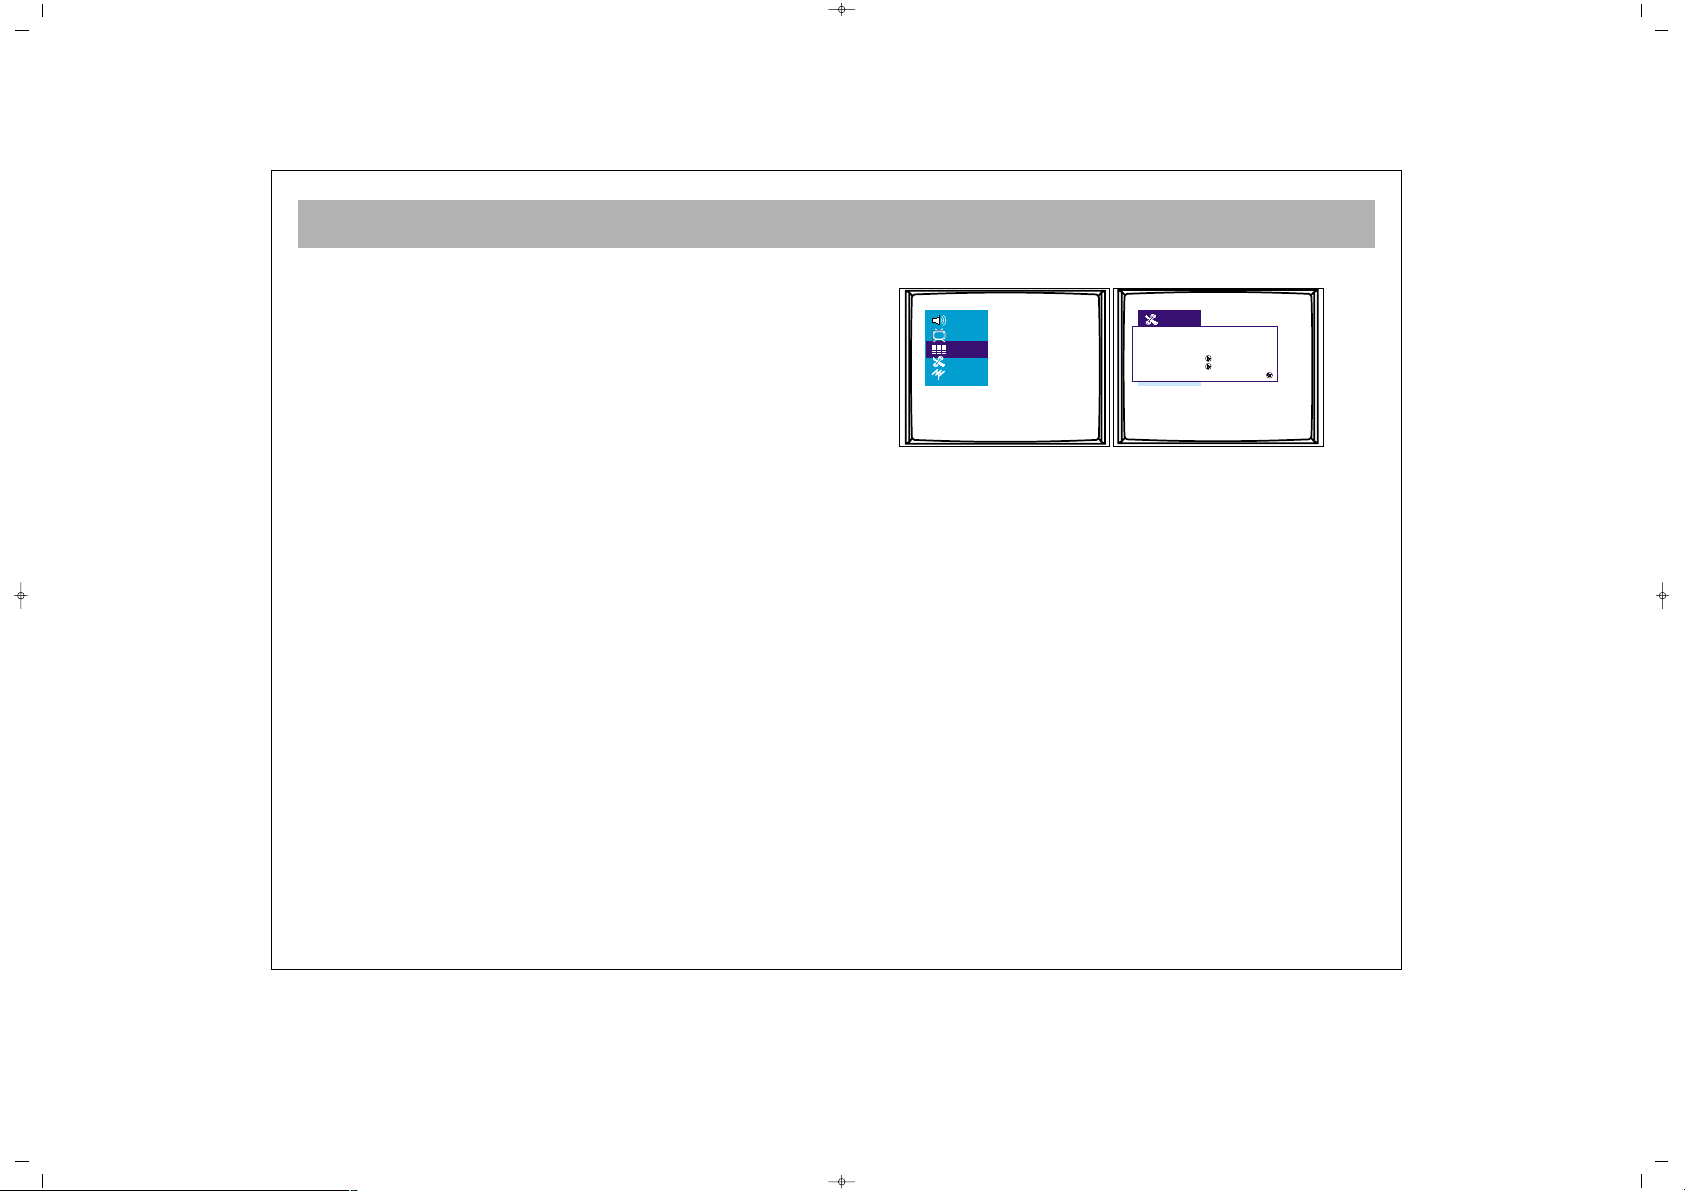
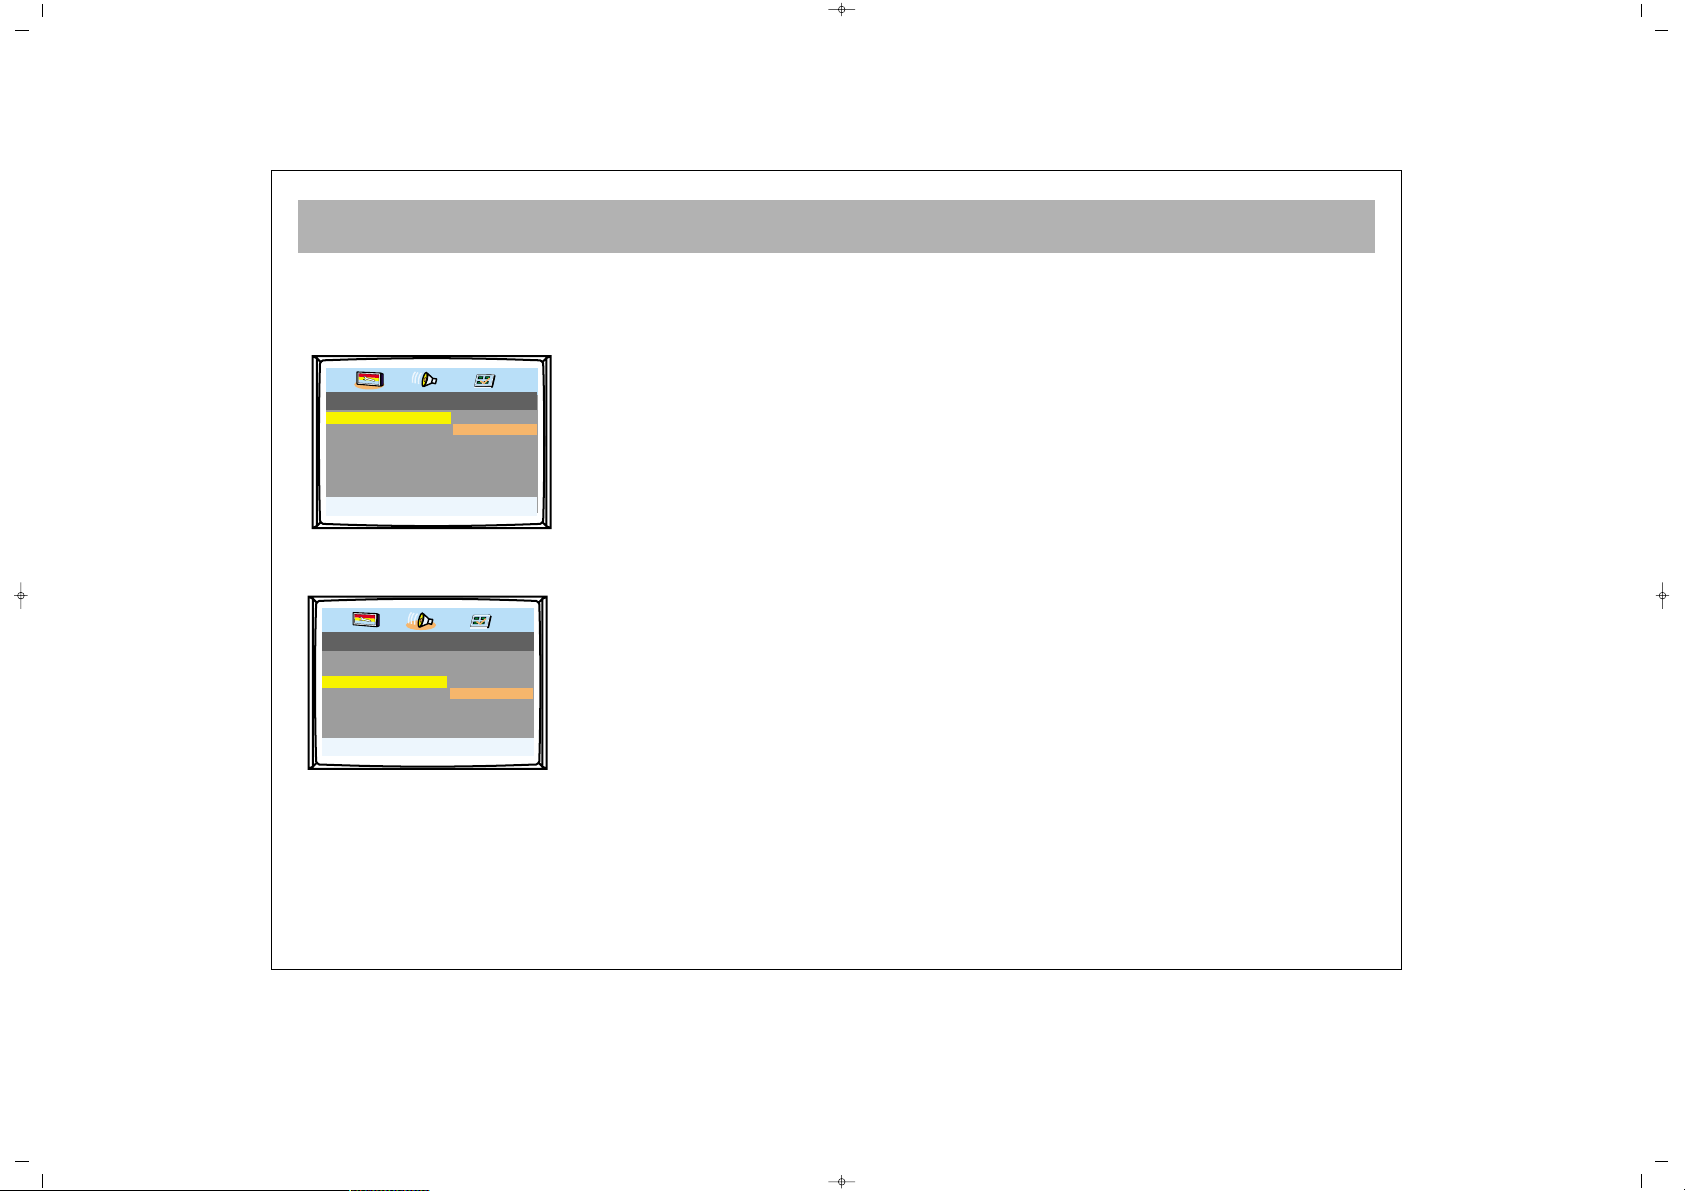
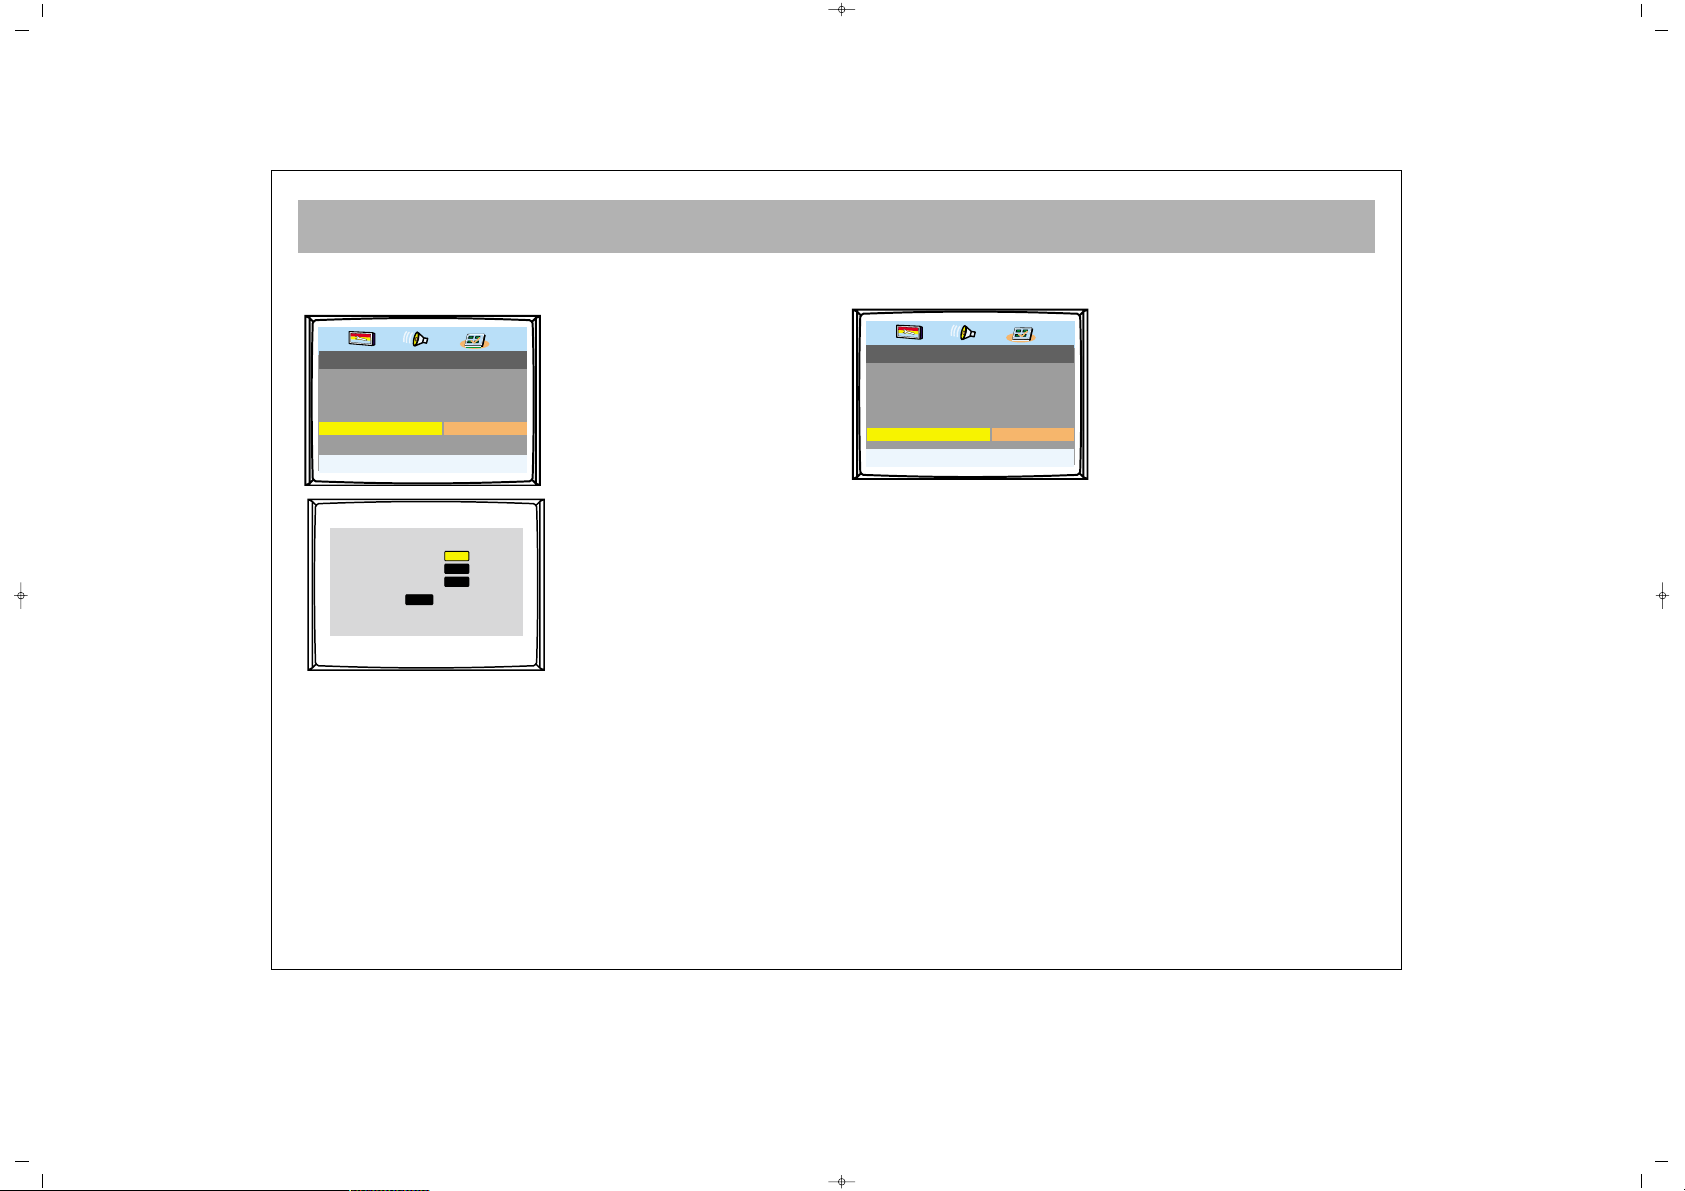
11.. VVOOLLUUMMEE--IINNSSTTEELLMMEENNUU
Door middel van de MENU-toets krijgt u toegang tot
het volume-instelmenu. In dit menu worden volumeinstellingen geselecteerd of opgeslagen door middel
van de toetsen P+/P- en kunnen worden gewijzigd via
de toetsen V+/V-.
VVoolluummee::
Het volume van het TV-toestel kan worden
geregeld
BBaallaannss::
De balans tussen linker en rechter
kanaaluitgangen wordt getoond
BBaass::
De gebruiker kan het basniveau regelen via deze
optie
HHooggee ttoonneenn::
De gebruiker kan de hoge tonen regelen
via deze optie. Stereo modellen hebben AVL-functie.
Dit wordt niet getoond in de menu's. Dit dient voor
automatische volumebeperking, dwz het
volumeniveau wordt op optimaal niveau gehouden bij
omschakeling van het ene naar het andere kanaal.
Daardoor komt het volume na het display in geval een
kanaal wordt omgeschakeld.
EEqquuaalliizzeerr::
U kunt het Equalizermenu openen met de "V+"-knop
terwijl u op de Equalizer-lijn zit. Als u dit menu bent,
kunt u één van de equalizerinstellingen selecteren
(personal, voice, music, theatre) met de “P+, P-“toetsen. Voro de persoonlijke equalizerinstellingen de
toetsen P+/- en V+/-.
HHooooffddtteelleeffoooonn:: ((OOppttiioonneeeell))
Als een hoofdtelefoon wordt ingestoken, komt er geen
volume uit de luidsprekers. Het volume komt alleen
uit de hoofdtelefoon. Via het volumemenu kan de
hoofdtelefoon worden ingesteld. U kunt het volume
wijzigen in Mono/Stereo/Dual via de S/M/D-toets.
Persoonl.
100 300 1k 3k 8k
Volume
Balans
Bas
Hoge Tonen
Equalizer
065001057460 15"LCDVD LOC1 HOLL 13/2/07 10:47 Page 15
Page 16
TV-FUNCTIES (MENU’S)
16
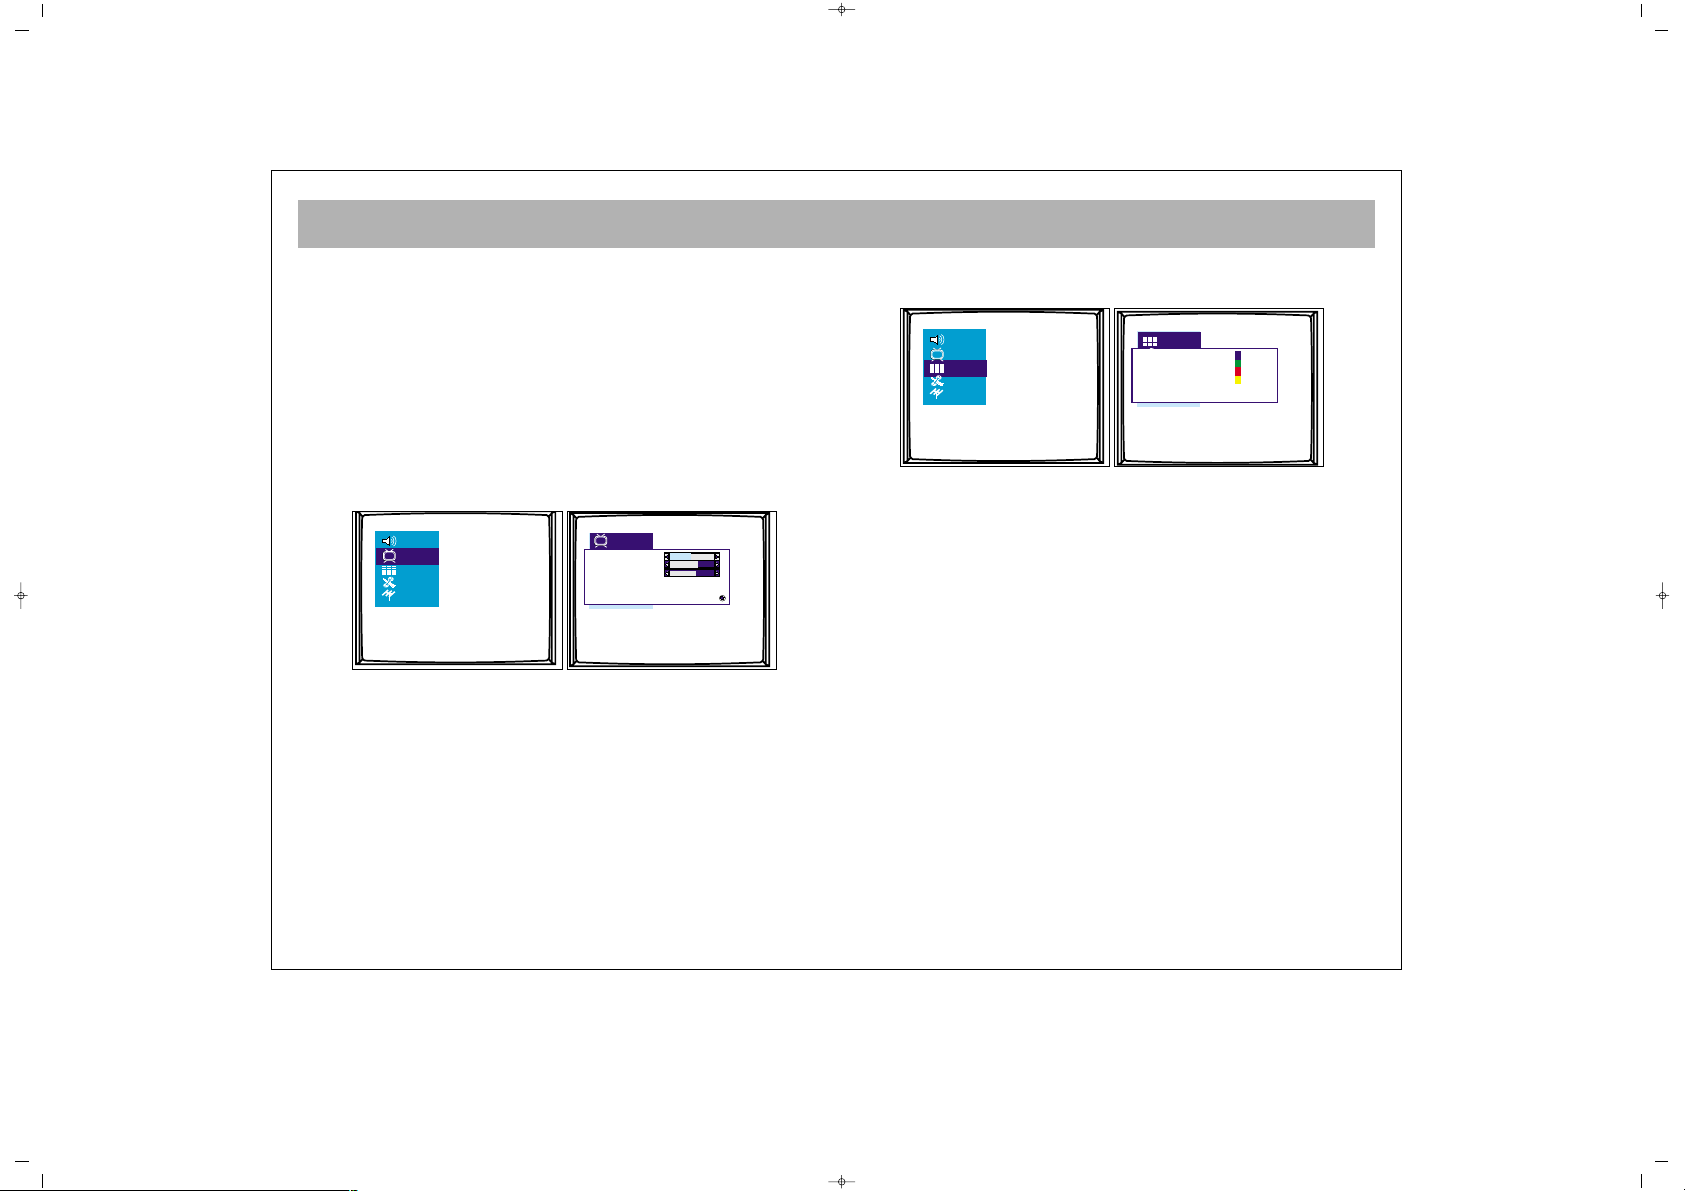
22.. BBEEEELLDDIINNSSTTEELLLLIINNGGEENNMMEENNUU
Door middel van de MENU-toets krijgt u toegang tot het
beeldinstelmenu. In het beeldinstellingenmenu kunt u
talrijke parameters in verband met de weergave
aanpassen. Helderheid, Contrast, Kleur, Scherpte, Dyn.
Huidskleur, wittint en gebruikerinstellingen kunnen
worden uitgevoerd volgens uw vereisten. Via de toetsen
P+/P- op de afstandsbediening kunt u de optie laten
oplichten die u wenst in te stellen en de
instellingswaarde of de optie wijzigen door op de toetsen
V+/V- te drukken.
De wijzigingen worden automatisch opgeslagen. De
gebruikersoptie wordt automatisch gedefinieerd als
“gebruiker”. De gebruikeroptie omvat ook
voorinstelling (fabrieksinstelling), cinema, sports, soft
en games.
Als op de MENU-toets drukt, krijgt u toegang tot het
vorige menu, terwijl u alle menu's kunt verlaten als u
op de TV-toets drukt.
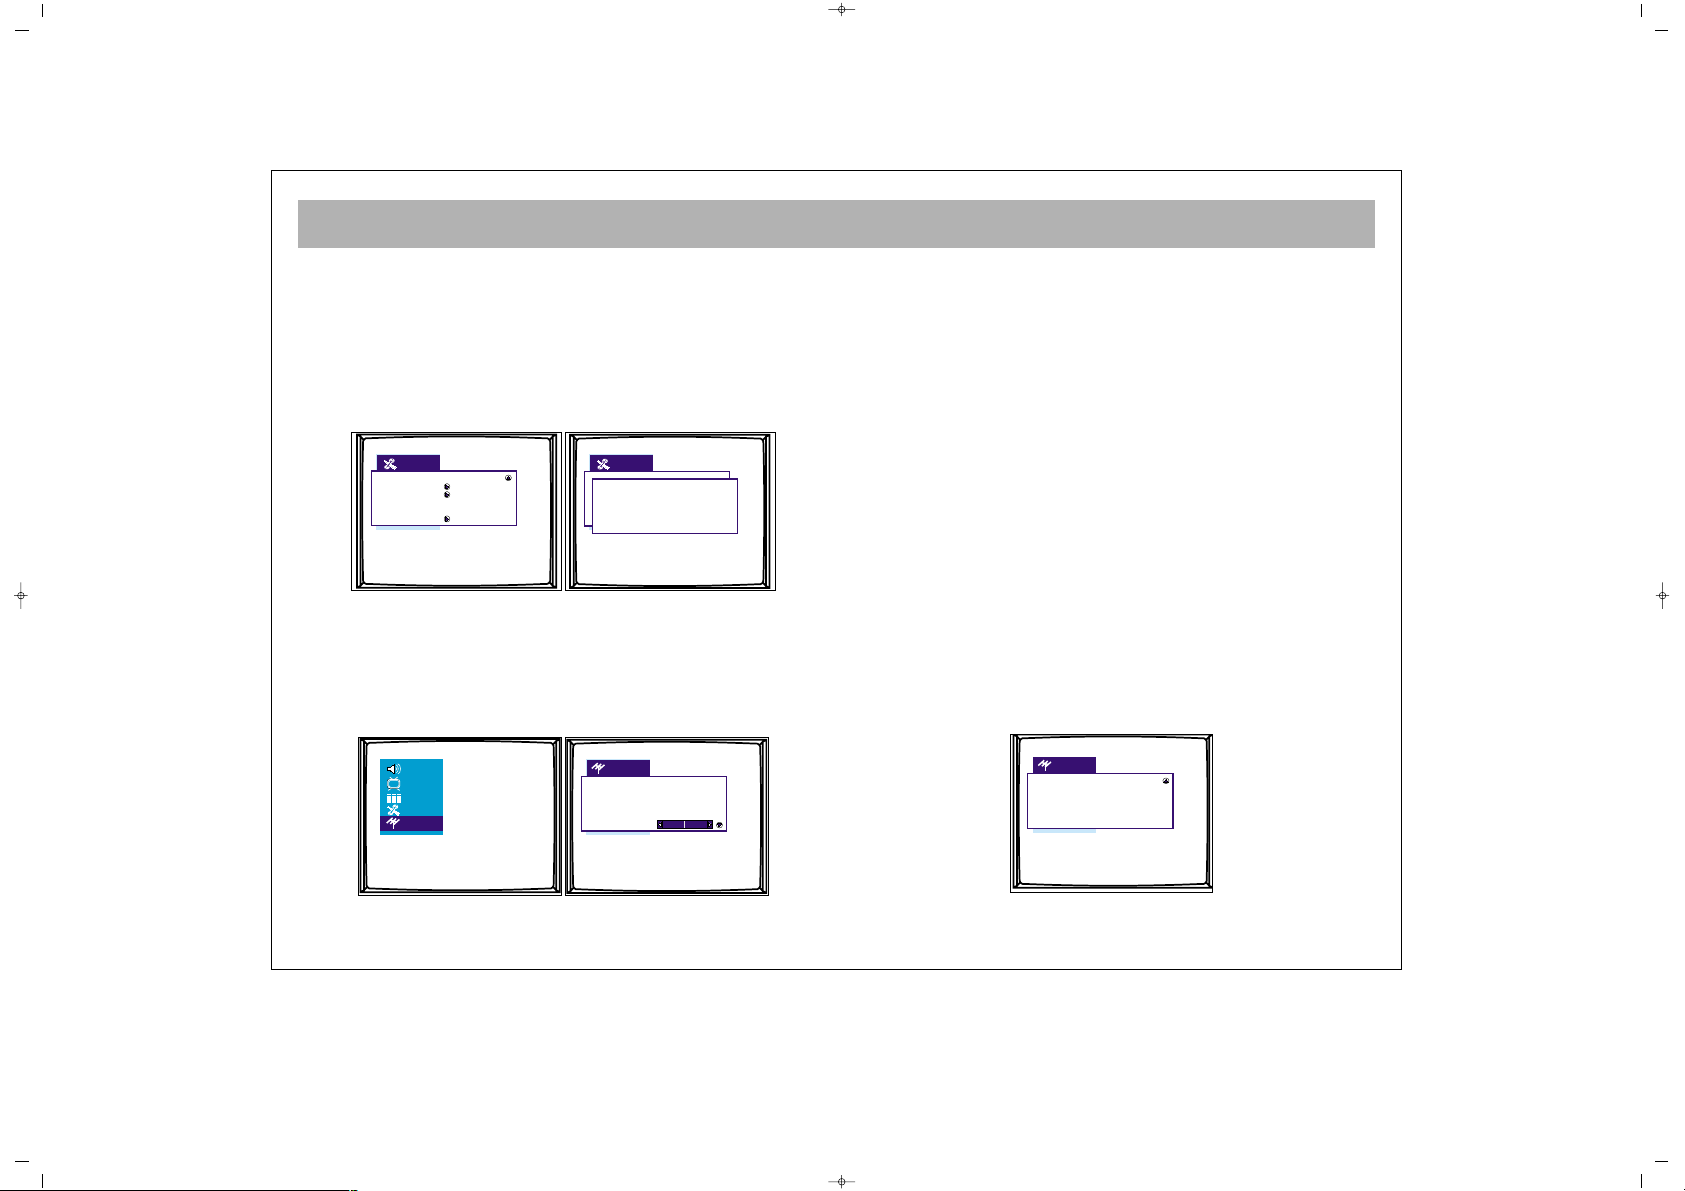
33.. PPRROOGGRRAAMMMMAATTAABBEELL::
Via de menutoetsen krijgt u
toegang tot de programmatabel.
Kanaalnummer en -naam in de programmatabel
verschijnen in verschillende kleuren. U krijgt toegang
tot andere kanalen via de toetsen P+/P- en V+/V- in de
programmatabel.
33..11..
Blauwe knop dient voor benoeming. Als u de
blauwe toets indrukt in het huidige kanaal, verschijnt
een klein venster. Het teken kan worden gewijzigd
door middel van de toetsen P+/P-. U krijgt toegang tot
de volgende of vorige tekens via de toetsen V+/V-. Als
de benoeming klaar is, de blauwe toets nogmaals
indrukken om deze op te slaan.
33..22..
U kunt van plaats veranderen door op de groene
toets te drukken. Ga naar het kanaal dat u wenst te
verplaatsen door op de toetsen P+/P- en V+/V- te
drukken en druk dan op de groene toets. Ga opnieuw
naar de plaats naar waar u wenst te verplaatsen door op
de toetsen P+/P- en V+/V- te drukken en druk dan op de
groene toets. Verplaatsingsproces is voltooid (Het
1
2
3
4
5
6
7
8
9
10
11
12
Naam
Ga
Wissen
Oversln.
Helderheid
Contrast
Kleur
Schaerpte Normaal
Dyn. huidskleur Uit
Wittint Normaal
065001057460 15"LCDVD LOC1 HOLL 13/2/07 10:47 Page 16
Page 17
TV-FUNCTIES (MENU’S)
17
verplaatste programma is ingevoegd tussen de andere
programma’s, waardoor het nummer van de volgende
programma’s met één wordt verhoogd)
33..33..
Rode toets dient voor wissen. Ga naar het kanaal
dat u wenst te wissen door op de toetsen P+/P- en
V+/V- te drukken en druk dan op de rode toets. Aan de
rechterkant van het menu verschijnt het kanaalnummer
met een rode toets. Als u de rode toets nogmaals
indrukt, wordt het kanaal gewist. Het volgende kanaal
vervangt het gewiste kanaal.
33..44..
U kunt kanalen overspringen met behulp van de
gele toets. Als u op het over te springen kanaal staat,
druk dan op de gele toets, daarbij kunt u de
overspringfunctie op dat kanaal aanpassen. Als u na het
afsluiten van de programatabel de knoppen “P+, P-“
gebruikt voor overlopen van de kanalen, zijn de
kanalen die u overspringt met deze toetsen niet
zichtbaar. U krijgt toegang tot dit kanaal via nummers,
de naam en het nummer van het kanaal verschijnt in
een andere kleur. Om de overspringfunctie te
annuleren kunt u de gele toets indrukken op het kanaal,
opnieuw in de programmatabel.
44.. IINNSSTTEELLLLIINNGGEENNMMEENNUU:: IInn ddiitt mmeennuu::
44..11.. BBrroonn OOSSDD::
De bron OSD-optie kan worden ingesteld
als Open / Gesloten. Deze verschaft continu weergave
van het huidige kanaal.
44..22.. TTaaaall::
Met deze optie kunt u de taal in de menu’s
wijzigen.
44..33 LLaanndd::
Uw toestel vindt het kanaal en kies het systeem
volgens het bepaalde land tijdens het automatisch
zoeken. Om deze reden is het van cruciaal belang de
juiste landcode in te voeren.
Vergeet dus niet de afkorting van het land te kiezen met
de toets “V+/V-“. (als u geen landnaam hebt, kies dan een
ander land dat hetzelfde systeem heeft).
44..44.. KKiinnddeerrsslloott::
In dit menu verschijnt “Vergrendeling en
Wachtwoord”. Als de Vergrendelingsfunctie aan staat
door gebruik van de toets V+, zal een wachtwoord
worden gevraagd als het
Bron OSD Uit
Taal Nederlands
Land NL
Kinderslot
Tijdsinstel.
Teleteksttaal Latijns
065001057460 15"LCDVD LOC1 HOLL 13/2/07 10:47 Page 17
Page 18

TV-FUNCTIES (MENU’S)
18
toestel wordt ingeschakeld vanuit de standby-stand en
zal werken als het wachtwoord correct werd
ingevoerd. Om het wachtwoord te wijzigen kunt u een
4-cijferig getal invoeren in de wachtwoordlijn, tussen
“0000” en “9999”.
NNoottaa::
Als u het wachtwoord vergeet, typ dan 4711
44..55.. TTiijjddiinnsstteelllliinnggeenn::
In dit menu worden Slaaptijd,
Herinneringstijd, UIT-tijd, Inschakeltijd en het
Inschakelprogramma getoond.
44..55..11.. SSllaaaappttiijjdd::
U kunt de slaaptijdfunctie instellen
tussen 5 en 120 minuten met de toets V+. Als de tijd
verstreken is, zal uw TV automatisch uitschakelen. De
afsluittijd kan worden verhoogd of verlaagd met
intervals van 5 minuten. Op het einde van de
ingestelde periode kunt u de laatste periode van 60
seconden op het scherm bekijken.
Sluit dit menu door op de “TV”-toets te drukken.
44..55..22.. HHeerriinnnneerriinnggssttiijjdd::
U kunt de terugroepperiode
instellen tussen 5 en 120 minuten met de toets V+. Op
het einde van de ingestelde periode verschijnt een
waarschuwingsboodschap op het scherm. Door het
indrukken van gelijk welke toets verdwijnt deze
boodschap. Herinneringstijd kan worden verhoogd of
verlaagd in stappen van 5 minuten.
44..55..33.. UUIITT--ttiijjdd::
U kunt de uitschakeltijd instellen. Nota:
Controleer op het RT-klokmenu of de tijd correct is
44..55..44..
Inschakelprogramma: Na instelling van de
inschakeltijd in de inschakeloptie zal het TV-toestel
overschakelen naar het ingestelde programma als het
tijdstip aanbreekt. Na aanpassing van de inschakeling,
als uw TV in Standby-modus staat, wordt ingeschakeld
op het ingestelde tijdstip en programma als het tijdstip
aanbreekt. Als de inschakeling op A/V-modus moet
worden gezet, druk dan op de A/V-knop in de
Inschakelprogramma-optie. De andere modi worden in
volgorde weergegeven.
44 .. 66 .. TTeelleetteekkssttttaaaall::
U kunt de teleteksttaal instellen
afhankelijk van de teletekst ontvangen door uw TVtoestel.
Slaaptijd Uit
Herinnering. Uit
Uitschakeltijd - -:- Inschakeltijd - -:- Inschakelprog. 5
Beveilig Uit
Bevl. code ****
065001057460 15"LCDVD LOC1 HOLL 13/2/07 10:47 Page 18
Page 19
TV-FUNCTIES (MENU’S)
19
44..77.. TTeelleetteekksstt OO//WW::
Hiermee worden de tekens
geselecteerd die specifiek zijn voor Oost-Europese en
West-Europese landen voor teletekst
44..88.. RReeaallttiimmee kkllookk::
De klok wordt ingesteld als “24
uren, 12 uren of gesloten”. Op de onderste regel wordt
de huidige tijd aangepast.
55.. PPRROOGGRRAAMMMMAA--IINNSSTTEELLLLIINNGGEENN
In het programma-instellingenmenu staan de opties
“Prog. Nr., Kanaalnaam, Systeem, Geluidsysteem,
Auto Prog., Frequentie, Fijnafstemming, AFC,
Overspringen en beveiligen".
PPrrooggrraammmmaannrr..::
Toont het nummer van het huidige
kanaal. Het programmanr. kan worden gewijzigd via de
toetsen V+/V- en cijfers.
PPrrooggrraammmmaannaaaamm::
De naam van het huidige kanaal
verschijnt. Druk op de toets V+/V- om de kanaalnaam in
te voeren. U kunt het teken wijzigen met de toetsen P+
en P-. U krijgt toegang tot de volgende of vorige tekens
via de toetsen V+/V-. Als de benoeming klaar is, kunt u
deze functie afsluiten met behulp van de toetsen V+/V-.
SSyysstteeeemmssttaannddaaaarrdd::
U kunt de systeemstandaard van het
land kiezen met de toetsen “V+/V-“. ( De Europese
landen behalve Frankrijk; u kunt de optie "Europa"
kiezen)
AAuuttoomm.. OOppssllaaaann::
Dit zorgt dat de programma's
automatisch worden gevonden. Als het zoeken begint,
wordt de boodschap "In uitvoering" weergegeven. Als
de transactie voltooid is, verdwijnt de "In uitvoering"
AFC Aan
Beveilig Uit
Opslaan
Programmanummer 2
Programmanaam
Sys. standaard Europa
Auto. Opslaan
Frequentie 182.25 MHz
Fijnafstemmen
Klok 24 uur
Tijd 00:05
Land NL
Kinderslot
Tijdsinstel.
Teleteksttaal Latijns
Teletekst OW West
RT Klok
065001057460 15"LCDVD LOC1 HOLL 13/2/07 10:47 Page 19
Page 20

TV-FUNCTIES (MENU’S)
20
boodschap. Na voltooiing van Autom. Opslaan wordt
de functie weergegeven tot de programmanummers
zijn gevonden.
BBiijjvvoooorrbbeeeelldd::
Als er 50 programma’s in Autom.
Opslaan staan, verdwijnt de functie na 50. Als P+
wordt ingedrikt in het 50ste programma, wordt
overgegaan naar PC in plaats van 51.
Frequentie: In de frequentieoptie wordt de frequentie
van het huidige kanaal weergegeven. U kunt de
frequentie wijzigen door middel van V+/V- of
cijfertoetsen.
FFiijjnnaaffsstteemmmmiinngg::
U kunt fijnafstemming uitvoeren op de
kanalen door de toetsen V+/V- in te drukken.
AAFFCC::
Hierdoor wordt AAN/UIT in werking gesteld. In
AAN-stand worden de mogelijke kleine
frequentievervormingen in de kanalen gevolgd of
gecorrigeerd.
VVeerrggrreennddeelliinngg::
Hierdoor wordt het huidige kanaal
vergrendeld. Als toegang tot het vergrendelde kanaal
wordt geprobeerd, wordt een wachtwoord gevraagd.
Als het wachtwoord correct wordt ingevoerd (het
wachtwoord dat wordt ingevoerd in de optie
kinderslot) verschijnt het kanaal. Na invoer van het
wachtwoord verschijnt het kanaal. Als het kanaal wordt
gewijzigd en dit kanaal wordt opnieuw bezocht,
verschijnt het wachtwoord als uit. U moet “Uit”
aanpassen in de Programma-instellingen om af te
sluiten.
SSttoorree::
U kunt de aanpassingen bewaren.
NNoottaa::
Het Kinderslot moet op Aan staan om dit slot
functioneel te maken.
065001057460 15"LCDVD LOC1 HOLL 13/2/07 10:47 Page 20
Page 21

MODI VOOR EXTERN TOESTEL
21
NNiieett aallllee mmeennuu’’ss vveerrsscchhiijjnneenn iinn ddee mmooddii vvoooorr eexxtteerrnn
ttooeesstteell,, ddeezzee kkuunnnneenn vveerrsscchhiilllleenn vvaann TTVV--mmeennuu’’ss..
BBiijjvvoooorrbbeeeelldd::
YYPPbbPPrr
In deze modus zijn sommige menu's gesloten. De
Volume-, Beeld- en Instellingenmenu’s zijn operationeel
Er vindt geen verandering plaats in het Volumemenu
In het Beeldmenu werd de “dyn.huidskleur” verwijderd.
Info-opties werden toegevoegd.
IInnffoo::
De informatie over de beeldresolutie verschijnt
De opties in verband met tekst werden verwijderd in het
instellingenmenu.
PPCC
Sommige menu’s werden gesloten in dit menu. De Geluid,
Beeld- en Instellingenmenu’s worden bewaard.
Aan het Geluidsmenu wordt de Optie Audio toegevoegd.
Als de Audio op Aan staat, kunt u het geluid van uw
computer uit de TV-luidsprekers horen. Als Audio uit staat,
kunt u de stem van uw computer niet horen uit uw TVluidsprekers.
In het Beeldmenu werd de “dyn.huidskleur”-optie
verwijderd. De opties Positie, Beeldruis, Autom. regeling,
Informatie, Fabriek en Kleurtemp werden toegevoegd.
PPoossiittiiee::
Stelt de horizontale en verticale positie van het
beeld in.
BBeeeellddrruuiiss::
In de beeldruis zijn er de opties “Fase” en
“Klok”. Met deze opties kunt u het beeld zuiverder
instellen.
Autom. Regeling: Stelt de beeldzuiverheid automatisch in
IInnffoo::
De informatie over de beeldresolutie verschijnt
FFaabbrriieekk::
Verschaft herstel van de beeldinstellingen naar
fabrieksinstellingen.
KKlleeuurrtteemmpp::
Stelt de beeldtemperatuur in. Als GEBRUIKER
wordt geselecteerd, verschijnt de boodschap "Wittint RGB"
in het onderste gedeelte. De gebruiker kan aanpassingen
uitvoeren.
De tekst in verband met opties werd verwijderd in het
instellingenmenu.
065001057460 15"LCDVD LOC1 HOLL 13/2/07 10:47 Page 21
Page 22
TELETEKST
22
TTEELLEETTEEKKSSTTMMOODDUUSS
Als het kanaal dat u aan het bekijken bent een
teletekstuitzending heeft, kunt u verschillende verrichtingen
uitvoeren door om te schakelen naar teletekstmodus door
middel van de hieronder beschreven toetsen:
11..TTeelleetteekksstt::
Verschaft omschakeling naar
teletekstuitzending in het huidige kanaal
22.. TTVV::
Gebruikt voor omschakeling naar TV-uitzending
terwijl u in Teletekstmodus staat
33.. OOnntthhuulllleenn//VVeerrbbeerrggeenn ((aannttwwoooorrddeenn))::
: Verschaft
weergave of heropslaan van bepaalde informatie verborgen
in de teletekstuitzending terwijl in teletekstmodus
44.. TTeelleetteekkssttttiijjddiinnsstteelllliinngg ((ddee ssuubbppaaggiinnaa’’ss ooppvvrraaggeenn)):: ::
Terwijl in TV-modus geeft deze modus de tijdinstelling van
uw TV-toestel weer in de rechter bovenhoek van het scherm.
In de Teletekstmodus wordt deze functie gebruikt voor een
directe toegang tot de subpagina’s van de huidige pagina.
BBiijjvvoooorrbbeeeelldd::
U zit op teletekstpagina nr. 500. Als de
boodschap _ verschijnt, toont het nummer 1 het
subpaginanummer en nummer 2 toont het totale aantal
subpagina’s. Door de teleteksttijdinstellingtoets in te
drukken in dit geval, zullen de
SS -- -- -- --
merktekens het
teletekstpaginanummer vervangen. Met behulp van nummer
0 tot 9 op de afstandsbediening krijgt u toegang tot de door u
gewenste subpagina. Bijvoorbeeld, als u toegang wilt krijgen
tot de tweede subpagina, druk dan op de cijfers 0, 0, 0, 2.
1. Teleteksttoets
2. TV-toets
3. Onthullen/Verbergen
(antwoorden)-toets
4. Teleteksttijd (subpagina’s
opvragen)-toets
5. Annuleren (updating)-toets
6. Grootte (paginavergroting)toets
7. Mengen (TV en
teletekstinformatie
gelijktijdig bekijken)-toets
8. Vasthouden (subpagina
vasthouden)-toets
9. Index (hoofdpagina)-toets
10.Kleur (rood, groen, geel,
blauw)-toetsen
065001057460 15"LCDVD LOC1 HOLL 13/2/07 10:47 Page 22
Page 23
TELETEKST
23
55.. AAnnnnuulleerreenn ((uuppddaattiinngg)):: ::
als u op deze toets drukt
terwijl u naar teletekst kijkt, wordt er terug overgeschakeld
naar normaal TV kijken. De teletekst functie blijft echter
actief. Als u nu een nieuw teletekstpaginanummer invoegt,
zal de televisie in de achtergrond naar die pagina op zoek
gaan. Vanaf het ogenblik dat die pagina gevonden is, wordt
het nummer op het scherm weergegeven. Als u terug drukt
op deze toets verschijnt opnieuw de teletekst maar met de
nieuwe gewenste pagina.
66.. FFoorrmmaaaatt ttooeettss :: ::
met deze toets kan de
teletekstpagina op drie formaten weergegeven worden :
normaal (heel scherm), en dubbele grootte van het
bovenste en onderste deel van de pagina.
77.. CCoommbbiinnaattiiee ttooeettss :: ::
met deze toetst kan de teletekst
tezamen met het normale beeld van de zender weergegeven
worden. Bij opnieuw drukken op deze toets verschijnt
opnieuw alleen de teletekst.
88.. TTooeettss oomm ssuubbppaaggiinnaa vvaasstt ttee hhoouuddeenn :: ::
als een
teletekstpagina verschillende subpagina's heeft, worden deze
met een bepaald interval weergegeven. Met deze toets kan
een bepaalde subpagina vastgehouden worden. Er verschijnt
dan rechtsboven in het scherm een icoontje. Druk opnieuw
op deze toets om de functie uit te schakelen.
99.. IInnddeexx :: ::
met deze toets gaat u naar de hoofdpagina
van de teletekstuitzending.
1100.. KKlleeuurreennttooeettsseenn ((rroooodd//ggrrooeenn//ggeeeell//bbllaauuww)) ::
(alleen
bruikbaar bij snelle teletekst). Met deze toetsen kan sneller
naar een bepaalde informatie gezocht worden).
VVOOOORRBBEEEELLDD ::
TTVV--GGIIDDSS SSPPOORRTT AACCTTUUAALLIITTEEIITTEENN HHEETT WWEEEERR
(De informatie hierboven geldt als een voorbeeld. In
werkelijkheid variëren de onderwerpen die verbonden zijn
met de gekleurde toetsen in functie van de gekozen pagina).
OOPPMMEERRKKIINNGG ::
bepaalde modellen beschikken niet over
teletekst.
Druk op de
rrooddee
toets
voor de tvgids.
Druk op de
ggrrooeennee
toets
voor de
sportinformatie.
Druk op de
ggeellee
toets
voor het
nieuws.
Druk op de
bbllaauuwwee
toets
voor het
weerbericht.
065001057460 15"LCDVD LOC1 HOLL 13/2/07 10:47 Page 23
Page 24

DVD-SPELER
24
UW DVD-SPELER HEEFT EEN PERFECTE BEELD- EN GELUIDSKWALITEIT DANKZIJ DE DIGITALE AUDIO EN VIDEO
SYSTEMEN.
U WAANT ZICH IN DE BIOSCOOP BIJ HET BEKIJKEN VAN FILMS VIA UW DVD-SPELER.
EIGENSCHAPPEN:
- TAALKEUZE
- ONDERTITELING
-GESCHIKT VOOR DVD
- VERTRAAGD EN VERSNELD AFSPELEN
- VERSCHILLENDE CAMERAPOSITIES (MITS OP DE DVD AANWEZIG)
AArreeaaccooddee
Deze speler is alleen geschikt voor
discs met areacode 2 en speelt
geen discs met een andere code.
065001057460 15"LCDVD LOC1 HOLL 13/2/07 10:47 Page 24
Page 25
AFSTANDSBEDIENING (DVD-FUNCTIES)
25
11.. PPOOWWEERR ttooeettss
Om het toestel in en uit te schakelen
22.. EEJJEECCTT ttooeettss
Om de disklade te openen en te sluiten
33.. MMUUTTEE ttooeettss
Om het geluid compleet te dempen
44.. ZZOOOOMM ttooeettss
Om in te zoomen op het beeld
55.. SSLLOOWW ttooeettss
Vertraagd afspelen op 3 snelheden, voor
(Deze knoop functioneert niet bij sommige
modellen)
66.. CCLLRR ttooeettss
Om de invoer in de menu's te wissen
77.. SSEEAARRCCHH ttooeettss
Om naar een bepaalde plaats op de disk te
gaan
88.. SSLLOOWW ttooeettss
Vertraagd afspelen op 3 snelheden, achteruit.
(Deze knoop functioneert niet bij sommige
modellen)
99.. AA--BB ttooeettss
Om een bepaalde passage te markeren
1100.. EEXXIITT ttooeettss
Om het DVD menu te verlaten
1111.. MMEENNUU ttooeettss
Om de menu's weer te geven
1122.. SSEETTUUPP ttooeettss
Om instellingen in het setup menu te regelen
1133.. PPIIJJLLttooeettsseenn
Om naar boven, beneden, links en rechts te
navigeren
1144.. SSUUBB ttooeettss
Om de taal van de ondertitels te kiezen
1155.. AAUUDDIIOO ttooeettss
Om de gesproken taal te kiezen
1166.. DDIISSPPLLAAYY ttooeettss
Om informatie betreffende de DVD op te
roepen
1177.. RRAADDIIOO ttooeettss
(Deze knoop functioneert niet bij sommige
modellen)
1188.. NNuummeerriieekkee ttooeettsseenn
Om selecties in het menu in te voegen
1199.. SSKKIIPP ttooeettsseenn
Om bepaalde secties te overspringen
2200.. PPAAUUSSEE ttooeettss
Om te pauzeren
2211.. SSTTOOPP ttooeettss
Om de weergave te stoppen
2222.. PPLLAAYY ttooeettss
Om de weergave te starten
2233.. FFAASSTT ttooeettsseenn
Om de weergave voorwaarts of achterwaarts
te versnellen (5 niveaus)
2244.. EENNTTEERR ttooeettss
Om instellingen of keuzes in het menu te
bevestigen
2255.. DDVVDD // TTVV FFUUNNCCTTIIEESS
(Voor AFSTANDSBEDIENING)
065001057460 15"LCDVD LOC1 HOLL 13/2/07 10:47 Page 25
Page 26
WEERGAVE VAN CDs (DVD)
26
WWeeeerrggaavvee vvaann CCDD''ss
1. Druk op de "DVD/TV" toets op de afstandsbediening om
over te gaan naar de DVD modus.
2. Druk op de " DVD/TV " toets op de afstandsbediening
zodat deze ingesteld wordt voor gebruik van de DVD
functies.
3. Plaatst de kant van DVD dat gegevens worden
behandeld.
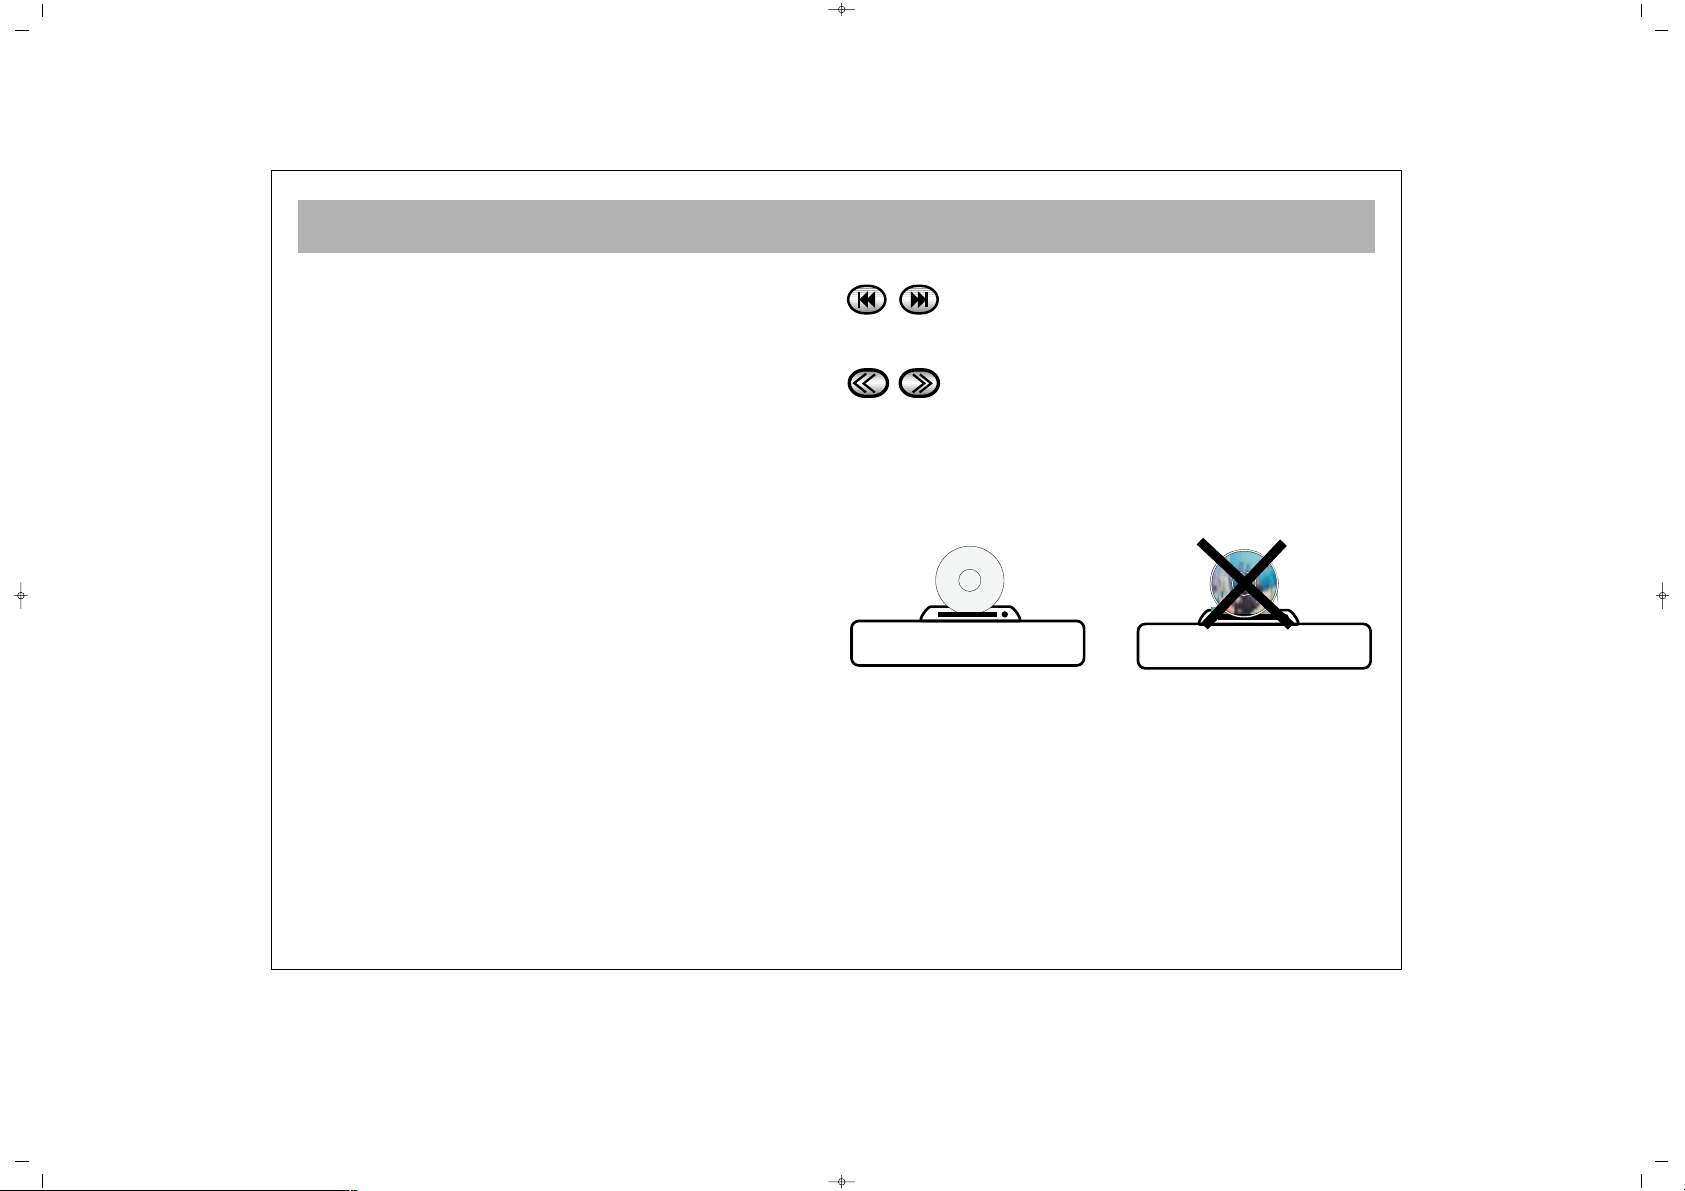
4. Breng een disk in met de bedrukte zijde naar boven.
5. Druk op de "PLAY" toets om de lade te sluiten en de
weergave te starten.
* Afhankelijk van de opname op de disk kan er nu eerst een
menu verschijnen. Navigeer doorheen het menu met de
pijltoetsen en gebruik de "ENTER" toets om een bepaalde
selectie te kiezen.
6. Druk op de "PAUSE" toets om de weergave te pauzeren.
Het laatste beeld wordt stilgezet. Druk weer op de play
toets om de weergave verder te zetten.
7. Druk op de "STOP" toets om de weergave te stoppen. Als
u op de "PLAY" toets drukt start de weergave vanaf het punt
waar u gestopt bent.
SSKKIIPP ::
om voorwaarts of achterwaarts te
springen tussen de verschillende secties
(hoofdstukken) op de DVD disk.
FFAASSTT ::
u kan het beeld versneld voorwaarts of
achterwaarts weergeven (5 verschillende
snelheden).
* Plaatst de kant van DVD dat gegevens worden behandeld.
065001057460 15"LCDVD LOC1 HOLL 13/2/07 10:47 Page 26
Page 27

INSTELLINGEN DVD
27
PPAAGGIINNAA MMEETT AALLGGEEMMEENNEE IINNSSTTEELLLLIINNGGEENN ::
** TTVV DDiissppllaayy ::
om het beeldformaat te kiezen
** AAnnggllee MMaarrkk ::
om de markering voor het bekijken vanuit
verschillende hoeken aan of uit te schakelen
** OOSSDD LLaanngg ::
om de taal van het instelmenu te kiezen
** CCaappttiioonnss ::
om verborgen tekst aan of uit te schakelen
** LLaasstt mmeemmoorryy ::
als deze functie is ingeschakeld wordt de
weergave automatisch herstart vanaf het punt waar u vorige
keer gestopt bent.
.. GENERAL SETUP PAGE ..
Stel status laatste geheugen in
Beeld verhouding PS
Hoekmarkering Aan
OSD taal DUT
Tekst Uit
Laatste geheugen Uit
Aan
Uit
.. GENERAL SETUP PAGE ..
Gesloten tekst
Beeld verhouding PS
Hoekmarkering Aan
OSD taal DUT
Tekst Uit
Laatste geheugen Uit
Aan
Uit
.. GENERAL SETUP PAGE ..
Stel OSD taal in
Beeld verhouding PS
Hoekmarkering Aan
OSD taal DUT
Tekst Uit
Laatste geheugen Uit
English
Frans
Duits
Italians
Turks
Nederlands
Spaans
.. GENERAL SETUP PAGE ..
Stel hoekmarkering in
Beeld verhouding PS
Hoekmarkering Aan
OSD taal DUT
Tekst Uit
Laatste geheugen Uit
Aan
Uit
Stel TV Display Modus in
.. GENERAL SETUP PAGE ..
Beeld verhouding PS
Hoekmarkering Aan
OSD taal DUT
Tekst Uit
Laatste geheugen Uit
Normaal/PS
Normaal/LB
Breed
.. GENERAL SETUP PAGE ..
Beeld verhouding PS
Hoekmarkering Aan
OSD taal DUT
Tekst Uit
Laatste geheugen Uit
Go To General Setup page
065001057460 15"LCDVD LOC1 HOLL 13/2/07 10:47 Page 27
Page 28
INSTELLINGEN DVD
28
PPAAGGIINNAA AAUUDDIIOO IINNSSTTEELLLLIINNGGEENN ::
** DDoowwnnmmiixx ::
de audio uitgang kan via dit submenu
ingesteld worden
** HHCCCCDD ::
de audio bitrate voor PCM kan ingesteld worden
HDCD
.. Pagina Luidspreker Instellingen ..
Downmix
HDCD Uit Uit
44.1K
88.2K
.. Pagina Luidspreker Instellingen ..
Kies Downmix modus
Downmix LT:RT
HDCD Uit Stereo
065001057460 15"LCDVD LOC1 HOLL 13/2/07 10:47 Page 28
Page 29
INSTELLINGEN DVD
29
VVOOOORRKKEEUUZZEE PPAAGGIINNAA
DDiitt mmeennuu kkaann ggeeaaccttiivveeeerrdd wwoorrddeenn wwaannnneeeerr ddee ssppeelleerr iinn ssttoopp iiss ooff
wwaannnneeeerr eerr ggeeeenn ddiisskk iinnggeebbrraacchhtt IISS..
** TTVV ttyyppee ::
het videoformaat kan ingesteld worden
(PAL,NTSC,Auto)
** AAuuddiioo ::
de gesproken taal kan gekozen worden
** OOnnddeerrttiitteellss ::
de taal van de ondertitels kan gekozen worden
** DDiisscc mmeennuu ::
de taal van het DVD diskmenu kan gekozen
worden
** PPaarreennttaall ::
het niveau van de ouderlijke controle kan
ingesteld worden
1.KID SAF
2.G
3.PG
4.PG 13
5.PGR
6.R
7.NC17
8.ADULT
.. Voorkeurpagina ..
Stel ouderlijke controle in
TV Type PAL
Audio ENG
Ondertitels ENG
Disc Menu ENG
Ouderlijk
Password
Standaard
English
Frans
Spaans
Duits
Nederlands
Turks
Italiaans
.. Voorkeurpagina ..
Voorkeuze Taal Menu
TV Type PAL
Audio ENG
Ondertitels ENG
Disc Menu ENG
Ouderlijk
Password
Standaard
English
Frans
Spaans
Duits
Nederlands
Turks
Italiaans
Pools
.. Voorkeurpagina ..
Voorkeuze Taal Ondertitels
TV Type PAL
Audio ENG
Ondertitels ENG
Disc Menu ENG
Ouderlijk
Password
Standaard
English
Frans
Spaans
Duits
Nederlands
Turks
Italiaans
.. Voorkeurpagina ..
Voorkeuze Taal Audio
TV Type PAL
Audio ENG
Ondertitels ENG
Disc Menu ENG
Ouderlijk
Password
Standaard
.. Voorkeurpagina ..
Stel TV Standaard in
TV Type PAL PAL
Audio ENG Auto
Ondertitels ENG NTSC
Disc Menu ENG
Ouderlijk
Password
Standaard
065001057460 15"LCDVD LOC1 HOLL 13/2/07 10:47 Page 29
Page 30
INSTELLINGEN DVD
30
** PPaasswwoooorrdd ::
het paswoord voor het instellen van de
ouderlijke controle kan gewijzigd worden
Breng het oude paswoord in en vervolgens het nieuwe en
bevestig het.
((HHeett iinn ddee ffaabbrriieekk iinnggeesstteellddee ppaasswwoooorrdd iiss 11336699))
** FFaabbrriieekkssiinnsstteelllliinngg ::
kunnen opgeroepen worden door "default"
te kiezen.
Stel terug in
.. Voorkeurpagina ..
Laad fabrieksinstellingen
TV Type PAL
Audio ENG
Ondertitels ENG
Disc Menu ENG
Ouderlijk
Password
Standaard
Oud paswoord
Nieuw paswoord
Bevestig PWD
OK
Wijzig
.. Voorkeurpagina ..
Vijzig paswoord
TV Type PAL
Audio ENG
Ondertitels ENG
Disc Menu ENG
Ouderlijk
Password
Standaard
065001057460 15"LCDVD LOC1 HOLL 13/2/07 10:47 Page 30
Page 31

BASIS FUNCTIES
31
ZZOOOOMM MMOODDUUSS ::
u kunt op het beeld inzoomen door op de
toets "ZOOM" te drukken. De zoomfunctie heet 6 niveaus
(2x, 3x, 4x). De zoomfunctie is niet beschikbaar op alle
disks. Het zoomniveau kan ook verschillend zijn van disk tot
disk. Als de disk slechts over 2 zoomniveaus beschikt dan
zal bij een derde druk op de "zoom" toets terug overgegaan
worden naar een normaal beeld. U kan het ingezoomde
beeld naar boven, beneden, links en rechts bewegen met de
pijltoetsen.
DDIISSPPLLAAYY::
u kan kiezen uit verschillende tijdweergaven door
op de "display" toets te drukken : TITEL, RESTERENDE TIJD
TITEL, HOOFDSTUK, RESTERENDE TIJD HOOFDSTUK.
OONNDDEERRTTIITTEELLSS ::
de taal van de ondertitels wordt gewijzigd
telkens u op de "SUB" toets van de afstandsbediening drukt.
AAUUDDIIOO ::
de gesproken taal kan gewijzigd worden door op
de "Audio" toets op de afstandsbediening te drukken.
MMUUTTEE ::
door op deze toets te drukken wordt het geluid
volledig gedempt. Druk terug op deze toets om opnieuw een
normale geluidsweergave te bekomen.
065001057460 15"LCDVD LOC1 HOLL 13/2/07 10:47 Page 31
Page 32

BASIS FUNCTIES
32
DDIISSCC MMEENNUU::
door op de "MENU" toets op de
afstandsbediening te drukken krijgt u toegang tot het menu dat
zich op de disk bevindt. Gewoonlijk kunt u met dit menu
informatie oproepen betreffende de delen van de disk, de
regisseur, de acteurs, de geschiedenis van de film en
advertenties. Als er op het menu geen "exit" functie aanwezig
is, druk dan op de "EXIT" toets om het menu te verlaten.
ZZOOEEKK MMEENNUU
**
Als u op de "search" toets drukt verschijnt het volgende
menu (het beeld van de film bovenaan en de gegevens
onderaan).
U kan de gewenste lijn (titel, hoofdstuk, audio, ondertitels,
hoeken, tijd, enz) selecteren door op "enter" te drukken en
dan de instellingen te maken.
** TTiitteell ::
de gewenste titel kan direct geselecteerd worden
** HHooooffddssttuukk ::
het gewenste hoofdstuk kan direct geselecteerd
worden
** AAuuddiioo ::
de audio instelling kan gekozen worden
** OOnnddeerrttiitteellss ::
de taal van de ondertitels kan gekozen worden
** HHooeekk ::
de verschillende hoeken kunnen gekozen worden
(indien aanwezig op disk)
** TTTT ttiijjdd ::
de gewenste tijd kan direct ingebracht worden
** CCHH ttiijjdd ::
de gewenste tijd van een hoofdstuk kan ingebracht
worden
** HHeerrhhaalliinngg ::
de herhaling van een titel of de gehele disk kan
gekozen worden
** TTiijjddwweeeerrggaavvee ::
het formaat van de tijdweergave kan
gekozen worden (verlopen tijd titel, resterende tijd titel,
verlopen tijd hoofdstuk, resterende tijd hoofdstuk).
VVOOOORR UUWW IINNFFOORRMMAATTIIEE
Druk op een toets van een functie die niet werkzaam is en
het symbool van een hand verschijnt op het scherm om aan
te tonen dat de gewenste functie niet uitvoerbaar is.
• Als het instelmenu gebruikt wordt kunnen de toetsen PLAY,
STOP, SKIP, PAUSE, enz niet gebruikt worden. Om deze te
gebruiken dient eerst het menu verlaten te worden.
• Dolby Digital AC-3 is het laatste compressiesysteem dat
door Dolby Laboratories ontwikkeld werd. Er bevindt zich in
uw DVD speler een speciale decoder om dit systeem te
kunnen gebruiken. U bekomt een geluidsweergave als in de
bioscoop indien u de aansluitingen aan het audio systeem
maakt zoals beschreven in deze handleiding.
• PCM is de afkorting van Pulse Code Modulation. Dit heeft
te maken met het geluid. Bij DVD wordt het geluid zowel in
AC-3 als in PCM opgenomen.
• Regionale code : als de regionale codes van de speler en
van de disk niet met elkaar overeenkomen kan de disk niet
weergegeven worden. "Invalid Area" verschijnt dan op het
scherm. De regionale code van deze speler is "2" en alleen
disks met een code "2" kunnen weergegeven worden.
Menu
Nummer 01/01
Disk tijd 0:43:33
Nummer tijd 0:43:33
Herhaal Uit
Nummer:01 0:00:31
065001057460 15"LCDVD LOC1 HOLL 13/2/07 10:47 Page 32
Page 33

CD, MP3
33
GGEEBBRRUUIIKK VVAANN AAUUDDIIOO CCDD ::
bij de weergave van audio
CD's kunnen bepaalde toetsen niet gebruikt worden. De
weergave van audio CD's gebeurt op dezelfde wijze als
andere CD's. Druk op de "EJECT" toets om de disklade te
openen, druk op PLAY [ ], om de weergave te starten, druk
op PAUSE [ ], om de weergave te onderbreken, druk op
STOP [ ], om de weergave te stoppen en gebruik de SKIP
toetsen om direct naar bepaalde nummers te gaan. Het
gebruik van de menu's is gelijk aan dat van andere CD's.
GGEEBBRRUUIIKK VVAANN MMPP33 CCDD ::
bij de weergave van MP3 disks
verschijnt een MP3 lijst op het TV scherm. Druk op de
"EJECT" toets om de disklade te openen, druk op PLAY [ ],
om de weergave te starten, druk op PAUSE [ ], om de
weergave te onderbreken, druk op STOP [ ], om de
weergave te stoppen en gebruik de SKIP toetsen om direct
naar bepaalde nummers te gaan. U kan de gewenste
nummers direct selecteren met de numerieke toetsen (0-9).
Het gebruik van de menu's is gelijk aan dat van andere CD's.
JJPPEEGG BBEEEELLDD DDIISSPPLLAAYY ::
dit activeert het beeldmenu. In dit
menu kunt u de beelden selecteren en weergeven als een
diapresentatie. U kunt deze functie verlaten door op "STOP"
te drukken. Daarna verschijnt een menu met de functies van
de verschillende toetsen. Druk op de "menu" toets om terug
naar het hoofdmenu te gaan.
WWAAAARRSSCCHHUUWWIINNGG ::
Uw speler kan geblokkeerd raken als de disks beschadigd of
gekrast zijn.
In dat geval moet u de speler uitschakelen en dan opnieuw
inschakelen.
OOppmmeerrkkiinngg ::
Als u gedurende een bepaalde tijd geen functie selecteert,
treedt de screen saver automatisch in werking.
Na eender welke toets in te drukken verschijnt op het
scherm het DVD logo. Dit gebeurt ook bij de weergave van
Audio CD's en MP3 CD's.
065001057460 15"LCDVD LOC1 HOLL 13/2/07 10:47 Page 33
Page 34

PROBLEMEN OPLOSSEN
34
Als er een probleem is met het beeld of het geluid, kunt u deze probemen verhelpen door eerst te vergelijken met het “foutsymptoom” en dan de “controle
en aanpassing”-suggesties uit te voeren. Als het probleem niet kan worden verholpen, moet u contact opnemen met het bevoegde servicecenter.
SSyymmppttoooomm
Geen voeding. LED niet
aan
Geen beeld “zwart
scherm”-LED aan.
Geen beeld, scherm aan,
ruis in beeld
Zwak “schaduwbeeld”
Geen beeld op A/V-stand
Geen kleur
Zwakke kleurweergave
met ruisvorming.
Gekleurde vlekken op TVscherm.
Vervormde Teletekst
MMooggeelliijjkkee ffoouutt
Geen voeding naar de TV
TV niet aangezet
Toestel in standby.
Helderheid te laag ingesteld.
TV omgeschakeld op AV
Toestel niet afgestemd op
zenders
Antenne niet aangesloten.
Zwak signaal
A/V-bron niet aangesloten of
ingeschakeld.
Kleurregeling niet ingesteld
Toestel kan fijnafstemming
nodig hebben.
Scherm kan gemagnetiseerd
zijn
Externe luidsprekers kunnen
magnetische veldvervorming
veroorzaken
Zwak signaal.
RReemmeeddiiee
Controleer alle aansluitingen en zorg dat de stekker stevig in
het stopcontact zit
Zet de TV aan met de Aan/Uit-toets
Druk op de toetsen P+ of P- of de cijfertoetsen van de
afstandsbediening. Pas helderheid aan.
Selecteer “TV” of druk op een cijfertoets van de
afstandsbediening.
Fijnafstemming uitvoeren
Sluit antenne aan en controleer aansluitingen
Bij gebruik van een binnenhuisantenne een externe antenne
laten monteren. Externe antenne beschadigd.
Controleer A/V-draden naar Euro-bus en zorg dat A/V-bron is
ingeschakeld.
Pas kleurregeling aan via de afstandsbediening
Voer fijnafstemming uit voor een zuiverder beeld
Zorg dat de TV volledig is uitgeschakeld na gebruik. Het
scherm wordt automatisch gedemagnetiseerd telkens de TV
wordt aangezet. Wacht minstens 15 minuten vooraleer het
toestel opnieuw aan te zetten.
Verplaats de externe luidsprekers weg van het TV-toestel
Teletekst vereist een sterk signaal. Laat de antenne
controleren.
065001057460 15"LCDVD LOC1 HOLL 13/2/07 10:47 Page 34
Page 35

TECHNISCHE KENMERKEN
35
Schermgrootte
1155””
Standaardgrootte 39 cm
Stroomverbruik 55
Bedrijfsspanning AC 230V ~50Hz ( via adapter 12V DC)
TV-systeem MULTISYSTEEM / NTSC-WEERGAVE
Band VHF 1 Band 2 - 4
VHF 1 Band 5 - 12
UHF Band 21-69
S Band S1-S41
Antenne-ingang 75 ohm Standaard Antennestekker
Programmacapaciteit 100 + AV
Beeldbuis TFT LCD-scherm 1024 x 768 resolutie
Geluidsuitgang rms 2 x 2 W
065001057460 15"LCDVD LOC1 HOLL 13/2/07 10:47 Page 35
Page 36

BBeellaannggrriijjkk
Geachte koopster/koper,
De batterijen welke in dit product worden gebruikt bevatten stoffen
die schadelijk zijn voor het milieu.
GGooooii ddaaaarroomm nnooooiitt bbaattttee--
rriijjeenn bbiijj hheett ggeewwoonnee
hhuuiissvvuuiill..
Laat bij voorkeur de batterijen
door uw vakhandelaar vervangen
of lever de batterijen in bij de
chemocar of het chemo-inleverpunt in uw gemeente indien u de
batterijen zelf verwisselt.
065001057460 15"LCDVD LOC1 HOLL 13/2/07 10:47 Page 36
Page 37

MANUEL D’INSTRUCTIONS
065 001 057 470
LCD 1520TNBL-DVD
065001057470 15"LCDVD LOC1 FRA 13/2/07 10:49 Page 1
Page 38

2
CONSIGNES DE SECURITE . . . . . . . . . . . . . . . . . . . . . . . . . . . . . . . . . . . . . . . . . . . . . . . . . . . . . . . . . . . . . . . . . . . . . .3
TELEVISEUR . . . . . . . . . . . . . . . . . . . . . . . . . . . . . . . . . . . . . . . . . . . . . . . . . . . . . . . . . . . . . . . . . . . . . . . . . . 5
TELECOMMANDE . . . . . . . . . . . . . . . . . . . . . . . . . . . . . . . . . . . . . . . . . . . . . . . . . . . . . . . . . . . . . . . . . . . . . . . . . . . . .6
BRANCHEMENT DE L'ANTENNE . . . . . . . . . . . . . . . . . . . . . . . . . . . . . . . . . . . . . . . . . . . . . . . . . . . . . . . . . . . . . . . . . .8
CONNEXION D'UN MAGNETOSCOPE, D'UN LECTEUR DVD, D’UN ORDINATEUR ET D'UN DECODEUR . . . . . . . . . . 9
CONNEXIONS AUDIO / VIDEO . . . . . . . . . . . . . . . . . . . . . . . . . . . . . . . . . . . . . . . . . . .10
FONCTIONS DU TELEVISEUR . . . . . . . . . . . . . . . . . . . . . . . . . . . . . . . . . . . . . . . . . . . . . . . . . . . . . . . .11
CONFIGURATION . . . . . . . . . . . . . . . . . . . . . . . . . . . . . . . . . . . . . . . . . . . . . . . . . . . . . . . . . . . .13
FONCTIONS DU TELEVISEUR (MENUS) . . . . . . . . . . . . . . . . . . . . . . . . . . . . . . . . . . . . . . . . . . . . . . . .15
MENU DE REGLAGE DU VOLUME , EQUALISEUR, ECOUTEURS . . . . . . . . . . . . . . . . . . . . . . . . . . . . . . . . . ..15
MENU DE CONFIGURATION DE L’IMAGE, LISTE DES CHAINES . . . . . . . . . . . . . . . . . . . . . . . . . . . . . . . . . .16
MENU DE CONFIGURATION . . . . . . . . . . . . . . . . . . . . . . . . . . . . . . . . . . . . . . . . . . . . . . . . . . . . . . . . . . . . . . . . . . . . .17
CONFIGURATION DES CHAINES . . . . . . . . . . . . . . . . . . . . . . . . . . . . . . . . . . . . . . . . . . . . . . . . . . . . . . . . . . . . . . . . . .18
MODES DES PERIPHERIQUES . . . . . . . . . . . . . . . . . . . . . . . . . . . . . . . . . . . . . . . . . . . . . . . . . . . . . . . . . . . . . . . . . . 21
TELETEXTE . . . . . . . . . . . . . . . . . . . . . . . . . . . . . . . . . . . . . . . . . . . . . . . . . . . . . . . . . . . . . . . . . . . . . . . . . . . . . . . . . . .22
LECTEUR DVD . . . . . . . . . . . . . . . . . . . . . . . . . . . . . . . . . . . . . . . . . . . . . . . . . . . . . . . . . . . . . . . . . . . . . . . . . . . . . .24
TÉLÉCOMMANDE (FONCTIONS DVD) . . . . . . . . . . . . . . . . . . . . . . . . . . . . . . . . . . . . . . . . . . . . . . . . . . . . . . . . . . . . .25
LA LECTURE DE CD . . . . . . . . . . . . . . . . . . . . . . . . . . . . . . . . . . . . . . . . . . . . . . . . . . . . . . . . . . . . . . . . . . . . . . . . . . . .26
RÉGLAGES DU DVD . . . . . . . . . . . . . . . . . . . . . . . . . . . . . . . . . . . . . . . . . . . . . . . . . . . . . . . . . . . . . . . . . . . . . . . . . . . .27
FONCTIONS DE BASE . . . . . . . . . . . . . . . . . . . . . . . . . . . . . . . . . . . . . . . . . . . . . . . . . . . . . . . . . . . . . . . . . . . . . . . . . .31
CD, CD MP3 . . . . . . . . . . . . . . . . . . . . . . . . . . . . . . . . . . . . . . . . . . . . . . . . . . . . . . . . . . . . . . . . . . . . . . . . . . . . . . . . . . .33
GUIDE DE DEPANNAGE . . . . . . . . . . . . . . . . . . . . . . . . . . . . . . . . . . . . . . . . . . . . . . . . . . . . . . . . . . . . . . . . . . . . . . . . . 34
CARACTÉRISTIQUES TECHNIQUES . . . . . . . . . . . . . . . . . . . . . . . . . . . . . . . . . . . . . . . . . . . . . . . . . . . . . . . . . . . . . . . . .35
TABLE DES MATIERES
065001057470 15"LCDVD LOC1 FRA 13/2/07 10:49 Page 2
Page 39

CONSIGNES DE SECURITE
3
SSOOUURRCCEE DD''AALLIIMMEENNTTAATTIIOONN
Ne branchez la TV qu'à un secteur de 230 à 240 V CA, 50 Hz.
CCÂÂBBLLEESS DD''AALLIIMMEENNTTAATTIIOONN EETT AAUUTTRREESS CCÂÂBBLLEESS
Positionnez le câble d'alimentation et les autres câbles de
sorte qu'on ne puisse pas marcher dessus ou qu'ils ne soient
pas coincés par des objets placés sur ou contre eux. Portez
une attention particulière au point d'entrée des câbles dans
la prise de courant, ainsi qu'à leur point de sortie de la TV.
HHUUMMIIDDIITTÉÉ EETT EEAAUU
Ne placez pas votre téléviseur dans une zone humide ou moite.
L'appareil ne doit pas être exposé aux gouttes ou aux
éclaboussures, car celles-ci peuvent s'avérer dangereuses.
Aucun objet rempli de liquide, tel qu'un vase, ne doit être placé
sur l'appareil.
AAUUCCUUNNEE FFLLAAMMMMEE NNUUEE
Aucune source de flammes nues telles que les bougies allumées,
ne doit être placée sur l'appareil.
NNEETTTTOOYYAAGGEE
Débranchez la TV avant de la nettoyer. N'utilisez pas de
nettoyants liquides ni d'aérosols. Nettoyez votre TV à l'aide
d'un chiffon doux et légèrement humide.
EEVVAACCUUAATTIIOONN DDEESS PPIILLEESS VVIIDDEESS
Veuillez tenir compte des aspects environnementaux au
moment de jeter la pile de la télécommande à
Veuillez évacuer vos piles usagées de façon responsable,
conformément aux instructions du fabricant.
VVEENNTTIILLAATTIIOONN
Les fentes et ouvertures situées sur la TV sont réservées à la
ventilation.
Veillez à ménager un espace suffisant pour assurer une
ventilation adéquate autour du téléviseur (au moins 10 cm)
Evitez de couvrir ou d’obstruer les fentes car cela pourrait
entraîner une surchauffe.
PPIIÈÈCCEESS DDEE RREECCHHAANNGGEE
Si votre TV nécessite de nouvelles pièces, veillez à ce que la
personne chargée du remplacement utilise des pièces
recommandées par le fabricant ou conformes aux spécifications de
la pièce d'origine. Les pièces non conformes peuvent provoquer
des incendies, des chocs électriques ou d'autres dangers.
EENNTTRREETTIIEENN
Assurez-vous que la personne chargée de dépanner votre TV
soit qualifiée pour le faire. Respectez les consignes d’entretien
fournies avec ce produit. Ne retirez pas le capot vous-même car
vous pourriez subir un choc électrique.
ATTENTION: POUR RÉDUIRE LE RISQUE
D’ELECTROCUTION, NE PAS RETIRER LE CAPOT (OU
L’ARRIÈRE) DE VOTRE TELEVISEUR. CET APPAREIL NE
CONTIENT AUCUNE PIÈCE SUSCEPTIBLE D'ETRE REPAREE
PAR L’UTILISATEUR. POUR LE DÉPANNAGE, ADRESSEZVOUS A UN PERSONNEL QUALIFIÉ.
065001057470 15"LCDVD LOC1 FRA 13/2/07 10:49 Page 3
Page 40

CONSIGNES DE SÉCURITÉ (suite)
4
FFOOUUDDRREE
Débranchez la TV de la prise murale en cas de tempête ou de
foudre, ou si vous partez en vacances.
GGÉÉNNÉÉRRAALLIITTÉÉSS
• Abstenez-vous de brancher ou d’ajuster les câbles
lorsque la TV est branchée.
• Ne placez pas la TV dans une zone chaude, froide ou
humide.
• Les piles de la télécommande peuvent fuir. Vérifiez-les
régulièrement si vous ne les avez pas remplacées
récemment.
• Ne laissez personne, et surtout pas des enfants, insérer
le moindre objet dans les orifices ou fentes de
ventilation.
• Abstenez-vous d’utiliser votre téléviseur si vous y avez
répandu des liquides, s’il a été endommagé ou s’il ne
fonctionne plus correctement. Débranchez-le
immédiatement et demandez l’avis d’un technicien.
• Ce produit est exclusivement destiné à un usage
ménager ou similaire. Toute autre utilisation peut
invalider la garantie et susciter un danger.
• Nous sommes fiers de vous proposer un produit de
haute qualité. Pour maintenir ce niveau de qualité,
votre TV doit être entretenue dans un centre de
dépannage agréé.
""EEMMBBAALLLLEEZZ DDUU DDÉÉFFAAUUTT DDEE FFOONNCCTTIIOONNNNEEMMEENNTT DDÛÛ AAUUXX
DDÉÉCCHHAARRGGEESS ÉÉLLEECCTTRROOSSTTAATTIIQQUUEESS,, RREELLAANNCCEEMMEENNTT DDUU
DDVVDD--PPLLAAYYEERR RREEQQUUIISS..””
065001057470 15"LCDVD LOC1 FRA 13/2/07 10:49 Page 4
Page 41

TELEVISEUR
5
AAVVAANNTT ::
1 Touche Stand by
2 Capteur de la télécommande
3 Haut-parleur(s)
4 P+ / – Touches chaînes suivantes/précédentes
5 e + / – Touches volume
6 AV2 / S-Video Entrée / Prise casque
AARRRRIIEERREE ::
77
Prise pour antenne
88
Entrée Péritel (Avec cette entrée, vous pouvez connectez un
ordinateur, un décodeur ou un magnétoscope à votre TV)
99
Entrée audio composante (G+D)
1100
Entrée composante YPbPr
1111
Entrée PC
1122
Entrée audio PC
1133
Entrée DC 12V
DC 12V
EURO AV
Y
PC INPUT
PC
AUDIO IN
8
10
11
12
13
RL
AUDIO IN
9
Pb Pr
IN
7
6
Compartiment DVD / Touche éjection du DVD
065001057470 15"LCDVD LOC1 FRA 13/2/07 10:49 Page 5
Page 42

TELECOMMANDE
6
1. Touche de mise en veille
2. Touches de sélection directe des chaînes
3. Touche de permutation
4. Touche MUTE (sourdine)
5. Touche MENU (menu principal)
6. Touche TV (pour passer du mode TV à AV )
7. Chaînes +/- en mode TV, page télétexte +/- en mode télétexte, menu +/- en mode menu
8. Touches d’augmentation/diminution du volume et de réglage dans les menus
9. Touche de sortie du menu (les touches EXIT et TV permettent de sortir des menus)
10. Touche de réinitialisation
11. Touche d’information sur le statut de l’appareil
12. Touche de sélection du son DUAL I, DUAL II, Stéréo, Mono (DUAL I, II,
ST/MONO) (Touche de mémorisation pour les modèles mono)
13. Affichage du menu de configuration
14. Touche AV
15. (Touche bleue) sélection audio “incredible stereo”/”mono-normal”
16. (Touche jaune)
17. (Touche verte) Réglage par défaut de l’image
18. (Touche rouge) Réglage par défaut du volume
19. Sélection du format de l'image (sur certains modèles)
20. DVD/TV (pour les téléviseurs avec reproducteur DVD)
NNoottee ::
Pour utiliser les autres fonctions de votre télécommande décrites dans le ménu,
veuillez vous rapporter aux pages avec la figurine télécommande dans les parties
TELETEXTE ou DVD Player..
065001057470 15"LCDVD LOC1 FRA 13/2/07 10:49 Page 6
Page 43

TELECOMMANDE
7
Ne jamais laisser tomber votre télécommande.
Ne jamais tenter d'ouvrir votre télécommande.
Ne jamais appuyer sur deux touches à la fois.
Enlever les piles de la télécommande en cas d'inutilisation
prolongée.
RReemmaarrqquuee::
votre télécommande peut contrôler votre
téléviseur sur une distance de 7 mètres et un angle de 30
degrés.
.
IINNSSEERRTTIIOONN DDEESS PPIILLEESS ((22 ppiilleess AAAAAA ddee 11,,55VV))
• Ouvrez le couvercle.
• Placez les piles en respectant les polarités.
• Refermez le couvercle.
065001057470 15"LCDVD LOC1 FRA 13/2/07 10:49 Page 7
Page 44

CONNECTION DE L'ANTENNE
8
CCOONNNNEEXXIIOONN DDEE LL''AANNTTEENNNNEE EEXXTTEERRIIEEUURREE
Vous obtiendrez une image et des couleurs optimales moyennant l'installation
d'une antenne extérieure de bonne qualité.
Branchez la fiche de l'antenne à sa prise (voir fig. A- 1) par le biais d'un câble
coaxial (75 ohm, voir fig. A- 2).
Vous pouvez également connecter l’antenne par le biais d’un magnétoscope via
l’entrée et la sortie Rf de ce dernier (cf. schéma).
Couvercle arrière
Antenne Connexion du magnétoscope
Entrée RF
Sortie RF
Prise antenne
Prise péritel
Prise antenne
(Fig. A-1)
Câble coaxial (75 ohm)
(Fig. A- 2)
065001057470 15"LCDVD LOC1 FRA 13/2/07 10:49 Page 8
EURO AV
AUDIO IN
RL
Page 45

CONNEXION D'UN MAGNETOSCOPE, D'UN LECTEUR DVD, D'UN DECODEUR SATELLITE ET
D’UN ORDINATEUR
9
UUTTIILLIISSAATTIIOONN DD''UUNN MMAAGGNNEETTOOSS--
CCOOPPEE VVIIAA LLAA SSOORRTTIIEE RRFF
• Pour connecter le magnétoscope votre
TV LCD via les prises RF, branchez un
câble coaxial entre la sortie RF (RF OUT)
du magnétoscope et la prise antenne du
téléviseur; branchez le câble d'entrée de
l'antenne à la prise entrée (RF IN) du
magnétoscope.
• Sélectionnez le programme numéro 0
sur la TV.
• Insérez une cassette dans le magnétoscope puis appuyez sur la touche de
lecture.
• Cherchez le canal RF du magnétoscope.
• Suivez les instructions de
programmation manuelle (plus loin dans
ce guide d’utilisation) afin de chercher et
de mémoriser le canal de sortie RF de
votre magnétoscope en tant que
Programme 0 sur votre TV LCD.
UUTTIILLIISSAATTIIOONN DD’’UUNN MMAAGGNNEETTOOSS--
CCOOPPEE EETT DD’’UUNN LLEECCTTEEUURR DDEE DDVVDD
VVIIAA LLAA PPRRIISSEE EEUURROO--PPEERRIITTEELL
• Connectez la prise péritel de votre
magnétoscope ou lecteur de DVD à la
prise péritel de votre TV LCD.
• Sélectionnez le canal AV en appuyant
sur la touche AV de la télécommande.
• Appuyez sur la touche de lecture de
votre magnétoscope ou lecteur DVD.
• L'avantage de cette connexion réside
dans le fait qu'elle offre une meilleure
qualité d'image et de son.
PPCC CCOONNNNEEXXIIOONN DD’’UUNN PPCC
((OOppttiioonnnneell))
Vous pouvez utiliser votre TV LCD
comme moniteur pour votre PC en
connectant le câble VGA de votre PC à
l’entrée PC de votre TV LCD. Résolution
PC compatible :
VGA 640 x 480
AC230V~
50Hz/30W
AC230V~
50Hz/30W
vers l'entrée RF
Câble coaxial
depuis la sortie RF
Antenne
vers la prise antenne
vers l'entrée RF
câble péritel vers le magnétoscope
câble péritel vers la TV
PPRRIISSEE EEUURROO--PPEERRIITTEELL
La prise péritel permet la connexion d’un magnétoscope, d’un lecteur de DVD, d’une console de jeux ou d’un décodeur
satellite moyennant l’utilisation d’un câble approprié. Sélectionnez le mode AV de votre téléviseur pour accéder au signal reçu
via la prise péritel.
LL RR
LL RR
065001057470 15"LCDVD LOC1 FRA 13/2/07 10:49 Page 9
EURO AV
RL
AUDIO IN
AUDIO IN
RL
EURO AV
EURO AV
TV
AUDIO IN
TV
Y
Pb Pr
RL
IN
PC INPUT
AUDIO IN
PC
DC 12V
PC
Page 46

CONNEXIONS AUDIO / VIDEO
10
aa)) AAvveecc uunn ccoonnnneecctteeuurr PPEERRIITTEELL
• Raccordez la prise PERITEL du récepteur à la prise PERITEL de
votre TV LCD à l’aide d’un câble PERITEL adapté.
• Sélectionnez un canal AV sur votre TV à l’aide de la touche AV
de la télécommande. Votre TV LCD affiche maintenant le signal
reçu du récepteur satellite ou câble.
bb)) EEnnttrrééee ccoommppoossaannttee YYppbbPPrr
• Si votre source vidéo est équipée d’une sortie vidéo composante
YPbPr, raccordez cette dernière à l’entrée YpbPr de votre TV. Pour
ce faire, utilisez un câble RCA à 3 entrées et respectez les couleurs
des connecteurs. L’image apparaîtra ainsi sur votre TV LCD.
• Pour une connexion audio, utilisez un câble AV à deux entrées.
Connectez les sorties audio gauche et droite du récepteur aux
entrées audio gauche et droite de votre TV LCD.
• Sélectionnez un canal YpbPr sur votre TV LCD à l’aide de la
touche AV de la télécommande.
L
DC 12V
EURO AV
Y
PC INPUT
PC
AUDIO IN
RL
AUDIO IN
Pb Pr
IN
DECODER SCART TV SCART
OUT
SVSH V L R
TV
AERIAL
DISH
LNB
AUDIO OUT
RL
DC 12V
EURO AV
Y
PC INPUT
PC
AUDIO IN
RL
AUDIO IN
Pb Pr
IN
DECODER SCART TV SCART
OUT
SVSH V L R
TV
AERIAL
DISH
LNB
RECEIVER
LL RR
LL RR
065001057470 15"LCDVD LOC1 FRA 13/2/07 10:49 Page 10
Page 47

FONCTIONS DU TELEVISEUR
11
11.. FFOONNCCTTIIOONNNNEEMMEENNTT
aa.. MMiissee eenn mmaarrcchhee ddee llaa TTVV..
Branchez le cordon d’alimentation de la TV dans la
prise murale.
* Votre appareil fonctionne sur une alimentation DC de
12 V. Veuillez donc utiliser l’adaptateur fourni avec
votre TV.
bb..
Mode Stand-by Lorsque la TV est en mode Stand-by,
vous pouvez l'allumer en appuyant sur l'un des
boutons de sélection des programmes (0-9), sur P+/P- à
partir de la télécommande, ou sur les boutons P+/P- de
la TV.
22.. ÉÉTTEEIINNDDRREE LLAA TTVV
aa..
Éteindre la TV (TV OFF) Lorsque vous souhaitez
éteindre votre télévision, appuyez sur le bouton on/off
(marche/arrêt).
bb..
Mode Stand-by Pour éteindre la TV pendant une
courte période de temps, appuyez sur le bouton Standby de votre télécommande.
11.. SSEELLEECCTTIIOONN DDEE LLAA CCHHAAIINNEE
* Appuyez sur la touche P+/- pour passer au numéro de
chaîne suivant et ainsi sélectionner la chaîne de votre
choix.
* Sélectionnez les chaînes de 0 à 9 à l’aide du pavé
numérique de la télécommande.
* Pour sélectionner une chaîne à deux chiffres,
saisissez les deux chiffres à la suite à l’aide du pavé
numérique.
EExxeemmppllee ::
Pour passer à la chaîne 14, appuyez tout
d’abord sur la touche « 1 ». « 1- » s’affiche dans le coin
supérieur gauche de l’écran. Maintenez la touche
enfoncée pour passer à la chaîne n°1. Le téléviseur
passe sur la chaîne n°1 si vous n'appuyez pas sur le
chiffre 4 avant que ce message ne disparaisse de l'écran.
065001057470 15"LCDVD LOC1 FRA 13/2/07 10:49 Page 11
Page 48

FONCTIONS DU TELEVISEUR
12
22.. SSOOUURRDDIINNEE
Pour mettre le son en sourdine, appuyez sur la touche
MUTE de la télécommande. Appuyez de nouveau sur
cette touche pour rétablir le son.
33.. TToouucchhee dd’’iinnffoorrmmaattiioonn ssuurr llee ssttaattuutt ddee ll’’aappppaarreeiill
():
Appuyez sur cette touche pour afficher quelques
instants le numéro de chaîne, le niveau de volume et le
système audio.
44.. TToouucchhee PPPP::
Appuyez sur cette touche pour voir quels
réglages de l’image ont été effectués sur votre TV.
55.. TToouucchhee ddee ppeerrmmuuttaattiioonn ::
Cette touche vous permet
de repasser à la chaîne que vous regardiez
précédemment.
66.. TToouucchhee SSMMDD ::
MMoonnoo ::
Cette touche n’a aucun effet sur les TV mono
ou lors des émissions diffusées en mono.
SSttéérrééoo ::
Utilisez cette touche pour sélectionner un son
mono ou DUAL sur votre TV.
77..TToouucchhee AAVV ::
Appuyez sur la touche AV de la
télécommande pour sélectionner le mode AV. Entrez un
numéro de chaîne ou appuyez sur la touche TV pour
repasser un mode TV. Il n’est pas possible de passer en
mode AV si un menu est affiché à l’écran. En mode AV,
vous ne pouvez pas afficher le tableau des chaînes. Par
contre, vous pouvez utiliser des appareils connectés à
votre TV via la prise PERITEL (vidéo, DVD,
magnétoscope, etc.). La touche AV vous permet
également d’afficher le type d’appareils pouvant être
connectés à votre TV.
88.. MMIISSEE EENN VVEEIILLLLEE AAUUTTOOMMAATTIIQQUUEE
Si la TV ne reçoit aucun signal pendant 5 minutes, elle
passe automatiquement en mode de veille. Cette
fonction n’est pas active en mode AV.
99..TToouucchhee MMEENNUU ::
Appuyez sur cette touche pour
afficher le menu principal. Appuyez de nouveau sur
cette touche pour quitter le menu principal. Cette
touche vous permet également de retourner au menu
précédent lorsque vous vous trouvez dans un sousmenu.
1100..TToouucchhee TTVV ((EEXXIITT)) ::
Appuyez sur cette touche pour
quitter les menus.
1111..TToouucchhee 1166::99 ::
Cette touche vous permet de passer
du format d’affichage 4: 3 au format d’affichage 16: 9
1122..ZZAAPPPPIINNGG AAUUTTOOMMAATTIIQQUUEE ::
Maintenez cette
touche enfoncée quelques instants puis relâchez-la
pour lancer la recherche automatique de chaînes.
L’indication « Zapping automatique » s’affiche dans le
coin supérieur droit.
1133..
TToouucchhee RRoouuggee::
Vous pouvez choisir pour prérégler
des valeurs de "bruit" en utilisant le bouton rouge. La
valeur "personnelle" est les ajustements que vous avez été
faits sur votre appareil.
1144..
TToouucchhee vveerrtt::
Vous pouvez choisir pour prérégler des
valeurs d'"image" en utilisant le bouton vert. La valeur
"personnelle" est les ajustements que vous avez été faits sur
votre appareil.
065001057470 15"LCDVD LOC1 FRA 13/2/07 10:49 Page 12
Page 49
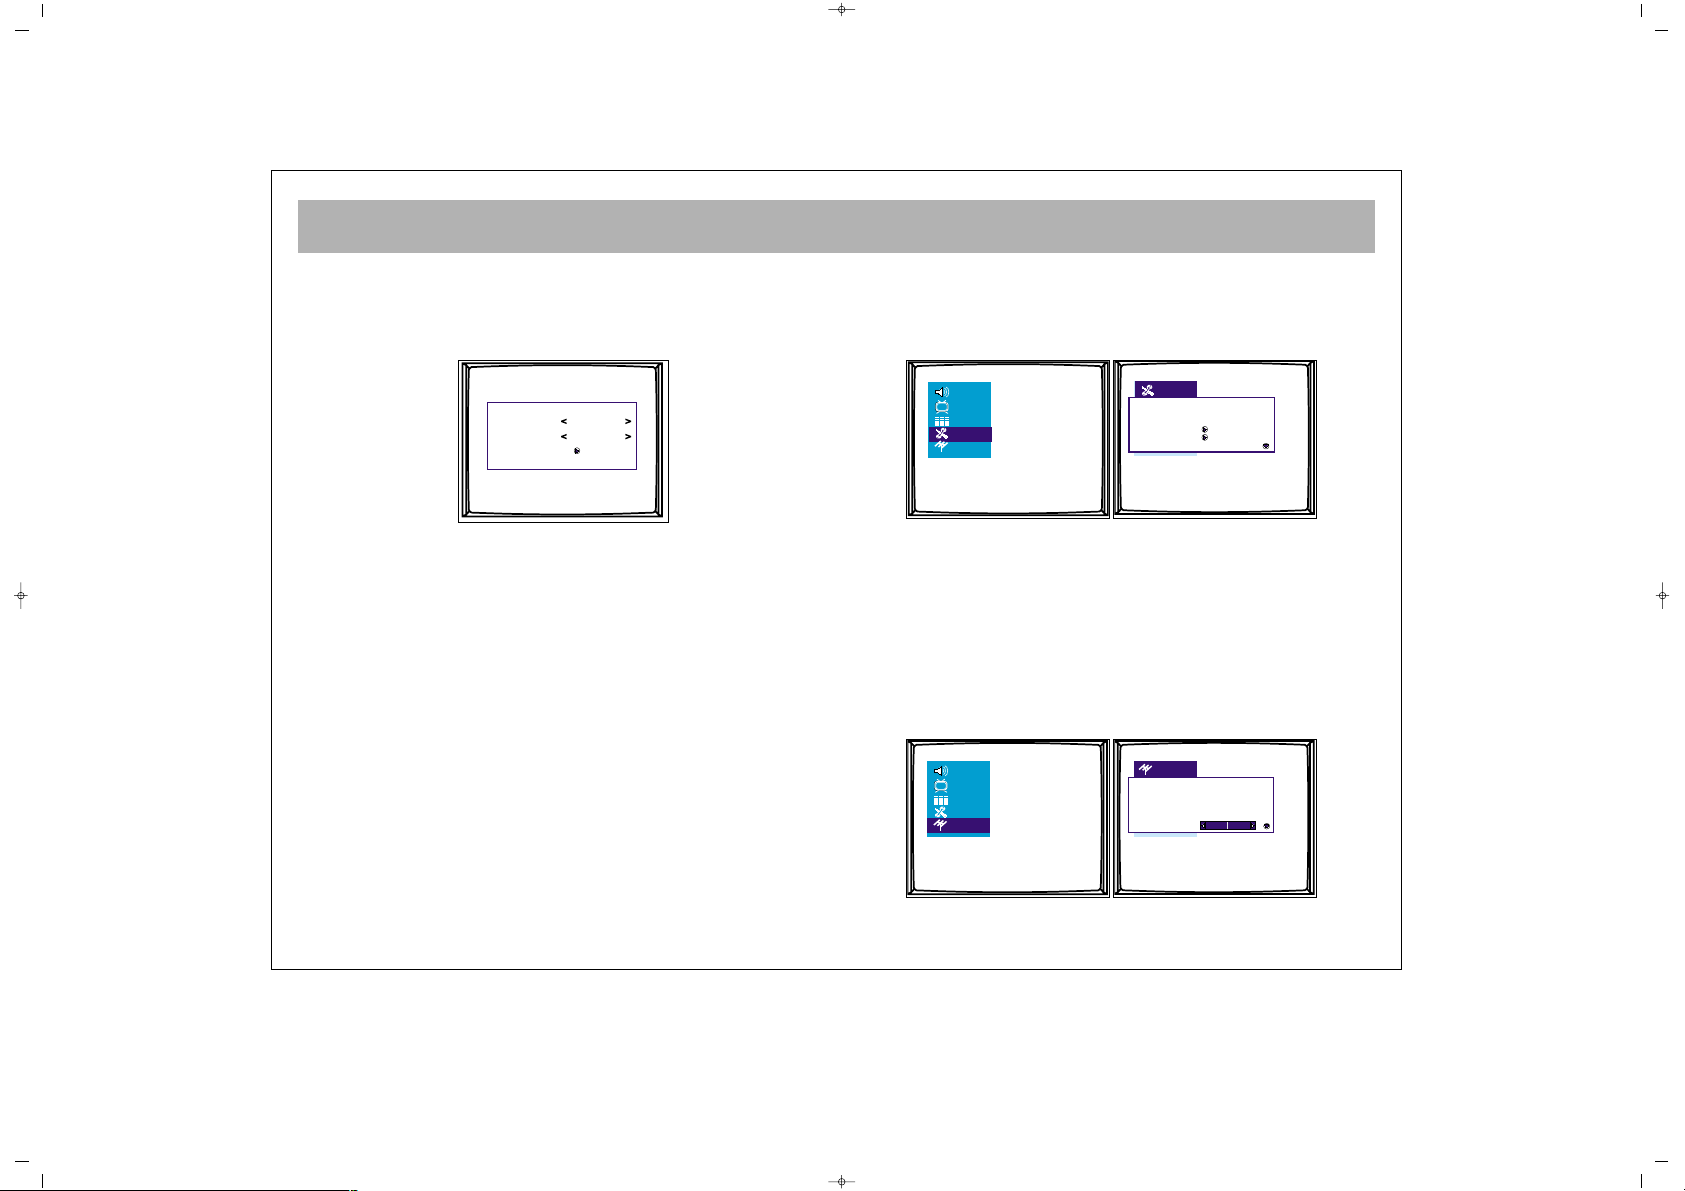
CONFIGURATION
13
Si vous installez votre appareil conformément aux
explications données dans les pages précédentes,
l’indication « Automatic Search » (Recherche automatique)
(Welcome/Bienvenue) apparaît à l’écran. Dans ce menu;
11--
Sélectionnez l’option « Pays » à l’aide des touches «
P+/P- » et choisissez l’abréviation de votre pays à l’aide des
touches « V+/V- ».
22--
Sélectionnez l’option « Langue » à l’aide des touches
« P+/P- » et choisissez la langue de votre choix à l’aide des
touches « V+/V- ».
33--
Sélectionnez l’option « Mémorisation auto » à l’aide des
touches « P+/P- » et lancez la recherche automatique à
l’aide de la touche « V+ ». N’appuyez sur aucune touche
pendant la recherche automatique. Votre appareil trouve les
chaînes et les mémorise automatiquement.
Si le menu « Welcome » (Bienvenue) ne s’affiche pas,
procédez à la recherche des chaînes comme suit :
11--
Appuyez sur la touche « Menu ».
22--
Sélectionnez le menu de configuration à l’aide des
touches « P+/P- » et validez votre sélection à l’aide de la
touche « V+ ».
33--
Sélectionnez l’option « Langue » à l’aide des touches «
P+/P- » et choisissez la langue de menu de votre choix à
l’aide des touches « V+/V- ».
44--
Sélectionnez l’option « Pays » à l’aide des touches «
P+/P-» et choisissez l’abréviation de votre pays à l’aide des
touches « V+/V- ».
55--
Appuyez sur la touche « MENU » pour repasser au
menu principal.
N. de progr. 2
Nomme
Syst. Etalon Europe
Recher. auto
Frequence 182.25 MHz
Réglage fin.
Affichage OSD Non
Langage Francais
Pays F
Verrouillage
Minuteries
Teletext lang. Europèen
Pays F
Langage Français
Recher. auto
065001057470 15"LCDVD LOC1 FRA 13/2/07 10:49 Page 13
Page 50

CONFIGURATION
14
6- Sélectionnez l’option « Program Settings »
(Configuration des chaînes) à l’aide des touches « P+/P- »
et validez votre sélection à l’aide de la touche « V+/V- ».
7- Sélectionnez l’option « Mémorisation auto » à l’aide
des touches « P+/P- » et lancez la recherche à l’aide de
la touche « V+ ». N’appuyez sur aucune touche
pendant la recherche automatique. Votre appareil
trouve les chaînes et les mémorise automatiquement.
Utilisez les touches P+, P-, V+ et V- pour changer la langue
du menu et procéder aux réglages manuels à l’intérieur du
menu « Program adjustements » (réglage des chaînes).
Lorsque vous êtes dans le menu « Program table » (liste des
chaînes), les touches P+, P-, V+ et V- vous permettent
également de changer l’ordre des chaînes, de leur donner
un nom, d’en supprimer ou d’en sauter certaines. La
marche à suivre est décrite dans les pages suivantes.
Appuyez sur la touche TV pour quitter ce menu.
065001057470 15"LCDVD LOC1 FRA 13/2/07 10:49 Page 14
Page 51

FONCTIONS DU TELEVISEUR (MENUS)
15
MMeennuu pprriinncciippaall::
Appuyez sur la touche MENU pour
afficher ce menu. Utilisez les touches P+/- pour passer
d'une option à l’autre du menu principal et procédez
aux réglages en appuyant sur les touches V+/-.
11.. MMEENNUU DDEE RREEGGLLAAGGEE DDUU VVOOLLUUMMEE
Accédez au menu de réglage du volume à l’aide de la
touche MENU. Les touches P+/- vous permettent de
sélectionner une option et de mémoriser les réglages
tandis que les touches V+/- sont utilisées pour effectuer
les réglages.
VVoolluummee::
Sélectionnez ce sous-menu pour régler le
volume de la TV.
BBaallaannccee::
Ce sous-menu affiche la balance entre les
sorties gauche et droite.
GGrraavveess::
Cette option permet de régler le niveau des
graves.
AAiigguuss::
Cette option permet de régler le niveau des
aigus. Les modèles stéréo disposent de la fonction AVL.
Celle-ci n’apparaît dans les menus. Cette fonction
limite automatiquement le volume : le volume est réglé
à son niveau optimal lorsque vous passez d’une chaîne
à une autre. C’est pourquoi le son est coupé un court
instant lorsque vous changez de chaîne.
EEqquuaalliisseeuurr ::
Pour entrer dans le menu « Equaliseur », sélectionnez
la ligne « Equaliseur » et appuyez sur la touche V+.
Lorsque vous êtes dans ce menu, sélectionnez l’un des
modes équaliseur (Personnalisé, Voix, Musique,
Théâtre) à l’aide des touches P+ et P-. Pour un réglage
personnalisé de l’équaliseur, appuyez sur les touches
P± et V±.
EEccoouutteeuurrss :: ((eenn ooppttiioonn))
Le son des haut-parleurs est coupé lorsque des
écouteurs sont branchés dans la prise pour écouteurs.
Le son passe uniquement par les haut-parleurs. Le
Personnel
100 300 1k 3k 8k
Volume
Balance
Graves
Aigus
Equalizer
065001057470 15"LCDVD LOC1 FRA 13/2/07 10:49 Page 15
Page 52

FONCTIONS DU TELEVISEUR (MENUS)
16
volume des écouteurs peut être réglé à l’aide du menu
de volume. Utilisez la touche S/M/D pour choisir un
son mono, stéréo ou dual.
22.. MMEENNUU «« PPIICCTTUURREE SSEETTTTIINNGGSS »» ((CCOONNFFIIGGUURRAATTIIOONN
DDEE LL’’IIMMAAGGEE))
Accédez au menu « Picture settings » (configuration de
l’image) à l’aide de la touche MENU. Ce menu vous
permet de régler de nombreux paramètres liés à
l’affichage. Il est possible de régler la luminosité, le
contraste, la couleur, la netteté, l’amélioration des
couleurs peau, le bruit blanc et les paramètres définis par
l’utilisateur. Sélectionnez l’option de votre choix à l’aide
des touches P+/- de la télécommande et procédez aux
réglages à l’aide des touches V+/-.
Les changements sont automatiquement mémorisés.
Appuyez sur la touche MENU pour retourner au menu
précédent ; appuyez sur la touche TV pour quitter tous les
menus.
33.. LLIISSTTEE DDEESS CCHHAAIINNEESS::
Affichez le tableau des
chaînes à l’aide de la touche MENU.
Dans le tableau des chaînes, le numéro et le nom des
chaînes sont écrits dans des couleurs différentes.
Sélectionnez des chaînes à l’aide des touches P+/- et V+/-.
33..11..
La touche bleue vous permet de nommer les
chaînes. Si vous appuyez sur cette touche, un petit
cadre apparaît. Changez les lettres à l’aide des touches
P+/-. Passez au caractère précédent ou suivant à l’aide
des touches V+/-. Lorsque vous avez nommé une
chaîne, appuyez sur la touche bleue pour la mémoriser.
33..22..
La touche verte vous permet de déplacer des
chaînes. Sélectionnez la chaîne que vous désirez
déplacer à l’aide des touches P+/- et V+/- et appuyez
sur la touche verte. Sélectionnez ensuite le numéro
sous lequel vous désirez enregistrer la chaîne à l’aide
des touches P+/- et V+/- et appuyez sur la touche verte.
La chaîne a été déplacée (elle a été insérée entre les
autres ; le numéro des chaînes suivantes est augmenté
d’une unité).
1
2
3
4
5
6
7
8
9
10
11
12
Nomme
Deplacer
Effaccer
Saut
Lumière
Contraste
Couleur
Contour Normal
Dyn. skin tone Non
Bal. d. blancs Normal
065001057470 15"LCDVD LOC1 FRA 13/2/07 10:49 Page 16
Page 53
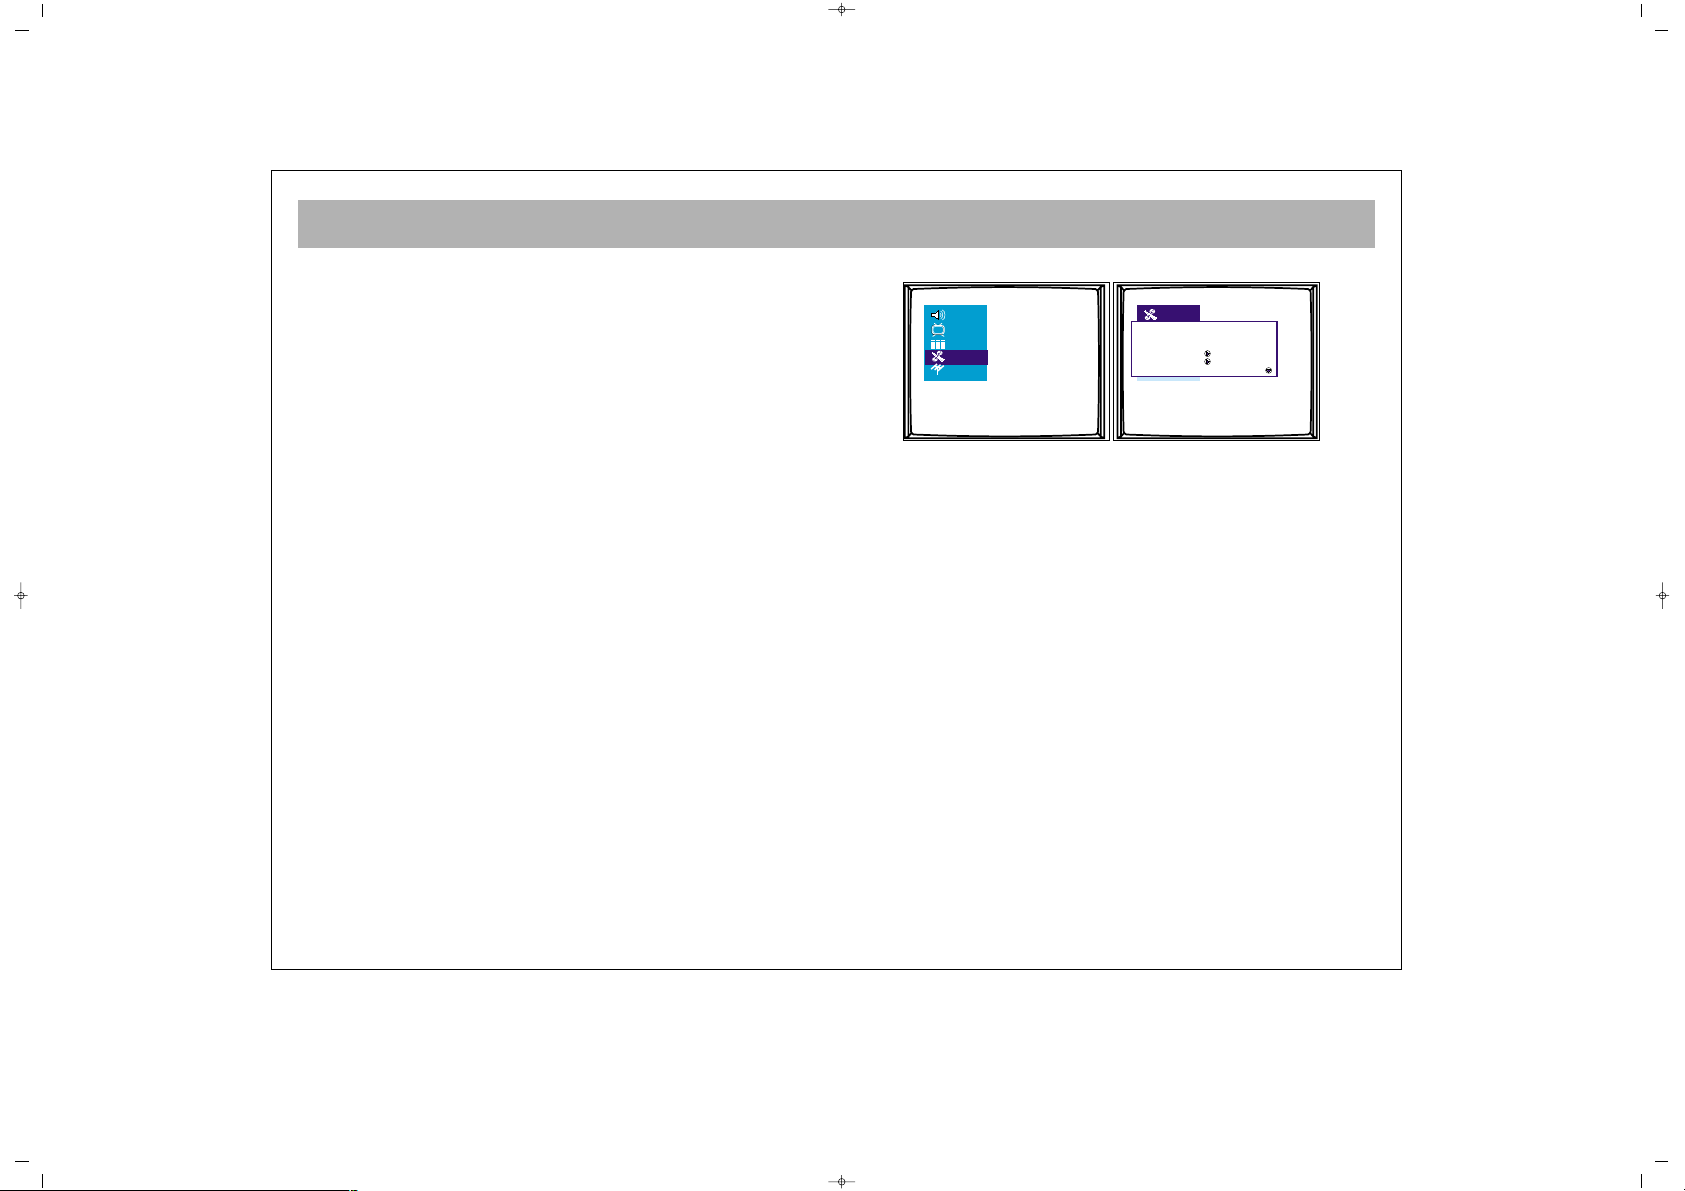
FONCTIONS DU TELEVISEUR (MENUS)
17
33..33..
La touche rouge vous permet de supprimer des
chaînes. Sélectionnez la chaîne que vous désirez
supprimer à l’aide des touches P+/- et V+/- et appuyez
sur la touche rouge. Le numéro de la chaîne et l’icône
d’une touche rouge apparaissent à la droite du menu.
Appuyez sur la touche rouge pour supprimer la chaîne.
La chaîne supprimée est remplacée par la chaîne
suivante.
33..44..
La touche jaune vous permet de sauter des
chaînes. Sélectionnez la chaîne de votre choix et
appuyez sur le bouton jaune pour activer la fonction de
saut sur cette chaîne. Quand vous aurez quitté le
tableau des chaînes et que vous utiliserez les touches
P+/- pour passer d’une chaîne à l’autre, les chaînes
pour lesquelles vous aurez activé la fonction de saut ne
seront pas affichées. Utilisez le pavé numérique pour
atteindre cette chaîne ; le nom et le numéro de la
chaîne sont affichés dans des couleurs différentes. Pour
annuler la fonction de saut, affichez le tableau des
chaînes, sélectionnez la chaîne en question et appuyez
sur la touche jaune.
44.. MMEENNUU DDEE CCOONNFFIIGGUURRAATTIIOONN ::
44..11.. SSoouurrccee OOSSDD::
Il est possible d’activer ou de
désactiver l’option « source OSD ». Cette fonction
permet d’afficher en permanence le numéro de la chaîne.
44..22.. LLaanngguuee::
Vous pouvez modifier la langue des
menus grâce à cette option.
44..33.. PPaayyss ::
Lors de la recherche automatique, votre
appareil recherche les chaînes et choisit le système
approprié au pays que vous avez choisi. C’est pourquoi
il est primordial de bien saisir le code de votre pays.
Veuillez ne pas oublier de sélectionner l’abréviation de
votre pays à l’aide des touches « V+/V- » (si le nom de
votre pays n’est pas dans la liste, sélectionnez un autre
pays qui possède le même système).
44..44.. VVeerrrroouuiillllaaggee eennffaanntt ::
Dans ce menu, l’indication
“Lock and Password” (Verrouillage et Mot de passe)
Affichage OSD Non
Langage Francais
Pays F
Verrouillage
Minuteries
Teletext lang. Europèen
065001057470 15"LCDVD LOC1 FRA 13/2/07 10:49 Page 17
Page 54

FONCTIONS DU TELEVISEUR (MENUS)
18
apparaît. Activez la fonction de verrouillage à l’aide
de la touche V+ pour qu’un mot de passe vous soit
demandé lorsque vous allumez la TV alors qu’elle se
trouvait en mode de veille. Elle ne se mettra en marche
que si vous saisissez le bon mot de passe. Pour changer
de mot de passe, saisissez un nombre à 4 chiffres dans
la ligne « mot de passe » (entre « 0000 » et « 9999 »).
RReemmaarrqquuee ::
Si vous avez oublié le mot de passe,
saisissez le 4711.
44..55.. MMiinnuutteerriieess ::
Ce menu contient les options «
Minuterie sommeil », « Minuterie rappel », «
Désactiver minuterie », « Minuterie chgt prog. » et
« Changement prog. ».
44..55..11.. MMiinnuutteerriiee ssoommmmeeiill::
Réglez la minuterie sommeil
entre 5 et 120 minutes à l’aide de la touche V+.
Lorsque le temps choisi est écoulé, la TV s’éteint
automatiquement. La durée se règle par tranche de 5
minutes. Un décompte apparaît à l’écran lors des 60
dernières secondes du temps choisi.
Appuyez sur la touche TV pour quitter ce menu.
44..55..22.. MMiinnuutteerriiee rraappppeell::
Réglez la minuterie rappel
entre 5 et 120 minutes à l’aide de la touche V+. Un
message d’avertissement apparaît à l’écran à la fin du
temps choisi. Appuyez sur n’importe quelle touche
pour que ce message disparaisse. La minuterie rappel
se règle par tranche de 5 minutes.
44..55..33..
Minuterie de mise hors tension Il est possible de
régler l’heure à laquelle la TV doit s’éteindre.
Remarque : Entrez dans le menu « Horloge temps réel
» et vérifiez si l’heure est bien réglée.
44..55..44.. CChhaannggeemmeenntt ddee pprrooggrraammmmee ((cchhaannggeemmeenntt pprroogg..)) ::
Réglez la minuterie de changement de programme
dans l’option « Switch » (changement) pour que la TV
passe à la chaîne sélectionnée à l’heure fixée. Une fois
le réglage terminé, si votre TV est en mode de veille à
l’heure fixée, elle se rallumera et passera à la chaîne
sélectionnée. Si vous voulez que votre TV passe
automatiquement en mode AV, appuyez sur la touche
Mode sommeil Non
Temps restant Non
Heure d’arrêt - -:- Heure comm. - -:- Com. vers 5
Serrure Non
Code 1111
065001057470 15"LCDVD LOC1 FRA 13/2/07 10:49 Page 18
Page 55

FONCTIONS DU TELEVISEUR (MENUS)
19
AV lorsque vous êtes dans l’option « Changement prog.
». Les autres modes s’affichent dans l’ordre.
44..66.. LLaanngguuee ttéélléétteexxttee ::
Choisissez la langue télétexte
en tenant compte du télétexte reçu par votre TV.
44..77.. TTéélléétteexxttee EE//OO ::
Cette fonction permet de
sélectionner les caractères propres à l’Europe de l’Est et
de l’Ouest qui seront utilisés dans le télétexte.
44..88.. HHoorrllooggee tteemmppss rrééeell ::
Vous avez le choix entre les
formats « 24 hours » (24 heures), « 12 hours » (12
heures) ou « closed » (désactivé). La ligne inférieure
vous permet de régler l’heure.
55.. CCOONNFFIIGGUURRAATTIIOONN DDEESS CCHHAAIINNEESS
Le menu de configuration des chaînes contient les
options « Prog. No. » (N° de chaîne), « Channel Name
» (Nom de la chaîne), « System » (Système), « Système
son », « Auto Prog. » (Prog. auto), « Fréquence », « Fine
tuning » (syntonisation précise), « AFC », « Saut » et «
Verrouiller ».
NN°° ddee cchhaaîînnee::
Cette fonction permet d’afficher le
numéro de la chaîne. Changez le n° de chaîne à l’aide
des touches V+/- et du pavé numérique.
NNoomm ddee llaa cchhaaîînnee ::
Cette fonction permet d’afficher le
nom de la chaîne. Appuyez sur la touche V+/- pour
saisir le nom de la chaîne. Changez les lettres à l’aide
des touches P+/-. Passez au caractère précédent ou
suivant à l’aide des touches V+/-. Lorsque vous avez
donné un nom à la chaîne, appuyez sur la touche V+
ou V- pour quitter cette option.
SSttaannddaarrdd ssyyssttèèmmee ::
Sélectionnez le standard système de
votre pays à l’aide des touches « V+/V- » (Tous les
Européens peuvent sélectionner l’option « Europe »,
sauf les Français).
MMéémmoorriissaattiioonn aauuttoo ::
Cette option permet une
recherche automatique des chaînes. Le message « En
N. de progr. 2
Nomme
Syst. Etalon Europe
Recher. auto
Frequence 182.25 MHz
Réglage fin.
Clock Non
Time 01:22
Pays F
Verrouillage
Minuteries
Teletext lang. Europèen
Teletext E / W Quest
RT Clock
065001057470 15"LCDVD LOC1 FRA 13/2/07 10:49 Page 19
Page 56
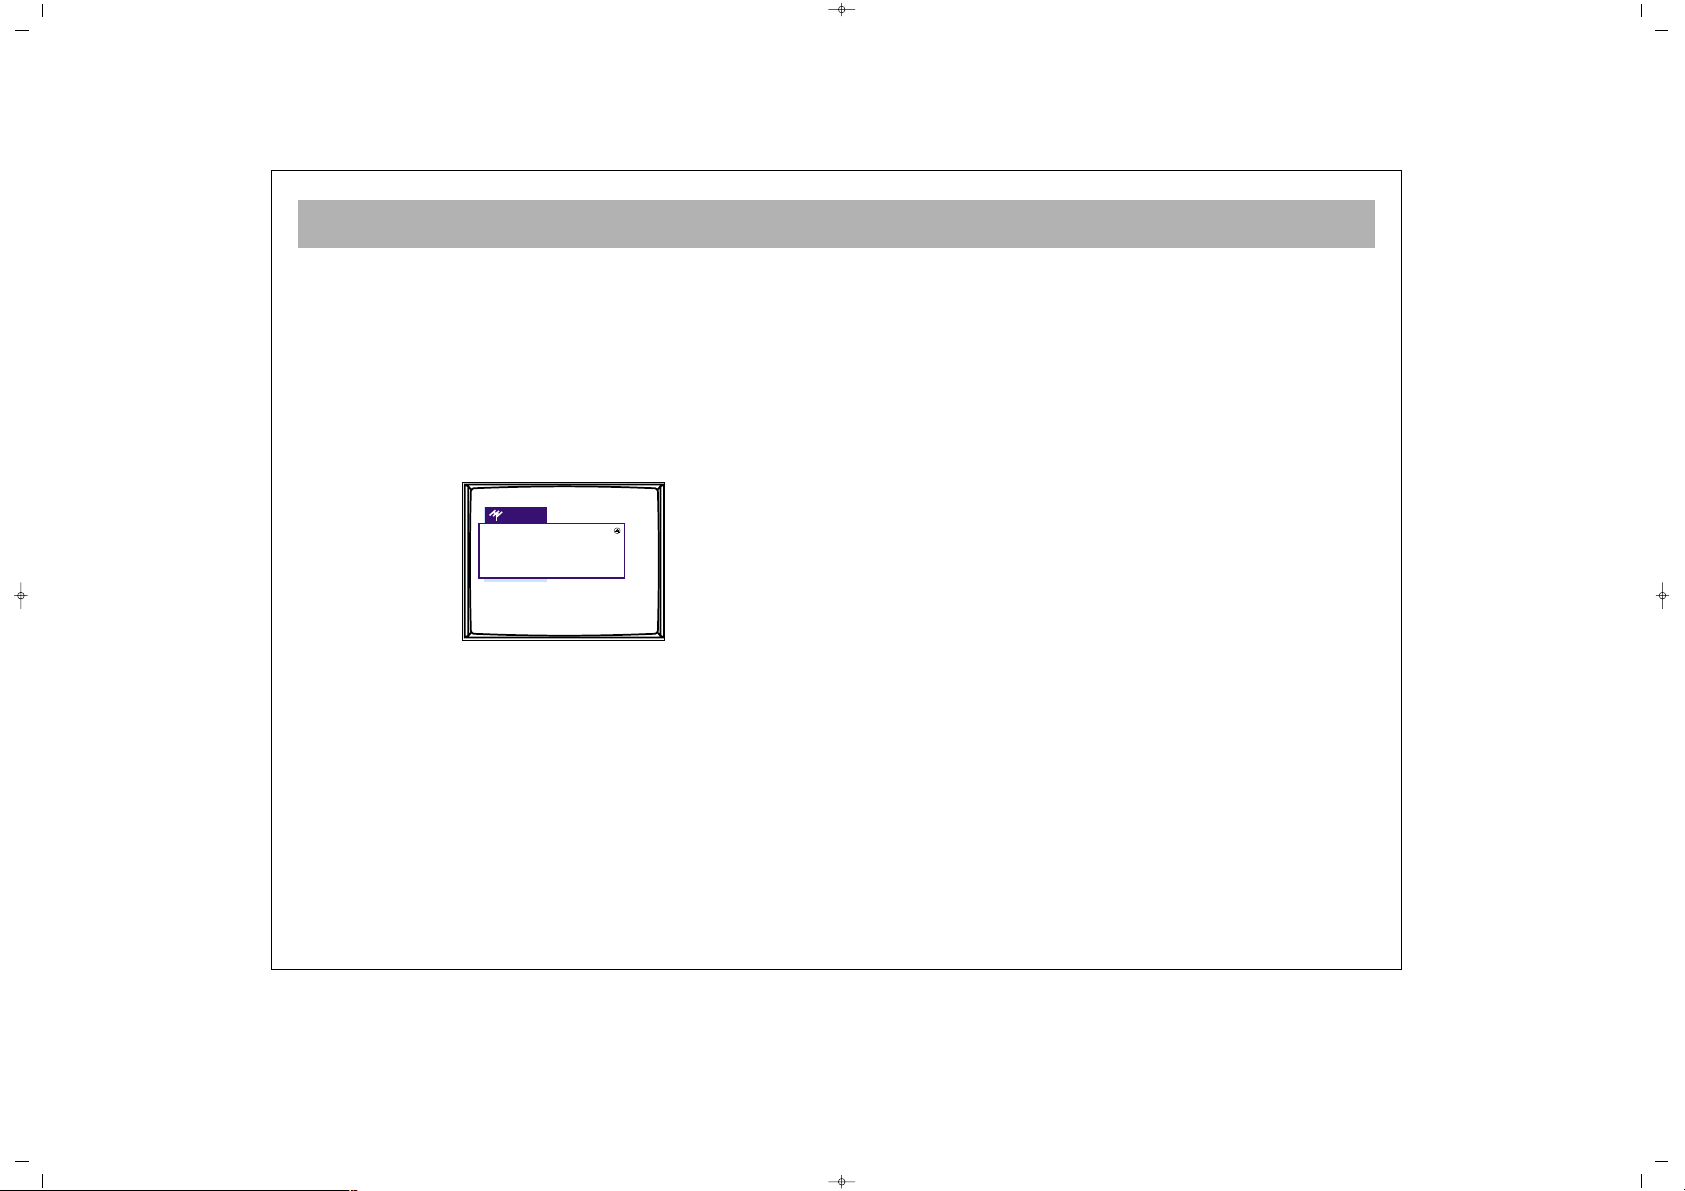
FONCTIONS DU TELEVISEUR (MENUS)
20
cours » est affiché pendant la recherche. Il disparaît
lorsque celle-ci est terminée. Lorsque le processus de
mémorisation automatique est terminé, une liste des
programmes trouvés s’affiche.
PPaarr eexxeemmppllee ::
Si 50 chaînes ont été trouvées, les
numéros supérieurs à 50 ne sont pas affichés. Si vous
appuyez sur la touche P+ alors que vous êtes sur la
chaîne 50, la TV passe en mode PC (et non pas à la
chaîne 51).
FFrrééqquueennccee ::
Sélectionnez cette option pour voir la
fréquence de la chaîne. Il est possible de changer la
fréquence à l’aide des touches V+/- ou du pavé
numérique.
RRééggllaaggee ffiinn::
Procédez à une syntonisation précise à
l’aide des touches V+/-.
AAFFCC::
Vous avez le choix entre les options « ACTIVE »
et « DESACTIVE ». Activez cette fonction pour
optimiser la fréquence des chaînes.
CCoonnttrrôôllee ppaarreennttaall ::
Cette fonction permet de verrouiller
la chaîne sur laquelle la TV se trouve. Un mot de passe
vous sera demandé lorsque vous sélectionnerez cette
chaîne. La chaîne ne s’affichera que si vous entrez le bon
mot de passe (celui que vous avez choisi pour l’option
de contrôle parental). Si vous passez à une autre chaîne
et que vous revenez ensuite à la chaîne verrouillée, vous
devrez à nouveau saisir le mot de passe. Choisissez
l’option « Désactivé » dans le menu de configuration des
chaînes pour désactiver cette fonction.
SSttoorree::
Vous pouvez sauver les ajustements.
RReemmaarrqquuee ::
Une chaîne ne peut être verrouillée que si
la fonction de contrôle parental est activé.
AFC Oui
Serrure Non
Store
065001057470 15"LCDVD LOC1 FRA 13/2/07 10:49 Page 20
Page 57

MODES DES PERIPHERIQUES
21
CCeerrttaaiinnss mmeennuuss nnee ssoonntt ppaass ddiissppoonniibblleess oouu ssoonntt ddiifffféérreennttss
lloorrssqquuee ddeess ppéérriipphhéérriiqquueess ssoonntt ccoonnnneeccttééss..
PPaarr eexxeemmppllee ::
YYPPbbPPrr mmooddee
En mode HD, certains menus ne sont pas disponibles. Les
menus « Volume », « Picture » (Image) et « Settings »
(Configuration) sont fonctionnels.
Il n’y a aucun changement dans le menu « Volume ».
Dans le menu « Picture » (Image), l’option « Amél. couleur
peau »n’est pas disponible. Les options et « Info » ont été
ajoutées.
IInnffoo ::
Cette option vous permet d’afficher la résolution
d’affichage.
Les options concernant les textes ont été supprimées du
menu de configuration.
PPCC mmooddee
En mode PC, certains menus ne sont pas disponibles. Les
menus « Sound » (Son), « Picture » (Image) et « Settings »
(Configuration) restent accessibles.
LLee mmeennuu «« SSoouunndd »» ((SSoonn)) ccoonnttiieenntt uunnee ooppttiioonn
ssuupppplléémmeennttaaiirree ::
l’option « Audio ». Activez l’option «
Audio » si vous souhaitez que le son de votre ordinateur
soit émis via les haut-parleurs de la TV. Désactivez cette
option dans le cas contraire.
Dans le menu « Picture » (Image), l’option « Amél. couleur
peau » n’est pas disponible. Les options « Position », «
Bruit vidéo » « Réglage auto », « Information », « Par
défaut » et « Temp. couleurs » ont été ajoutées.
PPoossiittiioonn ::
Cette option permet de déterminer la position
horizontale et verticale de l’image.
BBrruuiitt vviiddeeoo ::
Ce menu contient les options « Phase » et «
Horloge ». Ces dernières vous permettent d’augmenter la
qualité d’affichage.
RRééggllaaggee aauuttoo::
Cette option vous permet d’améliorer
automatiquement la netteté de l’image.
IInnffoo ::
Cette option vous permet d’afficher la résolution
d’affichage.
PPaarr ddééffaauutt ::
Cette option vous permet de restaurer les
réglages d’usine relatifs à l’image.
Temp. couleurs : Règle la température des couleurs de
l’image. Si “Utilisateur” est sélectionné, le message «
White tone RGB » (Bruit blanc RVB) s’affiche dans la partie
inférieure de l’écran. Vous pouvez procéder aux réglages.
Les options concernant les textes ont été supprimées du
menu de configuration.
065001057470 15"LCDVD LOC1 FRA 13/2/07 10:49 Page 21
Page 58

TELETEXTE
22
MMOODDEE TTEELLEETTEEXXTTEE
Si la chaîne en cours de visualisation possède une
diffusion télétexte, vous pouvez utiliser les touches
suivantes pour accéder au mode télétexte et effectuer
diverses opérations :
11.. TT éé ll éé tt ee xx ttee
: Pour passer à la diffusion télétexte
de la chaîne en cours de visualisation.
22.. TTVV ::
Pour repasser en mode TV lorsque vous êtes en
mode Télétexte.
33.. RRéévvéélleerr//MMaassqquueerr ((rrééppoonnssee)) ::
Pour révéler des
informations masquées sur les pages télétexte.
44..TToouucchhee ddee mmiinnuutteerriiee dduu ttéélléétteexxttee ((aaffffiicchhaaggee ddee ssoouuss--
ppaaggeess))::
En mode TV, la touche de minuterie du
télétexte permet d’afficher l’horloge de votre TV dans le
coin supérieur droit de l’écran. En mode Télétexte,
appuyez sur cette touche pour accéder directement aux
sous-pages de la page en cours.
PPaarr eexxeemmppllee ::
Vous êtes sur la page n° 500 du télétexte.
Si le message « 1/2 » est affiché, le numéro 1 indique le
numéro de la sous-page en cours tandis que le numéro
2 indique le nombre total de sous-pages. Appuyez sur la
touche de minuterie du télétexte : l’indication « S - - -
- » s’affiche à la place du numéro de la page télétexte.
Accédez à la sous-page de votre choix à l’aide du pavé
numérique de votre télécommande. Par exemple,
saisissez les nombres 0, 0, 0, 2 pour accéder à la
seconde sous-page.
1. Touche Télétexte
2. Touche TV
3. Touche Révéler/Masquer
(réponse)
4. Touche de minuterie du
télétexte (affichage de souspages)
5. Touche d’annulation
(mise à jour)
6. Bouton Format
(élargissement de la page)
7. Touche Mixte (affichage
simultané de la TV et du
télétexte)
8. Touche de verrouillage
(arrêt sur une sous-page)
9. Touche Index
(page d'accueil)
10.Touches de couleur
(rouge, vert, jaune, bleu)
065001057470 15"LCDVD LOC1 FRA 13/2/07 10:49 Page 22
Page 59

TELETEXTE
23
55.. AAnnnnuullaattiioonn ((mmiissee àà jjoouurr)) ::
: En mode Télétexte,
appuyez sur cette touche pour afficher la diffusion TV
tout en restant en mode Télétexte. La recherche des
pages continue si un nouveau numéro de page est saisi.
Lorsque la page demandée a été trouvée, un message
indiquant le numéro de la page est affiché. Appuyez de
nouveau sur cette touche pour visionner la page
télétexte.
66.. FFoorrmmaatt ((ééllaarrggiisssseemmeenntt ddee llaa ppaaggee))
: Cette touche
permet d’afficher la page télétexte en cours sous 3
formats d’affichage différents : taille normale, taille
double (partie supérieure), taille double (partie
inférieure).
77.. MMiixxttee ((aaffffiicchhaaggee ssiimmuullttaannéé ddee llaa ttéélléévviissiioonn eett dduu
ttéélléétteexxttee))
: Pour afficher simultanément la diffusion
TV et les données télétexte de la chaîne en cours.
Appuyez à nouveau sur la touche Mixte pour repasser
en mode télétexte normal.
88.. VVeerrrroouuiillllaaggee ((aarrrrêêtt ssuurr uunnee ssoouuss--ppaaggee)) ::
: Si une
page télétexte est composée de plusieurs sous-pages,
ces dernières sont affichées successivement de manière
automatique. Utilisez la touche de verrouillage pour
arrêter le défilement sur la sous-page en cours.
Pendant tout le temps où la page reste figée à l’écran,
l’indication « HOLD » est affichée dans le coin
supérieur gauche de l’écran. Appuyez de nouveau sur
la touche de verrouillage pour annuler cette fonction.
99.. IInnddeexx ((ppaaggee dd''aaccccuueeiill)) ::
: Pour accéder
directement à la page d’accueil du télétexte.
1100)) TToouucchheess ddee ccoouulleeuurr ((RROOUUGGEE,, VVEERRTT,, JJAAUUNNEE,, BBLLEEUU))
Ces touches vous permettent de parcourir plus aisément le
contenu du télétexte.
EEXXEEMMPPLLEE::
GGUUIIDDEE TTVV SSPPOORRTTSS AACCTTUUAALLIITTEESS MMEETTEEOO
(Les informations ci-dessus sont données à titre d'exemple.
Les informations associées aux différentes couleurs varient
en fonction de la page consultée).
RREEMMAARRQQUUEE::
certains modèles ne disposent pas de la
fonction TELETEXTE.
Appuyez sur
la touche
RROOUUGGEE
pour recevoir
les informations TV
Appuyez sur
la touche
VVEERRTTEE
pour recevoir
les informations sportives
Appuyez sur
la touche
JJAAUUNNEE
pour recevoir
les
actualités
Appuyez sur
la touche
BLEUE pour
recevoir les
prévisions
météorologiques
065001057470 15"LCDVD LOC1 FRA 13/2/07 10:49 Page 23
Page 60

LECTEUR DVD
24
VOTRE LECTEUR DVD POSSÈDE UNE QUALITÉ D'IMAGE ET DE SON PARFAITE GRCE A SES SYSTÈMES VIDÉO ET
AUDIO NUMÉRIQUES.
VOUS AUREZ L'IMPRESSION D'ÊTRE AU CINÉMA LORSQUE VOUS REGARDEREZ DES FILMS SUR VOTRE LECTEUR
DVD. SES CARACTÉRISTIQUES HAUT DE GAMME SONT LES SUIVANTES;
SÉLECTION DE LA LANGUE
- CHOIX DU SOUS-TITRAGE
- POSSIBILITÉ DE LECTURE DE DVD,
- DIFFÉRENTS DEGRÉS D'AFFICHAGE LENT ET RAPIDE DES IMAGES,
- POSSIBILITÉ DE VISUALISATION DU DISQUE DVD SELON UN ANGLE DE VUE PARTICULIER SI LES SCÈNES ONT ÉTÉ
TOURNÉES DEPUIS DIFFÉRENTS ANGLES DE VUE.
CCooddee dduu sseecctteeuurr dduu lleecctteeuurr
CCeett ééqquuiippeemmeenntt nnee ppeeuutt lliirree qquuee lleess
ddiissqquueess ppoorrttaanntt llee ccooddee MMuullttii.. IIll nnee ppeeuutt
ppaass lliirree lleess ddiissqquueess aayyaanntt uunn ccooddee ddiifffféérreenntt..
065001057470 15"LCDVD LOC1 FRA 13/2/07 10:49 Page 24
Page 61

LA TELECOMMANDE (FONCTIONS DVD)
25
1. Touche MARCHE/ARRÊT
Pour allumer/éteindre l’appareil.
2. Touche EJECT
Pour ouvrir et fermer le plateau CD.
3. Touche MUTE
Pour couper complètement le son.
4. Touche ZOOM
Pour agrandir l'image.
5. Touches SLOW
Pour une lecture au ralenti avant
(ce bouton ne fonctionne pas à
quelques modèles)
6. Touche CLEAR
Pour effacer les entrées effectuées dans les
menus.
7. Touche SEARCH
Pour passer à une plage précise d’un CD.
8. Touches SLOW
Pour une lecture au ralenti arrière
(ce bouton ne fonctionne pas à
quelques modèles)
9. Touche A-B
Pour désigner le passage à répéter.
10. Touche EXIT
Pour quitter le menu du lecteur DVD.
11. Touche MENU
Pour afficher les menus du disque.
12. Touche SETUP
Pour accéder à l’installation du menu de
réglages.
13. Touches FLECHES
Pour naviguer vers le haut/bas, la
droite/gauche dans les menus.
14. Touche SUB
Pour modifier la langue des sous-titres.
15. Touche AUDIO
Pour modifier la langue de doublage.
16. Touche DISPLAY
Pour obtenir des informations sur le DVD
en cours de lecture.
17. Touche RADIO
(ce bouton ne fonctionne pas à
quelques modèles)
18. Touches numériques
Pour saisir des sélections dans les menus.
19. Touches SAUT
Pour passer au chapitre suivant/précédent.
20. Touche PAUSE
Pour un arrêt sur image.
21. Touche STOP
Pour arrêter la lecture du
DVD/MP3 CD.
22. Touche LECTURE
Pour démarrer la lecture d’un CD et la
reprendre à partir de l’arrêt sur image.
23. Touches RECHERCHE RAPIDE
Pour une recherche arrière/avant (5 vitesses).
24. Touche ENTER
Pour confirmer un choix et accéder aux
options du menu d’installation.
25. DVD/TV Touche
065001057470 15"LCDVD LOC1 FRA 13/2/07 10:49 Page 25
Page 62

LECTURE DES DISQUES CD (DVD)
26
LLeeccttuurree ddee CCDD ::
1. Appuyez sur la touche « DVD/TV » de la télécommande
afin que votre téléviseur soit en mode Lecture de DVD.
2. Pour ouvrir le plateau CD, appuyez sur la touche « EJECT »
3. Placez le côté de DVD que des données sont traité.
4. Appuyez sur la touche « LECTURE » pour rentrer le
plateau et commencer la lecture du film.
En fonction du style d’enregistrement des CD, la lecture de
certains disques ne démarre qu’avec un menu. Déplacez le
curseur dans le menu à l’aide des flèches, confirmer votre
choix à l’aide la touche « ENTER » pour commencer la
lecture du film.
5. En appuyant une première fois sur la touche « PAUSE »,
vous allez suspendre la lecture du film. La dernière image
sera figée à l’écran (arrêt sur image). Lorsque vous appuierez
sur la touche « LECTURE », la lecture du film redémarrera.
6. Vous pouvez arrêter le film en appuyant sur la touche «
STOP ». Lorsque par après, vous appuierez sur la touche «
LECTURE », le film redémarrera à l’endroit où vous l’avez
arrêté.
SSAAUUTT ::
Avance ou retour en arrière entre les
pistes (chapitres) du DVD.
RREECCHHEERRCCHHEE RRAAPPIIDDEE ::
Effectuer une recherche
rapide (5 vitesses) dans le film.
** PPllaacceezz llee ccôôttéé ddee DDVVDD qquuee ddeess ddoonnnnééeess ssoonntt ttrraaiittéé..
065001057470 15"LCDVD LOC1 FRA 13/2/07 10:49 Page 26
Page 63

REGLAGES DVD
27
MMEENNUU RRÉÉGGLLAAGGEESS
**AAffffiicchhaaggee TTVV ::
vous pouvez sélectionner le format
d’affichage. Il s’active immédiatement lorsque vous entrez
dans le menu et choisissez un format d’affichage.
**AAnnggllee MMaarrkk ::
la fonction Angle Mark peut être
activée/désactivée.
**LLaanngguuee OOSSDD ::
vous pouvez sélectionner la langue du Menu
Réglages.
**SSoouuss--ttiittrreess ::
la fonction sous-titrage pour malentendants
peut être activée/désactivée
**DDeerrnniièèrree mméémmooiirree ::
lorsque la lecture est interrompue, la
lecture peut reprendre à partir de l’endroit où elle a été
arrêtée si la fonction Dernière mémoire a été activée.
Régler État Dernière Mémoire
.. PAGE CONFIG. GÉNÉRALE ..
Affichage TV PS
Repere D'angles On
Langue OSD FRE
Inscription Titres Off
Dernière Mèmoire Off
On
Off
Inscription Titres
.. PAGE CONFIG. GÉNÉRALE ..
Affichage TV PS
Repere D'angles On
Langue OSD FRE
Inscription Titres Off
Dernière Mèmoire Off
On
Off
Régler La Langue OSD
Anglais
Français
Allemand
Italien
Turc
Néerlandais
Espagnol
.. PAGE CONFIG. GÉNÉRALE ..
Affichage TV PS
Repere D'angles On
Langue OSD FRE
Inscription Titres Off
Dernière Mèmoire Off
Régler Le Angle Mark
.. PAGE CONFIG. GÉNÉRALE ..
Affichage TV PS
Repere D'angles On
Langue OSD FRE
Inscription Titres Off
Dernière Mèmoire Off
On
Off
.. PAGE CONFIG. GÉNÉRALE ..
Régler Mode Affichage TV
Affichage TV PS
Repere D'angles On
Langue OSD FRE
Inscription Titres Off
Dernière Mèmoire Off
Normal/PS
Normal L/B
Large
.. PAGE CONFIG. GÉNÉRALE ..
Affichage TV PS
Repere D'angles On
Langue OSD FRE
Inscription Titres Off
Dernière Mèmoire Off
Atteindre Page Générale
065001057470 15"LCDVD LOC1 FRA 13/2/07 10:49 Page 27
Page 64

REGLAGES DVD
28
MMEENNUU RRÉÉGGLLAAGGEESS AAUUDDIIOO
**DDoowwnnmmiixx ::
la sortie audio peut être sélectionnée à partir
du sous-menu downmix
**HHCCCCDD ::
le taux de bits Audio pour sortie PCM peut être
sélectionnée
HDCD
Downmix
HDCD Off OFF
44.1K
88.2K
.. PAGE CONFIG. DE HAED. PABL ..
.. PAGE CONFIG. DE HAED. PABL ..
Régler Mode Downmix
Downmix LT:RT
HDCD Off Stereo
065001057470 15"LCDVD LOC1 FRA 13/2/07 10:49 Page 28
Page 65
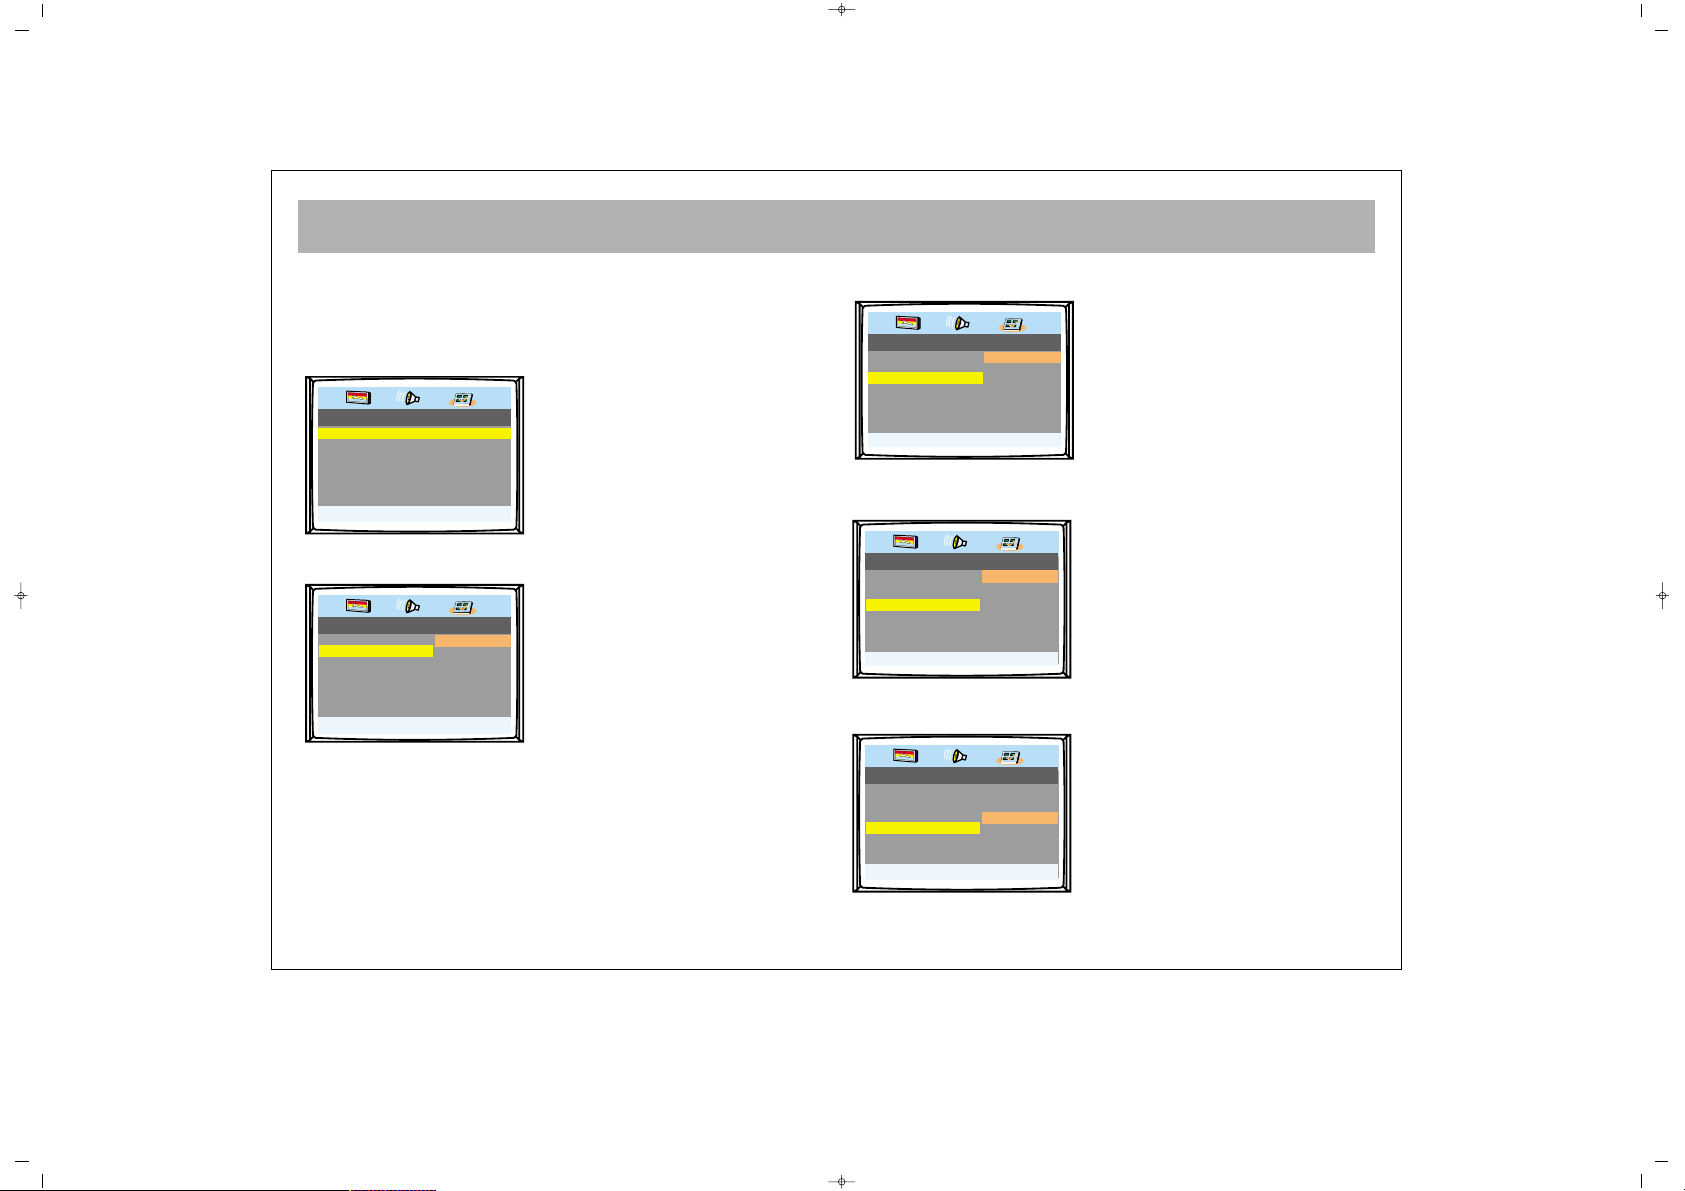
REGLAGES DVD
29
MMEENNUU PPRRÉÉFFÉÉRREENNCCEESS
CCee mmeennuu eesstt aaccttiivvéé eenn ccaass dd’’aarrrrêêtt oouu dd’’aabbsseennccee ddee CCDD ((mmeessssaaggeess
““PPoossiittiioonn SSttoopp”” oouu ““IInnsséérreezz CCDD””))
**TTyyppee TTVV ::
le format vidéo peut être sélectionné (PAL, Auto,
NTSC)
**AAuuddiioo ::
la langue du doublage du DVD peut être
sélectionné
**SSoouuss--ttiittrree ::
la langue des sous-titres DVD peut être
sélectionnée
**MMeennuu dduu DDiissqquuee ::
la langue du menu disque DVD peut
être sélectionnée
**CCoonnttrrôôllee ppaarreennttaall ::
le contrôle parental pour DVD peut-être
sélectionnée
Régler Sur Contr. Parent
.. PAGE DE PRÉFÉRENCES ..
Type De TV PAL
Audio ENG
Sous Titre ENG
Menu De Disque ENG
Parentale
Password
Par Défau
1. BARNSIKRING
2.G
3.PG
4.PG 13
5.PGR
6.R
7.NC17
8.ADULTE
Langue De Menu Préférée
.. PAGE DE PRÉFÉRENCES ..
Type De TV PAL
Audio ENG
Sous Titre ENG
Menu De Disque ENG
Parentale
Password
Par Défau
English
Français
Espagnol
Allemand
Néerlandais
Turc
Italien
Polonais
.. PAGE DE PRÉFÉRENCES ..
Type De TV PAL
Audio ENG
Sous Titre ENG
Menu De Disque ENG
Parentale
Password
Par Défau
Langue Sous-Titrage Préfér.
English
Français
Espagnol
Allemand
Néerlandais
Turc
Italien
Polonais
Langue Dáudio Préférée
.. PAGE DE PRÉFÉRENCES ..
Type De TV PAL
Audio ENG
Sous Titre ENG
Menu De Disque ENG
Parentale
Password
Par Défaut
English
Français
Espagnol
Allemand
Néerlandais
Turc
Italien
.. PAGE DE PRÉFÉRENCES ..
Régler Le Standard TV
Type De TV PAL PAL
Audio ENG Auto
Sous Titre ENG NTSC
Menu De Disque ENG
Parentale
Password
Par Défaut
065001057470 15"LCDVD LOC1 FRA 13/2/07 10:49 Page 29
Page 66

REGLAGES DVD
30
**MMoott ddee ppaassssee ::
la clé parentale peut être modifiée
Entrer l’ancien mot de passe, ensuite le nouveau mot de passe
et confirmer ce dernier.
((LLee MMoott ddee PPaassssee ppaarr ddééffaauutt eesstt 11336699))
**PPaarr ddééffaauutt ::
les paramètres d’usine peuvent être configurés en
sélectionnant ‘Par défaut’
Charger Paramét. Dûsine
.. PAGE DE PRÉFÉRENCES ..
Type De TV PAL
Audio ENG
Sous Titre ENG
Menu De Disque ENG
Parentale
Password
Par Défau
Reset
ANCIEN PASSE
NOUVEU PASSE
CONFIRMER PASSE
OK
Changer Mot De Passe
.. PAGE DE PRÉFÉRENCES ..
Type De TV PAL
Audio ENG
Sous Titre ENG
Menu De Disque ENG
Parentale
Password
Par Défau
Changer
065001057470 15"LCDVD LOC1 FRA 13/2/07 10:49 Page 30
Page 67

FONCTIONS DE BASE
31
MMOODDEE ZZOOOOMM ::
Vous pouvez agrandir l’image à l’écran en
appuyant sur la touche « ZOOM » de la télécommande. Le
zoom possède six niveaux (2x, 3x, 4x). Il peut arriver que
l’on ne puisse pas activer le zoom pour certains DVD. Le
niveau de zoom peut être plus petit en fonction du type
d’enregistrement. Par exemple, si seul un niveau deux est
possible (zoom niveau 2), lorsque vous appuierez une
troisième fois, l’image sera affichée normalement. Vous
pouvez vous déplacer dans l’image agrandie en haut, en bas,
à gauche et à droite à l’aide des flèches.
DDIISSPPLLAAYY ::
vous pouvez choisir une des possibilités suivantes
d’affichage du temps en appuyant sur la touche Affichage :
TITRE, TEMPS RESTANT DU TITRE, TEMPS ÉCOULÉ DU
CHAPITRE, TEMPS RESTANT DU CHAPITRE.
SSOOUUSS--TTIITTRREE ::
la langue du sous-titre sera modifiée à chaque
fois que vous appuierez sur la touche « SUB » de la
télécommande.
LLAANNGGUUEE DDEE DDOOUUBBLLAAGGEE ((AAUUDDIIOO)) ::
la langue de doublage
sera changée à chaque fois que vous appuierez sur le touche
« AUDIO » de la télécommande.
MMUUTTEE ::
À l’aide de cette touche, vous pouvez complètement
couper le son de votre DVD. Pour le remettre, appuyez une
seconde fois sur cette touche.
MMEENNUU DDIISSQQUUEE ::
La touche « MENU » sur la télécommande
vous permet d’accéder au menu qui se trouve sur le disque.
Vous avez avec ce menu, accès aux informations concernant
les sections du film, le réalisateur, les acteurs et actrices, le
making-of du film et les bandes de lancement de films. S’il
n’y a pas d’option Quitter, appuyez sur la touche EXIT pour
quitter.
065001057470 15"LCDVD LOC1 FRA 13/2/07 10:49 Page 31
Page 68

FONCTIONS DE BASE
32
MMEENNUU RREECCHHEERRCCHHEE
Lorsque vous appuyez sur la touche « Search », un écran
apparaîtra dans le bas. (L’écran sera partagé en deux : le film en
haut de l’écran et les données du disque dans le bas de l’écran).
Vous pouvez sélectionner la ligne désirée (titre, chapitre,
audio, sous-titre, angle, temps, etc….) en appuyant sur la
touche « Enter » et effectuer ensuite les réglages.
**TTiittrree ::
le titre souhaité peut être sélectionné directement
**CChhaappiittrree ::
le chapitre souhaité peut être sélectionné
directement
**AAuuddiioo ::
la langue de doublage du DVD peut être sélectionnée
**SSoouuss--ttiittrree ::
la langue des sous-titres DVD peut être sélectionnée
**AAnnggllee ::
les différents angles peuvent être sélectionnés si le
disque possède cette option
**TTTT TTiimmee ::
le moment précis du titre peut être entré directement
**CCHH ttiimmee ::
le moment précis du chapitre peut être entré
directement
**RReeppeeaatt ::
la répétition du titre, chapitre ou de tout le disque peut
être sélectionnée
**TTeemmppss DDiisspp.. ::
le format d’affichage du temps peut être
sélectionné (temps écoulé du titre, temps restant du titre, temps
écoulé du chapitre, temps restant du chapitre)
PPOOUURR VVOOTTRREE IINNFFOORRMMAATTIIOONN ::
Si vous appuyez sur une
touche qui est désactivée, vous verrez apparaître sur l’écran
de votre TV, une icône en forme de main vous indiquant que
votre lecteur de DVD ne peut exécuter cette opération.
• Dans le menu Réglages du lecteur de DVD, les touches
([LECTURE], [STOP], [SAUT], [PAUSE], etc.) ne fonctionnent pas.
Pour utiliser ces touches, vous devez d’abord quitter le menu.
• Le Dolby Digital AC-3 est le dernier système de
compression audio qui a été développé par les Laboratoires
Dolby. Un décodeur spécial a été intégré dans votre lecteur
de DVD afin de décoder ce système. Vous aurez grâce à cela
une sortie audio de qualité cinéma si vous établissez les
connexions du système audio comme décrit dans ce manuel.
• PCM est l’abréviation de Pulse Code Modulation. Cela
concerne le son. Dans les DVD, des données audio ont été
encodées avec les technologies AC-3 et PCM.
• Code de zone : les codes de zone des lecteurs de DVD et
des CD sont affichés ici. Si les codes du lecteur de DVD et
des CD ne sont pas identiques, le CD ne pourra être lu et le
message « Zone incorrecte » apparaîtra à l’écran. Le code de
zone de ce lecteur de DVD est « Multi » et seuls les CD
portant ce code de zone pourront être lus.
Menu
Title 21/25
Chapter 02/07
Audio CANAL Anglais
Sous Titre Off
Titre:21 Chapitre:02 0:13:19
065001057470 15"LCDVD LOC1 FRA 13/2/07 10:49 Page 32
Page 69

CD, CD MP3
33
LLEECCTTUURREE DDEE CCDD AAUUDDIIOO ::
lors de la lecture de CD audio,
certaines touches seront inactives. Le placement dans le
plateau et la lecture de CD est la même que pour les autres CD.
Pour sortir le plateau CD, appuyez sur [EJECT] ; pour lancer
la lecture, appuyez sur LECTURE [ ]pour marquer une
pause, appuyez sur PAUSE [ ]; pour arrêter, appuyez sur
STOP [ ]; pour passer à la plage suivante, appuyez sur
SAUT [ ]. L’utilisation des fonctions du menu est la
même que pour les autres CD.
LLEECCTTUURREE DDEE CCDD MMPP33 ::
Lors de la lecture de disques MP3, la
liste des fichiers MP3 sera affichée sur l’écran de votre TV.
Pour sortir le plateau CD, appuyez sur [EJECT] ; pour lancer
la lecture, appuyez sur LECTURE [ ]; pour marquer une
pause, appuyez sur PAUSE [ ]; pour arrêter, appuyez sur
STOP [ ], pour passer au fichier MP3 suivant, appuyez sur
SAUT [ ].Vous pouvez directement sélectionner le fichier
MP3 souhaité en utilisant les touches numériques (0-9).
L’utilisation des fonctions du menu est la même que pour les
autres CD.
AAFFFFIICCHHAAGGEE DD’’IIMMAAGGEESS JJPPEEGG ::
le Menu Photos est activé.
Dans ce menu, vous pouvez choisir les photos et les afficher
successivement sous forme de diaporama. Vous pouvez
quitter le diaporama en utilisant la touche « STOP ». Après
avoir appuyé sur « STOP », vous verrez apparaître un menu
vous montrant les fonctions des touches pour les différents
sous-menus. Appuyez sur la touche « Menu » pour retourner
au menu principal.
AATTTTEENNTTIIOONN ::
Votre DVD peut se bloquer si les disques que vous lisez sont
endommagés ou griffés, auquel cas, vous devez éteindre
votre lecteur et ensuite, le rallumer.
NNoottee ::
Lorsque qu’aucune fonction n’est activée pendant un certain
temps en mode DVD, l’écran de veille est activé.
Lorsque vous appuyez sur une touche, le logo DVD
apparaîtra à nouveau à l’écran. Cette procédure s’applique
également aux CD Audio et CD MP3.
065001057470 15"LCDVD LOC1 FRA 13/2/07 10:49 Page 33
Page 70

GUIDE DE DEPANNAGE
34
Vous pouvez remédier aux éventuels problèmes d'image ou de son en En cas de problème d’image ou de son, référez-vous à ce guide de dépannage. Si le
problème persiste, veuillez contacter un service de réparation agréé.
SSyymmppttôômmee
Absence d’alimentation
L’afficheur LED n’est pas
allumé
Pas d’image (l’écran est
noir, mais l’afficheur LED
est allumé).
Pas d’image, image
trouble (l’écran est
allumé)
Image instable
Pas d’image en mode AV
Pas de couleurs
Couleurs de mauvaise
qualité
Taches de couleur sur
l’écran
Télétexte brouillé
CCaauusseess ppoossssiibblleess
La TV n'est pas alimentée
La TV n’est pas sous tension
La TV est en mode de veille.
La luminosité est réglée au
minimum.
La TV est mode AV.
Aucune syntonisation n’a été
effectuée.
L’antenne n’est pas connectée.
Le signal est trop faible.
La source AV n’est pas
connectée ou sous tension.
La couleur n’est pas réglée.
Une syntonisation précise est
peut-être nécessaire.
L’écran est magnétisé.
Des haut-parleurs externes
perturbent le champ
magnétique.
Le signal est trop faible.
SSoolluuttiioonnss
Vérifiez si le câble d’alimentation secteur est bien branché
dans la prise murale
Mettez votre TV sous tension à l’aide du bouton On/Off
Appuyez sur la touche P+ ou P- ou sur une touche du pavé
numérique de la télécommande. Réglez la luminosité.
Sélectionnez le mode TV ou appuyez sur une touche du pavé
numérique de la télécommande.
Effectuez une syntonisation précise.
Connectez l’antenne et vérifiez les branchements.
Installez une antenne extérieure si vous utilisez une antenne
intérieure. Vérifiez le bon état de l’antenne extérieure.
Vérifiez si le câble AV est branché à la prise péritel et si la
source AV est sous tension.
Réglez la couleur à l’aide de la télécommande.
Effectuez une syntonisation précise pour obtenir une image
plus nette.
Veillez à ce que la TV soit complètement hors tension après
utilisation. L’écran est automatiquement démagnétisé
lorsque la TV est mise hors tension. Attendez au moins 15
minutes avant de remettre la TV sous tension.
Eloignez les haut-parleurs externes de votre TV.
Faites vérifier votre antenne.
065001057470 15"LCDVD LOC1 FRA 13/2/07 10:49 Page 34
Page 71

CARACTÉRISTIQUES TECHNIQUES
35
Taille de l’écran
1155””
Taille standard 39 cm
Consommation 55
Alimentation AC 230V ~50Hz ( avec adaptateur 12V DC)
Système TV MULTI SYSTEM / NTSC PLAYBACK
Bande Bande VHF I 2 - 4
Bande VHF III 5 -12
Bande UHF 21-69
Bande S S1-S41
Entrée antenne Prise d’antenne standard 75 ohm
Capacité de mémorisation de chaînes 100 + AV
Tube cathodique Ecran TFT LCD avec résolution 1024 x 768
Puissance sonore rms 2 X 2 W
065001057470 15"LCDVD LOC1 FRA 13/2/07 10:49 Page 35
Page 72

065 001 057 480
INSTRUCTION MANUAL
LCD 1520TNBL-DVD
065001057480 15" LCD LOCDVT ING 15/8/06 15:18 Page 1
Page 73

2
SAFETY INFORMATION . . . . . . . . . . . . . . . . . . . . . . . . . . . . . . . . . . . . . . . . . . . . . . . . . . . . . . . . . . . . . . . . . . . . . . . . . . .3
WHAT TO DO FOR SAFETY OF YOUR TV . . . . . . . . . . . . . . . . . . . . . . . . . . . . . . . . . . . . . . . . . . . . . . . . . . . . . . . . . . . . .4
WHICH PART OF YOUR TV PERFORMS WHAT FUNCTION . . . . . . . . . . . . . . . . . . . . . . . . . . . . . . . . . . . . . . . . . . . . . . .6
REMOTE CONTROL . . . . . . . . . . . . . . . . . . . . . . . . . . . . . . . . . . . . . . . . . . . . . . . . . . . . . . . . . . . . . . . . . . . . . . . . . . . . . .7
AERIAL CONNECTION . . . . . . . . . . . . . . . . . . . . . . . . . . . . . . . . . . . . . . . . . . . . . . . . . . . . . . . . . . . . . . . . . . . . . . . . . . . .9
VCR, DVD, COMPUTER AND DECODER CONNECTIONS . . . . . . . . . . . . . . . . . . . . . . . . . . . . . . . . . . . . . . . . . . . . . . .10
AUDIO/VIDEO CONNECTIONS . . . . . . . . . . . . . . . . . . . . . . . . . . . . . . . . . . . . . . . . . . . . . . . . . . . . . . . . . . . . . . . . . . . .11
TV FUNCTIONS . . . . . . . . . . . . . . . . . . . . . . . . . . . . . . . . . . . . . . . . . . . . . . . . . . . . . . . . . . . . . . . . . . . . . . . . . . . . . . . . .12
SETUP . . . . . . . . . . . . . . . . . . . . . . . . . . . . . . . . . . . . . . . . . . . . . . . . . . . . . . . . . . . . . . . . . . . . . . . . . . . . . . . . . . . . . . . .14
TV FUNCTIONS (MENUS) . . . . . . . . . . . . . . . . . . . . . . . . . . . . . . . . . . . . . . . . . . . . . . . . . . . . . . . . . . . . . . . . . . . . . . . . .16
VOLUME ADJUSTMENT MENU, EQUALIZER, HEADPHONE . . . . . . . . . . . . . . . . . . . . . . . . . . . . . . . . . . . . . . . . . . . . .16
PICTURE SETTINGS MENU, PROGRAM TABLE . . . . . . . . . . . . . . . . . . . . . . . . . . . . . . . . . . . . . . . . . . . . . . . . . . . . . . . . .17
SETTINGS MENU . . . . . . . . . . . . . . . . . . . . . . . . . . . . . . . . . . . . . . . . . . . . . . . . . . . . . . . . . . . . . . . . . . . . . . . . . . . . . . .18
PROGRAM SETTINGS . . . . . . . . . . . . . . . . . . . . . . . . . . . . . . . . . . . . . . . . . . . . . . . . . . . . . . . . . . . . . . . . . . . . . . . . . . . .19
EXTERNAL DEVICE MODES . . . . . . . . . . . . . . . . . . . . . . . . . . . . . . . . . . . . . . . . . . . . . . . . . . . . . . . . . . . . . . . . . . . . . . . .22
TELETEXT . . . . . . . . . . . . . . . . . . . . . . . . . . . . . . . . . . . . . . . . . . . . . . . . . . . . . . . . . . . . . . . . . . . . . . . . . . . . . . . . . . . . . .23
DVD PLAYER . . . . . . . . . . . . . . . . . . . . . . . . . . . . . . . . . . . . . . . . . . . . . . . . . . . . . . . . . . . . . . . . . . . . . . . . . . . . . . . . . . .25
REMOTE CONTROL (DVD FUNCTIONS) . . . . . . . . . . . . . . . . . . . . . . . . . . . . . . . . . . . . . . . . . . . . . . . . . . . . . . . . . . . . .26
PLAYING DVD’s . . . . . . . . . . . . . . . . . . . . . . . . . . . . . . . . . . . . . . . . . . . . . . . . . . . . . . . . . . . . . . . . . . . . . . . . . . . . . . . .27
DVD SETTINGS . . . . . . . . . . . . . . . . . . . . . . . . . . . . . . . . . . . . . . . . . . . . . . . . . . . . . . . . . . . . . . . . . . . . . . . . . . . . . . . . .28
BASIC FUNCTIONS . . . . . . . . . . . . . . . . . . . . . . . . . . . . . . . . . . . . . . . . . . . . . . . . . . . . . . . . . . . . . . . . . . . . . . . . . . . . . .32
PICTURE PLAYBACK . . . . . . . . . . . . . . . . . . . . . . . . . . . . . . . . . . . . . . . . . . . . . . . . . . . . . . . . . . . . . . . . . . . . . . . . . . . . .35
TROUBLESHOOTING . . . . . . . . . . . . . . . . . . . . . . . . . . . . . . . . . . . . . . . . . . . . . . . . . . . . . . . . . . . . . . . . . . . . . . . . . . . .36
TECHNICAL SPECIFICATIONS . . . . . . . . . . . . . . . . . . . . . . . . . . . . . . . . . . . . . . . . . . . . . . . . . . . . . . . . . . . . . . . . . . . . . .38
CONTENTS
065001057480 15" LCD LOCDVT ING 15/8/06 15:18 Page 2
Page 74

SAFETY INFORMATION
3
MMaaiinnss ssuuppppllyy
This unit is designed to operate from a 230 Volt, 50Hz AC mains supply. Other power sources may damage it.
Check that the rating on the back of the unit says 230V AC ( ~ ) before you plug it in for the first time.
MMaaiinnss pplluugg
We have fitted this unit with a standard mains plug.
• If the mains lead gets damaged it must be replaced by a qualified service agent with an approved lead of the same type.
• If you cut off the mains plug, for example to fit a different type, please destroy the old plug as it would be dangerous if inserted
into a live power outlet. Carefully follow the wiring instructions supplied with the new plug.
• Remove the fuse from UK standard (BS 1363) plugs before disposal.
• Never use a mains plug without the fuse cover.
MMaaiinnss pplluugg wwiirriinngg ffoorr tthhee UUKK
• The colours of the wires in the mains lead of this unit may not match the coloured markings of the mains plug terminals. You can
identify the correct terminals as follows.
• The wire that is coloured BROWN is connected to the terminal that is marked with the letter L or coloured red.
• The wire that is coloured BLUE is connected to the terminal that is marked with the letter N or coloured back.
• Make sure the lead is firmly secured under the cord clamp.
• Do not connect anything to the earth terminal which is marked E or
or coloured green or green and yellow.
MMaaiinnss ffuussee ffoorr tthhee UUKK
UK standard (BS 1363) plugs must have a 3 amp (BS 1362 type) fuse fitted. For any other type of plug or connection, you
must fit a fuse rated between 3 and 5 amps in the mains plug or adapter, or at the fuse box feeding this unit.
SSyymmbboollss
This unit complies with European safety and
electrical interference directives.
Dangerous voltage constituting a risk of electric
shock is present inside this unit.
There are important operating and maintanence
instructions in the literature accompanying this unit.
065001057480 15" LCD LOCDVT ING 15/8/06 15:18 Page 3
Page 75

WHAT TO DO FOR SAFETY OF YOUR TV
4
PPOOWWEERR SSOOUURRCCEE
You should only plug this TV into a 230-240V AC 50Hz
mains supply.
MMAAIINNSS AANNDD OOTTHHEERR LLEEAADDSS
Position the mains supply lead and other leads so that they
are not likely to be walked on, pinched by things or placed
on or against them. Pay particular attention to leads where
they enter a power socket and at the point where they come
out of the TV.
MMOOIISSTTUURREE AANNDD WWAATTEERR
Do not use the TV in a humid or damp area. The equipment
must not be exposed to dripping or splashing, as this may be
extremely dangerous. Objects filled with liquids, such as vases,
must not be placed on this equipment.
NNOO NNAAKKEEDD FFLLAAMMEESS
Naked flame sources, such as lighted candles, must not be
placed near this equipment, or on top of it.
CCLLEEAANNIINNGG
Always unplug the TV before cleaning it. Do not use liquid or
aerosol cleaners. Clean your TV with a soft damp cloth.
BBAATTTTEERRYY DDIISSPPOOSSAALL
Your attention is drawn to the environmental aspects of infrared
remote control battery disposal.
Please dispose of depleted batteries responsibly and ensure you
follow the battery manufacturers disposal instructions.
VVEENNTTIILLAATTIIOONN
The slots and openings on the TV are for ventilation.
Please ensure that there is enough space to allow for adequate
ventilation around the TV (at least 10cm).
Do not block or cover these holes as overheating could occur.
RREEPPLLAACCEEMMEENNTT PPAARRTTSS
The person carrying out the job must use parts that are specified
by the manufacturer or have the same specifications as the
original parts. The use of other parts may cause fire, electric
shock or other hazards.
SSEERRVVIICCIINNGG
Ensure the person carrying out repairs to your TV is qualified to
do so.
PPlleeaassee rreeffeerr ttoo sseeppaarraattee sseerrvviiccee iinnffoorrmmaattiioonn ssuupppplliieedd wwiitthh
tthhiiss pprroodduucctt..
Never remove the cover yourself, there are
dangerous voltages inside and you could receive an electric
shock.
CAUTION: TO REDUCE THE RISK OF ELECTRIC
SHOCK DO NOT REMOVE COVER (OR BACK). NO
USER-SERVICEABLE PARTS INSIDE. REFER
SERVICING TO QUALIFIED PERSONNEL.
065001057480 15" LCD LOCDVT ING 15/8/06 15:18 Page 4
Page 76

SAFETY INFORMATION (continued)
5
LLIIGGHHTTNNIINNGG
In the event of a lightning storm, unplug your TV from the wall
socket.
Always unplug the TV if going away on holiday.
GGEENNEERRAALL
• Do not connect or adjust cables while the TV is
plugged into the mains supply.
• Do not leave your TV in a hot, cold or humid area.
• Batteries in remote handsets can leak. Please check the
batteries regularly if they have not been replaced
recently.
• Never let anyone, especially children, push objects into
holes and ventilation slots.
• Don't continue to use your unit if you have spilt liquids
in it, if it is damaged in any way or if it does not work
normally. Immediately unplug the unit and get expert
advice.
• This product is only designed for household or similar
general use. Any other use may invalidate the guarantee
and might be dangerous.
• We are proud to offer this high quality product. To keep
this equipment at this level of quality, this equipment
should only be serviced at your authorised service
centre.
• This appliance is supplied with a Class I construction
in-line AC/DC mains adaptor and must be connected to
an earthed mains outlet socket.
• The in-line AC/DC mains adaptor supplied with the unit
must remain readily available at all time when in use"
065001057480 15" LCD LOCDVT ING 15/8/06 15:18 Page 5
Page 77

WHICH PART OF YOUR TV PERFORMS WHAT FUNCTION
6
FFRROONNTT ::
11
Standby button
22
Remote control sensor
33
Speaker(s)
44
P+ / – Program up and down buttons
55
e + / – Volume up and down buttons
66
Headphone in / AV in / S-Video in
BBAACCKK ::
77
Aerial in
88
“Scart in” (Using this entry, you can connect to your TV
such devices as computer, decoder and VCR)
99
Component Audio in (L+R)
1100
Component YPbPr input
1111
PC input
1122
PC Audio in
1133
DC 12V in
DC 12V
EURO AV
Y
PC INPUT
PC
AUDIO IN
8
10
11
12
13
RL
AUDIO IN
9
Pb Pr
IN
7
6
DDVVDD EEjjeecctt aanndd DDVVDD TTrraayy
065001057480 15" LCD LOCDVT ING 15/8/06 15:18 Page 6
Page 78

REMOTE CONTROL
7
1. Switching off (stand-by button)
2. Direct program selection buttons
3. Swap button
4. Mute button
5. Main Menu Button
6. TV button (to shift to TV from AV)
7. Program ± in TV setting, Teletext page ± in teletext setting, menu ± in menu setting
8. Volume ± and menu setting button
9. Menu leave button (EXIT or TV button leaves from the menu)
10. User normalization button
11. Status button (i)
12. Volume setting button DUAL I, DUAL II, Stereo, Mono
(DUAL I, II, ST/MONO) (Memory Button in Mono Models)
13. To reach Setup Menu
14. AV Button
15. (Blue button) incred.stereo/mono-normal Audio select
16. (Yellow button)
17. (Green button) Picture preliminary values
18. (Red button) Volume preliminary values
19. Picture format selection (In some models)
20. DVD/TV Button.
Switches between TV and DVD pictures.
NNoottee::
Please refer to separate remote control descriptions in the DVD and TELETEXT
sections.
065001057480 15" LCD LOCDVT ING 15/8/06 15:18 Page 7
Page 79

REMOTE CONTROL
8
Never drop your Remote Control.
Do not attempt to open your Remote Control.
Do not press any 2 buttons on Remote Control.
simultaneously
If you do not use your Remote Control. for a long time,
remove the batteries.
NNoottee::
Your Remote Control controls your TV at 7 meters far
and 30 degrees of an angle
.
BBAATTTTEERRYY IINNSSEERRTTIIOONN ((11..55VV AAAAAA xx 22 ppiieecceess))
• Remove battery cover
• Place the batteries properly.
• Close the cover.
065001057480 15" LCD LOCDVT ING 15/8/06 15:18 Page 8
Page 80
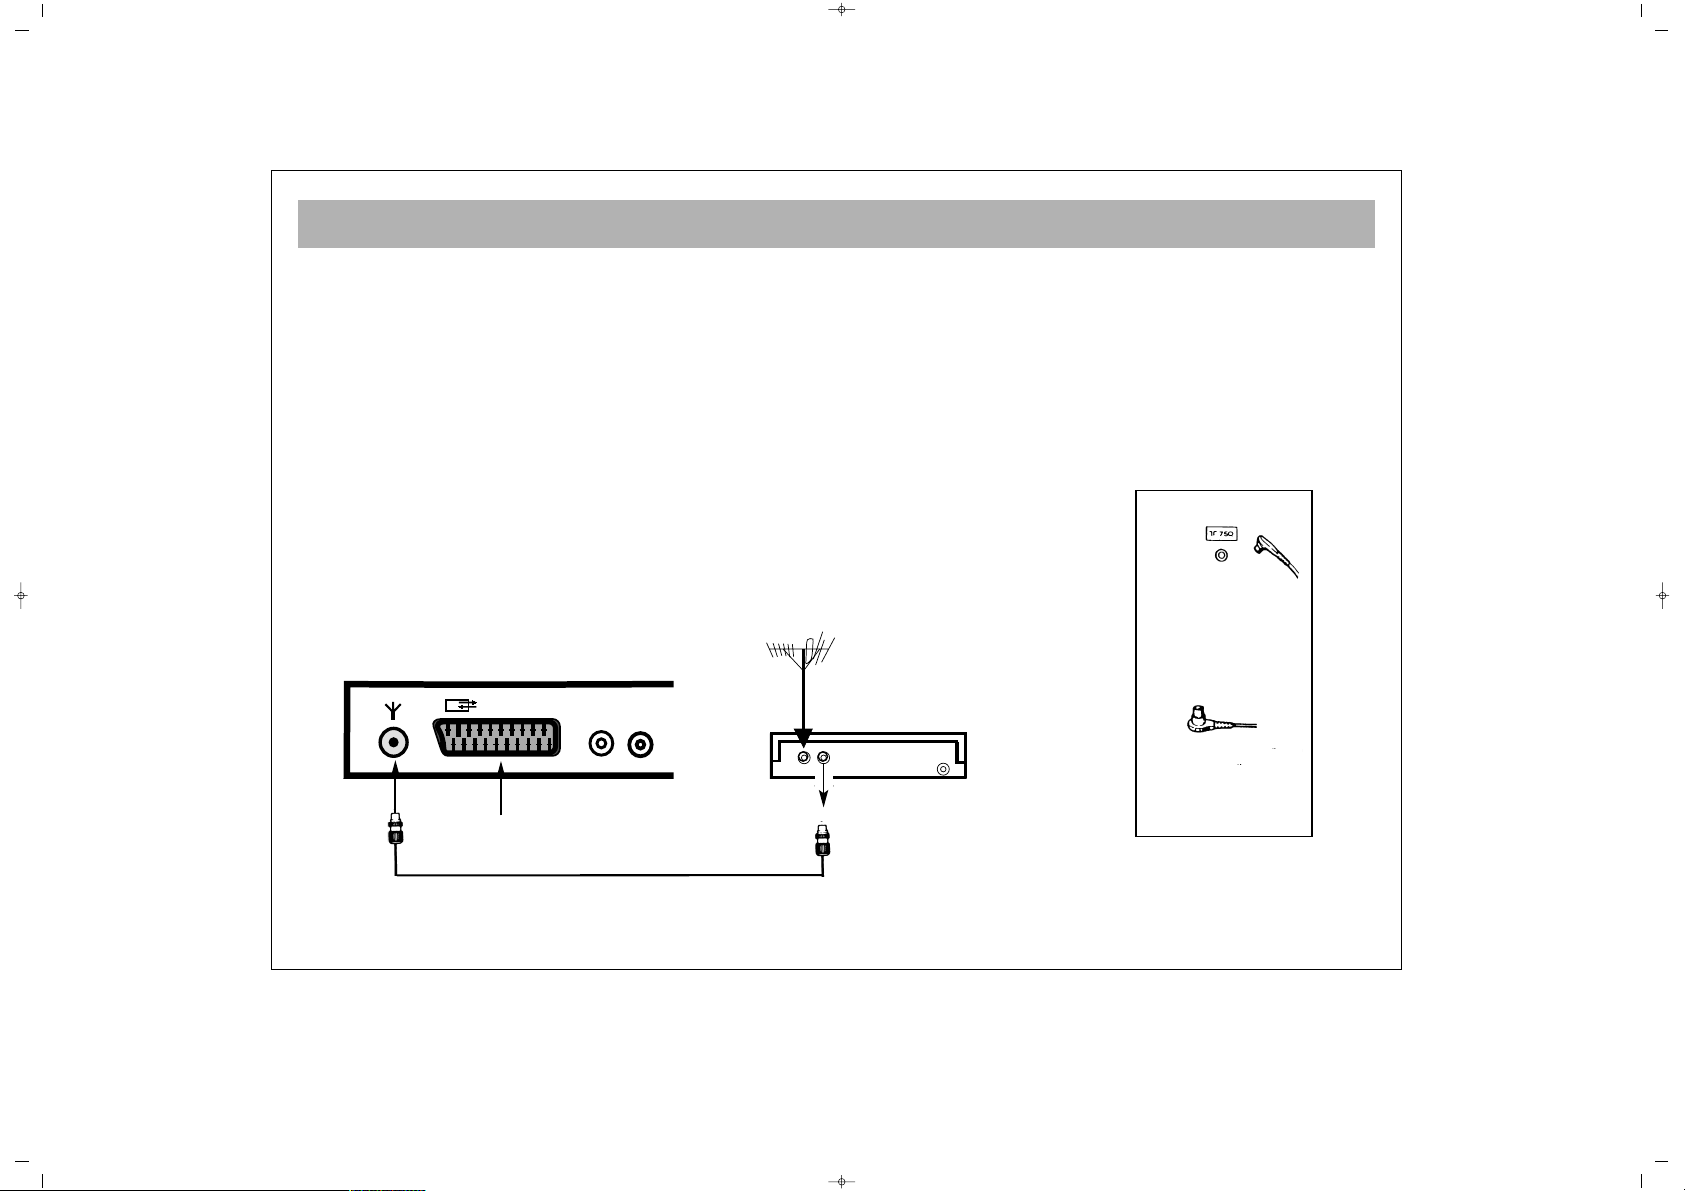
AERIAL CONNECTION
9
OOUUTTDDOOOORR AAEERRIIAALL CCOONNNNEECCTTIIOONN
Optimum good picture and colour reception requires a good outdoor aerial.
Using a coaxial cable (75 ohm Fig A-2) for a aerial, connect the plug (refer to Fig.
A-1) into the aerial input of the set.
Alternatively you may connect the aerial via a video recorder by using the video
recorder Rf Input and Rf Output connections as shown.
AERIAL Socket
(Fig.A-1)
Coaxial cable(75 ohm)
Fig. A-2
Back cover
AERIAL Connection with video recorder
RF input
RF output
Aerial input
Scart socket
065001057480 15" LCD LOCDVT ING 15/8/06 15:18 Page 9
EURO AV
AUDIO IN
RL
Page 81

VCR, DVD, SATELLITE DECODER AND COMPUTER CONNECTIONS
10
EEUURROO--SSCCAARRTT SSOOCCKKEETT
A Video Cassette Recorder, DVD Player, Games Console or Satellite Decoder may be connected to the scart socket with an
appropriate connecting cable. Select programme mode AV to access the signal being received through the SCART Socket.
VVCCRR OOPPEERRAATTIIOONN BBYY UUSSIINNGG TTHHEE
RRFF OOUUTT
• Alternatively to connect a VCR to your
LCD TV using the RF sockets, connect
a coaxial cable from the RF Out socket
of the VCR to the aerial input socket of
your TV. Then connect the coaxial cable
from your TV aerial to the RF In socket
of the VCR.
• Select programme no. 0 on your LCD
TV.
• Insert a video tape into the VCR and
press the “play” key.
• Use the instructions under “Program
Settings” (See pages 23/24) to search
and store the VCR’s RF Output channel
in Channel 0 on your LCD TV.
NNoottee::
Not all VCRs necessarily have this
facility.
VVCCRR AANNDD DDVVDD PPLLAAYYEERR
OOPPEERRAATTIIOONN BBYY UUSSIINNGG TTHHEE
EEUURROO--SSCCAARRTT SSOOCCKKEETT
• Connect the SCART socket on your
VCR or DVD Player to the SCART
Socket on your LCD TV
• Select AV Channel on your LCD TV by
pressing the AV selection key on your
remote control handset.
• Press the PLAY key on your VCR or
DVD Player
• The advantage of this connection is a
superior quality of picture and sound
during play back.
PPCC CCOONNNNEECCTTIIOONN ((OOppttiioonnaall))
You may use your LCD TV as a PC
monitor by connecting the VGA cable of
your PC into the LCD TV’s PC socket.
Supported PC resolutions:
VGA 640 x 480
AC230V~
50Hz/30W
AC230V~
50Hz/30W
To “RF IN”
Coaxial cable
From “RF OUT”
Aerial
To aerial socket
To “RF IN”
To “EURO SCART”(VCR)
To “EURO SCART”(TV)
065001057480 15" LCD LOCDVT ING 15/8/06 15:18 Page 10
EURO AV
AUDIO IN
RL
AUDIO IN
RL
EURO AV
EURO AV
TV
AUDIO IN
TV
Y
Pb Pr
RL
PC INPUT
IN
AUDIO IN
PC
DC 12V
PC
Page 82

AUDIO/VIDEO CONNECTIONS
11
aa)) WWiitthh SSCCAARRTT CCoonnnneeccttoorr
• Connect the SCART socket on the receiver to the SCART socket
on your LCD TV using the appropriate SCART connecting cable.
• Select AV Channel on your LCD TV by pressing the AV
selection key on your remote control handset. Your LCD TV will
now display the signal from your Satellite or Cable Receiver.
bb)) CCoommppoonneenntt YYPPbbPPrr iinnppuutt::
• If your Video Source has a YPbPr component video output, you
can connect this to your LCD TV’s YPbPr input using 3-Way chinch
cable by refering connector colours. This method will carry the
image to your LCD TV.
• For audio connection use a 2-Way AV connecting lead to
connect left and right audio outputs to your LCD TV’s left and
right audio inputs.
• Select YPbPr Channel on your LCD TV by pressing AV
selection key on your Remote Control handset.
L
DC 12V
EURO AV
Y
PC INPUT
PC
AUDIO IN
RL
AUDIO IN
Pb Pr
IN
DECODER SCART TV SCART
OUT
SVSH V L R
TV
AERIAL
DISH
LNB
AUDIO OUT
RL
DC 12V
EURO AV
Y
PC INPUT
PC
AUDIO IN
RL
AUDIO IN
Pb Pr
IN
DECODER SCART TV SCART
OUT
SVSH V L R
TV
AERIAL
DISH
LNB
RECEIVER
065001057480 15" LCD LOCDVT ING 15/8/06 15:18 Page 11
Page 83
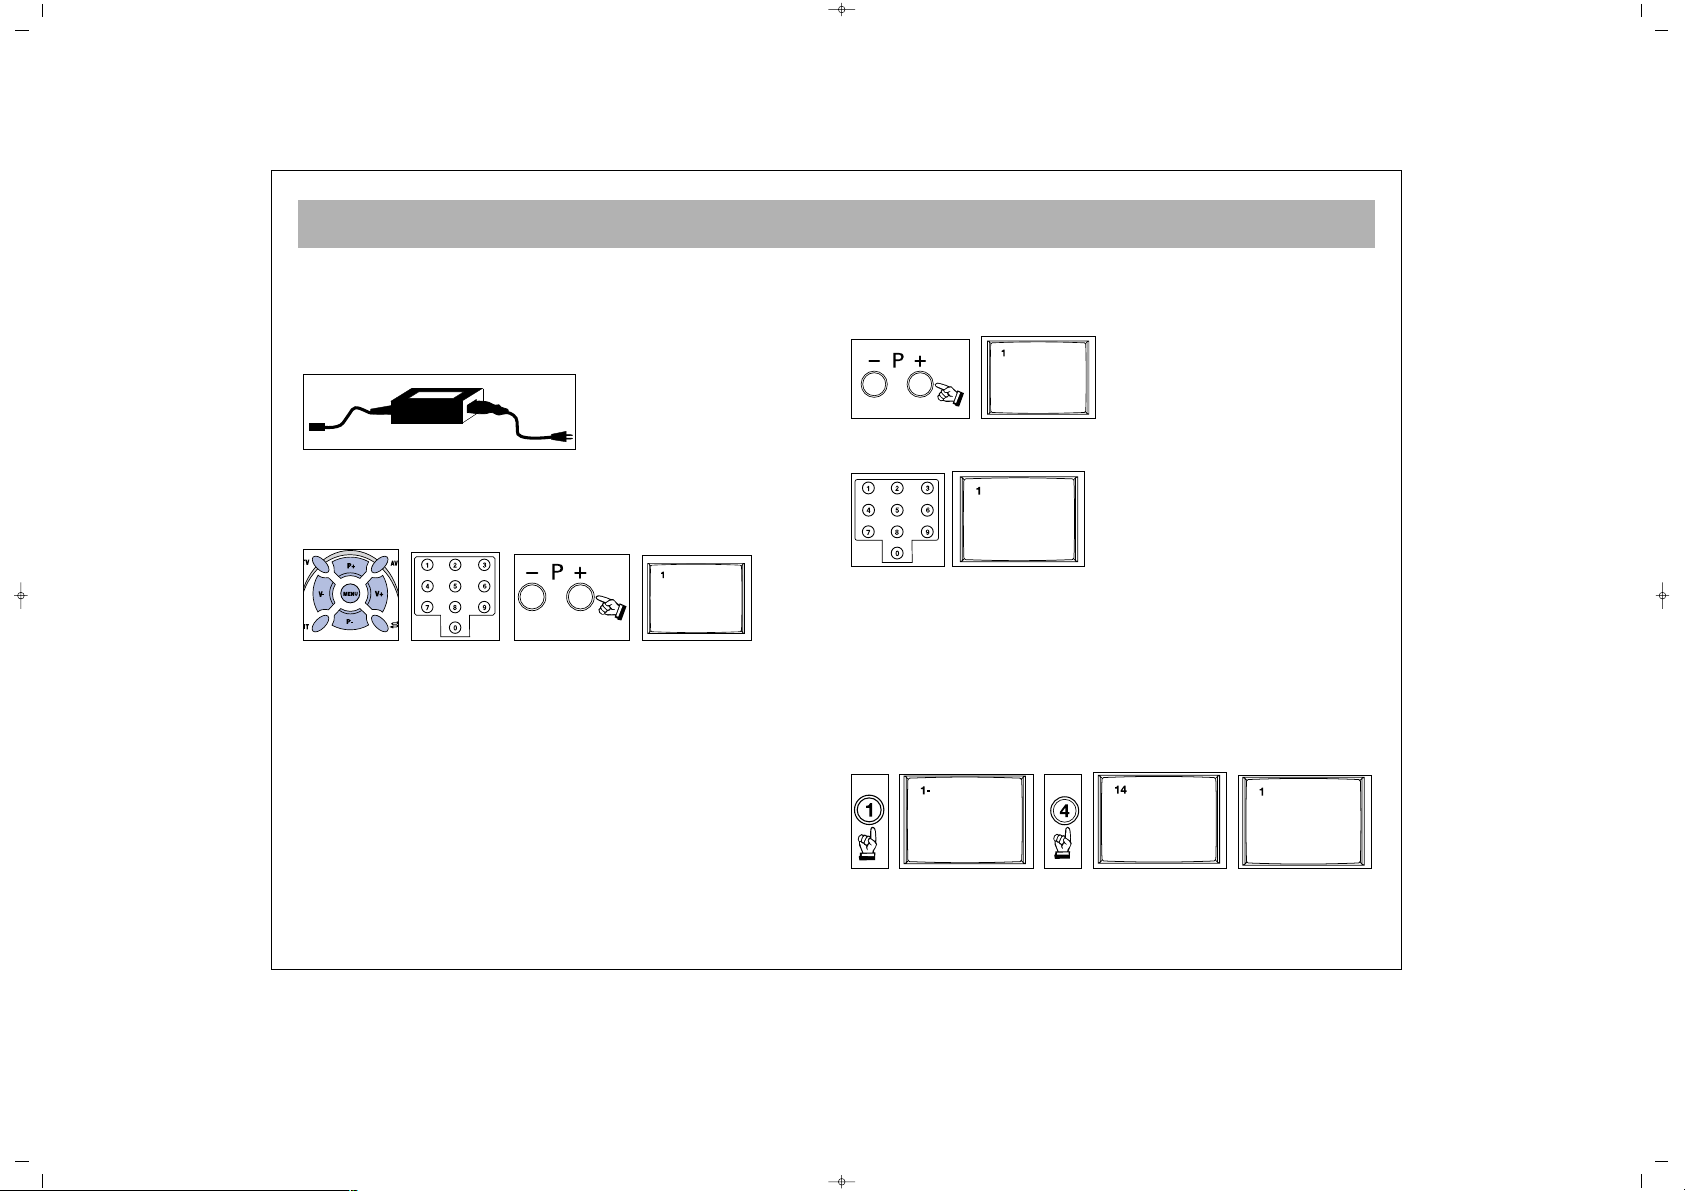
TV FUNCTIONS
12
11.. OOPPEERRAATTIIOONN
aa.. SSwwiittcchhiinngg oonn tthhee TTVV
Plug the power cable of the TV set into the wall outlet.
* Your set works on 12V DC power. For this purpose, use the
adapter provided within your TV set.
bb..SSttaanndd--BByy MMooddee
While your TV is at stand-by mode, you can operate your TV
using one of the program selection buttons on the RC (0 to 9)
or the P± on the TV set
22.. SSWWIITTCCHHIINNGG OOFFFF
aa.. SSwwiittcchhiinngg OOFFFF tthhee TTVV
When you want to switch off the TV completely,
remove the power cable from the wall outlet.
bb.. SSttaannddbbyy MMooddee
To close your TV, for a start time, use stand by button
which is on the remote control or on TV.
NNoottee:: RRCC mmeeaannss RReemmoottee CCoonnttrroolllleerr
11.. PPRROOGGRRAAMM NNUUMMBBEERR SSEELLEECCTTIIOONN
* You can select the program you want by increasing
the program number pressing the P± button.
* Select the program no. 0 – 9 with the single number
keys (0-9) on the Remote control.
* To select a “double digit” number, simply press the
two required digits consecutively, within a short time.
EExxaammppllee::
To shift to the program No. 14, first press 1
button. In this case, the "1-" message appears on the left
corner of the screen. If you keep the button pressed,
you shift to the program No.1. As long as this message
appears on the screen (3 seconds) without pressing 4,
the TV shifts to the program No. 1
065001057480 15" LCD LOCDVT ING 15/8/06 15:18 Page 12
Page 84

TV FUNCTIONS
13
22.. MMUUTTEE
In order to mute the sound immediately, press the Mute
button on the RC. Pressing this button again will allow
you to hear the sound before pressing Mute.
33.. SSTTAATTUUSS BBuuttttoonn::
( ) Shows the program number,
volume level and audio system info for 3 seconds on
the screen
44.. PPPP BBuuttttoonn::
With this button you can see which preset
picture value
has been adjusted to you TV.
55.. SSWWAAPP BBuuttttoonn::
Provides swapping to the previously
watched channel
66.. SSMMDD BBuuttttoonn::
MMoonnoo::
This button is not operative on TVs or mono
broadcastings
SStteerreeoo::
This button is used to select mono or DUAL
volume outputs in TV sets
77.. AAVV BBuuttttoonn::
In order to select the AV Mode, press the AV
button on the RC. To come back to the TV mode again,
enter the program number or press TV button. As long as
there is a menu on the screen, you cannot take your TV
set to AV mode. While on AV Mode, you cannot enter
into the Program Table menu. In the AV mode, you can
watch the external devices connected through the scart
(Video, DVD, VCD etc.). Each time you press the AV
button, the modes that you can connect to your device
are displayed.
88..AAUUTTOOMMAATTIICC SSHHUUTT OOFFFF..
If the Tv receives no signal for 5 minutes it will
automatically switch to Stand - By. This feature is not
enabled in AV mode.
99.. MMeennuu BBuuttttoonn::
When you press this button you can
reach the main menu. Pressing menu while navigating
the sub-menus will return you to the main / preceding
menu.
1100.. TTVV ((EEXXIITT)) BBuuttttoonn::
Provides exit from the menus
1111..1166::99 BBuuttttoonn::
This is used to change the screen
format from 4 : 3 to 16 : 9
1122.. AAUUTTOO ZZAAPP::
Pressing P± button for 3 to 4 seconds and
releasing will cause automatic channel search. On the
upper right corner "Auto Zap" appears.
1133..
RReedd BBuuttttoonn::
You can select the equalizer values by
using the red button. The "Personal" value stores the
adjustments which you can make on your apparatus.
1144..
GGrreeeenn BBuuttttoonn::
You can select the preset "Picture"
values by using the green button. The "Personal" value
stores the adjustments which you can make on your
apparatus.
065001057480 15" LCD LOCDVT ING 15/8/06 15:18 Page 13
Page 85

SETUP
14
If you assemble your apparatus according to the
explanations from the preview pages "Automatic Search"
(Welcome) will appear on the screen. At this menu;
1- Use "P+/P-" button for "Country" option and choose the
country's abbreviation with "V+/V-" button.
2- Use "P+/P-" button for "Language" option and adjust
the menu language with "V+/V-" button.
3- Use "P+/P-" button for "Auto store" and initiate the
automatic search with the "V+" button. Please do not press
any button during automatic search. Your apparatus will
find the channels and record the memory automatically.
If "Welcome" menu does not appear you can search the
channels as below:
1- Press "Menu" button
2- Use "P+/P-" to highlight setting icon and enter the menu
with "V+" button.
3- Choose "Language" option with "P+/P-" button and
adjust you rdesired menu language with "V+/V-" button.
4- Use "P+/P-" button for "Country" option and choose the
country's abbreviation with "V+/V-" button.
5- Press "MENU" button to return to the main menu.
6- Use "P+/P-" button to highlight "Program Settings" and
enter the menu with "V+" button.
7- Use "P+/P-" button to highlight "Auto store" and start the
search with the "V+" button. Do not press any button
during the automatic search. Your apparatus will find the
channels and record the memory automatically.
Program nr. 2
Program name
System standard Europe
Autostore
Frequency 182.25 MHz
Fine tune
Source OSD Off
Language English
Country GB
Child lock
Timers
Teletext lang Pan European
Country GB
Language English
Autostore
065001057480 15" LCD LOCDVT ING 15/8/06 15:18 Page 14
Page 86

SETUP
15
NNoottee::
It is unlikely, the channels will be stored in the
correct order. When changing the channels, the program
being received will be displayed below the channel
number in the top left hand corner.
Use P+,P-,V+,V- for changing the menu language and the
manual adjustments processes at Program adjustments
Menu.
Use P+,P-,V+,V- for changing the order of the program,
naming the program, deleting the program and skipping
process at Program table Menu. These processes had been
mentioned at further pages.
Leave this menu pressing “TV” button.
065001057480 15" LCD LOCDVT ING 15/8/06 15:18 Page 15
Page 87
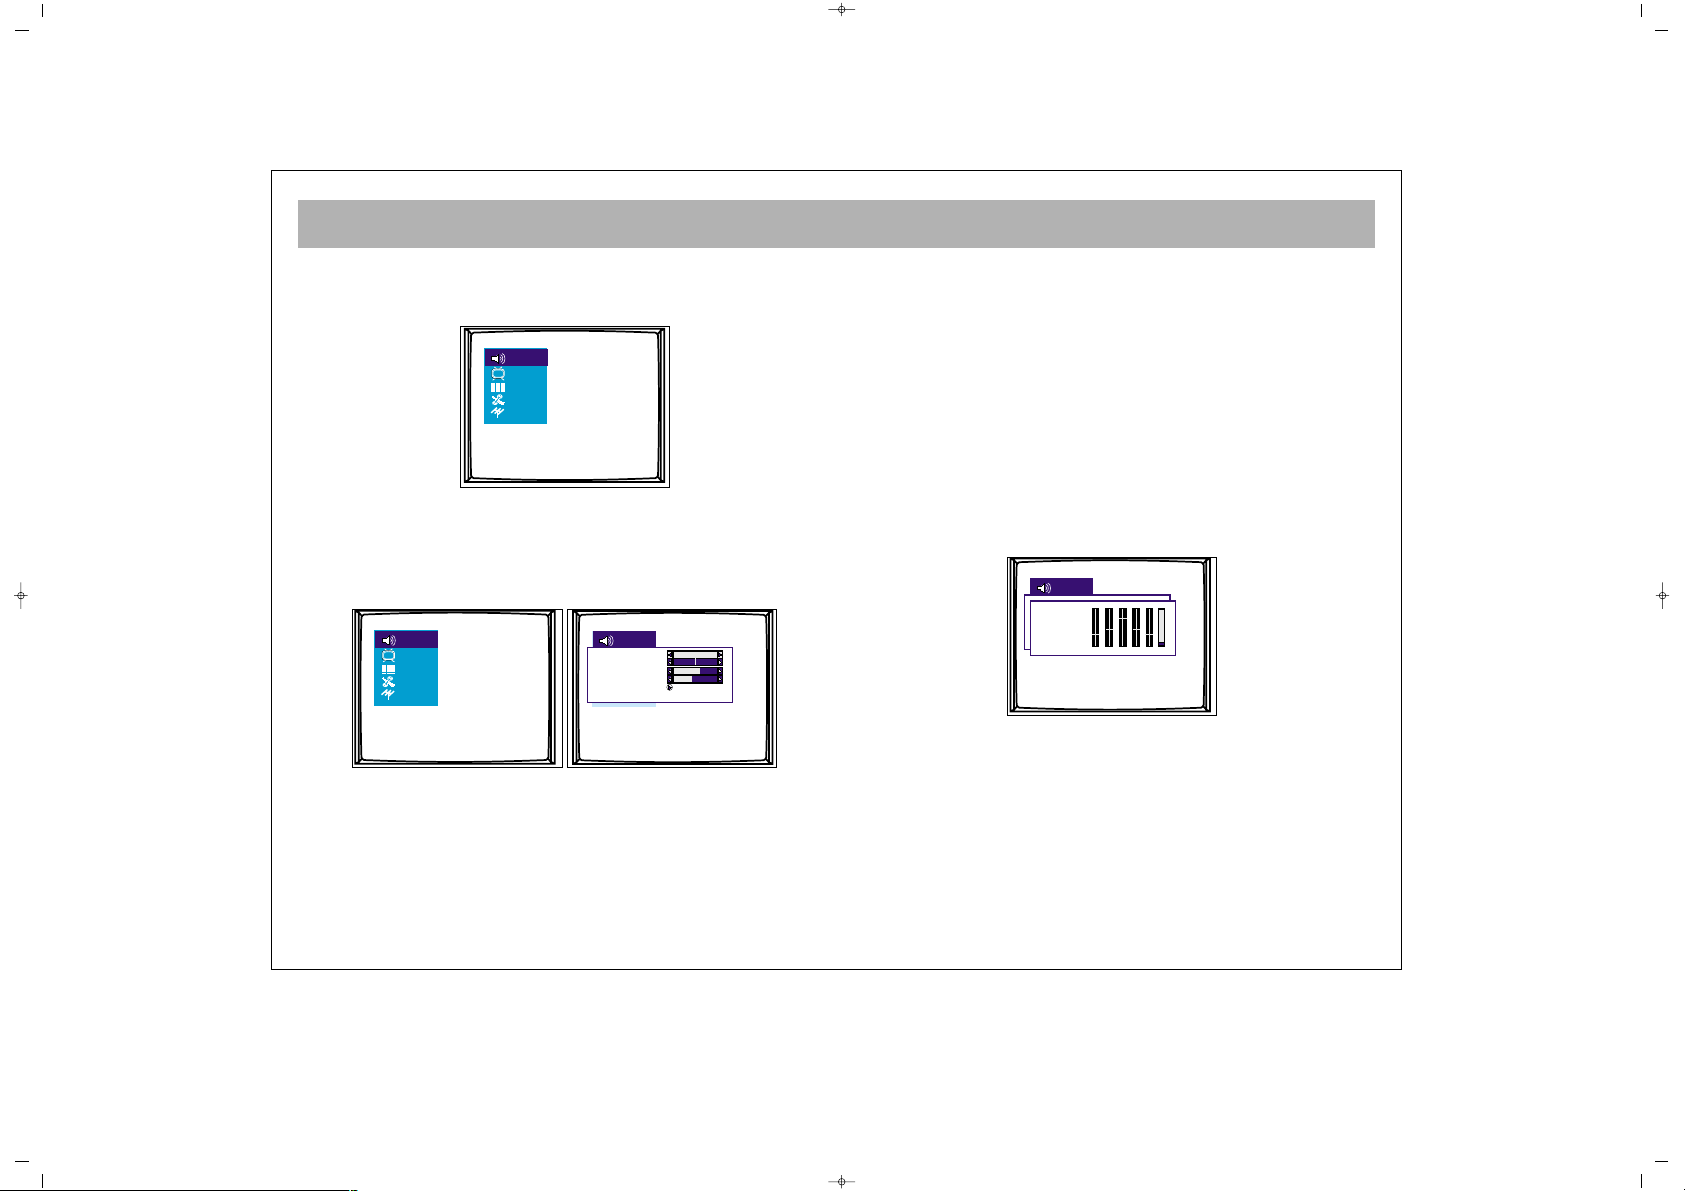
TV FUNCTIONS (MENUS)
16
MMaaiinn MMeennuu::
To access this menu, press menu button.
You can choose an option in the main menu using P±
buttons and activate the options pressing V± buttons.
11.. VVOOLLUUMMEE AADDJJUUSSTTMMEENNTT MMEENNUU
Highlight volume icon and press V+/- to access volume
adjustment menu. In this menu, volume settings are
selected using P± buttons and can be changed using
V± buttons.
VVoolluummee::
The TV set's volume can be adjusted
BBaallaannccee::
The balance between left and right channel
outputs is shown
BBaassss::
The user can adjust the bass level at this option
TTrreebbllee::
The user can adjust the treble at this option
Stereo models have AVL property. This is not shown on the
menus. This is for automatic volume limitation, i.e. it
keeps the volume level at the optimum level when shifting
from one channel to another. Because of this, the volume
comes after the display in case a channel is shifted.
EEqquuaalliizzeerr::
You can enter the Equalizer menu with the" V+" button
while you are in the Equalizer line. When you are in
this menu you can select (personal, voice, Music,
theatre) one of the equalizer adjustments with the "P+,
P-" buttons. For the personal equalizer settings P±, V±
buttons.
HHeeaaddpphhoonnee:: ((OOppttiioonnaall))
When a headphone is inserted, no volume comes from
the speakers. The volume is only through the
headphones. Using the volume menu, headphone can
be set. You can change the volume as
Mono/Stereo/Dual using the S/M/D button.
Personal
100 300 1k 3k 8k
Volume
Balance
Bass
Treble
Equalizer
065001057480 15" LCD LOCDVT ING 15/8/06 15:18 Page 16
Page 88
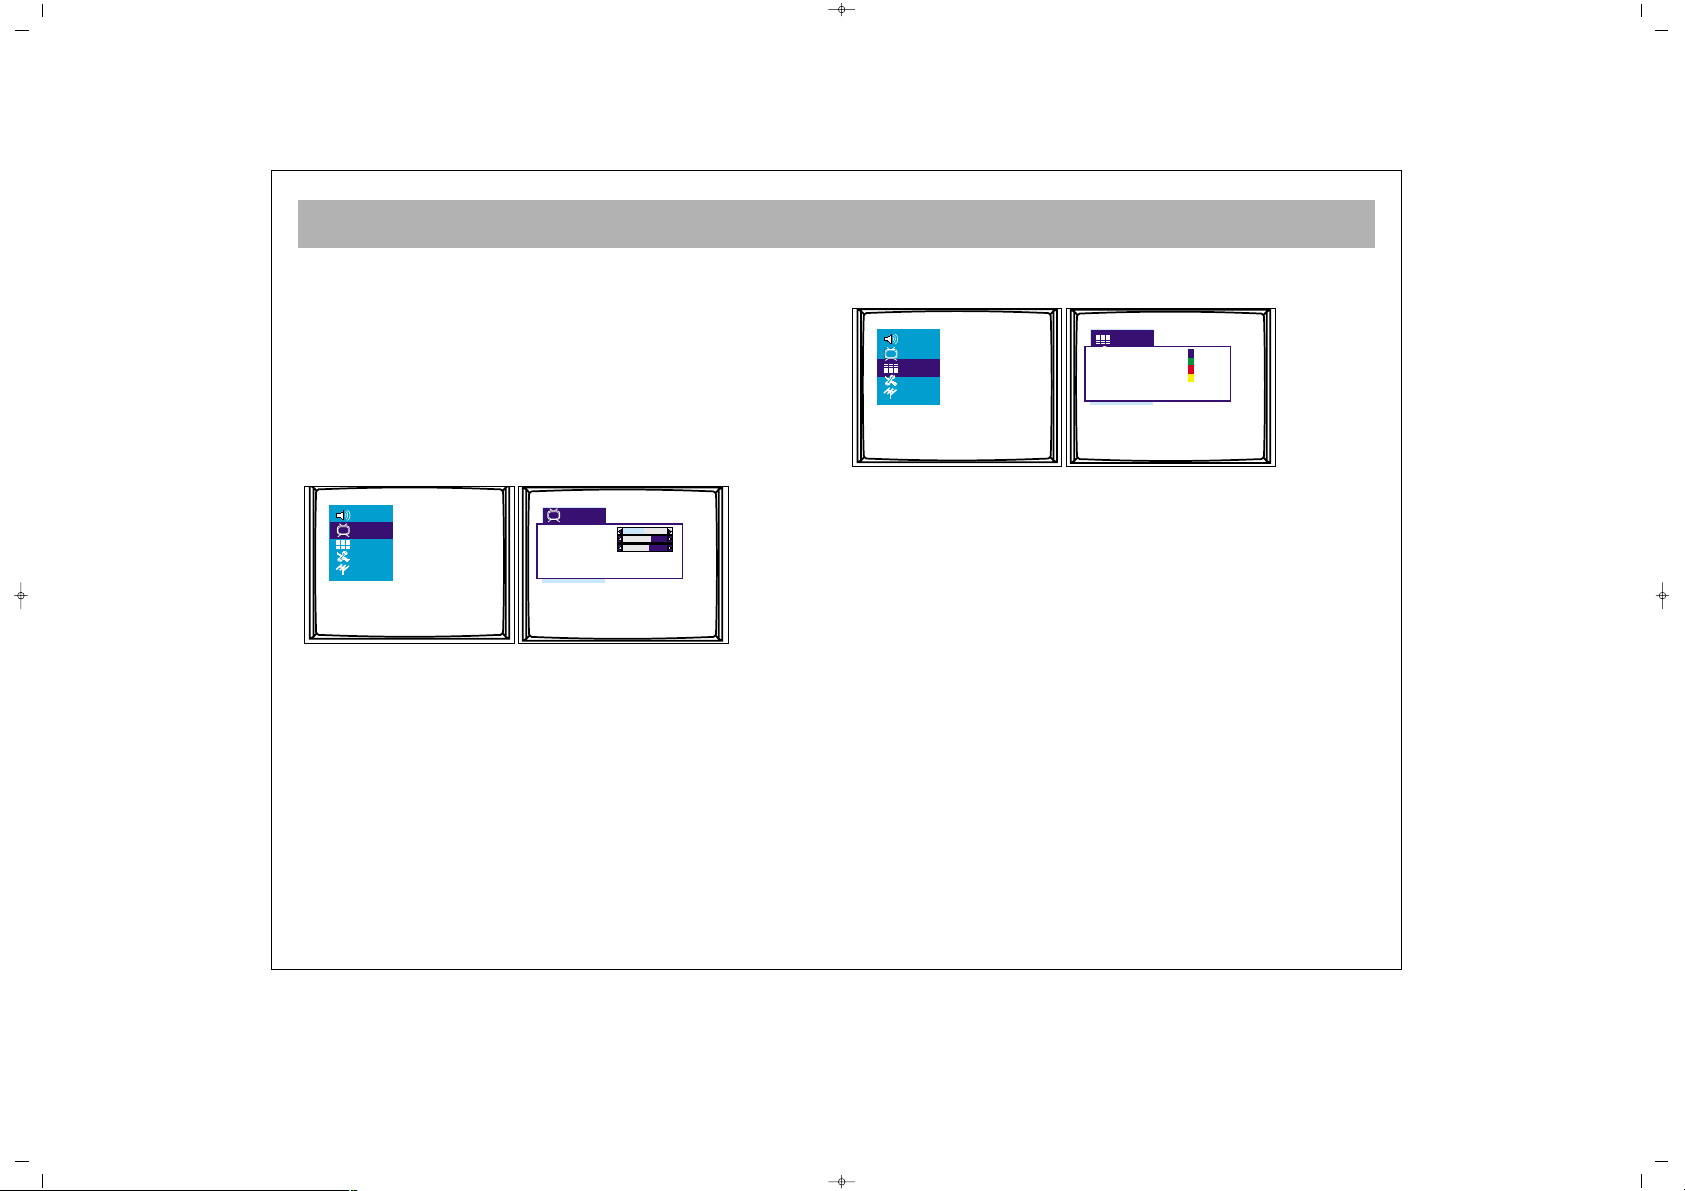
TV FUNCTIONS (MENUS)
17
22.. PPIICCTTUURREE SSEETTTTIINNGGSS MMEENNUU
Using the MENU button, you can access to picture
settings menu. In the picture settings menu, you can
alter many parameters related to display. Brightness,
Contrast, Colour, Sharpness, Dyn. Skin tone and White
tone settings can be made according to your
requirements. Using the P± buttons on the RC, highlight
the option you want to set and change the setting value
or the option pressing the V± buttons.
The changes are automatically memorized.
If you press MENU button, you can access to former menu,
while you can leave all menus if you press TV button.
33.. PPRROOGGRRAAMM TTAABBLLEE ::
Using menu buttons, you can
access to program table.
The channel number and name in the program table
appear in different colors. You can access to other
channels using P± and V± buttons in the program table.
33..11..
Blue button is for naming. When pressing the blue
button in the current channel, a small box appears.
The character can be changed pressing P± buttons. You
can access to the following or previous characters using
V± buttons. When the naming is over, press the blue
button again to memorize.
33..22..
You can move by pressing the green button. Access
the channel you want to move pressing P± and V±.
Press green button to access move option. Use P+/- and
V+/- buttons to select channel to move to and press the
green button.
(The moved program is inserted between the others,
increasing the number of the following programs by
one)
1
2
3
4
5
6
7
8
9
10
11
12
Name
Move
Delete
Skip
Brightness
Contrast
Colour
Sharpness Normal
Dyn. skin tone Off
White tone Normal
065001057480 15" LCD LOCDVT ING 15/8/06 15:18 Page 17
Page 89

TV FUNCTIONS (MENUS)
18
33..33..
Red button is for deletion. Access the channel you
want to delete pressing P± and V+ buttons and press
the red button. On the right side of the menu, the
channel number appears with a red button. Pressing
the red button once more will delete the channel. The
following channel will replace the deleted one.
33..44..
You can skip a channel when using P+/- to change
channels during regular use. The channel to be skipped
must be selected in the program table using P+/-. Then
press yellow.After you leave the program table; if you
use the buttons "P+, P-" for passing the channels, the
channels which you skip with these buttons cannot be
seen. You can access to that channel using numbers,
the number of the channel appears in a different colour
(blue). To cancel the skip function, you can press
yellow button on the channel, again in the prog. table.
44.. SSEETTTTIINNGGSS MMEENNUU::
In this menu;
44..11.. SSoouurrccee OOSSDD::
The source OSD option can be
adjusted as Open / Closed. It provides continuous
display of the current channel.
44..22.. LLaanngguuaaggee::
Using this option, you can change the
language in the menus.
44..33..CCoouunnttrryy::
Your apparatus finds the channel and
choose the system according to the determined country
during the automatic search. For this reason it is
essential to enter the right code of the country.
Please do not forget to choose the country's
abbreviation with "V+/V-" button. ( if you do not have a
country name choose another country which has the
same system).
44..44.. CChhiilldd LLoocckk::
In this menu "Lock and lock code"
appears. When the Lock function is on with by using
the V+ button, a password will be asked when the TV
Source OSD Off
Language English
Country GB
Child lock
Timers
Teletext lang Pan European
065001057480 15" LCD LOCDVT ING 15/8/06 15:18 Page 18
Page 90

TV FUNCTIONS (MENUS)
19
set is switched on from the standby position and will
operate if the password is correctly entered. To change
the password, you can enter a 4 digit number in the
password line, between "0000" and "9999". Press menu
to exit. New code is automatically memorised.
NNoottee:: IIff yyoouu ffoorrggeett tthhee ppaasssswwoorrdd,, ttyyppee 44771111
This is the default password.
44..55.. TTiimmeerrss::
In this menu, Sleep timer, Reminder timer, OFF
timer, Switch timer and the Switch program are shown.
44..55..11.. SSlleeeepp TTiimmeerr::
You can adjust the Sleep timer
functions between 5 to 120 minutes with the V+/buttons.
NNoottee::
User may lock individual channels. Refer to lock
on Page 24.
When the time is over, Your TV will close
automatically.
The closing time can be increased or reduced with 5
minutes intervals. At the end of the adjusted period,
you will see the last 60 seconds count down on the
screen.
You can leave this menu pressing TV button.
44..55..22.. RReemmiinnddeerr TTiimmeerr::
You can adjust the recall period
between 5 to 120 minutes with the V+ button. At the
end of the set period, a warning message appears on
the screen. Pressing any button, this message will
disappear. Reminder time may be increased or
decreased by 5 minutes steps.
44..55..33.. OOFFFF TTiimmeerr::
You can set the switching off time.
NNoottee::
Check from the RT clock menu. if the time is
correct. Refer to 4.8 RT clock.
44..55..44.. SSwwiittcchh pprrooggrraamm::
After setting the switch time in
the switch option. Use P+- to highlight switch timer.
Use keypad to set switch time. The TV set switches to
the set program when the time comes. When your TV
set is in Stand by position, it is switched on at the
adjusted time to the selected program. When the switch
is to be set to AV mode, press the AV button in the
switch Program option. The other modes are displayed
in order.
Sleep timer Off
Reminder timer Off
Off timer - -:- Switch timer - -:- Switch program 5
Lock Off
Lock code 1111
065001057480 15" LCD LOCDVT ING 15/8/06 15:18 Page 19
Page 91

TV FUNCTIONS (MENUS)
20
44..66.. TTeelleetteexxtt LLaanngguuaaggee::
You can set the teletext
language depending on the teletext received by your
TV set.
NNoottee::
For U.K. the setting is Pan European. This is the
default.
44..77.. TTeelleetteexxtt EE//WW::
This selects the characters peculiar to
Eastern Europe and Western Europe countries for
teletext
44..88.. RRTT CClloocckk::
The clock is adjusted as "24 hours, 12
hours or closed". In the lower line, the current time is
adjusted.
NNoottee::
RT clock menu may not appear in the initial.
Main menu list when menu is first pressed. P- must be
pressed to navigate down the menu and make RT clock
menu appear.
55.. PPRROOGGRRAAMM SSEETTTTIINNGGSS
In the program settings menu are the options "Prog.
No., Channel Name, System, Sound System, Auto
Prog., Frequency, Fine Tuning, AFC, Skip and Lock".
PPrrooggrraamm nnrr..::
Shows the number of the current channel.
The Prog. No. can be changed using V± and numbers.
PPrrooggrraamm nnaammee::
The name of the current channel
appears. Press V± to enter the channel name. You can
change the character using P± buttons. You can access
the following and previous characters using V±. When
the naming is over, you can leave from there using V±.
SSyysstteemm SSttaannddaarrtt::
You can choose the country!s system
standard with the "V+/V-". ( The European countries
except France ; can choose the "Europe" option)
AAuuttoo SSttoorree::
This provides automatic finding of the
programs. When the search begins, the message "Busy"
is displayed. When the transaction is over, the "Busy"
Program nr. 2
Program name
System standard Europe
Autostore
Frequency 182.25 MHz
Fine tune
Clock Off
Time 01:22
Country GB
Child Lock
Timers
Teletext lang. Pan European
Teletext E / W West
RT Clock
065001057480 15" LCD LOCDVT ING 15/8/06 15:18 Page 20
Page 92

TV FUNCTIONS (MENUS)
21
message disappears. After the Auto store is over, it
displays until the found program numbers.
FFoorr eexxaammppllee::
If there are 50 programs in the Auto Store,
it hides after 50. When P+ is pressed in the 50th
program, it proceeds to PC instead of 51.
FFrreeqquueennccyy::
In the frequency option, the frequency of
the current channel is displayed. You can change the
frequency using V± or numerical buttons.
FFiinnee TTuunnee::
You can fine tune the channels pressing V±
AAFFCC::
This operates ON/OFF. When ON, Its follows or
corrects the possible small frequency distortions in the
channels.
LLoocckk::
This provides locking of the current channel.
When the locked channel is accessed, a password is
asked. If the password is entered correctly ( the password
which is entered at the option of child lock), the channel
appears. After entering the password, the channel
appears.
To remove child lock enter the locked channel and
access program settings (last icon in main menu). Use
P+/- to highlight lock and V+ to switch lock off.
SSttoorree::
You can save the adjustments.
NNoottee::
The Child Lock should be On in order for this
lock to be functional.
AFC On
Lock Off
Store
065001057480 15" LCD LOCDVT ING 15/8/06 15:18 Page 21
Page 93

EXTERNAL DEVICE MODES
22
NNoott aallll mmeennuuss aappppeeaarr iinn tthhee eexxtteerrnnaall ddeevviiccee mmooddeess,, tthheessee
ccaann bbee ddiiffffeerreenntt ffrroomm TTVV mmeennuuss..
FFoorr eexxaammppllee::
YYPPbbPPrr mmooddee
In this mode, some of the menus are closed. Volume,
Picture and Settings menus are operative
There is no change in the
VVoolluummee MMeennuu
IInn tthhee PPiiccttuurree mmeennuu,,
the "dyn.skin tone" has been removed.
Info options have been added.
IInnffoo::
The information on the display resolution appears
The options related to text have been removed in the
settings menu.
PPCC mmooddee
Some of the menus have been closed in this menu. Sound,
Picture and Settings menus are preserved.
TToo tthhee SSoouunndd MMeennuu,,
the Audio option is added. When the
Audio is On, you can hear the sound of your computer
from the TV speakers. When it is off, you cannot hear
your computer's voice from your TVs speakers.
IInn tthhee PPiiccttuurree MMeennuu,,
"dyn.skin tone" option has been
removed. Position, Video noise, Auto adjust, Information,
Factory and Color temp options have been added.
PPoossiittiioonn::
Adjust horizontal and vertical position of the
picture.
VViiddeeoo NNooiissee::
In the video noise, there are "Phase and
Clock" options. Using these options, you can make the
display more clear.
AAuuttoo AAddjjuusstt::
Adjusts the picture clearness automatically
IInnffoo::
The information on the display resolution appears
FFaaccttoorryy::
Provides restoration of the picture settings to
factory settings.
CCoolloouurr tteemmpp::
Sets the picture heat. When USER is
selected, the message "White tone RGB" appears at the
lower part. The user can do the adjustments.
The text related options have been removed in the settings
menu.
065001057480 15" LCD LOCDVT ING 15/8/06 15:18 Page 22
Page 94

TELETEXT
23
TTEELLEETTEEXXTT MMOODDEE
If the channel you are watching has a teletext
broadcasting, you can perform various transactions by
shifting to teletext mode using the below described
buttons:
11.. TTeelleetteexxtt
: Provides shifting to teletext
broadcasting in the current channel
22.. TTVV ::
Used for shifting to TV broadcasting while you
are in Teletext mode
33.. RReevveeaall // CCoonncceeaall ((RReessppoonnddiinngg))
: Provides
displaying or re-saving of some information hidden in
the teletext broadcasting while in teletext mode
44.. TTeelleetteexxtt TTiimmeerr ((CCaalllliinngg tthhee ssuubbppaaggeess))
: While in
TV mode, this mode displays the timer of your TV set
on the upper right corner of the screen. In the Teletext
mode, this is used for a direct access to the subpages of
the current page.
FFoorr EExxaammppllee::
You are in the teletext page No. 500. If the
message 1/9 appears. Pressing teletext timer button in
this case, the
SS -- -- -- --
marks will replace the teletext page
number. Using the number 0 to 9 on the RC, you can
access the subpage you would like to view. For instance,
if you want to access the second subpage, press the
numbers 0, 0, 0, 2.
.
11..
Teletext key
22..
TV key
33..
Reveal/Conceal
(answering) key
44..
Teletext timer (calling
sub pages) key
55..
Cancel (updating) key
66..
Size (page expanding)
key
77..
Mix (viewing TV and
Teletext information
together) key
88..
Hold (holding sub
page) key
99..
Index (main page) key
1100..
Colour (red, green,
yellow, blue) keys
065001057480 15" LCD LOCDVT ING 15/8/06 15:18 Page 23
Page 95

TELETEXT
24
55.. CCaanncceell ((UUppddaattiinngg))
: While in teletext mode,
pressing this button will bring TV broadcasting, but
teletext is still active and if a new page number is
entered, page search will continue. When the required
page comes, a message for page number is displayed.
Pressing this button once more, the teletext page
66.. SSiizzee ((PPaaggee eexxppaannddiinngg))
: This button is used for
displaying the current teletext page in 3 different
formats. This converts the display in normal size, upper
half doubled or lower half doubled format
77.. MMiixx ((SSiimmuullttaanneeoouuss TTVV aanndd TTEELLEETTEEXXTT bbrrooaaddccaassttiinngg))
: This provides simultaneous broadcasting of the
current channel and the related teletext data. Pressing
the mix button again will shift the TV to normal teletext
mode.
88.. HHoolldd ((HHoollddiinngg ssuubb ppaaggee))
: If a teletext page has
subpages, such subpages are displayed from time to
time. In such a case, this button is pressed to hold that
page continuously on the screen. When the page is
held pressing "HOLD", the HOLD script appears on the
upper left corner of the screen. Pressing this button
again will release the page from the hold position.
99.. IInnddeexx ((HHoommee PPaaggee))
: This button provides
direct access to the teletext index page
1100)) CCoolloouurr KKeeyyss ((RREEDD//GGRREEEENN//YYEELLLLOOWW//BBLLUUEE))
You can scan the teletext information more easily using these
four colour text buttons.
EEXXAAMMPPLLEE::
TTVV GGUUIIDDEE SSPPOORRTTSS NNEEWWSS WWEEAATTHHEERR
The above given information are given for instance.
The color may change depending on the searched
page.
NNoottee::
Some models do not have TELETEXT feature.
Press
RREEDD
button to
receive TV
information
Press
GGRREEEENN
key to receive
Sports
Information
Press
YYEELLLLOOWW
key
to receive the
news
Press
BBLLUUEE
key to receive
weather
forecast
065001057480 15" LCD LOCDVT ING 15/8/06 15:18 Page 24
Page 96

DVD PLAYER
25
YOUR DVD PLAYER OFFERS EXCELLENT PICTURE AND SOUND QUALITY THANKS TO ITS DIGITAL AUDIO AND
DIGITAL VIDEO SYSTEMS.
AMONG ITS FEATURES ARE;
- LANGUAGE SELECTION ,
- SUBTITLE SELECTION ,
- ABILITY TO PLAY DVD,
- SLOW AND FAST MOTION DISPLAY IN VARIOUS SPEEDS,
- VIEWING FROM DIFFERENT CAMERA ANGLES (IF THIS FEATURE IS INCLUDED ON THE DISC)
065001057480 15" LCD LOCDVT ING 15/8/06 15:18 Page 25
Page 97

REMOTE CONTROL (DVD FUNCTIONS)
26
11.. PPOOWWEERR bbuuttttoonn
For putting the unit on stand-by.
22.. EEJJEECCTT bbuuttttoonn
To open and close the CD tray.
33.. MMUUTTEE bbuuttttoonn
To turn off the sound completely
44.. ZZOOOOMM bbuuttttoonn
To enlarge the picture.
55.. RReevveerrssee SSLLOOWW bbuuttttoonnss
To slow reverse play the movie
66.. CCLLEEAARR bbuuttttoonn
To clear the entries done in the menus.
77.. SSEEAARRCCHH bbuuttttoonn
To jump to a desired position on CD.
88.. FFoorrwwaarrdd SSLLOOWW bbuuttttoonnss
To slow forward play the movie
99.. AA--BB bbuuttttoonn
To designate the interval that will be
repeated.
1100.. EEXXIITT bbuuttttoonn
To exit the DVD player menu.
1111.. MMEENNUU bbuuttttoonn
To display disk menus.
1122.. SSEETTUUPP bbuuttttoonn
To enter and exit the DVD set-up menus.
1133.. AARRRROOWW bbuuttttoonnss
To navigate up/down, left/right in menu.
1144.. SSUUBB bbuuttttoonn
To change subtitle language.
1155.. AAUUDDIIOO bbuuttttoonn
To change spoken language.
1166.. DDIISSPPLLAAYY bbuuttttoonn
To get information about the playing DVD.
1177.. RRAADDIIOO BBuuttttoonn
At some models.
1188.. NNuummbbeerr bbuuttttoonnss
To enter selections in menus.
1199.. SSKKIIPP bbuuttttoonnss
To skip to sections.
2200.. PPAAUUSSEE bbuuttttoonn
To pause.
2211.. SSTTOOPP bbuuttttoonn
To stop the disc playing.
2222.. PPLLAAYY bbuuttttoonn
To play the disc or re-start from pause.
2233.. FFAASSTT bbuuttttoonnss
To fast forward or fast reverse play the
movie.
2244.. EENNTTEERR bbuuttttoonn
To confirm choices in the menus.
2255.. DDVVDD // TTVV bbuuttttoonn
Switches between TV and DVD pictures.
065001057480 15" LCD LOCDVT ING 15/8/06 15:18 Page 26
Page 98
PLAYING DVD’s
27
11..
Press the “DVD/TV” button on the remote handset to
switch your TV to DVD mode. The DVD logo should appear.
22..
To open the tray, press “EJECT”.
33..
Place the Side of DVD which data is processed.
44..
Press “PLAY” to close the tray and start the playback of the
disc.
55..
Depending on the type of DVD entered, a disc menu may
be displayed first. You can navigate through this menu by
using the “ARROW” and “ENTER” buttons. There is usually a
menu item for playing the movie.
66..
You can pause the playback of the movie by pressing the
“PAUSE” button. To restart playback press the “PLAY” button.
77..
You can stop the movie by pressing the “STOP” button. If
“PLAY” is then pressed, the movie will start from where it was
last stopped. To stop the playback completely so it wont start
again from where it was stopped, the “STOP” button must be
pressed twice.
SSKKIIPP::
You can skip chapters either forwards or
backwards by using the SKIP buttons.
FFAASSTT::
You can watch the film in five levels of
fast motion in either direction by using the
“FAST” buttons.
** PPllaaccee tthhee SSiiddee ooff DDVVDD wwhhiicchh ddaattaa iiss pprroocceesssseedd..
065001057480 15" LCD LOCDVT ING 15/8/06 15:18 Page 27
Page 99
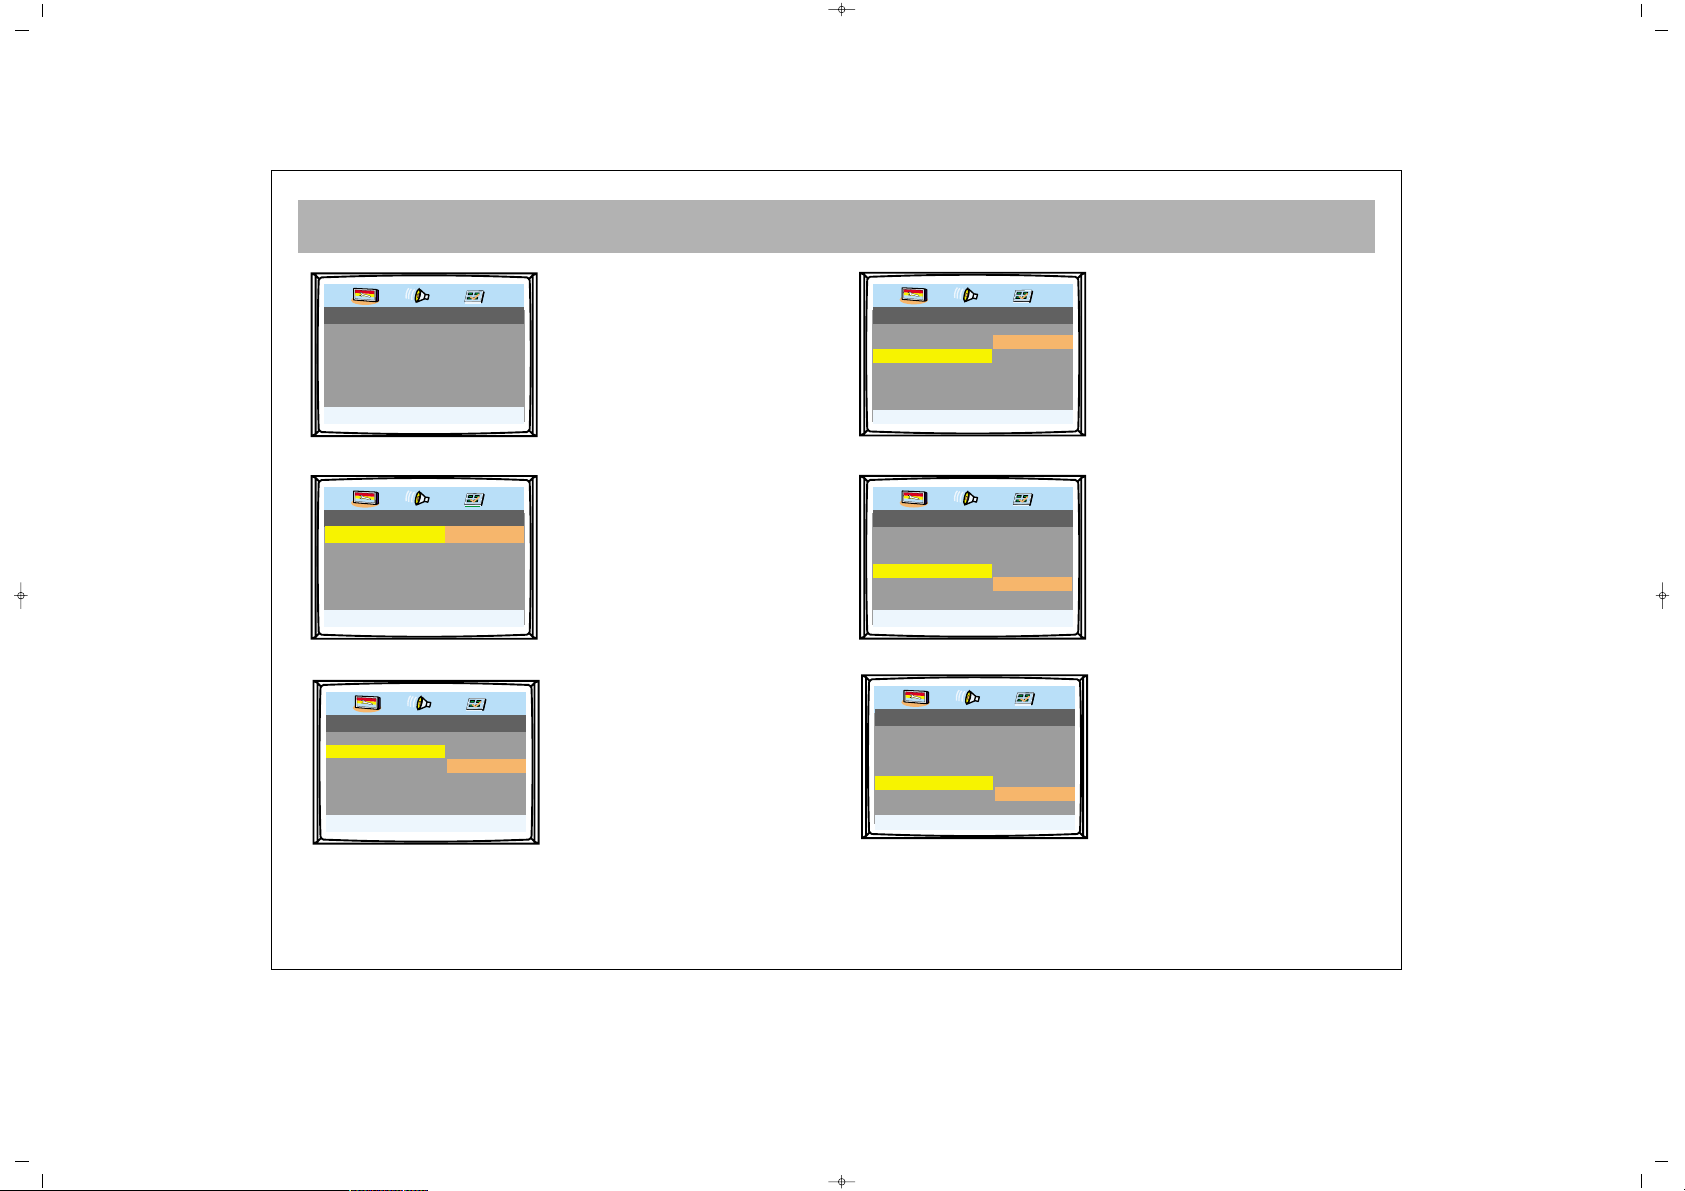
DVD SETTINGS
28
TTHHEE DDVVDD GGEENNEERRAALL
SSEETTUUPP PPAAGGEE
Press the SETUP button.
Press ENTER and "arrow" buttons
to navigate and change settings.
TTVV DDIISSPPLLAAYY::
You can change the output
format of the DVD player
between “Normal PS” (4:3 Pan
Scan), “Normal LB” (4:3
Letterbox) and Wide (16:9).
AANNGGLLEE::
The angle mark is used to alert
you to alternative camera angles
on DVD discs when they are
included. When this option is
ON, an angle mark will appear
on the screen when alternative
angles become available. If this is
switched OFF then you will not
be alterted when alternative
camera angles are available.
Note:- This function is dependant
on the DVD being played.
OOSSDD LLAANNGG::
The language of the On Screen
Display can be changed.
CCAAPPTTIIOONNSS::
Closed captions can be switched
on or off from here.
LLAASSTT MMEEMMOORRYY::
When this setting is active, the
unit can play back interrupted
discs from the point that they
were left.
065001057480 15" LCD LOCDVT ING 15/8/06 15:18 Page 28
.. General Setup Page ..
TV Display PS
Angle Mark Off
OSD Lang ENG
Captions Off
Last Memory Off
Go To General Setup page
.. General Setup Page ..
TV Display PS Normal : PS
Angle Mark Off Normal : LB
OSD Lang ENG Wide
Captions Off
Last Memory Off
Set TV Display Mode
.. General Setup Page ..
TV Display PS
Angle Mark Off On
OSD Lang ENG Off
Captions Off
Last Memory Off
Set Angle Mark
.. General Setup Page ..
TV Display PS
Angle Mark Off
OSD Lang ENG
Captions Off
Last Memory Off
Set OSD Language
.. General Setup Page ..
TV Display PS
Angle Mark Off
OSD Lang ENG
Captions Off On
Last Memory Off Off
Closed Caption
.. General Setup Page ..
TV Display PS
Angle Mark Off
OSD Lang ENG
Captions Off
Last Memory Off On
Set Last Memory State
English
French
German
Italian
Turkish
Dutch
Spanish
Off
Page 100

DVD SETTINGS
29
AAUUDDIIOO SSEETTUUPP PPAAGGEE
Display the audio set-up page by pressing SETUP, then the
right arrow key
.. Audio Setup Page ..
HDCD
Downmix
HDCD Off Off
44.1K
88.2K
.. Audio Setup Page ..
Set Downmix Mode
Downmix LT:RT
HDCD Off Stereo
DDOOWWNNMMIIXX::
The style of down mixing can be
selected from the DOWNMIX
menu. Downmixing to Stereo
produces Stereo output while
LT/RT produces 2 channels that
are compatible with Dolby
virtual surround systems
HHDDCCDD::
The audio bit-rate for PCM OUT
can be set from here. Check with
your PCM compatible amplifier
for the correct setting. For normal
use without an external digital
amplifier, this setting should be
should be OFF.
065001057480 15" LCD LOCDVT ING 15/8/06 15:18 Page 29
 Loading...