

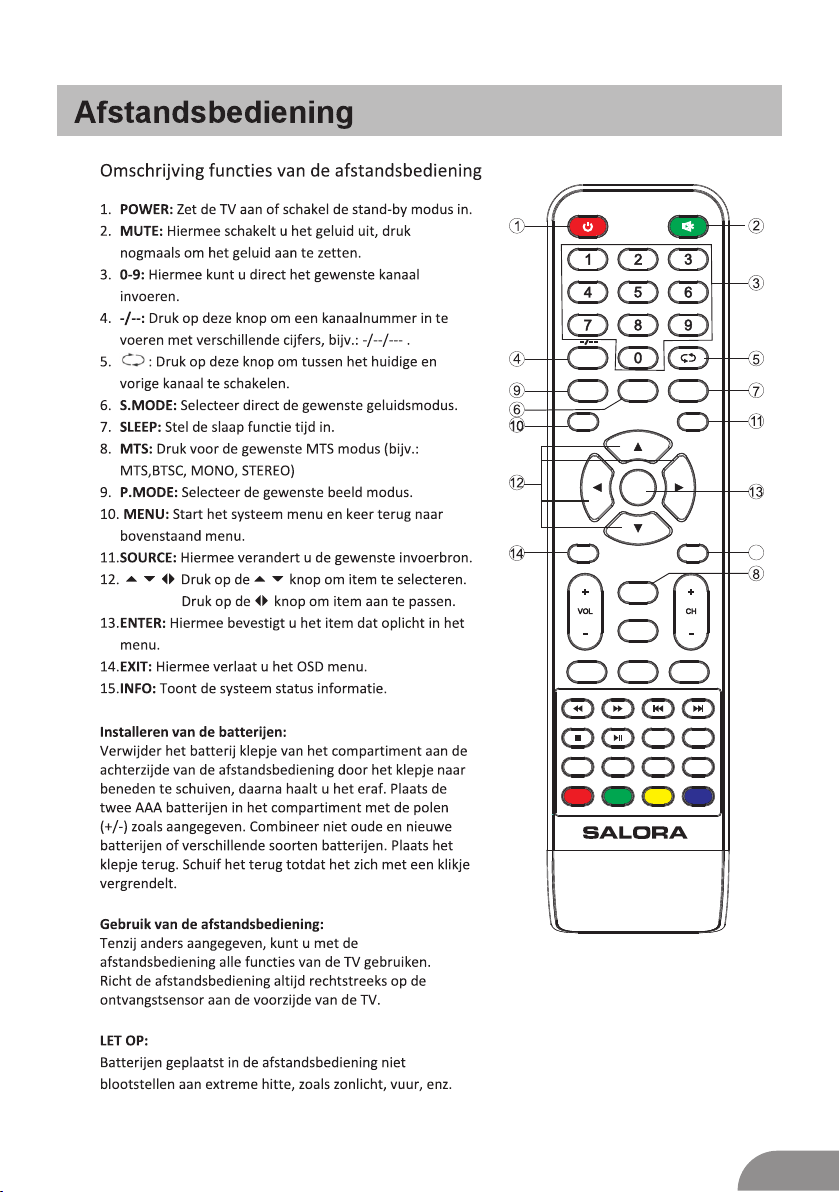
Page 1
22” FHD LED TV
MODEL NR.:22LED1600
Page 2

123
Page 3
Page 4
Page 5
1 2
VOLVOL+
-
CH
-
SOURCEMENUCH+
3
4
4
Page 6
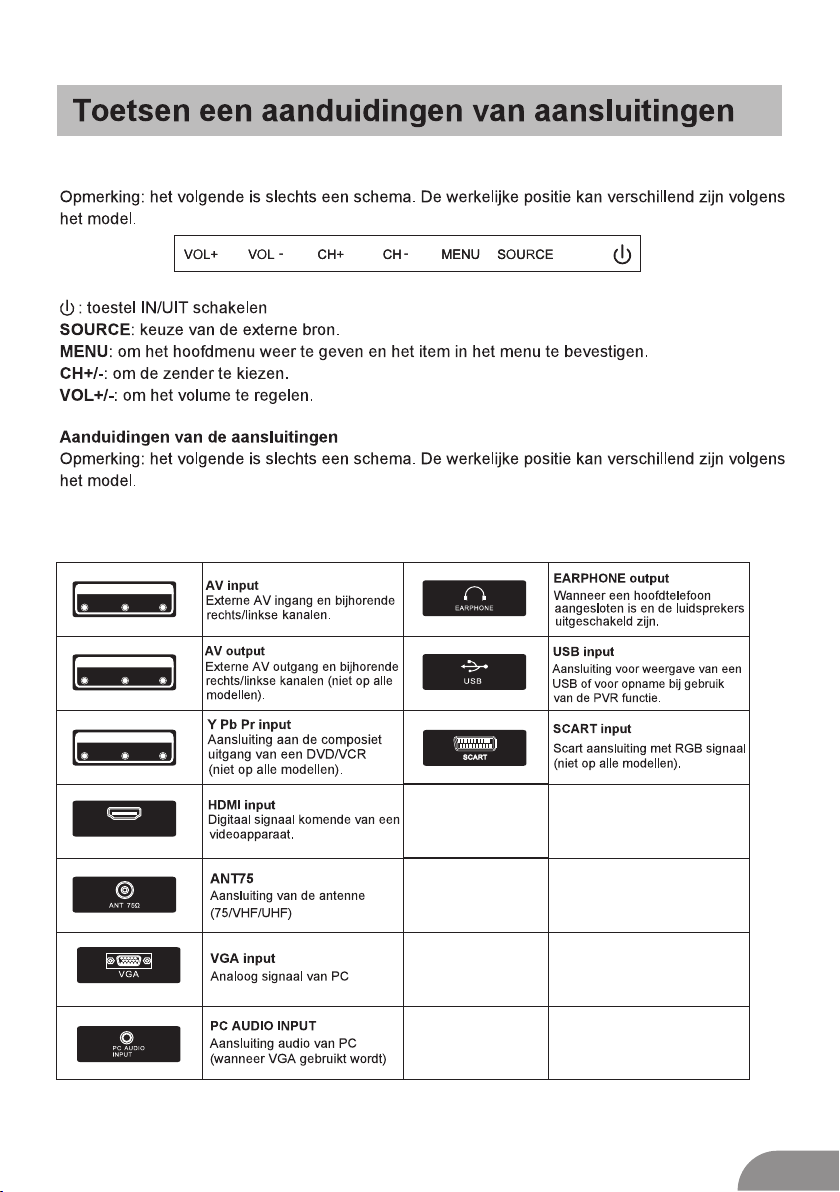
TV Buttons
INP UT
VIDE O R L
OUT PUT
VIDE O R L
INP UT
Y Pb Pr
HDM I
5
Page 7
DV D
Set top b ox en
HDM I
HDMI in ga ng a an sl ui ti ng
HDM I
INP UT
VIDE O R L
AV ing an g aa ns lu it in g
AV ing an g aa ns lu it in g
VIDE O R L
AV uit ga ng a an sl ui ti ng
OUT PUT
INP UT
Y Pb Pr
AV ing an g aa ns lu it in g
USB aan sl ui ti ng
Set top b ox es
SCART a an sl ui ti ng
VIDE O R L
TV aa ns lu it in g
INP UT
6
Page 8
3
FM ANT
TV si gnal ou tput
2
TV ANT
1
1
3
2
4
7
Page 9
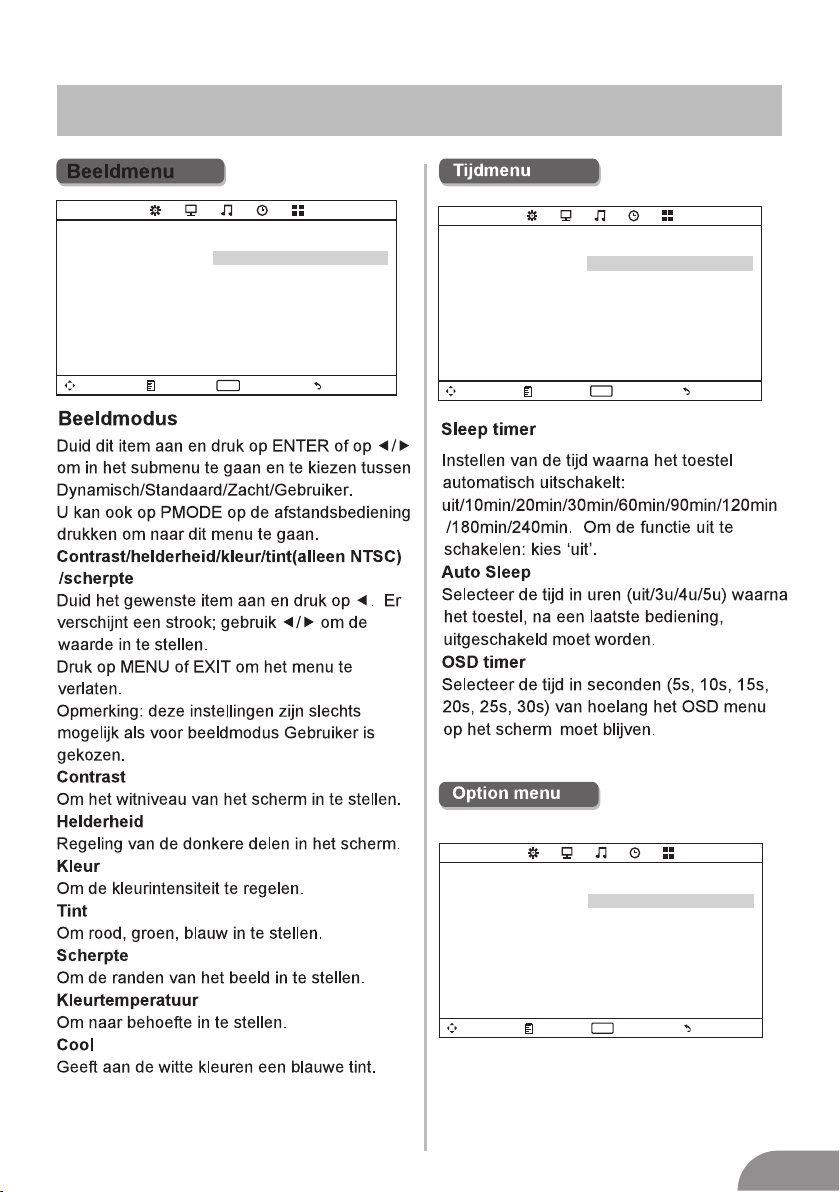
TV Menu
Input So ur ce
TV
AV
YPb Pr
HDM I
PC
Med ia
ENTER
Ent er
Ent er
Opme rki ng: a fbe eld ing h ier bov en alleen
als re fer ent ie.
Druk o p SOU RCE o m de in gan gsl ijs t wee r
te gev en.
Gebr uik / o m de ge wen ste b ron t e kie zen
en dru k op EN TER o m te be ves tig en.
Druk o p EXI T om het menu te s lui ten ,
of het g aat a uto mat isc h na ee n bep aal de
tijd u it (o m de ti jd in t e ste lle n:
MENU – Ti jdm enu – O SD ti mer ).
CHAN NE L
Tune Ty pe Air
Aut o Tuning
Met au to tu nin g wor den d e zen der s
auto mat isc h opg ezo cht . Geb rui k / om
Auto Tun ing a an te d uid en en d ruk o p OK om
het zo eke n te st art en. Al s u het z oek en wi l
stop pen , dru k op ME NU of E XIT en dr uk op
om te be ves tig en of o p om te a nnu ler en.
Channel Tuning
TV : 5 Pr og ra mm e( s)
44%... 433.75MHZ (TV)
Menu
ATV Ma nual Tuni ng
-
Cur rent CH 1
Col or Syst em PAL
Sou nd Syst em DK
Fin e-Tune 4 9.75M HZ
AFC O ff
Sea rch
+
Menu
Mov e Men u Ent er
CHAN NE L
Mov e Men u Ent er
ENTER
Aut o Tuning
ATV Ma nual Tun ing
Pro gramm e Edit
ENTER
Exi t
Exi t
Opme rki ng: h et ze nde rme nu is a lle en
besc hik baa rin TV-m odu s en is h et
stan daa rdm enu w ann eer op ME NU ge drukt
word t. Om a nde re me nu' s(b eel d/g eluid/tijd/
opti es) o p te ro epe n: ge bru ik / .
Sound S yste m
8
Page 10

TV Menu
Pro gramm E dit
Dele te Ren ame Mov e
FAV
FAV
ENTER
Ent er
Ent er
Fav
Fav
Men u
Men u
SOUN D
Mov e Men u Ent er
Skip
Sou nd Mode S tanda rd
Treb le 50
Bas s 50
Bal ance 0
Aut o Volume O ff
ENTER
Exi t
9
Page 11
TV Menu
PICT UR E
Mov e Men u Ent er
Pic ture Mo de Sta ndard
Con trast 50
Bri ghtne ss 50
Col or 50
Tint 5 0
Sha rpnes s 50
Col or Temper ature Med ium
Noi se Redu ction Middle
ECO M ode Off
ENTER
Exi t
TIME
Mov e Men u Ent er
Slee p Timer O ff
Auto Sleep O ff
OSD Ti mer 10s
ENTER
Exi t
OPTI ON
Mov e Men u Ent er
OSD La ngua ge Engl ish
Asp ect Rat io 16:9
Blu e Scree n Off
Key Lo ck Off
Cap tion Off
Par ent Con trol
Res et
Sof tware Up date (USB)
ENTER
Exi t
10
Page 12

TV Menu
Set P asswo rd
Loc k Syste m ON
TV
MPAA R
Can ada Eng lish PG
Can ada Fre nch G
Menu
11
Page 13
TV Menu
TV ra ting
ALL
TV-Y
TV-Y 7
TV-G
TV-P G
TV-1 4
TV-M A
FV
ALL
ALL
ALL
ALL
ALL
V
V
V
Men u
OPTI ON
D
L
S
D
L
S
L
S
Mov e Men u Ent er
OSD L angua ge Engl ish
Asp ect Rat io 16:9
Blu e Scree n Off
Key L ock Off
Cap tion Off
Par ent Con trol
Hot el Mode
Res et
Sof tware U pdate (USB)
ENTER
Exi t
HOTE L
Mov e Men u Ent er
Hot el Mode O n
Sou rce Loc k
Def ault So urce Off
Def ault Pr og 1
Max Vo lume 10 0
Cha nnel lo ck Off
Def ault Vol ume 20
Cle ar Lock
Set P asswo rd
ENTER
Exi t
12
Page 14
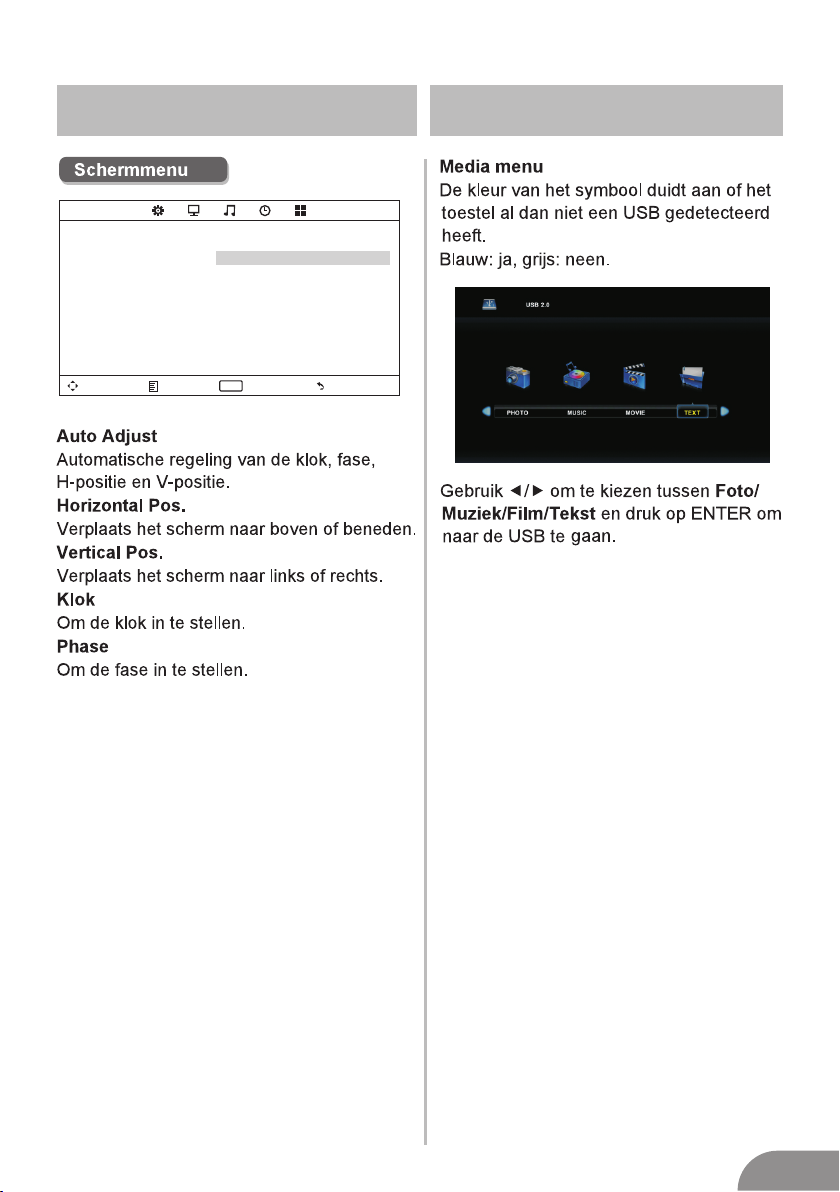
PC Menu
Media Menu
SCREEN
Mov e Men u Ent er
Aut o Adj ust
Hor izont al Pos. 50
Vert ical Pos . 50
Cloc k 50
Pha se 99
ENTER
Exi t
13
Page 15

Hulp
14
Page 16
Scre en S ize
16”
19”/ 20 ”
22”
24”
32”
39”/ 40 ”
42”
46”
50”
TV Sys te m
PAL/ NTS C
PAL/ NTS C
PAL/ NTS C
PAL/ NTS C
PAL/ NTS C
PAL/ NTS C
PAL/ NTS C
PAL/ NTS C
PAL/ NTS C
Preset Channel s
PAL: 0-199 ,NTSC :AIR 2- 69
CAB LE1-1 25
PAL: 0-199 ,NTSC :AIR 2- 69
CAB LE1-1 25
PAL: 0-199 ,NTSC :AIR 2- 69
CAB LE1-1 25
PAL: 0-199 ,NTSC :AIR 2- 69
CAB LE1-1 25
PAL: 0-199 ,NTSC :AIR 2- 69
CAB LE1-1 25
PAL: 0-199 N TSC:A IR 2-69
CAB LE1-1 25
PAL: 0-199 ,NTSC :AIR 2- 69
CAB LE1-1 25
PAL: 0-199 ,NTSC :AIR 2- 69
CAB LE1-1 25
PAL: 0-199 ,NTSC :AIR 2- 69
CAB LE1-1 25
Spea ke r Outpu t
5W+5 W
5W+5 W
5W+5 W
5W+5 W
10W+ 10 W
10W+ 10 W
10W+ 10 W
10W+ 10 W
10W+ 10 W
Scre en S ize
16”
19”/ 20 ”
22”
24”
26”
32”
39”/ 40 ”
42”
46”
50”
power Con sump tion
(LE D)
24W
36W
36W
36W/ 48 W
56W/ 65 W/100 W
70W/ 75 W
70W
110W
135W
power Con sump tion
(LCD)
36W
48W
48W
60W
100W
100W /1 35W
135W
175W
280W
Main a cc essor ie s
User's manual x1
Remote controller x1
AAA Batteries x2
LIFE TIM E 60. 000 H rs
15
Page 17
P.MODE S.MODE
MENU SOURCE
SLEEP
ENTER
EXIT
MTS
ASPECT
REPEAT
ROOT
FAV FAV- FAV+
CANCEL
INDEX
REVEAL SIZE
RED GREEN
SUB .PG
HOLD
YELLOW
INFO
15
GOTO
FREEZE
ON/OFF
MIX
CYAN
16
Page 18

P.MODE S.MODE
MENU SOURCE
SLEEP
ENTER
EXIT
16
MTS
18
17
ROOT
27
19
20
22
31
32
23
FAV FAV- FAV+
INDEX
CANCEL
REVEAL SIZE
RED GREEN
ASPECT
REPEAT
SUB .PG
HOLD
YELLOW
GOTO
INFO
FREEZE
ON/OFF
MIX
CYAN
24
34
26
25
30
21
29
28
35
36
33
17
Page 19

22” FHD LED TV
USER MANUAL
MODEL NO.:22LED1600
IMPORTANT
Please read this manual carefully before installing
and operating the TV.
Keep this manual handy for further reference
Page 20

Table Of Contents
Preparations Guide
Safety Information.................................................................................................................2
Important Safety Precautions.................................................................................................3
Installed And Connected TV
TV Bracket assemble.............................................................................................................4
TV Buttons And Terminal Interface........................................................................................ 5
Exter nal de vice c onnection dia gram .... ........... .... .... ........... .... ........... .... .... ....... ... 6
Install And Connect TV...........................................................................................................7
TV Stan d inst alla tion Instruct ions .... ........... .... ........... .... .... ........... .... ........... .... ...7
TV Menu
Select Input Source................................................................................................................8
Channel Menu........................................................................................................................8
Picture Menu..........................................................................................................................8
Sound Menu.......................................................................................................................... 9
Time Menu.............................................................................................................................9
Option Menu.........................................................................................................................10
Paren t Cont rol. ........... .... ........... .... .... ........... .... ........... .... .... ....... .... .... ........... . 10
TV rati ng.. .... ....... .... .... ........... .... ........... .... .... ........... .... ........... .... .... ....... .... .... .12
Hotel M enu. .... ........... .... ........... .... .... ....... .... .... ........... .... ........... .... .... ........... ..12
PC Menu
Screen Menu........................................................................................................................13
Media Menu
Media Menu.........................................................................................................................13
Other Information
Help......................................................................................................................................14
Specifications.......................................................................................................................15
Remote controller.................................................................................................................16
This u ser m anu al fo r ref ere nce o nly
1
Page 21

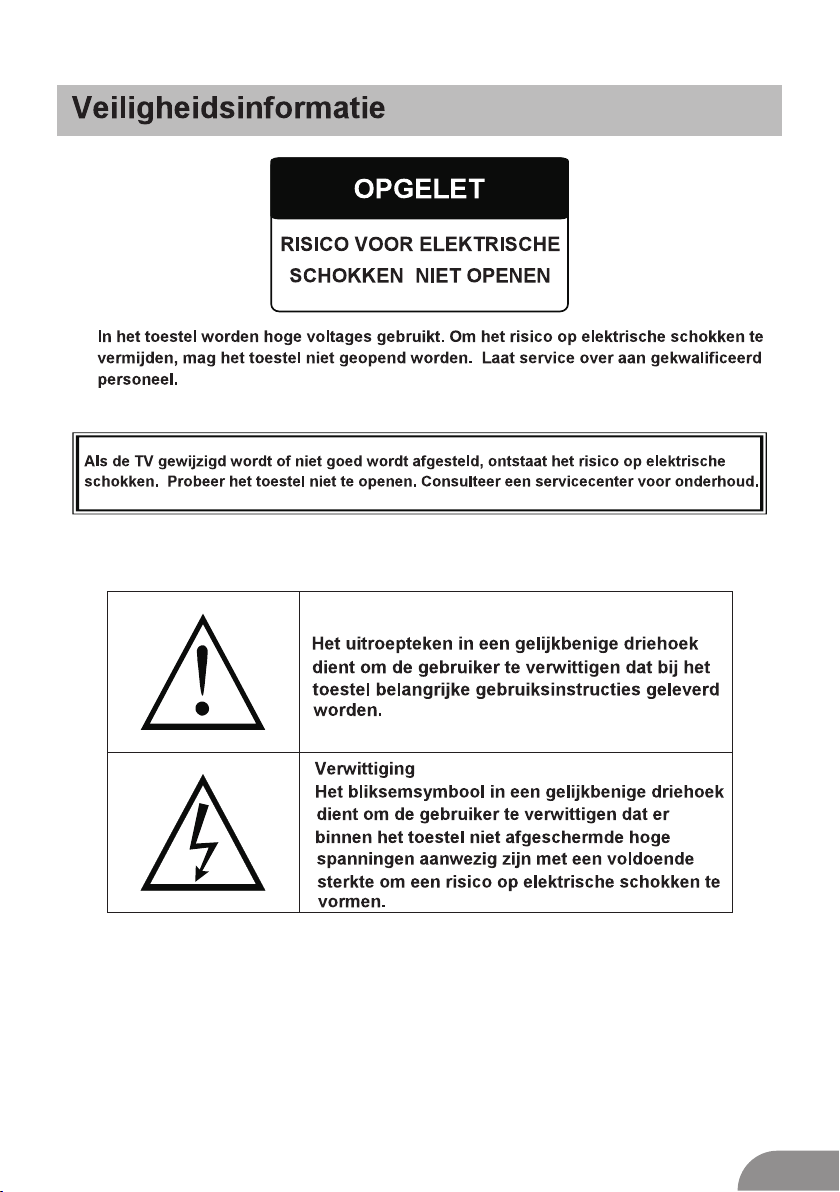
Safety Information
MAY HAVE RIS K OF ELE CTRI C SHOCK ,IF DO ANY CH ANGE O R
ADJUST.D O NOT OPEN THE BAC K CABINET.PLEAS E CONTACT
SERV ICE CE NTER F OR ANY PROBLEM
THIS MA RK REM IND AND AL ERT USER MUST
OPERATE TH E TV SE T COR RECTLY
ACCOR DING TO THE USE R MUANAL.
IN CASE AN Y DAM AGE.
THIS MA RK IS IN DIAC ATE THE TV SET IS
SENSI TIVE E LECT RONIC PRODUCT.
PLEAS E AVOID WATER OR WE T, INCASE
OF FIRE O R ELEC TIC SH OCK.DO NOT
OPEN THE BAC K CABI NET. IF ANY
PROBL EM.P LEAS E CALL NEAREST
SERV ICE CE NTER .
2
Page 22

Important Safety Precautions
1. Read t hese i nstr uctions.
2. Keep t hese i nstr uctions.
3. Heed a ll war ning s.
4. Foll ow all i nstr uctions.
5. Do not u se thi s appa ratus near wate r.
6. Clea n only w ith dr y cloth.
7. Do not b lock a ny ven tilation open ings . Inst all in a ccordance wit h the
manuf actu rer’s i nstructions .
8. Do not i nsta ll nea r any heat source s such a s radi ator s, heat registe rs, st oves , or
other a ppar atus ( including amp lifi ers) t hat pr oduce heat.
9. Do not d efea t the sa fety purpose of t he pol ariz ed or grounding-typ e plug . A
polar ized p lug ha s two blades with o ne wid er tha n the ot her. A gr ounding type pl ug
has two b lade s and th ird grounding p rong . The w ide bl ade or third pron g are
provi ded fo r your s afety. When the p rovi ded pl ug doe s not fit into your o utle t,
consu lt an el ectr ician for repla ceme nt of th e obsolete outlet.
10. Pro tect t he pow er cord from bein g walk ed on or p inch ed, particula rly at p lugs ,
conve nien ce rec eptacles, and t he poi nt whe re the y exit from the app arat us.
11. Onl y use at tach ments/acces sori es spe cifi ed by the manufac ture r.
12. Use o nly wi th the c art, stand, tri pod, b rack et, or table spec ifie d by the
manuf actu rer, or sold with the appa ratu s. Whe n a cart is used caution when
movin g the ca rt/apparatu s comb inat ion to a void injury tip -ove r.
13. Unp lug th is app aratus during l ight ning s torm s or when unused fo r long p erio ds
of time .
14. Ref er all s ervi cing to qualifi ed ser vice p erso nnel. Servici ng is re quir ed when the
appar atus h as bee n damaged in any wa y, suc h as pow er-s upply cord or plu g is
damag ed, li quid h as been spilled or obje cts ha ve fal len into the appa ratu s, the
appar atus h as bee n exposed to rain o r mois ture , does n ot operate norm ally, or has
been dr oppe d. Warni ng to reduce the ri sk of fi re or el ectric shock, d o not ex pose
this ap para tus to r ain or moisture .
15. The apparatus shall be disconnected from the mains by placing the power/standby
switc h in the s tand by position and u nplu ggin g the power cord of the apparatus from
the AC mai ns rec epta cle.
16. The socket-out shall be installed near the equipment and shall be easily accessible.
17. Th is pro duct s houl d never be placed i n a buil t-in i nstallation such as a b ookc ase
or rack u nles s prop er ventilatio n is pro vide d or the manufacturer's instructions have
been ad here d to.
18. Appa ratu s shal l not be exposed to d ripp ing or s plas hing.
19. Do no t plac e any so urces of danger o n the ap para tus (e .g. liquid fill ed obj ects ,
light ed can dles ).
20. Wall or C eili ng Mou nting - The applianc e shou ld be mo unted to a wall or ce ilin g
only as r ecom mend ed by the manufac ture r.
21. Nev er pla ce the TV, remote control o r batt erie s near naked flam es or ot her
heat so urce s, including direct s unli ght. To prevent the spre ad of fi re, ke ep
candl es or ot her flames away from th e TV, remo te con trol and batter ies at
all tim es.
22. Th e USB te rmin al sho uld be loaded wit h 0.5 A un der no rmal o pera tion.
3
Page 23

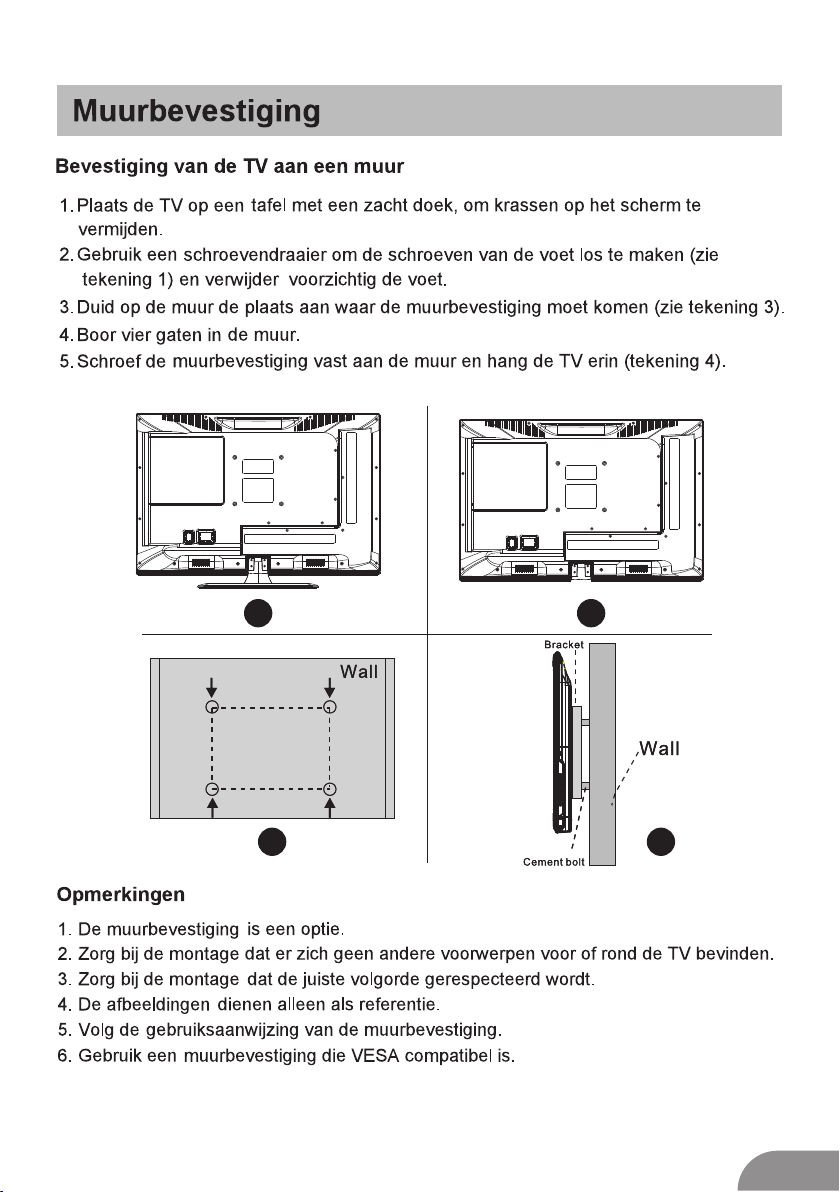
TV Bracket assemble
Fix the T V on the w all
1.Fir st,p ut the TV on the table smo othl y and pu t some s oft cloth on the table to av oid
scrat chin g the sc reen.
2.Use r the sc rew dr iver to take off the scr ews wh ich ar e fixed on the bott om sta nd
(the di rect ion of t he arrow, refer to t he pto to1) .And take off the bottom stand(please
tak e off the screws and bottom stand carefully).
3.Mak e one br acke t which can fix on th e wall a ccor ding t o the size of arrow d irec tion
of phot o2 and p hoto 3.
4.Dri ll fou r hole s properly on the w all (t he siz e only f or reference) a nd put i nto fo ur
screw s.(o ptio nal parts) Dril l four h oles properly on the wall (the size only for reference)
and put i nto fo ur scr ews.(option al par ts)
5.acc ordi ng to th e step 4,use the sc rewd rive r to lock the screw o n the ba ck of th e TV.
then ha ng the TV on th e wall .
1 2
VOLVOL+
-
CH
-
SOURCEMENUCH+
3
4
Note:
1.The b rack et fix ed on the wall is opt iona l part .
2.whe n you as semb le the TV, there should be no o ther articles on the around and front
and ple ase ke ep the d istance from ot her ar ticl es.
3.Whe n asse mble t he TV, please ask the c aree r man to f ix in or der to avoid the da nger.
4.The f ixin g pict ure is only for ref eren ce.
5.Ple ase fo llow t he use manual abo ut bra cket a ssem ble to fix the TV.
6.Att ach th e moun ting bracket fr om the V ESA com patible wall mounti ng kit .
4
Page 24

TV Buttons And Terminal Interface
TV Buttons
Note: The fo llow ing is o nly functiona l sche mati c, And the actual po siti on and
arran geme nt of di fferent mode ls may b e differe nt.
:Tu rn ON/ OFF Po wer.
SOURC E:Ex tern al Signal Input S elec tion .
MENU: Disp lay Ma in MENU And Confirm MENU I tem Se lect ion.
CH+/- :Sel ecti ng Channel.
VOL+/ -:Ad just ing Volume.
Terminal Interface
Note: The fo llow ing ar e the various ter mina l inte rface, the actu al pos itio n and
arran geme nt, th e number of diff eren t mode ls may b e different.
INP UT
VIDE O R L
OUT PUT
VIDE O R L
INP UT
Y Pb Pr
HDM I
AV inp ut
Ext ernal AV Si gn al I npu t An d
Rel evant R ith/L eft Sou nd Chan nel
AV out pu t
Ext ernal AV Si gn al o utp ut And
Rel evant R ight/ Left So und Cha nnel
(So me mode ls with out thi s inter face)
Y Pb Pr i np ut
Con nect to t he comp osite t ermin al of
you r DVD/V CR
(So me mode ls with out thi s inter face)
HDM I input
Dig ital si gnal in put fro m HDMI vi deo
con necto r.
ANT 7 5
Con nect th e anten nal/c adle tv i nput
(75 /VHF/ UHF)
VGA i npu t
PC an alog si gnal in put
PC AU DIO I NPUT
VGA in put and a udio in put whe n VGA
inp ut
EAR PHONE o utput
Whe n earph ones ar e plugg ed in,
spe akers a re disa bled
USB i nput
Con nect a US B devic e here to p lay
its m edia fi les.
SCA RT inpu t
sta ndard ,it sup ports c ompos ite and
RGB signa l input .lt is a co nnect ion
for e urope an
(So me mode ls with out thi s inter face)
5
Page 25

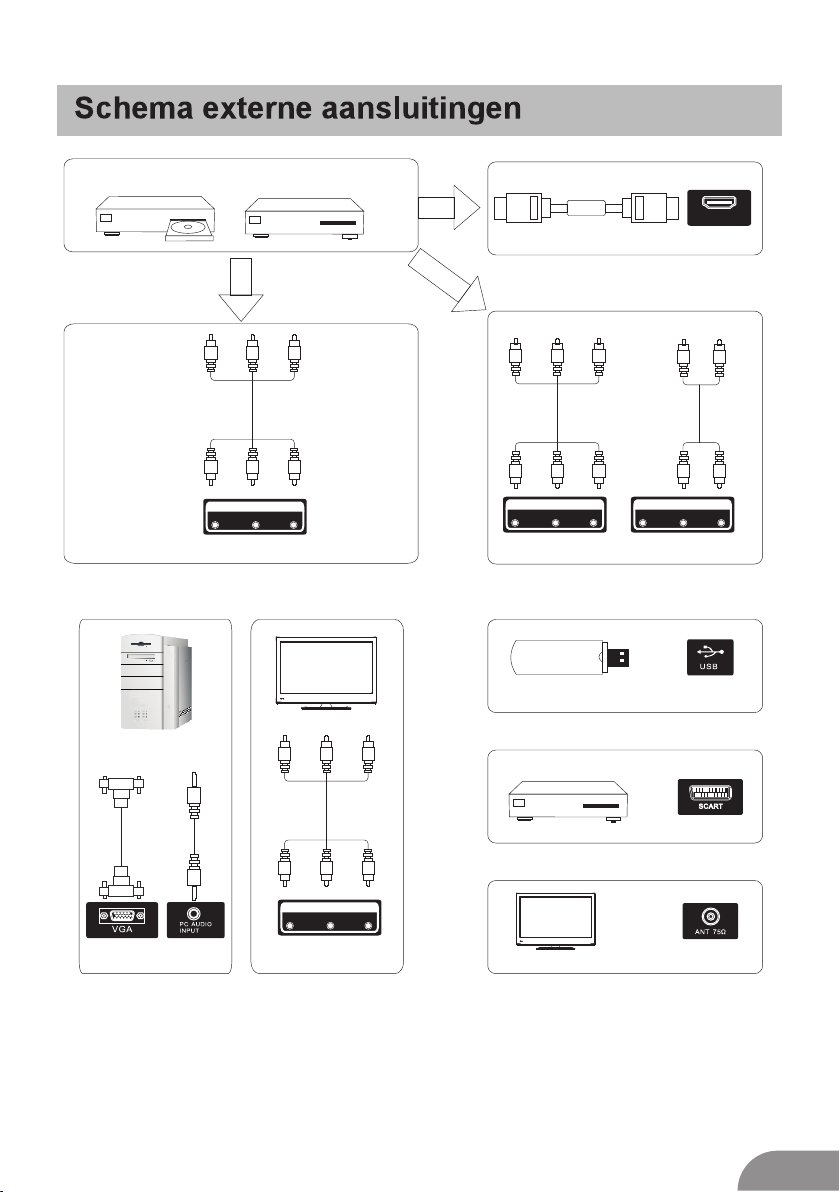
External device connection diagram
DV D
Set-t op b ox es
INP UT
VIDE O R L
AV inp ut c on ne ct io n
AV inp ut c on ne ct io n
HDM I
HDMI in pu t co nn ec ti on
INP UT
Y Pb Pr
AV inp ut c on ne ct io n
USB con ne ct io n
HDM I
INP UT
VIDE O R L
OUT PUT
VIDE O R L
AV out pu t co nn ec ti on
Set-t op b ox es
SCART c on ne ct io n
TV co nn ec ti on
6
Page 26

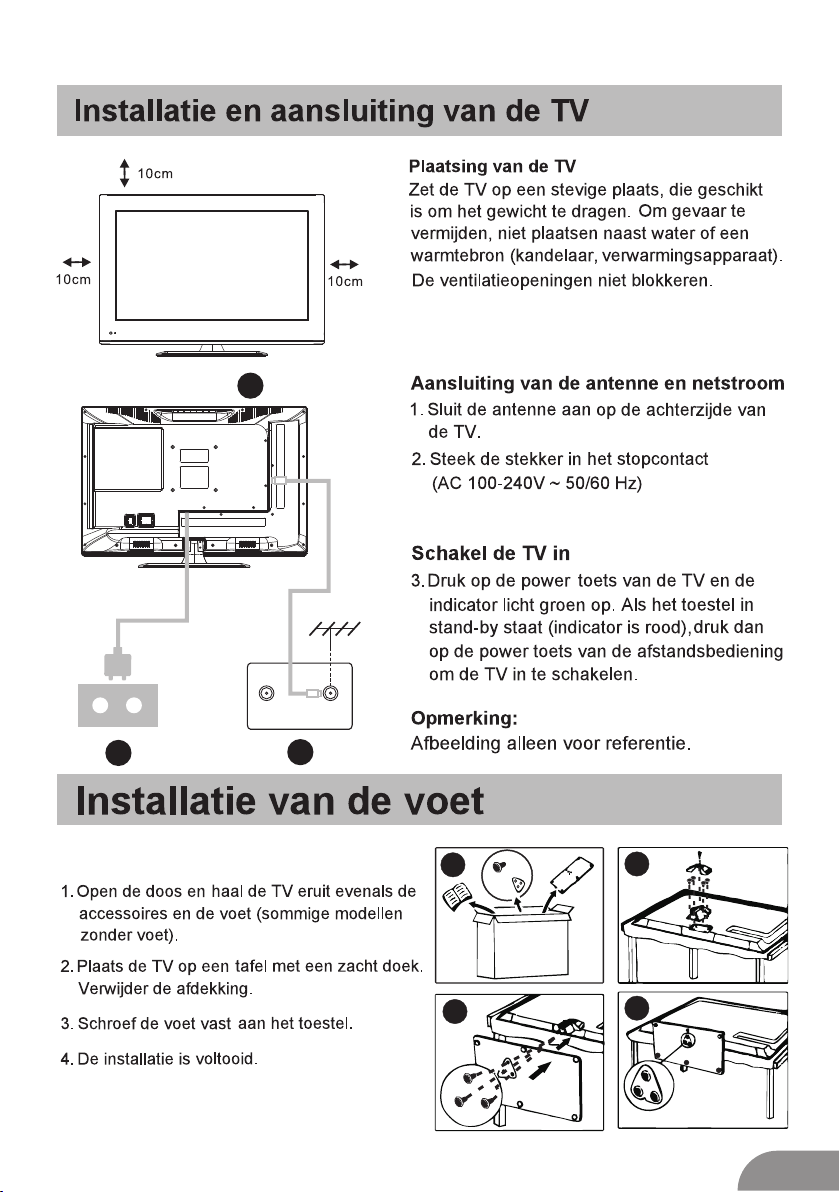
Install And Connect TV
Set you r TV
To put your TV in a fi rm pla ce whi ch can
bear th e weig ht of th e TV.
To avoid da nger, p leas e don’ t expose the
TV near w ater o r heat ing place (such a s
light , cand le, he ating machine ),do n ot blo ck
the ven tila tion a t the back of TV.
3
FM ANT
TV si gnal ou tput
2
TV ANT
1
Conne ct ant enna a nd power
1.Con nect t he ant enna cable to the antenna
socke t on the b ack of t he TV.
2.To plug t he pow er cor d of TV ( AC 100 240V~ 5 0/60 Hz).
Turn on T V
3.Pre ss the p ower b utton of the TV th e
indic atio n ligh t will turn to gree n. if it i s
on stan dby mo de (th e light is red),p ress
the pow er but ton on t he remote contr ol
to turn o n the TV.
Note:
Pictu re for r efer ence purposes o nly.
TV Stand Installation Instructions
1.Op en the c arto n and remove the TV
and sca tter ed acc essories and ba se
(some m odel s with out base).
2.to av oid th e inju ry of the TV, covered
with a soft mattress, put it on the table, face
down on a soft mattress, the base of th e
neck is f ixed o n the TV with screws.
3.screw the base and connected to the TV.
4. the in stal lati on is complete.
1
3
2
4
7
Page 27

TV Menu
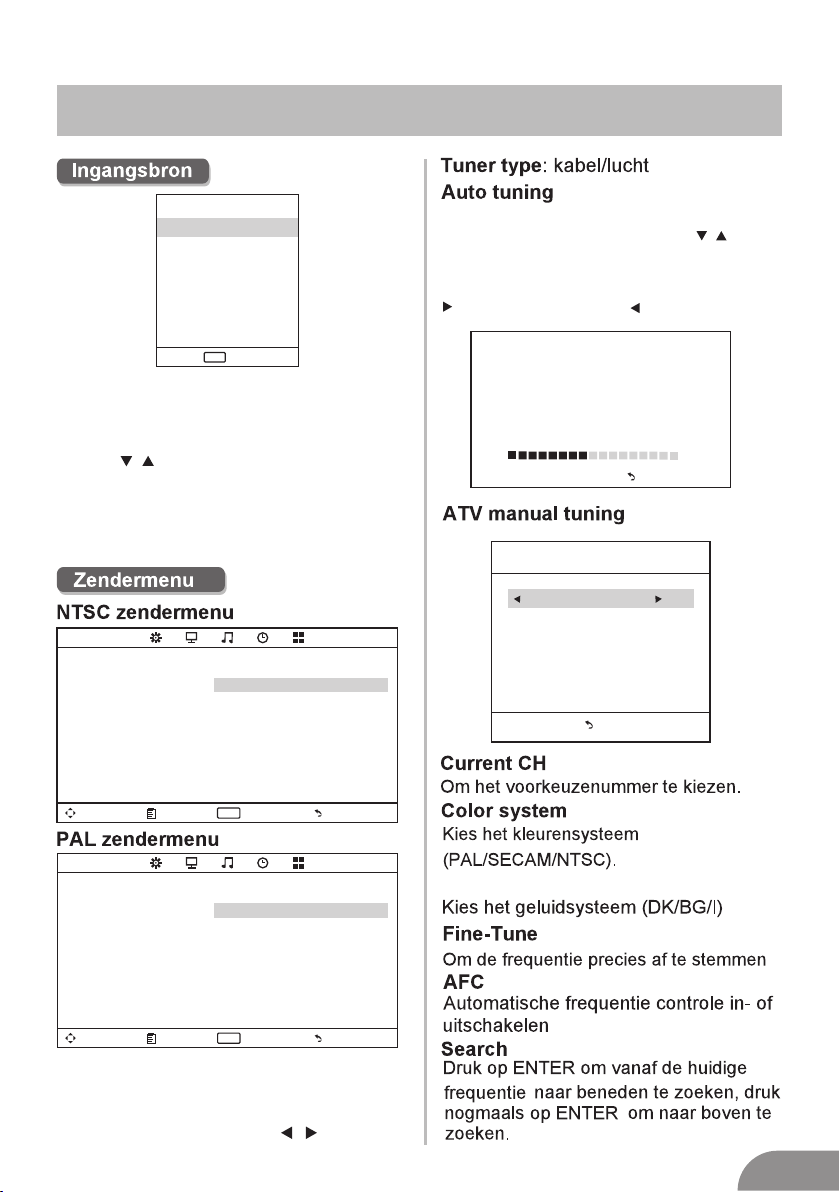
Input Source
Input So ur ce
TV
AV
YPb Pr
HDM I
PC
Med ia
ENTER
Ent er
Ent er
Note: The ab ove is f or reference only, to
preva il any k ind
Press SOURCE to display the input source list.
Press ▼/▲ t o high ligh t the input sourc e
and pre ss ENT ER to co nfirm.
Press E XIT to hide t he On-Screen me nu,
or it wil l disappear after seconds. (The way
to set the disappeared time: M ENU - TIME
Menu - OS D Timer )
Channel Menu
NTSC Ch anne l Menu
CHAN NE L
Tune Ty pe Air
Aut o Tuning
Tune Type
Cable /Air
Auto Tuning
Auto Tun i n g wi l l sea r c h fo r avai l a ble
chan n e ls a n d pro g r ams. P r ess▼/▲ to
sele c t A u t o Tu n ing, t h en p r e ss O K to
star t aut o sear c h . If y ou w a n t to s top
sear c h ing, p r ess M E N U o r EXIT, a n d
pres s to c o nfirm o r to c ancel .
Channel Tuning
TV : 5 Pr og ra mm e( s)
44%... 433.75MHZ (TV)
Menu
ATV Man ual Tuning
ATV Ma nual Tuni ng
-
Cur rent CH 1
Col or Syst em PAL
Sou nd Syst em DK
Fin e-Tune 4 9.75M HZ
AFC O ff
Sea rch
+
Mov e Men u Ent er
ENTER
Exi t
PAL Channe l Menu
CHAN NE L
Mov e Men u Ent er
Note : The Channe l Men u is av ail abl e onl y
in TV mo de, and the it em is t he de fau lt
when p res sin g MEN U, if y ou wa nt view
the Pi ctu re/ Sou nd/ Time /Op tio n Men u,
plea se pr ess t o sel ect .
Aut o Tuning
ATV Ma nual Tun ing
Pro gramm e Edit
ENTER
Exi t
Menu
Curre nt CH
Set the channel number
Color s yste m
Select the color system(PAL/SE CAM/
NTSC)
Sound S yste m
Select the sound system( DK/B G/I)
Fine- Turn
Adjust the frequency of the channe l fine ly.
AFC
Autom atic F ine tu ning.
Searc h
Press ENTER to search down from the current
frequ ency, and pr ess ENTER to sear ch up.
8
Page 28

TV Menu
Progr amm Ed it
Pro gramm E dit
Dele te Ren ame Mov e
FAV
FAV
ENTER
Ent er
Ent er
Fav
Fav
Men u
Men u
Skip
The fou r colo red ke y is the shortcut k ey for
progr ammi ng the c hannel.
First p ress ▼/▲ t o high light the chann el
you wan t to del ete or r ename or mo ve or
skip, t hen:
Press t he Red b utto n to delete the cha nnel .
Press t he Gre en but ton to enter the
renam e stat e, the npress to selec t the
word yo u want t o chan ge, and ▼/▲ to
selec t word .
Press t he Yell ow but ton to set the chan nel
to mo ving state. then p ress ▼/▲ t o mo ve
it to the p osit ion yo u want to put.
Press t he Blu e butt on to skip the sele ct
chann el. (Your TV set w ill sk ip the channel
autom atic ally w hen using CH+/- t o view
the cha nnel s.)
Fav Add or D elet e the ch annel to your fav er
ate lis t.
Mediu m
Gives w hite c olor s a neutral tint.
War m
Gives w hite c olor s a red tint.
Noise R educ tion
Off/ Low/ Midd le/H igh
You can clear up the input signal by setting
the ite m.
Sound Menu
SOUN D
Mov e Men u Ent er
Sound M ode
Standard/Music/Movie/Sports/User/Only
in this m ode, Tr e ble an d Bass can be
adjus ted. )
Bass
Adjus t the lo w freq uency sounds.
Treble
Adjus t the hi gh fre quency sounds .
Balan ce
Adjus t the le vel of s ound coming fro m
the lef t and ri ght sp eakers.
Auto Volume
Press L /R to se t or can cel. When set
on, it wi ll lev el out t he sound being he ard
when su dden c hang es in volume
occur d urin g comm ercial breaks o r
chann el cha nges .
Adjus ting t he Bas s/Treble/Bal ance
1 Selec t Soun d Mode a s User.
2 Highl ight t he ite m and press ▼/▲ to
displ ay the s ub-m enu, then press
to adju st the v alue .
Sou nd Mode S tanda rd
Treb le 50
Bas s 50
Bal ance 0
Aut o Volume O ff
ENTER
Exi t
9
Page 29

TV Menu
Picture M enu
PICT UR E
Mov e Men u Ent er
Pict ure M ode
High lig ht th e ite m and Press EN TER o r
to ent er th e sub -me nu, that sho ws
the pi ctu re mo de yo u can choose :
Dyna mic /St and ard/Mild /Us er
Pres s PMO DE on t he re mote contr ol
to sel ect p ict ure m ode direct ly.
Cont ras t/B rig htness/C olo r/Tin t
(NTS C onl y)/ Sha rpness
High lig ht th e ite m and press , an d a
proc ess b ar ap pea rs, then pre ss
to adj ust t he va lue .
Pres s MEN U or EX IT to hid e the
on-s cre en me nu.
Note : Those s ett ing s can b e adj usted
only w hen t he Pi ctu re Mode is set t o Use r.
Cont ras t
Adju st th e whi te le vel of the pic tur e
Brig htn ess
Adju st da rkn ess o f black sect ion s in th e
pict ure .
Colo r
Adju st th e col or in tensity of t he pi ctu re.
Tint
Adju st th e hue (Re d,Green, Blu e) of t he
pict ure .
Shar pne ss
Obje ct ed ges a re en hanced for p ict ure d
etai l.
Colo r Temper atu re
Sele ct th e col or te mperatur e tha t you f eel
comf ort abl e.
Cool
Give s whi te co lor s a blue tint.
Pic ture Mo de Sta ndard
Con trast 50
Bri ghtne ss 50
Col or 50
Tint 5 0
Sha rpnes s 5 0
Col or Temper ature Med ium
Noi se Redu ction Middle
ECO M ode Off
ENTER
Exi t
.
Time Menu
TIME
Mov e Men u Ent er
Sleep Ti mer
Selec t the ti me in mi nutes(off,10mi n,
20min ,30m in,6 0min,90min,120m in,
180mi n,24 0min ) that you want the
TV to shu t off a utom atically afte r you
set the t ime. C ance l by setting it to Off
Auto Sl eep
Selec t the ti me in ho urs(off,3h,4h, 5h)
that yo u want t he TV t o remain on after
your la st ope rati on. Cancel by set ting i t
to Off .
OSD Ti me r
Selec t the ti me in se conds(5s,10 s,15 s,
20s,2 5s,3 0s,) t hat you want the On -
Scree n Men re main d isplay after yo ur las t
opera tion .
Slee p Timer O ff
Auto Sleep O ff
OSD Ti mer 10s
ENTER
Exi t
Option Menu
OPTI ON
Mov e Men u Ent er
OSD La ngua ge Engl ish
Asp ect Rat io 16:9
Blu e Scree n Off
Key Lo ck Off
Cap tion Off
Par ent Con trol
Res et
Sof tware Up date (USB)
ENTER
Exi t
10
Page 30

TV Menu
OSD L a ng uage
Set t h e OSD d ispla y lang u a g e.
Aspe c t Rat i o
Sele c t the s ui table a spect R ation . (4:3 /
16:9 / Z o om1/Z o o m 2).
Blue S cr een
Set the back grou nd co lor to blu e or black
when h av ing n o inp u t sig n a l .
Key L o ck
Set to prevent it from being used by young
chil d r e n, o r o ther u n expec t e d us i n g .
Capt i o n
Select from belo w clo sed-c apti on mo des.
CC1,2, 3,4 Displays corresponding caption
ch a n ne ls o f a a n a l og p r o g ram. ( U su ally
be s e t to C c 1 fo r most p rogra m s . )
Text1,2,3,4 Display s c o r r e s p o n d i ng text
serv i c e ch a n n el o f a an a l o g pr o g r am.
Pare n t Con t r o l
For d e ta il p l e a se r e f e r to p ag e 7.
Rese t
Reca l l the d ef ault s e tting .
Soft w a r e Upd a t e( USB)
Update your TV set. Select the software in
the r o ot of y our U S B me m o r y, a n d pre s s
ENTE R l .
Parent Co ntrol(NTSC)
Set P asswo rd
Loc k Syste m ON
TV
MPAA R
Can ada Eng lish PG
Can ada Fre nch G
Menu
Se t P as s w o r d F ir s t y o u s ho u l d e nt e r
th e c or r e c t o ld p as s w o r d t h e n e nt e r n ew
pa s s w o r d t wi c e .
Lo c k S ys t e m
Se t t he l oc k s ys t e m O N or OFF.
TV
Th e T V rating compose of two a s p e c ts:
ag e - b a s e d a nd c on t e n t - b a s ed. P a g e 9
MA P P
Th i s s ys t e m d ef i n e s t h e r at i n g c on t r o l
wh i c h c om e f ro m M PAA rules.
G
Ge n e r a l a ud i e n c e . All ages admitted
PG
Pa r e n t a l g ui d a n c e
PG - 1 3
Pa r e n t s s tr o n g l y c a u t i o n e d . S o m e
ma t e r i a l m ay b e inapp r o p r i a t e f o r
ch i l d r e n u nd e r 1 3 .
R
Re s t r i c t e d . C h i l d r e n u nd e r 1 7 r eq u i r e
ac c o m p a n y i n g p a r e n t o r adult g ua r d i a n .
NC - 1 7
No o ne 1 7 and under a a d m i t t e d .
X
Ad u l t a ud i e n c e o n l y
Ca n a d a E ng l i s h T h e r a t i n g s a r e f or
pr o g r a m s w hi c h a r e u si n g E ng l i s h r at i n g
sy s t e m .
C
Ch i l d r e n
C8 +
Ch i l d r e n 8 years and o lder
G
Ge n e r a l p ro g r a m m i n g
PG
Pa r e n t a l g ui d a n c e
14 +
Vi e w e r s 1 4 a nd o ld e r
18 +
Ad u l t p ro g r a m m i n g
Canada French
Th e r at i n g s a re f or p ro g r a m s w h i c h a re
us i n g F re n c h r at i n g s y s t e m .
G
Ge n e r a l
8 ans+
No t r ec o m m e n d e d f o r y ou n g e r c hi l d r e n
13 a ns +
No t r ec o m m e n d e d f o r c hi l d r e n u nd e r
ag e 1 3
16 a ns +
Not recommended for ages u n d e r 1 6
18 a ns +
Th i s p ro g r a m i s restr i c t e d t o adults
11
Page 31

TV Menu
TV rati ng(N TSC)
TV ra ting
ALL
TV-Y
TV-Y 7
TV-G
TV-P G
TV-1 4
TV-M A
FV
ALL
ALL
D
ALL
ALL
ALL
Men u
L
S
V
V
V
D
L
S
L
S
TV-Y
Gene r a l audience
TV-Y7
Pare n t a l guidance suggested
TV-G
Pare n t s strongly cautioned
TV-PG
Restr i c t e d
TV-14
No one 17 a n d und e r admitted
TV-MA
Adul t audience only
FV
Fant a s y violence
D
Sugg e s t i v e dialogue
L
Stro n g language
S
Sexu a l situations
V
Vi o l e n c e
N o t e : T h e c o n t e n t r a t i n g s w i l l i ncrease d e pe nd ing on t h e level of the
age-b a s ed ratin g . For ex a m pl e,
a progr a m with a T V-PG V ( v io le nce)
rating may contain moderate violence,
while a TV-14 V (v io lence)
rating m a y contai n intense v i olence.
So lock i n g a high e r level o pt io n will
automati c a ll y lockin g the
op tions that h as more sensitive level.
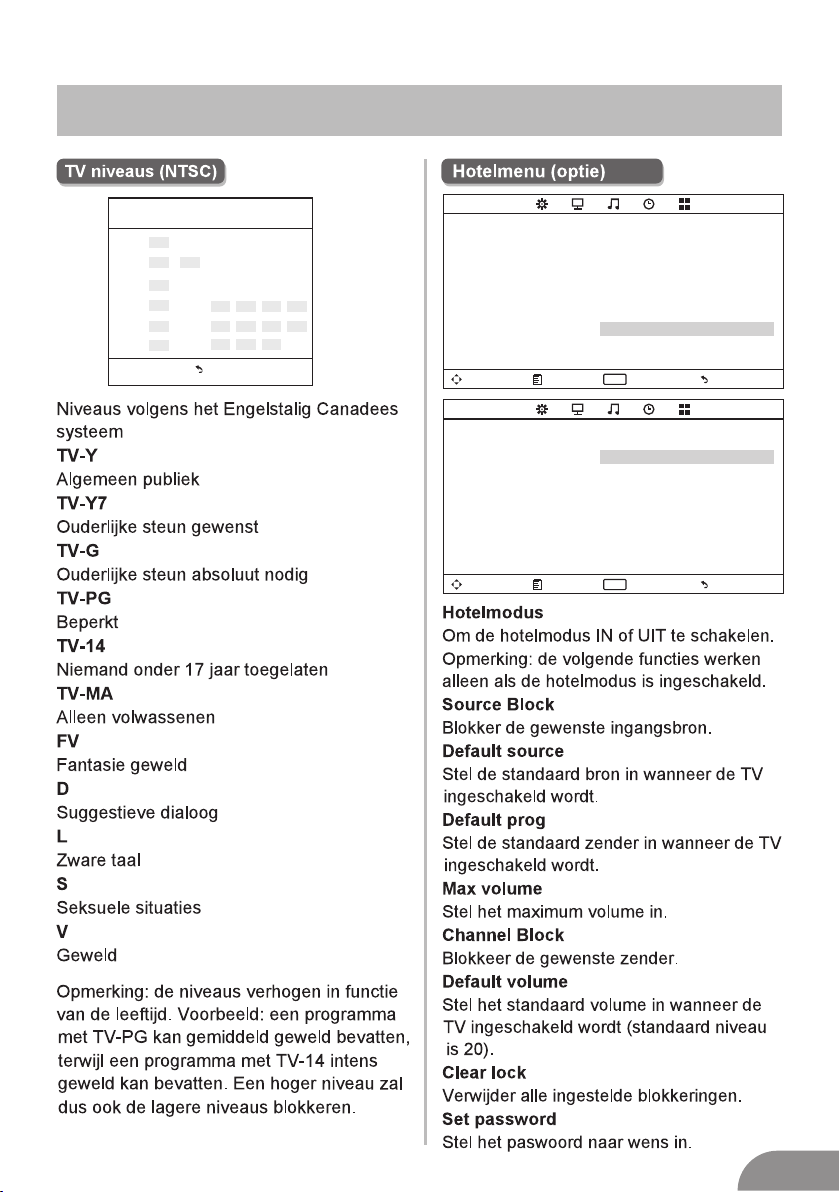
Hotel M enu( Opti onal)
OPTI ON
Mov e Men u Ent er
HOTE L
Mov e Men u Ent er
OSD L angua ge Engl ish
Asp ect Rat io 16:9
Blu e Scree n Off
Key L ock Off
Cap tion Off
Par ent Con trol
Hot el Mode
Res et
Sof tware U pdate (USB)
ENTER
Hot el Mode O n
Sou rce Loc k
Def ault So urce Off
Def ault Pr og 1
Max Vo lume 10 0
Cha nnel lo ck Off
Def ault Vol ume 20
Cle ar Lock
Set P asswo rd
ENTER
Exi t
Exi t
Hotel M ode
Set hot el mo de ON or OFF.
No t e : T he f o llowin g set t i ngs w ork o nly
when Ho tel M ode is set to b e ON.
Sourc e Loc k
Lock th e inp ut source w hich you wa nt.
Defau lt So urce
Set the default input source when turning
on your TV.
Defau lt Pr og
Set the d efa ult program when turning on
your TV.
Max Vol ume
Set the m ax vo lume that y ou can adjust.
Chann el lo ck
Lock th e cha nnel whic h you prefe red .
Defau lt Volume
Set the default volume for every time you
open th e TV, the d efault vo lume is 20.
Clear L ock
Recall the default settings in hotel mode.
Set Pas swo rd
Set the p ass word as you l ike.
12
Page 32

PC Menu
Media Menu
Scree n Menu
SCREEN
Mov e Men u Ent er
Aut o Adj ust
Hor izont al Pos. 50
Vert ical Pos . 50
Cloc k 50
Pha se 99
ENTER
Exi t
Auto Adju st
Autom atic ally a djust Clock, Ph ase,
H-Pos itio n, and V- Position sett ings .
Horiz onta l Pos.
Shift t he scr een up o r down.
Vertic al Pos .
Shift t he scr een le ft or right.
Clock
Adjus t the in tern al sampling clo ck rat e.
Phase
Adjus t the in tern al signal phase .
The col or of th e icon m eans whether
your TV has de tect ed a USB memory or
not. Bu le: Yes; G ray: N o;
Press
to sele ct Pho to/M usic/
Movie /Tex t icon a nd ENTER to enter
the USB m emor y.
13
Page 33

Help
14
Page 34

Machine Technical Specifications
Scre en S ize
16”
19”/ 20 ”
22”
24”
32”
39”/ 40 ”
42”
46”
50”
Scre en S ize
16”
19”/ 20 ”
22”
24”
26”
32”
39”/ 40 ”
42”
46”
50”
TV Sys te m
PAL/ NTS C
PAL/ NTS C
PAL/ NTS C
PAL/ NTS C
PAL/ NTS C
PAL/ NTS C
PAL/ NTS C
PAL/ NTS C
PAL/ NTS C
power Con sump tion
(LE D)
24W
36W
36W
36W/ 48 W
56W/ 65 W/100 W
70W/ 75 W
70W
110W
135W
Preset Channel s
PAL: 0-199 ,NTSC :AIR 2- 69
CAB LE1-1 25
PAL: 0-199 ,NTSC :AIR 2- 69
CAB LE1-1 25
PAL: 0-199 ,NTSC :AIR 2- 69
CAB LE1-1 25
PAL: 0-199 ,NTSC :AIR 2- 69
CAB LE1-1 25
PAL: 0-199 ,NTSC :AIR 2- 69
CAB LE1-1 25
PAL: 0-199 N TSC:A IR 2-69
CAB LE1-1 25
PAL: 0-199 ,NTSC :AIR 2- 69
CAB LE1-1 25
PAL: 0-199 ,NTSC :AIR 2- 69
CAB LE1-1 25
PAL: 0-199 ,NTSC :AIR 2- 69
CAB LE1-1 25
power Con sump tion
(LCD)
36W
48W
48W
60W
100W
100W /1 35W
135W
175W
280W
Spea ke r Outpu t
5W+5 W
5W+5 W
5W+5 W
5W+5 W
10W+ 10 W
10W+ 10 W
10W+ 10 W
10W+ 10 W
10W+ 10 W
Main a cc essor ie s
User's manual x1
Remote controller x1
AAA Batteries x2
LIFE TIME 60, 000 H rs
15
Page 35

Remote Controller
1.POWER:
2.MUTE:
3.0-9:
4.
5.
6.S.MODE:
7.SLEEP:
8. MTS: Press to select the MTS mode.(for example,
9.P.MODE:
BTSC,MONO,STEREO .eg )MTS ,
10.MENU:
11.SOURCE:
12.
13.ENTER:
14.EXIT:
15.INFO:
ENTER
MTS
ASPECT
REPEAT
SLEEP
GOTO
SUB .PG
HOLD
YELLOW
P.MODE S.MODE
MENU SOURCE
EXIT
ROOT
FAV FAV- FAV+
CANCEL
INDEX
REVEAL SIZE
RED GREEN
INFO
15
FREEZE
ON/OFF
MIX
CYAN
CAUTION:
Batteries installed in the unit should not be exposed to excessive heat such as sunshine,fire and the like.
16
Page 36

Remote Controller
16.VOL+:
17.ROOT:
When playing the photo or VIDEO,if you
press ROOT,then it will stop playing and return
to the current catalogue,in USB mode.
18.VOL-:
19.FR:
USB mode.
FAV: Press to add or remove your favorite
channels under TV menu
20.PLAY/PAUSE:
,in USB mode.
21.PREV:
USB mode.
FAV+: Press to switch your favorite channels
under TV menu
22.STOP:
USB mode.
23.GREEN/RED/YELLOW/CYAN:
Under the menu corresponding to the TV,
press the button according to the color
display to enter
RED:Exchange
GREEN:Insert
YELLOW:Copy
BLUE:Delete
24.CH+:
25.REPEAT: Repeat
26.CH-:
27.FF:
USB mode.
FAV-: Press to switch your favorite channels
under TV menu
28.
29.NEXT:
FREEZE:Image still
30.GOTO:Skip
31.
32.
33.
34.
ASPECT:
ON/OFF
35.
36.
USB mode.
16
18
17
27
19
20
22
31
32
23
ENTER
MTS
ASPECT
REPEAT
SLEEP
GOTO
SUB .PG
HOLD
YELLOW
P.MODE S.MODE
MENU SOURCE
EXIT
ROOT
FAV FAV- FAV+
INDEX
CANCEL
REVEAL SIZE
RED GREEN
INFO
FREEZE
ON/OFF
CYAN
24
34
26
25
30
21
29
28
MIX
35
36
33
17
Page 37

TV FHD LED 22”
MANUEL D'UTILISATION
MODELE NO:22LED1600
IMPORTANT
Lisez ce manuel d'utilisation avant d'installer et
d'utiliser le TV.
Gardez le manuel pour consultation ultérieure.
Page 38

Sommaire
Guide d e prép arat ion
Infor mati on de sé curité...... .... .... ....... .... .... ........... .... ........... .... .... ........... .... ........2
Préca utio ns de sé curité import ante s.... ........... .... .... ....... .... .... ........... .... ........... ...3
Insta llat ion et c onnexion du TV
Fixat ion mu rale. ........... .... ........... .... .... ........... .... ........... .... .... ....... .... .... ........... ..4
Bouto ns et affic hage c onnexions... .... ........... .... .... ........... .... ........... .... .... ....... .... .5
Schém a des co nnex ions externes. .... .... ........... .... ........... .... .... ........... .... ........... ..6
Insta llat ion et c onnexion TV...... .... ........... .... .... ....... .... .... ........... .... ........... .... .... .7
Monta ge du pi ed... ........... .... ........... .... .... ........... .... ........... .... .... ....... .... .... ......... 7
Menu TV
Sélec tion d 'ent rée......... .... .... ....... .... .... ........... .... ........... .... .... ........... .... ........... .8
Menu ém ette urs.. ........... .... ........... .... .... ........... .... ........... .... .... ....... .... .... ........... 8
Arran geme nt les é metteurs.... .... .... ........... .... ........... .... .... ....... .... .... ........... .... ....9
Menu so n.... .... ........... .... ........... .... .... ....... .... .... ........... .... ........... .... .... ....... .... ... 9
Menu im age/ menu t emps........ .... .... ....... .... .... ........... .... ........... .... .... ........... .... . 10
Menu op tion. .... ........... .... ........... .... .... ....... .... .... ........... .... ........... .... .... ........... .10
Contr ôle pa rent al.......... .... .... ....... .... .... ........... .... ........... .... .... ........... .... ........... 11
Nivea ux de co ntrô le.......... .... .... ....... .... .... ........... .... ........... .... .... ........... .... .......12
Menu hô tel.. .... ........... .... ........... .... .... ....... .... .... ........... .... ........... .... .... ........... ..12
Menu PC
Menu éc ran.. .... ........... .... ........... .... .... ....... .... .... ........... .... ........... .... .... ........... .13
Menu mé dia
Menu mé dia.. .... ........... .... ........... .... .... ....... .... .... ........... .... ........... .... .... ........... 13
Autre s info rmat ions
Aide.. .... .... ....... .... .... ........... .... ........... .... .... ....... .... .... ........... .... .... ....... .... .... ...14
Spéci fica tion s........... .... ........... .... .... ....... .... .... ........... .... ........... .... .... ........... .15
Téléc omma nde.. ........... .... ........... .... .... ....... .... .... ........... .... ........... .... .... .........16
Ce man uel d 'ut ili sat ion e st un iqu ement pour réfé ren ce.
1
Page 39

Information de sécurité
ATTENTION
RISQU E POU R CHOCS
ELECT RIQ UES NE PAS OU VRIR
Si le TV es t chang é ou mal ré paré, i l exist e le risq ue pour c hocs
électriques. N'essayez pas d'ouvrir l'appareil. Consultez un
spécialiste pour entretien.
Des hautes voltages sont utilisés pour l'opération
de ce pro duit . Afin d' éviter le risqu e pour c hocs
élect riqu es, ne p as ouvrir l'app arei l.Co ntac tez
une per sonn e qual ifié e pour service.
Le poin t d'ex clam ation dans un tri angl e isoc èle
sert à pr éven ir l'u tilisateur qu e des do cume nts
impor tant s acco mpagnent l'ap pare il.
Le symb ole d' écla ir dans un triang le iso cèle
sert à pr éven ir l'u tilisateur qu 'à l'i ntér ieur d e
l'app arei l se tro uvent des haute s volt ages n on
isolé s avec u ne pui ssance importante p our
cause r des ri sque s pour chocs élec triq ues au x
perso nnes .
2
Page 40

Précautions de sécurité importantes
1.Lise z les in stru ctions.
2.Gard ez les i nstr uctions.
3.Suiv ez tou s les av ertissement s.
4.Suiv ez tou tes le s instruction s.
5.Ne pas u tili ser l' appareil à côté d 'eau .
6.Nett oyez u niqu ement avec un chi ffo n sec.
7.Ne pas b loqu er les o uverture de ven tila tion . Inst allez en suivan t les in stru ctions
du fabr ican t.
8.Ne pas i nsta ller à c ôté des sources d e chal eurs t elle s que radiateur s, poê le, ou
d'aut res ap pare ils (y compris un a mpli fica teur ) qui produisen t du cha leur.
9.Cons ulte z votr e revendeur qua nd la pr ise co uran t secteur ne corr espo nd pas a vec
votre r ésea u sect eur.
10.Fai tes at tent ion à ne pas marche r sur le c âble c oura nt secteur. Fait es att enti on à
l'end roit o u le câb le sort de l'appa reil .
11.Uti lise z uniq ueme nt les accessoi res re comm andées par le fab rica nt.
12. Uti lise z uniq uement un suppo rt, tr ipod , fixation ou tab le spé cifi ée ou li vrée
par le fa bric ant. Quand vous d épla cez l' appa reil, faites at tent ion qu 'il ne
peut pa s tomb er et causer des bl essu res.
13.Déc onne ctez l e courant secte ur en ca s d'or age ou q uand vous n'utl isez p as
l'app arei l pend ant un certain te mps.
14.Con ctac tez du p ersonnel qual ifié p our ré para tion. Ceci est né cess aire q uand
l'app arei l est en dommagé, quan d le câb le cou rant s ecteur est endo mmag é, qua nd
une liq uide o u un aut re objet est péné tré da ns l'a ppar eil, quand l'ap pare il a été
expos é à la plu ie ou l' humidité, qua nd l'a ppar eil ne f onctionne pas b ien ou e st
tombé . Afin d' évit er les risques po ur cho cs éle ctriques, ne pas expo ser l' appa reil
à la plui e ou l'h umid ité.
15.L'a ppar eil es t complètemen t déco nnec té du co urant secteur q uand l e bout on
power est mis en position standby et quand la prise courant secteur est déconnectée.
16.La pr ise co uran t secteur doit se t rouv er prè s de l'a ppareil et doit ê tre ac cess ible
facil emen t.
17.Ne pa s plac er l'a ppreil dans des endro its fe rmés c omme une biblio thèq ue, sa uf
s'il y a as sez de p lace l ibre pour venti lati on, co mme in diqué par le fabr ican t.
18.Ne pa s expo ser l' appareil aux goutes e t gicl ures .
19.Ne pa s plac ez des o bjets dangereux (p. e. vas e ou bou gie) au-dessu s de l'a ppar eil.
20.L'a ppar eil do it être fixé au mur o u au pla fond s elon l es instructio ns du fa bric ant.
21. Ne ja mais p lace r le TV, la télécomma nde et l es pil es à côté d'une flemme
ouver te ou de s sources de chaleur, y co mpri s la lum ière du soleil. Af in
d'évi ter le r isque du feu, ne pa s plac er des b ougi es ou des flemmes à c ôté
du TV, la tél écom mand e etles piles.
22.L'e ntré e USB do it être chargée a vec 0. 5A (opé rati on normale).
3
Page 41

Fixation murale
Fixer l e TV au mu r
1.Mett ez d'a bord l e TV à pl at sur une table co uver te d'u n tapis doux, afi n d'év iter d es
rayur es sur l 'écr an.
2.Util isez u n tour nevis pour démo nter l e pied ( figu re 1). Eloignez p rude ment l e pied.
3.Indi quez s ur le mu r l'endroit où la f ixat ions m ural e doit venir (fig ure 3) .
4.Fore z quat re tro us dans le mur.
5.Mont ez la fi xati on murale au mur et s uspe ndez l e TV da ns la fixation (f igur e 4)
1 2
VOLVOL+
-
CH
-
SOURCEMENUCH+
3
4
Remar ques
1.La fix atio n mura le est une option .
2.Fait es att enti on qu'il n'y a pas d' autr es obj ets au tour du TV quand v ous effec tuez
le mont age.
3.Fait es att enti on de respecter l 'ord re du tr avai l.
4.Les fi gure s sont u niquement pou r réfé renc e.
5.Suiv ez le ma nuel d 'instructio ns de la f ixat ion mu rale.
6.Util isez u ne fix ation compati ble av ec VES A.
4
Page 42

Boutons et affichages connexions
Bouto ns TV
Remar que : ce q ui sui t est uniquemen t sché mati que. L 'arrengemen t peut ê tre
diff éren t selo n le mod èle.
:Pour m ettr e EN/H ORS fonction
SOURC E : séle ctio n de source d'ent rée.
MENU : affic her le m enu pr incipal et conf irme r la sél ection.
CH+/- : c hois ir l'é metteur
VOL+/ - : régl age du v olume
Affic hage d es con nexions
Remar que : ce q ui sui t est uniquemen t sché mati que. L 'arrengemen t peut ê tre
diff éren t selo n le mod èle.
INP UT
VIDE O R L
OUT PUT
VIDE O R L
INP UT
Y Pb Pr
HDM I
AV inp ut
Sig nal d'e ntrée AV ex te rn e et
can aux G/D
AV out pu t
Sig nal de so rtie AV ext er ne e t
can aux G/D ( pas dis ponib le sur
tou s les mod èles)
Y Pb Pr i np ut
Con nexio n de la sor tie com posit e
du DV D/VCR ( pas dis ponib le sur
tou s les mod èles) .
HDM I input
Sig nal d'e ntrée v idéo di gital
ANT 7 5
Con nexio n de l'an tenne
(75 /VHF/ UHF)
VGA i npu t
Sig nal d'e ntrée a nalog ique PC
PC AU DIO I NPUT
Sig nal d'e ntrée a udio PC ( en
com binai son ave c VGA)
EAR PHONE o utput
Con nexio ns casq ue d'éc oute et
hau t-par leurs h ors fon ction
USB i nput
Con nexio n d'un ap parei l USB,
lec ture et e nregi strem ent par
fon ction P VR
SCA RT inpu t
Con nexio n stand ard, si gnal
com posit e et RGB (p as disp onibl e
sur t ous les m odèle s).
5
Page 43

External device connection diagram
DVD
Conne xi on e nt ré e AV
Setp to p bo xe s
INP UT
VIDE O R L
Conne xi on e nt ré e AV
HDM I
Conne xi on e nt ré e HD MI
INP UT
Y Pb Pr
Conne xi on e nt ré e AV
Conne xi on U SB
HDM I
INP UT
VIDE O R L
OUT PUT
VIDE O R L
Conne xi on e nt ré e AV
Set top b ox es
Conne xi on S CA RT
Conne xi on T V
6
Page 44

Installation et connexion TV
Empla ceme nt du TV
Mette z votr e TV su r un support stab le
qui peu t supp orte r le poids du TV.
Pour év iter l e dang er, ne pas placer le
TV à côté d 'eau o u d'un e source de
chale ur (bo ugie , radiateur).
Ne pas bl oque r la ven tilation sur le dos
du TV.
3
FM ANT
TV si gnal ou tput
2
TV ANT
1
Montage du pied
1.Ouvr ez le ca rton ; s ortez le TV, les
acces soir es et le p ied (certains m odèl es
sans pi ed).
2.Pour n e pas ab imer l e TV, plac ez le sur
une tab le cou vert e d'un tapis doux .
3.Fixe z le pie d sur le TV.
4.Inst alla tion c omplète.
Conne xion a nten ne et courant
1.Conn ecte z l'an tenne sur le dos du TV.
2.Conn ecte z le cou rant secteur
(AC 100 -240 V ~50/ 60 Hz)
Mette z votr e TV en fo nction
3.Pous sez le b outo n power du TV, le
témoi n devi ent ve rt. En mode stand by
(témo in en ro uge) , poussez le bout on
power d e la tél écom mande.
Remar que
Les ill ustr atio ns sont uniquem ent co mme
référ ence .
1
3
2
4
7
Page 45

Menu TV
Sourc e d'en trée
Input So ur ce
TV
AV
YPb Pr
HDM I
PC
Med ia
ENTER
Ent er
Ent er
Remar que : l' illu stration ci-d essu s
uniqu emen t comm e référence.
Pouss ez SOU RCE po ur afficher la liste
d'ent rée.
Utili sez ▼/▲ po ur sél ectionner la so urce e t
pouss ez ENT ER pou r confirmer.
Pouss ez EXI T pou r quit ter le menu,
autre ment l e menu d isparraît
autom atiq ueme nt après quelqe s seco ndes
(pour r égle r le tem ps : MENU – Menu
TEMPS – Temps OS D).
Menu ém ette urs
Menu ém ette urs NT SC
CHAN NE L
Tune Ty pe Air
Aut o Tuning
Type tun er : Câb le/A ir
Synto nisa tion a utomatique
La synt onis atio n automatique c herc he
les éme tteu rs. Ut ilisez▼/▲pour
sélec tion ner Aut o
Tun ing et p ouss ez OK po ur démarrer la
reche rche . Pour a rrêter la reche rche
pouss ez MEN U
ou EXIT et pou ssez p our confirmer o u
pour an nule r.
Channel Tuning
TV : 5 Pr og ra mm e( s)
44%... 433.75MHZ (TV)
Menu
Synto nisa tion ATV m anuelle
Canal a ctue l
ATV Ma nual Tuni ng
-
Cur rent CH 1
Col or Syst em PAL
Sou nd Syst em DK
Fin e-Tune 4 9.75M HZ
AFC O ff
Sea rch
+
Mov e Men u Ent er
ENTER
Exi t
Menu ém ette urs PAL
CHAN NE L
Mov e Men u Ent er
Aut o Tuning
ATV Ma nual Tun ing
Pro gramm e Edit
ENTER
Exi t
Remar que : le m enu ém etteurs est
uniqu emen t disp onib le en mode TV. C'est le
menu st anda rd qua nd vous poussez MENu.
Utili sez ▼/▲ po ur voi r les autres menu s
image /son /tem ps/options.
Menu
Intro duis ez le nu méro de préséle ctio n.
Systè me cou leur s
Sélec tion nez le s ystème couleu rs
(PAL/ SECA M/NT SC).
Systè me son
Sélec tion nez le s ystème son (DK/ BG/I )
Fine Tune
Pour ré glag e fin de l a fréquence de
l'éme tteu r
AFC
Autom atic F requ ency Control
Searc h
Pouss ez ENT ER pou r chercher vers l e
bas à par tir de l a fréq uence actuell e,
repou ssez E NTER p our chercher ve rs
le haut .
8
Page 46

Menu TV
Arran geme nt des é metteurs
Pro gramm E dit
Dele te Ren ame Mov e
ENTER
Ent er
Ent er
FAV
FAV
Fav
Fav
Men u
Men u
Skip
Utili sez le s quat res boutons cou leur s
pour ar rang er les é metteurs.
Utili sez ▼/▲ po ur sél ectionner
l'éme tteu r que vo us voulez annul er,
donne r un aut re nom o u déplacer et
ensui te :
Pouss ez le bo uton r ouge pour annul er
l'éme tteu r.
Pouss ez le bo uton v ert pour entrer
dans le m ode 'n om' ; ut ilisez pour
sélec tion ner le m ot que vous voule z
chang er et ut ilis ez▼/▲pour choisir les
lettr es.
Pouss ez le bo uton j aune pour entre r
dans le m ode de d épla cement et
utili sez▼/▲ po ur dép lacer l'émett eur
à la posi tion q ue vou s voulez.
Pouss ez le bo uton b leu pour sauter
l'éme tteu r (en ut ilisant le bout on
CH+/- l 'éme tteu r est sauté).
Fav Add ou D elet e pour a jouter ou
annul er l'é mett eur de la liste pré féré e.
Mediu m
Donne u ne tei nte ne utre aux couleurs
War m
Donne u ne tei nte ch aude aux couleurs.
Noise R educ tion
Hors fo ncti on/b as/medium/h aut.
Pour le s ouffle da ns l'i mage.
Menu so n
SOUN D
Mov e Men u Ent er
Sou nd Mode S tanda rd
Treb le 50
Bas s 50
Bal ance 0
Aut o Volume O ff
ENTER
Exi t
Mode so n
Stand ard/ musi que/film/sp orts /uti lisa teur
(pour p ouvo ir rég ler les graves et l eis
aigüe s).
Bass
Régla ge des g rave s
Treble
Régla ge des a igüe s
Balan ce
Pour ré gler l e nive au entre le canal
gauch e et dro ite.
Auto Volume
Pouss ez L/R p our me ttre en ou hors
fonct ion. Q uand m is en fonction le
nivea u du vol ume re ste constant qu and
il y a des me ssag es com merciales ou
quand v ous ch ange z l'émetteur.
Régla ge des g rave s/aigües/ba lanc e
1.Choi siss ez com me mode son :
utili sate ur
2.Séle ctio nnez l 'item et utilis ez▼/▲pou r
entre r dans l e sous menu et utilise z
pour ré gler l e nive au.
9
Page 47

Menu TV
Men u imag e
PICTUR E
Mov e Men u Ent er
Mod e imag e
Pic ture Mo de Sta ndard
Con trast 50
Bri ghtne ss 50
Col or 50
Tint 5 0
Sha rpnes s 5 0
Col or Temper ature Med ium
Noi se Redu ction Middle
ECO M ode Off
ENTER
Exi t
Sélec tion nez l' item et poussez ENT ER ou
utili sez po ur ent rer dans le sousmen u :
dynami que/st anda rd/d oux/utilisa teur.
Pouss ez PMODE sur la t éléc omman de pour
entre r dire ctemen t dan s le mod e imag e.
Cont r aste /lumi no sité /couleur s/teint e
(un iqe men t NT SC) /netteté
Sélec tion nez l' item et poussez ; l 'ind icat ion
du nive au app araî t. Ut ilisez pou r régl er
le nive au.
Pouss ez MENU ou EX IT po ur qui tter le men u.
Remar que : ces rég lage s ne peu vent être
utlis és que q uand v ous avez choisi u tili sate ur.
Cont r ast
Pour ré gler l e nive au blanc dans l'imag e.
Brigh tne s s
Pour ré gler l a lumi nosité.
Color
Pour ré gler l 'int ensité des coul eurs .
Tint
Pour ré gler l a tein te (rouge,ver t,bl eu).
Sharpn es s
Pour ré gler l a nett eté (les bords da ns l'i mag e).
Color t ge mpe ratur e
Pour ré gler l a tempé ra ture d es couleurs
comme v ous vo ulez .
Cool
Donne u ne tei nte bl eue aux blancs.
Menu te mps
TIME
Mov e Men u Ent er
Slee p Timer O ff
Auto Sleep O ff
OSD Ti mer 10s
ENTER
Exi t
Sleep t imer
Pour ré gler l e temp s après lequel
l'app arei l doit s e mettre
autom atiq ueme nt hors fonctio n(ho rs
fonct ion/ 10mi n/20min/30m in/6 0min /
120mi n/18 0min /240min). Pou r annu ler
mettr e en pos itio n hors fonction .
Auto Sl eep
Pour ré gler l e temp s en heurs après
leque l l'ap pare il doi t rester en fonct ion
après v otre d erni ère commande (h ors
fonct ion/ 3h/4 h/5h). Pour ann uler m ettr e
en posi tion h ors fo nction.
OSD Ti mer
Pour ré gler l e temp s en secondes (5s ,
10s, 15 s, 20s , 25s, 3 0s) après leque l
l'affich age OS D doit d isparraître .
Menu op tion
OPTI ON
Mov e Men u Ent er
OSD La ngua ge Engl ish
Asp ect Rat io 16:9
Blu e Scree n Off
Key Lo ck Off
Cap tion Off
Par ent Con trol
Res et
Sof tware Up date (USB)
ENTER
Exi t
10
Page 48

Menu TV
OSD lan guag e
Pour ch oisi r la lan gue OSD.
Aspec t Rati o
Pour ch oisi r le for mat d'écran (4 :3 / 16 :9/
Zoom1 / Zoom 2).
Blue sc reen
Pour me ttre l 'écr an en bleu quand il n 'y a
pas de si gnal .
Key Loc k
Pour bl oque r les bo utons pour que les
enfan ts ne pe uven t pas utiliser l' appa reil .
Capti on
Pour sé lect ionn er le texte.
CC1,2 ,3,4 c orre spond avec les ém ette urs
analo giqu es (da ns la pl upart des cas en
CC1).
Text1 ;2, 3,4 co rres pond avec le text e des
émett eurs a nalo giques.
Paran tal co ntro l
Voyez pl us loi n.
Reset
Pour re veni r aux ré glages d'usin e.
Softw are up date ( USB)
Pour me ttre à j our le TV.
Paren t cont rol (N TSC)
Set P asswo rd
Loc k Syste m ON
TV
MPAA R
Can ada Eng lish PG
Can ada Fre nch G
Menu
Set pas swor d
Pour en trer l e mot de p asse correct ou
pour in trod uire d eux fois un nouve au
mot de pa sse.
Lock sy stem
Pour me ttre l e sytè me en ou hors f
oncti on.
TV
Les niv eaux s ont ba sés sur l'age et le
conte nu.
MAPP
Les niv eaux s ont ba sés sur les règle s
MAPP
G
Audie nce gé néra le. Tous les ages
sont pe rmis .
PG
Assis tanc e pare ntale
PG-13
Assis tanc e pare ntale recomma ndée .
Le cont enu ne p eut pa s être appropri é
pour de s ages e n dess ous de 13.
R
Limit é. Enf ants e n dessous de 17 ans
nécés sist ent as sistance pare ntal e.
NC-17
Pas aut oris é pour d es ages en
desso us de 17 .
X
Uniqu emen t adul tes.
Canad a Engl ish
Les niv eaux s ont ba sés sur les règle s
canad iens a ngla is.
C
Enfan ts
C8+
Enfan ts de 8 an s ou plu s.
G
Audie nce gé néra le
PG
Assis tanc e pare ntale
14+
Enfan ts de 14 a ns ou pl us
18+
Adult es
Canad a Fren ch
Les niv eaux s ont ba sés sur les règle s
canad iens f ranç ais.
G
Audie nce gé néra le
8ans+
Pas rec omma ndé po ur des enfants
très je unes
13ans +
Pas rec omma ndé po ur des enfants en
desso us de 13 a ns.
16ans +
Pas rec omma ndé po ur des enfants en
desso us de 16 a ns.
18ans +
Pour ad ulte s
11
Page 49

Menu TV
Nivea ux TV ( NTSC )
TV ra ting
ALL
TV-Y
TV-Y 7
TV-G
TV-P G
TV-1 4
TV-M A
FV
ALL
ALL
D
ALL
ALL
ALL
Men u
L
S
V
V
V
D
L
S
L
S
TV-Y
Audie nce gé néra le
TV-Y7
Assis tanc e pare ntale recomma ndée
TV-G
Assis tanc e pare ntale fortemm ent
recom mand ée
TV-PG
Limit é
TV-14
Pas aut oris é pour d es ages en dessou s
de 17.
TV-MA
Uniqu emen t adul tes
FV
Viol ence f anta ste
D
Dialo gue su gges tive
L
Langu e fort e
S
Situa tion s sexu elles
V
Viol ence
Remar que : le n ivea u augmente avec l'age .
Exemp le : une p rogr amme TV-PG peut
avoir u n cont enu de v iolence moyen, mais
un nive au TV- 14 peu t avoi r en contenu de
forte v iole nce. U n niveau supéri eur bl oque
autom atiq ueme nt les niveaux en d esso us.
Mode hô tel (o ptio n)
OPTI ON
Mov e Men u Ent er
HOTE L
Mov e Men u Ent er
Mode hô tel
OSD L angua ge Engl ish
Asp ect Rat io 16:9
Blu e Scree n Off
Key L ock Off
Cap tion Off
Par ent Con trol
Hot el Mode
Res et
Sof tware U pdate (USB)
ENTER
Hot el Mode O n
Sou rce Loc k
Def ault So urce Off
Def ault Pr og 1
Max Vo lume 10 0
Cha nnel lo ck Off
Def ault Vol ume 20
Cle ar Lock
Set P asswo rd
ENTER
Exi t
Exi t
Mettr e le mod e en ou ho rs fonction
Remar que : le s régl ages ci-desso us
sont un ique ment d isponibles quand le
mode hô tel es t en fon ction.
Sourc e lock
Pour bl oque r la sou rce d'entrée désiré e
Defau lt sou rce
Pour sé lect ionn er la source d'en trée
stand ard ap rès la m ise en fonction d u TV.
Defau lt Pro g
Pour sé lect ionn er l'émetteur s tand ard
après l a mise e n fonc tion du TV.
Max vol ume
Pour ré gler l e volu me maximal.
Chann el loc k
Pour bl oque r l'ém etteur désiré .
Defau lt vol ume
Pour ré gler l e volu me standard apr ès la
mise en f onct ion du TV. (volume
stand ard es t 20).
Clear L ock
Déblo quer l es rég lage s en mode hôtel.
Set Pas swor d
Entre r le mot d e pass e.
12
Page 50

Menu PC
SCREEN
Mov e Men u Ent er
Menu éc ran
Auto ad just
Réglage automatique de la montre, phase,
posit ion H et p osit ion V.
Horiz onta l Pos.
Régla ge hor izon tale de l'écran
Vertic al Pos .
Régla ge ver tica le de l'écran
Clock
Régla ge de la m ontr e.
Phase
Régla ge de la p hase .
Aut o Adj ust
Hor izont al Pos. 50
Vert ical Pos . 50
Cloc k 50
Pha se 99
ENTER
Exi t
Menu média
La coul eur du s ymbo le indique que
l'app arei l a déte cté une mémoire U SB.
Bleu : ou i, gri s : non.
Pouss ez pou r séle ctionner Phot o/
Musiq ue/F ilm/ Texte et poussez EN TER
pour en trer d ans la m émoire USB.
13
Page 51

Aide
14
Page 52

Spécifications
Scre en S ize
16”
19”/ 20 ”
22”
24”
32”
39”/ 40 ”
42”
46”
50”
Scre en S ize
16”
19”/ 20 ”
22”
24”
26”
32”
39”/ 40 ”
42”
46”
50”
TV Sys te m
PAL/ NTS C
PAL/ NTS C
PAL/ NTS C
PAL/ NTS C
PAL/ NTS C
PAL/ NTS C
PAL/ NTS C
PAL/ NTS C
PAL/ NTS C
power Con sump tion
(LE D)
24W
36W
36W
36W/ 48 W
56W/ 65 W/100 W
70W/ 75 W
70W
110W
135W
Preset Channel s
PAL: 0-199 ,NTSC :AIR 2- 69
CAB LE1-1 25
PAL: 0-199 ,NTSC :AIR 2- 69
CAB LE1-1 25
PAL: 0-199 ,NTSC :AIR 2- 69
CAB LE1-1 25
PAL: 0-199 ,NTSC :AIR 2- 69
CAB LE1-1 25
PAL: 0-199 ,NTSC :AIR 2- 69
CAB LE1-1 25
PAL: 0-199 N TSC:A IR 2-69
CAB LE1-1 25
PAL: 0-199 ,NTSC :AIR 2- 69
CAB LE1-1 25
PAL: 0-199 ,NTSC :AIR 2- 69
CAB LE1-1 25
PAL: 0-199 ,NTSC :AIR 2- 69
CAB LE1-1 25
power Con sump tion
(LCD)
36W
48W
48W
60W
100W
100W /1 35W
135W
175W
280W
Spea ke r Outpu t
5W+5 W
5W+5 W
5W+5 W
5W+5 W
10W+ 10 W
10W+ 10 W
10W+ 10 W
10W+ 10 W
10W+ 10 W
Main a cc essor ie s
User's manual x1
Remote controller x1
AAA Batteries x2
60 000 h eu re s la d uré e de v ie
15
Page 53

Télécommande
P.MODE S.MODE
MENU SOURCE
ENTER
EXIT
MTS
ASPECT
REPEAT
ROOT
FAV FAV- FAV+
CANCEL
INDEX
REVEAL SIZE
RED GREEN
SUB .PG
HOLD
YELLOW
SLEEP
INFO
15
GOTO
FREEZE
ON/OFF
MIX
CYAN
16
Page 54

Télécommande
16
18
17
27
19
20
22
31
32
23
ENTER
MTS
ASPECT
REPEAT
SLEEP
GOTO
SUB .PG
HOLD
YELLOW
P.MODE S.MODE
MENU SOURCE
EXIT
ROOT
FAV FAV- FAV+
INDEX
CANCEL
REVEAL SIZE
RED GREEN
INFO
FREEZE
ON/OFF
MIX
CYAN
24
34
26
25
30
21
29
28
35
36
33
17
 Loading...