

Page 1

HL / HM10
Dear Customer,
Thank you for purchasing a new generation Sagemcom radio.
This product has been manufactured with the greatest care. It undergoes continuous
development. We thus reserve the right to make modifications and improvements to the
product described in this user manual without notice.
For your comfort and safety, please read the “Safety recommendations and
instructions”, page 2 paragraph carefully.
The CE marking certifies that the product complies with the essential
requirements of Directives 2006/95/EC concerning safety, 2004/108/EC
concerning electromagnetic compatibility and ErP 2009/125/EC concerning
ecodesign requirements, defined by the European Parliament and Council to
minimize electromagnetic interferences, ensure the safety of users and their
equipment and protect their health, and minimize the impact of products on the
environment.
EN
The declaration of conformity may be consulted on the website www.sagemcom.com
the "support" section or you may request it from:
Sagemcom Broadband SAS
250, route de l'Empereur
92848 Rueil-Malmaison Cedex - France
Copyright © Sagemcom Broadband SAS
All rights reserved
Sagemcom is a registered trade mark.
1
in
Page 2
SAFETY RECOMMENDATIONS AND INSTRUCTIONS
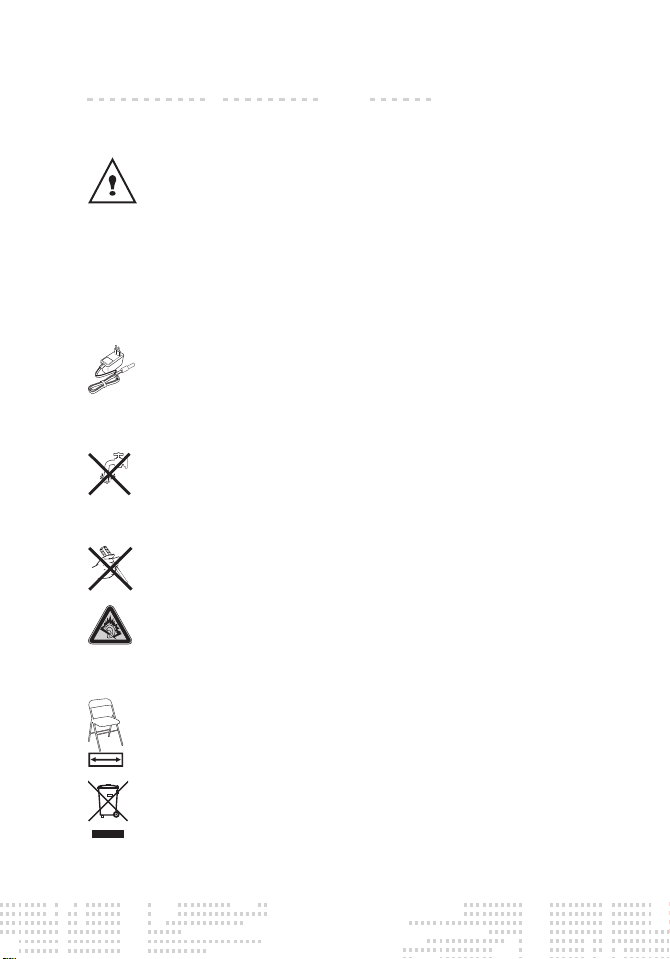
In general, switch off your radio wherever its use is prohibited. Do not leave your radio
within reach of small children (some mobile parts may be accidentally swallowed).
NEVER OPEN THE RADIO! YOU MAY RUN THE RISK OF AN ELECTRIC
SHOCK
For your safety, never use your radio without the battery flap or you risk an
electrical shock.
For optimal audio quality, your radio should be used at an ambient
temperature of between + 5 °C and + 45 °C (temperate climates).
Keep the radio away from heat sources such as radiators, candles, lamps,
etc.
Do not place anything on your radio (this may hinder correct ventilation): the
air vents on the casing protect your device from overheating. If you place
your radio in a compartment, leave at least 10 cm on either side and 20 cm at
the front and rear.
Only alkaline batteries are recommanded to be used for this product.
Only use the power supplied unit, and connect it to the mains according to
the installation instructions in this manual and the indications on the
identification label located next to the battery compartment and the power
supply unit supplied (voltage, current, mains network frequency). As a
precaution, in the event of danger, mains adapters are used as cut-off
devices for 230V mains power. They should be located near the equipment
and remain easily accessible.
Do not use your radio outdoors, or in a damp room (shower, bathroom,
washroom, kitchen, etc.) less than 1.50 m from a water point.
Never place an object containing liquid (a vase for example) on the device.
Any contact with liquid may damage your radio and cause a failure. If liquid
enters the radio, immediately disconnect it from the mains and contact your
dealer.
Do not attempt to remove the screws or open the equipment. It contains no
parts that can be replaced by the user.
The use of headphones at high volume can cause hearing damage.
Sound perception can be misleading. Over time, your hearing "comfort level"
gets used to higher and higher volumes. After prolonged listing, what may
seem a "normal" volume to you, may in fact be too high and harmful to your
hearing. To protect yourself from this risk, set the volume to a safe level and
do not increase it subsequently.
The radio is equipped with non-slip feet to ensure stability and leave no trace
on furniture surfaces. However, given the wide variety of lacquers and
varnishes used by furniture manufacturers, we cannot guarantee that no
traces will be left on furniture surfaces. Sagemcom Broadband SAS shall
bear no liability in the event of such damage.
Worn-out batteries should be disposed of in accordance with the instructions
in chapter “Environment”, page 3 of this manual.
2
Page 3
ENVIRONMENT
1
2 3
4
Preserving the environment is an essential preoccupation at Sagemcom. Sagemcom
wishes to operate environmentally-friendly installations and has decided to include
environmental performance in the entire life-cycle of its products, from manufacturing to
installation, usage and disposal.
Packing
The presence of the logo (green point) means that a contribution is paid to an
approved national body, in order to improve packing recovery and recycling
infrastructures.
To facilitate recycling, please comply with local sorting rules for this type of
waste.
Batteries
If your product contains batteries, they should be disposed of in designated collection
points.
The product
The crossed-out bin label on the product or its accessories means that it
belongs to the family of electrical and electronic equipment.
As such, European regulations require that it be selectively collected:
In distribution points if an equivalent item of equipment is purchased.
In locally available collection points (civic amenity, separate collection, etc.).
In this way, you participate in the reuse and recovery of WEEE (Waste
Electrical and Electronic Equipment) which may have harmful effects on the
environment and on human health.
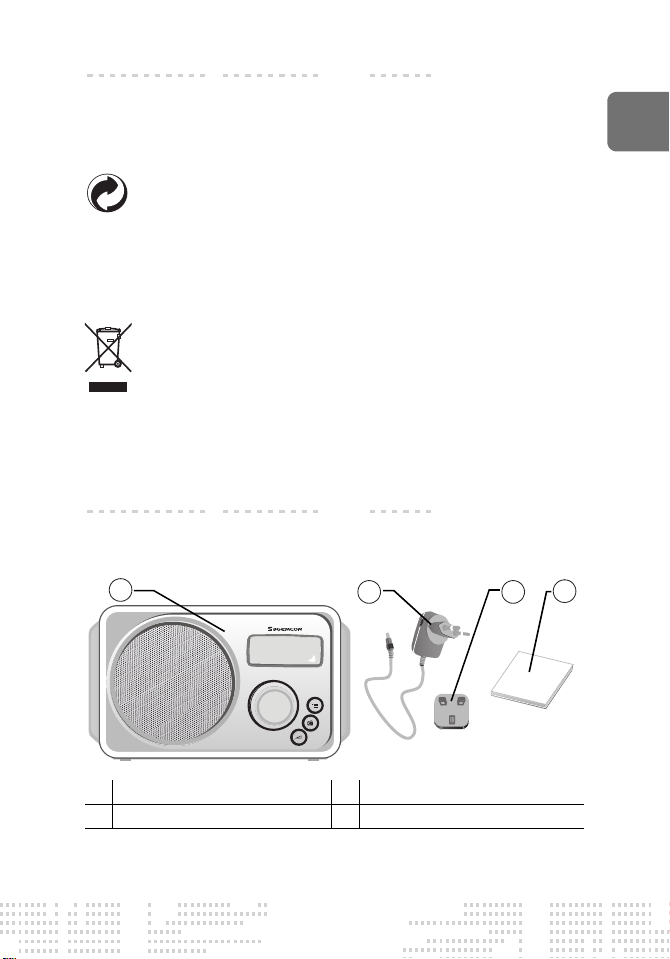
PRESENTATION
YOUR PACK
Check that the following components are in the packing:
EN
1 the radio, 3 the UK adapter,
2 the power transformer, 4 this user manual.
3
Page 4

FM / AM
PO / GO
1 2
3
4
5
7
6
8
9
10
11
12
13
FM / AM
PO / GO
DISCOVERING YOUR RADIO
GENERAL VIEW
No. Keys Used to... See...
1 Loud speaker - -
2 Screen To display the status of the radio. P. 5
3
Menu key
Stations key
4
5
Volume key
6 Knob To tune the radio. P. 5
7
Lock button
FM/PM/PO/GO Modes
8
key (HM10 model)
9 Headset jack.
10 Aerial - P. 7
11
On/Off switch
12 Preselection keys 1 - 5 To memorize your favourite stations. P. 8
13 Power outlet To connect the power transformer. P. 7
To access the menu. P. 6
To look for station(s).
To display the list of saved station.
P. 8
P. 8
To adjust the volume. P. 8
To lock the radio buttons. -
Select a mode. P. 7
To connect headphones.
Note: 150 mV maximum output
To switch the radio On/Off. P. 5
-
4
Page 5

THE SCREEN
---------
12:03
107.7
FMAMSW
LW
1
2
3
4
6
7
5
8
9
During operation or on standby, your radio screen will inform you by means of icons of the
status of your radio.
Depending on the radio status, the following icons may be displayed:
No. Keys No. Keys
1 Mode activated. 6 Reception quality.
2 Alarm activated. 7
3 Lock activated. 8
Number of favourite station
broadcast.
Radio frequency currently
broadcast.
4 Time. 9 Message display zone.
5 Mains connected.
USING THE KNOB
The radio is equipped with a multifunction knob.
1
2
EN
Tur n the knob to
the right or left to...
Press the knob
to...
Listening In the menus
Look for a station.
Increase or reduce the
volume.
-
5
Scroll through the menus.
Define a value (for
example to set the time).
Select a menu.
Confirm a setting.
Page 6

SWITCHING THE RADIO ON / OFF
Alarm
Standby
Configuration
Alarm1
Alarm2
Alarm3
Off
10 mins
|
90 mins
Initial configuration
Language
Time
Station search
Automatic
Manual
Audio FM
Stereo
Mono
Press the key on the top of the radio. The screen lights up.
Standby: press briefly on the key. Only the time remains displayed on the
screen.
BROWSING THE MENUS
1. Press the key. Scroll through the menus by turning the knob.
2. When the required menu is displayed:
press the knob to enter this menu, or
press the key to return to the previous screen.
3. To exit the main menu, press the key several times.
You will automatically exit the main menu after a few seconds of inactivity.
MENU OVERVIEW
The following menus depend on the radio model you have.
6
Page 7

SWITCHING ON
FM / AM
PO / GO
Only use approved chargers and accessories for use with this model.
Connecting other accessories may be dangerous and void your warranty
rights.
CHOOSING THE ADAPTER
Choose the adapter according to your country.
1. Align the adapter with its housing and slide it in the
power transformer as illustrated here, until it clips into
place.
If you cannot align the adapter in its housing, do not
force it. You must be handling it in a wrong way.
SWITCHING ON YOUR RADIO
1. Take the power jack ang plug it on the radio.
2. Connect the power plug to the mains.
3. Press the key on the top of the radio. The screen lights
up.
USING THE RADIO DAILY
LOCKING / UNLOCKING THE RADIO
To carry your radio while it is on, place the button on the right side of your radio in the
raised position. The control buttons are inactive.
POSITIONING THE AERIAL
For optimal reception, unfold the aerial. If necessary, move it to adjust the position.
Keep the aerial away from any source of radiation to prevent interference
(television, video recorder, etc.).
EN
SELECTING A MODE
Press the key on the right side of your radio.
The screen displays the corresponding icon.
7
Page 8

SEARCHING FOR A RADIO STATION
1
1. Press the key. The station search screen appears.
2. Turn the knob to the right or left to scan the selected band.
The progression is displayed on the screen.
3. At the end of the search, the radio broadcasts the station with the best signal.
To refine your search, you can manually scan the selected band. For more
details, see section “Choosing the station search mode”, page 10.
MEMORIZING YOUR FAVOURITE RADIO STATIONS
You can avail of 5 slots to memorize the frequencies of your favourite stations.
When the station is broadcasting, press long on one of the preselection keys on the top
of the radio.
The number now associated with the radio station is displayed on the screen when it is
broadcast. For example for the preselection key 1 : .
To memorize a new radio station and associate it with a preselection key
already in use, press long on the required key.
LISTENING TO YOUR FAVOURITE RADIO STATIONS
To listen to your memorized radio stations, press the associated preselection key.
ADJUSTING VOLUME
Turn the knob to the right to increase the volume, and to the left to reduce it.
To display the volume control menu at any time, press the key.
THE FUNCTIONS
You radio has additional functions for greater listening and user comfort.
See section “Browsing the menus”, page 6.
PROGRAMMING AN ALARM
There are 3 programmable alarms.
1. In the Alarm menu, select Alarm1, Alarm2 or Alarm3 and confirm.
2. Select On and confirm.
3. Define the alarm start time:
turn the knob to reach the desired time,
press the knob to confirm.
Thus, first define the hours, then the minutes.
8
Page 9

4. The screen displays Repeat. Select the alarm repetition frequency:
Once: the alarm will sound at the set time on the required day, or
Once: the alarm will sound at the set time every day.
5. Select the Source to sound when the alarm goes off:
if you choose FM, AM, SW, LW, select a radio station,
if you choose Bip, select the required tone, then the volume to apply (from 1 to
10) and confirm.
The icon is displayed on the screen.
PROGRAMMING THE AUTOMATIC SLEEP FUNCTION
You can set your radio to switch off automatically after a certain time, when listening to
the radio for example.
In the Standby menu, select the period required, from 10 to 90 minutes.
The screen displays the rime remaining before the radio switches off.
To remove the automatic sleep function, select the Off option and confirm.
RESETTING THE RADIO
If necessary, you can reset the radio to its initial settings.
If you reset the radio, you will lose your personal settings.
In the Configuration > Initial configuration menu, select Yes and confirm. Now the
radio is on factory settings.
CHANGING THE DISPLAY LANGUAGE
In the Configuration > Language menu, select the desired language and confirm. The
messages are displayed in the chosen language.
CHANGING THE TIME DISPLAY
The time is displayed in the format HH:MM
1. In the menu Configuration > Time, set the time:
turn the knob to reach the desired time,
press the knob to confirm the time displayed.
Thus, first define the hours, then the minutes.
2. Confirm at each stage.
The set time is displayed on the screen.
EN
9
Page 10

CHOOSING THE STATION SEARCH MODE
The radio has two station search modes:
Automatic: the stations are found according to the reception quality automatically
detected,
Manual: the stations are set by means of successive manual jumps of 0.05 MHz in
the chosen band.
To select a station search mode:
In the menu Configuration > Station search, select Manual or Automatic according to
the search mode required.
LISTENING TO THE RADIO IN STEREO OR MONO
In the menu Configuration > Audio FM, select Stereo or Mono depending on the
broadcast mode you want and confirm.
MAINTENANCE
Radio
Clean your radio using a soft, lint-free cloth.
Some chemical products may damage the plastic. Do not use spray products,
certain special cleaning products, corrosive products, solvents, alcohols or
detergents, etc.
TROUBLESHOOTING
Problem Causes Solutions
You cannot switch on the
radio
Bad quality radio reception Signal too weak Find a place where the
No sound Volume fault Adjust the volume.
Radio buttons inactive Radio locked Lower the HOLD button.
Cannot find radio station in
the list
Mains plug fault Check that the radio's
Bad quality radio reception
during station scanning
power plug is connected
and that the mains plug is
powered.
signal is stronger.
Unfold the aerial fully.
Redo the scan.
10
 Loading...