

Page 1
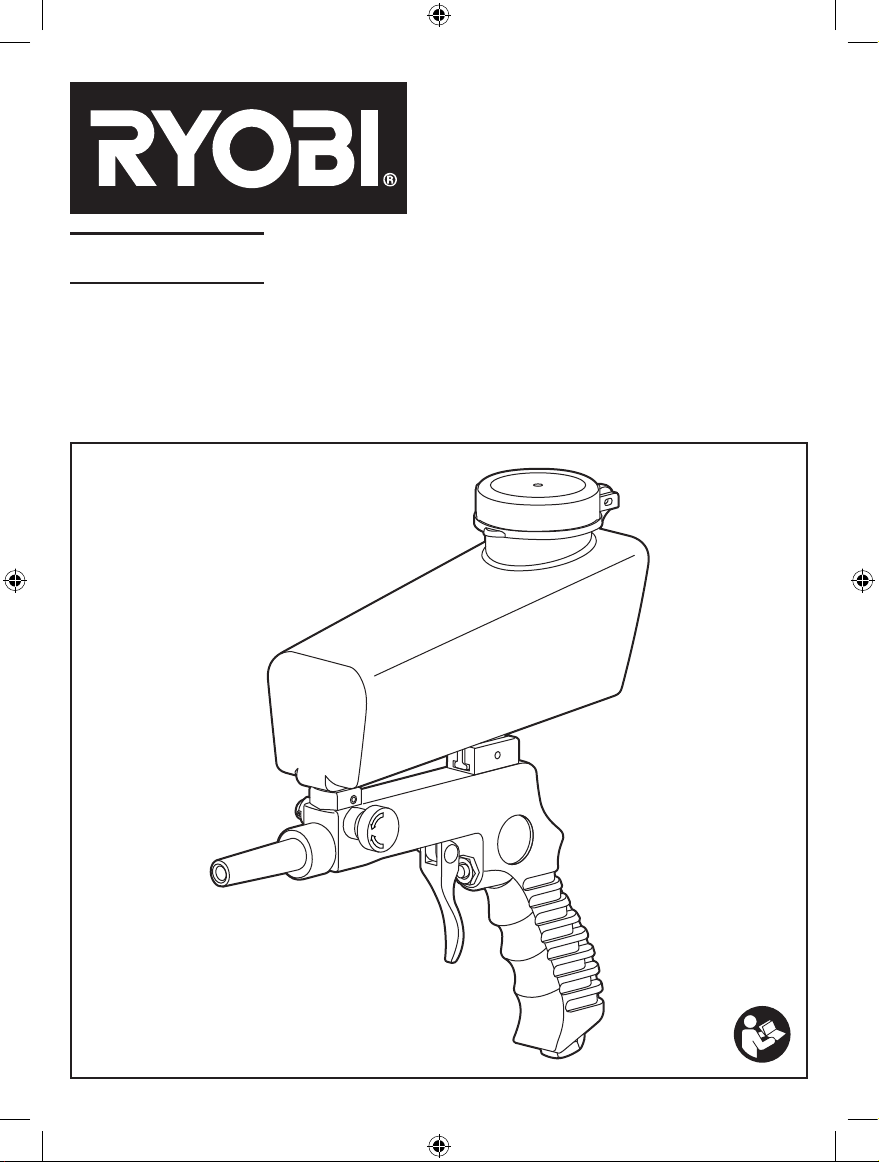
RA-SBG-B
AIR SAND BLASTING GUN
OPERATOR'S MANUAL
ORIGINAL INSTRUCTIONS
ON
OFF
Page 2

Important!
It is essential that you read the instructions in this manual before
operating this machine.
Subject to technical modifications.
Page 3
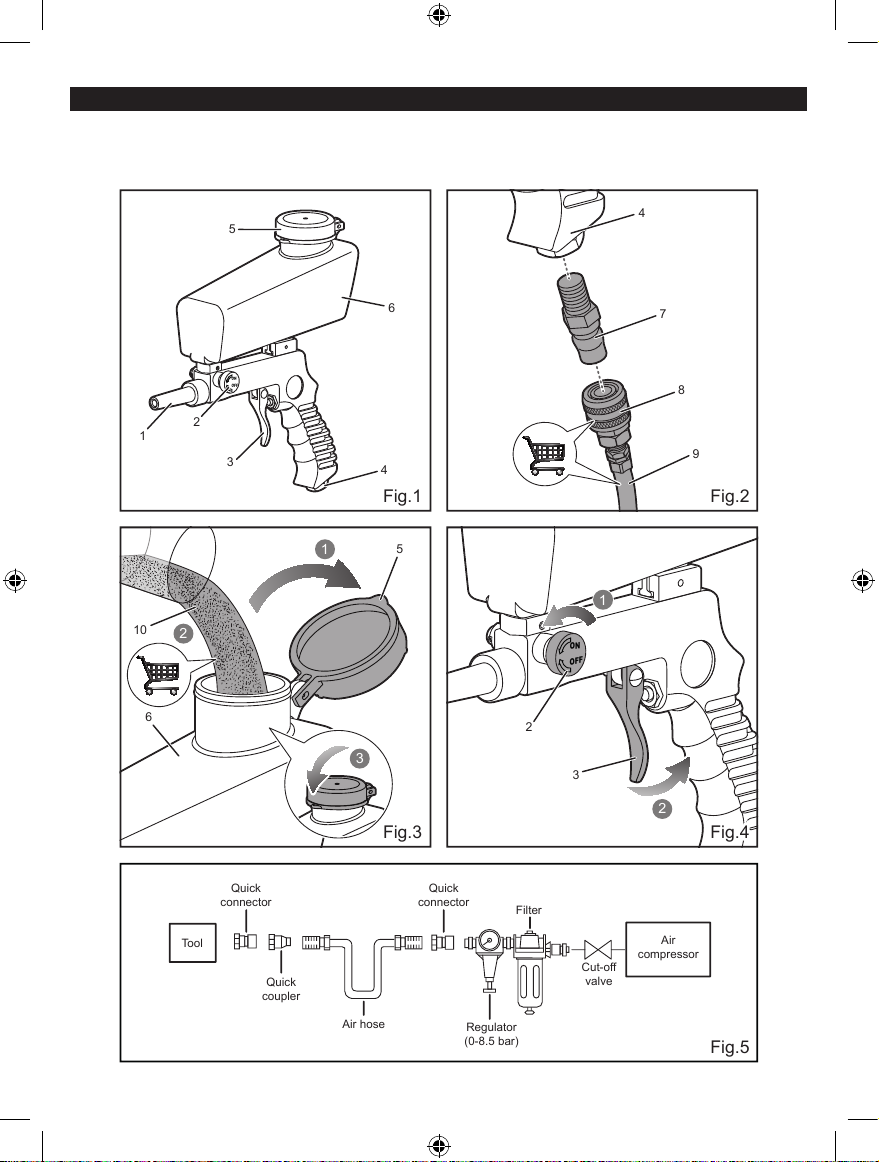
1. Nozzle
Fig.1 Fig.2
Fig.5
Quick
connector
Quick
connector
Filter
Cut-off
valve
Regulator
(0-8.5 bar)
Quick
coupler
Tool
Air
compressor
Air hose
ON
OFF
1
2
ON
OFF
Fig.4
Fig.3
1
2
3
6
4
3
2
2
1
5
6
4
7
5
8
9
3
10
2. Regulator
3. Trigger
4. Air inlet
DESCRIPTION
5. Cap
6. Hopper
7. NITTO style coupler
8. Quick connector (not included)
9. Air hose (not included)
10. Sanding abrasive (not included)
Page 4
■ Cutters can become hot during use; do not touch.
GENERAL SAFETY WARNINGS
■ For multiple hazards, read and understand the safety
instructions before installing, operating, repairing,
maintaining, changing accessories on, or working
near the product. Failure to do so can result in serious
bodily injury.
■ Only qualified and trained operators should install,
adjust or use the product.
■ Do not modify the product. Modifications can reduce
the effectiveness of safety measures and increase the
risks to the operator.
■ Do not discard the safety instructions; give them to the
operator.
■ Check the product for any possible defects before use.
If the product exhibits any faults, it should not be used
under any circumstances.
■ Do not use the product if it has been damaged.
■ Always wear impact-resistant eye protection during
operation of the product. The grade of protection
required should be assessed for each use.
■ Wear relevant protective equipment such as gloves.
■ The product may only be operated on clean,
condensate-free and oil-free compressed air.
■ Do not use oxygen or any combustible gas as an
energy source.
■ Keep work area clean and well lit. Cluttered or dark
areas invite accidents.
■ Do not use the product in explosive atmospheres,
such as in the presence of flammable liquids, gases
or dust.
■ Never smoke near the work area.
■ Work only in sufficiently ventilated rooms.
■ Never exceed the maximum operating pressure of 6.3
bar (90 psi).
■ Use only suitable blasting sand recommended by the
manufacturer in this manual for your sand blasting
work.
■ Keep children and bystanders away while operating
the product. Distractions can cause you to lose control.
■ Do not point the product toward people or animals.
■ Ensure that the workpiece is securely fixed.
■ Operators and maintenance personnel shall be
physically able to handle the bulk, weight and power
of the product.
■ Hold the product correctly; be ready to counteract
normal or sudden movements and have both hands
available.
■ Maintain a balanced body position and secure footing.
■ Release the trigger in the case of an interruption of the
energy supply.
■ Avoid unsuitable postures as it is likely for these
positions not to allow counteracting of normal or
unexpected movement of the tool.
■ When using the product to perform work-related
activities, the operator can experience discomfort in
the hands, arms, shoulders, neck or other parts of the
body.
■ While using the product, the operator should adopt a
comfortable posture whilst maintaining secure footing
and avoiding awkward or off-balance postures. The
operator should change posture during extended
tasks; this can help avoid discomfort and fatigue.
■ If the operator experiences symptoms such as
persistent or recurring discomfort, pain, throbbing,
aching, tingling, numbness, burning sensations or
stiffness, these warning signs should not be ignored.
The operator should consult a qualified health
professional.
■ Disconnect the product from the energy supply before
fitting or changing accessories.
■ Use only sizes and types of accessories and
consumables that are recommended by the
manufacturer of the product; do not use other types or
sizes of accessories or consumables.
■ Do not use cracked or deformed accessories.
■ Slips, trips and falls are major causes of workplace
injury. Be aware of slippery surfaces caused by use of
the tool and also of trip hazards caused by the air line
or hydraulic hose.
■ Proceed with care in unfamiliar surroundings. There
can be hidden hazards, such as electricity or other
utility lines.
■ The product is not intended for use in potentially
explosive atmospheres and is not insulated against
contact with electric power.
■ Ensure that there are no electrical cables, gas pipes,
etc., which can cause a hazard if damaged by use of
the tool.
■ Dust and fumes generated when using the product
can cause ill health (for example cancer, birth
defects, asthma and/or dermatitis); risk assessment
and implementation of appropriate controls for these
hazards are essential.
■ Risk assessment should include dust created by the
use of the product and the potential for disturbing
existing dust.
■ Take precautions to ensure that other people are not
contaminated (dust generation).
■ Ensure that the used blast medium is trapped
and collected so that it can be disposed of in an
environmentally compatible manner.
■ Operate and maintain the product as recommended in
these instructions, to minimize dust or fume emissions.
■ Direct the exhaust so as to minimize disturbance of
dust in a dust-filled environment.
1
Page 5
■ Where dust or fumes are created, the priority shall be
to control them at the point of emission.
■ Use appropriate respiratory protection when using the
product.
■ Exposure to high noise levels can cause permanent,
disabling hearing loss and other problems, such as
tinnitus (ringing, buzzing, whistling or humming in the
ears). Therefore, risk assessment and implementation
of appropriate controls for these hazards are essential.
■ Appropriate controls to reduce the risk may include
actions such as damping materials to prevent
workpieces from “ringing”.
■ Use appropriate hearing protection when using the
product.
■ Operate and maintain the product as recommended in
the instruction handbook, to prevent an unnecessary
increase in the noise level.
WARNING
KICKBACK FORCES! At high working pressures,
kickback can occur which can, under certain
circumstances, lead to danger due to continuous loads.
WARNING
RISK OF INJURY! Disconnect the product from the
compressed air source before starting any repairs or
maintenance work and before moving it to another
location.
WARNING
RISK OF INJURY! Disconnect the product from the
compressed air source before relling blasting sand.
ADDITIONAL SAFETY INSTRUCTIONS FOR
PNEUMATIC POWER TOOLS
WARNING
To prevent serious injury from explosion, use only
clean, dry, regulated, and compressed air to power
the product. Do not use oxygen, carbon dioxide,
combustible gases, or any other bottled gas as power
source for the product.
■ Air under pressure can cause severe injury.
■ Always shut off air supply, drain hose of air pressure
and disconnect the product from air supply when not
in use, before changing accessories or when making
repairs.
■ Never direct air at yourself or anyone else.
■ Whipping hoses can cause severe injury. Always
2
check for damaged or loose hoses and fittings.
■ Cold air shall be directed away from hands.
■ Whenever universal twist couplings (claw couplings)
are used, lock pins shall be installed and whipcheck
safety cables shall be used to safeguard against
possible hose-to-tool or hose-to-hose connection
failure.
■ Do not exceed the maximum air pressure stated on
the product.
■ Never carry an air tool by the hose.
SAFETY WARNINGS FOR AIR SAND BLASTING GUN
■ Avoid unintentional starting. Prepare for work before
turning on the product.
■ Do not leave the product unattended when it is
connected to air supply. Release the trigger, switch
off the product and disconnect from air supply before
leaving.
■ Do not point the nozzle at a person or animal.
■ Always wear the following safety equipment:
– Respiratory mask appropriate to the work
performed and abrasive materials
– Heavy-duty work gloves
– Non-skid safety shoes
– Hard hat
– Safety goggles
– Hearing protection; exposure to noise can cause
hearing injury.
– Protective work clothes to limit skin exposure
■ Secure the workpiece to a stable platform using
clamps or other practical methods.
■ Ensure the regulator is in the “off” position before
connecting to the air supply.
■ Do not allow the product to free run for an extended
period of time as this will shorten its life.
■ Disconnect the product from the power source before
changing accessories or making adjustments.
■ Keep hose away from heat, oil and sharp edges. Check
hose for wear, and make sure that all connections are
secure.
■ Use the product only for its intended purpose.
■ The product is not a toy. Keep the product out of reach
of children.
SAFETY WARNINGS RELATED TO ABRASIVE
MATERIALS
Observe the following instructions when selecting
abrasive materials.
The following concentrations of hazardous substances
must not be exceeded in the shot blasting abrasives:
– Antimony, lead, cadmium, tin, arsenic, beryllium,
chromates, cobalt, nickel in total 2 % of mass
fraction;
Page 6
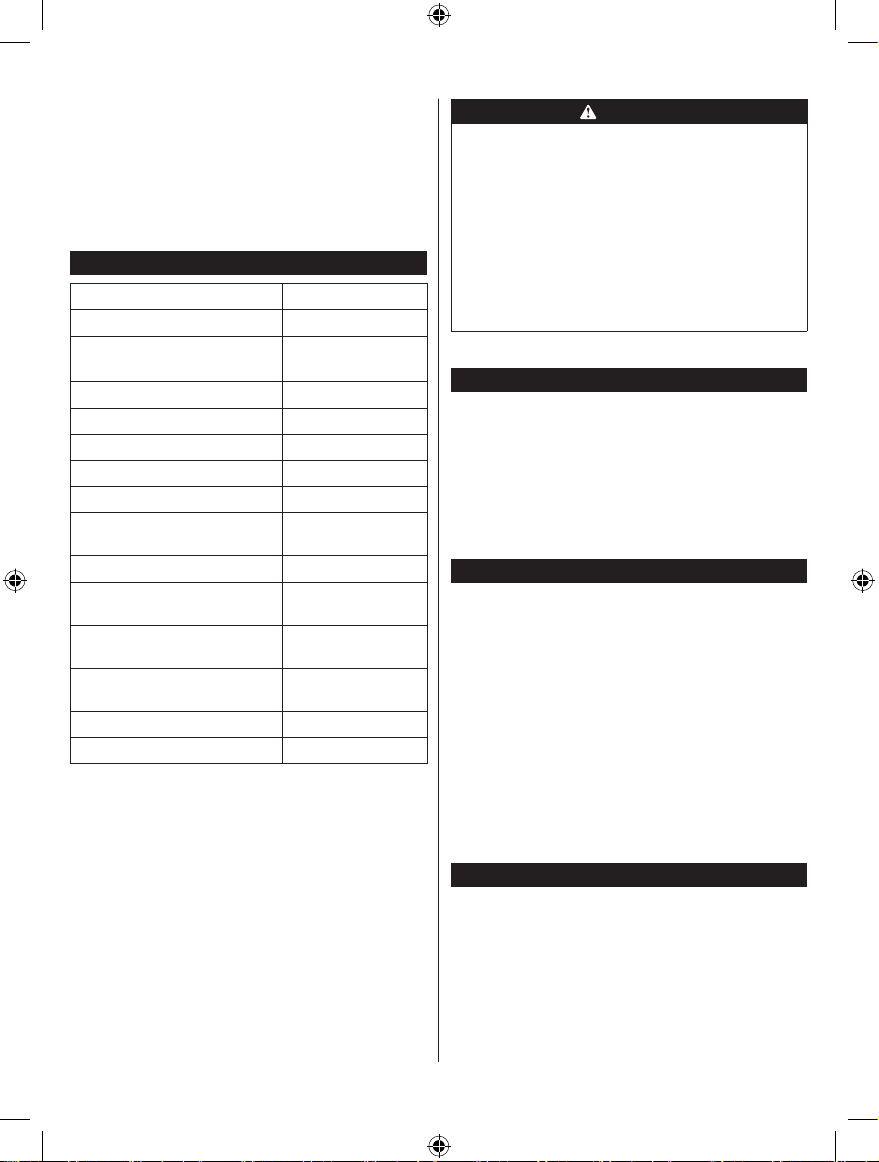
– Arsenic, beryllium, chromates, cobalt and nickel in
total 0.2 % of mass fraction;
– Beryllium, chromates, cobalt, cadmium separately
0.1 % of mass fraction;
– Metallic compounds shall be calculated as the
metal element and chromates as CrO3;
– Free crystalline silicic acid (SiO2): 2 % of mass
fraction.
SPECIFICATIONS
Air sand blasting gun
Model RA-SBG-B
Average air consumption 330 L/min @
6.3 bar (90 psi)
Maximum working pressure 6.3 bar (90 psi)
Weight 0.68 kg
Air inlet size 6.35 mm (1/4” BSP)
Air hose ID 9.52 mm (3/8”)
Hopper capacity 0.62 L
Abrasive media size 120~180 Micron
(120~80 Mesh)
Abrasive media type Glass bre sand
Air quality Oil-free compressed
air
A-weighted sound pressure
level
LpA: 86 dB(A),
KpA=3dB
Sound power level LwA: 97 dB(A),
KwA=3dB
Vibration value ah: 0.4 m/s
Uncertainty K=1.5 m/s
2
2
Noise emission values are in accordance with EN 1265,
and this air sand blasting gun noise level is tested at no
load.
Vibration emission values are in accordance with EN ISO
20643.
WARNING
The vibration level specied in these instructions has
been measured in accordance with a standardised
measuring procedure specied in EN ISO 20643 and
can be used to make equipment comparisons. The
specied vibration emission value can also be used to
make an initial exposure estimate.
The vibration level varies in accordance with the use
of the compressed air tool and may be higher than
the value specied in these instructions in some
cases. It is easy to underestimate the vibration load if
the compressed air tool is used regularly in a certain
manner.
INTENDED USE
The air sand blasting gun is intended to be used only by
adults who have read and understood the instructions
and warnings in this manual, and can be considered
responsible for their actions.
The product is intended for removing metal surface
contaminants, stains, rust, paint, oil, roughening/matting
a surface, etc,. using abrasive materials.
Do not use the product for any other purpose.
RESIDUAL RISKS
Even if you are operating this product in accordance
with all the safety requirements, potential risks of injury
and damage remain. The following dangers can arise in
connection with the structure and design of this product:
1. Dust and fumes generated when using the product
can cause health defects.
– Only work in sufficiently ventilated area.
– Always wear a safety mask when using the product
and keep other people far away from work area.
2. Danger of injury and property damage caused by high
speed sanding abrasive.
– Wear appropriate personal protective equipment.
– Prior to operation, protect other people and
property in the work area from high speed sanding
abrasive by providing barriers or shields.
ASSEMBLY
AIR SUPPLY SET UP
See gure 2.
■ Make sure the regulator is in the "off" position.
■ Connect the product to a quick coupler. Wrap the
thread with thread seal tape.
■ Attach the air hose to the compressor's air outlet. Then
connect the other end to the quick coupler attached to
the product.
3
Page 7
NOTE: the air hose must be long enough to reach
the work area with enough extra length to allow free
movement while working.
■ Turn on the air compressor according to the
manufacturer's instructions. Allow it to build up
pressure until it cycles off.
■ Adjust the air compressor's output regulator to not
more than 6.3 bar (90 psi).
■ The minimum hose diameter should be 9.52 mm
(3/8”) I.D. and the fittings must have the same inside
dimensions.
■ Check for leaks in the air connections. Repair as
needed.
■ If the product will not be used, turn off and disconnect
the air supply. Discharge any residual air pressure to
prevent accidental operation.
OPERATION
PREPARATION
■ Designate a work area which is clean and well lit.
Prevent access by children and animals.
■ Route the air hose along a safe route to reach the
work area. The air hose must be long enough to reach
the work area with enough extra length to allow free
movement while working.
■ Make sure no hazardous objects such as utility lines or
foreign objects are present nearby.
■ The workpiece must be stationary and clamped.
Unrestrained or moving workpieces could cause injury
during operation.
WARNING
Prior to sandblasting, protect other people and property
in the work area from ying debris by providing barriers
or shields. Wear appropriate personal protective
equipment.
GENERAL OPERATING INSTRUCTION
See gure 3-4.
WARNING
Do not use sand (crystalline silica) for blasting.
■ Make sure the regulator is in the "off" position.
■ Open the cap of the hopper and fill with 80-120# glass
fibre sand. Replace the cap.
■ Ensure that the filling does not exceed the capacity of
the hopper (0.62 L).
NOTE: To prevent the beads from accidentally spilling out
of the nozzle, do not point the nozzle downward.
■ Connect the air hose to the quick coupler attached to
the product.
■ Turn the compressor's regulator to 6.3 bar (90 psi).
Then turn on the compressor.
WARNING
Ensure the air supply is clean and does not exceed
6.3 bar (90 psi) while operating the product. Too high an
air pressure and unclean air will shorten the product's
life due to excessive wear, and may be dangerous
causing damage and/or personal injury.
■ Turn on the blasting gun's regulator by rotating
counterclockwise. Grip the sand blasting gun firmly
with both hands.
■ Aim the nozzle toward the object to be blasted. Then
turn the regulator to the "on" position. Squeeze the
trigger to activate the sand blasting gun.
■ Do a test on an old workpiece to find out the optimum
distance/working pressure and avoid excessive
rebounding from the workpiece.
■ The closer between the nozzle and the workpiece, the
smaller the dispersion pattern and vice versa.
■ When finished blasting, release the trigger. Turn off
the air compressor and squeeze the trigger once to
release residual pressure in the sand blasting gun.
Disconnect the sand blasting gun from the air supply.
■ To refill the hopper, release the trigger. Turn off the
blasting gun's regulator by rotating clockwise. Turn
off the air compressor and squeeze the trigger again
to release residual pressure in the sand blasting gun.
Then refill the hopper.
■ Dispose of used abrasive media according to local
regulation and guidelines.
■ Clean and store the product out of reach of children.
MAINTENANCE
WARNING
Maintenance tasks not explained in this manual must
be carried out by qualied personnel.
WARNING
To prevent serious personal injury from accidental
operation, disconnect the product from the air supply
and discharge any residual air pressure in the product
before carrying out any inspection, maintenance or
cleaning.
4
Page 8
WARNING
To prevent serious personal injury from product failure,
Do not use damaged equipment. If abnormal noise,
vibration or air leak occurs, stop using the product and
have the product inspected and corrected before use.
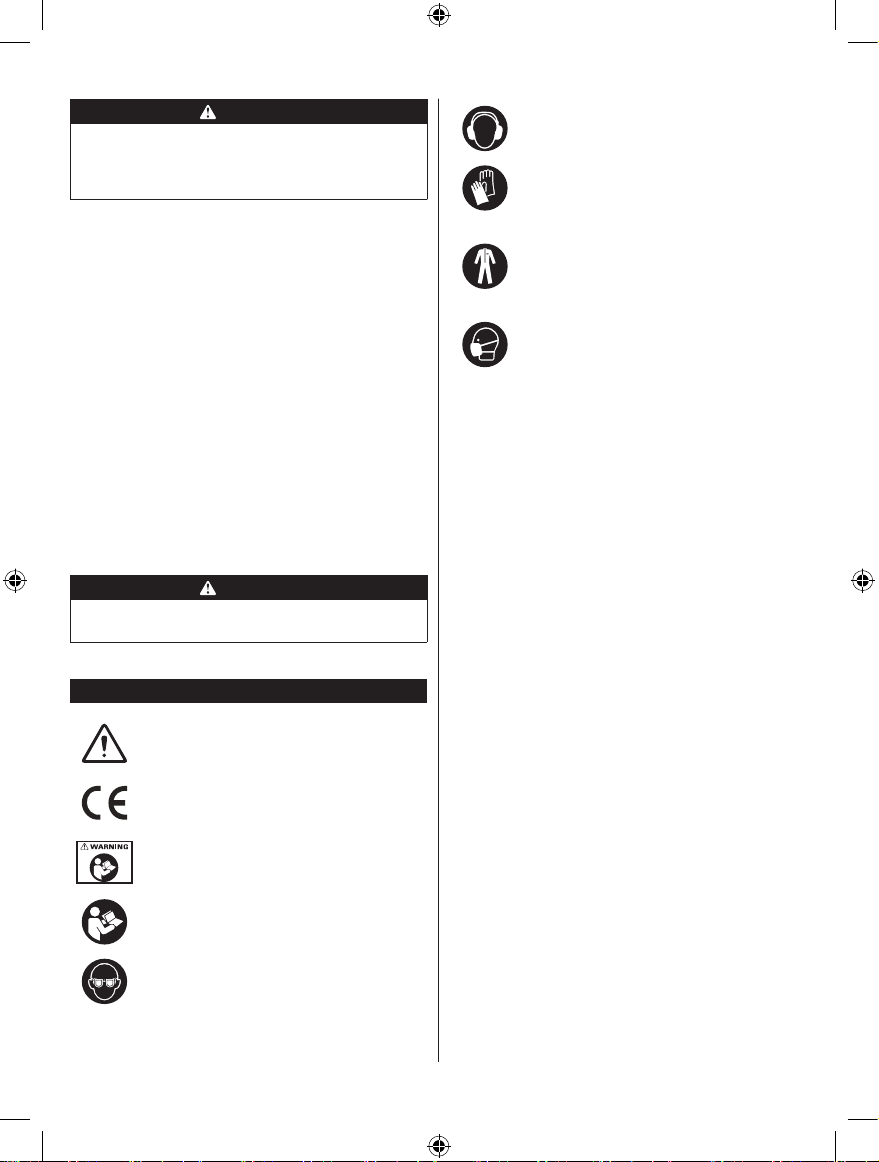
Wear ear protection.
Wear safety gloves
■ Keep the product safe by regular maintenance.
Maintenance shall be performed weekly.
■ Before each use, check for loose screws, misalignment,
or binding of moving parts, clogged nozzle, damaged
supply hose, cracked or broken parts, and any other
condition which may affect safe operation. Do not use
damaged equipment.
■ After each use, clean the external surfaces with a
clean cloth. Do not use solvents or immerse in liquid
as doing so will damage the product.
■ Store the product in a dry, secure location out of reach
of children.
■ Drain the air tank daily. Water in the air line will
damage the product.
■ If the product cannot be used anymore, make sure to
dispose of it so as not to impose hazards on people
and the environment.
■ Clean the air inlet mesh on the sand blasting gun and
clean the compressor inlet filter weekly.
WARNING
For greater safety and reliability, all repairs should be
performed by an authorised service centre.
SYMBOLS
Safety alert
CE conformity
Wear EN ISO 14877 approved type 3
abrasive blasting clothing.
WARNING! The abrasive blasting clothing
is a part of an abrasive blasting combination
and shall only be used when correctly tted to
the respiratory protective devices.
Wear a safety mask.
Please read and understand all instructions
before operating the product, follow all
warnings and safety instructions.
Please read the instructions carefully before
starting the product.
Wear eye protection.
20180404v1
5
Page 9
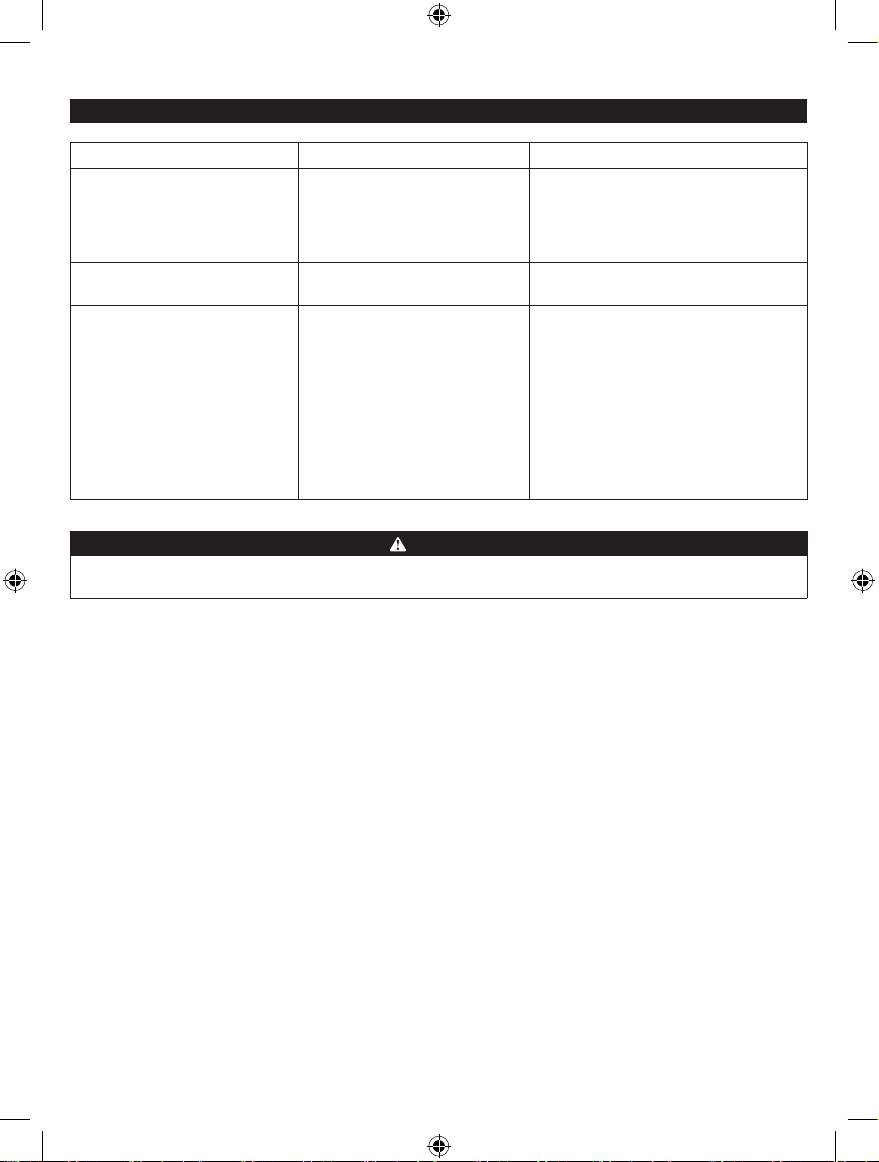
TROUBLESHOOTING
PROBLEM CAUSE SOLUTION
The product will not start. 1. Compressor is not turned on.
2. Air line is not connected
properly.
1. Turn compressor on.
2. Check that air line is connected
properly.
Blast ow surges / Excessive
abrasive consumption.
Clogging and plugging of blast
ow.
1. Air pressure is too low. 1. Increase air pressure.
1. Hopper is empty.
2. Moisture in abrasive.
3. Air pressure is too low.
4. Air hose is kinked.
5. Excessive debris in abrasive.
6. Size of abrasive is incorrect.
7. The outlet of hopper does not
align with inlet of gun body.
1. Fill the hopper.
2. Use dry abrasive
3. Increase air pressure.
4. Un-kinked air hose.
5. Clean or lter abrasive.
6. Use abrasive of correct size.
7. Loosen the hopper xing screws and
align the holes. Then tighten xing
screws. (Tighten torque need be
less than 0.3Nm to avoid damage to
hopper outlet.)
WARNING
To prevent serious personal injury from accidental operation, disconnect the product from the air supply and discharge
any residual air pressure in the product before carrying out any inspection, maintenance or cleaning.
6
Page 10
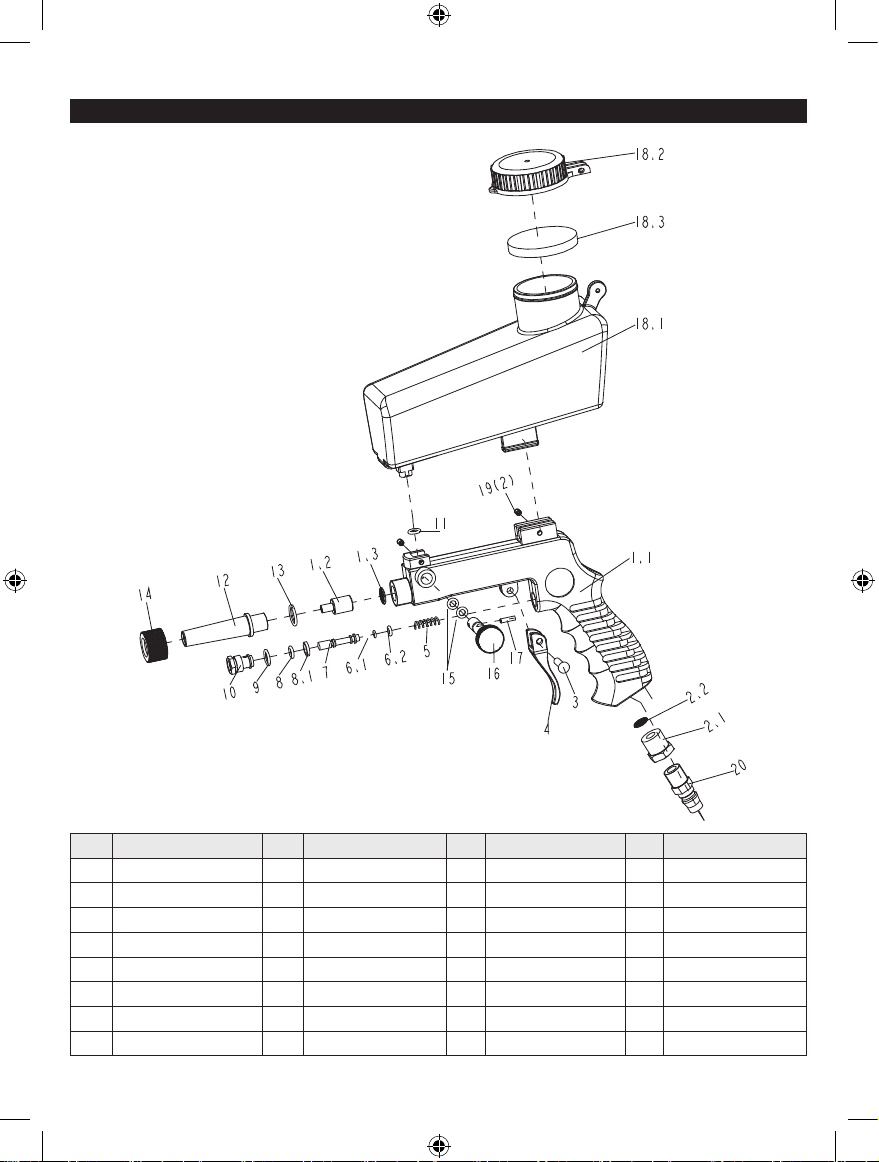
PARTS LIST
No. Description No. Description No. Description
1 Gun Body Assembly 4 Trigger 11 O-ring 2*6
1.1 Gun Body 5 Spring 0.75*6*34 12 Nozzle
1.2 Adapter 6.1 O-ring 2*4 13 O-ring 2*13
1.3 Strainer 6.2 O-ring 1.5*3 14 Ring Nut
2 Air Inlet Assembly 7 Valve Stem 15 O-ring 2*5
2.1 Air Inlet NPT 1/4 8 O-ring 2*6
2.2 Strainer 9 O-ring 2*9
3 Trigger Pin 10 Air Valve
16
Regulator
17
Lock Pin 3*12
18
Hopper Assembly
7
No.
18.1
18.2
18.3
19
20
Description
Hopper
Hopper Cover
Sponge
Screw 4*6
Coupler NPT 1/4
Page 11

NITTO is a registered trademark owned by Nitto Kohki Co., Ltd
Page 12

Techtronic Industries Australia Pty Ltd
31 Gilby Road, Mount Waverley, VIC 3149,
Melbourne, Australia
Techtronic Industries N.Z. Limited
2 Landing Drive, Mangere
Auckland, 2022, New Zealand
 Loading...