

Page 1
OK
VOL
VOL
HOME
MENU
AM/FM
4:30 PM
Now Playing
Home
Shared
Favorit es
Sleep Timer
Alarm
Sources
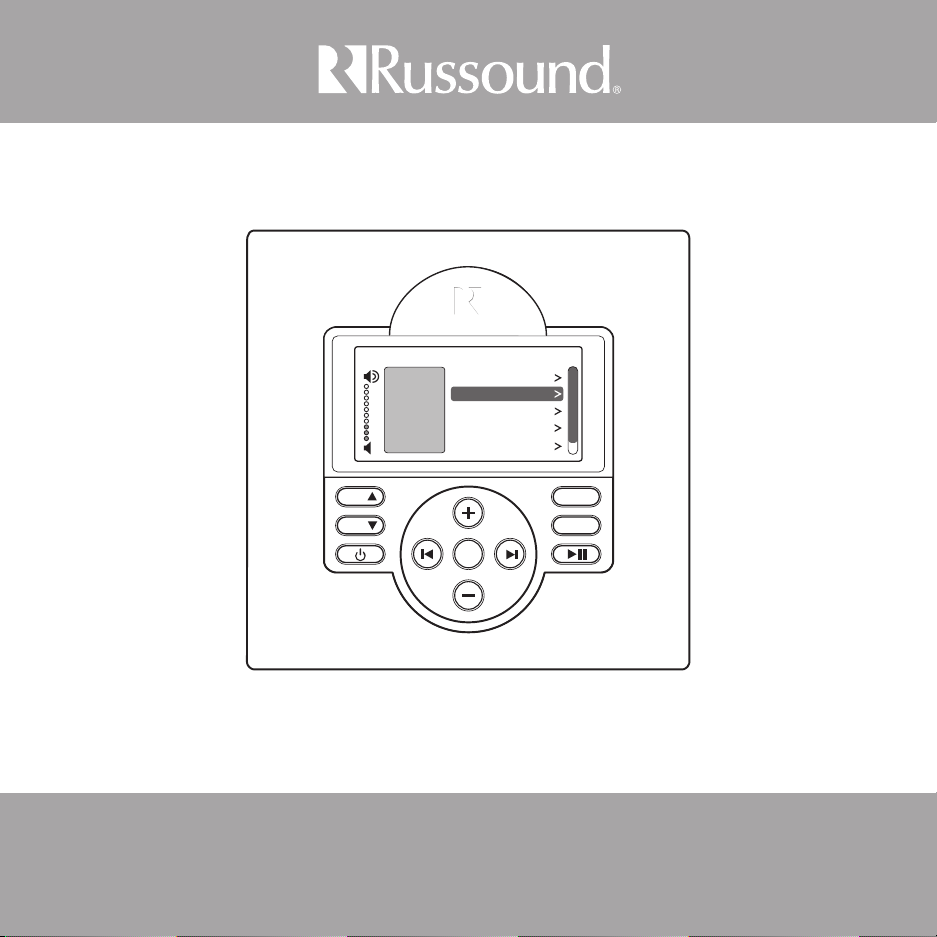
MDK-C5
Multiline Display Keypad
Russound User and Installation Manual
Page 2

SAFETY INSTRUCTIONS
For your safety, please read and follow these precautions
before installing or using this product:
Read instructions. Read and understand all the 1.
applicable instructions before installing or operating
the product.
Retain instructions. Keep this manual in a convenient 2.
place for reference.
Heed warnings. Be aware and heed all warnings on the 3.
product and in the instructions.
Follow instructions. Install and use this product only 4.
as described in the instructions. Don’t try to use this
product in ways for which it wasn’t designed.
Use indoors only. Don’t expose this product to the 5.
weather or harsh environmental conditions such as
continuous sunlight, excessive humidity, or rain.
Keep product dry. Don’t use the product near water; 6.
for example, near a bathtub, washbowl, kitchen sink,
laundry tub, in a wet basement, or near a swimming
pool. Also, do not handle the product when your hands
are wet or damp.
Use the right power source. Don’t connect the product 7.
directly to electrical line voltage. Use only the power
adapter provided with the product, described in the
operating instructions, or as marked on the product.
Ground product properly. Make sure the product’s 8.
means of grounding or polarization is not defeated.
Power cord protection. Power supply cords should be 9.
routed so that they are not likely to be walked on or
pinched by items placed upon or against them, paying
particular attention to cords at plugs, receptacles, and
the point where they exit from the appliance.
Keep product clean. From time to time, wipe o the 10.
product with a clean soft cloth. Don’t use abrasive
materials, thinners, alcohol or other chemical solvents
or materials.
Avoid spills and foreign objects. Make sure liquids and 11.
objects don’t get into the product enclosure through
any openings.
Get professional service. Have the product serviced 12.
only by qualied service personnel when:
The power supply cord/plug has been damaged •
Liquids spilled/objects have fallen into the •
product
The product has been exposed to rain•
The product doesn’t appear to operate normally•
The product is damaged•
13. Don’t attempt to service the product yourself. Doing
so will void the warranty.
If you have any questions, call Russound at 1.800.638.8055
or 603.659.5170.
2 Russound MDK-C5 User and Installation Manual
Rev. 1
Page 3

TABLE OF CONTENTS / pRODUCT OVERVIEW
Table of Contents
Product Information
Safety ...............................................................................................2
Product Overview ....................................................................... 3
User Information
Keypad Front View ......................................................................4
Using the system .........................................................................5
Keypad Installation
Keypad Rear View .......................................................................8
Color Plate Conversion ..............................................................9
External IR Connection ...........................................................10
Keypad Installation ...................................................................11
Controller / Keypad Connection ..........................................12
Specications / Warranty
Technical specications ..........................................................13
Warranty .......................................................................................14
Overview
The MDK-C5 keypad is a beautiful wall-mounted interface
for C-Series controllers. It features a gray scale screen,
menus and navigation buttons to easily nd and control
music sources and to make changes to system settings
and room audio levels. The alarm and sleep timer add extra
functionality.
This double-gang keypad oers responsive hard buttons
to access power on/o, music pause, volume up/down,
and menu shortcuts. The OK button in the center activates
a menu choice and the navigation buttons allow you to
move through menus and lists, as well as provide source
controls. The buttons' LED brightness is adjustable and can
be dimmed at the owner's discretion. It also supports IR
reception for use with a remote control.
The gray scale LCD screen displays real-time information
such as Playlist, Channel, Station, Artist, Song Title, Genre,
and more from the RNET audio sources.
The MDK-C5 is designed to control a C-Series system such
as the MCA-C5 controller amplier multiroom audio system.
It controls Russound source equipment, including the SMS3
Smart Media Server, iBridge™ Dock and Bay, and the ST2
Tuner with AM/FM and/or satellite radio.
Most controller and source setup functions are performed
through SCS-C5 programming software; however, a few
installation steps are completed through the MDK-C5
menus, including setting time and date, keypad brightness
and contrast, and adjusting room audio properties. The
MDK-C5’s installation screen provides a gateway for online
support for the system when needed.
Rev. 1
3Russound MDK-C5 User and Installation Manual
Page 4
KEYpAD FRONT
OK
VOL
VOL
HOME
MENU
AM/FM
4:30 PM
Now Playing
Home
Shared
Favo rites
Sleep Timer
Alarm
Sources
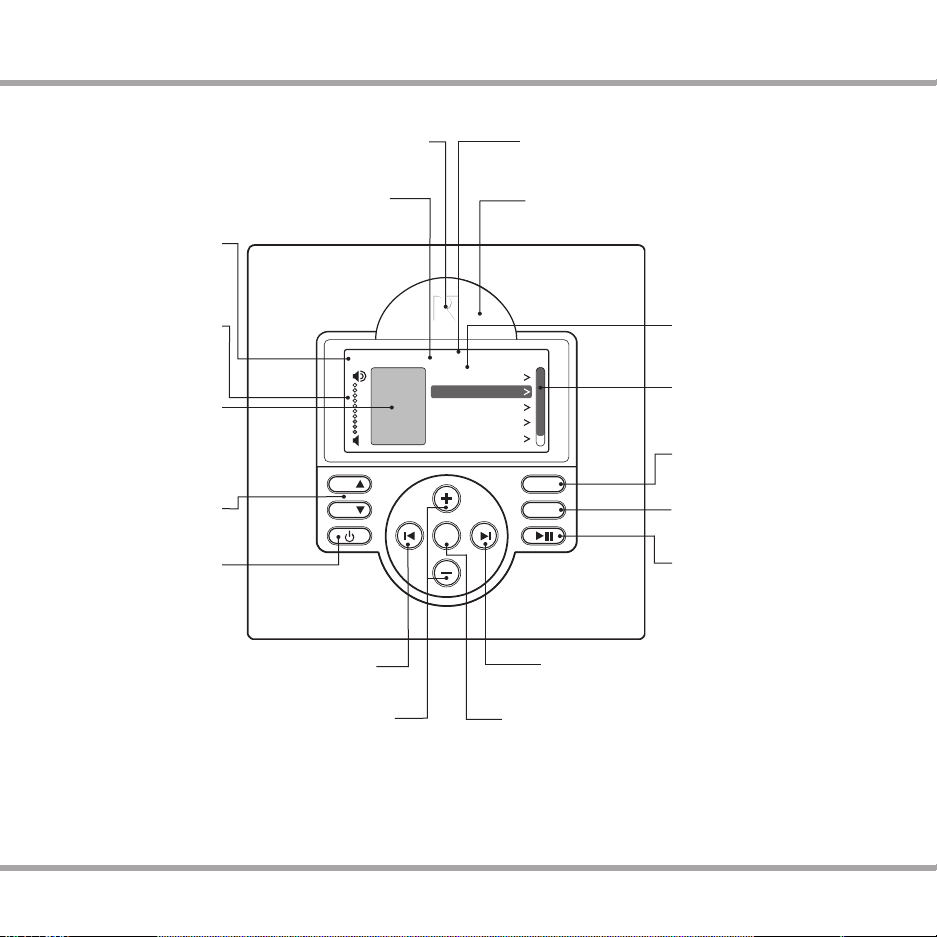
IR Receiver - Receives IR signals from
Title bar - Current menu name
Source name - Shows
you what source you are
listening to
Volume Indicator -
Shows volume level for
the room or if Mute is on
Status box - Shows
system status messages
Party, Master, Shared
(source), DND, etc.
Volume - Adjusts the
volume up or down
Power - Turns keypad
and zone o or on. Press
and hold for system all
on/o
Previous - Navigates backwards through
menus or play previous selection
Menu Navigation - Navigates through
menus, press (slow) or press and hold
(fast) to move up/down a menu list
remote controls
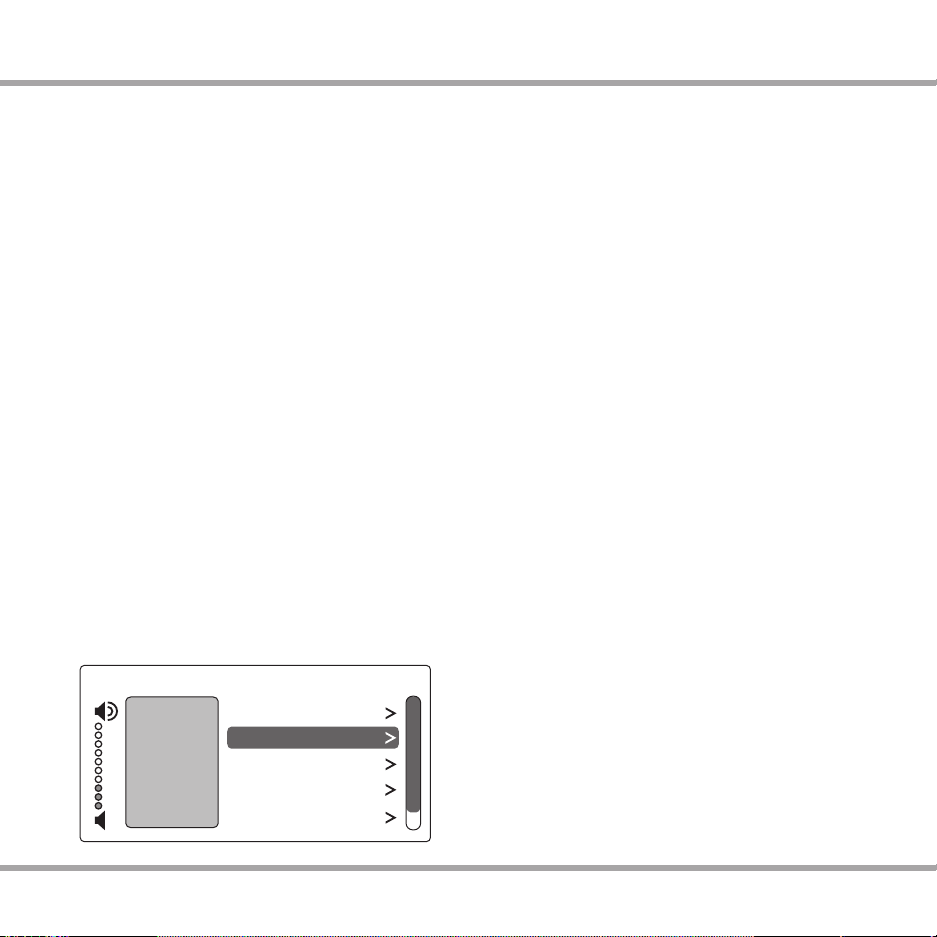
LCD Screen - Gray scale graphic screen shows
source and system navigation screens
IR Talk-back LED - Lights red to indicate IR
signal receipt
Menu - List of options
to choose from, with
highlighted item selected
Scroll bar - Shows that more
menu choices are available
through scrolling
Home - Returns view to the
home screen
Menu - Returns view to main
menu (for current source)
Play/Pause - Press for Pause,
or press and hold for Play
Forward - Press to forward through
menu or play next selection
OK - Press to select highlighted item
from the menu, or access source list
from Now Playing
MDK-C5 Keypad (front)
4 Russound MDK-C5 User and Installation Manual
Rev. 1
Page 5
USINg ThE SYSTEM
AM/FM 4:30 PM
Now Playing
Home
Shared
Favorites
Sleep Timer
Alarm
Sources
Basic Operation
Turn on the zone - Press the power button on the keypad
or press power on the SRC-C5 remote control to turn on the
zone and hear music. The zone will default to the last playing
source before being turned o. Press and hold the power
button (when ON) to turn on all enabled keypads.
Turn o the zone - Press the power button on the keypad
or press the power button on the SRC-C5 remote control to
turn o the keypad and music. Press and hold the power
button (when OFF) to turn o all other keypads.
Volume adjustments - Press the Volume up/down buttons
on the side of the keypad, or press the VOL +/- button on the
SRC-C5 remote control.
Mute Audio - Press the Mute button on the SRC-C5 remote
control.
Main Menu - Sources
From the home screen, select "Sources." A list of available
audio sources appears. Select a source, or press a numbered
"Source" button on the SRC-C5 remote control.
Once selected, choose music from that source. Each source
has its own menu and screens. Main menus list what is
available: channels, genres, playlists, songs, or artists.
Shared - When you see "Shared" on the screen, what
you are listening to is also playing in another room. If you
change the selection (song, channel, playlist) on that source,
the change will also happen in the other "Shared" room.
Main Menu - Favorites
Favorites - Save a source or a radio station/channel as a
favorite.
Add new - Tune to the music source you want to save as a
favorite. From the Favorites menu, select "Add New." Name
the favorite using the +/- buttons to move through the
alphabet. Press the OK button to save.
Edit name - Choose the favorite to rename and use the
+/- buttons to scroll through the alphabet and the forward
button to move to the next character.
Delete favorite - Choose the favorite to be deleted, press
the OK button to delete.
Rev. 1
5Russound MDK-C5 User and Installation Manual
Page 6

USINg ThE SYSTEM
AM/FM 7:30 PM
Alarm
Home
Shared
Party Mode
Settings
Sleep Timer
Do Not Disturb
DND
AM/FM
9: 30 PM
Wake Time
Alarm
Alarm On/Off
Wake To
Choose Days
Set Snooze
7:30 AM
Alarm
Once
AM/FM
9:30 PM
Sleep Timer
After 15 minutes
Cancel
After 30 minutes
After 45 minutes
After 60 minutes
Main Menu - Alarm
Set the keypad as an alarm clock and wake up to music.
From the home screen menu, scroll to and select "Alarm" for
the following options:
Alarm on/o - Activates alarm on or o. If an alarm is set
a clock icon will appear on the keypad display.
Wake time - Set the time for the alarm to go o.
Wake to - Choose the music source.
Choose days - Set the alarm to go o on weekdays, all
days or just once.
Set snooze - Choose the interval (5 to 30 minutes) before
the alarm goes o again.
Alarm level - Set the volume of the alarm.
Main Menu - Sleep Timer
You can set the timer so the zone turns o in one of the
following increments: 15, 30, 45, or 60 minutes.
Main Menu - Set Party Mode or DND
Party and Master - The keypad that shows Master has
started a "party" and keypads that show Party are
"attending." All rooms are listening to the same music,
and only the Master can change the music. Volume
control remains independent.
DND - Stands for Do Not Disturb. Someone in another
room has chosen a source and locked out anyone else
from changing it. That room also won’t be disturbed by
paging or a doorbell chime.
How to:
Turn o active alarm - Press the power button on the
keypad or SRC-C5 remote.
Snooze - Press the play/pause button on the keypad or
the pause button on the SRC-C5 remote control.
6 Russound MDK-C5 User and Installation Manual
Rev. 1
Page 7

Main Menu - Settings
AM/FM
10:25 AM
12 : 45 PM
Set Time
use + & - for Numbers
use | & | for Cursor
press OK to Save
AM/FM
10:45 AM
Treble
Audio Set
Bass
Balance
Loudness
Turn On Volume
+3
0
0C
On
15
AM/FM 4:30 PM
Display
6
Contrast
Brightness
15
use + & - to Adjust
AM/FM 7:30 PM
Network
MAC: 00:21:C7:00:02:2A
IP: 197.168.1.103
Audio
Adjust Settings - From the home screen, scroll to and
select "settings," and choose "audio settings." You’ll see
items to adjust, such as bass, treble and balance. Each
selection has its own screen and shows levels for realtime adjustments.
Clock
Set Time - From the Clock menu, select "Set Time." Press
the +/- buttons to move through numbers. Press the |<
or >| buttons to move the cursor and press OK to save.
Set Date - From the Clock menu, select "Set Date." The
date format is month/day/year. Press the +/- buttons
to move through numbers. Press the |< or >| buttons to
move the cursor, and press OK to save.
Clock Format - From the home menu, select "Settings,"
then "Clock." Choose "Clock Format," and select 12
hour (AM/PM) or 24 hour (1200) format.
USINg ThE SYSTEM
Display
Adjust Settings - Set the contrast and brightness for the
keypad display. Use the buttons to move the cursor to
the desired level.
Installer Options
IR Enable/Disable - The default is Enabled. If an external
IR receiver is used, the keypad IR receiver should be
disabled. From the main menu, select "Settings", then
"Installation", then IR Enable/Disable. Select "disable"
and exit back to the menu.
Diagnostics - Select Display Test and Version list. Version
shows rmware versions for controller and keypad,
and keypad bootloader version.
Network Settings - If the MCA-C5 is connected to a
network, its IP and MAC addresses can be read from
the keypad. From the Home screen, choose "Settings",
then "Installation." From the Installation menu, choose
"Network Settings" to see the controller’s IP address
and MAC address.
Rev. 1
7Russound MDK-C5 User and Installation Manual
Page 8

KEYpAD REAR
Foam Spacers - Remove spacers
for better t in retrot box or
P-ring installations
Cover - Remove to expose
Update port and jumper
External IR Connection
Four pole detachable
screw down connection for
optional external IR receiver
OS Update Jumper - Selects
"Run" or "Program" mode
Programming Port - Insert cable here for
rmware updates. Requires Advanced
Programming Cable P/N 2500-521065.
MDK-C5 Keypad (rear)
8 Russound MDK-C5 User and Installation Manual
Controller - RJ-45 CAT-5e
connection to controller
keypad input
Rev. 1
Page 9

MDK-C5 Color Plate Conversion
VOL
VOL
HOME
MENU
You will need both small straight and Phillips head
screwdrivers to change the color plates on the keypad. The
Bezel Molding and the Trim Plate will be switched for the
new color plates.
If installed, remove the MDK-C5 keypad from the 1.
wall. Gently pull the Trim Plate o the mounting
plate. Unscrew the unit from the electrical box, and
disconnect the cable.
Unscrew the plastic Frame Plate. Keep the Frame Plate 2.
and screws for reattachment later.
Remove the Display Lens from the Bezel Molding by 3.
providing inward pressure to the two locking tabs
while simultaneously pushing it away from the Bezel
Molding.
Once the Display Lens is removed, put aside for 4.
reattachment later. Be careful to not damage the
display.
KEYpAD COLOR pLATE CONVERSION
Remove the Bezel Molding by gently pressing in each 5.
of the 4 locking tabs (2 per side) while pushing it away
from the metal frame. CAUTION: To avoid damage to
the LCD panel, do not use hard edged tools.
Reverse the order for installation, taking the following 6.
precautions:
a. Make sure the button key mat is positioned properly
on the front circuit board and without dust or debris
on the button contact points prior to attaching the
Bezel Molding.
b. Make sure that there isn’t any debris or ngerprints
on either the display or back of the Display Lens prior
to reattachment.
c. Use a clean, dry, lint-free soft cloth to gently wipe
the display or back of the Display Lens to clean if
necessary. Never use cleaning agents as this can cause
streaking or permanent damage to either part.
Screws
Rev. 1
Metal Frame
Bezel Molding
Keypad Disassembly / Assembly
Display Lens
Frame Plate
Screws
Trim Plate
9Russound MDK-C5 User and Installation Manual
Page 10

ExTERNAL IR CONNECTION
Russound 858
IR Receiver (back)
Shield wired to GND
on keypad only
Do NOT
Connect
Shield
2 Twisted
Pair Cable
AM/FM
11:30 AM
Front IR
On
Off
External IR Connection to MDK-C5 Keypad
The MDK-C5 keypad has an External IR Receiver In terminal
for connecting an external IR Receiver such as the Russound
858, SaphIR 862 Eye, or SaphIR 860 Phantom.
Use 2 twisted pair wire with one pair connecting GND
(GROUND) and IR (SIGNAL) and the other pair connecting ST
(STATUS) and V+ (+12VDC). Do not connect the shield to the
IR receiver terminals.
If utilizing an external IR receiver, then you must disable
the IR receiver in the keypad. This is disabled in the installer
options menu on the keypad. See screen at right.
Disable Keypad IR
Connection of External IR to Keypad
10 Russound MDK-C5 User and Installation Manual
Rev. 1
Page 11

Keypad Installation
///
/
OK
VOL
VOL
HOME
MENU
For best viewing and usage, the MDK-C5 should be
mounted at thermostat height, or about 58"-60" (1.5m) from
the oor.
To install a double-gang keypad, you will need a UL/CSA
approved plastic 32ci double-gang wall box. Attach the box
to the wall with appropriate fasteners.
For installations employing a retrot box or P-ring, the two
foam spacers on the rear of the keypad’s metal back plate
can be removed for a better t.
Route CAT-5e wire to the wall box from the controller. There
should be not more than 250 feet of CAT-5e cable between
the keypad and the controller.
Terminate the CAT-5e cable with an RJ-45 connector, using
the T568A wiring standard. Insert the RJ-45 connector into
the jack marked “Controller” on the back of the keypad.
Mount the keypad in the wall box and attach the cover
plate. Repeat the steps until all keypads are installed.
KEYpAD INSTALLATION
CAUTION
Mounting screws must be hand-
tightened. Over-tightening the
mounting screws can cause the
buttons to jam and malfunction.
Rev. 1
Double-gang wall box
MDK-C5 keypad
Cover plate
11Russound MDK-C5 User and Installation Manual
Page 12

MDK-C5
MCA-C5 Controller
CAT-5e Cables
MDK-C5
CONTROLLER / KEYpAD CONNECTION
Controller / Keypad Connection
The MDK-C5 keypad is designed for use with the C-Series
controllers, and connects to a keypad port near the top
left on the rear of the controller. These RJ-45 ports support
MDK-C5 keypads (and up to eight UNO-TS2 touchscreens
per controller).
The eight keypad ports correspond to the eight zones
supported by the MCA-C5. When a connected keypad is
powered on, the zone becomes active and the corresponding
zone LED lights up on the front of the MCA-C5 controller.
Connections are made using CAT-5e with RJ-45 connectors
using T568A wire conguration. For a clean installation
when wiring from a keypad port use a CAT-5e patch cable
to connect from the keypad port to a RJ-45 wall plate
(optional). Using the same T568A RJ-45 wiring conguration,
use CAT-5e from the wall plate to the keypad. Maximum
CAT-5e cable length is 250 feet between the controller and
the keypad. The OS Update jumper should be in the RUN
position on the lower two pins.
If more keypads are desired for a zone, use an optional
SA-ZX3 keypad splitter with a Russound 1201A (12VDC1A)
power supply at the controller end. All keypads on an
SA-ZX3 control the same zone. More detailed information
regarding SA-ZX3 installation and operation can be found in
its installation manual.
Keypad connection to the MCA-C5
12 Russound MDK-C5 User and Installation Manual
Rev. 1
Page 13

MDK-C5 Keypad
Power requirements: 275mA @ 12VDC MAX
CAT-5e connection: RJ-45 (T568A standard)
Display: 70 mm W x 35 mm H
high resolution LCD
Controls: Eleven backlit hard buttons
Wall surface dimensions: 4.5"W x 4.5"H
(11.43 x 11.43 cm)
Inside box dimensions: 3.5"W x 1.5"D x 2.75"H
(8.9 x 3.8 x 6.9 cm)
Weight: 1 lbs. (0.45 kg)
TEChNICAL SpECIFICATIONS
Rev. 1
13Russound MDK-C5 User and Installation Manual
Page 14

WARRANTY
The Russound MDK-C5 Multiline Display Keypad is fully
guaranteed against all defects in materials and workmanship
for two (2) years from the date of purchase. During this
period, Russound will replace any defective parts and
correct any defect in workmanship without charge for either
parts or labor.
For this warranty to apply, the unit must be installed
and used according to its written instructions. If service is
necessary, it must be performed by Russound. The unit must
be returned to Russound at the owner’s expense and with
prior written permission. Accidental damage and shipping
damage are not considered defects, nor is damage resulting
from abuse or from servicing by an agency or person not
specically authorized in writing by Russound.
This Warranty does not cover:
Damage caused by abuse, accident, misuse, negligence, •
or improper installation or operation
Power surges and lightning strikes•
Normal wear and maintenance•
Products that have been altered or modied•
Any product whose identifying number, decal, serial •
number, etc. has been altered, defaced or removed.
Russound sells products only through authorized Dealers
and Distributors to ensure that customers obtain proper
support and service. Any Russound product purchased from
an unauthorized dealer or other source, including retailers,
mail order sellers and online sellers will not be honored or
serviced under existing Russound warranty policy. Any sale
of products by an unauthorized source or other manner
not authorized by Russound shall void the warranty on the
applicable product.
Damage to or destruction of components due to
application of excessive power voids the warranty on those
parts. In these cases, repairs will be made on the basis of the
retail value of the parts and labor. To return for repairs, the
unit must be shipped to Russound at the owner’s expense,
along with a note explaining the nature of service required.
Be sure to pack the unit in a corrugated container with at
least three (3) inches of resilient material to protect the unit
from damage in transit.
Before returning a unit for repair, call Russound at
(603) 659-5170 for a Return Authorization number. Write this
number on the shipping label and ship to:
Russound
ATTN: Service
5 Forbes Road
Newmarket, NH 03857
Due to continual eorts to improve product quality as new
technology and techniques become available, Russound/
FMP, Inc. reserves the right to revise system specications
without notice.
14 Russound MDK-C5 User and Installation Manual
Rev. 1
Page 15

NOTES
Rev. 1
15Russound MDK-C5 User and Installation Manual
Page 16

MDK-C5
Multiline Display Keypad
Russound User and Installation Manual
©2008 Russound. All rights reserved.
All trademarks are the property of their respective owners.
Specications are subject to change without notice.
Russound is not responsible for typographical errors or omissions.
Russound, Inc.
5 Forbes Road, Newmarket, NH 03857
tel603.659.5170•fax603.659.5388
email: tech@russound.com www.russound.com
28-1334 Rev. 1 12/17/09
 Loading...