

RugGear RG500 PRO Quick Start Manual
Quick Start Manual_En
ScHnEllStartanlEitunG_DE

2 titE l DES kaP itElS 3titE l DES kaP itElS
En
contEnt
En
DISPLAY LAYOUT
7_Display layout 15
7.1_Status bar 16
7.1.1_Notication panel 17
7.2_Quick access panel 18
7.3_Home screen 18
7.3.1_Adding a new screen item 18
7.3.2_Moving a screen item 19
7.3.3_Removing a screen item 19
7.3.4_Creating a folder 19
7.3.5_Renaming a folder 19
7.3.6_Changing the wallpaper 20
INFORMATION
8_Specications 20
9_Troubleshooting 21
10_Maintenance 23
11_SAR 24
Service center 26
SAFETY INSTRUCTIONS
1_Introduction 5
2_Faults and damages 6
3_Further safety advises 7
QUICK START
4_Keys 9
5_First steps 10
5.1_Battery 10
5.1.1_Installing and extracting the battery 10
5.1.2_Charging the battery 11
5.1.3_Battery use 11
5.2_Installation of the SIM cards 12
5.3_Installation of the microSD card 12
FIRST USE
6_First use 12
6.1_Powering on your phone 12
6.2_Powering o your phone 13
6.3_Locking and unlocking the phone 13
6.4_Using the touchscreen 14
6.5_Connecting the phone with a computer 15

5
En
rESErvation
Technical Data is subject to change without notice.
Changes, errors and misprints may not be used as a
basis for any claim for damages.
All rights reserved.
RugGear Europe GmbH cannot be held responsible
for any data or other loss and direct or indirect
damages caused by any improper use of this phone.
This document contains a quick start guide and the
safety instructions necessary for the safe use of the
smartphone RG500.
More detailed instructions on the use of the phone
can be found at www.ruggear-europe.com or directly
at our Service Centre.
C 2015 RUGGEAR EUROPE GMBH
DW3150114
SafEt y inStr uction S
1_introDuction
This document contains information and safety regulations
which are to be observed without fail for safe operation of the
smartphone RG500 under the described conditions.
The current EC declaration of conformity, EC certicate of
conformity, safety instructions and manual can be found
at www.ruggear-europe.com, or requested from
RugGear Europe GmbH.
NOTE
This document contains only the instructions necessary for setting
up and safe use of your phone. A complete Quick Start Manual can
be found at www.ruggear-europe.com.
To ensure the IP protection of the phone please make sure that the
seals of the battery, the USB port cover and all the screw covers are
in their correct place.
Please consult page 15 to learn how to access the phone from any
computer.

6 7
En
SafEt y inStr uction SSafEt y inStr uction S
3_furtHEr SafEty aDviSES
Do not touch the screen of the phone with sharp objects.
Dust particles and dirt may scratch the screen. Please maintain
the screen clean. Remove dust on the screen with a soft cloth
gently and do not scratch the screen.
Charge the phone under indoor conditions only.
Please do not put the phone in environments with excessive
temperatures as this could lead to heating of the battery,
resulting in re or explosion.
Do not charge the phone near any ammable or explosive
substances.
Do not charge the phone in environments with much
dust, humidity, or excessively high or low temperatures
(the permitted charging temperature range is 0 °C – 45 °C).
Do not use the phone in areas where regulations or legislatives
prohibit the use of a mobile phone.
Do not expose the phone, the battery or the charger to strong
magnetic elds, such as are emitted from induction ovens or
micro-waves.
Do not attempt to open or repair the phone. Improper repair
or opening can lead to the destruction of the phone, re or
explosion. Only authorized personnel are allowed to repair
the phone.
Only use accessories approved by RugGear Europe GmbH.
Please do not connect the poles of the battery directly, to avoid
short-circuiting the battery.
Power o the phone in hospitals or other places where the use
of mobile phones is prohibited. This phone may aect proper
work of medical equipment, like pacemakers, so always keep a
distance of at least 15 cm between the phone and these devices.
2_faultS anD DaMaGES
If there is any reason to suspect that the safety of the phone has
been compromised, it must be withdrawn from use immediately.
Measures must be taken to prevent any accidental restarting
of the phone.
The safety of the phone may be compromised if, for example:
malfunctions occur.
the housing of the phone or the battery shows damage.
the phone has been subjected to excessive loads.
the phone has been stored improperly.
8 9
En
SafEt y inStr uction S
Observe all corresponding laws that are in force in the
respective countries regarding the use of mobile phones
while operating a vehicle.
Please power o the phone and disconnect the charging cable
before cleaning the phone.
Do not use any chemical cleaning agents to clean the phone or
the charger. Use a damp and anti-static soft cloth for cleaning.
Do not discard old and abandoned lithium batteries into
the trash, send them to designated waste disposal locations
or return them to RugGear Europe GmbH.
The user alone is responsible for any and all damages and
liabilities caused by malware downloaded when using the
network or other data-exchange functions of the phone.
RugGear Europe GmbH cannot be held responsible for any
of these claims.
WARNING
RugGear Europe GmbH will not assume any liability for damages
caused by disregarding any of these advices or by any inappropriate use of the phone.
Quic k Start
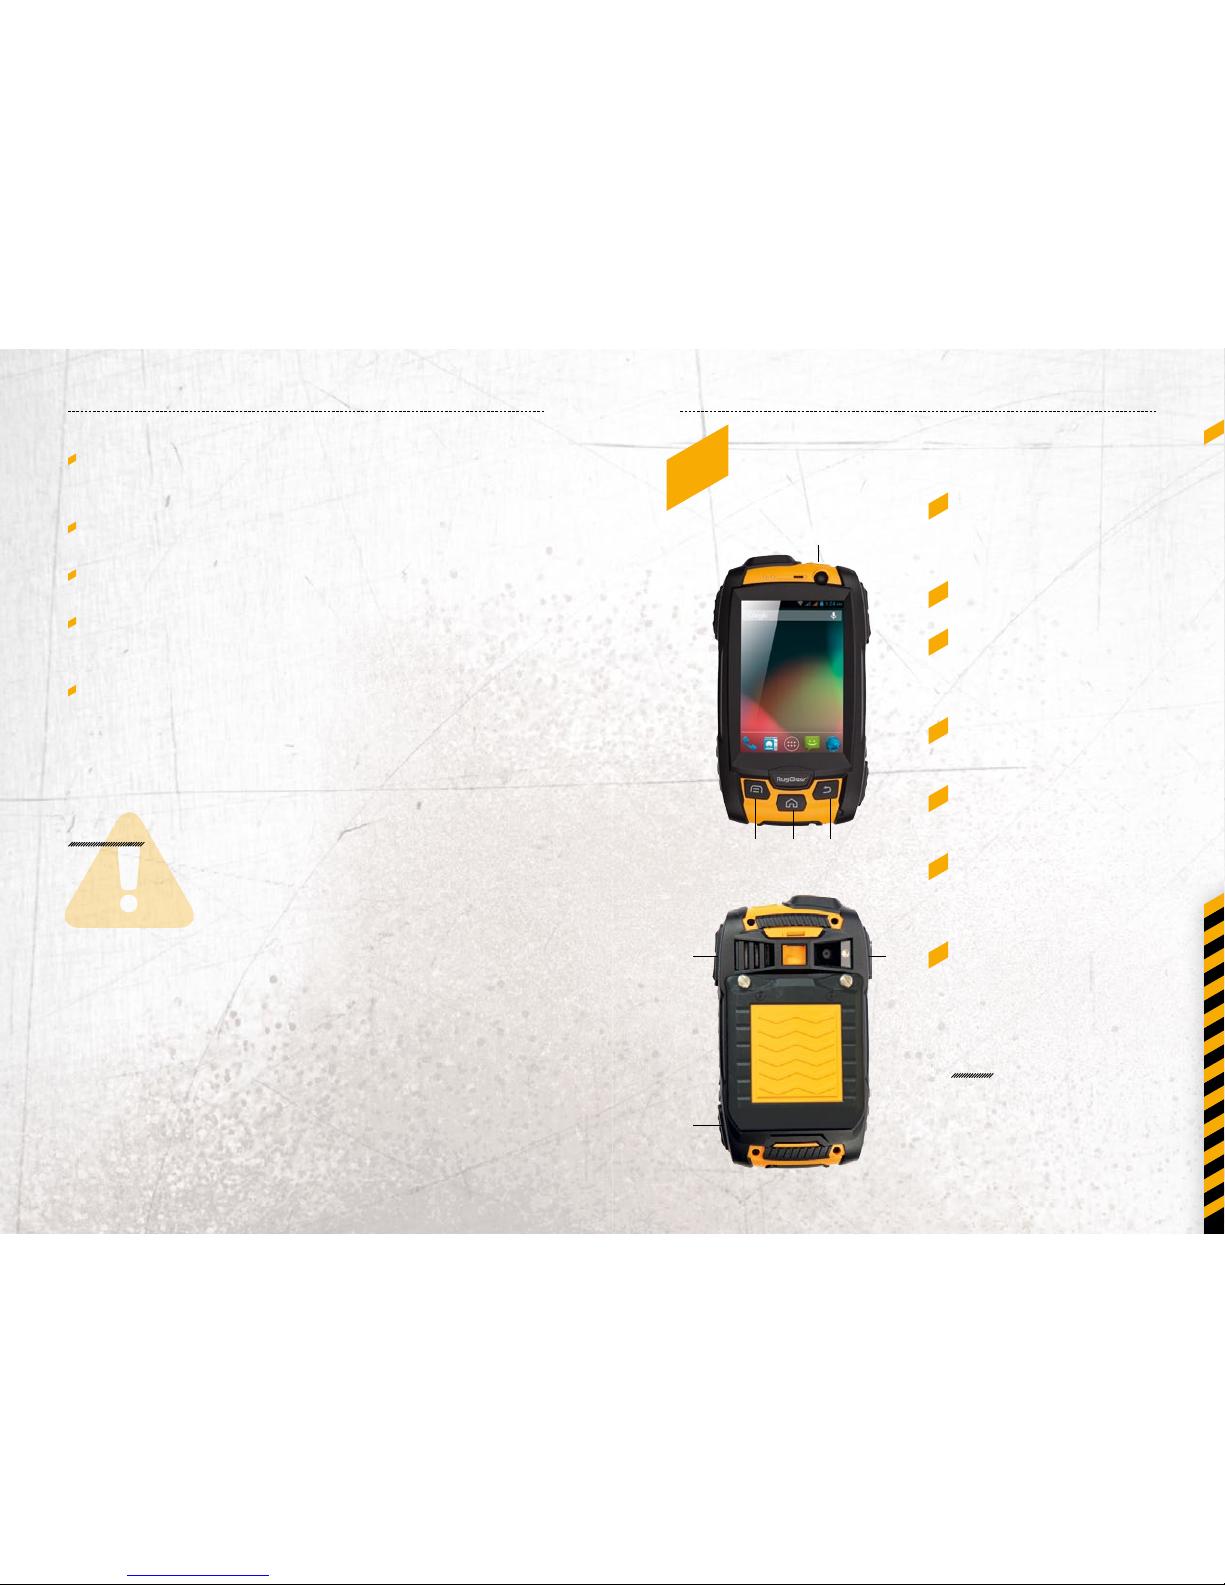
4_kEyS
1_ Power:
Lock the phone. Long
press to power on and
o the phone.
2_ Menu:
Bring up a list of options.
3_ Home:
Returns to the Home Screen.
Long press to see a list of
last accessed apps.
4_ Back:
Return to the previous
screen.
5_ Volume:
Context-sensitive volume
regulation.
6_ SOS:
prepared for emergency
call function, additional
paid application necessary.
7_ PTT:
prepared for push to talk
function, additional paid
application necessary.
7
2 3 4
5
1
6
NOTE
You can nd our
recommendations of PTT
and SOS applications under:
www.ruggear-europe.com
10 11
En
Quic k StartQuic k Start
5_firSt StEPS
5.1_BATTERY
The battery is inserted into the back of the phone. The battery
is not fully charged when the phone is purchased, but it contains
enough energy to power on the phone. To obtain best battery
performance and battery life, let the battery discharge completely
before charging it completely for the rst three charging cycles.
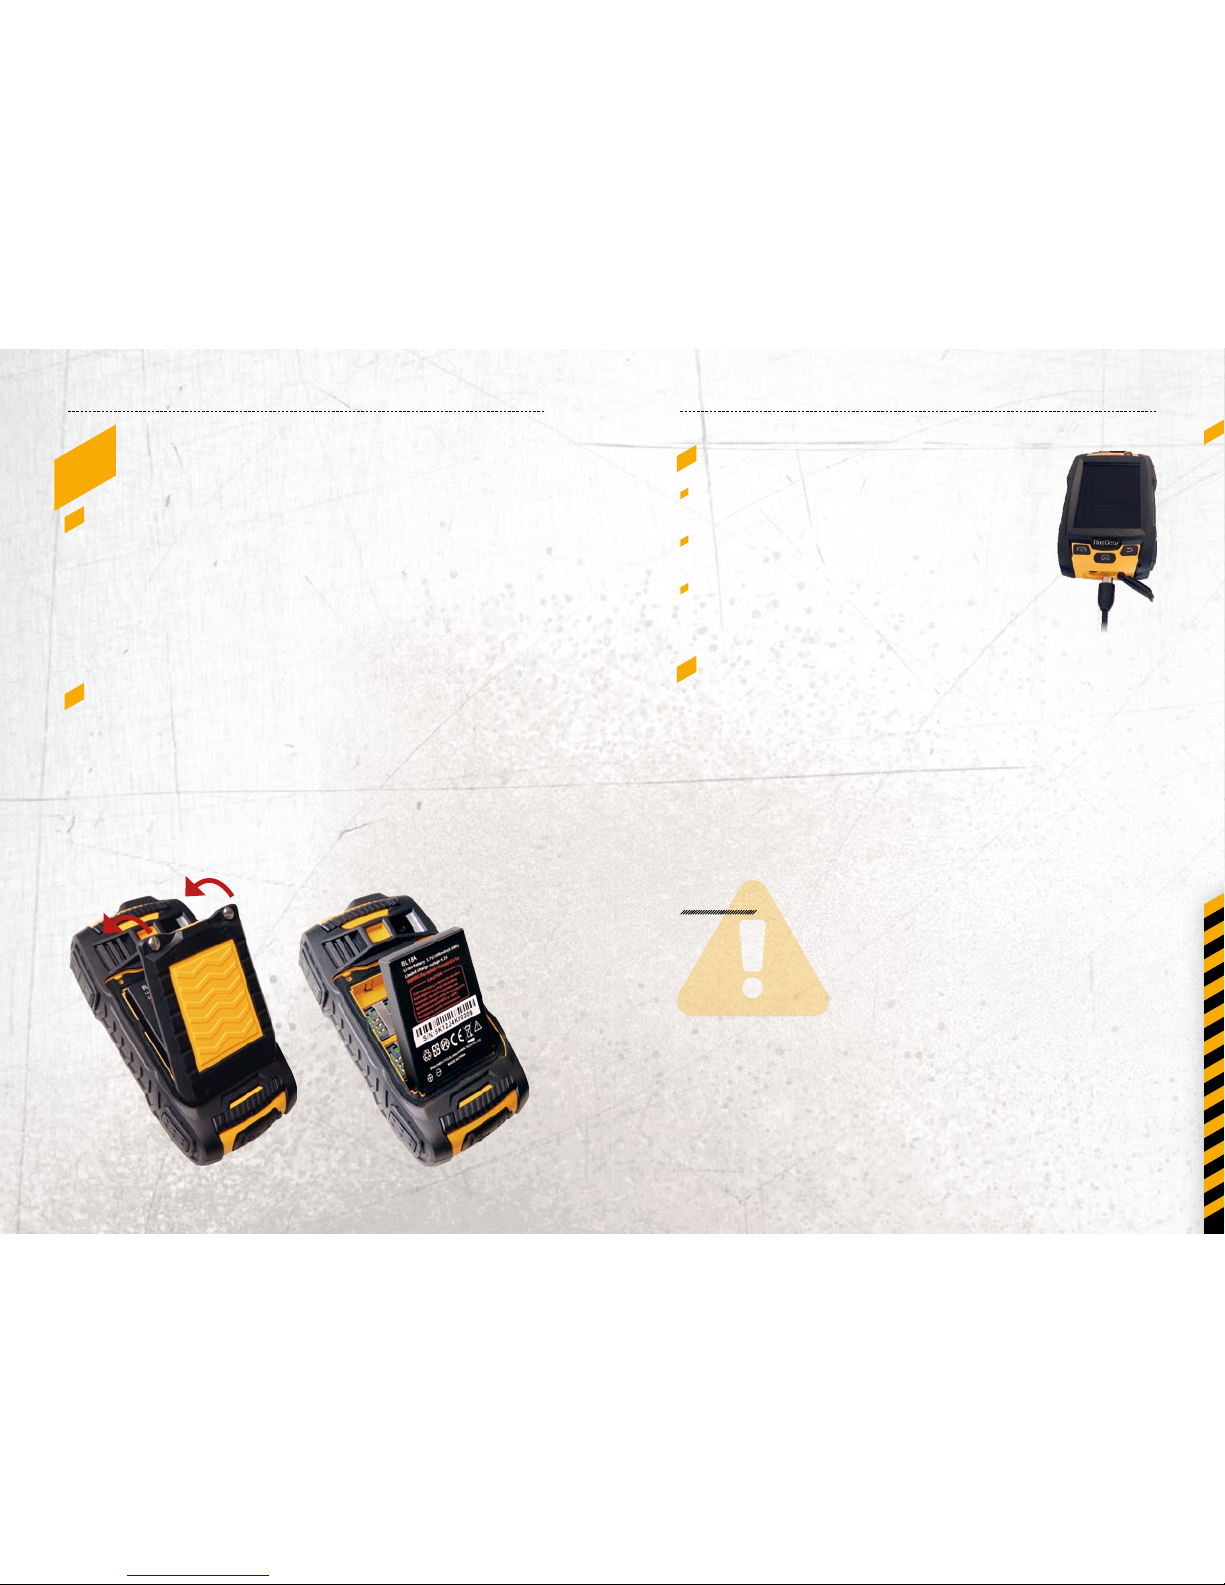
5.1.1_INSTALLING AND EXTRACTING THE BATTERY
When installing the battery, insert the teeth at the bottom of the
battery into the corresponding notches of the phone, then put
the battery inside and press the battery down. Next, insert the battery cover in the same way and secure it by turning the two screws
with the delivered screw driver. Ensure that both – battery and
battery cover – is safely in place before powering on the phone.
5.1.2_CHARGING THE BATTERY
Connect the USB-cable with the phone as
indicated in the picture.
Connect the plug with the socket of the
Power Supply.
After charging, remove the USB-cable from
the charger.
5.1.3_BATTERY USE
In actual use, the standby time and talk time of the phone varies
with the network status, working environment and usage.
When the power of the battery is lower than normal, the phone
will prompt you to charge it. Please charge the battery; otherwise
you may lose any les which have not been saved.
If you do not charge for a long time, the phone will be powered o
automatically.
WARNING
The phone may only be charged at ambient temperatures in
a range from 0 °C – 45 °C. Please do not use charging equipment
if the temperature exceeds this range. Only use the RugGear
approved USB-cable and charger.
12 13
En
firSt uSEQuic kStart / fir St uSE
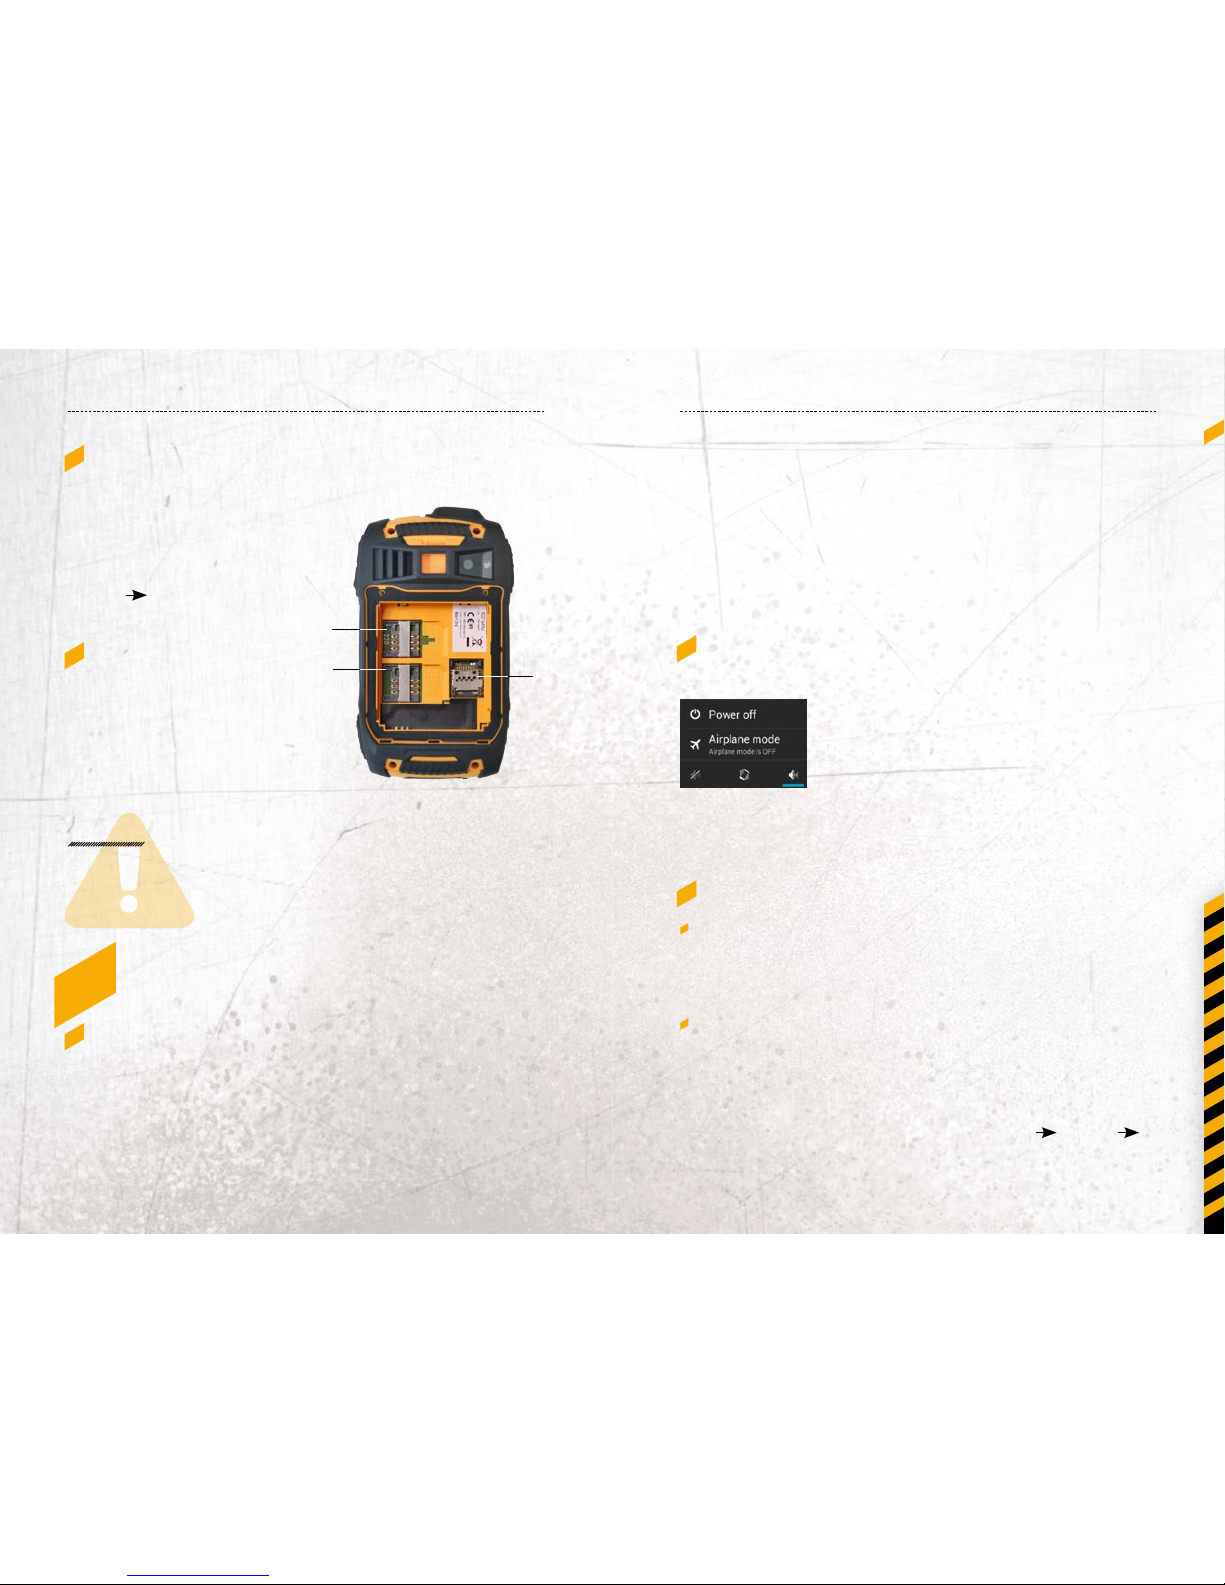
5.2_ INSTALLATION OF
THE SIM CARDS
The phone features two SIM
card slots (1, 2). If you have
installed two SIM cards, you
can choose your primary card in
Settings
SIM management.
5.3_ INSTALLATION OF
THE MICROSD CARD
Open the microSD card holder,
and insert the microSD card
into the slot (3), then close the
microSD card holder.
1
2
WARNING
Do not try to insert or remove any of the SIM cards when any
external power supply is connected, otherwise the SIM cards or
the phone may be damaged.
6_firSt uSE
6.1_POWERING ON YOUR PHONE
Press the Power key until the screen lights up.
Depending on the security settings of your SIM card, the phone
may ask you for your personal identication number (PIN) before
starting up.
3
The rst time you power on your phone, you may be prompted
to assign a language, a date and a time zone and to enter your
personal information.
You will also be asked to sign in or set up your Google™ account.
You can do this later but please note that some of the functions
of the phone like the Google Play™ Store depend on a Google™
account.
6.2_POWERING OFF YOUR PHONE
1. Press and hold the Power key to open the Phone options menu.
2. Tap Power o.
3. Tap OK.
6.3_LOCKING AND UNLOCKING THE PHONE
Press the Power key to lock the phone. When the screen is
locked, you can still receive messages and calls.
If you leave your phone undisturbed for a while, the screen
will lock automatically.
To unlock the phone, press the Power key again. After
the screen has lit up, drag the lock icon to the unlock icon
to unlock the phone.
Depending on your security settings, the phone may ask for a PIN
to unlock. Please note that this is NOT the PIN of your SIM card, but
a code that can be assigned under System settings
Security
Screen lock.
14 15
En
firSt uSE / DiSP lay layoutfirSt uSE
6.4_USING THE TOUCHSCREEN
This phone features a capacitive touchscreen. It is not necessary
to press the screen for it to work, a simple touch is enough.
The following gestures can be used with this phone:
Tap
To open an application (app), or to enter a character using
the on-screen keyboard, tap it with a nger.
Tap and hold
Tap and hold your nger to the screen for more than two
seconds to access further options where available.
Drag
Tap an icon and hold your nger to the screen. Then drag it
to where you would like to place it.
Double tap
Perform two taps onto a webpage or image to zoom in.
Double tap again to zoom out.
Flick
Touch the screen and ick your nger left, right, up or down
to scroll through available panels or lists.
Pinch
Touch the screen with two ngers near together. While touching the screen, put your ngers farther apart to zoom into
a webpage or picture. Do the reverse to zoom out again.
6.5_CONNECTING THE PHONE WITH A COMPUTER
You can access the microSD card of the phone by any compatible
computer via the USB cable. The card will be accessed as a mass
storage device.
1. Connect your phone to the computer with the USB cable.
When connecting the phone to a computer for the rst time,
the computer will install the necessary drivers automatically.
2. Tap turn on USB storage in the dialogue box that opens on the
phone and tap OK to conrm your choice. Your computer
will detect the microSD card as a removable disc. You can
now transfer les from and to the microSD card.
NOTE
While USB mass storage function is enabled, some functions
of the phone may not be available.
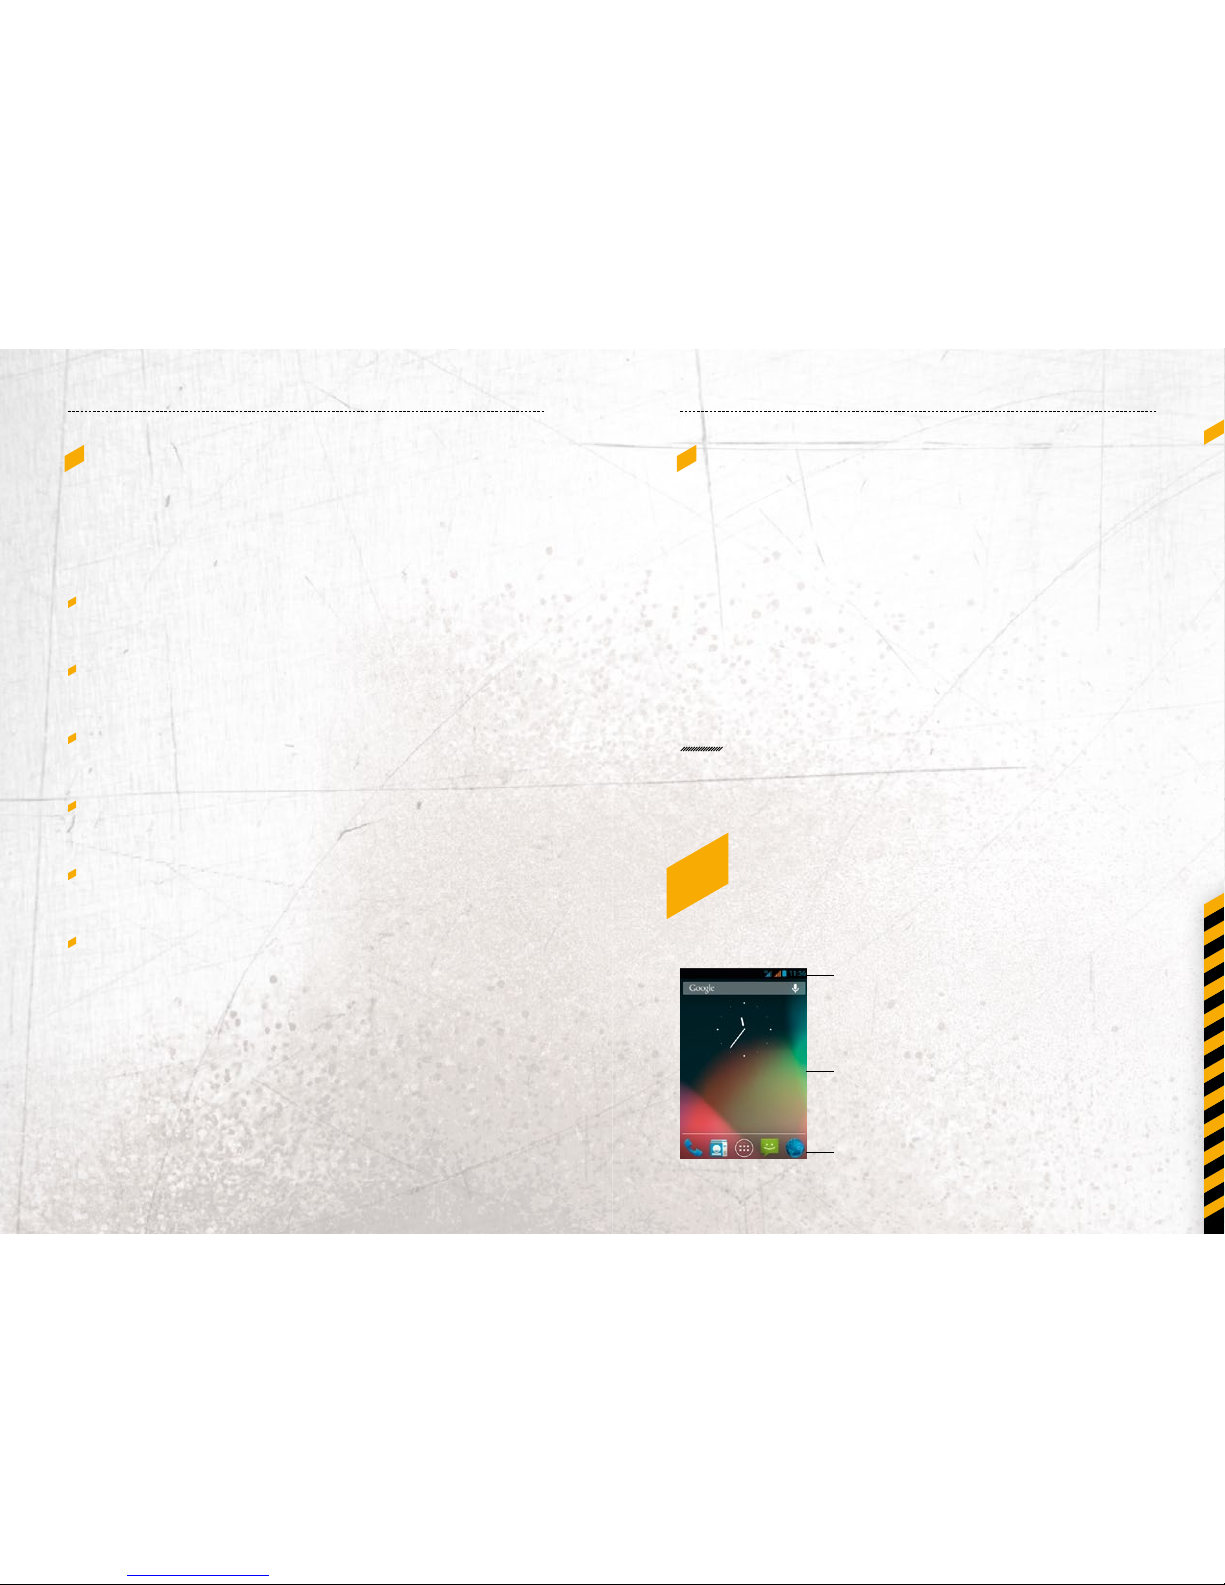
7_DiSPlay layout
After you sign in or when you power on the phone, by default the
Home Screen opens:
Status Bar
Home
Screen
Quick
Access Bar
The Home Screen is your
starting point to access
all the features on your
phone. It displays application icons, shortcuts
and other features. You
can customize the Home
Screen and display the
items you need.

16 17
En
DiSPl ay layoutDi SPlay layout
7.1_STATUS BAR
The status bar appears at the top of every screen.
On the right side, it displays phone status icons, such as the status
of the battery, GPS, data or mobile connections and the time.
On the left side, it displays notication icons, such as missed calls
or received messages.
STATUS ICONS
SIM1 or SIM2 current signal status, type (E for Edge,
3G for UMTS, H for HSDPA) and strength
Wi-Fi connection status and signal strength
Bluetooth® connection status
Airplane mode (all wireless interfaces are o)
Battery power level indicator
GPS is receiving location data
Vibration alert only
Silent mode (no ringtone, no vibration alert)
Missed calls
One or several new e-mails
One or several new SMS
Alarm clock active
USB connection established
NOTIFICATION ICONS
7.1.1_NOTIFICATION PANEL
Drag the Status Bar down to reveal the notication panel:
Your phone will notify you here when you
receive a new message or when there is an
upcoming event. The notication panel also
informs you about alarms, settings and other
relevant information.
Tap a notication to open a related application.
To remove notications from the panel,
swipe the notication to the left or to the
right side of the panel.
Use the settings icon in the top right corner of
the notication panel to access system settings.
To close the notication panel, drag the bottom of the panel
to the top of the screen.
 Loading...