

Page 1
Side-Loading AnoSkyBox
TM
Parts
Instruction Sheet
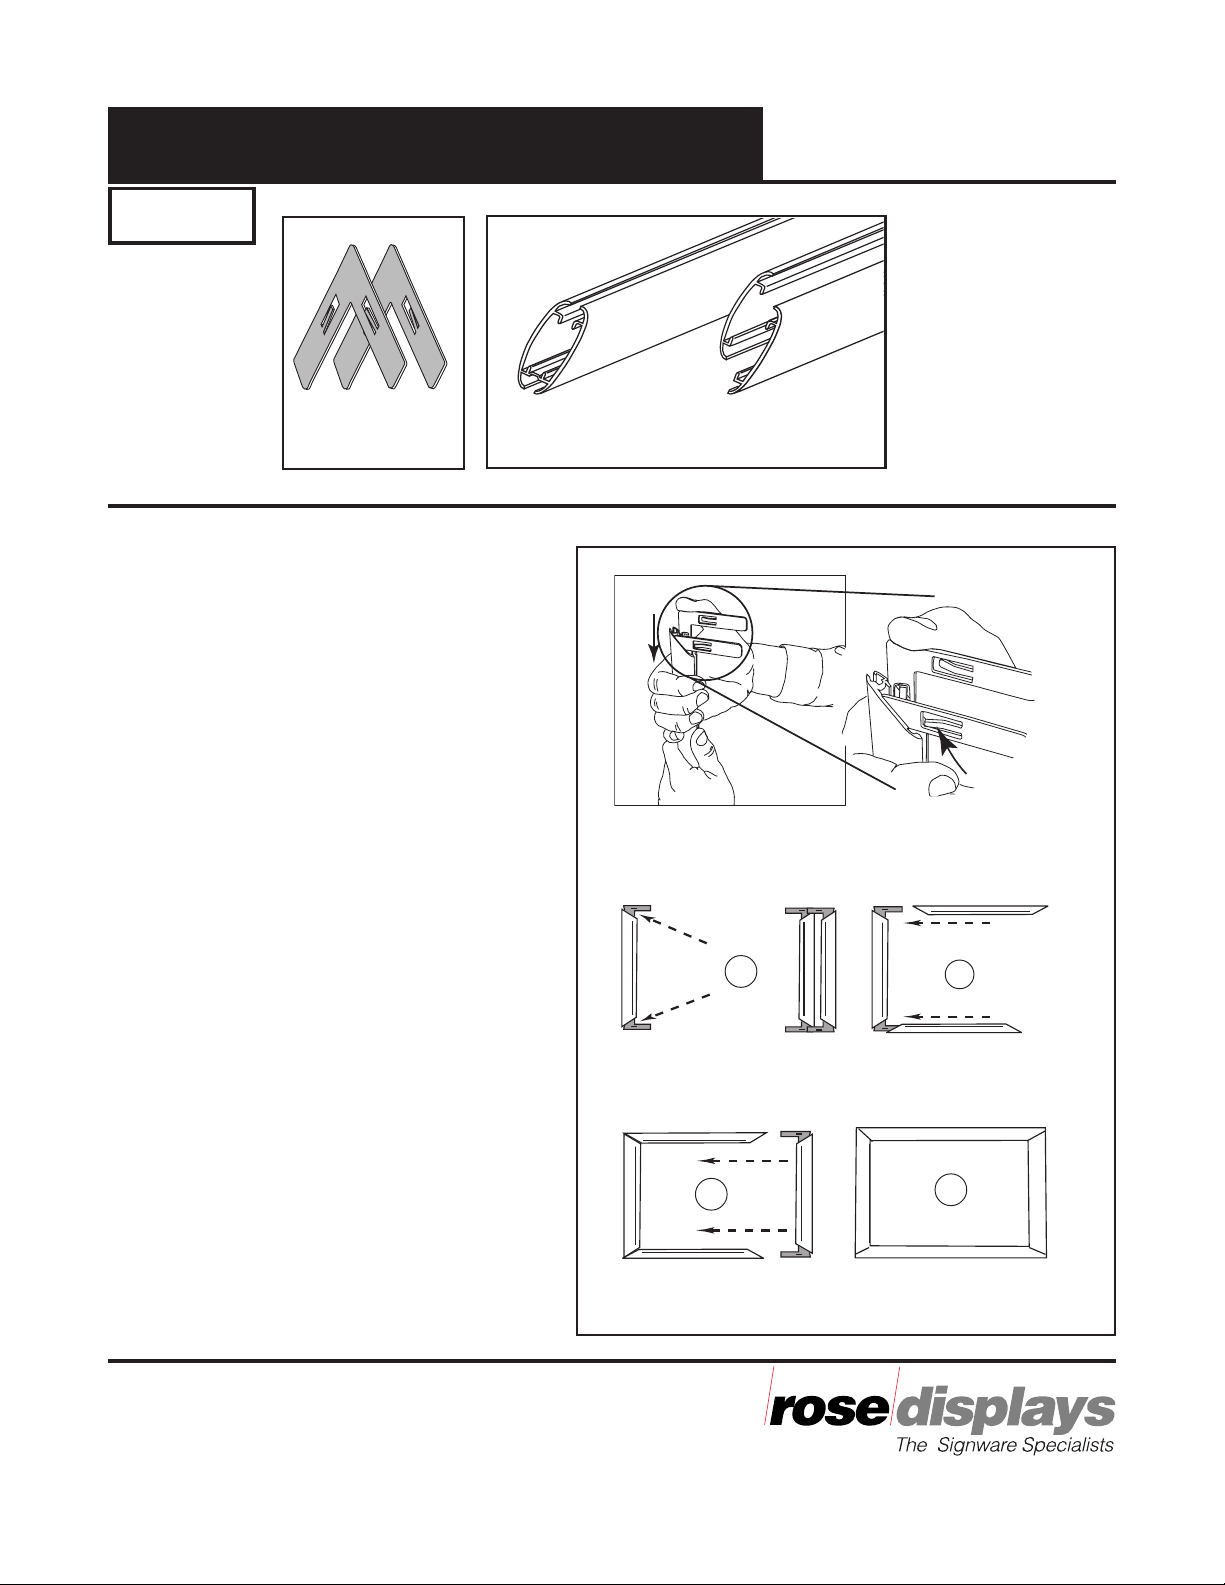
32 Corner
Brackets
Instructions for assembly
Note: You will be assembling four frames.
Below instructions are for one frame only.
Repeat steps 1 & 2 for each frame.
Step 1
Locate two split rails and a solid rail that is
the same length as the split rails.
Insert two corner brackets in each end of
the solid side AnoFrame rail. Insert one
corner bracket into each end of each split
side AnoFrame rails. Fig. 1.
Note: Tension tabs on corner brackets face
towards outside of frame rails.
Step 2
Assemble frame following steps in Fig. 2
sliding sides together in the order shown.
12 AnoFrame Rails
12AF-100
Figure 1
solid rail
8 AnoFrame
split rails
split rails
1
solid rail
2
solid rail
The AnoSkybox™ is a trademark of Rose Displays, Ltd. Neither the
manufacturer nor any sales agent may be held liable for injury, loss or
damage resulting from the use of these products.
Part #03INSSideLoadingAnoSkyBox
Incept-1.24.03
3
split rails
4
Figure 2
35 Congress Street, Salem, MA 01970
Tel# 1- 800 631-9707 Fax# 1-800-560-2890
e-mail:signware@rosedisplays.com
Page 2
Side-Loading AnoSkyBox
TM
Parts
Instruction Sheet
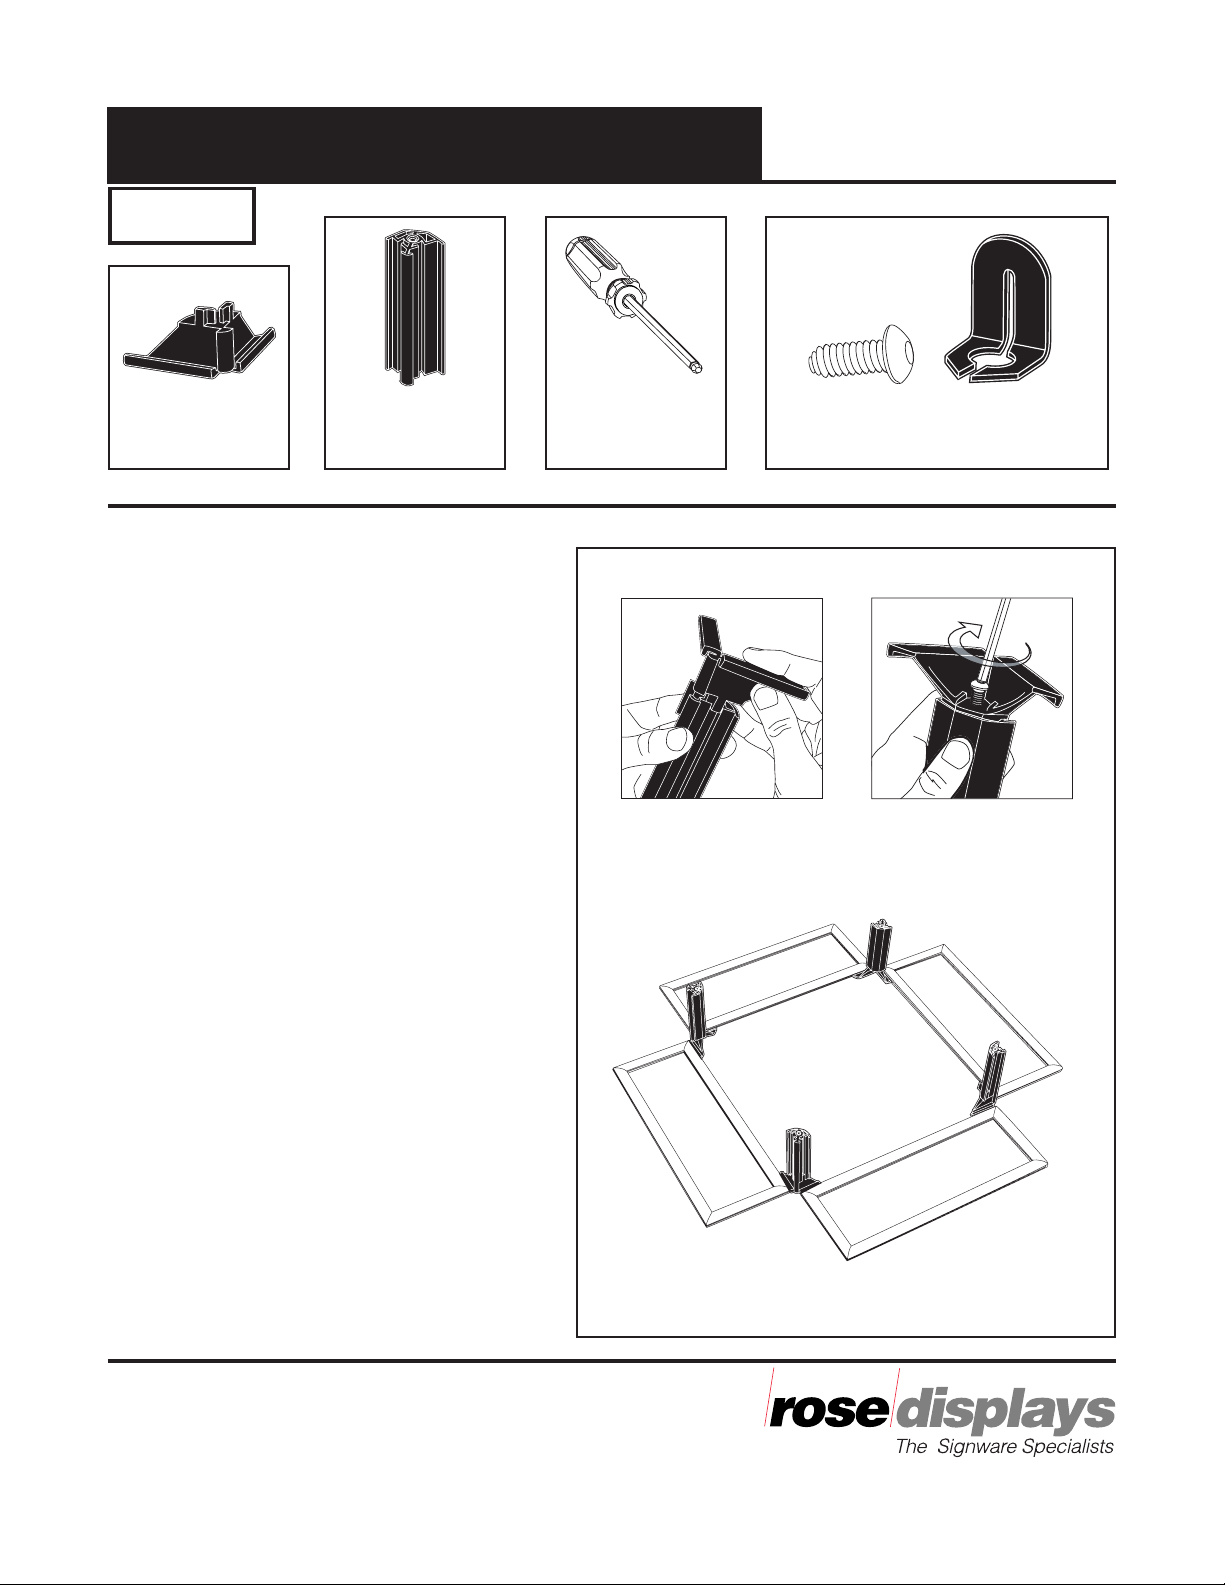
8 Corner
Braces 4 Spine Rails
Instructions for assembly
Step 3
Attach one corner brace onto one end of
each corner spine. Fig. 3.
Step 4
Screw into place and tighten. Fig. 4.
Step 5
Lay out AnoSkyBox parts as shown.
Be sure to lay out frames so each corner
contains matching frame sides — two
corners should contain only split rails and
two corners should contain only solid rails.
Fig. 5.
Note: Once side of each frame contains
split rails. When laying out your
AnoSkybox, make sure you match the
split rail sides of both frames to the same
corner spine. You should have only 2
corners containing split rails.
1 Ball Head
Screwdriver 8 Screws 4 Hanger Tabs
Figure 3 Figure 4
split rails
solid rail
solid rail
The AnoSkybox™ is a trademark of Rose Displays, Ltd. Neither the
manufacturer nor any sales agent may be held liable for injury, loss or
damage resulting from the use of these products.
Part #03INSSideLoadingAnoSkyBox
Incept-1.24.03
split
rails
Figure 5
35 Congress Street, Salem, MA 01970
Tel# 1- 800 631-9707 Fax# 1-800-560-2890
e-mail:signware@rosedisplays.com
Page 3

Side-Loading AnoSkyBox
TM
Parts
Instruction Sheet
8 Corner
Braces 4 Spine Rails
Instructions for assembly
Step 6
Attach frames to corner spines. Be sure
to insert bottom rib of corner brace into
bottom channel of the AnoFrame rail,
as shown in Fig. 6.
Repeat for all frames. Fig. 7.
Step 7
Attach one corner brace onto the top
of each corner spine rail. Fig. 8.
Step 8
If using the cable and loop for hanging,
insert loop into hanger tab. If using the
cable and saucer for hanging, insert saucer
into hanger tab. Fig. 9.
1 Ball Head
Screwdriver 8 Screws 4 Hanger Tabs
Figure 6
Figure 7
Step 9
Insert one screw into each hanger tab
and align with hole in top corner brace.
Fig. 10.
Step 10
Screw hanger tab into place. Fig. 11.
The AnoSkybox™ is a trademark of Rose Displays, Ltd. Neither the
manufacturer nor any sales agent may be held liable for injury, loss or
damage resulting from the use of these products.
Part #03INSSideLoadingAnoSkyBox
Incept-1.24.03
Figure 8
Figure 9
Figure 11Figure 10
35 Congress Street, Salem, MA 01970
Tel# 1- 800 631-9707 Fax# 1-800-560-2890
e-mail:signware@rosedisplays.com
Page 4

Side-Loading AnoSkyBox
TM
Parts
2 Velcro Straps
Instructions for assembly
Step 11
Insert one Velcro strap through each
corner containing split rails. Slide the
strap through the split rails. Fig. 12.
Instruction Sheet
Step 12
Tighten and secure in place on the inside
of the AnoSkyBox. Fig. 13.
Step 13
Suspend AnoSkyBox through hanger
tabs with appropriate Rose Displays
hanging accessories.
Step 14
Insert graphics. Fig. 14.
Figure 12 Figure 13
Figure 14
The AnoSkybox™ is a trademark of Rose Displays, Ltd. Neither the
manufacturer nor any sales agent may be held liable for injury, loss or
damage resulting from the use of these products.
Part #02INSSideLoadingAnoSkyBox
Incept-1.24.03
35 Congress Street, Salem, MA 01970
Tel# 1- 800 631-9707 Fax# 1-800-560-2890
e-mail:signware@rosedisplays.com
 Loading...