Rose Displays SPIDER CEILING TRACK WITH SCREWS User Manual

Spider™ Ceiling Track Instruction Sheet
Parts
Spider™ |
|
|
|
Ceiling Track |
Toggle Bolts |
Wood Screws |
|
25-0027 |
|||
|
|
||
Instructions for Hanging |
|
|
|
Step 1 |
|
|
|
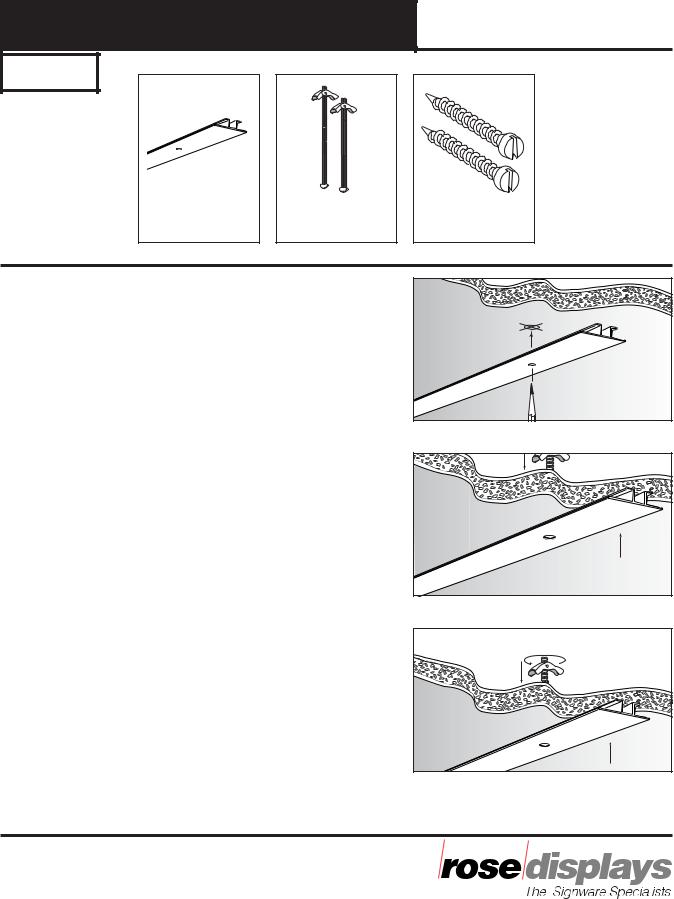
Place Spider Ceiling Track in position and mark |
|
||
all mounting holes on ceiling. Fig. 1 |
|
|
|
Note: Determine what type of ceiling you have |
|
||
and choose the appropriate mounting anchor for |
|
||
your ceiling type. |
|
|
|
For plaster board ceilings use toggle bolt anchors. |
Figure 1 |
||
For hard wood ceilings use wood screw anchor. |
|||
|
|||
Plastic expansion anchors are not recommended |
|
||
for installation of this system. |
|
|
|
Step 2 |
|
|
|
Drill pilot holes for appropriate anchor. Fig. 2 |
|
||
Note: Use a 3/8” masonry bit for plasterboard/ |
|
||
drywall when installing with toggle bolts. |
|
|
|
Use a #48 or .076” drill bit when installing |
|
Figure 2 |
|
Spider ceiling track using wood screws. |
|
|
|
Step 3
Place bolts or screws through mounting holes in Spider ceiling track. Fig. 3 If using toggle bolts, attach wing nuts to bolts and insert into predrilled holes in ceiling. Tighten bolts or screws until Spider ceiling track is snug and secure to ceiling.
Step 4
Install Signware OneUp anchors with ladderless |
Figure 3 |
RoPole installation tool. |
|
The SpiderTM Ceiling Track trademark of Rose Displays, Ltd. Neither the manufacturer nor any sales agent may be held liable for injury, loss or damage resulting from the use of these products. Part #00INSSpider Ceiling Track
|
35 Congress Street, Salem, MA 01970 |
|
Tel# 1- 800 631-9707 Fax# 1-800-560-2890 |
Incept-9.5.00 |
e-mail:signware@rosedisplays.com |
 Loading...