

Roper TOP-MOUNT REFRIGERATOR Use & Care Manual
TOP-MOUNT
REFRIGERATOR
Use & Care Guide
For questions about features, operation/performance,
parts accessories or service, call: 1-800-44-ROPER (1-800-447 -6737).
In Canada, call for assistance 1-800-461-5681, for installation
and service, call: 1-800-807-6777
or visit our website at...
www.roperappliances.com
RÉFRIGÉRATEUR
SUPERPOSÉ
Guide d’utilisation
et d’entretien
Au Canada, pour assistance, composer le
1-800-44-ROPER (1-80 0-447-67 37),
pour installation ou service le 1-800-807-6777
Table of Contents/Table des matièr es..... ........ ...... ......... ...... .....2
ou visitez notre site web à
www.roperappliances.com
2213900

TABLE OF CONTENTS
TABLE DES MATIÈRES
REFRIGERATOR SAFETY.......................................................... 3
INSTALLING YOUR REFRIGERATOR..........................................4
Unpacking Your Refrigerator.......................................................4
Space Requirements....................................................................4
Electrical Requirements...............................................................5
Connecting the Refrigerator to a Water Source..........................5
Refrigerator Doors: Removing,
Reversing (optional) and Replacing.............................................7
Door Closing and Alignment........................................................8
Understanding Sounds You May Hear........................................9
USING YOUR REFRIGERATOR....................................................9
Ensuring Proper Air Circulation....................................................9
Setting the Control(s) .................................................................10
Adjusting Control Settings.........................................................10
Ice Maker....................................................................................11
REFRIGERATOR FEATURES......................................................11
Refrigerator Shelves...................................................................11
Meat Drawer and Cover.............................................................11
Crisper and Crisper Cover.........................................................12
Utility or Egg Bin.........................................................................12
FREEZER FEATURES..................................................................13
Freezer Shelf ..............................................................................13
DOOR FEATURES........................................................................13
Drop-in Door Rails......................................................................13
CARING FOR YOUR REFRIGERATOR.......................................13
Cleaning Your Refrigerator.........................................................13
Changing the Light Bulb............................................................14
Power Interruptions....................................................................14
Vacation and Moving Care.........................................................14
TROUBLESHOOTING..................................................................15
ASSISTANCE OR SERVICE.........................................................17
WARRANTY.............................................................................. 18
SÉCURITÉ DU RÉFRIGÉRATEUR...........................................19
INSTALLATION DU RÉFRIGÉRATEUR ......................................20
Déballage de votre réfrigérateur ................................................20
Espacement requis.....................................................................20
Spécifications électriques..........................................................21
Raccordement du réfrigérateur
à une canalisation d’eau ............................................................21
Portes du réfrigérateur : Démontage,
inversion (option) et réinstallation...............................................23
Fermeture et alignement des portes..........................................25
Les bruits de l’appareil que vous pouvez entendre...................25
UTILISATION DU RÉFRIGÉRATEUR..........................................26
Pour s’assurer d’une circulation d’air appropriée......................26
Réglage des commandes..........................................................26
Ajustement des réglages de commande...................................26
Machine à glaçons.....................................................................27
CARACTÉRISTIQUES DU RÉFRIGÉRATEUR ...........................28
Tablettes du réfrigérateur...........................................................28
Bac à viande et couvercle..........................................................28
Bac à légumes et couvercle.......................................................28
Casier utilitaire ou oeufrier..........................................................29
CARACTÉRISTIQUES DU CONGÉLATEUR...............................29
Clayette du congélateur.............................................................29
CARACTÉRISTIQUES DE LA PORTE.........................................30
Tringles dans la porte.................................................................30
ENTRETIEN DE VOTRE RÉFRIGÉRATEUR...............................30
Nettoyage du réfrigérateur.........................................................30
Remplacement de l’ampoule d’éclairage..................................31
Pannes de courant.....................................................................31
Entretien avant les vacances
ou lors d’un déménagement......................................................31
DÉPANNAGE.................................................................................32
ASSISTANCE OU SERVICE.........................................................35
GARANTIE.................................................................................36
2
REFRIGERATOR SAFETY
Your safety and the safety of others are very important.
We have provided many important safety messages in this manual and on your appliance. Always read and obey all
safety messages.
This is the safety alert symbol.
This symbol alerts you to potential hazards that can kill or hurt you and others.
All safety messages will follow the safety alert symbol and either the word “DANGER” or
“WARNING.” These words mean:
You can be killed or seriously injured if you don't
immediately follow instructions.
You can be killed or seriously injured if you don't
follow instructions.
All safety messages will tell you what the potential hazard is, tell you how to reduce the chance of injury, and tell you
what can
WARNING:
precautions:
■
■
■
■
■
■
■
happen if the instructions are not followed.
IMPORTANT SAFETY INSTRUCTIONS
To redu ce th e ris k of fire, electric shock , or injury when using your refrigerator, fo llo w thes e ba s ic
Plug into a grounded 3 prong outlet.
Do not remove ground prong.
Do not use an adapter.
Do not use an extension cord.
Disco n n e c t po wer be fo re s er v icing.
Replace all panels before operating.
Remove doors from your old refriger a tor.
■
Use nonflammable clean er.
■
Keep flammable ma terials and vapo rs , su ch as
gasoline, aw ay from refr iger ato r.
■
Use two or mo re peop le to mov e and insta ll
refrigerator.
■
Disconnect power before installing ice maker (on
ice maker kit ready models only).
■
Use a sturdy glass when dispensing ice or water
(on some models).
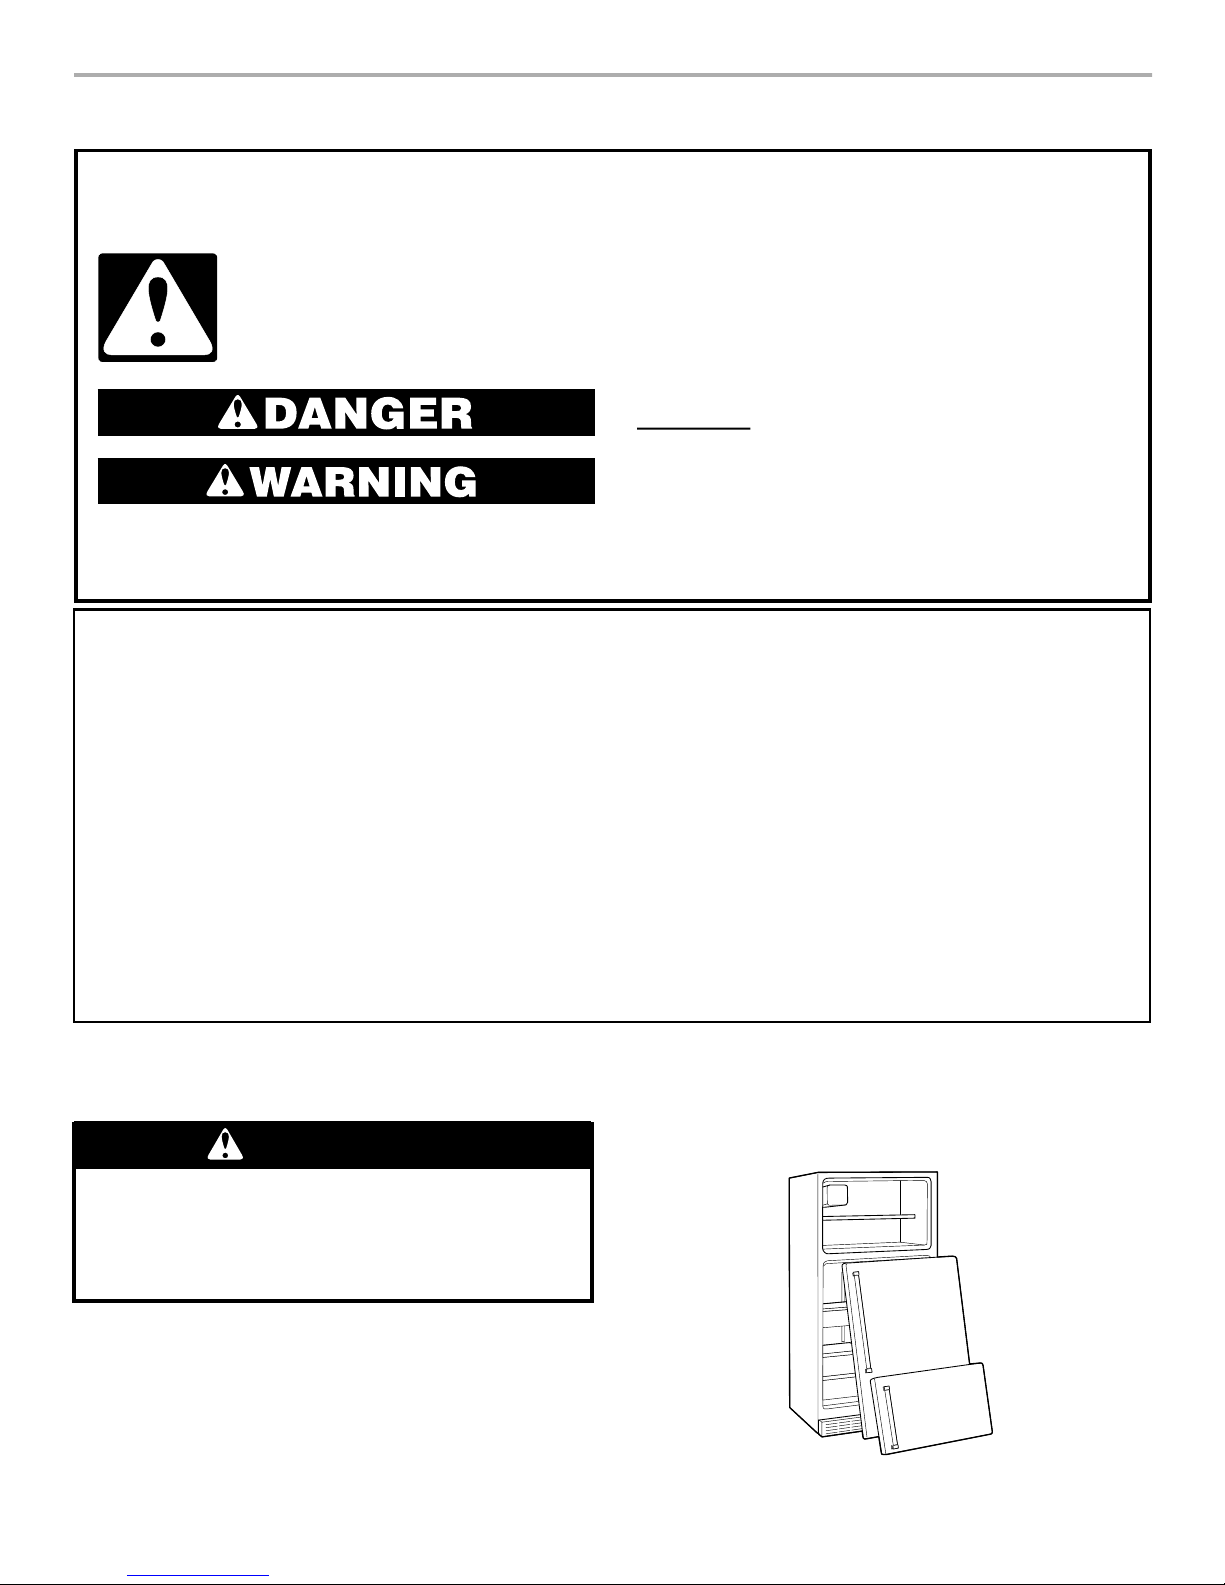
Proper Disposal of Your
Old Refrigerator
WARNING
Suffocation Hazard
Remove doors from your old refrigerator.
Failure to do so can result in death or
brain damage.
IMPORTANT: Child entrapment and suffocation are not problems
of the past. Junked or abandoned refrigerators are still dangerous
– even if they will sit for “just a few days.” If you are getting rid of
your old refrigerator, please follow these instructions to help
prevent accidents.
SAVE THESE INSTRUCTIONS
Before you throw away your old refrigerator or freezer:
■ Take off the doors.
■ Leave the shelves in place so that children may not easily
climb inside.
3
INSTALLING YOUR
REFRIGERATOR
Unpacking Your Refrigerator
WARNING
Excessive Weight Hazard
Use two or more people to move and install
refrigerator.
Failure to do so can result in back or other injury.
Remove shelves from the shipping position (shelves are
shipped upside down):
Grasp the front of the upper shelf with one hand and use the
1.
other hand to remove packing material from the shelf area.
Lower the front of the upper shelf until shelf hooks can be
2.
removed from the shelf supports and pull the shelf forward.
Flip the shelf over and insert the rear shelf hooks into the
3.
shelf supports. Tilt th e front of shelf up until rear shelf hooks
drop into the shelf supports.
Lower the front of the shelf and check to make sure that it is
4.
securely in position.
Removing packaging materials
■ Remove tape and glue from your refrigerator before using. To
remove any remaining tape or glue, rub the area briskly with
your thumb. Tape or glue residue can also be easily removed
by rubbing a small amount of liquid dish soap over the
adhesive with your fingers. Wipe with warm water and dry.
■ Do not use sharp instruments, rubbing alcohol, flammable
fluids, or abrasive cleaners to remove tape or glue. These
products can damage the surface of your refrigerator. For
more information, see “Refrigerator Safety” section.
■ On some models, shelves, bins, door shelf rails, and other
feature parts may be packaged in the Int erior FeaturePak.
Follow the instructions contained in the package for proper
assembly.
■ Depending on your model, to remove the protective
(transparent) film that is on the nameplate, which is located
on the freezer handle, use your fingernail and peel off the film,
starting from one side and peeling to the other.
IMPORTANT:
white foam air return insert that is located behind the control
panel on the ceiling of the refrigerator. The insert is part of the
refrigerator and not part of the packing materi al. If the insert is
removed, ice may migrate down from the freezer and cause
icicles to form.
Depending on your model, do not remove the
Cleaning before use
After you remove all of the package materials, clean the inside of
your refrigerator before using it. See the cleaning instructions in
the “Caring for your Refrigerator” section.
Important information to know about glass shelves
and covers:
Do not clean glass shelves or covers with warm water when
they are cold. Shelves and covers may break if exposed to
sudden temperature changes or impact, such as bumping.
For your protection, tempered glass is designed to shatter
into many small, pebble-size pieces. This is normal. Glass
shelves and covers are heavy. Use special care when removing them to avoid impact from dropping.
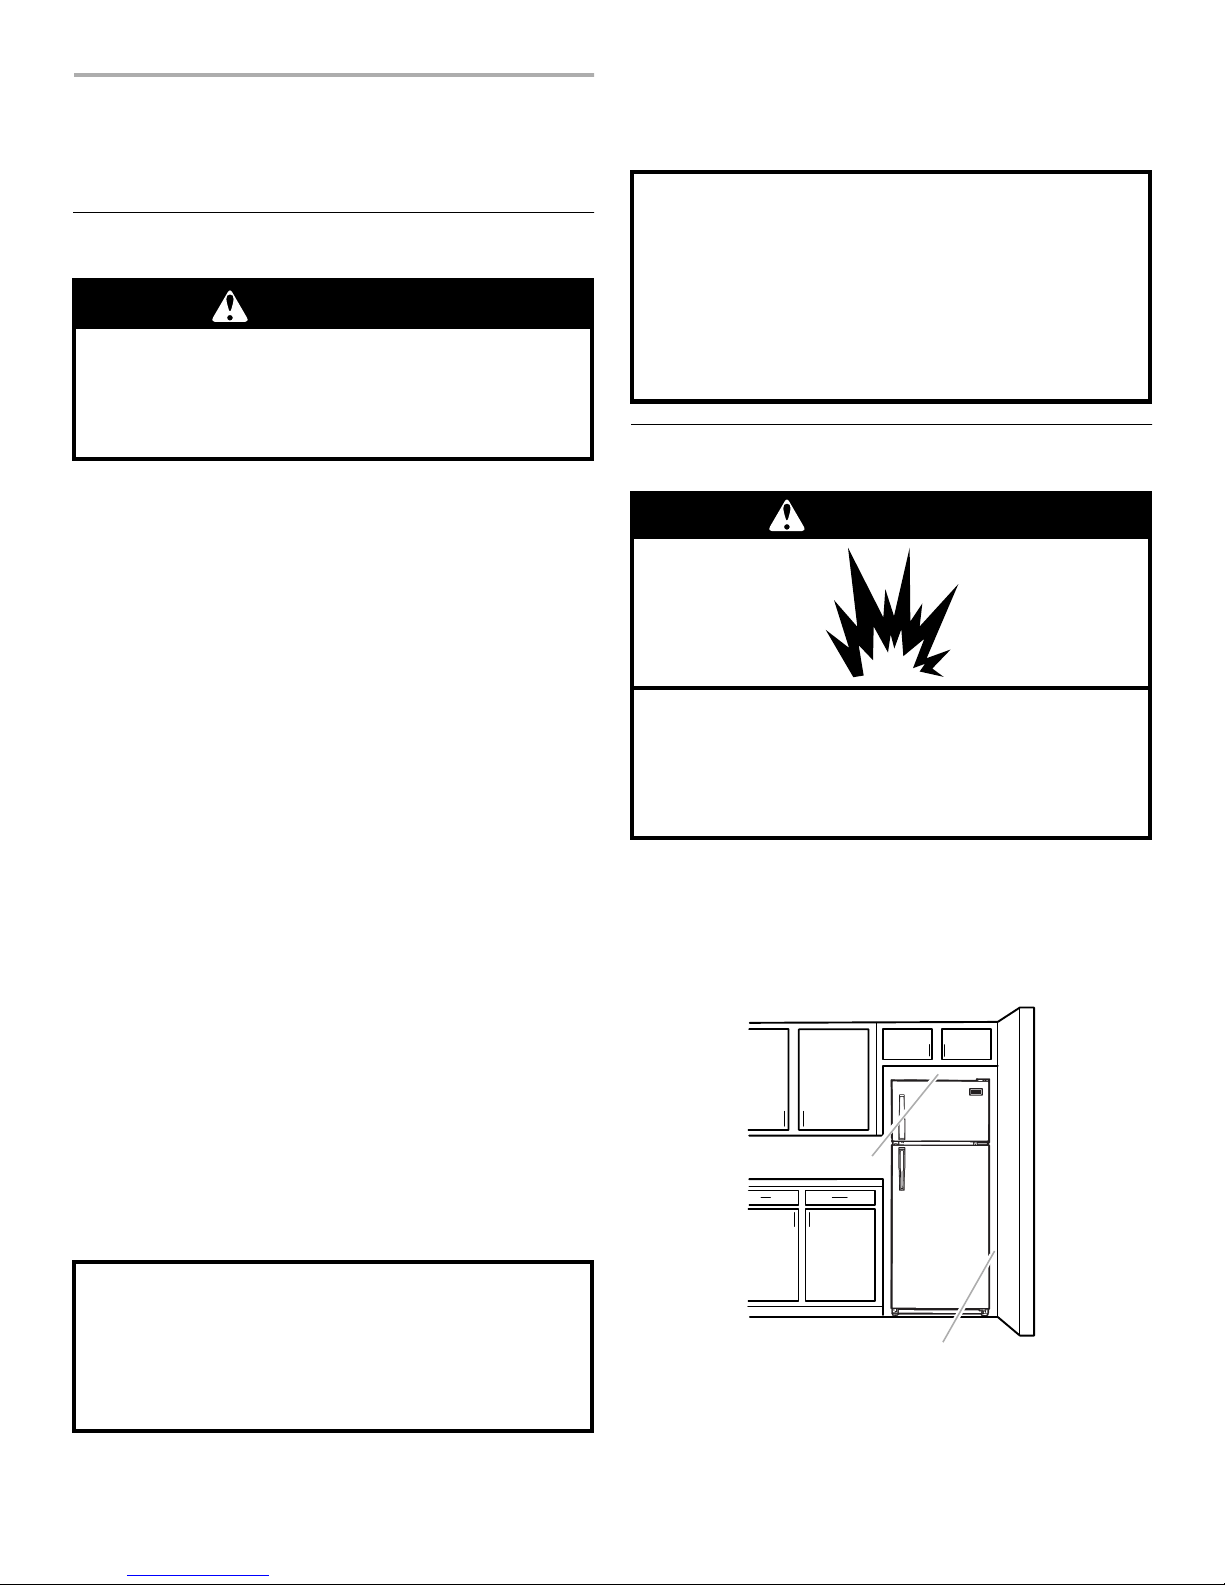
Space Requirements
WARNING
Explosion Hazard
Keep flammable materials and vapors, such as
gasoline, away from refrigerator.
Failure to do so can result in death, explosion,
or fire.
■ To ensure proper ventilation for your refrigerator, allow for a
.5 in. (1.25 cm) space on each side.
■ Allow 3 in. (7.5 cm) of space between overhead cabinets and
refrigerator top.
■ Allow at least 1 in. (2.5 cm) between bac k of cabinet and the
wall.
3" (7.5 cm)
When Moving Your Refrigerator:
Your refrigerator is heavy. When moving the refrigerator
for cleaning or service, be sure to protect the floor.
Always pull the refrigerator straight out when moving it.
Do not wiggle or “walk” the refrigerator when trying to move
it, as floor damage could occur.
4
2" (5.08 cm)
■ If your refrigerator has an ice maker, make sure you leave
some extra space at the back for the water line connections.
■ If you are installing your refrigerator next to a fixed wall, leave
2 in. (5.08 cm) minimum on the hinge side (depending on your
model) to allow for the door to swing open.
■ Level the refrigerator (See “Door Closing and Alignment”).
NOTE: Do not install the refrigerator near an oven, radiator, or
other heat sour ce, no r in a locatio n wher e the te mperat ure wi ll fall
below 40°F (5°C).
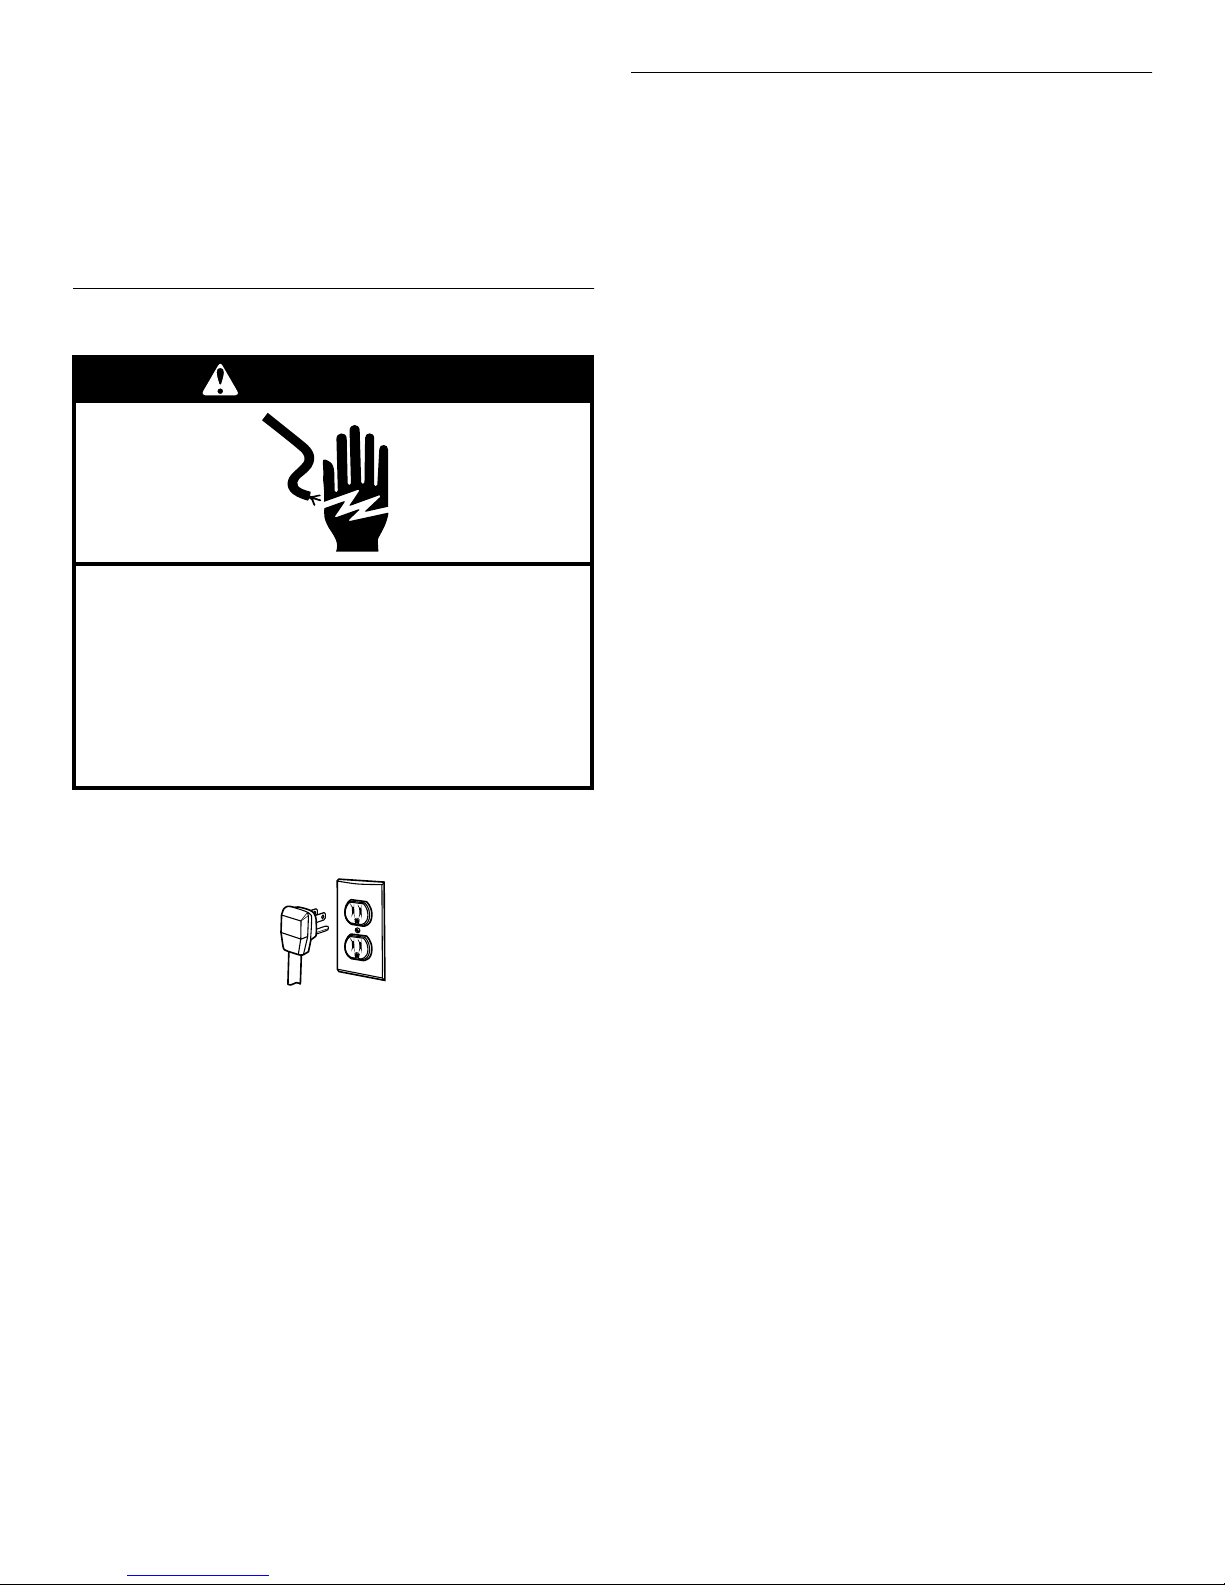
Electrical Requirements
WARNING
Electrical Shock Hazard
Plug into a grounded 3 prong outlet.
Do not remove ground prong.
Do not use an adapter.
Do not use an extension cord.
Failure to follow these instructions can result in
death, fire, or electrical shock.
Before you move your refrigerator into its final location, it is
important to make sure you have the proper electrical
connection:
Recommended gr oun ding met hod
A 115 Volt, 60 Hz., AC only 15 or 20 ampere fused, grounded
electrical supply is required. It is recommended that a separate
circuit serving only your refrigerator be provided. Use an outlet
that cannot be tur ned off by a switch. Do not use an
extension cord.
NOTE: Before performing any type of installation, cleaning, or
removing a light bulb, turn the control, (Thermostat, Refrigerator
or Freezer Control depending on the model) to OFF and then
disconnect the refrigerator from the electrical source. When you
are finished, reconnect the refrigerator to the electrical source
and reset the control (Thermostat, Refrigerator or Freezer Control
depending on the model) to the desired setting.
Connecting the Refrigerator
to a Water Source
Read all directions carefully before you begin.
IMPORTANT:
■ If operating the refrigerator before installing the water
connection, turn ice maker to the OFF position to prevent
operation without water.
■ All installations must be in accordance with local plumbing
code requirements.
■ Use copper tubing and check for leaks.
■ Install copper tubi ng only in areas where temperatures will
remain above freezing.
■ It may take up to 24 hours for your ice maker to begin
producing ice.
Tools required:
■ Standard screwdriver
■ ⁷⁄₁₆ in. and ¹⁄₂ in. open-end wrenches or two adjustable
wrenches
■ ¹⁄₄ in. nut driver
■ ¹⁄₄ in. drill bit
■ Hand drill or electric drill (properly grounded)
NOTE: Your refrigerator dealer has a kit available with a
¹⁄₄ in. (6.35 mm) saddle-type shut-off valve, a union, and copper
tubing. Before purchasing, make sure a saddle-type valve
complies with your local plumbing codes. Do not use a piercingtype or ³⁄₁₆ in. (4.76 mm) saddle valve which reduces water flow
and clogs more easily.
Cold Water Supply
The ice maker water valve contai ns a flow washer which is used
as a water pressure regulator. The ice maker needs to be
connected to a cold water line with water pressure between 30
and 120 psi. If a problem occurs, ca ll your utility company.
Connecting to water line:
1. Unplug refrigerator or disconnect power.
2. Turn OFF main water supply. Turn ON nearest faucet long
enough to clear line of water.
3. Find a ¹⁄₂ in. (12.7 mm) to 1¹⁄₄ in. (3.18 cm) vertical COLD
water pipe near the refrigerator.
NOTE: Horizontal pipe will work, but the following procedure
must be followed: Drill on the top side of the pipe, not the
bottom. This will help keep water away from the drill. This
also keeps normal sediment from collecting in the valve.
4. To determine the length of copper tubing you will need,
measure from connection on lower left rear of refrigerator to
water pipe. Add 7 feet (2.1 m) to allo w for mov in g refrigerator
for cleaning. Use ¹⁄₄ in. (6.35 mm) O.D. (outside diamet er)
copper tubing. Be sure both ends of copper tubing are cut
square.
5
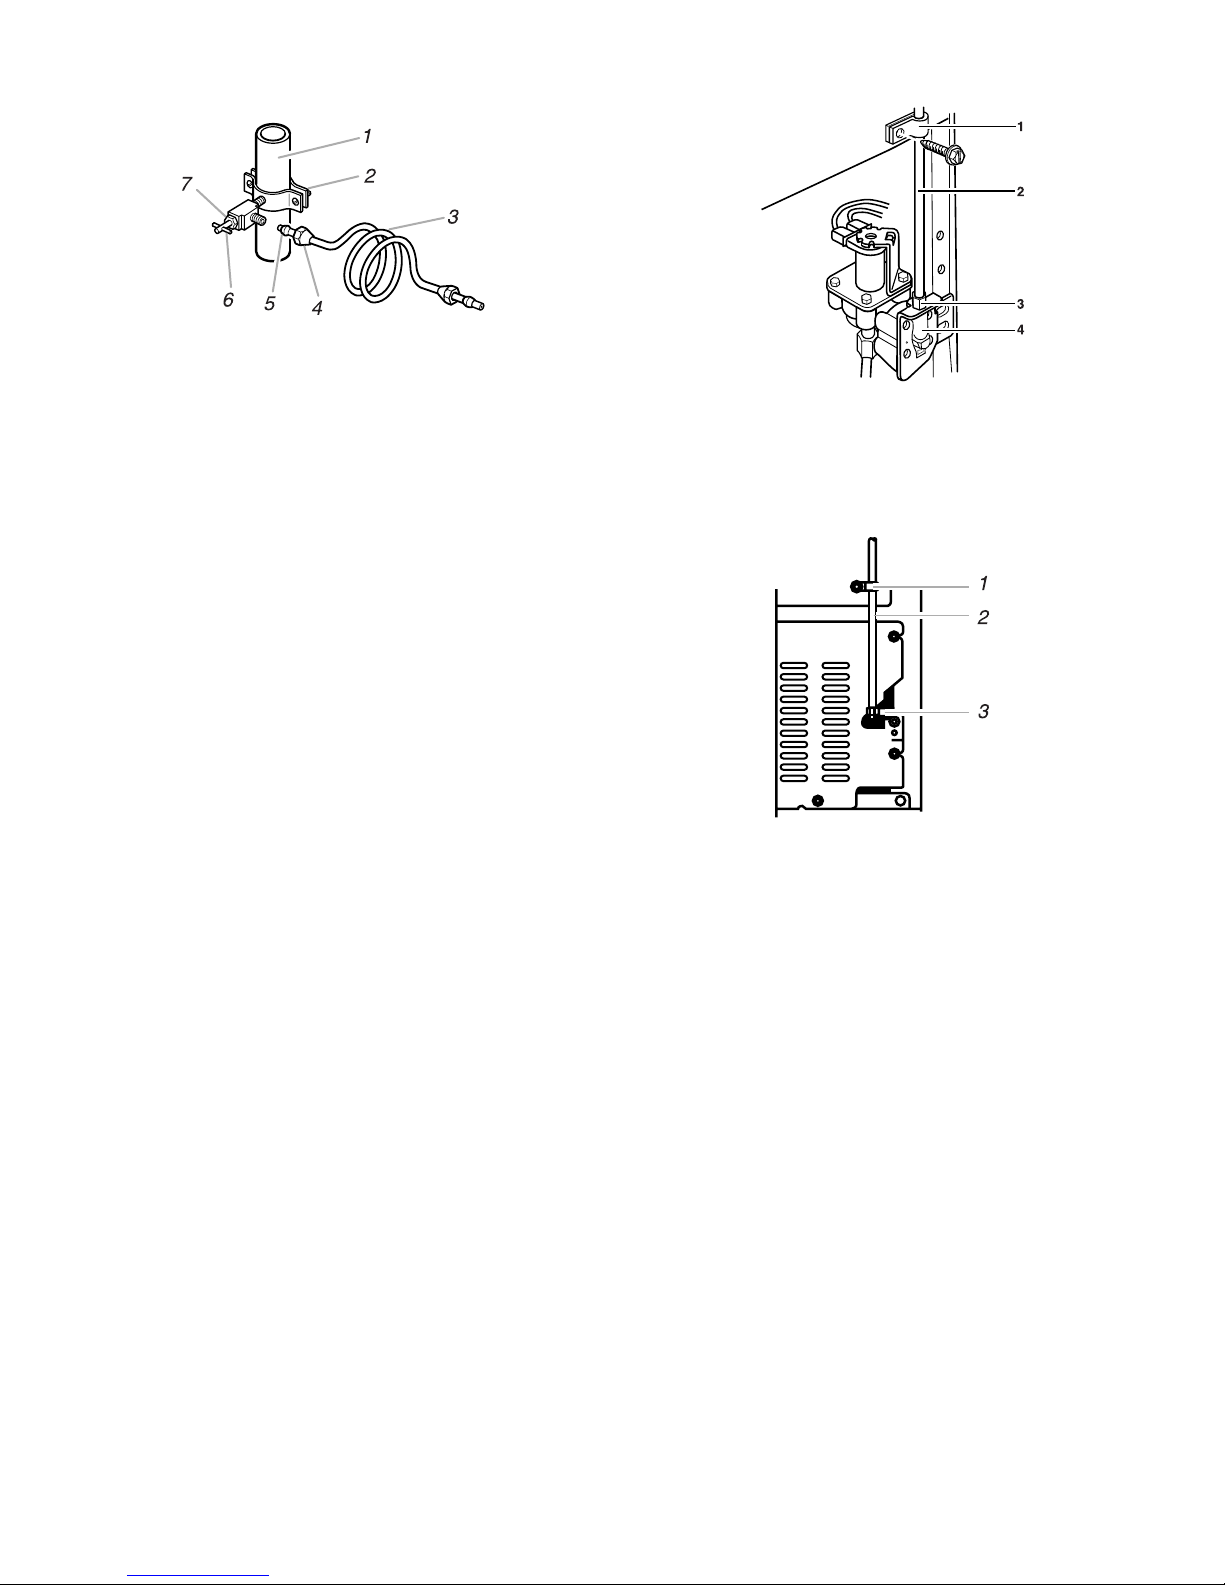
5. Using a grounded drill, drill a ¹⁄₄ in. (6.35 mm) hole in the cold
water pipe you have selected.
1. Cold Water Pipe
2. Pipe Clamp
3. Copper Tubing
4. Compression Nut
5. Compression Sleeve
6. Shut-Off Valve
7. Packing Nut
Style 1
1. Tube Clamp
2. Copper Tubing
3. Compression Nut
4. Valve Inlet
6. Fasten shut-off valve to cold water pipe with pipe clamp. Be
sure outlet end is solidly in the ¹⁄₄ in. (6.35 mm) drilled hole in
the water pipe and that washer is under the pipe clamp.
Tighten packing nut. Tighten the pipe clamp screws carefully
and evenly so washer makes a watertight seal. Do not
overtighten or you may crush the copper tubing, es pecially if
soft (coiled) copper tubi ng is used. Now you are ready to
connect the copper tubing.
7. Slip compression sleeve and compression nut on copper
tubing as show n. Inse rt end of tu bing into o utle t en d sq uar el y
as far as it will go. Screw compression nut onto outlet end
with adjustable wrench. Do not overtighten.
8. Place the free end of the tubing into a container or sink, and
turn ON main water supply and flush out tubing until water is
clear. Turn OFF shut-off valve on the water pipe. Coil copper
tubing.
Connecting to refrigerator:
NOTE: The first step for connecting the water line to you r
refrigerator is different depending on the type of water valve
provided with your refrigerator. See the diagrams below to
determine the style of valve you have. (On kit models, assemble
water valve to refrigerator per kit instructions.)
1. For Style 1, disconnect the tube clamp on the back of the
product and insert the copper tubing through the clamp, as
shown. Remove th e tape label from the valve inlet and insert
copper tubing until it bottoms out (approximately ³⁄₄ in. [1.9
cm]). Tighten nut by hand as much as possible; then turn the
nut an additional ¹⁄₂ tu rn using a wrench. Do not overtighten.
Re-attach the tube clamp and tube to the back of the cabinet.
Skip to Step 2.
For Style 2, disconnect the tube clamp on the back of the
product and insert copper tubing through the clamp as
shown. Attach the copper tube to the valve inlet using a
compression nut and sleeve as shown. Tighten the
compression nut. Do not overtighten. Re-attach the tube
clamp and tube to the back of the cabinet. Move to Step 2.
2. Turn shut-off valve ON. Check For Leaks. Tighten any
connections (including connections at the valve) or nuts that
leak.
Style 2
1. Tube Clamp
2. Copper Tubing
3. Compression Nut
3. The ice maker is equipped with a built-in water strainer. If
local water conditions require periodic cleaning or a well is
your source of water supply, a second water strainer sho uld
be installed in the ¹⁄₄ in. (6.35 mm) water line. Obtain a water
strainer from your nearest appliance dealer. Install at either
tube connection.
4. Plug in refrigerator or reconnect power.
6
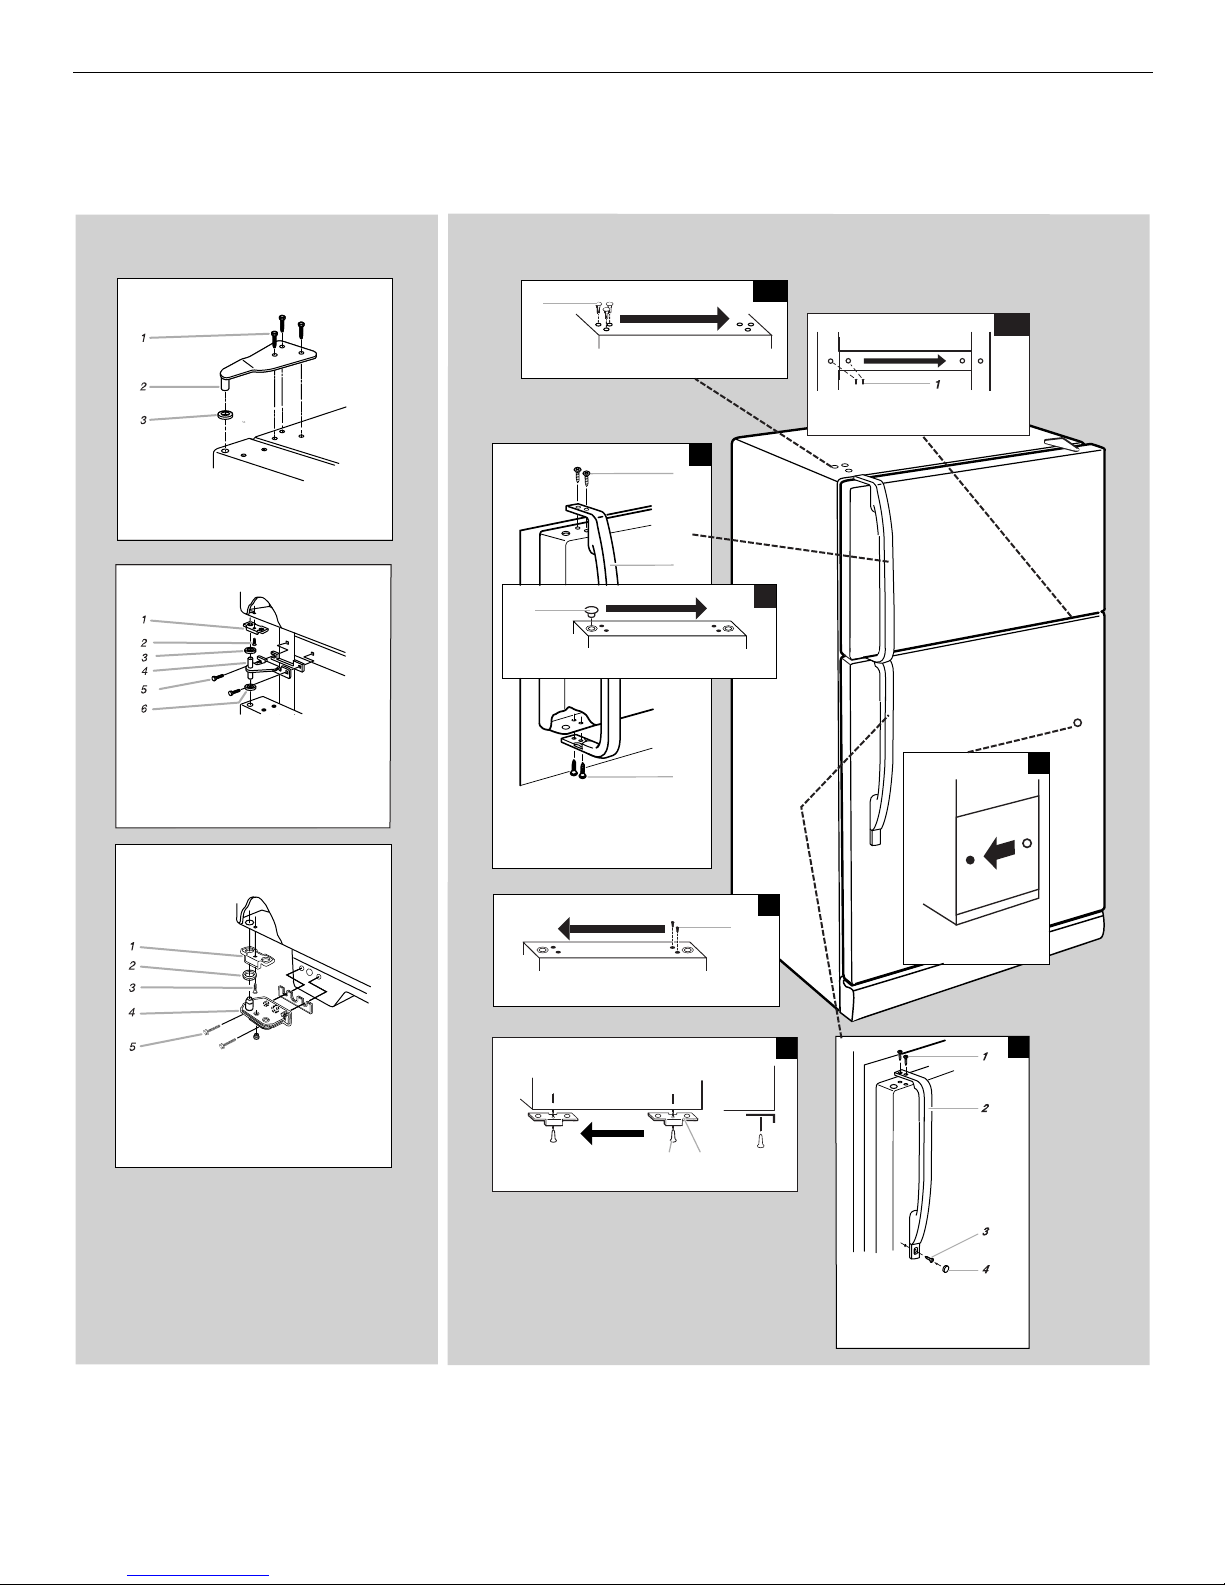
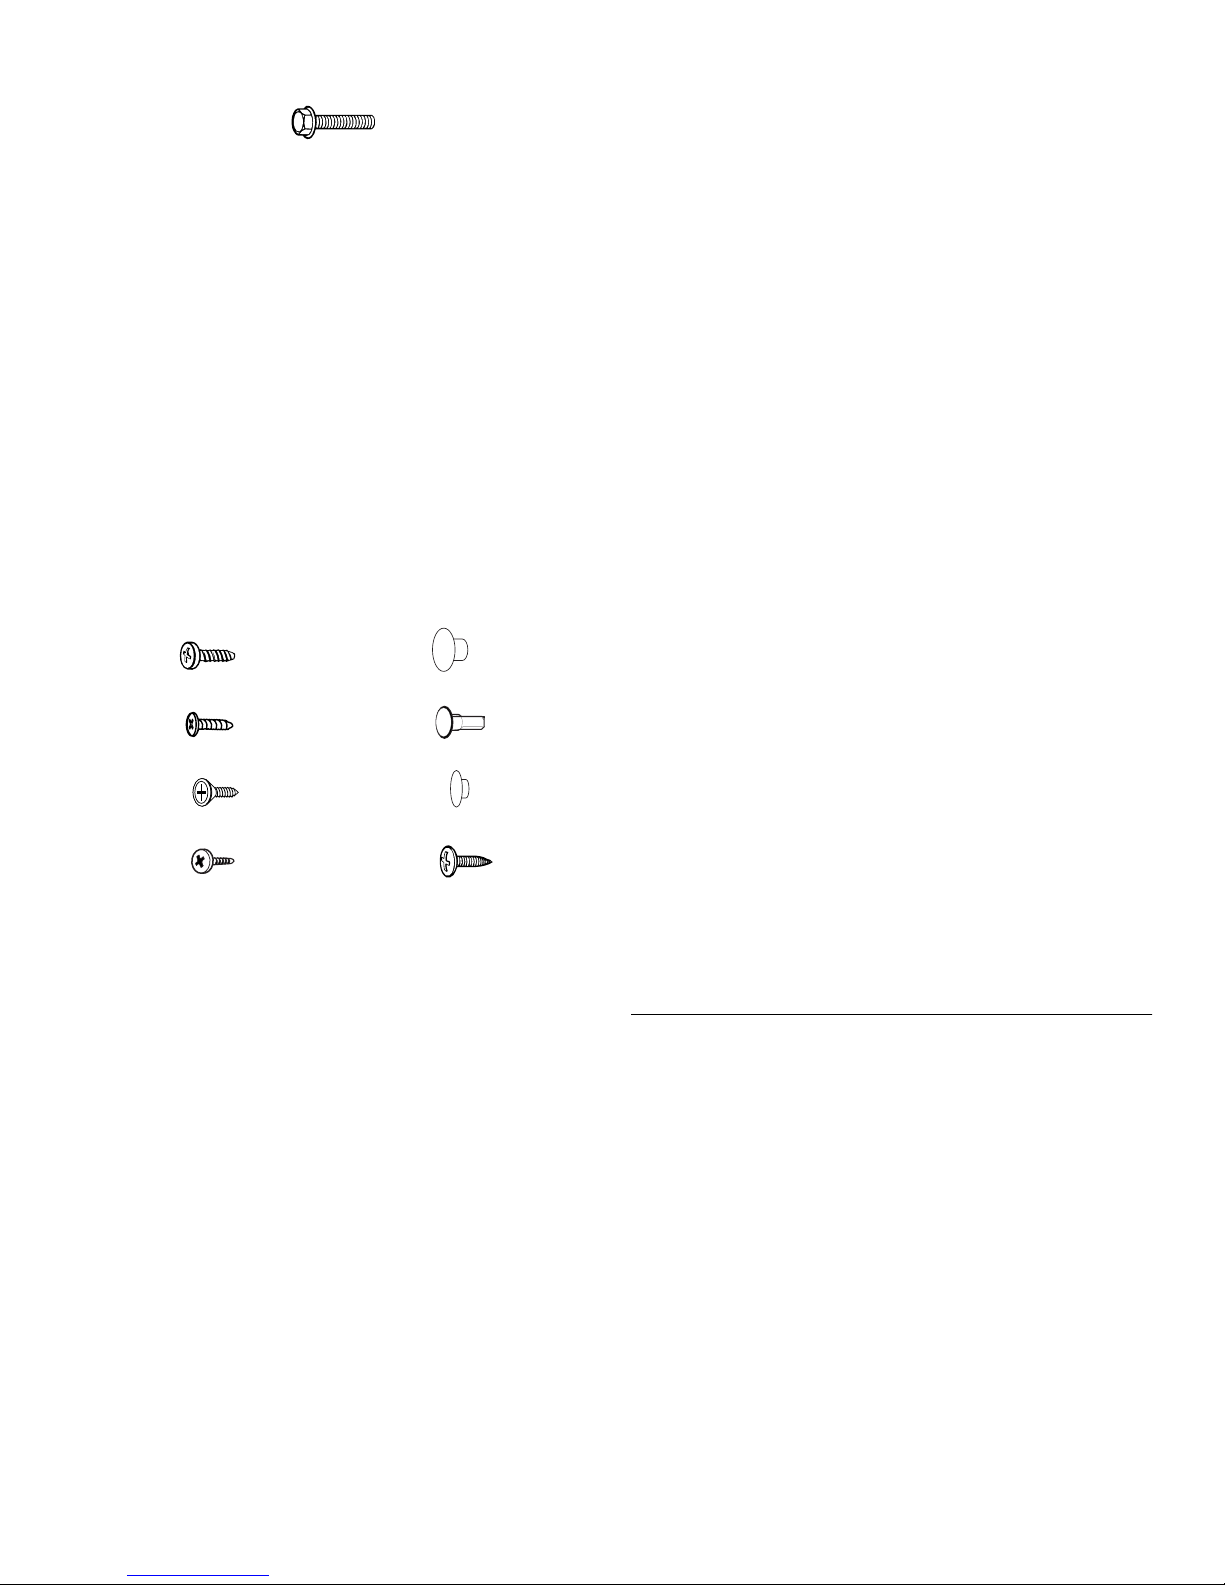
Refrigerator Doors: Removing, Reversing (optional) and Replacing
TOOLS NEEDED: ⁵⁄₁₆ in. hex-head socket wrench, No. 2 Phillips screwdriver, flat-head screwdriver, ⁵⁄₁₆ in. open-end wrench, flat 2 in.
putty knife.
IMPORTANT: Before you begin, turn the refrigerator control OFF, unplug refrigerator or disconnect power. Remove food from doors.
Door Removal &
Replacement
Top Hinge
5
/
16
1. " Hex-Head Hinge Screws
2. Top Hinge
3. Spacer
Center Hinge
1. Door Stop
2. Door Stop Screw
3. Spacer
4. Center Hinge
5
/
16
5. " Hex-Head Hinge Screws
6. Spacer
Bottom Hinge
Door Swing Reversal (optional)
1
1. Cabinet Hinge Hole Plugs
1
1. Door Hinge Hole Plug
1. Flat-Head Handle Screws
2. Freezer Handle
1-2
1-1
5
/
16
1. " Hex-Head Hinge
Screws and Washers
2
1
2
3
1
7
1. Door Stop
2. Spacer
3. Door Stop Screw
4. Bottom Hinge
5
/
16
5. " Hex-Head Hinge Screws
1. Door Handle Sealing Screws
Front View
1. Door Stop Screw
2. Door Stop
1
1
Side View
2
4
1. Door Handle
Seal Screw Front
5
1. Flat-Head Handle Screw
2. Refrigerator Handle
3. Handle Screw
4. Screw Cover
6
7
Door and hinge removal
in. Hex-Head Hinge Screw
⁵⁄₁₆
Unplug refrigerator or disconnect power.
1.
Keep both doors closed until you are ready to lift them free
2.
from the cabinet.
Provide additional support f or the doors while the
NOTE:
hinges are being moved. Do not depend on the door magnets
to hold the doors in place while you are working.
Remove the parts for the top hinge as shown in Top Hinge
3.
graphic.
Lift the freezer door free from the cabinet.
4.
Remove the parts for the center hinge as shown in the Center
5.
Hinge graphic.
Lift the refrigerator door free from the cabinet.
6.
Remove the parts for the bottom hing e as shown in the
7.
Bottom Hinge graphic.
IMPORTANT: If you want to reverse your doors so that they
open in the opposite direction, follow these steps. If you are
not reversing the doors, see “Door and Hinge Replacement.”
Door reversal (optional)
Door Stop Screw Door Hinge Hole Plug
Door Handle Sealing Screw Cabinet Hinge Hole Plug
Flat-Head Handle Screw Door Handle Screw Cover
Door Handle Seal Screw Front Round-Head Handle Screw
Cabinet
Remove
1.
move them to opposite side (see Graphic 1-1).
Remove cabinet hinge hole plugs from cabinet top and move
2.
them to opposite side hinge holes as shown (see Graphic 1-
2).
Freezer door
Remove freezer handle assembly as shown . Keep all parts
1.
together (see Graphic 2).
Remove door hinge hole plug. Move to opposite side as
2.
shown (see Graphic 3).
Remove door handle sealing screws. Move to opposite side
3.
of freezer door as shown (see Graphic 4).
Remove door stop. Move to opposite side of freezer door as
4.
shown (see Graphic 5).
Position freezer handle on opposite side of freezer door.
5.
Assemble handle on door as shown (see
Graphic 2).
Tighten all screws. Set aside door until hinges and refrigerator
6.
compartment door are in place.
in. hex-head hinge screws from ha ndle side and
⁵⁄₁₆
Refrigerator door
Remove the screw cover (see Graphic 6).
1.
Remove refrigerator handle assembly as shown. Keep all
2.
parts together (see Graphic 6).
Remove door hinge hole plug from refrigerator door. Move to
3.
opposite side hinge h ole as shown (see Graphic 3).
Remove door handle sealing screws. Move to opposite side
4.
of refrigerator door as shown (see Graphic 4).
Remove door handle seal screw front. Move to opposite side
5.
of refrigerator door as shown (see Graphic 7).
Remove door stop. Move to opposite side of refrigerator door
6.
as shown (see Graphic 5).
Position refrigerator handle on opposite side of the
7.
refrigerator door as shown (see Graphic 6). Drive top two
screws in handle first. Align lower portion of handle and drive
bottom screw.
Replace screw cover (see Graphic 6).
8.
Tighten all screws. Set aside refrigerator door until bottom
9.
hinge is instal led on product.
Door and hinge replacement
Graphic may be reversed if door swing is reversed.
Note:
Replace the parts for the bottom hinge as shown. Tighten
1.
screws.
Replace the refrigerator door.
2.
Provide additional support for the doors while the
NOTE:
hinges are being moved. Do not depend on the door magnets
to hold the doors in place while you are working.
Assemble the parts for the center hinge as shown and tighten
3.
all screws (see Center Hinge graphic).
Replace the freezer door.
4.
Assemble the parts of the top hinge as shown (see T op Hinge
5.
graphic). Do not tighten screws completely.
Line up the doors so that the bot tom of the freezer door
6.
aligns evenly with the top of the refrigerator door. Tighten all
screws.
Final Steps
Check all holes to make sure that hole plugs and screws are
1.
in place.
Plug in refrigerator or reconnect power.
2.
Reset the controls (see “Setting the Controls” section.)
3.
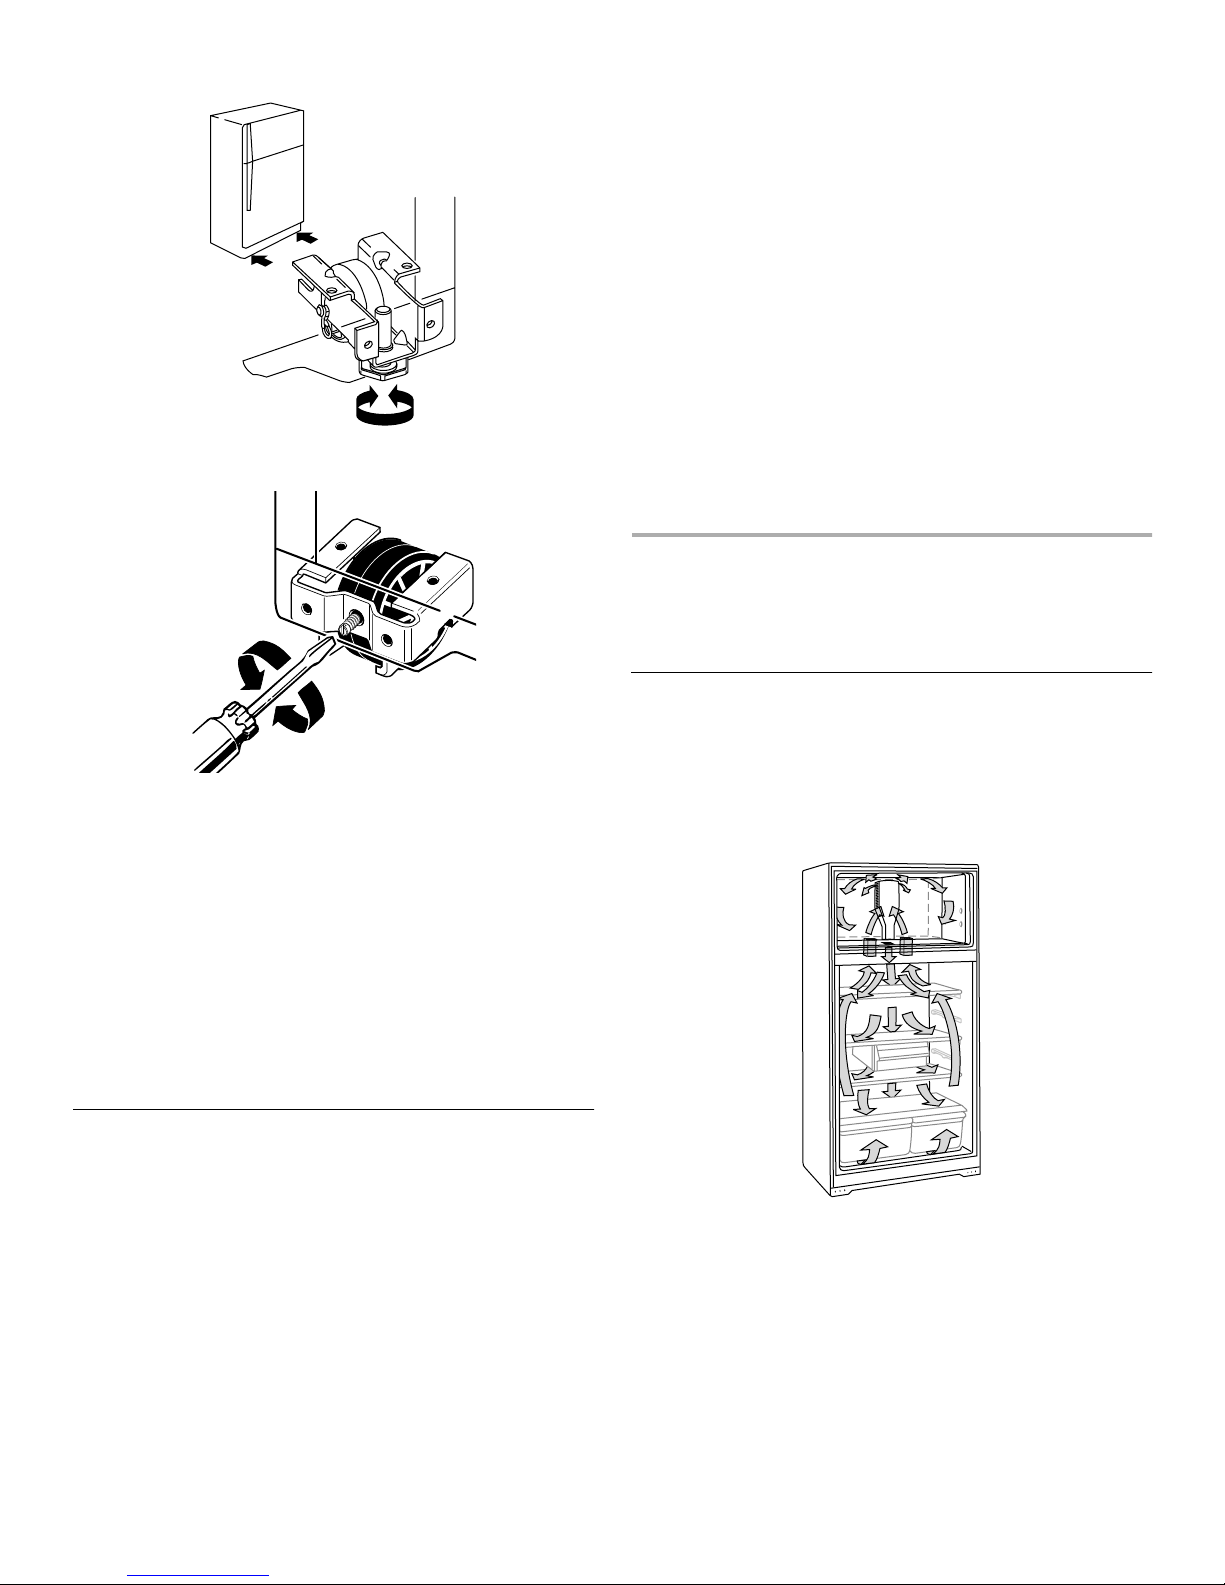
Door Closing and Alignment
Your refrigerat or has two fr ont a djustab le r ollers – one on the rig ht
and one on the left. If your refrigerator seems unsteady or you
want the doors to close easier, adjust the refrigerator's tilt using
the instructions below:
Roll out the refrigerator and use a level to ch eck the floor at
1.
the back from side-to-side. If needed, use shims to level the
back of the refrigerator if it is uneven. Roll the refrigerator
back into place with the rear rollers on top of any shim(s)
used so that the rear of the refrigerator is level.
With the rear already level and the refrigerator in place, use
2.
the bottom leveling screws to level the refrigerator from sideto-side. They are part of the front roller assemblies, which are
found at the base of the refrigerator on either side.
Having someone push agains t the top of the
NOTE:
refrigerator takes some weight off the leveling screws and
rollers. This makes it easier to adjust the screws.
8
Style 1
Style 2
■ Rattling noises may come from the flow of refrigerant, the
water line, or items stored on top of the refrigerator.
■ Your refrigerator is desi gned to run more efficiently to keep
your food items at the desired temperature. The high
efficiency compressor may cause your new refrigerator to run
longer than your old one, and you may hear a pulsating or
high-pitched sound.
■ Water dripping on the defrost heater during a defrost cycle
may cause a sizzling sound.
■ You may hear the evaporator fan motor circulating the air
through the refrigerator and freezer compartments.
■ As each cycle ends, you may hear a gu rgling sound due to
the refrigerant flowing in your refrigerator.
■ Contraction and expansion of the inside walls may cause a
popping noise.
■ You may hear air being forced over the condenser by the
condenser fan.
■ You may hear water runnin g into the drain pan during the
defrost cycle.
USING YOUR
REFRIGERATOR
3. Depending on your model, to level your refrigerator you may
either turn the screw clockwi se to raise that side of the
refrigerator or turn the screw counterclockwise to lower that
side. Place a level on top of the refrigerator to check
adjustments.
4. If the doors do not close on their own, you will need to raise
the front of the refrigerator so it is slightly h igh er than the
back. To do this, turn both leveling screws clockwise ¹⁄₂ turn.
IMPORTANT: Be sure to turn both screws an equal amount
or the refrigerator will no longer be level side-to-side.
5. Open doors and check if they close automatically. If not,
repeat steps 3 and 4.
6. Using a level, check to see if the refrigerator is still level sideto-side. Readjust if necessary.
Understanding Sounds You May Hear
Your new refrigerator may make sounds that your old one didn’t
make. Because the sounds are new to you, you might be
concerned about them. Most of the new sounds are normal. Hard
surfaces, like the floor , walls, and cabinets, can make the sounds
seem louder than they actually are. The following desc ribes the
kinds of sounds and what may be making them.
■ If your product is equipped wi th an ice maker, you will hear a
buzzing sound when the water valve opens to fill the ice
maker for each cycle.
■ The defrost timer will click when the automatic defrost cycle
begins and ends. Also, the Thermostat Control (or
Refrigerator Control depending on the model) will click when
cycling on and off.
Ensuring Proper Air Circulation
In order to ensure proper temperatures, you need to permit air
flow between the refrigerator and freezer sections. As shown in
the illustration, cool air enters through the bottom of the freezer
section and moves up. Most of the air then flows through the
freezer section vents and recirculates under the freezer floor. The
rest of the air enters the refrigerator section through the top vent.
Do not block any of these vents with food packages. If the
vents are blocked, airflow will be prevented and temperature and
moisture problems may occur.
IMPORTANT: Because air circulates between both sections, any
odors formed in one section will transfer to the other. You must
thoroughly clean both sections to eliminate odors. To prevent
odor transfer and drying out of food, wrap or cover foods tightly.
(See the “Refrigerator Safety” section for details.)
9
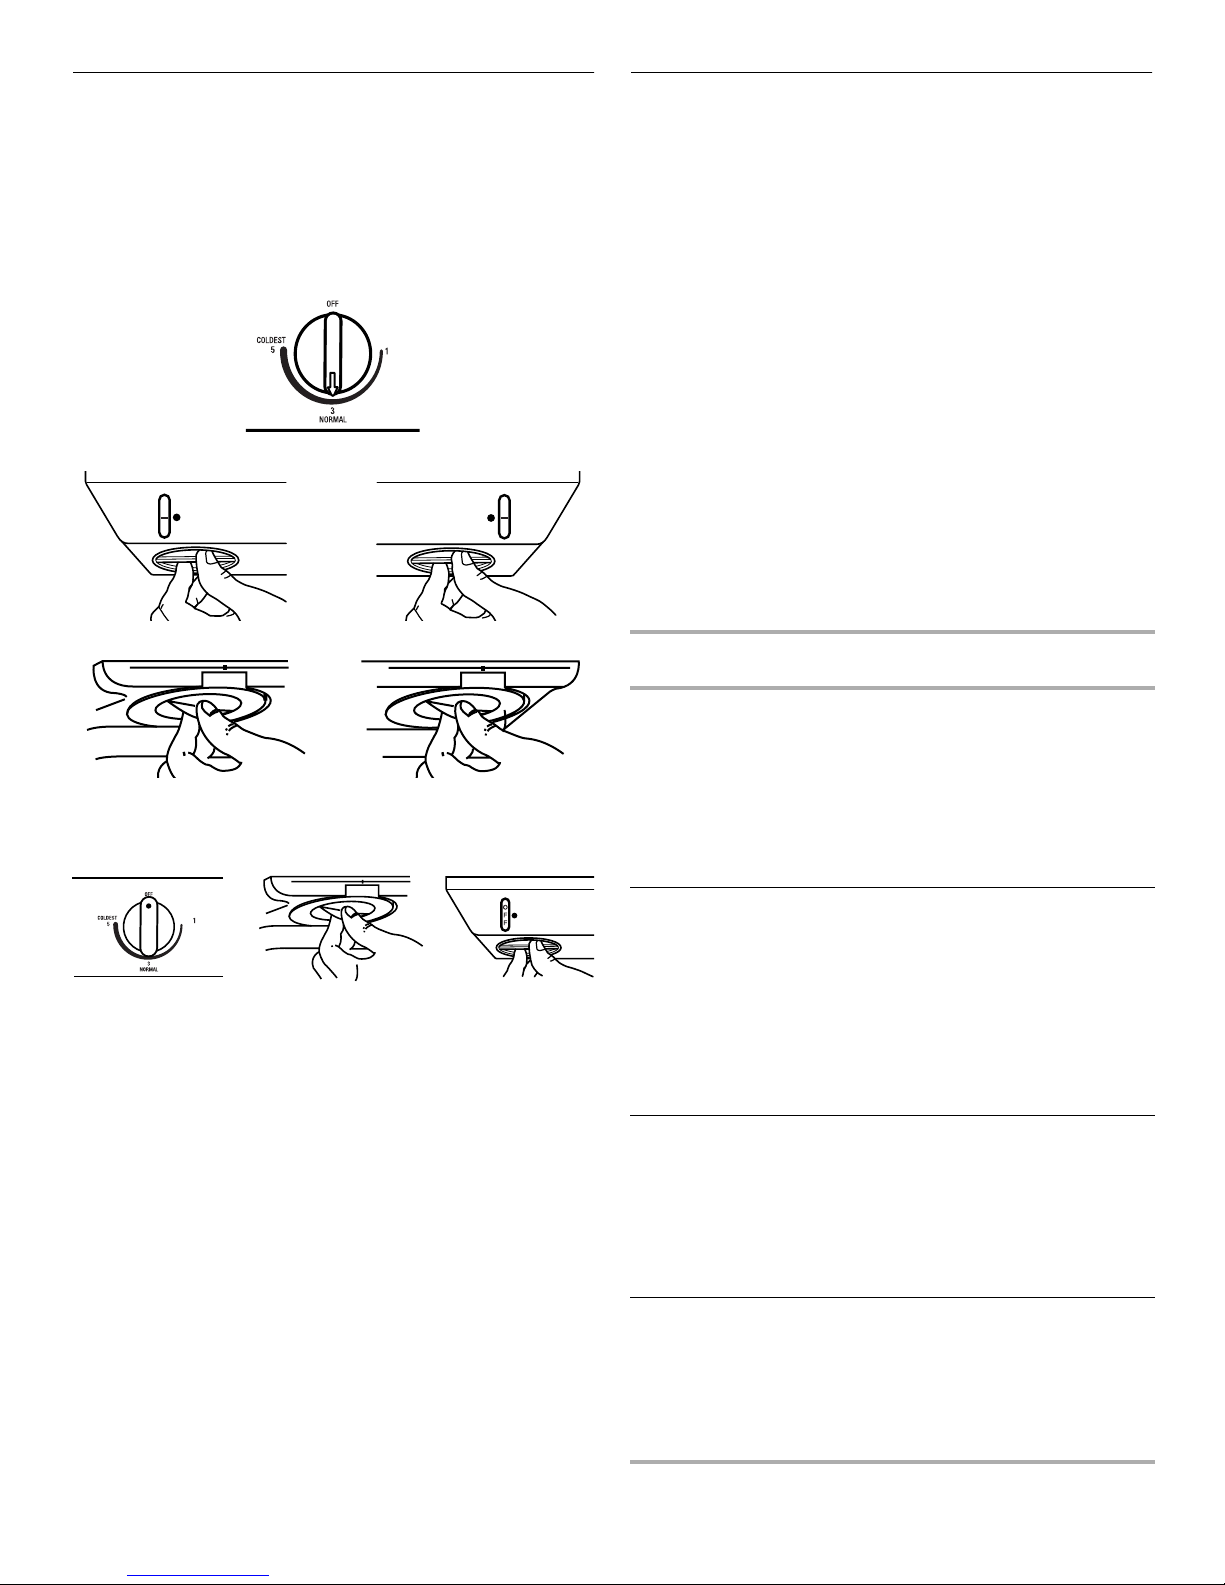
Setting the Control(s)
For your convenience, the refrigerator controls are preset at
the factory. Controls for the refrigerator and freezer are located
in the top of the refrigerator section.
When you first install your refrigerator, make sure that the
control(s) are still preset. The control(s) should be at the
“mid-settings” as shown for each style of control.
Mid-setting “3”
Mid-setting “3”
WARMER
1
2
REFRIGERATOR
3
RECOMMENDED SETTINGRECOMMENDED SETTING
4
5
COLDER
Mid-setting “4”
REFRIGERATOR
4
NOTE: To turn your refrigera tor o f f, turn the refrigerator contr ol to
the word OFF or until the word OFF appears, as shown below.
Your product will not cool when the refrigerator control is set to
OFF.
REFRIGERATOR
OFF
Give your refrigerator time to cool down completely before
adding food. It is best to wait 24 hours before you put food into
the refrigerator.
IMPORTANT: If you add food before the refrigerator has cooled
completely, your food may spoil. Turning the Refrigerator or
Freezer Control(s) to a higher (colder) than recommended
setting will not cool the compartments any faster.
On models with t wo controls, the Freeze r C on trol functions as an
airflow director . Setting “1” will direct more of the cold air into the
refrigerator section, while setting “5” (or “7” depending on your
model) will d ir ect mor e of the cold air into th e f re eze r se ction . Th e
cold air flows from the freezer compartment through the top vent
into your fre sh food s ect io n ( s ee d ia gra m in the "En su ring Proper
Air Circulation" section). On models with one control, the airflow
does not require adjustment.
WARMER
FREEZER
RECOMMENDED SETTINGRECOMMENDED SETTING
COLDER
1
2
3
4
5
FREEZER
4
WARMER
1
2
REFRIGERATOR
3
RECOMMENDED SETTING
4
5
COLDER
Adjusting Control Settings
Give the refrigerator time to co ol down completely before adding
food. It is best to wait 24 hours before you put food into the
refrigerator. The “mid-settings” indicated in the previous section
should be correct for normal household refrigerator usage. The
controls are set correctly when milk or juice is as cold as you like
and when ice cream is firm.
For models with two controls:
The Refrigerator Control functions as the thermostat for the entire
product (refrigerator and freezer sections). The higher the number
setting, the longer the compressor will run to keep the
temperature colder. The Freezer Control adjusts the cold air flow
from the freezer to the refrigerator.
If you need to adjust temperatures in the refrigerator or freezer,
start by adjusting the refrigerator first. Wait 24 hours after the
refrigerator adjustment to check the freezer temperature. If it is
too warm or too cold, then adjust the Freezer Control as well.
For models with a single control:
The Temperature Control functions as the thermostat for the
entire product (refrigerator and freezer sections). The higher t he
number setting, the longer the compressor will run to keep the
temperature colder.
Use the settings listed in the chart below as a guide. Always
remember to wait at least 24 hours between adjustments.
CONDITION/REASON:
REFRIGERATOR section
too warm
■ Door opened often
■ Large amount of food added
■ Room temperatur e very
warm
■ Blocked air stream
FREEZER section too warm/
ice not made fast enough
■ Door opened often
■ Large amount of food added
■ Very cold room temperature
(can’t cycle often enough)
■ Heavy ice usage
■ Blocked air stream
REFRIGERATOR section
too cold
■ Controls not set correctly for
your conditions
■ Blocked air stream
FREEZER section too cold
■ Controls not set correctly for
your conditions
RECOMMENDED
ADJUSTMENT:
Turn
REFRIGERATOR Control
or TEMPERATURE
Control to next higher
number, wait 24 hours,
then re-check
Move items out of air
stream
T urn FREEZER Contr ol or
TEMPERATURE Control
to next higher number,
wait 24 hours, then recheck
Move items out of air
stream
Turn REFRIGERATOR
Control or
TEMPERATURE Control
to next lower number,
wait 24 hours, then recheck
Move items out of air
stream
T urn FREEZER Contr ol or
TEMPERATURE Control
to next lower number,
wait 24 hours, then recheck
10
■ Blocked air stream
Move items out of air
stream
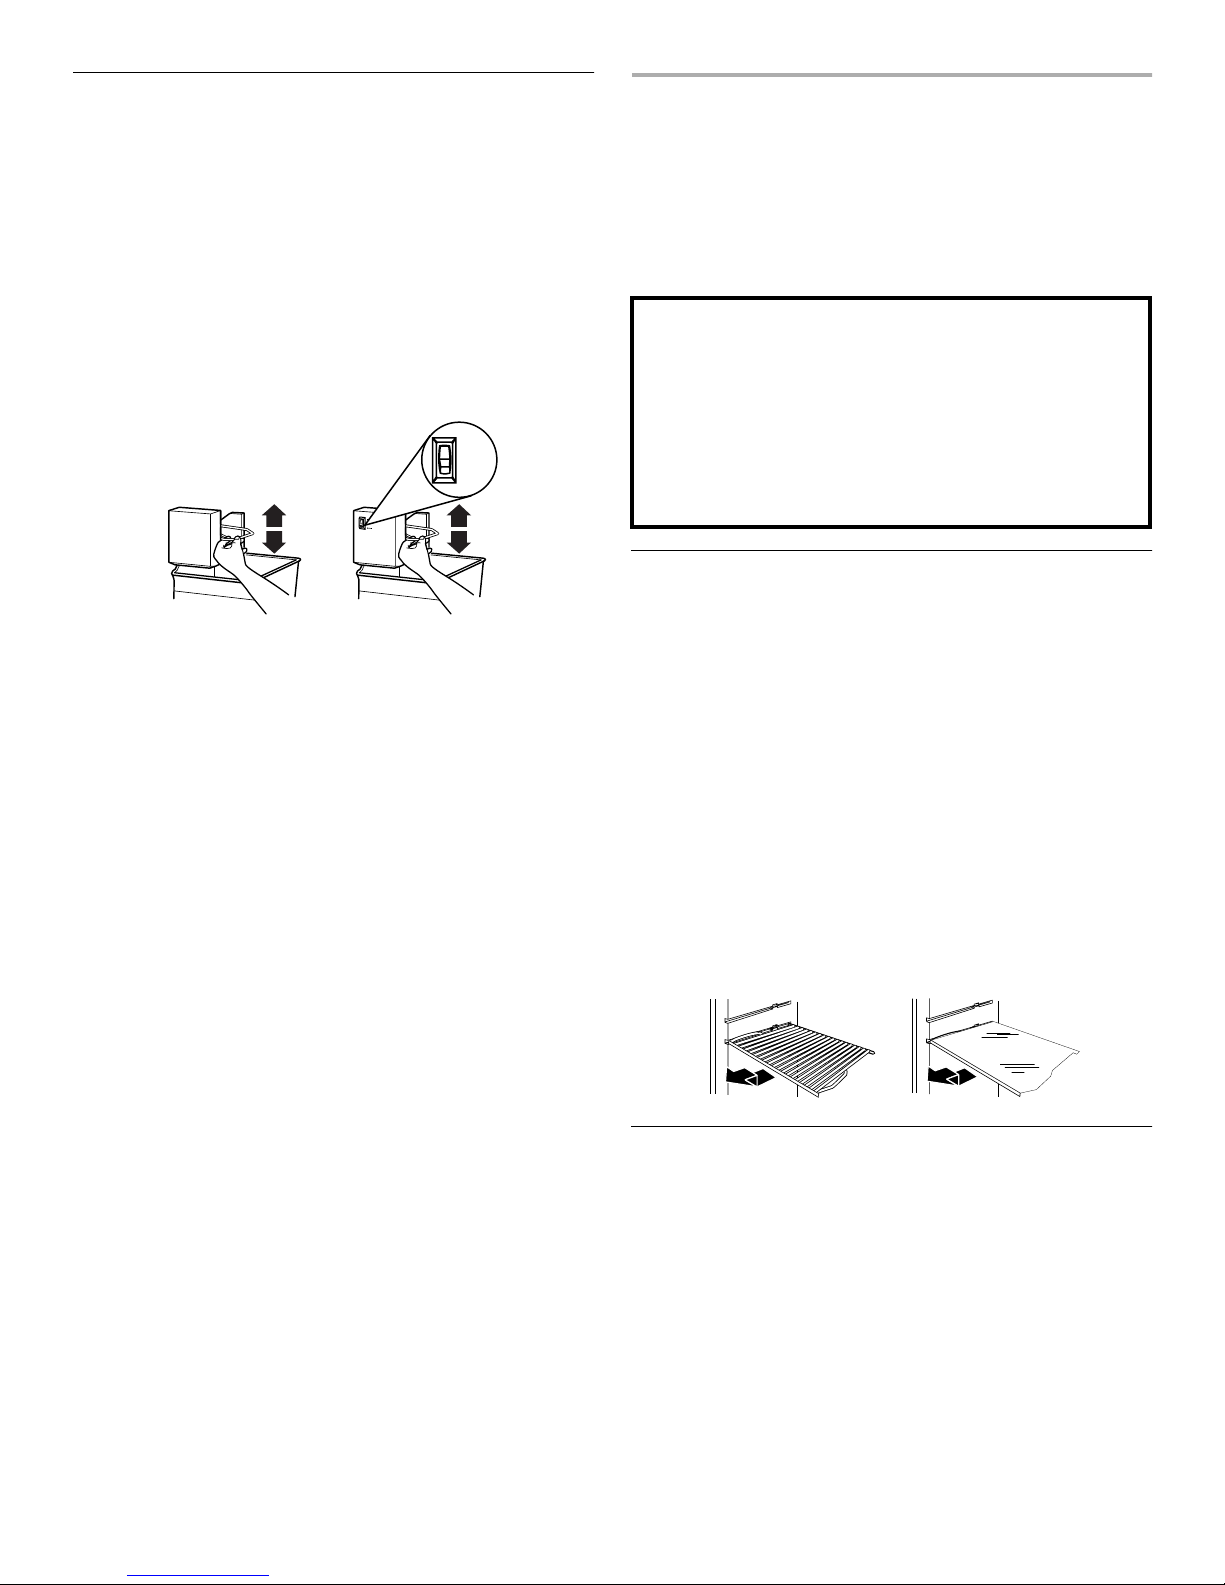
Ice Maker
(on some models - Accessory)
To turn the ice maker on/off:
The on/off switch for the ice maker is a wire shut-off arm located
on the side of the ice maker.
1. To turn the ice maker on, simply lower the wire shut-off arm.
NOTE: Your ice maker has an automatic shut-off. As ice is
made, the ice cubes will fill the ice storage bin and the ice
cubes will raise the wire shut-off arm to the OFF (arm up)
position.
2. To manually turn the icemaker off, lift the wire shut-off arm to
the OFF (arm up) position and listen for the click to make sure
the ice maker will not continue to operate.
MAX
NORMAL
To increase ice production rate:
■ Normal Ice Production: In normal ice production mode, the
ice maker should produce approximately 8 to 12 batches of
ice in a 24-hour period. If ice is not being made fast enoug h,
turn the Freezer Control toward a higher (colder) number in
half number steps. (For example, if the control is at 3, move it
to between 3 and 4.) Wait 24 hours and, if necessary,
gradually turn the Freezer Control to the hi ghest setting,
waiting 24 hours between each increase.
■ Maximum Ice Production (on some models): In maximum
ice production, the ice maker should produce approximately
16 to 20 batches of ice in a 24-hour period. If your refrigerator
has the maximum ice production feature, push the switch to
MAX.
REMEMBER:
■ Allow 24 hours to produce the first batch of ice.
■ Discard the first three batches of ice produced to avoid
impurities that may be flushed out of the system.
■ The quality of your ice will be only as good as the quality of
the water supplied to your ice maker.
■ Avoid connecting the ice maker to a softene d water supply.
Water softener chemicals (such as salt) can damage parts of
the ice maker and lead to poor quality ice. If a softened water
supply cannot be avoid e d, make sure the water softener is
operating properly and is well maintained.
■ It is normal for the ice cubes to be attached at the corners.
They will break apart easily.
■ Do not force the wire shut-off arm up or down.
■ Do not store anything on top of the ice maker or in the ice
storage bin.
REFRIGERATOR FEATURES
Your model may have some or all of these features. Features that
can be purchased separately as product accessories are labeled
with the word “Accessory.” Not all accessories will fit all models.
If you are inte r e sted in pu r cha sin g one of th e ac ces sori es , pl eas e
call the toll-free number on the cover or in the "Assistance or
Service" section.
Important information to know about glass shelves
and covers:
Do not clean glass shelves or covers with warm water when
they are cold. Shelves and covers may break if exposed to
sudden temperature changes or impact, such as bumping.
For your protection, tempered glass is designed to shatter
into many small, pebble-size pieces. This is normal. Glass
shelves and covers are heavy. Use special care when removing them to avoid impact from dropping.
Refrigerator Shelves
(Glass shelves on some models)
The shelves in your refrigerator a re adjustable to match your
individual storage need s.
Storing similar food items together in your refrigerator and
adjusting the shelves to fit different heights of items will make
finding the exact item you want easier. It will also reduce the
amount of time the refrigerator door is open, and save energy.
To remove and replace a shelf:
1. Remove items from the shelf.
2. Slide the shelf straight out to the stop.
3. Depending on your model, lift back or front of the shelf past
the stop. Slide shelf out the rest of the way.
4. Replace the shelf by sliding t he back of the shelf into the
track in the wall of the cabinet.
5. Guide the front of the shelf into the shelf track. Be sure to
slide the shelf in all the way.
Meat Drawer and Cover
(on some models)
To remove and replace the meat drawer:
1. Slide meat drawer out to the stop.
2. Lift front of meat drawer with one hand while supporting
bottom of drawer with other hand. Slide drawer out the rest of
the way.
3. Replace the drawer by sliding it back in fully past the drawer
stop.
11
 Loading...