

Page 1
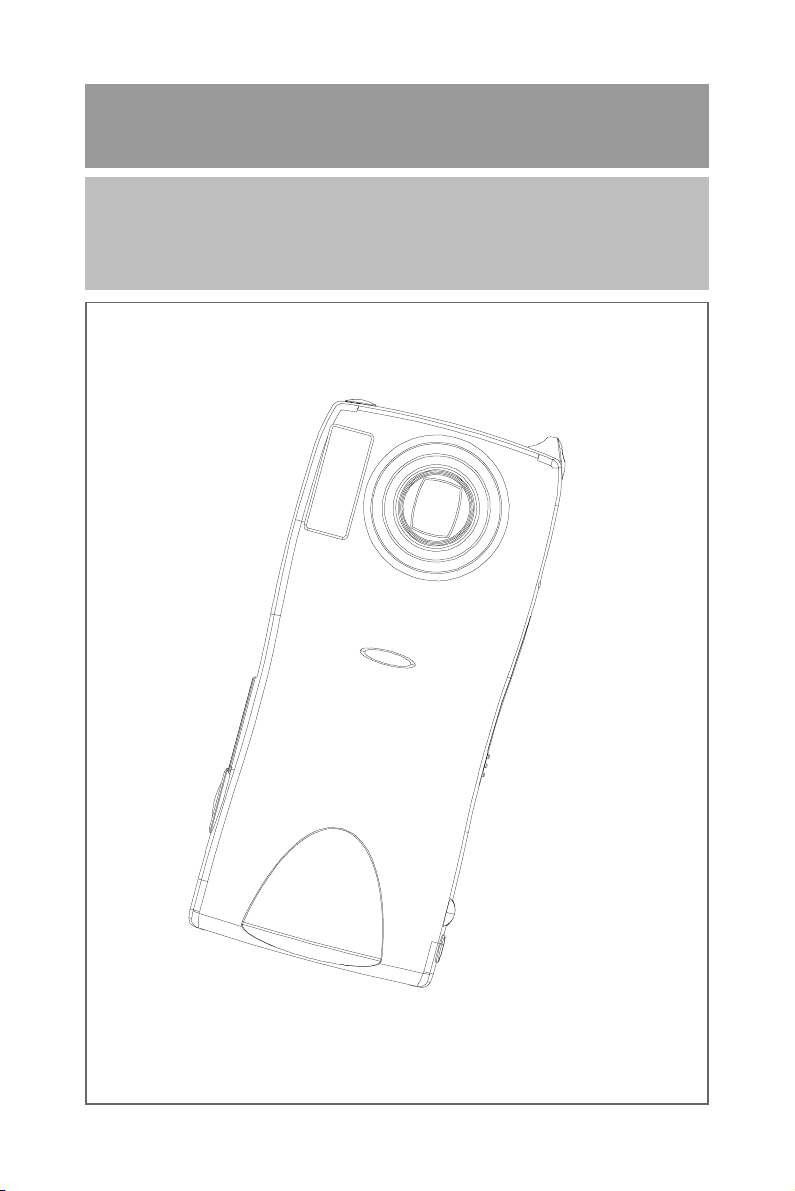
3.3 MegaPixels DSC
User Manual - English
Page 2

Contents
Safety Precautions 1
Specifications 2
Name of Parts 4
Before Using the Camera 8
1. Preparation 9
Powering the Camera 9
Storage Media 10
2.Recording 12
○○○○○○○○○○○○○○○○○○○○○○○○○○
○○○○○○○○○○○○○○○○○○○○○○○○○○
Basic Recording 12
Other Advanced Menu Functions 15
3. Playback / Delete 16
Basic Playback 16
Various Playback Functions 18
Deleting Files 23
4. Others 24
Changing the Camera Settings 24
Transferring your Image to the computer 27
Video Capture 28
○○○○○○○○○○○○○○○○○○○○○○○○○○
○○○○○○○○○○○○○○○○○○○○○○○○○○○○○
○○○○○○○○○○○○○○○○○○○○○○○○○○○
○○○○○○○○○○○○○○○○○○○○○○○
○○○○○○○○○○○○○○○○○○○○○○○○○○
○○○○○○○○○○○○○○○○○○○○○○○○○○
○○○○○○○○○○○○○○○○○○
○○○○○○○○○○○○○○○○○○○○○○○○○○
○○○○○○○○○○○○○○○○○○○○○○○
○○○○○○○○○○○○○○○○○○○○○○○○○
○○○○○○○○○○○○○○○○
○○○○○○○○○○○○○○○○○○○○○○
○○○○○○○○○○○○○○○○○○○○○○○○○○
○○○○○○○○○○○○○○○○○○○
○○○○○○○○○○○○○○○○○
○○○○○○○○○○○○
Warning Message 29
○○○○○○○○○○○○○○○○○○○○○○○○
Page 3
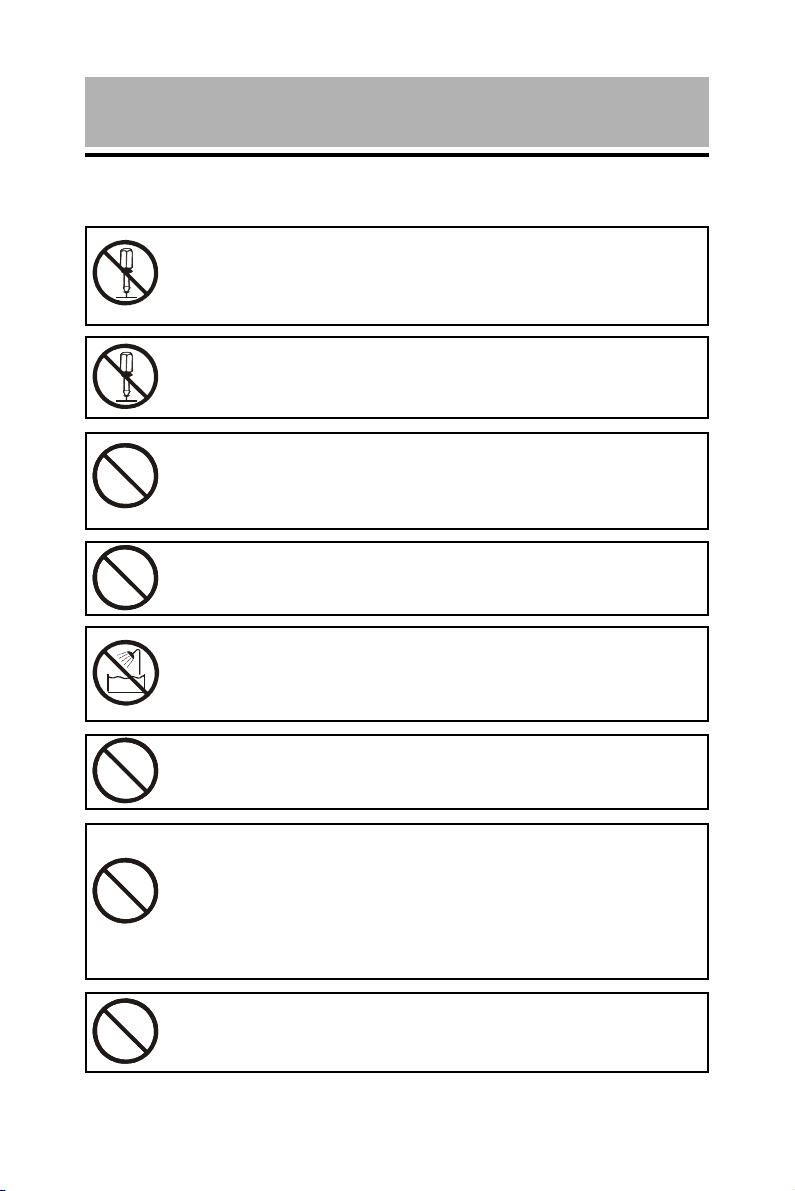
Danger
Do not attempt to disassemble, repair or alter the equipment
yourself. The high-voltage circuitry in the equipment poses
significant electrical hazard.
Do not attempt to disassemble, alter or directly solder the
battery.
Do not put the battery in a fire, attempt to heat it, uses it in
high temperature environment such as next to a fire or inside
a car.
Do not put it into water or allow it to get wet.
Do not use this camera in the bathroom.
Safety Precautions
Do not use batteries that are significantly damaged or
deformed.
Turn off the power immediately in the event of irregularity,
such as the equipment emitting smoke or a strange smell.
Remove the battery as soon as possible, being careful to
avoid electric shocks or burns. If you are drawing power from
a household electric outlet, be sure to unplug the power cord.
Keep the battery and SD memory card used in this camera
out of the reach of children to prevent accidental ingestion.
1
Page 4
Specification
General
z Video Signal Protocol NTSC / PAL
z Power Source Rechargeable Lithium-Ion Battery 3.7V
/ AC Adapter 5V
z Dimensions (WxHxD) 116.7 x 53.8 x 29.5 mm (4.5” x 2.1” x 11.6)
z Weight Approx. 172g (6.0 oz) (without battery)
z Operating Conditions Temperature: 0°C to 40°C (32°F to 104°F)
Humidity: 85% or less
z Storage Temperature -20°C ~ 60°C (-4°F to 140°F)
Memory Media
z Internal Memory 16 MB
z Memory Card Secure Digital Memory Card Slot
2
Page 5

Camera
z CCD 1/2.7 inch 3.34 mega pixels
z Lens Zoom Lens F2.8 ~ 3.8
z Focal Length f = 5.9 ~ 11.8 mm (equivalent to 38 ~ 76 mm in
35 mm format )
z Shooting Range z General: Approx. 14 cm (5.5”) (at Wide)
Approx. 40 cm (15.7”) (at Tele)
z Macro: Approx. 7 ~ 14 cm (2.75” to 5.5”) (at Wide)
z Digital Zoom 2X
z Monitor 1.5 inch LTPS TFT color LCD
z White Balance Auto / Preset (Daylight, Overcast, Fluorescent
Light, Tungsten Light)
z Exposure z Exposure Metering System: Center-weighted
Compensation z Mode: Auto /Manual compensation (± 2.0EV in
0.5 EV steps)
z Metering: TTL CCD method
z Shutter Speed 4, 2, 1 ~ 1/ 1000
z ISO Sensitivity Auto, ISO 200, ISO 400
z Built-in Flash Modes: Flash Off, Forced, Auto, Slow Synchro,
Red-eye Reduction
z Image z Still Picture: 2848 x 2136 / 2048 x 1536 /
Resolution 1600 x 1200/ 1280 x 960
z Motion Picture:320 x 240
z File Format JPEG (Exif2.1), TIFF, AVI
3
Page 6
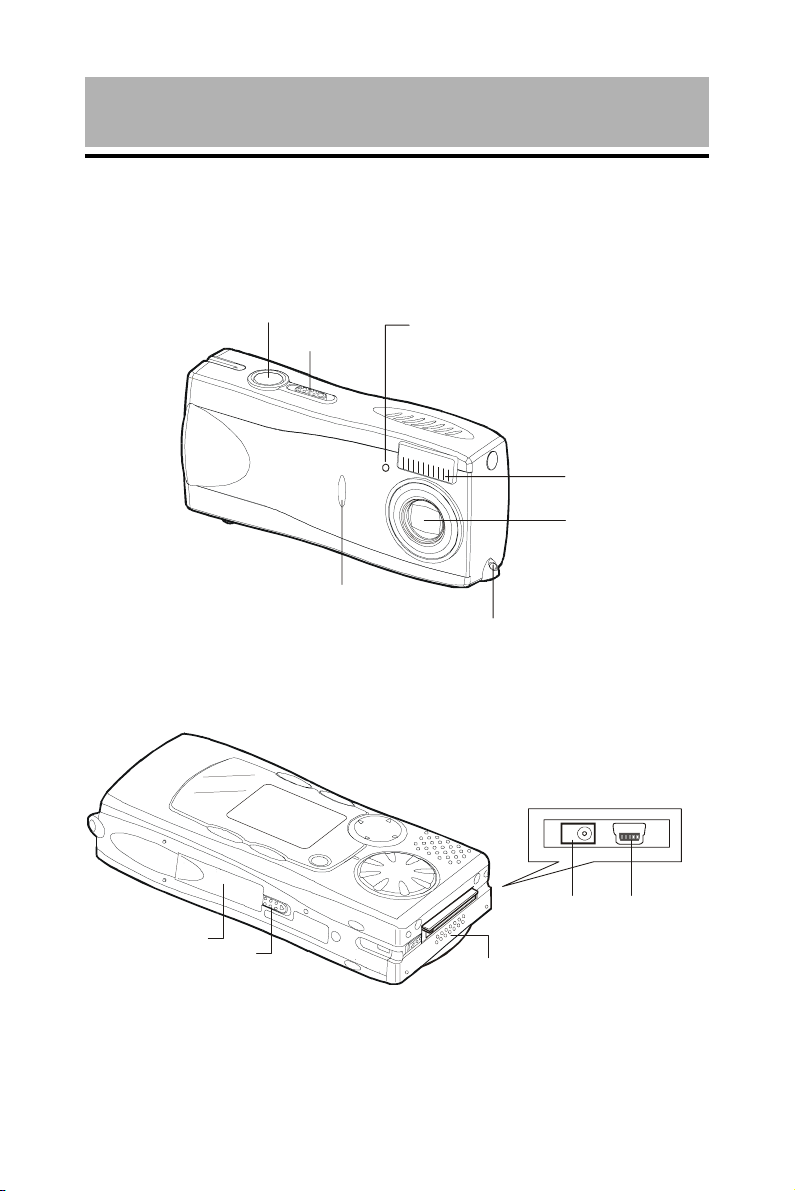
Camera
Names of Parts
a. Front
b. Back
Shutter
Release
Power
Switch
Battery Recharging
and Self-Timer LED
Flash
Sensor
Flash
Lens
Wrist Strap Eyelet
Card Cover
Card Cover Switch
Power Supply
Terminal DC Input
Battery Cover
USB Terminal
4
Page 7

Operating Parts
Vedio Out
LCD Monitor
Main Switch
PIC Button
Button
/ Zoom Button
Mode Dial
Flash LED
Autofocus LED
MENU / ENTER Button
CANCLE Button
DISPLAY Button
The camera offers a number of modes for
recording and playback. The mode dial is
used to select the desired mode.
Mode Dial Mode Name Description
SET UP
Set up mode
Playback mode This mode is used for playing
Still Picture mode This mode is used for normal
This mode is used for changing
and confirming the camera
setting.
recording files.
shooting.
5
Page 8
Continuous Picture are recorded
Shooting mode continuously while the
shutter release button
is pressed.
Motion Picture This mode is used for recording
motion picture.
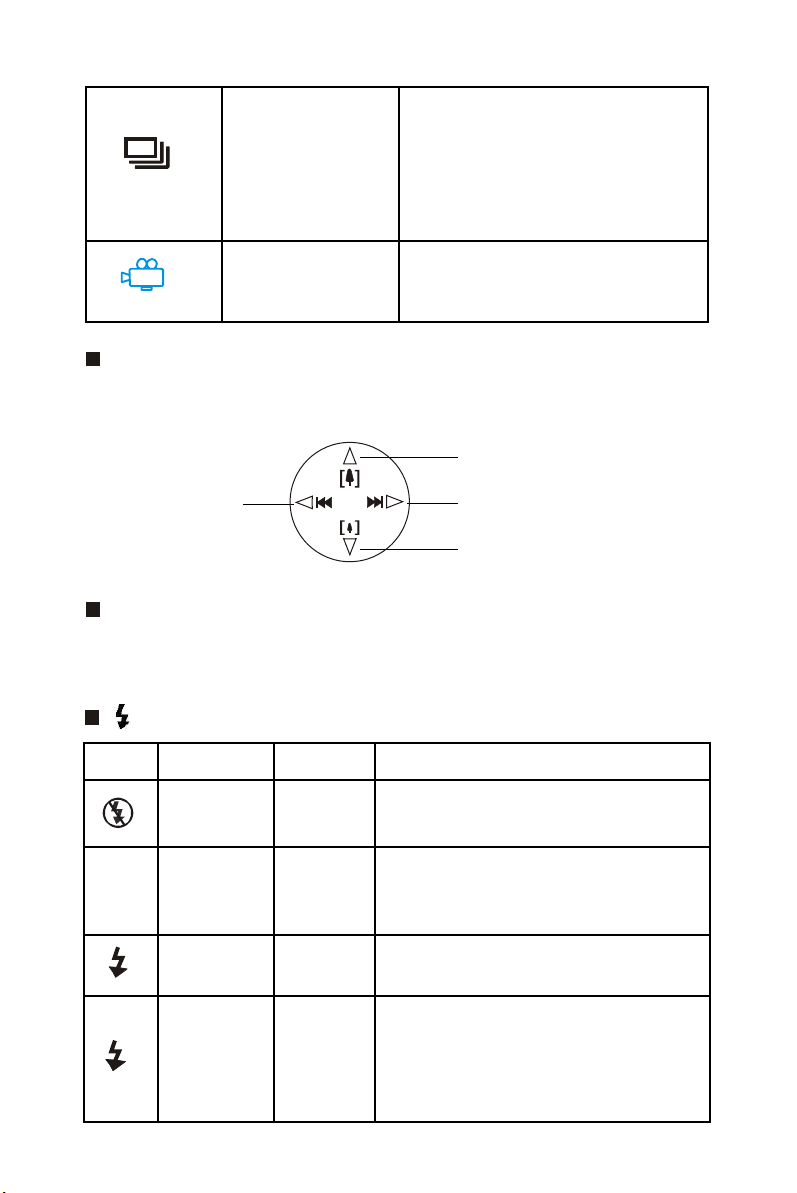
4-way Button
For Up / Down / Left / Right and Zoom Function.
Tele / Up
Left
Right
Wide / Down
MENU / ENTER Button
Display Menu and various modes.
Button
Icon Display Mode Description
Lit Flash The flash will not fire under
Off any conditions.
No No Auto The flash fire automatically in
Icon Display low light and back light
conditions.
Lit Forced The flash will fire under
any conditions.
Blinking Slow The flash can be fired to
Synchro illuminate the subject while a slow
shutter speed correctly exposes the
6
background.
Page 9
PIC Button
The camera offers six image quality modes: 2848 x 2136N,
2048 x 1536NC, 2048 x 1536F, 2048 x 1536N, 1600 x 1200N,
and 1280 x 960.
The default is 2048 x 1536N.
2848 x 2136N used for taking pictures with higher image
quality.
This mode can not be played back by using
Zoom Playback Function.
NC (non-compressed) mode is for recording data without
compressing it. N and F stand for Normal and Fine.
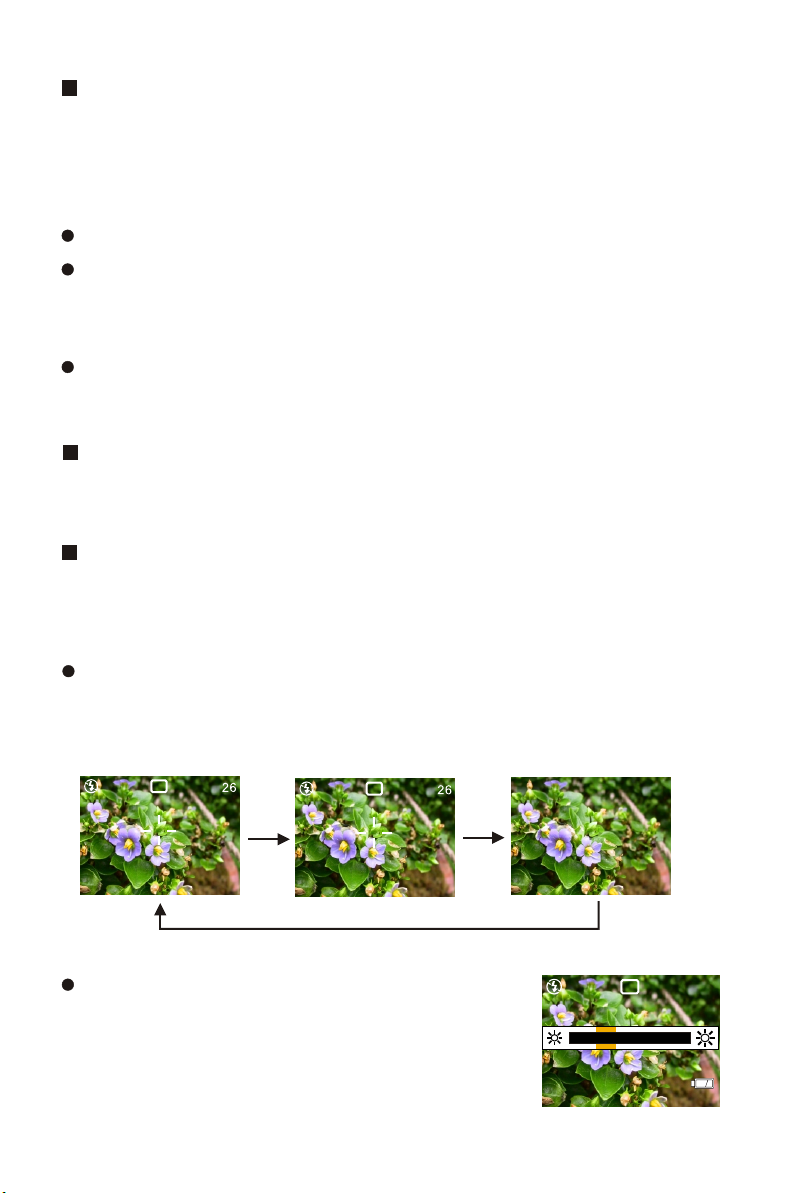
CANCEL Button
For Canceling.
DISPLAY Button
For LCD Display Function and Adjusting the Brightness of
the LCD Monitor.
The data display changes to show the recording mode,PIC
mode, recordable picture count, etc. each time the
DISPLAY button is pressed.
N 1600
2002/07/15 11:25
Press this button (approx. 2 seconds)
to adjust the brigstness of the LCD
monitor when it is hard to see, such
as in strong sunlight.
26
2002/07/15 11:25
7
Page 10
Before using the camera
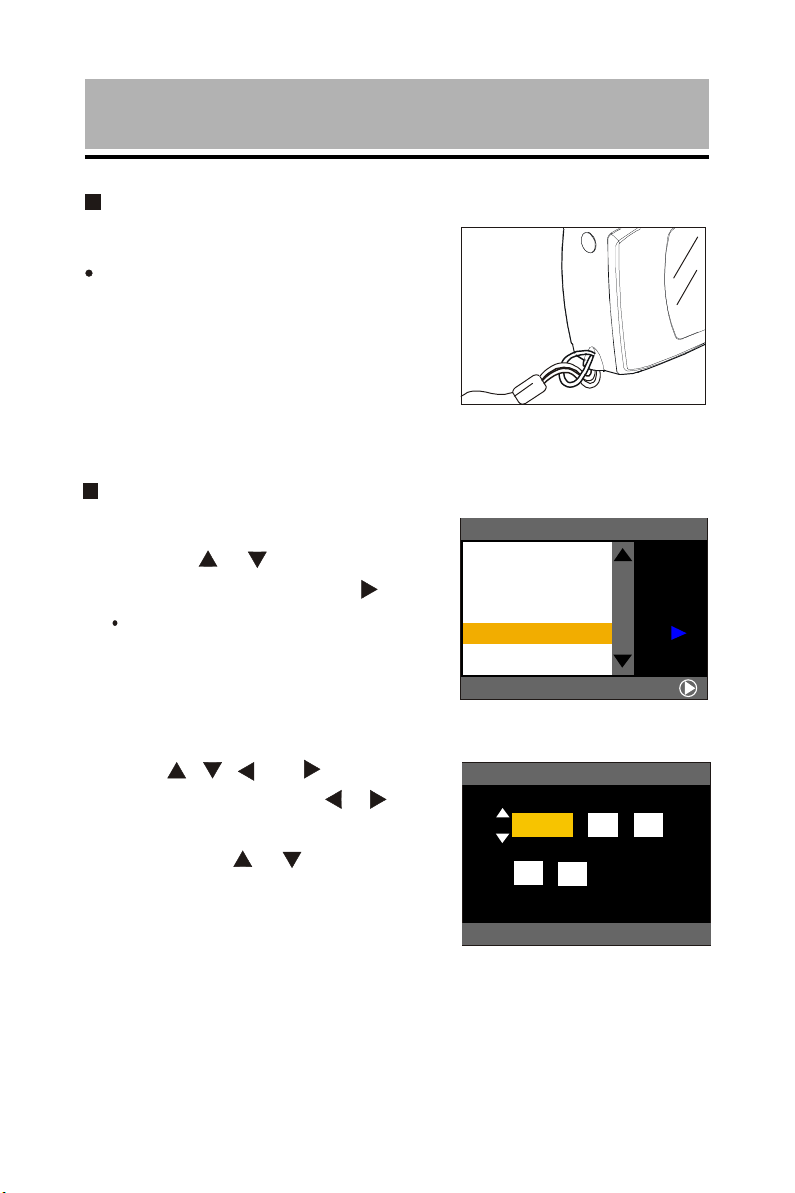
Attaching the Wrist Strap
Attach the wrist strap to the camera.
Pass the end of the strap through
the wrist strap eyelet on
the camera.
Setting the Date and Time
1. Set the mode dial to [ SET UP ].
2. Press the or button to select
[ DATE SETTING ] and press Button.
The time is displayed in 24 - hour
clock format.
3. Press , , and buttons to set
the date and time. Press or button
to highlight the item you wish to adjust,
and press the or button to adjust
the item.
8
SET UP
BEEP SOUND
POWER SAVE
SEQ.FILE NO.
DATE SETTING
LANGUAGE
SELECT:
SET DATE/TIME
2002
/ / 01 01
00 00:
CANCEL:CANCEL
SEL.:ENTER
2/3
ON
OFF
ON
ENGLISH
Page 11

1. Preparation
Powering the Camera
zz
z Loading the Battery
zz
1. Check that the camera is turned off and slide the battery cover open.
2. Load the battery and close the battery cover.
zz
z Charging the battery
zz
1. Turn off the camera power.
2. Set the battery in the camera.
3. Connect the AC Adapter cable to the (DC IN) jack of camera.
4. Insert the power plug into a power outlet.
z The LED on the front side will lit-on in Red. When the LED turn to
Green, charging is completed.
zz
z Using the AC Adapter
zz
1. Make sure the camera power is turned off, then connect the AC
Adapter cable to the camera power (DC IN) jack.
2. Insert the power plug into a power outlet.
When a battery is located in the camera, power from the AC
Adapter (power outlet) will take priority.
1
zz
z Auto Power Off Setting
zz
The camera will turn off automatically in Record and Play modes to
conserve the battery if no operation is performed (no buttons are
pressed) for the preset length of time. You can select the time until the
auto power off is activated from Off, 1 min, 3 min, or 5 min, please see
page 25.
Note
Auto Power Off Setting can not be worked when using the AC Adapter
as power source.
9
Page 12

Storage Media
This camera uses Internal Memory and Secure Digital (SD) Card as
storage media to record data.
zz
z Internal Memory
zz
The size of the Internal Memory is 16 MB.
zz
z Secure Digital Memory Card
zz
Insert the SD Memory Card
1. Check that the camera is turned off.
2. Slide the card cover switch in the
direction shown by the arrow andopen
the card cover.
3. Insert the card with the label facing toward you.
z Removing the SD Memory Card
1. Check that the camera is turned off
2. Slide the card cover switch to open the
card cover.
3. Push the card and then pull it out.
z About Memory Card
You are recommended to use only SD Memory Card. If you using an
MMC (Multi-Media Card), the following points shoule be noted.
1. You can not record motion pictures.
2. The processing speed is slow.
On account of the above limitations, we cannot guarantee operation of
MMC.
10
Page 13

z Formatting the Internal Memory and
SD Memory Card
1. Set the mode dial to [ SET UP ].
2. Press the S or T button to select [ FORMAT ] and press the
RIGHT button.
3. Press the S or T button to select [ CARD ] or [ Internal ] and
press the [ ENTER ] button.
4. Press shutter release button.
z [ FORMATTING ] message will display. The screen will return to
SET UP menu when the formatting is completed.
1
11
Page 14

2. Recording
Basic Recording
1. Turn on the camera.
z Slide the power switch to turn on the camera.
2. Set the mode dial to [ , , or ].
3. Select the PIC (image quality) mode.
z Press the PIC button to select the image quality mode.
z In Continuous Mode, Image Enlargement Mode and Non-com
pressed Mode can not be chose.
z PIC button does not work to Motion Picture Mode.
4. Compose the picture.
z Press
button to make the subject larger and the
to make the subject smaller
5. Record the image.
z Press the shutter release button halfway to lock the focus, and
then press the shutter release button fully without releasing it.
z In continuous Mode, you need to keep pressing the shutter release
button.
z In motion Mode, there will be messages of
start : Release / stop : Release.
zz
z Image Enlargement
zz
Used for taking pictures with higher image quality. Pictures can
be taken at a size of 2848 x 2136 pixels.
1. Set the mode dial to [ ].
2. Press the PIC button to selsct 2848 x 2136.
3. Compose the picture.
4. Press shutter pelease button to record the image.
z Zoom Playback does not work for the Image Enlargement mode.
12
button
Page 15

Recording Capacities
Mode / PIC Mode 16MB 32MB 64MB
2848 x 44
2048 x 1536 F 10 21
Still N
(No. of NC 1 2
Images) 1600 x 1200 N
1280 x 960 N
Motion Picture (min:sec) 1:10 2:49 5:10
36
21 N
0
1
20
33
49
21
44
71
106
44
91
146
219
Using the Flash
1. Set the mode dial to [ ].
2. Press the button to select a flash mode.
You can choose from four flash mode: Flash Off, Auto, Forced
Flash, and Slow Synchro.
Flash can not be used in Continuous Mode and Motion Mode.
3. Press the shutter release button to record the image.
5
2
Menu Function
Use button to select funtion and
press ENTER button.
Exposure Compensation :
The exposure can be compensated to intentionally brighten or darken
the overall recorded image. The exposure compensation range is
2.0EV ( set in 0.5EV / step ).+/-
1. Set the mode dial to [ , , or ] and press MENU button.
13
Page 16
2. Check that has been selected and press ENTER button.
3. Press S or T button to select the compensation level and press
ENTER button.
4. Press shutter release button.
zz
z White Balance :
zz
The white balance can be adjusted so that images can be recorded in
natural colors no matter what light source the subject is exposed. There
are 5 modes can be chose: Auto (default and no display), Daylight ( ),
Overcast ( ), Tungsten Light ( ), and Fluorescent Light ( ).
1. Set the mode dial to [ , , or ] and press MENU button.
2. Check that has been selected and press ENTER button.
3. Press S or T button to select the white balance and press ENTER
button.
4. Press shutter release button.
z Macro Mode :
1. Set the mode dial to [ , , or ] and press MENU button.
2. Check that [ ] has been selected and press ENTER button.
3. Press S or T button to select [ ON ] and press ENTER button.
4. Press shutter release button.
z Self-Timer :
1. Set the mode dial to [ ] and press MENU button.
2. Check that [ ] has been selected and press ENTER button.
3. Press S or T button to select [ ON ] and press ENTER button.
4. Press shutter release button.
z The Self-Timer LED will start flashing (with beep sound) and the
14
shutter will be released with approximate delay of 10 seconds.
Page 17

Other Advance Menu Functions
In MENU, user can set the following functions:
Focus: can be set in Still, Continuous, and Motion Picture Mode
Date Imprint: can be set in Still and Continuous Mode
ISO: can be set in Still and Continuous Mode
Red-eye Reduction: can be only set in Still Mode
Time Exposure: can be only set in Still Mode
z Methods to set
1. Set the mode dial to [ , , or ] and press MENU button.
2. Press X to select and press ENTER button.
2
3. Press S or T button to select a function you want to set and press
X button.
4. Press S or T to change the function and press ENTER button to
complete the setting.
z Press CANCEL button to exit the operation.
Important
Be sure the card door is closed when there are a message of
"RECORDING", "COPYING" or file is reading in Recording, Set Up, or
Playback Mode as this colud result in loss or damage of data stored on
the card / Internal Memory, or malfunction of the camera.
15
Page 18

3. Playback / Delete
Basic Playback
z Playing Still Picture / Continuous Files
1. Set the mode dial to [ ].
2. Press W or X button to select the file to be played back.
Press W button to display the previous file and X to display next
file. If keep the button pressed, the file will advance continuously.
z Playing a Motion Picture File
1. Set the mode dial to [ ].
2. Press W or X button to select the motion picture file.
3. Press shutter release button.
The motion picture file will be played back and the playback
indicator and time elapsed will be displayed. Playback of motion
picture files ends automatically.
z To pause and resume playback
To temporarily pause playback, press the shutter release button
during playback, and to resume playback, press the shutter
release button again.
z Slow playback
To play a file slowly, press X button during playback.
Attention :
z If an unplayable is encounted, the “UNMATCHED FILE”
message will be displayed.
z In some case, data recorded with the cameras of other
companies cannot be played back.
16
Page 19

z Playing File on a TV
zz
z Connecting
zz
1. Make sure the camera is turned off.
2. Open the Video Out Terminal cover and connect the Video Out
Cable to the terminal.
3. Connect the other end of the Video Out Cable to the Video-In
Terminal of the TV.
4. Connect the AC Adapter.
5. Play back the files.
Turn the camera on and set the mode dial to Playback Mode [ ].
zz
z Disconnecting
zz
1. Make sure the camera is turned off.
2. Disconnect the cable.
3
17
Page 20

Various Playback Functions
Thumbnail Playback
This function enables user to play 9-file at once for quick searching.
1. Set the mode dial to [ ] and press the MENU button.
2. Press button to select and press ENTER button.
The screen will change to the thumbnail display.
5/26
100-0005
1600
Indicator Status
No Mark Still picture
Motion Picture File
2002/07/15 11:25
3. Press , , , buttons to select file.
? Unplayable File
100-0005
5/26
1600
The file on which the focus is set is the
selected file.
2002/07/15 11:25
4. Press ENTER button , the screen will return to single image
display.
Zoom Playback
1. Set the mode dial to [ ] and press the MENU button.
2. Press button to select and press ENTER button.
3. Press or button to change the magnification.
Note
Image of 2848 x 2136 can not be played back by using Zoom Playback
Function.
18
Page 21

To move the display position
Press DISPLAY button, than use , , , button to change the
position displayed. Press DISPLAY button again to return to the
zoom playback screen.
4. Press CANCEL button.
The screen will return to the normal playback screen.
Protecting a File
This function enables the user to protect important files.
Protecting / Unprotecting a Single File or All Files
1. Set the mode dial to [ ] and press
the MENU button.
2. Press or button to select [ ] and
press ENTER button.
3. Press or to select [ ALL FILES ]
[ CANCLE FILES ], [ ONE FILE ]
and press the ENTER button.
4. Press ENTER button.
Protecting a File / All Files: the setting will be enabled and the
display will return to the protect screen. The symbol will be
displayed to the file / files.
PROTECT
PROTECT
ALL FILES
CANCEL ALL
ONE FILE
MENU
3
Unprotecting a file / All Files: If you select [CANCLE FILES]
and press the ENTER button when a file has already been
protected, it will be unprotected.
19
Page 22

Other Advance Functions under [ MENU ] in
Playback Mode
Auto Playback
This function allows user to select playback time (1 SEC. 3 SEC. 5
SEC. 10 SEC. or 30 SEC.) to play all files automatically.
1. Set the mode dial to [ ] and press
the MENU button.
2. Press button to select and press
MENU
ENTER button.
3. Press or button to select
[ AUTO PLAY ] and press button.
4. Press or button to select the
playback time and press ENTER button.
MODE SETTING
AUTO PLAY
DPOF
DELETE ALL
BACK:CANCEL
MODE SETTING
AUTO PLAY
DPOF
DELETE ALL
CANCEL:
SELECT:
SEL.:ENTER
1SEC.
10SEC.
DPOF
1. Set the mode dial to [ ] and press the MENU button.
3SEC.
5SEC.
30SEC.
2. Press button to select and press ENTER button.
MENU
3. Press or button to select [ DPOF ] and press button.
DPOF menu will be displayed.
MODE SETTING
AUTO PLAY
DPOF
DELETE ALL
BACK:CANCEL
SELECT:
DPOF
STND PRINTS
INDEX PRINTS
CANCEL DPOF
CONFIRM
BACK:CANCEL
0
SELECT:
Press or to select [ STND PRINTS ], [ INDEX PRINTS ],
[ CANCEL DPOF ], [ CONFIRM ] on the DPOF menu and press
button, then works on the funtion as below :
20
Page 23

Specifying the Number of Prints
1. Press or button to select [ ALL ] or
[ ONE FILE ] and press ENTER button.
DPOF
STND PRINTS
INDEX PRINTS
CANCEL DPOF
CONFIRM
ALL
ONE FILE
Specify the number of prints.
In case of [ ALL ], press or button
to specify the number of prints and
press ENTER button.
In case of [ ONE FILE ], press or
button to select the file you want to specify
the number of prints and press ENTER button.
Then press or button to specify the
number of prints and press ENTER button.
STND PRINTS
BACK:CANCEL
STND PRINTS
CANCEL:CANCEL
2. Press ENTER button to complete the setting
Press CANCEL button to exit the operation.
CANCEL:CANCEL
PRINTS
3
SEL.:ENTER
CANCEL:
ALL IMAGES
3
SEL.:ENTER
PRINTS
SEL.:ENTER
3
Specifying the Number of Index Prints
All files can be printed in reduced size.
1. Press button to specify the
number of Index prints and press
ENTER button.
or
DPOF
STND PRINTS
INDEX PRINTS
CANCEL DPOF
CONFIRM
BACK:CANCEL
0
SELECT:
21
Page 24

2. Press ENTER button to complete the setting.
Press CANCEL button to exit the operation.
INDEX PRINTS
PRINTS
5
Canceling the DPOF Setting
CANCEL:CANCEL
1. Select [ STND ] or [ INDEX ] and press ENTER button.
DPOF
STND PRINTS
INDEX PRINTS
CANCEL DPOF
CONFIRM
BACK:CANCEL
0
SELECT:
DPOF
STND PRINTS
INDEX PRINTS
CANCEL DPOF
CONFIRM
CANCEL:
STND
INDEX
SEL.:ENTER
2. Press ENTER button to complete the setting.
Press CANCEL button to exit the operation.
Confirming the DPOF Setting
!
!
DELETE FILES
CANCLE
PRINT ORDER
EXCEPT PROTECTED FILES
CANCEL:CANCEL
CANCEL:CANCEL
1. After confirm the settings, press
CANCEL button.
DPOF
STND PRINTS
INDEX PRINTS
CANCEL DPOF
CONFIRM
0
CONFIRM DPOF
TOTAL :
INDEX :
STND PRINT
:
SEL.:ENTER
SEL.:ENTER
SEL.:ENTER
BACK:CANCEL
SELECT:
2. Press CANCEL button to return to
DPOF menu.
22
BACK:CANCEL
Page 25

Deleting Files
This section explains how to delete recorded files.
Deleting a Single File
1. Set the mode dial to [ ].
2. Press or button to select the file you want to delete and press
MENU button.
3. Check that [ ] has been selected and press ENTER button.
Then press Shutter Release button.
DELETE ONE
MENU
!
DELETE THIS IMAGE
CANCEL:CANCEL
5/26
100-0005
1600
SEL.:RELEASE
The file will be deleted and the display will return to Playback screen.
Deleting All Files
1. Set the mode dial to [ ].
2. Press button to select and press ENTER button.
3. Press or buttons to select [ DELETE ALL ] and press
button. Then press shutter release button.
MODE SETTING
MENU
MENU
MODE SETTING
AUTO PLAY
DPOF
DELETE ALL
BACK:CANCEL
SELECT:
!
!
DELETE FILES
DELETE FILES
EXCEPT PROTECTED FILES
EXCEPT PROTECTED FILES
CANCEL:CANCEL
CANCEL:CANCEL
SEL.:ENTER
SEL.:ENTER
3
All files will be deleted and the display will return to Playback screen.
23
Page 26

4. Others
Changing the Camera Settings
This section explains how to change the camera settings:
1.Turn the mode dial to [ SET UP ].
The set up menu displays.
2.Press S or T button to select a camera setting you want to
change the setting.
3.Press X button to enter the camera setting and make decision.
4.Press ENTER to complete the setting.
Press CANCEL button to exit the operation.
FORMAT
Memory Card and Internal Memory can be formatted.
KEEP SETTING
This keep setting mode is for saving the camera setting after the camera
is turned off if you have set it to ON. The following settings can be
saved:
Flash
Exposure Compensation White Balance
24
Page 27

Focus Date Print
ISO Setting Time Exposure
DIGITAL ZOOM
Set it to ON to enable the digital zoom function.
Note
If Digital Zoom function does not be actived, the Tele and Wide button
only for Optical Zoom control. After you active the Digital Zoom function,
when you set to the end of Tele of the Optical Zoom, the Digital Zoom
bar will appear in 2 seconds if keep pressing the Tele key.
LCD CONFIRM (LCD Confirmation Time)
When you press shutter release button to take a still picture, the image
is displayed on the LCD monitor.You can select the image confirmation
time from zero (0), 1 SEC., 2 SEC., 3 SEC., or 5 SEC.
AUTO OFF (Auto Power Off Setting)
The camera will turn off automatically in Record and Play to conserve
the battery if no operation is performed (no buttons are pressed) for the
preset length of time. You can select the time until the auto power off is
activated from OFF, 1 MIN., 3 MIN., or 5 MIN. The default setting is 5
MIN. in Record / Playback mode.
BEEP SOUND (Beep Sound Setting)
The camera beep to alert you when it records an image.
POWER SAVE (Power Saving Mode)
This function enables you to reduce the power consumed by the LCD
monitor and increase the life of the battery
SEQ. FILE NO (File Numbering System)
4
25
Page 28

This function enables you to set whether sequential
numbers are automatically assigned to files.
Set to ON: The camera remembers the last file name assigned and
even when a new memory card is inserted, numbers are
assigned in sequence to subsequent files.
Set to OFF: When a new memory card is inserted, files name are
assigned in sequence from 0001. When a memory card
on which files have been recorded is inserted, the con-
secutive numbers on the card will be assigned.
DATE SETTING
You will need to adjust the Date and Time when you first use the
camera and each time you change time zones on trip. For the how to
set the Date and Time, please see page 8.
LANGUAGE (Display Language)
This function enables you to set the language to be
displayed on the LCD monitor: English, German, French, Spanish,
Italian, Dutch.
VIDEO OUT (Video out Signal Method)
If you wish to play recorded files on a TV when you are abroad,
change the Video-out Signal Method according to the video system
(NTSC / PAL) used in the country where you are.
OPTION (Initializing the Settings)
This function enables you to reset all the settings and return them to the
status when the camera left the factory.
COPY (Copy Files to Memory Card from Internal Memory)
This functions allows you to copy files in the Internal memory to Secure
Digital Memory Card.
Note
Message of “INSUFFICIENT MEMORY “ will be displayed if the
26
Page 29

file size is bigger than the memory space of the Memory Card and
no copy action will be taken.
Please make sure there is sufficient memory in card to copy all
files.
STORAGE (Selecting a Recording Destination)
This function allows you to select whether to record shot files in Internal
Memory or on the Secure Digital Memory Card.
Transferring your Image to the computer
Driver Installation
If you are planning to transfer your images to your PC, make sure to
complete the camera driver installation before the camera connection.
The steps are as below:
1. Insert the software CD-ROM disc into your CD-ROM
drive.
2. The setup program starts. Follow the on screen instruction to
complete the camera driver installation.
Mass Storage Function
Downloading Images
1. Turn on the power of your PC.
2. Turn on the power of your camera.
3. Set the Storage Destination in SET UP mode
4. Set the Mode Dial to PLAY.
5. Use the USB cable to connect the camera and PC.
6. Double click “ My Computer “.
7. Double click the newly created “ Removable Device (G)“.
This assumes that the new device is drive G.
8. Double click the “ DCIM ” folder.
Image file will display, you can save or copy the file to
the desired location on the PC.
9. Double click the file to display the image.
4
27
Page 30

Note
:
z If use the Mass Storage Function, the mode dial must turn to “
PLAY “.
Attention :
z If you disconnect the cable before close the Mass Storage, the
Storage Destination (the hard disk) will be damaged.
Video Capture
z Driver Installation
The steps are as below:
1. Insert the software CD-ROM disc into your CD-ROM drive.
2. The setup program starts. Follow the on screen instruction to
complete the camera driver installation.
Video Capture Function
1. Turn on the power of your PC.
2. Turn on the power of your camera.
3. Set the Mode Dial to MOTION.
4. Use the USB cable to connect the camera and PC.
5. Double click “Presto! VideoWorks 4.5” to Run VideoWorks.
6. Click ” Capture Video ” Button. Pop Play dialog, then click “ Setting “
Button , Select Video Device to “JD 3.3 x4ie Video for Windows ”.
7. Click “PLAY” Button to start.
Note :
z If use the Video Capture Function, the mode dial must turn to
“ MOTION “.
z The LED on front will lit-on in green when the PC and Camera is
connected properly.
Attention :
During Previewing and Capturing, please do not try to disconnect the
USB cable as this could result in malfunction of the camera and the PC.
User must turn off the Application Software first before disconnect the
cable.
28
Page 31

z Warning Message
If the warning message is displayed on the LCD monitor, follow the
procedures below.
Message Remedy
NO CARD No card has been inserted. Insert card.
FORMAT CARD Card not formatted. Format card.
CARD ERROR Format card again. If warning message is still
displayed, there is problem with card. Use another
card.
CARD PROTECTED Card write-protect is set on [ LOCK ]. Release lock.
INSUFFICIENT Delete unwanted files or format card to ensure
MEMORY sufficient memory space.
Number of index prints or image prints has exceeded
limit. Select some images and set number to zero.
In Copy Function, card does not have sufficient
memory space.
CANNOT RECORD Motion picture file cannot be recorded on
MOVIE this card. Use SD memory card.
FILE PROTECTED File is protected. Unprotect card before
deleting.
UNMATCHED FILE Unplayable file selected.
FILE NUMBER OVER File number limit exceeded. Format card or use
another card.
NO FILE There is no image file in the Memory Card and
Internal Memory.
Important :
1. Do not try to open the card door during recording, playing back, or
copying file.
2. Do not try to turn off the power during recording, playing back, or
copying file.
3. Do not try to disconnect USB (TV out) Cable abnormally during
recording or (playing back) files.
4
29
 Loading...