

Page 1

Page 2

Page 3
CAUTION
RISK OF ELECTRIC SHOCK
DO NOT OPEN
ATTENTION: RISQUE DE CHOC ELECTRIQUE NE PAS OUVRIR
CAUTION: TO REDUCE THE RISK OF ELECTRIC SHOCK,
DO NOT REMOVE COVER (OR BACK).
NO USER-SERVICEABLE PARTS INSIDE.
REFER SERVICING TO QUALIFIED SERVICE PERSONNEL.
The lightning flash with arrowhead symbol, within an
equilateral triangle, is intended to alert the user to the
presence of uninsulated “dangerous voltage” within the
product’s enclosure that may be of sufficient magnitude to
constitute a risk of electric shock to persons.
The exclamation point within an equilateral triangle is
intended to alert the user to the presence of important
operating and maintenance (servicing) instructions in the
literature accompanying the product.
INSTRUCTIONS PERTAINING TO A RISK OF FIRE, ELECTRIC SHOCK, OR INJURY TO PERSONS.
IMPORTANT SAFETY INSTRUCTIONS
SAVE THESE INSTRUCTIONS
WARNING - When using electric products, basic precautions should always be followed, including the following:
1. Read these instructions.
2. Keep these instructions.
3. Heed all warnings.
4. Follow all instructions.
5. Do not use this apparatus near water.
6. Clean only with a dry cloth.
7. Do not block any of the ventilation openings. Install in
accordance with the manufacturers instructions.
8. Do not install near any heat sources such as radiators,
heat registers, stoves, or other apparatus (including
amplifiers) that produce heat.
9. Do not defeat the safety purpose of the polarized or
grounding-type plug. A polarized plug has two blades with
one wider than the other. A grounding type plug has two
blades and a third grounding prong. The wide blade or the
third prong are provided for your safety. If the provided plug
does not fit into your outlet, consult an electrician for
replacement of the obsolete outlet.
WARNING:
IMPORTANT:
As the colours of the wires in the mains lead of this apparatus may not correspond with the coloured markings identifying
the terminals in your plug, proceed as follows:
The wire which is coloured GREEN-AND-YELLOW must be connected to the terminal in the plug which is marked by the
letter E or by the safety earth symbol or coloured GREEN or GREEN-AND-YELLOW.
The wire which is coloured BLUE must be connected to the terminal which is marked with the letter N or coloured BLACK.
The wire which is coloured BROWN must be connected to the terminal which is marked with the letter L or coloured RED.
THIS APPARATUS MUST BE EARTHED
THE WIRES IN THIS MAINS LEAD ARE COLOURED IN ACCORDANCE WITH THE FOLLOWING CODE.
GREEN-AND-YELLOW: EARTH, BLUE: NEUTRAL, BROWN: LIVE
For the U.K.
10. Protect the power cord from being walked on or pinched
particularly at plugs, convenience receptacles, and the
point where they exit from the apparatus.
11. Only use attachments/accessories specified by the
manufacturer.
12. Use only with the cart, stand, tripod, bracket,
or table specified by the manufacturer, or
sold with the apparatus. When a cart is used,
use caution when moving the cart/apparatus
combination to avoid injury from tip-over.
13. Unplug this apparatus during lightning storms or when
unused for long periods of time.
14. Refer all servicing to qualified service personnel. Servicing
is required when the apparatus has been damaged in any
way, such as power-supply cord or plug is damaged, liquid
has been spilled or objects have fallen into the apparatus,
the apparatus has been exposed to rain or moisture, does
not operate normally, or has been dropped.
WARNING: To reduce the risk of fire or electric shock, do not expose this apparatus to rain or moisture.
Before using this unit, carefully read the sections entitled: “IMPORTANT SAFETY INSTRUCTIONS,” “USING THE
UNIT SAFELY” (p. 14), and “Important Notes” (p. 17).
These sections provide important information concerning the proper operation of the unit. Additionally, in
order to feel assured that you have gained a good grasp of every feature provided by your new unit, owner’s
manual should be read in its entirety. The manual should be saved and kept on hand as a convenient
reference.
Copyright © 2008 ROLAND CORPORATION
All rights reserved. No part of this publication may be reproduced in any form
without the written permission of ROLAND CORPORATION.
Page 4
Look at All You Can Do with the VIMA
The VIMA is a new concept of keyboard that allows even musically inexperienced people to
connect a LCD television, video camera, portable audio player, or other devices, and enjoy
music and video.
Enjoy Full-Fledged Piano Playing
“Progressive Hammer Action II” (PHAII) keyboard delivers the
playing touch characteristic of a piano, letting you enjoy fullfledged piano performance with a playing feel like that of a
grand piano.
You can also...
Use “Piano Designer” to Customize Your Piano Sound p. 48
This feature simulates the sound and expressive power of the grand piano, including aspects such as the
sympathetic resonance of the piano strings, the way in which the sound is affected by the opened or closed
position of the piano lid, and the subtle sounds that occur when the damper pedal is pressed to release the
strings. You can create your own personalized piano sound by adjusting these factors to your taste.
Enjoy Performing with a Variety of Sounds p. 44, p. 61, p. 64
In addition to piano sounds, a variety of carefully selected sounds for manual playing is also built-in. There
are also dedicated sounds specifically for use with the “Layer” function (which lets you combine sounds), or
with the “Split” function, which lets you play different sounds in the left and right hands.
Enjoy Performing along With a Song p. 93
You can play along with internal songs, or songs from USB memory, CD-ROM, or a music CD.
You can also silence the melody part and play the melody yourself, or reduce the volume of the melody and
use it as a guide for your own performance.
Use “ANIME” to Add Movement to Video p. 128
“ANIME” is a special effect that displays graphics or text on the screen in synchronization with your
keyboard playing or the song playback; the graphics or text will move around the screen and gradually
disappear.
This can be a way of enhancing the visual impact when you’re performing along with a song or along with
a slide show or DVD video.
4
Page 5
Look at All You Can Do with the VIMA
Apply Dedicated Vocal Effects to Enhance Your Singing
You can connect two microphones and perform a duet with
someone else. You can also add automatic harmony simply by
singing along with a song, add standard effects such as echo,
or use the “Transformer” effect to convert your voice into
someone else’s voice.
You can also...
Enjoy Singing Together p. 101
A television connected to the RK-300 can display lyrics or musical notation, allowing you to enjoy fullfledged karaoke at home. You can adjust the speed (tempo) of the song for comfortable singing, and
transpose the key of the song to fit the pitch of the singer.
Enjoy Karaoke with Music CDs p. 110
You can minimize the vocal sounds of a commercially available music CD, and use it for karaoke enjoyment.
Sing Backed by a Slide Show p. 114
You can watch a slide show on your television while enjoying karaoke with the song that’s playing.
Expand your karaoke repertoire by using VIMA TUNES (CD-ROMs produced for VIMA) that contain lyrics and
image data.
Import Songs from a Music CD p. 82
Convert Your Own Performances Into Audio Files p. 146
The RK-300 is able to play back audio files.
Songs from a music CD can also be imported into the RK-300 as audio files.
You can overdub your own performances while you play back the imported audio file.
Your recorded performance can be saved as an audio file, and then played back on your portable audio
player.
5
Page 6
Look at All You Can Do with the VIMA
Connect a Guitar or Electronic Drums, and Enjoy Ensemble Performance
You can connect a guitar to the MIC 1/GTR jack, apply
dedicated guitar effects, and enjoy performing.
You could also connect electronic drums, and enjoy
performing in a band that combines vocals, keyboard,
guitar, and drums.
You can also...
Turn Your Ensemble Into a Music CD p. 154
While playing back a song, you can view music notation on your television, and enjoy ensemble
performance with vocal, guitar, keyboard, or drums.
You can copy your ensemble performances to CD as audio recordings, and then finalize the disc to
complete your music CD.
Enjoy Video Along with Music
You can enjoy performing or listening to music while watching video on the large screen of a television
connected to the RK-300.
Enjoy DVD Video p. 124
You can enjoy video from a DVD or a video-capable portable audio player. Switching video to match the
character of the song you’re performing is as easy as pressing a button.
Enjoy a Slide Show Using Your Own Photos p. 120
In addition to enjoying a slide show by playing back a song that includes image data, you can also enjoy a
slide show with photos of your vacation or family.
Enjoy the Music Visually With the Piano Roll Screen p. 130
The on-screen keyboard can automatically move according to the notes while a song plays, or you can
watch a visual representation of the pitch and duration of the notes. This means that you can enjoy music
not just with your ears, but also with your eyes.
6
Page 7

Introduction
Thank you, and congratulations on your choice of the VIMA (RK-300). To ensure that you
obtain the maximum enjoyment and take full advantage of the VIMA’s functionality, please
read this owner’s manual carefully.
Conventions in this Manual
In order to explain the operations as clearly as possible, this manual uses the following
conventions.
• Text enclosed in square brackets [ ] indicates the name of a button or a knob, such as the
[ECHO] button, [VOLUME] knob.
• Text enclosed in angle brackets < > indicates text that appears in the screen, such as
<Menu>.
• For ease of reading, some of the screen illustrations use color that differs from the actual
screen of the RK-300. Please be aware that these may differ from the appearance of the
actual screen.
• When the manual instructs you to “touch” something, it means that you should touch
that location in the touch panel screen.
• Lines that begin with or an asterisk * are cautionary statements that you must be
sure to read.
• The numbers of pages that you can turn to for additional, related information are given
like this: (p. **).
• This document uses screen shots for explanatory purposes. Please be aware that the
settings in these explanatory screen shots may not match the actual factory settings
(Tone names, etc.).
7
Page 8

Contents
Look at All You Can Do with the VIMA 4
Introduction 7
Conventions in this Manual ................................................................................................................................7
USING THE UNIT SAFELY 14
Important Notes 17
Names of Things and What They Do 20
Front Panel ..............................................................................................................................................................20
Rear Panel................................................................................................................................................................23
Main Screen ............................................................................................................................................................24
Getting Ready 26
Placing the RK-300 on a Stand.........................................................................................................................26
If Using the KSC-48 Stand .......................................................................................................................................26
If Using the KS-G8 Stand .........................................................................................................................................27
Getting Ready to Play..........................................................................................................................................28
Connecting the Power Cords (Main Unit/Stand)............................................................................................28
Connecting the Speaker Cable .............................................................................................................................28
Connecting the Piano Pedal ..................................................................................................................................29
Connecting the DP-10..............................................................................................................................................29
Attaching a CD Drive ................................................................................................................................................30
Attaching the Music Rest ........................................................................................................................................32
Connecting User Memory.......................................................................................................................................32
Turning the Power On/Off......................................................................................................................................33
Adjusting the Volume ..............................................................................................................................................34
Formatting the User Memory................................................................................................................................34
Locking the USER MEMORY Connector Cover ................................................................................................35
Installing Batteries in the Remote........................................................................................................................35
Copying Songs from the Included CD to “Favorites”....................................................................................36
Connecting External Memory ...............................................................................................................................36
Adjusting the Brightness of the Screen........................................................................................................37
Listening Through Headphones .....................................................................................................................38
Attaching the Headphone Hook..........................................................................................................................38
Connecting an External Display or a Television.........................................................................................39
Connecting a Television..........................................................................................................................................39
Connecting an External Display ...........................................................................................................................39
Selecting the Video Output Destination...........................................................................................................40
Switching Off Your Television or External Display.........................................................................................40
Using the RK-300’s Display
to Check the Image Shown on the External Display (Video Monitor) ...............................................41
Experiencing the RK-300 Demo.......................................................................................................................42
8
Page 9

Contents
Performing 44
Playing the Piano ..................................................................................................................................................44
Selecting a Sound......................................................................................................................................................44
Changing the Brightness of the Sound (Brilliance) .......................................................................................45
Adding Reverberation (Reverb)............................................................................................................................46
Adding Liveliness to the Sound (Dynamics) ....................................................................................................47
Creating Your Own Piano Sound (Piano Designer)..................................................................................48
Adjusting Resonance when the Damper Pedal is Depressed (Damper Resonance).........................50
Adjusting the Sound Heard at String Release
When the Damper Pedal is Depressed (Damper Noise)..............................................................................50
Adjusting the Sympathetic Vibrations of an Acoustic Piano’s Duplex Scale (Duplex Scale)..........50
Producing the Resonance of the Strings when the Keys Are Played (String Resonance) ...............51
Playing Sounds When the Keys Are Released (Key Off Resonance) ........................................................51
Tuning to Other Instruments’ Pitches (Master Tuning) ...............................................................................51
Changing the Tuning (Temperament)...............................................................................................................52
Setting the Tuning Curve (Stretch Tuning) ......................................................................................................52
Adjusting the Keyboard Touch (Key Touch) ....................................................................................................53
Changing the Timing of Sounds According
to the Force Used to Press the Keys (Hammer Response) ..........................................................................53
Adjusting the Sound of Hammers Striking Strings (Hammer Noise)......................................................54
Opening or Closing the Lid to Change the Resonance (Lid)......................................................................54
Playing Various Sounds ......................................................................................................................................55
Playing Sound Effects or Percussion Instruments from the Keyboard...................................................55
Performing with Your Favorite Sounds (User Tones) ...................................................................................57
Dividing the Keyboard for Two-person Performance (Twin Piano) ........................................................60
Layering Two Sounds (Layer Performance)......................................................................................................61
Playing Different Tones with the Left and Right Hands (Split Performance).......................................64
Using the D Beam Controller for Additional Enjoyment .............................................................................67
Playing Back Songs 69
Songs You Can Listen to on the RK-300 .......................................................................................................69
Listening to Internal Songs ...............................................................................................................................70
Listening to Songs from CD ..............................................................................................................................72
Listening to Songs from USB Memory ..........................................................................................................76
Deleting a Song from USB Memory ...............................................................................................................79
Registering a Song in “Favorites” (Copy)......................................................................................................80
Copying Songs from Internal Memory/ USB Memory/ CD-ROM to “Favorites”..................................80
Copying Songs from a Music CD to “Favorites”..............................................................................................82
Listening to Songs Copied in “Favorites”.....................................................................................................85
Deleting a Song from “Favorites”....................................................................................................................87
Changing the Tempo (Playback Speed) of a Song ...................................................................................88
Playing Back at a Fixed Tempo (Tempo Mute)................................................................................................89
Using the Remote .................................................................................................................................................90
Using the Remote......................................................................................................................................................90
Button Functions .......................................................................................................................................................91
9
Page 10

Contents
Playing Along with a Song 93
Performing while You Watch a Notation (DIGISCORE) ...........................................................................93
Performing with Sounds that Match the Song (Recommended Tones) ..........................................95
Sounding a Count to Keep Your Timing Accurate....................................................................................96
Adjusting the Volume Balance Between the Song and Keyboard .....................................................98
Silencing a Song’s Melody and Playing it Yourself (Mute).....................................................................99
Decreasing the Melody Volume of a Song (Guide) ...............................................................................100
Singing Along with the VIMA 101
Connecting a Microphone.............................................................................................................................. 101
Adjusting the Volume of the Microphone................................................................................................102
Viewing Lyrics .....................................................................................................................................................103
Applying an Effect to Your Voice (Vocal Effect) ......................................................................................104
Adding Harmony to Match the Song ..............................................................................................................104
Modifying Your Voice (Transformer)................................................................................................................ 105
Using the Control Pedal to Turn an Effect On/Off....................................................................................... 106
Adding Echo to Vocals (ECHO)...................................................................................................................... 108
Changing the Song to a Key that’s Comfortable for Singing (KEY CONTROL) ............................109
Enjoying Karaoke with a Music CD (CENTER CANCEL)......................................................................... 110
Muting the Melody of an Internal Song or Music Files for a Sing-along (Mute) .........................111
Decreasing the Melody Volume of a Song (Guide) ...............................................................................112
Enjoying Music and Video 113
Playing Photos Automatically (Slide Show) .............................................................................................114
Enjoying a Slide Show Along with Internal Songs or VIMA TUNES ...................................................... 114
Selecting the Type of Photo Used for the Slide Show (Picture Category).......................................... 115
Watching a Slide Show with Digital Camera Photos ................................................................................. 120
Watching a Slide Show with Photos Saved on USB Memory.................................................................. 122
Zooming or Panning the Image (Zoom/Pan) ............................................................................................... 123
Performing with a Background Image from a DVD Player .................................................................124
Enjoying Powerful Sound and Big-screen Playback
from Your Portable Audio/Video Player.................................................................................................... 126
Having the Image Change According to Your Performance (ANIME)............................................ 128
Using the D Beam Controller to Vary the ANIME Effect............................................................................ 129
10
Watching the Notes while a Song Plays (Piano Roll).............................................................................130
Page 11

Contents
Enjoying Ensemble Performance 132
Perform with a Connected Guitar................................................................................................................132
Basic Operation........................................................................................................................................................ 132
Using a Guitar-type Effect.................................................................................................................................... 133
Applying Chorus/Reverb...................................................................................................................................... 134
Performing with Electronic Drums Connected.......................................................................................135
Enjoying Ensemble Performance with a Song........................................................................................ 135
Performing while Viewing Chord Indications .............................................................................................. 135
Silencing or Reducing the Volume of a Specific Part (Part Mute) ......................................................... 136
Performing with the Metronome................................................................................................................. 137
Recording and Saving 139
SMF Recording....................................................................................................................................................140
Recording Your Keyboard Performance......................................................................................................... 140
Recording a Performance You Played Along with a Song....................................................................... 142
Saving a Recorded Performance to “Favorites”........................................................................................... 144
Audio Recording ................................................................................................................................................146
Recording the Sound of Your Keyboard Performance or Ensemble.................................................... 146
Layering Your Performance onto the Playback ........................................................................................... 149
Copying Songs from “Favorites” to USB memory..................................................................................152
Creating a Music CD 154
Storing Your Sound Settings (User Program) 157
Storing a “User Program”................................................................................................................................ 158
Selecting a “User Program” ............................................................................................................................160
Saving “User Programs” to USB Memory ..................................................................................................161
Loading a File from USB Memory.................................................................................................................164
Copying a File Between User Memory and External Memory........................................................... 166
Deleting a Saved File ........................................................................................................................................168
Using a Pedal to Switch the “User Program”............................................................................................170
Settings 171
Controller Settings ............................................................................................................................................171
Adjusting the Sensitivity of the D Beam Controller (D Beam Sensitivity) .......................................... 171
Assigning Functions to Pedals (Left Pedal/Center Pedal)........................................................................ 171
Assigning Functions to Control Pedal (Control Pedal).............................................................................. 172
Using a Pedal to Switch the “User Program”................................................................................................. 172
Player Settings ....................................................................................................................................................173
Continuous Playback (Play Mode).................................................................................................................... 173
Changing the Melody Channel (Melody Channel) .....................................................................................173
Playing Back at a Fixed Tempo (Tempo Mute)............................................................................................. 173
11
Page 12

Contents
Adjusting the Volume of the Audio Signal (Audio Play Level)............................................................... 174
Adjusting the Audio Recording Level (Audio Recording Gain).............................................................. 174
Video Settings..................................................................................................................................................... 174
Using the Keyboard to Switch the Display (Piano Roll Split) .................................................................. 175
Specifying the Television Format (Video Type) ...........................................................................................175
Selecting the Aspect Ratio of the Video Output (Video Output Aspect Ratio) ................................176
Selecting the Video Output Destination (Output Select)......................................................................... 176
Selecting the Screen That’s Shown When the Video Output is Off (Blank Screen)......................... 176
Notation Settings...............................................................................................................................................177
Selecting the Part for which Notation will be Shown (Part).................................................................... 177
Specifying the Timing with which Notation Display is to Begin (Start Position)............................. 177
Selecting the Part Displayed in the Right-hand Notation (Upper) .......................................................177
Selecting the Part Displayed in the Left-hand Notation (Lower) .......................................................... 177
Displaying Note Names in the Score (Pitches)............................................................................................. 177
Classic Type Piano Roll Screen Settings.....................................................................................................178
Specifying the Color of the Piano (Cabinet).................................................................................................. 178
Specifying the State of the Door of the Player Piano (Door)................................................................... 178
Displaying Bar Lines and Measure Numbers (Measure Display)............................................................ 178
Specifying How Notes are Shown (Gradation)............................................................................................. 179
Specifying the Logo of the Piano (Logo)........................................................................................................ 179
Modern Type Piano Roll Screen Settings ..................................................................................................179
Specifying the Direction in which the Piano Roll Screen Moves (Viewpoint)................................... 180
Selecting the Background Image (Background).......................................................................................... 180
Selecting the Foreground Image (Frame)...................................................................................................... 180
Specifying How Notes are Shown (Gradation)............................................................................................. 180
Slide Show Settings........................................................................................................................................... 181
Selecting the Type of Slide Show (Type)........................................................................................................ 181
Selecting the Interval at which Images will Change (Interval) ............................................................... 181
Synchronizing the Slide Show and Song (Sync).......................................................................................... 181
Selecting the Type of Photo Used for the Slide Show (Picture Category).......................................... 181
Vocal Settings...................................................................................................................................................... 182
Switching the Type of Vocal Effect (Effect).................................................................................................... 182
Adjusting the Volume of the Harmony (Harmony Level)......................................................................... 182
Adding a Backing Chorus to the Harmony (Backing Choir) ....................................................................182
Adjusting the Volume of the Backing Choir (Backing Choir Level) ...................................................... 182
Selecting the Type of Mic Echo (Echo Type) ................................................................................................. 182
Adjusting the Mic Echo (Echo)........................................................................................................................... 182
System Settings.................................................................................................................................................. 183
Specifying What the Key Control Buttons will Affect (Key Control) .....................................................183
Changing the Language Displayed in the Screen (Language)............................................................... 183
Adjusting the Brightness of the Display (Display Brightness) ................................................................183
Changing the Way in Which the Sound is Heard (Twin Piano Mode).................................................. 183
Changing the Velocity When the Key Touch is Set to “Fixed” (Fix Velocity) .....................................184
Changing the Display Order of the Sound List (Tone Name Order)..................................................... 184
Remote Control Settings.................................................................................................................................184
Disabling the Remote Control Unit (Remote Control) ..............................................................................185
Assigning Functions to the Remote’s Buttons (FUNC 1, FUNC2) ..........................................................185
CD and AUDIO/VIDEO PORT Settings......................................................................................................... 185
Setting the Type of CD to be Played Back (CD/Audio Type)................................................................... 186
Synchronizing the Timing of the Piano and Accompaniment (CD/Audio Sync)............................. 186
12
Page 13

Contents
Specifying the Type of Signal at the AUDIO/VIDEO PORT (Audio Port Mode)................................. 186
Synchronizing the Timing of the Signals
from the Piano and the AUDIO/VIDEO PORT (Audio Port Sync)............................................................ 186
MIDI Settings .......................................................................................................................................................187
Changing the MIDI Transmit Channel (Tx Channel)................................................................................... 187
Disconnecting the Internal Sound Generator and Keyboard (Local Control) .................................. 187
USB Settings.........................................................................................................................................................188
Changing the USB Driver Settings (USB Driver)........................................................................................... 189
Changing the Communication Settings for User Memory (User Memory Mode)........................... 189
Changing the Communication Settings for External Memory (Ext. Memory Mode) ..................... 189
Changing the Communication Settings for External Drive (Ext. Drive Mode) ................................. 189
Other Settings..................................................................................................................................................... 190
Preparing a CD-R Disc for Playback on Another CD Player (Finalize)................................................... 190
Calibrating the Touch Screen (Touch Screen).............................................................................................. 191
Initializing External Memory (Format External Memory) ......................................................................... 192
Initializing User Memory (Format User Memory)........................................................................................ 193
Restoring the Factory-Set Condition (Factory Reset) ................................................................................ 194
Locking the Panel at the Current Settings (Panel Lock)............................................................................ 195
Connecting Other Equipment 196
Connecting Audio Equipment...................................................................................................................... 196
Playing the RK-300 through Connected Speakers...................................................................................... 196
Playing the Sound of an Audio Device through the RK-300................................................................... 197
Connecting MIDI Equipment.........................................................................................................................198
Using a MIDI Sequencer to Play the RK-300.................................................................................................. 198
Playing a MIDI Sound Module from the RK-300 ..........................................................................................198
Connecting Your Computer...........................................................................................................................199
Using the V-LINK Function .............................................................................................................................200
Appendices 201
Troubleshooting.................................................................................................................................................201
Error Messages....................................................................................................................................................209
Tone List................................................................................................................................................................ 210
Internal Song List ...............................................................................................................................................215
Music Files That the RK-300 Can Use ..........................................................................................................216
MIDI Implementation Chart........................................................................................................................... 217
Specifications ......................................................................................................................................................218
Index....................................................................................................................................................................... 222
13
Page 14
USING THE UNIT SAFELY
USING THE UNIT SAFELY
Used for instructions intended to alert
the user to the risk of death or severe
injury should the unit be used
improperly.
Used for instructions intended to alert
the user to the risk of injury or material
damage should the unit be used
improperly.
* Material damage refers to damage or
other adverse effects caused with
respect to the home and all its
furnishings, as well to domestic
animals or pets.
Safety grounding connection
001-50
Connect mains plug of this model to a mains socket
outlet with a protective earthing connection.
.................................................................................................................................
Do not disassemble or modify
002a
Do not open or perform any internal modifications on
the unit.
.................................................................................................................................
Do not repair or replace parts
003
Do not attempt to repair the unit, or replace parts
within it (except when this manual provides specific
instructions directing you to do so).
Refer all servicing to your retailer, the nearest Roland
Service Center, or an authorized Roland distributor, as
listed on the “Information” page.
.................................................................................................................................
Never install the unit in any of the following locations
004
• Subject to temperature extremes (e.g., direct
sunlight in an enclosed vehicle, near a heating
duct, on top of heat-generating equipment); or are
• Damp (e.g., baths, washrooms, on wet floors); or
are
• Exposed to steam or smoke; or are
• Subject to salt exposure; or are
• Humid; or are
• Exposed to rain; or are
• Dusty or sandy; or are
• Subject to high levels of vibration and shakiness.
.................................................................................................................................
The symbol alerts the user to important instructions
or warnings.The specific meaning of the symbol is
determined by the design contained within the
triangle. In the case of the symbol at left, it is used for
general cautions, warnings, or alerts to danger.
The symbol alerts the user to items that must never
be carried out (are forbidden). The specific thing that
must not be done is indicated by the design contained
within the circle. In the case of the symbol at left, it
means that the unit must never be disassembled.
The ● symbol alerts the user to things that must be
carried out. The specific thing that must be done is
indicated by the design contained within the circle. In
the case of the symbol at left, it means that the powercord plug must be unplugged from the outlet.
Use only a stand that is recommended
005
This unit should be used only with a stand that is
recommended by Roland.
.................................................................................................................................
Do not place in an unstable location
006
When using the unit with a stand recommended by
Roland, the stand must be carefully placed so it is
level and sure to remain stable. If not using a stand,
you still need to make sure that any location you
choose for placing the unit provides a level surface
that will properly support the unit, and keep it from
wobbling.
.................................................................................................................................
Connect the power cord to an outlet of the correct
voltage
008a
The unit should be connected to a power supply only
of the type described in the operating instructions, or
as marked on the rear side of unit.
.................................................................................................................................
Use only the included power cord
008e
You must use only the power cord included with the
device. Do not use the included power cord with any
other device.
.................................................................................................................................
Do not bend the power cord or place heavy objects on
it
009
Do not excessively twist or bend the power cord, nor
place heavy objects on it. Doing so can damage the
cord, producing severed elements and short circuits.
Damaged cords are fire and shock hazards!
.................................................................................................................................
14
Page 15
USING THE UNIT SAFELY
Avoid extended use at high volume
010
This unit, either alone or in combination with an
amplifier and headphones or speakers, may be
capable of producing sound levels that could cause
permanent hearing loss. Do not operate for a long
period of time at a high volume level, or at a level that
is uncomfortable. If you experience any hearing loss
or ringing in the ears, you should immediately stop
using the unit, and consult an audiologist.
.................................................................................................................................
Do not insert foreign objects
011
Do not allow any objects (e.g., flammable material,
coins, pins); or liquids of any kind (water, soft drinks,
etc.) to penetrate the unit.
.................................................................................................................................
Turn off the power if an abnormality or malfunction
occurs
012a
Immediately turn the power off, remove the power
cord from the outlet, and request servicing by your
retailer, the nearest Roland Service Center, or an
authorized Roland distributor, as listed on the “Information” page when:
• The power-supply cord or the plug has been
damaged; or
• If smoke or unusual odor occurs
• Objects have fallen into, or liquid has been spilled
onto the unit; or
• The unit has been exposed to rain (or otherwise
has become wet); or
• The unit does not appear to operate normally or
exhibits a marked change in performance.
.................................................................................................................................
Do not allow children to use without supervision
013
In households with small children, an adult should
provide supervision until the child is capable of
following all the rules essential for the safe operation
of the unit.
.................................................................................................................................
Do not drop or subject to strong impact
014
Protect the unit from strong impact.
(Do not drop it!)
.................................................................................................................................
Do not share an outlet with an unreasonable number
of other devices
015
Do not force the unit’s power-supply cord to share an
outlet with an unreasonable number of other
devices. Be especially careful when using extension
cords—the total power used by all devices you have
connected to the extension cord’s outlet must never
exceed the power rating (watts/amperes) for the
extension cord. Excessive loads can cause the
insulation on the cord to heat up and eventually melt
through.
.................................................................................................................................
Do not use overseas
016
Before using the unit in a foreign country, consult
with your retailer, the nearest Roland Service Center,
or an authorized Roland distributor, as listed on the
“Information” page.
.................................................................................................................................
Do not recharge, heat, or disassemble the batteries
Do not incinerate or submerge in water
019
Batteries must never be recharged, heated, taken
apart, or thrown into fire or water.
.................................................................................................................................
Do not use a CD-ROM in an audio CD player or DVD
player
023
DO NOT play a CD-ROM disc on a conventional audio
CD player. The resulting sound may be of a level that
could cause permanent hearing loss. Damage to
speakers or other system components may result.
.................................................................................................................................
Do not place containers of water on the device
026
Do not put anything that contains water (e.g., flower
vases) on this unit. Also, avoid the use of insecticides,
perfumes, alcohol, nail polish, spray cans, etc., near
the unit. Swiftly wipe away any liquid that spills on
the unit using a dry, soft cloth.
.................................................................................................................................
Never expose battery to excessive heat
027
Never expose battery to excessive heat such as
sunshine, fire or the like.
.................................................................................................................................
Place in a well ventilated location
101a
The unit should be located so that its location or
position does not interfere with its proper ventilation.
.................................................................................................................................
Use only the specified stands
101c
This (RK-300) for use only with Roland stand KSC-48
or KS-G8. Use with other stands is capable of
resulting in instability causing possible injury.
.................................................................................................................................
You should always perform a safety check each time
you use the stand
101f
Please be sure to read and adhere to the cautionary
notices contained in the instructions that came with
this product.
Please note that, depending on the manner in which
keyboard performances are carried out, you may
encounter situations where the keyboard falls off the
stand or the stand topples over, even though you
have followed all of the instructions and advice
contained within the product’s manual. For this
reason, you should always perform a safety check
each time you use the stand.
.................................................................................................................................
15
Page 16
USING THE UNIT SAFELY
Grasp the plug when connecting or disconnecting the
power cord
102b
Always grasp only the plug on the power-supply cord
when plugging into, or unplugging from, an outlet or
this unit.
.................................................................................................................................
Periodically wipe the dust off the power cord plug
103a
At regular intervals, you should unplug the power
plug and clean it by using a dry cloth to wipe all dust
and other accumulations away from its prongs. Also,
disconnect the power plug from the power outlet
whenever the unit is to remain unused for an
extended period of time. Any accumulation of dust
between the power plug and the power outlet can
result in poor insulation and lead to fire.
.................................................................................................................................
Manage cables for safety
104
Try to prevent cords and cables from becoming
entangled. Also, all cords and cables should be
placed so they are out of the reach of children.
.................................................................................................................................
Do not stand or place heavy objects on this device
106
Never climb on top of, nor place heavy objects on the
unit.
.................................................................................................................................
Do not connect or disconnect the power cord with wet
hands
107b
Never handle the power cord or its plugs with wet
hands when plugging into, or unplugging from, an
outlet or this unit.
.................................................................................................................................
Cautions when moving this unit
108d: Selection
If you need to move the instrument, take note of the
precautions listed below. At least two persons are
required to safely lift and move the unit. It should be
handled carefully, all the while keeping it level. Make
sure to have a firm grip, to protect yourself from
injury and the instrument from damage.
1
• Check to make sure the knob bolts securing the
unit to the stand have not become loose. Fasten
them again securely whenever you notice any
loosening.
2
• Disconnect the power cord.
3
• Disconnect all cords coming from external devices.
6
• Remove the music stand.
.................................................................................................................................
Unplug the power cord from the AC outlet before
cleaning
109a
Before cleaning the unit, turn off the power and
unplug the power cord from the outlet.
.................................................................................................................................
If there is a possibility of lightning strike, disconnect
the power cord from the AC outlet
110a
Whenever you suspect the possibility of lightning in
your area, pull the plug on the power cord out of the
outlet.
.................................................................................................................................
Cautions when using batteries
111: Selection
If used improperly, batteries may explode or leak and
cause damage or injury. In the interest of safety,
please read and observe the following precautions
(p. 35).
1
• Carefully follow the installation instructions for
batteries, and make sure you observe the correct
polarity.
2
• Avoid using new batteries together with used
ones. In addition, avoid mixing different types of
batteries.
3
• Remove the batteries whenever the unit is to
remain unused for an extended period of time.
5
• If a battery has leaked, use a soft piece of cloth or
paper towel to wipe all remnants of the discharge
from the battery compartment. Then install new
batteries. To avoid inflammation of the skin, make
sure that none of the battery discharge gets onto
your hands or skin. Exercise the utmost caution so
that none of the discharge gets near your eyes.
Immediately rinse the affected area with running
water if any of the discharge has entered the eyes.
6
• Never keep batteries together with metallic
objects such as ballpoint pens, necklaces, hairpins,
etc.
.................................................................................................................................
Caution when dispose batteries
112
Used batteries must be disposed of in compliance
with whatever regulations for their safe disposal that
may be observed in the region in which you live.
.................................................................................................................................
Keep small items out of the reach of children
118c
To prevent small items such as the following from
being swallowed accidentally, keep them out of the
reach of children.
• Included items
• Lock for the USER MEMORY connector cover
• Screws for installing the CD drive on the CD tray
• CD tray attachment screws
• Screws for installing the CD drive to the bottom
of the unit
• Removed parts
• Screws for locking the USER MEMORY
connector cover
• Music rest attachment screws
• Screws for installing the jack cover
.................................................................................................................................
16
Page 17

Important Notes
Power Supply
301
• Do not connect this unit to same electrical outlet that is being
used by an electrical appliance that is controlled by an inverter
(such as a refrigerator, washing machine, microwave oven, or
air conditioner), or that contains a motor. Depending on the
way in which the electrical appliance is used, power supply
noise may cause this unit to malfunction or may produce
audible noise. If it is not practical to use a separate electrical
outlet, connect a power supply noise filter between this unit
and the electrical outlet.
307
• Before connecting this unit to other devices, turn off the
power to all units. This will help prevent malfunctions and/or
damage to speakers or other devices.
308
• When you turn off the power, the screen and indicators of this
device will go dark, but this does not mean that the main
power supply is completely disconnected. If you need to
completely shut off the power supply, turn off the power
switch of this device and then unplug it from the AC outlet.
Connect this device to an AC outlet that is as close and accessible as possible.
Placement
351
• Using the unit near power amplifiers (or other equipment
containing large power transformers) may induce hum. To
alleviate the problem, change the orientation of this unit; or
move it farther away from the source of interference.
352a
• This device may interfere with radio and television reception.
Do not use this device in the vicinity of such receivers.
352b
• Noise may be produced if wireless communications devices,
such as cell phones, are operated in the vicinity of this unit.
Such noise could occur when receiving or initiating a call, or
while conversing. Should you experience such problems, you
should relocate such wireless devices so they are at a greater
distance from this unit, or switch them off.
354b
• Do not expose the unit to direct sunlight, place it near devices
that radiate heat, leave it inside an enclosed vehicle, or
otherwise subject it to temperature extremes. Also, do not
allow lighting devices that normally are used while their light
source is very close to the unit (such as a piano light), or
powerful spotlights to shine upon the same area of the unit
for extended periods of time. Excessive heat can deform or
discolor the unit.
355b
• When moved from one location to another where the temperature and/or humidity is very different, water droplets
(condensation) may form inside the unit. Damage or
malfunction may result if you attempt to use the unit in this
condition. Therefore, before using the unit, you must allow it
to stand for several hours, until the condensation has
completely evaporated.
356
• Do not allow rubber, vinyl, or similar materials to remain on
the unit for long periods of time. Such objects can discolor or
otherwise harmfully affect the finish.
358
• Do not allow objects to remain on top of the keyboard. This
can be the cause of malfunction, such as keys ceasing to
produce sound.
359
• Do not paste stickers, decals, or the like to this instrument.
Peeling such matter off the instrument may damage the
exterior finish.
360
• Depending on the material and temperature of the surface on
which you place the unit, its rubber feet may discolor or mar
the surface.
You can place a piece of felt or cloth under the rubber feet to
prevent this from happening. If you do so, please make sure
that the unit will not slip or move accidentally.
Maintenance
401b
• To clean the unit, use a dry, soft cloth; or one that is slightly
dampened. Try to wipe the entire surface using an equal
amount of strength, moving the cloth along with the grain of
the wood. Rubbing too hard in the same area can damage the
finish.
402
• Never use benzine, thinners, alcohol or solvents of any kind, to
avoid the possibility of discoloration and/or deformation.
Repairs and Data
452
• Please be aware that all data contained in the unit’s memory
may be lost when the unit is sent for repairs. Important data
should always be backed up on a USB memory, or written
down on paper (when possible). During repairs, due care is
taken to avoid the loss of data. However, in certain cases (such
as when circuitry related to memory itself is out of order), we
regret that it may not be possible to restore the data, and
Roland assumes no liability concerning such loss of data.
Additional Precautions
551
• Please be aware that the contents of memory can be
irretrievably lost as a result of a malfunction, or the improper
operation of the unit. To protect yourself against the risk of
loosing important data, we recommend that you periodically
save a backup copy of important data you have stored in the
unit’s memory on a USB memory.
552
• Unfortunately, it may be impossible to restore the contents of
data that was stored on a USB memory once it has been lost.
Roland Corporation assumes no liability concerning such loss
of data.
553
• Use a reasonable amount of care when using the unit’s
buttons, sliders, or other controls; and when using its jacks
and connectors. Rough handling can lead to malfunctions.
554
• Never strike or apply strong pressure to the display.
555
• A small amount of noise may be heard from the display during
normal operation.
556
• When connecting / disconnecting all cables, grasp the
connector itself—never pull on the cable. This way you will
avoid causing shorts, or damage to the cable’s internal
elements.
557
• A small amount of heat will radiate from the unit during
normal operation.
558a
• To avoid disturbing your neighbors, try to keep the unit’s
volume at reasonable levels. You may prefer to use
headphones, so you do not need to be concerned about those
around you (especially when it is late at night).
17
Page 18

Important Notes
559a
• When you need to transport the unit, package it in the box
(including padding) that it came in, if possible. Otherwise, you
will need to use equivalent packaging materials.
560
• Do not apply undue force to the music stand while it is in use.
561
• Use only the specified expression pedal (EV-5/7; sold
separately). By connecting any other expression pedals, you
risk causing malfunction and/or damage to the unit.
562
• Some connection cables contain resistors. Do not use cables
that incorporate resistors for connecting to this unit. The use
of such cables can cause the sound level to be extremely low,
or impossible to hear. For information on cable specifications,
contact the manufacturer of the cable.
566b
• The sensitivity of the D Beam controller will change
depending on the amount of light in the vicinity of the unit. If
it does not function as you expect, adjust the sensitivity as
appropriate for the brightness of your location.
Add
• In order to provide the highest possible image quality, the
VIMA uses a TFT liquid crystal display. Due to the nature of a
TFT liquid crystal display, the screen may contain pixels that
fail to light or that remain constantly lit, but please be aware
that this is not a malfunction or defect.
Before Using USB Memory
USB Memory Handling
704
• When connecting USB memory, firmly insert it all the way in.
Add
• When connecting USB memory, position it horizontally with
the external memory connector and insert it without using
excessive force. The external memory connector may be
damaged if you use excessive force when inserting USB
memory.
Add
• Do not insert anything other than USB memory (e.g., wire,
coins, other types of device) into the external memory
connector. Doing so will damage the external memory
connector.
Add
• Do not apply excessive force to the connected USB memory.
705
• Do not touch the pins of the USB memory port, or allow them
to become dirty.
708
• USB memory is made using high-precision electronic components, so please observe the following points when handling
it.
• To prevent damage from static electrical charges,
discharge any static electricity that might be present in
your body before handling USB memory.
• Do not touch the terminals with your fingers or any metal
object.
• Do not bend or drop USB memory, or subject it to strong
impact.
• Do not leave USB memory in direct sunlight or in locations
such as a closed-up automobile. (Storage temperature: 0–
50 degrees C).
• Do not allow USB memory to become wet.
• Do not disassemble or modify USB memory.
Add
• If you will not be using USB memory for an extended period of
time, close the USB memory cover.
Before Using the CD Drive
CD Drive Handling
• Water droplets may form inside the CD drive if you move it to
a location of radically different humidity. Using the drive in
this condition will cause malfunctions, so please allow several
hours for the condensation to disappear before you use the
drive.
• Remove the disc from the disc tray before you turn the power
on or off.
• Do not insert anything (wire, coins, other types of media) into
the disc tray other than discs bearing the “COMPACT disc
DIGITAL AUDIO” logo. Doing so will cause the CD drive to
malfunction.
• Do not subject the CD drive to vibration or shock while it is in
use, or move it while its power is on.
• The pickup is designed to be dust-proof. Do not use pickup
cleaner or similar products, since this may cause malfunctions.
CD (CD-ROM) Handling
• When handling the discs, please observe the following.
• Do not touch the recording surface of the disc.
• Do not use in dusty areas.
• Do not leave the disc in direct sunlight or an enclosed
vehicle. (Storage temperature: 10–50 degrees C)
801
• Avoid touching or scratching the shiny underside (encoded
surface) of the disc. Damaged or dirty CD-ROM discs may not
be read properly. Keep your discs clean using a commercially
available CD cleaner.
• Keep CDs in their case when not in use.
• Do not leave a CD in the CD drive for an extended period of
time.
• Bending a CD may make it unreadable and cause malfunctions.
• To hold a CD, insert a finger into the center hole
and grasp it between the hole and the outer
edge. Do not allow fingerprints or scratches to
mar the recording surface of the CD.
• Do not drop CDs or stack them.
• Do not place heavy objects on a CD or subject them to strong
impact.
• Do not affix adhesive labels to the label side of a CD. The CD
may be scratched if you use it with an adhesive label affixed.
• When writing a title on the label side of a CD, use a soft-tipped
writing instrument such as a felt-tipped pen.
• Read the cautions printed on the CD jacket before using a CD.
18
Page 19
Important Notes
CD Cleaning
• If dust or dirt adheres to a CD, lightly wipe it off
with a soft cloth. Always wipe from the center
toward the outer edge of the disc. Do not wipe
in a concentric circular direction.
• Do not use record cleaner, record spray, or
solvents such as benzene to clean a CD.
Cautions when Using a CD
• CDs that contain both music tracks and data will not play
correctly.
• For playback of commercially available CDs, this device
supports playback only for discs bearing the “COMPACT disc
DIGITAL AUDIO” logo, which indicates the official CD standard.
We cannot guarantee that this device will correctly play discs
that do not comply with the CD standard, such as music discs
that use copy-protection technology.
• The RK-300 is unable to play back music discs that use copyprotection technology.
• For details on music discs that use copy-protection
technology, please contact the distributor of the disc.
• You cannot save songs on a CD or delete a song from a CD,
nor can you format a CD.
About the License Agreement
• The RK-300’s CD-writing functionality, and its backing-up
functionality are designed to allow you to reproduce material
to which you have copyright, or material which the copyright
owner has granted you permission to copy.
Accordingly, reproduction of Music CD or other copyrighted
material without permission of the copyright owner avoiding
technical prohibiting features of second generation and later
copying like SCMS or others constitutes copyright
infringement and may incur penalties even in case such reproduction is for your own personal use and enjoyment (private
use). Consult a copyright specialist or special publications for
more detailed information on obtaining such permission from
copyright holders.
Copyright
851
• Recording, duplication, distribution, sale, lease, performance,
or broadcast of copyrighted material (musical works, visual
works, broadcasts, live performances, etc.) belonging to a
third party in part or in whole without the permission of the
copyright owner is forbidden by law.
852
• This product can be used to record or duplicate audio or visual
material without being limited by certain technological copyprotection measures. This is due to the fact that this product is
intended to be used for the purpose of producing original
music or video material, and is therefore designed so that
material that does not infringe copyrights belonging to others
(for example, your own original works) can be recorded or
duplicated freely.
853
• Do not use this unit for purposes that could infringe on a
copyright held by a third party. We assume no responsibility
whatsoever with regard to any infringements of third-party
copyrights arising through your use of this unit.
203
* GS ( ) is a registered trademark of Roland
Corporation.
Add
* XG lite ( ) is a registered trademark of Yamaha
Corporation.
204
* Microsoft and Windows are registered trademarks of
Microsoft Corporation.
206j
* Windows® is known officially as: “Microsoft® Windows®
operating system.“
207
* Apple and Macintosh are registered trademarks of
Apple Inc.
209
* Mac OS is a trademark of Apple Inc.
* This product uses certain software of the “Independent
JPEG Group.”
220
* All product names mentioned in this document are
trademarks or registered trademarks of their respective
owners.
238
* MPEG Layer-3 audio compression technology is licensed
from Fraunhofer IIS Corporation and THOMSON
Multimedia Corporation.
19
Page 20
Names of Things and What They Do
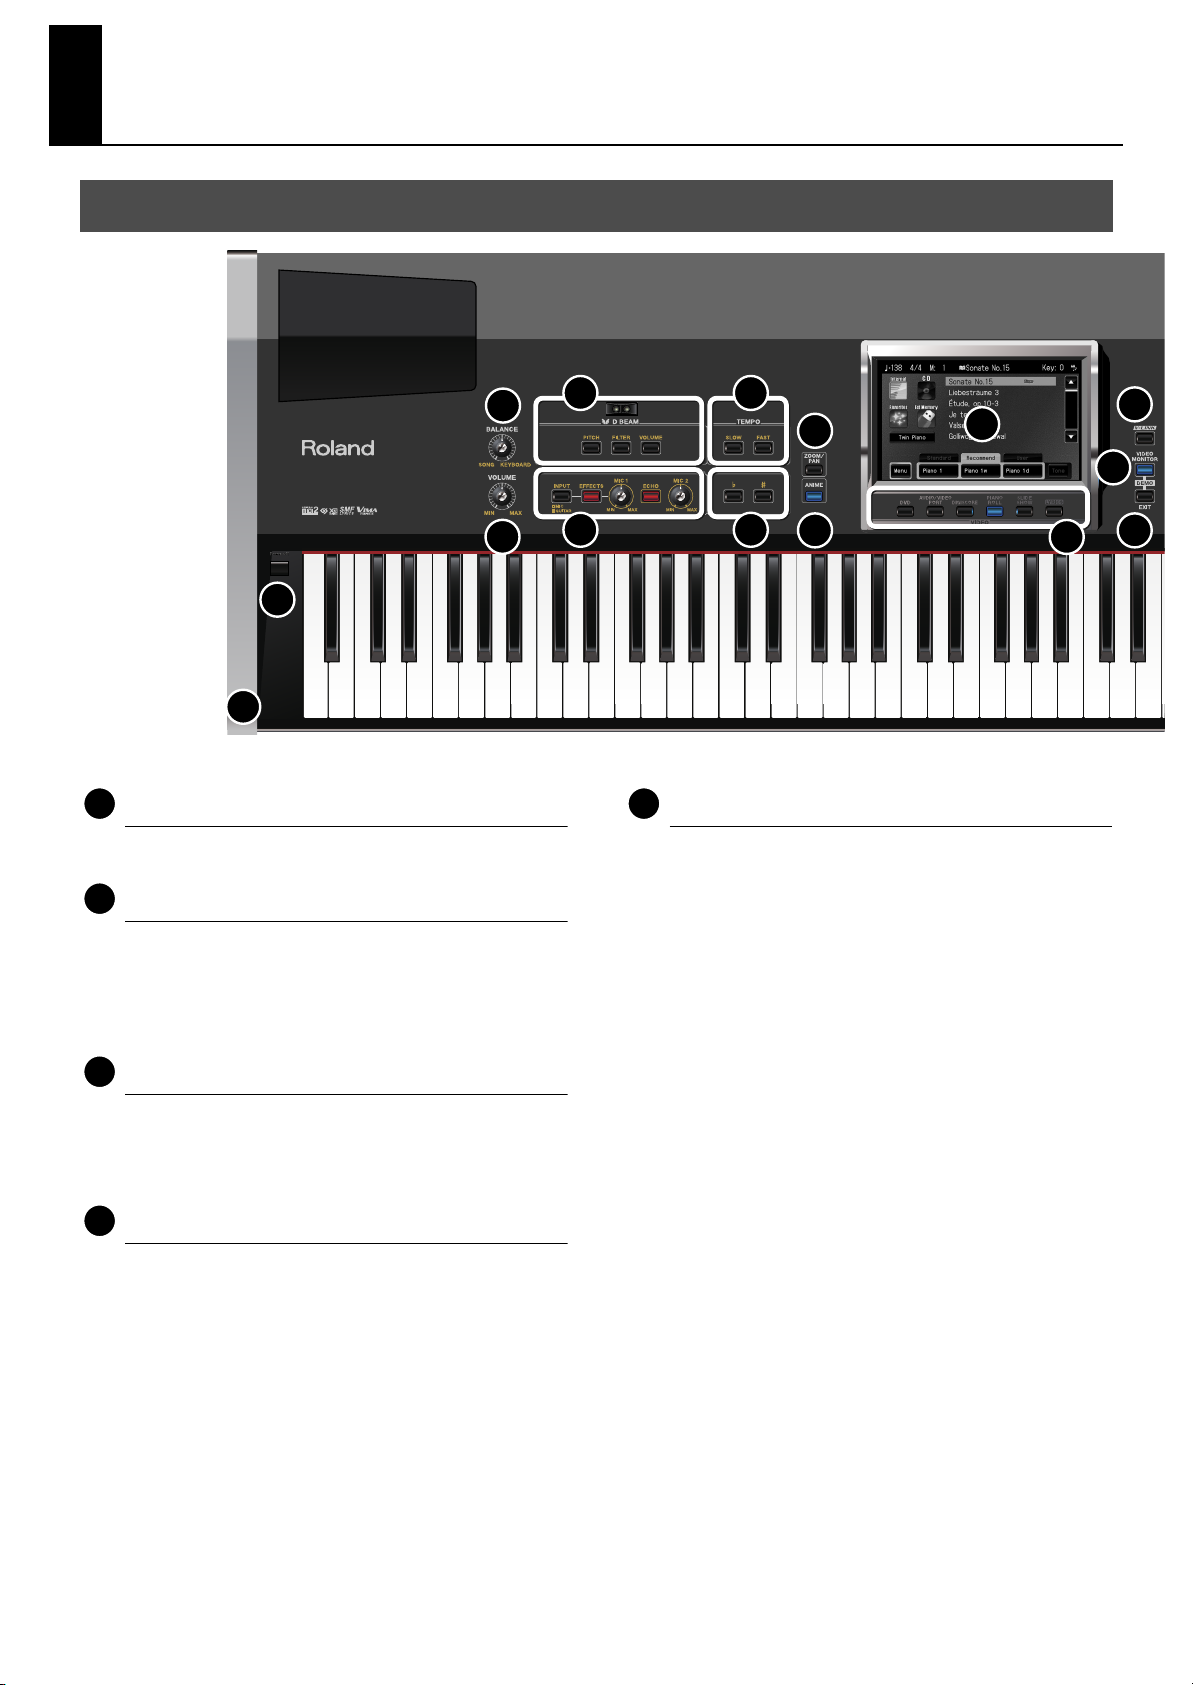
5
Front Panel
1
22
1
[Power ON] Switch
This turns the power on/off (p. 33).
2
[BALANCE] Knob
This adjusts the volume balance between the song and
your keyboard performance (p. 98).
When you’re playing along with a song, you can use this
knob to turn down the volume of the song.
3
[VOLUME] Knob
This adjusts the overall volume of the RK-300 (p. 34).
If headphones are connected, this adjusts the volume of
the headphones (p. 38).
2
3
4
5 7
6
8
9
10
11
12
13
14
VOCAL
Here you can apply harmony (p. 104) or effects such as
echo (p. 108) to the sound of the microphone.
If a guitar is connected, you can also use effects that are
designed specifically for guitar (p. 133).
[INPUT] Button
If you’ve connected a microphone to the MIC 1/GTR jack,
this button’s illumination needs to be off. If you’ve
connected a guitar, this button should be lit.
[EFFECTS] Button
Press this if you want to apply an effect to the input from
the MIC 1/GTR jack. You’ll be able to use a vocal effect if
you’re using a microphone, or a guitar effect if you’re using
a guitar.
4
D BEAM
By moving your hand above the D Beam controller you can
modify the sounds you’re playing on the keyboard (p. 67),
or produce sound effects such as applause (p. 68).
Press the [PITCH], [FILTER], or [VOLUME] button to choose
what will be controlled by the D Beam.
[MIC 1] Knob
This adjusts the volume of the microphone/guitar that’s
connected to the MIC 1/GTR jack.
[ECHO] Button
This turns the echo on/off.
[MIC 2] Knob
This adjusts the volume of the microphone connected to
the MIC 2 jack.
20
Page 21
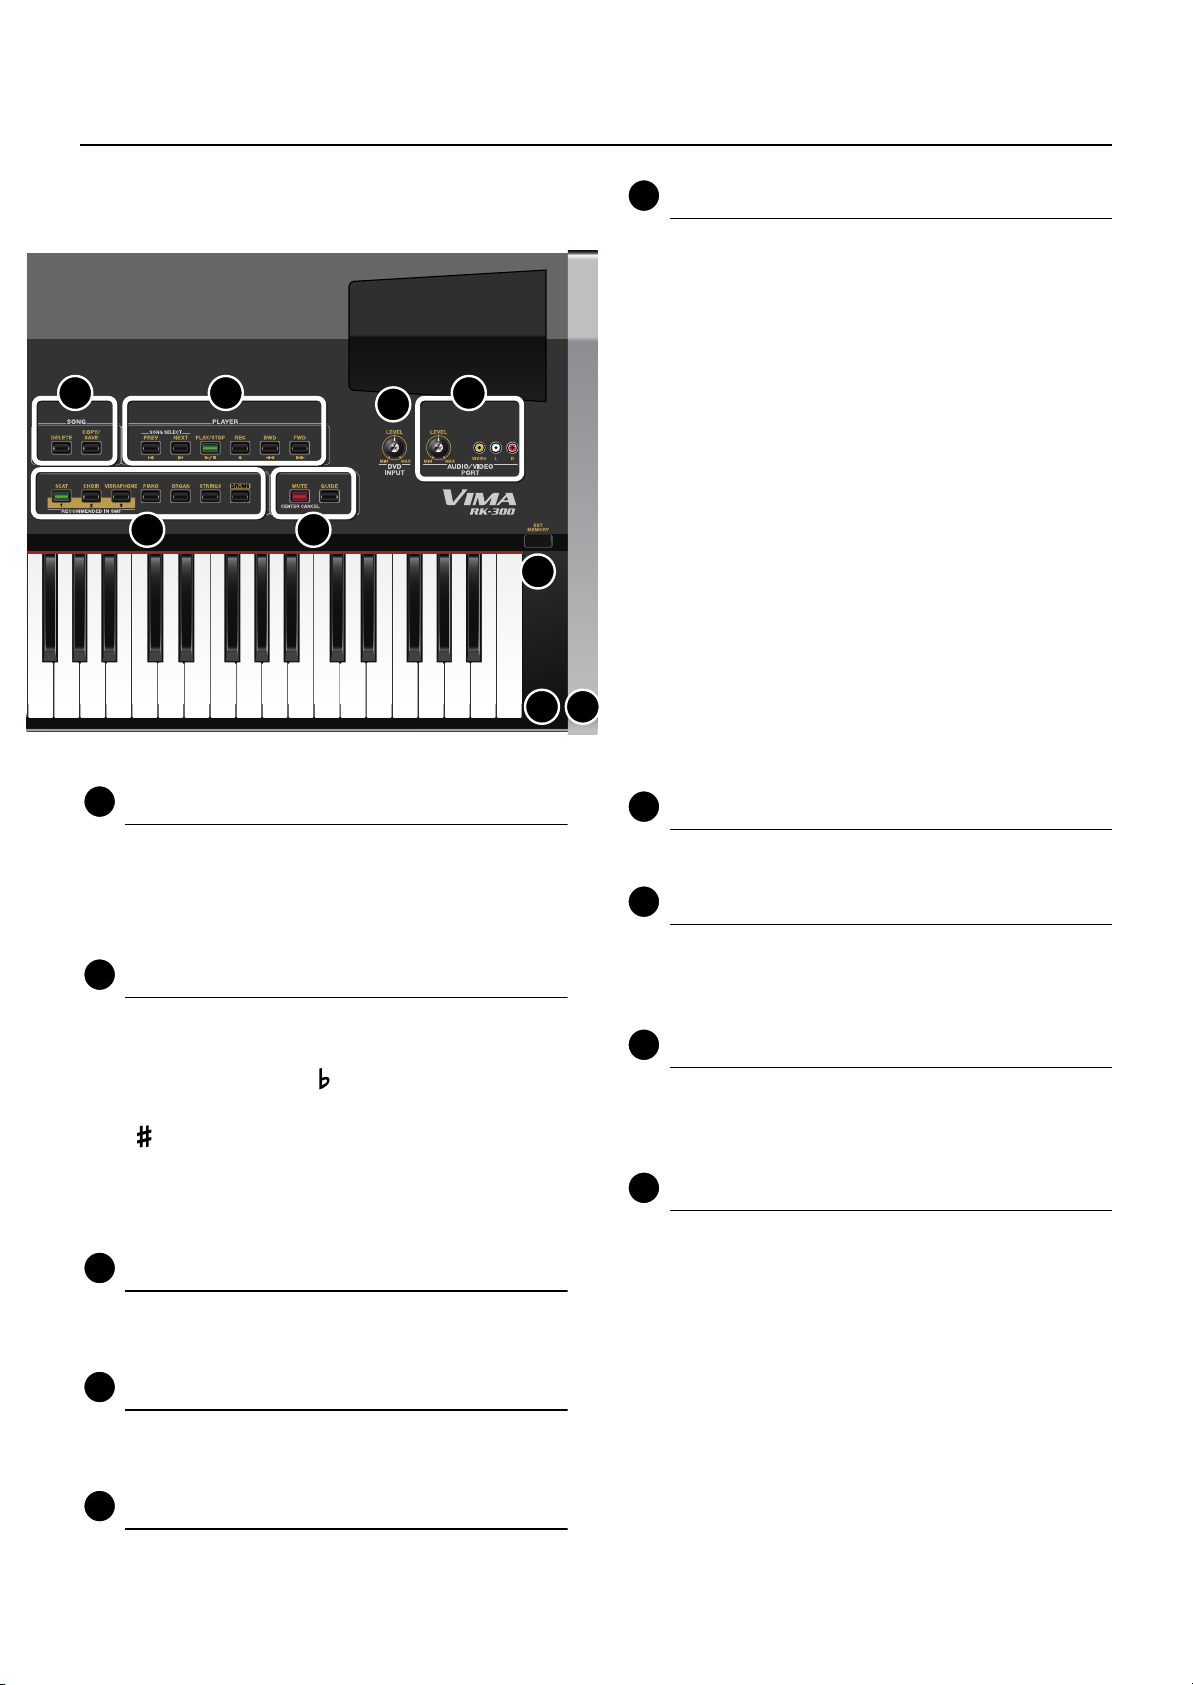
1112131415
15
16
19
20
Names of Things and What They Do
Video Function Select Buttons
Use these buttons to switch the image that is shown on the
RK-300’s display and on an external display/television
connected to the RK-300.
[DVD] Button
This button switches to the image from the DVD player
connected to the DVD INPUT jack (p. 124).
[AUDIO/VIDEO PORT] Button
This button switches to the image from the device
connected to the Roland AUDIO/VIDEO PORT jacks (p. 130).
17 18
6
TEMPO
This adjusts the tempo (playback speed) of the song (p. 88).
The tempo (playback speed) will decrease each time you
press the [SLOW] button, and increase each time you press
the [FAST] button.
7
KEY CONTROL
Here you can change the key of the song and of your
performance on the keyboard (p. 109).
Each time you press the [ ] button the key will shift
downward by a semitone, and each time you press the
[ ] button the key will shift upward by a semitone.
You can use this to shift the key of a song for easier singing,
or to transpose the keyboard without changing your
fingering.
8
[ZOOM/PAN] Button
21
23 24
[DIGISCORE] Button
This button switches to the musical score display (p. 93).
[PIANO ROLL] Button
This button switches to the piano roll screen (p. 130).
[SLIDE SHOW] Button
This button switches to the slide show screen (p. 114).
[LYRICS] Button
Press this button to view lyrics (p. 103).
[V-LINK] Button
This button turns the V-Link function on/off (p. 200).
[VIDEO MONITOR] Button
This button allows you to view the image being sent to the
connected external display/television on the RK-300’s own
display (p. 41).
[EXIT] Button
Press this button once to return to the previous screen. By
pressing this button a number of times you can return to
the main screen (p. 24).
SONG
[DELETE] Button
Use this button to delete a song (p. 79, p. 87).
This button lets you zoom/pan the image of the slide show
(p. 123).
9
[ANIME] Button
This button lets you change the image in time with your
performance (p. 128).
10
Display
This shows images, and various settings of the RK-300. You
can make settings by touching the screen.
[COPY/SAVE] Button
Use this button to copy (p. 80) or save (p. 144) a song.
21
Page 22
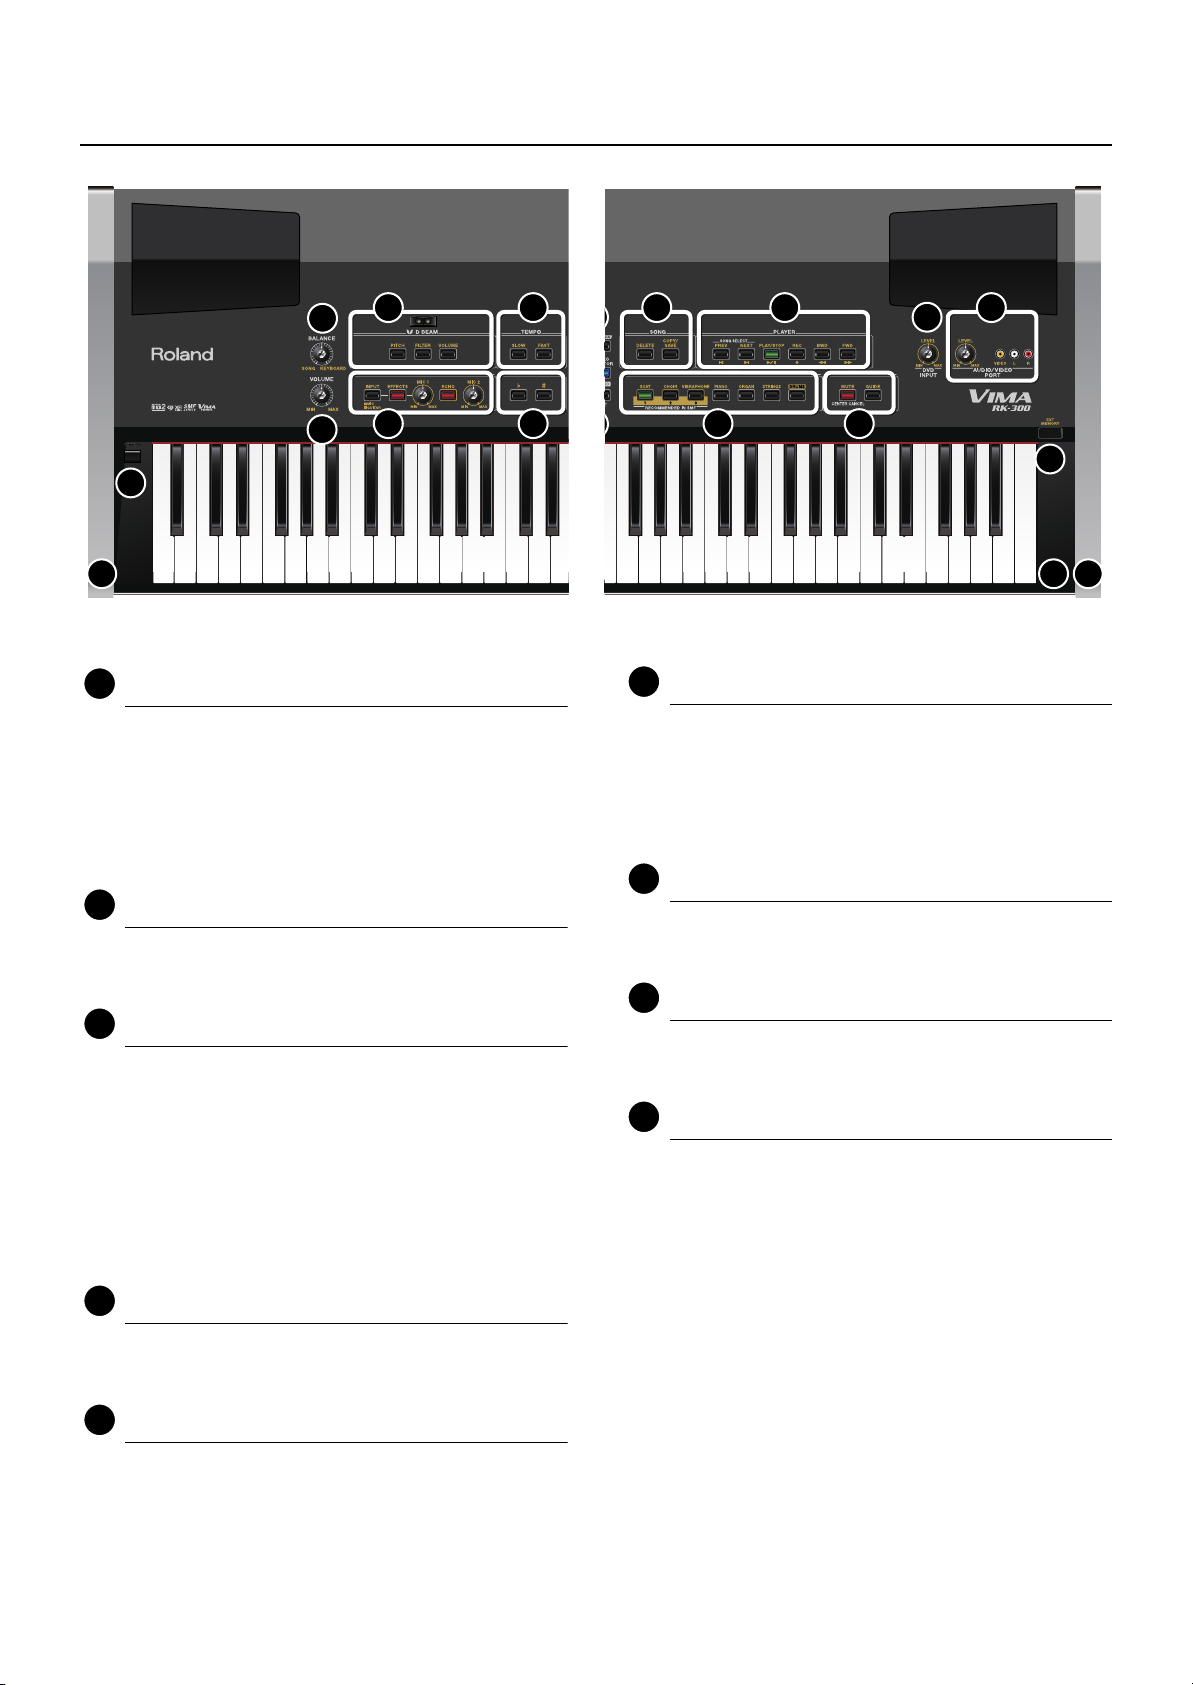
Names of Things and What They Do
212223
24
2
3
1
22
16
PLAYER
These buttons let you play back the RK-300’s internal
songs, songs you’ve copied to “favorites,” songs from CD or
USB memory, or your own performances that you’ve
recorded (p. 140).
When a list of songs is shown in the screen, use the [PREV]
or [NEXT] buttons to select the song that you want to play.
17
INSTRUMENT Buttons
Use these buttons to select the instrumental sound that
you’ll play from the keyboard (p. 44).
18
MELODY
4
5 7
[MUTE/CENTER CANCEL] Button
This button lets you silence the melody or vocal of a song
(p. 99, p. 110).
[GUIDE] Button
This button lets you decrease the volume of the song’s
melody or vocal, so that you can use it as a guide (p. 100, p.
112).
6
15
16
17 18
19
20
21
23 24
EXT MEMORY Connector
You can also play songs from USB memory (p. 76) or copy
songs recorded on the RK-300 to USB memory (p. 152).
You can connect USB memory or a digital camera here, and
view a slide show of the images or photos that it contains
(p. 120, p. 122).
Phones Jacks
Connect headphones to these jacks. The RK-300 allows you
to use two headphones simultaneously (p. 38).
Remote Sensor
When using the remote control to operate the RK-300,
point the remote control toward this sensor (p. 90).
MIC 1/GTR, MIC 2 Jacks
Connect microphones to these jacks. The RK-300 allows
you to use two microphones simultaneously, so that two
people can sing together (p. 101).
If you’re connecting a guitar, connect it to the MIC 1/GTR
jack (p. 132).
19
[DVD INPUT] Knob
This knob adjusts the volume of the input from the DVD
player (p. 124).
20
Roland [AUDIO/VIDEO PORT] Jacks/Knob
Here you can connect a video-capable portable audio
player or similar device, and show its image on an external
display or television, or play back music from it (p. 126).
22
Page 23
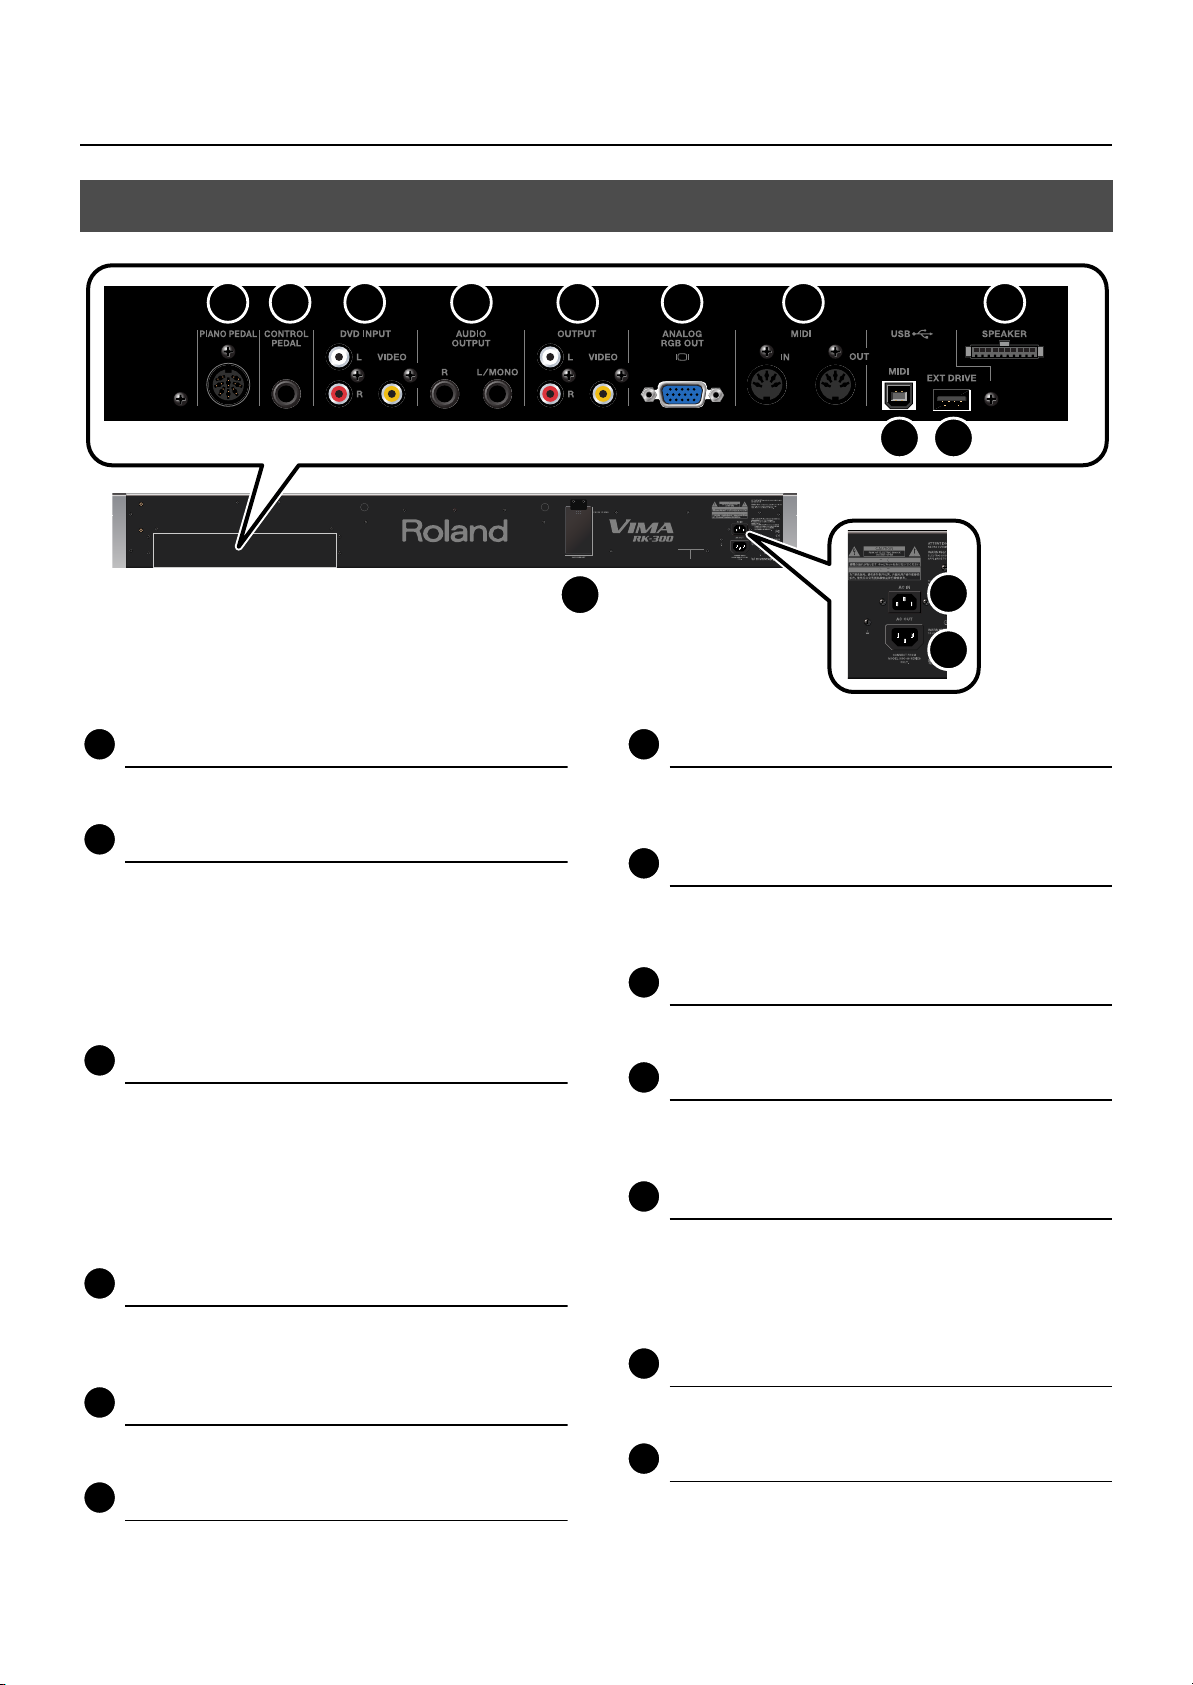
Rear Panel
26
31
3233343536
37
25 26 27 28 29 30 31 34
Names of Things and What They Do
32 33
25
PIANO PEDAL Connector
Connect the Piano Pedal here (p. 29).
CONTROL PEDAL Jack
You can connect the included pedal (DP-10) here and use it
as a damper pedal, or you can assign a variety of other
functions for the pedal to control (p. 29, p. 106, p. 172).
You can connect a separately sold expression pedal (EV-5/
7) here, and use it to control the effect you apply to the
vocal.
27
DVD INPUT Jacks
Here you can connect a DVD player or other video device,
and show its image on an external display or television
connected to the RK-300, or play back music from it (p.
124).
* Use the front panel [DVD INPUT] knob to adjust the volume
of the device connected to the DVD INPUT jacks.
28
AUDIO OUTPUT L/R Jacks
Connect amplified speakers or a sound system here to play
the RK-300’s sounds from external speakers (p. 196).
35
36
37
MIDI IN/OUT Connectors
Connect these to external MIDI devices to send and receive
performance information (p. 198).
USB MIDI Connector
Connect this to your computer to send and receive
performance information (p. 199).
EXT DRIVE Connector
Connect a USB CD drive here (p. 30).
SPEAKER Connector
Connect the speaker cable from the dedicated stand to this
connector (p. 28).
USER MEMORY Connector
You can connect USB memory here, and use it as
“Favorites” memory (p. 80) for saving your recorded
performances or copying songs, or as “User” memory when
saving a “User Program” (p. 157).
AC IN
29
OUTPUT Jacks
Connect a television here to view images (p. 39).
30
ANALOG RGB OUT Connector
Connect an external display here to view images (p. 39).
Connect the included power cord here (p. 28).
AC OUT
Connect this to the AC inlet of the dedicated stand (p. 28).
23
Page 24
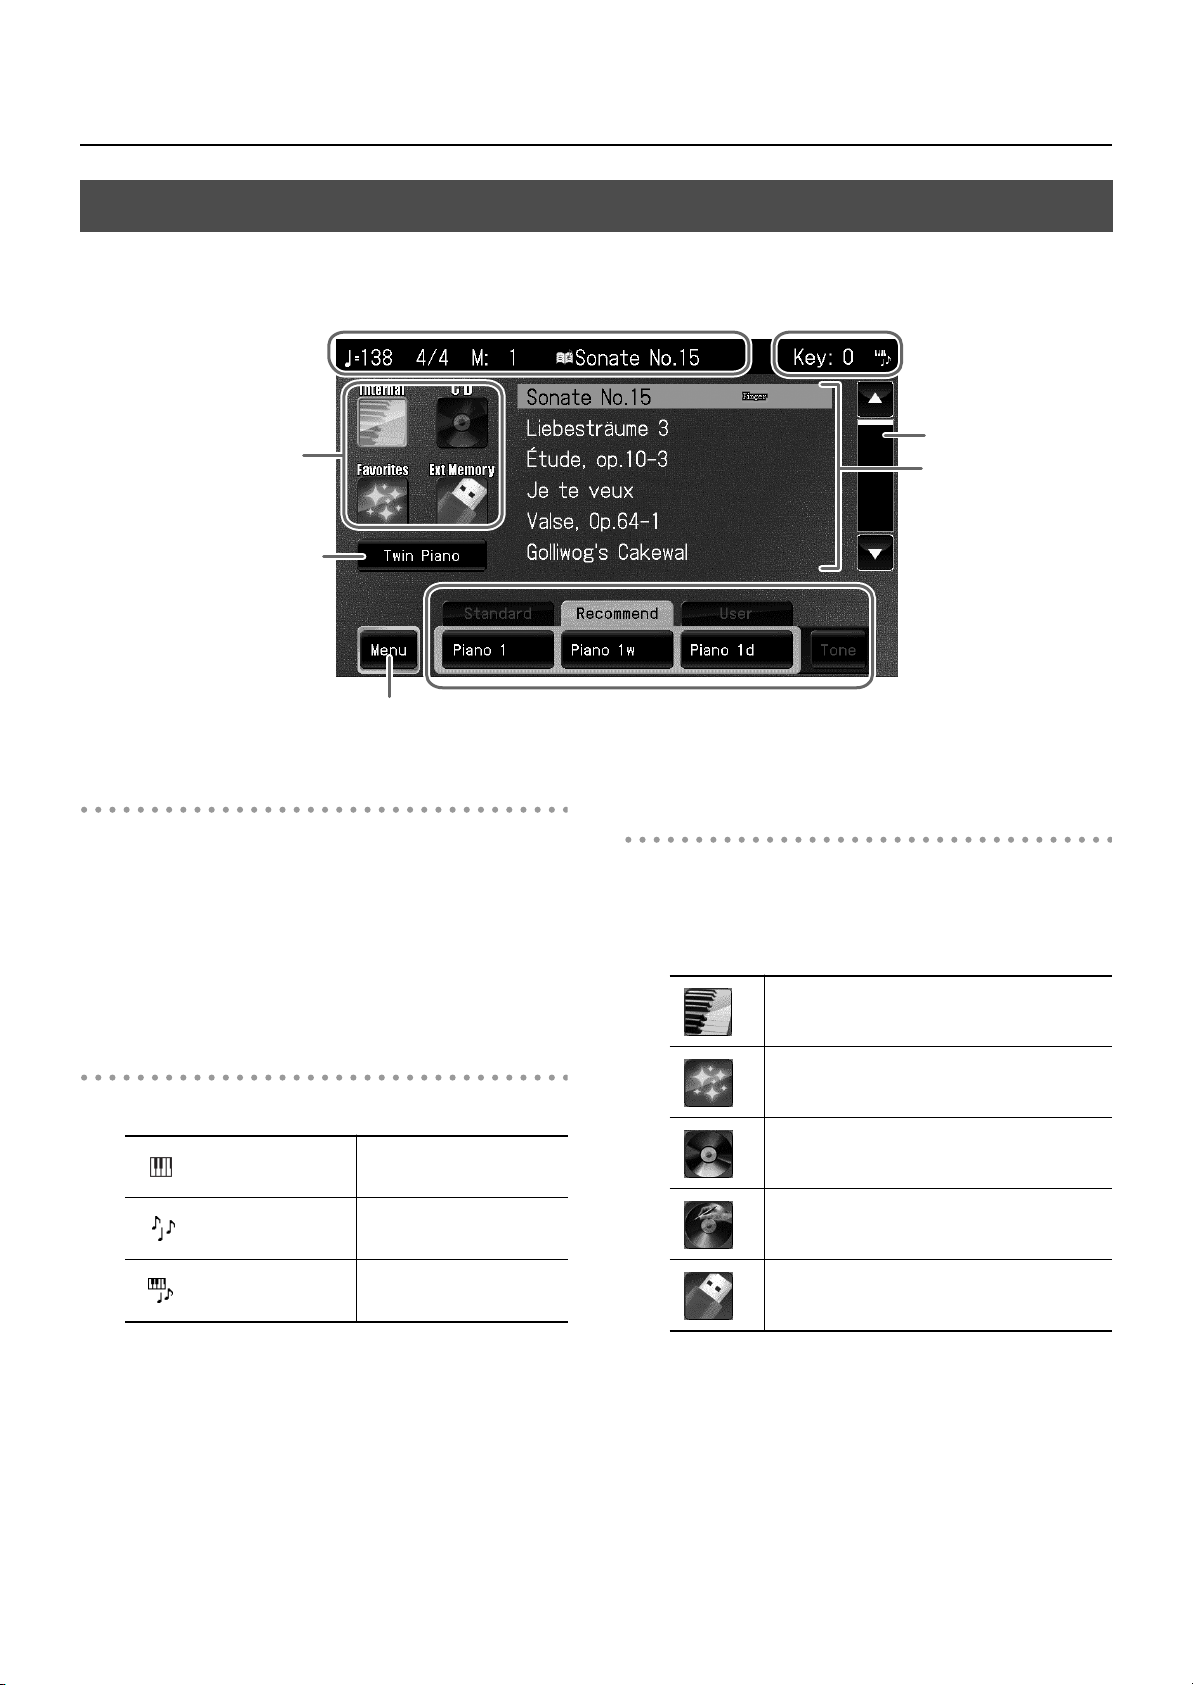
Names of Things and What They Do
Main Screen
(Tempo, Time signature, Measure number, Song Name)
Location in which
songs are saved
(Song Location)
Twin Piano
button
Menu button
Song information
For an SMF format song
This shows the tempo, time signature, measure number,
and the name of the currently selected song.
For a music CD or an audio/MP3 format song
This shows the playback speed, current time, and the name
of the currently selected song.
Song information
Tone buttons
(Standard tone, Recommended Tone, User Tone)
Location in which songs are saved
(Song Location)
Here you can select the location in which songs are saved
(song location).
When you touch an icon in the screen, a list of the songs in
the selected location appears.
Key control
information
Scroll bar
Song list
Internal (Internal songs)
Key control information
This area shows the key control settings (p. 109, p. 183).
(Keyboard)
(Song)
(Keyboard and Song)
Changes the key of the
keyboard.
Changes the key of the
song.
Changes the key of both
the keyboard and song.
24
Favorites (User memory)
CD (Music CD)
CD-R
External memory (USB memory connected
to the EXT MEMORY connector)
Page 25
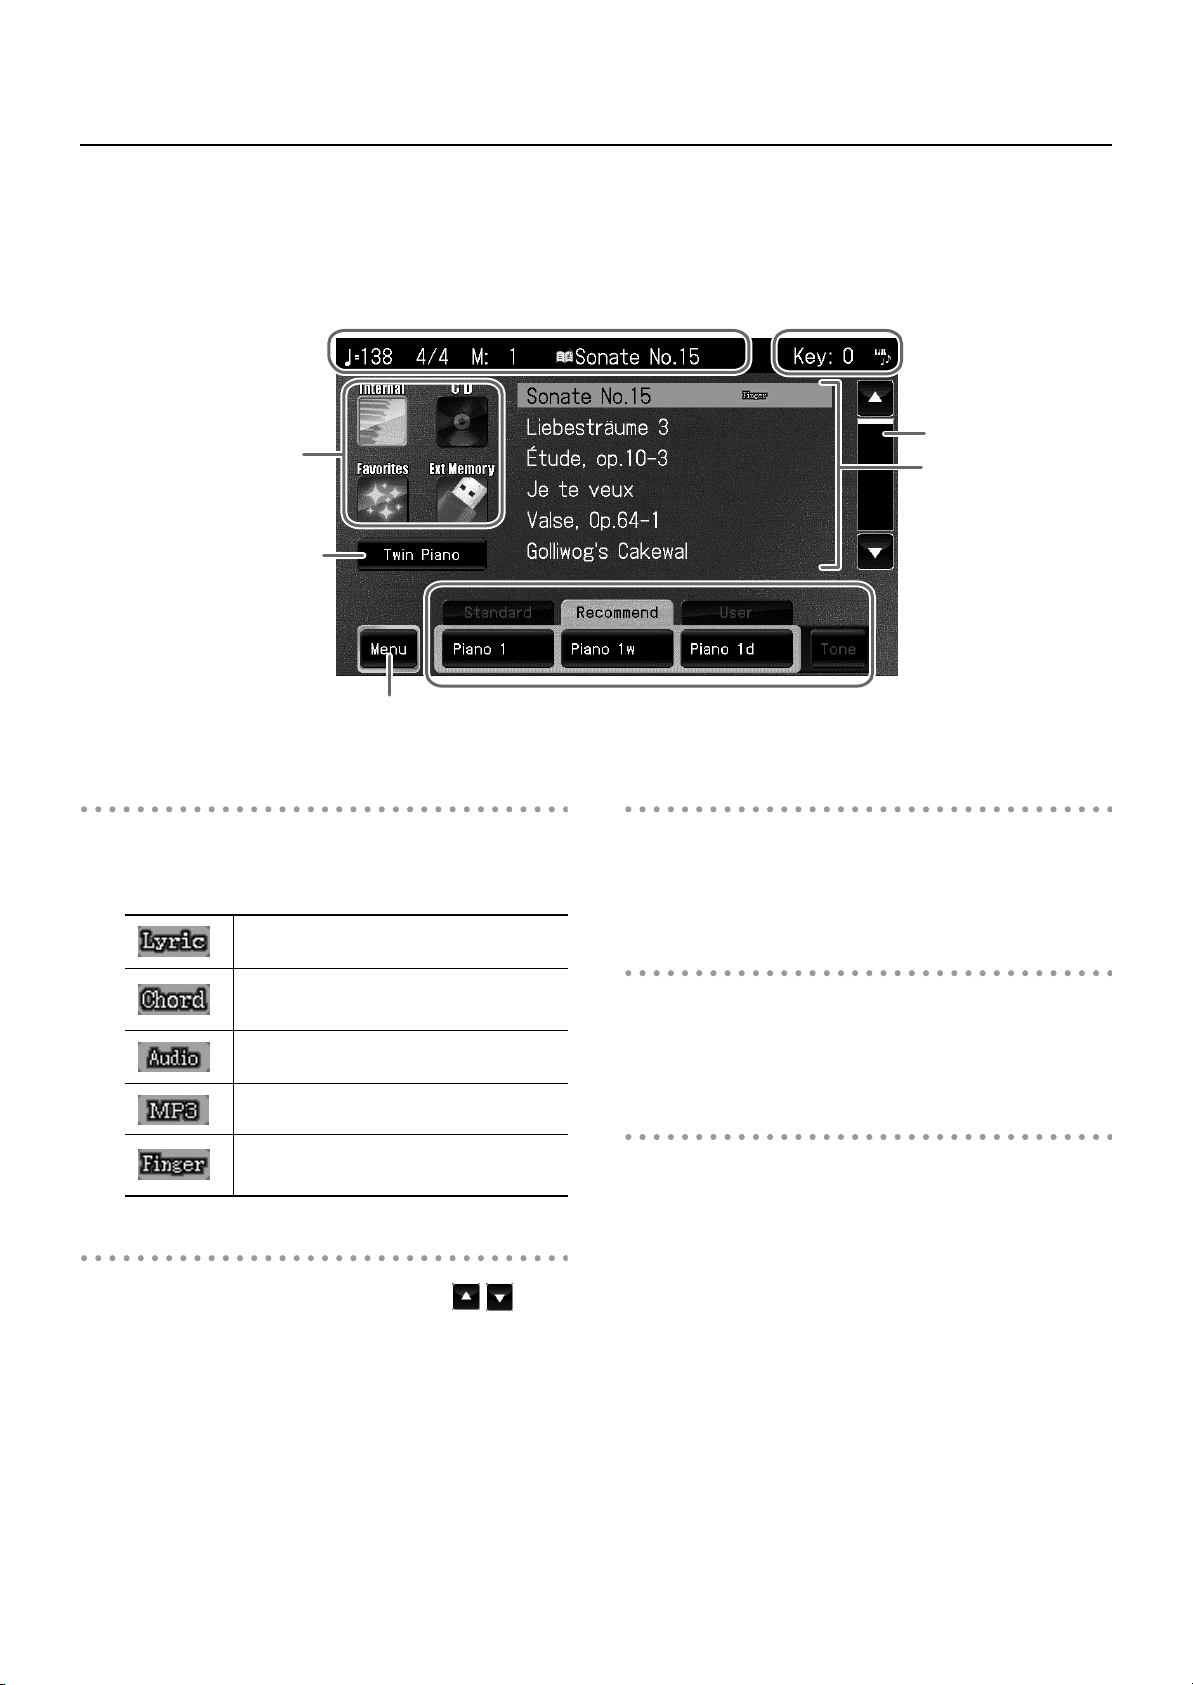
Names of Things and What They Do
(Tempo, Time signature, Measure number, Song Name)
Location in which
songs are saved
(Song Location)
Twin Piano
button
Menu button
Song list
This shows a list of the songs in the currently selected
location. You can select a song by touching its name or by
using the [PREV] [NEXT] buttons.
Song information
Tone buttons
(Standard tone, Recommended Tone, User Tone)
Twin Piano button
This turns “Twin Piano” on.
The keyboard will be divided into left and right regions so
that two people can play the same range of pitches.
Key control
information
Scroll bar
Song list
Song contains lyrics
DIGISCORE screen contains chord
indications
Music CD or song in audio format
Song in MP3 format
DIGISCORE screen contains fingering
indications
Scroll bar
You can view the hidden songs by pressing to
move the scroll bar up/down.
You can also move the scroll bar by touching it in the
display.
Menu button
This displays the Menu screen.
In the Menu screen you can choose the setting that you
want to modify.
Tone buttons
This shows “Standard,” “Recommend,” and “User.”
By touching the tabs shown in the screen, you can switch
between the “Standard,” “Recommend,” and “User”
displays.
25
Page 26
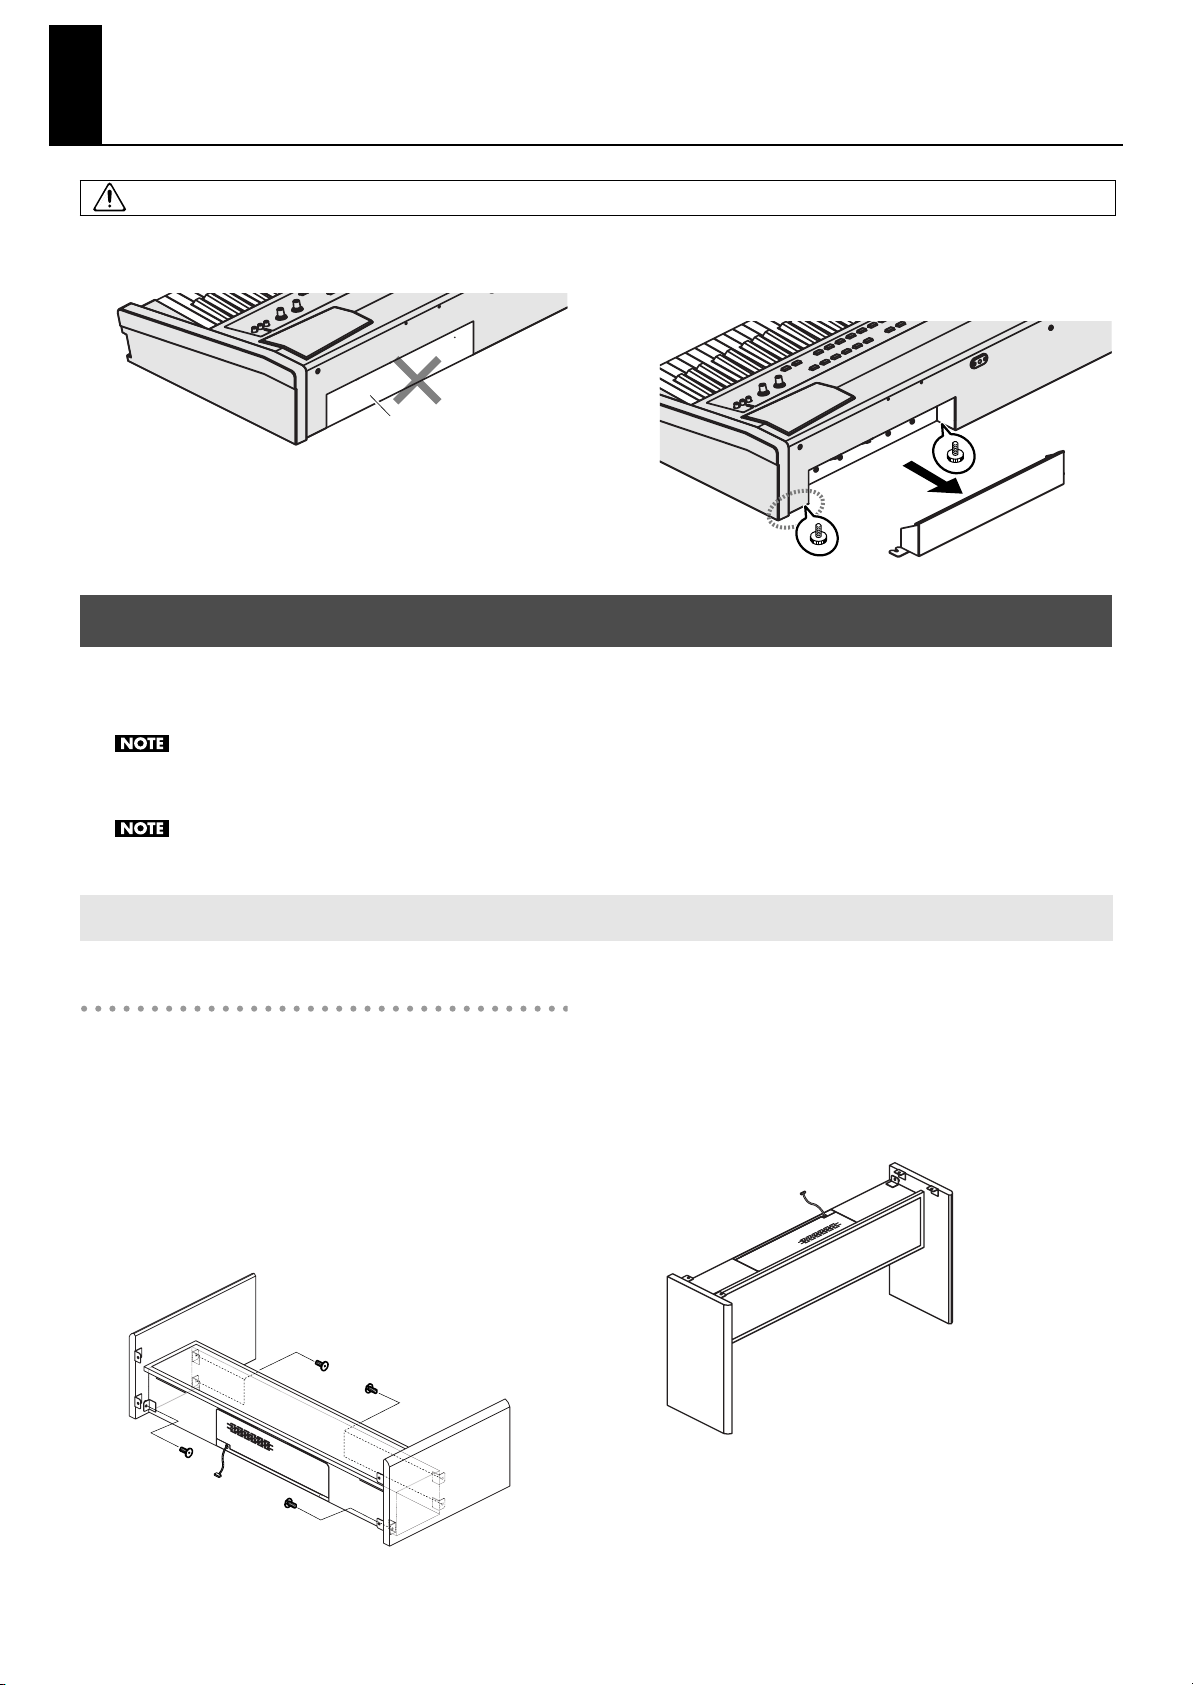
Getting Ready
Loosen
Loosen
Grasp
here
CAUTION
Do not grasp the jack panel cover when lifting the RK-300
keyboard unit.
fig.JackCoverCaution.eps
Jack panel cover
If you need to transport the RK-300 keyboard unit, remove
the jack panel cover, and hold the bottom of the unit when
lifting it.
fig.JackCoverRemove.eps
Placing the RK-300 on a Stand
If you place the RK-300 on a stand, you must use the special stand KSC-48 (sold separately) or KS-G8 (sold separately).
When placing the RK-300 on the KSC-48 or KS-G8, place it in the position shown below.
Using the RK-300 with any other stand may produce an unstable situation, possibly causing the instrument to fall or overturn, and
resulting in injury or damage.
For details on how to assemble the stand, refer to the owner's manual that accompanied the stand.
If Using the KSC-48 Stand
Stand Assembly
At first, assemble the entire stand in a temporary fashion,
without really tightening the screws. Then, after checking
the overall alignment of the boards (and gently shifting
certain parts where necessary), go around and tightly fasten
each of the screws.
Attach the side board (right) for the right sides to
1.
the speaker box.
Use screws to temporarily fasten these parts together.
2.
Attach the side board (left) for the left sides to the
speaker box.
Use screws to temporarily fasten these parts together.
After you’ve temporarily fastened the screws, place
3.
the stand upright, and securely tighten screws to
fasten the speaker box and side boards.
26
Page 27
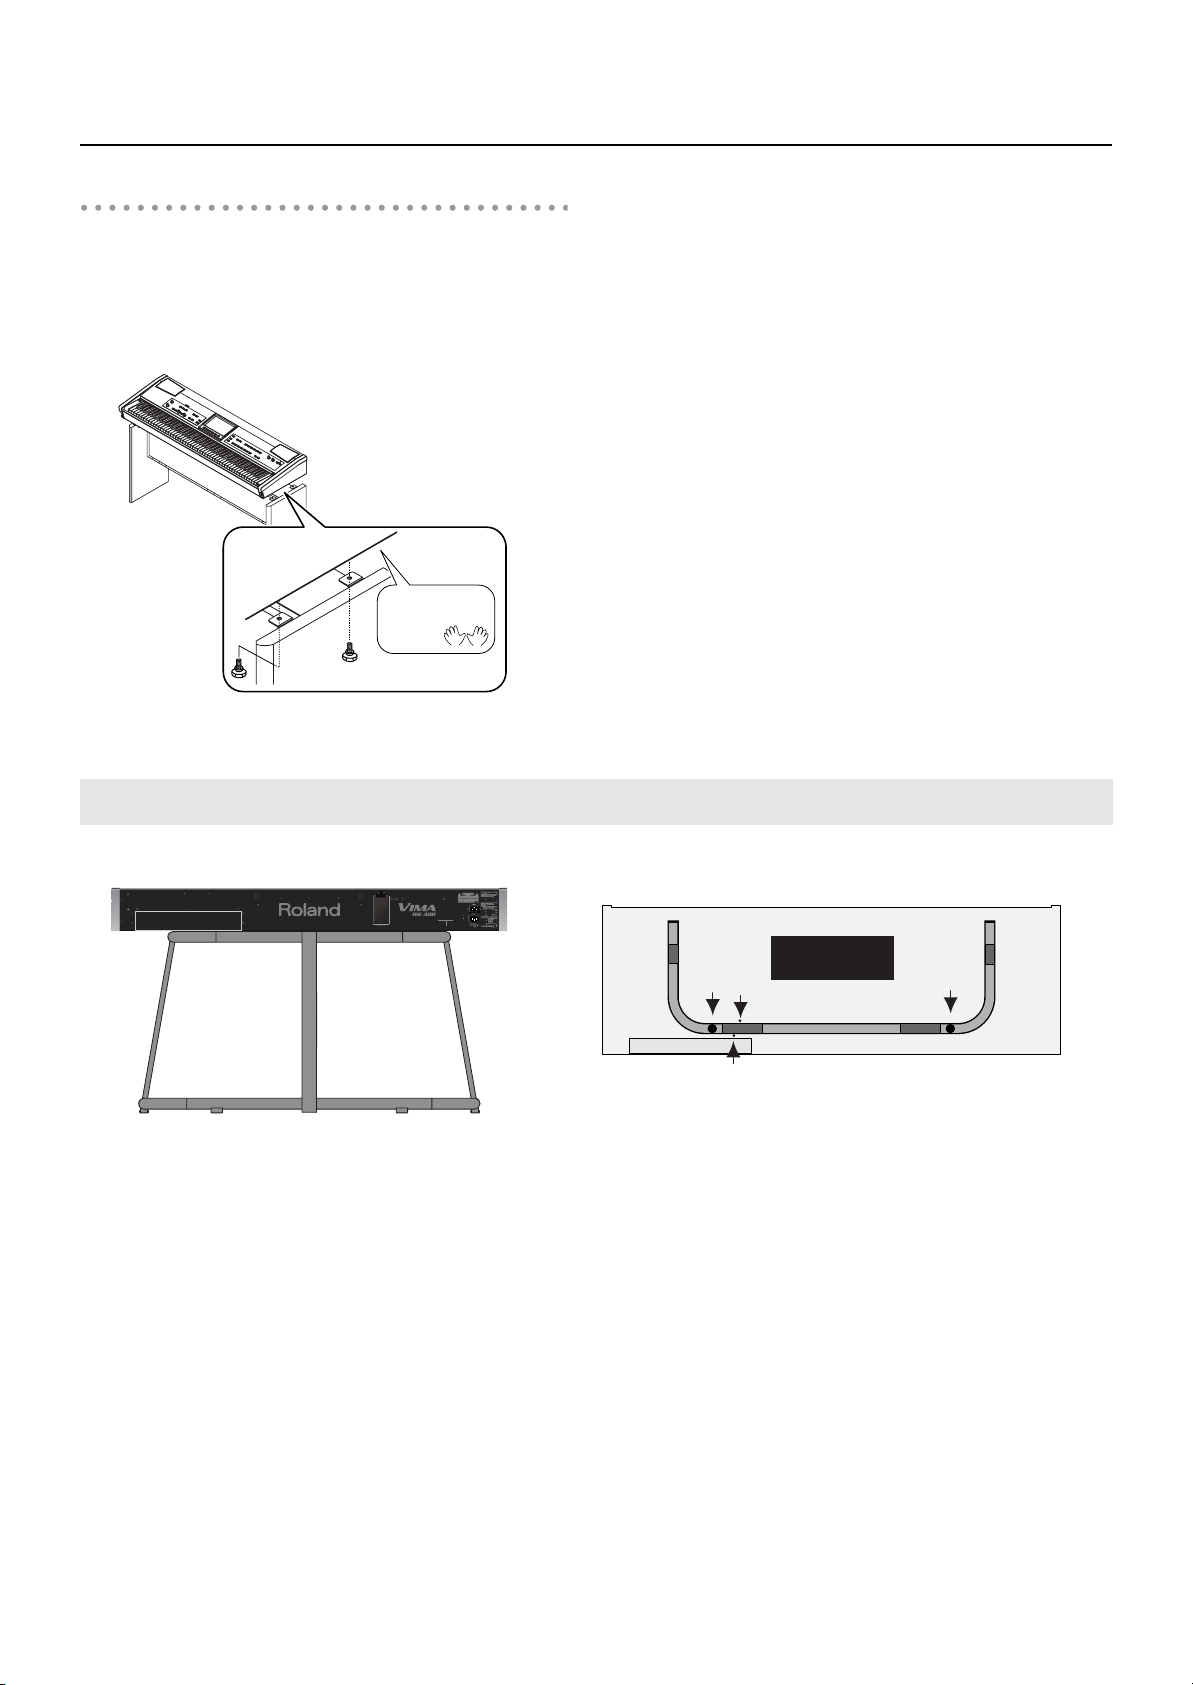
Installing the RK-300 on the KSC-48
Set the RK-300 on the KSC-48, then firmly attach
4.
the four knob bolts.
* When handling the RK-300, firmly grasp it. Be careful, so you
do not get your fingers pinched.
Please don’t
get your fingers
pinched
Getting Ready
If Using the KS-G8 Stand
Front (keyboard) side
(A)
(B)
(B)
Top View
Rear panel side
(A)
Place the RK-300 so that the rubber feet closest to its rear panel
are directly above the arms at locations (A) and also located at
both sides of the rubber feet of the arms.
Make sure that the screws located on the bottom of the RK-300
at locations (B) are not resting on the arm’s rubber foot.
27
Page 28
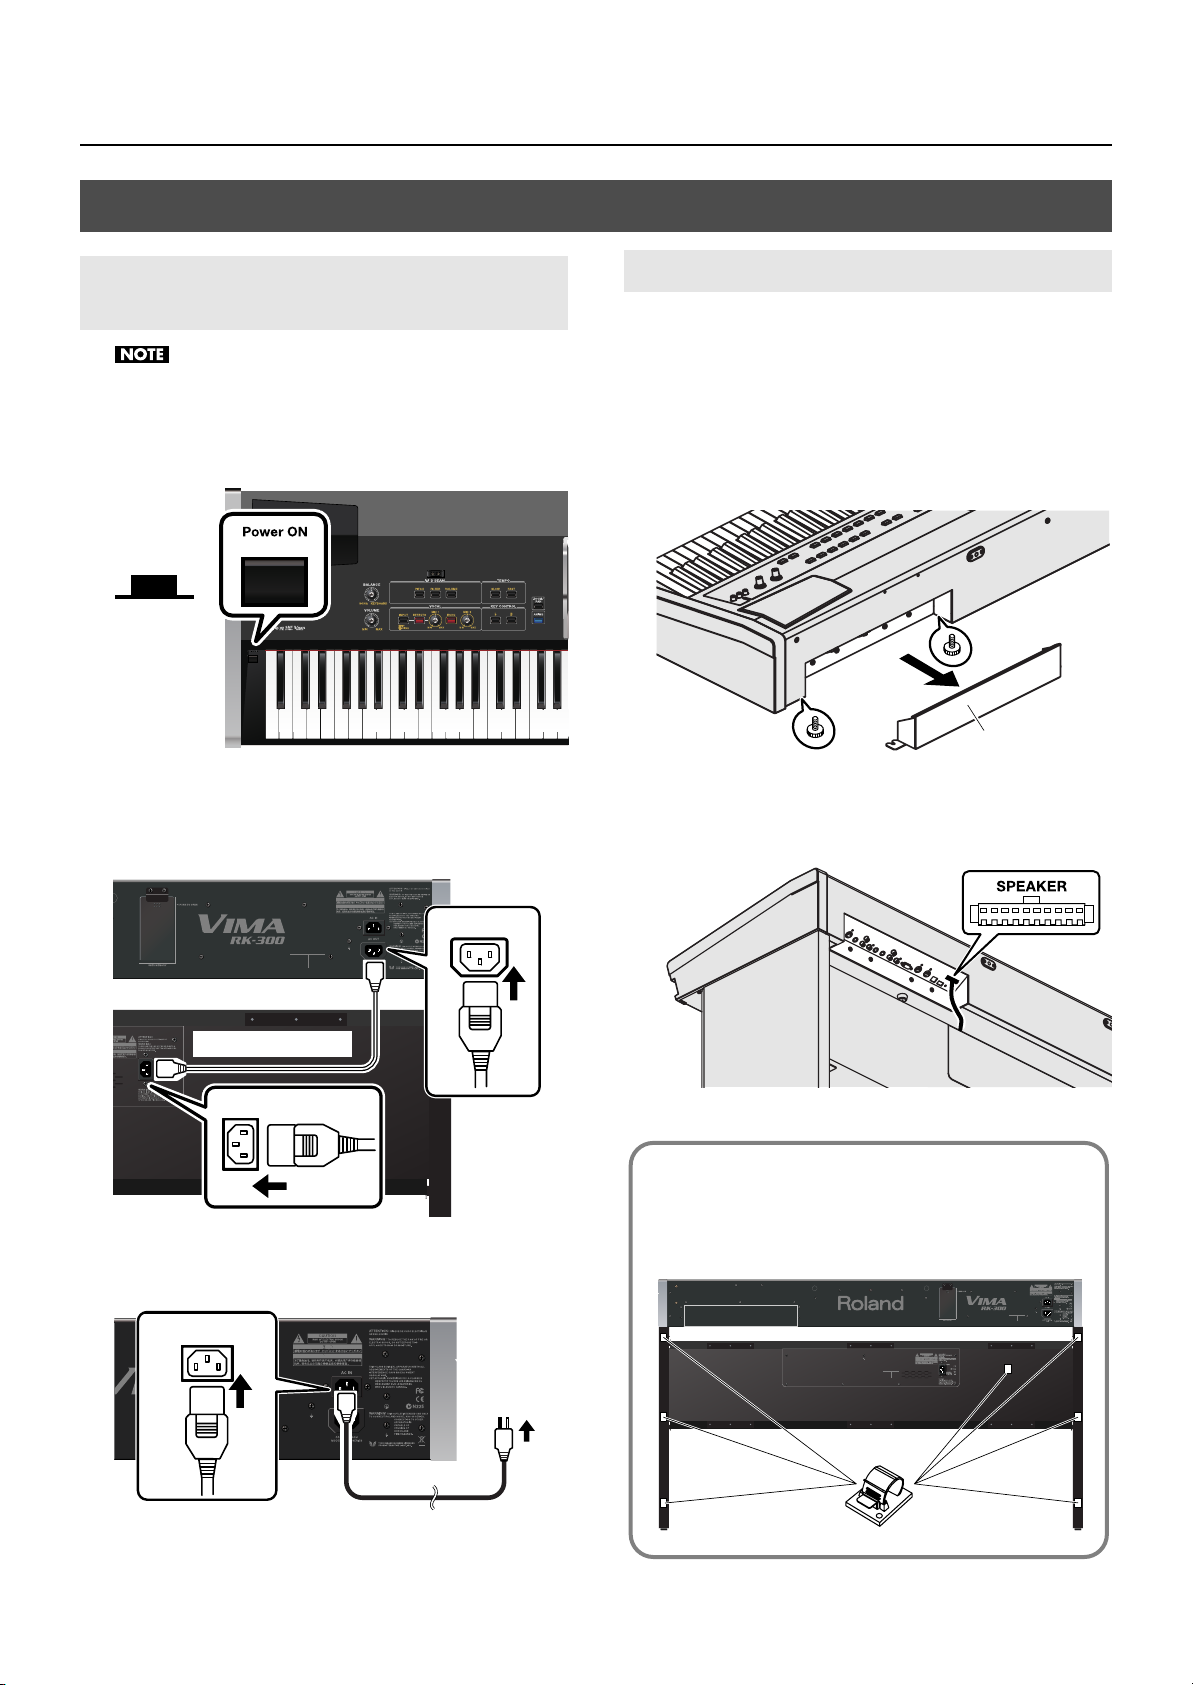
Getting Ready
Loosen
Loosen
Jack panel cover
Getting Ready to Play
Connecting the Power Cords (Main Unit/Stand)
Make sure to use only the supplied power cords.
1.
Make sure that the [Power ON] switch is off
(upward position).
fig.powerOff_e.eps
Upward
position
OFF
2.
If you’re using the KSC-48 stand, designed to
accommodate the RK-300, use the dedicated power
cord to connect the RK-300’s AC OUT to the AC IN of
the stand.
fig.RKtoKSC_e.eps
Connecting the Speaker Cable
(If using the KSC-48 dedicated stand)
1.
As shown in the illustration, loosen the two screws
that fasten the jack panel cover on the bottom
panel of the RK-300.
2.
Remove the cover from the jack panel.
fig.JackCover.eps
3.
Connect the speaker cable that extends from the
stand to the SPEAKER connector on the RK-300’s
rear panel.
fig.SPcable.eps
AC OUT
Dedicated power cord
AC IN
Connect the included power cord to AC IN (AC inlet)
3.
on the RK-300’s rear panel.
fig.PowerCord_e.eps
AC IN
AC Outlet
Power cord
Affix the cable clamps (included with the stand) to the
locations shown in the illustration (recommended), and
use them to secure the power cord, piano pedal
connecting cables, etc.
fig.SetCordClamp.eps
To
4.
Connect the other end of the power cord to an AC
outlet.
28
Page 29
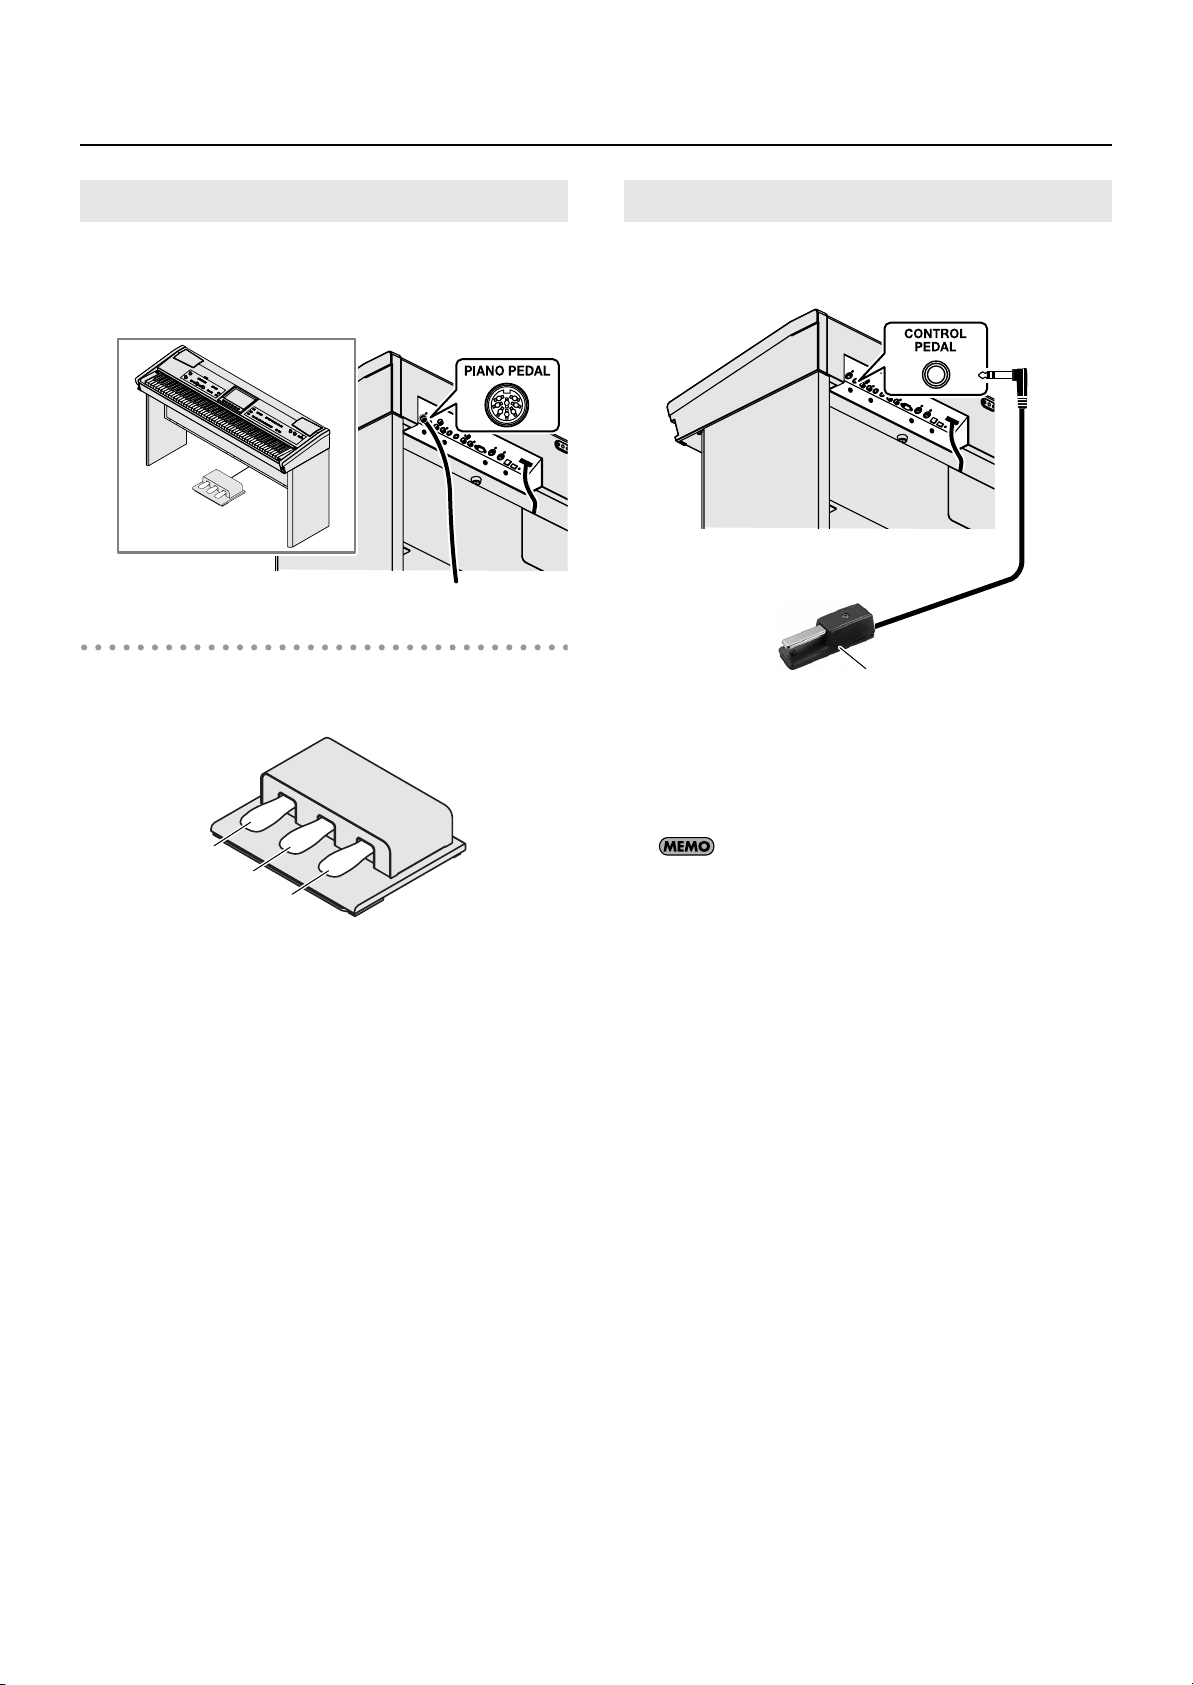
Getting Ready
Soft Pedal
Damper Pedal
Sostenuto Pedal
Connecting the Piano Pedal
(If using the KSC-48 dedicated stand)
Connect the cable of the included piano pedal to the PIANO
PEDAL connector on the RK-300’s rear panel.
fig.SetPianoPedal.eps
About the pedals
The pedals perform the following operations. You’ll use
them mainly playing piano.
fig.PianoPedal.eps
Connecting the DP-10
Connect the pedal (DP-10) included with the RK-300 to the
CONTROL PEDAL jack on the rear panel.
fig.SetDP-10.eps
Set the pedal select switch to
“Continuous.”
* With the factory settings, the pedal connected to the
CONTROL PEDAL jack will function as a “damper pedal.”
Damper Pedal (right pedal)
While this pedal is held down, notes will be sustained for an
extended time even if you release your fingers from the
keyboard.
The length of sustain will change subtly depending on how
deeply you press the pedal.
On an acoustic piano, holding down the damper pedal will
cause the strings for notes other than the ones you actually
play to vibrate in sympathy with what you’ve played,
producing a rich resonance. The RK-300 simulates this
sympathetic vibration (damper resonance).
Sostenuto Pedal (center pedal)
The notes you are pressing when this pedal is depressed will
be sustained.
Soft Pedal (left pedal)
If you hold down this pedal, the notes will be softer in tone.
The softness of the tone can be varied subtly by the depth to
which you press the pedal.
You can assign other functions to the pedal connected to
the CONTROL PEDAL jack, and use your foot to control these
functions.
“Using the Control Pedal to Turn an Effect On/Off” (p. 106)
“Assigning Functions to Control Pedal (Control Pedal)” (p.
172)
29
Page 30
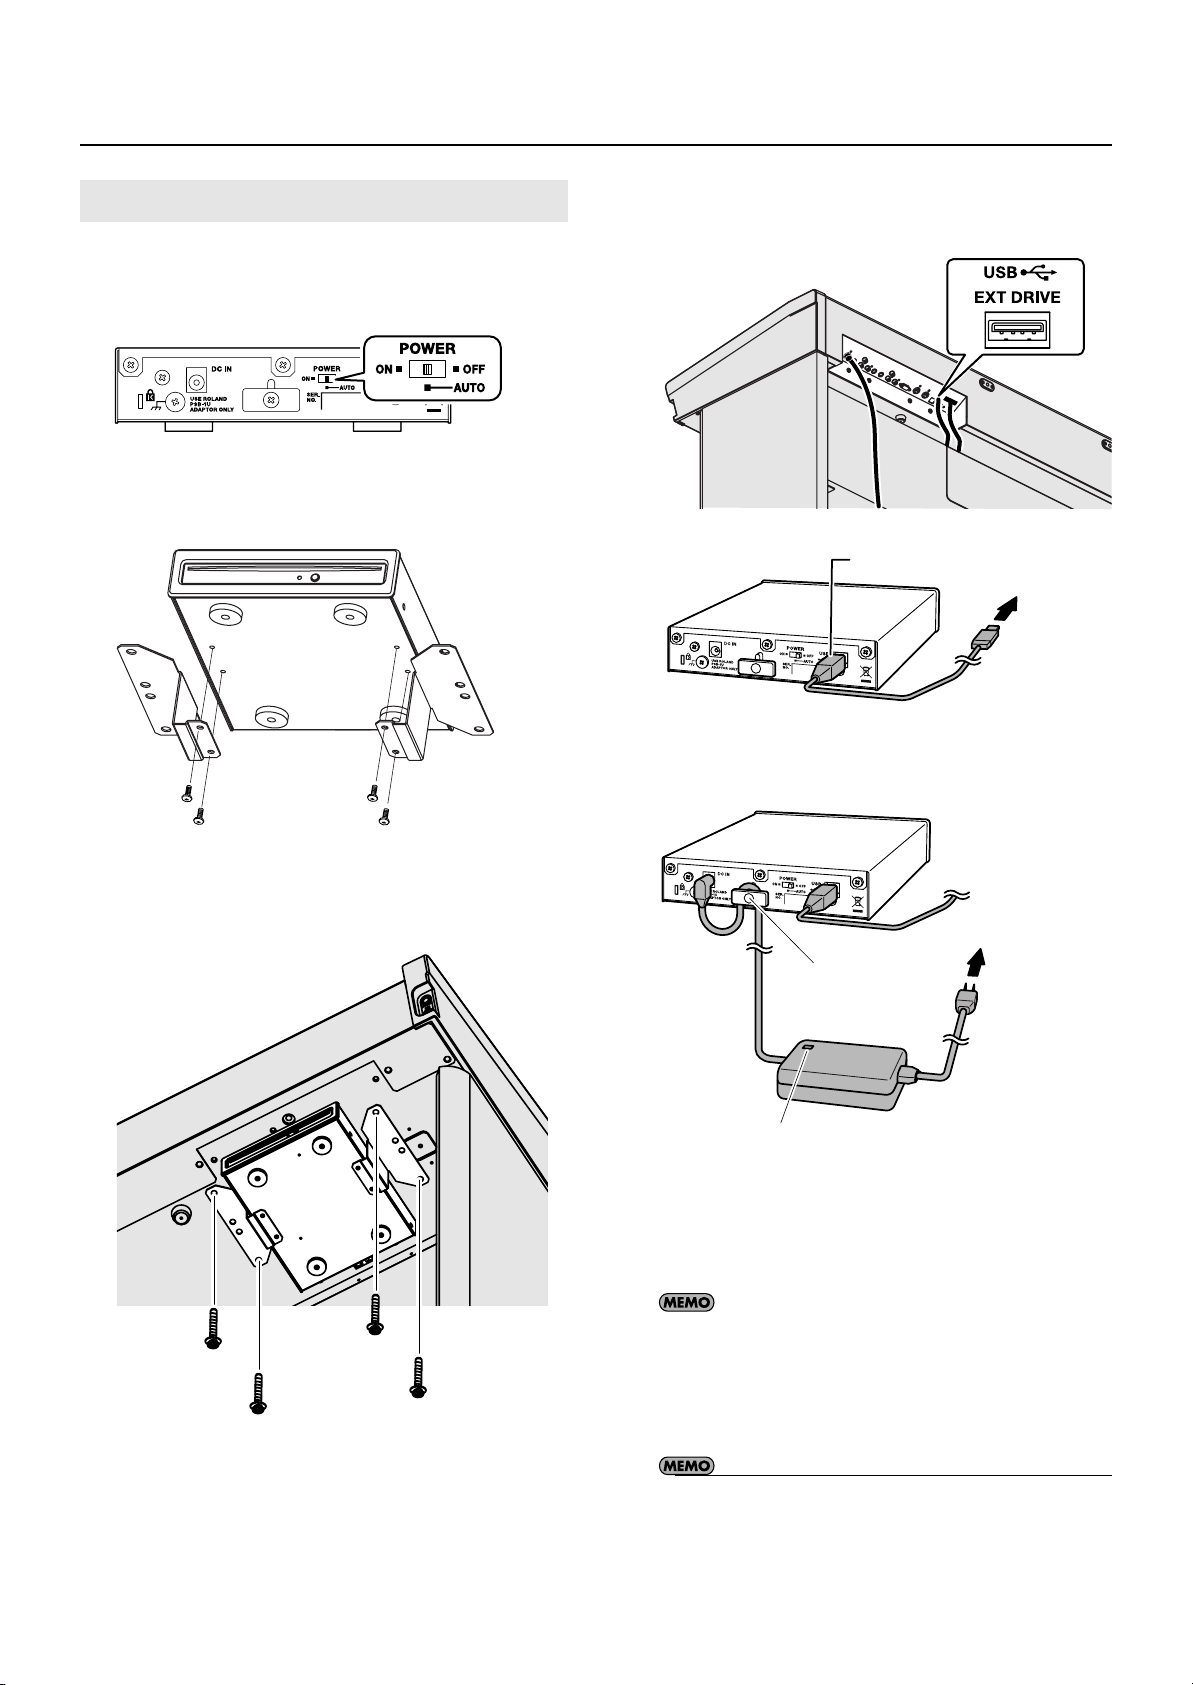
Getting Ready
Screws (3 x 8 mm)
USB cable
To EXT DRIVE
connector
AC adaptor
Power cord
To AC outlet
Cord hook
Place the AC adaptor so the side with the indicator (see illustration)
faces upwards and the side with textual information faces
downwards.
The indicator will light when you plug the AC adaptor into an AC
outlet.
Attaching a CD Drive
(If using the KSC-48 dedicated stand)
1.
Turn the CD drive’s power “AUTO.”
0_fig.CDSW.eps
Use the screws (3 x 8 mm) to attach the holders to
2.
the CD drive.
0_fig.CDHolder.eps
Use a USB cable to connect the CD drive’s USB
4.
connector to the EXT DRIVE connector on the RK300’s rear panel.
fig.CDD-USB.eps
As shown in the illustration, fasten the CD drive
3.
using the screws (4 x 16 mm) and the screw holes
located on the bottom of the RK-300.
0_fig.CDD.eps
Screws (4 x 16 mm)
Connect the AC adaptor included with the CD drive
5.
to the CD drive’s DC IN jack.
0_fig.CDD-Adap.eps
Connect the AC adaptor to an AC outlet.
6.
To prevent the inadvertent disruption of power to your unit
(should the plug be pulled out accidentally), and to avoid
applying undue stress to the AC adaptor jack, anchor the
power cord using the cord hook, as shown in the illustration.
30
• If you’re using the KSC-48 dedicated stand, you can also
use the included CD tray to place the CD drive on the
front panel.
Page 31

Getting Ready
Spacer
If you’re using the KS-G8 stand
If you’re using the KS-G8 as your stand, you must use the
included CD tray to place the CD drive on the front panel.
It is not possible to attach the CD drive to the bottom of the
RK-300.
1.
Set the CD drive’s POWER switch to “AUTO.”
0_fig.CDSW.eps
Using the CD drive attachment screws, attach the
2.
CD drive to the CD tray.
When doing so, insert the spacer between the CD drive and
the CD tray.
0_fig.CDtotray.eps
Place the CD tray between the screws and the RK-
4.
300, and turn the two screws to securely fasten the
CD tray.
Be careful not to pinch your hands when installing the CD
tray.
If you remove the CD tray, be sure to securely refasten the
screws.
0_fig.SetHolder.eps
5.
Use a USB cable to connect the CD drive’s USB
connector to the RK-300’s rear panel EXT DRIVE
connector.
6.
Connect the AC adaptor included with the CD drive
to the CD drive’s DC IN jack.
3.
As shown in the illustration, loosen the two screws
fastening the CD tray on the back of the RK-300.
0_fig.MusicRestScrew.eps
7.
Connect the AC adaptor to an AC outlet.
Operating the power switch
• At the “AUTO” setting, the CD drive’s power will turn on/
off in tandem when the RK-300’s own power is turned on/
off.
• If you want to turn the CD drive on/off by itself (i.e., not in
synchronization with the RK-300), move the switch
between the “ON” and “OFF” settings as desired.
31
Page 32

Getting Ready
Attaching the Music Rest
Here’s how to attach the included music rest.
1.
Loosen the screws used for securing the music rest
on the rear panel of the instrument (two locations).
0_fig.MusicRestScrew.eps
2.
Place the music rest between the screws and the
chassis.
0_fig.MusicRest.eps
Connecting User Memory
If you connect the included (or commercially available) USB
memory to the USER MEMORY connector on the RK-300’s
rear panel, you’ll be able to use the USB memory as “User
memory.”
You can use this memory as “Favorites” (p. 80) for saving
your recorded performances or copied songs, and use it to
save “User Programs” (p. 157).
1.
Press the upper part of the USER MEMORY
connector cover, and open it.
fig.USERUSB01.eps
3.
While using one hand to support the music rest,
tighten the screws (two locations) to fasten the
music rest firmly in place.
When attaching the music rest, you must use your hand to
support it firmly so that it does not fall.
Be careful not to pinch your hand.
To remove the music rest, support it with one hand while
you loosen the screws. Remove the music rest, and then
securely retighten the screws.
• Don’t apply excessive force to the installed music rest.
• You must use the included screws to attach the music
rest.
Connect the included (or commercially available)
2.
USB memory to the USER MEMORY connector.
fig.USERUSB02.eps
Carefully insert the USB memory all the way in—until it is
firmly in place.
Press the upper part of the USER MEMORY
3.
connector cover to close it.
Be sure to keep the USER MEMORY connector cover closed
unless you’re connecting or disconnecting USB memory.
32
Page 33

Getting Ready
OFF
Upward
position
Turning the Power On/Off
Once the connections have been completed, turn on power
to your various devices in the order specified. By turning on
devices in the wrong order, you risk causing malfunction
and/or damage to speakers and other devices.
Turning the power on
1.
Turn the [VOLUME] knob all the way to the left to
minimize the volume.
fig.VolumeMin.eps
Turning the power off
Turn the [VOLUME] knob all the way to the left to
1.
minimize the volume.
fig.VolumeMinOff.eps
Press the [Power ON] switch.
2.
The screen will disappear, and the power will turn off.
fig.PowerOff_e.eps
If the CD drive is not being powered on/off in
2.
synchronization with the RK-300, turn the CD
drive’s power switch “ON.”
3.
Press the [Power ON] switch.
fig.PowerOn_e.eps
Lower
position
ON
The power will turn on, several images will appear in the RK300’s screen, and then the main screen (p. 24) will appear.
After a brief interval, the RK-300 will be ready to produce
sound when you play the keyboard.
* This unit is equipped with a protection circuit. A brief interval
(a few seconds) after power up is required before the unit
will operate normally.
4.
Use the [VOLUME] knob to adjust the volume (p.
34).
3.
If the CD drive’s power is not being switched on/off
in sync with the RK-300, turn the CD drive’s power
switch “OFF.”
• If you need to turn off the power completely, first turn off
the [Power ON] switch, then unplug the power cord from
the power outlet. Refer to “Power Supply” (p. 17).
33
Page 34

Getting Ready
Adjusting the Volume
Here’s how to adjust the volume of your keyboard playing or
the playback volume of an internal song or CD song.
If headphones are connected, use the [VOLUME] knob to
adjust the headphone volume.
Turn the [VOLUME] knob to adjust the overall
1.
volume.
Adjust the volume while you play the keyboard to produce
sound.
fig.MasterVolume.eps
Formatting the User Memory
When you’ve finished connecting USB memory to the USER
MEMORY connector, you’ll need to format the USB memory
so that it can be used as “user memory.”
Access the main screen.
1.
* If you’re not at the main screen, press the [EXIT] button a
number of times until the main screen appears.
fig.d-MainScreen.eps
Touch < Menu >.
2.
The Menu screen appears.
fig.d-SetMenu3-3.eps
• You can also use the remote control to adjust the volume.
Refer to “Button Functions” (p. 91).
• Even if the [VOLUME] knob is raised, you won’t hear any
sound if the volume has been set to “0” using the
remote’s VOLUME [-] [+] buttons or if the [MUTE] button
was pressed.
* There are three menu screens. Touch to switch
screens.
Touch < Format User Memory >.
3.
A confirmation message appears.
fig.d-UserFormat.eps
* By touching < Cancel > you can return to the previous
screen without formatting.
34
Page 35

Touch < OK >.
4.
Formatting will begin.
The entire contents of user memory will be formatted.
• Never turn off the power while the screen shows the
message “Now formatting...”
• If the screen indicates “Error,” refer to the “Error
Messages” (p. 209).
Locking the USER MEMORY Connector Cover
To prevent theft or loss of the USB memory connected to the
USER MEMORY connector, you can lock the USER MEMORY
connector cover.
Getting Ready
Installing Batteries in the Remote
Install the included batteries (two) into the remote control
unit.
fig.RemoteBattery.eps
Remote (rear)
Battery cover
1.
Use a screwdriver to remove the two screws that
lock the USER MEMORY connector cover.
fig.USBLOCK01.eps
2.
As shown in the illustration below, use the screws
to fasten the USER MEMORY connector cover lock.
fig.USELOCK02.eps
• You must fasten the USER MEMORY connector cover lock
using the screws you removed.
1.
Slide the cover located on the rear of the remote to
open it.
2.
Insert the two LR6 (AA) type batteries in the
orientation shown on the remote.
* Be sure to observe the correct polarity (+, -) for each battery.
3.
Slide the cover closed.
• If used improperly, batteries may explode or leak and
cause damage or injury. In the interest of safety, please
read and observe the following precautions.
• Avoid using new batteries together with used ones. In
addition, avoid mixing different types of batteries.
• Remove the batteries whenever the unit is to remain
unused for an extended period of time.
• If a battery has leaked, use a soft piece of cloth or
paper towel to wipe all remnants of the discharge
from the battery compartment. Then install new
batteries. To avoid inflammation of the skin, make sure
that none of the battery discharge gets onto your
hands or skin. Exercise the utmost caution so that
none of the discharge gets near your eyes.
Immediately rinse the affected area with running
water if any of the discharge has entered the eyes.
• Never keep batteries together with metallic objects
such as ballpoint pens, necklaces, hairpins, etc.
35
Page 36

Getting Ready
Copying Songs from the Included CD to “Favorites”
Here’s how to copy songs from the included CD to
“Favorites” (user memory).
If USB memory is not connected to the USER MEMORY
connector, you won’t be able to copy to “Favorites.”
Touch < One Song > if you want to copy a single
4.
song, or < All > if you want to copy all songs.
The song(s) from the included CD will be copied to “Favorites.”
• Never turn off the power while the screen indicates
“Copying...”
1.
Insert the included CD into the CD drive.
After a brief interval, a list of the songs in the included CD
will appear in the screen.
fig.d-AccCD-List.eps
Use the [PREV] or [NEXT] button to select a song.
2.
You can also select a song by touching it in the screen.
fig.d-AccCD-List2.eps
Connecting External Memory
You can connect USB memory to the EXT MEMORY
connector, and play back songs that were saved on the USB
memory. Songs you’ve recorded on the RK-300 can also be
copied to USB memory for safekeeping (p. 152).
Use USB memory sold by Roland. We cannot guarantee
operation if any other USB memory is used.
Before using newly purchased USB memory, you’ll need to
format (initialize) it on the RK-300. For details, refer to
“Initializing External Memory (Format External Memory)” (p.
192).
1.
Connect the USB memory to the EXT MEMORY
connector as shown in the illustration below.
fig.EXTUSB.eps
Press the [COPY/SAVE] button.
3.
The following screen appears.
fig.d-AccCDcopy.eps
* If you decide not to copy the song, touch < Cancel >.
36
* Make sure that the memory is plugged in all the way. Do not
use excessive force.
Page 37

Adjusting the Brightness of the Screen
You can adjust the screen brightness for best visibility.
1.
Access the main screen.
* If the main screen is not shown, press the [EXIT] button until
the main screen appears.
fig.d-MainScreen.eps
4.
Touch “Display Brightness” to adjust the
brightness.
5.
Press the [EXIT] button when you’ve finished
making adjustments.
Cautions regarding the LCD display
Setting
1–3
Getting Ready
Explanation
Higher settings will make the display
brighter.
2.
Touch < Menu >.
The Menu screen appears.
fig.d-SetMenu3-3.eps
* There are three menu screens. Touch to switch
screens.
3.
Touch < System >.
fig.d-System.eps
• In order to provide the highest possible image quality,
the RK-300 uses a TFT liquid crystal display. Due to the
nature of a TFT liquid crystal display, the screen may
contain pixels that fail to light or that remain constantly
lit, but please be aware that this is not a malfunction or
defect.
• The brightness may be affected by the temperature.
37
Page 38

Getting Ready
Wing nut
Headhone
hook
Listening Through Headphones
You can use headphones to enjoy the RK-300 without disturbing those around you, such as at night. Since the RK-300 has two
headphone jacks, two people can also use headphones simultaneously.
If you’re using only one set of headphones, you may connect them to either of the two headphone jacks.
0_fig.Headphones-a.eps
Attaching the Headphone Hook
Whenever you are not using the headphones, you can hang
them on the headphone hook of the RK-300.
0_fig.headphonHook.eps
Plug the headphones into the Phones jack.
1.
If headphones are connected, no sound will be output from
the RK-300’s speakers.
Use the RK-300’s [VOLUME] knob (p. 34) to adjust
2.
the headphone volume.
• To prevent damage to the cord’s internal conductors,
avoid rough handling. When using headphones, mainly
try to handle either the plug or the headset.
• Your headphones may be damaged if the volume of a
device is already turned up when you plug them in.
Minimize the volume before you plug in the headphones.
• Excessive input will not only damage your hearing, but
may also strain the headphones. Please enjoy music at an
appropriate volume.
• Use headphones that have a stereo 1/4” phone plug.
Press and twist the headphone hook included with
1.
the RK-300 into the hole in the bottom left of the
RK-300 (refer to the figure above).
Turn the headphone hook wing nut to secure the
2.
headphone hook.
• Do not hang anything other than headphones on the
headphone hook. Doing so may damage the instrument
or the hook.
38
Page 39

Connecting an External Display or a Television
You can’t use the VIDEO OUTPUT jack and ANALOG RGB OUT connector at the same time.
Getting Ready
Connecting a Television
fig.ConnectTV.eps
Video cable
(Commercially available)
OUTPUT
(Rear panel)
VIDEO jack
Before you make connections to other devices, you must
turn down the volume of all devices and turn off their power
to prevent malfunctions or damage to your speakers.
1.
Switch off the RK-300 and the television you’ll be
connecting (p. 33).
Connect the RK-300 to your television, use a video
2.
cable (commercially available) to connect the RK300’s VIDEO OUTPUT jack to the television.
3.
Switch on the RK-300 (p. 33).
4.
Switch on your television.
Television
Connecting an External Display
fig.ConnectDisplay.eps
ANALOG
RGB OUT
(Rear panel)
External display
Monitor cable
(Commercially available)
Types of display that can be connected
In general, you can connect any display that is sold as a
“multiscan monitor.” However, to be certain, please check
the following specifications before you connect your display.
Resolution
Horizontal scan rate
Vertical scan rate
Connector
Signal
800 x 480 pixels or more
31.5 kHz
60 Hz
Three-row 15-pin D-sub type
Analog
5.
Set to “Video” at “Selecting the Video Output
Destination” (p. 40).
(As necessary) Specify the television output format
6.
(p. 175).
7.
Specify the aspect ratio (ratio between width and
height) for your television (p. 176).
• The aspect ratio is the proportional relationship between
the width and height of the screen. The RK-300’s screen
has an aspect ratio of 16:9. Televisions can have an aspect
ratio of either 4:3 or 16:9 (wide screen).
• There are small areas at the left and right of the screen
that do not show an image; this is due to the design of
the RK-300.
Before you make connections to other devices, you must
turn down the volume of all devices and turn off the power
to prevent malfunctions or damage to your speakers.
1.
Switch off the RK-300 and the display you’ll be
connecting (p. 33).
2.
Use a commercially available monitor cable to
connect the RK-300’s ANALOG RGB OUT connector
to the analog RGB connector of your display.
Switch on the RK-300 (p. 33).
3.
Switch on the connected display.
4.
For details on how to use your external display, refer to the
owner’s manual for your display.
5.
Set to “RGB” at “Selecting the Video Output
Destination” (p. 40).
39
Page 40

Getting Ready
Selecting the Video Output Destination
Here’s how to choose whether the image will be shown on a
television connected to the VIDEO OUTPUT jack or an
external display connected to the ANALOG RGB OUTPUT
connector.
Access the main screen.
1.
* If the main screen is not shown, press the [EXIT] button until
the main screen appears.
fig.d-MainScreen.eps
Touch “Output Select” to select the video
4.
output destination.
Setting
Video
RGB
In some cases, the RK-300’s display screen may flicker when
you switch this setting, but this does not indicate a
malfunction.
5.
Press the [EXIT] button when you’ve finished
making the setting.
Explanation
VIDEO OUTPUT jack
ANALOG RGB OUTPUT connector
Switching Off Your Television or External Display
You must turn off the power of the television or external
display in the following order.
2.
Touch < Menu >.
The Menu screen appears.
fig.d-SetMenu3-2.eps
* There are three menu screens. Touch to switch
screens.
Touch < Video >.
3.
The following screen appears.
fig.d-Video.eps
1.
Minimize the volume of the RK-300 (p. 34).
Switch off the connected television or display.
2.
Switch off the RK-300 (p. 33).
3.
40
Page 41

Getting Ready
Using the RK-300’s Display to Check the Image Shown on the External Display (Video Monitor)
Here’s how you can use the RK-300’s display to view the image that’s being shown on the external display or
fig.P-VMonitorBtn.eps
television connected to the RK-300. Normally, the RK-300’s display will show the main screen.
Press the [VIDEO MONITOR] button so it’s lit.
1.
The RK-300’s own display will show the same image as shown on the externally connected display or television.
If the video function is off
(When all video function select buttons (p. 21)
are unlit:)
The VIMA logo is shown.
* You can use the Blank Screen (p. 176)
setting to change the image.
If no external video device is connected
Example:
If you press the [DVD] button when nothing is
connected to the DVD INPUT jacks,
like the one shown at right will appear
a message
.
2.
To return to the main screen, press the [VIDEO MONITOR] button or the [EXIT] button to turn
off the [VIDEO MONITOR] button’s light.
41
Page 42

Getting Ready
Experiencing the RK-300 Demo
fig.P-DemoBtn.eps
fig.d-DEMO.eps
You can experience three different demos that introduce the most important functions.
While holding down the [VIDEO MONITOR] button, press the [EXIT] button.
1.
The demo menu screen appears.
Touch the demo that you want to experience.
2.
The [VIDEO MONITOR] button will automatically turn on (lit), and the demo image will appear in the RK-300’s
display.
If an external display or television is connected to the RK-300, the demo will also appear on the external display
or television.
*
If you touch < Play All >
To end the demo, press the [EXIT] button.
3.
• All rights reserved. Unauthorized use of this material for purposes other than private, personal enjoyment is a
violation of applicable laws.
, the three demos will continue playing consecutively until you press the [EXIT] button.
42
Page 43

MEMO
43
Page 44

Performing
Playing the Piano
The RK-300’s high-quality grand piano sound allow you to enjoy a true piano performance experience.
Selecting a Sound
The RK-300 has seven “tone buttons.”
Press a tone button to select the instrumental sound that you want to play.
fig.P-ToneButton.eps
1.
2.
fig.d-ToneStdrd.eps
3.
4.
Access the main screen.
* If the main screen is not shown, press the [EXIT] button until the main screen appears.
Touch the < Standard > tab.
Press one of the tone buttons to select a sound.
Play the keyboard.
You’ll hear the sound of the selected instrument.
44
• If you’ve selected “Recommend” (recommended tones) in the main screen, you’ll be able to play
instrumental sounds that are appropriate for the selected internal song or VIMA TUNES (CD-ROMs
produced for VIMA) (p. 95).
• If you’ve selected “User” (user tones), you’ll be able to play the sounds you assigned to
INSTRUMENT buttons [1]–[3] (p. 57).
Page 45

Changing the Brightness of the Sound (Brilliance)
You can adjust the brightness of the sound heard when you play the keyboard.
Access the main screen.
1.
* If the main screen is not shown, press the [EXIT] button until the main screen appears.
Touch < Menu >.
2.
The Menu screen appears.
fig.d-SetMenu3-2.eps
Performing
3.
fig.d-Sound.eps
4.
* There are three menu screens. Touch to switch screens.
Touch < Sound >.
The following screen appears.
Touch “Brilliance” to adjust the setting.
Setting
Standard, Mellow, Bright
If you touch < Reset >, all settings (parameters) shown in the current screen will return to
their factory-set values.
When you’re finished making adjustments, press the [EXIT] button.
5.
45
Page 46

Performing
Adding Reverberation (Reverb)
You can add reverberation (reverb) to the sound.
Adding reverb will produce the spacious sensation of performing in a concert hall.
Access the main screen.
1.
* If the main screen is not shown, press the [EXIT] button until the main screen appears.
Touch < Menu >.
2.
The Menu screen appears.
fig.d-SetMenu3-2.eps
3.
fig.d-Sound.eps
4.
* There are three menu screens. Touch to switch screens.
Touch < Sound >.
The following screen appears.
Touch “Reverb” to adjust the setting.
Setting Explanation
Off, 1–10
Higher settings produce deeper reverb, enhancing the sense of spaciousness and
depth. With a setting of Off there will be no reverb.
46
If you touch < Reset >, all settings (parameters) shown in the current screen will return to
their factory-set values.
When you’re finished making adjustments, press the [EXIT] button.
5.
Page 47

Adding Liveliness to the Sound (Dynamics)
You can add liveliness to the sound to give it superb clarity and distinctness.
Access the main screen.
1.
* If the main screen is not shown, press the [EXIT] button until the main screen appears.
Touch < Menu >.
2.
The Menu screen appears.
fig.d-SetMenu3-2.eps
Performing
3.
fig.d-Sound.eps
4.
* There are three menu screens. Touch to switch screens.
Touch < Sound >.
The following screen appears.
Touch “Dynamics” to adjust the setting.
Setting
Off
Sharp
Clear
Power
Explanation
Dynamics sound control is turned off.
Creates a sound with boosted bass and treble.
Produces a sound with chords in the low registers that are clear and distinct.
Creates a sound with boosted bass.
If you touch < Reset >, all settings (parameters) shown in the current screen will return to
their factory-set values.
When you’re finished making adjustments, press the [EXIT] button.
5.
47
Page 48

Performing
Creating Your Own Piano Sound (Piano Designer)
The RK-300 lets you make detailed adjustments to the piano sound as desired. This function is called
“Piano Designer.”
Some of the “Piano Designer” functions apply only to specific sounds. For details, refer to
the explanation of the Piano Designer functions.
Whenever you change any of the settings for the items in the “Piano Designer” screens, the
setting changes you’ve made will be stored automatically as soon as you close the screen.
Access the main screen.
1.
* If the main screen is not shown, press the [EXIT] button until the main screen appears.
Touch < Menu >.
2.
The Menu screen appears.
fig.d-SetMenu-3-1.eps
3.
fig.d-Pdesigner1.eps
* There are three menu screens. Touch to switch screens.
Touch < Piano Designer 1 >–< Piano Designer 3 >.
48
Page 49

To change the setting, touch for the item you want to specify.
4.
Performing
Parameter
Piano designer 1
Damper Resonance
Damper Noise
Duplex Scale
String Resonance
KeyOff Resonance
Piano designer 2
Master Tuning
Temperament
Temperament Key
Stretch Tuning
Piano designer 3
Key Touch
Item Page
The sound of resonance in other strings caused by the sound of the
fingered key, when the damper pedal is depressed
The sound heard when strings are released by depressing the damper
pedal
The sound of aliquot resonance
The resonant sound of strings for keys already held down when the
keyboard is fingered
The sound when a key is released
Matching the pitch with other instruments
Equal temperament, tunings originally used for baroque and other
styles of classical music, and arabic scale
Specifies the tonic when using a tuning other than equal temperament
A distinctive piano tuning
Adjust the touch sensitivity of the keyboard
p. 50
p. 51
p. 51
p. 52
Key Touch Offset
Hammer Response
Hammer Noise
Lid
When you’re finished making settings, press the [EXIT] button.
5.
Fine adjustment to the touch sensitivity
Time from when the key is fingered until the piano sound is heard.
The sound of hammers striking strings
Adjusts the extent to which the lid of the grand piano is open
p. 53
p. 54
49
Page 50

Performing
Piano Designer 1
fig.d-Pdesigner1.eps
If you touch < Reset >, all settings (parameters) shown in the
current screen will return to their factory-set values.
Adjusting Resonance when the Damper Pedal is Depressed (Damper Resonance)
Adjusting the Sound Heard at String Release When the Damper Pedal is Depressed (Damper Noise)
You can adjust the damper noise of the acoustic piano sound
(the sound of the damper releasing the strings when you
press the damper pedal).
This setting applies only for the front panel [PIANO] button
and for the piano tones Superior Grand and Natural Grand. It
is not available for other tones.
This setting is ignored when Damper Resonance is set to
“Off.”
Setting
Off, 1–10
Explanation
Larger values produce correspondingly
greater damper noise.
The Damper Noise function is not active
when the value is set to “Off.”
You can change the volume of the damper pedal resonance.
On an acoustic piano, depressing the damper pedal makes
the notes you play resonate with other strings, adding rich
reverberations and fatness to the sound. The damper pedal
on the RK-300 recreates this resonance (Damper Resonance)
when depressed.
This setting applies only for the front panel [PIANO] button
and for the piano tones Superior Grand and Natural Grand. It
is not available for other tones.
Setting Explanation
The resonance volume decreases as the
value is lowered, while raising the value
Off, 1–10
increases the volume of the Damper
Resonance.
The Damper Resonance function is not
active when the value is set to “Off.”
Adjusting the Sympathetic Vibrations of an Acoustic Piano’s Duplex Scale (Duplex Scale)
“
Duplex Scale
vibrations in the sections of the string toward the front and
toward the back.
It can produce sound that is richer and brighter by adding the
string’s higher harmonics.
Because no damper (sound-stopping mechanism) is applied
to the front or back sections of the string, the resonating
sounds linger even after the sound of the string stops when
you release the played key.
This setting applies only for the front panel [PIANO] button
and for the piano tones Superior Grand and Natural Grand. It
is not available for other tones.
Setting
Off, 1–10
” refers to a system that causes sympathetic
Explanation
Higher settings will make the sympathetic
vibration louder.
The Duplex Scale function is not active
when the value is set to “Off.”
50
Page 51

Performing
Producing the Resonance of the Strings when the Keys Are Played (String Resonance)
When you play the keys on an acoustic piano, the strings that
are already playing resonate as well. The function that
reproduces this effect is called “String Resonance.”
This setting applies only for the front panel [PIANO] button
and for the piano tones Superior Grand and Natural Grand. It
is not available for other tones.
Setting
Off, 1–10
Explanation
The resonance level decreases as the value
is decreased, while increasing the value
increases the amount of resonance.
The String Resonance function is not active
when the value is set to “Off.”
Playing Sounds When the Keys Are Released (Key Off Resonance)
You can play the “key off” sound (the subtle sound produced
when the keys are released) obtained when playing an
acoustic piano.
This setting applies only for the front panel [PIANO] button
and for the piano tones Superior Grand and Natural Grand. It
is not available for other tones.
Piano Designer 2
fig.d-Pdesigner2.eps
If you touch < Reset >, all settings (parameters) shown in the
current screen will return to their factory-set values.
Tuning to Other Instruments’ Pitches (Master Tuning)
In situations such as when playing ensemble with other
instruments, you can tune the RK-300’s standard pitch to the
pitch of another instrument.
The standard pitch generally refers to the pitch of the note
that’s played when you finger the middle A key.
This tuning of all the instruments to a standard pitch is called
“tuning.”
This setting applies to all tones.
Setting
Off, 1–10
Explanation
The volume of the Key Off sound decreases
as the value is lowered, while raising the
value increases the volume of the Key Off
sound.
The Key Off Resonance function is not
active when the value is set to “Off.”
Setting
415.3 Hz–440.0 Hz–466.2 Hz
If you continue touching the master tuning , the
value will change continuously.
51
Page 52

Performing
Changing the Tuning (Temperament)
You can play classical styles such as Baroque using historic
temperaments (tuning methods).
Most modern songs are composed for and played in equal
temperament, the most common tuning in use today. But at
one time, there were a wide variety of other tuning systems in
existence.
By playing in the temperament that was in use when a
composition was created, you can experience the sonorities
of chords originally intended for that song.
This setting applies to all tones.
Setting
Equal
Just Major
Just Minor
Arabic
Kirnberger
Meantone
Pythagorean
Werckmeister
Explanation
This temperament divides the octave
into 12 equal parts. All intervals will be
slightly out of tune by the same
amount.
This temperament makes the 5th and
3rd intervals pure. It is unsuitable for
playing melodies and modulation is
not possible, but it produces
beautifully harmonious chords.
Just intonation differs between major
and minor keys. The same results as
major can be obtained in a minor key.
This tuning is suitable for the music of
Arabia.
This temperament is a modification of
meantone temperament and just
intonation, allowing more freedom of
modulation. It allows you to play in all
keys (third method).
This temperament is a partial
compromise of just intonation in order
to allow modulation.
This temperament is based on the
theories of the Greek philosopher
Pythagoras, and has pure fourths and
fifths. Chords containing a third will
sound impure, but melodies will sound
good.
This temperament is a combination of
meantone and Pythagorean
temperaments. It allows you to play in
all keys. (First method, number three.)
Setting the Temperament Key
When playing with tuning other than equal temperament,
you need to specify the tonic note for tuning the song to be
performed (that is, the note that corresponds to C for a major
key or to A for a minor key).
If you choose an equal temperament, there’s no need to
select a tonic note.
This setting applies to all tones.
Setting
C, C#, D, Eb, E, F, F#, G, Ab, A, Bb, B
When performing in ensemble with other instruments, be aware
that depending on the key, there may be some shifting of the pitch.
Tune the RK-300 to the fundamental pitch of the other instruments.
Setting the Tuning Curve (Stretch Tuning)
Pianos are generally tuned so that the low range is flatter and
the high range is sharper than equal tempered pitches. This
method of tuning is unique to the piano, and is known as
“stretched tuning.”
A graph that shows the changes in pitch of actual tuning
compared with the changes in equal temperament pitch is
called a tuning curve.
Changing the tuning curve produces subtle variations in the
reverberations of the chords you play.
This setting applies only for the front panel [PIANO] button
and for the piano tones Superior Grand and Natural Grand. It
is not available for other tones.
Setting
On
Off
Explanation
This tuning curve expands the bass and
treble ends somewhat. It is suitable for
performances such as piano solos.
This is the standard tuning curve. It is
suitable when playing in an ensemble with
other instruments.
52
Page 53

Piano Designer 3
fig.d-Pdesigner3.eps
Performing
Making fine adjustments to the key
touch (Key Touch Offset)
This lets you make further detailed adjustments to the
keyboard sensitivity as appropriate for the strength of your
fingers.
This setting applies to all tones.
If you touch < Reset >, all settings (parameters) shown in the
current screen will return to their factory-set values.
Adjusting the Keyboard Touch (Key Touch)
You can adjust the touch (playing feel) of the keyboard.
This setting applies to all tones.
Setting
Fixed
Super Light
Light
Medium
Explanation
The sound plays at one set volume,
regardless of the force used to play the
keys.
This setting produces the lightest
keyboard touch.
You can achieve fortissimo (ff) play with a
less forceful touch than usual, so the
keyboard feels lighter. This setting makes
it easy to play, even for children.
This sets the standard keyboard touch.
You can play with the most natural
touch. This is the closest to the touch of
an acoustic piano.
Setting
-10–0–9
Explanation
Higher settings will produce a heavier
playing feel.
Changing the Timing of Sounds According to the Force Used to Press the Keys (Hammer Response)
This adjusts how your playing strength will affect the timing
at which the note sounds. This is called the “Hammer
Response” function.
On an acoustic piano, pressing a key moves a hammer, which
strikes a string to produce sound. If you press the key softly,
the hammer will move slowly, meaning that it will take
slightly longer (in comparison to a strongly-played note) from
the moment you press the key until the sound is produced.
If the Hammer Response function is turned on, the time
between the moment you press a key until the sound is heard
will change depending on the strength with which you play.
As you play more softly, this time will become longer.
This setting applies to all tones.
Setting
Off, 1–10
Explanation
Higher settings will produce slower
response. The Hammer Response function
is not active when the value is set to “Off.”
Heavy
Super Heavy
You have to finger the keyboard more
forcefully than usual in order to play
fortissimo (ff), so the keyboard touch
feels heavier. Dynamic fingering adds
even more feeling to what you play.
This setting produces the heaviest
keyboard touch.
53
Page 54

Performing
Adjusting the Sound of Hammers Striking Strings (Hammer Noise)
You can adjust the sound produced when the hammer of an
acoustic piano strikes the string.
This setting applies only for the front panel [PIANO] button
and for the piano tones Superior Grand and Natural Grand. It
is not available for other tones.
Setting
-2–0–2
Explanation
Higher settings will produce a louder
sound of the hammer striking the string.
Opening or Closing the Lid to Change the Resonance (Lid)
Adjusts the extent to which the lid of the grand piano is open.
This setting applies only for the front panel [PIANO] button
and for the piano tones Superior Grand and Natural Grand. It
is not available for other tones.
Setting
0–6
Explanation
As the value decreases, the lid seems to
close more, producing a softer sound.
increasing the value opens the lid more,
producing a brighter sound.
54
Page 55

Playing Various Sounds
Playing Sound Effects or Percussion Instruments from the Keyboard
You can play sound effects or percussion instrument sounds from the keyboard.
fig.P-DrumsButton.eps
Performing
1.
2.
fig.DrumSound.eps
Press the [DRUMS] button so its indicator is lit.
Play notes in the C2–B3 range on the keyboard.
The white keys in the C2–B3 range will play drum sounds. The black keys in the C2 to B3 range will play
sound effects.
The keys C4–C8 will play the instrumental sound that was selected before you pressed the [DRUMS]
button (i.e., the tone button that is lit).
* Playing the A0–B1 keys will not produce sound.
For example, if you had pressed the [PIANO] button and were playing the piano sound, and
then pressed the [DRUMS] button, the keyboard will play the following tones.
Sound Effects
A0 C4C2 C8B1 B3
Drum SoundNo sound Piano Tone
Muting the Percussion Instrument Sounds
Press the [DRUMS] button to turn off its indicator.
1.
55
Page 56

Performing
Drum Key-Map Label
Affixing the included Drum Key-Map Label
If desired, you can affix the included Drum Key-Map Label in the locations shown below. You may find
this a useful when playing percussion instrument sounds.
fig.DrumLabel.eps
56
Page 57

Performing with Your Favorite Sounds (User Tones)
The RK-300 contains the tones of numerous instruments in addition to the seven tones accessible
through the INSTRUMENT buttons.
From this large selection of internal instruments, you can select and assign your favorite tones to the
[1] button, [2] button, and [3] button. The sounds you assign (user tones) are remembered even when
the RK-300’s power is off, so you’ll find it convenient to register your favorites as user sounds.
Performing
Setting user tones
Access the main screen.
1.
* If the main screen is not shown, press the [EXIT] button until the main screen appears.
Touch < User > tab.
2.
The screen will show three buttons assigned to user sounds. You can also select these sounds by
pressing tone buttons [1], [2], or [3].
When the RK-300 is shipped from the factory, “Brass Fall” is assigned to [1] button, “Nylon-str.Gt” is
assigned to [2] button, and “Flute” is assigned to [3] button.
fig.d-userTone1.eps
57
Page 58

Performing
Tone group Tone list Tone group
fig.d-UserTone2.eps
fig.d-UserTone3.eps
Touch the button whose tone assignment you want to change.
3.
You can also press one of the INSTRUMENT buttons [1], [2], or [3] to select the button whose tone
assignment you want to change.
In the screen, touch <Tone>.
4.
The user tone setting screen appears.
58
Touch the tone group name.
5.
The tone list appears.
* You can also switch the tone list by touching .
Touch the name of a tone.
6.
The selected tone will be assigned to the button as a user tone.
Press the [EXIT] button.
7.
Page 59

Selecting user tones
Access the main screen.
1.
* If the main screen is not shown, press the [EXIT] button until the main screen appears.
Touch < User > tab.
2.
The screen will show three buttons assigned to user sounds. You can also select these sounds by
pressing tone buttons [1], [2], or [3].
fig.d-userTone1.eps
Performing
3.
fig.d-UserToneSel.eps
Touch the user tone indication in the screen to select a user tone.
You can also select a user tone by pressing the [1], [2], and [3] INSTRUMENT buttons of the panel.
You will hear the selected tone when you play the keyboard.
59
Page 60

Performing
Dividing the Keyboard for Two-person Performance (Twin Piano)
You can divide the keyboard into left and right areas so that two people can play the same range of
pitches.
This means that you’ll be able to use the keyboard as though it were two separate pianos.
Access the main screen.
1.
* If the main screen is not shown, press the [EXIT] button until the main screen appears.
Touch < Twin Piano >.
2.
The following screen appears.
fig.d-TwinPiano.eps
When you turn Twin Piano on, the instrument will be in the following state.
●
The keyboard will be divided into left and right areas, with “middle C” located in the center of each
area.
●
The left and right areas will have the same sound (Superior Grd).
●
The right pedal will be the damper pedal for the right area, and the left pedal will be the damper
pedal for the left area.
To cancel Twin Piano, press the [EXIT] button.
3.
• You can change the way in which the sounds are heard when using the Twin Piano feature.
Refer to “Changing the Way in Which the Sound is Heard (Twin Piano Mode)” (p. 183).
60
Page 61

Layering Two Sounds (Layer Performance)
By choosing sounds whose names are separated by a “+” (e.g., Piano + Str.1) as a user sound, you can
play two sounds layered. This is referred to as “layered performance.”
Access the main screen.
1.
* If the main screen is not shown, press the [EXIT] button until the main screen appears.
Touch < User > tab.
2.
The screen will show three buttons assigned to user sounds. You can also select these sounds by
pressing tone buttons [1], [2], or [3].
fig.d-userTone1.eps
Performing
3.
fig.d-UserTone2.eps
Touch the button whose tone assignment you want to change.
You can also press one of the INSTRUMENT buttons [1], [2], or [3] to select the button whose tone
assignment you want to change.
61
Page 62

Performing
Tone list Tone group
fig.d-UserTone3.eps
fig.d-LayerTone.eps
In the screen, touch <Tone>.
4.
The user tone setting screen appears.
Touch the tone group “Layer.”
5.
A list of sounds for layered performance appears.
* You can also switch the tone list by touching .
Touch a sound name.
6.
The selected sound will be assigned to the button as a user sound.
Press the [EXIT] button.
7.
62
Page 63

Adjusting the volume balance of layered sounds
When you’ve selected layered sounds, you can adjust the volume balance of the two sounds.
This setting is remembered for each user button.
Access the main screen.
1.
* If the main screen is not shown, press the [EXIT] button until the main screen appears.
Touch < Menu >.
2.
The Menu screen appears.
fig.d-SetMenu-3-1.eps
Performing
3.
fig.d-LayerSplit.eps
4.
* There are three menu screens. Touch to switch screens.
Touch < Layer/Split >.
The following screen appears.
Touch “Layer Balance” to adjust the setting.
Setting
9:1, 8:2, 7:3, 6:4, 5:5, 4:6,
3:7, 2:8, 1:9
Explanation
A higher number means a louder volume.
Example: If you choose a setting of 7:3 for the “Piano + Str.1” sound
Piano = volume 7, Strings 1 = volume 3
If you touch < Reset >, all settings (parameters) shown in the current screen will return to
their factory-set values.
When you’re finished making adjustments, press the [EXIT] button.
5.
63
Page 64

Performing
Playing Different Tones with the Left and Right Hands (Split Performance)
By choosing sounds whose names are separated by a “/” (e.g., Piano/ Str.1), you can play separate
sounds in the right and left-hand regions, separated by a specific key. This is referred to as “split
performance.”
Split performance lets you play different sounds in the left-hand and right-hand regions of the
keyboard.
When using split performance, the boundary key is called the “split point” and is included in the lefthand keyboard region.
* This is set to “F#3” at the factory settings.
Access the main screen.
1.
* If the main screen is not shown, press the [EXIT] button until the main screen appears.
Touch < User > tab.
2.
The screen will show three buttons assigned to user sounds. You can also select these sounds by
pressing tone buttons [1], [2], or [3].
fig.d-userTone1.eps
64
3.
fig.d-UserTone2.eps
Touch the button whose tone assignment you want to change.
You can also press one of the INSTRUMENT buttons [1], [2], or [3] to select the button whose tone
assignment you want to change.
Page 65

4.
Tone list Tone group
fig.d-UserTone3.eps
5.
fig.d-SplitTone.eps
Performing
In the screen, touch <Tone>.
The user tone setting screen appears.
Touch the tone group “Split.”
A list of sounds for split performance appears.
* You can also switch the tone list by touching .
Touch a sound name.
6.
The selected sound will be assigned to the button as a user sound.
Press the [EXIT] button.
7.
65
Page 66

Performing
Specifying where the keyboard is divided (Split Point)
Here’s how to specify the note (split point) at which the keyboard is divided when using split
performance.
This setting is remembered for each user button.
Access the main screen.
1.
* If the main screen is not shown, press the [EXIT] button until the main screen appears.
Touch < Menu >.
2.
The Menu screen appears.
fig.d-SetMenu-3-1.eps
3.
fig.d-LayerSplit.eps
4.
* There are three menu screens. Touch to switch screens.
Touch < Layer/Split >.
The following screen appears.
Touch “Split Point” to make the setting.
Setting
B1–B6
66
If you touch < Reset >, all settings (parameters) shown in the current screen will return to
their factory-set values.
When you’re finished making adjustments, press the [EXIT] button.
5.
Page 67

Using the D Beam Controller for Additional Enjoyment
Modifying the Sound
You can modify the sound simply by moving your hand above the D Beam controller located on the
panel.
fig.P-DBeam.eps
Performing
Press a D BEAM button, [PITCH], [FILTER], or [VOLUME], a number of times until
1.
the button is lit red.
Button
[PITCH]
[FILTER]
[VOLUME]
Move your hand above the D Beam controller.
2.
The sounds you play from the keyboard will change as you move your hand above the D Beam
controller.
The sensitivity of the D Beam controller will vary according to the brightness of its
surroundings. If it does not operate as you expect, you can readjust the sensitivity.
Increasing the D Beam sensitivity value (p. 171) will make it more sensitive.
Button status Explanation
Changes the pitch of the sounds you play on the keyboard.
Lit red
Changes the tonal character of the sounds you play on the keyboard.
* For some sounds, the tonal change may be difficult to notice.
Changes the volume of the sounds you play on the keyboard.
Effective range of the D Beam controller
The illustration at right shows the effective range of the D Beam
controller.
Moving your hand outside this range will not produce any effect.
The effective range of the D Beam controller will be drastically
decreased under strong direct sunlight. Please be aware of this when
using the D Beam controller outdoors.
To turn off the D Beam controller, press the button that’s lit enough times to
3.
turn off its illumination.
67
Page 68

Performing
• If ANIME effect is on, you can press either the [PITCH], [FILTER], or [VOLUME] button to lit red and
use the D Beam controller to modify the ANIME effect (p. 129).
Moving your hand above the D Beam controller to produce a sound effect
In addition to using the D Beam controller to modify the sound, you can also use it to produce a variety
of sound effects.
fig.P-DBeam.eps
Press one of the D BEAM buttons, [PITCH], [FILTER], or [VOLUME], a number of
1.
times until the button is lit green.
Button
[PITCH]
[FILTER]
[VOLUME]
Move your hand above the D Beam controller.
2.
You’ll hear the sound effect of the button that’s lit green.
To turn off the D Beam controller, press the button that’s lit enough times to
3.
Button status Explanation
A snare drum roll is produced.
Lit green
Applause by a large audience is produced.
The sound of a wind chime is produced.
turn off its illumination.
68
Page 69

Playing Back Songs
Songs You Can Listen to on the RK-300
You can listen to internal songs, songs you’ve recorded yourself, songs from a music CD, songs from
the CD-ROM included with the RK-300, and songs saved on USB memory (sold separately).
fig.d-ToneStdrd.eps
What you can play
The RK-300’s internal songs
Songs you record
Songs copied in “Favorites”
Songs on external memory
CD-ROM included with the RK-300
VIMA TUNES
(CD-ROMs produced for VIMA)
Music CDs
Explanation
The RK-300 contains numerous built-in 75 songs. While a song plays,
you can use an external display or a television to view a slide show
suitable for the character of that song.
You can record your performance on the RK-300 and play it back for
listening. You can also save such songs in “Favorites.”
You can play songs (SMF format/ audio format) that you’ve copied
from a music CD, CD-ROM, or USB memory to “Favorites.”
You can play songs (SMF format/ audio format/ MP3 format) from
USB memory that’s connected to the EXT MEMORY connector.
The CD-ROM included with the RK-300 contains 37 different songs.
While a song plays, you can use an external display or a television to
view a slide show suitable for the character of that song.
You can play back commercially available CD-ROMs made for the
VIMA (VIMA TUNES). While a song plays, you can use an external
display or a television to view a slide show suitable for the character
of that song.
You can play back standard music CDs.
Touch an icon shown in the main screen to select the location of the song you want to play.
What are “locations”?
On the RK-300, “locations” are the places in which songs are held, such as “Internal (internal
songs),” “Favorites (user memory),” “CD,” or “Ext Memory (external memory).”
69
Page 70

Playing Back Songs
Listening to Internal Songs
The RK-300 contains numerous built-in 75 songs. Here’s how to select and play back one of these
songs.
fig.P-IntSongSel.eps
Selecting a song
In the main screen, touch (Internal).
1.
* If the main screen is not shown, press the [EXIT] button until the main screen appears.
* If you’re using the remote, press the remote’s [INTERNAL] button.
fig.d-MainScreen.eps
It will be easy to select frequently used songs if you copy them to “Favorites” (p. 80).
70
2.
fig.d-iIntSongSel.eps
The RK-300’s screen will show a list of the internal songs.
Use the [PREV] [NEXT] buttons to select the song that you want to play.
You can also select a song by touching it in the screen.
Page 71

Playing the song
Press the [PLAY/STOP] button.
3.
The selected song will play.
Playing Back Songs
Button
[]
[]
[]
[]
Stopping the song
Press the [PLAY/STOP] button once again.
4.
• You can also play/stop the song by pressing the remote’s [ ] button, selects the preceding
song by pressing the remote’s [ ] button, and select the next song by pressing the remote’s
[ ] button.
• When you press the remote [ ] button to begin playback, the songs will play back
successively, starting with the selected song.
Function
Moves to the beginning of the currently selected song. If you’re already at the beginning of
the song, you’ll move to the beginning of the previous song.
Moves to the beginning of the next song.
While a song is playing, hold down this button to rewind the song.
While a song is playing, hold down this button to fast-forward the song.
fig.d-DelSongOK.eps
If the following screen appears
If you attempt to select another song before you’ve saved your recorded song in “Favorites,”
a screen like the following appears.
If you don’t want to keep the song you recorded, touch <OK>. If you do want to keep the
song, touch <Cancel> to cancel the song selection, and then save your song in “Favorites.”
(p. 144)
• All rights reserved. Unauthorized use of this material for purposes other than private, personal
enjoyment is a violation of applicable laws.
71
Page 72

Playing Back Songs
Listening to Songs from CD
Here’s how to play back commercially available music CDs, CD-ROMs containing SMF music files, the
CD-ROM included with the RK-300, or the VIMA TUNES (CD-ROMs produced for VIMA).
It will be easy to select frequently used songs if you copy them to “Favorites” (p. 80).
fig.P-IntSongSel.eps
Inserting the CD into the CD drive
Insert the CD into the CD drive.
1.
Reading of data from the CD starts when the CD is inserted in the drive. It may take a few moments to
complete reading of the data.
When the data has been loaded, a list of the songs on the CD will appear in the main screen.
fig.d-CDSong.eps
The list will show the songs in the following order: (1) SMF format, (2) Audio, (3) MP3 format.
72
For a music CD, the screen will show the song numbers. Song names are not shown.
Page 73

Selecting a song from CD
In the main screen, touch (CD).
1.
If you’re using the remote, press the remote’s [EXTERNAL] button several times to select “CD” as the
location of the song you want to play.
fig.d-CDSong.eps
The RK-300’s screen will show a list of the songs on the CD.
Playing Back Songs
2.
fig.d-CDSongSel.eps
The list will show the songs in the following order: (1) SMF format, (2) Audio, (3) MP3 format.
For a music CD, the screen will show the song numbers. Song names are not shown.
If there’s no CD in the CD drive, you won’t be able to touch (CD).
Press the [PREV] [NEXT] buttons to select the song you want to play.
You can also select a song by touching it in the screen.
73
Page 74

Playing Back Songs
To select a song that’s inside a folder
Folders containing songs are indicated by a “ ” symbol next to their name in the song list.
To select a song that’s inside this folder, proceed as follows.
1.
Touch the folder name.
The folder will be selected.
2.
Touch the folder name once again.
A list of the songs in the folder appears.
* You can also open a folder by touching it and then pressing the [PLAY/STOP] button.
* Alternatively, you can use the remote’s [ ] button or [ ] button to select a
folder and press the [ ] button to open that folder.
In the list of songs, touch to select the song that you want to play.
3.
To exit the folder
Touch < > in the screen.
4.
Touch < > once again.
5.
Playing the Song from a CD
Press the [PLAY/STOP] button.
3.
The selected song will play.
Button
[]
[]
[]
[]
Function
Moves to the beginning of the currently selected song. If you’re already at the beginning of
the song, you’ll move to the beginning of the previous song.
Moves to the beginning of the next song.
While a song is playing, hold down this button to rewind the song.
While a song is playing, hold down this button to fast-forward the song.
To stop song playback
Press the [PLAY/STOP] button once again.
4.
74
Page 75

• You can also play/stop the song by pressing the remote’s [ ] button, selects the preceding
• When you press the remote [ ] button to begin playback, the songs will play back
• A song from a music CD can be transposed to a key that’s more comfortable for you to sing. You
Removing the CD
Press the CD drive’s Eject button.
5.
After a brief interval, the CD will be ejected.
Playing Back Songs
song by pressing the remote’s [ ] button, and select the next song by pressing the remote’s
[ ] button.
successively, starting with the selected song.
can also minimize the volume of the vocal, and perform or sing the vocal yourself.
“Changing the Song to a Key that’s Comfortable for Singing (KEY CONTROL)” (p. 109)
“Enjoying Karaoke with a Music CD (CENTER CANCEL)” (p. 110)
You can also eject the CD by pressing the remote’s [EJECT] button.
• Use of the CD supplied with this product for any purpose other than private, personal enjoyment
without the permission of the copyright holder is prohibited by law. Additionally, this data must
not be copied, nor used in a secondary copyrighted work without the permission of the copyright
holder.
If you’re unable to remove the CD
If the CD is not ejected when you press the eject button, switch off the power to the RK-300
and the CD drive, and insert a straightened paper clip or similar object into the emergency
eject hole to forcibly eject the CD.
Emergency Eject Hole
The emergency eject hole must be used only when the RK-300’s power is switched
OFF. Using it while the power is on may damage the disc or cause serious
problems.
75
Page 76

Playing Back Songs
Listening to Songs from USB Memory
Here’s how you can listen to songs that are saved on USB memory (sold separately). You can also use
the keyboard to play along with the song.
It will be easy to select frequently used songs if you copy them to “Favorites” (p. 80).
fig.P-IntSongSel.eps
Selecting a song
Connect the USB memory containing the song you want to listen to the EXT
1.
MEMORY connector.
In the main screen, touch (Ext Memory).
2.
If you’re using the remote, press the remote’s [EXTERNAL] button several times to select “Ext Memory
(External Memory)” as the location of the song you want to play.
The RK-300’s screen will show a list of the songs on USB memory.
76
The list will show the songs in the following order: (1) SMF format, (2) Audio, (3) MP3 format.
If there’s no USB memory connected to the EXT MEMORY connector, you won’t be able to
touch (Ext Memory).
Page 77

3.
To select a song that’s inside a folder
Folders containing songs are indicated by a “ ” symbol next to their name in the song list.
To select a song that’s inside this folder, proceed as follows.
1.
Touch the folder name.
The folder will be selected.
2.
Touch the folder name once again.
fig.d-USBSongSel.eps
Playing Back Songs
Press the [PREV] [NEXT] buttons to select the song you want to play.
You can also select a song by touching it in the screen.
Playing the song
Press the [PLAY/STOP] button.
4.
The selected song will play.
A list of the songs in the folder appears.
* You can also open a folder by touching it and then pressing the [PLAY/STOP] button.
* Alternatively, you can use the remote’s [ ] button or [ ] button to select a
folder and press the [ ] button to open that folder.
In the list of songs, touch to select the song that you want to play.
3.
To exit the folder
Touch < > in the screen.
4.
Touch < > once again.
5.
Button
[]
[]
[]
[]
Function
Moves to the beginning of the currently selected song. If you’re already at the beginning of
the song, you’ll move to the beginning of the previous song.
Moves to the beginning of the next song.
While a song is playing, hold down this button to rewind the song.
While a song is playing, hold down this button to fast-forward the song.
77
Page 78

Playing Back Songs
• You can also play/stop the song by pressing the remote’s [ ] button, selects the preceding
song by pressing the remote’s [ ] button, and select the next song by pressing the remote’s
[ ] button.
• When you press the remote [ ] button to begin playback, the songs will play back
successively, starting with the selected song.
To stop song playback
Press the [PLAY/STOP] button once again.
5.
78
Page 79

Deleting a Song from USB Memory
fig.P-SongFavoDel.eps
Connect the USB memory containing the song you want to delete to the EXT
1.
MEMORY connector.
In the main screen, touch (Ext Memory).
2.
The RK-300’s screen will show a list of the songs saved in USB memory.
Playing Back Songs
3.
fig.d-USBSongSel.eps
4.
fig.d-FavoSongDel.eps
Press the [PREV] [NEXT] buttons to select the song you want to delete.
You can also select a song by touching it in the screen.
Press the [DELETE] button.
A message will ask you to confirm the operation.
* If you decide not to delete the song, touch <Cancel>.
Touch <OK>.
5.
The selected song will be deleted from USB memory.
• Never turn off the power while the screen indicates “Executing....”
79
Page 80

Playing Back Songs
Registering a Song in “Favorites” (Copy)
What are the “Favorites”?
“Favorites” refers to an area of memory (user memory) in which you can store performances
you’ve recorded on the RK-300 or have copied from a connected USB memory or CD-ROM.
The USB memory that’s connected to the RK-300’s rear panel USER MEMORY connector is
used as “Favorites.”
Songs you’ve copied to “Favorites” will be retained even after you turn off the power, so if
you collect your favorite songs in “Favorites,” you’ll be able to easily select them when you
want.
Copying Songs from Internal Memory/ USB Memory/ CD-ROM to “Favorites”
fig.P-SongFavoCopy.eps
If you want to copy audio/MP3 format songs from USB memory to the “Favorites,” do so
when a CD-R is not inserted in the CD drive. If a CD-R is inserted, writing to the CD-R will
take priority, and you won’t be able to copy the data to the “Favorites.”
Prepare the song that you want to copy in “Favorites.”
1.
If you want to copy songs from CD-ROM, insert the CD-ROM into the CD drive (p. 72).
If you want to copy songs from USB memory, connect the USB memory (p. 76).
Touch the main screen to select the location that contains the song you want
2.
to copy to “Favorites.”
Indication
(Internal)
(CD)
(CD-R)
(Ext Memory)
Explanation
Internal songs
Songs on CD-ROM
If a CD-R is in the CD drive
Songs in USB memory
80
Songs that you record can also be saved in “Favorites” (p. 144).
Page 81

3.
fig.d-USBSongSel.eps
4.
fig.d-SongFavoCopy.eps
Playing Back Songs
Press the [PREV] [NEXT] buttons to select a song.
You can also select a song by touching it in the screen.
Press the [COPY/SAVE] button.
The following screen appears.
* If you decide not to copy the song, touch < Cancel >.
Touch < One Song > if you want to copy just a single song, or touch < All > if
5.
you want to copy all songs.
Copying of the selected song(s) will begin.
• Never turn off the power while the screen indicates “Executing...”
• The song contains image data will take some time to copy.
• If there is insufficient capacity remaining, the indication “Error: 11” will appear (p. 209), and you
won’t be able to copy the song.
81
Page 82

Playing Back Songs
Copying Songs from a Music CD to “Favorites”
Here’s how to copy songs from a music CD to “Favorites.”
fig.P-SongFavoCopy.eps
Prepare the song that you want to copy in “Favorites.”
1.
Reading of data from the CD starts when the CD is inserted in the drive. It may take a few moments to
complete reading of the data.
When the data has been loaded, a list of the songs on the CD will appear in the main screen.
If a different location is selected
In the main screen, touch < CD >.
2.
A list of the songs on the CD will appear in the main screen.
fig.d-AudioSong.eps
Press the [PREV] [NEXT] buttons to select a song.
3.
fig.d-AudioSong.eps
82
You can also select a song by touching it in the screen.
Page 83

4.
fig.d-AudioFavoCopy.eps
* If you decide not to copy the song, touch < Cancel >.
5.
fig.d-AudioCopyright1.eps
Playing Back Songs
Press the [COPY/SAVE] button.
The following screen appears.
Touch < One Song > if you want to copy just a single song, or touch < All > if
you want to copy all songs.
The following screen (“Concerning Copyrights”) appears.
6.
fig.d-AudioCopyright2.eps
* If you decide not to copy the song, touch < Cancel >.
Touch < OK >.
The following screen (“License Agreement”) appears.
83
Page 84

Playing Back Songs
Touch < OK >.
7.
The “Rename” screen appears.
fig.d-AudioRename.eps
* If you don’t want to change the name, proceed to step 10.
Touch to move the cursor.
8.
Enter the desired characters.
9.
If you’re copying all songs, you’ll be able to specify only one name. Once you’ve specified
the name, a number reflecting the song order will be automatically added to the end of the
name.
(Example: ALBUM_01_01, ALBUM_01_02, ALBUM_01_03...)
Icon
< ABC >–< YZ >
< A–a–0–! >
< Del >
When you’ve specified the desired name, press the [EXIT] button.
10.
The song(s) will be saved in “Favorites” under the name you specified.
• Never turn off the power while the screen indicates “Executing...”
Explanation
Enters a character at the cursor location. For example, each time you touch the <ABC>
icon, the character to be entered will cycle in the order of A → B → C → A...
Cycles you through the available selections for the character type, in this order:
“Uppercase letters,” “Lowercase letters,” “Numerals,” “Symbols.”
Delete the character at the cursor position.
84
Page 85

Listening to Songs Copied in “Favorites”
Here’s how to play back a song you’ve copied to “Favorites.”
fig.P-IntSongSel.eps
Selecting a Song
Playing Back Songs
1.
* If you’re using the remote, press the remote’s [FAVORITES] button.
fig.d-FavoSong.eps
2.
fig.d-FavoSongSel.eps
In the main screen, touch (Favorites).
The RK-300’s screen will show a list of the songs saved in “Favorites.”
If no songs have been saved in “Favorites,” no song list will appear when you choose
“Favorites” as the song location.
Press the [PREV] [NEXT] buttons to select the song you want to play.
You can also select a song by touching it in the screen.
85
Page 86

Playing Back Songs
Playing the song
Press the [PLAY/STOP] button.
3.
The selected song will play.
Button
[]
[]
[]
[]
Stopping the song
Press the [PLAY/STOP] button once again.
4.
• You can also play/stop the song by pressing the remote’s [ ] button, selects the preceding
song by pressing the remote’s [ ] button, and select the next song by pressing the remote’s
[ ] button.
• When you press the remote [ ] button to begin playback, the songs will play back
successively, starting with the selected song.
Function
Moves to the beginning of the currently selected song. If you’re already at the beginning of
the song, you’ll move to the beginning of the previous song.
Moves to the beginning of the next song.
While a song is playing, hold down this button to rewind the song.
While a song is playing, hold down this button to fast-forward the song.
86
Page 87

Deleting a Song from “Favorites”
fig.P-SongFavoDel.eps
In the main screen, touch (Favorites).
1.
The RK-300’s screen will show a list of the songs saved in “Favorites.”
Press the [PREV] [NEXT] buttons to select the song you want to delete.
2.
fig.d-FavoSongSel.eps
Playing Back Songs
3.
fig.d-FavoSongDel.eps
* If you decide not to delete the song, touch <Cancel>.
4.
You can also select a song by touching it in the screen.
Press the [DELETE] button.
A message will ask you to confirm the operation.
Touch <OK>.
The selected song will be deleted from “Favorites.”
• Never turn off the power while the screen indicates “Executing....”
87
Page 88

Playing Back Songs
Changing the Tempo (Playback Speed) of a Song
Here’s how to change the tempo of a song.
If a song is too fast for you to play or sing along comfortably, you can slow it down to a more
comfortable tempo.
Changing the tempo (playback speed) will not affect the pitch. You can also change the tempo even
while the song is playing.
Here’s how to change the playback speed of a music CD or an audio/MP3 format song.
fig.P-Tempo.eps
Use the [SLOW] [FAST] buttons to adjust the tempo (playback speed).
1.
Pressing the [SLOW] button will make the tempo slower, and pressing the [FAST] button will make the
tempo faster.
• For an SMF format song, the tempo can be adjusted in a range of =10–500.
• For a music CD song or an audio/MP3 format song, you can adjust the playback speed in a range
of 75%–125% relative to an original playback speed of 100%.
To return to the normal tempo (playback speed) of the song, press the [SLOW]
2.
and [FAST] buttons simultaneously.
The “normal tempo (playback speed)” is the appropriate tempo that is pre-specified for each song.
88
Page 89

Playing Back at a Fixed Tempo (Tempo Mute)
Some of the internal preset songs have a tempo that varies during the song.
Here’s how you can make these songs play back at a fixed, unchanging tempo.
This function is not available for audio/MP3 format songs.
Access the main screen.
1.
* If the main screen is not shown, press the [EXIT] button until the main screen appears.
Touch < Menu >.
2.
The Menu screen appears.
fig.d-SetMenu-3-1.eps
Playing Back Songs
3.
fig.d-Player.eps
4.
* There are three menu screens. Touch to switch screens.
Touch < Player >.
The following screen appears.
Touch “Tempo Mute” to make the setting.
Setting Explanation
On
The tempo changes recorded in the song will be ignored, and the song will play at a fixed
tempo.
Off
When you’re finished making settings, press the [EXIT] button.
5.
The song will play back according to the tempo changes recorded in the song.
89
Page 90

Playing Back Songs
Remote sencer
Operating range for the remote
Distance: 4 meters or less
Angle: 40 degrees or less (to left or right)
Remote
Using the Remote
You can use the included remote control to conveniently play/stop a song or to select songs.
You can also use the remote to switch the image of the external display or television, or assign
frequently used functions to the remote buttons.
Using the Remote
When using the remote, point it toward the remote sensor on the RK-300, and stay within the
allowable operating range described below.
fig.P-RemoteCtrl.eps
Cautions when using the remote
• You can’t operate two or more of the remote’s buttons simultaneously.
• Even if the remote is within the operating range, it may not work if there are obstacles between it
and the remote sensor, or if the angle is poor.
• Malfunctions may occur if you use the remote near a device that produces infrared light, or if you
use another infrared remote control nearby.
• The battery life will depend on the conditions of use. The operating range will decrease as the
batteries run down. Replace the batteries if this occurs.
• If you won’t be using the remote for an extended period, remove the batteries.
• If a strong light such as a spotlight strikes the remote sensor, the remote control may respond
sluggishly.
90
Page 91

Button Functions
1
25
7
10
11
4
3
6
8
9
You can use the buttons of the remote control to perform the following functions.
fig.RemoteCtrl.eps
Playing Back Songs
Button
1
2
3
4
5
[EJECT]
[VOCAL]
[VIDEO]
[CANCEL]
[TONE]
Explanation
Ejects the CD.
Applies an effect to vocals arriving via the microphone.
Each time you press the button, the vocal effect type (the type of effect applied
to the sound from the microphone) will change.
Duet →Trio → Quarter → Off → Duet...
* This button will not operate when the RK-300's [INPUT] button is lit (i.e.,
when the guitar input is being used)
Switches the image shown in the connected external display or television.
You can use an external display or a television to view the image from a video
camera or digital camera, DVD player, or audio player with video capability that
is connected to the RK-300. You can also use it to DIGISCORE (p. 93), a slide
show (p. 114), or a piano roll screen (p. 130).
DVD → AUDIO/VIDEO PORT → DIGISCORE → Piano Roll → Slide Show → OFF
(Video function is turned off) → DVD.....
Returns the setting of the remote’s [VOCAL] button to its original state.
The sound of the melody channel will be set to Piano.
The sound of the melody channel (p. 173) will change each time you press this
button.
91
Page 92

Playing Back Songs
Button
6
7
8
SONG [INTERNAL]
SONG [FAVORITES]
SONG [EXTERNAL]
[]
[ ] (Play/Stop)
[]
VOLUME [MUTE]
VOLUME [-] [+]
Explanation
Selects internal songs.
Selects songs from “Favorites (p. 80).”
* This button won’t work if no songs have been saved in “Favorites.”
Selects songs from a CD or USB memory.
If a CD is inserted and at the same time USB memory is connected, pressing the
button toggles you between “CD” and “Ext Memory (external memory).”
* This button won’t work if no CD is in the CD drive and no USB memory is
connected to EXT MEMORY connector.
Pressing the [ ] button selects the preceding song.
Plays/stops the song.
Press the remote [ ] button to toggle the song between playing and
stopped.
When you press the remote [ ] button, songs will play back
consecutively from the selected song. All songs in the selected “Location”
(internal songs, favorites, CD, or external memory) will play back in succession.
Playback will stop when you press the remote [ ] button once again.
Press the [ ] button to select the next song.
Temporarily mutes all sounds.
Adjust the volume of the keyboard and song.
Pressing the VOLUME [-] button decreases the volume, and pressing the
VOLUME [+] button increases the volume.
9
10
11
[FUNC 1]
[FUNC 2]
TEMPO [-] [+]
KEY CTRL (key control)
[-] [+]
Executes the function you’ve assigned to this button.
You can change the function that’s assigned to the button (p. 185).
With the factory settings, “Panel” is assigned to this button.
Executes the function you’ve assigned to this button.
You can change the function that’s assigned to this button (p. 185).
With the factory settings, “Mute (Center Cancel)” is assigned to this button (p.
99, p. 110, p. 111).
Adjust the tempo of the song.
Pressing the TEMPO [-] button slows down the tempo, and pressing the TEMPO
[+] button speeds up the tempo.
Change the key of the keyboard or of the song that’s playing.
Pressing the KEY CTRL [-] button will lower the key, and pressing the KEY CTRL
[+] button will raise the key.
→
KEY CONTROL (p. 109)
→
KEY CONTROL Setting (p. 183)
92
Page 93

Playing Along with a Song
You can enjoy playing the keyboard along with a song that’s being played back by the RK-300,
including those on the included CD or in external memory.
Performing while You Watch a Notation (DIGISCORE)
The RK-300 is able to show a musical score (music notation) in its display, not only for the internal
songs, but also for SMF format songs or songs you’ve recorded on the RK-300. This is called the
“DIGISCORE” function.
Lyrics will also be displayed if you play back SMF music files that contains lyric data.
Since the notation can be shown not only on the RK-300’s display but also on an external display or a
television, you can play back a song and have everyone sing along from the notation shown on a big
screen.
fig.P-DigiScore.eps
1.
2.
fig.d-Dscore1.eps
Select the song that you want to play (p. 70, p. 72, p. 76, p. 85).
Press the [DIGISCORE] button so it’s lit.
The notation of the selected song appears in the external display or television connected to the RK-
300.
If you’re playing SMF music files that contains lyric data, the lyrics will be displayed if you press the
[LYRICS] button so it’s lit.
The RK-300’s display will show the “Lyrics” setting screen (p. 177). If you press the [VIDEO
MONITOR] button so it’s lit, you’ll be able to view the score in the built-in display as well.
93
Page 94

Playing Along with a Song
You can switch the type of notation screen by pressing the [DIGISCORE] button
3.
several times.
The RK-300 provides three types of notation screen. Each time you press the [DIGISCORE] button, the
screen will change as follows.
fig.DscoreType.eps
Notation (Enlarged) Notation
Off Notation + Keyboard
Press the [PLAY/STOP] button to play the song.
4.
The song will begin playing, and the notation pages will turn automatically as the song progresses.
Watch the notation, and play or sing along with the song.
You can press the [VIDEO MONITOR] button so it’s lit, and watch the notation in the RK-300’s builtin
display.
Press the [PLAY/STOP] button to stop the song.
5.
Notes about the DIGISCORE
• When displaying the notation for a song from USB memory, CD-ROM, or “Favorites,” it will take
some time for the data to be read from USB memory, CD-ROM, or user memory, so you may have
to wait for a while before the notation appears.
• The displayed notation is generated from the music files, and gives priority to easy visibility in the
screen rather than the accurate depiction of complex or sophisticated performances. For this
reason, it may differ from commercially available printed scores. In particular, it is not suitable for
depicting sophisticated or difficult pieces that require a detailed notation.
• In some cases, lyrics or notes in the notation screen may fall outside of the displayed area of the
screen, and may not be visible.
• In some cases, the song may play back from the beginning if you display the notation while the
song is playing.
• Notes will not appear in the screen if you select a part that contains no performance data. To change
the part that’s displayed, refer to “Changing the Melody Channel (Melody Channel)” (p. 173).
• A notation cannot be displayed for a song from a music CD and an audio/MP3 format.
• If you want to view the notation on an external display or television, we recommend that you
connect it to the ANALOG RGB OUT connector. This will provide a clearer picture than if you
connect your display or television to the VIDEO OUTPUT jack.
94
Page 95

Performing with Sounds that Match the Song (Recommended Tones)
When playing along on the keyboard while listening to an internal song or VIMA TUNES (CD-ROMs
produced for VIMA), this function lets you play using instrumental sounds that are appropriate for the
atmosphere of the selected song.
When you select an internal song or a song from VIMA TUNES (CD-ROMs produced for VIMA), sounds
suitable for that song will automatically be assigned to the three buttons [1], [2], and [3]. You can use
these three sounds to perform sounds that will match the character of that song.
* If you want to select a song from VIMA TUNES (CD-ROMs produced for VIMA), insert the CD-ROM into
the CD drive.
fig.P-UserTone.eps
Playing Along with a Song
1.
2.
fig.d-MainScreen.eps
3.
fig.d-RecomToneSel.eps
From the internal songs or VIMA TUNES (CD-ROMs produced for VIMA), select
the song that you want to play (p. 70, p. 72).
When you select a song, three tones suitable for that song will automatically be selected.
In the bottom of the screen, touch <Recommend> tab.
The three recommended tones will be shown in the screen. The same three recommended tones
will also be selected for the [1], [2], and [3] INSTRUMENT buttons.
Select the tone you want to play.
You can either touch one of the three tone buttons in the screen, or press the [1], [2], or [3] button.
Play along with the song.
4.
The tones you play will be suitable for the character of the song.
95
Page 96

Playing Along with a Song
Sounding a Count to Keep Your Timing Accurate
If you’re playing along with a song, you can sound a count to make it easier to synchronize your own
playing with the song. A “count-in” is a count that is sounded before the song begins to play. A “countdown” is a count that is sounded at the end of the song’s introduction (before you begin playing the
keyboard).
fig.CountIn.eps
After you hear the count,
Example) A song in 4/4 time
Count In
1 2 341 2 34
Count Sound (2 measures)
fig.CountDown.eps
Example) A song in 4/4 time
Intro
Count Down
begin performing here.
The intro will end,
and the melody
will begin playing.
1.
* If the main screen is not shown, press the [EXIT] button until the main screen appears.
2.
fig.d-SetMenu-3-1.eps
1234
Count Down
Access the main screen.
Touch < Menu >.
The Menu screen appears.
96
* There are three menu screens. Touch to switch screens.
Page 97

3.
fig.d-Count.eps
4.
5.
Playing Along with a Song
Touch < Count >.
The following screen appears.
Touch “Count” to turn it “On.”
Turn this “Off” if you don’t want a count to sound.
Touch “Count Mode” to select the type of count.
Type of count
Count In
Countdown
Count In/down
Touch “Count In Sound” to select the count-in sound.
6.
Setting
Click, Electronic, Voice (Japanese), Voice (English), Animal, Wood Block, Castanets, Hand Clap
If you touch < Reset >, all settings (parameters) shown in the current screen will return to
their factory-set values.
When you’re finished making settings, press the [EXIT] button.
7.
Press the [PLAY/STOP] button.
8.
The count will sound.
How the count is sounded
A two-measure count sounds before the song plays.
A one-measure count sounds at the end of the song’s introduction
A two-measure count sounds before the song plays, and a one-measure count sounds
at the end of the song’s introduction
97
Page 98

Playing Along with a Song
Adjusting the Volume Balance Between the Song and Keyboard
You can adjust the volume balance between the song that’s playing and your performance on the
keyboard.
If you’re performing along with the playback of a song, lowering the volume of the song will make it
easier for you to hear your own keyboard performance.
fig.P-BalanceKnob.eps
Turn the [BALANCE] knob to adjust the volume balance.
1.
Operation
Turning the [BALANCE] knob toward “SONG”
Turning the [BALANCE] knob toward “KEYBOARD”
Explanation
Decreases the volume of the keyboard.
Decreases the volume of the song.
98
Page 99

Playing Along with a Song
Silencing a Song’s Melody and Playing it Yourself (Mute)
You can play back an internal song or music data with the melody part silenced.
This allows you to play the melody yourself while listening to the song.
In the case of a music CD and an audio/MP3 format song, the [MUTE/CENTER CANCEL]
button will turn the Center Cancel function on/off.
fig.P-MuteButton.eps
Prepare to play back the desired song.
1.
If you want to play an SMF format song from a CD-ROM, insert the CD-ROM into the CD drive (p. 72).
If you want to play an SMF format song from USB memory, connect the USB memory (p. 76).
Select the song that you want to play (p. 70, p. 72, p. 76, p. 85).
2.
Press the [MUTE/CENTER CANCEL] button so it’s lit.
3.
The Mute function is turned on.
Press the [PLAY/STOP] button to play back the song.
4.
When you play back the song, the sound of the melody channel will be temporarily silenced.
Try playing the melody yourself while you listen to the song.
The melody channel will depend on the song. If the melody is not muted when you press
the [MUTE/CENTER CANCEL] button, change the melody channel setting (p. 173).
Press the [PLAY/STOP] button to stop the song.
5.
To cancel the Mute function, press the [MUTE/CENTER CANCEL] button to turn
6.
off its illumination.
When you play back the song, the melody will return to its original volume.
99
Page 100

Playing Along with a Song
Decreasing the Melody Volume of a Song (Guide)
You can play a internal song or SMF music file with the volume of the melody part lowered.
Until you’ve learned the melody, it may be helpful to listen to the melody at a lower volume and use
it as a guide for your own playing.
Once you’ve learned the melody, use Mute function (p. 99) to silence the melody while you play.
The Guide function won’t work with a music CD and an audio/MP3 format song.
fig.P-GuideButton.eps
Prepare to play back the desired song.
1.
If you want to play an SMF format song from a CD-ROM, insert the CD-ROM into the CD drive (p. 72).
If you want to play an SMF format song from USB memory, connect the USB memory (p. 76).
Select the song that you want to play (p. 70, p. 72, p. 76, p. 85).
2.
Press the [GUIDE] button so it’s lit.
3.
The Guide function is turned on.
Press the [PLAY/STOP] button to play back the song.
4.
When you play back the song, the volume of the melody channel will temporarily be lowered.
Try playing the melody while you listen to the song. The melody will be audible at a lower volume, and
you can use it as a guide for your own playing.
The melody channel will depend on the song. If the melody volume does not decrease,
change the “Melody Channel” (p. 173).
Press the [PLAY/STOP] button to stop the song.
5.
To cancel the Guide function, press the [GUIDE] button to turn off its
6.
illumination.
100
When you play back the song, the melody will return to its original volume.
 Loading...