

Page 1
Owner’s Manual
AC & BATTERY
POWERED
DCAC
FET
*G6017288-03*
Page 2

Thank you, and congratulations on your choice of BOSS PH-3 Phase Shifter.
Before using this unit, carefully read the sections entitled: “USING THE UNIT SAFELY” and “IMPORTANT NOTES” (Owner’s manual p. 25 – p. 31; p. 4 – p. 5). These sections provide important information concerning the proper operation of the unit.
Additionally, in order to feel assured that you have gained a good grasp of every feature provided by your new unit, Owner’s manual should be read in its entirety. The
manual should be saved and kept on hand as a convenient reference.
Copyright © 2000 BOSS CORPORATION
All rights reserved. No part of this publication may be reproduced in any form
without the written permission of BOSS CORPORATION.
2
Page 3

Main Features
●
In addition to the standard four setting types available on previous phasers (4-/8-/
10-/12-stage), the PH-3 adds further features, including new RISE and FALL effects
and a STEP setting which changes the effect in steps, for a total of seven switchable
phase effects (an effect that adds a cyclic sensation to the sound).
●
New RISE/FALL features give you continuous rising and falling effects unavailable
with previous phasers.
●
You can use the PH-3’s pedal to set the RATE to the tempo. This makes it easy to sync
to songs (tempo and measure), formerly a difficult process.
●
Includes an expression/control jack.
You can connect an expression pedal (Roland EV-5; sold separately) to this jack and
make continuous changes to the RATE for a rotary speaker-like sound, while connecting a foot switch (BOSS FS-5U; sold separately) allows you to match the rate to
the tempo.
3
Page 4

IMPORTANT NOTES
In addition to the items listed under “USING THE UNIT SAFELY” on p. 25, please read
and observe the following:
Power Supply: Use of Batteries
•Do not use this unit on the same power circuit with any device that will generate line
noise (such as an electric motor or variable
lighting system).
•The AC adaptor will begin to generate heat
after long hours of consecutive use. This is
normal, and is not a cause for concern.
•The use of an AC adaptor is recommended
as the unit’s power consumption is relatively high. Should you prefer to use batteries,
please use the alkaline type.
•Batteries should always be installed or replaced before connecting any other devices.
This way, you can prevent malfunction
and/or damage to speakers or other devices.
4
•A battery was installed in the unit before it
left the factory. The life of this battery may
be limited, however, since its primary purpose was to enable testing.
• Before connecting this unit to other devices,
turn off the power to all units. This will help
prevent malfunctions and/or damage to
speakers or other devices.
Placement
•Using the unit near power amplifiers (or
other equipment containing large power
transformers) may induce hum. To alleviate
the problem, change the orientation of this
unit; or move it farther away from the
source of interference.
•This device may interfere with radio and
television reception. Do not use this device
Page 5

IMPORTANT NOTES
in the vicinity of such receivers.
•To avoid possible breakdown, do not use
the unit in a wet area, such as an area exposed to rain or other moisture.
Maintenance
•For everyday cleaning wipe the unit with a
soft, dry cloth or one that has been slightly
dampened with water. To remove stubborn
dirt, use a cloth impregnated with a mild,
non-abrasive detergent. Afterwards, be
sure to wipe the unit thoroughly with a soft,
dry cloth.
•Never use benzine, thinners, alcohol or solvents of any kind, to avoid the possibility of
discoloration and/or deformation.
Additional Precautions
•Use a reasonable amount of care when using the unit’s buttons, sliders, or other controls; and when using its jacks and
connectors. Rough handling can lead to
malfunctions.
•When connecting / disconnecting all cables, grasp the connector itself—never pull
on the cable. This way you will avoid causing shorts, or damage to the cable’s internal
elements.
•To avoid disturbing your neighbors, try to
keep the unit’s volume at reasonable levels.
You may prefer to use headphones, so you
do not need to be concerned about those
around you (especially when it is late at
night).
• When you need to transport the unit, package it in the box (including padding) that it
came in, if possible. Otherwise, you will
need to use equivalent packaging materials.
• Use only the specified expression pedal (Roland EV-5; sold separately). By connecting
any other expression pedals, you risk causing malfunction and/or damage to the unit.
5
Page 6
Feature Names and Functions
2
1
3
4
5
6
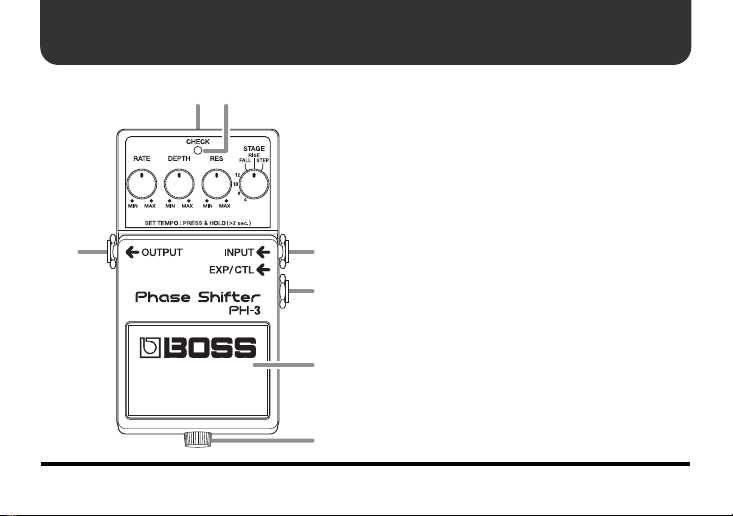
1. AC adaptor Jack
An AC adaptor (BOSS PSA series: sold
separately) can be connected to this jack.
If an AC adaptor is used, you will be able
to play for extended periods without
worrying about battery life.
* As soon as you connect the AC adaptor,
the unit is turned on.
* If there is the battery in the unit while an
AC adaptor is being used, normal
operation will continue should the line
voltage be interrupted (power blackout or
power cord disconnection).
* If you are going to use an AC adaptor, be
sure to use the specified unit (BOSS PSA
series).
7
6
Page 7

Feature Names and Functions
2. CHECK Indicator
Combination indicator that shows the effect’s on/off status, tempo (in Tempo
mode: p. 13), and Battery Check function.
The indicator is lit when the effect is on,
thereby allowing you to check whether
the effect is on or off.
* If the indicator dims when the effect is on
or when the tempo is being displayed, it
means that the battery is running out of
reserve; when this occurs, replace with
fresh batteries. For instructions on
changing the batteries, refer to
“Changing the Battery” (p. 17).
* The CHECK indicator shows whether the
effect is being applied or not, and is used to
indicate other effects. It does not indicate
whether the power to the device is on or not.
3. OUTPUT Jack
This output jack is connected to an amplifier or other effects device.
4. INPUT Jack
This jack accepts input signals (coming
from a guitar, some other musical instrument, or another effects unit).
* When a battery is used, the INPUT jack
also functions as a power switch. When a
plug is inserted into the INPUT jack, the
power will be turned on. When the plug is
pulled out, the power will be turned off.
When you are not using the unit, pull the
plug out of the INPUT jack.
7
Page 8
Feature Names and Functions
5. EXP/CTL Jack
Accepts connection of an expression pedal (Roland EV-5; sold separately) or momentary-type foot switch (BOSS FS-5U;
sold separately).
Use the EV-5 to change the RATE continuously.
Setting tempos is easy with the FS-5U.
* Refer to “Using the EXP/CTL Jack” (p. 15).
6. Pedal Switch
Used for switching effects on/off, and for
inputting the tempo.
When the effect is on, be sure to start any
changes with the filter at the lowest setting.
* For inputting the tempo, refer to “Setting
the Tempo with the PH-3’s Pedal Switch”
(p. 13).
8
7. Thumbscrew
When this screw is loosened, the pedal
will open, allowing you to change the battery.
* For the procedure, refer to “Changing the
Battery” (p. 17).
118910
Page 9

Feature Names and Functions
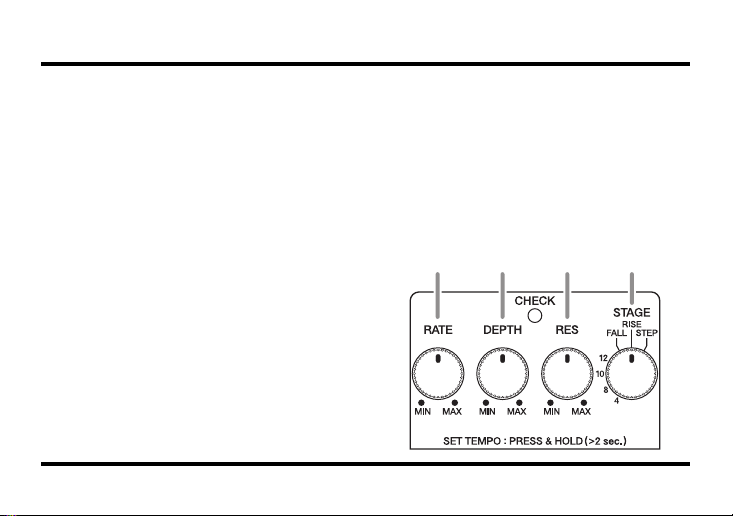
8. RATE Knob
Adjusts the speed at which the filter changes. When set to MIN, the filter remains off.
9. DEPTH Knob
Adjusts the depth of the filter change.
The filter effect stops when this is set to
MIN with the STAGE switch set to anything besides FALL or RISE.
10. RES (Resonance) Knob
Adjusts the strength of the filter effect.
The effect sound becomes stronger the
further the knob is turned clockwise.
* Raising the RES setting (turning it
clockwise) makes it easier for the sound to
become distorted. If it appears that the
sound is becoming distorted, try lowering
the RES setting.
11. STAGE Switch
Selects the number of phase steps and the
phase type. The higher the number, the
more depth the phaser effect has.
4:
4-stage phaser; a light, vintage
phaser effect with a classic feel.
8:
8-stage phaser that gives a balanced phaser sound.
10:
10-stage phaser providing a deep
phaser effect.
12:
12-stage phaser, with two sixstage phasers connected in series
for a powerful phaser effect.
FALL:
Phase effect featuring a continuously falling sensation.
RISE:
Phase effect that imparts a continuously rising sensation.
STEP:
Phase effect whereby filter modifications occur in a non-consecutive
manner. This can provide some really unique, illusional effects.
9
Page 10
Connections
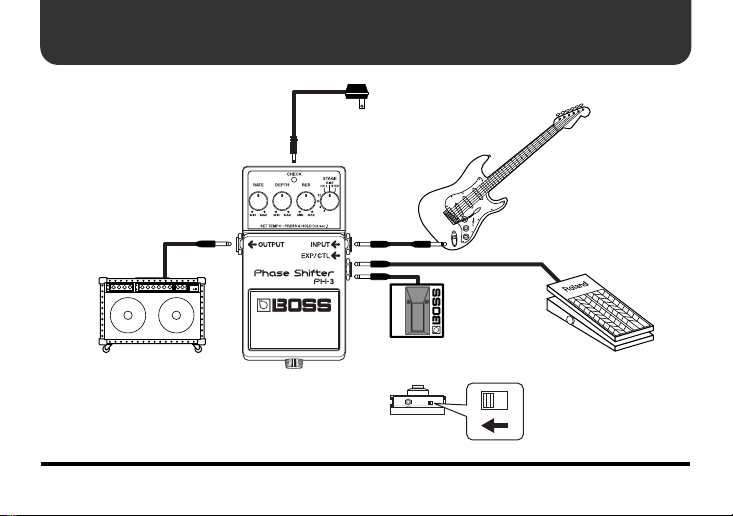
AC adaptor
PSA series (option)
Electric guitar
10
Amplifier
FS-5U
Footswitch
BOSS FS-5U (option)
Polarity
Switch
or
Expression Pedal
Roland EV-5 (option)
Page 11

Connections
* Inserting a plug into the INPUT Jack will automatically switch the unit on.
* To prevent malfunction and/or damage to speakers or other devices, always turn down the
volume, and turn off the power on all devices before making any connections.
* If there are batteries in the unit while an AC adaptor is being used, normal operation will
continue should the line voltage be interrupted (power blackout or power cord disconnection).
* Use only the specified expression pedal (Roland EV-5; sold separately). By connecting any
other expression pedals, you risk causing malfunction and/or damage to the unit.
* Once you've gotten hooked up correctly (p. 10), be sure to observe the following order when
switching on the power to your equipment. By turning on devices in the wrong order, you
risk causing malfunction and/or damage to speakers and other devices.
When powering up: Turn on the power to your guitar amp last.
When powering down: Turn off the power to your guitar amp first.
11
Page 12
Operation
32,4 2,5 2,6
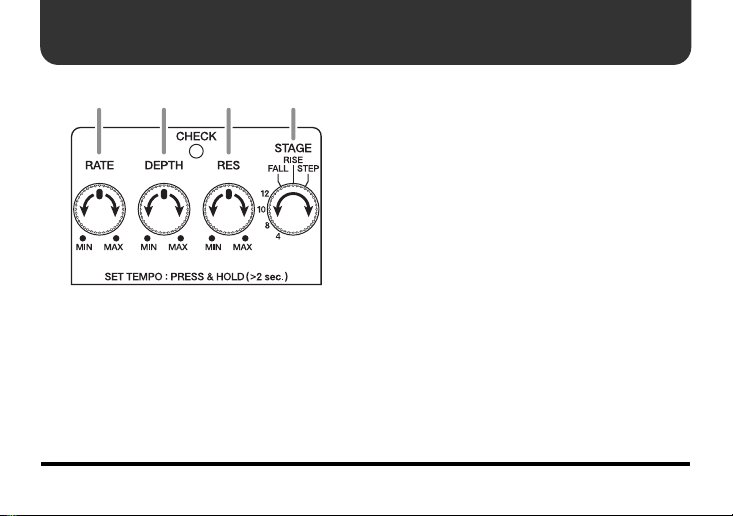
1.
When you have finished making the
connections (p. 10), press the pedal
switch to turn the effect on (the
CHECK indicator is lit).
2.
Set the RATE, DEPTH, and RES knobs
at the center position.
12
3.
Use the STAGE switch to select the
stage type.
4.
With the RATE knob, adjust the speed
of the filter change.
* When set to MIN, the filter remains off.
5.
With the DEPTH knob, adjust the
depth of the filter change.
* The filter effect stops when this is set to
MIN with the STAGE switch set to
anything besides FALL or RISE.
6.
With the RES (Resonance) Knob,
adjust the strength of the filter effect.
* Raising the RES setting (turning it
clockwise) makes it easier for the sound to
become distorted. If it appears that the
sound is becoming distorted, try lowering
the RES setting.
Page 13

Setting the Tempo with the PH-3’s Pedal Switch
* RATE cycles for use with the tempo settings can be made in the range of 0.2–16 seconds.
1.
Step on, and continue depressing the
PH-3’s pedal switch for at least two
seconds.
If the pedal switch is pressed when the
effect is on, the CHECK indicator goes
out, and the effect is turned off for two
seconds.
If the pedal switch is pressed when the
effect is off, the CHECK indicator turns
red, and the effect is turned on for two
seconds.
* For switching without the normal stress
and hassle of turning effects on and off,
when you go into the tempo setting mode
while the effect is on, the effect is first
switched off for two seconds, and the PH3 switches to tempo setting mode.
2.
The CHECK indicator then flashes in
red and green, and the tempo can
then be set with the effect on.
* Here, the tempo is indicated by the value
set with the RATE knob.
3.
Press the PH-3’s pedal switch in timing with the tempo.
The CHECK indicator then flashes in red
and green in time with the tempo.
* When the pedal switch is pressed, the filter
is completely lowered (except when set to
RISE or FALL). When using this, even if
the RATE (as shown by the flashing
CHECK indicator) is off slightly from the
tempo, you can match the RATE to the
tempo with one step on the PH-3's pedal.
13
Page 14

Setting the Tempo with the PH-3’s Pedal Switch
Setting the RATE near the desired tempo beforehand allows
you to make faster and more natural tempo settings.
4.
Press and continue holding the PH-3's
pedal switch for two seconds or
longer to finish setting the tempo.
The effect goes on, and instead of flashing in red and green, the CHECK indicator will light steadily in red.
* When you have finished setting the
tempo, the RATE changes to the value for
the tempo setting made with the pedal, so
the value will differ from the value
indicated by the RATE knob.
* When changed with the RATE knob, the
tempo is then the same as the value for the
RATE knob.
14
Page 15
Using the EXP/CTL Jack
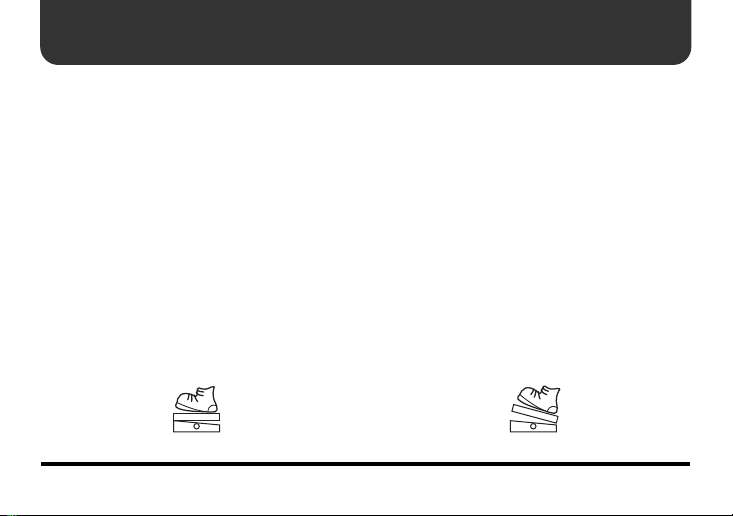
* When an EV-5 or FS-5U is connected to
the EXP/CTL jack, the PH-3’s own pedal
switch then only turns the effect on and off.
●
When Connecting the (Optional) Roland EV-5
The RATE settings can be adjusted with the EV-5.
You can change from the minimum RATE value set by the EV-5’s Minimum Value to
the value set with the PH-3’s RATE knob.
1.
Connect the EV-5 to the EXP/CTL
jack, and press the pedal completely
forward. The adjustment made with
the RATE knob in this condition
determines the maximum RATE
value when controlled with the EV-5.
* When disconnecting from the EXP/CTL
jack, the RATE (tempo) settings used up to
that point are cleared, with the RATE knob
setting then becoming effective.
2.
Return (raise) the pedal completely
back so the heel is down. The adjustment made with the RATE knob at
this point determines the minimum
RATE value when controlled with the
EV-5.
15
Page 16
Using the EXP/CTL Jack
●
When Connecting the (Optional) BOSS FS-5U
The tempo can be set with the FS-5U.
Concerning how to make the tempo settings, refer to steps 3 and 4 under “Setting
the Tempo with the PH-3’s Pedal Switch”
(p. 13). Simply substitute “FS-5U” where
it says “PH-3’s pedal switch.”
* The PH-3's pedal switch switches the
effect on and off. When the effect is on, the
CHECK indicator flashes alternately in
red and green.
* If you turn the RATE after setting the
tempo with the FS-5U, the RATE knob
value is then adjusted.
* You can also make the tempo settings
with the effect off.
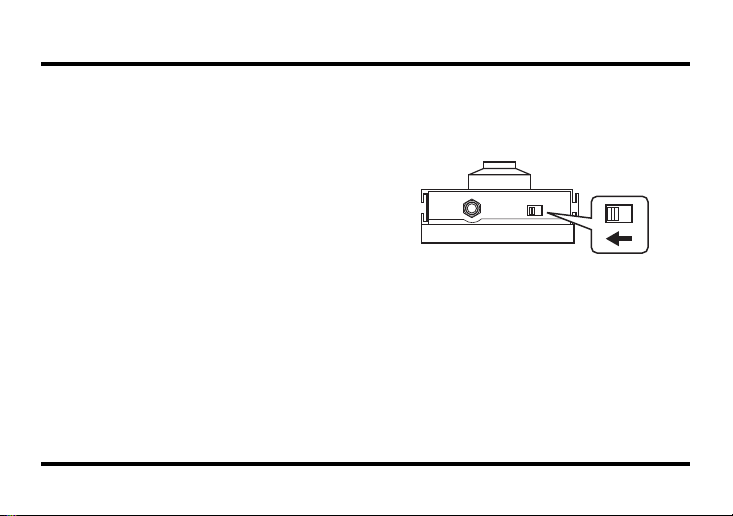
* Set the polarity switch of the connected
the FS-5U as shown in the figure below.
16
Polarity switch
Page 17
Changing the Battery
When the CH
longer lights while an effect is on, it means
that the battery is nearly dead and must be
replaced.
the steps below.
* For best results (i.e., longest usable life)
use an alkaline type battery.
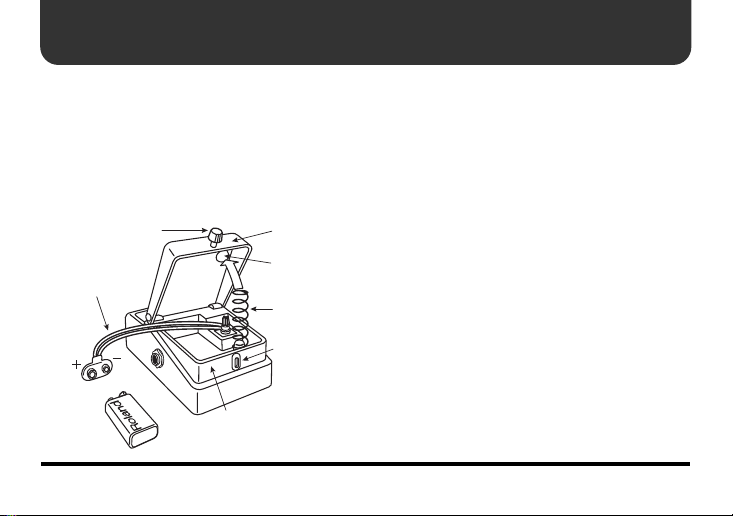
Thumbscrew
Battery Snap
Cord
Battery
Snap
9V Battery
ECK indicator goes dim or no
Replace the battery following
Pedal
Spring Base
Coil Spring
Guide Bush
Hole
Battery Housing
1.
Loosen the thumbscrew at the front of
the pedal, then lift the pedal upwards to
open the unit.
* The thumbscrew can be left in the pedal
while changing the battery.
2.
Remove the old battery from the battery
housing, and remove the battery snap
connected to it.
3.
Connect the battery snap to the new battery, and place the battery inside the battery housing.
* Be sure to carefully observe the battery’s
polarity (+ versus -).
Slip the coil spring onto the spring base on
4.
the back of the pedal, then close the pedal.
* Take care not to allow the battery snap cord to become
caught in the pedal, coil spring, or other places.
5.
Finally, insert the thumbscrew into the
guide bush hole and fasten it securely.
17
Page 18

Troubleshooting
Power won’t come on/
CHECK indicator doesn’t light:
●
Is the specified adaptor (PSA series;
sold separately) properly connected?
Check the connection once more (p. 10).
●
Is the battery low or dead?
Replace with a new battery (p. 17).
●
Is the guitar connected properly to
the INPUT jack?
Check the connection once more (p. 10).
* To prevent excess battery drainage, turn the
power on without the plug inserted in the
INPUT jack.
* The battery that was supplied with the unit
is for temporary use—intended primarily for
testing its operation. For using the unit for
more extended periods of time, we
recommend the use of alkaline batteries.
18
No sound / Low volume:
●
Is the PH-3 properly connected to
your instrument?
Check the connection once more (p. 10).
●
Is the volume turned down on any
guitar amp or effects device you have
connected?
Sound is distorted:
●
Is the battery low?
As the battery is drained, the CHECK indicator dims, and the PH-3 may start to
function incorrectly. Replace with a new
battery (p. 17).
●
Could the level of the sound being
input be excessive?
With some guitars, distortion may be
produced. Be careful of your guitar’s output level.
Page 19

Troubleshooting
Cannot adjust the RATE using
(optional) external EV-5 pedal:
●
Could the EV-5’s minimum volume
be set to the maximum level (10)?
●
Could the RATE knob be set to MIN?
You cannot input the tempo with
the external foot switch:
●
Is the connector cord designed for
stereo use?
●
Have you connected a latch-type foot
switch (such as the optional BOSS
FS-5L)?
Cannot input the tempo correctly
with the external foot switch:
●
Is the polarity switch of the foot
switch (optional BOSS FS-5U) set
correctly?
Check the connection once more (p. 10).
The effect doesn’t change:
●
Could the RATE knob be set to MIN?
●
If the STAGE switch is at a setting
other than RISE or FALL, is the
DEPTH knob set to MIN?
19
Page 20
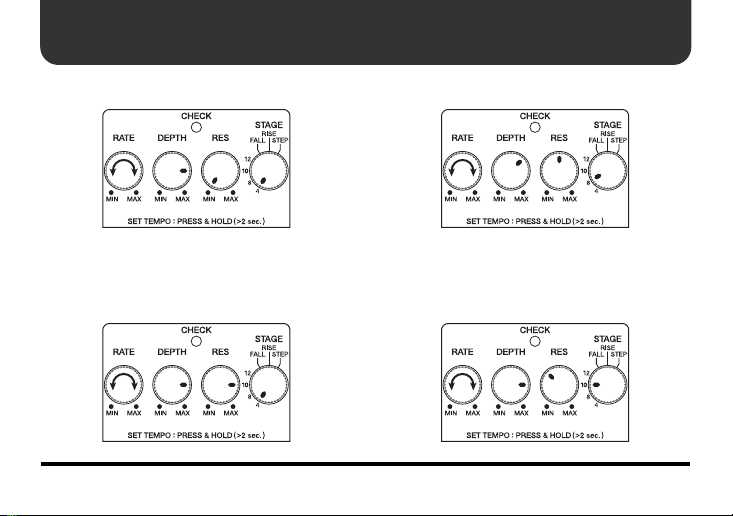
Setting samples
Vintage Phase Shift 1
Vintage Phase Shift 2
20
Standard Phase Shift
Deep Phase Shift
Page 21
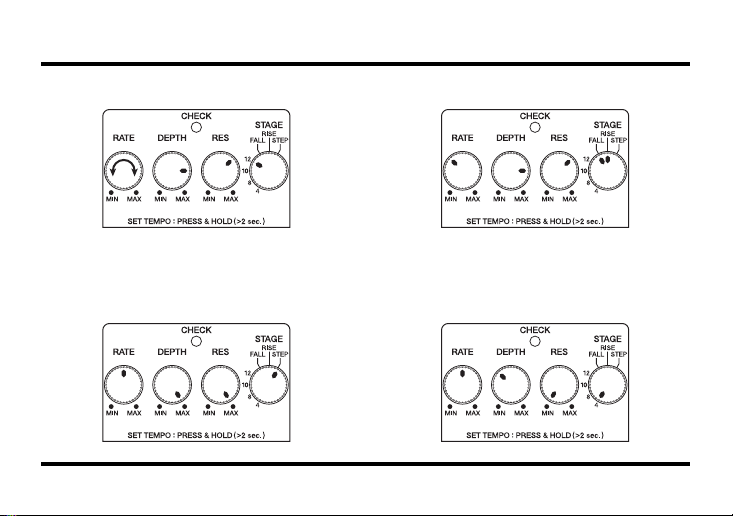
Setting samples
Hard Resonance Sound
Random Step Sound
Standard FALL/RISE Sound
Tremolo Sound
21
Page 22
Setting memo
( )
( )
22
( )
( )
Page 23

Specifications
PH-3: Phase Shifter
Nominal Input Level ..................-20 dBu
Input Impedance ......................... 1 M
Nominal Output Level ...............-20 dBu
Output Impedance...................... 1 k
Recommended Load Impedance
Residual Noise.............................-92 dBu (IHF-A, Type.)
Controls ........................................Pedal Switch, RATE Knob, DEPTH Knob,
Indicators...................................... CHECK Indicator
Connectors
Power Supply...................................DC 9 V: Dry battery 6F22 (9 V) type (carbon)/
Current Draw............................... 50 mA (DC 9 V)
....................................INPUT Jack, OUTPUT Jack, EXP/CTL Jack, AC adaptor Jack
Ω
Ω
.... 10 kΩ or greater
RES (resonance) Knob, STAGE Switch
(Serves also as tempo and battery check indicator)
Dry battery 6LR61 (9 V) type (alkaline)
AC Adaptor (PSA series: optional)
* Expected battery life under continuous use:
Carbon: 2 hours Alkaline: 6 hours
These figures will vary depending on the actual conditions of use.
23
Page 24

Specifications
Dimensions .................................. 73 (W) x 129 (D) x 59 (H) mm
Weight........................................... 420 g /15 oz (including Battery)
Accessories ................................... Owner’s Manual,
Options .........................................AC Adaptor (PSA series)
* 0 dBu = 0.775 Vrms
* In the interest of product improvement, the specifications and/or appearance of this unit are
subject to change without prior notice.
2-7/8 (W) x 5-1/8 (D) x 2-3/8 (H) inches
(“USING THE UNIT SAFELY,” “IMPORTANT NOTES,” and “Information”)
Leaflet
Dry battery 9 V type (6F22)
* The battery that was supplied with the unit is for temporary
use—intended primarily for testing its operation.
We recommend that alkaline batteries be used when replacing
the batteries.
Expression pedal Roland EV-5
Footswitch (momentary-type) BOSS FS-5U
Dry battery 6LR61 (9 V) type (alkaline)
24
Page 25
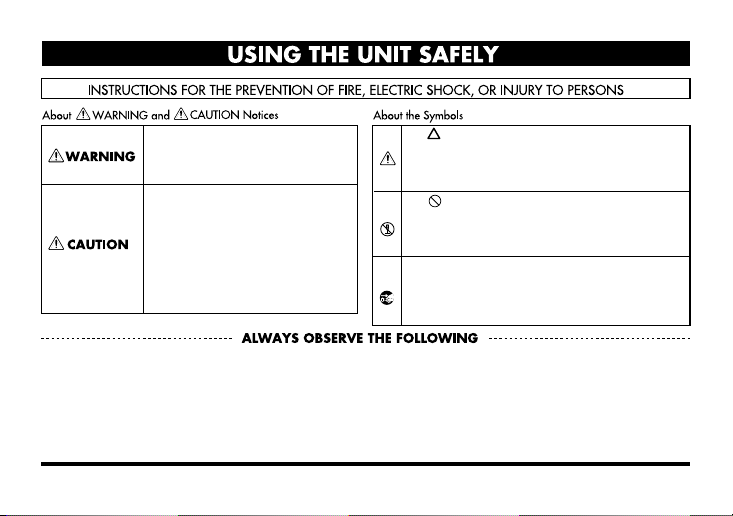
USING THE UNIT SAFELY
Used for instructions intended to alert
the user to the risk of death or severe
injury should the unit be used
improperly.
Used for instructions intended to alert
the user to the risk of injury or material
damage should the unit be used
improperly.
* Material damage refers to damage or
other adverse effects caused with
respect to the home and all its
furnishings, as well to domestic
animals or pets.
The symbol alerts the user to important instructions
or warnings.The specific meaning of the symbol is
determined by the design contained within the
triangle. In the case of the symbol at left, it is used for
general cautions, warnings, or alerts to danger.
The symbol alerts the user to items that must never
be carried out (are forbidden). The specific thing that
must not be done is indicated by the design contained
within the circle. In the case of the symbol at left, it
means that the unit must never be disassembled.
The ● symbol alerts the user to things that must be
carried out. The specific thing that must be done is
indicated by the design contained within the circle. In
the case of the symbol at left, it means that the powercord plug must be unplugged from the outlet.
25
Page 26
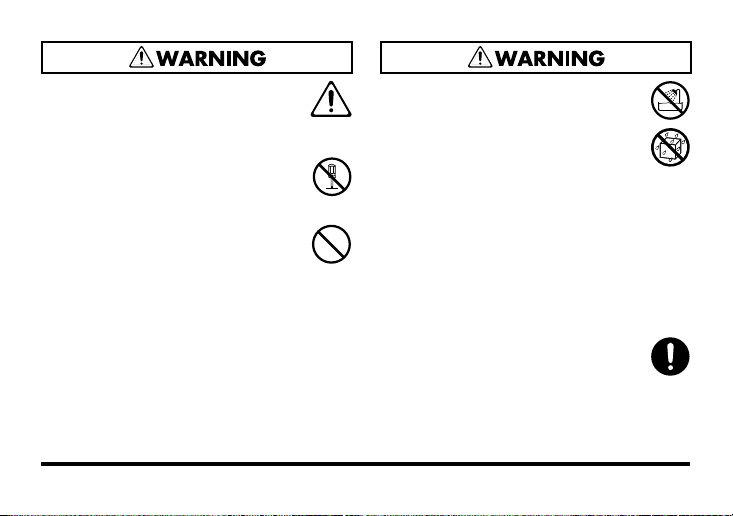
001
• Before using this unit, make sure to
read the instructions below, and the
Owner’s Manual.
.................................................................................
002c
• Do not open (or modify in any way)
the unit or its AC adaptor.
.................................................................................
003
• Do not attempt to repair the unit, or
replace parts within it (except when
this manual provides specific
instructions directing you to do so).
Refer all servicing to your retailer,
the nearest Roland Service Center,
or an authorized Roland distributor,
as listed on the “Information” page.
.................................................................................
26
004
• Never use or store the unit in places
that are:
• Subject to temperature extremes
(e.g., direct sunlight in an
enclosed vehicle, near a heating
duct, on top of heat-generating
equipment); or are
• Damp (e.g., baths, washrooms, on
wet floors); or are
• Humid; or are
• Exposed to rain; or are
• Dusty; or are
• Subject to high levels of vibration.
..................................................................................
007
• Make sure you always have the unit
placed so it is level and sure to
remain stable. Never place it on
stands that could wobble, or on
inclined surfaces.
..................................................................................
Page 27
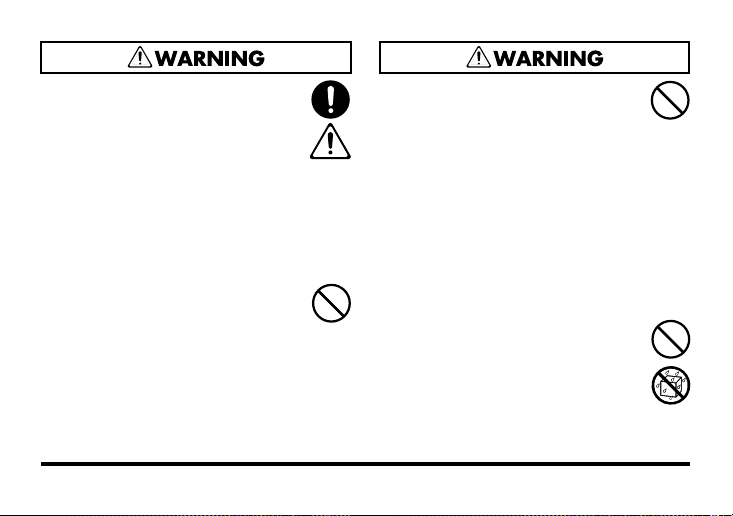
008b
• Use only the specified AC adaptor
(PSA series), and make sure the line
voltage at the installation matches
the input voltage specified on the
AC adaptor’s body. Other AC
adaptors may use a different
polarity, or be designed for a
different voltage, so their use could
result in damage, malfunction, or
electric shock.
.................................................................................
009
• Do not excessively twist or bend the
power cord, nor place heavy objects
on it. Doing so can damage the cord,
producing severed elements and
short circuits. Damaged cords are
fire and shock hazards!
.................................................................................
010
• This unit, either alone or in combination with an amplifier and
headphones or speakers, may be
capable of producing sound levels
that could cause permanent hearing
loss. Do not operate for a long
period of time at a high volume
level, or at a level that is uncomfortable. If you experience any
hearing loss or ringing in the ears,
you should immediately stop using
the unit, and consult an audiologist.
..................................................................................
011
• Do not allow any objects (e.g.,
flammable material, coins, pins); or
liquids of any kind (water, soft
drinks, etc.) to penetrate the unit.
..................................................................................
27
Page 28
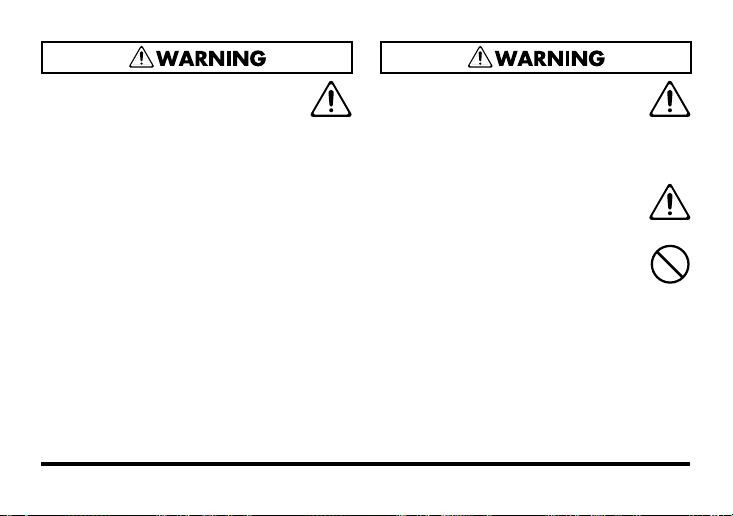
012c
• Immediately turn the power off,
remove the AC adaptor from the
outlet, and request servicing by
your retailer, the nearest Roland
Service Center, or an authorized
Roland distributor, as listed on the
“Information” page when:
• The AC adaptor or the power-
supply cord has been damaged;
or
• Objects have fallen into, or liquid
has been spilled onto the unit; or
• The unit has been exposed to rain
(or otherwise has become wet); or
• The unit does not appear to
operate normally or exhibits a
marked change in performance.
.................................................................................
28
013
• In households with small children,
an adult should provide supervision
until the child is capable of
following all the rules essential for
the safe operation of the unit.
..................................................................................
014
• Protect the unit from strong impact.
(Do not drop it!)
..................................................................................
015
• Do not force the unit’s power-supply
cord to share an outlet with an unreasonable number of other devices. Be
especially careful when using
extension cords—the total power
used by all devices you have
connected to the extension cord’s
outlet must never exceed the power
rating (watts/amperes) for the
extension cord. Excessive loads can
cause the insulation on the cord to
heat up and eventually melt through.
..................................................................................
Page 29
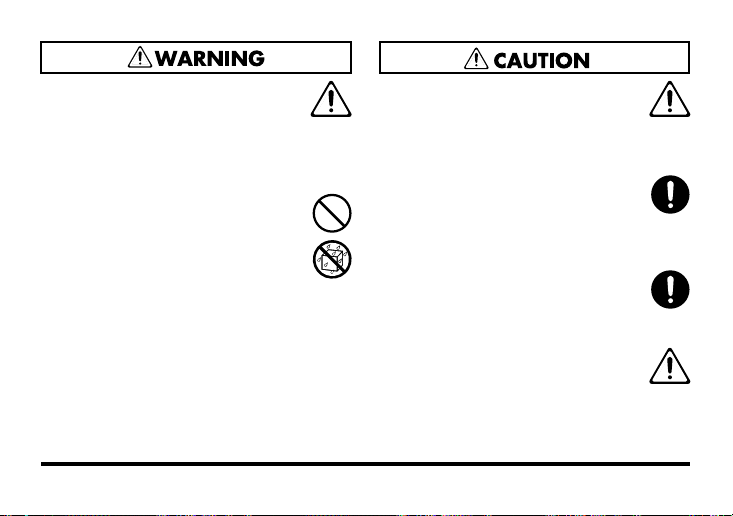
016
• Before using the unit in a foreign
country, consult with your retailer,
the nearest Roland Service Center,
or an authorized Roland distributor,
as listed on the “Information” page.
.................................................................................
019
• Batteries must never be recharged,
heated, taken apart, or thrown into
fire or water.
.................................................................................
101b
• The unit and the AC adaptor should
be located so their location or
position does not interfere with
their proper ventilation.
..................................................................................
102d
• Always grasp only the plug or the
body of the AC adaptor when
plugging into, or unplugging from,
an outlet or this unit.
..................................................................................
103b
• Whenever the unit is to remain
unused for an extended period of
time, disconnect the AC adaptor.
..................................................................................
104
• Try to prevent cords and cables
from becoming entangled. Also, all
cords and cables should be placed
so they are out of the reach of
children.
..................................................................................
29
Page 30
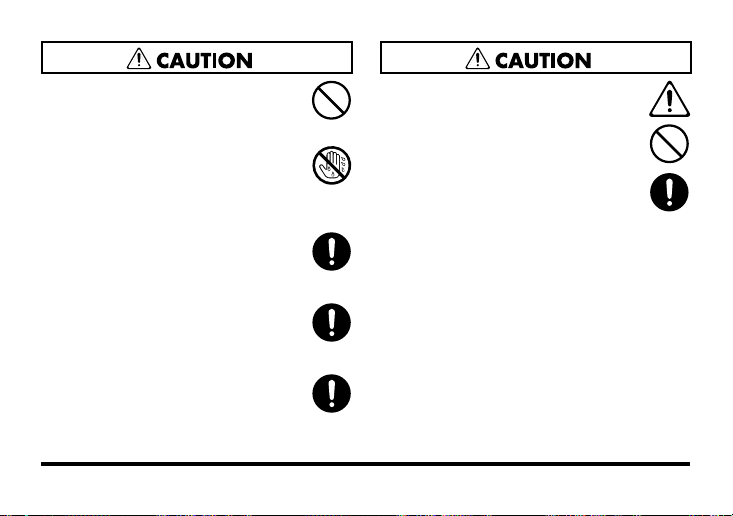
106
• Never climb on top of, nor place
heavy objects on the unit.
.................................................................................
107d
• Never handle the AC adaptor body,
or its plugs, with wet hands when
plugging into, or unplugging from,
an outlet or this unit.
.................................................................................
108b
• Before moving the unit, disconnect
the AC adaptor and all cords
coming from external devices.
.................................................................................
109b
• Before cleaning the unit, turn off the
power and unplug the AC adaptor
from the outlet (p. 10).
.................................................................................
110b
• Whenever you suspect the possibility of lightning in your area,
disconnect the AC adaptor from the
outlet.
.................................................................................
30
111: Selection
• If used improperly, batteries may
explode or leak and cause damage
or injury. In the interest of safety,
please read and observe the
following precautions (p. 17).
1
• Carefully follow the installation
instructions for batteries, and
make sure you observe the
correct polarity.
2
• Avoid using new batteries
together with used ones. In
addition, avoid mixing different
types of batteries.
3
• Remove the batteries whenever
the unit is to remain unused for
an extended period of time.
Page 31
5
• If a battery has leaked, use a soft piece of
cloth or paper towel to wipe all remnants
of the discharge from the battery
compartment. Then install new batteries.
To avoid inflammation of the skin, make
sure that none of the battery discharge
gets onto your hands or skin. Exercise the
utmost caution so that none of the
discharge gets near your eyes. Immediately rinse the affected area with running
water if any of the discharge has entered
the eyes.
6
• Never keep batteries together with
metallic objects such as ballpoint pens,
necklaces, hairpins, etc.
.................................................................................
112
• Used batteries must be disposed of
in compliance with whatever
regulations for their safe disposal
that may be observed in the region
in which you live.
..................................................................................
118
• Should you remove the Thumbscrew, make sure to put them in a
safe place out of children's reach, so
there is no chance of them being
swallowed accidentally.
..................................................................................
31
Page 32
This product complies with the requirements of EMC Directive 2004/108/EC.
FEDERAL COMMUNICATIONS COMMISSION
RADIO FREQUENCY INTERFERENCE STATEMENT
This equipment has been tested and found to comply with the limits for a Class B digital device, pursuant to Part 15 of the
FCC Rules. These limits are designed to provide reasonable protection against harmful interference in a residential
installation. This equipment generates, uses, and can radiate radio frequency energy and, if not installed and used in
accordance with the instructions, may cause harmful interference to radio communications. However, there is no guarantee
that interference will not occur in a particular installation. If this equipment does cause harmful interference to radio or
television reception, which can be determined by turning the equipment off and on, the user is encouraged to try to correct the
interference by one or more of the following measures:
– Reorient or relocate the receiving antenna.
– Increase the separation between the equipment and receiver.
– Connect the equipment into an outlet on a circuit different from that to which the receiver is connected.
– Consult the dealer or an experienced radio/TV technician for help.
This device complies with Part 15 of the FCC Rules. Operation is subject to the following two conditions:
(1) this device may not cause harmful interference, and
(2) this device must accept any interference received, including interference that may cause undesired operation.
Unauthorized changes or modification to this system can void the users authority to operate this equipment.
This equipment requires shielded interface cables in order to meet FCC class B Limit.
This Class B digital apparatus meets all requirements of the Canadian Interference-Causing Equipment Regulations.
Cet appareil numérique de la classe B respecte toutes les exigences du Règlement sur le matériel brouilleur du Canada.
NOTICE
AVIS
For EU Countries
For the USA
For Canada
For C.A. US (Proposition 65
WARNING
This product contains chemicals known to cause cancer, birth defects and other reproductive harm, including lead.
)
G6017288R0
 Loading...