

Page 1
Owner’s Manual (p. 1)
Bedienungsanleitung (p. 41)
Mode d’emploi (p. 81)
Manuale dell’utente (p. 121)
Manual del Usuario (p. 161)
Handleiding (p. 201)
Copyright © 2004 ROLAND CORPORATION
All rights reserved. No part of this publication may be reproduced in any form
without the written permission of ROLAND CORPORATION.
Page 2

WARNING: To reduce the risk of fire or electric shock, do not expose this apparatus to rain or moisture.
CAUTION
RISK OF ELECTRIC SHOCK
DO NOT OPEN
ATTENTION: RISQUE DE CHOC ELECTRIQUE NE PAS OUVRIR
CAUTION: TO REDUCE THE RISK OF ELECTRIC SHOCK,
DO NOT REMOVE COVER (OR BACK).
NO USER-SERVICEABLE PARTS INSIDE.
REFER SERVICING TO QUALIFIED SERVICE PERSONNEL.
The lightning flash with arrowhead symbol, within an
equilateral triangle, is intended to alert the user to the
presence of uninsulated “dangerous voltage” within the
product’s enclosure that may be of sufficient magnitude to
constitute a risk of electric shock to persons.
The exclamation point within an equilateral triangle is
intended to alert the user to the presence of important
operating and maintenance (servicing) instructions in the
literature accompanying the product.
INSTRUCTIONS PERTAINING TO A RISK OF FIRE, ELECTRIC SHOCK, OR INJURY TO PERSONS.
IMPORTANT SAFETY INSTRUCTIONS
SAVE THESE INSTRUCTIONS
WARNING - When using electric products, basic precautions should always be followed, including the following:
1. Read these instructions.
2. Keep these instructions.
3. Heed all warnings.
4. Follow all instructions.
5. Do not use this apparatus near water.
6. Clean only with a dry cloth.
7. Do not block any of the ventilation openings. Install in
accordance with the manufacturers instructions.
8. Do not install near any heat sources such as radiators,
heat registers, stoves, or other apparatus (including
amplifiers) that produce heat.
9. Do not defeat the safety purpose of the polarized or
grounding-type plug. A polarized plug has two blades with
one wider than the other. A grounding type plug has two
blades and a third grounding prong. The wide blade or the
third prong are provided for your safety. When the provided
plug does not fit into your outlet, consult an electrician for
replacement of the obsolete outlet.
10. Protect the power cord from being walked on or pinched
particularly at plugs, convenience receptacles, and the
point where they exit from the apparatus.
11. Only use attachments/accessories specified by the
manufacturer.
12. Never use with a cart, stand, tripod, bracket,
or table except as specified by the
manufacturer, or sold with the apparatus.
When a cart is used, use caution when
moving the cart/apparatus combination to
avoid injury from tip-over.
13. Unplug this apparatus during lightning storms or when
unused for long periods of time.
14. Refer all servicing to qualified service personnel. Servicing
is required when the apparatus has been damaged in any
way, such as power-supply cord or plug is damaged, liquid
has been spilled or objects have fallen into the apparatus,
the apparatus has been exposed to rain or moisture, does
not operate normally, or has been dropped.
For the U.K.
IMPORTANT: THE WIRES IN THIS MAINS LEAD ARE COLOURED IN ACCORDANCE WITH THE FOLLOWING CODE.
BLUE:
BROWN:
As the colours of the wires in the mains lead of this apparatus may not correspond with the coloured markings identifying
the terminals in your plug, proceed as follows:
The wire which is coloured BLUE must be connected to the terminal which is marked with the letter N or coloured BLACK.
The wire which is coloured BROWN must be connected to the terminal which is marked with the letter L or coloured RED.
Under no circumstances must either of the above wires be connected to the earth terminal of a three pin plug.
NEUTRAL
LIVE
Page 3
Owner’s Manual
Thank you, and congratulations on your choice of the Roland Digital Piano HP107e.
Main Features
Piano Sounds with Rich Resonance and Wide-ranging Expressiveness
The stereo sampling piano sound generator realistically reproduces even the sound of the hammers
striking the strings, producing the tones of a high-quality concert grand piano. Maximum polyphony of 128 notes ensures that you can use the pedal freely without running out of notes.
This instrument is receptive to all the subtle nuances that a performer might use, and skillfully
reproduces them—whether it be slight variations in touch or the resonance in the strings when the
keys are released, or the type of resonance heard when the pedals are released (Piano Resonance).
In addition, this instrument features a “Grand Sound” speaker system, and simulates the full,
three-dimensional nature of a concert grand piano (Grand Space), which together help to deliver a
sound with even greater clarity and power (Dynamic Emphasis).
Pursuing the Playing Feel of a Grand Piano
This instrument features a progressive hammer action keyboard, which duplicates the touch of a
grand piano, with a heavier touch in the lower register, and a lighter touch in the upper register. In
addition, on the HP107e, even the distinctive “click” that you feel when pressing a key on a grand
piano has been faithfully simulated (escapement mechanism).
The instrument features two kinds of key touch control; key response, which changes the keys’
apparent weighting, and “hammer response function,” which reproduces the piano hammers’ subtle movements. The pedal is designed for good-feeling response, and allows subtle performance
nuances to be expressed.
Before using this unit,
carefully read the sections
entitled:
safely” (p. 2)
notes” (p. 4)
provide important
information concerning the
proper operation of the unit.
Additionally, in order to feel
assured that you have
gained a good grasp of every
feature provided by your
new unit, Owner’s manual
should be read in its
entirety. The manual should
be saved and kept on hand
as a convenient reference.
“Using the unit
“Important
and
. These sections
Expressiveness Only a Digital Instrument Can Provide
The HP107e lets you add just the right sounds to the piano for an effect that is full and rich.
You can layer different instrument sounds over the piano sound, layer sounds one octave higher,
and use a pedal to control the volume.
Comfortable for Use with Headphones
Special effects applied to the sound when headphones are used make listening through headphones comfortable, not fatiguing. And in addition to an indicator on the Front panel that lights up
when you connect a pair of headphones, the HP107e also provides a convenient hook where you
can keep your headphones when they’re not in use.
A Variety of Helpful Practice Features and Built-in Piano Songs
A metronome function and “two-track recorder,” the built-in songs for a collection of scores (60
songs included), and other features let you experience piano lessons in ways possible only with a
digital piano.
Copyright © 2004 ROLAND CORPORATION
All rights reserved. No part of this publication may be reproduced in
any form without the written permission of ROLAND CORPORATION.
Page 4
Using the unit safely
Used for instructions intended to alert
the user to the risk of death or severe
injury should the unit be used
improperly.
Used for instructions intended to alert
the user to the risk of injury or material
damage should the unit be used
improperly.
* Material damage refers to damage or
other adverse effects caused with
respect to the home and all its
furnishings, as well to domestic
animals or pets.
• Before using this unit, make sure to read the
instructions below, and the Owner’s Manual.
...........................................................................................................
• Do not open or perform any internal modifications on the unit.
...........................................................................................................
• Do not attempt to repair the unit, or replace parts
within it (except when this manual provides specific instructions directing you to do so). Refer all
servicing to your retailer, the nearest Roland Service Center, or an authorized Roland distributor,
as listed on the “Information” page.
...........................................................................................................
• Never use or store the unit in places that are:
• Subject to temperature extremes (e.g., direct sun-
light in an enclosed vehicle, near a heating duct,
on top of heat-generating equipment); or are
• Damp (e.g., baths, washrooms, on wet floors); or
are
• Humid; or are
• Exposed to rain; or are
• Dusty; or are
• Subject to high levels of vibration.
...........................................................................................................
• This unit should be used only with a rack or stand
that is recommended by Roland.
...........................................................................................................
• Make sure you always have the unit placed so it is
level and sure to remain stable. Never place it on
stands that could wobble, or on inclined surfaces.
...........................................................................................................
• The unit should be connected to a power supply
only of the type described in the operating instructions, or as marked on rear of the unit.
...........................................................................................................
• Use only the attached power-supply cord. Also,
the supplied power cord must not be used with
any other device.
...........................................................................................................
The symbol alerts the user to important instructions
or warnings.The specific meaning of the symbol is
determined by the design contained within the
triangle. In the case of the symbol at left, it is used for
general cautions, warnings, or alerts to danger.
The symbol alerts the user to items that must never
be carried out (are forbidden). The specific thing that
must not be done is indicated by the design contained
within the circle. In the case of the symbol at left, it
means that the unit must never be disassembled.
The ● symbol alerts the user to things that must be
carried out. The specific thing that must be done is
indicated by the design contained within the circle. In
the case of the symbol at left, it means that the powercord plug must be unplugged from the outlet.
• Do not excessively twist or bend the power cord,
nor place heavy objects on it. Doing so can damage the cord, producing severed elements and
short circuits. Damaged cords are fire and shock
hazards!
...........................................................................................................
• This unit, either alone or in combination with an
amplifier and headphones or speakers, may be
capable of producing sound levels that could
cause permanent hearing loss. Do not operate for
a long period of time at a high volume level, or at
a level that is uncomfortable. If you experience
any hearing loss or ringing in the ears, you should
immediately stop using the unit, and consult an
audiologist.
...........................................................................................................
• Do not allow any objects (e.g., flammable material,
coins, pins); or liquids of any kind (water, soft
drinks, etc.) to penetrate the unit.
...........................................................................................................
• Immediately turn the power off, remove the
power cord from the outlet, and request servicing
by your retailer, the nearest Roland Service Center, or an authorized Roland distributor, as listed
on the “Information” page when:
• The power-supply cord, or the plug has been dam-
aged; or
• If smoke or unusual odor occurs
• Objects have fallen into, or liquid has been spilled
onto the unit; or
• The unit has been exposed to rain (or otherwise
has become wet); or
• The unit does not appear to operate normally or
exhibits a marked change in performance.
...........................................................................................................
Page 5
• In households with small children, an adult
should provide supervision until the child is capable of following all the rules essential for the safe
operation of the unit.
...........................................................................................................
014
• Protect the unit from strong impact.
• (Do not drop it!)
...........................................................................................................
015
• Do not force the unit’s power-supply cord to share
an outlet with an unreasonable number of other
devices. Be especially careful when using extension cords—the total power used by all devices
you have connected to the extension cord’s outlet
must never exceed the power rating (watts/
amperes) for the extension cord. Excessive loads
can cause the insulation on the cord to heat up and
eventually melt through.
...........................................................................................................
016
• Before using the unit in a foreign country, consult
with your retailer, the nearest Roland Service Center, or an authorized Roland distributor, as listed
on the “Information” page.
...........................................................................................................
026
• DO NOT play a CD-ROM disc on a conventional
audio CD player. The resulting sound may be of a
level that could cause permanent hearing loss.
Damage to speakers or other system components
may result.
...........................................................................................................
026
• Do not put anything that contains water (e.g.,
flower vases) on this unit. Also, avoid the use of
insecticides, perfumes, alcohol, nail polish, spray
cans, etc., near the unit. Swiftly wipe away any liquid that spills on the unit using a dry, soft cloth.
...........................................................................................................
• The unit should be located so that its location or
position does not interfere with its proper ventilation.
...........................................................................................................
• Always grasp only the plug on the power-supply
cord when plugging into, or unplugging from, an
outlet or this unit.
...........................................................................................................
• At regular intervals, you should unplug the power
plug and clean it by using a dry cloth to wipe all
dust and other accumulations away from its
prongs. Also, disconnect the power plug from the
power outlet whenever the unit is to remain
unused for an extended period of time. Any accumulation of dust between the power plug and the
power outlet can result in poor insulation and lead
to fire.
...........................................................................................................
• Try to prevent cords and cables from becoming
entangled. Also, all cords and cables should be
placed so they are out of the reach of children.
...........................................................................................................
106
• Never climb on top of, nor place heavy objects on
the unit.
...........................................................................................................
• Never handle the power cord or its plugs with wet
hands when plugging into, or unplugging from,
an outlet or this unit.
...........................................................................................................
• If you need to move the instrument, take note of
the precautions listed below. At least two persons
are required to safely lift and move the unit. It
should be handled carefully, all the while keeping
it level. Make sure to have a firm grip, to protect
yourself from injury and the instrument from
damage.
• Check to make sure the screws securing the unit to
the stand have not become loose. Fasten them
again securely whenever you notice any loosening.
• Disconnect the power cord.
• Disconnect all cords coming from external devices.
• Raise the adjusters on the stand (p. 11).
• Close the lid.
• Fold down the music rest.
...........................................................................................................
109a
• Before cleaning the unit, turn off the power and
unplug the power cord from the outlet (p. 9).
...........................................................................................................
110a
• Whenever you suspect the possibility of lightning
in your area, pull the plug on the power cord out
of the outlet.
...........................................................................................................
116
• Be careful when opening/closing the lid so you do
not get your fingers pinched (p. 10). Adult supervision is recommended whenever small children
use the unit.
...........................................................................................................
118b
• Should you remove the music rest’s attachment
screws, screws of stand, and wing nut, make sure
to put them in a safe place out of children’s reach,
so there is no chance of them being swallowed
accidentally.
...........................................................................................................
ENGLISH
ENGLISH
ENGLISH ENGLISH ENGLISH ENGLISH
Page 6

HP107e – Important notes
Important notes
In addition to the items listed under “IMPORTANT SAFETY INSTRUCTIONS” and “Using the unit safely” (p. 2), please
read and observe the following:
Power Supply
• Do not connect this unit to same electrical outlet that is
being used by an electrical appliance that is controlled by
an inverter (such as a refrigerator, washing machine,
microwave oven, or air conditioner), or that contains a
motor. Depending on the way in which the electrical
appliance is used, power supply noise may cause this
unit to malfunction or may produce audible noise. If it is
not practical to use a separate electrical outlet, connect a
power supply noise filter between this unit and the electrical outlet.
307
• Before connecting this unit to other devices, turn off the
power to all units. This will help prevent malfunctions
and/or damage to speakers or other devices.
308
• Although the LCD and LEDs are switched off when the
POWER switch is switched off, this does not mean that
the unit has been completely disconnected from the
source of power. If you need to turn off the power completely, first turn off the POWER switch, then unplug the
power cord from the power outlet. For this reason, the
outlet into which you choose to connect the power cord’s
plug should be one that is within easy reach and readily
accessible.
Placement
• Using the unit near power amplifiers (or other equipment
containing large power transformers) may induce hum.
To alleviate the problem, change the orientation of this
unit; or move it farther away from the source of interference.
352a
• This device may interfere with radio and television reception. Do not use this device in the vicinity of such receivers.
352b
• Noise may be produced if wireless communications
devices, such as cell phones, are operated in the vicinity
of this unit. Such noise could occur when receiving or initiating a call, or while conversing. Should you experience
such problems, you should relocate such wireless devices
so they are at a greater distance from this unit, or switch
them off.
354b
• Do not expose the unit to direct sunlight, place it near
devices that radiate heat, leave it inside an enclosed vehicle, or otherwise subject it to temperature extremes. Also,
do not allow lighting devices that normally are used
while their light source is very close to the unit (such as a
piano light), or powerful spotlights to shine upon the
same area of the unit for extended periods of time. Excessive heat can deform or discolor the unit.
355b
• When moved from one location to another where the
temperature and/or humidity is very different, water
droplets (condensation) may form inside the unit. Damage or malfunction may result if you attempt to use the
unit in this condition. Therefore, before using the unit,
you must allow it to stand for several hours, until the
condensation has completely evaporated.
• Do not allow rubber, vinyl, or similar materials to remain
on the unit for long periods of time. Such objects can discolor or otherwise harmfully affect the finish.
358
• Do not allow objects to remain on top of the keyboard.
This can be the cause of malfunction, such as keys ceasing
to produce sound.
359
• Do not paste stickers, decals, or the like to this instrument. Peeling such matter off the instrument may damage the exterior finish.
Maintenance
• To clean the unit, use a dry, soft cloth; or one that is
slightly dampened. Try to wipe the entire surface using
an equal amount of strength, moving the cloth along with
the grain of the wood. Rubbing too hard in the same area
can damage the finish.
402
• Never use benzine, thinners, alcohol or solvents of any
kind, to avoid the possibility of discoloration and/or
deformation.
• The pedals of this unit are made of brass.
Brass eventually darkens as the result of the natural oxidization process. If the brass becomes tarnished, polish it
using commercially available metal polisher.
Repairs and Data
• Please be aware that all data contained in the unit’s memory may be lost when the unit is sent for repairs. Important data should always be backed up in another MIDI
device (e.g., a sequencer), or written down on paper
(when possible). During repairs, due care is taken to
avoid the loss of data. However, in certain cases (such as
when circuitry related to memory itself is out of order),
we regret that it may not be possible to restore the data,
and Roland assumes no liability concerning such loss of
data.
Additional Precautions
• Please be aware that the contents of memory can be irretrievably lost as a result of a malfunction, or the improper
operation of the unit. To protect yourself against the risk
of loosing important data, we recommend that you periodically save a backup copy of important data you have
stored in the unit’s memory in another MIDI device (e.g.,
a sequencer).
552
• Unfortunately, it may be impossible to restore the contents of data that was stored in the unit’s memory and
another MIDI device (e.g., a sequencer) once it has been
lost. Roland Corporation assumes no liability concerning
such loss of data.
553
• Use a reasonable amount of care when using the unit’s
buttons, sliders, or other controls; and when using its
jacks and connectors. Rough handling can lead to malfunctions.
4
Page 7

Important notes
• When connecting / disconnecting all cables, grasp the
connector itself—never pull on the cable. This way you
will avoid causing shorts, or damage to the cable’s internal elements.
557
• A small amount of heat will radiate from the unit during
normal operation.
558a
• To avoid disturbing your neighbors, try to keep the unit’s
volume at reasonable levels. You may prefer to use headphones, so you do not need to be concerned about those
around you (especially when it is late at night).
559b
• When you need to transport the unit, pack it in shockabsorbent material. Transporting the unit without doing
so can cause it to become scratched or damaged, and
could lead to malfunction.
560
• Do not apply undue force to the music rest while it is in
use.
562
• Use a cable from Roland to make the connection. If using
some other make of connection cable, please note the following precautions.
• Some connection cables contain resistors. Do not use
cables that incorporate resistors for connecting to this unit.
The use of such cables can cause the sound level to be
extremely low, or impossible to hear. For information on
cable specifications, contact the manufacturer of the cable.
565
• Before opening or closing the keyboard lid, always make
sure that no pets or other small animals are located on top
of the instrument (in particular, they should be kept away
from the keyboard and its lid). Otherwise, due to the
structural design of this instrument, small pets or other
animals could end up getting trapped inside it. If such a
situation is encountered, you must immediately switch
off the power and disconnect the power cord from the
outlet. You should then consult with the retailer from
whom the instrument was purchased, or contact the nearest Roland Service Center.
ENGLISH
ENGLISH
ENGLISH ENGLISH ENGLISH ENGLISH
Handling CD-ROMs
• Avoid touching or scratching the shiny underside
(encoded surface) of the disc. Damaged or dirty CD-ROM
discs may not be read properly. Keep your discs clean
using a commercially available CD cleaner.
5
Page 8

HP107e – Contents
Contents
Using the unit safely ..........................................................2
Important notes ..................................................................4
Panel Descriptions .............................................................7
Front Panel ......................................................................................................... 7
Rear Panel........................................................................................................... 8
Bottom Panel...................................................................................................... 8
Before You Start Playing ...................................................9
Connecting the Pedal Cable............................................................................. 9
Connecting the Speaker Cable......................................................................... 9
Connect the Power Cord ..................................................................................9
Setting Up the Music Rest................................................................................ 9
Opening/Closing the Lid............................................................................... 10
Connecting Headphones................................................................................ 10
Using the headphones hook ............................................................10
Turning the Power On and Off .....................................................................11
Adjusting the Sound’s Volume and Brilliance............................................ 11
About the Pedals ............................................................................................. 11
Chapter 1. Enjoying the Built-in Songs..........................12
Listening to Built-in Songs............................................................................. 12
Playing back all songs continuously (All Song Play)...................12
Selecting a song and playing it........................................................12
Listening to the Demo Songs......................................................................... 13
Playing Back the Tone Demo Songs ...............................................13
Listening to a Demo of the Functions.............................................13
Chapter 2. Performance...................................................14
Performing with a Variety of Sounds........................................................... 14
Making Fine Adjustments to the Piano Sound (Piano Resonance)..........14
Playing Sounds When the Keys Are Released (Key Off).............14
Producing the Resonance of the Strings When the Keys Are
Played (String Resonance)................................................................14
Having Resonance Played When You Press the Damper Pedal
(Damper Resonance).........................................................................15
Adjusting the Keyboard Touch (Key Touch) ..............................................15
Changing the Timing of Sounds According to the Force Used to
Press the Keys (Hammer Response)...............................................15
Adding a Sense of Depth to the Sound (Grand Space).............................. 16
Adding the Right Sense of Depth for Headphones (Grand Space) ......... 16
Adding Liveliness to the Sound (Dynamic Emphasis).............................. 17
Applying Effects to the Sound ...................................................................... 17
Adding reverberation to the sound (Reverb)................................17
Adding richness to the sound (Chorus).........................................17
Changing the amount of effect applied..........................................17
Transposing the Key of the Keyboard (Transpose).................................... 18
Layering Complementary Sounds with the Piano Tones (Acoustic
Layering)........................................................................................................... 18
Changing the Volume Balance for Acoustic Layering.................19
Playing Two Sounds Together (Dual Performance) .................................. 19
Adjusting the volume balance in Dual performance (Dual
Balance)...............................................................................................19
Playing Different Tones with the Left and Right Hands (Split) ...............20
Changing the keyboard’s split point ..............................................20
Changing How the Center Pedals Work ..................................................... 21
Using Metronome............................................................................................ 21
Sounding the metronome.................................................................21
Changing the metronome volume ..................................................21
Splitting the Keyboard Into Two Sections for Four-Hand Performances
(Twin Piano Mode).......................................................................................... 22
Chapter 3. Playing Along with the Built-in Songs ........ 23
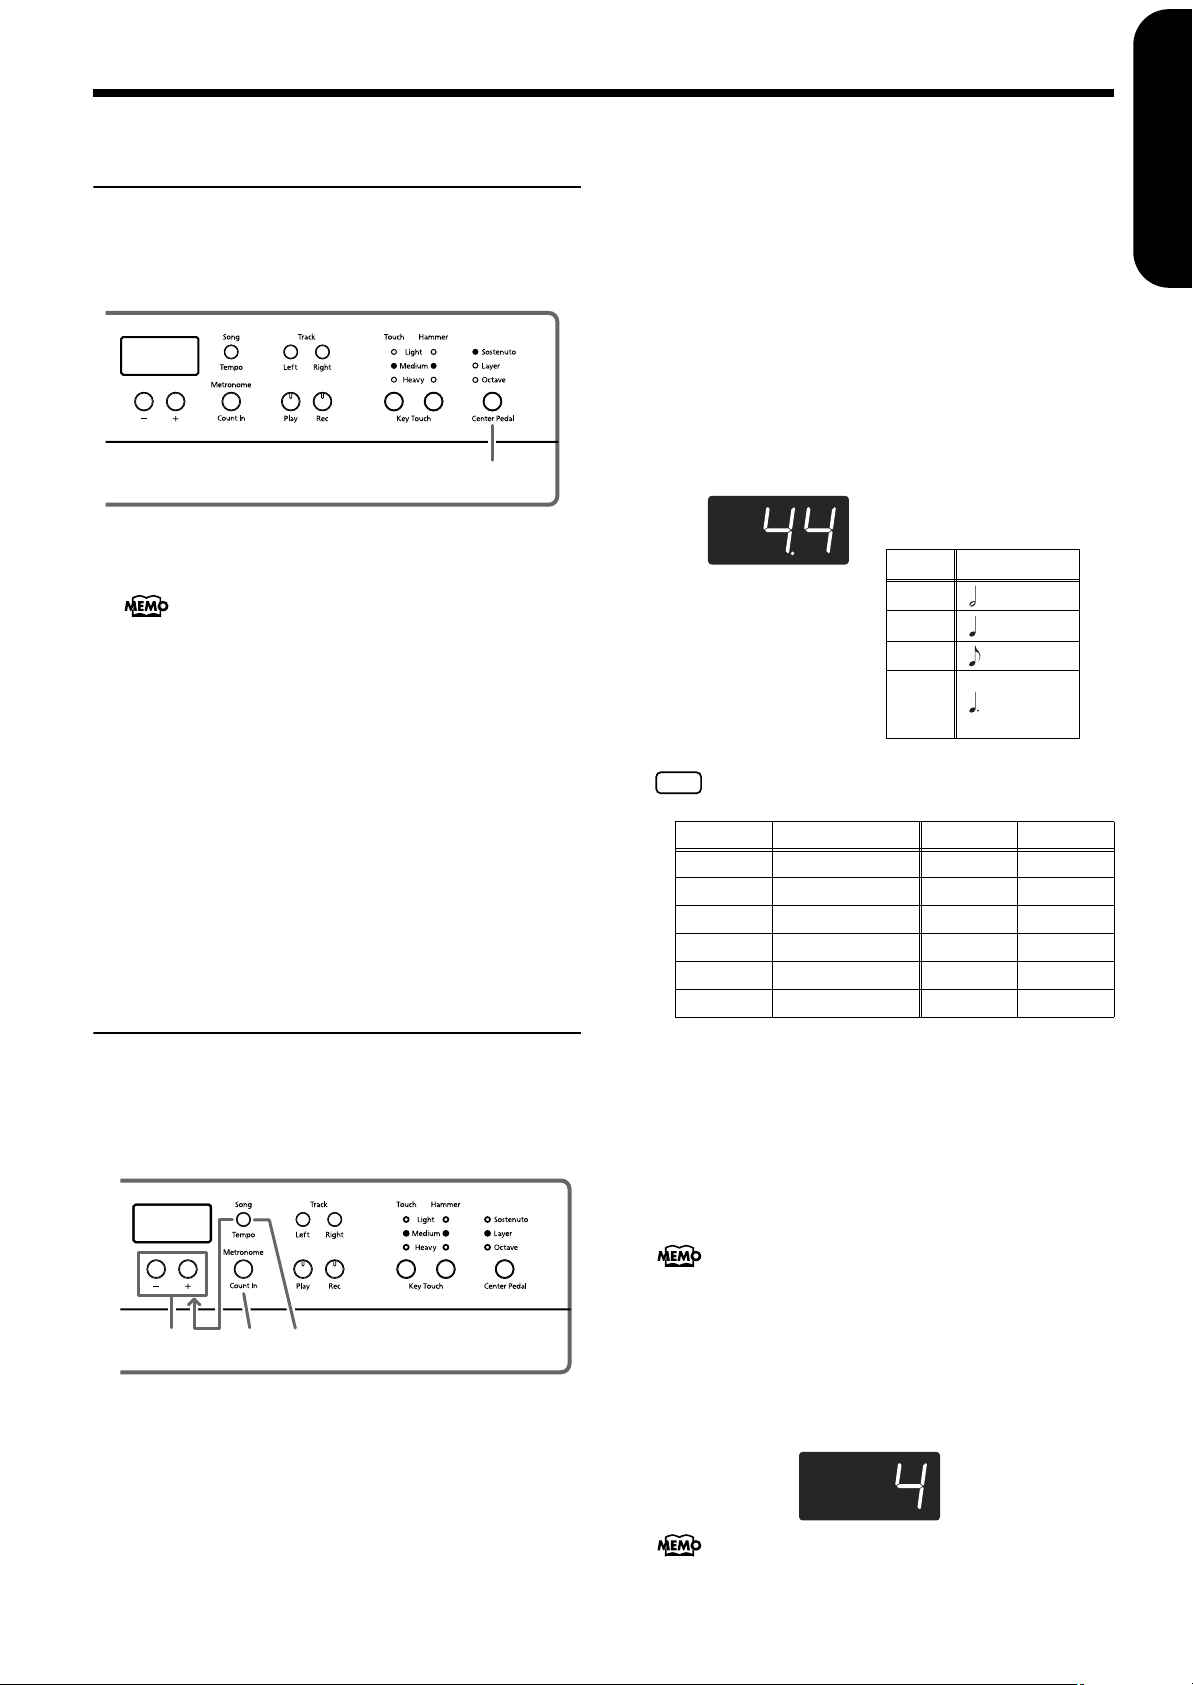
Changing the Tempo.......................................................................................23
Adding a count-in to match the timing (Count-In)......................23
Playing Each Hand Separately ......................................................................24
Chapter 4. Recording Your Performance ...................... 25
Recording a New Song ...................................................................................25
Recording Along with a Song........................................................................26
Selecting and Recording the Track for Each Hand Separately .................27
Erasing Recorded Performances....................................................................27
Erasing a performance from the specified track...........................27
Erasing a song....................................................................................27
Chapter 5. Changing Various Settings .......................... 28
Making Detailed Settings (Function) ............................................................28
Tuning to other instruments’ pitches (Master Tuning) ...............29
Changing the temperament .............................................................29
Setting the tuning curve (Stretch Tuning) .....................................29
Changing the Pitch by Octaves (Octave Shift) ..............................30
Applying the damper pedal to the left-hand keyboard area......30
Changing How Grand Space is Applied (Grand Space Mode)..30
Disabling Everything Except Piano Play (Panel Lock) ..............................30
Restoring the Settings to the Factory Condition (Factory Reset)..............31
Remembering the Settings Even When the Power is Turned Off
(Memory Backup)............................................................................................31
Saving Recorded Songs (Song Backup)........................................................31
Deleting backed up songs ................................................................31
Using the V-LINK function ............................................................................32
Making the Settings for the USB Driver.......................................................32
Chapter 6. Connecting External Devices....................... 33
Connecting to Audio Equipment ..................................................................33
Connecting to the USB Connector.................................................................33
Connecting MIDI Devices ..............................................................................34
Making MIDI-related Settings .......................................................................34
MIDI send channel settings .............................................................35
Switching Local Control on and off................................................35
Transmitting a performance you recorded....................................35
Appendix........................................................................... 36
Troubleshooting...............................................................................................36
Error Messages/Other Messages ..................................................................37
Parameters Stored in Memory Backup.........................................................37
Easy Operation List .........................................................................................38
Main Specifications..........................................................................................39
Tone List ......................................................................... 240
Built-in Song List ...........................................................241
MIDI Implementation Chart.................................. 243
6
Page 9
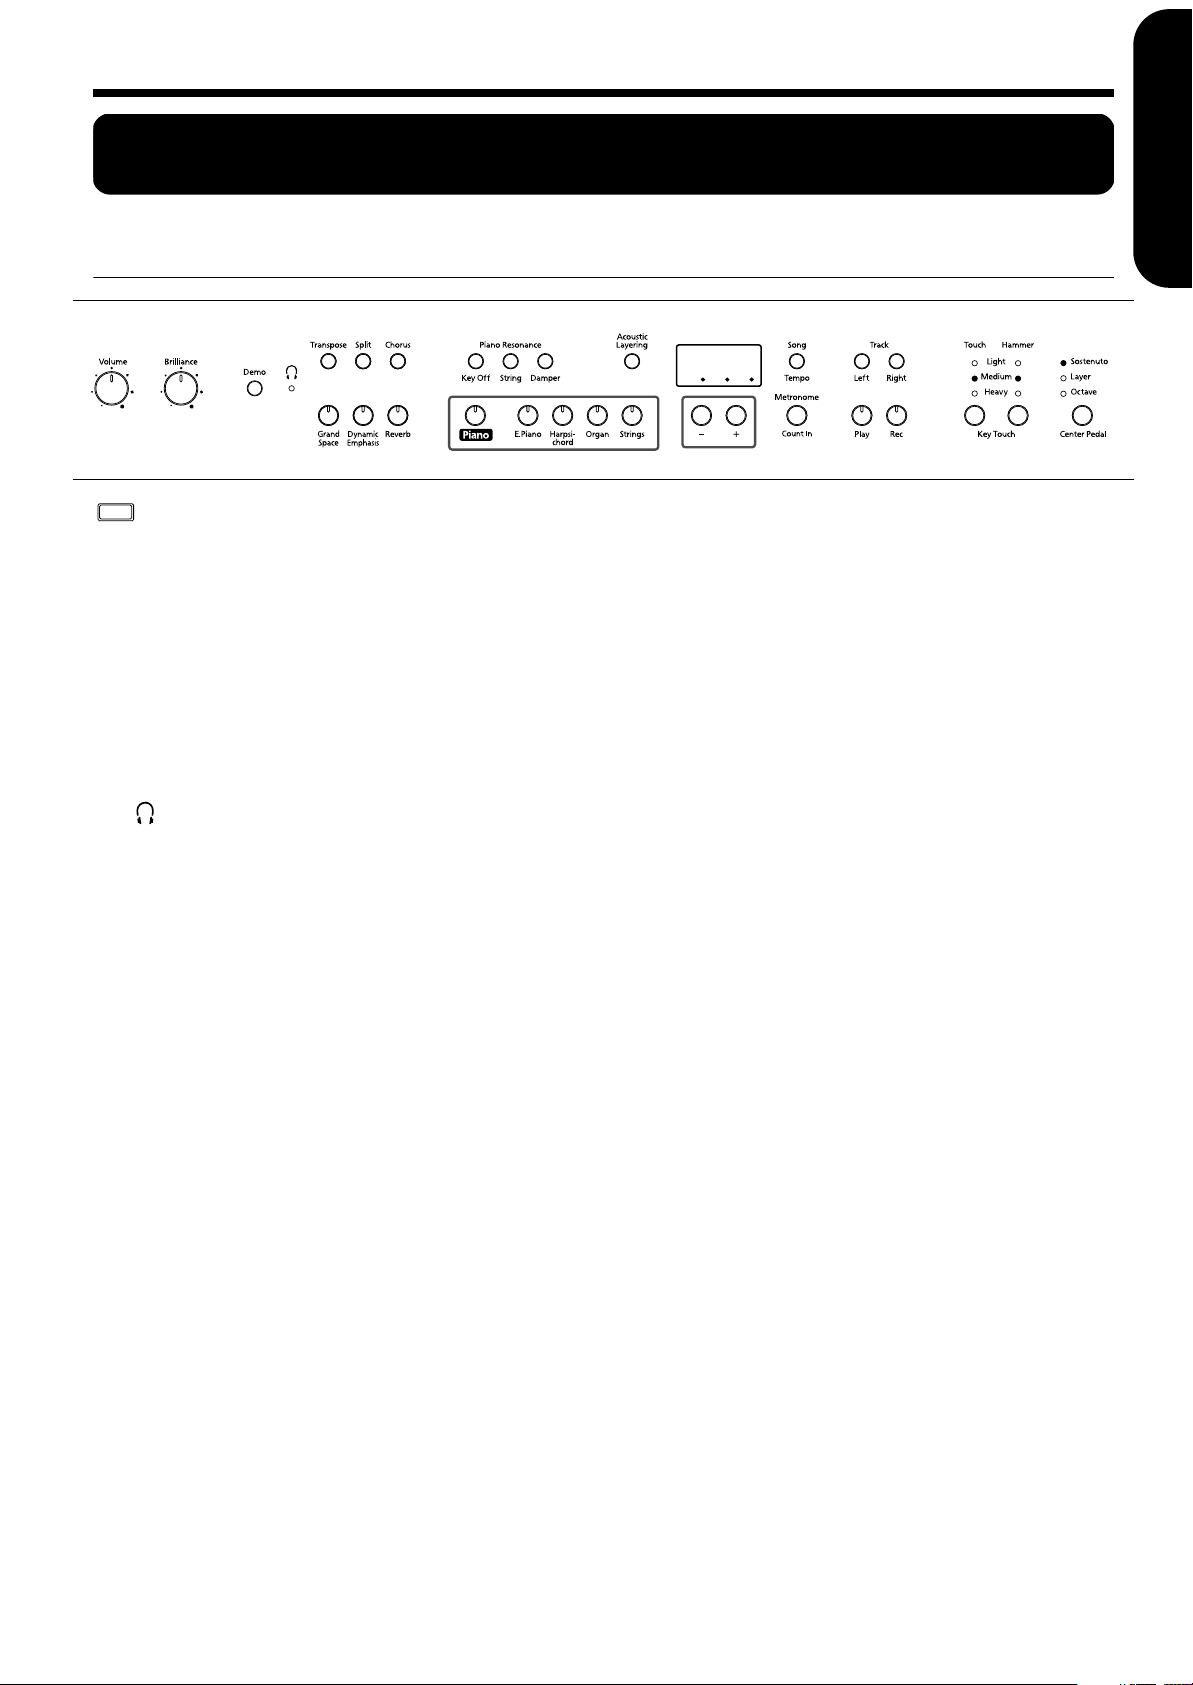
Panel Descriptions
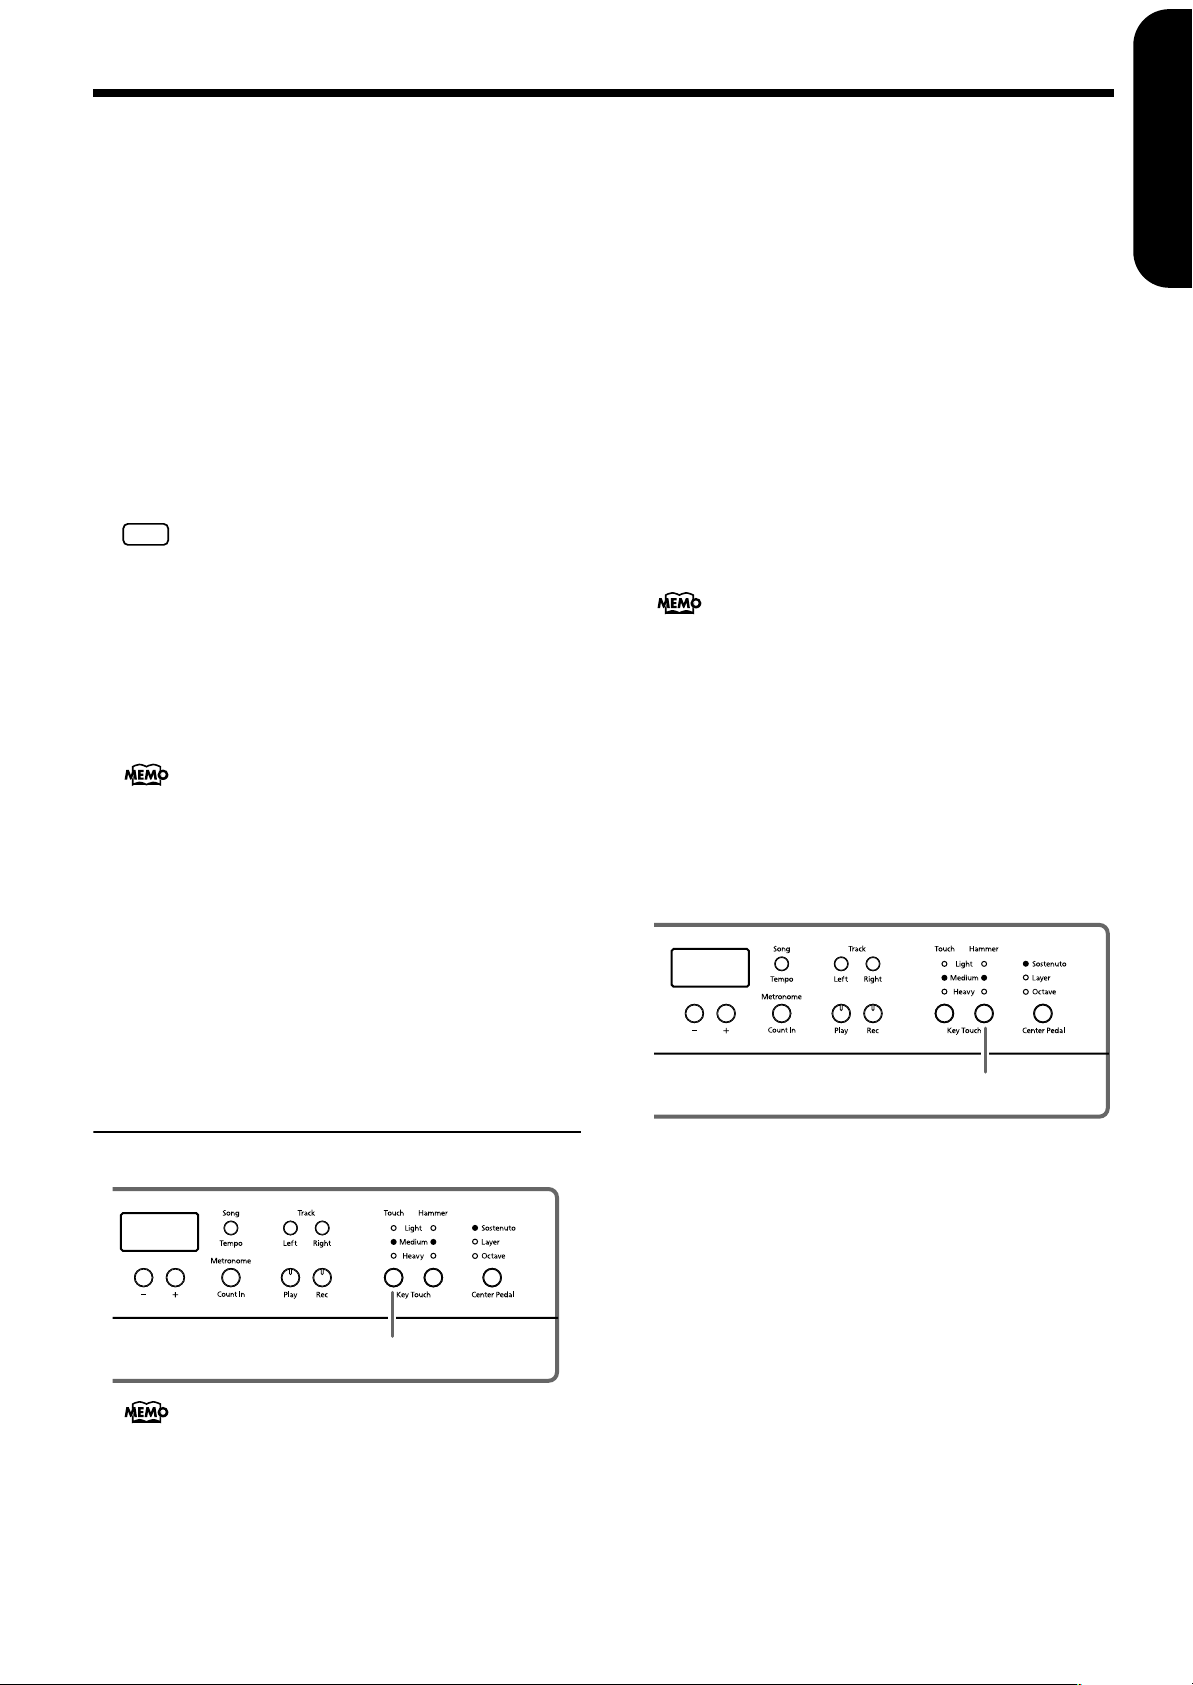
Front Panel
Panel Descriptions
ENGLISH
6
78 17
12 13 14
4325
92010 11
Power On
1
1.
[Power On] switch
Turns the power on/off (p. 11).
2.
[Volume] knob
Adjusts the overall volume level (p. 11).
3.
[Brilliance] knob
Adjusts the tone brightness (p. 11).
4.
[Demo] button
You can listen to a demo of the instrument’s tones as well
as a demo of the various functions (p. 13).
5.
[ (Headphones)] indicator
This indicator lights up when headphones are connected
to the headphone jack (p. 10).
6.
[Transpose] button
Transposes the pitch of the keyboard (p. 18).
7.
[Split] button
Divides the keyboard into right-hand and left-hand areas,
allowing you to play a different sound in each area (p.
20). You can also set a number of different functions
when this button and the [Chorus] button are held down
(p. 28–p. 32, p. 34–p. 35).
8.
[Chorus] button
Adds richness to the sound (p. 17).
9.
[Grand Space] button
Adds a sense of depth to the sound (p. 16, p. 16).
10.
[Dynamic Emphasis] button
Creates brilliance and liveliness in the sound (p. 17).
11.
[Reverb] button
Adds reverberation to the sound (p. 17).
Piano Resonance
12.
[Key Off] button
Plays the sound produced when the keys are released (p.
14).
[String] button
13.
Produces the resonance of the strings created when you
play the keyboard (p. 14).
[Damper] button
14.
Changes the resonance produced when the damper pedal
is pressed (p. 15).
15
16 19
15.
[Acoustic Layering] button
You can layer and play recommended tones that complement the piano’s own sound (p. 18).
16.
Tone buttons
They are used to choose the kinds of tones (tone groups)
played by the keyboard (p. 14).
17.
Display
The display indicates values for various settings, including the tone variation, song number, and tempo. Usually
these will appear as in the figure above.
18.
[Song/Tempo] Button
Used to select from the built-in songs (p. 12, p. 23).
Furthermore, you can press this button to alternately dis-
play the tempo and the currently selected song number
(indicated by an “S.” before it). The indicator is green
when the tempo is indicated and red when the song number is displayed.
19.
[-] [+] buttons
Allow you to select the value of various settings.
Pressing both the [-] and [+] buttons simultaneously
returns the setting of a particular item or function to its
original value.
20.
[Metronome/Count In] Button
Turns the metronome on/off (p. 21). Also featured is the
count-in sound, which can be played before the song
starts, allowing you to begin playing with the song with
perfect timing (p. 23).
TRACK
21.
[Left] button
Plays back or records a performance separately for each
hand (p. 24, p. 26–p. 27).
The left-hand performances of the built-in songs are
assigned to this button. This button and the following
[Right] button are collectively referred to as the “track
buttons.”
22.
[Right] button
Plays back or records a performance separately for each
hand (p. 24, p. 26–p. 27). The right-hand performances of
the built-in songs are assigned to this button.
182321
22
ENGLISH
24 25 26 27
ENGLISH ENGLISH ENGLISH ENGLISH
7
Page 10
HP107e – Panel Descriptions
23.
[Play] button
Starts and stops playback of built-in songs and recorded
performances (p. 12, p. 23).
Also starts/stops recording of a performance (p. 25–p.
27).
24.
[Rec] button
Puts the HP107e in recording-standby mode (p. 25–p. 27).
KEY TOUCH
25.
[Touch] button
Modifies the playing feel of the keyboard (p. 15).
Front Panel
Bottom Panel
26.
[Hammer] button
Adjusts how variations in your keyboard playing
strength will modify the timing at which notes are
sounded (p. 15).
27.
[Center Pedal] button
Switches the center pedal function (p. 21).
Rear Panel
Rear Panel
Bottom Panel
31 32 33
28 29 30
28.
Pedal connector
Connect the pedal cable of the special stand to this connector (p. 9).
29.
Input jacks
These jacks can be connected to another sound generating
device or an audio device, so that the sound of that device
will be output from the HP107e’s speakers (p. 33).
30.
Output jacks
Allows you to output the piano’s sound to sound reinforcement equipment to obtain a more powerful sound.
These can also be connected to a tape recorder or other
recording device to record a performance (p. 33).
31.
Phones jacks
A set of headphones can be connected here (p. 10).
32.
MIDI Out/In connectors
Connect to external MIDI devices to exchange performance data (p. 34).
33.
USB connector
You can connect a computer and exchange performance
data between the instrument and the computer (p. 33).
8
Page 11
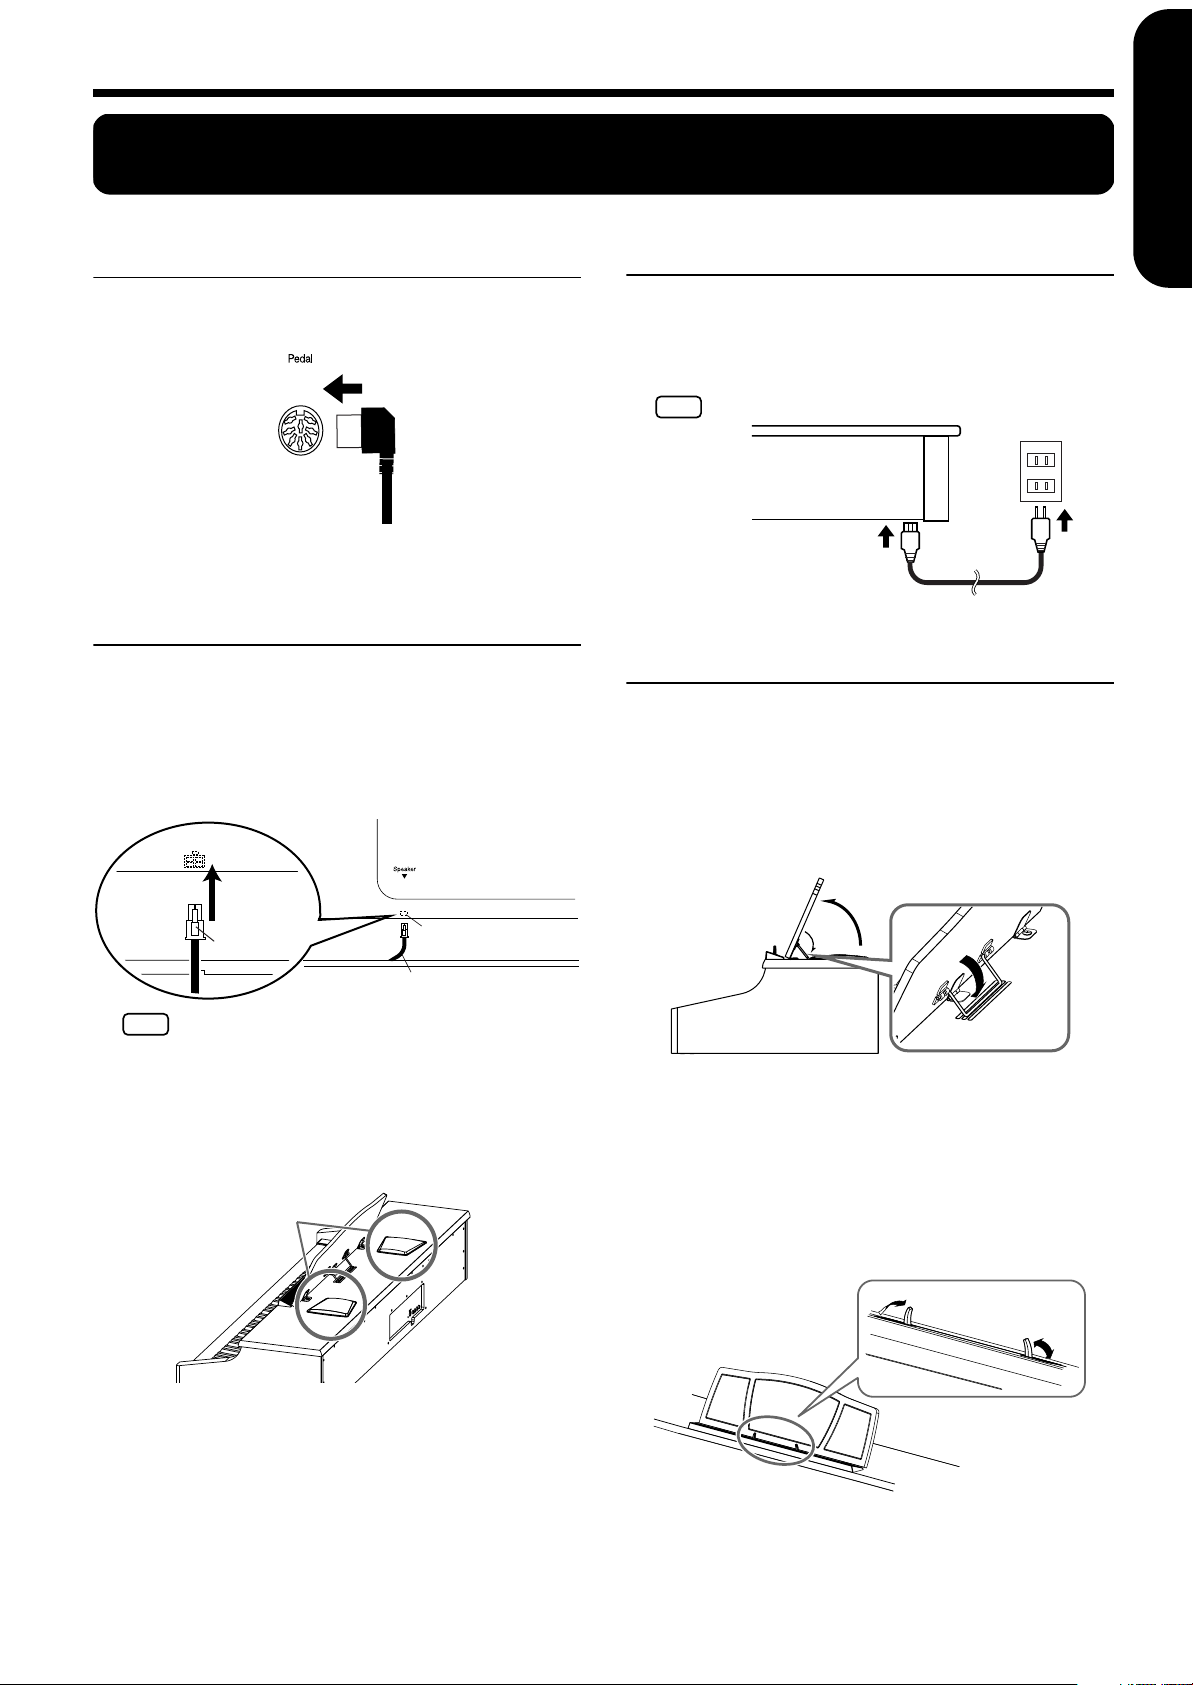
Before You Start Playing
Before You Start Playing
ENGLISH
Connecting the Pedal Cable
Insert the pedal cable into the Pedal connector on
the rear panel of the HP107e.
Connecting the Speaker
Cable
As shown in the diagram, connect the speaker
cable leading from the speaker box of the stand to
the speaker connector located on the rear bottom
of the HP107e.
Push the speaker cable in until it clicks into position.
Connect the Power Cord
1.
Insert the included power cord into the AC inlet
on the bottom panel of the HP107e.
2.
Plug the power cord into a power outlet.
Use only the attached power-supply cord.
NOTE
Setting Up the Music Rest
1.
Grasping the music rest with both hands, lift it
toward you until its in the upright position.
2.
Use the support on the back of the music rest to
keep the stand in place.
The angle of the music rest can be set to any of three positions.
ENGLISH
ENGLISH ENGLISH ENGLISH ENGLISH
Clip portion
Speaker cable
Do not put anything that contains water (e.g., flower
NOTE
vases) on this unit. Also, avoid the use of insecticides,
perfumes, alcohol, nail polish, spray cans, etc., near the
unit.
The speakers of this piano are mounted beneath the upper
surface, and face upwards. Malfunctions or accidents
may occur if liquids contact any part of the speakers.
Speakers
Speaker connector
1
2
■
Folding down the music rest
Raise the support located on the back of the music
rest, then gently fold down the music rest.
■
Using the music holders
You can use the holders to hold pages in place. When not
using the holders, leave them folded down.
9
Page 12
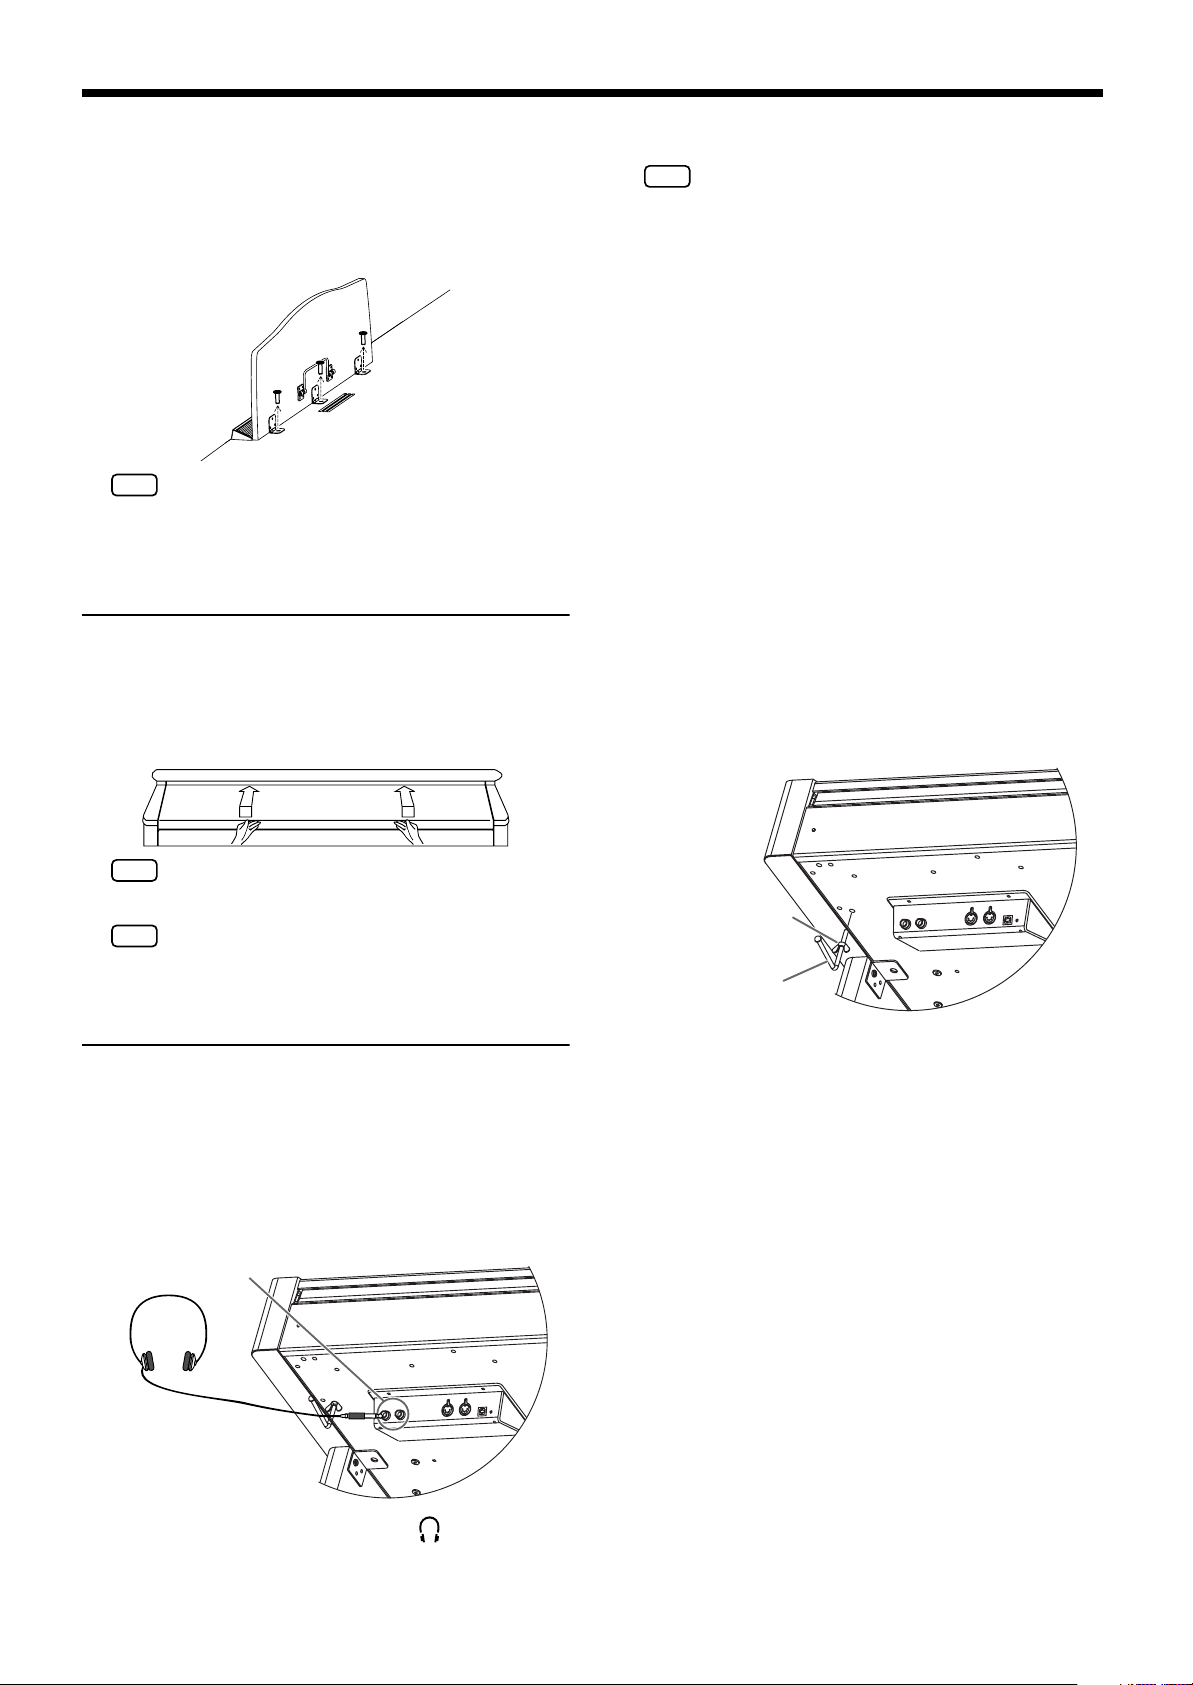
HP107e – Before You Start Playing
NOTE
■
Removing the music rest
You can remove the music rest from the piano. This
allows you to place a notebook computer on the piano.
Position the music rest so it’s upright, then remove
the three screws, as shown.
You can remove the screws using a coin.
Be careful not to lose the screws that you removed from
NOTE
the music rest, or put them where they might be swallowed by small children.
Opening/Closing the Lid
To open the lid, use both hands to lift it lightly,
and slide it away from yourself.
To close the lid, pull it gently toward yourself, and
lower it softly after it has been fully extended.
The headphone volume is adjusted by the [Volume] knob
(p. 11) of the HP107e.
Use Stereo headphones.
Make sure to use only Roland headphones. Headphones
from other manufacturers may be unable to provide sufficient volume.
Some notes on using headphones
• To prevent damage to the cord, handle the headphones only
by the headset or the plug.
• Connecting the headphones when the volume of connected
equipment is turned up may result in damage to the headphones. Lower the volume on the HP107e before plugging
in the headphones.
• Listening at excessively high volume levels will not only
damage the headphones, but may also cause hearing loss.
Use the headphones at a moderate volume level.
■
Using the headphones hook
Whenever you are not using the headphones, you can
hang them on the headphone hook at the lower left of the
HP107e.
Attaching the Headphone Hook
Press and twist the headphone hook included with the
HP107e into the hole in the bottom of the HP107e (refer to
the figure below). Turn the wing nut of headphone hook
to secure the headphone hook.
When opening and closing the lid, be careful not to let
NOTE
your fingers get caught. If small children will be using
the HP107e, adult supervision should be provided.
If you need to move the piano, make sure the lid is closed
NOTE
first to prevent accidents.
Connecting Headphones
The HP107e has two jacks for plugging in headphones. This
allows two people to listen through headphones simultaneously, making it very useful for lessons and when performing piano pieces for four hands. Additionally, this
allows you to play without having to worry about bothering
others around you, even at night.
Plug the headphones into the Phones jacks located
at the bottom left of the piano.
Phones jack x 2
Wing Nut
Headphone Hook
When headphones are connected, the [ (Headphones)]
indicator (p. 7) lights up, and sounds stop playing from
the speakers of the HP107e.
10
Page 13
Turning the Power On and
Before You Start Playing
ENGLISH
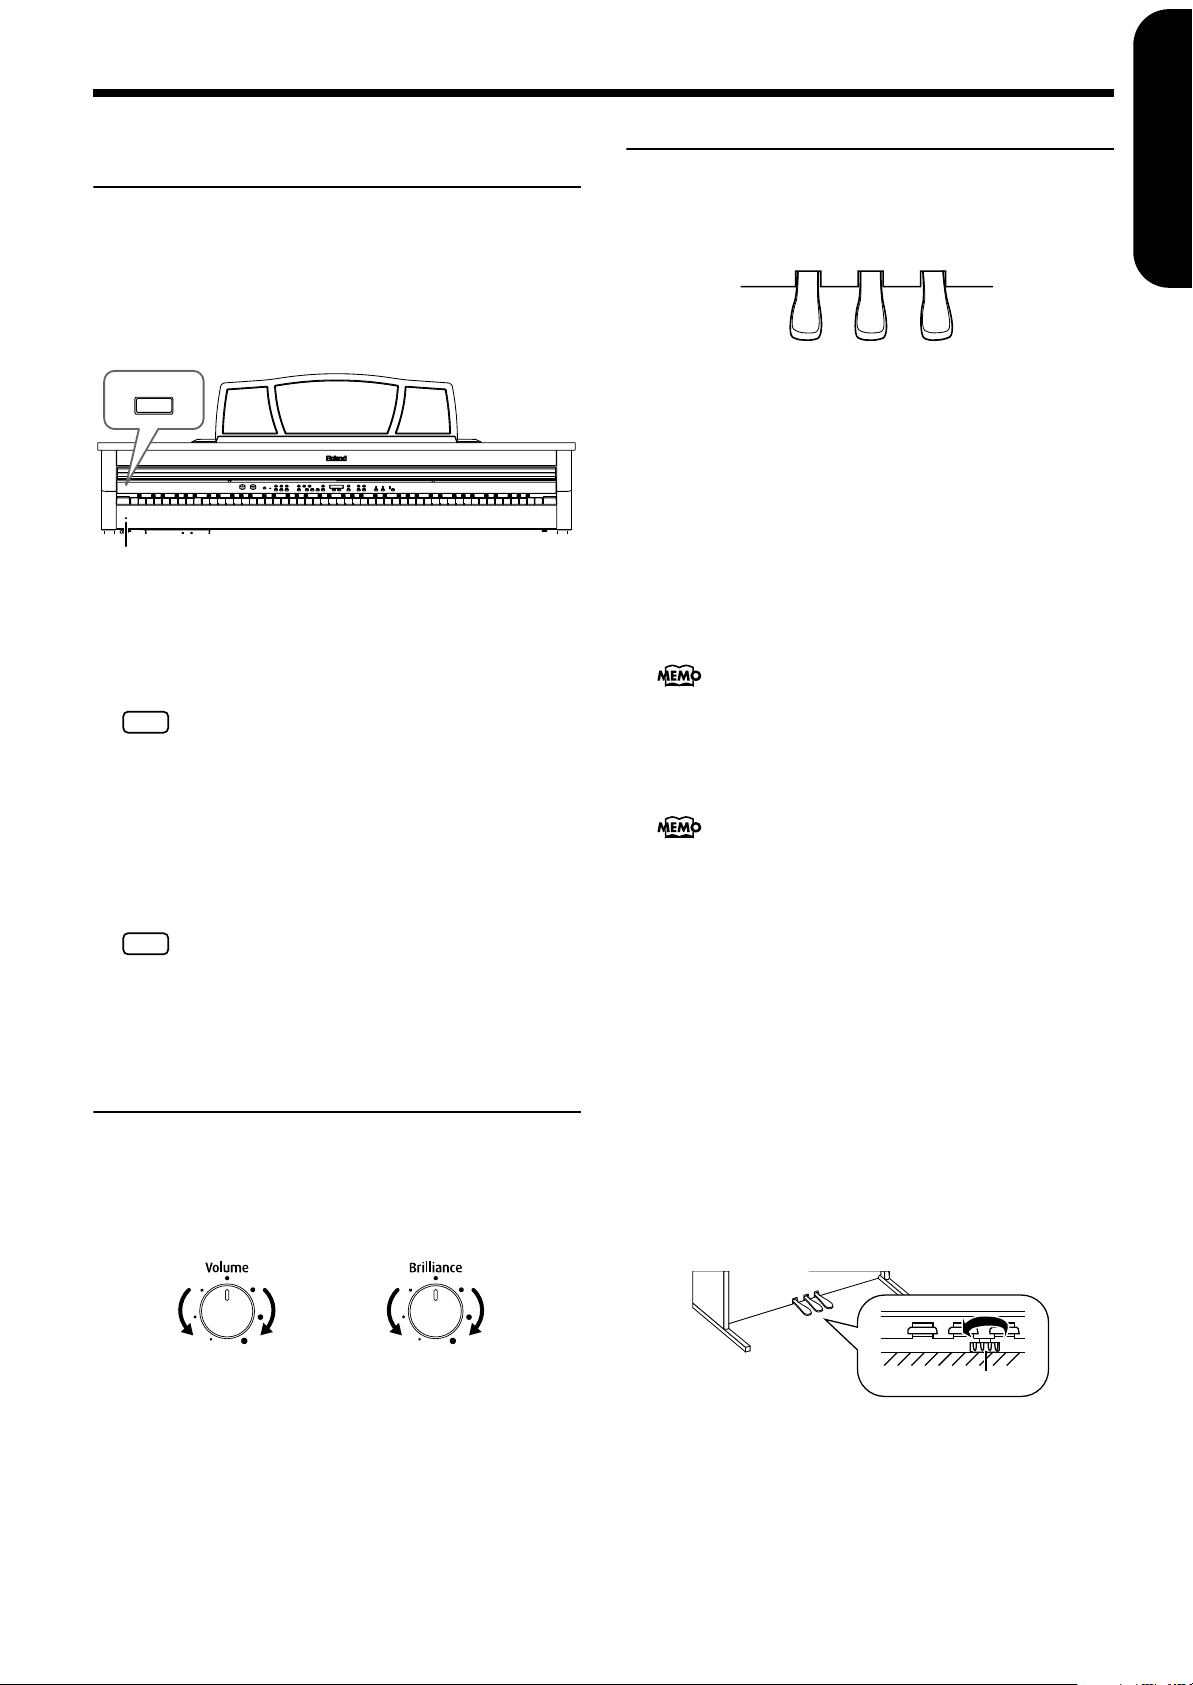
About the Pedals
Off
Turn on power to your various devices in the order specified.
By turning on devices in the wrong order, you risk causing
malfunction and/or damage to speakers and other devices.
To turn the power on, turn the [Volume] knob all
the way down, and then press the [Power On]
switch.
Power On
Power Indicator
The power will turn on, and the Power indicator at the
left front of the HP107e will light.
After a few seconds, you will be able to play the keyboard
to produce sound. Use the [Volume] knob to adjust the
volume.
This unit is equipped with a protection circuit. A brief
NOTE
interval (a few seconds) after power up is required before
the unit will operate normally.
To turn the power off, turn the [Volume] knob all
the way to the left, and press the [Power On]
switch.
The Power indicator at the left front of the HP107e will go
dark, and the power will be turned off.
If you need to turn off the power completely, first turn off
NOTE
the POWER switch, then unplug the power cord from
the power outlet. Refer to “Power Supply” (p. 4).
The pedals have the following functions, and are used
mainly for piano performance.
Soft Pedal Damper Pedal
Sostenuto Pedal
Damper pedal (right pedal)
While this pedal is pressed, notes will be sustained even
after you take your fingers off the keys.
The length of sustain will change subtly depending on
how deeply you press the pedal.
On an acoustic piano, holding down the damper pedal
will allow the remaining strings to resonate in sympathy
with the sounds that you played from the keyboard, adding a rich resonance. The HP107e simulates this sympathetic resonance.
You can change the amount of resonance applied with
the damper pedal (p. 15).
Sostenuto pedal (center pedal)
This pedal sustains only the sounds of the keys that were
already played when you pressed the pedal.
You can switch the function of the sostenuto pedal (p.
21).
Soft pedal (left pedal)
When you hold down this pedal and play the keyboard,
the sound will have a softer tone.
The softness of the tone can be varied subtly by the depth
to which you press the pedal.
ENGLISH
ENGLISH ENGLISH ENGLISH ENGLISH
Adjusting the Sound’s
Volume and Brilliance
Turn the [Volume] knob to adjust the overall volume.
Turn the [Brilliance] knob to adjust the brightness
of the sound.
Min Max
Mellow
Bright
About the adjuster
Be sure to use the adjuster underneath the pedals whenever the instrument is moved or when the pedals appear
to be unstable.
❍
Rotate the adjuster to lower it so that it is in firm contact
with the floor. If there is a gap between the pedals and
the floor, the pedals may be damaged. In particular when
placing the instrument on carpet, adjust this so that the
pedals firmly contact the floor.
Adjuster
11
Page 14
HP107e – Chapter 1. Enjoying the Built-in Songs
Chapter 1. Enjoying the Built-in Songs
■
Listening to Built-in Songs
The HP107e comes with 68 piano songs onboard.
“Chapter 3. Playing Along with the Built-in Songs” on
page 23, “Tone List” (p. 240)
■
Playing back all songs continuously (All Song
Play)
The built-in songs can be played back consecutively.
Selecting a song and playing it
3, 4
2
1
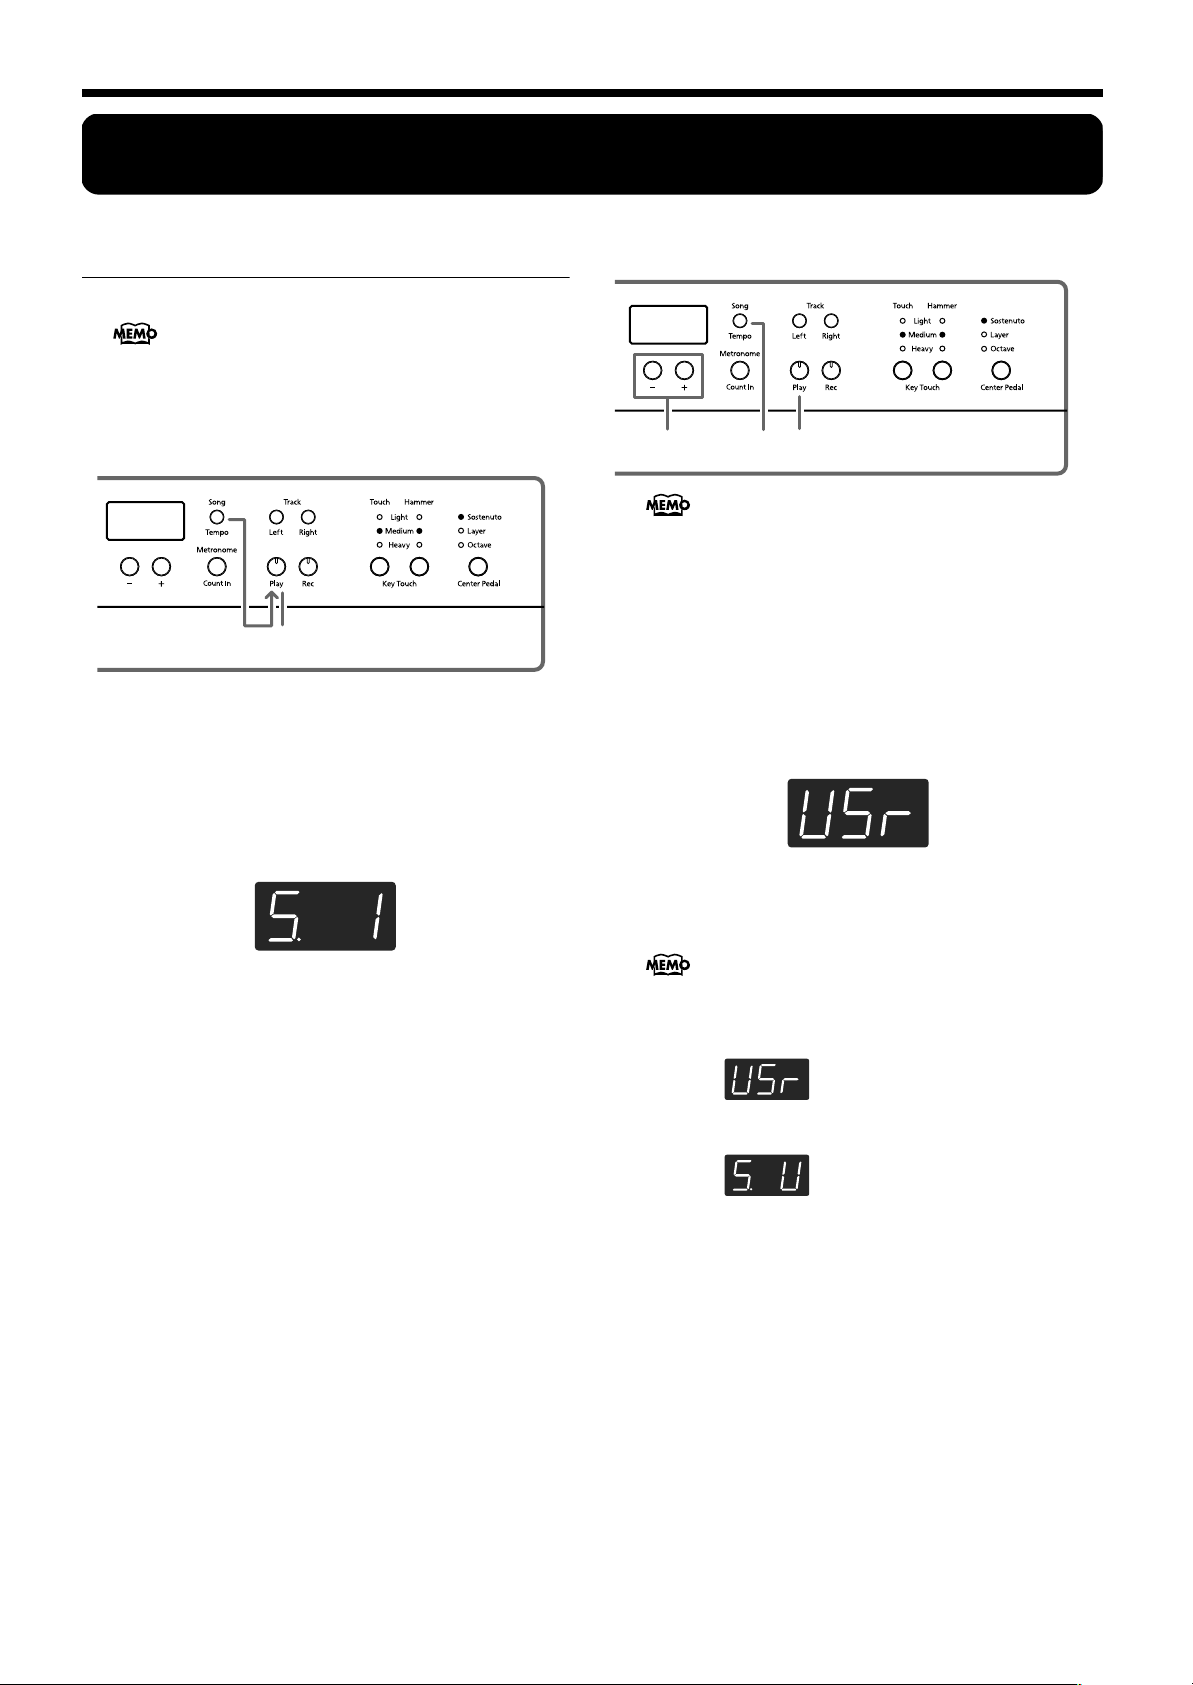
About the display for the built-in songs
USr (user) … The location where you can record your
performance. (For details on recording → p. 25)
S.1–S.68 … Built-in songs
S. U … Song saved with Song Backup (p. 31)
12
1.
Simultaneously press the [Song/Tempo] and
[Play] button.
The [Song/Tempo] button’s indicator will light, the [Play]
button’s indicator will blink, and the songs will play back
successively, starting with the currently selected song.
The song number appears in the display for several seconds.
You can press the [-] or [+] button to select the song that
you want to play back.
When all songs have been played, playback will return to
the first song and resume.
Stopping the playback
2.
Press the [Play] button.
Playback will stop.
Choosing the song to play back
1.
Press the [Song/Tempo] button, getting its indicator to light in red.
The song number appears in the display for several seconds.
2.
Press the [-] or [+] button to select a song.
Holding down the button causes the numbers to change
continuously.
Select backed up songs with the following procedure:
1 Simultaneously press the [-] and [+] buttons
so that “USr” appears in the display.
2 Press the [-] button so that “S. U” is displayed.
12
Playing back
3.
Press the [Play] button.
The button’s indicator will light, and the selected song will
play.
Stopping the playback
4.
Press the [Play] button.
The button’s indicator goes out, and playback stops. The
next time you press the [Play] button, the song that was
stopped is played from the beginning.
Page 15
Chapter 1. Enjoying the Built-in Songs
Listening to the Demo Songs
You can listen to various demo songs, including those demonstrating the piano and other tones, as well as the function
applied to the piano tones.
■
Playing Back the Tone Demo Songs
1.
Press the [Demo] button.
The button’s indicator flashes, and playback of the tone
demo songs starts.
When playback of the last song is finished, playback then
returns to the first song.
When you press any of the tone buttons while the [Demo]
button is flashing, the demo song corresponding to that
tone button is played.
Button assigned
tone demo
[Piano] Piano tone demo songs
[E. Piano] E. Piano tone demo songs
[Harpsichord] Harpsichord tone demo songs
[Organ] Organ tone demo songs
[Strings] Strings tone demo songs
[Acoustic Layering]
[Split] Demo songs using the Split function (p. 20)
Demo songs using the Acoustic Layering
function (p. 18)
Stopping the Tone Demo Songs
2.
Press the [Demo] button.
The [Demo] button’s indicator goes off, and the demo
quits.
Demo content
When a button is pressed, the demo assigned to the button
is played. Two versions of the demo will be played—one
includes the function provided by the button you’ve
pressed, the other doesn’t.
When you press the button pressed in Step 2, you can
switch between demos both with the function switched
on and off.
About the Hammer Response Function
Demo
The performance stops when the Hammer Response
function demo is selected. Hammer Response is alternately switched on and off each time you press the Key
Touch [Hammer] button.
Try playing the keyboard and see how the Hammer
Response function feels.
When Hammer Response is switched on, the sounds are
expressed more slowly as you play the keys with
greater force.
The Hammer Response function demo makes it easy to
hear how the sound will be with the function both on and
off.
Stopping the Demo of the Functions
3.
Press the [Demo] button.
The [Demo] button’s indicator goes off, and the demo
quits.
ENGLISH
ENGLISH
ENGLISH ENGLISH ENGLISH ENGLISH
■
Listening to a Demo of the Functions
You can listen to the demo of the functions that can be
applied to the piano tones.
1.
Press the [Demo] button.
The button’s indicator flashes, and playback of the tone
demo songs starts.
2.
Press any of the following buttons.
Button assigned function
demo
[Grand Space] Grand Space demo p. 16
[Dynamic Emphasis] Dynamic Emphasis demo p. 17
Piano Resonance [Key Off] Key off demo p. 14
Piano Resonance [String] String Resonance demo p. 14
Piano Resonance [Damper] Damper Resonance demo p. 15
Key Touch [Hammer] Hammer Response demo p. 15
Demo content
13
Page 16
HP107e – Chapter 2. Performance
NOTE
Chapter 2. Performance
Performing with a Variety of Sounds
The HP107e contains 36 different built-in tones. The tones are
organized into five tone groups, which are assigned to the
Tone buttons.
Selecting a tone group
1.
Press any Tone button.
The indicator of the button you pressed will light.
When you play the keyboard, you will hear a sound in the
selected tone group.
Selecting variation tones
2.
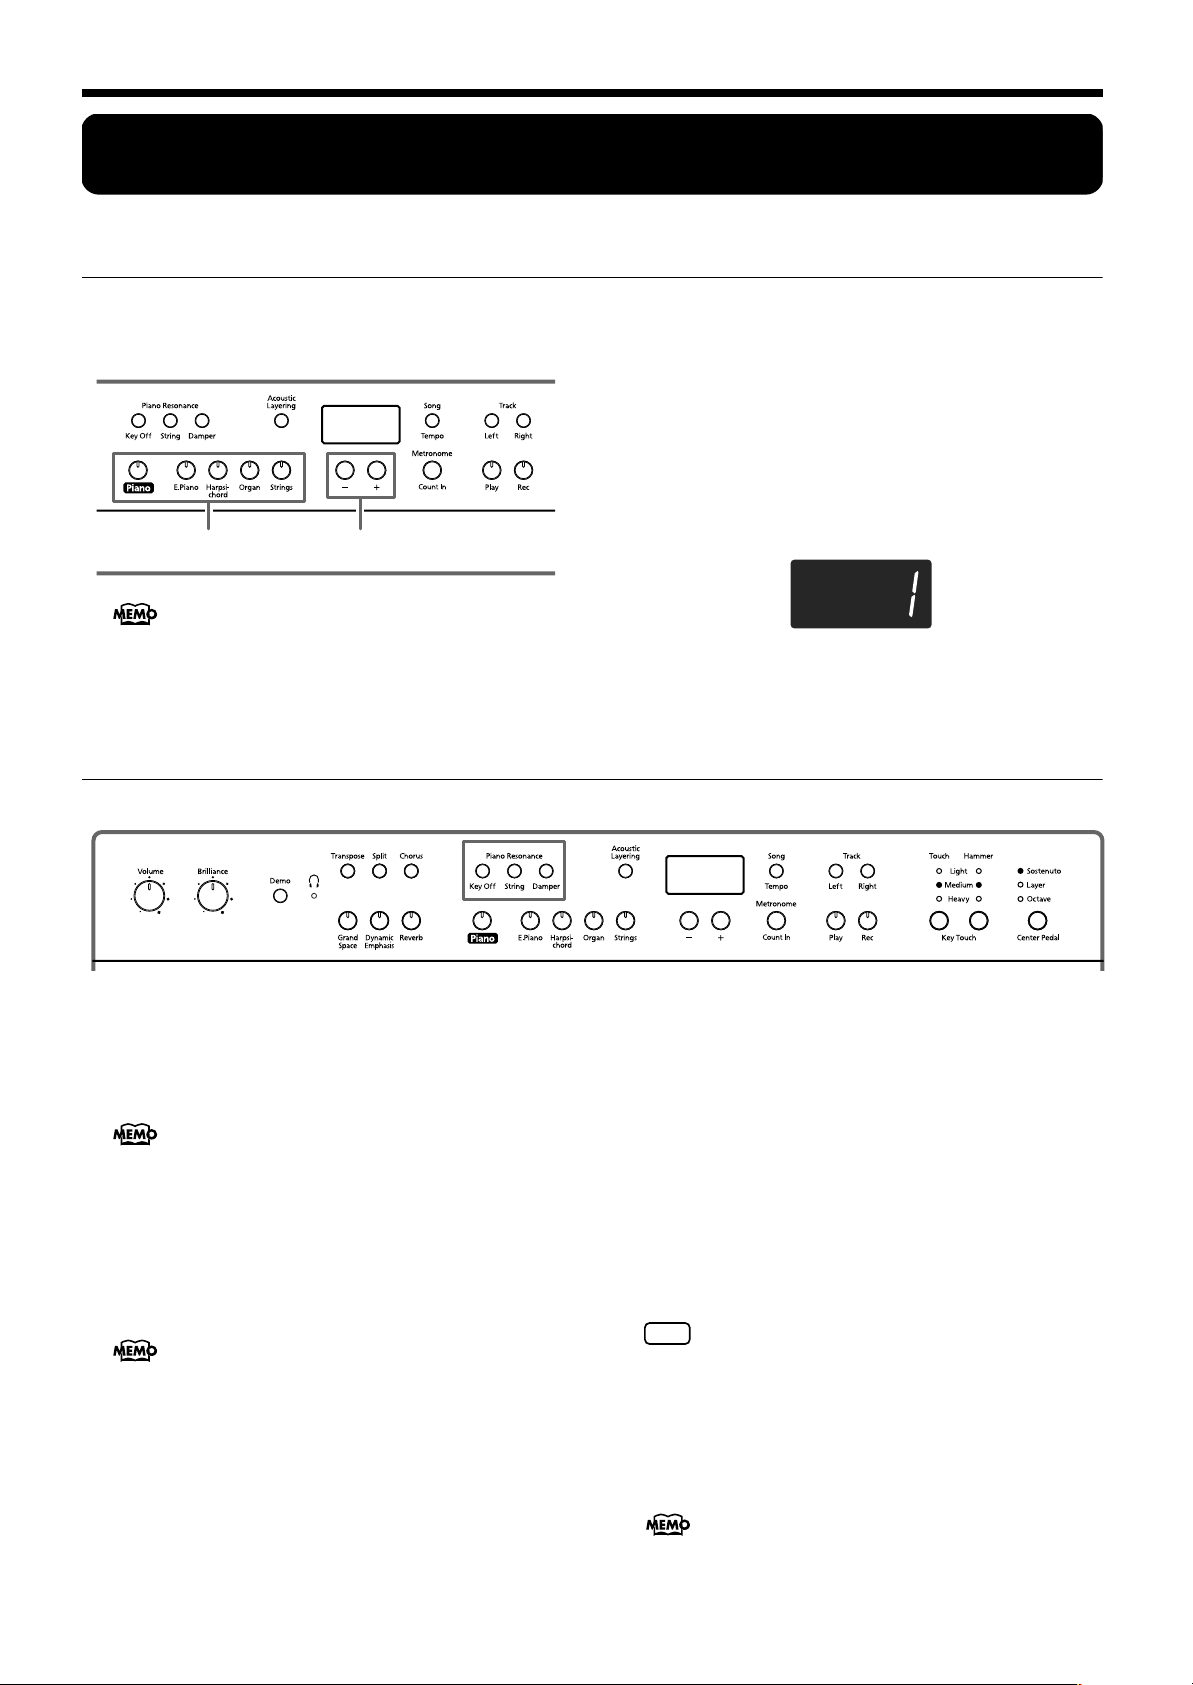
Press the [-] or [+] button.
The Tone variation number appears in the display for several seconds.
21
For more details, refer to Tone List (p. 240).
The tone you’ve selected is heard when you finger the keyboard.
Making Fine Adjustments to the Piano Sound
(Piano Resonance)
You can make fine adjustments to the sound of the piano as desired.
■
Playing Sounds When the Keys Are Released
(Key Off)
You can play the “key off” sound (the subtle sound produced when the keys are released) obtained when playing
an acoustic piano.
You can save this setting in the HP107e’s memory using
the Memory Backup function (p. 31).
1.
Press the Piano Resonance [Key Off] button, getting its indicator to light.
A distinctive sound results when you release the keys.
Press the Piano Resonance [Key Off] button once more,
causing the button’s indicator to go off, and the effect is
cancelled.
For more about the tones with which this setting is
enabled, refer to the Tone List (p. 240).
Adjusting the Volume of the Key Off Sound
2.
Hold down the Piano Resonance [Key Off] button
and press the [-] or [+] button.
You can set the volume of the sound heard when the keys
are released to any of ten different levels.
The volume increases as the value is raised.
■
Producing the Resonance of the Strings When
the Keys Are Played (String Resonance)
When you play the keys on an acoustic piano, the strings
that are already playing resonate as well. The function that
reproduces this effect is called “String Resonance.”
This setting is enabled only with the piano tones. You
cannot set this for other tones.
1.
Press the Piano Resonance [Sting] button, getting
its indicator to light.
The String Resonance function is switched on. Press the
Piano Resonance [String] button once more, causing the
button’s indicator to go off, and the effect is cancelled.
You can save this setting in the HP107e’s memory using
the Memory Backup function (p. 31).
14
Page 17
Chapter 2. Performance
Adjusting the Depth of the Resonance
2.
Hold down the Piano Resonance [String] button
and press the [-] or [+] button.
You can adjust the resonance depth (the volume of the resonance) to any of ten levels.
More resonance effect is applied as the value is increased.
■
Having Resonance Played When You Press
the Damper Pedal (Damper Resonance)
You can change the volume of the damper pedal resonance.
On an acoustic piano, depressing the damper pedal makes
the notes you play resonate with other strings, adding rich
reverberations and fatness to the sound. The damper
pedal on the HP107e recreates this resonance (sympathetic
resonance) when depressed.
This setting is enabled only with the piano tones. You
NOTE
cannot set this for other tones.
1.
Hold down the Piano Resonance [Damper] button,
getting its indicator to light.
The Damper Resonance function is switched on.
Press the Piano Resonance [Damper] button once more,
causing the button’s indicator to go off, and the effect is
cancelled.
You can save this setting in the HP107e’s memory using
the Memory Backup function (p. 31).
Adjusting the Depth of the Resonance
2.
Hold down the Piano Resonance [Damper] button,
and press the [-] or [+] button.
You can select from ten levels of depth for the resonant
sound (resonance level).
Larger values will produce a deeper effect.
“Light” Lit. Fortissimo (ff) can be produced by playing
less strongly than usual, making the keyboard feel lighter.
This setting makes it easy to play, even for children.
“Medium” Lit. This allows you to play using the most natural touch. This is the closest to the touch of an acoustic
piano.
“Heavy” Lit. Fortissimo (ff) cannot be produced unless
you play more strongly than usual, making the keyboard
feel heavier. Dynamic fingering adds even more feeling to
what you play.
All Indicators Off. Fixed. Sounds at a fixed volume,
regardless of your keyboard playing strength.
■
Changing the Timing of Sounds According to
the Force Used to Press the Keys
(Hammer Response)
This adjusts how your playing strength will affect the timing at which the note sounds. This is called the “Hammer
Response” function.
You can save this setting in the HP107e’s memory using
the Memory Backup function (p. 31).
On an acoustic piano, pressing a key moves a hammer,
which strikes a string to produce sound. If you press the
key softly, the hammer will move slowly, meaning that it
will take slightly longer (in comparison to a stronglyplayed note) from the moment you press the key until the
sound is produced.
If the Hammer Response function is turned on, the time
between the moment you press a key until the sound is
heard will change depending on the strength with which
you play. As you play more softly, this time will become
longer.
ENGLISH
ENGLISH
ENGLISH ENGLISH ENGLISH ENGLISH
Adjusting the Keyboard
Touch (Key Touch)
You can adjust the touch (playing feel) of the keyboard.
1
You can save this setting in the HP107e’s memory using
the Memory Backup function (p. 31).
1.
Press the Key Touch [Touch] button.
Each time you press the Key Touch [Touch] button, the
indicator that is lit switches, and the touch changes.
1
1.
Press the Key Touch [Hammer] button to get the
appropriate indicator to light.
“Light” Lit. The response is faster when the keys are
pressed gently.
“Medium” Lit. The regular timing is used when the keys
are pressed gently.
“Heavy” Lit. The timing of the sounds is delayed when the
keys are pressed gently.
All Indicators Off. The Hammer Response function is cancelled. The sound is played immediately, regardless of the
force with which the keys are played (velocity).
15
Page 18
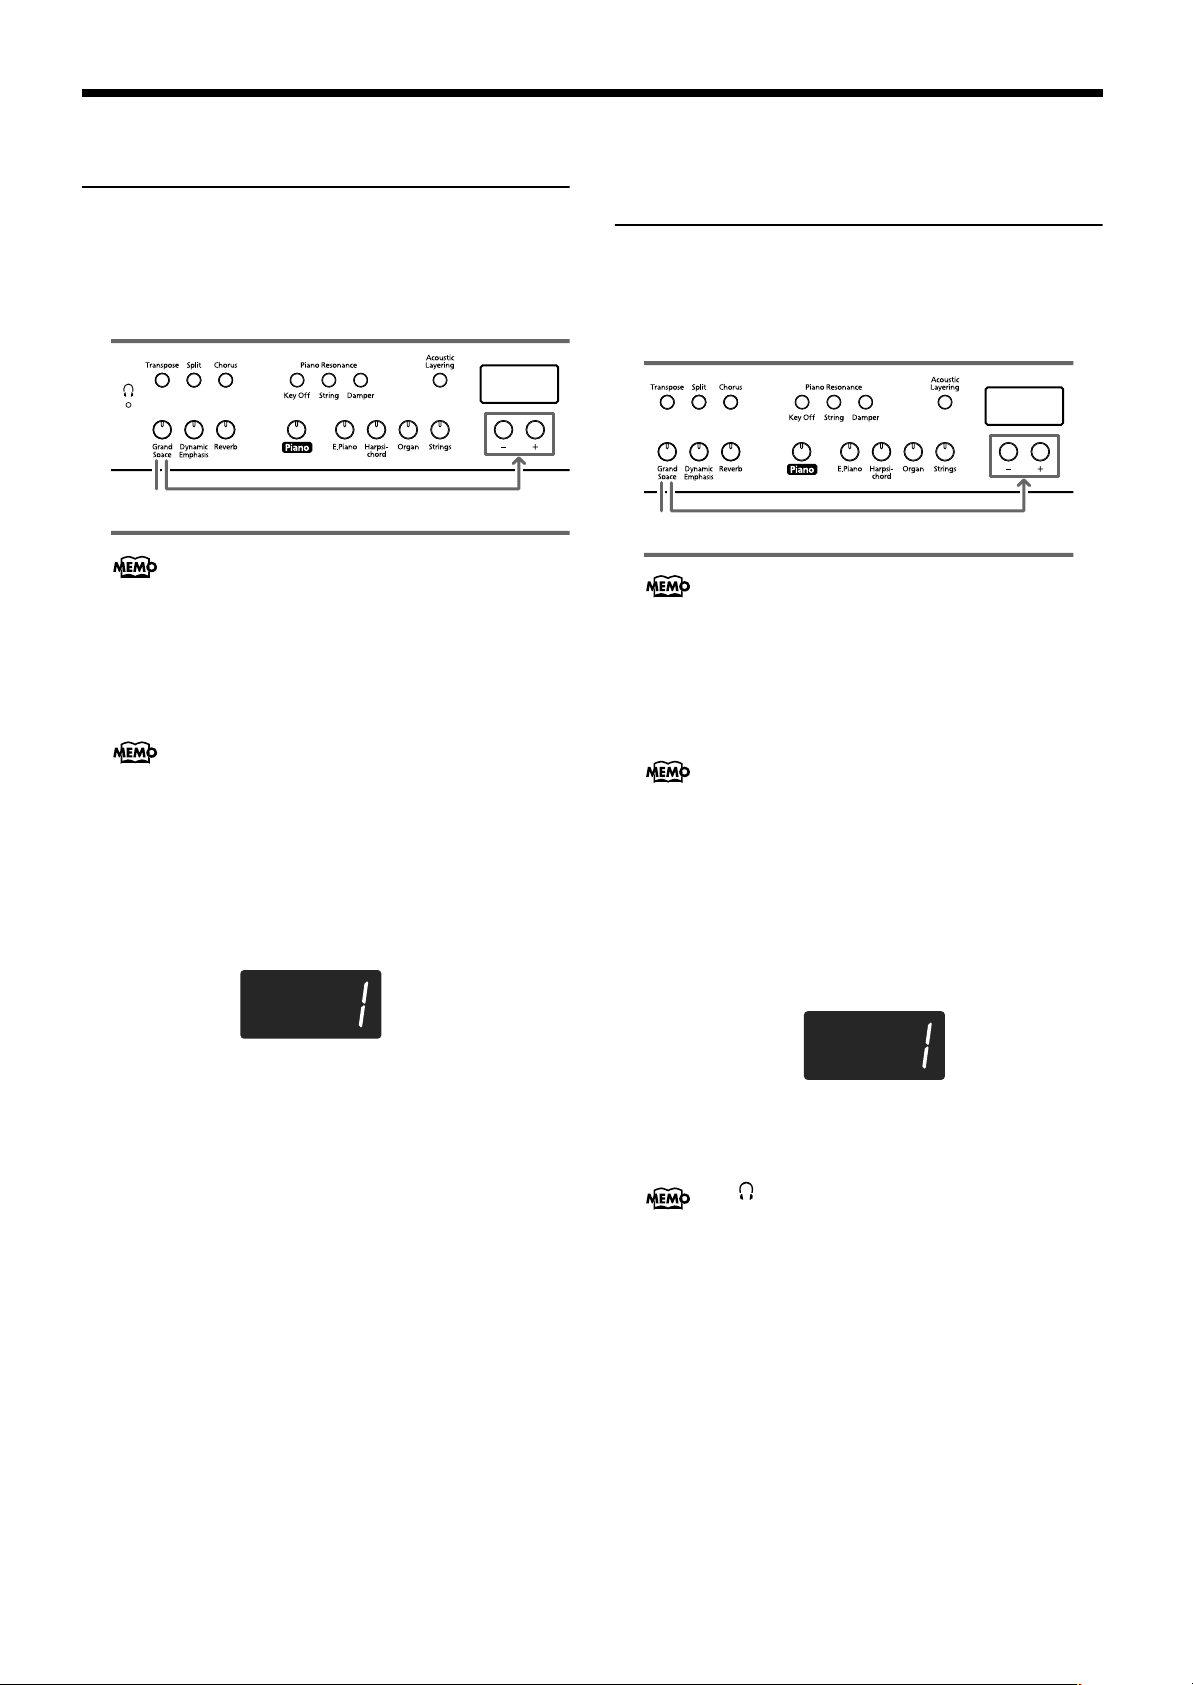
HP107e – Chapter 2. Performance
Adding a Sense of Depth to
the Sound (Grand Space)
The HP107e includes a “Grand Space” function that allows
you to get sounds that have a sense of depth like you get by
playing an acoustic piano. Using this function gives you the
natural-sounding reverberation and breadth of sound that an
acoustic piano provides.
1
You can save this setting in the HP107e’s memory using
the Memory Backup function (p. 31).
1.
Press the [Grand Space] button, getting its indicator to light.
The Grand Space function is switched on, giving the
sound a greater sense of depth.
When Grand Space Mode (p. 30) is set to “1” and a pair
of headphones is connected, the sense of depth is optimized for headphones, and when no headphones are connected, the optimal depth for speakers is selected.
2.
Hold down the [Grand Space] button, and press
the [-] or [+] button.
You can adjust the sense of depth to any of four levels.
A greater sense of depth is produced as the value is
increased.
2
Adding the Right Sense of
Depth for Headphones
(Grand Space)
You can achieve the kind of sonic depth produced with a
grand piano through headphones as well. Using this function
provides you with the natural reverberation and breadth in
the sound provided by an acoustic piano.
1
You can save this setting in the HP107e’s memory using
the Memory Backup function (p. 31).
1.
Press the [Grand Space] button, getting its indicator to light.
The Grand Space function is switched on, giving the
sound a greater sense of depth.
When Grand Space Mode (p. 30) is set to “1” and a pair
of headphones is connected, the sense of depth is optimized for headphones, and when no headphones are connected, the optimal depth for speakers is selected.
2.
Hold down the [Grand Space] button, and press
the [-] or [+] button.
You can adjust the sense of depth to any of four levels.
A greater sense of depth is produced as the value is
increased.
2
3.
To cancel the Grand Space function, press the
[Grand Space] button once more so its illumination is turned off.
16
3.
To cancel the Grand Space function, press the
[Grand Space] button once more so its illumination is turned off.
The [ (Headphones)] indicator lights up when headphones are connected.
Page 19
Adding Liveliness to the
NOTE
Chapter 2. Performance
ENGLISH
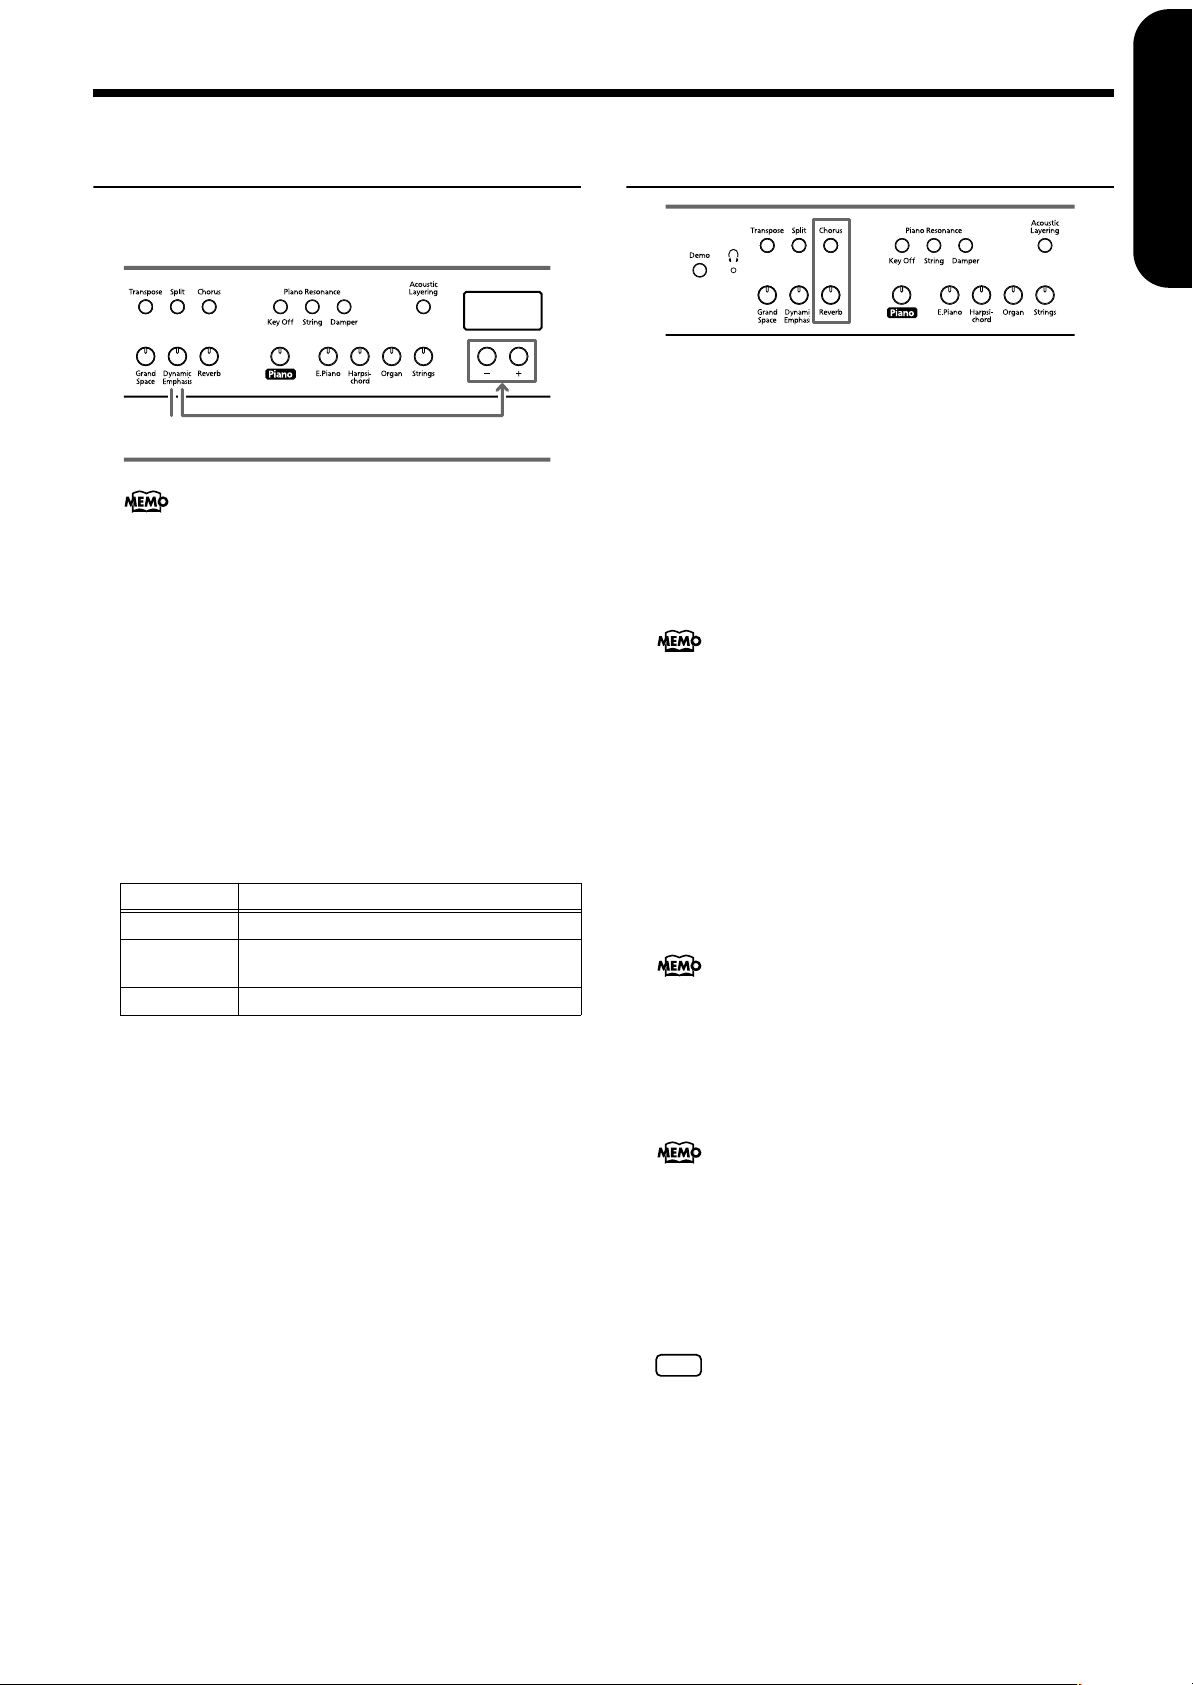
Applying Effects to the
Sound (Dynamic Emphasis)
You can add liveliness to the sound to give it superb clarity
and distinctness.
1
You can save this setting in the HP107e’s memory using
the Memory Backup function (p. 31).
1.
Press the [Dynamic Emphasis] button, getting its
indicator to light.
The Dynamic Emphasis function is switched on, enlivening the sound.
2.
To cancel the Dynamic Emphasis function, press
the [Dynamic Emphasis] button once more so its
illumination is turned off.
Changing the Dynamic Emphasis Settings
3.
Hold down the [Dynamic Emphasis] button, and
press the [-] or [+] button.
Indicator Description
1 Creates a sound with boosted bass and treble.
2
3 Creates a sound with boosted bass.
Produces a sound with chords in the low registers that are clear and distinct.
3
Sound
■
Adding reverberation to the sound (Reverb)
By applying the reverb effect you can produce a pleasant
reverberation, making it sound as though you were performing in a concert hall.
1.
Press the [Reverb] button.
The button’s indicator will light, and a reverb effect will be
applied to the sound.
To cancel the reverb effect, press the [Reverb] button, getting its indicator to go dark.
You can save the reverb on/off setting as well as the setting for the amount of reverb applied in the HP107e’s
memory using the Memory Backup function (p. 31).
■
Adding richness to the sound (Chorus)
By adding the chorus effect, you can give the sound
greater dimension, with more fatness and breadth.
1.
Press the [Chorus] button.
The button’s indicator will light, and a chorus effect will be
applied to the sound.
To cancel the chorus effect, press the [Chorus] button, getting its indicator to go dark.
You can save separate chorus effect on/off settings to
each tone individually. The original settings are restored
when the power is turned off.
ENGLISH
ENGLISH ENGLISH ENGLISH ENGLISH
■
Changing the amount of effect applied
The amount (depth) of the reverb and chorus effects can be
set to any of ten levels.
With the factory settings, the reverb and chorus are set to
“5.”
Changing the depth of the reverb effect
1.
Hold down the [Reverb] button and press the [-] or
[+] button.
The currently specified value will be displayed.Higher
values will produce a deeper effect.
You cannot save separate reverb settings to each tone
individually.
Changing the depth of the chorus effect
1.
Hold down the [Chorus] button and press the [-] or
[+] button.
The currently specified value will be displayed. Higher
values will produce a deeper effect.
17
Page 20
HP107e – Chapter 2. Performance
Transposing the Key of the
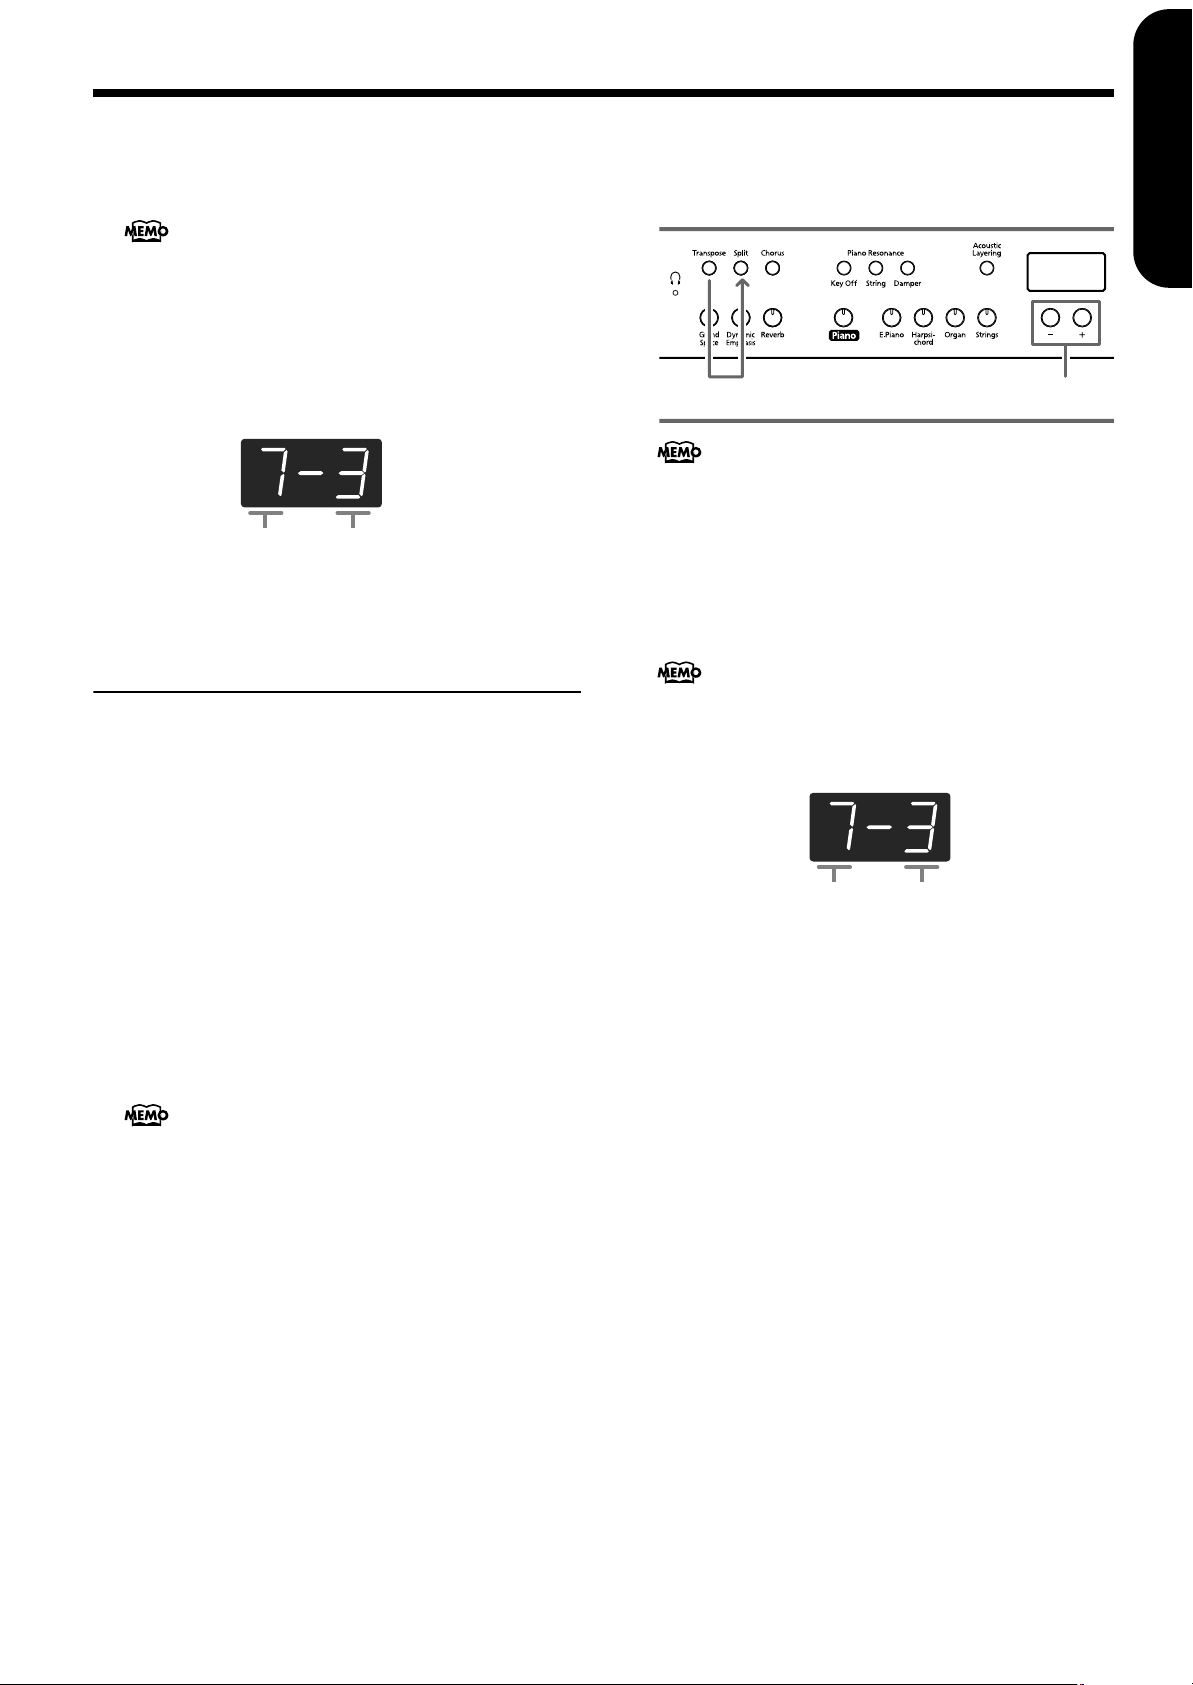
Keyboard (Transpose)
By using the “Transpose function,” you can transpose your
performance without changing the notes you play. For example, even if the song is in a difficult key with numerous
sharps (#) or flats (b), you can transpose it to a key that is easier for you to play.
When accompanying a vocalist, you can easily transpose the
pitch to a range that is comfortable for the singer, while still
playing the notes as written (i.e., with the same fingering
positions).
1
1.
Continue to hold down the [Transpose] button,
and press a note to indicate the tonic of the key to
which you want to transpose.
The button’s indicator will light, and the keyboard will be
transposed.
When you hold down the [Transpose] button, the currently specified value will be displayed.
You can also transpose by holding down the [Transpose]
button and pressing the [-] or [+] button.
If you hold down the [Transpose] button and press the [-]
and [+] buttons simultaneously, the setting will return to
the original value (0).
This can be set in a range of -6–0–5 (semitone steps).
For example, if you want the E pitch to sound when you
play the C key, hold down the [Transpose] button and
press the E key.
Counting from C as a reference point, one moves up four
keys, including the black keys, to reach E, thus “4” appears
in the display.
If you play C E G It will sound E G# B
When the transpose value is set to “0,” the button’s indicator will remain dark even if you press the [Transpose] button.
To cancel the transpose function, press the [Transpose]
button, extinguishing its indicator.
When you press the [Transpose] button once again, getting its indicator to light, the keyboard will be transposed
to the note you specified here.
This setting returns to the original value (0) when you
turn off the power.
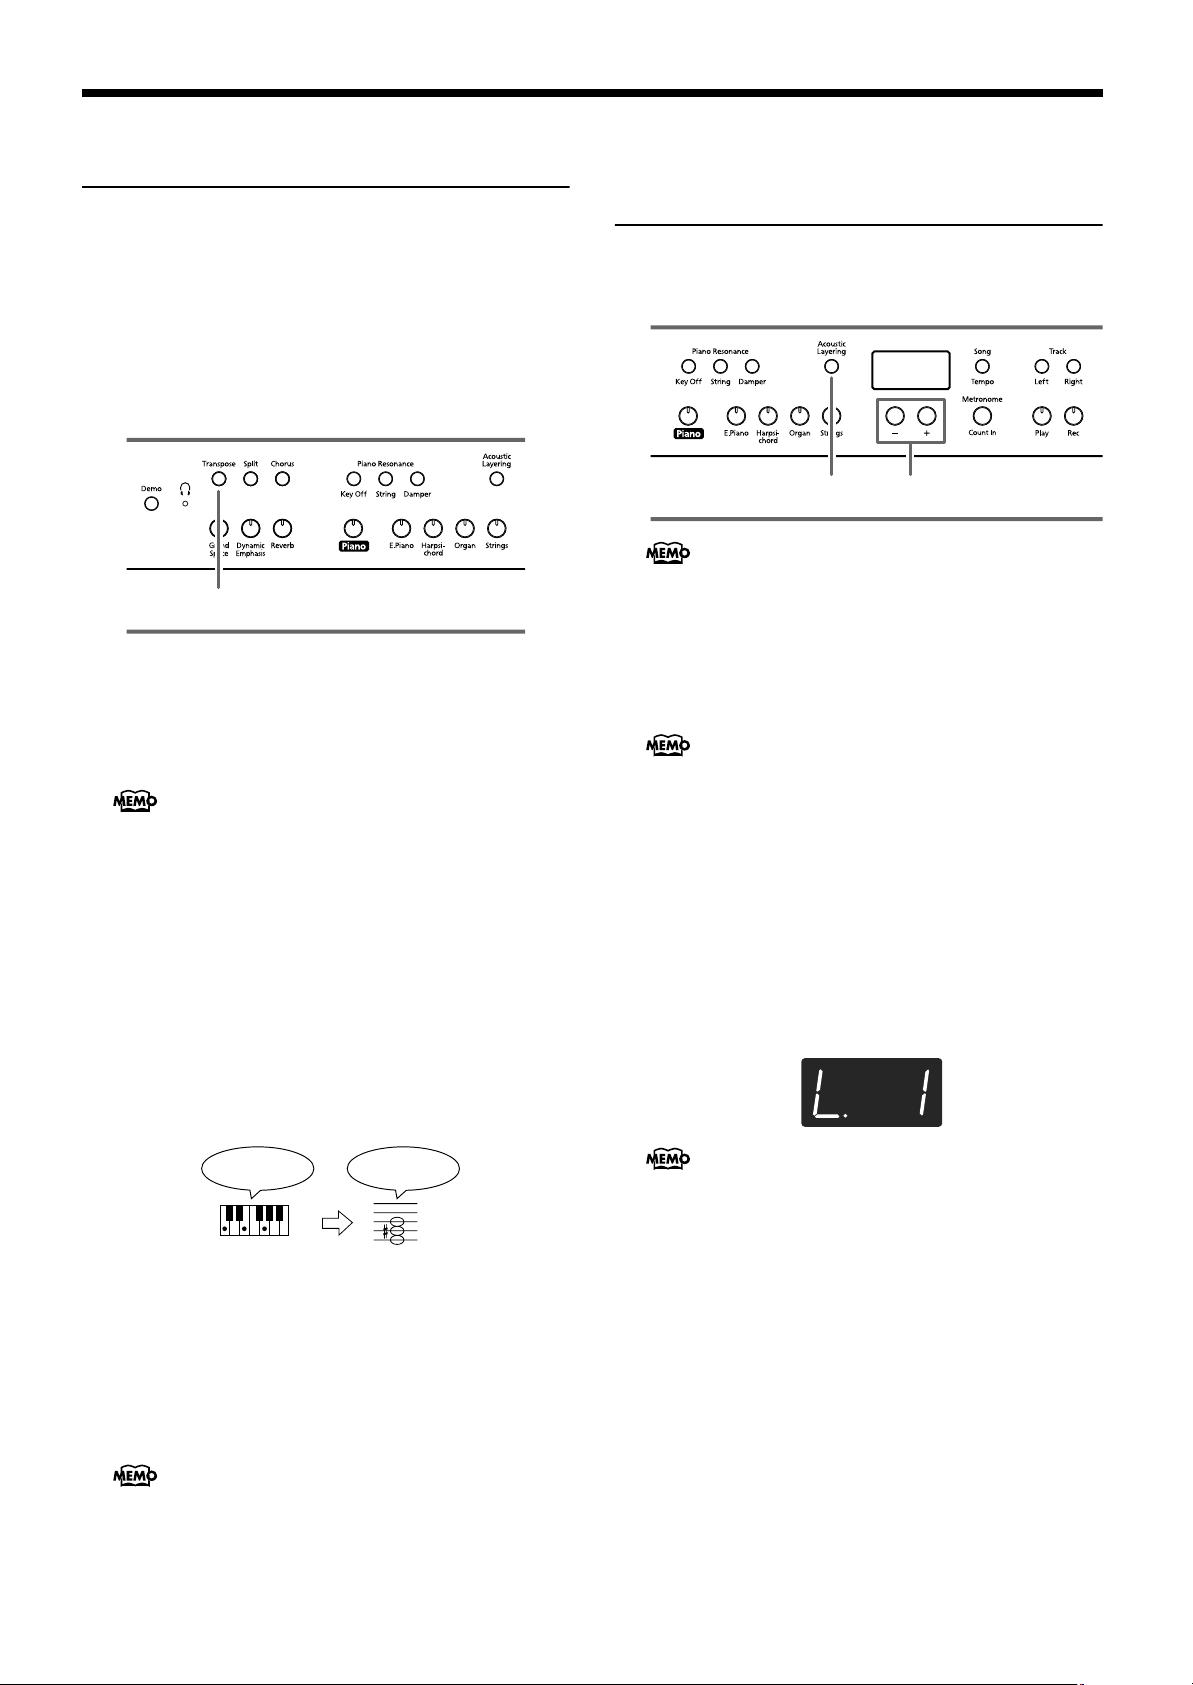
Layering Complementary
Sounds with the Piano Tones
(Acoustic Layering)
With the HP107e, you can easily select the perfect tones to
complement the piano tone and play together with the piano
tone. This feature is called the “Acoustic Layering function.”
21
You can change the pitch of the Layer tone in octave
steps (p. 30).
First have a piano tone selected (p. 14).
1.
Press the [Acoustic Layering] button, getting its
indicator to light.
When you play the keyboard, the piano tone and the tone
complementing it are layered and played together.
When you want to layer sounds to tones other than the
piano tone, press the tone button, then select the tone to
be used as the basis.
Selecting the Tone to Be Layered with the
Piano Tone
2.
Use the [-] and [+] buttons to select the layered
tone.
The song number appears in the display for several seconds.
The number for the tone layered with the piano tone (the
layer tone) has “L.” appended to it.
When “Layer” is selected as the center pedal setting, the
Acoustic Layering function is switched on automatically (p. 18). In this case, you can adjust the volume of
the tone layered with the piano tone with the pedal.
When you play the keyboard, the piano tone and the tone
you have selected are layered and played together.
18
Page 21
■
Changing the Volume Balance for Acoustic
Layering
You can adjust the balance in volume between the two
selected tones when performing with Acoustic Layering.
When the volume balance is changed with Acoustic Layering in effect, the Dual Balance also changes to the same
volume balance settings (p. 19).
1.
Hold down the [Acoustic Layering] button and
press the [-] or [+] button.
The volume balance changes.
To return to the original volume balance, press the [-] and
[+] buttons simultaneously.
Volume of the Piano tone Volume of Layer Tone
Playing Two Sounds
Together (Dual Performance)
Simultaneously playing two tones when one key is pressed is
called “Dual performance.” You can select the tone you want
to have layered by pressing the corresponding tone button.
Chapter 2. Performance
■
Adjusting the volume balance in Dual performance (Dual Balance)
You can change the volume balance between the two layered sounds in Dual performance.
1
You can save this setting in the HP107e’s memory using
the Memory Backup function (p. 31).
1.
Hold down the [Transpose] button, and press the
[Split] button.
The indicators of the buttons you pressed will blink.
The current volume balance appears in the display.
2.
Press the [-] or [+] button to change the value.
The volume balance changes.
You can also change the volume balance by holding
down the [Acoustic Layering] button and pressing the
[+] or [-] button.
To return to the original volume balance, press the [-] and
[+] buttons simultaneously.
2
ENGLISH
ENGLISH
ENGLISH ENGLISH ENGLISH ENGLISH
1.
Simultaneously press the two Tone buttons that
you want to play together.
The indicator of the button you pressed will light.
When you play the keyboard, the tones of the two Tone
buttons you selected will sound simultaneously.
To cancel Dual performance, press any Tone button.
To change the tone of the right button of
the two selected tones
2.
Press the [-] or [+] button.
Dual performance now features the tone of the left side’s
tone button along with the newly selected tone.
You can change the pitch of the tone of the right button
in octave steps (p. 30).
To change the tone of the left button of the
two selected tones
Cancel the Dual performance, and then re-select the tone.
Press the two Tone buttons that you want to play together.
Volume of the left button tone Volume of the right button tone
Press any button other than the [-] [+] buttons, and the button’s indicator will return to the previous state.
19
Page 22
HP107e – Chapter 2. Performance
Playing Different Tones with
the Left and Right Hands
(Split)
Dividing the keyboard into right-hand and left-hand areas,
then playing different sounds in each is called “Split performance.” The boundary key is called the “split point.”
Split Point (Factory setting: F#3)
C1 D1 E1 F1 G1 A1 B1A0 B0 C2 C3 C4 C5
…
Right-hand ToneLeft-hand Tone
1
Changing tone played by the right hand
Cancel Split performance, and then re-select the tone.
In Split performance, the damper pedal will be applied
only to the right-hand area of the keyboard. If you want
the damper pedal to be applied to the left-hand area, refer
to Applying the damper pedal to the left-hand
keyboard area (p. 30).
■
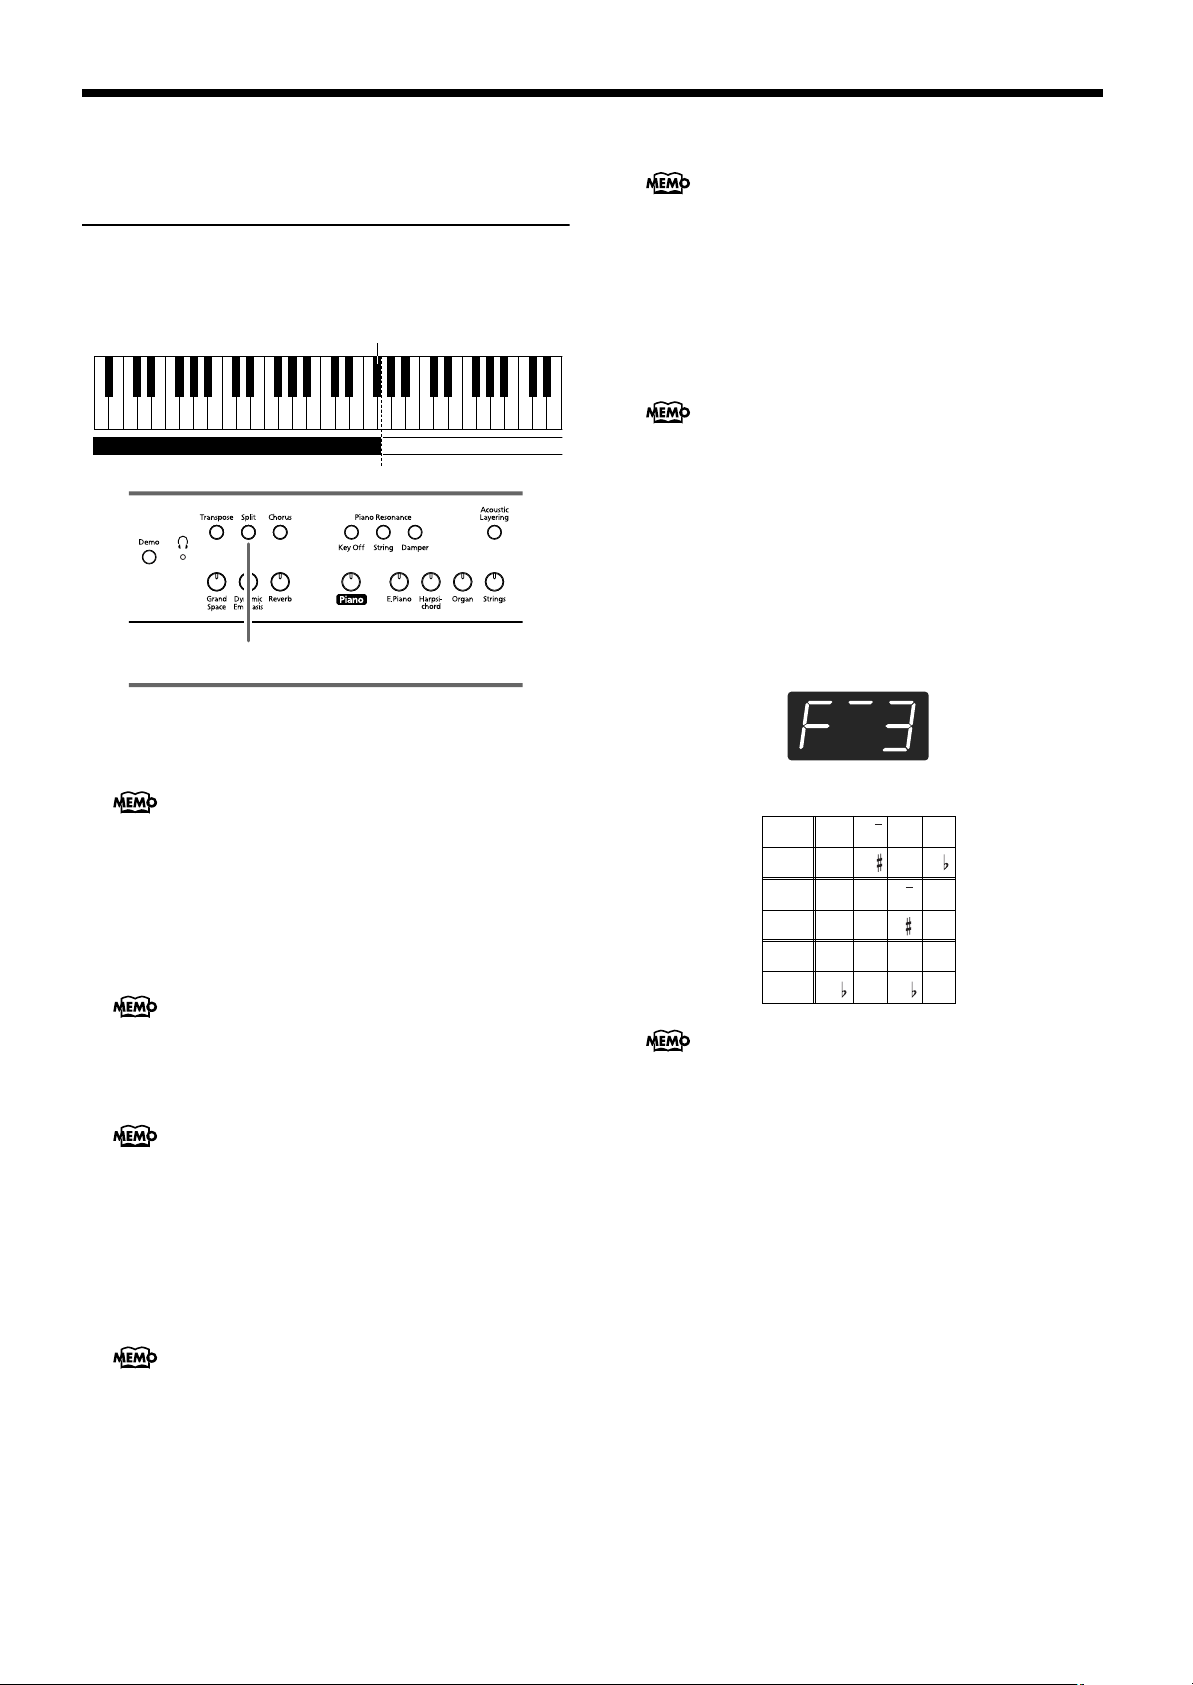
Changing the keyboard’s split point
You can change the location where the keyboard is
divided (the split point) within the range of B1 through B6.
This is set at the factory to “F#3.”
1.
While continuing to hold the [Split] button, press
the key that you want to specify as the split point.
The key you pressed becomes the split point, and belongs
to the left-hand section of the keyboard.
You can also change the setting by pressing the [-] or [+]
button while continuing to hold down the [Split] button.
If you hold down the [Split] button and simultaneously
press the [-] and [+] buttons, the setting will return to its
original value (F#3).
1.
Press the [Split] button.
The button’s indicator will light. The keyboard is divided
into right-hand and left-hand areas.
The split point key is included in the left-hand keyboard
area.
The tone played on the right side is the tone in use before
the [Split] button is pressed, while the bass tone is played
on the left side when the power is turned on, with a different tone selected when the left-hand tone is changed.
To cancel Split performance, press the [Split] button, getting its indicator to go dark.
When using Dual performance, press the [Split]
button
The right hand will play the tone of the left button of
Dual performance, and the left hand will play a suitable
match for the right-hand tone.
You can change the pitch of the tones on the left side of
the keyboard in octave steps (p. 30).
Changing tone played by the left hand
1.
Press any Tone button.
2.
Press the [-] or [+] button.
Each time you press the [-] or [+] button, the left-hand tone
will change.
For more about the tones, refer to the Tone List (p.
240).
The split point key is displayed as follows.
Display
C C d E_
Letter
name
C C D E
Display
E F F G
Letter
name
E F F G
Display
A_ A b_ b
Letter
name
A A B B
When you continue holding the [Split] button, the currently specified split point value will be displayed.
20
Page 23
Changing How the Center
NOTE
Pedals Work
With the factory setting, the center pedal functions as a sostenuto pedal (p. 11).
However, the center pedal setting can be changed to any of a
variety of different functions.
1
1.
Press the [Center Pedal] button to get the appropriate indicator to light.
If Acoustic Layering (p. 26) and Dual function are
switched off, the Acoustic Layering function is then
switched on.
Sostenuto. Sets function to sostenuto pedal (p. 11).
Layer. When you play a key while pressing on the center
pedal, a suitable tone to match the piano tone is selected,
and the two tones are layered and played together.
The volume of the layer tone is adjusted according to
how much you press the pedal.
Octave. When you play a key while pressing on the center pedal, the note for the key being pressed and the note
one octave above it are layered and played together. You
can adjust the volume of the sound one octave above the
layer tone by changing the pressure used on the pedal.
Using Metronome
■
Sounding the metronome
The HP107e features a built-in metronome.
While a song plays back, the metronome will sound at the
tempo and time signature (Beat) of that song.
Chapter 2. Performance
Changing the tempo
2.
Press the [Song/Tempo] button; the button’s indicator lights in green.
3.
Press the [-] or [+] button to adjust the tempo.
Changing the beat of metronome
4.
Hold down the [Song/Tempo] button, and press
the [-] or [+] button.
The currently selected beat will be displayed.
If you hold down the [Song/Tempo] button and press the
[-] or [+] button, the beat will change.
If you hold down the [Song/Tempo] button and press the
[-] and [+] buttons simultaneously, the beat will go back to
what it was before you changed it.
Correspondence between
beat and tempo display
Beat Tempo Value
2/2 =5–250
x/4 =10–500
3/8 =20–999
6/8
9/8 = 7–333
12/8
It is not possible to change the beat during song playback
or recording.
Display beat Display beat
2.2 2/2 6.4 6/4
0.4 Only weak beats 7.4 7/4
2.4 2/4 3.8 3/8
3.4 3/4 6.8 6/8
4.4 4/4 9.8 9/8
5.4 5/4 12.8 12/8
Stopping the metronome
5.
Once again press the [Metronome/Count In] button, getting its indicator to go dark.
The metronome will stop.
■
Changing the metronome volume
The volume of the metronome can be adjusted, with ten
volume levels available.
This is set to “4” when the instrument is turned on.
ENGLISH
ENGLISH
ENGLISH ENGLISH ENGLISH ENGLISH
341,5 2
Sounding the metronome
1.
Press the [Metronome/Count In] button.
The metronome will sound. The button’s indicator flashes
in red and green in time with the beat selected at that time.
The indicator lights in red on the downbeats, and in green
on weak beats.
1.
While holding down the [Metronome/Count In]
button, press the [-] or [+] button.
The currently specified volume will be displayed.
Continue to hold down the [Metronome/Count In] but-
ton, and press the [-] or [+] button to sound the metronome, and change the volume.
When the metronome volume is set to “0,” the metronome sound does not play.
21
Page 24
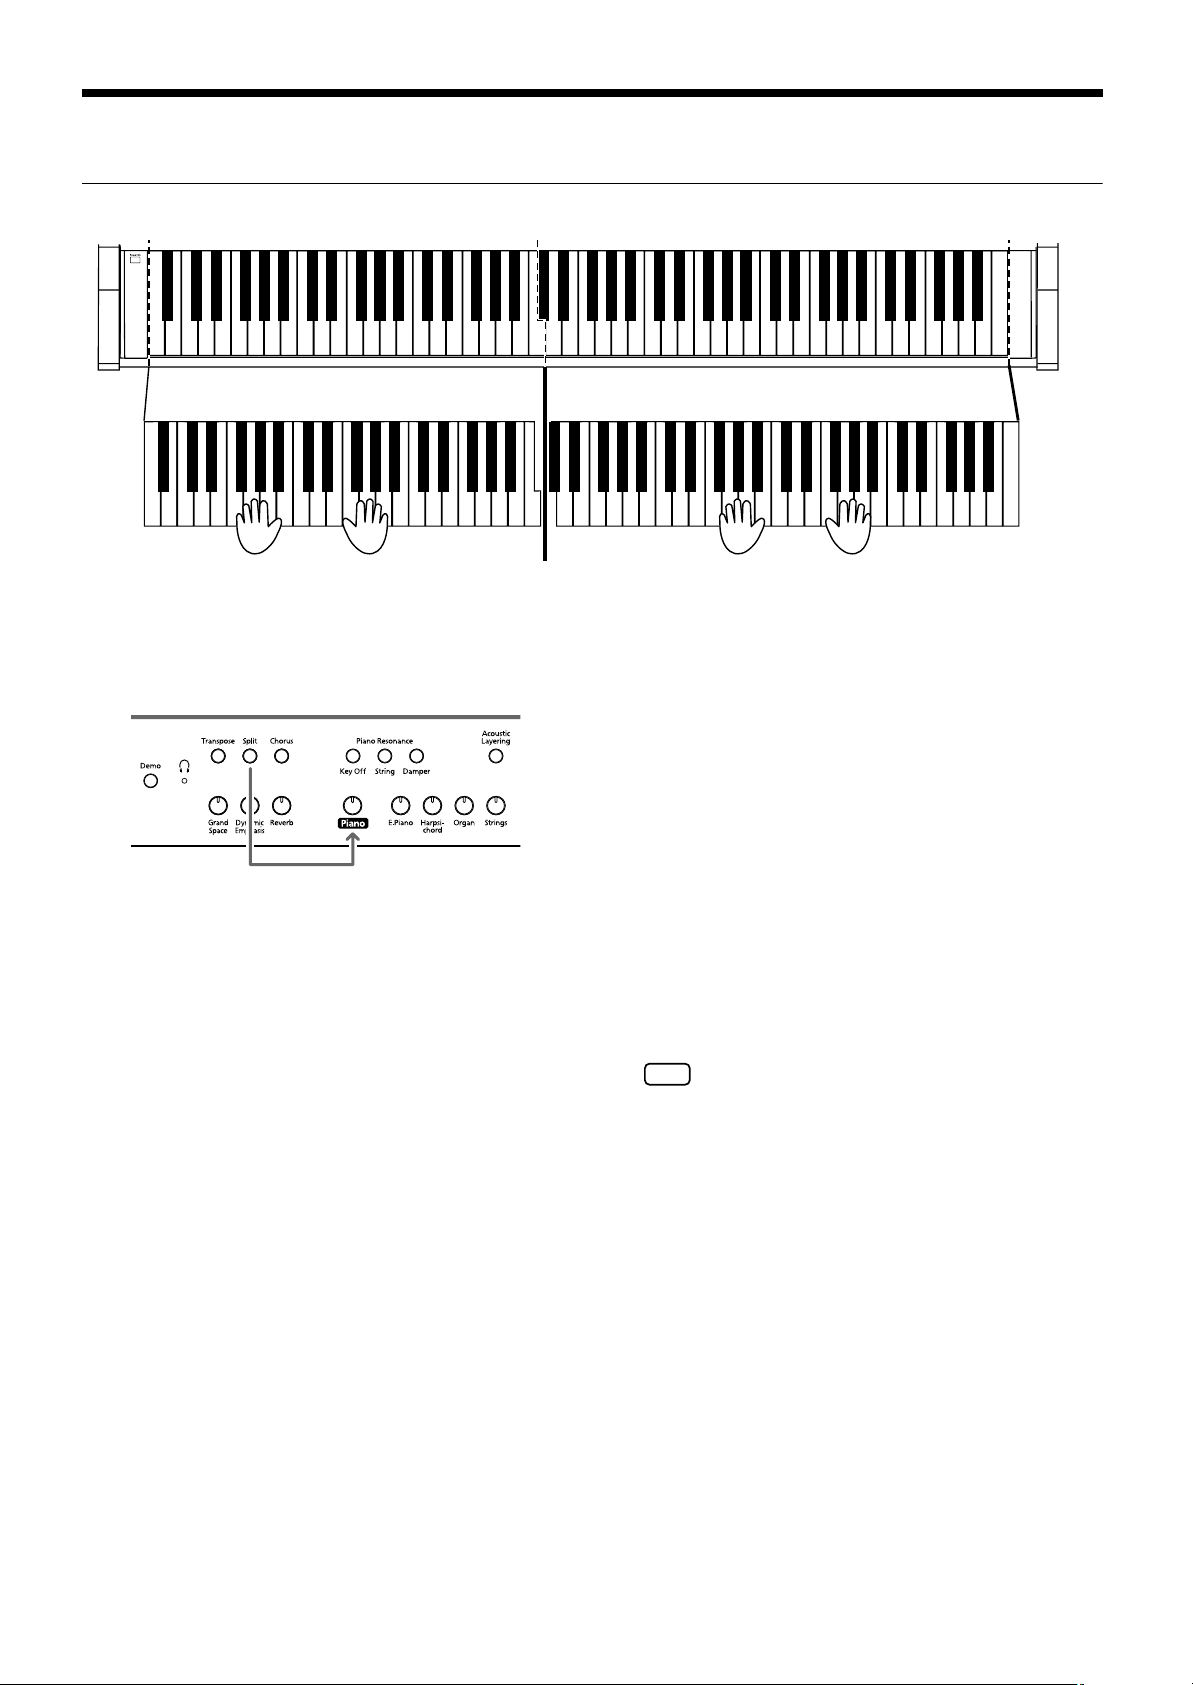
HP107e – Chapter 2. Performance
NOTE
Splitting the Keyboard Into Two Sections for Four-Hand
Performances (Twin Piano Mode)
You can divide the keyboard into two separate sections, allowing two people to perform in the same registers.
C4 C5 C6 C7 C8C3C2C1
C4 C5 C6C3C4 C5C3 C6
1.
While holding down the [Split] button and press
the [Piano] button.
The [Split] button’s indicator will light, and Twin Piano
Mode is switched on.
2.
To exit the function, while holding down the
[Split] button and press the [Piano] button once
more.
● The following occur when Twin Piano Mode is switched
on:
• The keyboard is divided into two separate sections, and
the pitch changes.
• The right pedal now functions as the damper pedal for
the right keyboard section, and the left pedal functions
as the damper pedal for the left keyboard section.
• The center pedal now functions as the Sostenuto pedal
for the right keyboard section.
• If recording is in progress or the instrument is in
recording standby, recording is stopped or recording
standby is cancelled. The [Rec] button is disabled while
Twin Piano Mode is active.
• If the Split function happens to be on, it is switched off.
• The same tone and effects are used on both the left and
right sides. If the piano is in Split Play before switching
Twin Piano Mode on, then the tone selected for the
right hand in Split Play is used.
The damper resonance function is not operational in
Twin Piano Mode.
22
Page 25
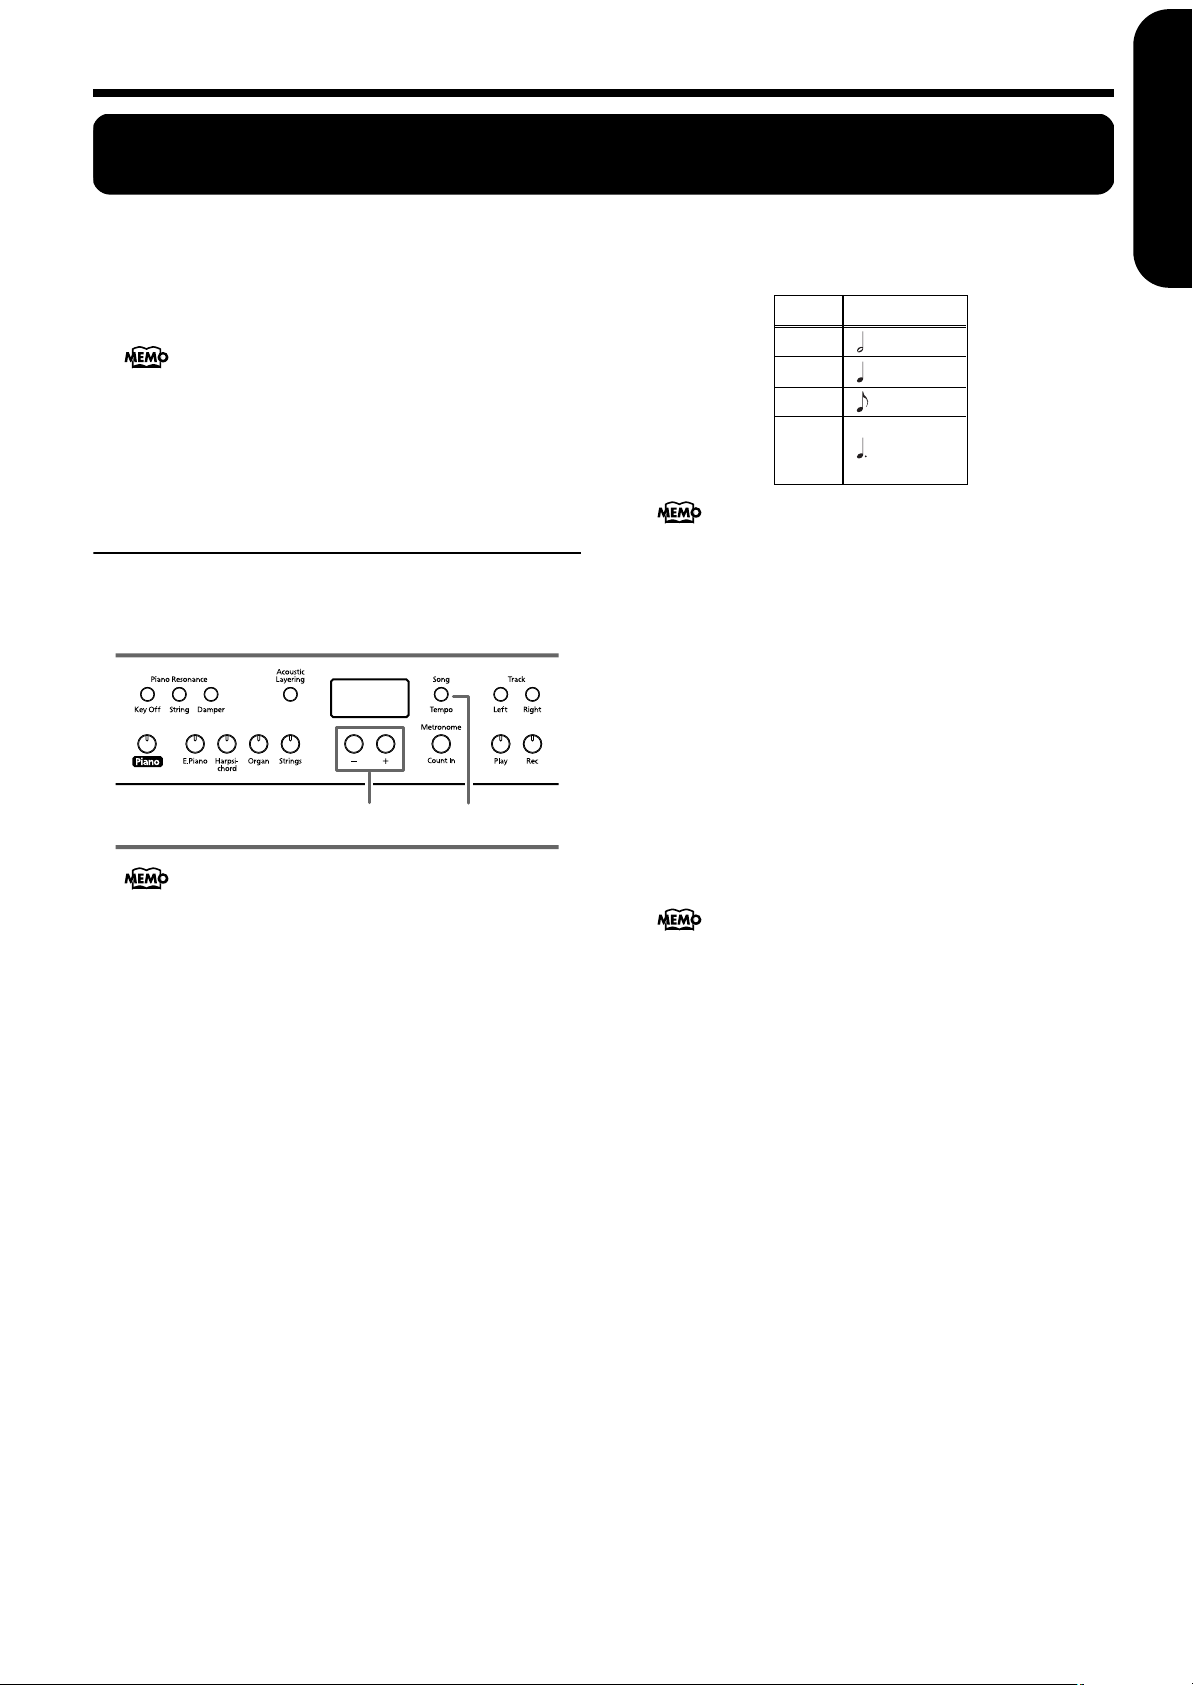
Chapter 3. Playing Along with the Built-in Songs
ENGLISH
Chapter 3. Playing Along with the Built-in Songs
Here’s how you can play along with the built-in songs.
You can slow down the playback tempo of the song, or play
back each hand separately. Before you try playing the song,
listen to it several times to get a general feel for the song.
If you turn on the metronome while the song plays back,
the metronome will sound at the beat and tempo of the
song.
For details on operation, refer to “Selecting a song and
playing it” (p. 12).
Changing the Tempo
If the song has a rapid tempo, you can slow down the
tempo so that you can practice it more easily. It is effective
to gradually raise the tempo as you practice.
2
Some of the built-in songs have tempos that change during the song.
First select the song that you want to play back (p. 12).
1.
Press the [Song/Tempo] button, getting its indicator to light in green.
The tempo appears in the display.
Each time you press the [Song/Tempo] button, the tempo
and the currently selected song number (prefixed by “S.”)
will be displayed alternately.
While the tempo is displayed, the [Song/Tempo] button
indicator will light in green. While the song number is displayed, it will light in red.
2.
Press the [-] or [+] button to adjust the tempo.
The tempo can be adjusted in a range of q= 10–500. You
can also change the tempo during playback.
Pressing the [+] button once increases the tempo by one
unit. Holding down the button increases the tempo continuously.
Pressing the [-] button once decreases the tempo by one
unit. Holding down the button makes the tempo change
(slow down) continuously.
If you press the [-] and [+] buttons simultaneously, you
will return to the basic tempo of the song (the tempo
before you modified it).
1
Correspondence between beat and tempo
display
Beat Tempo Value
2/2 =5–250
x/4 =10–500
3/8 =20–999
6/8
9/8 = 7–333
12/8
About the display for the built-in songs
USr (user) … The location where you can record your
performance. (For details on recording → p. 25)
S.1~S.68 … Built-in songs
S. U … Song saved with Song Backup (p. 31)
■
Adding a count-in to match the timing (CountIn)
When you’re playing along with a song, you can make
sure that your playing is in time with the song by sounding a count before the song starts playing.
Sounding a “count sound” leading up to playback of a
song is called “Count-In.”
On the HP107e, if you playback a song while the metronome is sounding, two measures of lead-in count will be
heard at the beginning of the song.
During the count-in, the count measure is indicated in
the display as “-2” then “-1.”
“Sounding the metronome” on page 21
ENGLISH
ENGLISH ENGLISH ENGLISH ENGLISH
23
Page 26
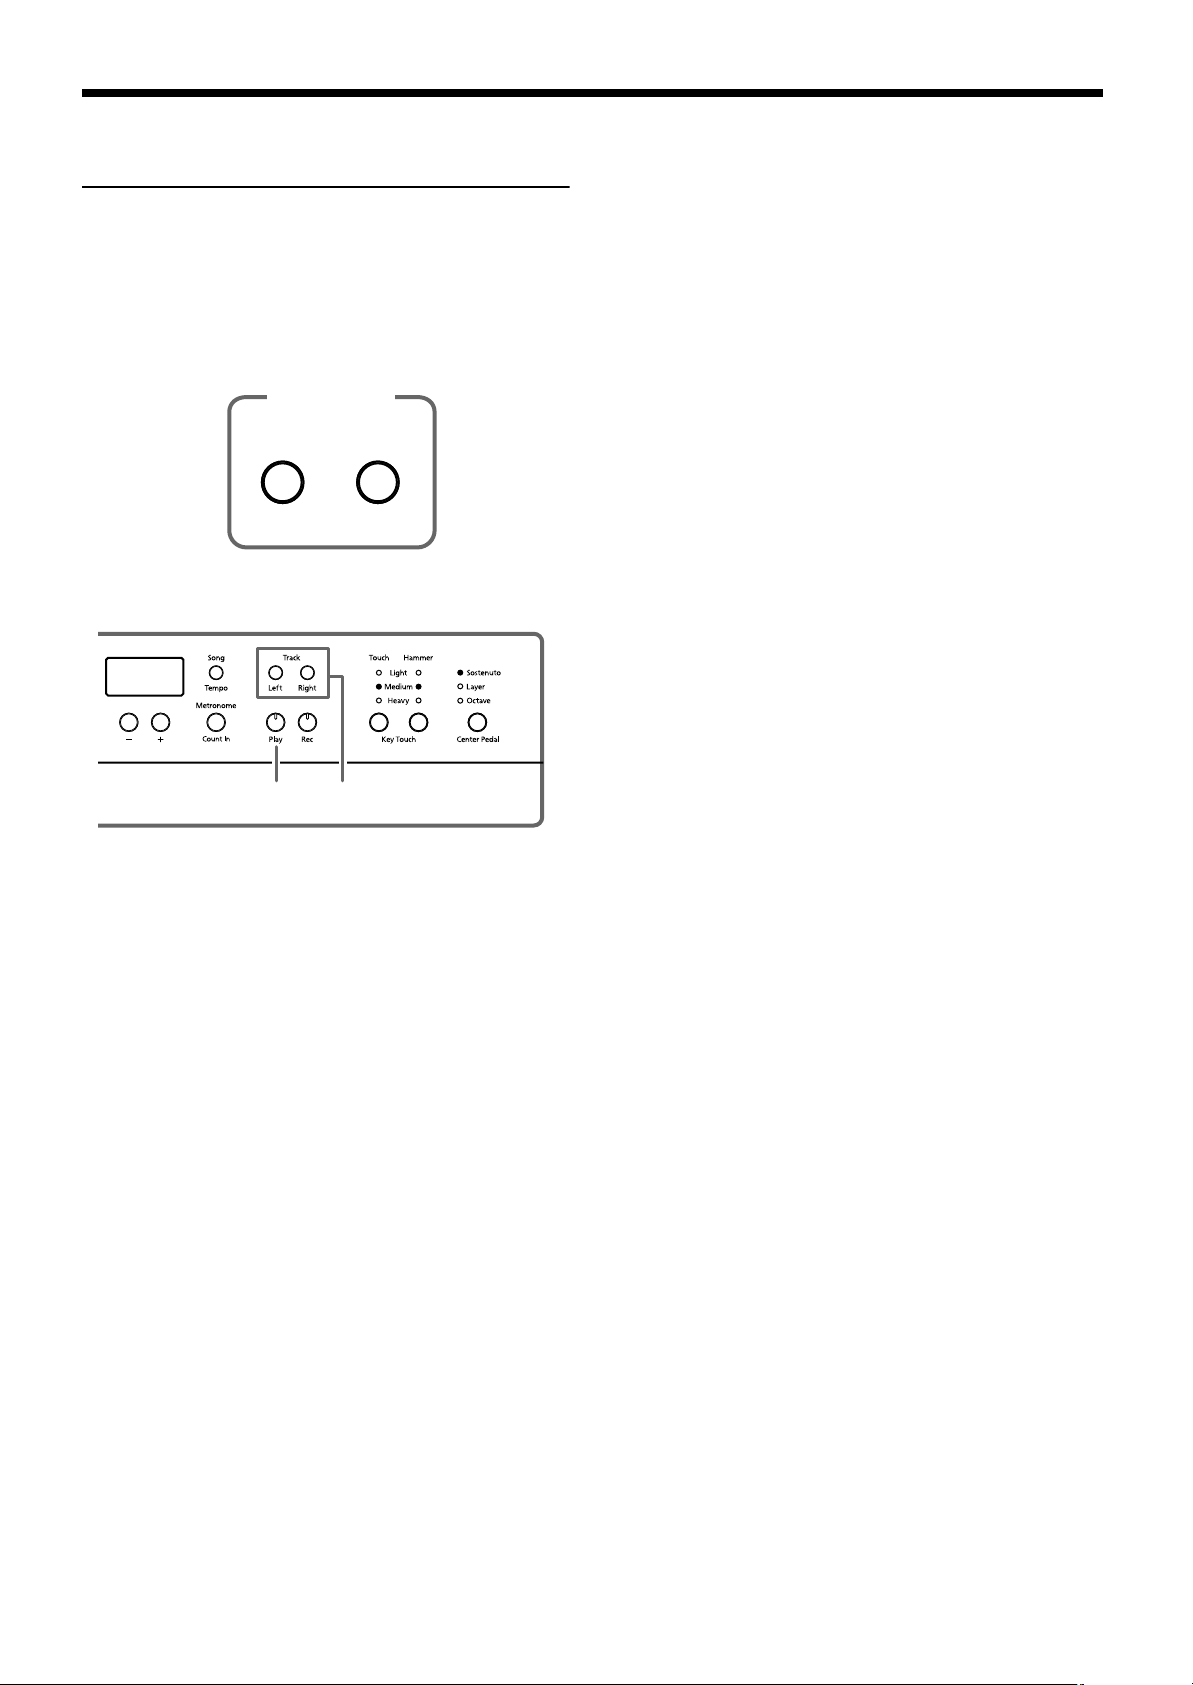
HP107e – Chapter 3. Playing Along with the Built-in Songs
Playing Each Hand
Separately
The built-in songs allow you to select the performance part
that will be played back.
The left-hand performance of the built-in songs is assigned to
the [Left] button, while the right-hand performance is
assigned to the [Right] button. The place where each part of
the performance is held is called a “track,” and the [Left] and
[Right] buttons are called “track buttons.”
Track buttons
Left-hand
Part
Left
Here’s how to practice each hand separately along with the
song.
Right-hand
Part
Right
Playing back a song
2.
Press the [Play] button, getting its indicator to
light.
The song will begin playing back. The part you selected in
step 1 will not sound.
Practice your right-hand performance along with the lefthand playback.
Once again press the button you selected in step 1. The
button’s indicator will light, and the sound will be heard
once again.
Even while the song is playing, you can press the track
buttons to mute or un-mute the sound.
Stopping the song
3.
Press the [Play] button, getting its indicator to go
dark.
The song will stop.
2, 3 1
First select the song that you want to play back (p. 12).
Selecting the part that you yourself will
play
1.
Press the [Left] or [Right] button.
The indicator of the button you’ve pressed goes out, and
the sound of the selected part will no longer be heard.
For example, if you want to practice the right hand, press
button [Right] and get its indicator to go dark. When you
play back the song, the right-hand performance will not
sound.
24
Page 27
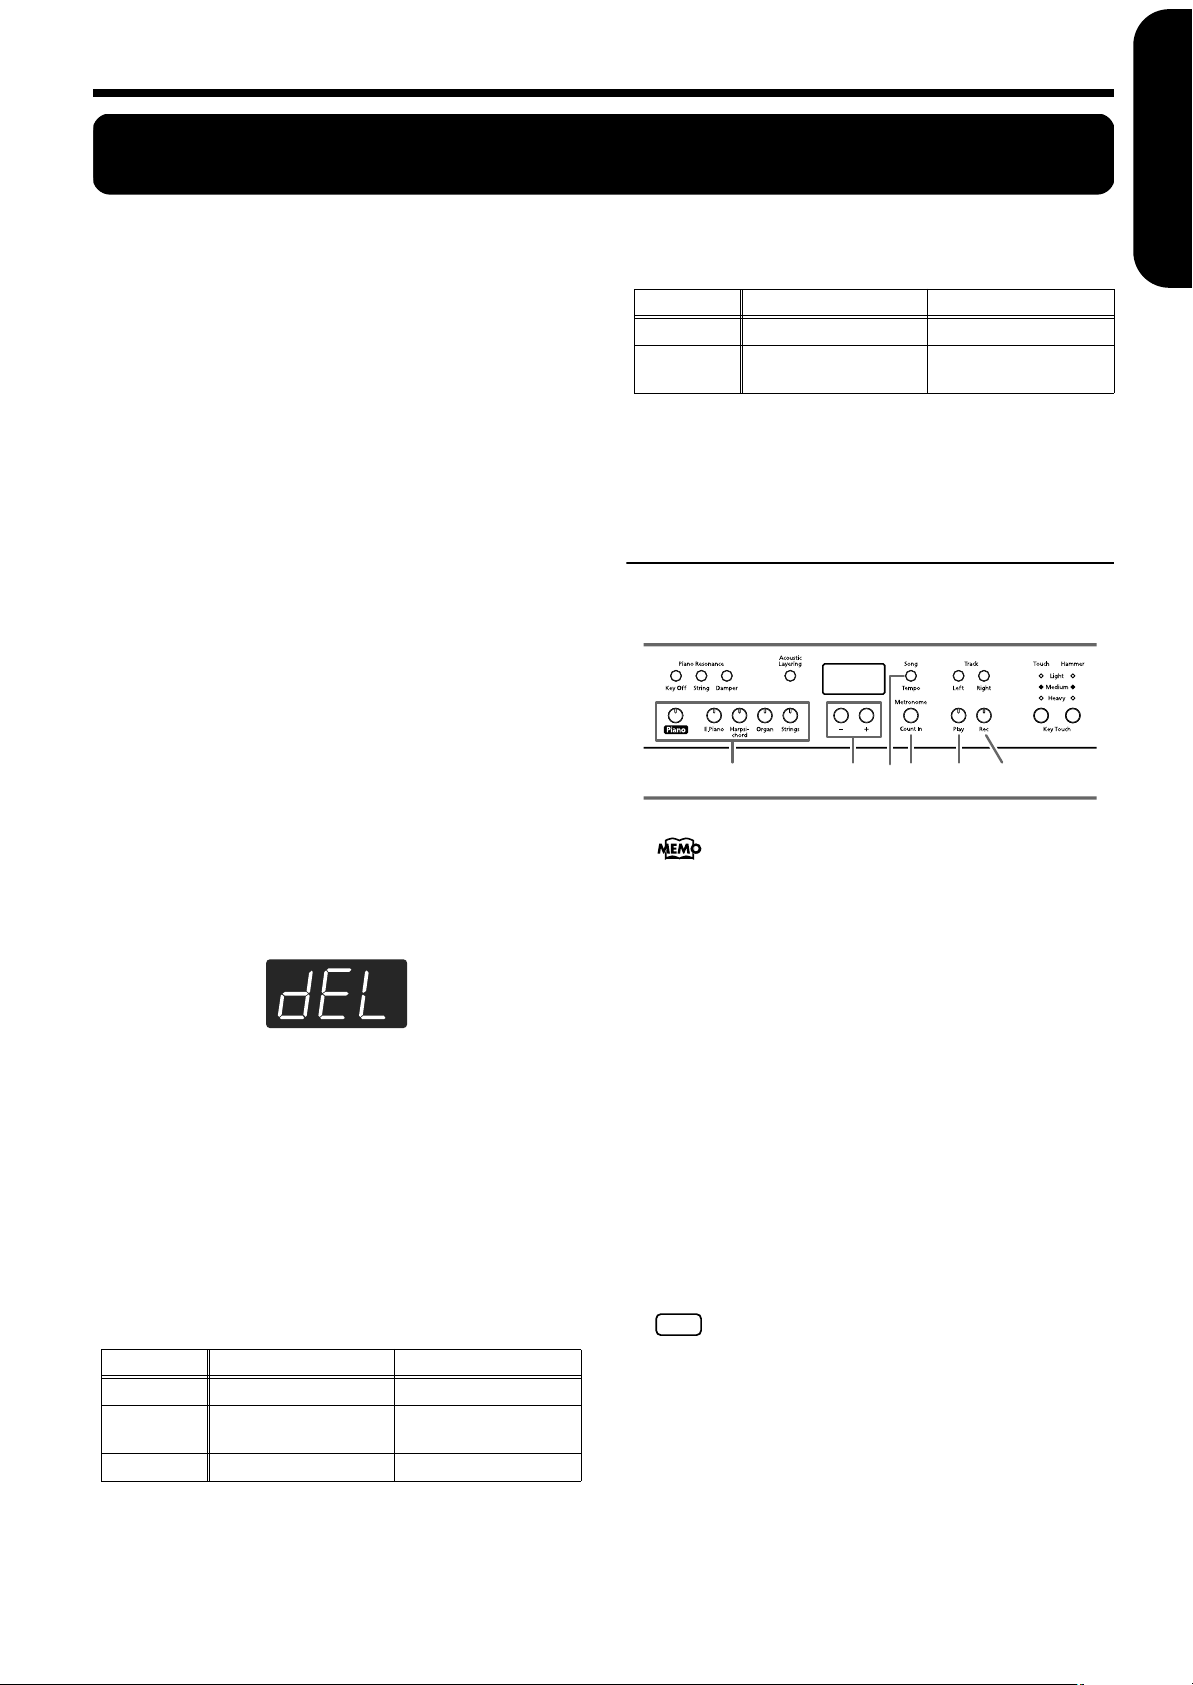
Chapter 4. Recording Your Performance
NOTE
Chapter 4. Recording Your Performance
ENGLISH
You can easily record your performances.
A recorded performance can be played back to hear your
own playing, or to add additional parts.
The following types of recording can be done using the
HP107e.
• Recording just your own keyboard performance (→
“Recording a New Song” p. 25)
• Recording along with a built-in song (→ “Recording
Along with a Song” p. 26)
• Recording each hand separately (→ “Selecting and
Recording the Track for Each Hand Separately” p. 27)
Notes regarding recording
• Only one song can be recorded.
• The HP107e includes a “Song Backup function” (p. 31),
which allows you to store the song recorded with the
HP107e in the instrument itself. Recorded performance
that have not been backed up with Song Backup is
erased with the power is turned off. Be sure to use Song
Backup for any performance you want to keep. You can
either record it on an external audio device, or use an
external MIDI device to save the performance data on a
floppy disk. For details, refer to Chapter 6. Connect-
ing External Devices (p. 33).
If you see the following...
If you attempt to select a song when another performance
has already been recorded, the following appears in the
display and the [Record] button’s indicator flashes.
If it is OK to erase the performance, press the [Rec] button.
If you do not want to erase the performance, press the
[Play] button.
C. Recording while the “Layer” or “Octave” function is
assigned to the center pedal
Function Left Track Right Track
Layer Layer tone Original tone (piano tone)
Octave
* When using method B or C above to layer a recording to a
song, press both the [Left] and [Right] buttons before recording so that the buttons flash.
Layer tone (one octave
higher)
Original tone
Recording a New Song
Record only the keyboard performance without playing
along with a built-in song.
1
2 4 6,8 5,73
The HP107e includes a “Song Backup function” (p. 31),
which allows you to store the song recorded with the
HP107e in the instrument itself.
Recording settings (select “USr”)
1.
Press the [Song/Tempo] button, getting its indicator to light in red.
The song number appears in the display.
2.
Press [-] and [+] buttons simultaneously, and
“USr” appears in the display.
ENGLISH
ENGLISH ENGLISH ENGLISH ENGLISH
About the Recorded Tracks
A. Recording without specifying the track to be recorded
If there is no data recorded on the left and right track, the
data is then recorded to the right track. If there is any data
recorded to either the left or right track, the data is then
recorded to the empty track.
B. Recording while using the Dual, Acoustic Layering, or Split
functions
Function Left Track Right Track
Dual Tone from right tone button Tone from left tone button
Acoustic Lay-
ering
Split Left (keyboard) tone Right (keyboard) tone
Layer tone Original tone (piano tone)
Specifying the tone and tempo for recording
3.
Select the tone that you want to play (p. 14).
4.
If necessary, turn on the metronome.
Sound the metronome while you set the tempo and beat of
the song (p. 21).
If you layer a newly recorded performance without erasing the recorded song, the song tempo and beat will be
stored with the settings that were recorded first.
5.
Press the [Rec] button.
The [Rec] button’s indicator will light, the [Play] button’s
indicator will blink, and you will be in recording-standby
mode.
25
Page 28
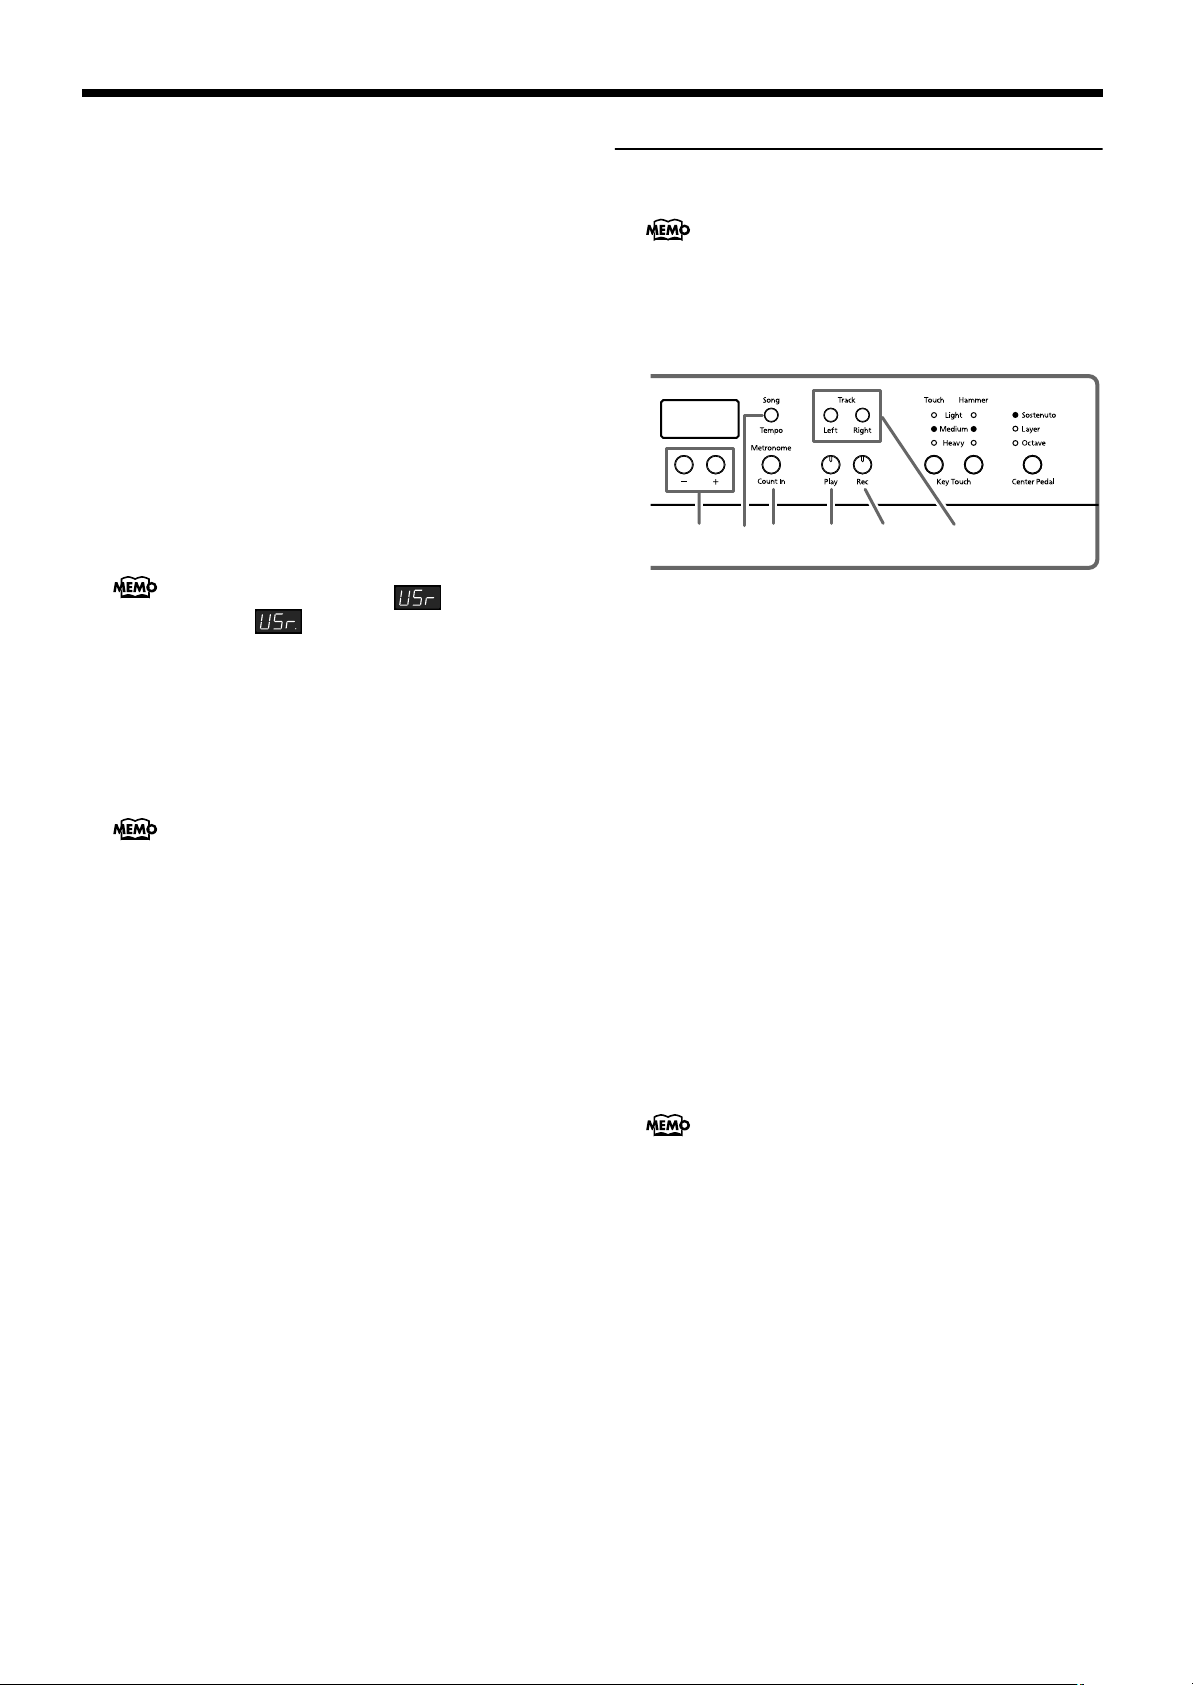
HP107e – Chapter 4. Recording Your Performance
Start recording
6.
Recording will start when you either press the
[Play] button or play the keyboard.
Two measures of the count sound are played, and the
recording begins.
Note that recording will also begin as soon as you play
anything on the keyboard, even if you do not press the
[Play] button. There is no count sound played when you
start in this manner.
When recording begins, the [Play] button and [Rec] button
indicators will light.
Go ahead and perform on the keyboard.
Stop recording
7.
Press the [Play] or [Rec] button.
Recording will stop, and the indicators for the [Play] and
[Rec] buttons will go dark.
About the “USr” display
When you stop recording, the “ ” display will
change to “ .”
The “.” in the lower right of the display indicates that
there is already a recorded performance.
Play back the recorded performance
8.
Press the [Play] button.
You will hear the recorded performance.
Once again press the [Play] button, and playback will stop.
If you record without specifying the recording track, the
performance will be recorded to the [Right] button.
If you want to record the right and left hands separately
on separate recording tracks, refer to “Selecting and
Recording the Track for Each Hand Separately” (p. 27).
Recording Along with a Song
You can record a performance that you play along with an
built-in song.
The HP107e includes a “Song Backup function” (p. 31),
which allows you to store the song recorded with the
HP107e in the instrument itself.
Using the [Left] or [Right] buttons, you can (for example)
perform and record just the right-hand part of a song
while listening to the left-hand playback of a built-in song.
1
253 6,8 4,7
Selecting the song to record
1.
Press the [Song/Tempo] button, getting its indicator to light in red.
The display will indicate the song number.
2.
Use the [-] or [+] button to select the song that you
want to play.
3.
As necessary, set the metronome and tempo (p.
21).
4.
Press the [Rec] button.
The [Rec] button’s indicator will light.
Selecting the track to record
5.
Press the [Left] or [Right] button.
When you want to record the left-hand performance, press
the [Left] button; to record that of the right hand, press the
[Right] button.
The indicators of the button you pressed and of the [Play]
button will blink, and the HP107e enters recordingstandby mode.
If “dEL” appears in the display, refer to p. 25.
26
Starting to record
6.
Press the [Play] button.
Recording begins after two measures of count sound.
Play along with the song.
Stop recording
7.
Press the [Play] or [Rec] button.
Recording will stop, and the indicators for the [Play] and
[Rec] buttons will go dark.
The recorded performance is stored in “USr (User).”
Play back the recorded performance
8.
Press the [Play] button.
You will hear the recorded performance.
Once again press the [Play] button, and playback will stop.
Page 29
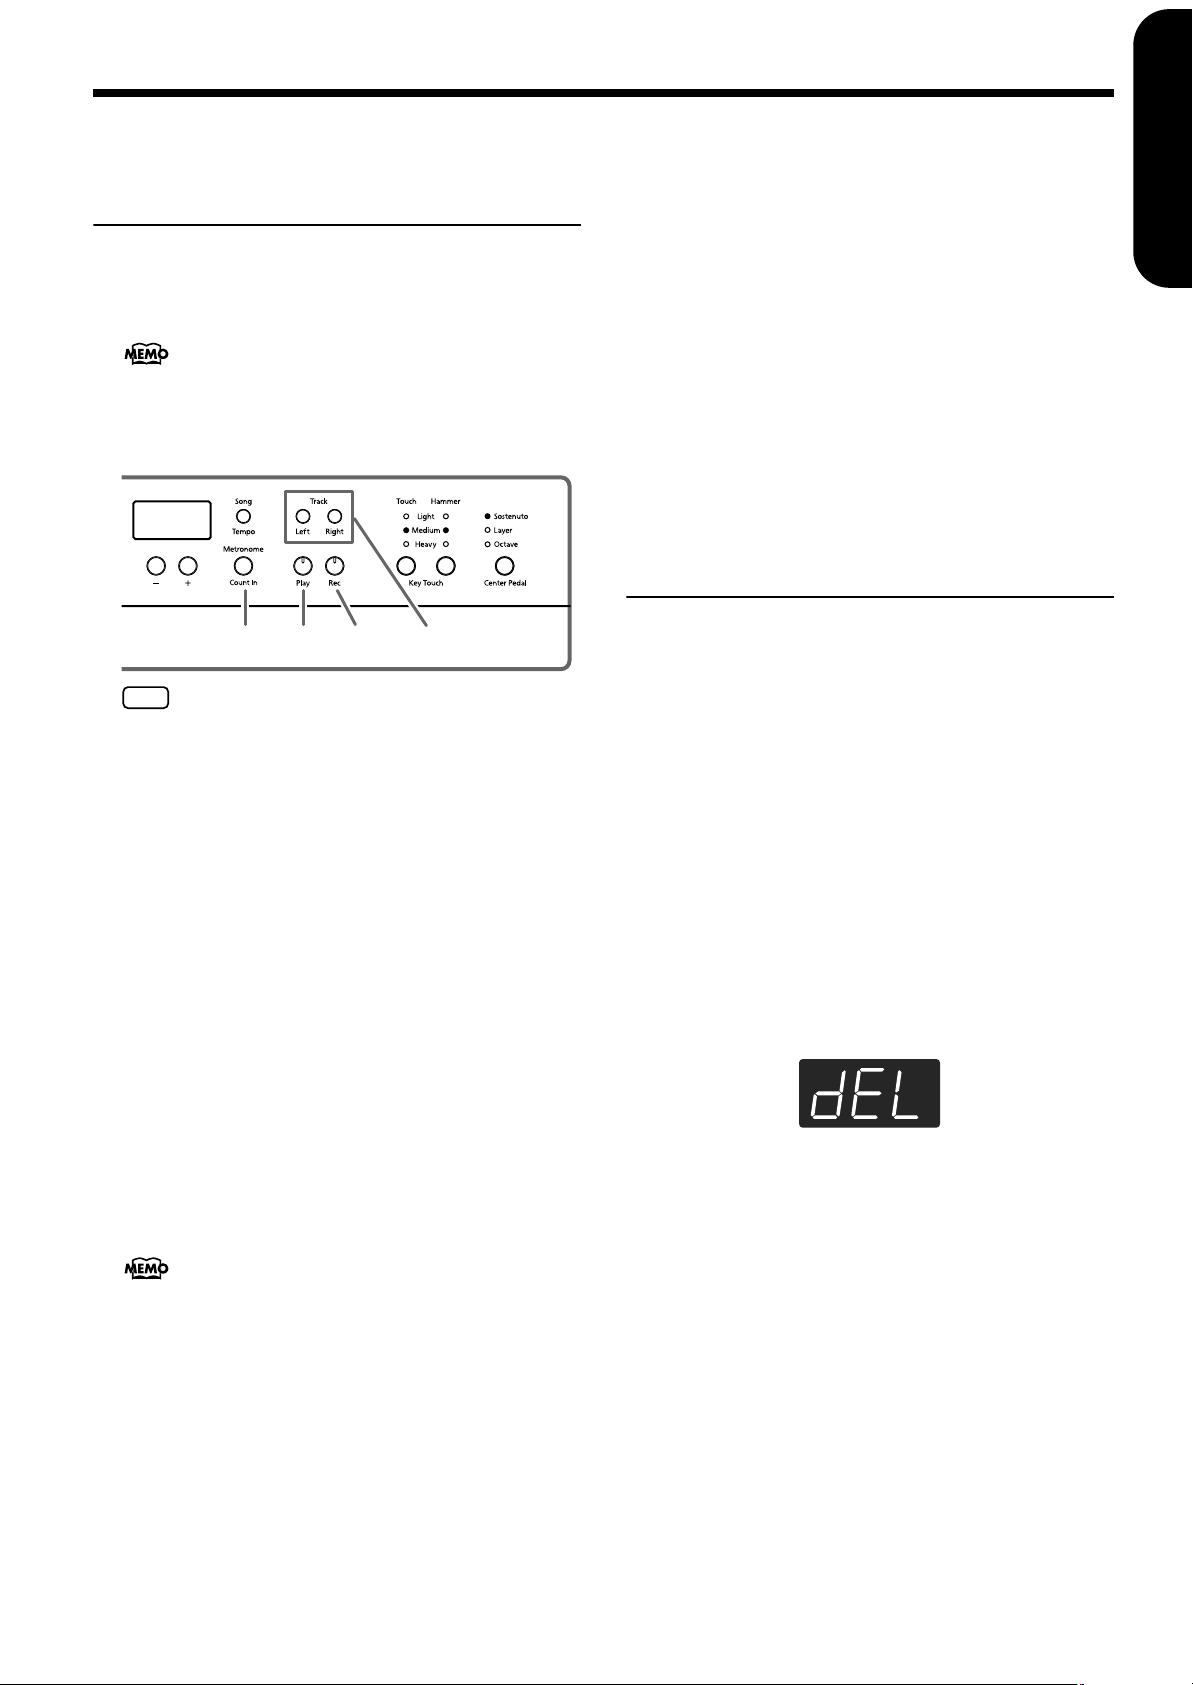
Selecting and Recording the
Track for Each Hand
Separately
The recorder of the HP107e has two recording tracks,
allowing you to record the right and left hands separately.
Use the [Left] button or [Right] button to specify the
recording track.
The HP107e includes a “Song Backup function” (p. 31),
which allows you to store the song recorded with the
HP107e in the instrument itself.
If you want to re-do the recording, you can re-record just
a specific track.
31 4,6 2,5
If you go on to record additional material without eras-
NOTE
ing the recorded song, the song tempo, beat, and metronome settings of the original recording will be used for
the new material as well.
When recording a new song, first follow the instructions in
Steps 1 and 2 of Recording a New Song (p. 25) to select
“USr.” When layering recordings with built-in songs or
songs that have been backed up, select the built-in or
backed up song as described in Steps 1 and 2 of Selecting
a song and playing it (p. 12).
1.
As necessary, turn on the metronome (p. 21).
2.
Press the [Rec] button.
The [Rec] button’s indicator will light, the [Play] button’s
indicator will blink, and you will be in recording-standby
mode.
The button indicators of tracks that are already recorded
will light.
The track button for which you will next be recording will
be blinking.
3.
Press the [Left] or [Right] button to turn off the
button for the track not to be recorded.
The track buttons allow you to record to either the [Left]
or the [Right] button, one at a time.
Chapter 4. Recording Your Performance
Stop recording
5.
Press the [Play] or [Rec] button.
Recording will stop, and the indicators for the [Play] and
[Rec] buttons will go dark.
Your performance has been recorded to the specified track
button.
If you want to record on the other track, return to step 2 to
record your performance again. You can record while you
listen to the previously recorded performance.
Play back the recorded performance
6.
Press the [Play] button.
You will hear the recorded performance.
Press the [Play] button once again, and playback will stop.
Erasing Recorded Performances
You can erase a recorded performance.
■
Erasing a performance from the specified
track
You can select a recorded track and erase it.
Hold down either the [Left] or [Right] button, and
press the [Rec] button.
The indicator of the button you pressed will go dark, and
the performance of the selected track will be erased.
■
Erasing a song
You can erase a song you’ve recorded.
Hold down the [Song/Tempo] button and press
the [Rec] button.
The following display will appear, and the [Rec] button’s
indicator will blink.
If you decide not to erase the performance, press the [Play]
or [Song/Tempo] button.
7.
Once again press the [Rec] button.
The recorded performance is erased.
ENGLISH
ENGLISH
ENGLISH ENGLISH ENGLISH ENGLISH
Start recording
4.
Press the [Play] button.
Two measures of the count sound are played, and the
recording begins. Go ahead and perform on the keyboard.
Note that recording will also begin as soon as you play
anything on the keyboard, even if you do not press the
[Play] button. There is no count sound played when you
start in this manner.
27
Page 30
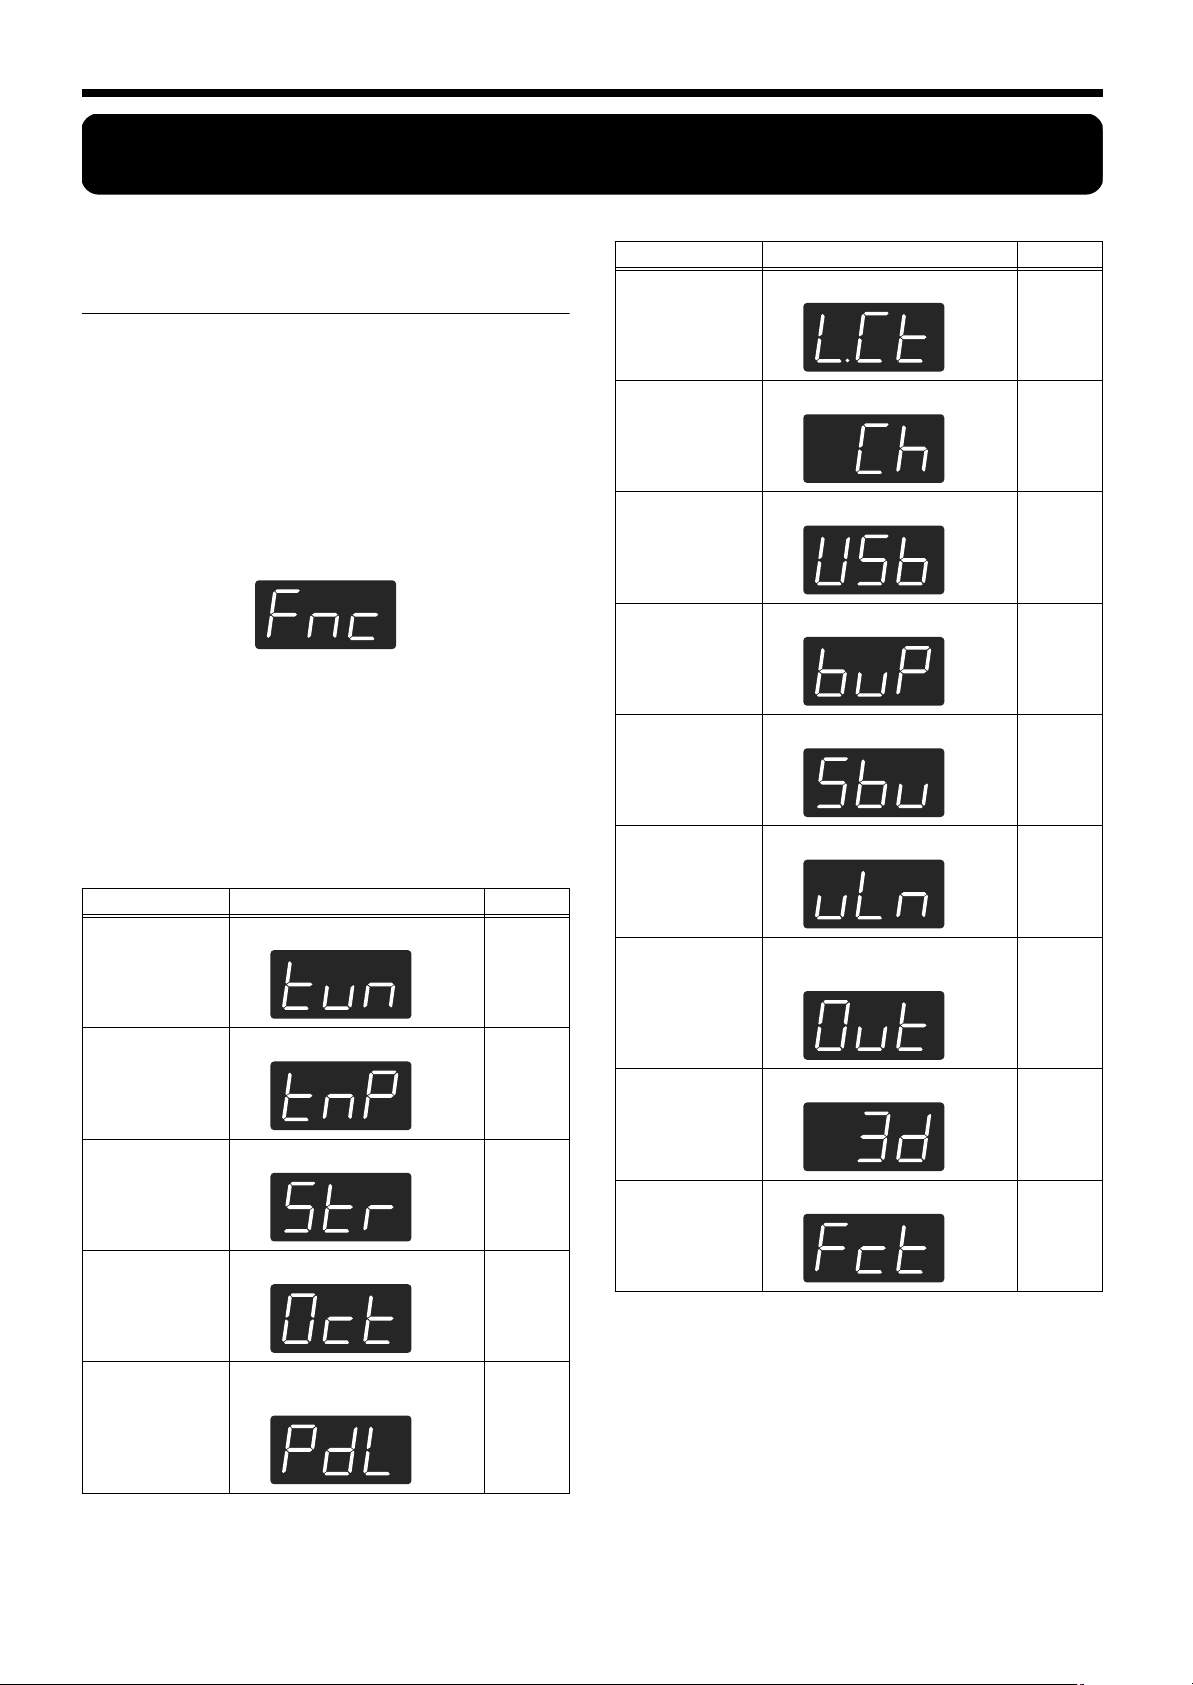
HP107e – Chapter 5. Changing Various Settings
Chapter 5. Changing Various Settings
Making Detailed Settings
(Function)
You can make performance-related settings such as tuning
and temperament.
How to enter function mode
1.
Simultaneously press the [Split] and [Chorus] button.
The HP107e switches to the set mode.
The indicators for the [Split] and [Chorus] buttons and
the button to which the function is assigned start flashing.
Setting the various functions
2.
Press the button to which the desired function is
assigned.
The indicators for pressed button, [Split] button, and
[Chorus] button flash.
The name of the function assigned to the button appears
in the display for as long as the button is held down.
Button Function Page
Master Tuning
[Piano]
p. 29
Button Function Page
Local Control
Piano Resonance
[Key Off]
MIDI send channel
Piano Resonance
[Strings]
USB Driver Setting
Piano Resonance
[Damper]
Memory Backup
[Metronome/
Count In]
Song Backup
[Song/Tempo]
V-LINK
[Right]
Transmitting a recorded
performance
[Left]
p. 35
p. 35
p. 32
p. 31
p. 31
p. 32
p. 35
[E. Piano]
[Harpsichord]
[Organ]
[Strings]
Temperament
Stretch Tuning
Octave Shift
Applying the damper pedal to the
left-hand keyboard area
p. 29
p. 29
p. 30
p. 30
Grand Space Mode
[Grand Space]
Factory Reset
Key Touch
[Touch]
For details on each function, refer to the explanations
below.
3.
Press the [-] or [+] button to change the value.
Pressing the [-] and [+] buttons simultaneously restores
the factory values.
How to exit function mode
4.
Press the [Split] or [Chorus] button.
The button’s indicator will return to the previous state.
p. 30
p. 31
28
Page 31

■
Tuning to other instruments’ pitches (Master
Tuning)
In situations such as when playing ensemble with other
instruments, you can tune the HP107e’s standard pitch to
the pitch of another instrument. The standard pitch generally refers to the pitch of the note that’s played when
you finger the middle A key. This tuning of all the instruments to a standard pitch is called “tuning.”
If you press the [Piano] button in step 2 of Making
Detailed Settings (Function) (p. 28), a display like the
following will appear.
The last three digits are indicated in the display. “440.0
Hz” is indicated in the figure above.
Value 415.3 Hz–440.0 Hz–466.2 Hz
Factory setting 440.0 Hz
This setting remains in effect until you turn off the power.
* You can save this setting in the HP107e’s memory using the
Memory Backup function (p. 31).
■
Changing the temperament
You can play classical styles such as Baroque using historic temperaments (tuning methods).
Today, compositions are generally created with equal
temperament in mind and are played using equal temperament. However in past ages of classical music, a variety of temperaments were used. Playing a composition
with its original tuning lets you enjoy the sonorities of the
chords that the composer originally intended.
If you press the [E.Piano] button in step 2 of Making
Detailed Settings (Function) (p. 28), a display like the
following will appear.
Chapter 5. Changing Various Settings
Display
Tempera-
ment
6 Mean Tone
7 Pythagorean
Werck-
8
meister
Qualities
This scale makes some compromises in just
intonation, enabling transposition to other
keys.
This tuning, devised by the philosopher
Pythagoras, eliminates dissonance in
fourths and fifths. Dissonance is produced
by third-interval chords, but melodies are
euphonious.
This temperament combines the Mean Tone
and Pythagorean tunings. Performances are
possible in all keys (first technique, III).
Factory setting 1 C
Tonic
When playing with tuning other than equal temperament, you need to specify the tonic note for tuning the
song to be performed (that is, the note that corresponds to
C for a major key or to A for a minor key).
While hold down the [E. Piano] button, and press a
note to specify the desired tonic key.
The tonic note you specify will be displayed as follows.
fig.Chart_note2.j
Display
Letter
name
* If you record with a temperament other than equal tempera-
* When performing in ensemble with other instruments, be
* You can save this setting in the HP107e’s memory using the
C C d E_ E F F G A_ A b_ b
C C D E E F F G A A B B
If you choose an equal temperament, there’s no need to
select a tonic note.
ment selected, and then want to play back that performance,
use this setting to select the same temperament for playback as
the temperament you used when recording.
aware that depending on the key, there may be some shifting of
the pitch. Tune the HP107e to the fundamental pitch of the
other instruments.
Memory Backup function (p. 31).
ENGLISH
ENGLISH
ENGLISH ENGLISH ENGLISH ENGLISH
Temperament Tonic
You can choose from among the eight temperaments
described below.
Display
Tempera-
ment
1 Equal
Just
2
Major
Just
3
Minor
4 Arabic
Kirn-
5
berger
Qualities
In this tuning, each octave is divided into
twelve equal steps. Every interval produces
about the same amount of slight dissonance.
This tuning eliminates ambiguities in the
fifths and thirds. It is unsuited to playing
melodies and cannot be transposed, but is
capable of beautiful sonorities.
The Just tunings differ from major and
minor keys. You can get the same effect with
the minor scale as with the major scale.
This tuning is suitable for the music of Arabia.
This is an improvement of the Mean Tone
and Just tunings that provides a high degree
of freedom of modulation. Performances are
possible in all keys (III).
■
Setting the tuning curve (Stretch Tuning)
A piano is generally tuned to a pitch with a lower bass
range and a higher treble range than equal temperament.
This special tuning method for pianos is called “Stretch
Tuning.”
If you press the [Harpsichord] button in step 2 of Mak-
ing Detailed Settings (Function) (p. 28), a display like
the following will appear.
OFF This is the standard tuning curve. This is the right
choice when using Dual performance (p. 19), or
when playing in ensemble with other instruments.
On This tuning curve expands the bass and treble
ends somewhat. It is suitable for performances
such as piano solos.
Factory setting On
* This effect works only with the piano tones.
29
Page 32

HP107e – Chapter 5. Changing Various Settings
* You can save this setting in the HP107e’s memory using the
Memory Backup function (p. 31).
■
Changing the Pitch by Octaves (Octave Shift)
You can change the pitch of the left tone in Split Play (p.
20), the right tone in Dual Play (p. 19), and the Layer tone
in Acoustic Layering Play (p. 18) in octave increments.
This function is called “Octave Shift.”
If you press the [Organ] button in step 2 of Making
Detailed Settings (Function) (p. 28), a display like the
following will appear.
You can alter the pitch in a range from two octaves below
(-2) to two octaves above (+2) the original pitch.
* Certain Octave Shift settings may result in tones that exceed
the recommended range, are difficult to hear well, or that have
unnatural tonal qualities or pitches.
■
Applying the damper pedal to the left-hand
keyboard area
When you are using Split performance (p. 20), you can
apply the damper pedal effect to the sound played by the
left-hand keyboard range.
If you press the [String] button in step 2 of Making
Detailed Settings (Function) (p. 28), a display like the
following will appear.
■
Changing How Grand Space is Applied
(Grand Space Mode)
If you press the [Grand Space] button in step 2 of Making Detailed Settings (Function) (p. 28), a display like
the following will appear.
Setting Descriptions
When the headphones are connected, the depth
effect is optimized for headphones, and when no
1
headphones are connected, the optimal depth for
speakers is applied.
The optimal depth for speakers is used, regardless
of whether or not headphones are connected.
Grand Space is also applied to the sound output
2
from the Output connectors, making this convenient when you want to play through speakers connected to the Output connectors.
The optimal depth for headphones is used, regard-
3
less of whether or not headphones are connected.
* You can save this setting in the HP107e’s memory using the
Memory Backup function (p. 31).
Disabling Everything Except
Piano Play (Panel Lock)
On The damper pedal effect will be applied to the
sound of the left and right hand keyboard area.
OFF The damper pedal effect will not be applied to the
sound of the left-hand keyboard area.
Factory setting OFF
* You can save this setting in the HP107e’s memory using the
Memory Backup function (p. 31).
The “Panel Lock” function locks the HP107e in a state where
only piano performance can be used, and all buttons will be
disabled. This prevents the settings from being inadvertently
modified even if children press the buttons accidentally.
In the Panel Lock state, only the grand piano sound can be
played.
1.
Turn the volume to the minimum, and press the
[Power On] switch to turn off the power.
2.
Hold down the [Piano] button, and press the
[Power On] switch to turn on the power.
Then, continue to hold down these two buttons for a few
seconds.
The following display will appear.
All buttons are disabled.
Adjust the volume.
When you play the keyboard, the grand piano sound will
be heard.
To defeat the Panel Lock function, turn the volume down
to the minimum, and turn on the power once again.
30
Page 33

Restoring the Settings to the
Chapter 5. Changing Various Settings
ENGLISH
Saving Recorded Songs
Factory Condition (Factory
Reset)
The settings stored in the HP107e can be returned to their
factory settings.
* Songs secured with the Song Backup procedure (p. 31) are not
deleted when Factory Reset is executed.
1.
Hold down the [Split] button, and press the [Chorus] button.
The HP107e switches to the set mode.
2.
Press the Key Touch [Touch] button.
The following appears in the display.
3.
Press the [Rec] button.
Factory Reset is executed.
When Factory Reset is finished, the following appears in
the display. Turn off the power at this time.
* Do not turn off the power until “End” is displayed in the
screen. Turning off the power before this is displayed may
damage the HP107e’s internal memory, rendering the instrument unusable.
(Song Backup)
Normally, any songs you have recorded are deleted when
you turn off the power to the HP107e. However, if you wish,
you can have such recorded songs be saved even while the
power is turned off. This function is called “Song Backup.”
* You cannot use the Song Backup function unless you have
recorded song.
1.
Hold down the [Split] button, and press the [Chorus] button.
The HP107e switches to the set mode.
2.
Press the [Song/Tempo] button.
The button’s indicator flashes.
The following appears in the display.
3.
Press the [Rec] button.
Song backup is executed.
When Song Backup is finished, the display and buttons
return to their normal appearance.
* You can select and play songs that have been backed up in the
same way as you do with the built-in songs (p. 12). Songs that
have been backed up are indicated in the display as shown
below.
ENGLISH
ENGLISH ENGLISH ENGLISH ENGLISH
Remembering the Settings
Even When the Power is
Turned Off (Memory Backup)
Normally, the various settings revert to their default values
when the power is turned off. However, you can specify that
the settings will be remembered even when the power is
turned off. This function is called “Memory Backup.”
* For more on the settings stored using Memory Backup, refer to
“Parameters Stored in Memory Backup” (p. 37).
1.
Hold down the [Split] button, and press the [Chorus] button.
The HP107e switches to the set mode.
2.
Press the [Metronome/Count In] button.
The button’s indicator flashes.
The following appears in the display.
3.
Press the [Rec] button.
Memory backup is executed.
When Memory Backup is finished, the display and buttons return to their normal appearance.
■
Deleting backed up songs
1.
Hold down the [Split] button, and press the
[Chorus] button.
2.
Press the [Song/Tempo] button.
The following appears in the display.
To cancel the procedure, press the [Play] button.
3.
Press the [Rec] button.
The backed up song is deleted.
The display and buttons return to their normal appear-
ance.
31
Page 34

HP107e – Chapter 5. Changing Various Settings
Using the V-LINK function
Connecting the HP107e to a V-LINK compatible image
device allows you to control the images with the HP107e.
V-LINK
V-LINK ( ) is functionality promoted by Roland
that allows linked performance of music and visual material. By using V-LINK-compatible video equipment,
visual effects can be easily liked to, and made part of the
expressive elements of a performance.
How to Use the V-LINK
1.
Hold down the [Split] button, and press the [Chorus] button.
The HP107e switches to the set mode.
2.
Press the [Right] button.
The button’s indicator flashes.
The following appears in the display.
OFF The V-LINK function is switched off.
On The V-LINK function is switched on. You can
control images using the twelve keys at the left
end of the keyboard.
Factory setting OFF
3.
Press the [-] and [+] buttons to switch the V-LINK
function on and off.
You can control images using the twelve keys at the left
end of the keyboard.
* While V-LINK is switched on, no sound is produced when you
press any of the twelve keys at the left end of the keyboard.
Making the Settings for the
USB Driver
If you intend to connect to a computer using the USB connector, you need to make the following setting before you make
the connection.
1.
Hold down the [Split] button, and press the [Chorus] button.
The HP107e switches to the set mode.
2.
Press the Piano Resonance [Damper] button.
The button’s indicator flashes.
The following appears in the display.
3.
Press the [-] and [+] buttons to set the driver.
Indication Description
vdr (Vendor)
GEn (Generic)
How to exit function mode
4.
Press the [Split] or [Chorus] button.
The button’s indicator returns to its original state.
Select this when using the supplied driver with
a USB connection.
Select this when using a generic USB driver
included with the OS with a USB connection.
How to exit function mode
4.
Press the [Split] or [Chorus] button.
The button’s indicator returns to its original state.
32
Page 35

Chapter 6. Connecting External Devices
Chapter 6. Connecting External Devices
ENGLISH
Connecting to Audio
Equipment
You can connect audio devices to play the sound of the
HP107e through the speakers of your audio system, or to
record your performance on a tape recorder or other recording device.
When connecting, please use an audio cable with a standard
phone plug (sold separately).
Connection examples
* To prevent malfunction and/or damage to speakers or other
devices, always turn down the volume, and turn off the power
on all devices before making any connections.
Playing the sound of the HP107e through
the speakers of an audio system/Recording
the performance of the HP107e on a
recording device
Input R/L (Line In,
Aux In)
HP107e
Playing the sound of an audio device
through the speakers of the HP107e
Output R/L (Line Out,
Aux Out)
HP107e
❍ Use the following procedure when turning on the power.
1.
Turn on the power of the connected device.
2.
Turn on the power of the HP107e.
3.
Adjust the volume of each device.
* You cannot use the HP107e to adjust the volume of the con-
nected sound generating device.
Turning off the power
1.
Set the volume of the HP107e and of the connected
devices to the minimum position.
2.
Turn off the power to the HP107e.
3.
Turn off the connected equipment.
ENGLISH
ENGLISH ENGLISH ENGLISH ENGLISH
❍ Use the following procedure when turning on the power.
1.
Turn on the power of the HP107e.
2.
Turn on the power of the connected device.
3.
Adjust the volume of each device.
* You can adjust the volume of a connected sound module with
the HP107e.
When Recording HP107e Performances on a Recording
Device
4.
Start recording with the connected device.
5.
Perform on the HP107e.
6.
When the performance ends, stop recording on the
connected equipment.
Connecting to the USB
Connector
You can use a USB connector to connect the HP107e to
your computer. For more details, refer to the separate
“USB Installation Guide.”
* Connecting your computer to the HP107e for the first time
requires installation of the “USB Driver” (on the included
CD-ROM) to the computer. For more details, refer to the sepa-
rate “USB Installation Guide.”
* Only MIDI data can be transmitted using USB.
* To prevent malfunction and/or damage to speakers or other
devices, always turn down the volume, and turn off the power
on all devices before making any connections.
* USB cables are not included. Consult your Roland dealer if
you need to purchase.
* Use a USB cable no longer than 3 meters.
* Turn on the power to the HP107e before starting up MIDI
applications on the computer. Do not turn the HP107e on or
off while any MIDI application is running.
* Do not connect or disconnect the USB cable while the
HP107e’s power is on.
* If not using USB, disconnect the USB cable from the HP107e.
* If during the transmission/reception of data, the computer
switches to energy-saving mode or suspended mode, or if
power is switched on or off, the computer may freeze, or the
HP107e’s operation may become unstable.
33
Page 36

HP107e – Chapter 6. Connecting External Devices
Connecting MIDI Devices
By connecting an external MIDI device and exchanging
performance data, you can control the performances on
one device from the other. For instance, you can output
sound from the other instrument or switch tones on the
other instrument.
■ What’s MIDI?
MIDI stands for Musical Instrument Digital Interface, an
international standard which allows performance information to be communicated among electronic musical
instruments and computers.
The HP107e provides MIDI connectors, which allow performance data to be exchanged with external devices.
When these connectors are used to connect the HP107e to
external devices, an even wider range of possibilities
becomes available.
* A separate publication titled “MIDI Implementation” is also
available. It provides complete details concerning the way
MIDI has been implemented on this unit. If you should require
this publication (such as when you intend to carry out bytelevel programming), please contact the nearest Roland Service
Center or authorized Roland distributor.
Connection examples
* To prevent malfunction and/or damage to speakers or other
devices, always turn down the volume, and turn off the power
on all devices before making any connections.
Playing the HP107e from a MIDI
sequencer/Recording an HP107e performance on a MIDI sequencer
MT Series
* MT-90s has no MIDI Out
InOut
connector.
MIDI
Perform on the HP107e to play a MIDI
sound generator
Sound Module
MIDI
OUTTHRU IN
HP107e
Making MIDI-related Settings
Here’s how you can set the transmit channel and other
MIDI-related settings.
How to enter function mode
1.
Hold down the [Split] button, and press the
[Chorus] button.
The HP107e switches to the set mode.
The indicators for the [Split] and [Chorus] buttons and
the button to which the function is assigned start flashing.
Setting various functions
2.
Press the button to which the desired function is
assigned.
The indicators for pressed button, [Split] button, and
[Chorus] button flash.
For details on the contents of each function, refer to the
explanations that follow.
3.
Press the [-] or [+] button to change the value.
If you press the [-] and [+] buttons simultaneously, the
setting will return to the original value.
HP107e
Set Local Off if you have connected the HP107e to a
MIDI sequencer. Refer to “Switching Local Control on
and off” (p. 35). Also set your MIDI sequencer to
MIDI Thru mode (so that messages received at MIDI
IN will be re-transmitted without change from MIDI
OUT). For details, refer to the owner’s manual of
your MIDI sequencer.
How to exit function mode
4.
Press the [Split] or [Chorus] button.
The button’s indicator will return to the previous state.
34
Page 37

Chapter 6. Connecting External Devices
■
MIDI send channel settings
MIDI features sixteen MIDI channels, numbered 1–16.
Simply connecting a cable is not enough for communication to take place. The connected devices must be set to
use the same MIDI channels. Otherwise, no sound will be
produced, and no sounds can be selected.
* The HP107e receives all channels 1–16.
* When using the HP107e in Dual mode (p. 19) or Split mode
(p. 20), the left hand of the performance is transmitted on
Channel 5 in Dual mode and in on Channel 3 in Split mode.
These MIDI Transmit channel settings are fixed and cannot be
changed. When connecting an external MIDI device while
using Dual or Split modes, use channels other than 3 and 5 for
the MIDI device.
If you press the Piano Resonance [String] button in
step 2 of “Making MIDI-related Settings”, a display like
the following will appear.
Value 1~16
Factory setting 1
■
Switching Local Control on and off
When connecting a MIDI sequencer, set Local Control to
“OFF.”
As illustrated, information describing what has been
played on the keyboard is passed to the internal sound
generator over two different routes, (1) and (2). As a
result, you hear overlapping or intermittent sounds. To
prevent this from happening, route (1) must be severed,
by setting the unit to what is known as “Local Off.”
(1) Local On
Sequencer
MIDI
Sound Gener-
ator
Each note is sounded
twice played
MIDI
IN
MIDI
OUT
OUT
MIDI
IN
(2) Thru function On
Memory
Local Control ON: The keyboard and the internal sound
generator are in a linked state.
Sound is emitted
* When a Roland MT series instrument is connected, it is not
necessary to make the Local Off setting. MT units transmit
Local Off messages when their power is switched on. If you
turn on the power in the order of the HP107e
→
MT series,
Local Off will be set automatically.
If you press the Piano Resonance [Key Off] button in
step 2 of “Making MIDI-related Settings”, a display like
the following will appear.
fig.disp-on
Value On, OFF
Factory setting On
■
Transmitting a performance you recorded
If you want to transmit a performance recorded on the
HP107e to an external MIDI device or computer, turn this
setting “On.” If this is “OFF,” the data will not be transmitted.
If you press the [Left] button in step 2 of “Making MIDIrelated Settings”, a display like the following will appear.
fig.disp-Off
Value On, OFF
Factory setting OFF
If you wish to save the performance recorded on the
HP107e, use the following procedure. In this situation,
your external sequencer is set its MIDI Thru feature to be
OFF. For details, refer to the owner’s manual of your
MIDI sequencer.
Connect a MIDI sequencer such as the MT series (p. 34).
Record the performance on the HP107e (p. 25).
Set this setting to “On.”
Start recording with the connected MIDI sequencer.
Start playback of the recorded song on the HP107e.
When playback ends, stop recording with the connected
MIDI sequencer.
Use a connected MIDI sequencer to save the data on a
floppy disk or other media.
ENGLISH
ENGLISH
ENGLISH ENGLISH ENGLISH ENGLISH
Sound Generator
Local On
Local Control OFF: The keyboard and the internal sound
generator are in an unlinked state. No sound will be produced by the keyboard when it is played.
No sound produced
Sound Generator
Local Off
35
Page 38

HP107e – Troubleshooting
Troubleshooting
If you think there’s a problem, read this first.
The power doesn’t come on
Is the power cord connected and plugged in correctly? (p. 9)
The button doesn’t work
Is the panel locked? (p. 30)
Turn the power off, then back on.
No sound is heard
Is the volume level of the HP107e turned all the way down? (p. 11)
Are headphones plugged in? (p. 10)
Has a plug remained connected to the Phones jack?
When headphones are connected, the keyboard’s speaker stops
playing.
Is Local Off selected?
When Local Control is set to OFF, no sound is produced by playing the keyboard. Set Local Control to “ON” (p. 35).
Is V-LINK switched on?
While V-LINK is switched on, no sound is produced when you
press any of the twelve keys at the left end of the keyboard.
No sound is heard (when a MIDI instrument is connected)
Have all devices been switched on?
Are the MIDI cables connected correctly?
Does the MIDI channel match the connected instrument? (p. 35)
Sounds are heard twice (doubled) when the keyboard is played
Is the HP107e in Dual performance? (p. 19)
When the HP107e is connected to an external sequencer, set it to
the Local OFF mode (p. 35).
Alternatively, the sequencer could be set so its MIDI Thru feature
is OFF.
Tone doesn’t change
Is the panel locked? (p. 30)
Turn the power off, then back on.
Are the indicators for the [Split] and [Chorus] buttons flashing?
Setting of functions is in progress. Press the [Split] or [Chorus]
button to exit function mode (p. 28, p. 34).
Not all played notes are sounded
The maximum number of notes that the HP107e can play simultaneously is 128.
Frequent use of the damper pedal when playing along with a
song may result in performance data with too many notes, causing some notes to drop out.
The tuning or pitch of the keyboard or song is off
Have you set Transpose? (p. 18)
Are the settings for the “Temperament” and “Stretch Tuning”
correct? (p. 29)
Is the setting for the “Master Tuning” correct? (p. 29)
Song doesn’t play back/ Only the sound of a particular instrument in a
song does not play
Are the indicator for the Track buttons ([Left] and [Right] buttons)
extinguished? (p. 24)
If the button indicator is out, the music on that track is not heard.
Press the track button so the indicator is illuminated.
Can’t record
Has the track buttons for recording been selected? (p. 25–p. 27)
Tempo of recorded song or metronome is off
If you select an built-in song in which the tempo changes during
the song, and then record, the tempo will change in the same way
for the performances. The tempo of the metronome will also
change in the same way.
If you record additional material without erasing the previously
recorded song, the song will be recorded at the first-recorded
tempo. Please erase the previously recorded song before you rerecord (p. 27).
The recorded performance has disappeared
Recorded performance that have not been backed up with Song
Backup is erased with the power is turned off. A performance
cannot be restored once it’s been deleted.
The HP107e includes a “Song Backup function” (p. 31), which
allows you to store song recorded with the HP107e in the instrument itself. Use the Song Backup function to save any performance you do not want deleted to the HP107e.
Depressing a pedal has no effect, or the pedal effect doesn’t stop
Is the pedal connected correctly?
Make sure the pedal cable extending from the stand is securely
connected to the pedal jack on the rear of the unit (p. 9).
The pedal rattles
Adjust the adjuster underneath the pedal so that the adjuster
presses firmly against the floor surface (p. 11).
Reverberation still audible even with Reverb turned off
Since the HP107e’s piano sounds accurately reproduce the depth
and reverberation of the original acoustic piano, you may find
that reverberation is audible when the Key Off function and
Grand Space are enabled.
If you want to eliminate the reverberation, turn off the Key Off
function (p. 14) and Grand Space (p. 16–16).
In the upper range, the sound changes abruptly beyond a certain key
On an acoustic piano, notes in the upper one and a half octaves of
the keyboard continue to sound until they decay naturally,
regardless of the damper pedal. There is a difference in the timbre
as well. Roland pianos faithfully simulate such characteristics of
the acoustic piano. On the HP107e, the range that is unaffected by
the damper pedal will change depending on the Key Transpose
setting.
A High-pitched whine is produced
When listening through headphones:
Some of the more flamboyant and effervescent piano tones feature an ample high-end component, which may make the sound
appear to have metallic reverberation added. Since this reverberation becomes particularly audible when supplemented by heavy
reverb, you may be able to diminish the problem by reducing the
amount of reverb applied to the sound.
When listening through speakers:
Here, a different cause (such as resonance produced by the
HP107e) would be suspect. Consult your Roland dealer or nearest
Roland Service Center.
The bass range sounds odd, or there is a vibrating resonance
When listening through speakers:
Playing at loud volumes may cause instruments near the HP107e
to resonate. Resonation can also occur with fluorescent light
tubes, glass doors, and other objects. In particular, this problem
occurs more easily when the bass component is increased, and
when the sound is played at higher volumes. Use the following
measures to suppress such resonance.
• Place speakers so they are 10–15 cm from walls and other surfaces.
• Reduce the volume.
• Move the speakers away from any resonating objects.
When listening through headphones:
Here, a different cause would be suspect. Consult your Roland
dealer or nearest Roland Service Center.
The volume level of the instrument connected to Input jacks is too low
Could you be using a connection cable that contains a resistor?
Use a connection cable that does not contain a resistor.
36
Page 39

Error Messages/Other Messages
Error Messages/Other Messages
Display Meaning
USr User Song. Stores recorded performances (p. 25).
Usr. The “.” in the display indicates that there is performance material already recorded (p. 25).
S.1~68 Built-in song number (p. 12).
S. U This is a song backed up with the Song Backup function (p. 31).
PU This appears when a song with a pickup (a song that does not start on the first beat) is played back.
dEL This appears when you attempt to delete a recorded song (p. 25, p. 27, p. 31).
E.32 The amount of performance information is too large, and further recording is not possible.
E.41 A problem such as a loose MIDI cable occurred. Make sure the MIDI cables are correctly hooked up.
_._._. V-LINK function is On (p. 32).
* Error messages are indicated by an “E.” before the number. Press any button, and you can cancel the error message.
ENGLISH
ENGLISH
Parameters Stored in Memory Backup
Key Off Resonance (On/Off, Volume) p. 14
String Resonance (On/Off, Depth) p. 14
Damper Resonance (On/Off, Depth) p. 15
Key Touch p. 15
Hammer Response p. 15
Piano Tone-Related Settings in Effect
When the Power is Turn On
Temperament (Temperament, Tonic) p. 29
Stretch Tuning p. 29
Grand Space (On/Off, Depth) p. 16, p. 16
Dynamic Emphasis (On/Off, Depth) p. 17
Master Tuning p. 29
Reverb (On/Off, Depth) p. 17
USB Driver Setting p. 32
ENGLISH ENGLISH ENGLISH ENGLISH
Other Settings
Applying the damper pedal to the left-hand keyboard area p. 30
Grand Space Mode p. 30
Split Point p. 20
Dual Balance, Layer Balance p. 19, p. 19
37
Page 40

HP107e – Easy Operation List
Easy Operation List
1 2 3
711 6 5 4
4 6 7 8 9 1411
8910
5
3
1
10 12 13
2
No. You want to Buttons Page
Press the [Split] and [Chorus] buttons simultaneously, and press the [●] button.
Local Control [Split] + [Chorus] → Piano Resonance [Key Off] p. 35
1
MIDI send channel settings [Split] + [Chorus] → Piano Resonance [String] p. 35
2
USB Driver Setting [Split] + [Chorus] → Piano Resonance [Damper] p. 32
3
Grand Space Mode [Split] + [Chorus] → [Grand Space] p. 30
4
Master Tuning [Split] + [Chorus] → [Piano] p. 29
5
Selecting a temperament
6
Specifying the keynote
Stretch tuning [Split] + [Chorus] → [Harpsichord] p. 29
7
Octave Shift [Split] + [Chorus] → [Organ] p. 30
8
Applying the damper pedal to the left-hand keyboard area [Split] + [Chorus] → [Strings] p. 30
9
[Split] + [Chorus] → [E. Piano]→
[E. Piano] + key
p. 29
Song Backup [Split] + [Chorus] → [Song/Tempo] p. 31
10
Memory Backup [Split] + [Chorus] → [Metronome/Count In] p. 31
11
Transmitting a recorded performance [Split] + [Chorus] → [Left] p. 35
12
V-LINK [Split] + [Chorus] → [Right] p. 32
13
Factory Reset [Split] + [Chorus] → Key Touch [Touch] p. 31
14
Hold down the [ ] button and press the [-] or [+] button.
Beat of metronome [Song/Tempo] + [-] [+] p. 21
1
Metronome volume [Metronome/Count In] + [-] [+] p. 21
2
Layer Balance (Dual Balance) [Acoustic Layering] + [-] [+] p. 19
3
Damper pedal’s resonance level Piano Resonance [Damper] + [-] [+] p. 15
4
String’s resonance level Piano Resonance [String] + [-] [+] p. 14
5
Key Off volume Piano Resonance [Key Off] + [-] [+] p. 14
6
Depth of the Chorus effect [Chorus] + [-] [+] p. 17
7
Depth of the Reverb effect [Reverb] + [-] [+] p. 17
8
Dynamic Emphasis setting [Dynamic Emphasis] + [-] [+] p. 17
9
Grand Space setting [Grand Space] + [-] [+] p. 16, p. 16
10
Press the [ ] button, and press the [-] or [+] button.
Dual Balance (Layer Balance) [Transpose] + [Split] → [-] [+] p. 19
11
Hold down the [Split] or [Transpose] button and press the key.
Split Point [Split] + key p. 20
Key Transpose [Transpose] + key p. 18
38
Page 41

Main Specifications
Main Specifications
Keyboard
Keyboard 88 keys (Progressive Hammer Action Keyboard with Escapement)
Touch Sensitivity
Keyboard Mode Whole, Layer/Dual (volume balance adjustable), Split (split point adjustable)
Sound Generator
Max. Polyphony 128 voices
Tones 5 groups 36 variations+ 4 tones for Layer
Temperament 8 types, selectable tonic
Stretched Tuning 2 types
Master Tuning 415.3 Hz–466.2 Hz (0.1 Hz Step)
Transpose -6–+5 (in semitones)
Effects
Metronome
Beat 2/2, 0/4, 2/4, 3/4, 4/4, 5/4, 6/4, 7/4, 3/8, 6/8, 9/8, 12/8
Volume 10 levels
Recorder
Tracks 2 tracks
Song 1 song (Rememberable)
Note Storage Approx. 10,000 notes
Tempo Quarter note = 10–500
Resolution 120 ticks per quarter note
Control Play/Stop, Rec, Tempo, All Song Play, Track Select
Built-in Songs 68 songs + 14 Tone Demo songs
Others
Rated Power Output 50 W x 2
Speakers 20 cm x 2 (Speaker Box), 10cm x 2
Display
Control Volume, Brilliance
Pedals Damper (half-pedal recognition), Soft (half-pedal recognition), Sostenuto (function assignable)
Other Functions Panel Lock, Song backup, Memory backup, Factory Reset
Connectors
Power supply AC 230V
Power Consumption 110 W
Dimensions
(including piano stand)
Weights
(including Piano Stand)
Accessories
* In the interest of product improvement, the specifications and/or appearance of this unit are subject to change without prior notice.
Touch: Light, Medium, Heavy, Fixed
Hammer: Light, Medium, Heavy, Off
Grand Space, Dynamic Emphasis, Piano Resonance (Key Off Resonance, String Resonance,
Damper Resonance), Reverb (10 levels), Chorus (10 levels)
Beat LED
7 segments, 3 characters (LED)
Headphones indicator
USB connector (MIDI), Output jacks (L/Mono, R), Input jacks (L/Mono, R), Headphone jack x 2 (Stereo),
MIDI connectors (In, Out)
1,425 (W) x 536 (D) x 931 (H) mm (music rest down)
1,425 (W) x 536 (D) x 1,083.5(H) mm (music rest up)
82kg
Owner’s manual, Roland 60 Classical Piano Masterpieces, USB Installation Guide,
CD-ROM (Roland Digital Piano USB Driver), Power Cord, Headphone Hook
ENGLISH
ENGLISH
ENGLISH ENGLISH ENGLISH ENGLISH
39
Page 42

HP107e – Main Specifications
40
Page 43

Bedienungsanleitung
Vielen Dank, dass Sie sich für ein Digital-Piano HP107e von Roland entschieden haben.
Die wichtigsten Funktionen
Klavierklänge mit einer breit gefächerten Resonanz und einer großen Expressivität
Die Stereo-Samples liefern einen besonders realistischen Klangeindruck, weil selbst die beim Auftreffen der Hämmer auf die Saiten entstehenden Geräusche berücksichtigt werden. Somit ist ein
realistischer Klavierklang gewährleistet, der kaum noch von einem akustischen Flügel zu unterscheiden ist. Das Instrument ist 128-stimmig polyphon. Sie können das Dämpferpedal also bedenkenlos verwenden, ohne befürchten zu müssen, dass Noten wegfallen.
Dieses Instrument erkennt selbst die feinsten Nuancen Ihres Spiels und gibt sie naturgetreu wieder: Anschlagvariationen, Simulation der Saitenresonanzen bei der Tastenfreigabe und bei Verwendung des Pedals (“Piano Resonance”) usw. Darüber hinaus enthält das Instrument ein “Grand
Sound”-Lautsprechersystem, das im Zusammenspiel mit der “Grand Space”- und “Dynamic
Emphasis”-Funktion den druckvollen, brillanten und dreidimensionalen Klangeindruck eines
Konzertflügels überzeugend simuliert.
Ansprache und Anschlagverhalten eines Flügels
Dieses Instrument enthält eine “Progressive Hammer Action”-Tastatur, die das gleiche Spielgefühl
vermittelt wie die Klaviatur eines Flügels: Im Bass ist der Widerstand der Tasten nämlich etwas
größer als im Diskant. Die Klaviatur des HP107e erzeugt zudem das für einen Flügel typische “Klicken” der Tasten (Druckpunktsimulation bzw. “Escapement”).
Die Anschlagdynamik kann auf zwei Arten ausgewertet werden: Über die “Hammeransprache”
(die das Verhalten der Hämmer simuliert) und über die Tastenansprache. Auch die Pedale sprechen besonders akkurat an, so dass wirklich alle Facetten Ihres Spiels zum Tragen kommen.
Lesen Sie sich vor dem Einsatz folgende Punkte durch:
“Hinweise für eine sichere
Handhabung” (S. 42) und
“Wichtige Hinweise” (S. 44).
Dort finden Sie wichtige Bedien- und Sicherheitshinweise. Außerdem müssen Sie
sich natürlich die gesamte Bedienungsanleitung durchlesen, um alle Funktionen kennen zu lernen und bei der Bedienung alles richtig zu machen. Bewahren Sie die Bedienungsanleitung für die späte-
re Bezugnahme an einem sicheren Ort auf.
Expressivität, die es nur auf Digital-Instrumenten gibt
Das HP107e bietet ausnahmslos authentische Klänge, deren Verhalten jenem der akustischen Vorlagen sehr nahe kommt. Bei Bedarf können dem Klavierklang andere Klangfarben hinzugefügt
(und auf Wunsch sogar in Oktavschritten transponiert) werden. Die Balance der beiden Klänge
lässt sich über ein Pedal einstellen.
Auch im Kopfhörer überlegen
Bei Verwendung eines Kopfhörers kommen spezielle Effekte zum Einsatz, die einen angenehmen
und niemals ermüdenden Klangeindruck bewirken. Wenn Sie einen Kopfhörer anschließen, leuchtet eine Diode im Bedienfeld. Ferner ist das HP107e mit einem Haken ausgestattet, an dem Sie den
Kopfhörer bequem aufhängen können.
Eine Vielzahl praktischer Übungsfunktionen und interne Klavierstücke
Eine Metronomfunktion und ein 2-Spur-Recorder sowie die 60 internen Klavierstücke mit dazugehörigem Notenheft sowie weitere praktische Funktionen, die man nur auf einem Digital-Piano findet, machen dieses Instrument auch für Unterrichtszwecke geeignet.
Copyright ©2004 ROLAND CORPORATION.
Alle Rechte vorbehalten. Diese Bedienungsanleitung darf ohne die schriftliche Genehmi-
gung der ROLAND CORPORATION weder auszugsweise, noch vollständig kopiert werden.
Page 44

Hinweise für eine sichere Handhabung
HINWEISE FÜR EINE SICHERE HANDHABUNG
MASSNAHMEN FÜR DIE VERMEIDUNG VON BRÄNDEN, STROMSCHLÄGEN UND VERLETZUNGEN
Über die WARNUNG und VORSICHT Hinweise Über die Symbole
Dieses Symbol signalisiert Dinge, welche
WARNUNG
VORSICHT
den Anwender bei unsachgemäßer Behandlung auf die Gefahr schwerer Verletzungen
(eventuell mit Todesfolge) hinweisen.
Weist auf Verletzungsgefahr oder mögliche
Sachschäden hin, die sich aus einer unsachgemäßen Bedienung ergeben können.
* Mit "Sachschäden" sind hier Schäden an
den Möbeln oder Verletzungen von
Haustieren gemeint.
BITTE FOLGENDE PUNKTE BEACHTEN
WARNUNG
• Lesen Sie sich vor dem Einsatz dieses Produkts
alle Hinweise dieser Seite sowie den Rest dieser
Bedienungsanleitung durch.
...........................................................................................................
•Öffnen Sie das Instrument niemals und nehmen
Sie keine Modifikationen vor.
...........................................................................................................
• Versuchen Sie niemals, das Gerät zu öffnen oder
selbst defekte Teile zu erneuern (es sei denn, die
Bedienungsanleitung enthält ausdrückliche
Anweisungen). Überlassen Sie alle Wartungs- und
Reparaturarbeiten Ihrem Roland-Händler, einer
qualifizierten Kundendienststelle oder dem offiziellen
Roland-Vertrieb (siehe die Adressen auf der “Information”-Seite).
...........................................................................................................
• Verwenden bzw. lagern Sie dieses Gerät niemals
an folgenden Orten:
• Orte, die extremen Temperaturen ausgesetzt sind
(z.B. in der prallen Sonne, in einem geschlossenen
Fahrzeug, in der Nähe eines Heizkörpers, Herdes
usw.);
• Feuchte Orte (Bad, Waschküche, nasser Fußboden
usw.);
• Nasse Orte;
• Draußen im Regen;
• Staubige Orte;
• Orte, die starken Vibrationen ausgesetzt sind.
...........................................................................................................
• Dieses Instrument darf nur auf einen Ständer
gestellt werden, der von Roland ausdrücklich
empfohlen wird.
...........................................................................................................
• Stellen Sie das Gerät immer auf eine ebene und
stabile Oberfläche. Verwenden Sie niemals ein
wackliges Stativ bzw. ein Stativ, auf dem das
Gerät geneigt aufgestellt würde.
...........................................................................................................
• Schließen Sie dieses Produkt nur an eine Steckdose an, die den Angaben in dieser Bedienungsanleitung bzw. auf dem Typenschild entspricht.
...........................................................................................................
Das Symbol weist auf wichtige Instruktionen oder Warnungen hin. Die genaue Bedeutung des Symbols richtet sich
nach dem Zeichen in dem Dreieck. Das hier gezeigte Symbol
bedeutet beispielsweise, daß es sich um einen allgemeinen
Hinweis auf mögliche Gefahren handelt.
Das Symbol verweist auf Handlungen hin, die Sie niemals
ausführen dürfen (welche verboten sind). Was genau verboten ist, können Sie an dem Symbol in dem Kreis ablesen.
Das hier gezeigte Symbol bedeutet beispielsweise, daß das
Gehäuse nicht geöffnet werden darf.
Das ● Symbol bezeichnet Dinge, die Sie unbedingt
ausführen müssen. Auch hier richtet sich die genaue Bedeutung nach dem Symbol in dem schwarzen Kreis. Das hier gezeigte Symbol bedeutet beispielsweise, daß der Netzanschluß
gelöst werden muß.
• Verwenden Sie ausschließlich das beiliegende
Netzkabel. Umgekehrt eignet sich das beiliegende
Netzkabel nicht für andere Geräte.
...........................................................................................................
WARNUNG
• Beschädigen Sie niemals das Netzkabel und stellen Sie keine schweren Gegenstände darauf. Verlegen Sie es so, dass es weder gequetscht, noch
anderweitig abgeklemmt wird. Bei Verwendung
eines beschädigten Kabels besteht Stromschlagbzw. Brandgefahr.
...........................................................................................................
• Dieses Gerät kann entweder von sich aus oder im
Zusammenspiel mit einem Verstärker oder Kopfhörer einen Schallpegel erzeugen, der zu einem
permanenten Hörschaden führen kann. Verwenden Sie es niemals über einen längeren Zeitraum
bei hohem Schallpegel. Wenden Sie sich bei Verdacht auf Gehörverlust oder anderen Beschwerden sofort an einen Ohrenarzt.
...........................................................................................................
• Achten Sie darauf, dass niemals Fremdkörper
(brennbare Stoffe, Münzen, Büroklammern usw.)
oder Flüssigkeiten (Wasser, Getränke usw.) in das
Geräteinnere gelangen.
...........................................................................................................
• Schalten Sie das Gerät sofort aus, lösen Sie den
Netzanschluss und wenden Sie sich an Ihren
Roland-Händler oder den Vertrieb (siehe die
“Information”-Seite), wenn:
• Das Netzkabel oder der Stecker sichtbare Schäden
aufweist;
• Wenn Rauch aus dem Gerät kommt bzw. wenn es
verbrannt riecht.
• Wenn Fremdkörper oder Flüssigkeiten ins
Geräteinnere gelangt sind.
• Das Gerät im Regen gestanden hat (oder nass
geworden ist);
• Sich das Gerät nicht erwartungsgemäß verhält
oder in seiner Leistung merklich nachgelassen hat.
...........................................................................................................
Page 45

WARNUNG
• In Familien mit kleinen Kindern müssen die Eltern
darauf achten, dass die Kinder das Gerät erst dann
alleine bedienen, wenn sie mit allen wichtigen
Bedienungsverfahren vertraut sind.
...........................................................................................................
014
• Setzen Sie das Gerät niemals schweren
Erschütterungen aus.
• (Lassen Sie es niemals fallen!)
...........................................................................................................
015
• Schließen Sie das Netzkabel niemals an einen
Stromkreis an, der bereits mehrere andere Geräte
speist. Seien Sie besonders vorsichtig mit Verlängerungskabeln: die Gesamtleistungsaufnahme
aller daran angeschlossenen Geräte darf niemals
größer sein als die Angaben auf dem Kabel, weil
sonst die Adern schmelzen, was zu Kurzschlüssen
führt.
...........................................................................................................
016
• Vor dem Einsatz dieses Produkts im Ausland
wenden Sie sich mit eventuellen Fragen bezüglich
der Stromversorgung bitte an Ihren Händler oder
den Vertrieb (siehe die “Information”-Seite).
...........................................................................................................
026
• Spielen Sie eine CD-ROM UNTER KEINEN
UMSTÄNDEN mit einem herkömmlichen CDPlayer ab. Das könnte nämlich zu Hörschäden
und einer Beschädigung der Lautsprecher bzw.
anderer Komponenten Ihrer Anlage führen.
...........................................................................................................
026
• Stellen Sie niemals Flüssigkeitsbehälter (Vasen
usw.) auf das Instrument. Vermeiden Sie außerdem die Verwendung von Insektensprays, Parfüm, Alkohol, Nagellack, Spraydosen usw. in
unmittelbarer Nähe des Geräts. Falls das Gehäuse
trotzdem Spritzer abbekommt, müssen Sie diese sofort
wegwischen.
...........................................................................................................
VORSICHT
• Das Gerät und Netzkabel müssen immer so aufgestellt bzw. verlegt werden, dass eine ausreichende
Lüftung gewährleistet ist.
...........................................................................................................
• Ziehen Sie beim Lösen des Netzanschlusses nur
am Stecker des Netzkabels und niemals am Kabel,
um das Reißen der Adern zu vermeiden.
...........................................................................................................
• Lösen Sie den Netzstecker in regelmäßigen
Abständen und reinigen Sie ihn mit einem trockenen Tuch, um die Steckerstifte von Staub und
anderem Schmutz zu befreien. Außerdem sollten
Sie den Netzanschluss lösen, wenn Sie das Gerät
längere Zeit nicht verwenden möchten. Bedenken
Sie, dass Staub zwischen dem Netzstecker und der
Anschlussbuchse zu einer ungenügenden Isolierung führen und einen Brand verursachen kann.
...........................................................................................................
• Netz- und Signalkabel sollten niemals miteinander verdreht werden. Verlegen Sie alle Kabel
außerdem immer außerhalb der Reichweite von
Kindern.
...........................................................................................................
106
• Setzen Sie sich niemals auf das Gerät und stellen
Sie keine schweren Gegenstände darauf.
...........................................................................................................
VORSICHT
• Fassen Sie das Netz- und die übrigen Kabel niemals mit feuchten oder nassen Händen an.
• Beachten Sie beim Transport des Gerätes folgende
Hinweise. Am besten bitten Sie jemanden, Ihnen
beim Tragen des Instrumentes zu helfen. Halten
Sie das Instrument waagerecht und transportieren Sie es mit äußerster Vorsicht, um Verletzungen und Schäden zu vermeiden.
• Kontrollieren Sie, ob die Schrauben, mit denen das
Instrument am Ständer befestigt wurde, noch fest
sitzen. Wenn sie sich gelöst haben, müssen Sie sie
sofort wieder fest andrehen.
• Lösen Sie den Netzanschluss.
• Lösen Sie die Kabel aller externen Geräte.
• Drehen Sie die Einstellschraube weiter heraus
(S. 51).
• Schließen Sie die Tastenklappe.
• Klappen Sie den Notenständer hinunter.
...........................................................................................................
109a
• Schalten Sie das Instrument vor dem Reinigen aus
und lösen Sie den Netzanschluss (S. 49).
...........................................................................................................
110a
• Im Falle eines Gewitters lösen Sie am besten den
Netzanschluss.
116
• Seien Sie beim Öffnen und Schließen des Tastaturdeckels vorsichtig, um Sie sich nicht die Finger zu
klemmen (S. 50). Am besten überlassen Sie das
niemals einem Kind.
...........................................................................................................
118b
• Wenn Sie Schrauben oder Muttern des Notenoder Pianoständers bzw. die Flügelmutter lösen,
müssen Sie sie an einem sicheren Ort –auf jeden
Fall aber außerhalb der Reichweite von Kindern–
aufbewahren, damit niemand sie verlegt bzw. verschluckt.
...........................................................................................................
DEUTSCH
DEUTSCH
DEUTSCH DEUTSCH DEUTSCH DEUTSCH
Page 46

HP107e – Wichtige Hinweise
Wichtige Hinweise
Bitte lesen Sie sich außer “IMPORTANT SAFETY INSTRUCTIONS” und “Hinweise für eine sichere Handhabung” (S. 42)
auch folgende Punkte durch:
Stromversorgung
• Schließen Sie das Instrument niemals an eine Steckdose
an, die auch Geräte speist, welche mit einem Wechselrichter arbeiten (z.B. Kühlschrank, Waschmaschine,
Mikrowellenherd oder Klimaanlage) oder einen Motor
enthalten. Solchen Geräte können nämlich Funktionsstörungen und hörbare Störgeräusche verursachen. Wenn
Sie keine andere Möglichkeit haben, sollten Sie einen
Netzfilter zwischen dem Instrument und jener Steckdose
verwenden.
307
• Schalten Sie das Instrument sowie die übrigen Geräte
Ihrer Anlage aus, bevor Sie sie miteinander verbinden.
Nur so ist nämlich sichergestellt, dass es weder zu Fehlfunktionen noch zu Schäden an den Lautsprechern
kommt.
308
• Obwohl das Display und die Dioden bei Drücken des
POWER-Schalters ausgehen, ist das Gerät nach wie vor
mit dem Netz verbunden. Um auch die Stromzufuhr zu
unterbinden, müssen Sie nach Drücken des POWERSchalters den Netzanschluss lösen. Daher sollten Sie das
Gerät nach Möglichkeit an eine Steckdose anschließen,
die man bequem erreicht bzw. ein beschaltetes Verlängerungskabel verwenden.
Aufstellung
• Wenn das Gerät zu nahe an Verstärkern oder größeren
Transformatoren platziert wird, können Brummgeräusche entstehen. Stellen Sie das Gerät bzw. die andere
Störquelle dann etwas weiter entfernt auf.
352a
• Dieses Gerät könnte den Empfang von Radios oder Fernsehgeräten beeinträchtigen. Betreiben Sie es niemals in
der Nähe solcher Empfänger.
352b
• Wenn Sie in der Nähe dieses Gerätes ein drahtloses Telefon bzw. Handy verwenden, können Brummgeräusche
entstehen. Das ist vor allem bei Erhalt oder Beginn eines
Anrufs der Fall. Daher raten wir, niemals in unmittelbarer Nähe des Gerätes zu telefonieren und das Handy
sogar auszuschalten.
354b
• Setzen Sie das Gerät keinen extremen Temperaturen (z.B.
direkter Sonneneinstrahlung) aus und lassen Sie es nicht
in einem geschlossenen Auto liegen, das in der Sonne
steht. Vermeiden Sie außerdem, dass Leuchten mit einem
starken Lichtstrahl lange Zeit auf dieselbe Stelle des
Gehäuses strahlen. Nur so ist sichergestellt, dass sich das
Gehäuse weder verfärbt, noch verformt.
355b
• Wenn das Gerät von einem kälteren/feuchteren Ort an
einen wärmeren/trockeneren Ort (oder umgekehrt)
gebracht wird, könnte es zu Kondensbildung kommen.
Im Extremfall führt dies beim Einschalten zu einem Kurzschluss oder Brand. Warten Sie nach dem Transport also
mehrere Stunden, bevor Sie das Gerät einschalten, damit
das Kondenswasser verdampfen kann.
• Gegenstände aus Gummi, Vinyl o.ä. sollten niemals längere Zeit auf das Gerät gestellt werden, weil das zu einer
Verfärbung bzw. schwer entfernbaren Rändern führt.
358
• Legen Sie niemals (schwere) Gegenstände auf die Tastatur. Das könnte nämlich dazu führen, dass die Tasten
nicht mehr erwartungsgemäß reagieren.
359
• Bringen Sie niemals Aufkleber oder andere Ziergegenstände auf dem Instrument an. Wenn Sie diese nämlich
später wieder entfernen, bleiben eventuell Reste kleben
bzw. entstehen Ränder, die sich kaum noch entfernen lassen.
Wartung und Pflege
• Verwenden Sie für die Reinigung ein weiches, trockenes
Tuch, das bei Bedarf auch leicht angefeuchtet werden
darf. Bei stärkerer Verschmutzung kann auch ein mildes,
neutrales Reinigungsmittel verwendet werden. Wenden
Sie dabei niemals Gewalt an, um das Gehäuse nicht zu
beschädigen.
402
• Verwenden Sie kein Benzin, Verdünner, Alkohol o.ä., um
eine Beschädigung oder Verfärbung der Geräteoberfläche
zu vermeiden.
• Die Pedale sind aus Messing.
Messing wird nach und nach dunkler, was auf eine Oxidierung zurückzuführen ist. Daher sollten Sie die Pedale
in regelmäßigen Zeitabständen mit einem Metallreiniger
säubern.
Reparaturen und Datenspeicher
• Bitte beachten Sie, dass der Speicherinhalt verloren gehen
kann, wenn das Instrument zur Reparatur eingereicht
wird. Archivieren Sie alle wichtigen Daten via MIDI oder
notieren Sie sie, bevor Sie das Instrument zur Reparatur
einreichen. Zwar geben wir uns große Mühe, den Speicherinhalt zu erhalten, jedoch können wir das nicht
garantieren. Bei bestimmten Reparaturen (z.B. wenn eine
Schaltung oder der Speicherbereich selbst beschädigt ist)
können die intern gespeicherten Daten nicht wiederhergestellt werden. Roland haftet nicht für den Verlust solcher Daten.
Weitere Vorsichtsmaßnahmen
• Beachten Sie, dass der Speicherinhalt im Falle einer Störung bzw. bei unsachgemäßer Behandlung gelöscht werden kann. Roland kann nicht garantieren, dass diese
Daten auch wieder in den internen Speicher geladen werden können. Daher raten wir, Ihre Einstellungen in regelmäßigen Zeitabständen via MIDI (z.B. mit einem Sequenzer) extern zu archivieren.
552
• In bestimmten Fällen können via MIDI (z.B. mit einem
Sequenzer) archivierte Daten nicht mehr geladen werden.
Roland haftet nicht für Schäden, die sich aus solchen
Datenverlusten ergeben könnten.
553
• Behandeln Sie die Bedienelemente und Anschlussbuchsen des Gerätes mit der gebührenden Umsicht. Eine
etwas zu forsche Handhabung kann nämlich zu Schäden
führen.
44
Page 47

• Ziehen Sie beim Herstellen bzw. Lösen der Anschlüsse
nur an den Steckern – niemals an den Kabeln. Nur so vermeiden Sie das Reißen der Adern bzw. Schäden an den
internen Komponenten.
557
• Während des Betriebs wird das Gerät warm. Das ist völlig normal.
558a
• Um die Nachbarn oder die übrigen Familienmitglieder
nicht zu stören, sollten Sie die Lautstärke immer in vertretbaren Grenzen halten. Am besten verwenden Sie spät
Abends oder früh Morgens einen Kopfhörer.
559b
• Transportieren Sie das Instrument immer im OriginalLieferkarton bzw. in einem geeigneten Koffer o.ä., um
das Gehäuse nicht unnötig zu beschädigen.
560
• Belasten Sie den Notenständer niemals übermäßig.
562
• Verwenden Sie zum Herstellen von Audioverbindungen
ausschließlich Roland-Kabel. Wenn Sie sich trotzdem für
eine andere Marke entscheiden, beachten Sie bitte folgende Punkte:
• Bestimmte Verbindungskabel enthalten Widerstände.
Diese sind für die Verwendung mit diesem Gerät nicht
geeignet, weil die Lautstärke sonst u.U. viel zu gering ist.
Im Extremfall hören Sie überhaupt nichts mehr. Wenden
Sie sich im Zweifelsfall an den Hersteller oder Vertrieb
der verwendeten Audiokabel.
565
• Sorgen Sie vor Öffnen oder Schließen der Tastenklappe
dafür, dass sich kein Haus- oder Kleintier auf dem Instrument befindet (insbesondere nicht in der Nähe der Tastatur oder der Klappe). Andernfalls könnte es zwischen
Klappe und Tastatur geraten und dort eingeschlossen
werden. Dann müssen Sie das Gerät sofort ausschalten
und den Netzanschluss lösen. Wenden Sie sich anschließend an Ihren Roland-Händler oder an die nächste Kundendienststelle.
Wichtige Hinweise
DEUTSCH
DEUTSCH
DEUTSCH DEUTSCH DEUTSCH DEUTSCH
Handhabung von CD-ROMs
• Vermeiden Sie Kratzer und Flecke auf der glänzenden
(Daten)Seite der CD. Beschädigte und/oder schmutzige
CD-ROMs sind u.U. unleserlich. Bei Bedarf können Sie
sie mit einem CD-Reinigungsmittel säubern.
45
Page 48

HP107e – Inhaltsverzeichnis
Inhaltsverzeichnis
Hinweise für eine sichere Handhabung .........................42
Wichtige Hinweise............................................................44
Beschreibung der Bedienelemente ................................47
Bedienfeld ..........................................................................................................47
Rückseite ............................................................................................................48
Unterseite ...........................................................................................................48
Vorbereitung .....................................................................49
Anschließen des Pedalkabels ..........................................................................49
Anschließen des Lautsprecherkabels............................................................. 49
Anschließen des Netzkabels............................................................................ 49
Verwendung des Notenständers.................................................................... 49
Öffnen/Schließen des Tastaturdeckels.......................................................... 50
Anschließen eines Kopfhörers ........................................................................50
Verwendung des Kopfhörerhakens................................................50
Ein- und Ausschalten .......................................................................................51
Lautstärke und Klangfarbe.............................................................................. 51
Über die Pedale .................................................................................................51
Kapitel 1. Abspielen der internen Stücke.......................52
Anhören der internen Stücke ..........................................................................52
Abspielen aller Klavierstücke..........................................................52
Anwahl des Stückes, das Sie sich anhören möchten....................52
Anhören der Demosongs................................................................................. 53
Abspielen einer Klangdemo.............................................................53
Anhören einer Funktionsdemo .......................................................53
Kapitel 2. Und nun dürfen Sie spielen............................54
Kapitel 3. Spielen zu den internen Stücken................... 63
Ändern des Tempos..........................................................................................63
Starten der Wiedergabe nach einem Einzähler.............................63
Separate Wiedergabe der beiden Hände .......................................................64
Kapitel 4. Aufnehmen Ihres Spiels ................................. 65
Aufnahme eines neuen Stücks ........................................................................65
Aufnahme mit einem internen Stück .............................................................66
Aufnahme auf zwei Spuren.............................................................................67
Löschen einer Aufnahme .................................................................................67
Löschen einer Spur............................................................................67
Löschen eines Stückes.......................................................................67
Kapitel 5. Weitere Funktionen......................................... 68
Weiter führende Einstellungen (Funktionsmodus) .....................................68
Angleichen der Stimmung an ein anderes Instrument
(Gesamtstimmung)............................................................................68
Auswahl des Stimmungssystems ...................................................69
Andere Stimmungskurven (Stretch Tuning).................................69
Transponieren in Oktavschritten ....................................................70
Aktivieren des Dämpferpedals für die linke Hälfte.....................70
Einstellungen des “Grand Space”-Modus’....................................70
Verriegeln der Bedienelemente.......................................................................70
Laden der Werksvorgaben (Factory Reset) ...................................................71
Speichern der Einstellungen (Memory Backup)...........................................71
Speichern des aufgenommenen Stücks (Song Backup) ...............................71
Löschen eines gespeicherten Stücks ...............................................71
Verwendung der V-LINK-Funktion...............................................................72
Einstellen des USB-Treibers.............................................................................72
Kapitel 6. Anbindung externer Geräte ........................... 73
Klanganwahl...................................................................................................... 54
Feine Korrekturen des Klavierklangs (Piano Resonance)...........................54
Aktivieren des Klickens bei der Tastenfreigabe (Key Off)..........54
Simulieren der Saitenresonanz (String Resonance)......................54
Resonanzsimulation für das Pedalspiel (Damper Resonance) ...55
Einstellen der Anschlagdynamik (Key Touch)............................................. 55
Notenverzögerung bei variierendem Anschlag
(Hammer Response)..........................................................................55
Den Klang mit ‘Tiefe’ versehen (Grand Space) ............................................56
Den Klang im Kopfhörer mit ‘Tiefe’ versehen (Grand Space) ...................56
Den Klang ‘lebendiger’ machen (Dynamic Emphasis) ............................... 57
Verwendung der Digital-Effekte ....................................................................57
Verwendung des Halleffekts (Reverb)...........................................57
Verwendung des Chorus-Effekts (Chorus) ...................................57
Einstellen des Effektanteils ..............................................................57
Transponieren der Tastatur (“Transpose”-Funktion) ................................. 58
Hinzufügen eines komplementären Klangs zum Klavierklang
(Acoustic Layer) ................................................................................................ 58
Ändern der Balance im ‘Acoustic Layer’-Modus .........................59
Stapeln zweier Klänge (Dual-Modus)............................................................ 59
Lautstärkebalance im Dual-Modus (Dual Balance)......................59
Unterschiedliche Klänge für die linke/rechte Hand (Split-Modus) .........60
Ändern des Splitpunkts....................................................................60
Funktion des mittleren Pedals ........................................................................61
Verwendung des Metronoms ......................................................................... 61
Arbeiten mit dem Metronom...........................................................61
Ändern der Metronomlautstärke....................................................61
Aufteilen der Klaviatur für vierhändiges Spiel (Twin-Modus) .................62
Verwendung externer Audiogeräte................................................................73
Verwendung des USB-Anschlusses................................................................73
Arbeiten mit MIDI-Geräten .............................................................................74
Einstellen der MIDI-Funktionen ..................................................................... 74
Einstellen des MIDI-Kanals .............................................................75
Ein-/Ausschalten der Local-Funktion............................................75
Ausgabe der Recorder-Daten über MIDI OUT.............................75
Anhang.................................................................... 76
Fehlersuche ........................................................................................................76
Fehler- und andere Meldungen ......................................................................77
Speicherbare Einstellungen .............................................................................77
Übersicht der internen Funktionen ................................................................78
Technische Daten ..............................................................................................79
Tone List ......................................................................... 240
Built-in Song List ...........................................................241
MIDI Implementation Chart.................................. 243
46
Page 49

Beschreibung der Bedienelemente
Beschreibung der Bedienelemente
Bedienfeld
DEUTSCH
6
78 17
12 13 14
4325
92010 11
Power On
1
1.
[Power On]-Schalter
Hiermit schalten Sie das Instrument ein und aus (S. 51).
2.
[Volume]-Regler
Hiermit wird die Lautstärke eingestellt (S. 51).
3.
[Brilliance]-Regler
Hiermit regeln Sie die Klangfarbe (S. 51).
4.
[Demo]-Taster
Dient zur Anwahl der Klang- und Funktions-Demosongs
des Instruments (S. 53).
5.
[ (Kopfhörer)]-Diode
Diese Diode leuchtet, wenn Sie einen Kopfhörer an eine
der beiden Buchsen anschließen (S. 50).
6.
[Transpose]-Taster
Hiermit transponieren Sie die Klaviatur (S. 58).
7.
[Split]-Taster
Hiermit kann die Klaviatur in zwei Hälften geteilt werden. Dann lassen sich zwei unterschiedliche Klänge spielen (S. 60). Wenn Sie diesen Taster gemeinsam mit [Chorus] gedrückt halten, haben Sie Zugriff auf weitere Funktionen (S. 68~S. 72, S. 74~S. 75).
8.
[Chorus]-Taster
Hiermit schalten Sie den Chorus-Effekt ein/aus (S. 57).
9.
[Grand Space]-Taster
Versieht den Klang mit einer gewissen “Tiefe” (S. 56,
S. 56).
10.
[Dynamic Emphasis]-Taster
Macht den Klang brillanter und lebendiger (S. 57).
11.
[Reverb]-Taster
Hiermit schalten Sie den Halleffekt ein/aus (S. 57).
15
16 19
14.
[Damper]-Taster
Hiermit kann die Resonanz des Pedalspiels simuliert
werden (S. 55).
15.
[Acoustic Layering]-Taster
Hiermit können Sie dem gewählten Klavierklang einen
passenden Zweitklang hinzufügen (S. 58).
16.
Tone-Taster
Mit diesen Tastern wählen Sie die Familie des Klangs,
den Sie spielen möchten (S. 54).
17.
Anzeige
Das Display informiert Sie über die Einstellungen, darunter der aktuell gewählte Variationsklang, die Song-Nummer und das Tempo. Siehe obige Abbildung.
18.
[Song/Tempo]-Taster
Hiermit wählten Sie die intern gespeicherten Stücke
(S. 52, S. 63).
Außerdem können Sie mit diesem Taster abwechselnd
die Tempoangabe und die Nummer des gewählten
Stücks (“S.” vor der Nummer) aufrufen. Wenn das
Tempo angezeigt wird, leuchtet die Diode grün. Andernfalls leuchtet sie rot.
19.
[–] [+]-Taster
Hiermit stellen Sie Werte ein.
Drücken Sie [–] und [+] gemeinsam, um wieder den Vor-
gabewert der betreffenden Funktion zu wählen.
20.
[Metronome/Count In]-Taster
Hiermit schalten Sie das Metronom ein/aus (S. 61).
Außerdem können Sie eine Einzählfunktion aktivieren,
um zeitgleich mit den internen Stücken beginnen zu können (S. 63).
182321
22
DEUTSCH
24 25 26 27
DEUTSCH DEUTSCH DEUTSCH DEUTSCH
Piano Resonance
12.
[Key Off]-Taster
Erzeugt das typische Geräusch, das bei der Tastenfreigabe auftritt (S. 54).
13.
[String]-Taster
Hiermit aktivieren Sie eine Resonanzsimulation für die
gespielten Noten (S. 54).
TRACK
21.
[Left]-Taster
Dient zur Anwahl des Parts, den Sie sich anhören oder
aufnehmen möchten (S. 64, S. 66~S. 67).
Diesem Taster ist die linke Hand der internen Stücke
zugeordnet. Diesen und den [Right]-Taster unten wollen
wir die “Spurtaster” nennen.
47
Page 50

HP107e – Beschreibung der Bedienelemente
22.
[Right]-Taster
Dient zur Anwahl des Parts, den Sie sich anhören oder
aufnehmen möchten (S. 64, S. 66~S. 67). Diesem Taster ist
die rechte Hand der internen Stücke zugeordnet.
23.
[Play]-Taster
Hiermit starten und stoppen Sie die Wiedergabe der
internen und selbst aufgenommenen Stücke (S. 52, S. 63).
Außerdem starten/stoppen Sie hiermit die Aufnahme
(S. 65~S. 67).
24.
[Rec]-Taster
Hiermit aktivieren Sie die Aufnahmebereitschaft des
HP107e (S. 65~S. 67).
Bedienfeld
Unterseite
KEY TOUCH
25.
[Touch]-Taster
Hiermit ändern Sie die Anschlagdynamik (S. 55).
26.
[Hammer]-Taster
Hiermit stellen Sie ein, wie stark sich die Verzögerung
zwischen dem Anschlagen einer Taste und der Ausgabe
der entsprechenden Note nach dem Anschlag richtet
(S. 55).
27.
[Center Pedal]-Taster
Hiermit können Sie die Funktion des mittleren Pedals
wählen (S. 61).
Rückseite
Rückseite
Unterseite
31 32 33
28 29 30
28.
Pedal-Buchse
Schließen Sie hier das Kabel der Pedaleinheit an (S. 49).
29.
Input-Buchsen
Hier können die Audio-Ausgänge eines anderen Gerätes
angeschlossen werden. Dessen Signal wird dann ebenfalls über die Lautsprecher des HP107e ausgegeben
(S. 73).
30.
Output-Buchsen
Bei Bedarf können Sie diese Buchsen mit den Eingängen
eines Leistungsverstärkers, Mischpultes, Kassettendecks
usw. verbinden. Einen externen Verstärker brauchen Sie
nur, wenn Sie das Instrument in einem Saal o.ä. verwenden möchten (S. 73).
31.
Kopfhörerbuchsen
Hier können Sie einen oder zwei Kopfhörer anschließen
(S. 50).
32.
MIDI Out/In-Buchsen
Schließen Sie hier andere MIDI-kompatible Instrumente
an (S. 74).
33.
USB-Buchse
Diese kann mit einem Computer verbunden werden und
erlaubt also den Datenaustausch (S. 73).
48
Page 51

Vorbereitung
Vorbereitung
DEUTSCH
Anschließen des Pedalkabels
Schließen Sie das Pedalkabel an die Pedal-Buchse
auf der Rückseite des HP107e an.
Anschließen des
Lautsprecherkabels
Verbinden Sie das Kabel des Lautsprecherkastens
(am Ständer) wie gezeigt mit der Lautsprecherbuchse des HP107e.
Schieben Sie den Stecker so weit, bis er festklickt.
Lautsprecheranschluss
Klemmstecker
Lautsprecherkabel
Anschließen des Netzkabels
1.
Verbinden Sie den kleineren Stecker des beiliegenden Netzkabels mit dem Netzanschluss an der
Unterseite des HP107e.
2.
Verbinden Sie den größeren Stecker des Netzkabels mit einer Steckdose.
Verwenden Sie ausschließlich das beiliegende Netzkabel.
Anm.
Verwendung des
Notenständers
1.
Halten Sie den Notenständer mit beiden Händen
fest, während Sie ihn zu sich hinziehen, um ihn
hochzuklappen.
2.
Arretieren Sie den Notenständer mit der Stützklemme.
Für die Neigung des Notenständers stehen drei Positionen zur Verfügung.
DEUTSCH
DEUTSCH DEUTSCH DEUTSCH DEUTSCH
Stellen Sie niemals Flüssigkeitsbehälter (Vasen usw.) auf
Anm.
das Instrument. Vermeiden Sie außerdem die Verwendung von Insektensprays, Parfüm, Alkohol, Nagellack,
Spraydosen usw. in unmittelbarer Nähe des Geräts.
Die Lautsprecher dieses Pianos befinden sich unter der
Deckplatte und sind nach oben gedreht. Vermeiden Sie
daher, dass Flüssigkeiten auf die Lautsprecher tropfen.
Lautsprecher
1
2
■
Hinunterklappen des Notenständers
Heben Sie die Stützklemme an der Rückseite des
Notenständers hoch und senken Sie den Notenständer ab.
■
Verwendung der Klemmen
Bei Bedarf können Sie die Klemmen zum Halten der
Notenblätter verwenden. Wenn Sie die Klemmen nicht
brauchen, klappen Sie sie am besten wieder hinunter.
49
Page 52

HP107e – Vorbereitung
Anm.
■
Entfernen des Notenständers
Der Notenständer kann auch abgenommen werden.
Dann können Sie einen Laptop o.ä. auf das Instrument
stellen.
Klappen Sie den Notenständer zuerst hoch und
lösen Sie dann die drei Schrauben.
Die Schrauben können mit einer Geldmünze gelöst werden.
Bewahren Sie die Schrauben an einem sicheren Ort auf,
Anm.
um sie nicht zu verlieren und zu verhindern, dass Kleinkinder sie verschlucken.
Öffnen/Schließen des
Tastaturdeckels
Um den Tastaturdeckel zu öffnen, müssen Sie ihn
mit beiden Händen leicht anheben und zur Rückseite des Instruments schieben.
Um ihn zu schließen, heben Sie sie leicht an und
ziehen sie zu sich hin.
Schließen Sie einen Kopfhörer an eine der beiden
Buchsen links unter dem Instrument an.
Kopfhörerbuchse x2
Wenn mindestens ein Kopfhörer angeschlossen ist, leuch-
tet die [ ]-Diode (S. 47) und die Lautsprecher des
HP107e werden stummgeschaltet.
Die Lautstärke im Kopfhörer kann mit dem [Volume]Regler des HP107e eingestellt werden (S. 51).
Verwenden Sie nach Möglichkeit einen Stereokopfhörer.
Am besten entscheiden Sie sich für einen Kopfhörer von
Roland. Kopfhörer anderer Hersteller sind u.U. viel zu
leise.
Anmerkungen zur Verwendung von
Kopfhörern
• Um das Anschlusskabel des Kopfhörers weder zu dehnen
noch zu beschädigen, dürfen Sie nur den Kopfhörer anfassen.
• Wenn Sie den Kopfhörer anschließen, während die Lautstärke sehr hoch eingestellt ist, könnte der Kopfhörer
beschädigt werden. Am besten stellen Sie die Lautstärke des
HP107e vorher auf den Mindestwert.
•Überhaupt sollten Sie die Lautstärke immer in erträglichen
Grenzen halten, weil Sie sonst nicht nur den Kopfhörer
beschädigen, sondern sich auch einen Hörschaden zuziehen
können.
Seien Sie beim Öffnen/Schließen des Deckels vorsichtig,
Anm.
damit Sie sich nicht die Finger klemmen. Kinder sollten
den Tastaturdeckel des HP107e nur unter Aufsicht eines
Erwachsenen öffnen und schließen.
Schließen Sie den Tastaturdeckel vor dem Transport des
Anm.
Instruments, um Verletzungen zu vermeiden.
Anschließen eines
Kopfhörers
Ihr HP107e ist mit zwei Kopfhörerbuchsen versehen. Es können also zwei Kopfhörer angeschlossen werden, was z.B. für
den Unterricht oder zum Spielen vierhändiger Stücke notwendig ist. Außerdem stören Sie bei Verwendung eines
Kopfhörers niemanden.
■
Verwendung des Kopfhörerhakens
Bei Nichtbenutzung können Sie Ihren Kopfhörer an den
dafür vorgesehenen Haken links unter der HP107e-Tastatur hängen.
Anbringen des Kopfhörerhakens
Schieben Sie den beiliegenden Kopfhörerhaken mit einer
Drehbewegung in die Bohrung an der Unterseite des
HP107e (siehe die Abbildung). Arretieren Sie ihn
anschließend mit der Flügelmutter.
Flügelmutter
Kopfhörerhaken
50
Page 53

Ein- und Ausschalten
Vorbereitung
DEUTSCH
Über die Pedale
Nach Herstellen aller notwendigen Verbindungen müssen
Sie die Geräte in der richtigen Reihenfolge einschalten. Wenn
Sie eine andere als die hier erwähnte Reihenfolge wählen,
werden u.U. die Lautsprecher und/oder der Verstärker
beschädigt.
Vor dem Einschalten müssen Sie den [Volume]Regler auf den Mindestwert stellen. Drücken Sie
anschließend den [Power On]-Schalter.
Power On
Netzanzeige
Das HP107e wird eingeschaltet und die Diode vorne links
leuchtet.
Nach ein paar Sekunden hören Sie die auf der Klaviatur
gespielten Noten. Stellen Sie mit dem [Volume]-Regler
die gewünschte Lautstärke ein.
Das Gerät ist mit einer Schutzschaltung versehen.
Anm.
Daher dauert es nach dem Einschalten ein paar Sekunden, bevor Sie etwas hören.
Vor dem Ausschalten müssen Sie den [Volume]Regler auf den Mindestwert stellen. Drücken Sie
anschließend den [Power On]-Schalter.
Das HP107e wird ausgeschaltet und die Diode vorne
links erlischt.
Um auch die Stromzufuhr zu unterbinden, müssen Sie
Anm.
nach Drücken des POWER-Schalters den Netzanschluss
lösen. Siehe “Stromversorgung” (S. 44).
Lautstärke und Klangfarbe
Stellen Sie mit dem [Volume]-Regler die allgemeine Lautstärke ein.
Mit dem [Brilliance]-Regler können Sie die Klangfarbe (brillant/rund) einstellen.
Die Pedale haben –zumal beim Spielen von Klavierklängen–
folgende Funktionen:
Leisepedal Dämpferpedal
Sostenutopedal
Dämpferpedal (rechts)
Verwenden Sie dieses Pedal, um die gespielten Noten
länger zu halten.
Dieses Pedal arbeitet stufenlos, d.h. über die Pedalposition kann die Haltedauer der Noten exakt dosiert werden.
Bei einem akustischen Klavier schwingen bei Betätigen
dieses Pedals auch andere Saiten mit jenen der gespielten
Noten mit. Dadurch wird der Klang voller. Das
Dämpferpedal des HP107e simuliert dieses Phänomen,
das man “Saitenresonanz-Simulation” nennt.
Der Resonanzanteil ist einstellbar (S. 55).
Sostenutopedal (Mitte)
Wenn Sie das Sostenutopedal betätigen, werden nur die
zu dem Zeitpunkt gespielten Noten gehalten.
Diesem Pedal kann man auch eine andere Funktion
zuordnen (S. 61).
Leisepedal (links)
Mit diesem Pedal können Sie die Lautstärke der gespielten Noten verringern.
Da auch dieses Pedal stufenlos arbeitet, können Sie die
Lautstärkeverringerung ebenfalls exakt dosieren.
Über die Einstellschraube
Nach dem Transport des Instruments muss die Einstellschraube in der Regel nachjustiert werden.
❍ Drehen Sie die Einstellschraube so weit heraus, bis sie
den Boden berührt. Berührt sie den Boden nämlich nicht,
so werden u.U. nicht alle Pedalbewegungen ausgewertet.
Vor allem bei einem dicken Teppich ist darauf zu achten,
dass die Einstellschraube fest gegen den Untergrund
drückt.
DEUTSCH
DEUTSCH DEUTSCH DEUTSCH DEUTSCH
Min Max
Mellow
Bright
Einstellschraube
51
Page 54

HP107e – Kapitel 1. Abspielen der internen Stücke
Kapitel 1. Abspielen der internen Stücke
■
Anhören der internen Stücke
Das HP107e enthält 68 Klavierstücke.
“Kapitel 3. Spielen zu den internen Stücken” auf S. 63,
“Tone List” (S. 240)
■
Abspielen aller Klavierstücke
Bei Bedarf können alle internen Stücke der Reihe nach
abgespielt werden.
12
1.
Drücken Sie den [Song/Tempo]- und [Play]-Taster
gleichzeitig.
Die Diode des [Song/Tempo]-Tasters leuchtet und die
Diode des [Play]-Tasters blinkt. Die Wiedergabe beginnt
ab dem zuletzt gewählten Stück.
Im Display wird kurz die Nummer des aktuell gewählten
Stücks angezeigt.
Anwahl des Stückes, das Sie sich anhören
möchten
3, 4
2
Anwahl des Stückes
1.
Drücken Sie den [Song/Tempo]-Taster (Diode
muss rot leuchten).
Im Display wird kurz die Nummer des aktuell gewählten
Stücks angezeigt.
1
Display-Anzeige bei Anwahl der internen Stücke
USr (“User”) … Dieser Speicher enthält Ihre eigene
Aufnahme (Hinweise zur Aufnahme → S. 65).
S.1~S.68 … Interne Stücke
S. U … Das selbst gespeicherte Stück (S. 71)
Mit dem [–]- oder [+]-Taster können Sie ein anderes Stück
wählen.
Am Ende des letzten Stücks kehrt das Instrument zurück
zum ersten und setzt die Wiedergabe fort.
Anhalten der Wiedergabe
2.
Drücken Sie den [Play]-Taster.
Die Wiedergabe hält an.
2.
Wählen Sie mit [–] oder [+] ein Stück.
Bei Bedarf können Sie diese Taster gedrückt halten, um
schneller ein weiter entferntes Stück zu wählen.
Selbst gespeicherte Stücke können folgendermaßen gewählt werden:
1 Drücken Sie den [–]- und [+]-Taster gemein-
sam, um “USr” zu wählen.
2 Wählen Sie mit dem [–]-Taster “S. U”.
Starten der Wiedergabe
3.
Drücken Sie den [Play]-Taster.
Dessen Diode leuchtet und die Wiedergabe des gewählten
Stücks beginnt.
Anhalten der Wiedergabe
4.
Drücken Sie den [Play]-Taster.
Die Diode dieses Tasters erlischt und die Wiedergabe hält
an. Wenn Sie den [Play]-Taster danach erneut drücken,
wird die Wiedergabe ab Beginn des zuletzt erreichten Stü-
ckes fortgesetzt.
52
Page 55

Anhören der Demosongs
Es stehen mehrere Demosongs zur Verfügung, darunter Stücke, welche die verfügbaren Klänge (“Tones”) vorführen
sowie Demos der Klavierfunktionen.
■
Abspielen einer Klangdemo
1.
Drücken Sie den [Demo]-Taster.
Die Diode des Tasters blinkt und die Wiedergabe der
Funktionsdemos beginnt.
Am Ende des letzten Stücks kehrt das Instrument zurück
zum ersten und setzt die Wiedergabe fort.
Wenn Sie bei blinkendem [Demo]-Taster einen Tone-Taster betätigen, wird sofort die dazugehörige Demo abgespielt.
Klangdemotaster Demo
[Piano] Vorführung der Klavierklänge
[E. Piano] Vorführung der E. Piano-Klänge
[Harpsichord] Cembalodemo
[Organ] Orgeldemo
[Strings] Streicherdemo
[Acoustic Layering]
[Split]
Demosongs, welche die “Acoustic Layer”Funktion veranschaulichen (S. 58)
Demosongs, welche die “Split”-Funktion
veranschaulichen (S. 60)
Kapitel 1. Abspielen der internen Stücke
Bei Drücken eines dieser Taster beginnt der entsprechende
Demosong. Die Wirkung wird anhand eines A/B-Vergleichs (Wiedergabe mit und ohne Effekt) veranschaulicht.
Durch erneutes Betätigen des Tasters, den Sie in Schritt
2 gedrückt haben, können Sie den Effekt abwechselnd
ein- und ausschalten.
Über die Vorführung der Hammeransprache
Bei Anwahl der Hammer-Demo hält die Wiedergabe
an. Die Hammeransprache kann dann durch wiederholtes Drücken des Key Touch [Hammer]-Tasters abwechselnd ein- und ausgeschaltet werden.
Spielen Sie jeweils ein paar Noten, um sich mit der
Hammersimulation vertraut zu machen.
Wenn die Hammeransprache aktiv ist, werden die
Noten bei zunehmend leichterem Anschlag immer träger wiedergegeben.
Anhand der Hammer-Demo können Sie sehr leicht
ermitteln, wie sich die Funktion auf die Ansprache auswirkt.
Anhalten der Funktionsdemos
3.
Drücken Sie den [Demo]-Taster.
Die Diode des [Demo]-Tasters erlischt und die Wiedergabe hält an.
DEUTSCH
DEUTSCH
DEUTSCH DEUTSCH DEUTSCH DEUTSCH
Anhalten der Klangdemos
2.
Drücken Sie den [Demo]-Taster.
Die Diode des [Demo]-Tasters erlischt und die Wiedergabe hält an.
■
Anhören einer Funktionsdemo
Diese Stücke veranschaulichen die Spezialfunktionen für
Klavierklänge.
1.
Drücken Sie den [Demo]-Taster.
Die Diode des Tasters blinkt und die Wiedergabe der
Funktionsdemos beginnt.
2.
Drücken Sie einen der folgenden Taster.
Taster mit Funktionsdemo
[Grand Space]
[Dynamic Emphasis]
Piano Resonance [Key Off]
Piano Resonance [String] Saitenresonanz-Demo S. 54
Piano Resonance [Damper] Dämpferresonanz-Demo S. 55
Key Touch [Hammer]
Vorführung des “Grand
Space”-Effekts
Vorführung des “Dynamic Emphasis”-Effekts
Vorführung der “Key
Off”-Funktion
Vorführung der Hammeransprache
Demo
S. 56
S. 57
S. 54
S. 55
53
Page 56

HP107e – Kapitel 2. Und nun dürfen Sie spielen
Anm.
Kapitel 2. Und nun dürfen Sie spielen
Klanganwahl
Das HP107e enthält 36 Klänge (“Tones”). Diese sind in fünf
Gruppen unterteilt, die man mit den Tone-Tastern wählt.
Anwahl der Klanggruppe
1.
Drücken Sie einen Tone-Taster
Die Diode des gedrückten Tasters leuchtet.
Spielen Sie auf der Klaviatur, um den so gewählten Klang
zu beurteilen.
Anwahl eines Variationsklangs
2.
Drücken Sie den [–]- oder [+]-Taster.
Im Display wird kurz die aktuell gewählte Klangvariation
21
Siehe auch “Tone List” (S. 240).
angezeigt.
Spielen Sie auf der Tastatur, um die gewählte Variation zu
beurteilen.
Feine Korrekturen des Klavierklangs (Piano Resonance)
Bei Bedarf können Sie die Klangfarbe der Klavierklänge noch weiter Ihren Bedürfnissen anpassen.
■
Aktivieren des Klickens bei der Tastenfreigabe (Key Off)
Wenn Sie möchten, erklingt bei Freigabe jeweils jenes Klicken, das auch auf einem akustischen Klavier auftritt.
Diese Funktion nennen wir “Key Off”.
Die Einstellung kann mit der “Backup”-Funktion des
HP107e gespeichert werden (S. 71).
1.
Drücken Sie den Piano Resonance [Key Off]-Taster (Diode muss leuchten).
Nun hören Sie beim Loslassen der Tasten jenes typische
Geräusch.
Drücken Sie den Piano Resonance [Key Off]-Taster noch
einmal, um den Effekt wieder auszuschalten (die Diode
erlischt).
In der “Tone List” (S. 240) erfahren Sie, für welche
Klänge diese Funktion belegt ist.
Lautstärke des ‘Key Off’-Geräuschs
2.
Halten Sie den Piano Resonance [Key Off]-Taster
gedrückt, während Sie den [–]- oder [+]-Taster
betätigen.
Die Lautstärke des “Key Off”-Klickens kann in zehn Stufen eingestellt werden.
Je größer der Wert, desto lauter ist der Effekt.
■
Simulieren der Saitenresonanz
(String Resonance)
Beim Spielen einer Note, während andere Tasten noch
gedrückt sind, entstehen auf einem akustischen Instrument spezifische Schwingungen, die von der Saitenresonanz-Simulation perfekt wiedergegeben werden.
Diese Funktion ist nur für Klavierklänge belegt. Für
andere Klänge ist sie nicht belegt.
1.
Drücken Sie den Piano Resonance [Sting]-Taster
(Diode muss leuchten).
Die Saitenresonanz-Simulation ist nun aktiv. Drücken Sie
den Piano Resonance [String]-Taster noch einmal, um den
Effekt wieder auszuschalten (die Diode erlischt).
Die Einstellung kann mit der “Backup”-Funktion des
HP107e gespeichert werden (S. 71).
54
Page 57

Ändern der Resonanzintensität
2.
Halten Sie den Piano Resonance [String]-Taster
gedrückt, während Sie den [–]- oder [+]-Taster
betätigen.
Die Resonanzintensität (Lautstärke) kann in zehn Stufen
eingestellt werden.
Je größer der Wert, desto lauter wird der Resonanzeffekt.
■
Resonanzsimulation für das Pedalspiel (Damper Resonance)
Der bei Betätigen des Dämpferpedals hinzugefügte Resonanzanteil ist einstellbar.
Bei einem akustischen Klavier schwingen bei Betätigen
des Dämpferpedals auch andere Saiten mit jenen der
gespielten Noten mit. Dadurch wird der Klang voller. Das
Dämpferpedal des HP107e simuliert dieses Phänomen,
das man “Saitenresonanz-Simulation” nennt.
Diese Funktion ist nur für Klavierklänge belegt. Für
Anm.
andere Klänge ist sie nicht belegt.
1.
Halten Sie den Piano Resonance [Damper]-Taster
gedrückt (Diode muss leuchten).
Die Dämpferresonanz-Simulation ist nun aktiv.
Drücken Sie den Piano Resonance [Damper]-Taster noch
einmal, um den Effekt wieder auszuschalten (die Diode
erlischt).
Die Einstellung kann mit der “Backup”-Funktion des
HP107e gespeichert werden (S. 71).
Ändern der Resonanzintensität
2.
Halten Sie den Piano Resonance [Damper]-Taster
gedrückt, während Sie den [–]- oder [+]-Taster
betätigen.
Es stehen zehn Resonanzpegel zur Wahl.
Je größer der Wert, desto auffälliger wird der Effekt.
Kapitel 2. Und nun dürfen Sie spielen
“Light” leuchtet. Bereits mit einem relativ leichten
Anschlag können Fortissimo-Noten erzielt werden. Das
erweckt den Eindruck eines geringeren Tastenwiderstandes. Diese Einstellung ist vor allem für Kinder gedacht.
“Medium” leuchtet. Diese Einstellung vertritt das
Anschlagverhalten, das jenem eines akustischen Klaviers
am ähnlichsten ist.
“Heavy” leuchtet. Um besonders laute Noten (“Fortissimo” oder “ff”) zu spielen, muss man viel härter anschlagen als sonst. Das erweckt den Eindruck einer “schwer
gängigen” Klaviatur. Allerdings verfügen Sie dann über
den größten Dynamikumfang, so dass sich jede Note viel
genauer dosieren lässt.
Alle Dioden aus. Fest. Ihre Anschlagtechnik ist unerheblich, weil alle Noten gleich laut wiedergegeben werden
und auch dieselbe Klangfarbe aufweisen.
■
Notenverzögerung bei variierendem
Anschlag (Hammer Response)
Mit dieser Funktion können Sie einstellen, inwiefern man
über den Anschlag bestimmen kann, wann die gespielten
Noten ausgegeben werden. Diese Funktion heißt “Hammer Response”.
Die Einstellung kann mit der “Backup”-Funktion des
HP107e gespeichert werden (S. 71).
Auf einem akustischen Klavier bewegt sich beim Spielen
einer Note ein Hammer und schlägt die entsprechenden
Saiten an. Je leichter man eine Taste anschlägt, desto langsamer trifft der Hammer auf die Saiten – es entsteht also
eine Verzögerung zwischen dem Drücken der Taste und
dem Erklingen der Note.
Mit der Hammeransprache kann dieser Effekt simuliert
werden. Bedenken Sie aber, dass dieser Effekt nur bei
leicht angeschlagenen Tasten zum Tragen kommt.
DEUTSCH
DEUTSCH
DEUTSCH DEUTSCH DEUTSCH DEUTSCH
Einstellen der Anschlagdynamik (Key Touch)
Bei Bedarf kann die Anschlagdynamik -eigentlich: die
Ansprache der Klaviatur- geändert werden.
1
Die Einstellung kann mit der “Backup”-Funktion des
HP107e gespeichert werden (S. 71).
1.
Drücken Sie den Key Touch [Touch]-Taster.
Bei wiederholtem Drücken des Key Touch [Touch]-Tasters leuchtet jeweils eine andere Diode. So wissen Sie, welche Anschlagdynamik gewählt ist.
1
1.
Aktivieren Sie mit dem Key Touch [Hammer]-Taster die gewünschte Diode.
“Light” leuchtet. Geringe Verzögerung bei leicht angeschlagenen Noten.
“Medium” leuchtet. Normale Verzögerung bei leicht
angeschlagenen Noten.
“Heavy” leuchtet. Starke Verzögerung bei leicht angeschlagenen Noten.
Alle Dioden aus. Die Hammeransprache wird nicht simuliert. Alle Noten werden ohne Verzögerung ausgegeben
(die Anschlagstärke hat darauf also keinen Einfluss).
55
Page 58

HP107e – Kapitel 2. Und nun dürfen Sie spielen
Den Klang mit ‘Tiefe’
versehen (Grand Space)
Das HP107e verfügt über eine so genannte “Grand Space”Funktion. Damit erzielen Sie eine “Tiefe”, die jener eines Flügels entspricht. Diese Funktion simuliert den natürlichen
Hall und die Klangfülle eines akustischen Flügels.
1
Die Einstellung kann mit der “Backup”-Funktion des
HP107e gespeichert werden (S. 71).
1.
Drücken Sie den [Grand Space]-Taster (Diode
muss leuchten).
Die “Grand Space”-Funktion wird aktiviert und reichert
den Klavierklang an.
Wählen Sie für den Kopfhörerbetrieb die “Grand Space”Einstellung “1” (S. 70). Dann erfolgt nämlich eine automatische Optimierung der Effektintensität für den Kopfhörer, sobald Sie einen anschließen. Solange kein Kopfhörer angeschlossen ist, wird hingegen die Lautsprecherausgabe optimiert.
2.
Halten Sie den [Grand Space]-Taster gedrückt,
während Sie den [–]- oder [+]-Taster betätigen.
Die “Klangtiefe” kann in vier Stufen geändert werden.
Je höher der Wert, desto räumlicher wird der Klang.
2
Den Klang im Kopfhörer mit
‘Tiefe’ versehen
(Grand Space)
Die “Grand Space”-Funktion kann auch das Kopfhörersignal aufwerten. Diese Funktion simuliert den natürlichen Hall
und die Klangfülle eines Flügels.
1
Die Einstellung kann mit der “Backup”-Funktion des
HP107e gespeichert werden (S. 71).
1.
Drücken Sie den [Grand Space]-Taster (Diode
muss leuchten).
Die “Grand Space”-Funktion wird aktiviert und reichert
den Klavierklang an.
Wählen Sie für den Kopfhörerbetrieb die “Grand Space”Einstellung “1” (S. 70). Dann erfolgt nämlich eine automatische Optimierung der Effektintensität für den Kopfhörer, sobald Sie einen anschließen. Solange kein Kopfhörer angeschlossen ist, wird hingegen die Lautsprecherausgabe optimiert.
2.
Halten Sie den [Grand Space]-Taster gedrückt,
während Sie den [–]- oder [+]-Taster betätigen.
Die “Klangtiefe” kann in vier Stufen geändert werden.
Je höher der Wert, desto räumlicher wird der Klang.
2
3.
Drücken den [Grand Space]-Taster erneut (die
Diode erlischt), um die gleichnamige Funktion
wieder auszuschalten.
56
3.
Drücken den [Grand Space]-Taster erneut (die
Diode erlischt), um die gleichnamige Funktion
wieder auszuschalten.
Die [ ]-Diode leuchtet, wenn Sie einen Kopfhörer
anschließen.
Page 59

Den Klang ‘lebendiger’
Anm.
Kapitel 2. Und nun dürfen Sie spielen
DEUTSCH
Verwendung der Digital-
machen (Dynamic Emphasis)
Hiermit sorgen Sie dafür, dass der Klangeindruck noch
transparenter und lebendiger wirkt.
1
Die Einstellung kann mit der “Backup”-Funktion des
HP107e gespeichert werden (S. 71).
1.
Drücken Sie den [Dynamic Emphasis]-Taster
(Diode muss leuchten).
Die “Dynamic Emphasis”-Funktion wird aktiviert und
der Klang erscheint lebendiger.
2.
Drücken Sie den [Dynamic Emphasis]-Taster
erneut (die Diode erlischt), um diese Funktion
wieder auszuschalten.
Ändern der “Dynamic Emphasis”-Einstellung
3.
Halten Sie den [Dynamic Emphasis]-Taster
gedrückt, während Sie den [–]- oder [+]-Taster
betätigen.
Diode Beschreibung
1 Der Bass und die Höhen werden angehoben.
2
3 Der Bassbereich wird angehoben.
Akkorde in tieferen Lagen klingen klar und
transparent.
3
Effekte
■
Verwendung des Halleffekts (Reverb)
Der Reverb-Effekt versieht den Klang mit Rauminformationen und erweckt so den Eindruck, dass man in einem
Konzertsaal spielt.
1.
Drücken Sie den [Reverb]-Taster.
Dessen Diode leuchtet und der Klang wird mit Hall versehen.
Drücken Sie den [Reverb]-Taster noch einmal, um den
Hall wieder auszuschalten (Diode erlischt).
Der Status (an/aus) des Halleffekts und der Effektanteil
können mit der “Backup”-Funktion des HP107e gespeichert werden (S. 71).
■
Verwendung des Chorus-Effekts (Chorus)
Der Chorus-Effekt erzeugt einen volleren Klang mit einem
ausgesprochenen “Stereo-Charakter”, der sich besonders
für Popmusik eignet.
1.
Drücken Sie den [Chorus]-Taster.
Dessen Diode leuchtet und der Klang wird mit Chorus
versehen.
Drücken Sie den [Chorus]-Taster noch einmal, um den
Effekt wieder auszuschalten (Diode erlischt).
Der Status und Pegel des Chorus-Effekts werden für
jeden Klangwahltaster separat gepuffert. Bei Ausschalten des Instruments werden allerdings wieder die Vorgaben geladen.
DEUTSCH
DEUTSCH DEUTSCH DEUTSCH DEUTSCH
■
Einstellen des Effektanteils
Der Hall- und Chorus-Anteil (Lautstärke des Halls bzw.
Chorus-Effekts) sind in zehn Stufen einstellbar.
Ab Werk verwenden der Hall- und Chorus-Effekt die
Einstellung “5”.
Ändern des Hallanteils
1.
Halten Sie den [Reverb]-Taster gedrückt, während
Sie den [–]- oder [+]-Taster betätigen.
Im Display erscheint der aktuelle Wert. Je größer der Wert,
desto lauter ist der Effekt.
Die Einstellungen des Reverb-Effekts gelten jeweils für
alle Klänge.
Ändern des Chorus-Anteils
1.
Halten Sie den [Chorus]-Taster gedrückt, während
Sie den [–]- oder [+]-Taster betätigen.
Im Display erscheint der aktuelle Wert. Je größer der Wert,
desto lauter ist der Effekt.
57
Page 60

HP107e – Kapitel 2. Und nun dürfen Sie spielen
Transponieren der Tastatur
(“Transpose”-Funktion)
Ihre Musik kann in einer anderen Tonart wiedergegeben
werden als jener, in der Sie spielen. Beispiel: Stücke in einer
schwierigen Tonart, d.h. mit vielen Kreuzen (#) oder Bs (b)
können mit dem Fingersatz einer einfacheren Tonart gespielt
werden.
Das ist z.B. praktisch, wenn Sie ein Stück in einer bestimmten
Tonart einstudiert haben und es nun in einer anderen spielen
müssen: stellen die entsprechende Transposition ein – und
schon kann’s losgehen.
1
1.
Halten Sie den [Transpose]-Taster gedrückt, während Sie die Taste betätigen, die dem Grundton
der gewünschten Tonart entspricht.
Dessen Diode leuchtet und die Tastatur wird transponiert.
Solange Sie den [Transpose]-Taster gedrückt halten,
wird der aktuelle Wert angezeigt.
Bei Bedarf können Sie die Tastatur auch transponieren,
indem Sie den [Transpose]-Taster gedrückt halten, während Sie den [–]- oder [+]-Taster betätigen.
Halten Sie den [Transpose]-Taster gedrückt, während Sie
[–] und [+] gleichzeitig betätigen, um wieder die Vorgabe
(“0”= keine Transposition) zu wählen.
Der Einstellbereich für die Transposition lautet –6~0~5
Halbtöne.
Beispiel: Wenn Sie bei Drücken einer “C”-Taste jeweils
eine “E”-Note hören möchten, müssen Sie den [Transpose]-Taster gedrückt halten und eine “E”-Taste betätigen.
Da sich das “E” vier (weiße und schwarze) Tasten weiter
rechts befindet, erscheint im Display dann der Wert “4”.
Wenn Sie C, E, G
spielen…
…hören Sie
E, G#, B.
Hinzufügen eines komplementären Klangs zum
Klavierklang (Acoustic Layer)
Das HP107e bietet eine Funktion, mit der man blitzschnell
Klangfarben wählen kann, die besonders gut zum aktiven
Klavierklang passen. Diese Funktion heißt “Acoustic Layer”.
21
Der hinzugefügte Klang kann in Oktavschritten transponiert werden (S. 70).
Wählen Sie zunächst einen Klavierklang (S. 54).
1.
Drücken Sie den [Acoustic Layering]-Taster
(Diode muss leuchten).
Alle gespielten Noten werden nun von zwei Klängen wiedergegeben.
Es gibt auch eine Kombinationsfunktion für andere
Klänge als Klavier: Drücken Sie zuerst einen Klangwahltaster und wählen Sie anschließend den “Grundklang”.
Wahl des Zusatzklangs
2.
Wählen Sie mit dem [–]- oder [+]-Taster den
Zusatzklang.
Im Display wird kurz die Klangnummer angezeigt.
Die Nummer des Zusatzklangs ist mit der Kennzeichnung
“L.” versehen.
Wenn Sie dem mittleren Pedal die “Layer”-Funktion
zuordnen, wird die “Acoustic Layer”-Funktion automatisch aktiviert (S. 58). Dann können Sie die Lautstärke
des Zusatzklangs mit dem mittleren Pedal einstellen.
Alle gespielten Noten werden nun von zwei Klängen
(dem Klavier- und dem gewählten Zusatzklang) wiedergegeben.
Wenn der Transpose-Wert “0” lautet, leuchtet die Diode
des [Transpose]-Tasters selbst dann nicht, wenn Sie ihn
einzuschalten versuchen.
Um die Transposition wieder auszuschalten, müssen Sie
den [Transpose]-Taster noch einmal drücken (seine Diode
erlischt dann wieder).
Drücken Sie den [Transpose]-Taster erneut, um wieder
das zuletzt gewählte Transpositionsintervall aufzurufen.
Beim Ausschalten wird wieder “0” eingestellt.
58
Page 61

■
Ändern der Balance im ‘Acoustic Layer’Modus
Der “Acoustic Layer”-Modus bietet eine Funktion, mit der
man die Balance zwischen dem Haupt- und Zusatzklang
einstellen kann.
Wenn Sie die “Acoustic Layer”-Balance ändern, wird
auch der Dual-Balancewert (S. 59) anders eingestellt.
1.
Halten Sie den [Acoustic Layering]-Taster
gedrückt, während Sie den [–]- oder [+]-Taster
betätigen.
Das Lautstärkeverhältnis ändert sich.
Um wieder die zuvor verwendete Balance zu wählen,
müssen Sie den [–]- und [+]-Taster gleichzeitig drücken.
Lautstärke des Klavierklangs Lautstärke des Zusatzklangs
Stapeln zweier Klänge
(Dual-Modus)
Bei Bedarf können Sie zwei Klänge gleichzeitig spielen. Der
betreffende Modus heißt “Dual”. Den hinzugefügten Klang
kann man mit den Tone-Tastern wählen.
Kapitel 2. Und nun dürfen Sie spielen
■
Lautstärkebalance im Dual-Modus
(Dual Balance)
Bei Bedarf können Sie das Lautstärkeverhältnis der beiden
im Dual-Modus gespielten Klänge ändern.
1
Die Einstellung kann mit der “Backup”-Funktion des
HP107e gespeichert werden (S. 71).
1.
Halten Sie den [Transpose]-Taster gedrückt, während Sie den [Split]-Taster betätigen.
Die Dioden dieser beiden Taster fangen an zu blinken.
Im Display wird die aktuelle Balance angezeigt:
2.
Zum Ändern eines Wertes verwenden Sie die [–]-/
[+]-Taster.
Das Lautstärkeverhältnis ändert sich.
Sie können die Balance auch ändern, indem Sie den
[Acoustic Layering]-Taster gedrückt halten, während Sie
den [+]- oder [–]-Taster betätigen.
Um wieder die zuvor verwendete Balance zu wählen,
müssen Sie den [–]- und [+]-Taster gleichzeitig drücken.
DEUTSCH
DEUTSCH
2
DEUTSCH DEUTSCH DEUTSCH DEUTSCH
1.
Drücken Sie die Taster der beiden benötigten
Klänge gleichzeitig.
Die Diode des gedrückten Tasters leuchtet.
Spielen Sie ein paar Noten auf der Klaviatur, um sich die
gewählte Klangkombination anzuhören.
Um den Dual-Modus wieder auszuschalten, müssen Sie
einen beliebigen Klangwahltaster drücken.
Anwahl eines anderen Klangs für den rechten Tone-Taster
2.
Drücken Sie den [–]- oder [+]-Taster.
Beim Spielen auf der Klaviatur hören Sie weiterhin den
vorhin gewählten Klang des linken Tone-Tasters. Dem
rechten Tone-Taster ist jedoch eine andere Klangvariation
zugeordnet.
Die Tonhöhe des Klangs, der dem “rechten” Tone-Taster zugeordnet ist, kann in Oktavschritten transponiert
werden (S. 70).
Anwahl eines anderen Klangs für den linken Tone-Taster
Verlassen Sie den Dual-Modus kurz und wählen Sie dann
einen anderen Klang. Drücken Sie die Taster der beiden
benötigten Klänge gleichzeitig.
Pegel des linken Tone-Tasters Pegel des rechten Tone-Tasters
Drücken Sie einen anderen Taster als [–] [+], damit die
Diode aufhört zu blinken.
59
Page 62

HP107e – Kapitel 2. Und nun dürfen Sie spielen
Unterschiedliche Klänge für
die linke/rechte Hand
(Split-Modus)
Das Instrument erlaubt das Aufteilen der Klaviatur, so dass
mit der linken und rechten Hand unterschiedliche Klänge
gespielt werden können. Auf Englisch nennt man dies
“Split”. Die Note, wo die Klaviatur geteilt wird, heißt folgerichtig “Splitpunkt”.
Splitpunkt (Vorgabe: F#3)
C1 D1 E1 F1 G1 A1 B1A0 B0 C2 C3 C4 C5
…
Klang der rechten HandKlang der linken Hand
1
1.
Drücken Sie den [Split]-Taster.
Die Diode dieses Tasters leuchtet. Die Klaviatur wird in
zwei Hälften geteilt: eine für die linke und eine weitere für
die rechte Hand.
Der Splitpunkt vertritt die höchste Note der linken
Tastaturhälfte.
Der rechten Hälfte wird der Klang zugeordnet, der vor
Drücken des [Split]-Tasters gewählt war, während der linken Hälfte ein Bassklang zugeordnet wird. Das kann man
aber ändern.
Drücken Sie den [Split]-Taster noch einmal, damit seine
Diode wieder erlischt.
Wenn Sie den [Split]-Taster im Dual-Modus
drücken:
Dann wird der Klang des linken leuchtenden Tone-Tasters der rechten Klaviaturhälfte zugeordnet. Für die linke
Hälfte wird hingegen ein passender Zusatzklang
gewählt.
Die Tonhöhe des linken Klangs kann in Oktavschritten
transponiert werden (S. 70).
Anwahl eines anderen Klangs für die rechte
Hälfte
Verlassen Sie den Split-Modus und wählen Sie dann einen
anderen Klang.
Im Split-Modus bezieht sich das Dämpferpedal anfangs
nur auf den rechts gespielten Klang. Es kann jedoch auch
der linken Hälfte zugeordnet werden. Siehe “Aktivieren
des Dämpferpedals für die linke Hälfte” (S. 70).
■
Ändern des Splitpunkts
Bei Bedarf können Sie den Splitpunkt (die Note, bei der die
Klaviatur geteilt wird) ändern. Der Splitpunkt kann einer
beliebigen Taste im Bereich B1~B6 (deutsch: H1~H6)
zugeordnet werden.
Die Vorgabe lautet “F#3”.
1.
Halten Sie den [Split]-Taster gedrückt, während
Sie die Taste betätigen, die als neuer Splitpunkt
fungieren soll.
Jene Taste vertritt die höchste Note der linken Hälfte.
Sie können den Splitpunkt auch einstellen, indem Sie den
[Split]-Taster gedrückt halten und [–] oder [+] betätigen.
Halten Sie den [Split]-Taster gedrückt, während Sie
sowohl [–] als auch [+] betätigen, um wieder den vorprogrammierten Splitpunkt (F#3) zu wählen.
Die Notennamen werden folgendermaßen im Display
dargestellt:
Anzeige
C C d E_
Notenname
C C D E
Anzeige
E F F G
Notenname
E F F G
Anzeige
A_ A b_ b
Notenname
A A B B
Solange Sie den [Split]-Taster gedrückt halten, wird der
aktuelle Splitpunkt angezeigt.
Anwahl eines anderen Klangs für die linke
Hälfte
1.
Drücken Sie einen Tone-Taster
2.
Drücken Sie den [–]- oder [+]-Taster.
Bei wiederholtem Drücken des [–]- oder [+]-Tasters wird
jeweils ein anderer Klang für die linke Hälfte gewählt.
Siehe auch “Tone List” (S. 240).
60
Page 63

Funktion des mittleren
Anm.
Pedals
Laut Vorgabe ist dem mittleren Pedal die Sostenuto-Funktion zugeordnet (S. 51).
Man kann ihm jedoch auch eine andere Funktion zuordnen.
1
1.
Aktivieren Sie mit dem [Center Pedal]-Taster die
gewünschte Diode.
Wenn die “Acoustic Layer”- und “Dual”-Funktion ausgeschaltet sind, wird die “Acoustic Layer”-Funktion
aktiviert.
Sostenuto. Das Pedal fungiert als Sostenutopedal (S. 51).
Layer. Solange Sie das mittlere Pedal drücken, werden
alle gespielten Noten von zwei Klängen wiedergegeben.
Mit dem Pedal kann die Lautstärke des Zusatzklangs
geändert werden.
Octave. Solange Sie das mittlere Pedal drücken, werden
alle gespielten Noten oktaviert und also doppelt ausgegeben. Die Oktavlage des Zusatzklangs kann über das
Pedal geändert werden (eine Oktave höher oder tiefer).
Verwendung des Metronoms
Kapitel 2. Und nun dürfen Sie spielen
3.
Drücken Sie den [–]- oder [+]-Taster, um das
Tempo zu ändern.
Anwahl einer anderen Taktart
4.
Halten Sie den [Song/Tempo]-Taster gedrückt,
während Sie den [–]- oder [+]-Taster betätigen.
Das Display zeigt die neue Taktart an.
Halten Sie den [Song/Tempo]-Taster gedrückt und betäti-
gen Sie [–] oder [+], um die Taktart zu ändern.
Halten Sie [Song/Tempo] weiterhin gedrückt, während
Sie den [–]- und [+]-Taster gleichzeitig betätigen, um wieder die vorige Taktart zu wählen.
Taktart und Tempoanzeige
Taktart Tempowert
2/2 =5–250
x/4 =10–500
3/8 =20–999
6/8
9/8 = 7–333
12/8
Während der Recorder-Wiedergabe bzw. -Aufnahme
kann die Taktart nicht geändert werden.
Anzeige Taktart Anzeige Taktart
2.2 2/2 6.4 6/4
0.4
2.4 2/4 3.8 3/8
3.4 3/4 6.8 6/8
4.4 4/4 9.8 9/8
5.4 5/4 12.8 12/8
Nur weiche
Schläge
7.4 7/4
DEUTSCH
DEUTSCH
DEUTSCH DEUTSCH DEUTSCH DEUTSCH
■
Arbeiten mit dem Metronom
Das HP107e bietet eine Metronomfunktion.
Während der Wiedergabe eines Stücks zählt das Metro-
nom im Takt (und Tempo) jenes Stücks.
341,5 2
Arbeiten mit dem Metronom
1.
Drücken Sie den [Metronome/Count In]-Taster.
Das Metronom beginnt zu zählen. Die Diode dieses Tasters blinkt im aktuellen Tempo (rot auf dem ersten Taktschlag und grün auf den übrigen Taktschlägen).
Ändern des Tempos
2.
Drücken Sie den [Song/Tempo]-Taster (dessen
Diode leuchtet grün).
Anhalten des Metronoms
5.
Drücken Sie den [Metronome/Count In]-Taster
noch einmal, damit seine Diode wieder erlischt.
Das Metronom hält an.
■
Ändern der Metronomlautstärke
Die Lautstärke des Metronoms kann in zehn Schritten eingestellt werden.
Beim Einschalten wird die Einstellung “4” gewählt.
1.
Halten Sie den [Metronome/Count In]-Taster
gedrückt, während Sie den [–]- oder [+]-Taster
betätigen.
Im Display erscheint nun der aktuell gewählte Lautstärke-
wert.
Halten Sie [Metronome/Count In] gedrückt und ändern
Sie den Lautstärkewert mit dem [–]- oder [+]-Taster.
Wenn Sie die Lautstärke auf “0” stellen, ist das Metronom unhörbar.
61
Page 64

HP107e – Kapitel 2. Und nun dürfen Sie spielen
Anm.
Aufteilen der Klaviatur für vierhändiges Spiel (Twin-Modus)
Die Klaviatur kann in zwei separate Bereiche aufgeteilt werden, so dass zwei Personen gleichzeitig in derselben Tonlage spielen
können.
C4 C5 C6 C7 C8C3C2C1
C4 C5 C6C3C4 C5C3 C6
1.
Halten Sie den [Split]-Taster gedrückt, während
Sie den [Piano]-Taster betätigen.
Die Diode des [Split]-Tasters leuchtet und der TwinModus wird aktiviert.
2.
Um diese Funktion zu verlassen, halten Sie den
[Split]-Taster gedrückt, während Sie erneut den
[Piano]-Taster betätigen.
● Im Twin-Modus werden folgende Dinge eingestellt:
• Die Klaviatur wird in zwei Bereiche aufgeteilt; der Tonumfang der beiden Hälften ändert sich entsprechend.
• Das rechte Pedal fungiert als Dämpferpedal für die
rechte Klaviaturhälfte, das linke als Dämpferpedal für
die linke Hälfte.
• Das mittlere Pedal fungiert als Sostenutopedal für die
rechte Klaviaturhälfte.
• Wenn momentan die Aufnahme läuft bzw. wenn das
Instrument aufnahmebereit ist, wird die Aufnahme/
Aufnahmebereitschaft deaktiviert. Im Twin PianoModus ist der [Rec]-Taster nicht belegt.
• Wenn die Split-Funktion aktiv ist, wird sie ausgeschaltet.
• Der linken und rechten Hälfte sind derselbe Klang und
dieselben Effekteinstellungen zugeordnet. Wenn sich
das Instrument vor Anwahl des Twin Piano-Modus’ im
Split-Modus befand, wird der Klang der rechten Klaviaturhälfte gewählt.
Die Saitenresonanz-Funktion ist im Twin-Modus nicht
belegt.
62
Page 65

Kapitel 3. Spielen zu den internen Stücken
Kapitel 3. Spielen zu den internen Stücken
DEUTSCH
Sehen wir uns nun an, wie man die internen Klavierstücke
als Begleitung verwenden kann.
Das Tempo kann bei Bedarf geändert werden. Ferner besteht
die Möglichkeit, den Part der linken oder rechten Hand auszuschalten, damit Sie nicht beide gleichzeitig spielen müssen.
Ganz gleich, welchen Ansatz Sie bevorzugen: Am besten
hören Sie sich ein Stück zuerst ein paar Mal an.
Bei Bedarf können Sie auch das Metronom aktivieren.
Dieses folgt dem Takt und Tempo des gewählten Stücks.
Wie man ein Stück anwählt und abspielt, erfahren Sie
unter “Anwahl des Stückes, das Sie sich anhören
möchten” (S. 52).
Ändern des Tempos
Wenn Ihnen das gewählte Stück anfangs etwas zu schnell
erscheint, können Sie das Tempo verringern. Das ist
besonders beim Einstudieren neuer Stücke wichtig.
2
Manche interne Stücke enthalten Tempowechsel.
Wählen Sie zuerst das Stück, das Sie spielen möchten
(S. 52).
1.
Drücken Sie den [Song/Tempo]-Taster (Diode
muss grün leuchten).
Im Display erscheint nun der aktuelle Tempowert.
Bei mehrmaligem Drücken des [Song/Tempo]-Tasters
werden abwechselnd der Tempowert und die Nummer
des aktuellen Stückes (mit vorangestelltem “S.”) angezeigt.
Wenn der Tempowert angezeigt wird, leuchtet die [Song/
Tempo]-Diode grün. Haben Sie die Song-Nummer
gewählt, so leuchtet die Diode rot.
2.
Drücken Sie den [–]- oder [+]-Taster, um das
Tempo zu ändern.
Der Einstellbereich für den Tempowert lautet q= 10~500.
Das Tempo kann auch bei laufender Wiedergabe geändert
werden.
Mit dem [+]-Taster erhöhen Sie das Tempo. Halten Sie ihn
gedrückt, um schnell einen weitaus größeren Wert zu
wählen.
Mit dem [–]-Taster verringern Sie das Tempo. Auch diesen
Taster können Sie gedrückt halten, um schnell einen weitaus niedrigeren Tempowert einzustellen.
1
Drücken Sie den [–]- und [+]-Taster gleichzeitig, um wieder den vorprogrammierten Tempowert zu wählen.
Die Taktart und Tempoanzeige
Taktart Tempowert
2/2 =5–250
x/4 =10–500
3/8 =20–999
6/8
9/8 = 7–333
12/8
Display-Anzeige bei Anwahl der internen Stücke
USr (“User”) … Dieser Speicher enthält Ihre eigene
Aufnahme (Hinweise zur Aufnahme → S. 65).
S.1~S.68 … Interne Stücke
S. U … Das selbst gespeicherte Stück (S. 71)
■
Starten der Wiedergabe nach einem Einzähler
Wenn Sie gleich ab Beginn des Stückes mitspielen
möchten/müssen, sollten Sie die Einzählfunktion aktivieren.
Diese ist zwar nicht separat verfügbar, kann aber folgendermaßen aktiviert werden.
Aktivieren Sie vor Starten der Wiedergabe das Metronom.
Dann zählt das HP107e nämlich zwei Takte ein. Danach
beginnt die Wiedergabe.
Das Display informiert Sie beim Einzählen folgendermaßen über die Taktanzahl vor Beginn des Stückes: “–2”
(noch zwei Takte), “–1” (noch ein Takt und die Musik
spielt auf).
“Arbeiten mit dem Metronom” auf S. 61
DEUTSCH
DEUTSCH DEUTSCH DEUTSCH DEUTSCH
63
Page 66

HP107e – Kapitel 3. Spielen zu den internen Stücken
Separate Wiedergabe der
beiden Hände
Bei Bedarf können Sie selbst bestimmen, welcher Part des
gewählten Stückes abgespielt wird.
Der Part der linken Hand ist dem [Left]-Taster zugeordnet.
Der Part der rechten Hand kann hingegen mit dem [Right]Taster ein-/ausgeschaltet werden. Die Parts befinden sich
auf so genannten “Spuren”. Einfachheitshalber wollen wir
die Taster [Left] und [Right] im folgenden die “Spurtaster”
nennen.
Spurtaster
Linke Hand
Left
Sie können den Part der linken oder rechten Hand ausschalten, um nicht beide gleichzeitig spielen zu müssen.
Rechte
Hand
Right
Starten der Wiedergabe
2.
Drücken Sie den [Play]-Taster (Diode muss leuchten).
Die Wiedergabe beginnt. Den unter Schritt 1 gewählten
Part hören Sie jetzt nicht mehr.
Sie können ihn also selbst spielen, während Sie sich vom
aufgezeichneten Part der linken Hand begleiten lassen.
Drücken Sie den unter Schritt 1 betätigten Taster noch einmal. Dessen Diode leuchtet und der Part ist wieder hörbar.
Sie können einen Part auch bei laufender Wiedergabe aktivieren/ausschalten.
Anhalten der Wiedergabe
3.
Drücken Sie den [Play]-Taster noch einmal, damit
seine Diode wieder erlischt.
Die Wiedergabe hält an.
2, 3 1
Wählen Sie zuerst das Stück, das Sie spielen möchten
(S. 52).
Ausschalten des Parts, den Sie selbst spielen möchten
1.
Drücken Sie den [Left]- oder [Right]-Taster.
Die Diode des gedrückten Tasters erlischt. Der betreffende
Part wird nicht mehr abgespielt.
Wenn Sie z.B. den Part der rechten Hand selbst spielen
möchten, müssen Sie den [Right]-Taster drücken (dessen
Diode erlischt). Jener Part wird nun nicht mehr ausgegeben.
64
Page 67

Kapitel 4. Aufnehmen Ihres Spiels
Anm.
Kapitel 4. Aufnehmen Ihres Spiels
DEUTSCH
Das Instrument bietet eine Funktion (Recorder), mit der man
sein Spiel aufnehmen kann.
Selbstverständlich kann man es danach auch wieder abspielen – und bei Bedarf sogar einen zweiten Part hinzufügen.
Die Aufnahmefunktion des HP107e kann auf verschiedene
Arten verwendet werden:
• Aufnahme nur des eigenen Spiels (→ “Aufnahme eines
neuen Stücks”, S. 65)
• Aufnahme Ihres Spiels zu einem internen Stück (→
“Aufnahme mit einem internen Stück”, S. 66)
• Separate Aufnahme zweier Parts (z.B. der linken und
rechten Hand (→ “Aufnahme auf zwei Spuren”, S. 67)
Anmerkungen zur Recorder-Funktion
• Es gibt nur einen Song-Speicher.
• Das HP107e bietet eine “Song Backup”-Funktion
(S. 71), mit der man das zuletzt eingespielte Stück speichern kann. Wenn Sie das nicht tun, wird die Aufnahme bei Ausschalten des Instruments gelöscht.
Daher sollten Sie sich mit der “Backup”-Funktion vertraut machen. Wenn Sie sie nicht verwenden, aber Ihr
Stück trotzdem nicht verlieren möchten, können Sie die
Daten vor dem Ausschalten zu einem externen Sequenzer oder Computer übertragen und dort speichern.
Siehe “Kapitel 6. Anbindung externer Geräte” (S. 73).
Wenn im Display folgende Meldung
erscheint…
Wenn Sie versuchen ein neues Stück aufzunehmen, während der Speicher noch ein zuvor eingespieltes Stück enthält, erscheint folgende Meldung. Außerdem blinkt die
Diode des [Record]-Tasters.
Wenn die vorigen Daten gelöscht werden dürfen, drücken
Sie [Rec]. Möchten Sie die erste Einspielung jedoch behalten, so müssen Sie den [Play]-Taster drücken.
Ein Wort zu Ihren Aufnahmen
A. Aufnahme ohne Anwahl einer Spur
Wenn keine der beiden Spuren Daten enthält, wird Ihr
Spiel auf die “Right”-Spur aufgenommen. Wenn eine der
beiden Spuren bereits Daten enthält, wird Ihr Spiel auf die
noch freie Spur aufgenommen.
B. Aufnahme im “Dual”-, “Acoustic Layer”- oder “Split”-
Modus
Funktion ‘Left’-Spur ‘Right’-Spur
Dual-Modus
‘Acoustic
Layer’
Split Linker Klang Rechter Klang
Klang des rechten Tone-
Tasters
Zusatzklang Originalklang (Klavier)
Klang des linken Tone-
Tasters
C. Aufnahme, wenn dem mittleren Pedal die “Layer”- oder
“Octave”-Funktion zugeordnet ist
Funktion ‘Left’-Spur ‘Right’-Spur
‘Layer’ Zusatzklang Originalklang (Klavier)
‘Octave’
* Wenn Sie sich für Verfahren “B” oder “C” entschieden haben,
müssen Sie vor Starten der Aufnahme [Left] UND [Right]
aktivieren (beide müssen blinken).
Layer-Klang (eine Oktave
höher)
Originalklang
Aufnahme eines neuen Stücks
Hier wird nur Ihr eigenes Spiel –ohne Begleitung eines
internen Stücks– aufgenommen.
1
2 4 6,8 5,73
Das HP107e bietet eine “Song Backup”-Funktion
(S. 71), mit der man das zuletzt eingespielte Stück speichern kann.
Anwahl des Speichers (wählen Sie “USr”)
1.
Drücken Sie den [Song/Tempo]-Taster (Diode
muss rot leuchten).
Im Display erscheint nun die Nummer des gewählten
Stücks.
2.
Drücken Sie den [–]- und [+]-Taster gemeinsam,
um “USr” zu wählen.
Anwahl des Klangs und Einstellen des Tempos
3.
Wählen Sie den Klang, den Sie für die Aufnahme
verwenden möchten (S. 54).
4.
Schalten Sie bei Bedarf das Metronom ein.
Starten Sie das Metronom, um die Taktart einstellen zu
können (S. 61).
Wenn Sie eine zuvor eingespielte Aufnahme mit einem
weiteren Part versehen, werden das Tempo und die Taktart der ersten Aufnahme verwendet.
5.
Drücken Sie den [Rec]-Taster.
Die [Rec]-Diode leuchtet und die [Play]-Diode blinkt. Das
Instrument ist nun aufnahmebereit.
DEUTSCH
DEUTSCH DEUTSCH DEUTSCH DEUTSCH
65
Page 68

HP107e – Kapitel 4. Aufnehmen Ihres Spiels
Starten der Aufnahme
6.
Die Aufnahme beginnt, sobald Sie eine Taste
anschlagen oder den [Play]-Taster betätigen.
Das Instrument zählt zwei Takte ein und startet dann die
Aufnahme.
Die Aufnahme kann auch durch Betätigen einer Klaviaturtaste (statt [Play]) gestartet werden. Dann beginnt die Aufnahme sofort.
Bei Starten der Aufnahme leuchten die [Play]- und [Rec]Diode.
Fangen Sie an zu spielen.
Anhalten der Aufnahme
7.
Drücken Sie den [Play]- oder [Rec]-Taster.
Die Aufnahme hält an und die [Play]- und [Rec]-Diode
erlöschen wieder.
Über die “USr”-Meldung
Nach der Aufnahme ändert sich die “ ”-Meldung zu “ ”.
Ein “.” im Display bedeutet, dass der User-Speicher
Daten enthält.
Anhören der Aufnahme
8.
Drücken Sie den [Play]-Taster.
Ihre Aufnahme wird nun abgespielt.
Drücken Sie den [Play]-Taster erneut, um die Wiedergabe
anzuhalten.
Wenn Sie vor Starten der Aufnahme keine Spur wählen,
wird Ihr Spiel automatisch auf die [Right]-Spur aufgenommen.
Unter “Aufnahme auf zwei Spuren” (S. 67) erfahren
Sie, wie man einen zweiten Part hinzufügt.
Aufnahme mit einem
internen Stück
Auch Ihr Spiel zu einem internen Stück kann aufgenommen werden.
Das HP107e bietet eine “Song Backup”-Funktion
(S. 71), mit der man das zuletzt eingespielte Stück speichern kann.
Sie könnten z.B. nur einen der beiden vorprogrammierten
Parts wiedergeben (und aufnehmen), indem Sie den
[Left]- oder [Right]-Taster aktivieren und jenen Part dann
selbst spielen.
1
253 6,8 4,7
Anwählen des Stücks
1.
Drücken Sie den [Song/Tempo]-Taster (Diode
muss rot leuchten).
Im Display wird nun die Nummer des aktuellen Stücks
angezeigt.
2.
Wählen Sie mit dem [–]- oder [+]-Taster das Stück,
das Sie als Grundlage verwenden möchten.
3.
Aktivieren Sie eventuell auch das Metronom und
stellen Sie das Tempo ein (S. 61).
4.
Drücken Sie den [Rec]-Taster.
Die Diode des [Rec]-Tasters leuchtet.
Anwahl der Aufnahmespur
5.
Drücken Sie den [Left]- oder [Right]-Taster.
Wenn Sie den Part der linken Hand selbst spielen
möchten, müssen Sie den [Left]-Taster drücken. Um den
Part der rechten Hand einzuspielen, müssen Sie den
[Right]-Taster drücken.
Die Dioden des gedrückten Spur- und [Play]-Tasters blinken. Das HP107e ist nun aufnahmebereit.
Wenn im Display die “dEL”-Meldung erscheint, siehe
S. 65.
Starten der Aufnahme
6.
Drücken Sie den [Play]-Taster.
Das Instrument zählt zwei Takte ein und startet dann die
Aufnahme.
Spielen Sie zu der internen Begleitung.
Anhalten der Aufnahme
7.
Drücken Sie den [Play]- oder [Rec]-Taster.
Die Aufnahme hält an und die [Play]- und [Rec]-Diode
erlöschen wieder.
Ihre Aufnahme befindet sich im “USr (User)”-Speicher.
66
Page 69

Anhören der Aufnahme
8.
Drücken Sie den [Play]-Taster.
Ihre Aufnahme wird nun abgespielt.
Drücken Sie den [Play]-Taster erneut, um die Wiedergabe
anzuhalten.
Kapitel 4. Aufnehmen Ihres Spiels
Starten der Aufnahme
4.
Drücken Sie den [Play]-Taster.
Das Instrument zählt zwei Takte ein und startet dann die
Aufnahme. Fangen Sie an zu spielen.
Die Aufnahme kann auch durch Betätigen einer Klaviaturtaste (statt [Play]) gestartet werden. Dann beginnt die Aufnahme sofort.
DEUTSCH
Aufnahme auf zwei Spuren
An anderer Stelle wurde bereits erwähnt, dass der Recorder des HP107e zwei Spuren bietet. Die könnten Sie z.B.
dazu nutzen, den Part der linken und rechten Hand separat aufzunehmen. Wählen Sie mit dem [Left]- und [Right]Taster jeweils die Spur, die Sie bespielen möchten.
Das HP107e bietet eine “Song Backup”-Funktion
(S. 71), mit der man das zuletzt eingespielte Stück speichern kann.
Vorteil dieser Arbeitsweise ist, dass man nur einen Part
erneut aufzunehmen brauchen, wenn er beim ersten Mal
nicht gelingt.
31 4,6 2,5
Wenn Sie eine zuvor eingespielte Aufnahme mit einem
Anm.
weiteren Part versehen, werden das Tempo, die Taktart
und die Metronomeinstellung der ersten Aufnahme verwendet.
Siehe die Schritte 1 und 2 unter “Aufnahme eines neuen
Stücks” (S. 65) und wählen Sie den “USr”-Speicher, um ein
neues Stück aufzunehmen. Wenn Sie Ihr Spiel gemeinsam
mit einem internen oder dem zuvor gespeicherten Stück
aufzeichnen möchten, müssen Sie jenes Stück zuerst wäh-
len. Siehe die Schritte 1 und 2 unter “Anwahl des Stückes,
das Sie sich anhören möchten” (S. 52).
1.
Aktivieren Sie bei Bedarf das Metronom (S. 61).
2.
Drücken Sie den [Rec]-Taster.
Die [Rec]-Diode leuchtet und die [Play]-Diode blinkt. Das
Instrument ist nun aufnahmebereit.
Wenn mindestens eine der beiden Spuren bereits Daten
enthält, leuchtet die Diode ihres Tasters.
Die Diode des für die Aufnahme gewählten Spurtasters
blinkt.
3.
Schalten Sie den Taster der Spur, die Sie NICHT
bespielen möchten ([Left] bzw. [Right]) AUS.
Man kann nicht auf beide Spuren gleichzeitig aufnehmen (drücken Sie also entweder [Left] oder [Right]).
Anhalten der Aufnahme
5.
Drücken Sie den [Play]- oder [Rec]-Taster.
Die Aufnahme hält an und die [Play]- und [Rec]-Diode
erlöschen wieder.
Ihr neuer Part befindet sich auf der oben gewählten Spur.
Wenn Sie nun noch einen zweiten Part aufnehmen
möchten, müssen Sie mit Schritt 2 fortfahren und die
andere Spur wählen. Während der erneuten Aufnahme
hören Sie dann den soeben aufgenommenen Part.
Anhören der Aufnahme
6.
Drücken Sie den [Play]-Taster.
Ihre Aufnahme wird nun abgespielt.
Drücken Sie den [Play]-Taster erneut, um die Wiedergabe
anzuhalten.
Löschen einer Aufnahme
Um eine oder beide Spuren des “USr”-Speichers zu
löschen, müssen Sie folgendermaßen verfahren:
■
Löschen einer Spur
Mit dem hier beschriebenen Verfahren können Sie eine
Spur löschen.
Halten Sie den [Left]- oder [Right]-Taster
gedrückt, während Sie den [Rec]-Taster betätigen.
Die Diode des gedrückten Spurtasters erlischt, um Sie darauf hinzuweisen, dass der betreffende Part gelöscht ist.
■
Löschen eines Stückes
Um den gesamten “Usr”-Speicher zu löschen, müssen Sie
folgendermaßen verfahren:
Halten Sie den [Song/Tempo]-Taster gedrückt,
während Sie den [Rec]-Taster betätigen.
Folgende Meldung erscheint und die Diode des [Rec]-Tasters beginnt zu blinken.
Wenn Sie es sich anders überlegt haben und das Stück
doch nicht löschen möchten, müssen Sie den [Play]- oder
[Song/Tempo]-Taster drücken.
7.
Drücken Sie den [Rec]-Taster noch einmal.
Ihr eigenes Stück wird nun gelöscht.
DEUTSCH
DEUTSCH DEUTSCH DEUTSCH DEUTSCH
67
Page 70

HP107e – Kapitel 5. Weitere Funktionen
Kapitel 5. Weitere Funktionen
Weiter führende Einstellungen
(Funktionsmodus)
Ihr Instrument bietet noch folgende Funktionen, die man wie
unten beschrieben einstellt:
Anwahl des Funktionsmodus’
1.
Drücken Sie den [Split]- und [Chorus]-Taster
gleichzeitig.
Das HP107e wechselt in den Funktionsmodus.
Die Dioden des [Split]-, [Chorus]- und des gedrückten
Tasters fangen an zu blinken.
Anwahl der änderungsbedürftigen Funktion
2.
Drücken Sie den Taster, dem die benötigte Funktion zugeordnet ist.
Die Dioden des [Split]-, [Chorus]- und des gedrückten
Funktionstasters blinken.
Solange Sie den Taster gedrückt halten, wird der Name
der gewählten Funktion im Display angezeigt.
Taster Funktion Siehe
MIDI-Übertragungskanal
Piano Resonance
[Strings]
USB-Treibereinstellung
Piano Resonance
[Damper]
Speicherfunktion
[Metronome/
Count In]
Song-Speicherung
[Song/Tempo]
V-LINK
[Right]
Ausgabe der Recorder-Daten
S. 75
S. 72
S. 71
S. 71
S. 72
Taster Funktion Siehe
Gesamtstimmung
[Piano]
Stimmungssystem
[E. Piano]
Gedehnte Stimmung
[Harpsichord]
Oktavierung
[Organ]
Zuordnen des Dämpferpedals
[Strings]
Local-Funktion
Piano Resonance
[Key Off]
S. 68
S. 69
S. 69
S. 70
S. 70
S. 75
[Left]
“Grand Space”-Effekt
[Grand Space]
Werksvorgaben
Key Touch
[Touch]
Alles Weitere zu diesen Funktionen finden Sie weiter
unten.
3.
Zum Ändern eines Wertes verwenden Sie die [–]-/
S. 75
S. 70
S. 71
[+]-Taster.
Drücken Sie [–] und [+] gleichzeitig, um wieder den Vorgabewert aufzurufen.
Verlassen des Funktionsmodus’
4.
Drücken Sie den [Split]- oder [Chorus]-Taster.
Die Diode dieses Tasters verhält sich nun wieder “normal”.
■
Angleichen der Stimmung an ein anderes
Instrument (Gesamtstimmung)
Wenn Sie das HP107e zum Begleiten schwer oder überhaupt nicht stimmbarer Instrumente verwenden, können
Sie seine Kammertonfrequenz an jene des akustischen
68
Page 71

Instruments angleichen. Diese Kammertonfrequenz verweist auf die Stimmung des mittleren “A”. Da sich beim
Ändern dieses Wertes auch die Stimmung der übrigen
Noten ändert, nennt man diese Funktion die “Gesamtstimmung”.
Drücken Sie in Schritt 2 unter “Weiter führende Einstellungen (Funktionsmodus)” (S. 68) den [Piano]-Taster. Im
Display erscheint nun z.B. folgende Meldung:
Das Display kann nur jeweils drei Ziffern anzeigen.
Darum erscheinen auch nur die letzten drei Stellen. Das
Beispiel oben verweist demnach auf “440.0Hz”.
Einstellung 415.3Hz~440.0Hz~466.2Hz
Vorgabe 440.0Hz
Diese Einstellung wird so lange beibehalten, bis Sie das
Instrument ausschalten.
* Die Einstellung kann mit der “Backup”-Funktion des HP107e
gespeichert werden (S. 71).
■
Auswahl des Stimmungssystems
Das Instrument bietet mehrere Stimmungen der klassischen Musik (darunter des Barock), so dass Sie jene
Musik mit der damals gebräuchlichen Stimmung spielen
können.
Bei den meisten neueren Stücken wird die wohltemperierte Stimmung vorausgesetzt (weil sie fast überall verwendet wird). In der Klassik wurden jedoch andere Stimmungen verwendet. Um zu entdecken, wie ein Stück zu
Lebzeiten des Komponisten geklungen hat, können Sie
eine der folgenden Stimmungen wählen.
Drücken Sie in Schritt 2 unter “Weiter führende Einstellungen (Funktionsmodus)” (S. 68) den [E.Piano]-Taster.
Im Display erscheint nun z.B. folgende Meldung:
Stimmungssystem Grundton
Es stehen acht Stimmungstypen zur Wahl:
Anzeige
Stimmungs-
system
Gleich-
1
schwebend
2 Rein (Dur)
3 Rein (Moll)
4 Arabisch
Erklärung
Jede Oktave ist in zwölf gleich große Intervalle eingeteilt. Alle Intervalle weisen also
die gleichen (wenn auch minimalen) Unsauberkeiten auf.
Diese Stimmung löst die Ambiguität von
Quinten und Terzen. Sie eignet sich nicht
für Melodien, bewirkt allerdings sehr
warme Akkorde.
Diese Stimmung liefert das gleiche Ergebnis
wie die vorige, allerdings ist sie für Stücke
in Moll gedacht.
Diese Stimmung eignet sich für orientalische Vierteltonmusik.
Kapitel 5. Weitere Funktionen
Anzeige
Stimmungs-
system
Kirn-
5
berger
6 Mittelton
7 Pythagoras
Werck-
8
meister
Erklärung
Dies ist eine Weiterentwicklung der Mittelton- und reinen Stimmung, mit der man ein
Stück leidlich transponieren und in fast
jeder Tonart spielen kann (III).
Ein Kompromiss, der auf der reinen DurStimmung beruht und das Transponieren
von Stücken erlaubt.
Diese Stimmung wird dem griechischen
Philosophen Pythagoras zugeschrieben. Sie
löst die Zweideutigkeit von Quarten und
Quinten und sorgt so für reinere Melodien.
Kombination der Mittelton- und pythagoreischen Stimmung, die sich für alle Tonarten
eignet (erste Technik, III).
Vorgabe 1 C
Grundton
Für alle Stimmungen außer der gleichschwebenden müssen Sie auch den Grundton (Tonika für Dur und Sexte für
Moll) für die Tonart des Stückes einstellen.
Halten Sie den [E. Piano]-Taster gedrückt, während Sie
die Taste jener Note betätigen, die als Grundton fungieren soll.
Der Grundton wird folgendermaßen angezeigt.
Anzeige
Noten-
name
* Wenn Sie vor Starten der Aufnahme eine andere Stimmung
* Denken Sie daran, alle Instrumente, mit denen Sie zusammen-
* Die Einstellung kann mit der “Backup”-Funktion des HP107e
■
C C d E_ E F F G A_ A b_ b
C C D E E F F G A A B B
Für die gleichschwebende Stimmung brauchen Sie keinen Grundton einzustellen.
wählen als die gleichschwebende, müssen Sie diese während
der Wiedergabe ebenfalls aktivieren, weil sie nur dann verwendet wird.
spielen, gleich zu stimmen, weil es sonst zu argen Dissonanzen kommt. Sorgen Sie dafür, dass die Gesamtstimmung des
HP107e jener der anderen Instrumente entspricht.
gespeichert werden (S. 71).
Andere Stimmungskurven (Stretch Tuning)
Flügel werden meist so gestimmt, dass die Noten im Bass
etwas unter und im Diskant etwas über der gleichschwebenden Temperierung liegen. Auf Englisch nennt man
dies “Stretch Tuning” (gedehnte Stimmung).
Drücken Sie in Schritt 2 unter “Weiter führende Einstellungen (Funktionsmodus)” (S. 68) den [Harpsichord]Taster. Im Display erscheint nun z.B. folgende Meldung:
OFF Normale Stimmungskurve. Wählen Sie diese Ein-
stellung, wenn Sie zwei Klänge stapeln (S. 59)
oder andere Instrumente begleiten möchten.
On Eine Stimmungskurve, bei der die Bassnoten
etwas tiefer und die Diskantnoten etwas höher
als die “Norm” gestimmt werden (“gedehnt”).
Eignet sich nur für Solo-Klavierspiel.
DEUTSCH
DEUTSCH
DEUTSCH DEUTSCH DEUTSCH DEUTSCH
69
Page 72

HP107e – Kapitel 5. Weitere Funktionen
Vorgabe On
* Diese Einstellung gilt nur für Klavierklänge.
* Die Einstellung kann mit der “Backup”-Funktion des HP107e
gespeichert werden (S. 71).
■
Transponieren in Oktavschritten
Folgende Klänge können in Oktavschritten höher/tiefer
transponiert werden: Im “Split”-Modus (S. 60) der linke,
im “Dual”-Modus (S. 59) der rechte und im “Acoustic
Layer”-Modus (S. 58) der Zusatzklang. Diese Funktion
heißt “Octave Shift”.
Drücken Sie in Schritt 2 unter “Weiter führende Einstellungen (Funktionsmodus)” (S. 68) den [Organ]-Taster. Im
Display erscheint nun z.B. folgende Meldung:
Die Tonhöhe kann bis zu zwei Oktaven abgesenkt (–2)
und erhöht (+2) werden.
* Bestimmte Einstellungen führen in bestimmten Lagen zu
einem unnatürlichen Klang, weil die Tonhöhe außerhalb des
“natürlichen” Bereichs liegt.
■
Aktivieren des Dämpferpedals für die linke
Hälfte
Wenn Sie im Split-Modus (S. 60) auch die links gespielten
Noten mit dem Dämpferpedal halten möchten, müssen
Sie folgendermaßen vorgehen:
Drücken Sie in Schritt 2 unter “Weiter führende Einstellungen (Funktionsmodus)” (S. 68) den [String]-Taster. Im
Display erscheint nun z.B. folgende Meldung:
■
Einstellungen des “Grand Space”-Modus’
Drücken Sie in Schritt 2 unter “Weiter führende Einstellungen (Funktionsmodus)” (S. 68) den [Grand Space]Taster. Im Display erscheint nun z.B. folgende Meldung:
Einstel-
lung
Bei Anschließen eines Kopfhörers erfolgt eine automatische Optimierung der Effektintensität. Sobald
1
Sie ihn herausziehen, passt sich der Effekt wieder
dem Lautsprecherbetrieb an.
Es wird die für den Lautsprecherbetrieb optimale
Effektintensität gewählt. Diese ändert sich selbst
dann nicht, wenn ein Kopfhörer angeschlossen
wird.
2
Auch die an den Output-Buchsen anliegenden Signale werden mit dem “Grand Space”-Effekt bearbeitet. Diese Einstellung empfiehlt sich also, wenn
Sie das Instrument an eine Beschallungsanlage usw.
anschließen.
Es wird die für den Kopfhörerbetrieb optimale
3
Effektintensität gewählt – unabhängig davon, ob
Sie einen Kopfhörer verwenden oder nicht.
* Die Einstellung kann mit der “Backup”-Funktion des HP107e
gespeichert werden (S. 71).
Beschreibung
Verriegeln der
Bedienelemente
On Das Dämpferpedal bezieht sich sowohl auf die
rechts als auch auf die links gespielten Noten.
OFF Das Dämpferpedal gilt nur für die in der rechten
Tastaturhälfte gespielten Noten.
Vorgabe OFF
* Die Einstellung kann mit der “Backup”-Funktion des HP107e
gespeichert werden (S. 71).
Fast alle Taster und Funktionen des HP107e können verriegelt werden. Dann steht nur noch der Klavierklang zur Verfügung. Das ist z.B. praktisch für den Musikunterricht, wenn
die Schüler weder die anderen Klänge ausprobieren, noch
mit dem Recorder spielen sollen.
Nach Verriegeln der Bedienfunktionen kann nur noch der
Flügelklang gespielt werden.
1.
Stellen Sie die Lautstärke auf den Mindestwert
und drücken Sie den [Power On]-Schalter, um das
Instrument auszuschalten.
2.
Halten Sie den [Piano]-Taster gedrückt, während
Sie den [Power On]-Taster betätigen.
Halten Sie den Taster ein paar Sekunden gedrückt.
Im Display erscheint folgende Anzeige:
Jetzt sind alle Taster verriegelt.
Stellen Sie die Lautstärke wunschgemäß ein.
Sie können jetzt “nur noch” Klavier spielen.
Um diese Riegelfunktion wieder zu deaktivieren, müssen Sie die Lautstärke auf den Mindestwert stellen und
das Instrument aus- und wieder einschalten.
70
Page 73

Laden der Werksvorgaben
Kapitel 5. Weitere Funktionen
DEUTSCH
Speichern des
(Factory Reset)
Bei Bedarf können Sie für alle Funktionen des HP107e wieder
die Werksvorgaben laden.
* Bei Verwendung dieser Funktion werden die intern gespei-
cherten Stücke nicht gelöscht (S. 71).
1.
Halten Sie den [Split]-Taster gedrückt, während
Sie den [Chorus]-Taster betätigen.
Das HP107e wechselt in den Funktionsmodus.
2.
Drücken Sie den Key Touch [Touch]-Taster.
Im Display erscheint folgende Anzeige:
3.
Drücken Sie den [Rec]-Taster.
Nun werden wieder die Werksvorgaben geladen.
Sobald die Einstellungen geladen sind, erscheint folgende
Anzeige. Schalten Sie das Instrument dann aus.
* Warten Sie mit dem Ausschalten, bis die Meldung “End” im
Display erscheint. Wenn Sie das HP107e bereits vorher ausschalten, wird u.U. sein interner Speicherbereich beschädigt.
Das kann zu Funktionsstörungen führen.
aufgenommenen Stücks
(Song Backup)
Das selbst aufgenommene Stück wird bei Ausschalten des
HP107e wieder gelöscht. Vor dem Ausschalten können Sie es
jedoch speichern. Diese Funktion heißt “Song Backup”.
* Diese Speicherfunktion ist nur belegt, wenn Sie bereits etwas
aufgenommen haben.
1.
Halten Sie den [Split]-Taster gedrückt, während
Sie den [Chorus]-Taster betätigen.
Das HP107e wechselt in den Funktionsmodus.
2.
Drücken Sie den [Song/Tempo]-Taster.
Die Diode dieses Tasters blinkt.
Im Display erscheint folgende Anzeige:
3.
Drücken Sie den [Rec]-Taster.
Das Stück wird gespeichert.
Sobald der Speichervorgang beendet ist, verhalten sich
das Display und die Tasterdioden wieder “normal”.
* Ein gespeichertes Stück kann man genau wie die internen Stü-
cke für die Wiedergabe anwählen (S. 52). Das gespeicherte
Stück erkennt man an folgender Bezeichnung:
DEUTSCH
DEUTSCH DEUTSCH DEUTSCH DEUTSCH
Speichern der Einstellungen
(Memory Backup)
Die meisten Einstellungen gelten nur so lange, bis Sie das
Instrument wieder ausschalten – es sei denn, Sie speichern
sie vorher. Die dafür benötigte Funktion heißt “Memory
Backup”.
* Eine Übersicht der speicherbaren Einstellungen finden Sie
unter “Speicherbare Einstellungen” (S. 77).
1.
Halten Sie den [Split]-Taster gedrückt, während
Sie den [Chorus]-Taster betätigen.
Das HP107e wechselt in den Funktionsmodus.
2.
Drücken Sie den [Metronome/Count In]-Taster.
Die Diode dieses Tasters blinkt.
Im Display erscheint folgende Anzeige:
3.
Drücken Sie den [Rec]-Taster.
Die Einstellungen werden gespeichert.
Sobald der Speichervorgang beendet ist, verhalten sich
das Display und die Tasterdioden wieder “normal”.
■
Löschen eines gespeicherten Stücks
1.
Halten Sie den [Split]-Taster gedrückt, während
Sie den [Chorus]-Taster betätigen.
2.
Drücken Sie den [Song/Tempo]-Taster.
Im Display erscheint folgende Anzeige:
Drücken Sie den [Play]-Taster, um den Vorgang abzubrechen.
3.
Drücken Sie den [Rec]-Taster.
Das gespeicherte Stück wird gelöscht.
Nun verhalten sich das Display und die Tasterdioden
wieder “normal”.
71
Page 74

HP107e – Kapitel 5. Weitere Funktionen
Verwendung der V-LINKFunktion
Wenn Sie das HP107e mit einem V-LINK-kompatiblen Videogerät verbinden, können Sie die Ausgabe von Bilddaten mit
dem HP107e beeinflussen.
V-LINK
Die von Roland entwickelte V-LINK-Technologie
( ) erlaubt nämlich das Einbinden von Videomaterial in Ihre Musik. Bei Verwendung von V-LINK-
kompatiblen Videogeräten können visuelle Effekte auf
einfache Weise in die Musik einbezogen werden.
V-LINK-Einstellungen
1.
Halten Sie den [Split]-Taster gedrückt, während
Sie den [Chorus]-Taster betätigen.
Das HP107e wechselt in den Funktionsmodus.
2.
Drücken Sie den [Right]-Taster.
Die Diode dieses Tasters blinkt.
Im Display erscheint folgende Anzeige:
Einstellen des USB-Treibers
Vor Anschließen des USB-Ports an Ihren Computer müssen
Sie folgenden Parameter einstellen.
1.
Halten Sie den [Split]-Taster gedrückt, während
Sie den [Chorus]-Taster betätigen.
Das HP107e wechselt in den Funktionsmodus.
2.
Drücken Sie den Piano Resonance [Damper]-Taster.
Die Diode dieses Tasters blinkt.
Im Display erscheint folgende Anzeige:
3.
Wählen Sie mit [–] und [+] die geeignete Treibereinstellung.
Anzeige Beschreibung
vdr (Vendor)
GEn (Generic)
Wählen Sie diese Einstellung, wenn Sie mit
dem beiliegenden USB-Treiber arbeiten.
Wählen Sie diese Einstellung, wenn Sie den
USB-Treiber Ihres Betriebssystems verwenden.
OFF V-LINK ist deaktiviert.
On Die V-LINK-Funktion ist aktiv. Nun dienen die
zwölf tiefsten Klaviaturtasten zum Steuern von
Videomaterial.
Vorgabe OFF
3.
Mit dem [–]- und [+]-Taster können Sie die VLINK-Funktion ein- und ausschalten.
Nun dienen die zwölf tiefsten Klaviaturtasten zum Steuern von Videomaterial.
* Solange V-LINK aktiv ist, können Sie mit den zwölf tiefsten
Tasten keine Noten spielen.
Verlassen des Funktionsmodus’
4.
Drücken Sie den [Split]- oder [Chorus]-Taster.
Die Diode dieses Tasters verhält sich nun wieder “normal”.
Verlassen des Funktionsmodus’
4.
Drücken Sie den [Split]- oder [Chorus]-Taster.
Die Diode dieses Tasters verhält sich nun wieder “normal”.
72
Page 75

Kapitel 6. Anbindung externer Geräte
Kapitel 6. Anbindung externer Geräte
DEUTSCH
Verwendung externer
Audiogeräte
Wenn Sie das HP107e an externe Audiogeräte anschließen,
können Sie es z.B. über die Lautsprecher Ihrer Stereo- oder
einer Beschallungsanlage verstärken bzw. Ihr Spiel auf Kassette usw. aufnehmen.
Für diese Verbindungen brauchen Sie Kabel mit einem herkömmlichen Klinkenstecker.
Anschlussbeispiele
* Um Schäden und/oder Funktionsstörungen der Lautsprecher
zu vermeiden, müssen Sie vor Herstellen/Lösen von Verbindungen die Lautstärke aller Geräte auf den Mindestwert stellen.
Extern Verstärken des HP107e/Aufnehmen Ihres Spiels
Input R/L (Line In,
Aux In)
HP107e
❍ Bei Verwendung eines externen Audiogeräts/Instruments
usw. müssen Sie die Geräte in folgender Reihenfolge einschalten:
1.
Schalten Sie das HP107e ein.
2.
Schalten Sie die externen Geräte ein.
3.
Stellen Sie die gewünschte Lautstärke ein.
* Die Lautstärke eines angeschlossenen Klangerzeugers kann
vom HP107e aus geregelt werden.
Wenn Sie Ihr Spiel auf dem HP107e mit einem externen
Gerät aufnehmen möchten:
4.
Starten Sie die Aufnahme des externen Geräts.
5.
Spielen Sie auf dem HP107e.
6.
Halten Sie am Ende des Stücks die Aufnahme des
externen Geräts an.
Anschließen externer Audio-Geräte/Instrumente an das HP107e
Output R/L (Line Out,
Aux Out)
HP107e
❍ Bei Verwendung eines externen Audiogeräts/Instruments
usw. müssen Sie die Geräte in folgender Reihenfolge einschalten:
1.
Schalten Sie die externen Geräte ein.
2.
Schalten Sie das HP107e ein.
3.
Stellen Sie die gewünschte Lautstärke ein.
* Die Lautstärke des angeschlossen Klangerzeugers kann nicht
vom HP107e aus geregelt werden.
Ausschalten
1.
Stellen Sie die Lautstärke des HP107e und externen Geräts auf den Mindestwert.
2.
Schalten Sie das HP107e aus.
3.
Schalten Sie die externen Geräte aus.
Verwendung des USBAnschlusses
Den USB-Port des HP107e können Sie mit einem Computer verbinden. Siehe auch den “USB Installation Guide”.
* Vor Anschließen des HP107e an den Computer müssen Sie
auf letzterem einen USB-Treiber (siehe die beiliegende CD-
ROM) installieren. Siehe auch den “USB Installation Guide”.
* Der USB-Port überträgt nur MIDI-Daten.
* Um Schäden und/oder Funktionsstörungen der Lautsprecher
zu vermeiden, müssen Sie vor Herstellen/Lösen von Verbin-
dungen die Lautstärke aller Geräte auf den Mindestwert stel-
len.
* Ein USB-Kabel gehört nicht zum Lieferumfang. Das finden
Sie jedoch bei Ihrem Roland-Händler.
* Das USB-Kabel darf maximal 3 Meter lang sein.
* Schalten Sie das HP107e ein, bevor Sie auf dem Computer ein
MIDI-Programm starten. Schalten Sie das HP107e niemals
ein bzw. aus, wenn bereits ein MIDI-Programm läuft.
* Lösen Sie die USB-Verbindung des HP107e, solange es einge-
schaltet ist.
* Wenn Sie die USB-Verbindung nicht brauchen, müssen Sie
das Kabel aus dem USB-Port des HP107e ziehen.
* Wenn der Computer während des Empfangs/der Übertragung
von Daten einschlummert, könnte er beim “Wecken” abstür-
zen. Außerdem ist es denkbar, dass sich das HP107e dann
nicht mehr erwartungsgemäß verhält.
DEUTSCH
DEUTSCH DEUTSCH DEUTSCH DEUTSCH
73
Page 76
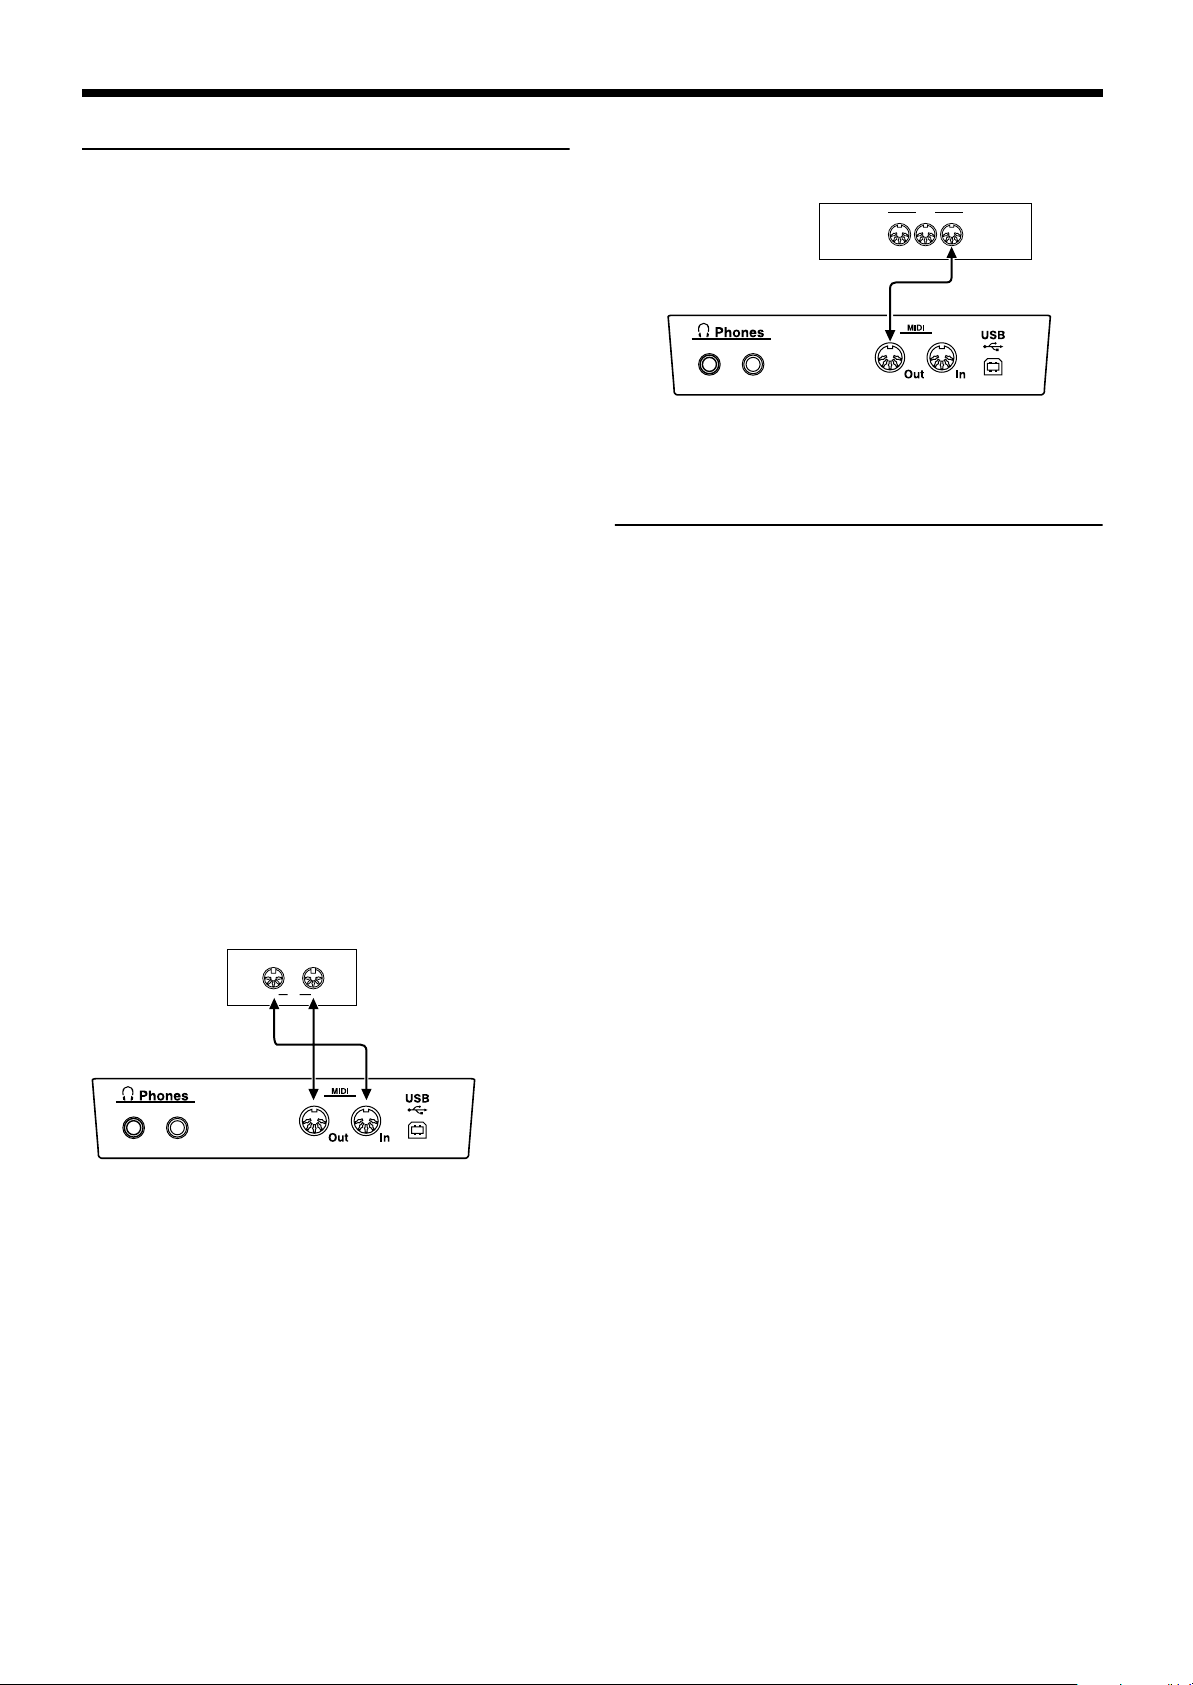
HP107e – Kapitel 6. Anbindung externer Geräte
Arbeiten mit MIDI-Geräten
Wenn Sie das Instrument an einen Sequenzer der MTSerie anschließen, kann das intern aufgenommene Stück
extern aufgezeichnet und auf Diskette gesichert werden.
Sie können Ihr Spiel aber auch direkt (ohne den Umweg
über den Recorder) aufnehmen und dann auf Diskette
o.ä. sichern.
■ Was ist MIDI?
MIDI ist die Abkürzung von “Musical Instrument Digital
Interface”. Hierbei handelt es sich um eine Norm für den
Austausch von Musikdaten zwischen elektronischen
Instrumenten und Computern.
Das HP107e ist mit zwei MIDI-Buchsen ausgestattet und
kann diese Daten also einerseits senden und andererseits
empfangen. Somit bieten sich zahlreiche spannende Mög-
lichkeiten für einen noch größeren Musikspaß mit dem
HP107e.
* Für dieses Instrument gibt es ein separat verfügbares Heft
namens “MIDI Implementation”. Diese Aufstellung enthält
Details zu allen gesendeten und empfangenen MIDI-Befehlen.
Wenn Sie diese Informationen für Programmierzwecke benötigen, wenden Sie sich bitte an Ihren Roland-Händler oder eine
Kundendienststelle.
Anschlussbeispiele
* Um Schäden und/oder Funktionsstörungen der Lautsprecher
zu vermeiden, müssen Sie vor Herstellen/Lösen von Verbindungen die Lautstärke aller Geräte auf den Mindestwert stellen.
Ansteuern des HP107e mit einem Sequenzer/Aufnahme mit dem Sequenzer
MT-Serie
* Der MT-90s besitzt keine
MIDI
HP107e
* Schalten Sie die Local-Funktion des HP107e aus, wenn Sie es
mit einem Sequenzer verbinden. Siehe “Ein-/Ausschalten der
Local-Funktion” (S. 75). Außerdem müssen Sie die MIDI
THRU-Funktion des Sequenzers aktivieren (damit die über
MIDI IN empfangenen Befehle zur MIDI OUT-Buchse des
Sequenzers durchgeschleift werden). Siehe auch die Bedienungsanleitung des Sequenzers.
MIDI OUT-Buchse.
InOut
Spielen auf dem HP107e und Ansteuern
eines externen Klangerzeugers
Klangerzeuger
MIDI
OUTTHRU IN
HP107e
Einstellen der MIDIFunktionen
Sehen wir uns zunächst an, wie man die belegten MIDIFunktionen erreicht und einstellt.
Anwahl des Funktionsmodus’
1.
Halten Sie den [Split]-Taster gedrückt, während
Sie den [Chorus]-Taster betätigen.
Das HP107e wechselt in den Funktionsmodus.
Die Dioden des [Split]-, [Chorus]- und des gedrückten
Tasters fangen an zu blinken.
Einstellen der MIDI-Funktionen
2.
Drücken Sie den Taster, dem die benötigte Funktion zugeordnet ist.
Die Dioden des [Split]-, [Chorus]- und des gedrückten
Funktionstasters blinken.
Die einzelnen Funktionen werden weiter unten vorgestellt.
3.
Zum Ändern eines Wertes verwenden Sie die [–]-/
[+]-Taster.
Drücken Sie den [–]- und [+]-Taster gleichzeitig, um wieder die Vorgabe zu wählen.
Verlassen des Funktionsmodus’
4.
Drücken Sie den [Split]- oder [Chorus]-Taster.
Die Diode dieses Tasters verhält sich nun wieder “normal”.
74
Page 77

■
Einstellen des MIDI-Kanals
MIDI erlaubt die Datenübertragung auf 16 Kanälen
gleichzeitig (1~16). Daher ist es mit dem bloßen Herstellen einer Verbindung nicht getan. Die angeschlossenen
Geräte müssen nämlich denselben MIDI-Kanal verwenden. Andernfalls werden die gespielten Noten nicht wiedergegeben, keine Klänge gewählt usw.
* Das HP107e empfängt auf allen MIDI-Kanälen (1~16).
* Im Dual- (S. 59) bzw. Split-Modus (S. 60) sendet das HP107e
die Daten des linken Klangwahltasters auf Kanal 5 (Dual)
bzw. der linken Hand auf Kanal 3 (Split). Diese Einstellungen
können nicht geändert werden. Vergessen Sie nach Anwahl
des Dual- bzw. Split-Modus’ also nicht, auf dem externen
Instrument (Sender) andere MIDI-Kanäle als “3” bzw. “5” zu
wählen.
Drücken Sie in Schritt 2 unter “Einstellen der MIDI-Funktionen” den Piano Resonance [String]-Taster. Im Display erscheint nun z.B. folgende Meldung:
Kapitel 6. Anbindung externer Geräte
Local OFF: Die Tastatur ist nicht mehr mit der internen
Klangerzeugung verbunden. Das Instrument gibt die
gespielten Noten also nicht wieder.
Sie hören nicht mehr, was Sie spielen
Klangerzeugung
Local aus
* Wenn Sie ein Gerät der MT-Serie anschließen, brauchen Sie
die Local-Funktion nicht von Hand einzustellen. Beim Ein-
schalten sendet das MT-Gerät nämlich einen Local Off-Befehl
via MIDI. Das geschieht automatisch, wenn Sie die Geräte in
folgender Reihenfolge einschalten: HP107e
→
MT-Gerät.
Drücken Sie in Schritt 2 unter “Einstellen der MIDI-Funktionen” den Piano Resonance [Key Off]-Taster. Im Display erscheint nun z.B. folgende Meldung:
DEUTSCH
DEUTSCH
Einstellung 1~16
Vorgabe 1
■
Ein-/Ausschalten der Local-Funktion
Wenn Sie mit einem MIDI-Sequenzer arbeiten, müssen
Sie die Local-Funktion wohl ausschalten (“OFF”).
Wie Sie nachstehend sehen, erreichen die beim Spielen
auf der Tastatur erzeugten MIDI-Befehle die interne
Klangerzeugung sonst auf zwei Wegen: (1) und (2).
Dadurch würde jede Note doppelt gespielt. Wenn Sie
Local ausschalten (“Local Off”), wird Signalweg (1)
unterbrochen.
(1) Local aktiv
Sequenzer
MIDI
Klangerzeugung
Jede Note wird doppelt wiedergegeben
MIDI
IN
MIDI
OUT
OUT
Speicher
MIDI
IN
(2) THRU-Funktion aktiv
Local ON: Die Tastatur ist mit der internen Klangerzeugung verbunden.
Sie hören, was Sie spielen
Klangerzeugung
Local aktiv
Einstellung On, OFF
Vorgabe On
■
Ausgabe der Recorder-Daten über MIDI OUT
Wenn Sie diese Einstellung aktivieren (“On”), werden die
mit dem Recorder aufgenommenen Daten zu einem
externen Instrument oder Computer übertragen. Wenn
Sie “OFF” wählen, werden die Daten nicht gesendet.
Drücken Sie in Schritt 2 unter “Einstellen der MIDI-Funktionen” den [Left]-Taster. Im Display erscheint nun z.B.
folgende Meldung:
Einstellung On, OFF
Vorgabe OFF
Für die Übertragung des mit dem HP107e aufgenommenen Stücks müssen Sie folgendermaßen verfahren. Vor
der Übertragung müssen Sie die MIDI THRU-Funktion
des Sequenzers ausschalten. Siehe auch die Bedienungsanleitung des Sequenzers.
Schließen Sie einen MIDI-Sequenzer, beispielsweise der
MT-Serie, an (S. 74).
Nehmen Sie mit dem HP107e ein Stück auf (S. 65).
Stellen Sie diesen Parameter auf “On”.
Starten Sie die Aufnahme des externen MIDI-Sequenzers.
Starten Sie die Wiedergabe des Songs auf dem HP107e.
Halten Sie die Aufnahme an, sobald die Wiedergabe
beendet ist.
Sichern Sie die Daten des externen Sequenzers auf einer
Diskette oder einem anderen Datenträger.
DEUTSCH DEUTSCH DEUTSCH DEUTSCH
75
Page 78

HP107e – Fehlersuche
Fehlersuche
Wenn sich das Instrument nicht erwartungsgemäß verhält, versuchen Sie das Problem am besten zuerst anhand der hier gegebenen Hinweise zu lösen, bevor Sie auf eine Störung schließen.
Das Instrument kann nicht eingeschaltet werden
Haben Sie das Netzkabel richtig angeschlossen (S. 49)?
Die Bedientaster funktionieren nicht
Haben Sie das Bedienfeld “verriegelt” (S. 70)?
Schalten Sie das Instrument aus und wieder ein.
Sie hören nichts
Haben Sie die Lautstärke des HP107e auf den Mindestwert
gestellt (S. 51)?
Haben Sie einen Kopfhörer angeschlossen (S. 50)?
Haben Sie eine Klinke an eine Kopfhörer-Buchse angeschlossen?
Dann werden die Lautsprecher nämlich deaktiviert.
Haben Sie die Local-Funktion ausgeschaltet?
Dann hören Sie die auf der Tastatur gespielten Noten nicht mehr.
Aktivieren Sie die Local-Funktion (“ON”, S. 75).
Ist die V-LINK-Funktion aktiv?
Solange V-LINK aktiv ist, können Sie mit den zwölf tiefsten Tasten keine Noten spielen.
Sie hören nichts (nach Anschließen eines MIDI-Instruments)
Haben Sie alle benötigten Geräte eingeschaltet?
Stimmen die MIDI-Verbindungen zwischen dem Instrument und
dem externen Gerät?
Haben Sie den richtigen MIDI-Kanal gewählt (S. 75)?
Der Klang wirkt eigenartig.
Haben Sie den Dual-Modus des HP107e aktiviert (S. 59)?
Wenn die SOFT THRU-Funktion des Sequenzers aktiv ist, wer-
den alle Noten eventuell doppelt abgespielt und klingen dementsprechend eigenartig. Stellen Sie die Local-Funktion des HP107e
auf “OFF” (S. 75).
Alternative: Schalten Sie die SOFT THRU-Funktion des Sequenzers aus (OFF).
Es kann kein anderer Klang gewählt werden
Haben Sie das Bedienfeld “verriegelt” (S. 70)?
Schalten Sie das Instrument aus und wieder ein.
Blinken die Dioden des [Split]- und [Chorus]-Tasters?
Das Instrument befindet sich im Funktionsmodus. Drücken Sie
den [Split]- oder [Chorus]-Taster (S. 68, S. 74).
Ab und zu fallen Noten weg
Das HP107e kann bis zu 128 Noten gleichzeitig wiedergeben.
Bei ausgiebiger Verwendung des Dämpferpedals und gleichzeitiger Wiedergabe eines internen Stücks reicht die “Polyphonie”
eventuell nicht aus.
Die selbst gespielten Noten klingen falsch.
Haben Sie die Transposition aktiviert (S. 58)?
Haben Sie das richtige Stimmungssystem gewählt (S. 69)?
Wie ist die Gesamtstimmung eingestellt (S. 68)?
Ein aufgezeichnetes Stück wird nicht/nur teilweise abgespielt
Schauen Sie nach, ob beide Spurtaster ([Left] und [Right]) leuchten (S. 64).
Wenn die Diode eines dieser Taster nicht leuchtet, wird der
betreffende Part nicht abgespielt. Aktivieren Sie jenen Taster also.
Es wird nichts aufgenommen
Haben Sie einen Spurtaster aktiviert (S. 65~S. 67)?
Leuchten der Fall sein. Dies macht sich vor allem beim Spielen tiefer Noten bemerkbar, wenn eine relativ hohe Lautstärke gewählt
wurde. Das kann folgendermaßen behoben werden:
• Stellen Sie das Instrument mindestens 10~15cm von der Wand
entfernt auf.
• Reduzieren Sie die Lautstärke.
Das Tempo eines Stücks ändert sich hin und wieder
Die internen Stücke enthalten Tempowechsel, die während der
Wiedergabe ausgeführt werden. An jenen Stellen ändert sich das
Tempo folglich. Das Metronom berücksichtigt derlei Variationen
ebenfalls.
Wenn Sie eine zuvor eingespielte Aufnahme mit einem weiteren
Part versehen, werden das Tempo und die Taktart der esten Aufnahme verwendet. Wenn Sie ein gleichmäßiges Tempo bevorzugen, müssen Sie Ihre Aufnahme zuerst löschen (S. 67).
Die Aufnahme wurde gelöscht
Wenn Sie das nicht tun, wird die Aufnahme bei Ausschalten des
Instruments gelöscht. Gelöschte Daten können nicht wiederhergestellt werden.
Das HP107e bietet eine “Song Backup”-Funktion (S. 71), mit der
man das zuletzt eingespielte Stück speichern kann. Wichtige Aufnahmen sollten Sie mit dieser Funktion intern speichern.
Die Pedale funktionieren nicht oder gehen nicht mehr aus
Haben Sie die Pedaleinheit richtig angeschlossen?
Überprüfen Sie, ob das Pedalkabel vollständig mit der PedalBuchse an der Rückseite verbunden ist (S. 49).
Eigenartige Geräusche bei Betätigen eines Pedals
Drehen Sie die Einstellschraube der Pedaleinheit so weit heraus,
bis sie den Boden berührt (S. 51).
Der Halleffekt (Reverb) wurde ausgeschaltet, ist aber nicht ganz verschwunden
Die “Grand Space”- und “Key Off”-Funktion des HP107e simulieren den natürlichen Nachhall und die Resonanz eines Flügels.
Deshalb kann der Eindruck entstehen, dass ein Halleffekt aktiv
ist.
Wenn Sie das nicht möchten, können Sie die “Key Off”- (S. 54)
und “Grand Space”-Funktion ausschalten (S. 56~56).
Im Diskant ändert sich der Klang ab einer bestimmten Note
Auf einem akustischen Instrument werden die Saiten der letzten
1,5 Oktaven nicht gedämpft und klingen also natürlich aus. Die
Einstellung des Dämpferpedals hat keinen Einfluss auf diese
Noten. Auch die Klangfarbe ist etwas anders. Die Digital-Pianos
von Roland simulieren dieses Phänomen naturgetreu. Außerdem
richtet sich der “ungedämpfte” Bereich des HP107e nach der eingestellten Transposition.
Es tritt ein Pfeif- oder Heulton auf
Wenn Sie mit einem Kopfhörer arbeiten:
Bestimmte Klavierklänge sind besonders brillant und könnten
daher einen “metallischen” Eindruck erzeugen, wenn Sie den
Halleffekt aktivieren. Wählen Sie eventuell einen geringeren
Hallanteil oder schalten Sie den Effekt aus.
Bei Verwendung der Lautsprecher:
In diesem Fall weist das Problem auf eine Funktionsstörung hin
(was z.B. darauf zurückzuführen ist, dass bestimmte Komponenten resonanzbedingt anfangen zu schwingen). Bitte wenden Sie
sich an Ihren Roland-Händler.
Die Bassnoten sind falsch oder erzeugen einen Brummton
Bei Verwendung der Lautsprecher:
Bei einer hohen Lautstärke ist es durchaus denkbar, dass das
Gehäuse des HP107e oder ein Gegenstand in seiner Nähe zu
schwingen beginnt. Das könnte auch bei Gläsern oder sogar
• Stellen Sie das mitschwingende Objekt woanders hin.
Wenn Sie mit einem Kopfhörer arbeiten:
Hier deutet das Problem auf eine Funktionsstörung hin. Bitte
wenden Sie sich an Ihren Roland-Händler.
76
Page 79

Fehlersuche
Die Lautstärke des an die Input-Buchsen angeschlossenen Instrumentes/Gerätes ist viel zu gering
Vielleicht verwenden Sie ein Audiokabel mit einem Widerstand.
Versuchen Sie es einmal mit einem anderen Kabel.
Fehler- und andere Meldungen
Anzeige Bedeutung
USr Der Speicher für Ihre Aufnahme. Hier befindet sich das Stück, das Sie selbst aufgenommen haben (S. 65).
Usr. Ein “.” im Display bedeutet, dass der “User”-Speicher bereits Daten enthält (S. 65).
S.1~68 Verweist auf ein internes Stück (S. 52).
S. U Dieses Stück wurde intern gespeichert (S. 71).
PU Diese Meldung bedeutet, dass das Stück mit einem (unvollständigen) Auftakt beginnt.
dEL Diese Meldung wird angezeigt, wenn Sie ein Stück zu löschen versuchen (S. 65, S. 67, S. 71).
E.32 Die Kapazität des Recorder-Speichers ist erschöpft. Es kann nichts mehr aufgenommen werden.
E.41
_._._. Die V-LINK-Funktion ist aktiv (S. 72).
* Fehlermeldungen sind an dem “E.” und einer Nummer erkenntlich. Um eine solche Meldung zu löschen, müssen Sie einen beliebigen
Taster drücken.
Es wurde ein MIDI-Problem festgestellt (wahrscheinlich wurde eine Verbindung gelöst). Kontrollieren Sie
die Anschlüsse.
DEUTSCH
DEUTSCH
DEUTSCH DEUTSCH DEUTSCH DEUTSCH
Speicherbare Einstellungen
“Key Off”-Resonanz (an/aus, Lautstärke) S. 54
Saitenresonanz-Simulation (an/aus, Lautstärke) S. 54
Dämpferresonanz-Simulation (an/aus, Lautstärke) S. 55
Anschlagdynamik S. 55
Hammeransprache S. 55
Klavierbezogene Einstellungen beim
Einschalten des Instruments
Andere Einstellungen
Stimmungssystem (+ Grundton) S. 69
Gedehnte Stimmung S. 69
‘Grand Space’ (an/aus, Lautstärke) S. 56, S. 56
Dynamic Emphasis (an/aus, Intensität) S. 57
Gesamtstimmung S. 68
Reverb-Effekt (an/aus, Lautstärke) S. 57
USB-Treibereinstellung S. 72
Zuordnen des Dämpferpedals S. 70
“Grand Space”-Effekt S. 70
Splitpunkt S. 60
Dual- und Layer-Balance S. 59, S. 59
77
Page 80

HP107e – Übersicht der internen Funktionen
Übersicht der internen Funktionen
1 2 3
711 6 5 4
4 6 7 8 9 1411
8910
5
3
1
10 12 13
2
Nr. Sie möchten… Taster Siehe
Den [Split]- und [Chorus]-Taster gedrückt halten, während Sie den [●]-Taster betätigen.
Local-Funktion [Split] + [Chorus] → Piano Resonance [Key Off] S. 75
1
Einstellen des MIDI-Kanals [Split] + [Chorus] → Piano Resonance [String] S. 75
2
USB-Treibereinstellung [Split] + [Chorus] → Piano Resonance [Damper] S. 72
3
“Grand Space”-Effekt [Split] + [Chorus] → [Grand Space] S. 70
4
Gesamtstimmung [Split] + [Chorus] → [Piano] S. 68
5
Anwahl eines Stimmungssystems
6
Angabe des Grundtons
Gedehnte Stimmung [Split] + [Chorus] → [Harpsichord] S. 69
7
Oktavierung [Split] + [Chorus] → [Organ] S. 70
8
Zuordnen des Dämpferpedals [Split] + [Chorus] → [Strings] S. 70
9
[Split] + [Chorus] → [E. Piano]→
[E. Piano] + Klaviaturtaste
S. 69
Song-Speicherung [Split] + [Chorus] → [Song/Tempo] S. 71
10
Speicherfunktion [Split] + [Chorus] → [Metronome/Count In] S. 71
11
Ausgabe der Recorder-Daten [Split] + [Chorus] → [Left] S. 75
12
V-LINK [Split] + [Chorus] → [Right] S. 72
13
Werksvorgaben [Split] + [Chorus] → Key Touch [Touch] S. 71
14
Halten Sie den [ ]-Taster gedrückt, während Sie den [–]- oder [+]-Taster betätigen.
Taktart des Metronoms [Song/Tempo] + [-] [+] S. 61
1
Metronomlautstärke [Metronome/Count In] + [-] [+] S. 61
2
Layer-Balance (Dual-Balance) [Acoustic Layering] + [-] [+] S. 59
3
Lautstärke der Dämpferresonanz Piano Resonance [Damper] + [-] [+] S. 55
4
Lautstärke der Saitenresonanz Piano Resonance [String] + [-] [+] S. 54
5
“Key Off”-Lautstärke Piano Resonance [Key Off] + [-] [+] S. 54
6
Chorus-Anteil [Chorus] + [-] [+] S. 57
7
Hallanteil [Reverb] + [-] [+] S. 57
8
“Dynamic Emphasis”-Effekt [Dynamic Emphasis] + [-] [+] S. 57
9
“Grand Space”-Effekt [Grand Space] + [-] [+] S. 56, S. 56
10
[ ] gedrückt halten, während Sie den [–]- oder [+]-Taster betätigen.
Dual-Balance (Layer-Balance) [Transpose] + [Split] → [-] [+] S. 59
11
Den [Split]- oder [Transpose]-Taster gedrückt halten, während Sie die gewünschte Note auf der Klaviatur spielen.
Splitpunkt [Split] + Klaviaturtaste S. 60
Transposition [Transpose] + Klaviaturtaste S. 58
78
Page 81

Technische Daten
Technische Daten
Tastatur
Tastatur 88 Tasten, “Progressive Hammer Action” (Hammermechanik) mit Druckpunktsimulation
Anschlagdynamik
Tastaturmodi Whole, Layer/Dual (Balance einstellbar), Split (Splitpunkt einstellbar)
Klangerzeugung
Polyphonie 128 Stimmen
Klänge 5 Gruppen, 36 Variationen + 4 Layer-Klänge
Stimmungssystem 8 Typen, einstellbarer Grundton
Gedehnte Stimmung 2 Typen
Gesamtstimmung 415.3Hz~466.2Hz (0.1Hz-Schritte)
Transposition –6~+5 Halbtöne
Effekte
Metronom
Taktart 2/2, 0/4, 2/4, 3/4, 4/4, 5/4, 6/4, 7/4, 3/8, 6/8, 9/8, 12/8
Lautstärke 10 Stufen
Recorder
Spuren 2 Spuren
Song 1 Stück (kann gespeichert werden)
Speicherkapazität ±10.000 Noten
Tempo Viertelnote= 10~500
Auflösung 120 Schritte je Viertelnote
Bedienfunktionen Play/Stop, Rec, Tempo, All Song Play, Track
Interne Stücke 68 Stücke + 14 Klangdemos
Andere
Ausgangsleistung 50W x2
Lautsprecher 20cm x2 (in separatem Gehäuse), 10cm x2
Anzeige
Bedienfunktionen Lautstärke, Brillanz
Pedale Dämpfer (stufenlos), Leise (stufenlos), Sostenuto (zuweisbare Funktion)
Andere Funktionen Riegelfunktion, Speicher für eine Aufnahme, Einstellungsspeicher, Werksvorgaben
Anschlüsse
Stromversorgung AC230V
Leistungsaufnahme 110W
Abmessungen
(inklusive Ständer)
Gewicht
(inklusive Ständer)
Lieferumfang
* Änderungen der technischen Daten und des Designs ohne vorherige Ankündigung vorbehalten. Für Druckfehler wird keine Haftung
übernommen.
Stufen: Leicht, mittel, schwer, fest
Hammer: Leicht, mittel, schwer, aus
‘Grand Space’, ‘Dynamic Emphasis’, Klavierresonanz (‘Key Off’, Saitenresonanz, Dämpferresonanz), Reverb/
Hall (10 Stufen), Chorus (10 Stufen)
Taktanzeige
7 Segmente, 3 Zeichen (LED)
Kopfhörerdiode
USB-Anschluss (MIDI), Audio-Ausgänge (L/Mono, R), Eingänge (L/Mono, R), Kopfhörerbuchsen x2 (Stereo),
MIDI IN & OUT
1425 (B) x 536 (T) x 931 (H) mm (Notenpult hinuntergeklappt)
1425 (B) x 536 (T) x 1.083,5 (H) mm (Notenpult hochgeklappt)
82kg
Bedienungsanleitung, “60 Classical Piano Masterpieces”, USB-Installationshandbuch,
CD-ROM (“Roland Digital Piano USB Driver”), Netzkabel, Kopfhörerhaken
DEUTSCH
DEUTSCH
DEUTSCH DEUTSCH DEUTSCH DEUTSCH
79
Page 82

HP107e – Technische Daten
80
Page 83

Mode d’emploi
Félicitations et merci d’avoir opté pour le piano numérique Roland HP107e.
Caractéristiques principales
Sons de piano d’une résonance extrêmement riche et d’une expressivité
infinie
Le générateur de son de piano échantillonné en stéréo reproduit fidèlement jusqu’au son des marteaux frappant les cordes afin de générer les superbes sonorités d’un piano à queue. La polyphonie
maximale de 128 notes vous permet d’utiliser les pédales sans craindre de perdre des notes.
Cet instrument restitue fidèlement les nuances les plus fines de votre jeu, qu’il s’agisse d’infimes
variations de toucher, de la résonance des cordes lorsque vous relâchez les touches ou de la résonance du piano lorsque vous relâchez les pédales. En outre, cet instrument dispose d’un système
de haut-parleurs “Grand Sound” simulant le son d’un piano à queue dans toute son ampleur
(Grand Space) et produisant une sonorité d’une clarté et d’une puissance extraordinaires (Dynamic
Emphasis).
Simulation de la dynamique d’un piano à queue
Cet instrument dispose d’un clavier avec marteaux à action progressive émulant le toucher d’un
piano à queue: plus lourd dans le grave et plus léger dans l’aigu. Le HP107e simule même le
“déclic” que vous ressentez lorsque vous enfoncez une touche sur un piano à queue (mécanisme
d’échappement).
L’instrument propose deux types de contrôle de la dynamique: la réponse des touches qui change
leur dynamique et la fonction de “réponse des marteaux” qui reproduit les mouvements subtils des
marteaux d’un piano. La pédale est conçue pour offrir une réponse optimale et permet d’exprimer
les nuances les plus subtiles.
Avant d’utiliser ce produit,
veuillez lire attentivement
les sections intitulées: “Consignes de sécurité” (p. 82) et
“Remarques importantes”
(p. 84). Ces sections donnent
des informations importantes concernant l’utilisation
appropriée du produit. En
outre, pour maîtriser correctement chaque fonction de
votre nouvelle acquisition,
veuillez lire entièrement le
mode d’emploi. Conservez
ensuite le manuel à portée
de main pour toute référence
ultérieure.
Expressivité que seul un instrument numérique peut offrir
Le HP107e vous permet d’ajouter des sons taillés pour le piano afin d’obtenir un résultat particuliè-
rement riche.
Vous pouvez ajouter le son de divers instruments au son de piano ou lui ajouter un son d’une
octave plus haut et vous servir d’une pédale pour contrôler le volume.
Confort de jeu avec casque
Des effets spéciaux sont ajoutés au son afin de rendre l’écoute au casque particulièrement confortable. Outre le témoin en face avant s’allumant lorsque vous branchez un casque, le HP107e propose également un crochet pratique auquel vous pouvez attacher le casque lorsque vous ne l’utilisez pas.
Aides diverses à l’apprentissage et morceaux de piano internes
Le métronome interne, “l’enregistreur” à deux pistes, les morceaux internes (60) et d’autres fonctions vous permettent d’aborder les leçons de piano sous un angle que seul un piano numérique
peut offrir.
Copyright © 2004 ROLAND CORPORATION
Tous droits réservés. Toute reproduction intégrale ou partielle de cette publication est
interdite sous quelque forme que ce soit sans l’autorisation écrite de
ROLAND CORPORATION.
Page 84

Consignes de sécurité
É
CONSIGNES DE SECURIT
INSTRUCTIONS POUR LA PREVENTION D'INCENDIE, CHOC ÉLECTRIQUE OU BLESSURE
A propos des symboles Avertissement et Précaution
Sert aux instructions destinées à alerter
l'utilisateur d'un risque mortel ou de
AVERTISSEMENT
PRUDENCE
blessure grave en cas d'utilisation
incorrecte de l'unité.
Sert aux instructions destinées à alerter
l'utilisateur d'un risque de blessure ou
de dommage matériel en cas d'emploi
incorrect de l'unité.
* Les dommages matériels se réfèrent
aux dommages ou autres effets
négatifs causés au lieu d'utilisation et
à tous ses éléments, ainsi qu'aux
animaux domestiques.
OBSERVEZ TOUJOURS CE QUI SUIT
AVERTISSEMENT AVERTISSEMENT
• Avant d’utiliser ce produit, lisez les instructions
données ci-dessous et dans le mode d’emploi.
...........................................................................................................
• N’ouvrez (et ne modifiez) pas le produit.
...........................................................................................................
• N’essayez pas de réparer ce produit ou d’en remplacer des éléments (sauf si ce manuel vous donne
des instructions spécifiques pour le faire). Confiez
tout entretien ou réparation à votre revendeur, au
service de maintenance Roland le plus proche ou à
un distributeur Roland agréé (vous en trouverez la liste à
la page “Information”).
...........................................................................................................
• Ne placez jamais ce produit dans des endroits:
• soumis à des températures extrêmes (en plein
soleil dans un véhicule fermé, à proximité d’une
conduite de chauffage, au-dessus de matériel
générateur de chaleur),
• humides (salles de bain, toilettes, sur des sols ou
supports mouillés),
•à l’humidité ambiante élevée,
• exposés aux précipitations,
• poussiéreux,
• soumis à de fortes vibrations.
...........................................................................................................
• Utilisez ce produit uniquement avec un support
ou un stand recommandé par Roland.
...........................................................................................................
• Veillez à placer ce produit sur une surface plane
afin de lui assurer une stabilité optimale. Évitez
les supports qui vacillent ou les surfaces inclinées.
...........................................................................................................
• Ne branchez l’appareil qu’à une prise de courant
répondant aux spécifications énoncées dans le
mode d’emploi ou imprimées à l’arrière de l’appareil.
...........................................................................................................
• Servez-vous exclusivement du cordon d’alimentation fourni. N’utilisez pas le cordon d’alimentation fourni avec un autre appareil.
...........................................................................................................
A propos des symboles
Le symbole alerte l'utilisateur d'instructions importantes
ou de mise en garde. La signification du symbole est
déterminée par ce que contient le triangle. Dans le cas du
symbole de gauche, il sert pour des précautions générales,
des mises en garde ou alertes vis-à-vis d'un danger.
Le symbole prévient l'utilisateur des interdits. Ce
qui ne doit spécifiquement pas être fait est indiqué
dans le cercle. Dans le cas du symbole de gauche, cela
signifie que l'unité ne doit jamais être démontée.
Le symbole ● alerte l'utilisateur de ce qui doit être
fait. Ce qui doit être fait est indiqué par l'icône
contenue dans le cercle. Dans le cas du symbole de
gauche, cela signifie que le cordon d'alimentation doit
être débranché de la prise murale.
•Évitez de tordre ou de plier excessivement le cor-
don d’alimentation ainsi que de placer des objets
lourds dessus. Vous risquez de l’endommager, ce
qui provoquerait des courts-circuits et couperait
l’alimentation de certains éléments. Un cordon
endommagé peut provoquer une électrocution ou un
incendie!
...........................................................................................................
• Ce produit, utilisé seul ou avec un amplificateur et
des enceintes ou un casque d’écoute, est en
mesure de produire des signaux à des niveaux qui
pourraient endommager l’ouïe de façon irréversible. Ne l’utilisez donc pas trop longtemps à
volume élevé ou inconfortable. Si vous pensez
avoir endommagé votre ouïe ou si vos oreilles
bourdonnent, arrêtez immédiatement l’écoute et
consultez un spécialiste.
...........................................................................................................
•Évitez que des objets (du matériel inflammable, de
la monnaie, des trombones) ou des liquides (eau,
limonades, etc.) ne pénètrent à l’intérieur de ce
produit.
...........................................................................................................
• Coupez immédiatement l’alimentation de l’appa-
reil, débranchez le cordon d’alimentation de la
prise et ramenez l’appareil chez votre revendeur,
au service après-vente Roland le plus proche ou
chez un distributeur Roland agréé (vous en trouverez la liste à la page “Information”) quand:
• le cordon d’alimentation ou la fiche est endom-
• il y a de la fumée ou une odeur inhabituelle
• des objets ou du liquide ont pénétré dans le pro-
• le produit a été exposé à la pluie (ou a été mouillé
• le produit semble ne pas fonctionner normalement ou affi-
...........................................................................................................
magé(e),
duit
d’une autre façon),
che un changement de performance marqué.
Page 85

AVERTISSEMENT
• Avec de jeunes enfants, la présence d’un adulte est
indispensable jusqu’à ce que l’enfant puisse respecter les précautions nécessaires au maniement
de ce produit.
...........................................................................................................
014
• Protégez ce produit contre tout coup ou impact
important.
• (Ne le laissez pas tomber!)
...........................................................................................................
015
• Ne faites pas partager au cordon d’alimentation
de ce produit une prise murale avec un nombre
excessif d’autres appareils. Soyez particulièrement
vigilant avec des multiprises. La puissance totale
utilisée par tous les appareils connectés ne doit
jamais excéder la puissance (watts/ampères) de la
rallonge. Une charge excessive peut augmenter la
température du câble et, éventuellement, entraîner
une fusion.
...........................................................................................................
016
• Avant d’utiliser ce produit dans un pays étranger,
contactez votre revendeur, le service de maintenance Roland le plus proche ou un distributeur
Roland agréé (vous en trouverez la liste à la page
“Information”).
...........................................................................................................
026
• N’insérez JAMAIS un CD-ROM dans un lecteur
de CD audio conventionnel. Le son produit pourrait atteindre un niveau entraînant une perte
d’audition irréversible. Les enceintes et/ou tout
autre élément du système d’écoute risque(nt)
d’être endommagé(es).
...........................................................................................................
026
• Ne placez aucun récipient contenant de l’eau (un
vase, par exemple) sur ce produit. Évitez en outre
l’usage d’insecticides, de parfum, d’alcool, de vernis à ongles, d’atomiseurs ou sprays à proximité
de ce produit. Essuyez rapidement tout liquide
renversé sur ce produit avec un chiffon sec et doux.
...........................................................................................................
PRUDENCE
• Placez ce produit de sorte à lui assurer une ventilation appropriée.
...........................................................................................................
• Saisissez toujours la fiche du cordon d’alimentation lors du branchement (débranchement) au secteur ou à ce produit.
...........................................................................................................
• A intervalles réguliers, débranchez la prise secteur
et frottez-la avec un chiffon sec pour enlever toute
la poussière et autres saletés accumulées sur ses
broches. Si ce produit ne va pas être utilisé durant
une période prolongée, débranchez le cordon
d’alimentation. Toute accumulation de poussière
entre la prise murale et la fiche d’alimentation
peut nuire à l’isolation et causer un incendie.
...........................................................................................................
•Évitez que les cordons d’alimentation et les câbles
ne s’emmêlent. De plus, tous les cordons et câbles
doivent être placés hors de portée des enfants.
...........................................................................................................
106
• Ne montez jamais sur ce produit et évitez d’y
déposer des objets lourds.
...........................................................................................................
PRUDENCE
• Ne saisissez jamais le cordon secteur ni ses fiches
avec des mains humides lorsque vous le branchez
ou débranchez d’une prise murale ou de l’instrument.
...........................................................................................................
• Lorsque vous déplacez l’instrument, veuillez
observer les précautions suivantes. Il faut au
moins deux personnes pour soulever et déplacer
l’instrument. Il doit être manié avec soin et maintenu horizontal. Veillez à saisir fermement l’instrument afin d’éviter tout risque de blessures et
d’endommagement de l’instrument en cas de
chute.
• Assurez-vous que les vis maintenant ce produit au
support ne sont pas desserrées. Resserrez-le si
nécessaire.
• Débranchez le cordon d’alimentation.
• Débranchez tous les câbles reliant l’instrument à
des appareils périphériques.
• Relevez le dispositif de réglage du pied (p. 91).
• Fermez le couvercle.
• Enlevez le pupitre.
...........................................................................................................
109a
• Avant de nettoyer cet appareil, éteignez-le et
débranchez le cordon d’alimentation de la prise
murale (p. 89).
...........................................................................................................
110a
• S’il y a risque d’orage, débranchez le cordon d’alimentation de la prise murale.
...........................................................................................................
116
• Veillez à ne pas vous coincer les doigts lorsque
vous ouvrez ou fermez le couvercle (p. 90). La pré-
sence d’un adulte est conseillée chaque fois qu’un
enfant utilise l’instrument.
...........................................................................................................
118b
• Si vous retirez les vis de fixation du pupitre, celles
du pied et le papillon, rangez-les immédiatement
hors de portée des enfants pour qu’ils ne risquent
pas de les avaler accidentellement.
...........................................................................................................
FRANÇAIS
FRANÇAIS
FRANÇAIS FRANÇAIS FRANÇAIS FRANÇAIS
Page 86

HP107e – Remarques importantes
Remarques importantes
Outre les informations des sections “IMPORTANT SAFETY INSTRUCTIONS” et “Consignes de sécurité” (p. 82), veuillez
lire et suivre les conseils suivants:
Alimentation
• Ne connectez jamais ce produit à une prise murale d’un
circuit auquel vous avez branché un appareil contenant
un inverseur (frigo, machine à lessiver, four à microondes ou climatisation), voire un moteur. Selon la façon
dont l’appareil en question est utilisé, il peut en effet
générer des parasites qui pourraient être enregistrés.
Dans certains cas, les parasites pourraient même entraîner des dysfonctionnements. S’il vous est impossible
d’utiliser une prise murale faisant partie d’un autre circuit, nous vous conseillons d’insérer un filtre antiparasites entre ce produit et la prise murale.
307
• Avant de brancher ce produit à d’autres appareils, mettez-les tous hors tension. Le non-respect de cette précaution pourrait entraîner des dysfonctionnements et/ou
l’endommagement de vos enceintes ou d’autres appareils.
308
• Bien que l’écran et les diodes s’éteignent quand vous mettez l’appareil hors tension avec son interrupteur POWER,
cela ne signifie pas que ce produit soit complètement
coupé de la source d’alimentation. Pour couper entièrement l’alimentation de l’appareil, mettez-le hors tension
avec l’interrupteur POWER puis débranchez le cordon
secteur de la prise de courant. Branchez donc ce produit à
une prise de courant facile à atteindre et immédiatement
accessible.
• Ne laissez pas traîner longtemps du caoutchouc, du
vinyle ou des matières similaires sur ce produit. Cela risque de décolorer ou d’abîmer la finition.
358
• Ne posez jamais d’objet sur le clavier. Cela pourrait pro-
voquer des dysfonctionnements (certaines touches ne
produisant plus de son, par exemple).
359
• Ne collez pas d’autocollants, de décalcomanies ou autres
sur ce produit. Vous risqueriez d’endommager la finition
lors du retrait de ces autocollants, etc.
Entretien
• Pour nettoyer ce produit, utilisez un chiffon sec et doux
ou, éventuellement, un chiffon légèrement humide.
Essuyez toute la surface en exerçant une force égale et en
suivant les lignes du bois. Si vous frottez trop fort un
endroit particulier, vous risquez d’endommager la finition.
402
• N’utilisez jamais d’essence, de diluant, de solvant ou
d’alcool d’aucune sorte pour éviter le risque de décoloration et/ou de déformation.
• Les pédales de cet instrument sont en cuivre.
Le cuivre finit par foncer en s’oxydant. Il suffit alors de
polir le cuivre avec un produit pour cuivre disponible
dans le commerce.
Emplacement
• L’usage de ce produit à proximité d’amplificateurs (ou de
tout autre matériel contenant de grands transformateurs
électriques) peut être source de bruit. Pour résoudre le
problème, changez l’orientation de ce produit ou éloignez-le de la source d’interférence.
• Ce produit peut causer des interférences lors de la
réception radio ou télévisée. Ne vous en servez pas à
proximité de tels récepteurs.
• Il peut y avoir du bruit si vous utilisez des moyens de
communication sans fil (tel qu’un téléphone mobile) à
proximité de ce produit. Ce bruit peut survenir au début
d’un appel (donné ou reçu) ou durant la conversation. Si
vous avez des problèmes, éloignez le téléphone portable
de ce produit ou coupez-le.
• N’exposez pas ce produit directement au soleil, ne le laissez pas près d’appareils irradiant de la chaleur, dans un
véhicule fermé ou dans un endroit le soumettant à des
températures extrêmes. Évitez également de laisser des
sources d’éclairage (telles qu’une lampe de piano) trop
longtemps trop près de ce produit. Évitez l’exposition
prolongée à la lumière de projecteurs puissants. Une chaleur excessive peut déformer ou décolorer ce produit.
• Lorsque vous déplacez ce produit en le soumettant à une
forte différence de température et/ou d’humidité, il peut
y avoir formation de condensation à l’intérieur. Une utilisation de ce produit dans cet état peut entraîner des pannes ou des dommages. Avant d’utiliser ce produit, laissez-le reposer quelques heures jusqu’à ce que la condensation se soit évaporée.
Réparations et données
• N’oubliez pas que toutes les données contenues dans ce
produit sont perdues s’il doit subir une réparation. Sauvegardez donc toujours vos données importantes sur un
autre appareil MIDI (un séquenceur, par exemple) ou
notez-les sur papier (si possible). Durant les réparations,
les techniciens tentent, dans la mesure du possible, d’éviter toute perte de données. Cependant, il peut se révéler
impossible de récupérer des données dans certains cas
(notamment lorsque les circuits touchant à la mémoire
elle-même sont endommagés). Roland rejette toute responsabilité concernant la perte de ces données.
Précautions supplémentaires
• N’oubliez jamais que le contenu de la mémoire peut être
irrémédiablement perdu suite à un mauvais fonctionnement ou un mauvais maniement de ce produit. Pour vous
prémunir contre un tel risque, nous vous conseillons de
faire régulièrement des copies de secours des données
importantes se trouvant dans la mémoire de l’appareil
sur un autre appareil MIDI (un séquenceur, par exemple).
552
• Il peut malheureusement se révéler impossible de récupérer les données de la mémoire ou stockées sur un autre
appareil MIDI (tel qu’un séquenceur) une fois qu’elles ont
été perdues. Roland rejette toute responsabilité concernant la perte de ces données.
84
Page 87

553
• Maniez les curseurs, boutons et autres commandes avec
un minimum d’attention; faites aussi preuve de délicatesse avec les prises et connecteurs de ce produit. Un
maniement trop brutal peut entraîner des dysfonctionnements.
• Lorsque vous branchez/débranchez des câbles, prenez la
fiche en main – jamais le câble. Vous éviterez ainsi
d’endommager le câble ou de provoquer des court-circuits.
557
• Ce produit dégage une faible quantité de chaleur durant
son fonctionnement.
558a
• Pour ne pas déranger vos voisins, maintenez le volume à
un niveau raisonnable. Il peut parfois être préférable
d’utiliser le casque (surtout quand vous jouez la nuit).
559b
• Si vous devez transporter l’instrument, emballez-le dans
du matériel le protégeant des chocs. Si vous transportez
l’instrument sans précautions, vous risquez de le griffer
ou de l’endommager, ce qui l’empêcherait de fonctionner
convenablement.
560
• Ne soumettez pas le pupitre à une pression excessive
lorsque vous l’utilisez.
562
• Utilisez un câble Roland pour effectuer la connexion. Si
vous utilisez un autre câble de connexion, notez les précautions suivantes.
• Certains câbles de connexion contiennent des résistances.
Ne vous servez pas de câbles contenant des résistances
pour connecter ce produit. De tels câbles engendrent un
volume extrêmement bas voire inaudible. Pour en savoir
plus sur les caractéristiques d’un câble, veuillez contacter
son fabricant.
565
• Avant d’ouvrir et de fermer le couvercle du clavier, assurez-vous toujours qu’aucun petit animal familier ou autre
ne se trouve sur l’instrument (gardez-les à distance du
clavier et du couvercle). Faute de quoi, l’animal risque
d’être coincé à l’intérieur. Dans un tel cas, coupez immédiatement l’alimentation et débranchez le cordon d’alimentation de la prise. Consultez ensuite le revendeur qui
vous a vendu l’instrument ou le SAV Roland le plus proche.
Remarques importantes
FRANÇAIS
FRANÇAIS
FRANÇAIS FRANÇAIS FRANÇAIS FRANÇAIS
Maniement des CD-ROM
•Évitez de toucher ou de griffer la surface inférieure
brillante (surface encodée) du disque. Les CD-ROM
endommagés ou sales peuvent ne pas être lus correctement. Nettoyez vos disques avec un produit de nettoyage
pour CD disponible dans le commerce.
85
Page 88

HP107e – Sommaire
Sommaire
Consignes de sécurité .....................................................82
Remarques importantes ..................................................84
Description........................................................................87
Face avant..............................................................................................87
Face arrière ............................................................................................88
Face inférieure.......................................................................................88
Avant de commencer à jouer ..........................................89
Connexion du câble de pédalier.........................................................89
Connexion du câble de haut-parleur.................................................89
Connexion du cordon d’alimentation ...............................................89
Installation du pupitre.........................................................................89
Ouvrir/fermer le couvercle ................................................................90
Brancher un casque ..............................................................................90
Utiliser le crochet pour casque ........................................................90
Mise sous/hors tension .......................................................................91
Réglage du volume et de la brillance ................................................91
Les pédales ............................................................................................91
Chapitre 1. Exploiter les morceaux internes..................92
Écouter les morceaux internes............................................................92
Écouter tous les morceaux consécutivement.................................92
Choisir un morceau pour l’écouter.................................................92
Écouter les morceaux de démonstration...........................................93
Écouter les morceaux de démonstration des sons........................93
Démonstration des fonctions...........................................................93
Chapitre 2. Jeu..................................................................94
Jouer avec différents sons....................................................................94
Réglages fins du son de piano (Piano Resonance) ..........................94
Son des touches relâchées (Key Off)...............................................94
Résonance des cordes........................................................................94
Résonance sympathique (Damper).................................................95
Réglage de la dynamique du clavier (Key Touch) ..........................95
Changer le timing en fonction de la force exercée sur les touches
(Hammer Response)..........................................................................95
Rendre le son plus profond (Grand Space) ......................................96
Sélectionner la bonne profondeur pour le casque (Grand Space).96
Ajouter de la dynamique au son (Dynamic Emphasis)..................97
Ajouter des effets au son .....................................................................97
Ajouter de la réverbération au son (Reverb) .................................97
Enrichir le son (Chorus)....................................................................97
Changer l’intensité de l’effet............................................................97
Transposer le clavier (Transpose) ......................................................98
Ajouter un son complémentaire au piano (Acoustic Layer)..........98
Changer la balance en mode “Acoustic Layer” ...............................99
Superposer deux sons (Superposition) .............................................99
Régler la balance en mode de superposition.................................99
Produire des sons différents des mains gauche & droite (Split) .100
Changer le point de partage du clavier........................................100
Changer la fonction de la pédale centrale.......................................101
Utilisation du métronome.................................................................101
Faire sonner le métronome.............................................................101
Changer le volume du métronome...............................................101
Partager le clavier en deux sections pour jeu à 4 mains ...............102
Chapitre 3. Accompagner les morceaux internes ...... 103
Changer le tempo ...............................................................................103
Ajouter un décompte (Count-In)...................................................103
Écouter séparément la partie d’une main.......................................104
Chapitre 4. Enregistrer votre jeu .................................. 105
Enregistrer un nouveau morceau ....................................................105
Enregistrer avec un morceau interne ..............................................106
Enregistrer séparément la partie de chaque main.........................107
Effacer une exécution enregistrée ....................................................107
Effacer un enregistrement de la piste choisie..............................107
Effacer un morceau .........................................................................107
Chapitre 5. Changer divers réglages ........................... 108
Réglages détaillés ...............................................................................108
Changer l’accord global (diapason)..............................................108
Changer la gamme ..........................................................................109
Réglage de la courbe d’accord (accord étiré)...............................109
Transposition par octave................................................................110
Appliquer la pédale forte à la section gauche du clavier ..........110
Changer le mode d’application de “Grand Space” ....................110
Mode Piano uniquement...................................................................110
Rappel des réglages usine (Factory Reset) .....................................111
Mémorisation des réglages (Backup) ..............................................111
Mémorisation de morceaux (Song Backup) ...................................111
Effacer un morceau mémorisé.......................................................111
Utiliser la fonction V-LINK...............................................................112
Réglages pour le pilote USB .............................................................112
Chapitre 6. Connexion d’appareils externes ............... 113
Connexion à du matériel audio........................................................113
Connexion au port USB.....................................................................113
Connexion d’appareils MIDI............................................................114
Réglages MIDI ....................................................................................114
Choisir le canal de transmission MIDI.........................................115
Activer/couper la fonction Local (On/Off) ................................115
Transmission d’un enregistrement ...............................................115
Appendice............................................................. 116
Dépannage...........................................................................................116
Messages d’erreur et autres messages ............................................117
Paramètres dont le réglage peut être mémorisé ............................117
Liste des opérations ...........................................................................118
Fiche technique...................................................................................119
Tone List ......................................................................... 240
Built-in Song List ...........................................................241
MIDI Implementation Chart.................................. 243
86
Page 89

Description
Face avant
Description
FRANÇAIS
6
78 17
12 13 14
4325
92010 11
Power On
1
1.
Commutateur [Power On]
Mise sous/hors tension (p. 91).
2.
Commande [Volume]
Détermine le volume global (p. 91).
3.
Commande [Brilliance]
Détermine le timbre (p. 91).
4.
Bouton [Demo]
Vous pouvez écouter une démonstration exploitant les
sons de l’instrument ainsi qu’une démonstration des
diverses fonctions (p. 93).
5.
Témoin [ (casque)]
Ce témoin s’allume quand vous branchez un casque à la
prise pour casque (p. 90).
6.
Bouton [Transpose]
Transpose le clavier (p. 98).
7.
Bouton [Split]
Divise le clavier en deux parties, une pour la main gauche
et l’autre pour la main droite; vous pouvez ainsi jouer
avec un son différent dans chaque partie (p. 100). Vous
pouvez aussi régler divers paramètres en maintenant ce
bouton et le bouton [Chorus] enfoncés (p. 108~p. 112,
p. 114~p. 115).
8.
Bouton [Chorus]
Enrichit le son (p. 97).
9.
Bouton [Grand Space]
Confère une impression de profondeur au son (p. 96,
p. 96).
10.
Bouton [Dynamic Emphasis]
Avive le son et le rend plus brillant (p. 97).
11.
Bouton [Reverb]
Ajoute de la réverbération au son (p. 97).
Piano Resonance
12.
Bouton [Key Off]
Produit le son généré quand les touches sont relâchées
(p. 94).
13.
Bouton [String]
Produit la résonance des cordes induite lorsque vous
jouez sur le clavier (p. 94).
15
16 19
14.
Bouton [Damper]
Change la résonance produite lorsque la pédale forte est
actionnée (p. 95).
15.
Bouton [Acoustic Layering]
Vous pouvez ajouter des sons complémentaires au son
du piano (p. 98).
16.
Boutons Tone
Ces boutons permettent de sélectionner des sons (ou
groupes de sons) pour jouer sur le clavier (p. 94).
17.
Écran
L’écran indique les valeurs de divers paramètres comme
la variation de son, le numéro de morceau et le tempo.
Elles sont affichées de la façon illustrée plus haut.
18.
Bouton [Song/Tempo]
Permet de choisir un morceau interne (p. 92, p. 103).
De plus, chaque pression sur ce bouton affiche alternati-
vement le tempo et le numéro du morceau sélectionné
(précédé d’un “S.”). Le témoin s’allume en vert quand le
tempo est affiché et en rouge pour le numéro de morceau.
19.
Boutons [–] [+]
Permettent de régler la valeur de divers paramètres.
Une pression simultanée sur les boutons [–] et [+] ramène
le paramètre en question à sa valeur originale.
20.
Bouton [Metronome/Count In]
Active/coupe le métronome (p. 101). Vous disposez aussi
d’un décompte joué avant le début du morceau pour
vous permettre d’accompagner parfaitement le morceau
(p. 103).
TRACK
21.
Bouton [Left]
Reproduit ou enregistre séparément une partie pour chaque main (p. 104, p. 106~p. 107).
La partie de la main gauche des morceaux internes est
assignée à ce bouton. Ce bouton et le bouton [Right] sont
appelés “boutons de piste”.
22.
Bouton [Right]
Reproduit ou enregistre séparément une partie pour chaque main (p. 104, p. 106~p. 107). La partie de la main
droite des morceaux internes est assignée à ce bouton.
182321
22
FRANÇAIS
24 25 26 27
FRANÇAIS FRANÇAIS FRANÇAIS FRANÇAIS
87
Page 90

HP107e – Description
23.
Bouton [Play]
Lance et arrête la reproduction de morceaux internes et
des enregistrements (p. 92, p. 103).
Lance et arrête aussi l’enregistrement (p. 105~p. 107).
24.
Bouton [Rec]
Fait passer le HP107e en attente d’enregistrement
(p. 105~p. 107).
Face avant
Face inférieure
KEY TOUCH
25.
Bouton [Touch]
Modifie la dynamique du clavier (p. 95).
26.
Bouton [Hammer]
Règle la façon dont la force exercée sur le clavier détermine le timing des notes (p. 95).
27.
Bouton [Center Pedal]
Change la fonction de la pédale centrale (p. 101).
Face arrière
Face arrière
Face inférieure
31 32 33
28 29 30
28.
USB
Branchez le câble du pédalier du pied à cette prise (p. 89).
29.
Prises Input
Ces entrées permettent de brancher un autre générateur
de sons ou un appareil audio pour que le son de cet appareil soit produit par les haut-parleurs du HP107e (p. 113).
30.
Prises Output
Ces sorties permettent d’envoyer le son du piano à une
sono afin d’obtenir un son plus puissant. Vous pouvez
aussi les brancher à un enregistreur pour enregistrer ce
que vous jouez (p. 113).
31.
Prises Phones
Permettent de brancher un casque (p. 90).
32.
Prises MIDI Out/In
Ces prises permettent de brancher l’instrument à des
appareils MIDI afin d’échanger des données de jeu
(p. 114).
33.
USB
Vous pouvez brancher un ordinateur et échanger des
données de jeu entre l’instrument et l’ordinateur (p. 113).
88
Page 91

Avant de commencer à jouer
Avant de commencer à jouer
FRANÇAIS
Connexion du câble de
pédalier
Branchez le câble du pédalier à la prise Pedal en
face arrière du HP107e.
Connexion du câble de hautparleur
Branchez le câble des haut-parleurs sortant du boîtier des haut-parleurs à la prise prévue à cet effet
sous le HP107e.
Enfoncez la fiche du câble des haut-parleurs jusqu’au
déclic.
Connexion du cordon
d’alimentation
1.
Insérez le cordon d’alimentation dans la prise AC
située sous le HP107e, à l’arrière.
2.
Branchez le cordon d’alimentation à une prise secteur.
Servez-vous exclusivement du cordon d’alimentation
NOTE
fourni.
Installation du pupitre
1.
Prenez le pupitre des deux mains et soulevez-le
vers vous jusqu’à ce qu’il soit redressé.
2.
Utilisez le support à l’arrière du pupitre pour le
maintenir en place.
Vous pouvez incliner le pupitre selon trois angles.
FRANÇAIS
FRANÇAIS FRANÇAIS FRANÇAIS FRANÇAIS
Clip
Câble de haut-parleur
Ne placez aucun récipient contenant de l’eau (un vase,
NOTE
par exemple) sur ce produit. Évitez en outre l’usage
d’insecticides, de parfum, d’alcool, de vernis à ongles,
d’atomiseurs ou sprays à proximité de ce produit.
Les haut-parleurs de ce piano sont montés sous le panneau supérieur de l’instrument et sont orientés vers le
haut. Il peut y avoir des problèmes ou des accidents si du
liquide entre en contact avec des éléments des hautparleurs.
Haut-parleurs
Prise pour haut-parleurs
1
2
■
Abaisser le pupitre
Relevez le support situé derrière le pupitre puis
abaissez doucement le pupitre.
■
Languettes de maintien de partition
Vous pouvez vous servir des languettes de maintien pour
maintenir la partition. Si vous ne les utilisez pas, repliezles.
89
Page 92

HP107e – Avant de commencer à jouer
NOTE
■
Enlever le pupitre
Vous pouvez enlever le pupitre du piano. Cela vous permet de placer un ordinateur portable sur le piano.
Redressez le pupitre verticalement puis dévissez
les trois vis.
Vous pouvez le faire à l’aide d’une pièce de monnaie.
Veillez à ne pas perdre les vis que vous ôtez; évitez de les
NOTE
laisser à un endroit où elles pourraient être avalées par
de jeunes enfants.
Ouvrir/fermer le couvercle
Pour ouvrir le couvercle, soulevez-le légèrement
avec les deux mains et éloignez-le de vous.
Pour refermer le couvercle, tirez-le doucement
vers vous et abaissez-le lorsqu’il est entièrement
tiré.
Lorsque vous branchez un casque, le témoin [ (casque)]
(p. 87) s’allume et les haut-parleurs du HP107e ne produisent plus de son.
Réglez le volume du casque avec la commande [Volume]
(p. 91) du HP107e.
Utilisez un casque stéréo.
Optez pour un casque Roland car un autre casque risque
de ne pas pouvoir fournir le volume nécessaire.
Remarques concernant l’usage du casque
• Pour éviter d’endommager le câble, prenez toujours le cas-
que en main lorsque vous le maniez; ne tirez pas sur le câble
mais sur la fiche pour le débrancher.
• Si vous branchez le casque alors que le volume est très
élevé, vous risquez de l’endommager. Réglez donc le
volume au minimum sur le HP107e avant de brancher le
casque.
• Une écoute à volume excessivement élevé endommage non
seulement le casque mais surtout votre ouïe. Réglez le
volume à un niveau adéquat.
■
Utiliser le crochet pour casque
Lorsque vous n’utilisez pas le casque, vous pouvez le suspendre au crochet prévu à cet effet sur le côté inférieur
gauche du HP107e.
Fixer le crochet pour casque
Enfoncez et faites tourner le crochet pour casque fourni
avec le HP107e dans l’orifice situé sous le HP107e (voyez
l’illustration ci-dessous). Serrez le papillon du crochet
pour casque.
Veillez à ne pas vous coincer les doigts lorsque vous
NOTE
ouvrez ou fermez le couvercle. Quand de jeunes enfants
jouent sur le HP107e, la présence d’un adulte est souhaitable.
Si vous devez déplacer le piano, fermez le couvercle pour
NOTE
éviter tout accident.
Brancher un casque
Le HP107e a deux prises pour casque. Cela permet à deux
personnes d’écouter simultanément au casque, ce qui vient à
point pour les leçons de piano ou le jeu à quatre mains. Cela
vous permet en outre de jouer sans déranger votre entourage, notamment le soir.
Branchez le(s) casque(s) à la (aux) prise(s) Phones
située(s) à gauche, sous le piano.
Prises pour casque x2
Papillon
Crochet pour casque
90
Page 93

Avant de commencer à jouer
FRANÇAIS
Mise sous/hors tension
Mettez vos différents appareils sous tension selon l’ordre
spécifié. Si vous modifiez cet ordre, vous risquez de provoquer des dysfonctionnements ou d’endommager certains éléments comme les haut-parleurs.
Pour mettre l’instrument sous tension, tournez la
commande [Volume] au minimum puis appuyez
sur [Power On].
Power On
Témoin de mise sous tension
L’instrument est sous tension et le témoin d’alimentation
à l’avant gauche du HP107e s’allume.
Attendez quelques secondes avant de jouer. Utilisez la
commande [Volume] pour régler le volume.
Ce produit est doté d’un circuit de protection. Il faut
NOTE
attendre un bref laps de temps (quelques secondes) après
la mise sous tension pour que le produit fonctionne normalement.
Pour mettre l’instrument hors tension, tournez la
commande [Volume] au minimum puis appuyez
sur [Power On].
L’instrument est hors tension et le témoin de mise sous
tension à l’avant gauche du HP107e s’éteint.
Pour couper entièrement l’alimentation de l’appareil,
NOTE
mettez-le hors tension avec l’interrupteur POWER puis
débranchez le cordon secteur de la prise de courant.
Voyez “Alimentation” (p. 84).
Les pédales
Les pédales ont les fonctions suivantes et servent surtout
pour le jeu de piano.
Pédale douce Pédale forte
Pédale sostenuto
Pédale forte (droite)
Tant que cette pédale est enfoncée, les notes sont maintenues même lorsque vous relâchez les touches.
La durée du maintien des notes varie subtilement en
fonction de la force exercée sur la pédale.
Lorsque vous actionnez la pédale forte d’un piano acoustique, les cordes des touches adjacentes sont libérées et
vibrent sous l’effet des touches actionnées sur le clavier,
rendant ainsi le son plus riche et plus vaste. Le HP107e
simule cette “résonance sympathique” produite par la
pédale forte.
Vous pouvez déterminer l’ampleur de la résonance générée par la pédale forte (p. 95).
Pédale sostenuto (centre)
Cette pédale maintient la note des touches actionnées
avant que vous n’appuyiez sur la pédale.
Vous pouvez changer la fonction de la pédale sostenuto
(p. 101).
Pédale douce (gauche)
Lorsque vous maintenez cette pédale enfoncée en jouant
sur le clavier, le son est adouci.
L’adoucissement du son varie subtilement en fonction de
la force exercée sur la pédale.
FRANÇAIS
FRANÇAIS FRANÇAIS FRANÇAIS FRANÇAIS
Réglage du volume et de la
brillance
Servez-vous de la commande [Volume] pour
régler le volume global.
Actionnez la commande [Brilliance] pour ajuster
le timbre du son.
Min Max
Mellow
Bright
Dispositif de réglage
Si vous avez l’impression que les pédales sont instables
ou si vous déplacez l’instrument, ajustez le dispositif de
réglage situé sous les pédales.
❍ Abaissez le dispositif en le tournant pour qu’il soit ferme-
ment en contact avec le sol. Si le pédalier ne repose pas
convenablement sur le sol, cela risque d’endommager les
pédales. Soyez particulièrement attentif lorsque vous placez l’instrument sur de la moquette ou un tapis: le pédalier doit être fermement en contact avec le sol.
Dispositif de réglage
91
Page 94

HP107e – Chapitre 1. Exploiter les morceaux internes
Chapitre 1. Exploiter les morceaux internes
■
Écouter les morceaux
internes
Le HP107e propose 68 morceaux de piano.
“Chapitre 3. Accompagner les morceaux internes” à la
page 103, “Tone List” (p. 240)
■
Écouter tous les morceaux consécutivement
Les morceaux internes peuvent être écoutés successivement.
Choisir un morceau pour l’écouter
3, 4
2
1
Affichage pour les morceaux internes
USr (utilisateur) … La mémoire où vous pouvez enregistrer votre jeu. (Pour en savoir plus sur l’enregistrement → p. 105)
S.1~S.68 … Morceaux internes
S. U … Morceau sauvegardé avec la fonction “Song
Backup” (p. 111)
12
1.
Appuyez simultanément sur les boutons [Song/
Tempo] et [Play].
Le témoin du bouton [Song/Tempo] s’allume, le témoin
du bouton [Play] clignote et les morceaux sont joués successivement en commençant par le morceau actuellement
sélectionné.
Le numéro du morceau apparaît à l’écran durant quelques
secondes.
Vous pouvez appuyer sur le bouton [–] ou [+] pour sélectionner le morceau que vous voulez écouter.
Lorsque tous les morceaux ont été joués, la reproduction
recommence à partir du premier morceau.
Arrêter la reproduction
2.
Appuyez sur le bouton [Play].
La reproduction s’arrête.
Choix d’un morceau à reproduire
1.
Appuyez sur le bouton [Song/Tempo] pour allumer son témoin en rouge.
Le numéro du morceau apparaît à l’écran durant quelques
secondes.
2.
Appuyez sur le bouton [–] ou [+] pour sélectionner
un morceau.
Maintenez le bouton enfoncé pour faire changer les numé-
ros de façon continue.
Pour sélectionner un morceau mémorisé, procédez comme suit.
1 Appuyez simultanément sur les boutons [–] et
[+] pour afficher “USr” à l’écran.
2 Appuyez sur le bouton [–] pour afficher “S.
U”.
92
Reproduction
3.
Appuyez sur le bouton [Play].
Le témoin s’allume et le morceau choisi est reproduit.
Arrêter la reproduction
4.
Appuyez sur le bouton [Play].
Le témoin du bouton s’éteint et la reproduction s’arrête. Si
vous appuyez une fois de plus sur [Play], le morceau interrompu est rejoué à partir du début.
Page 95

Écouter les morceaux de
démonstration
Vous pouvez écouter divers morceaux de démonstration
dont ceux exploitant les sons de piano et d’autres sons ainsi
que diverses fonctions.
■
Écouter les morceaux de démonstration des
sons
1.
Appuyez sur le bouton [Demo].
Le témoin du bouton clignote et la reproduction des morceaux de démonstration des sons commence.
Lorsque tous les morceaux ont été reproduits, la reproduction recommence à partir du premier morceau.
Si vous appuyez sur un des boutons de son (Tone) lorsque
le bouton [Demo] clignote, vous entendez le morceau de
démonstration correspondant au son choisi.
Démo des différents
boutons de sons
[Piano] Morceaux de démonstration de son Piano
[E. Piano]
[Harpsichord]
[Organ]
[Strings]
[Acoustic Layering]
[Split]
Morceaux de démonstration de son
E.Piano
Morceaux de démonstration de clavecin
(Harpsichord)
Morceaux de démonstration de son
d’orgue (Organ)
Morceaux de démonstration de son de cordes (Strings)
Morceaux de démonstration avec fonction
Split (p. 98)
Morceaux de démonstration avec fonction
Split (p. 100)
Arrêter la démonstration des sons
2.
Appuyez sur le bouton [Demo].
Le témoin [Demo] s’éteint et la démonstration s’arrête.
Contenu
Chapitre 1. Exploiter les morceaux internes
Démo des fonctions des
différents boutons
Piano Resonance [String]
Piano Resonance [Damper]
Key Touch [Hammer]
Contenu
Démonstration de la résonance des cordes
Démonstration de la résonance sympathique
Démonstration de la
réponse des marteaux
Lorsque vous appuyez sur un bouton, vous entendez la
démonstration assignée à ce bouton. Vous entendez en fait
deux versions: une avec la fonction du bouton actionné et
l’autre sans.
Lorsque vous appuyez une fois de plus sur le bouton
actionné à l’étape 2, vous changez de démonstration et
alternez ainsi entre celle avec et celle sans effet.
Démonstration de la réponse des marteaux
Le jeu s’arrête lorsque vous sélectionnez la démonstration de réponse des marteaux. Chaque pression sur le
bouton Key Touch [Hammer] active et coupe alternativement la fonction.
Jouez sur le clavier et testez la fonction de réponse des
marteaux.
Lorsque la fonction “Hammer Response” est activée, les
notes sont produites avec d’autant plus de retard que la
pression sur les touches est importante.
La démonstration de la réponse des marteaux montre
clairement la différence entre le son obtenu avec et sans
la fonction Hammer Response.
Arrêter la démonstration des fonctions
3.
Appuyez sur le bouton [Demo].
Le témoin [Demo] s’éteint et la démonstration s’arrête.
FRANÇAIS
p. 94
p. 95
p. 95
FRANÇAIS
FRANÇAIS FRANÇAIS FRANÇAIS FRANÇAIS
■
Démonstration des fonctions
Vous pouvez écouter la démonstration des fonctions disponibles pour les sons de piano.
1.
Appuyez sur le bouton [Demo].
Le témoin du bouton clignote et la reproduction des morceaux de démonstration des sons commence.
2.
Appuyez sur un des boutons suivants.
Démo des fonctions des
différents boutons
[Grand Space]
[Dynamic Emphasis]
Piano Resonance [Key Off]
Contenu
Démonstration de la fonction Grand Space
Démonstration de la fonction Dynamic Emphasis
Démonstration du son
après le relâchement des
touches
p. 96
p. 97
p. 94
93
Page 96

HP107e – Chapitre 2. Jeu
NOTE
Chapitre 2. Jeu
Jouer avec différents sons
Le HP107e est doté de 36 sons internes. Ils sont divisés en
cinq groupes assignés chacun à un bouton Tone.
Sélectionner un groupe de sons
1.
Appuyez sur n’importe quel bouton de son
(Tone).
Le témoin du bouton actionné s’allume.
Lorsque vous jouez sur le clavier, vous entendez un son
appartenant au groupe choisi.
Sélectionner des variations
2.
21
Pour en savoir plus, voyez “Tone List” (p. 240).
Appuyez sur le bouton [–] ou [+].
Le numéro de la variation apparaît à l’écran durant quelques secondes.
Le son sélectionné est audible lorsque vous jouez sur le
clavier.
Réglages fins du son de piano (Piano Resonance)
Vous pouvez affiner les réglages du son de piano.
■
Son des touches relâchées (Key Off)
Vous pouvez produire le son de “touche relâchée” (le son
subtil produit lorsque les touches sont relâchées) d’un
piano acoustique.
Vous pouvez sauvegarder ce réglage dans la mémoire du
HP107e avec la fonction de mémorisation (“Backup”)
(p. 111).
1.
Appuyez sur le bouton Piano Resonance [Key Off]
(son témoin s’allume).
Vous obtenez le son distinctif produit lorsque vous relâchez les touches.
Appuyez une fois de plus sur le bouton Piano Resonance
[Key Off] pour éteindre son témoin et couper la fonction.
Vous trouverez les sons pour lesquels cette fonction est
activée dans la “Tone List” (p. 240).
Réglage du volume du son de touche relâchée
2.
Maintenez le bouton Piano Resonance [Key Off]
enfoncé et appuyez sur le bouton [+] ou [–].
Vous pouvez régler le volume du son de touche relâchée
selon dix niveaux.
Plus la valeur est élevée, plus le volume augmente.
■
Résonance des cordes
Lorsque vous jouez sur le clavier d’un piano acoustique,
les cordes déjà actionnées résonnent également. La fonction qui produit cet effet est appelée “String Resonance”.
Cet effet ne fonctionne qu’avec les sons de piano. Il est
impossible de l’appliquer à d’autres sons.
1.
Appuyez sur le bouton Piano Resonance [Sting]
(son témoin s’allume).
La résonance des cordes est activée. Appuyez une fois de
plus sur le bouton Piano Resonance [String] pour éteindre
son témoin et couper la fonction.
Vous pouvez sauvegarder ce réglage dans la mémoire du
HP107e avec la fonction de mémorisation (“Backup”)
(p. 111).
94
Page 97

Régler l’intensité de la résonance
2.
Maintenez le bouton Piano Resonance [String]
enfoncé et appuyez sur le bouton [+] ou [–].
Vous pouvez régler l’intensité de la résonance (le volume
de la résonance) sur dix niveaux.
Plus la valeur est élevée, plus la résonance est importante.
■
Résonance sympathique (Damper)
Vous pouvez déterminer le volume de la résonance générée par la pédale forte.
Sur un piano acoustique, vous pouvez enfoncer la pédale
forte pour permettre aux cordes adjacentes de résonner
avec les notes que vous jouez afin d’enrichir le son et de lui
conférer plus de réverbération. La pédale forte du HP107e
simule cette résonance (sympathique) lorsqu’elle est
enfoncée.
Cet effet ne fonctionne qu’avec les sons de piano. Il est
NOTE
impossible de l’appliquer à d’autres sons.
1.
Maintenez le bouton Piano Resonance [Damper]
enfoncé (son témoin s’allume).
La résonance sympathique est activée.
Appuyez une fois de plus sur le bouton Piano Resonance
[Damper] pour éteindre son témoin et couper la fonction.
Vous pouvez sauvegarder ce réglage dans la mémoire du
HP107e avec la fonction de mémorisation (“Backup”)
(p. 111).
Régler l’intensité de la résonance
2.
Maintenez le bouton Piano Resonance [Damper]
enfoncé et appuyez sur le bouton [+] ou [–].
Vous disposez de dix niveaux d’intensité pour la résonance.
Des valeurs plus élevées augmentent l’intensité de l’effet.
Chapitre 2. Jeu
“Light” allumé. Pour jouer fortissimo (ff), la main peut
rester assez légère: le clavier réagit plus vite. Ce réglage
facilite le jeu, notamment pour les enfants.
“Medium” allumé. Permet de jouer avec le toucher le plus
naturel. Cette réponse est la plus proche de la dynamique
d’un piano acoustique.
“Heavy” allumé. Pour jouer fortissimo (ff), il faut avoir la
main plus lourde: le clavier donne l’impression d’être plus
dur. Un toucher dynamique rend votre jeu plus expressif.
Tous les témoins éteints. Fixe. La force exercée sur les
touches n’est pas prise en considération: le volume des
notes reste identique.
■
Changer le timing en fonction de la force
exercée sur les touches (Hammer Response)
Cette fonction détermine la façon dont votre toucher déte-
rmine le timing des notes. Cette fonction s’appelle “Hammer Response”.
Vous pouvez sauvegarder ce réglage dans la mémoire du
HP107e avec la fonction de mémorisation (“Backup”)
(p. 111).
Sur un piano acoustique, la pression d’une touche
actionne un marteau qui frappe une corde pour produire
du son. Si vous appuyez doucement sur la touche, le marteau se déplace lentement et prend donc plus de temps
pour produire la note.
Si vous activez la fonction “Hammer Response”, l’intervalle séparant la frappe sur la touche et la production du
son varie en fonction de la force avec laquelle vous jouez.
Plus vous jouez doucement, plus cet intervalle est long.
FRANÇAIS
FRANÇAIS
FRANÇAIS FRANÇAIS FRANÇAIS FRANÇAIS
Réglage de la dynamique du
clavier (Key Touch)
Vous pouvez régler la dynamique (la sensibilité au toucher)
du clavier.
1
Vous pouvez sauvegarder ce réglage dans la mémoire du
HP107e avec la fonction de mémorisation (“Backup”)
(p. 111).
1.
Appuyez sur le bouton Key Touch [Touch].
Chaque pression sur le bouton Key Touch [Touch] allume
un autre témoin et sélectionne une dynamique différente.
1
1.
Appuyez sur le bouton Key Touch [Hammer] pour
allumer le témoin voulu.
“Light” allumé. La réponse est plus rapide lorsque vous
appuyez doucement sur les touches.
“Medium” allumé. Le timing est normal lorsque vous
appuyez doucement sur les touches.
“Heavy” allumé. Les notes sont légèrement retardées lorsque vous appuyez doucement sur les touches.
Tous les témoins éteints. La fonction de réponse des
marteaux est coupée. Le son est produit immédiatement,
quelle que soit la force exercée sur les touches.
95
Page 98

HP107e – Chapitre 2. Jeu
Rendre le son plus profond
(Grand Space)
Le HP107e dispose d’une fonction “Grand Space” qui vous
permet d’obtenir un son dont la profondeur évoque celle
d’un piano à queue. Cette fonction vous permet donc de
retrouver la réverbération et la profondeur naturelles du son
produit par un piano à queue acoustique.
1
Vous pouvez sauvegarder ce réglage dans la mémoire du
HP107e avec la fonction de mémorisation (“Backup”)
(p. 111).
1.
Appuyez sur le bouton [Grand Space] (son témoin
s’allume).
La fonction “Grand Space” est activée et confère plus
d’ampleur au son.
Quand le mode “Grand Space” (p. 110) est réglé sur “1”
alors qu’un casque est branché, la profondeur est optimisée pour casque; si aucun casque n’est branché, la profondeur est optimisée pour haut-parleurs.
2.
Maintenez le bouton [Grand Space] enfoncé et
appuyez sur le bouton [+] ou [–].
Vous avez le choix entre quatre niveaux de profondeur.
Plus la valeur augmente, plus le son est profond.
2
Sélectionner la bonne
profondeur pour le casque
(Grand Space)
Vous pouvez également recréer la sensation de profondeur
d’un piano de concert à travers le casque. Cette fonction vous
permet de retrouver la réverbération et la profondeur naturelles du son produit par un piano à queue acoustique.
1
Vous pouvez sauvegarder ce réglage dans la mémoire du
HP107e avec la fonction de mémorisation (“Backup”)
(p. 111).
1.
Appuyez sur le bouton [Grand Space] (son témoin
s’allume).
La fonction “Grand Space” est activée et confère plus
d’ampleur au son.
Quand le mode “Grand Space” (p. 110) est réglé sur “1”
alors qu’un casque est branché, la profondeur est optimisée pour casque; si aucun casque n’est branché, la profondeur est optimisée pour haut-parleurs.
2.
Maintenez le bouton [Grand Space] enfoncé et
appuyez sur le bouton [+] ou [–].
Vous avez le choix entre quatre niveaux de profondeur.
Plus la valeur augmente, plus le son est profond.
2
3.
Pour couper la fonction “Grand Space”, appuyez
une fois de plus sur [Grand Space] afin d’éteindre
le bouton.
96
3.
Pour couper la fonction “Grand Space”, appuyez
une fois de plus sur [Grand Space] afin d’éteindre
le bouton.
Le témoin [ (casque)] s’allume quand un casque est
branché.
Page 99

Chapitre 2. Jeu
NOTE
FRANÇAIS
Ajouter de la dynamique au
son (Dynamic Emphasis)
Vous pouvez conférer une clarté et une définition extraordinaires au son.
1
Vous pouvez sauvegarder ce réglage dans la mémoire du
HP107e avec la fonction de mémorisation (“Backup”)
(p. 111).
1.
Appuyez sur le bouton [Dynamic Emphasis] (son
témoin s’allume).
La fonction “Dynamic Emphasis” est activée et anime le
son.
2.
Pour couper la fonction “Dynamic Emphasis”,
appuyez sur [Dynamic Emphasis] afin d’éteindre
le bouton.
3
Ajouter des effets au son
■
Ajouter de la réverbération au son (Reverb)
L’effet Reverb ajoute une belle réverbération au son et
vous donne l’impression de jouer dans une salle de concert.
1.
Appuyez sur le bouton [Reverb].
Le témoin du bouton s’allume et de la réverbération est
ajoutée au son.
Pour couper la réverbération, appuyez sur le bouton
[Reverb] (son témoin s’éteint).
Vous pouvez sauvegarder le réglage de réverbération
activée/coupée ainsi que l’intensité de la réverbération
dans la mémoire du HP107e avec la fonction de
mémorisation (“Backup”) (p. 111).
■
Enrichir le son (Chorus)
En ajoutant du chorus, vous conférez une dimension supplémentaire au son en l’enrichissant.
FRANÇAIS
FRANÇAIS FRANÇAIS FRANÇAIS FRANÇAIS
Changer les réglages “Dynamic Emphasis”
3.
Maintenez le bouton [Dynamic Emphasis]
enfoncé et appuyez sur le bouton [+] ou [–].
Témoin Description
1
2
3 Produit un son dont le grave est accentué.
Produit un son dont le grave et l’aigu sont
accentués.
Produit un son avec des accords dans le grave
qui sont clairs et distincts.
1.
Appuyez sur le bouton [Chorus].
Le témoin du bouton s’allume et le son est pourvu de chorus.
Pour couper l’effet Chorus, appuyez sur le bouton [Chorus] de sorte à éteindre son témoin.
Vous pouvez sauvegarder le réglage de chorus activé/
coupé pour chaque son individuel. Les réglages d’origine
sont rétablis à la mise hors tension.
■
Changer l’intensité de l’effet
Vous avez le choix entre dix niveaux d’intensité pour le
chorus.
Ce paramètre a été réglé sur “5” à la sortie d’usine pour
les effets Reverb et Chorus.
Changer l’intensité de la réverbération
1.
Maintenez le bouton [Reverb] enfoncé et appuyez
sur le bouton [+] ou [–].
La valeur en vigueur est affichée. Des valeurs plus élevées
augmentent l’intensité de l’effet.
Vous ne pouvez pas sauvegarder les réglages de
réverbération pour chaque son individuel.
Changer l’intensité du chorus
1.
Maintenez le bouton [Chorus] enfoncé et appuyez
sur le bouton [+] ou [–].
La valeur en vigueur est affichée. Des valeu-rs plus élevées
augmentent l’intensité de l’effet.
97
Page 100

HP107e – Chapitre 2. Jeu
Transposer le clavier
(Transpose)
La fonction de transposition vous permet de transposer votre
jeu pour éviter certaines difficultés techniques. Si, par exemple, le morceau est dans une tonalité difficile comprenant de
nombreux dièses (#) ou bémols (b), vous pouvez transposer le
clavier pour le jouer dans une tonalité plus facile.
Lorsque vous accompagnez un chanteur, vous pouvez transposer le clavier pour produire une hauteur plus confortable
pour le chanteur tout en jouant comme vous en avez l’habitude (vous actionnez toujours les mêmes touches).
1
1.
Maintenez le bouton [Transpose] enfoncé puis
appuyez sur la touche correspondant à la tonique
de la gamme voulue.
Le témoin s’allume et le clavier est transposé.
Si vous maintenez le bouton [Transpose] enfoncé, la
valeur en vigueur est affichée.
Vous pouvez aussi effectuer la transposition en maintenant le bouton [Transpose] enfoncé et en appuyant sur le
bouton [–] ou [+].
Une pression simultanée sur les boutons [+] et [–] en maintenant [Transpose] enfoncé rétablit le réglage original (0).
Vous pouvez transposer le clavier sur une plage de –6~0~
5 (demi-tons).
Imaginons que vous vouliez entendre un Mi lorsque vous
enfoncez la touche Do. Maintenez le bouton [Transpose]
enfoncé et actionnez la touche Mi.
En comptant à partir de Do comme point de référence, il
faut compter quatre touches (noires comprises) pour
atteindre le Mi; “4” s’affiche donc.
Si vous jouez
Do Mi Sol
Avec une valeur de transposition “0”, le témoin du bouton
reste éteint même si appuyez sur le bouton [Transpose].
Pour annuler la transposition, appuyez sur le bouton
[Transpose] (le témoin s’éteint).
Une nouvelle pression sur le bouton [Transpose] (son
témoin s’allume) transpose le clavier en fonction de la note
spécifiée ici.
Ce paramètre retrouve sa valeur originale (0) à la mise
hors tension.
vous entendrez
Mi Sol# Si
Ajouter un son complémentaire au piano
(Acoustic Layer)
Avec le HP107e, vous pouvez facilement sélectionner des
sons complétant parfaitement le son de piano et les ajouter
au son de piano. Cette fonction est appelée “Acoustic Layering”.
21
Vous pouvez changer la hauteur du son ajouté par octaves (p. 110).
Commencez par sélectionner un son de piano (p. 94).
1.
Appuyez sur le bouton [Acoustic Layering] (son
témoin s’allume).
Lorsque vous jouez sur le clavier, le son de piano et le son
complémentaire sont superposés.
Si vous voulez faire des superpositions avec d’autres
sons que le son de piano, choisissez un autre son comme
base.
Sélection du son à ajouter au son de piano
2.
Servez-vous des boutons [–] et [+] pour choisir le
son à ajouter.
Le numéro du morceau apparaît à l’écran durant quelques
secondes.
Le numéro du son ajouté au son de piano est doté d’un
“L.” (Layer= ajout).
Quand “Layer” est sélectionné comme réglage de la
pédale centrale, la fonction “Acoustic Layer” est automatiquement activée (p. 98). Dans ce cas, vous pouvez
régler le volume du son ajouté au son de piano avec la
pédale.
Lorsque vous jouez sur le clavier, le son de piano et le son
complémentaire sont superposés et produits simultanément.
98
 Loading...