

Page 1

r
HP-1
Owner’s Manual
ENGLISH ENGLISH
ENGLISH ENGLISH ENGLISH ENGLISH
Thank you for purchasing a Roland HP-1 Digital Piano. The HP-1 is the new entry-level model of Roland’s HP series
Digital Pianos. As such, it comes with all the benefits: a weighted Hammer-Action keyboard, vibrant sounds and a number of useful functions.
Authentic piano performances
A high-quality concert grand piano sound, and a keyboard that’s a true pleasure to play ensure an even
more realistic piano-playing experience. Thanks to its
Hammer-Action keyboard, the HP-1 faithfully reproduces the feel of an acoustic piano with minute control over the sound.
Captures the brilliant resonance
The sound of a grand piano has a brilliant timbre
because it contains a greater amount of high-frequency components. The HP-1 reproduces this characteristic of the grand piano.
Extended high-frequency response
One of the features of an acoustic piano is that for the
strings of the highest 1 1/2 octaves, there is no damper
to restrict the vibration of the strings, irrespective of
whether or not the damper pedal is used. Since this
also allows these strings to vibrate sympathetically
with other strings, they can sometimes be heard
sounding independently from the low and middleregister strings.
The HP-1 faithfully simulates these characteristics of
the acoustic piano (being a digital instrument, the
HP-1 contains no strings, however).
Eight Tones for a wide variety of musical genres
The HP-1 comes with eight sounds (called “Tones”).
That way, you can also use your instrument for playing harpsichord, organ, and pop/jazz music.
Before using this instrument, carefully read the sections on pages 2 and 4. They provide important information concerning the proper operation of the HP-1.
To get the most out of the HP-1 and to ensure many
years of trouble-free service, we urge you to read
through this Owner’s Manual thoroughly.
To avoid confusion, let’s agree to use the word “button” for all keys on the front panel, and only use “key”
when referring to the HP-1’s keyboard.
Copyright © 2002 ROLAND EUROPE. All rights reserved.
No part of this publication may be reproduced in any form without the written permission of Roland Europe S.p.a.
1
Page 2
Using the unit safely
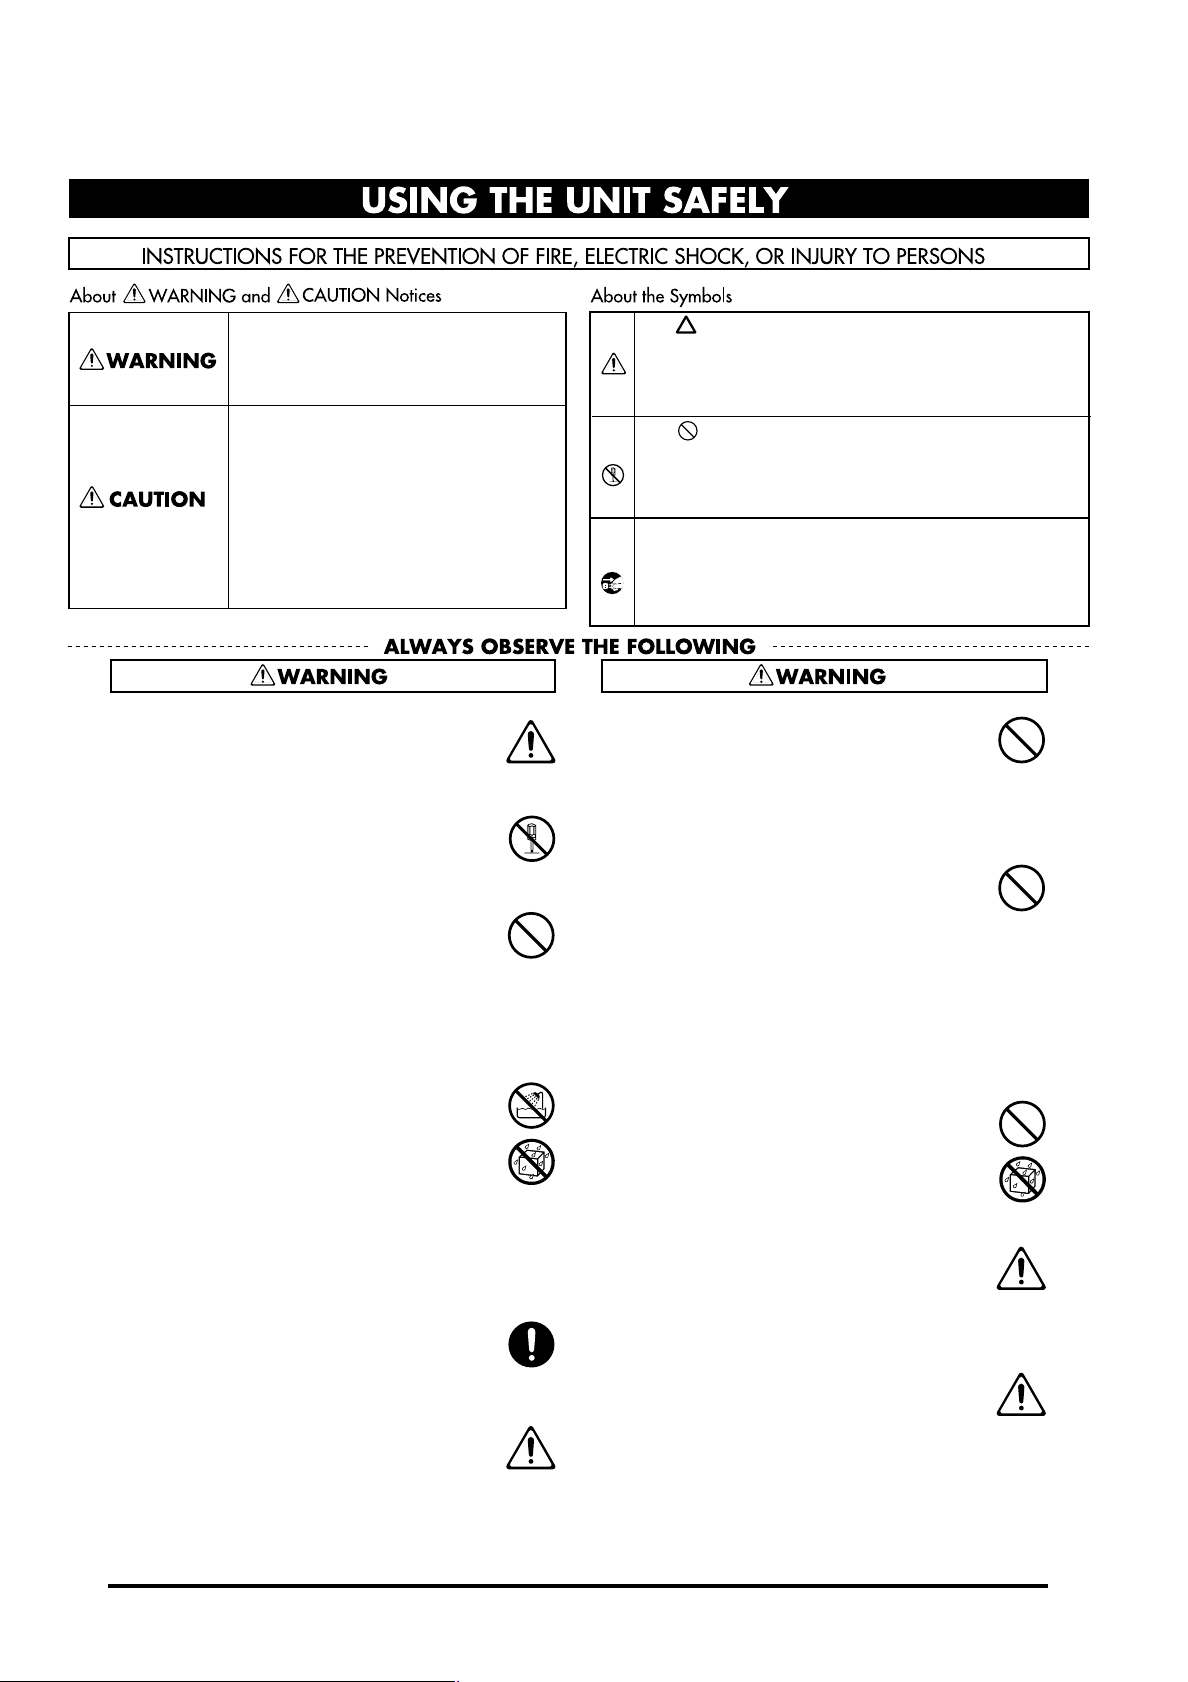
Used for instructions intended to alert
the user to the risk of death or severe
injury should the unit be used
improperly.
Used for instructions intended to alert
the user to the risk of injury or material
damage should the unit be used
improperly.
* Material damage refers to damage or
other adverse effects caused with
respect to the home and all its
furnishings, as well to domestic
animals or pets.
001
• Before using this unit, make sure to read the
instructions below, and the Owner’s Manual.
......................................................................................................
002a
• Do not open or perform any internal modifications on the unit.
......................................................................................................
003
• Do not attempt to repair the unit, or replace parts
within it (except when this manual provides specific instructions directing you to do so). Refer all
servicing to your retailer, the nearest Roland Service Center, or an authorized Roland distributor,
as listed on the “Information” page.
......................................................................................................
004
• Never use or store the unit in places that are:
• Subject to temperature extremes (e.g., direct sunlight in an enclosed vehicle, near a heating duct,
on top of heat-generating equipment); or are
• Damp (e.g., baths, washrooms, on wet floors); or
are
• Humid; or are
• Exposed to rain; or are
• Dusty; or are
• Subject to high levels of vibration.
......................................................................................................
007
• Make sure you always have the unit placed so it is
level and sure to remain stable. Never place it on
stands that could wobble, or on inclined surfaces.
......................................................................................................
008a
• The instrument should be connected to a power
supply only of the type described in the operating
instructions, or as marked on the unit.
......................................................................................................
The symbol alerts the user to important instructions
or warnings.The specific meaning of the symbol is
determined by the design contained within the
triangle. In the case of the symbol at left, it is used for
general cautions, warnings, or alerts to danger.
The symbol alerts the user to items that must never
be carried out (are forbidden). The specific thing that
must not be done is indicated by the design contained
within the circle. In the case of the symbol at left, it
means that the unit must never be disassembled.
The ● symbol alerts the user to things that must be
carried out. The specific thing that must be done is
indicated by the design contained within the circle. In
the case of the symbol at left, it means that the powercord plug must be unplugged from the outlet.
009
• Do not excessively twist or bend the power cord,
nor place heavy objects on it. Doing so can damage the cord, producing severed elements and
short circuits. Damaged cords are fire and shock
hazards!
......................................................................................................
010
• This unit, either alone or in combination with an
amplifier and headphones or speakers, may be
capable of producing sound levels that could
cause permanent hearing loss. Do not operate for
a long period of time at a high volume level, or at
a level that is uncomfortable. If you experience
any hearing loss or ringing in the ears, you
should immediately stop using the unit, and consult an audiologist.
......................................................................................................
011
• Do not allow any objects (e.g., flammable material, coins, pins); or liquids of any kind (water,
soft drinks, etc.) to penetrate the unit.
......................................................................................................
013
• In households with small children, an adult
should provide supervision until the child is
capable of following all the rules essential for the
safe operation of the unit.
......................................................................................................
014
• Protect the unit from strong impact.
(Do not drop it!)
......................................................................................................
2
Page 3

HP-1 – Owner’s Manual
ENGLISH ENGLISH
015
• Do not force the unit’s power-supply cord to
share an outlet with an unreasonable number of
other devices. Be especially careful when using
extension cords—the total power used by all
devices you have connected to the extension
cord’s outlet must never exceed the power rating
(watts/amperes) for the extension cord. Excessive
loads can cause the insulation on the cord to heat
up and eventually melt through.
......................................................................................................
016
• Before using the unit in a foreign country, consult with your retailer, the nearest Roland Service
Center, or an authorized Roland distributor, as
listed on the “Information” page.
......................................................................................................
101a
• The unit should be located so that its location or
position does not interfere with its proper ventilation.
......................................................................................................
102b
• Always grasp only the plug on the power-supply
cord when plugging into, or unplugging from, an
outlet or this unit.
......................................................................................................
104
• Try to prevent cords and cables from becoming
entangled. Also, all cords and cables should be
placed so they are out of the reach of children.
......................................................................................................
106
• Never climb on top of, nor place heavy objects on
the unit.
109a
• Before cleaning the unit, turn off the power and
unplug the power cord from the outlet (p. 7).
......................................................................................................
110a
• Whenever you suspect the possibility of lightning
in your area, pull the plug on the power cord out
of the outlet.
......................................................................................................
118
• Should you remove the screws fastening the
stand, make sure to put them in a safe place out
of children's reach, so there is no chance of them
being swallowed accidentally.
ENGLISH ENGLISH ENGLISH ENGLISH
......................................................................................................
107b
• Never handle the power cord or its plugs with wet
hands when plugging into, or unplugging from,
an outlet or this unit.
......................................................................................................
108d: Selection
• If you need to move the instrument, take note of
the precautions listed below. At least two persons
are required to safely lift and move the unit. It
should be handled carefully, all the while keeping
it level. Make sure to have a firm grip, to protect
yourself from injury and the instrument from
damage.
• Check to make sure the knob bolts securing the
unit to the stand have not become loose. Fasten
them again securely whenever you notice any loosening.
• Disconnect the power cord.
• Disconnect all cords coming from external
devices.
• Raise the adjusters on the stand (see page 7).
• Close the lid.
• Fold down the music stand.
......................................................................................................
3
Page 4

1. Important notes
Power Supply
• Do not use this unit on the same power circuit with
any device that will generate line noise (such as an
electric motor or variable lighting system).
• Before connecting the HP-1 to other devices, turn off
the power to all units. This will help prevent malfunctions and/or damage to speakers or other devices.
Placement
• Using the unit near power amplifiers (or other equipment containing large power transformers) may
induce hum. To alleviate the problem, change the orientation of this unit; or move it farther away from the
source of interference.
• This device may interfere with radio and television
reception. Do not use this device in the vicinity of
such receivers.
• Noise may be produced if wireless communications
devices, such as cell phones, are operated in the vicinity of this unit. Such noise could occur when receiving
or initiating a call, or while conversing. Should you
experience such problems, you should relocate such
wireless devices so they are at a greater distance from
this unit, or switch them off.
• Do not expose the instrument to direct sunlight, place
it near devices that radiate heat, leave it inside an
enclosed vehicle, or otherwise subject it to temperature extremes. Also, do not allow lighting devices that
normally are used while their light source is very close
to the unit (such as a piano light), or powerful spotlights to shine upon the same area of the unit for
extended periods of time. Excessive heat can deform
or discolor the unit.
• To avoid possible breakdown, do not use the HP-1 in a
wet area, such as an area exposed to rain or other
moisture.
• Do not allow rubber, vinyl, or similar materials to
remain on the HP-1 for long periods of time. Such
objects can discolor or otherwise harmfully affect the
finish.
• Do not put anything that contains water (e.g., flower
vases) on the piano. Also, avoid the use of insecticides,
perfumes, alcohol, nail polish, spray cans, etc., near
the unit. Swiftly wipe away any liquid that spills on the
unit using a dry, soft cloth.
• Do not allow objects to remain on the keyboard. This
can be the cause of malfunction, such as keys ceasing
to produce sound.
• Do not paste stickers, decals, or the like to this instrument. Peeling such matter off the instrument may
damage the exterior finish.
Maintenance
• To clean the unit, use a dry, soft cloth; or one that is
slightly dampened. Try to wipe the entire surface using
an equal amount of strength, moving the cloth along
with the grain of the wood. Rubbing too hard in the
same area can damage the finish.
• Never use benzine, thinners, alcohol or solvents of any
kind, to avoid the possibility of discoloration and/or
deformation.
Additional Precautions
• Use a reasonable amount of care when using the
HP-1’s buttons, sliders, or other controls; and when
using its jacks and connectors. Rough handling can
lead to malfunctions.
• When connecting/disconnecting cables, grasp the
connector itself—never pull on the cable. This way
you will avoid causing shorts, or damage to the cable’s
internal elements.
• A small amount of heat will radiate from the unit during normal operation.
• To avoid disturbing your neighbors, try to keep the
unit’s volume at reasonable levels. You may prefer to
use headphones.
• When you need to transport the unit, pack it in shockabsorbent material. Transporting the unit without
doing so can cause it to become scratched or damaged,
and could lead to malfunction.
• Use a cable from Roland to make the connection. If
using some other make of connection cable, please
note the following precautions.
• Some connection cables contain resistors. Do not
use cables that incorporate resistors for connecting
to this unit. The use of such cables can cause the
sound level to be extremely low, or impossible to
hear. For information on cable specifications, contact the manufacturer of the cable.
4
Page 5

Contents
t
Using the unit safely . . . . . . . . . . . . . . . . . . . . . . . . . . . . . . . . . . . . 2
1. Important notes . . . . . . . . . . . . . . . . . . . . . . . . . . . . . . . . . . . . . . 4
2. Panel descriptions . . . . . . . . . . . . . . . . . . . . . . . . . . . . . . . . . . . . 6
2.1 Front panel . . . . . . . . . . . . . . . . . . . . . . . . . . . . . . . . . . . . . . . . 6
2.2 Rear panel . . . . . . . . . . . . . . . . . . . . . . . . . . . . . . . . . . . . . . . . . 6
3. Main operations. . . . . . . . . . . . . . . . . . . . . . . . . . . . . . . . . . . . . . 7
3.1 Connecting the power cord. . . . . . . . . . . . . . . . . . . . . . . . . . . 7
3.2 About the pedals . . . . . . . . . . . . . . . . . . . . . . . . . . . . . . . . . . . 7
3.3 Setting up the music stand . . . . . . . . . . . . . . . . . . . . . . . . . . . 7
3.4 Connecting optional headphones. . . . . . . . . . . . . . . . . . . . . . 8
3.5 Turning the power on and off . . . . . . . . . . . . . . . . . . . . . . . . 8
3.6 Adjusting the volume. . . . . . . . . . . . . . . . . . . . . . . . . . . . . . . . 8
3.7 Listening to the demo songs . . . . . . . . . . . . . . . . . . . . . . . . . . 9
3.8 Selecting sounds . . . . . . . . . . . . . . . . . . . . . . . . . . . . . . . . . . . . 9
3.9 Adding Reverb . . . . . . . . . . . . . . . . . . . . . . . . . . . . . . . . . . . . 11
HP-1 – Owner’s Manual
ENGLISH ENGLISH
ENGLISH ENGLISH ENGLISH ENGLISH
4. Convenient functions . . . . . . . . . . . . . . . . . . . . . . . . . . . . . . . . 12
4.1 About the Function mode. . . . . . . . . . . . . . . . . . . . . . . . . . . 12
4.2 Transposing (same fingering, different notes) . . . . . . . . . . 12
4.3 Master Tuning . . . . . . . . . . . . . . . . . . . . . . . . . . . . . . . . . . . . 13
4.4 Changing the temperament . . . . . . . . . . . . . . . . . . . . . . . . . 14
4.5 Selecting the tuning curve (Stretch Tuning) . . . . . . . . . . . . 15
4.6 Setting the key touch . . . . . . . . . . . . . . . . . . . . . . . . . . . . . . . 15
4.7 Changing the damper pedal’s resonance . . . . . . . . . . . . . . . 16
4.8 Selecting the function of the left pedal. . . . . . . . . . . . . . . . . 16
5. Connecting to MIDI devices . . . . . . . . . . . . . . . . . . . . . . . . . . . 17
5.1 Selecting the MIDI transmit channel . . . . . . . . . . . . . . . . . . 17
5.2 Switching Local Control on and off . . . . . . . . . . . . . . . . . . . 18
6. Connecting audio equipment . . . . . . . . . . . . . . . . . . . . . . . . . . 19
7. Appendix . . . . . . . . . . . . . . . . . . . . . . . . . . . . . . . . . . . . . . . . . . 20
7.1 Troubleshooting. . . . . . . . . . . . . . . . . . . . . . . . . . . . . . . . . . . 20
7.2 Specifications . . . . . . . . . . . . . . . . . . . . . . . . . . . . . . . . . . . . . 20
5
Page 6
Panel descriptions
2. Panel descriptions
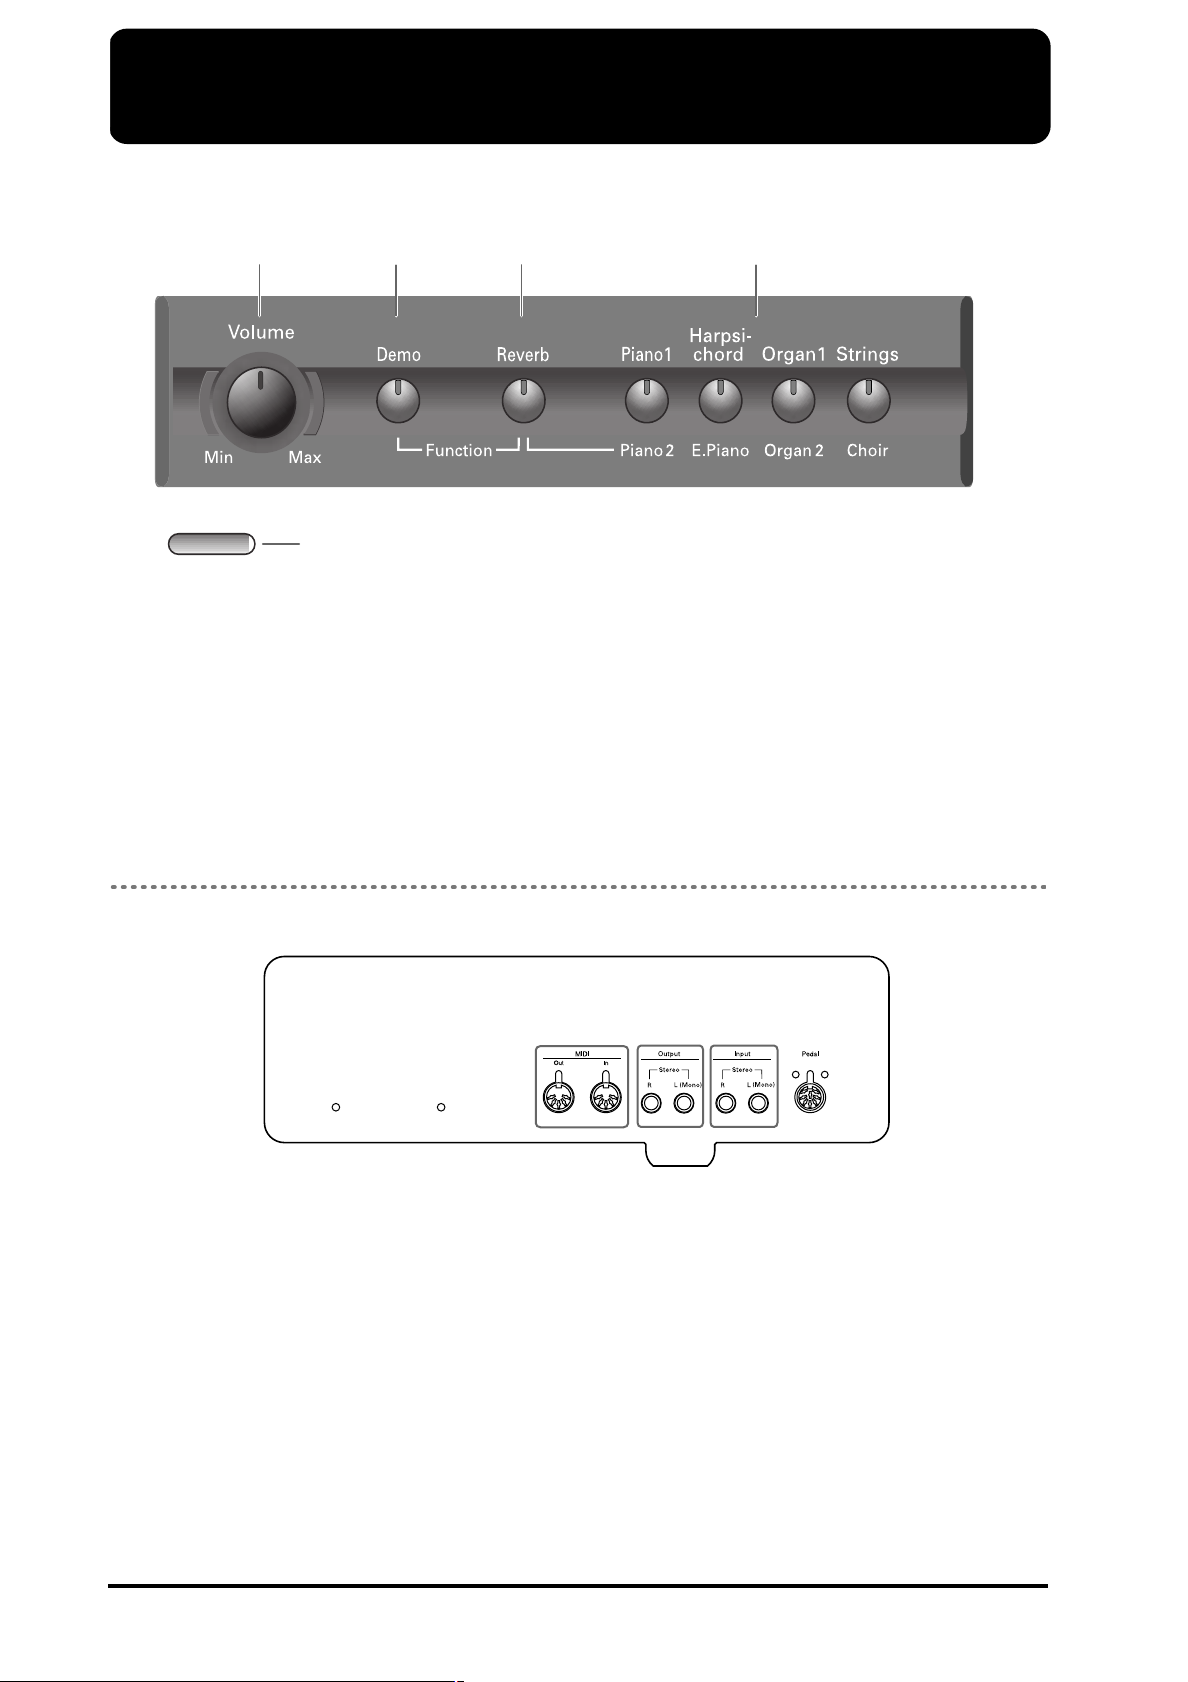
2.1 Front panel
B
Power
C D E
A
A [Power] switch
Turns the power on/off.
B [Volume] knob
Adjusts the overall volume level.
C [Demo] button
Allows you to play back the 65 pieces the HP-1 contains. By pressing it simultaneously with the [Reverb]
button, you access the HP-1’s Function mode (p. 12).
D [Reverb] button
This button has three functions. By pressing it, you
switch the Reverb effect on and off.
By holding it down while pressing a Tone button
([Piano 1]~[Strings]), you select the alternative for
the currently active Tone.
If you press it together with the [Demo] button, you
access the HP-1’s Function mode.
E Tone select buttons
These buttons are used to assign the desired sound (or
“Tone”) to the keyboard.
2.2 Rear panel
A MIDI Out/In connectors
Connect to external MIDI devices to exchange performance data.
B Output jacks
Allows you to connect the HP-1 to sound reinforcement equipment to obtain a more powerful sound.
They can also be connected to a tape recorder or other
recording device to record a performance.
A CBD
C Input jacks
These jacks can be connected to another sound generating device, or an audio device, so that the sound of
that device will be output via the HP-1’s speakers.
D Pedal connector
Connect the pedal cable of the special stand to this
socket.
6
Page 7

3. Main operations
HP-1 – Owner’s Manual
ENGLISH ENGLISH
Note: To prevent malfunction and/or damage to speakers or
other devices, always turn down the volume, and turn off
the power on all devices before making any connections.
3.1 Connecting the power cord
Connect the supplied power cord to a wall outlet.
Note: Strong tension applied to the cord may damage or
break it. Be careful not to pull the cord accidentally, or to
apply strong pressure to it.
3.2 About the pedals
The HP-1 comes with two pedals that are built into
the supplied stand:
About the adjuster
When you move the HP-1 or if you feel that the pedals
are unstable, adjust the adjuster located below the
pedals as follows.
Rotate the adjuster to lower it so that it is in firm contact with the floor. If there is a gap between the pedals
and the floor, the pedals may be damaged. In particular when placing the instrument on carpet, adjust this
so that the pedals firmly contact the floor.
Adjuster
3.3 Setting up the music stand
Set up the music stand as shown in the figure below.
ENGLISH ENGLISH ENGLISH ENGLISH
Soft pedal Damper pedal
Soft pedal–
the soft pedal depressed produces a sound that is not
as strong as when played with the equivalent strength.
This is the same function as the left-most pedal on an
acoustic piano.
Note: You can change the left pedal’s function. See (p. 16).
Damper pedal–
sound to linger on. While the damper pedal is
depressed, the sound from the keyboard continues to
linger for an extended period, even when you remove
your fingers from the keys.
This is the same function as the right-most pedal on
an acoustic piano.
This pedal softens the sound. Playing with
Use this pedal when you want the
Fold out the three supporting feet at the back of the
stand and check whether the stand is held in place.
Note: Before moving the HP-1, be sure to lower the music
stand as a safety precaution.
7
Page 8

Main operations
3.4 Connecting optional
headphones
Phones socket x2
Phones plug x 2
P
h
o
n
e
s
The HP-1 features two headphone sockets. This allows
two persons to listen through headphones simultaneously, making it very useful for lessons and when
performing piano pieces for four hands. Additionally,
this allows you to play without having to worry about
bothering others around you, even at night.
1.
Turn the volume all the way down.
2.
Connect the headphones to either headphone
socket.
3.
Adjust the volume.
By connecting headphones to the HP-1, you switch off
its speakers, which is ideal for playing or practising
without disturbing others.
Note: Be sure to use stereo headphones (Roland RH-25/50,
for example).
3.5 Turning the power on and off
Your HP-1 is fitted with an amplifier and speakers, so
that you do not need additional devices.
1.
Turn the volume all the way down.
2.
Press the [Power] switch, to turn on the power.
The power switch is located to the left of the keyboard.
Note: Your HP-1 is equipped with a protection circuit. A
brief interval after power-up is required before it will operate normally.
Turning off the power
1.
Turn the volume all the way down.
2.
Press the [Power] switch to turn off the power.
3.6 Adjusting the volume
Use the [Volume] knob to adjust the volume.
The knob’s setting also determines the volume in
headphones you may have connected.
8
Page 9

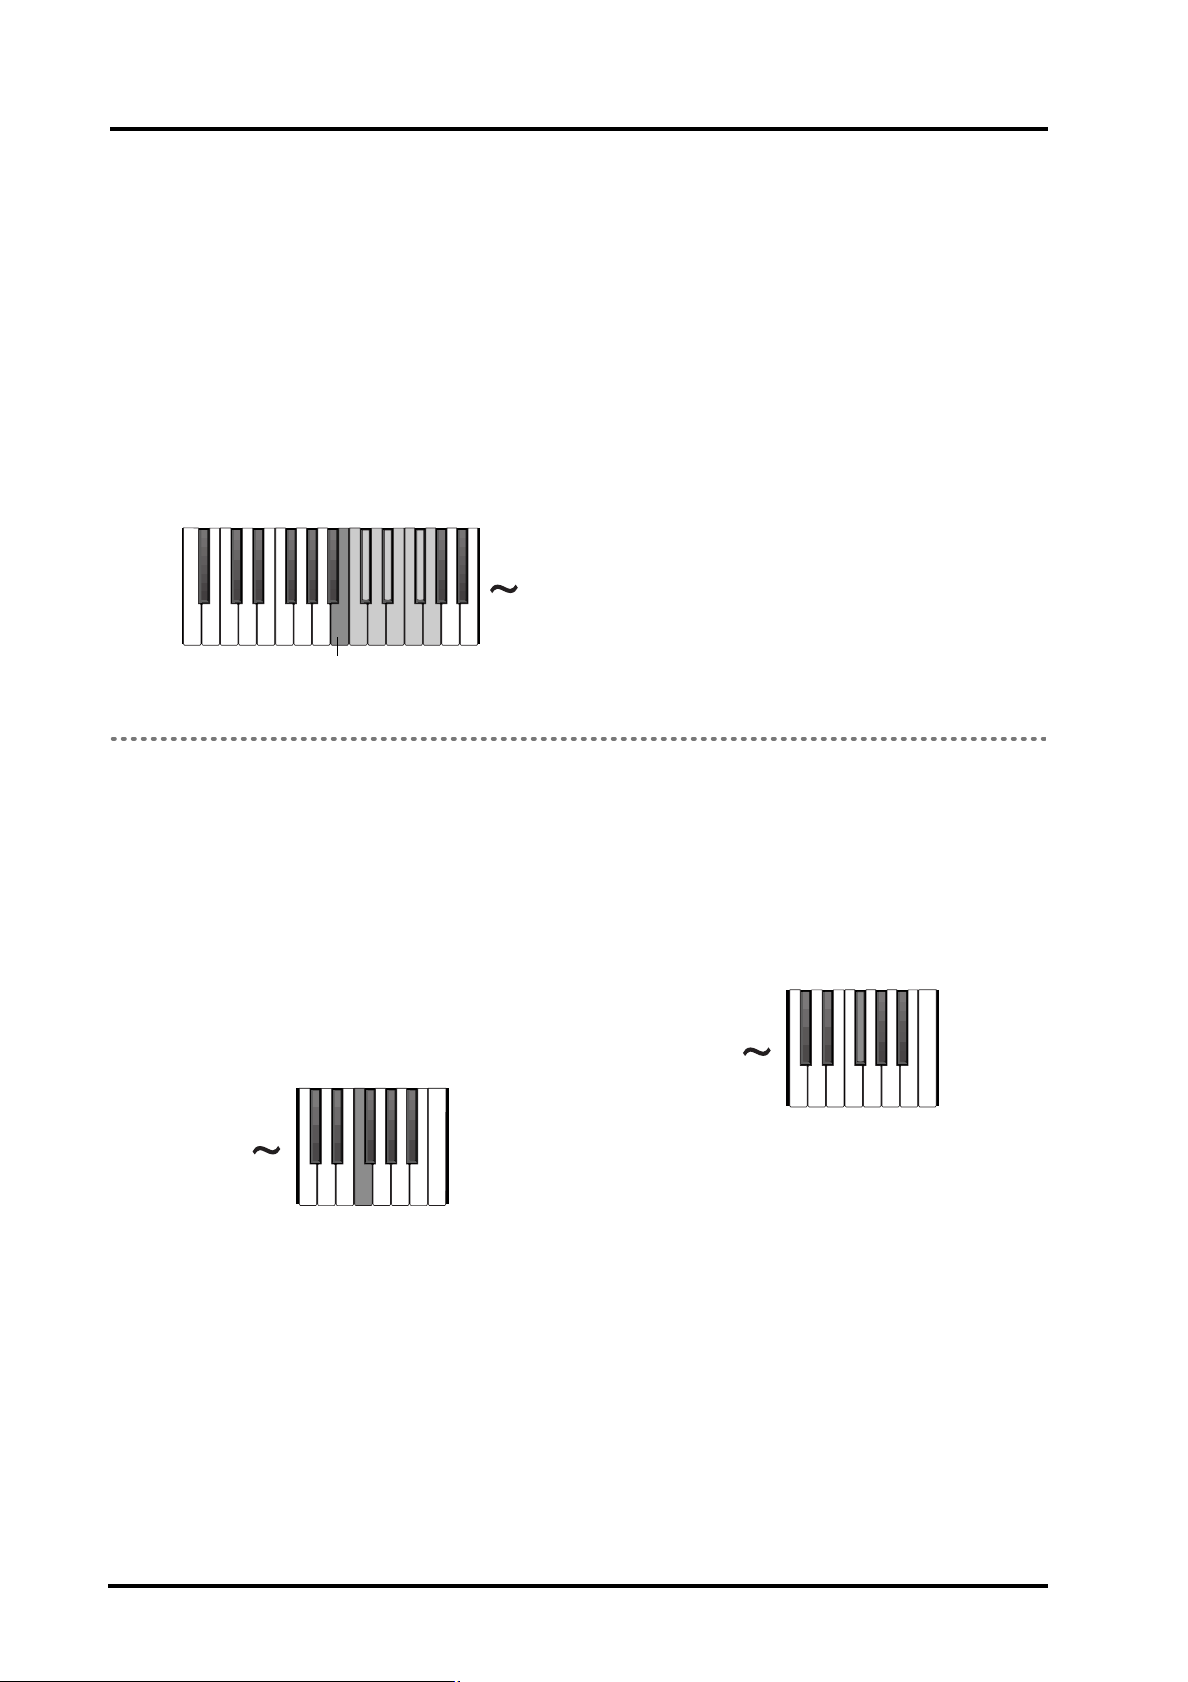
3.7 Listening to the demo songs
The HP-1 contains 65 internal piano pieces you may want to listen to before starting to play yourself.
A
25710 6562
B
13
4689… 646361…
Hold down [Demo] and press one of these keys.
HP-1 – Owner’s Manual
ENGLISH ENGLISH
Playing/stopping the demo songs
1.
Press the [Demo] button (indicator lights).
Playback of the first demo song starts. When it is finished, the HP-1 automatically starts playback of the
second song. All demo songs will be played back one
after another.
To listen to a specific demo song:
2.
Hold down the [Demo] button and press a (key-
board) key to select another demo song.
The first 65 keys from the left allow you to directly
select the song you want to listen to.
3.8 Selecting sounds
Playing one sound at a time
The HP-1 allows you to play eight different sounds,
including piano. The HP-1’s sounds are called “Tones”.
1.
Press the Tone button that is assigned to the Tone
you want to use:
The demo songs will play back consecutively, starting
with the song you selected. When the last song has
been played, playback will return to the first song and
resume.
3.
To stop demo song playback, press the [Demo] but-
ton and release it.
Note: All rights reserved. Unauthorized use of this material
for purposes other than private, personal enjoyment is a
violation of applicable laws.
Note: The data of the demo songs are not transmitted to the
HP-1’s MIDI OUTput.
3.
Hold down [Reverb] and press the same Tone button again to select the “secondary” Tone (the name
printed below the button you press).
ENGLISH ENGLISH ENGLISH ENGLISH
As you can see, there are four Tone buttons, while
there are eight Tones:
Piano [Piano 2]
Harpsichord [E.Piano]
Organ 1 [Organ 2]
Strings [Choir].
Here’s what you need to do in order to access the “hidden” Tones:
2.
First press the Tone button that provides access to
the desired Tone.
4.
To return to the “main” Tone, repeat step (3).
9
Page 10

Main operations
Playing two sounds at a time (“Dual”)
It is also possible to play two Tones simultaneously (something we like to call “Dual mode”). A popular combination is
piano with strings, but feel free to try out other combinations.
A
B
Right sound louder
C
1.
Hold down the Tone button of the first sound you
wish to use while pressing the Tone button of the
sound you want to add.
This only works for Tones that can be accessed via the
front panel (i.e. not for the “second” Tone set whose
names are printed below the keys).
You can also modify the balance of the two Tones:
2.
Simultaneously press [Demo] and [Reverb] to
enter Function mode (both indicators flash).
3.
Press the “G7” or “G#7” key.
Left sound louder
Press the white “G7” key to increase the volume of the
Tone assigned to the “left button” ([Piano1] in the
above example).
Press the black “G#7” key to increase the volume of the
Tone assigned to the “right button” ([Strings] in the
above example).
4.
Press [Demo] and [Reverb] again to leave the
HP-1’s Function mode.
Note: You have to leave Function mode in order to hear
what you are playing.
10
Page 11

HP-1 – Owner’s Manual
3.9 Adding Reverb
The HP-1 allows you to add reverberation to what you play on the keyboard. This effect gives the impression that you
are performing in a concert hall or similar space.
A
C
ENGLISH ENGLISH
Softer Reverb
Louder Reverb
Switching the Reverb effect on and off
At power-on, the digital Reverb effect is switched off.
To use this effect, you need to switch it on:
1.
Press the [Reverb] button to switch the Reverb
effect on (or off).
The button’s indicator lights when the Reverb effect is
on.
2.
Repeat the above to switch the Reverb back off (or
on) again.
Setting the Reverb level
You can also set the volume of the Reverb effect to
accommodate the sound your are using. You may want
to select a higher Reverb level for the “Organ” sounds
(to simulate the reverberations of a church) than for
the piano sound, for example.
There are eight possible Reverb level settings. At
power-on, the HP-1 selects level “3”.
3.
Simultaneously press [Demo] and [Reverb] to
enter Function mode (both indicators flash).
4.
Press a key between the “A2” and the “E3” (see the
keyboard illustration above) to set the desired Reverb
level.
ENGLISH ENGLISH ENGLISH ENGLISH
11
Page 12

Convenient functions
4. Convenient functions
4.1 About the Function mode
The functions described below need to be set in “Function mode”. After selecting that mode, you can use the HP-1’s
keys (on the keyboard) to make the desired settings.
Some of the available functions (Dual balance and Reverb level) have already been discussed and will not be repeated.
A
Left pedal
(p. 16)
Key Touch (p. 15)
B
Tuning (p. 13)
Sympathetic Reso-
nance (p. 16)
Reverb Level (p. 11)
Temperament and tonic (p. 14)
Transposition
(see below)
Stretch
(p. 15)
}
}
Dual Balance
(p. 10))
}
1.
Simultaneously press [Demo] and [Reverb] to
2.
See the explanations below for the key(s) to press.
enter Function mode (both indicators flash).
4.2 Transposing (same fingering, different notes)
You can play in a different key while still using exactly the same fingering. That way, even songs originally written in a
difficult key with many (sharps) or (flats) (i.e. with many black keys), can be played in a more convenient way. This is
especially useful when you are used to playing a given song in one key, while someone else wants you to play it in
another key: just change the Transpose setting and you’re there.
The transposition remains in effect until you change it or until you switch off the HP-1.
3.
[Ex.] Playing in C and sounding in E
1.
Simultaneously press [Demo] and [Reverb] to
enter Function mode (both indicators flash).
2.
Use the “C5”~“B5” notes to select the key.
For our example, press the “E” note in the indicated
range.
To return to the previous condition, press the “C5”
(leftmost note of the indicated range).
4.
Press [Demo] and [Reverb] again to leave the
HP-1’s Function mode.
Note: The transposition only applies to the notes you play
on the HP-1’s keyboard. It does not apply to note messages
received via the MIDI IN connector.
12
Page 13

HP-1 – Owner’s Manual
4.3 Master Tuning
When playing in ensemble with other instruments, you can adjust the HP-1’s reference pitch to that of another instrument.
Middle A (“A4”) is generally used for adjusting the tuning of the instruments. When playing in ensemble with other
instruments, tune each instrument to the same reference pitch. “440Hz” is the power-on default for the reference pitch.
The following operations only work after selecting the HP-1’s Function mode (see p. 12 for how to select it).
ENGLISH ENGLISH
Sounding the A4 note
While tuning, it is of utmost importance to compare
the HP-1’s tuning with that of the external instrument
or device. Since the keyboard is used for setting the
Function parameters, it is no longer available for playing that note the normal way.
That is why there are six keys that allows you to sound
the A4 note. These are the first six keys in the tuning
range indicated on p. 12:
Press these keys to sound the
A4 note.
Lowering/ raising the reference pitch
The following keys (“G1” and “G#1”) can be used for
lowering or raising the HP-1’s pitch in very small
steps:
Higher
Returning to 440Hz
Press the “A1” key on the keyboard.
Return to 440Hz
The reference pitch will be set to 440.0 Hz. This is the
most commonly used setting.
Setting the reference pitch to 442Hz straight
away
“442Hz” is a popular tuning pitch for concert grands.
Rather than trying to set it using the “G1” and “G#1”
keys, you can press the “A#1” key to select that tuning
right away:
Select 442Hz
ENGLISH ENGLISH ENGLISH ENGLISH
Lower
Press the “G1” note to lower the reference pitch, or
the “G#1” note to raise it.
Each time you press the “G1” key, the pitch will fall by
0.1 Hz. If you continue holding the key, the pitch will
continue falling.
Each time you press the “G#1” key, the pitch will rise
by 0.1 Hz. If you continue holding the key, the pitch
will continue rising.
The standard pitch will be set to 442Hz, and all other
notes will change accordingly.
13
Page 14

Convenient functions
4.4 Changing the temperament
You can play classical styles such as Baroque using historic temperaments (tuning methods).
Today, compositions are generally created with equal temperament in mind and are played using equal temperament.
However in past ages of classical music, a variety of temperaments were used. Playing a composition with its original
tuning lets you enjoy the sonorities of the chords that the composer originally intended.
1.
Simultaneously press [Demo] and [Reverb] to
enter Function mode (both indicators flash).
2.
Use the “F3”~”B3” keys to select the temperament:
F3
(See p. 12 for the exact location of these keys.)
You can choose from among the seven temperaments
described below.
[F3] Equal temperament–
divided into twelve equal steps. Every interval produces about the same amount of slight dissonance.
This setting is in effect when you turn on the power.
[F#3] Pythagorean–
opher Pythagoras, eliminates dissonance in fourths
and fifths. Dissonance is produced by third-interval
chords, but melodies are euphonious.
[G3] Just (major)–
the fifths and thirds. It is unsuited to playing melodies
and cannot be transposed, but is capable of beautiful
sonorities.
[G#3] Just (minor)–
and minor keys. You can get the same effect with the
minor scale as with the major scale.
[A3] Mean Tone–
in just intonation, enabling transposition to other
keys.
[A#3] Werckmeister–
Mean Tone and Pythagorean tunings. Performances
are possible in all keys (first technique, III).
[B3] Kirnberger–
Tone and Just tunings that provides a high degree of
freedom of modulation. Performances are possible in
all keys (III).
Initial setting: Equal temperament
This is an improvement of the Mean
In this tuning, each octave is
This tuning, devised by the philos-
This tuning eliminates ambiguities in
The Just tunings differ from major
This scale makes some compromises
This temperament combines the
Tonic
When playing with tuning other than equal temperament, you need to specify the keynote for tuning the
song to be performed (that is, the note that corresponds to C for a major key or to A for a minor key).
While still in Function mode, press the key that corresponds to the desired tonic:
Press to select C as tonic
If you choose an equal temperament, there’s no need
to select a keynote.
Note: When performing with other instruments, be aware
that depending on the key, there may be some shifting of the
pitch. Tune the HP-1 to the fundamental pitch of the other
instruments.
3.
Press [Demo] and [Reverb] again to leave the
HP-1’s Function mode.
14
Page 15

HP-1 – Owner’s Manual
4.5 Selecting the tuning curve (Stretch Tuning)
A piano is generally tuned to a pitch with a lower bass range and a higher treble range than equal temperament. This
special tuning method for pianos is called “Stretch Tuning.”
1.
Simultaneously press [Demo] and [Reverb] to
enter Function mode (both indicators flash).
2.
Use the “A7” or “A#7” key to switch the Stretch
Tuning function on or off.
Stretch Tuning on
Stretch Tuning off
(See p. 12 for the exact location of these keys.)
[A7] Off–
right choice when using Dual performance (p. 10), or
when playing in ensemble with other instruments.
[A#7] On–
ble ends somewhat. It is suitable for performances
such as piano solos. This setting is in effect when you
turn on the power.
This effect works only with the piano tones.
3.
HP-1’s Function mode.
This is the standard tuning curve. This is the
This tuning curve expands the bass and tre-
Press [Demo] and [Reverb] again to leave the
ENGLISH ENGLISH
4.6 Setting the key touch
Your HP-1 also provides a function that allows you to adapt it to your playing style, or to ensure that even your children
can play loud notes. The are four “Key Touch” levels that can be selected once you have called up the Function mode
(p. 12):
Press one of the keys labeled “Key Touch” to select the
desired level.
Note: Though “Light” may be a good settings for beginners,
they should also try to get used to playing with the
“Medium” setting.
Light: Little strength is required to play at high volumes.
Medium: The keyboard reacts normally (similar to an
acoustic piano).
Heavy : Choose this only if you usually strike with too
much force and therefore play very bright/loud notes.
This is also a good setting for practising purposes.
Fixed: The timbre (tone color) and volume are the
same for all notes. The HP-1 is therefore no longer
touch sensitive. This setting is probably only useful for
the “Organ 1” and “Organ 2” sounds.
Note: At power-on, the HP-1 selects the “Medium” setting.
ENGLISH ENGLISH ENGLISH ENGLISH
15
Page 16
Convenient functions
4.7 Changing the damper pedal’s resonance
On an acoustic piano, depressing the damper pedal makes the notes you play resonate with other strings, adding rich
reverberations and fatness to the sound. The damper pedal on the HP-1 recreates this resonance (Sympathetic Resonance) when depressed.
You can select from eight levels of depth for the resonant sound (resonance level) and even switch it off.
This setting is valid only for some piano tones. It cannot be made for other Tones.
1.
Simultaneously press [Demo] and [Reverb] to
enter Function mode (both indicators flash).
2.
Use the following keys to select the desired Sympa-
thetic Resonance setting:
24 7
1
35 68
Sympathetic Resonance off
(See p. 12 for the exact location of these keys.)
Use the “C2”~”G2” keys to set the desired Sympathetic Resonance level.
Press the “B1” key (leftmost key of the range) if you do
not need this effect.
3.
Press [Demo] and [Reverb] again to leave the
HP-1’s Function mode.
4.8 Selecting the function of the left pedal
Grand pianos (and upmarket-models of the Roland HP series) have three pedals instead of two. This means that, in
addition to the Damper and Soft pedals mentioned on p. 7, there is also a Sostenuto pedal.
On the HP-1, you can assign this function to the left pedal, in which case the Soft function is no longer available.
Sostenuto pedal–
pedal allows you to sustain the notes you played at the
time when you pressed the pedal. Subsequently played
notes, however, will not be held.
1.
Simultaneously press [Demo] and [Reverb] to
enter Function mode (both indicators flash).
2.
Press the “F7” key to select the Sostenuto function.
If you select this function, the left
(See p. 12 for the exact location of these keys.)
3.
To once again select the Soft function:
• Either press the “F#7” key;
• Or switch the HP-1 off and back on again.
16
Page 17

5. Connecting to MIDI devices
r
HP-1 – Owner’s Manual
By connecting an external MIDI device and exchanging performance data, you can control the performances on one
device from the other. For instance, you can output sound from the other instrument or switch Tones on the other
instrument.
MIDI stands for Musical Instrument Digital Interface, an international standard which allows performance information
to be communicated among electronic musical instruments and computers.
The HP-1 provides MIDI connectors, which allow performance data to be exchanged with external devices. When these
connectors are used to connect the HP-1 to external devices, an even wider range of possibilities becomes available.
ENGLISH ENGLISH
Connection examples
To prevent malfunction and/or damage to speakers or
other devices, always turn down the volume, and turn
off the power on all devices before making any connections.
Playing the HP-1 from a MIDI sequencer/recording
an HP-1 performance on a MIDI sequencer
MT series
MT Series
* The MT-90s/80s has no MIDI Out con-
HP-1
* MT-90s/80s has no MIDI Out connecto
MIDI
InOut
nector.
Switch off the Local Control function if you have connected the HP-1 to a MIDI sequencer (p. 18). Also set
your MIDI sequencer to MIDI Thru mode (so that
messages received at MIDI IN will be re-transmitted
without change from MIDI OUT). For details, refer to
the owner’s manual of your MIDI sequencer.
Perform on the HP-1 to play a MIDI sound generator
5.1 Selecting the MIDI transmit channel
Here’s how you can set the transmit channel and make other MIDI-related settings.
Sound module
Sound Module
MIDI
OUTTHRU IN
ENGLISH ENGLISH ENGLISH ENGLISH
HP-1
A
B
1.
Simultaneously press [Demo] and [Reverb] to
enter Function mode (both indicators flash).
2.
Press the “C6”~“D#7” keys to select the MIDI
channel.
MIDI features sixteen MIDI channels, numbered
1~16. Simply connecting a cable is not enough for
communication to take place. The connected devices
must be set to use the same MIDI channels. Otherwise, no sound will be produced, and no sounds can
be selected.
Note: The HP-1 receives on all channels 1~16.
24
3568
1
MIDI channel
7911
10121315
14 16
Local off
Local on
Note: Even in Dual mode, only the channel you specify here
will be transmitted.
17
Page 18

Connecting to MIDI devices
5.2 Switching Local Control on and off
When connecting a MIDI sequencer, switch off the Local Control function.
As illustrated, information describing what has been
played on the keyboard is passed to the internal sound
generator over two different routes, (1) and (2). As a
result, you hear overlapping or intermittent sounds.
To prevent this from happening, route (1) must be
severed, by setting the unit to what is known as “Local
Off.”
(1) Local On
Local On
Tone generator
Each note you play is
is sounded twice
sounded twice
MIDI
IN
MIDI
OUT
Sequencer
MIDI
OUT
Memory
MIDI
IN
(2) THRU function on
Thru function On
Local Control on: The keyboard and the internal
sound generator are in a linked state.
Produces sound
Sound is emitted
Tone generator
Local 0n
Local Control off: The keyboard and the internal
sound generator are in an unlinked state. No sound
will be produced by the keyboard when it is played.
No sound produced
No sound produced
Tone generator
Local 0ff
When a Roland MT series instrument is connected, it
is not necessary to make the Local Off setting. MT
units transmit Local Off messages when their power is
switched on. If you turn on the power in the order of
the HP-1 → MT series, Local Off will be set automatically.
1.
Simultaneously press [Demo] and [Reverb] to
enter Function mode (both indicators flash).
2.
Press the “B7” or “C8” key to set the Local function.
(See p. 17 for the exact location of these keys.)
Press the “B7” key to switch the Local function off.
Press the “C8” key (the rightmost key) to switch the
function back on again.
18
Page 19

6. Connecting audio equipment
HP-1 – Owner’s Manual
You can connect audio devices to play the sound of the HP-1 through the speakers of your audio system, or to record
your performance on a tape recorder or other recording device.
When connecting, please use an audio cable with a standard phone plug (sold separately).
ENGLISH ENGLISH
Connection examples
To prevent malfunction and/or damage to speakers or
other devices, always turn down the volume, and turn
off the power on all devices before making any connections.
Playing the sound of the HP-1 through the speakers
of an audio system/Recording the performance of the
HP-1 on a recording device
Input R/L
(Line In, Aux In)
HP-1
Use the following procedure when turning on the
power:
1.
Turn on the power of the HP-1.
2.
Turn on the power of the connected device.
3.
Adjust the volume of each device.
When recording HP-1 performances with a cassette
deck, etc.
4.
Start recording on the connected device.
5.
Perform on the HP-1.
6.
When the performance ends, stop recording on the
connected equipment.
Turning off the power
1.
Set the volume of the HP-1 and of the connected
devices to the minimum position.
2.
Turn off the power to the HP-1.
3.
Turn off the connected equipment.
Connecting to a computer
You can use a USB→MIDI interface cable (sold separately) to connect the HP-1 to your computer.
If the HP-1 is connected to a computer running
sequencer software such as Roland’s “Visual MT”, you
can record your music.
Connection examples
• To prevent malfunction and/or damage to speakers or
other devices, always turn down the volume, and turn
off the power on all devices before making any connections.
• In order to make connections to your computer, you
must install MIDI driver software on your computer.
For details, refer to the owner’s manual for your MIDI
interface.
Use a USB MIDI interface cable to connect the USB
port of your computer to the MIDI connectors of the
HP-1.
USB on your
USB Connector
computer
of your Computer
UM-1, etc.
Computer
MIDI OUT
MIDI IN
HP-1
ENGLISH ENGLISH ENGLISH ENGLISH
Playing the sound of an audio device through the
speakers of the HP-1
Output R/L
(Line Out, Aux Out)
HP-1
Use the following procedure when turning on the
power.
1.
Turn on the power of the connected device.
2.
Turn on the power of the HP-1.
3.
Adjust the volume of each device.
19
Page 20

Appendix
7. Appendix
7.1 Troubleshooting
If you are encountering problems with the HP-1, please read the section below before assuming that there is a malfunction.
The piano cannot be switched on
Is the power cord properly connected? (p. 7)
No sound is produced
Is the volume knob set to the minimum position?
(p. 8)
Are headphones connected? (p. 8)
Did you switch off the Local function? (p. 18)
The pitch of the keyboard sounds incorrect
Is the Master Tuning setting correct? (p. 13)
Is the Transpose setting correct? (p. 12)
Did you select another temperament? (p. 14)
Bass notes sound wrong/buzzing or vibration occurs
If you can’t hear the problem in the headphones: When
playing at high volumes, resonance may occur in the
piano itself or in objects near the piano. At times,
other objects in the room, such as fluorescent lights or
glass doors, could start vibrating. This becomes more
noticeable when sounding the lower frequencies at
high volume. To minimize such unwanted resonance,
please observe the following:
• Locate the instrument at least 10~15 cm away from
the walls.
• Reduce the volume.
• Increase the distance from the object that is resonating.
If you can hear the problem in the headphones, there
may be another reason. Please contact your dealer.
In the upper range, the sound changes abruptly
beyond a certain key
On an acoustic piano, notes in the upper one and a
half octaves of the keyboard continue to sound until
they decay naturally, regardless of the damper pedal.
There is a difference in the timbre as well. Roland
pianos faithfully simulate such characteristics of the
acoustic piano. On the HP-1, the range that is unaffected by the damper pedal depends on the Key Transpose setting.
When the HP-1 is connected to an external device
No sound is produced
Is the power to all equipment turned on?
Are the connections between the HP-1 and the MIDI
sequencer or the other external devices correct?
(p. 17)
Is the MIDI channel setting correct? (p. 17)
7.2 Specifications
Key boar d: 88 keys, Hammer Action
Touch sensitivity: Light, Medium, Heavy, Fixed
Keyboard modes: Whole, Dual (adjustable volume
balance)
Sound Source
Max. Polyphony: 64 voices
Tones: 4 groups, 8 Tones
Temperaments: 7 types, selectable tonic
Stretched Tuning: 2 types
Master tuning: 415.3 Hz~466.2 Hz (0.1 Hz-steps),
quick recall of 440Hz and 442Hz
Transpose: –6~+5 semitones
Effects: Reverb (8 levels), Sympathetic Resonance
(Piano only, 8 levels), Chorus (E.Piano)
Preset songs: 65 songs
Rated output power: 20W x 2
Speakers: 12cm x 2
Control: Volume control, Tone buttons, Reverb but-
ton, Demo button
Pedals: Damper, Soft/ Sostenuto (selectable)
Connectors: Output jacks (L/Mono, R), Input jacks
(L/Mono, R), Headphone jack x 2 (stereo), MIDI IN/
MIDI OUT connector, Pedal connector
Power supply: AC230V
Power consumption: 45W
Dimensions: 1389.5 (W) x 443 (D) x 826 (H) mm
(including stand)
Weight: 45.9 kg (including stand)
Accessories: Owner’s manual, power cord
Finish: Roland Rosewood
Note: In the interest of product improvement, the specifications and/or appearance of this instrument are subject to
change without prior notice.
20
 Loading...