

Page 1

Roland GS-24
Vinyl Cutter Quick
Reference Guide
Adobe Illustrator _ 2
Loading the vinyl_ 3
Weeding tips _ 3
Cut studio _3
Using the transfer tape _4
Application _4
Page 2
2
Roland GS-24 Vinyl Cutter Quick Reference Guide
Part 1: Adobe Illustrator
i. Open Adobe Illustrator CC
ii. Select an image that has 2 drastically different
tones, light and dark.
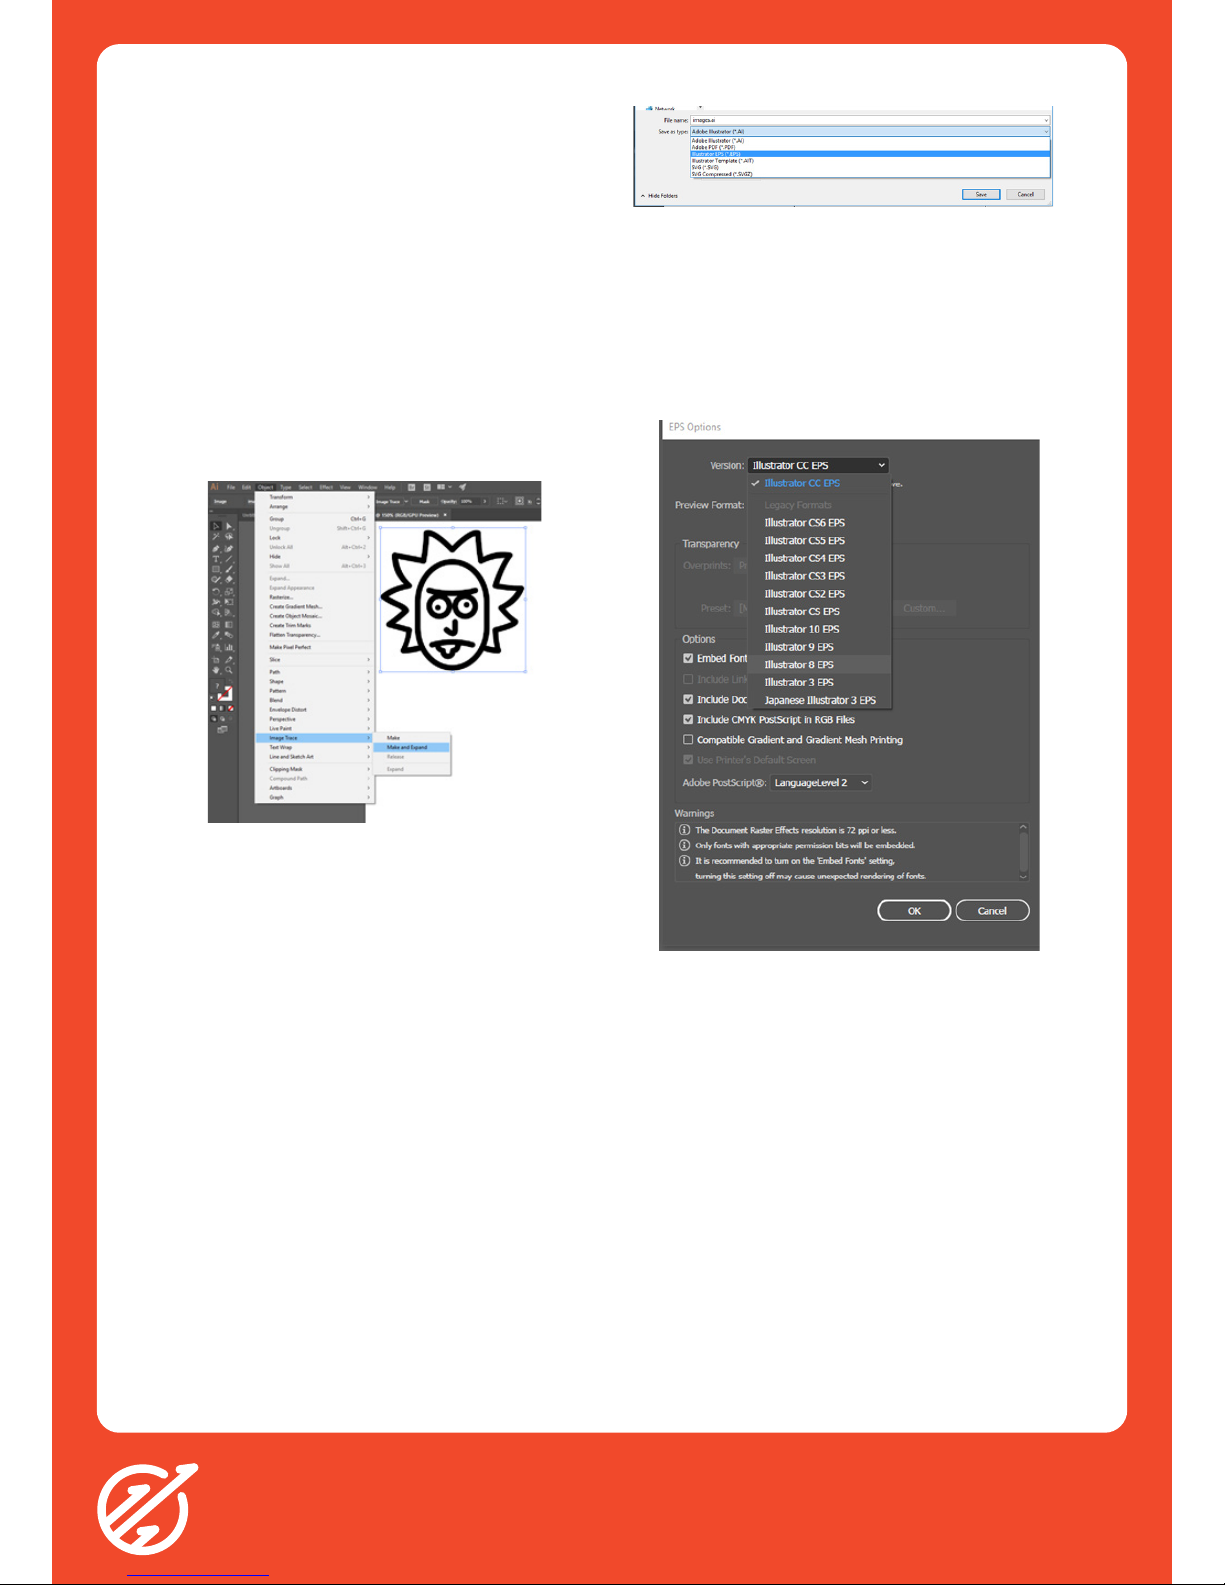
iii. Click Object > Image Trace > Make and Expand
This will gives you vector lines, which the vinyl cutter
will be able to read. To check all the available cut
lines on your image, click ‘Ctrl + Y’ to reveal all
vector lines.
iv. The lines created are what will be read by the
Vinyl Cutter and will be cut. If you would like to
remove some lines/curves, click the ‘Ctrl + Shift
+ G’ command to ungroup the lines.
v. Select individual lines and delete them.
Figure 1: The drop down menu which contains the ‘Make and Expand’
Command
Entering Text
i. Type out your text in illustrator using the type
tool
ii. Select the arrow (Selection Tool) in the top left of
the left hand menu.
iii. Click on your text
iv. Click Object > Expand
v. Your text is now a vector which can be read by
the Vinyl Cutter.
Saving your Design
i. Click the ‘File’ button in the Menu Bar and click
‘Save As’. Or simply click ‘Ctrl + Shift + S’
ii. Under ‘Save as type:’ select the ’Illustrator EPS
(*.EPS)’ option. Also rename your file to whatever
you like, and click ‘Save’.
Figure 2: Drop Down Menu with the Illustrator EPS (*.EPS) Option
Highlighted
iii. A new window will option named ‘Illustrator
Options’. Under the Version section, select the
‘Illustrator 8’ Option.
iv. Click the ‘OK’ button on the bottom right next to
‘Cancel’
Figure 3: Illustrator Options with the ‘Illustrator 8 EPS’ Option
Highlighted
Tips for a Successful Design
i. The larger the single mass of vinyl, the easier it
will be to weed and adhere
ii. The more detailed and smaller the cuts are, the
more likely it is to move and fall off
iii. When Image Tracing, larger sized files will pick
up more details, and thus clarity
iv. The more cut lines there are, the longer your
weeding process will take (The Unleash Space
record is close to an hour!)
Page 3
3
Roland GS-24 Vinyl Cutter Quick Reference Guide
Part 2: Loading the Vinyl
i. There is a lever on the top left of the Roland GS-24
Vinyl Cutter. Pull the lever outwards (away from
the machine) if it is locked.
ii. Insert your desired coloured vinyl from the back of
the machine.
iii. Check if the vinyl is parallel with the lines on the
front,
iv. Check if the rollers are on the white areas marked
on the Vinyl Cutter. Spread the rollers as wide as
possible.
v. Turn the machine on and press ‘Enter’ to calibrate
the tool head.
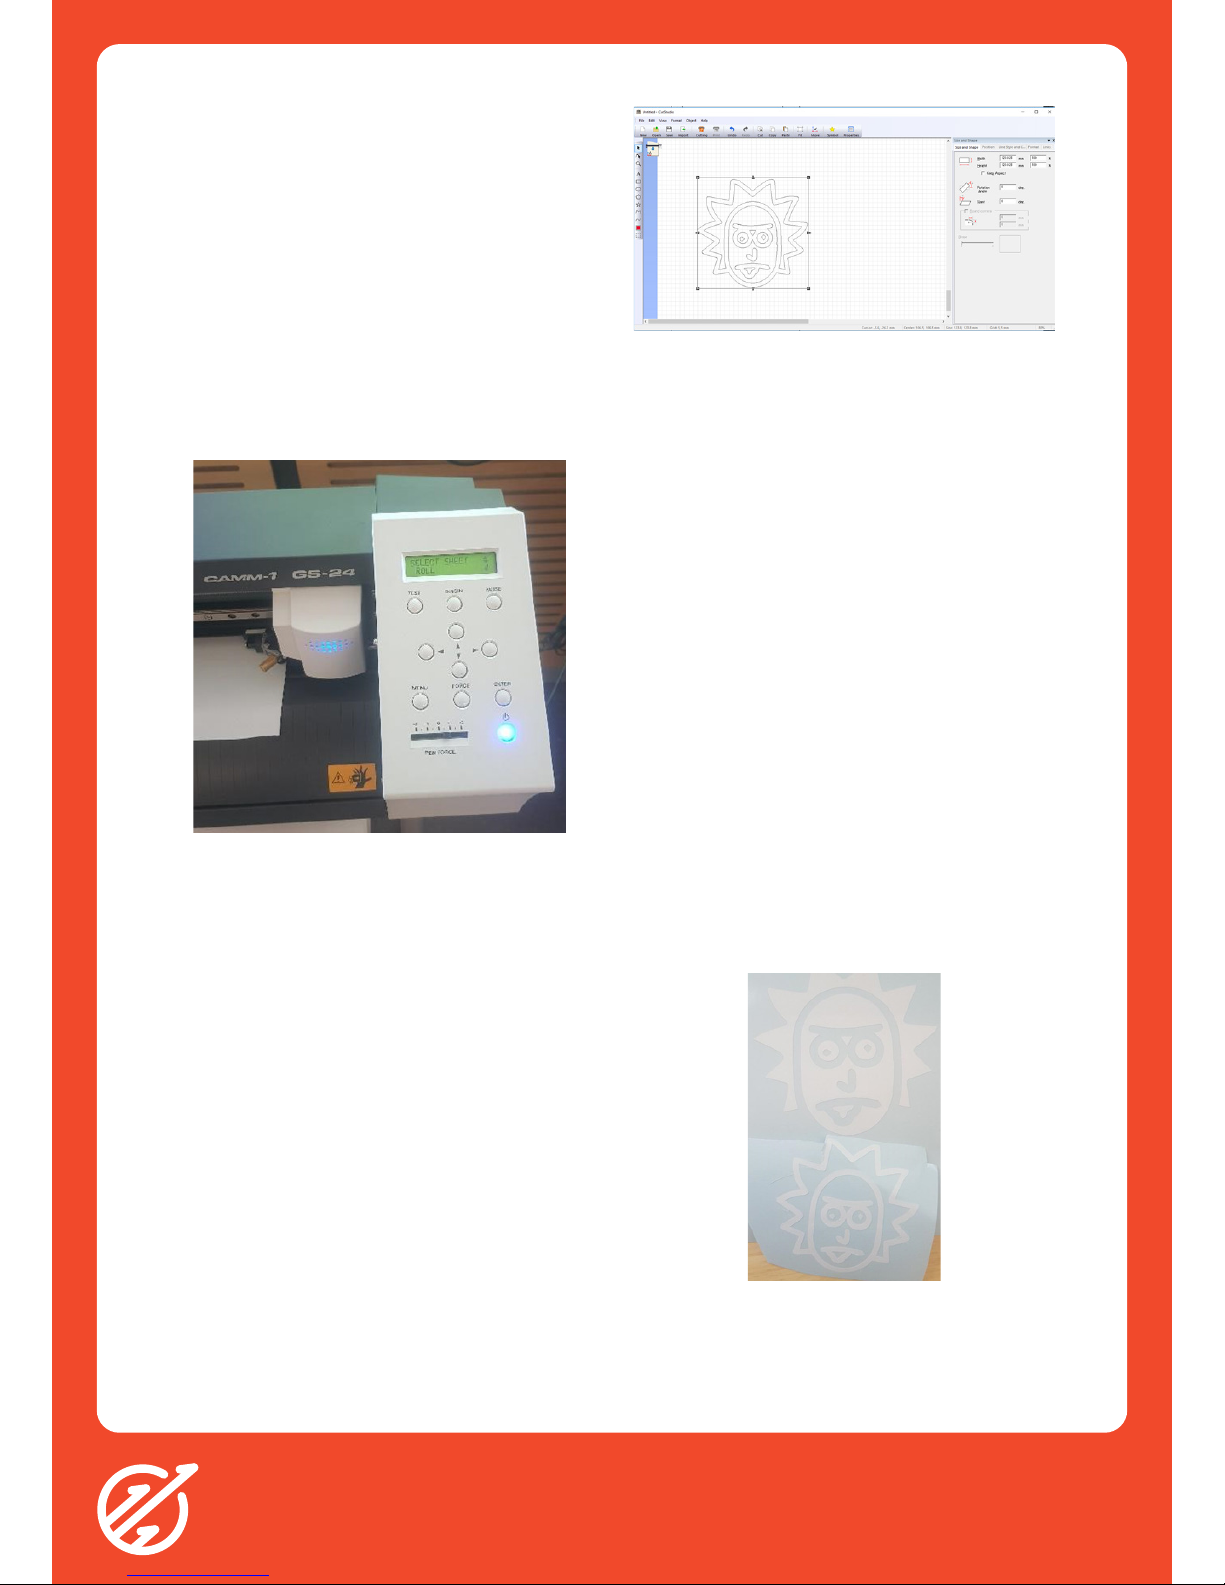
Figure 4: Roland GS-24 Vinyl Cutter Turned On and Calibrated
Part 3: CutStudio
CutStudio is loaded on the computer next to the Vinyl
Cutter. Open the CutStudio software located on the
desktop (or search All Programs).
i. Import your .eps file into CutStudio by selecting
the ‘Import’ button and locating your saved .eps
file.
ii. Under the ‘File’ button in the Menu Bar, click on
‘Cutting’ and select ‘Change’
iii. Select Roland GS-24 under ‘Printers’.
iv. Lay out your vector file(s) to conserve the vinyl.
v. Press ‘OK’ and your file will begin to cut.
Figure 5: CutStudio with Your Loaded Design
Part 4: Weeding Tips
There is no one right way to weed, or remove
unwanted material from a vinyl cut. However, here are
a few useful tips that might help.
i. There are 2 main methods: ‘Peeling’ and ‘Picking’
ii. Peeling involves removing the outline or large
chunks of material without much detail
a. When peeling, pull the excess vinyl away as close
to the horizontal as possible, this helps corners of
the desired vinyl to be stuck down.
b. It may be necessary to cut sections out to remove
separately, to avoid having a tennis ball size piece
of vinyl to move.
iii. Picking uses a scalpel instead of your fingers for
smaller, more detailed areas
a. Stabbing small pieces of vinyl work if you are
struggling to lift an edge away from the main vinyl
iv. Make a ‘Rubbish Ball’ to stick all excess vinyl to
help with the clean up
v. Depending on the design of your vinyl cut, you
may be able to pick and choose which section of
the vinyl to keep (see picture below).
Figure 6: Peeling for the Top Vinyl & Picking for the Bottom Vinyl
Page 4

4
Roland GS-24 Vinyl Cutter Quick Reference Guide
Part 5: Using the Transfer Tape
The Transfer Tape keeps all spatial differences
between the parts of your design throughout the cut
and application stages.
i. Cut off an appropriate size of transfer tape from
the roll.
ii. Take your transfer tape and lay it with the sticky
side up
iii. Starting from one corner, slowly place your
transfer down flat on the transfer tape, ensuring
no creases.
Part 6: Application
i. Peel off the backing paper, at a horizontal angle,
similar to the ‘Peeling’ described in ‘Part 4:
Weeding Tips’
ii. Place it onto your surface starting from one
corner, similar to when you applied the transfer
tape
iii. Rub it firmly onto the surface to aid adhesion of
smaller parts
iv. Peel off the transfer tape at a horizontal angle.
 Loading...