

Page 1
*04566689 -03 *
04566689 3KH
Copyright © 2006 ROLAND CORPORATION
All rights reserved. No part of this publication may be reproduced in any form
without the written permission of ROLAND CORPORATION.
USING THE UNIT SAFELY
001
• Before using this unit, make sure to
read the instructions below, and the
Owner’s Manual.
..................................................................................................
002a
• Do not open or perform any internal
modifications on the unit.
..................................................................................................
003
• Do not attempt to repair the unit, or
replace parts within it (except when
this manual provides specific instructions directing you to do so). Refer all
servicing to your retailer, the nearest
Roland Service Center, or an authorized Roland distributor.
..................................................................................................
013
• In households with small children, an
adult should provide supervision
until the child is capable of following
all the rules essential for the safe
operation of the unit.
104
• Try to prevent cords and cables from
becoming entangled. Also, all cords
and cables should be placed so they
are out of the reach of children.
118c
• Keep any screws, cable clip and
rubber foot you may remove and the
included screws in a safe place out of
children’s reach, so there is no chance
of them being swallowed accidentally.
..................................................................................................
Important Notes
401a
• For everyday cleaning wipe the unit with a
soft, dry cloth or one that has been slightly
dampened with water. To remove stubborn
dirt, use a cloth impregnated with a mild,
non-abrasive detergent. Afterwards, be sure
to wipe the unit thoroughly with a soft, dry
cloth.
402
• Never use benzine, thinners, alcohol or
solvents of any kind, to avoid the possibility
of discoloration and/or deformation.
556
• When connecting / disconnecting all cables,
grasp the connector itself—never pull on the
cable. This way you will avoid causing shorts,
or damage to the cable’s internal elements.
921
• To prevent malfunction and/or damage to
speakers or other devices, always turn down
the volume, and turn off the power on all
devices before making any connections.
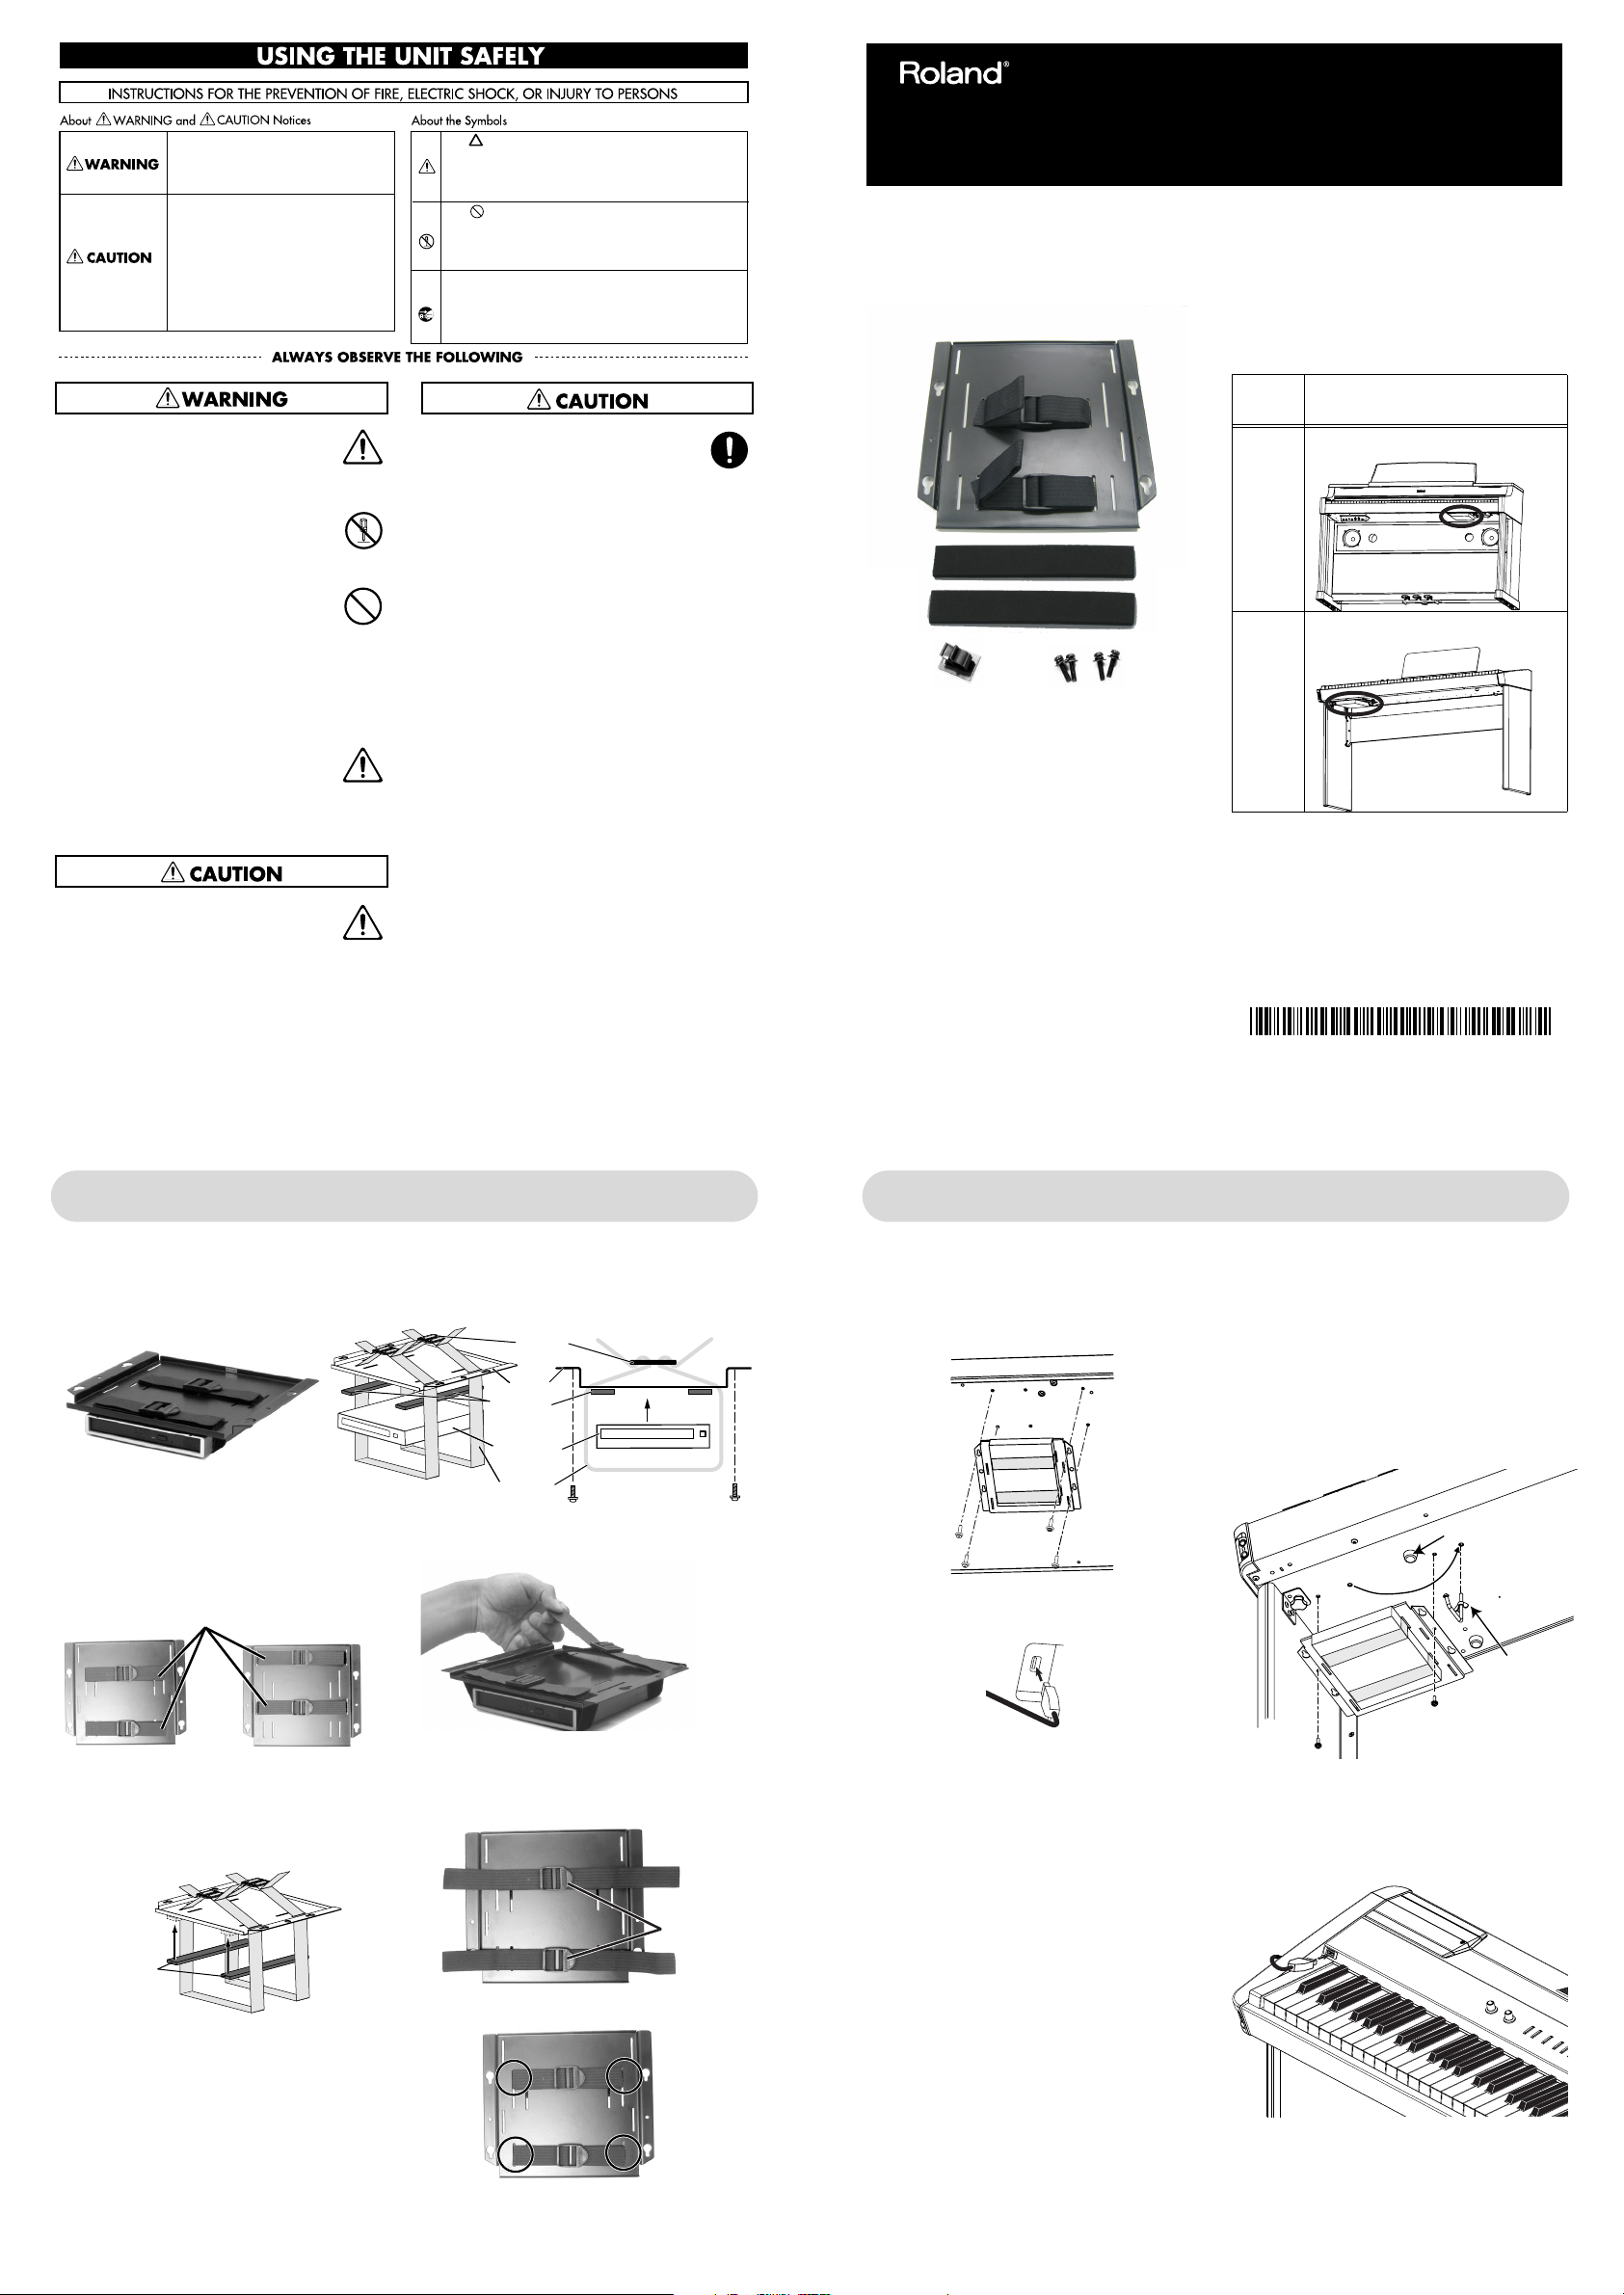
fig.Logo.e
Check the parts
Before you begin assembly, check that you
have all of the parts. You will also need a
Phillips screwdriver.
fig.parts.eps
• Holder (with two pieces of Velcro strap)
• Two cushions
• One cable clip
• Four screws
* A CD drive is not included.
* Refer to the Roland website for details on Compatible CD
Drives.
Attachment procedure
1.
Attach the CD drive to the holderx
2.
Attach the drive and holder to the piano
* Before you attach the drive, check to make
sure that your model of instrument is supported.
Supported models
As of February 2007
* You can’t use the DH-01 with a model that’s not
supported.
* If your model is not in the above list, refer to owner’s
manual of your model.
* Refer to the Roland website for details on supported
models.
* In the interest of product improvement, the specifications
and/or appearance of this unit are subject to change
without prior notice.
Supported
model
Location on piano at which to attach
the drive
RG-3,
HP-207,
HP-205,
HP-203
Attach at right side.
Read “attachment method A.”
FP-7 Attach at left side.
Read “attachment method B.”
1. Attach the CD drive to the holder (applies to all models)
Attach the CD drive to the holder as shown in the illustration below that depicts the completed
assembly.
Completed assembly Schematic diagram
Attachment procedure
1.
Change the position of the Velcro strap
appropriately for the size of your CD drive, as
shown in the illustration below.
* Make sure that the top and bottom surfaces are oriented
correctly.
2.
Position the CD drive where you want to attach
it, and affix the cushions to the holder as shown
in the illustration.
* The cushions have a peel-off backing. Peel off the backing
when you’re ready to affix the cushions.
* Use these cushions if you find it difficult to fasten your
CD drive using the Velcro strap.
* Carry out this procedure with the Velcro straps attached.
3.
Using the two pieces of Velcro strap, fasten your
CD drive to the holder as shown in the
illustration.
* Fasten the Velcro strap firmly so that there is no slack. If
the Velcro strap becomes loose, your CD drive may fall
down.
* Position the buckles of the Velcro strap in the center as
shown in the illustration.
4.
Cut the Velcro strap to an appropriate length.
Now you're ready to attach the drive and
holder assembly to your piano.
2. Attach the assembled drive and holder to your piano
Attachment method A
5.
Using the four included screws, fasten the
holder (with the attached CD drive) to the bottom
of your digital piano as shown in the illustration.
Fasten it securely so that it does not wobble.
6.
Connect the CD drive’s USB cable to the
“External memory connector” or “FDD
connector” of your digital piano.
fig.5.eps
7.
Use the included cable clip to bundle the cable
as necessary.
* Each time you use your digital piano, verify that the
Velcro strap or screws have not become loose.
* If the Velcro should come lose after you’ve installed the
holder, temporarily remove the holder from your digital
piano, and re-fasten the CD drive with the Velcro strap.
Attachment method B
5.
Remove one of the rubber feet from the front left
of the digital piano’s bottom surface
(see the illustration for step 7).
* Use a Phillips driver to remove the rubber foot.
6.
Move the headphone hook as necessary
(see the illustration for step 7).
7.
Using two of the included screws, fasten the
holder (with the attached CD drive) to the bottom
of your digital piano as shown in the illustration.
Fasten it securely so that it does not wobble.
* Keep the included screws and the rubber foot you
removed in a safe place so that they will not be swallowed
by small children.
8.
Connect the CD drive’s USB cable to the
“External memory connector” or “FDD
connector” of your digital piano.
9.
Use the included cable clip to bundle the cable
as necessary.
* Each time you use your digital piano, verify that the
Velcro strap or screws have not become loose.
* If the Velcro should come lose after you’ve installed the
holder, temporarily remove the holder from your digital
piano, and re-fasten the CD drive with the Velcro strap.
Used for instructions intended to alert
the user to the risk of death or severe
injury should the unit be used
improperly.
Used for instructions intended to alert
the user to the risk of injury or material
damage should the unit be used
improperly.
* Material damage refers to damage or
other adverse effects caused with
respect to the home and all its
furnishings, as well to domestic
animals or pets.
The symbol alerts the user to important instructions
or warnings.The specific meaning of the symbol is
determined by the design contained within the
triangle. In the case of the symbol at left, it is used for
general cautions, warnings, or alerts to danger.
The symbol alerts the user to items that must never
be carried out (are forbidden). The specific thing that
must not be done is indicated by the design contained
within the circle. In the case of the symbol at left, it
means that the unit must never be disassembled.
The ● symbol alerts the user to things that must be
carried out. The specific thing that must be done is
indicated by the design contained within the circle. In
the case of the symbol at left, it means that the powercord plug must be unplugged from the outlet.
HOLDER
DH-01 Owner’s Manual
Before using this unit, carefully read the sections entitled: "USING THE UNIT SAFELY"
and "IMPORTANT NOTES".These sections provide important information concerning the
proper operation of the unit. Additionally,in order to feel assured that you have gained a
good grasp of every feature provided by your new unit, Owner's Manual should be read
in its entirety. The manual should be saved and kept on hand as a convenient reference.
Top
Bottom
Velcro strap
Buckles
Holder
Cushions
CD drive
Velcro strap
6. Rubber foot
Small CD drive
Cushions
Big CD drive
Buckles
7. Headphone
hook
 Loading...