

Rode Smartlav User Manual
smartLav
quickstart
guide
TM
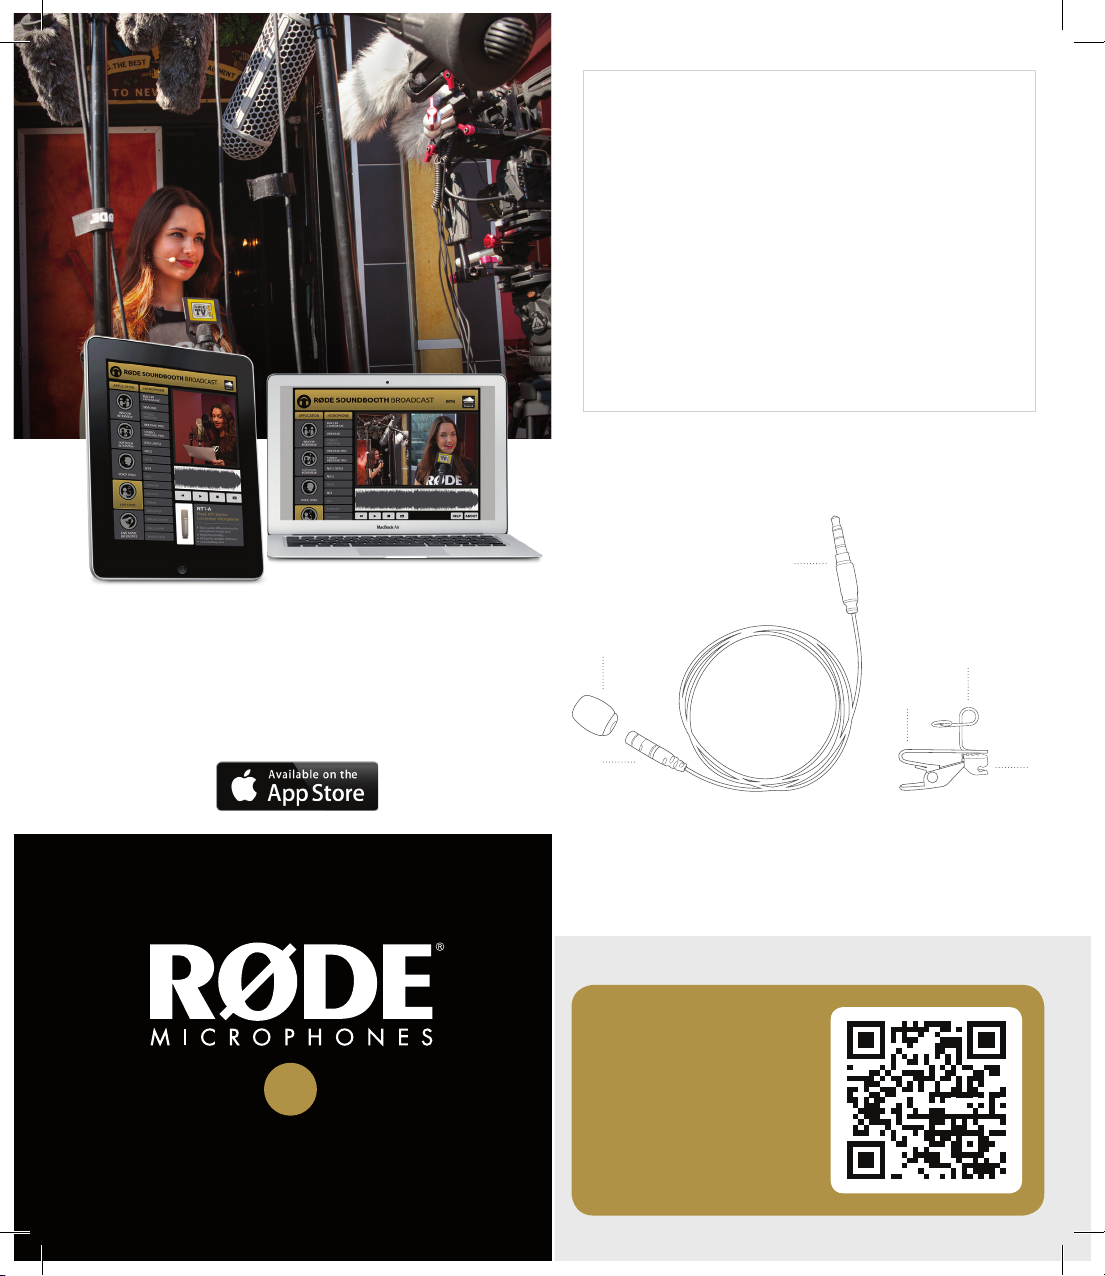
RØDE SOUNDBOOTH
now for Broadcast mics
Hear and compare RØDE microphones
at www.rodemic.com/soundbooth or on your iPad
smartLav
Parts Guide
3
1
®
2
Microphone and cord Clothing clip mount
1. Removable Pop shield
2. Microphone capsule
3. TRRS connector
TM
5
4
4. Lapel clip
5. Microphone mounting clip
6. Cable management clip
6
www.rodemic.com
remember
to register for your
twelve month warranty!
Scan the QR code to
register now, or visit
warranty.rodemic.com/smartlav
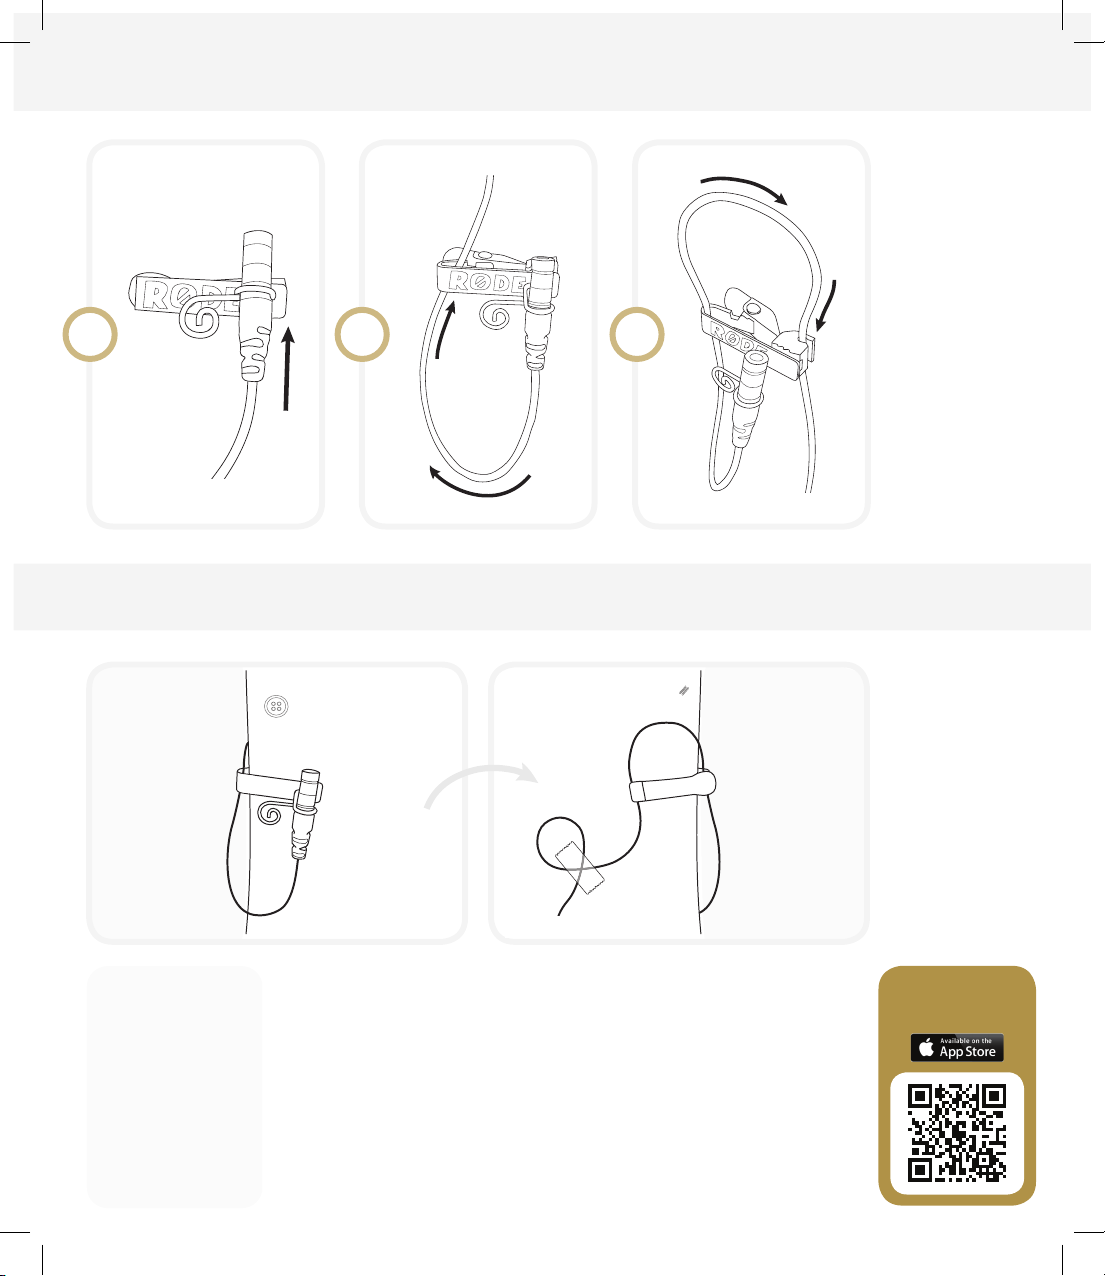
how to use the mount
1. Insert the mic
capsule into the
wire loop.
2. Loosely loop the
cord back up and
through the inside
of the clip.
3. Loop the cord
1
2
3
back down and
secure it in the
cable management clip.
This arrangement
helps to minimise
handling and
mechanical noise
and also minimises
cable strain.
mounting mic on clothing
mic tips
Exterior of clothing
Attach the smartLav
upside down to
reduce excessive
breath noises and tonal
inconsistencies due to
head movements.
TM
Interior of clothing
It is safest to use the
windshield at all times
to avoid plosives and
wind noise, even when
recording inside.
smartLavTM is compatible
with a range of phones,
laptop computers and
other audio devices.
Attach the mic to
lapel or clothing,
about 15- 20cm /
6 inches from face.
Pro tip: Tape a
loose loop in the
mic cord on the
inside of clothing.
This gives you
added strain relief
and isolation from
unwanted noise.
RØDE Rec
for iPhone & iPad
 Loading...