

Page 1
Frame Q, M, and N Circuit Breakers
Instructions for Padlockable Handle Lock Hasp Installation
A
DO NOT ATTEMPT TO INSTALL
MAINTENANCE ON EQUIPMENT WHILE IT
GIZED. DEATH, SEVERE PERSONAL INJURY,
SUBSTANTIAL PROPERTY DAMAGE CAN RESULT
FROM CONTACT WITH ENERGIZED EQUIPMENT.
ALWAYS VERIFY THAT NO VOLTAGE
BEFORE PROCEEDING WITH THE TASK, AND
ALWAYS FOLLOW GENERALLY ACCEPTED SAFE
TY PROCEDURES.
ALLEN-BRADLEY
PLICATION
UCTS.
The user is cautioned to observe all recommendations,
warnings, and cautions relating to the safety of person
nel and equipment as well as all general and local
health and safety laws, codes, and procedures.
OR
MISINSTALLATION OF ITS PROD
WARNING
OR
PERFORM
IS
IS
PRESENT
IS
NOT LIABLE FOR THE MISAP
ENER
OR
-
Bul. 140U
1.
INTRODUCTION
General Information
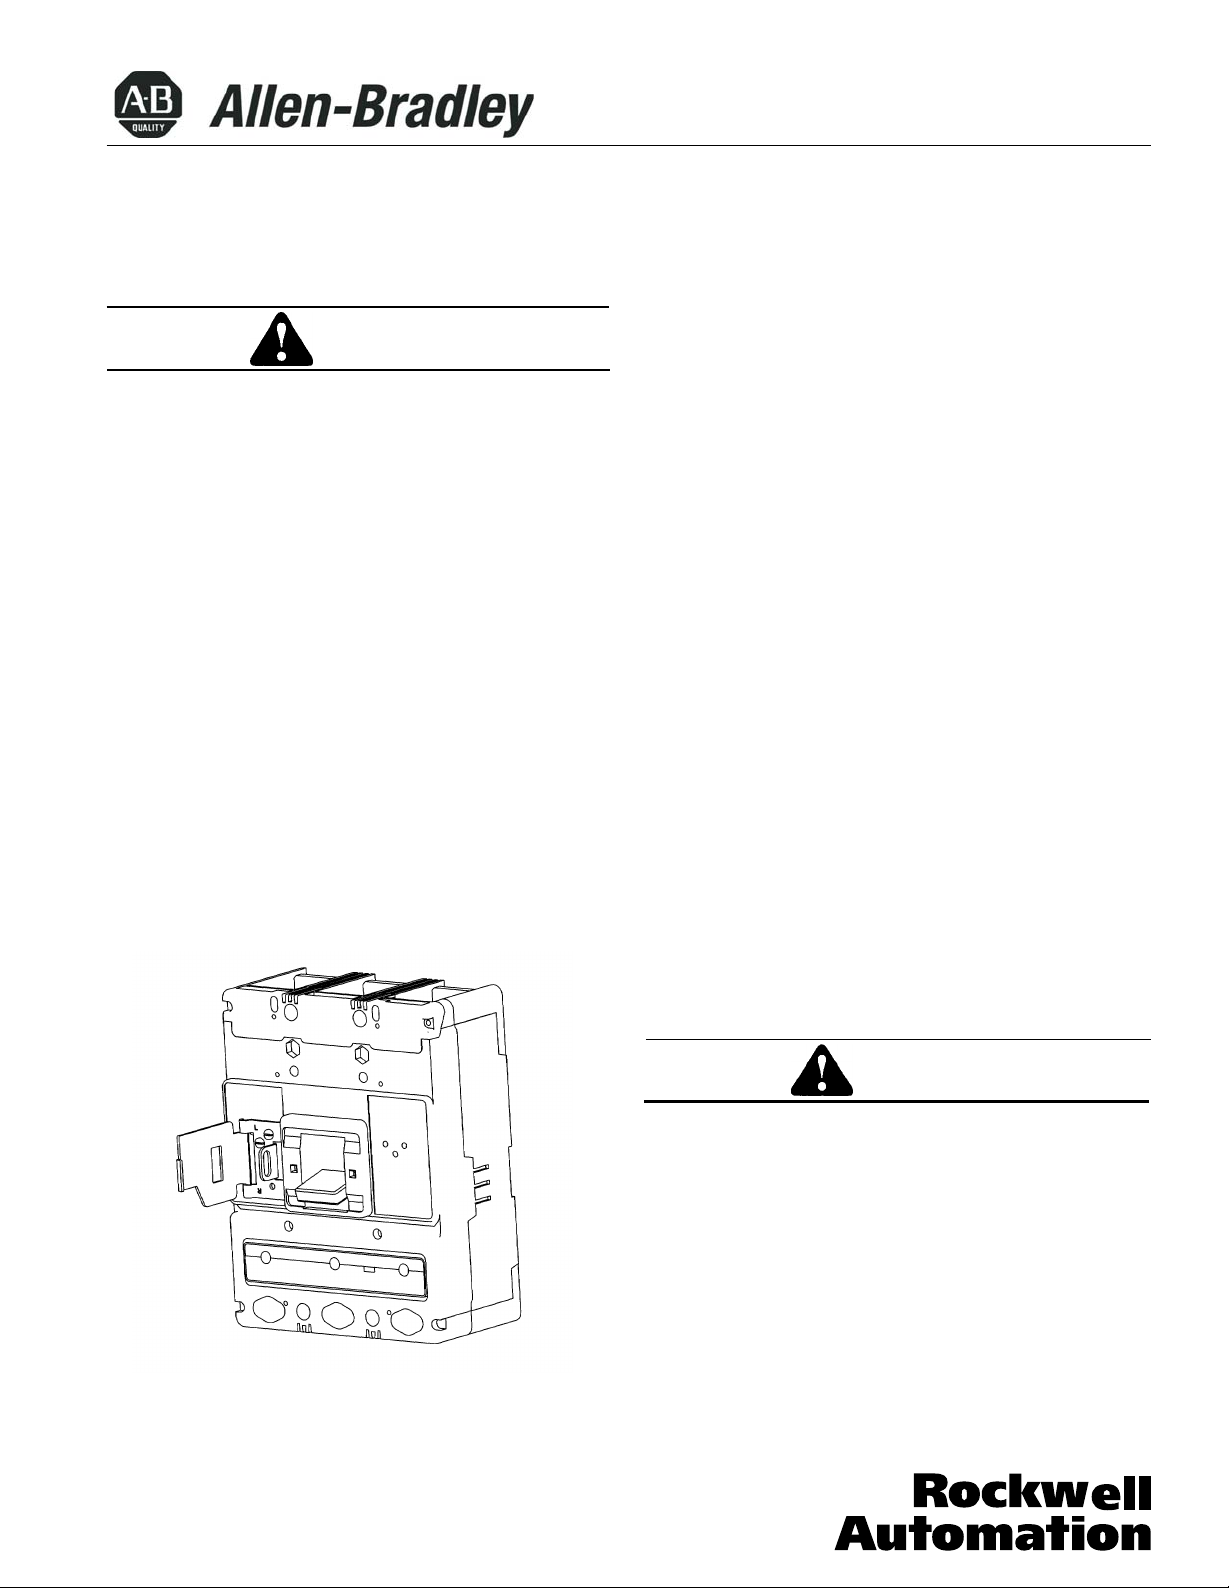
The padlockable handle lock hasp (Fig. 1-1) is used to
-
externally lock the circuit breaker handle in the
OFF position. Safety is ensured since trip
tion lets the circuit breaker trip when the handle
locked in the
circuit breaker cover in the left- or right
-
-
-
The hasp takes up to three padlock shackles, each with
a maximum diameter of 1/4 inch
It consists of a mounting plate connected by a hinge to
a lockplate. The mounting plate includes the padlock staple.
When the mounting plate is attached to the circuit breaker
cover, the lockplate hinges over the mounting plate and
staple. A tab on the lockplate prevents the circuit breaker
handle from moving.
This instruction leaflet (IL) gives detailed procedures for
installing the padlockable handle lock hasp.
ON
position. The hasp is mounted on the
-
pole position.
(6
mm).
ON
-
free opera
is
or
-
The recommendations and information contained herein
are based on Allen-Bradley experience and judgment,
but should not be considered to be all
ering every application or circumstance which may
arise.
If
any questions arise, contact Allen-Bradley for
further information or instructions.
Figure 1L-Frame Series C Circuit Breaker
1 Padlockable Handle Lock Hasp Installed on
-
inclusive or cov
-
2.
INSTALLATION
The padlockable handle lock hasp can be mounted in
the left-or right-pole position of 2-,3-, and 4-pole circuit
breaker. A padlockable handle lock hasp should normally
be mounted on the circuit breaker cover before the cir-
cuit breaker is installed in an electrical system. To mount
the padlockable handle lock hasp, perform the following
steps.
WARNING
BEFORE MOUNTING THE PADLOCKABLE HANDLE
LOCK HASP ON A CIRCUIT BREAKER INSTALLED
IN AN ELECTRICAL SYSTEM, MAKE SURE THE
CIRCUIT BREAKER IS SWITCHED TO THE OFF
POSITION AND THAT THERE IS NO VOLTAGE PRE-
SENT WHERE WORK IS TO BE PERFORMED.
40752-092 (1) Effective 05/02
Page 2
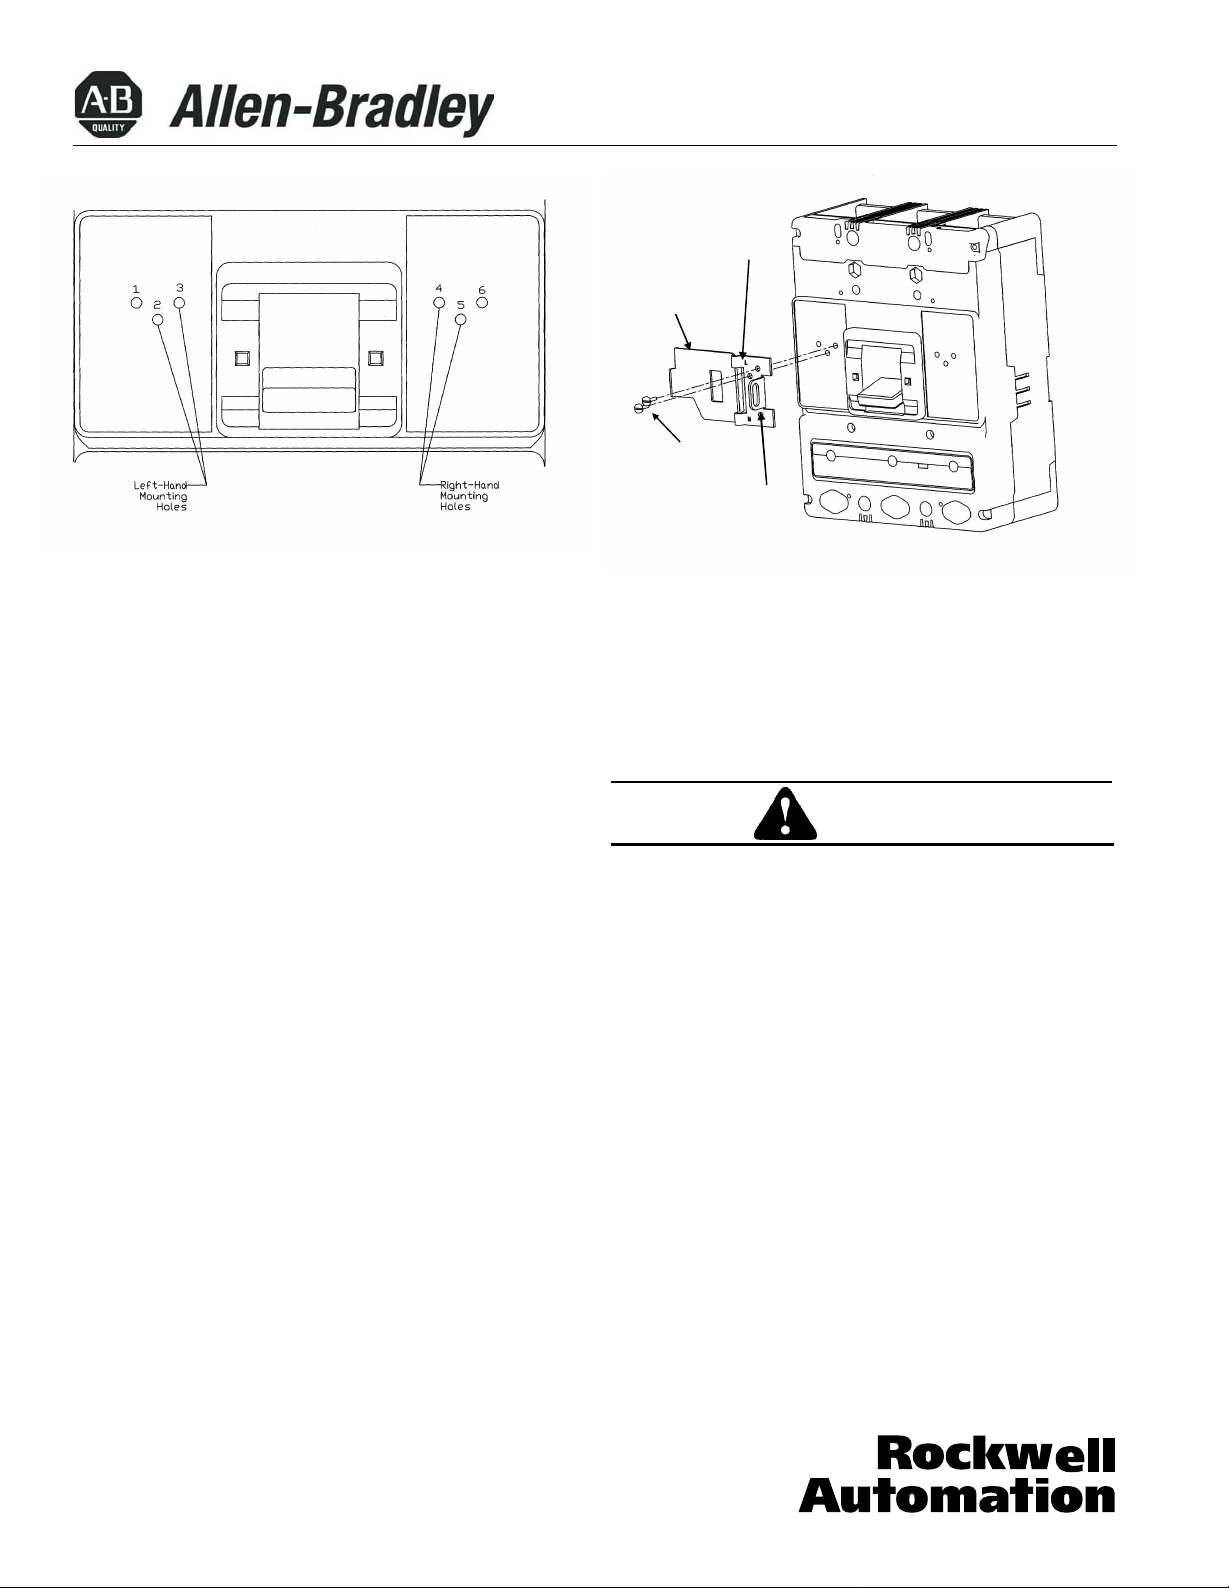
Mounting
Plate
Lockplate
Mounting
Plate
Securing
Screws
Staple
Page
2
Figure 2- 1 Padlockable Handle Lock Hasp Installation
SPECIAL ATTENTlON SHOULD BE PAID TO
REVERSE FEED APPLICATIONS TO ENSURE NO
VOLTAGE IS PRESENT. THE VOLTAGES IN ENERGIZED EQUIPMENT CAN CAUSE DEATH
SEVERE PERSONAL INJURY.
Note:
mounted on the circuit breaker cover,
nameplate information is covered. Before mounting
the hasp, make sure that the information is recorded
for future reference.
to record hidden information. The nameplate
should be placed on the side of the circuit breaker
or another convenient location adjacent to the cir
cuit breaker.
The following steps describe how to mount the pad
lockable handle lock hasp in the left-pole position
of the circuit breaker. The same procedure is used
for mounting the hasp in the right pole position.
2-1.
2-2...
2-3.
When the padlockable handle lock hasp is
A
blank nameplate is supplied
Mounting holes are located in the cover under the
nameplate. Find the mounting holes using the
locating marks in the nameplate. (See Fig.
Using a pencil
through the area of the nameplate covering holes
2
and 3
For mounting over the left pole, letter L on
mounting plate must be toward the line end of the
or
similar pointed tool, punch
(4
and 5 for right hand mounting).
OR
part
of the
-
2-1 .)
Figure 2-2 Mounting Hole Locations
circuit breaker (Fig. 2-2). For mounting over the
right pole, letter R
circuit breaker.
2-4.
Position mounting plate on cover. Align mounting
holes. (See Fig. 2-2).
A
FIRMLY TIGHTEN, BUT DO NOT OVERTIGHTEN,
MOUNTING PLATE SCREWS. OVERTIGHTENING
SCREWS CAN DAMAGE THE CIRCUIT BREAKER
COVER. USE ONLY HARDWARE PROVIDED, DO
NOT SUBSTITUTE.
-
2-5.
Secure mounting plate with
mm)
crossrecessed head, thread-cutting screws
provided. Torque screws to
Do
not substitute hardware.
2-6.
Move circuit breaker handle to the OFF position.
Hinge lockplate over staple. Check that padlock
shackle fits through staple and that tab on lock
plate blocks path of circuit breaker handle.
2-7.
Remove padlock. Hinge lockplate away from
circuit breaker handle. Move circuit breaker
handle to the
shackle and check that tab blocks path of circuit
breaker handle. (Lock On/Off Styles Only)
must be toward the line end of the
CAUTION
two
special
30
Ib.-in.
ON
position. Hinge lockplate over
#10
(3.5
(4.8
Nm).
40752-092 (1)
Printed in U.S.A. /TQC
Effective 05/02
 Loading...