

Page 1

R S 9 110
Operation Manual
Page 2

Page 3

Table of Contents Page
RS 9110
Table of Contents 1
Thermostat Operation 2-3
Thermostat Quick Reference 4-7
Programming 8-10
Installer Setup Menu 11-15
Terminal Designations 16
Caution
DO NOT SWITCH SYSTEM TO
COOL IF THE TEMPERATURE
IS BELOW 50°F (10°C). THIS
CAN DAMAGE THE AIR
CONDITIONING SYSTEM AND
CAUSE PERSONAL INJURY.
1
Page 4

THERMOSTAT OPERATION
Mon
Room
Menu
FAN
ON AUTO
LCD Screen Temperature Set-Point Buttons
1
SLEEP
2
3
System Switch
2
PM
Set At
+1
SYSTEM
COOL OFF HEAT
4
User Buttons Fan Switch
5
Page 5
THERMOSTAT OPERATION
LCD Screen
1
See page 4 for detailed information.
Fan Switch
2
Select ON or AUTO. ON will run the
fan continuously. AUTO will cycle the
fan on only when the heating or cooling
system is running.
System Switch
3
Select HEAT or COOL for your HVAC
system. Selecting HEAT turns on the
heat mode. Selecting COOL turns on
the air conditioning mode.
Selecting OFF turns both heating and
cooling off.
Temperature Set-Point
4
Buttons
Press the or to select
the desired temperature.
User Buttons
5
Use these buttons to set up
programming options.
3
Page 6
THERMOSTAT QUICK REFERENCE
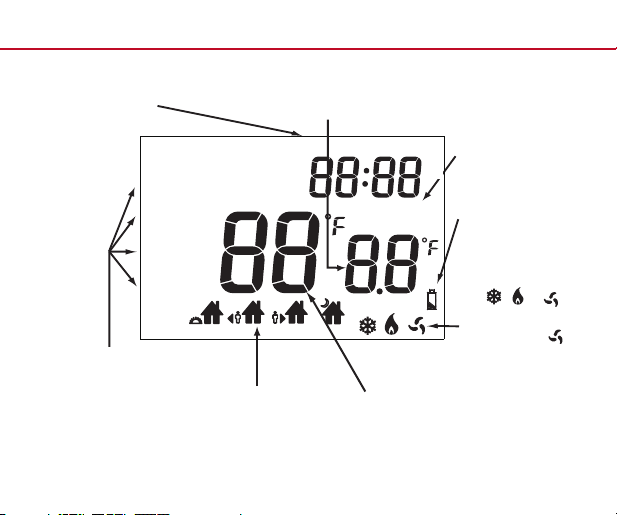
Days of the week and
time.
Tech Set
Next Step
Set Time
Run Sched
Set Sched
Hold
Prev Step
Menu
Done
Sun Mon Tue Wed Thu
Min Com On
Com Delay H eat
Cool Swing
Room
LEAVE RETURN SLEEP
WAKE
Button Options
Programmable Time Periods:
This thermostat has 4 programmable time
periods per day.
4
Displays the user selected
set-point temperature.
SatFri
AM
PM
Hold Filter
Set At
+1 +2
Indicates the current room
temperature.
Hold: Is displayed
when thermostat
program is overridden.
Low Battery
Indicator:
Replace batteries
when indicator is
shown.
System Operation
Indicators:
The , or icon
will display when the
COOL, HEAT, or (fan)
is on.
NOTE: If these icons
are ashing, there is
a 5-minute delay for
compressor protection.
Page 7
THERMOSTAT QUICK REFERENCE
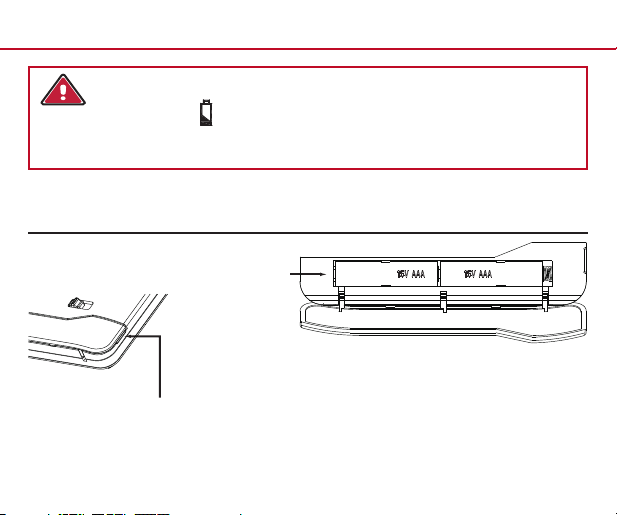
Caution:
When the battery icon appears, replace the alkaline AAA batteries
immediately to avoid damage to your HVAC system. Freezing or overheating
could occur.
Battery Door Information
Install two AAA
Alkaline batteries
into battery
compartment.
Be sure to match
positive (+) ends
of batteries with positive (+) battery
terminals in the battery compartment.
Press the lower portion of
the thermostat to open the
easy access battery door.
5
Page 8
THERMOSTAT QUICK REFERENCE
Temperature Adjustment (if Using a Program Schedule)
Temporary Adjustment: You may temporarily change the desired temperature set-point
by pressing either or . The temperature will remain at this set-point until the next
programmed WAKE, LEAVE, RETURN, or SLEEP event. The program schedule will
then resume.
Program Schedule Hold: The thermostat will display HOLD and RUN SCHED on
the left of the screen when you press either or . You may hold the temperature at
a xed temperature set-point and override the program schedule by pressing HOLD. The
thermostat will display HOLD below the temperature set-point to notify you that the program
schedule hold is in effect.
To Return to Programming: Press RUN SCHED to return to the program schedule.
6
Page 9
THERMOSTAT QUICK REFERENCE
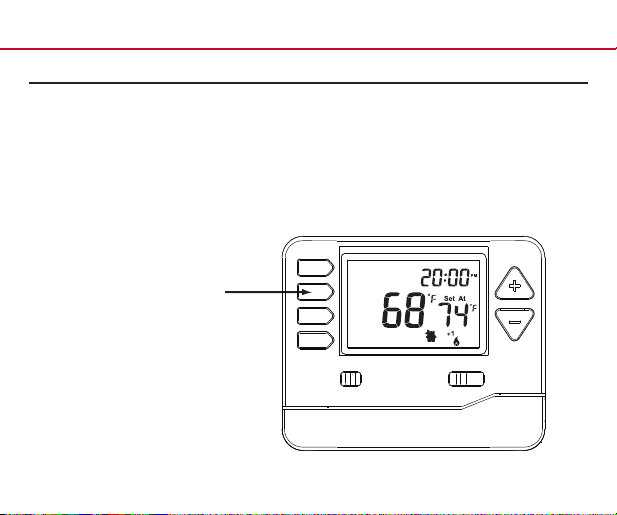
Filter Change Reminder
The thermostat can be congured to remind you when the air lter needs to be changed. The
lter change reminder can be adjusted to up to 2000 hours in 50 hour increments.
If the installer congured the thermostat to issue this reminder, FILTER will be displayed
when it is time to change the air lter. When FILTER is displayed, you should change the air
lter and reset the Filter Change Reminder by holding down the second button from the top
left side of the thermostat for 3 seconds.
Hold down button for
3 seconds to reset
lter reminder.
Menu
FAN
ON AUTO
Mon
Room
Set At
SLEEP
COOL OFF HEAT
PM
+1
SYSTEM
7
Page 10
PROGRAMMING
Set Time of Day and Day of Week
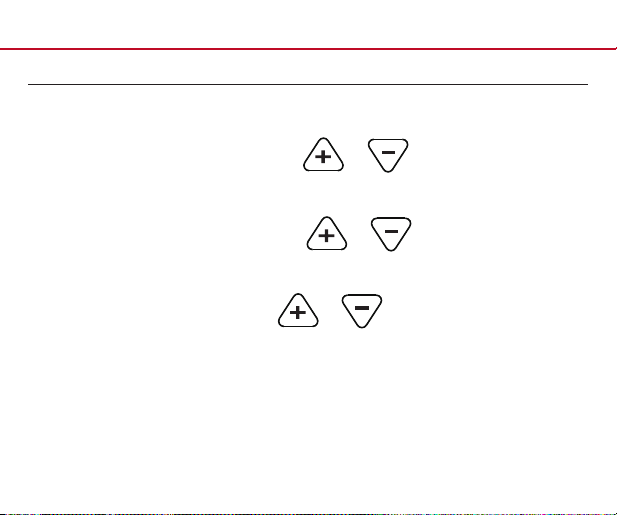
1. Press the MENU button.
2. Press SET TIME.
3. Day of the week will be ashing. Use or to select the current
day of the week.
4. Press NEXT STEP.
5. The current hour will be ashing. Use or to select the current hour.
Note the correct a.m. or p.m. indicator is selected.
6. Press NEXT STEP.
7. The minutes will be ashing. Use or to select the current minutes.
8. Press DONE when completed.
8
Page 11
PROGRAMMING
Custom Programming
This thermostat can be congured to have 7 Day or 5+1+1 programming. If 7 Day is
selected, all seven days will need to be programed individually. If 5+1+1 programming
is selected, Monday–Friday will be programmed together and Saturday and Sunday
will need to be programmed individually. There are four time periods for each day
(WAKE, LEAVE, RETURN, SLEEP).
Follow the steps below to customize your program schedule:
1. Select HEAT or COOL. Note: Heat and cool need to be programmed separately.
2. Press MENU (If menu does not appear rst, press RUN SCHED).
3. Press SET SCHED. Note: Monday–Friday (or Monday if in 7 Day mode) will be
displayed and the WAKE icon is shown.
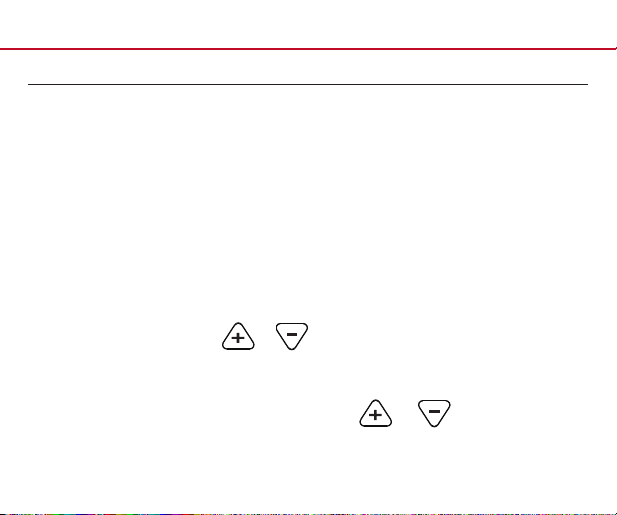
4. Time will be ashing. Use or to make your time selection for the
WAKE time period for Monday–Friday (or Monday if in 7 Day mode).
5. Press NEXT STEP.
6. The set-point temperature will be ashing. Use or to make your
set-point selection for the WAKE time period for Monday–Friday (or Monday
if in 7 Day mode).
9
Page 12
PROGRAMMING
Custom Programming
7. Press NEXT STEP.
8. Repeat steps 4 through 7 for the LEAVE time period, for the RETURN time
period, and for the SLEEP time period for Monday–Friday (or Monday if in
7 Day mode).
9. Repeat steps 4 through 8 for the Saturday WAKE, LEAVE, RETURN,
and SLEEP time periods, and then again for the Sunday WAKE, LEAVE,
RETURN, and SLEEP time periods for the 5+1+1 program schedule, and
for each day for the 7-day program schedule.
10
Page 13
INSTALLER SETUP MENU
1. Press MENU.
2. Press and hold TECH SET for 3 seconds.
3. Configure the installer options as desired using the table on page 12.
4. Use OR to change settings and the NEW STEP or
PREV STEP to move from one option to another.
Note: Only press DONE when you want to exit the Installer Setup Options.
11
Page 14
INSTALLER SETUP MENU
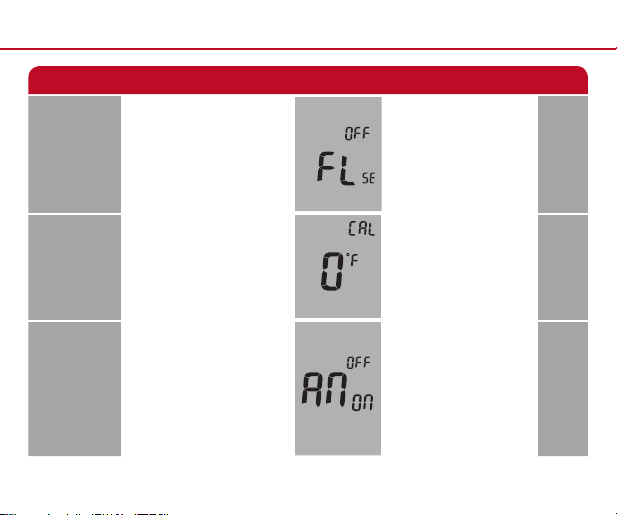
Settings Display Adjustment Options Default
The filter change reminder
can be adjusted from OFF
to 2000 hours in 50 hour
increments. Press the second
button from the top left side of
the thermostat to display the
current filter elapsed runtime.
The room temperature display
can be adjusted to read up to
3° above or below the factory
calibrated temperature.
The minimum compressor run
time can be adjusted from OFF
to 3, 4, or 5 minutes. If 3, 4, or
5 is selected, the compressor
will run for at least the
selected time before turning off
(although the fan may continue
to run for a short time).
Filter
Change
Reminder
Room
Temperature
Calibration
Minimum
Compressor
On-Time
12
This setting will ash FILT in the
display after the elapsed run time
to remind the user to change the
lter. The OFF setting will disable
this feature.
This setting allows the installer to
change the calibration of the room
temperature display so that, for
example, the thermostat would
read 72°F instead of 70°F.
The installer can select the
minimum run time for the
compressor to help protect the
compressor from short-cycling.
Next step
Prev step
Next step
Prev step
Next step
Prev step
OFF
0
OFF
Page 15
INSTALLER SETUP MENU
Settings Display Adjustment Options Default
Tech Settings LCD Will Show Adjustment Options Default
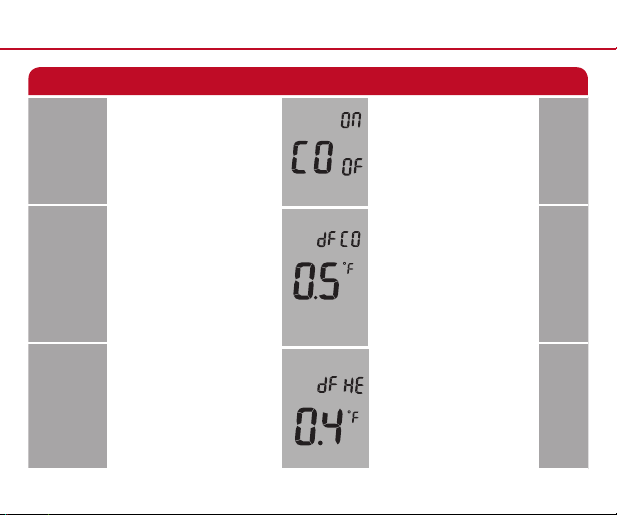
Compressor
Short Cycle
Delay
The compressor short cycle
delay setting will not allow the
compressor to be turned on for 5
minutes after it was last turned off
in order to protect the compressor.
Next step
Prev step
The compressor short cycle
delay setting can be removed
by selecting OFF.
ON
Cooling
Differential
Heating
Differential
The cooling differential is factory
preset at 0.5°. This means that
whenever the room temperature
heats by 0.5° full degree from the
temperature setting, the cooling
system will turn on. If the cooling
system turns on too often, increase
the temperature differential.
The heating differential is factory
preset at 0.4°. This means that
whenever the room temperature
cools by 0.4° from the temperature
setting, the heating system will
turn on. If the heating system
turns on too often, increase the
temperature differential.
Next step
Prev step
Next step
Prev step
The cooling differential setting is
adjustable from 0.2°F to 2°F.
The heating differential setting is
adjustable from 0.2°F to 2°F.
0.5
0.4
13
Page 16
INSTALLER SETUP MENU
Settings Display Adjustment Options Default
Next step
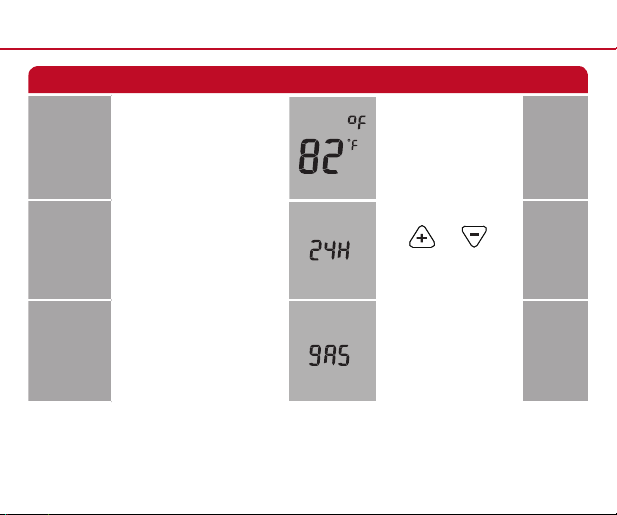
For C
12 or 24
Hour Clock
Fan
Operation
14
Select F for Fahrenheit
temperature display or select
C for Celsius display.
Prev step
Next step
Select a 12 or 24 hour
clock setting.
Prev step
Next step
Select GAS or ELEC depending
on the type of furnace.
Prev step
F for Fahrenheit
C for Celsius
Use and
to select 12 or 24
hour clock.
GAS - GS
or
ELEC-EL
GAS
F
12
Page 17
INSTALLER SETUP MENU
Settings Display Adjustment Options Default
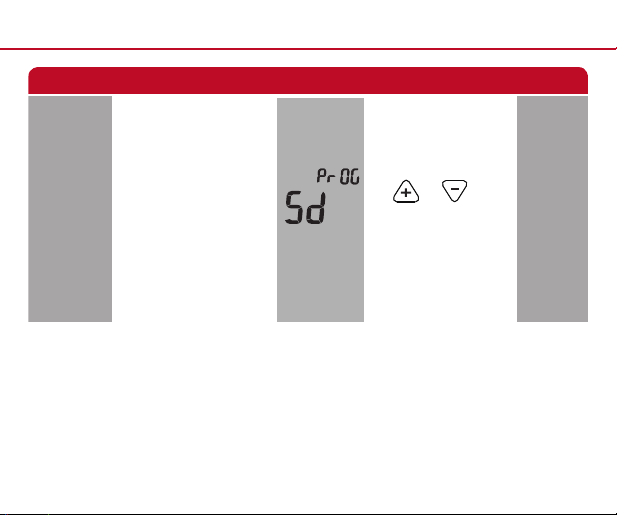
This thermostat can be
congured to have 7 Day,
5+1+1 programming or be
Program
Options
non-programmable.
If 7 Day is selected, in Set Time
all seven days will need to be
programmed individually.
If 5+1+1 programming is
selected, in Set Time Monday–
Friday will be programmed
together and Saturday and
Sunday will need to be
programmed individually.
If 0d is selected, the thermostat
becomes non-programmable.
Next step
Prev step
Use and
to select 7d for 7 Day, 5d
for 5+1+1, or Od for
non-programmable.
5d
15
Page 18

TERMINAL DESIGNATIONS
RH .............. 24VAC Heating
RC .............. 24VAC Cooling
C ................. Common 24VAC (system power supply)
W ................ HEAT
Y ................. COOL
G ................. FAN
B ................. REV VALVE HEAT
O ................. Cooling Activated Reversing Valve
16
Page 19

Page 20
Customer Service +1.800.304.6563
Technical Service +1.800.445.8299
[email protected]
www.robertshaw.com • 352-00301-001
© 2021 Robertshaw Controls Company.
Robertshaw® is a trademark of Robertshaw Controls Company.
352-00311-001 Rev. B
6
Year
Limited
Warranty
Use Phone
to Scan for
Warranty Info
 Loading...