

Page 1

User’s Manual
Quick Start Installation and Programming
110-739
W
A
R
R
A
N
T
Y
7 Day Programmable
1 Heat / 1 Cool
INTEGRATED COMFORT SOLUTIONS
™
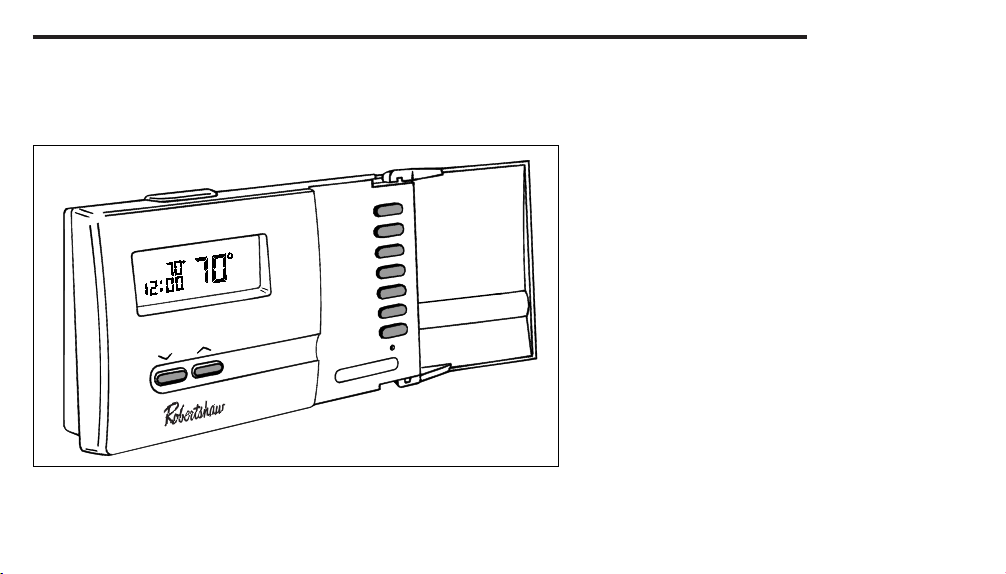
DELUXE
PROGRAMMABLE
THERMOSTAT
9700
®
ELECTRIC
E
GAS
G
110-739C
Page 2
2
PRODUCT FEATURES
SET
N
A
M
/
G
O
R
N
O
M
F
PM
U
N
A
M
T
A
E
H
AUTO FAN
L
A
As an ENERGY STA R®partner, Maple Chase has determined that this
thermostat product meets the E
efficiency
P
Q
LOCK
FILTER
NERGY STA R
T
E
S
K
C
I
U
M
E
T
S
Y
S
N
A
F
BYPASS
INSTALL
®
guidelines for energy
• Attractive, StyleLine™ design
• 7-day programming; 4 pre-programmed
E
NERGY STA R
®
setpoints per day
• QuickSet™ programming mode
• Autochangeover mode automatically
switches system from heat to cool
• Programmable fan control
• Detachable sub-base allows you to remove
mounted thermostat for easy, convenient
programming.
• Filter monitor notifies when to change or clean
furnace filter
• Programmable keypad lock prevents
unauthorized re-programming
• NiteView™ LCD display backlight
• Programmable residual cooling fan delay for
increased air conditioning efficiency
• Allows for up to 3 remote temperature
sensors
• Low temperature "freeze" protection
• Visual and audible low battery signal
Page 3
KEYPAD QUICK REFERENCE
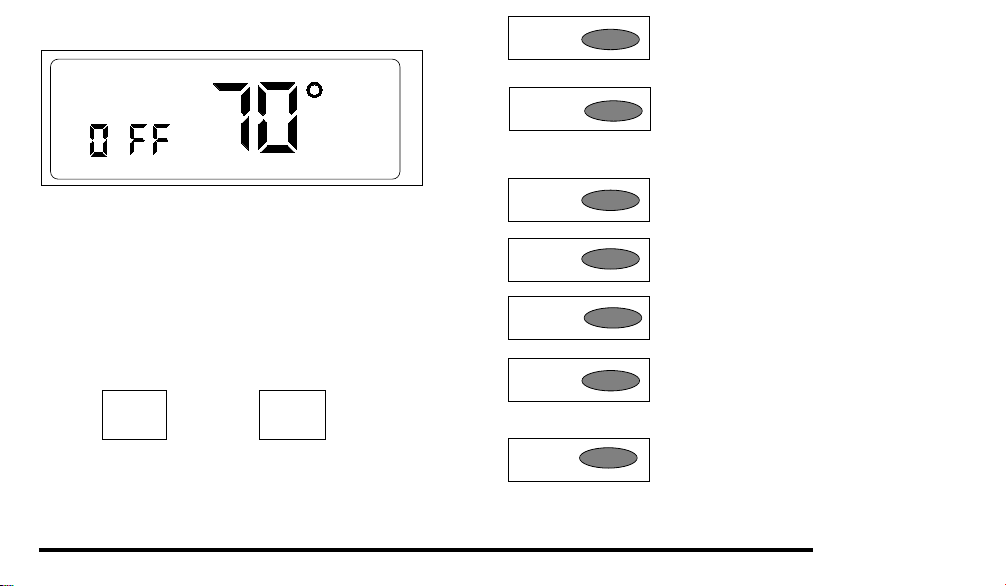
AUTO FAN
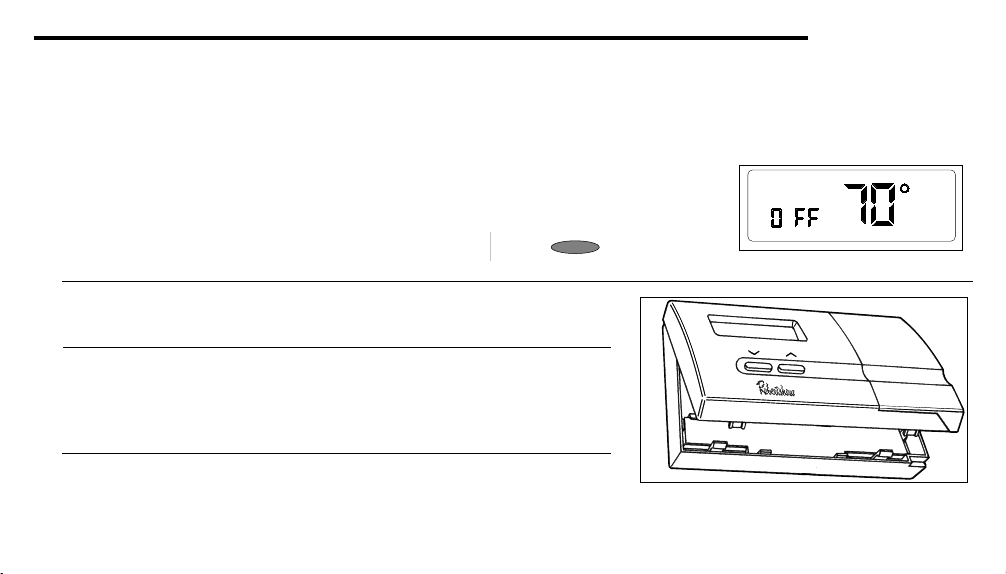
MAIN DISPLAY (OFF MODE)
A few seconds after power up or RESET, the display shown
above will appear. The thermostat will be in OFF mode.
1. Press SYSTEM button to enter HEAT, COOL, or AUTO*
(changeover) modes of operation.
2. Press PROG/MAN button to enter program or manual
modes. Pressing PROG/MAN returns thermostat to
main display from any menu.
*AUTO may only be entered if "AUTO CHG" was enabled during installation
and you are in PROGRAM mode. (See "CHANGING DIP SWITCH SETTINGS.")
V
V
Decreases or
reverses setting
on display.
Increases or
advances setting
on display.
SET
PROG/MAN
QUICKSET
LOCK
FILTER
SYSTEM
FAN
SET - Begins, saves, and advances
programming inputs
PROG/MAN - Sets thermostat to either
program or manual mode. Provides
quick return to normal operating mode
from any menu
QUICKSET - Allows quick programming
by enabling user to program all seven
days at once
LOCK - Accesses keypad “lock” and
“unlock” feature
FILTER - Accesses filter monitor
and status
SYSTEM - Accesses 4 modes of
operation: HEAT, COOL,
AUTO(changeover), or system OFF
FAN -Accesses two modes of fan
operation: auto and on
3
Page 4

The Maple Chase Item 9700 is directly compatible with 24V AC single stage heating and cooling systems.
It will operate with all standard forced air gas, oil, and electric heating and air conditioning systems as well
as hot water heating systems and single stage heat pump systems that do not have auxiliary or emergency
heating. No optional items are required.
This thermostat will automatically control the heating and/or cooling system. Once programmed, it will
automatically adjust the temperature setting and fan operation at your programmed times. When used
properly, this thermostat can reduce heating and cooling costs throughout the year.
TABLE OF CONTENTS
Product Features ..................................2
KeyPad Quick Reference ......................3
Important Safety Information ..............5
Helpful Programming Tips....................6
NiteView™ LCD Display Backlight ......7
Removing Thermostat from Wiring
Subbase ................................................8
Programming ........................................10
Set or Change Time, Day, etc ........10
Selecting ˚F/˚C ................................11
Programming with Quickset..........14
Review, Change, or Personalize....16
Review or Modify Program ..........19
Programming Filter Monitor ........20
Checking Filter Monitor ................20
Resetting Filter Monitor ................20
Programming Keypad Lock ..........21
Unlocking Keypad ..........................22
Operation ..............................................23
Beginning Programmed
Operation. ......................................23
Resetting Thermostat ....................24
Selecting Auto Changeover ..........25
Changing Dip Switch Settings..............27
Replacing the Batteries ........................28
Cleaning ................................................30
Troubleshooting ....................................31
Warranty ................................................35
4
Page 5

IMPORTANT SAFETY INFORMATION
!
WARNING:
■ Always turn off power at the main power source by unscrewing fuse or switching circuit breaker to the off position
before installing, removing, or cleaning this thermostat.
■ Read all of the information in this manual before programming this thermostat.
■ This is a 24V AC low-voltage thermostat. Do not install on voltages higher than 30V AC.
■ All wiring must conform to local and national building and electrical codes and ordinances.
■ Do not short (jumper) across terminals on the gas valve or at the system control to test installation. This will
damage the thermostat and void the warranty.
■ Do not switch system to cool if the temperature is below 50°F (10°C). This can damage the cooling system and
may cause personal injury.
■ The thermostat will not control your heating/cooling system without power. It requires four charged “AA” Energizer
brand batteries or equivalent alkaline batteries for thermostat operation, and a continuous 24V AC circuit for proper
system control.
■ Replace batteries every year or when “LO BATT” indicator appears on the thermostat display.
■ Use this thermostat only as described in this manual.
5
Page 6
HELPFUL PROGRAMMING TIPS
6
1. Make sure the SYSTEM switch is in the HEAT or COOL position
before programming. The thermostat will not allow
programming in AUTO or OFF modes.
2. Make sure you set the time of day (note AM/PM indicator) and
day of week accurately to ensure correct operation.
3. The program schedule has a winter (HEAT) and a summer (COOL)
program. Both schedules will use the same time settings, but can
have different temperature settings. If you change the time setting
in one program, the opposite program will change also.
4. To control the system, press the SYSTEM switch until HEAT,
COOL or AUTO appears in the display. The thermostat will not
properly control the system to your desired setpoint
temperature unless it is in one of these operating modes.
5. To enter AUTO, you must first be in PROGRAM mode. Press
PROG/MAN button until PROGRAM appears in display. Then
press SYSTEM button to enter AUTO.
6. The QuickSet™ feature programs each individual day
simultaneously with the identical program. Each and every
day can then be individually modified to suit specific
needs/desires.
SYSTEM
SYSTEM
PROG/MAN
SYSTEM
QUICKSET
Page 7
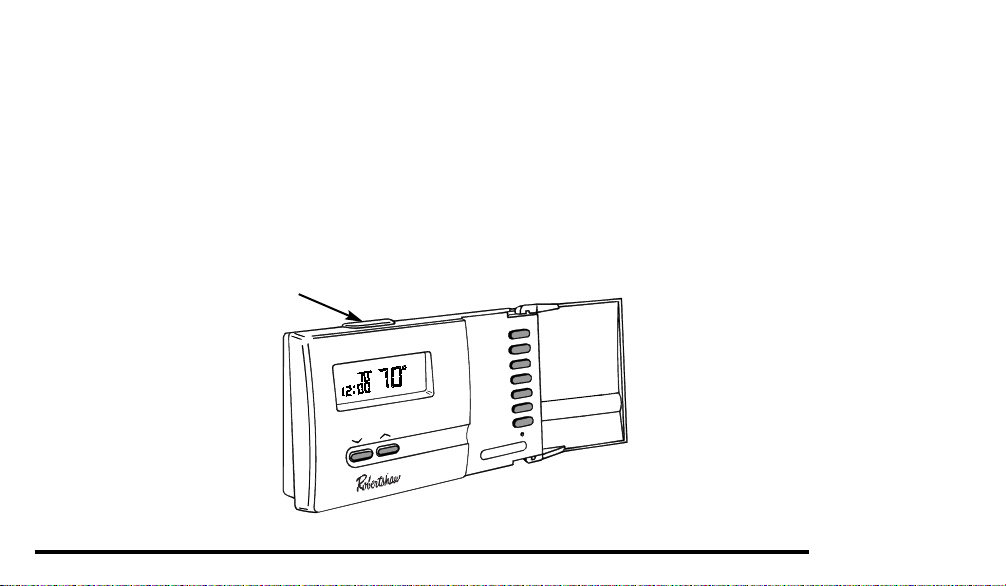
NITEVIEW™ LCD DISPLAY BACKLIGHT
This thermostat incorporates a revolutionary new display backlight to make nighttime
temperature or program adjustments quick and easy. The NiteView™ display backlight uses
modern lighting technology to provide an even-flowing light behind the display. There are two
ways to activate the backlight:
1. Every time you press a keypad button or the ∨ or ∧ buttons to make an adjustment, the
backlight will automatically turn on illuminating the display. The backlight will turn off after about
a minute of inactivity.
2. Press the NiteView™ display backlight button located on the top of the thermostat (over the LCD
display). The backlight will turn off after about a minute of inactivity.
NiteView™ light button
SET
N
A
M
/
G
O
R
N
O
M
F
T
A
E
H
N
A
F
O
T
U
PM
A
L
A
U
N
A
M
P
U
Q
O
L
F
SYSTEM
F
T
E
S
K
IC
K
C
R
E
T
L
I
N
A
S
S
A
P
Y
B
L
L
A
T
S
N
I
7
Page 8
REMOVING THERMOSTAT FROM WIRING SUBBASE
Your new thermostat can be removed from its wiring
subbase for easy programming, resetting the
thermostat, or changing the batteries. The wiring
subbase will remain attached to the wall.
To remove thermostat from wiring subbase:
1. Press SYSTEM button until OFF is displayed in the
time field.
2. Gently lift the bottom of the thermostat up and out
as shown in Figure 1.
3. Pull thermostat up and away from wiring subbase.
To replace thermostat onto wiring subbase:
1. Align slots on top of thermostat with square pins
on subbase.
2. Latch the top of the thermostat into place. Pivot the
thermostat down and push in to lock the bottom of
the thermostat into place.
SYSTEM
8
AUTO FAN
Figure 1
Page 9
To replace thermostat onto wiring subbase (cont.):
T
3. Press SYSTEM button to put the thermostat into HEAT,
COOL, or AUTO mode. The thermostat will return to normal
operating mode.
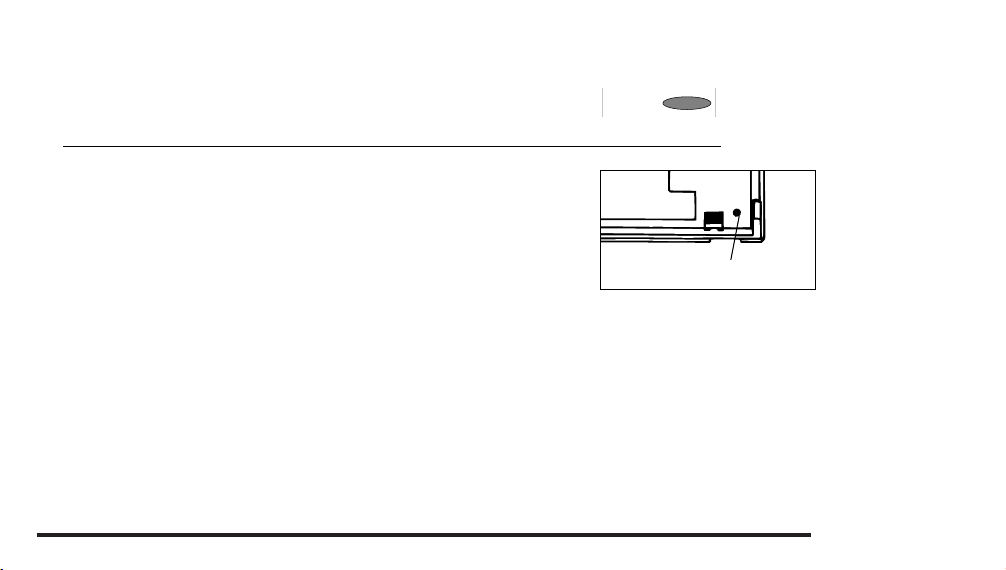
You may reset the thermostat at any time. Reset is located on the
back side of thermostat in the lower, right corner. See diagram.
Pressing reset will erase ALL programmed information as well as
time clock and day of week.
SYSTEM
RESET
9
Page 10
PROGRAMMING
PROGRAMMING
Set or Change Time, Day, Temp. Differential, and Residual Cooling
NOTE: During programming, the setting to be changed will flash on the display. If no key presses are made within 45 seconds,
the display will revert to the main display. Press PROG/MAN button at any time during programming to return to the main
display.
10
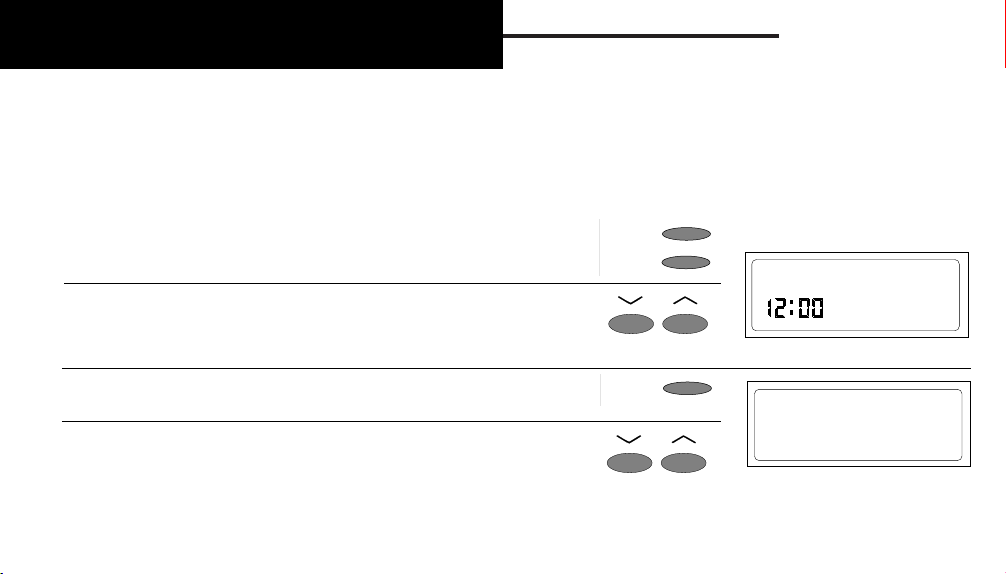
1. Press and hold SET button while pressing PROG/MAN button. Release
both buttons. The display will show the time clock setting:
2. Press either ∨ or ∧ button to adjust the current time forward or
backward. The time will change in one-minute increments each time
you press either button. The time will scroll in 10-minute increments
if you hold down either button. Note AM/PM indicator.
3. Press SET button. The day of the week will appear at the top of the
display.
4. Press either ∨ or ∧ button to change to the current day of the week
(MON, TUE, WED, THU, FRI, SAT, SUN).
SET
PROG/MAN
SET
PM
MON
Page 11
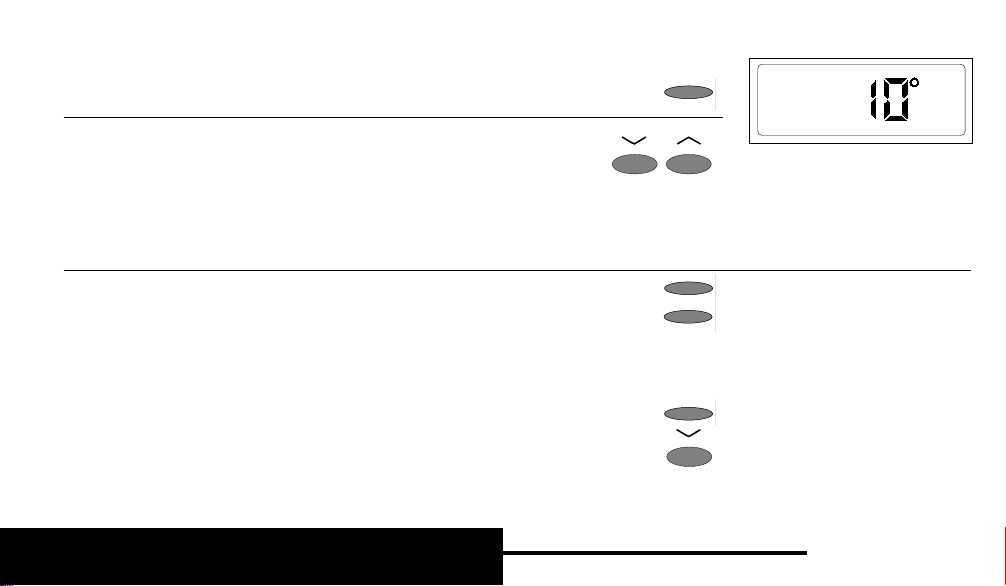
5. Press SET button. The temperature differential (1˚F) will appear
on the display as 10˚.
6. Press either ∨ or ∧ button to change the temperature differential.
The differential may be adjusted from .5˚F (05˚), 1˚F (10˚), 1.5˚F
(15˚), or 2˚F (20˚). (If your system cycles too often, increase the
temperature differential setting.)
NOTE: If SYSTEM button is in COOL, the display will show ":60." This
is the residual cooling fan delay. If desired, press either ∨ or ∧ button
to adjust the fan delay to ":00", ":30", ":60", OR ":90" seconds.
SET
7. Press SET button or PROG/MAN button to return to main
menu.
Selecting ˚F/˚C
The thermostat displays temperatures in degrees Fahrenheit. If you
wish to change the readout to Celsius:
1. Press and hold SET button while pressing ∨ button. Release both
buttons. The display will switch from Fahrenheit to Celsius. If you
wish to switch back to Fahrenheit, simply repeat this step.
NOTE: All differential control is done in˚F even though ˚C is
selected as your display choice.
PROGRAMMING
SET
PROG/MAN
SET
11
Page 12

PROGRAMMING
This programmable thermostat can have up to four setpoints a day (MORN, DAY, EVE, and NIGHT). Each of these
setpoints will have a time, temperature, and programmable fan setting. The thermostat monitors the time of day and
turns the system on or off, based on the temperature differential you have already set, to maintain the programmed or
manually selected setpoint temperatures.
To save money and energy, you can adjust these setpoint times and temperatures to provide set-back periods in
program mode during the day or at night. There are two modes of recovery from programmed set-back periods:
Normal Recovery (default setting) - the thermostat turns on the system (if required) at the programmed setpoint
time. This recovery mode can be used for maximum savings. If you wish to change the recovery mode, see "CHANGING
DIP SWITCH SETTINGS" section of this manual.
Early Recovery (optional) - the thermostat turns the system on prior to the next setpoint time so the setpoint
temperature can be reached at the setpoint time. This allows the user to maximize comfort for occupied periods and
eliminate energy wasting demand cycling prior to set-back periods.
NOTE: New dip switch settings will not register or operate options until the RESET button is pressed. Pressing RESET
will erase any previously entered programming information.
12
Page 13

NOTE: If "AUTO CHANGEOVER" was enabled during installation, refer to "SELECTING AUTO CHANGEOVER" for
restrictions on setting heating or cooling setpoint temperatures for proper operation. AUTO (changeover) will not
function unless the thermostat is set to PROGRAM mode. If "AUTO CHANGEOVER" was disabled during installation,
you may set heating or cooling setpoints to any temperature settings you desire.
NOTE: Both summer and winter programs use the same time settings and programmable fan settings.
Sample Program
Setting Time Summer Winter
MORN 6:00 a.m. 76 70
DAY 8:00 a.m. 82 60
EVE 5:00 p.m. 75 68
NIGHT 11:00 p.m. 78 66
PROGRAMMING
Your Program
Setting Time Summer Winter
MORN
DAY
EVE
NIGHT
13
Page 14

PROGRAMMING
Programming with QuickSet™
NOTE: To save valuable programming time, QuickSet™ allows you to set one schedule that is automatically copied
to each individual day of the week. You may then go into the program and change any specific day, time setting, or
temperature setting to suit your personalized schedule.
NOTE: The thermostat will not allow programs to be entered in the OFF or AUTO modes. Program in HEAT or COOL
modes only.
1. Press the SYSTEM button until the word “HEAT”or “COOL”
appears on the right side of the display.
SYSTEM
MON
MANUAL
F
PM
HEAT
AUTO FAN
14
2. Press QUICKSET button.The display will show all the days of the
week at the top of the display. This signals that you are in
QuickSet™ mode. "MORN” is the first setting for the day. The
display will show the setpoint time.
3. Press either ∨ or ∧ button to adjust the time setting for MORN. (Note:
Holding down either ∨ or ∧ button scrolls the time in 30 minute
increments.)
QUICKSET
MON
MANUAL
MON TUE WED THU FRI SAT SUN
F
PM
AM
AUTO FAN
MORN
COOL
Page 15

4. Press SET button. The display will show the setpoint temperature
SET
NOTE: Pressing QUICKSET button instead of the SET button will
also save your program settings.
5. Press either ∨ or ∧ button to adjust the setpoint temperature
for the programmed MORN time. (NOTE: Holding down either
∨ or ∧ button scrolls the temperature in 1˚ increments.)
6. Press SET button. The display will show AUTO with FAN.
7. Press either ∨ or ∧ button to program the fan to be in AUTO
(fan cycles with system when required for heating or cooling)
or ON (fan remains on continuously) for the individual daily
setpoint your are programming.
8. Press SET button.
9. Repeat steps 3-8 for the remaining DAY, EVE, and NIGHT
settings.
PROGRAMMING
SET
SET
MON TUE WED THU FRI SAT SUN
MON TUE WED THU FRI SAT SUN
MON TUE WED THU FRI SAT SUN
F
MORN
MORN
AUTO FAN
MORN
FAN ON
15
Page 16

PROGRAMMING
10.Press SYSTEM button for opposite program (HEAT or COOL).
11.Repeat the above steps to enter the temperature settings for the
opposite season.
NOTE: When programming opposite season, remember that both
programs use the same time settings and programmable fan settings.
Review, Change, or Personalize Program
NOTE: The thermostat will not allow programs to be entered in the
OFF or AUTO modes.
1. Press the SYSTEM button until the word "HEAT" or "COOL"
appears on the right side of the display.
SYSTEM
SYSTEM
MON
MANUAL
MON
MANUAL
F
PM
F
PM
HEAT
AUTO FAN
COOL
AUTO FAN
16
Page 17

2. Press SET button. The display will show the current day of the
week or the last programmed day. Press ∨ or ∧ to advance to
the day of the week you will program.
SET
MON
3. Press SET button. The display will show the time setting:
4. Press either ∨ or ∧ button to adjust the time setting for MORN.
(Note: Either ∨ or ∧ button scrolls the time in 30 minute
increments.)
5. Press SET button. The display will show the setpoint
temperature.
6. Press either ∨ or ∧ button to adjust the temperature setpoint
for the programmed MORN time.
PROGRAMMING
SET
SET
MON
MON
AM
F
MORN
MORN
17
Page 18

PROGRAMMING
7. Press SET button. The display will show AUTO with FAN.
8. Press either ∨ or ∧ button to adjust the fan setting to be in AUTO
(fan controlled by system when required for heating or cooling)
or ON (fan remains on continuously) for the individual daily
setpoint you are programming.
SET
MON
MON
MORN
AUTO FAN
MORN
FAN ON
18
9. Press SET button.
10. Repeat steps 3-9 for the remaining DAY, EVE, and NIGHT settings.
11. Press SYSTEM button for opposite program (HEAT or COOL).
12. Press SET button and repeat above steps for opposite program.
NOTE: Program changes made to setpoint times, temperatures, or
fan operation are not saved in memory unless you finish the operation
by pressing the SET button after each entry as shown above.
NOTE: When programming opposite season, remember that both
programs use the same time and programmable fan settings.
SET
SYSTEM
SET
MON
MORN
FAN ON
Page 19

Review or Modify Program
1. Press SYSTEM button until the word "HEAT" or "COOL" appears on
the right side of the display. This will choose the program you wish to
review or modify.
SYSTEM
MON
MANUAL
F
PM
HEAT
AUTO FAN
2. Press SET button.
3. To advance through each day's programmed setpoint times,
temperatures, and fan settings continue to press the SET button.
Each time you press the SET button, the LCD display will
advance to the next setting in the program.
4. Press ∨ or ∧ button to change any individual day's setpoint times,
temperatures, or fan settings.
5. Press SET button to save any changes and continue reviewing
your program.
6. Repeat 1-5 to review or modify the opposite program.
PROGRAMMING
SET
SET
SET
MON
MANUAL
F
PM
AUTO FAN
COOL
19
Page 20

PROGRAMMING
Programming Filter Monitor
The filter monitor keeps track of the total time the system fan has been in operation during the heating or cooling modes.
The "Check Filter" message appears when the hours of fan operation equals your programmed filter monitor hours setting.
1. Press SET and FILTER buttons at the same time. Release both
buttons. The display will show:
2. Press ∨ or ∧ button to change filter hours setting (0 to 960). The
default is 240 hours (based on average 30 day month at 8 hours
per day fan operation). A setting of 0 disables this function.
3. Press SET button to save setting.
Checking Filter Monitor
1. Press FILTER button. The current hours of fan operation since
last reset are shown for reference.
2. The main display will return after a few seconds.
Resetting Filter Monitor
1. When filter needs to be serviced, "Check Filter" will show in main
display indicating that the hours of fan operation have met your
programmed filter servicing interval.
2. After servicing the filter, repeat steps 1-3 to reset/reprogram your
filter monitor.
SET
FILTER
SET
FILTER
CHECK
FILTER
20
Page 21

Programming Keypad Lock
NOTE: In order for the lock function to work as described below, the "LOCK" function must have been enabled during
installation. If the Lock function does not seem to work, you must change a dip switch located on the back of the
thermostat. See “CHANGING DIP SWITCH SETTINGS” section to turn the “LOCK” function on.
This thermostat has a keypad lock that will prevent unauthorized program changes. When the keypad is locked, the
user must enter the 3-digit combination or the keypad will not allow programming changes.
IMPORTANT: Please write down your chosen 3-digit combination in a convenient location away from the thermostat.
The thermostat WILL NOT let you change the settings or the mode if you forget the combination. When the
thermostat "LOCK" function is on, only the LOCK keypad button is functional until the thermostat is unlocked.
Setting your combination and lock keypad:
1. Press SET and LOCK buttons at the same time. Release both
buttons. The display will show "000." The first digit will flash.
2. Press ∨ or ∧ button to enter the first (left) digit.
3. Press SET button to save first digit. The second digit will flash.
4. Press ∨ or ∧ button to enter the second (middle) digit.
PROGRAMMING
SET
LOCK
SET
21
Page 22

PROGRAMMING
5. Press SET button to save second digit. The third digit will flash.
6. Press ∨ or ∧ button to enter the third (right) digit.
22
SET
7. Press SET button to save third digit. "Lock” appears on the
screen and your combination is now saved.
Unlocking keypad:
1. Press LOCK button. The display will show “000.”
2. Follow steps 2-7 as listed above in “Setting your combination and
lock keypad.” If combination is correct, the word “LOCK” will
disappear from the display and the program may be changed. If
combination is not correct, the thermostat will display the word
“no” and return to normal display mode.
If, for any reason, you have forgotten your combination or are
unable to unlock the keypad, press reset button on the rear of the
thermostat. See “REMOVING THERMOSTAT FROM SUBBASE”
and “Resetting the Thermostat.” Pressing reset will erase ALL
programmed information as well as time clock and day of week.
SET
LOCK
MON
LOCK
RESET
MANUAL
F
AM
PM
AUTO FAN
HEAT
Page 23

OPERATION
The thermostat is now ready to run your saved programs and automatically control the temperature at your programmed
time settings. The thermostat will “flash” the word “heat” or “cool” in the main display when the system is active.
Beginning Programmed Operation:
NOTE: DO NOT switch system to COOL if outside temperature is
below 50˚F. This can damage the compressor/condenser unit on
your system.
1. Press PROG/MAN button until the display shows that the
thermostat is in the PROGRAM mode. This will allow you to
begin programmed operation.
2. Press SYSTEM button until HEAT, COOL, or AUTO appears on
the display (depending on the season). COOL will control the
air conditioner. HEAT will control the heating system. AUTO
will automatically choose between the HEAT or COOL
programs, depending on the temperature. (See “SELECTING
AUTO CHANGEOVER” for more information.) OFF will show in
the time field when the thermostat is off and not
operating the system. Depending on whether the fan
MON
is programmed or manually set to AUTO or ON, the
fan will automatically run (with or without a delay)
along with your program.
PROGRAM
PROG/MAN
SYSTEM
F
PM
AUTO FAN
COOL
MON
PROGRAM AUTO FAN
MON
PROGRAM
MON
PROGRAM
F
PM
F
PM
F
PM
AUTO FAN
AUTO FAN
HEAT
AUTO
23
OPERATION
Page 24

24
You may press the ∨ or ∧ buttons to temporarily change the
programmed temperature while in COOL or HEAT mode. The ∨ or
∧ buttons will not change the setting while the system is in
AUTO. You may also press the PROG/MAN button to change to
manual mode and manually change the temperature settings.
Resetting the Thermostat
If you ever experience a problem with the thermostat and find it is
not working correctly, or want to erase the ENTIRE program,
simply press and release the reset button. To access the RESET
button, remove thermostat from wiring subbase. (See
“REMOVING THERMOSTAT FROM WIRING SUBBASE.”) Note
reset location as shown in Figure 2. Use a small pin or paper clip
to push in the reset button.
The reset button is only accessible when the main unit is removed
from the wiring subbase. See “REMOVING THERMOSTAT FROM
WIRING SUBBASE.” This button will clear all the programs you
have set and revert to the default settings.
OPERATION
- + - +
- + - +
RESET
Figure 2
Page 25

Selecting Auto Changeover
You may wish to set your thermostat so it will automatically choose
between the HEAT or COOL programs for proper temperature
control. This program feature is referred to as the AUTO (Auto
Changeover) mode of system operation.
While in AUTO mode, the thermostat will constantly monitor the
room temperature to determine whether to run the HEAT or COOL
program to maintain comfort. To operate properly, the thermostat
requires a "dead band" setting to eliminate program conflicts. The
standard "dead band" setting is 3˚ between the highest HEAT
temperature setting and the lowest COOL temperature setting for a
given setpoint period. (There is an optional 5˚ "dead band" setting
available. See "CHANGING DIP SWITCH SETTINGS.")
For example, if the highest HEAT temperature setting for the MORN
setpoint is 72˚, then the lowest COOL temperature setting for a 3˚
"dead band" would be 75˚. The thermostat will emit a short "beep" if
the user attempts to enter a temperature setting while in the HEAT or
COOL program which would violate the established "dead band".
If you are in PROGRAM mode (PROG/MAN) and you have selected
AUTO using the SYSTEM button, the thermostat will constantly
compare the current room temperature to the current setpoint
(MORN, DAY, EVE, NIGHT) temperature settings for the HEAT and
COOL programs and choose which program is appropriate, for
example:
25
75˚ Lowest cool setting
74˚
73˚
72˚ Highest heat setting
3˚ Deadband
77˚ Lowest cool setting
76˚
75˚
74˚
˚
73
72˚ Highest heat setting
5˚ Deadband
(Optional)
OPERATION
Page 26

26
Your room temperature rises above the COOL setpoint programmed
temperature setting, the thermostat will activate the COOL program. If the
temperature continues to increase, the thermostat will turn on the COOL
mode and COOL will slowly flash in the display, indicating that it is in
operation. When the room temperature decreases to meet the COOL
program setpoint temperature, the thermostat will stop the cooling
system. COOL will be indicated in the display as active, but will not flash.
If the room temperature decreases below the HEAT setpoint programmed
temperature setting, the thermostat will activate the HEAT program. If the
temperature continues to decrease, the thermostat will turn on the heating
system and HEAT will slowly flash in the display. This indicates that the
heating system is currently in operation. When the room temperature
increases to meet the HEAT program setpoint temperature, the thermostat
will stop the heating system. HEAT will be indicated in the display as
active, but will not flash.
NOTE: AUTO (Auto Changeover) operation can only be selected using the
SYSTEM button while in PROGRAM mode. If the AUTO program feature is
not functioning properly, see "CHANGING DIP SWITCH SETTINGS" to
make sure AUTO CHANGEOVER was selected during installation.
NOTE: To change your current dead band setting, you must change a dip
switch located on the back of the thermostat. See “CHANGING DIP
SWITCH SETTINGS” section to change the dead band setting to either 3˚
or 5˚. Changing a dip switch setting will require resetting the thermostat to
register the new selection. This will erase previously entered program.
OPERATION
MON
PROGRAM
MON
PROGRAM
AUTO
COOL
PM
PM
AUTO FAN
AUTO FAN
AUTO
HEAT
Page 27

CHANGING DIP SWITCH SETTINGS
Thermostat functions are determined by settings on two sets of dip switches: "SWITCH 1" and "SWITCH 2". These
dip switches are pre-set at installation. However, some users may want to change some of the dip switch settings
on SWITCH 2 to enable or change certain thermostat options.
Figure 3 shows the location of the dip switches. Figure 4 shows a close-up of the dip switches. Dip switches marked
with an asterisk (*) should not be changed by the user. These are pre-set at time of installation by the installer and
must only be changed by a certified contractor familiar with heating and air conditioning systems. Change only the
dip switches necessary for options programming.
27
DIP SWITCHES
SWITCH 1
SWITCH 2
- + - +
- + - +
Figure 3
RESET
SWITCH 1
ON
MAIN
*
ON
REM 1
*
ON
REM 2
*
ON
REM 3
*
OFF
OFF
OFF
OFF
AUTO CHG OFF ON
DEAD BAND 5˚
REC. EARLY NORM
HEAT: GAS/OIL
*
HEATPUMP
*
Default Settings Default Settings
Figure 4
OPERATION
SWITCH 2
OFFLOCK ON
3˚
ELEC
STD
Page 28

28
T
Changing dip switch settings:
1. Use a small screwdriver or pencil to move the switch to the
desired setting.
OPERATION
CH 1
- + - +
- + - +
2. Press RESET button. See Figure 5. Pressing RESET will erase
any previously entered programming information.
IMPORTANT: New dip switch settings for Dip Switch #2 will not
register or operate options until the RESET button is pressed.
RESET
Figure 5
REPLACING THE BATTERIES
This thermostat has two levels of low battery indication. As the
batteries weaken, the thermostat will go to the next stage of low
battery indication.
Low Battery—Stage 1
“LO BATT” stays constant on the display. Replace batteries soon.
Display and thermostat functions normal.
Low Battery—Stage 2
“LO BATT” stays constant on the display and thermostat “beeps”
about once a minute. Replace batteries immediately. Display and
thermostat functions normal.
NOTE: When changing the settings on “SWITCH 1”, the reset
button does not have to be pressed for the new configuration to
register or operate.
MON
F
PM
MANUAL
LO
BATT
HEAT
Page 29

Replacing Batteries:
!
CAUTION: Installing batteries backwards can damage
NOTE: Replace batteries with four “AA” alkaline batteries only.
1. Press SYSTEM button until "OFF" appears in the time field on
the display.
2. Remove thermostat from wiring subbase. (See “REMOVING
THERMOSTAT FROM SUBBASE” for more information.)
3. Turn thermostat over. Locate battery compartment.
NOTE: Replace all four batteries at the same time. The thermostat
will “hold” all programmed information for about 30 seconds without
battery power. If 30 seconds elapse before batteries are replaced, the
program will be lost.
4. Replace all batteries with four new “AA” alkaline batteries.
Be sure the positive (+) ends of the batteries match the
positive terminals in the battery compartment.
5. Replace thermostat onto wiring subbase.
6. Press SYSTEM button until HEAT or COOL shows on the right
side of the display.
thermostat.
SYSTEM
SYSTEM
— + — +
— + — +
AUTO FAN
BATTERY
COMPARTMENT
29
OPERATION
Page 30

30
OPERATION
CLEANING
DANGER: ELECTRIC SHOCK HAZARD. Turn off power at the main service panel before cleaning, servicing, or
!
Use a dry cloth to remove any dust from the thermostat cover. Do not use water or submerge the thermostat in
water to clean. This can damage the thermostat.
If the thermostat does not operate properly, do not try to repair the thermostat yourself. This will void your
warranty. Return thermostat, shipping prepaid, to:
See warranty information at the end of this manual.
removing thermostat.
Uni-Line North America
Warranty Department
515 S. Promenade Ave.
Corona, CA 91719
Page 31

TROUBLESHOOTING
Symptom Remedy
Thermostat does not turn on system. Check wiring. (See “Installation Instructions” included with thermostat.)
Check to see if "OFF" is indicated in display. Select HEAT or COOL mode
by pressing SYSTEM button.
Heat turns on instead of cool and Check wiring and system specifications.
vice versa.
Thermostat turns on and off too much. Increase temperature differential setting. (See “PROGRAMMING.”)
Display is indicating “LO BATT.” Replace batteries soon. Be sure battery installation is correct. (See
“REPLACING THE BATTERIES.”)
Thermostat beeps once per minute Batteries low. Change batteries immediately. (See "REPLACING THE
and "LO BATT" is indicated in display. BATTERIES".)
LCD display is blank. Replace batteries to control system. (See "REPLACING THE BATTERIES".)
Thermostat does not change when SYSTEM button is in OFF or is in AUTO (changeover) position.
the ∨ or ∧ buttons are pressed.
31
Page 32

Symptom Remedy
Thermostat beeps and does not allow Autochangeover "deadband" conflict (See "SELECTING AUTO
temperature changes when ∨ or ∧ CHANGEOVER".) or thermostat is locked.
buttons are pressed.
Thermostat does not follow program. Check AM/PM indicators at time of day and programmed time changes.
(See “PROGRAMMING.”)
Thermostat may be in "Early Recovery" mode. Check dip switch settings.
(See "PROGRAMMING" and "CHANGING DIP SWITCH SETTINGS").
Thermostat may be OFF. Select HEAT or COOL mode by pressing SYSTEM
button.
Program may not have been done in HEAT or COOL modes.
(See "PROGRAMMING".)
Both HEAT and COOL programs utilize the same setpoint time and
programmable fan settings. Only setpoint temperatures can be different.
(See "PROGRAMMING".)
Check compatibility guide and system specifications.
Thermostat in MANUAL mode. (See “OPERATION.”)
Thermostat may not have been programmed in HEAT or COOL position.
Verify program. (See “PROGRAMMING – To Review or Change Program.”)
32
Page 33

Symptom Remedy
System runs too long. Temperature differential may be set too high. Decrease temperature
differential to lower setting, see "PROGRAMMING".
System will not enter AUTO Thermostat must be in PROGRAM mode to run AUTO system operation.
(Auto Changeover) mode. Press PROG/MAN button until PROGRAM is indicated in display. Then,
press SYSTEM button until AUTO is indicated in display.
Room temperature reading is If you have attached remote sensors, the thermostat will display the
inaccurate. average temperature of the activated sensors. See "INSTALLATION
INSTRUCTIONS" and "CHANGING DIP SWITCH SETTINGS".
If there are no remote sensors attached, make sure that the remote sensor
dip switch settings on the rear of the thermostat body are turned off and
the MAIN thermostat dip switch is turned on. See "CHANGING DIP
SWITCH SETTINGS."
Thermostat will not let me change AUTO (changeover) mode may be active. See OPERATION - Selecting
setpoint temperature above or below Auto Changeover. AUTO will be indicated in display.
a certain point.
Thermostat turns on system before my Early recovery mode is in effect. This optional feature turns on the system
programmed setpoint time. prior to the next setpoint time to reach the temperature you have
programmed. See "PROGRAMMING". If you wish to change your
thermostat to normal recovery, see 'CHANGING DIP SWITCH SETTINGS".
33
Page 34

Symptom Remedy
Thermostat turns off system before my Early recovery mode is in effect. This optional feature maximizes comfort
programmed setpoint time. for occupied periods and eliminates energy wasting demand cycling prior
to set-back periods. See "PROGRAMMING". If you wish to change your
thermostat to normal recovery, see "CHANGING DIP SWITCH SETTINGS".
CHECK FILTER" is indicated in main display. See "PROGRAMMING - Programming Filter Monitor".
Thermostat does not automatically Verify that thermostat is in PROGRAM mode and AUTO is indicated
switch from HEAT to COOL mode of in the display for proper AUTO(changeover) operation.
operation.
Auto (changeover) may have been disabled during installation.
(See "SELECTING AUTO CHANGEOVER".)
Fan runs continuously for hours at Review programmable fan settings entered during programming.
different times of the day (See "PROGRAMMING".)
Filter monitor indicates "CHECK FILTER" Check with your filter supplier and modify Filter Monitor settings to match
too soon for proper filter servicing interval. your servicing intervals. (See "PROGRAMMING FILTER MONITOR".)
If problems cannot be solved, call:
Technical Support: (800) 445-8299
Monday-Friday 7:30 - 5:30 Central Standard Time
34
Page 35

FIVE YEAR LIMITED WARRANTY
Maple Chase Company warrants to the original contractor installer or to the original consumer user, each new Coleman
thermostat to be free from defects in materials and workmanship under normal use and service for a period of five (5) years
from the date of purchase.
This warranty does not cover batteries, damage caused by batteries, damage resulting from improper installation, alteration,
misuse or abuse of the thermostat occurring after the date of purchase.
Maple Chase Company agrees to repair or replace at its option any thermostat under warranty provided it is returned within
the warranty period, postage prepaid, with proof of the date of purchase. Cost of thermostat removal or reinstallation is not
the responsibility of Maple Chase Company.
Repair or replacement as provided under this warranty is the exclusive remedy of the consumer. Maple Chase Company
shall not be liable for any incidental or consequential damages for breach of any express or implied warranty on this
product, or under any other theory of liability. Except to the extent prohibited by applicable law, any implied warranty of
merchantability or fitness for a particular purpose on this product is limited to the duration of this warranty.
Some states do not allow the exclusion or limitation of incidental or consequential damages, or allow limitations on how
long an implied warranty lasts, so the above limitations or exclusions may not apply to you. This warranty gives you specific
legal rights, and you may also have other rights which vary from state to state.
Instructions for return:
Pack the thermostat carefully in a well-padded carton. Be sure to include a note describing, in detail, what is wrong with the
product. Return, postage prepaid, to:
Uni-Line North America
515 S. Promenade Ave.
Corona, CA 91719
Attn: Warranty Department
35
Page 36

User’s Manual
Quick Start Installation and Programming
110-739
W
A
R
R
A
N
T
Y
7 Day Programmable
1 Heat / 1 Cool
INTEGRATED COMFORT SOLUTIONS
™
DELUXE
PROGRAMMABLE
THERMOSTAT
9700
®
ELECTRIC
E
GAS
G
Maple Chase Company
2820 Thatcher Road
Downers Grove, Illinois 60515
United States of America
 Loading...