

Page 1
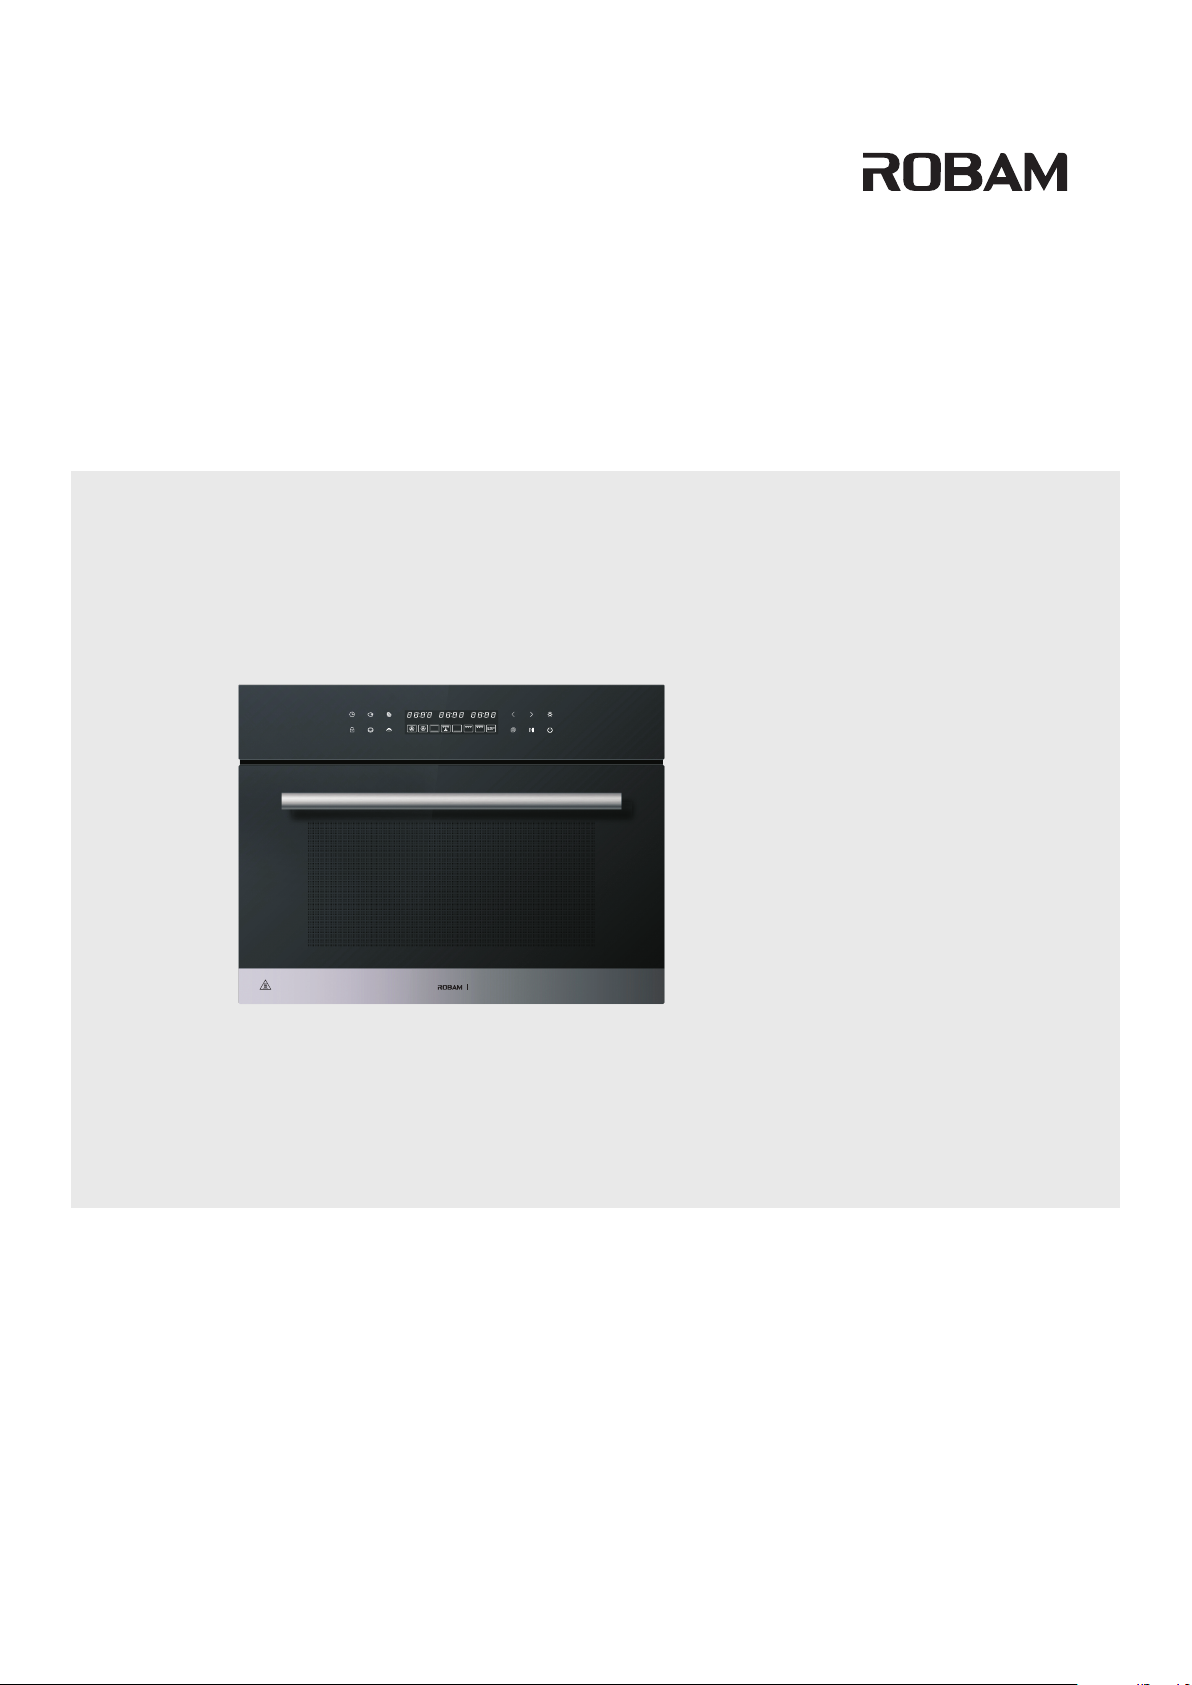
User Manual
CAUTION,HOT SURFACE.
KQWS-2400-R305
KQWS-2400-R305
Electric Oven
Page 2

Contents
Safety Precautions
Product Introduction
Installation Instructions
Operation Instructions
Common Faults and Fault Dropping
Maintenance and Care
Electrical Schematic Diagram
........................................................................................
......................................................................................
.................................................................................
...................................................................................
..................................................................................
......................................................................
...........................................................
1
3
5
6
13
13
15
Page 3
Electric Oven
Safety Precautions
In order to avoid any harm or property damage to the users and other persons, following distinctions and signs
are specially given.
All these are the important notices concerned with safety, so please abide by these notices strictly. And,
please use this product correctly on the premise that all the contents herein are understood fully.
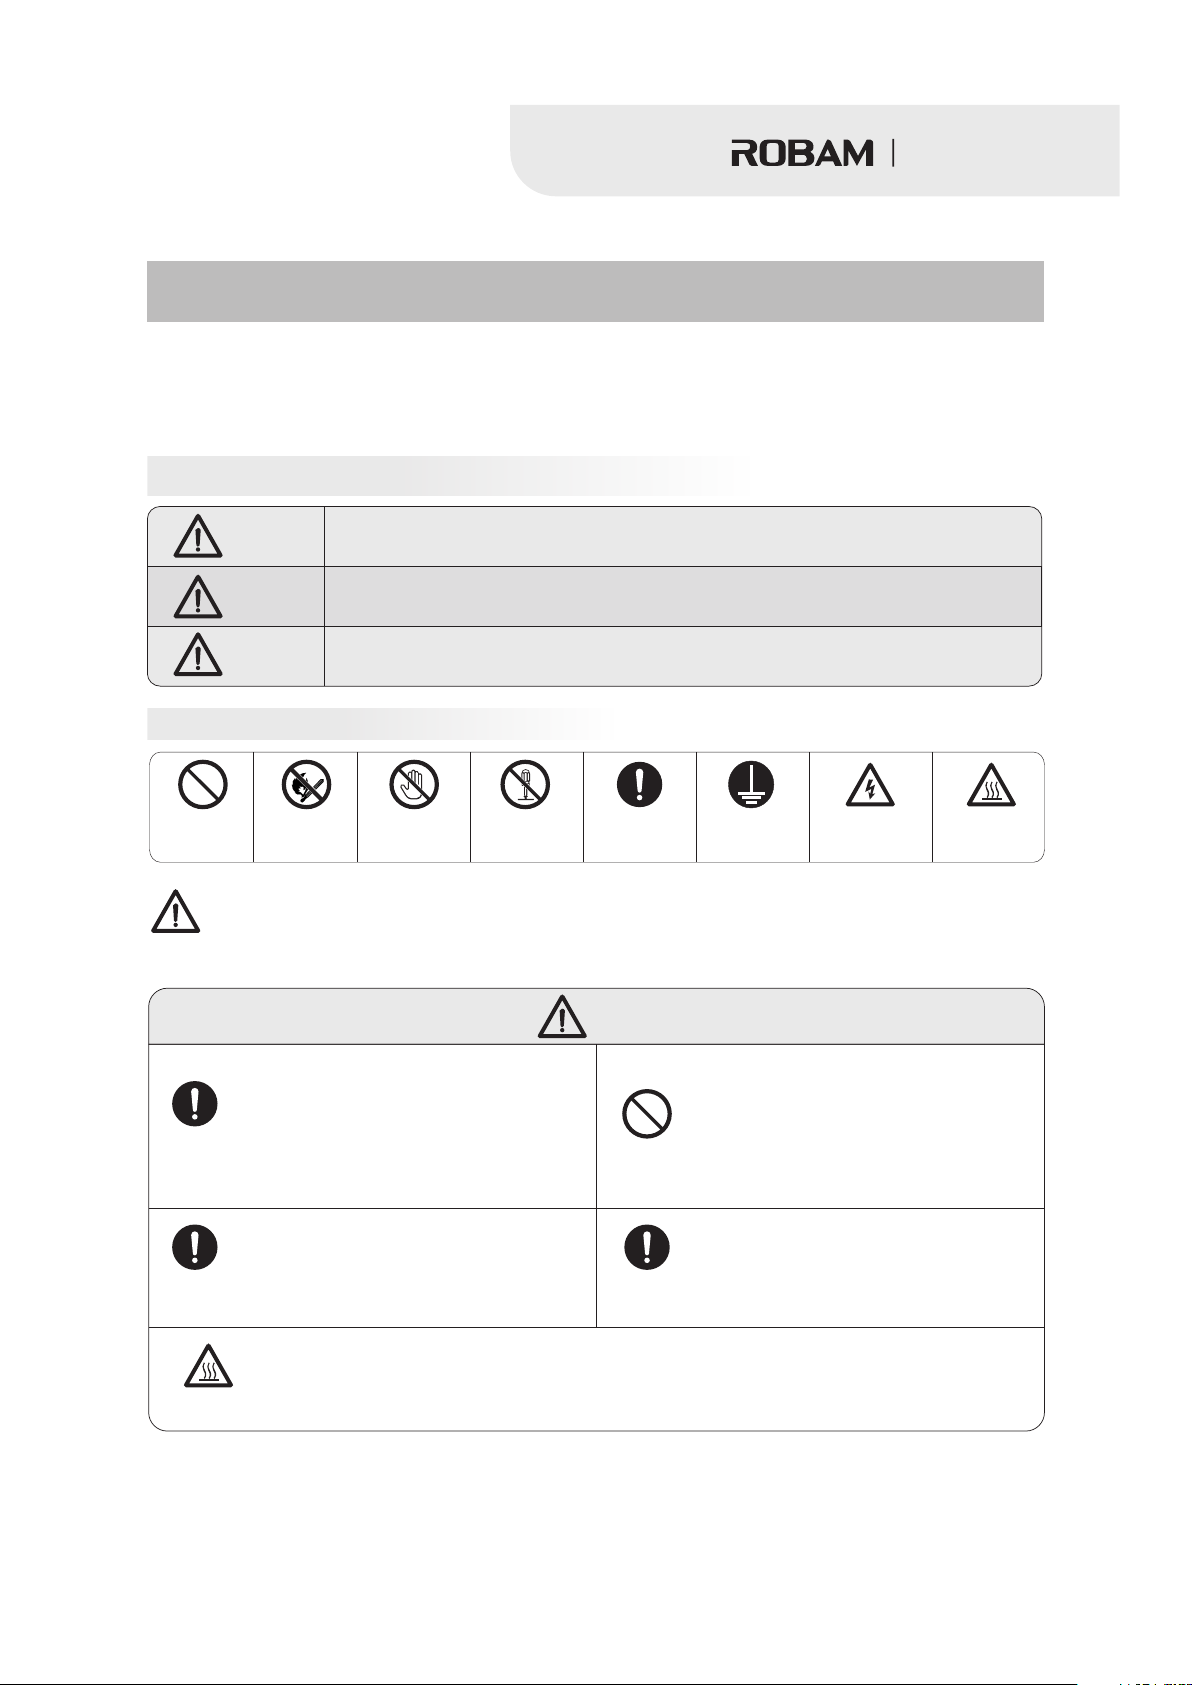
Distinctions on contents made in accordance with extent of harm and damage
Danger
War ning
Notice
Signs of the behaviors that shall be paid attention to or that shall be prohibited
Prohibited No touch No remove Abide by
War ning
Abide by
strictly
No open
flames
Before disconnecting plug from the
socket, you should grip the end of the
plug. Be sure not to disconnect the plug
with power wire in your hand, otherwise
such dangers as electric shock, short
out and fire may be caused .
Personal risk, serious injury or a fire may be very likely caused if this sign is
neglected and the product is operated improperly .
Personal risk, serious injury or a fire may be caused if this sign is neglected and the
product is operated improperly.
Personal injury or damage to objects may be caused if this sign is neglected and
the product is operated improperly.
To be
strictly
Please use this product strictly in accordance with contents of this Operation Manual.
Our company is not reliable for any property loss or personal injury caused by improper
using of this product.
Danger
Prohibited
grounded
Be sure not to use a power socket which
is loose or contacted poorly, otherwise
such dangers as electric shock, short
out and fire may be caused.
Electric
shock danger
Hot surface
Abide by
strictly
Hot surface
In order to avoid the electric shock that
may occur, please ensure that the
appliance has been disconnected from
power before replacement of a bulb.
During use the appliance becomes hot. Care should be taken to avoid touching heating
elements inside the oven. when taking out foods after using, make sure to wear the hightemperature resistant protective gloves properly in order to avoid burns.
Abide by
strictly
The complete appliance shall be kept
fa r a wa y f ro m h ea t s ou rc es and
inflammables (e.g. gas and alcohol).
1
Page 4
Electric Oven
War ning
Abide by
strictly
Abide by
strictly
Abide by
strictly
Abide by
strictly
Abide by
strictly
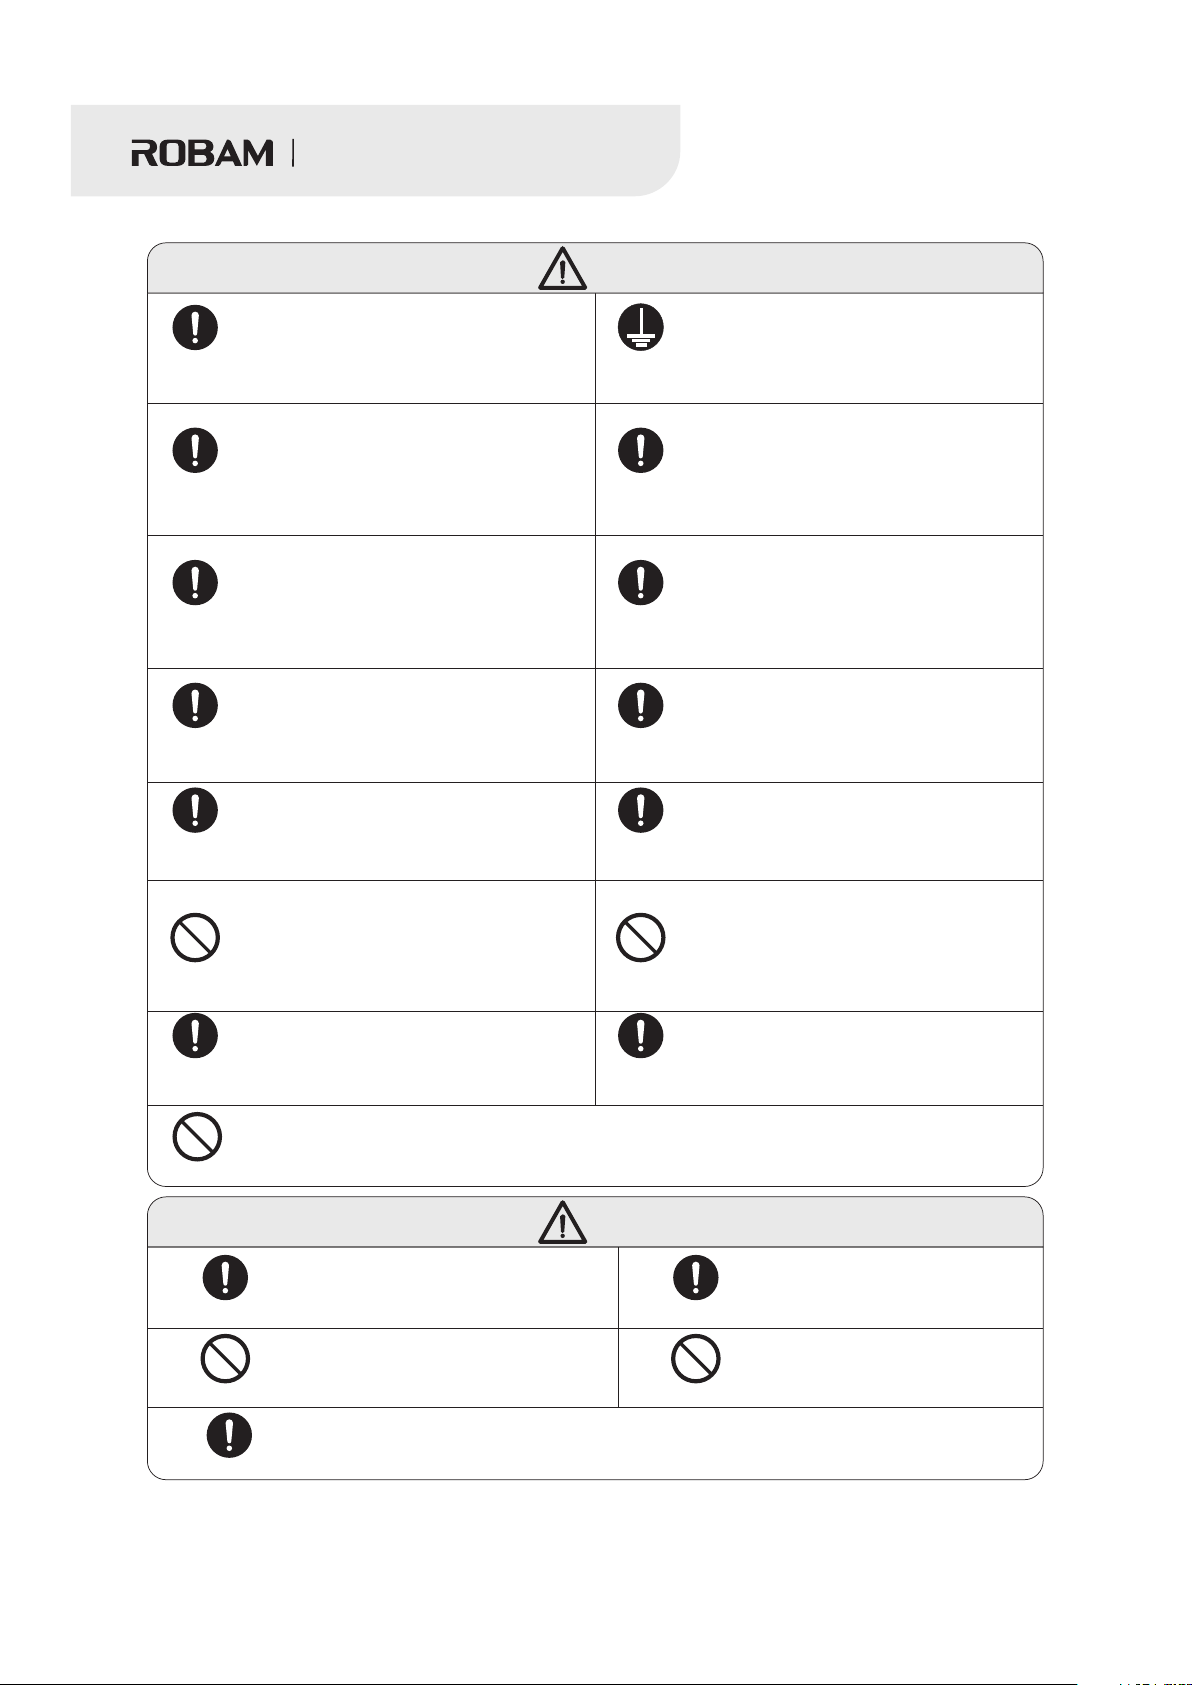
If the supply cord is damaged, it must be
replaced by the manufacturer, its service
agent or similarly qualified persons in
order to avoid a hazard.
If the appliance functions improperly,
make sure to disconnect it from the
power and stop using immediately. And,
be sure not to touch the appliance and
that it is repaired by a professional.
You should cut off the power before
cleaning of the appliance and use a
neutral detergent to clean it. Moreover,
make sure to clean it with a soft piece of
cloth, in order to prevent its surface from
being scratched.
Turn off the appliance immediately after
using, otherwise the residual fat may
cause a fire; in case the appliance is not
to be used for an extended period of time,
please cut off the power.
WARNING: Accessible parts may become
hot during use.
Young children should be kept away.
Do not use harsh abrasive cleaners or
sharp metal scrapers to clean the oven
door glass, since they can scratch the
surface, which may result in shattering of
the glass.
To be
grounded
Abide by
strictly
Abide by
strictly
Abide by
strictly
Abide by
strictly
ProhibitedProhibited
Use a separate 16A or higher socket, and
be sure not to connect several appliances
to the same power socket at the same
time, and make sure that the socket is
grounded safely and effectively.
Ma ke s ur e the power cord is not
damaged. When using the power cord,
make sure that the cord is not bent,
stretched, twisted or knotted. And, Be
sure not to press or attack the power cord
with weight.
Make sure to disconnect the electric oven
from power before removing the fan
guard. After c l e a n i ng, r e s e t the
guard properly to the original position
in accordance with the Operation Manual.
Hot air may come out when door of the
appliance is opened after using, so
please be sure not to stand too close to
the appliance to avoid burns caused by
the hot air.
WAR NING: Ensure th at the applia nce is
switched off before re placing the lam p to
avoid the pos sibility of ele ctric shock .
Never place any flammable substance
(e.g. smoke agent) in or under the
appliance; when using the appliance, be
sure not to spray any smoke agent
around it and that the appliance is always
supervised.
In order to prevent a fire, the appliance
Abide by
strictly
Prohibited
should be kept clean and the air duct
should be kept smooth.
This appliance is not intended for use by persons (including children) with reduced physical, sensory or
mental capabilities, or lack of experience and knowledge, unless they have been given supervision or
instruction concerning use of the appliance by a person responsible for their safety.
Children should be supervised to ensure that they do not play with the appliance.
Abide by stri ctly
Prohibited
Abide by stri ctly
Be sure not to operate the appliance
when any of your hand or foot is wet or
Abide by
your feet are bare.
strictly
Notice
If the appliance functions abnormally,
please disconnect the power plug and
power it on again.
Be sure not to use a steam cleaner.
Abide by stri ctly
The internal grills and ovenware,
etc. should be placed properly
during using.
The appliance cannot be used
as an indoor heater.
Prohibited
Use a temperature sensor recommended for this electric oven.
2
Page 5

Electric Oven
Product Introduction
Dear users:
We take this opportunity to express our heartfelt thanks to you for your choosing of ROBAM brand electric oven
series products. We especially recommend that you shall read this Manual carefully before installing and using
this product and keep it properly for later reference.
Our company is a professional corporation specializing in production of household appliances and kitchen
wares such as extractor hoods, electric ovens, gas cookers and disinfector cabinets in China. The electric oven
of ROBAM brand adopts advanced design concept and optimized molding and focuses on matching with
cabinet in the aspect of overall design.
Important Information
Packaging of electric oven
Please dispose these packaging materials in an environment-friendly way, in order to keep a good environment.
Be sure not to allow children to play with the packaging materials (e.g. plastic film and carton box, etc.),
otherwise it would lead to suffocation accident. So, please keep children away from the packaging materials.
Product Characteristics
Adopts the intelligent one-touch menu for easy operation and better baking taste;
The built-in full-automatic precise temperature probe adopts the dual temperature control technology to
improve the food baking quality;
The high-temperature enamel inner container is durable with flip heating pipes, easy to remove & clean;
Specially made hinge integrated with the multi-layer tempered glass door, easy and flexible to open and
close;
Multi-function baking selections to meet the diverse baking demands and make it easy for operation;
Specially designed professional baking modes with upper and lower dual temperature controls, to meet
diverse baking tastes;
Good quality baking heaters enables quick heat-up and efficient heating to extend the service life;
Adopts the energy efficient, environmental & high-temperature resistant cotton to secure the good heat
preservation performance and thus save more energy during baking.
Technica l Parameter s of the Product
Item No.
Rated Voltage
Rated Frequecy
Rated Power
Capacity
Net Weight
Outside Dim ension
W H D(mm)× ×
KQWS-2400-R305
220-240V~
50Hz
2400W
40L
34.5kg
595×455×520
3
Page 6

Product Structure
(The picture is for reference only,specifications are subject to the physical product)
Control panel
Shelf
Grill layers
Electric Oven
3
2
1
Fan cover plate
Hinge
Wire rack
List of Accessories
S/N
1
2
3
4
The side with holes
Note: when placing the ovenware, the side with holes shall be placed inward.
The should be pla ced in the .Wire rack shelf
Name
User Manual
Wire rack
Ovenware
Mounting screw
Quantity
1copy
2copy
1copy
2copy
Cavity
Ovenware
4
Page 7

Electric Oven
Installation Instructions
Drill a square hole on the setting position of the cabinet according to the installation drawing as shown below,
insert the electric oven into this square hole stably and keep the electric oven horizontal. The specific
dimensions of the hole are as shown in following table:
S/N
1
2
(The pictures are for reference only and the specifications are subject to the physical product)
Dimensions of the hole for full insertion
Dimensions of the hole for semi-insertion
5
455
59
5
0
Complete dimensions diagram
2
Mounting screw fixed plate
Name
52
0
0
5
Air vent(200× )200
A
(W x H x D)
(W x H x D)
445
B
600
560
Air vent(200× )200
C
A
B
460
450
C
565
550
B
C
2-20
20
A
Full insertion hole diagram
Installat ion Requireme nts:
The oven must not be installed behind a decorative door in order to avoid overheating.
The surface where the electric oven is to be placed on should be flat and the air around the electric oven
mounted in the cabinet shall be ventilated well as much as possible. It is recommended that the clamping
plates and fixed plates shall adopt incombustible thermal insulation material.
For easy connection and disconnection of power cord,be sure to disconnect the power supply at any time
after the installation of the oven. a separate 16A or higher socket shall be used, be sure not to connect several
appliances to the same power socket at the same time, and that the socket is grounded safely and effectively.
In case there is any other electrical appliances around, please keep a 100mm or larger mounting distance.
Semi-insertion hole diagram
5
Page 8

Electric Oven
Introduction to Control Panel
Operation Instructions
Preset key
Screen lock
button
Operation Instructions
First u se of the e lectric oven w ill generate the abnormal odo r, due to protect ive coating on the
heating compo nents at the storag e and the coating e va porated after h eating up. Th us keep the room
in goo d vent ilation conditi on and selec t th e fan baking funct ion. S et t he max . temp erature & wo rking
time an d heat up wi thout food t o evapo rate th e coati ng odor. When operatio n compl etes, o pen the
oven door to co ol down so as to secu re the good tas te for future baking.
After t he unit is pow ered off, if the temperature of t he inte rnal co mponents is stil l too high, th e fan
will stop ope ration after so me time, whic h is helpful to ext end the servi ce life of the un it.
Tips: when the electric oven is in use, it is recommended to switch on the the extractor hood.
Using Methods
1. Power on
When pl ug in , there will be a sound. All th e indic ators light up (see belo w figur e) and light out after a
few minutesThe powe r bu tton f lashes and the unit enters the standb y mo de. The display shows .If
no operatio n in 3 minutes appr oximately, it will powe r off.
One-button
menu
Temperature
Time
Functions
Heating time Adjusting key Lighting key
Change
button
OK/pause
button
Power
button
2. Time Adju stment
“ ” “ ” “ ”
When the display screen displays time ( in default), press and hold the
the time will blink, then press to adjust the hour. And, press the button again so that the
“ ” “ ” “ ”
Minute of the time will blink, then press or to adjust the minute. The adjustment will be set
automatically after several seconds, or you also can set directly by pressing the button. The time will
turn off automatically several minutes after the appliance is turned off.
Note: the time will restore to the default value
readjusted after power on.
“ ”or “ ” “ ”
button and the Hour of
“ ”
automatically after the power is cut off and shall be “ ”
6
Page 9

Electric Oven
3. Starting up
Press and hold the “ ” button to power on the unit and enter to the default quick heat up mode. The icons
and “ ” flash, indicating adjustable state (see below figure);
4. Selection of Functions
Press the “ ” or “ ” button to select the baking function as needed. The selected function icon flashes (e.g.
select the “fan baking”, see below figure). The default temperature and time is shown on the display.
1
Press the “ ” button to switch to the temperature display section and the indicator flashes. Then press the
“ ” or “ ” button to set the baking temperature (see below figure).
“ ”
3
2
Press the “ ” button to switch to the time display section and the indicator flashes. Then press the “ ” or “ ”
button to set the baking time (see below figure).
5
4
Note:
In the event of no need to set temperature or time, press the “ ” button directly to start after the
function is selected.
Users may refer to the baking reference table for temperature and time setting. Or set according to
personal taste and cooking experience.
“ ” button keeps the constant flashing state before pressing on it.
Press “ ” button to cyclically switch the temperature display section, heating time display section and
function section.
When setting the temperature and time, press and hold the “ ” or “ ” button to decrease or increase
progressively.
5. Confirmation to Start up
After the function is set, press “ ” button to start (see below figure). The electric oven automatically enters the
preheat mode. When it reaches the preheat temperature, indicating sound comes up. Place the food into the
oven. When the baking completes, beep comes on.
7
Page 10

Electric Oven
Note:
During the operation, the working state may be stopped by pressing “ ” button.
Pay attention to the baking process from time to time. If necessary, reset the time and temperature
or end the baking to avoid undesirable baking effect.
For better food baking effect, it is recommended to preheat the unit before placing the food into the
oven.
Adjustment of Settings
In the baking process, if need to change the selected baking mode, temperature or time, press the “ ” button
first to stop operation and enters to the adjustable state. Reset the function, temperature and time. Then repress
the “ ” button to start the baking.(When screen is locked, press the “ ” button to cancel the screen lock.
Then press “ ” to stop operation and adjust the setting)
Expert Baking Mode
To meet customers' diverse baking demands and taste, the professional baking mode is specially designed.The
function is capable of self-operated control the upper & lower layer of heating temperature. Operation steps are
as follows:
1. Select the “ ” professional baking mode.
2. Then press the “ ” button to enter the setting of the upper layer temperature. The display shows “ ”.
Press “ ” or “ ” button to adjust the temperature (see below figure)
2
1
3. Press the “ ” button to enter enter the setting of the lower layer temperature. The display shows “ ”.
Press “ ” or “ ” button to adjust the temperature (see below figure)
4
3
4. Press the “ ” button to enter into the setting of baking time. Press “ ” or “ ” button to adjust the timePress
“ ” button to start (see below figure)
When it reaches the preheat temperature, the indicating sound will be heard. Place the food into the oven.
When baking finishes, the beep comes on.
6
7
5
Note: the upper & lower layer temperature could be set at 30C at the maximum. The temperature at the
upper and lower layer will be shown alternatively during the baking process
One-button Menu
For users quick operation, the “Chicken wing , Beef , Biscuit , Bread ” one-touch menu is separately
provided. Directly press the menu button needed and then press “ ” to start. The display shows the real time
temperature and counting down time (see below figure).When it reaches the preheat temperature, the indicating
sound will be heard. Place the food into the oven. When baking finishes, the beep comes on.
8
Page 11

Electric Oven
1
2
Note: according to the food weight & thickness, customers may adjust the baking time by pressing “ ” or “ ”
button when menu is selected.
For easily baking the good tasted food, the (recipe & preparation method) is customized for the one-touch
menu and for your reference. You may also adjust on your own according to your cooking experience and
taste.
Roasted Chicken Wing
Ingredient: chicken wings, New Orleans seasoning, honey & salad oil.
Preparation Method
1. Slantingly make two cuts on both sides of the chicken wing, to get better taste after cure.
2. Cure: add the seasoning, honey, salad oil. The cure time is recommended to be more than 2 hours.
3. Place the cured chicken wing into the roasting rack and apply with honey.
4. Select the “ ” button to start. When it reaches the preheat temperature, the indicating sound will be
heard.Place the food into the second layer of the oven. The roasting will be completed automatically.
Recipes and Preparation Methods
Roast Beef
Ingredient: whole piece of beef tenderloin, red wine, black pepper (granulate), ground black pepper, salt,
rosemary (fresh), cooking oil, butter.
Preparation Method
1. Remove the tendon from the beef and cut into thick slices. Beat at both sides to make it soft and loose.
2. Cure: add proper amount of red wine, black pepper granulate, ground black pepper, salt, cooking oil &
rosemary. Apply butter on the surface. Cure for 20-40 minutes (the longer, the better taste) after all
ingredients are applied evenly.
3. Select the “ ” button to start. When it reaches the preheat temperature, the indicating sound will be
heard. Place the food into the second layer of the oven. The roasting will be completed automatically.
Cranberry Biscuit
Ingredient: low-gluten flour 115g, butter 75g, powdered sugar 60g, egg pulp 15ml, dried cranberry 35g.
Preparation Method
1. Add the powdered sugar after the butter is softened and stir to mix it evenly.
2. Add the egg pulp and stir (no need to beat into creamy or fluffy).
3. Add the mincing dried cranberry (do not mince into too small pieces).
4. Add the low-gluten flour and stir evenly into the dough. Wrap the dough with the preservative film. Manually
make the dough into the rectangle shape and place it into the fridge to harden it by frozen (takes 1 hour
approximately. Tips:place the dough in frozen rather than cold storage);
5. Take out the frozen dough and remove the wrap. Cut it into slices as soon as possible before it becomes soft.
Then place the cut slices into the oven.
6. Select the “ ” button to start. When it reaches the preheat temperature, the indicating sound will be heard.
Place the food into the second layer of the oven. The roasting will be completed automatically.
Tips: Pay attention to the biscuit color during the baking process. When the baking is well done, a strong
aromatic smell will come out!
9
Page 12

Electric Oven
Soft Bread
Ingredient: high-gluten flour 1000g, fresh yeast 30g, salt 15g, berry sugar 160g, butter 140g, egg 4each,
water 360g.
1. Cut the butter into small pieces.
2. Stir all ingredients together. Add proper amount of water as needed.
3. Manually make it into dough. Knead the dough sufficiently so that the thin film could be pulled from it.
4. Enters into the fermentation process till the dough ferment into the 2 times in size approximately. Knead
the dough and divide it into the smaller dough of the same size. Make the smaller doughs into the round
shape and ferment for another 20 minutes till becomes into the suitable size.
5. Place the fermented dough into the baking tray and apply evenly on the surface with a layer of egg.
6. Select the “ ” menu button to start. When it reaches the preheat temperature, the indicating sound will
be heard. Place the food into the second layer of the oven. The roasting will be completed automatically.
Note: fermentation box or the oven may be used to ferment the dough (It is recommended to place a pot
of hot water inside the oven when using it for fermentation to keep the certain moisture and temperature).
Preset Func tion
For example: current time is 9am, users would like to start cooking at 10:30. Detailed operation steps are as
follows:
1. Select the baking function first. Press the “ ” button to set the delay function and the hour setting is actuated.
Set the hour to 10 through the “ ” or “ ”button.
2. Then press “ ” button to actuate the minute setting. Press the “ ” or “ ” button to set the minute to 30
3. Press “ ” button to start the delay function. The delay menu icon flashes.
4. When the time shown on the display panel reaches “10:30”, the unit starts the baking mode automatically.
Tips:
lPress the “ ” button to start the delay function. Repeat pressing the button, it will switch between the
hour setting and minute setting. Operation repeats in such way;
If need to cancel the delay function, press and hold the “ ” button to cancel.
The delay time is the time starting the baking;
Before using the preset function, please make sure that the time displayed on the product is correct.
Screen Lock Function
This function is applicable for locking the screen in the operation to avoid the incorrect operation by children or
other person:
1. In the working state, press “ ” button and the indicator comes up. It enters into the program locking state.
2. If need to unlock the screen, press and hold the “” button and the screen will be unlocked.
Note: “ and ” buttons will not be locked. In the screen lock state, if the “ ” button is pressed and held, the
unit will be powered off.
Lighting Function
In the power on state, the lighting is automatically started. In the cooking process, press “ ” button to activate
the lighting function. Press the button again to switch off the function. Light will switch off automatically after 1
minute with no press.
Power off
1. When the baking operation completes, the beep comes on, indicating that it stops heating and enters the standby
mode.
2. In the standby mode (without any operation), the unit will automatically power off in a few minutes.
3. When the electric oven is running in the baking mode, press and hold the “ ” button to directly stop heating and
switch to the power off state.
10
Page 13

Baking Reference Table
Electric Oven
Function Food
Corn
Rapid
heating
Wind
baking
Baking
Fan
baking
Barbecue
Strong
grill
Note:
Vegetable
Egg tart
Kebab
Potato chips
Sweet potato
Cupcake
Cake
Steamed
creamy
custard bun
Biscuit
Pizza
Pork chop
Streaky pork
Bacon
Wing middle
joint
Drumstick
Roast duck
Roast chicken
Shrimp
Beef
Pork chop
Kebab
Sausage
Wing root
Beef
Sausage
Bacon
Roast chicken
Wing middle
joint
Wing root
Drumstick
Kebab
Roast fish
Position
of Grill
2
2
2
2
2
2
2
1
2
2
2
2
2
2
2
2
2
2
2
2
2
2
2
2
2
2
2
2
2
2
2
2
2
Apparatus
Adopted
Wire rack
Wire rack
Ovenware
Wire rack
Ovenware
Wire rack
Ovenware
Stainless steel
cookware
Ovenware
Ovenware
Ovenware
Ovenware
Ovenware
Ovenware
Wire rack
Wire rack
Wire rack
Wire rack
Wire rack
Wire rack
Ovenware
Wire rack
Wire rack
Wire rack
Ovenware
Wire rack
Ovenware
Wire rack
Wire rack
Wire rack
Wire rack
Wire rack
Ovenware
Temperature
( )
℃
215-2 25
20 0-2 10 8- 15
20 0-2 20
175-1 85
21 0-2 20 35 -45
155-1 65
155-1 65
200-2 20 12-18
195-2 05
185-1 95
135-1 55
175-1 85 8-15
200-2 20 10-25
175-1 85
175-1 85
195-2 05
180-2 00
195-2 05
Baking Time
(min)
25-30
15-20
10-15175-185
18-23
23-28
23-28
6-11195-2 05
10-18175-185
15-20175-1 85
45-50215-2 25
7-12
12-17
15-20175-1 85
67-72180-200
80-85
12-17
10-15195-205
15-20195-2 05
35-40
12-17
15-20185-1 95
8-13
85-90175-1 85
15-20185-1 95
40-45175-185
15-20185-1 95
15-20215-2 25
10-20
Remarks
2-5 eggs, suitable amount of flour (set
the time and temperature according to
the actual amount)
9~12mm/lump thick approximately
2mm/lump thick approximately
50g/each weight approximately
60g/each weight approximately
1800g/each weight approximately
1600g/each weight approximately
9~12mm/lump thick approximately
9~12mm/lump thick approximately
50g/each weight approximately
9~12mm/lump thick approximately
2mm/lump thick approximately
1200g/each weight approximately
50g/each weight approximately
50g/each weight approximately
50g/each weight approximately
500g/each weight approximately
The food baking temperature and time in the above table is for reference only. Users may set the temperature, time,
baking function & baking layer according to personal taste & experience.
When roasting chicken, duck and bigger piece of meat, it is recommended to roast at lower temperature first and
then switch to the higher temperature for better taste.
Before roasting food, users may cure the food as needed by using the prepared ingredient for approximately 30-40
minutes so that the taste is better.
Users may also select the different cooking function for the same food according to personal experience.
In order to have even heat during the baking process, it is recommended to turn over to the other food side.
11
Page 14
Electric Oven
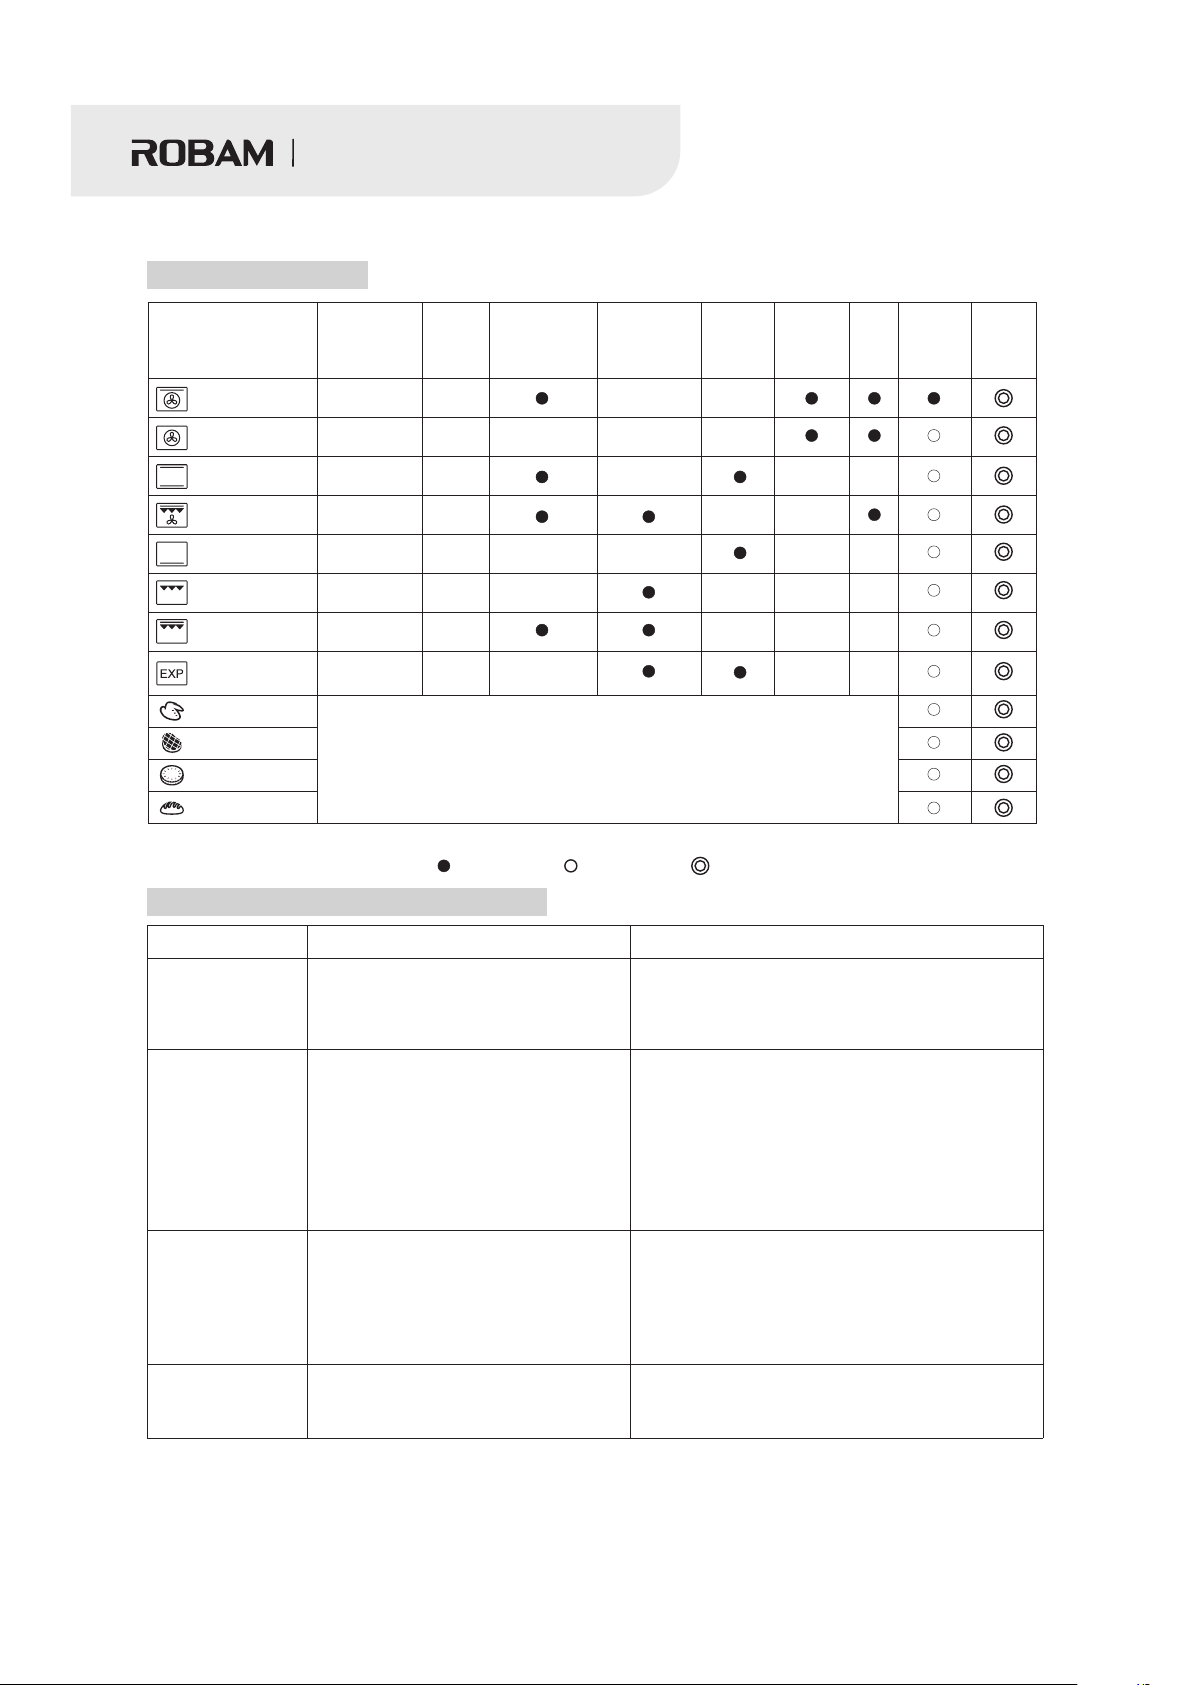
Baking & Heating Modes
Function
Rapid heating
Wind baking
Baking
Fan baking
Bottom heating
Barbecue
Strong grill
Expert baking
Default
Temperature
(℃)
200 50
200 60
160 60
220 60
160 50
180 50
180 40
Upper16 0
Lower13 0
Default
Time
(min)
20
Upper Outer
Heating
Tubes
Upper Inner
Heating
Tubes
Bottom
Heating
Tubes
Rear
Heating
Tubes
Rear
Fan
Lighting
Cooling
Fan
Chicken wing
Beef
Biscuit
The modes and t emperature wi ll be changed a nd
controlle d automatical ly
Bread
Note: users can know the heating ways and select an appropriate baking function accordin to the heating modes
mentioned in this table.
Required
Optional
Subject to te mperature control
Common Baking Symptoms and Remedies
Symptoms
Uneven baking
Food baked
Upper surface color
Or the bottom color
is too dark
Cake or pastry
baked has crack
and deep & thick
crust layer
Food baked
color is too light or
not well baked
Possible Causes
※Incorrect baking layer
※Food is not placed in the central position
of the baking tray
※Incorrect function selected
Incorrect function selected
※
※Food size is not even or food is not
placed evenly
※Baking temperature is too high
※The baking layer position is too high or
too low
※The oven door was too frequently open
during the baking process
Too long baking time
※
※Baking temperature is too high
※Baking layer position is too high
※Incorrect recipe or wrong preparation
process
※Incorrect vessel selected
※
Baking temperature is too low
※Baking layer position is too low
※Too short baking time
12
Remedies
※
Select the correct baking layer position
※Place food in the central position of the baking tray
※Select the correct function
Select the correct function
※
※Cut the food into even size and place the food evenly
※onto the baking tray
※Switch to lower temperature
※Change to the lower or higher layer
※Do not open the oven door till half of the baking time
is completed at least
Adjust the baking time
※
※Switch to lower temperature
※Place the cake/pastry in the lower layer
※Change the recipe and correct the preparation
process
※Change to the proper vessel
※
Adjust the baking temperature
※Place the cake/pastry in the higher layer
※Extend the baking time
Page 15

Common Faults and Fault Dropping
Electric Oven
Faults
Electric oven will not
start to work
Light will not come on
Insufficient heat up
Smoke comes from
the electric oven for
the first use
Display problem
Display problem
Display problem
The solid heating
pipe color fades
Possible Causes
※
Power supply is not connected
※Incorrect operation of the function button
Bulb is broken
※
※Open circuit of the bulb connection wire
or loose connection
※
Open circuit of heating pipe
※Sensor failure
※Protective oil is evaporating
※Upper fan malfunctions
※Sensor failure
※Communication failure
※
It is normal for the heating components
and the decoration circle color fades in
the baking process
Use after the power is connected.
※
※Operate correctly
Replace the bulb
※
※Contact the qualified personnel for repair.
※Contact the qualified personnel for repair.
※Use cloth to wipe
※Contact the qualified personnel for repair.
※Contact the qualified personnel for repair.
※Contact the qualified personnel for repair.
※Normal phenomenon needs no treatment
Fault Dropping
Note:
If the above problems could not be solved, contact ROBAM service center or the distributor. Disassembly by
unqualified personnel is not allowed.
Maintenance and Care
Important instruction: before cleaning the electric oven, power supply must be disconnected. Do not use
steam to clean the oven.
The electric oven must be kept in clean condition to make sure no fat or grease accumulated around the heating
components & fan. Baking trays & baking racks must be cleaned thoroughly to avoid the accumulated fat
resulting in fire. Meet can be wrapped with the aluminum foil during roasting for easy clean. Any fat or grease
may generate a layer of lacquer deposit accumulated in the oven, which is difficult to clean. Thus, the oven must
be cleaned thoroughly after each use.
1. Inner chamber: use hot water for clean. Do not use corrosive or abrasive detergent to clean.Use the nylon
brush or the mild detergent to clean the stubborn dirt. Do not use the steel wool for clean to avoid the unrepairable
damage on the surface.The detergent inside the chamber must be cleaned without any residue. Use cloth to wipe
the detergent after clean to keep the chamber in dry condition.
2. The stainless steel decorative plate: use the soft damp cloth to wipe the plate. For the grease which is difficult
to remove, use the mild detergent or the special stainless steel detergent to clean. Follow the texture of the
stainless steel when wiping the plate. Use clean and dry cloth to wipe the plate after cleaning.
3. Glass panel: glass on the door and control panel must be immediately cleaned when there is any dirt. Use the
mild detergent to clean the stubborn dirt.Do not use the steel wool for clean to avoid any scratch on the surface.
Use cloth to wipe after cleaning.
13
Page 16

Electric Oven
4. Disassembly and assembly of the fan lid: the fan lid is fixed by the 4 crews inside the chamber. Remove the fan
lid by rotating the screws in the anticlockwise direction.Note: the fan lid must be reassembled after cleaning
5. Disassembly and assembly of the light: remove the light by rotating the glass cover in the anticlockwise direction
and then rotating the bulb in the anticlockwise direction. Reassemble the light by rotating the bulb in the clockwise
direction and then rotating the glass cover in the anticlockwise direction.
6. For easy clean of the top of the inner container, the upper heating pipe could be turned downwards.Rotate the
fixing leg at the upper heating pipe by 90 degree (see the illustration). The front stator may be removed from the
fixing leg and it can be turned downwards by 20 degree approximately (see the illustration).Re-fix the upper
heating pipe by the reserved operation. Place back the stator into the heating leg and then rotate by 90 degree
for clasp up.
Fixing leg of the upper
heating pipe
Rotate 90 degree
Stator
Upper heating pipe
Top of the inner container
Upper heating pipe
Diag. 1 Diag. 2
7. Disassembly and assembly of the rest rack (same method for the left & right rest racks): press the location of
rest rack (see the illustration) till the rack leaves the positioning screw. Take the racks out by following the arrow
direction after slanting at a certain angle and disassembles the rest racks. Reassemble the rest rack by following
the illustration to align and insert the lower section of the rack into the hole. Then clasp the upper section into
the positioning screws.
1
Press
Hole 2
Hole 1
Diag. 3
Diag. 4
14
Page 17

Electrical Schematic Diagram
Electric Oven
L
N
220V~ 50Hz
Plug
Over-temperature
protector
Upper sensor
Lower sensor
Over-temperature
protector
Heating fan
Cooling fan
Lighting lamp
Computer controller
Upper inner heating tube
Upper outer heating tube
Rear heating tube
Bottom heating tube
M
M
Special Statements
Technical improvements of the product (if any) will be incorporated in the User Manual of a new version without
notice. If any alteration occurs on appearance or color of the product, the actual specifications are subject to the
physical product.
15
Page 18

Edition: A 0/
Publicati on Date: August, 01,2017
 Loading...