

Page 1
Before operating this unit, please read the ser manual completely and keep it. u
User Manual
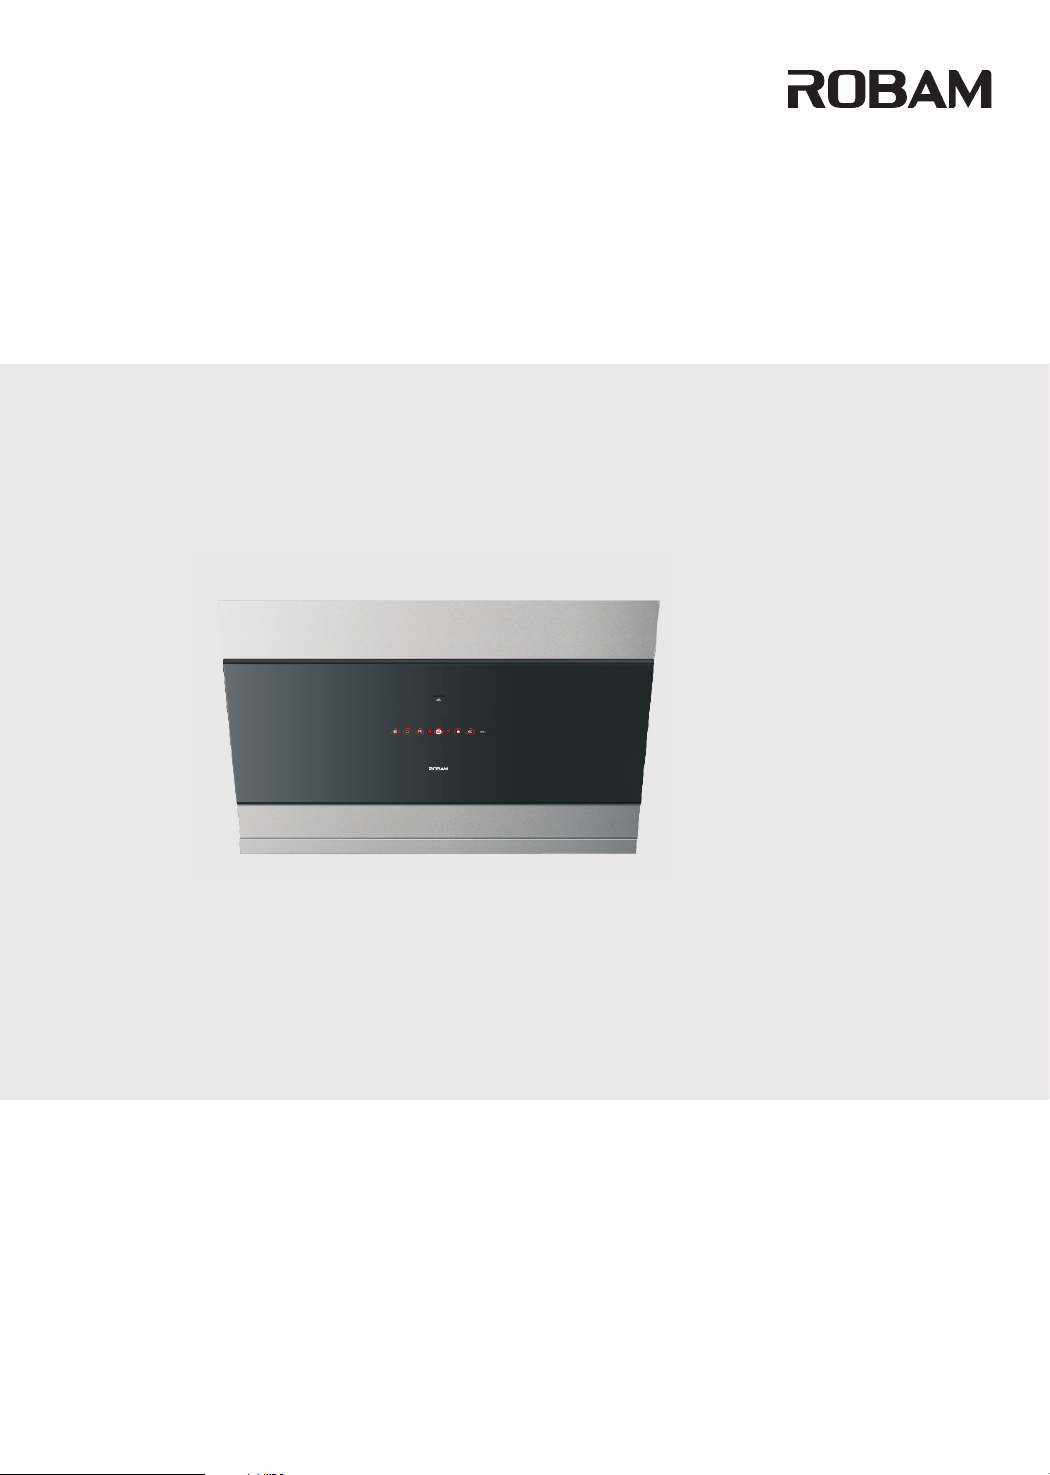
CXW-220-A670
Range Hood
Page 2

CONTENTS
Safety Precaution.......................................................................................... ....1
Important Information....................................................................................... .............3
Product Overview................................................................................................. ........4
Packing List......................................................................................................... .... ....4
Installation Instructions...................................................................................... ....5
User Manual......................................................................................................... 8
Maintenance.......................................................................................... 10
Removal of Components........................................................................................... 10
Circuit Diagram....................................................................................................... .. 12
Troubleshooting of General faults........................................................................................ 13
......................
..........
...........
........... .
.................
..................
...............................
............
........... .
..
Page 3
Range Hood
Dear users:
Thank for your buying our range hood. Please accept our best regards.Please read this user manual
carefully before installation and operation.
*The pictures in this manual only for your reference. If the picture isn’t accord with object, subject to object. We
keep to right to update appearance, structure or products without notice.
Safety Precaution
In ord er to avoid har m or proper ty damage to th e users or ot her person, t he followin g distinc tion and mark s
are st ipulated. The y are importa nt safety p recaution , please co mply strict ly based on the f ull under standing.
Subject t o harmful or d estruct de gree
Danger
Warnin g
Notice
If ign ore this sign a nd operat e product imp roperly, it’s high ly possible t o cause dan ger,
seri ous injury or f ire.
If ign ore this sign a nd operat e product imp roperly, it’s poss ible to cause d anger, ser ious
inju ry or fire.
If ign ore this sign a nd operat e product imp roperly, it’s poss ible to cause i njury or lo ss.
Notice an d Prohibit M ark
Proh ibit
War ning
Prohibit
Flame
Plea se use this pro duct acco rding to manu al strict ly, or RO BAM shall n ot take any
resp onsible cau sed by impr oper operat ion.
Prohibit
Touch
Prohibit Touch
by Wet Hand
Prohibit
Disassembly
Danger
Don' t al low childre n or w eakling to use
rang e h ood separa tely, or it ma y c ause
Proh ibit
Proh ibit Proh ibit
Execution
Strict
Execution
elec tric shock or o ther acci dent.
Prohibit water on motor, switches or
other electric parts; Prohibit wash range
hood by water spray. Don’t use range
hood if wet or it may cause electric
leakage or shock.
The electric wire must be cut off before
clean, install or maintain range hood
avoiding from electric shock.
Please turn off range hood immediately
if pan got fire (range hood shall
ag gra vat e fire if it’s working) and
extinguish fire by effective action. For
example, cover flame by metal cover, turn
off gas valve immediately and remove
inflammable things.
Prohibit Touch
by Wet Hand
Proh ibit Strict
Strict
Execution
Strict
Execution
Neccessary
Earthed
Do n’t t ouch plug, elec tri c par ts or
butt on by wet hands , or it may caus e
elec tric shock.
Don’ t cha nge, s tretch, bind or press
elec tric wire , or it’s possibl e to cause
elec tric shoc k or fi re becaus e of brok en
wire .
Proh ibit any c hange of inte rior c ircuit,
or it may cause injur y or other d anger,
for ex ample, elec tric shoc k or fire.
Any abnorma l, plea se turn off power,
take off plug or cut off electri c sou rce,
and contac t serv ice. It’s poss ible to
caus e electr ic shock or fire if usin g
rang e hood under ab normal si tuation.
Caution
Electric Shock
Caution Scald
1
Page 4
Range Hood
Warning
Prohibit
Disassembly
Strict
Execution
Strict
Execution
Strict
Execution
Range ho o d must be i n s t a l l e d ,
d i s a s se mbl e d o r m a i n t a i ne d b y
professional person.
In order to ensure safety, range hood
must be installed by specific accessory (
especially expansion pipe and wooden
screws, or it may cause accidental drop
of range hood). The pipe bore and hole
must fit tightly during the installation of
metal expansion pipe. It is prohibited to
make excessively large hole to prevent
accidental drop of loosening expansion
pipe.
If e l e c t r i c a l wir e i s broken , o n l y
prof essional en gineer ca n replace it.
If th e rang e hood will be used w ith th e
kitc hen range bur ning gas or other
fuel s, the room mus t be well ven tilated.
Proh ibit
Strict
Execution
Strict
Execution
Strict
Execution
Put out t he stov e fir e in time wh en it
is not use d. Th at the stove fir e bakes
the r ange hoo d direct ly is p rohibited .
Do not bar becue food dire ctly under
the range hood l est the range hood is
dama ged and a n accident sh ould
occu r.
The ra nge hood must be us ed by
spec ific plug a nd proper ly ground i t. It’s
poss ible to cause elect ric sho ck, h ot
plug or fire because of impro per
ele c t ric wire . In s talla t i on must be
exec uted by pro fessional p erson bas ed
on lo cal elec trical regulati ons. Befor e
co nnect ele ctr ici ty, pow er mu st be
turn ed off .
All opera tion mus t com ply with our
safe ty guidel ines as well as local sa fe ty
regu lations.
The range hood is used only daily life not
special environment ( for example, outside).
And it’s not allowed to exhaust dangerous or
explosive matter or air. It should be put
under dry and ventilation environment
without dangerous air.
Strict
Execution
Strict
Execution
Strict
Execution
The range hood and electric circuit must be
installed by skilled and trained personnel
with required qualific a t i o n . W h e n
installation, the related regulation, standard
or instruction on fire must be complied. It
may cause danger because of improper
installation, for example, electric shock,
drop or fire accident.
It may get fire if cleaning range hood not in
accordance with manual.
Keep a good habit to turn off gas hob and gas valve if go outside, sleep or finish operation. Replace or
check gas pipe regularly, since gas alarm device can’t completely avoid accident caused by gas
leakage.
Strict
Execution
Prohibit
Touch
The outlet must be connect with outside. In
order to ensure safety and fresh air, waste
gas should be exhaust to outside. Don’t
exhaust waste gas to the wall, loft or garage.
Don’t touch bulb if it’s on or just close in
short time, or it may cause scald.
2
Page 5

Notice
Range Hood
Proh ibit
Strict
Execution
Strict
Execution
Strict
Execution
The gas from range hood shall not be
exhausted to hot flue used for burning gas or
other fuels.
Because the installation is difficult and
hood is heavy, the installation shall be
executed by professional person based
on manul.
Don' t break electri c wire or other
in v i s i b le e q u i pmen t when c u ttin g
some thing or dril ling hole s on ceiling.
When the oil exceeds 2/3 or near tick
mark in the oil cup, clean it in time. Don't
eat waste oil from oil cup.
Strict
Execution
Strict
Execution
Strict
Execution
Strict
Execution
Th e temp e r a t ure f o r r a n g e h o o d
work ing can’t exc eed 40℃.
Be f o r e r e m o vi n g ra n g e ho o d fo r
inst allation, cle an or maint ainance ,
powe r m ust be cut off avoidin g f rom
elec tric sh ock. Wh en inst allation, clean
or ma inta inan ce, pro tect ive gl o ove
must b e wear avoidi ng from inj ury.
When range hood is using in well
sealed building, i t should have air inlet
or open door to ensur e good ventilation.
The wall of installing range hood needs
enough strength. For hollow walls, the
thickness of solid layer of hollow wall must
be more than 30mm, but for concrete walls,
it can be drill holes directly. The range hood
must be fixed on the wall firmly.
Important Information
重要信息
Package of Range Hood
Please settle those packages carefully in order to protect environment.
Don’t allow children to play plastic film and package, it may cause asphyxia. Please avoid children near package
material.
Before use Range hood
This range hood exhaust fume outside.
Please read this manual and all information carefully before installation and operation. Please comply with our
suggestion. If it’s necessary, please read manual for gas hob. And please keep these manual carefully for future
reference.
If range hood has obvious damage, please don’t electrify and contact operator.
This appliance is not intended for use by persons (including children) with reduced physical, sensory or mental
capabilities, or lack of experience and knowledge, unless they have been given supervision or instruction concerning
use of the appliance by a person responsible for their safety.
Children should be supervised to ensure that they do not play with the appliance.
3
Page 6

Range Hood
Technical Specification
Product Overview
Model
Powe r Supply
Total Pr essure Effici ency
Nomi nal Pressur e
Air Fl ow Rate
Maxi mum Static Pr essure
Odour Decrease Rate (Normal)
Odour Decrease Rate (Instantaneous)
Note : 1.The devia tion betw een the expre ssed valu e and measure d value of ai r flow rate, ma ximum stati c
pres sure and nomi nal wind pr essure shal l not excee d -10% of the exp ressed va lue.
2. Whe n stir-fryi ng functi on is enabled , the power w ill increas e by 10% comp ared to stron g power (leve l-2),
and th e air flow rate i s 20m /m in.
3
CXW-220-A670
220- 240V~ 50Hz
≥23%
340P a
19m /min
3
430P a
≥98%
≥80%
Rate d Input Power o f the Hood
Rated Input Power of the Main Motor
Maximum Input Power of the Light
Dimensions (L×W×H)
Net Weight of the Host
Grea se Separati on Rate
Nois e
57dB
222W
220W
≤2W
895×399× (mm)548
27.5 kg
≥92%
Body Size
895
548
399
The ma rked sizes ar e for refer ence only. (Unit : mm)
Packing List
Plea se check list s if open the p ackage.
No. Nam e
1
2
Pack ing List
alum inum exhaus t pipe
Exha ust pipe conn ection
3
4
5
6
7
Exha ust pipe fixe d strip
Exha ust pipe tape
Plas tic expansi on pipe
Rang e hood
Φ185 ( OD)
User m anual
Quan tity
1 piece
4 pieces
1 piece
1 set
No. Name
8
S T4x18 self-tapping screw
9
S 4× wooden sc rew T 60
10
Hitc hing foot sto pper
11
M6 met al expansio n pipe
12
13
14
4
Chec k valve
Hitc hing foot
Oil cu p
Quan tity
1 set
10 piece
4 pieces
1 piece
1 pair
1 piece
1 piece
Page 7

Range Hood
Installation
Warning
1.Th e air mus t not be dischar ged into a flue th at is use d for exh austing f umes fr om applia nces burn ing gas o r
othe r fuels,t he discharge of air mu st ful fill the req uiremen ts of local regula tions.
2.No te th at when install ing the metal expan si on pipe, the pi pe shall mat ch with the hol e in size. Overlarge hole is
proh ibited, as it wil l resul t in loos e pipe and accid ental drops .
3.Th ere sh all be adequ ate ve ntilation of the room wh en the range hood is us ed at the same ti me as applia nces
burn ing gas or other fuels.
4.If the flue apertur e is less than air duct aperture, it will influen ce the f ume suct ion effect and the too long air
duct w ill influen ce the fume s uction effect, too.
5.Th is product is only for daily use and please do not use it under special envi ronment (e.g. outdo or); nor ca n i t
be u sed to exha ust hazar dous or e xplosive substance or g as. Befor e assembl y, the prod uct shall be p laced
in env ironment wh ich is dry, v entilated wit hout co rrosive and harmf ul g as i n the surro unding.
Prepara tion for ins tallatio n
Surrounding
●
Keep the hood away from too many doors and windows, so as to avoid air convection affecting the efficiency.
●Tools preparation
The hood will be installed with the following tools:1. an impact drill (with drill bit) 2. a wrench 3. a screwdriver; and
4. a ruler.
Notice
● Install ation and circu it se tting must be done by experi enced profes sionals. Onl y a prof essionall y tra ined
pers on wit h an i nstallati on q ualificat ion can insta ll t he hoo d. N on-profes sionals are not allowed to insta ll,
dism antle and rep air the hoo d.
●Plea se do not power o n the hood be fore instal lation to a void electr ic shock.
●Do not e xpose the hoo d if y our kitch en is under ren ovation, be cause const ruction m aterials, d usts, paint ,
coat ings, a nd emitte d gases will c orrode an d tarni sh the ho od surf ace. Th erefore, it is r ecommende d to in stall
it aft er the renova tion is com pleted.
● D on't i nstall the h ood on w ood and other com bustible walls. The wal l shal l be made of nonco mbustible
mate rials with en ough stre ngth and the su rface sha ll be flat.
●The hood may have ver y sha rp edges. So, plea se we ar protectiv e g loves during hood in stallatio n, cleaning
or rep air.
●When drill ing o n t he wa ll or ce iling board, ke ep aw ay from embedde d wir es and o ther conceal ed devices to
avoi d electric sh ock and fir e.
● Do not instal l the hood at a t oo high positio n a s wel l a s kee p t he hood free from distu rbance of ambie nt
airf low lest the re duction o f smoke pumpi ng effect shall o ccur.
●When mak ing cabine t, please lea ve space for ins tallation and disassem bly of the hood in o rder to maintai n
and ov erhaul the ho od.
●When i nstalling , please ke ep the machin e body rema in horizont al.
●Please use single phase groun ded soc ket a nd th e hood shall be well grounded (wat er pi pe grou nding is n ot
reli able and gas pi peline gr ounding has r isks of cau sing fire dis aster and e xplosion) .
● In or der t o ens ure s afety and success ful i nstallati on, p lease use standar d acces sories provi ded w ith t he
hood f or installa tion, oth erwise the ho od may be at ri sk of falling d own.
●If t he power co rd is dam aged, in or der to av oid danger, it must b e replaced by manuf acturer, pr ofessiona ls
of it s mainte nance depa rtment or similar departme nts. Pleas e do not carry out re structu ring, stre tching,
knot ting and squeez ing o r a pply heavy obje cts t o t he po wer cord, etc., otherwi se it may cause power cord
dama ge easily, leadi ng to acciden ts such as el ectric shoc k and fire di saster, etc.
●Afte r installat ion, plea se clean the su rface of th e hood, and the n supply po wer for test ru n.
5
Page 8

Range Hood
Install ation
Note: All data units in the following figures are in mm
Figu re 1
Movable decorative
panel (homemade)
10
300~400
Cabinet dimension is for reference only
Figu re 3
10
848~94 8
800~85 0
350
500
235
Hitching foot
55 55
110
Hole s ize of the exha ust pipe Φ20 0mm
Figu re 2
Wal ls
391
215
399
895
Ceil ing hole size s
(Pro jection siz e of the hood t op)
1. Determine the position: Preliminary dimensions
of cabinet is shown as Figure 1, ceiling hole size is
shown in .
Hitc hing foot sto pper
72±2
35±2
509
2. Ins tall hitchi ng foot: ac cording to th e size of the h itching foo t, drill four 6 0-70mm- deep holes on t he wall
acco rdingly wit h an 10mm-d iameter dri ll bit (ove rlarge hole s are prohi bited). Pre ss the expans ion pipe in to
the ho les, and then r eliably f ix the hitchi ng foot wit h 4 accompany ing ST4×6 0 wood screws . Drill a hole wi th
diam eter of 10mm an d depth of 50 -55mm at the po sition 72 mm above the fo ur holes an d insert the M6 m etal
expa nsion pipe in to the hole . (As shown in Fi gure 3)
3. Ins tall the hood b ody: fix th e check valve a s shown in Fi gure 5. Then dire ct the hangin g holes in the ba ck of
hood a t the hooks of hi tching fo ot accordin g to Figure 3 , and press the m together. Sh ake the bod y to check if
it's h ung securel y. Aft er the body is mo unted, in stall the hit ching foo t st opper and g askets to the M 6 metal
expa nsion pipe, a nd then tig hten the nuts ( to preven t accidenta l decoupl ing of the body u nder extern al force) .
Install t he aluminu m foil exhaust pipe
●Dril ling posi tion of the alu minum foil ex haust pipe (p ublic flues do not requi re d rilling)
a. Aluminum foil exhaust pipe an d hob facing th e wind ow: Remo ve one of the glasses and install a plyw ood with
vent ilation holes or punch direc tly on th e glass .
b. Hob away from th e wind ow: In stall the al uminum foil exhaust pipe through the window that is cl ose to the hob
and connected out side; or in stall it by punch ing on the wall that is close to th e hob and connect ed o utside.
6
Page 9

Range Hood
c. Dr ill hole through the wall : Determin e the loc ation of the alum inum foi l exhaust pipe agai nst the wall and draw
the drill ing range (i.e. a circl e slightl y larger than the pip e OD). Then use a long drill bit to drill through the wa ll. Pay
atte ntion to the wall st ructure and mater ial, so as not to de stroy other par ts o f the wall.
●Link the alu minum foil ex haust pipe
Inse rt the end of aluminum foi l exha ust pipe without fixed strip to the pipe connecti on and stick wit h tape s, the n
stra ighten the aluminum foil exhaus t pipe and connect it to the publi c flue outl et (If there is no public flue, plea se
stra ighten the aluminum foil exhau st pi pe to th e outdoor s). This can be done direc tly whe n the pub lic flue outle t or
wall hol e is la rger than the alu minum foil exhaust pip e. O therwise, the re a re five typ es o f pipe small ends(OD : 140,
150, 160 , 170 and 180 res pective ly) to be chose n from accordi ng t o the hol e size. Then cut the exc ess part sm aller
than pub lic flue outlet or w all hole wi th s cissors.
Then ins ert the end of the aluminu m foil exhaust pip e with fixed str ip i n the out er r ing of th e check val ve conn ection
and seal with exhaust pipe tapes . A t last, put four snaps of the check valve connect ion in correspon ding slots, and
rota te t hem clockwise to fix the exhaust pip e to the check valve .
Figure 4
Φ185 a luminum foi l exhaust p ipe
Exhaust pipe tape
Exhaust
pipe tape
Exha ust pipe conn ection
Figure 5
Chec k valve conne ctor
Buck le
ST4X18 screw
Φ18 0
Φ17 0
Φ19 0
Φ16 0
Φ14 0
Φ15 0
Check valve
Slot
Check valve seal
Cut the excess part smaller than the wall hole
Note : During inst allatio n, straight en the alumin um foil
exha ust pipe to avo id noises i n semi-stre tched state .
Body
Exce ss part may be cu t with a wire c utter.
The exhaust wall hole diameter shall be close to that of the exhaust pipe, which shall not be too small. Otherwise, it
will cause poor exhaust efficiency, more noises and lower airflow, etc. The connection between the pipe and the
hole or the public flue must be sealed tightly to ensure that, the pipe and the check valve or public flue are
connected securely. The blades at the check valve connection or public flue connection must be flexible.
User Manual
Switch Co ntrol Pane l
Rese rvation dis play area
Waving sensor
Airf low display a rea
Power Supply
Cleaning reminder
When the hoo d is shutdow n, press the pow er butto n to enter stand by mode, and
now the fan is enabl ed. I f t he fa n is wor king, after press ing t he power button , the
powe r ic on w ill flash and the fan will be shut down after 1 minute. Whe n th e powe r
butt on is flashin g, press th e button agai n, all func tions will be d isabled .
Light
Reservation
Stir-frying
7
Air Flow Rate
Power Supply
Page 10

Air Flow Rate
Light
Stir-frying
Reservation
Cleaning reminder
Range Hood
In the standby status , press the airfl ow butt on, t he sm oke def lector will be un folded,
and the fan wil l run at “Level-2” ; then re pressing the airfl ow button , the fan w ill run a t
“Lev el-1”, an d then press again to sh ut d own the fan.
Pres s the light but ton to turn o n the light and r epress to t urn it off. (Press th e light
butt on in off mode, the s moke deflec tor and the l ight will be tu rned on at th e same
time . )
In the standby status, press the stir-frying button, and the smoke deflector will be
unfolded, and the fan will run at “Level-6”; then repressing the stir-frying button to shut
down the fan. After running at “Level-6” for 3 minutes, the hood will automatically
switch to “Level-2” airflow. In off mode, keeping pressing the stir-frying button for 3
seconds can check the accumulative total running hours of the hood.
Pres s the reserva tion butt on when the fan i s working , each press wi ll increa se the
rese rvation time by 10 minutes, and the maximu m reserva tion is 60 minutes . Upon end
of reser vation, the hood will so und a beep. Now, press any but ton to canc el t he b eep.
After the hood has run for 60 hours, the “cleaning reminder” icon will flash to remind the
user to clean the oil filter. Now press the cleaning button to enter cleaning mode (when the
fan stops, in addition to cleaning button and light button, the rest buttons are invalid), in
which users can clean the oil filter by themselves. Keep pressing the cleaning button for 3
seconds to exit the cleaning mode after cleaning, and the cumulative time will be cleared.
In normal state, keeping pressing the cleaning button for 3 seconds can enter cleaning
mode.
In off mode, the waving sensor is on standby. In standby mode or fan operation mode,
the “Level-6” can turned on or turned off by the waving sensor. In the off mode, keep
pressing the “stir-frying” button and “airflow” button for 3 seconds at the same time can
Waving sensor
turn on or turn off the waving sensor.
Maintenance
Warning
1. The re is a fire risk i f cleanin g is not carrie d out in acco rdance with t he instru ctions.
2. Cle aning and m aintenanc e shall be cond ucted und er outage. El ectrica l component s such as mot or,
swit ch, and conne ctor shal l not be spoile d by water so a s to prevent fr om accident s.
3. It's prohibited to w ash wit h water s o as to prevent accidents .
4. S tove fire shall be exting uished ti mely wh en it is not use d; do not flambe u nder th e range h ood and i t's
proh ibited to ba ke foo d unde r range ho od dir ectly to pr event range hood from da maging and causing
acci dents.
5.If the s upply cord is dama ged, it mus t be replac ed b y the man ufactur er, i ts s ervice agen t or simila rly
qual ified perso ns in order t o avoid a hazar d.
6.Ac cessible pa rts may bec ome hot when us ed with coo king applia nces.
8
Page 11

Range Hood
Notice
●The hood sh all be cl eaned and maint ained regul arly depe nding on th e surroun dings, so a s to ke ep i ts c leannes s
& effici ency an d extend its service lif e.
We recommend t hat:
Clea n the exhaust fum e colle cting hood an d hood body afte r each cooking.
To ensure smo oth discha rge of fume s, the filt er screen sha ll be clean ed regular ly accor ding to actua l situat ions.
Be caref ul t o avoid dam age when cleanin g.
●It is recom mended to us e a neutr al dete rgent to clean instead of strong deter gents, and dry with a soft cloth , and
shou ld a void th e contact bet ween de te rgent and contr ol b uttons.
●Do not allow sta ins to st ay on the surfa ce o f the hood fo r too long.
●Pl ease do no t use cle aning bal ls, brushes and other rou gh ob jects to clean the ho od to prevent the bod y surface
from scr atching.
●When cle aning or maintaining the hoo d, p lease wear protectiv e gloves to prev ent wound ing during wiping.
●Plea se c heck an d clean the oil cup regul arly. P inch the oil
cup by h ands as the rig ht p icture an d pull out to po ur t he w aste oi l.
●Do not touch the lig ht b ulb that ha s been tu rned on or just been
turn ed o ff to avoid burns.
●Plea se u nplug it du ring long -term shutd own, but please do not pul l hard.
Removal of Components
Warning
1.The machine body needs not to be disassembled in ordinary conditions. Disassembly shall be operated by
professional serviceman.
2. The electricity must be cut off before clean, installation or maintenance of range hood.
Note: The installation procedures are in reverse with the removal. Please wear protective gloves during operation
to prevent the sharp edge of metal from hurting your hands.
Removal o f light
ligh t
Keep pressi ng the cl eanin g icon to unf old
smok e deflect or, and unp lug the p ower plu g.
Remo ving the two screw s on the sm all cover
plat e by a s crewdrive r, and t ake the s mall cov er
plat e as per the dire ction of th e arrow.
Push the lig ht by han d from insi de, and t hen
disc onnect the wi re for repa ir and replac ement.
9
Page 12

Removal o f switch
Range Hood
Deflector
Small cover plate
Switch assembly
Keep pressing the cle aning icon to unfol d smok e
defl ector, and unpl ug the power plug. Removin g
the two screw s on the small c over pla te by a
scre wdriver, and tak e th e small cover pla te a s pe r
the di rection of th e arrow.
Removal o f filter scr een
Long press on the ico n o f c leaning remi nder will
make t he smoke defl ector ope n.
Take out t he switch ass embly and u nplug the
conn ection line f or mainte nance and rep lacemen t.
Magnetic clasp
Slot
Hold t he two magn etic clas ps with sli ghtly out ward
forc e to make t he filter n o longe r been suc ked.
Then lift the filter scr een as per the arrow direc tion
to make i t out of slot. At last, take t he filt er sc reen
outw ard for clean ing.
10
Page 13

Range Hood
Removal o f the whole bo dy
Remo val steps
1. Kee p pressing th e cleanin g icon to lock th e smoke def lector in the o pen condi tion. Then take off the f ilter
scre en accordin g to filter r emoval step s and unscr ew four screw s on the retain ing ring.
2. Clo se the smoke de flector a nd pluck the po wer plug;
3. Scr ew out the scre ws on the bac k board to remo ve it. Then unscr ew each fou r screws of the a ir outlet and
the bo rder of air pas sage and re move the air pa ssage;
4. Uns crew the cap cl ockwise , and take out of t he impell er vertical ly;
5. Take out of the l amp accor ding to the lam p removal s teps;
6. Take out of the s witch ass embly accor ding to the s witch remov al steps;
Inst allation st eps are opp osite to the re moval ste ps.
(Whe n you install t he impell er, please add s ome lubri cating oil on t he shaft ho le of it. )
In general, there is no need to dissemble the hood body.
The remove work needs to be completed by professional maintenance staff.
Back b oard
Air pa ssage
Elec tric mot or
Cap
Top cove r plate
Exha ust fume coll ecting ho od
Impe ller
Sm ok e de f lec tor
Air fi lter cover
Oil cu p
11
Switch assembly
Light
Page 14

Range Hood
Circuit diagram
Terminal box
EL
Green/Yellow
220- 240V~
No response after pressing any button
1
2
3
4
5
6
(e.g. the impeller does not rotate, or
the light is off)
Pres sing the ligh t switch, t he light is
not li t.
Indu ced current e xists on th e hood
body m ay paralyze h ands
Abno rmal sound du ring impe ller
runn ing
No oil in the oil cup after a period of time
Afte r pressing th e air flow ke y and
duri ng the openin g of the smok e
defl ector, there a re some bee ps or
the sm oke deflect or cannot o pen at
all.
M
L
N
blue
red
brow n
oran ge
gray
blac k
blue
brow n
XP
blue
Green/Yellow E
blue
red
yell ow
C
red
Control circuit
K4
K3
K2
K1
Troubleshooting of General faults
FaultNo.
The power plug is not connected
properly or there is power failure
The light is damaged or poorly
connected.
The po wer socket is n ot
grou nded well.
The impeller is loose, and the cap
is not tightened.
The bo dy is tilt
The driving circuit of the
electronic push rod or the push
rod itself malfunctions, or the
wire of the push rod is in poor
contact.
Cause
Operating Circuitn
Electric putter
Warning
1. When connecting or
replacing the plug, please
unplug the power plug.
2. If the range hood's
power cords are damaged,
it must be replaced by our
company's professional
maintenance staff.
3. The flame is strictly
prohibited being sucked
into the machine in case
of the accidents.
12
Page 15

Mode l A67 0
:
Edit ion: A/0
Publ ication Dat e:
Augu st,1,2017
 Loading...