


VRCD400-SDU

VRCD400-SDU
OWNER’S MANUAL
AM/FM Receiver, CD/MP3/WMA Player with
USB Port, Aux In, & Detachable Face
• AM/FM MPX STEREO
• MP3 / WMA WITH ID3 DISPLAY
• ASPS MEMORY CONTROL
• AUTO SEEK UP / DOWN
• FM STEREO / MONO
• 30 PRESET MEMORY
• MIX BAS / TRE / BAL / FAD SWITCH
• AUTO CD PLAY / RADIO
• AUTO POWER LOADING
• LOUDNESS CONTROL
• MUTE SOUND CONTROL
• USB CONTROL FOR MP3 / WMA
• WIRE HARNESS ON PLUG
• DIGITAL LCD DISPLAY
• DUAL CHANNEL LEVEL METER
• TIME CLOCK DISPLAY
• PRESET EQ (POP, ROCK,
FLAT, CLASSIC)
• BUILT IN NOISE FILTER
• BUILT IN RCA OUTPUT
• SUBWOOFER OUTPUT
• AUXILIARY INPUT
• AUTO ANTENNA ACTIVATOR
• INFRA RED REMOTE CONTROL

Welcome!
Dear Customer,
CONGRATULATIONS. The VRCD400-SDU Compact Disc Player and AM/
FM Stereo Receiver with USB Port and AUX In, when used as described, will
give you years of dependable service in your car, truck, RV, or mini-van. We
have taken numerous measures in quality control to ensure that your product
arrives in top condition and will perform to your satisfaction. In the rare event
that your VRCD400-SDU Compact Disc Player and AM/FM Stereo Receiver
with USB Port and AUX In contains a damaged or missing item, does not
perform as specified, requires warranty service, or you have an installation
problem, DO NOT RETURN THIS PRODUCT TO THE STORE. PLEASE
CALL OUR TOLL FREE NUMBER FROM
THE U.S.A. AND CANADA
1-800-445-1797 and ask to speak with a member of our technical service
team; or submit your questions by e-mail to customerservice@vr-3.com and
a member of our technical service team will respond by e-mail to your questions. Our in-house technical service team will expedite delivery of your part,
advise you on installation, or help troubleshoot a problem with you. If your
product needs warranty service, our technical service team representative will
help you obtain the fastest remedy possible under the warranty.
Contents
Precautions .......................................................................................................2
Notes on Installation ........................................................................................3
Before You Install.............................................................................................4
Installation (DIN Front Mount) ......................................................................5
Installation (Vehicle's Brackets).......................................................................6
Parts..................................................................................................................6
Wiring Connections..........................................................................................7
Location of the Controls ..................................................................................8
Remote Control ................................................................................................9
Basic Operation..............................................................................................10
Radio Operation .............................................................................................11
CD Operation .................................................................................................12
MP3/WMA Operation (CD)..................................................................... 13-14
USB Operation ...............................................................................................15
SD Memory Card Operation..........................................................................16
AUX IN, RCA, & Subwoofer Control ..........................................................17
Simple Troubleshooting Guide ......................................................................18
Specifications .................................................................................................19
Warranty .........................................................................................................20
1

Care of Discs
• Handle the disc by its edge to keep
the disc clean. Do not touch the
disc’s surface.
• Do not use a CD with paste or ink
residue on it.
• Do not use CDs with labels or stickers attached. The label may leave
a sticky residue when it begins to
peel.
• Clean the discs with an optional
cleaning cloth. Wipe each disc from
the center out.
Precautions
Type of disc
CD, MP3, & WMA
Label on the disc Recorded material
Audio only
Size of disc
12 cm
• Do not attempt to modify the unit.
• Modifying the unit will void the
warranty.
• Stop the vehicle before carrying out
any operation that could interfere
with your driving.
• Do not operate in extremely high or
low temperatures. The temperature
inside the vehicle should be between
32º F (0º C) and 100º F (37º C)
before turning on your unit.
• This unit will only play the following discs.
• Disconnect negative battery terminal before starting installation. Consult the vehicle’s
owner’s manual for proper instruction.
• The unit is designed for a 12Volt DC negative ground operation system only. Before
installing the unit, make sure your vehicle is a 12Volt DC negative ground system.
• Mark the polarity of the existing speaker wires before disconnecting the old unit.
• Be sure to connect the color coded leads according to the diagram. Incorrect connections
may cause the unit to malfunction or damage the vehicle's electrical system.
• Make sure all the connections are completely correct before turning on your unit.
•
When extending the ignition, memory backup or ground cable, use diameter of 0.75mm (AWG18)
or more automotive grade cable to avoid wire deterioration or damage to the wire coating.
• To prevent short circuit, never put or leave any metallic object inside the unit. If you
smell or see smoke, turn off the power immediately and consult your dealer.
• Insert the unit until it is firmly locked into mounting sleeve, otherwise it may fall out.
•
Be careful not to drop or shock the unit, it may break or crack because it contain glass parts.
• The unit is only designed for use with 4 speakers. Do not combine output for use with 2
speakers. Do not ground negative speaker leads to the chassis ground.
• Do not open the top or bottom cover and do not install the unit in place where it is
exposed to direct sunlight (including the faceplate), in order to avoid high heat or humidity, water splash over it or dust.
• The faceplate is a precision piece of equipment that contains sensitive electronic components. Do not subject it to excessive shock.
• When replacing the fuse(s), the replacement must be of the same amperage as shown on
the fuse holder.
• Do not block vents or heater panels. Blocking them will cause heat to build up inside
and may result in fire.
• After completing the installation and before operating the unit, reconnect the battery.
Then press the (RES) button with a pointed object, such as a ball-point pen to set the
unit to its initial status.
• Do not touch the terminals of the faceplate or of the unit.
• If you have difficulty in installing this unit in your vehicle. Please contact your dealer.
Notes on Installation
Remove the
half sleeve
3
Before You Install
Automotive audio equipment installations can be troublesome at times, even to the most
experienced of installation technicians. If you are not confident working with electrical
wiring, removing and reinstalling interior panels, carpeting, dashboards or other components of your vehicle, please call our toll-free help line 1-800-445-1797 and our in-house
technical service team will answer your installation questions. Contact the vehicle's
manufacturer for vehicle specific instructions, or consider having the VRCD400-SDU
professionally installed.
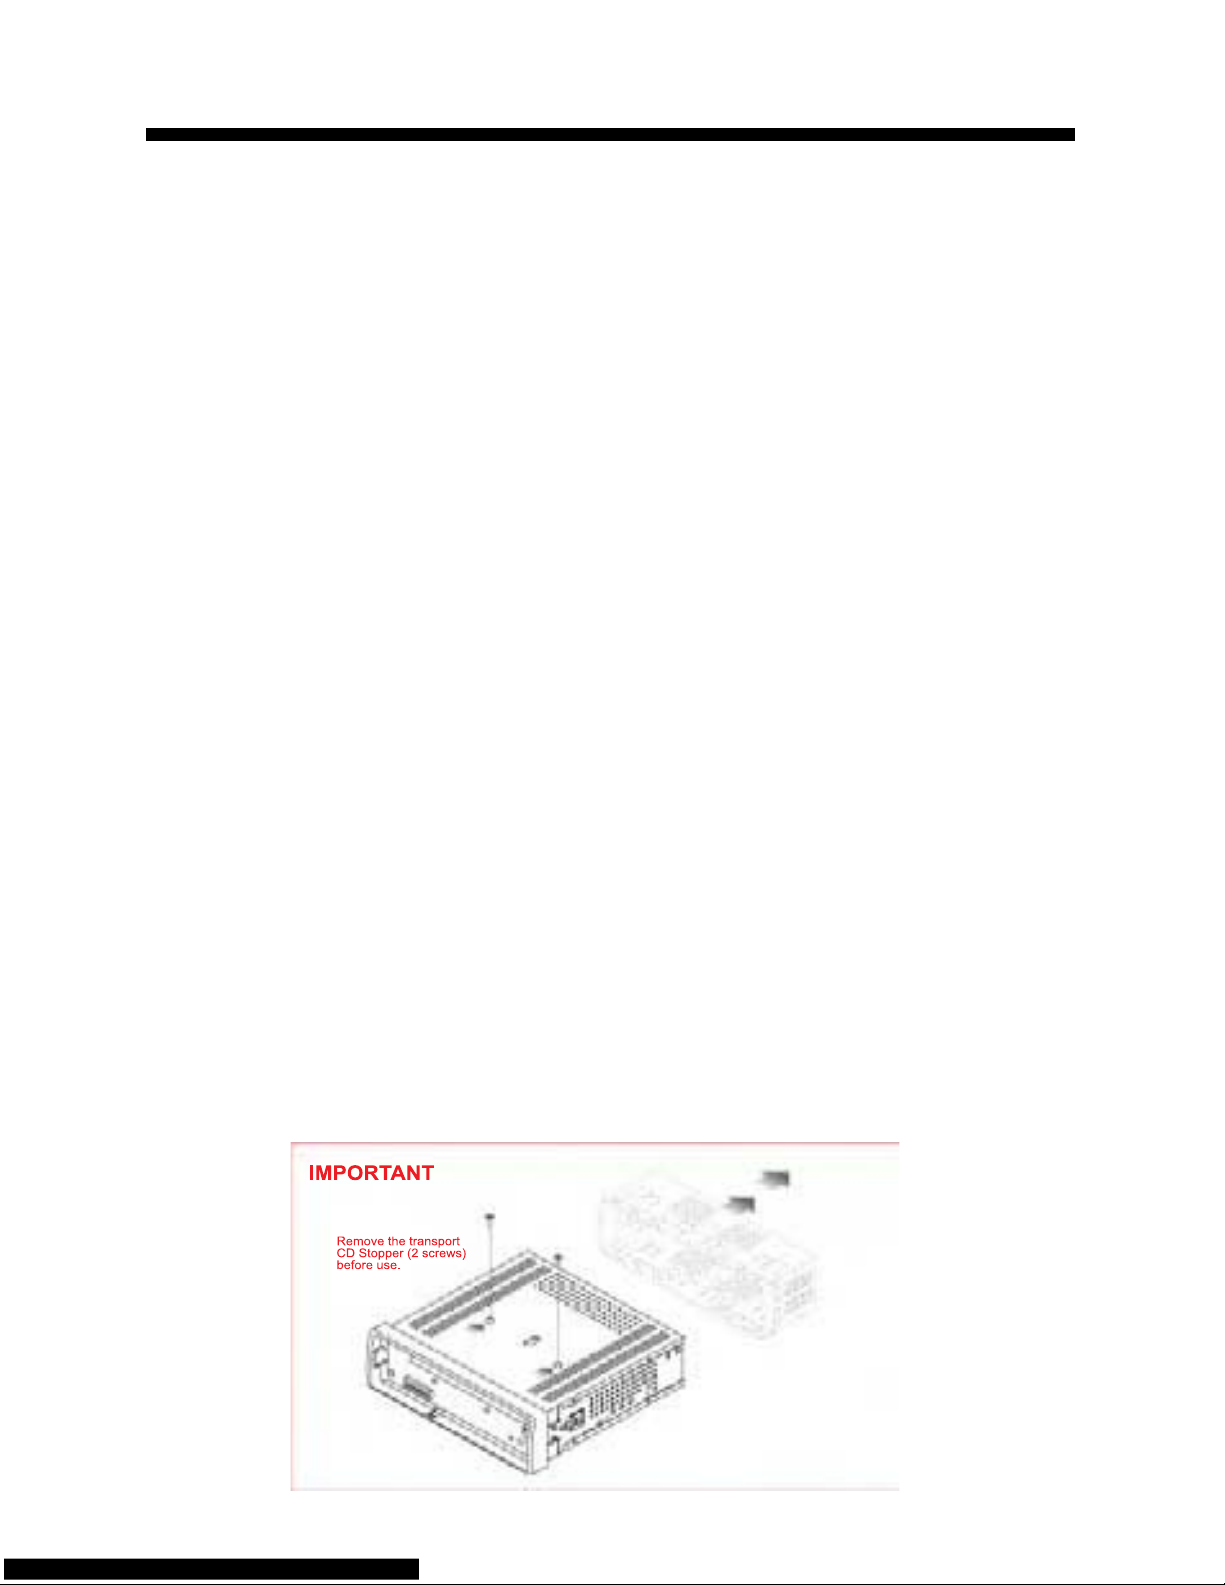
IMPORTANT:
Remove the two transport screws from the top of the unit before installing.
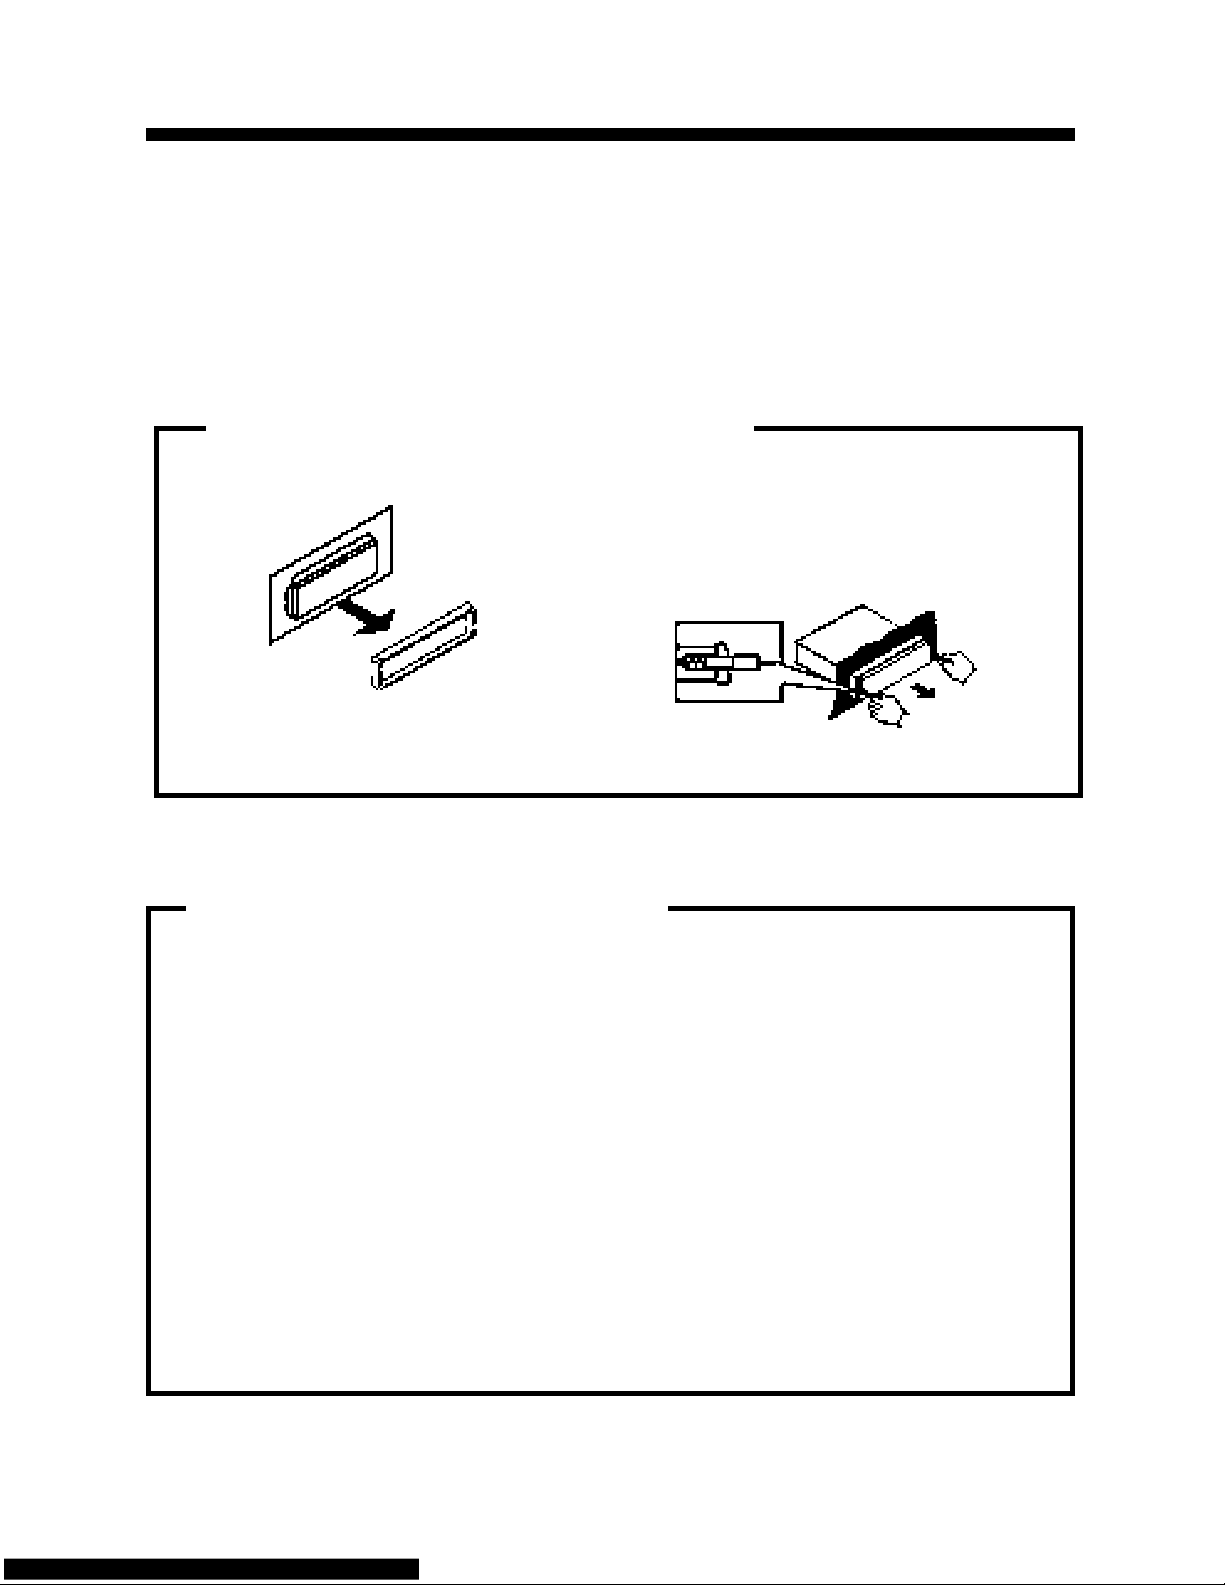
B. Insert the keys supplied with the old unit
into both sides of the unit as shown in figure below until they click. Pull to remove
the old unit from the dashboard.
1. Remove the Old Unit from the Dashboard
DIN Front Mount
DO NOT DISCONNECT WIRES AT THIS TIME!
A. Remove the outer trim frame.
Marking the polarity of the speaker
wires will make it easier to connect the
existing speakers to the VRCD400-SDU.
Consult wiring diagram of existing head
unit before disconnecting any wires. If a
wiring diagram is not available contact
the manufacturer.
1.
While the old unit is playing, discon-
nect the wires from one speaker.
2. Take a length of masking tape and
fold it around the wire so it forms a
flag.
3. On the masking tape mark the polar-
ity of the speaker wires (+ & - ), as
well as left or right, and front or rear.
4. Double check that you marked the
first speaker correctly by checking
that the speaker wires are the same at
the head unit.
5. Repeat this procedure for all of the
speakers.
6. Mark the power, ground, and any
other wires also
.
2. Mark Polarity of the Speaker Wires
4
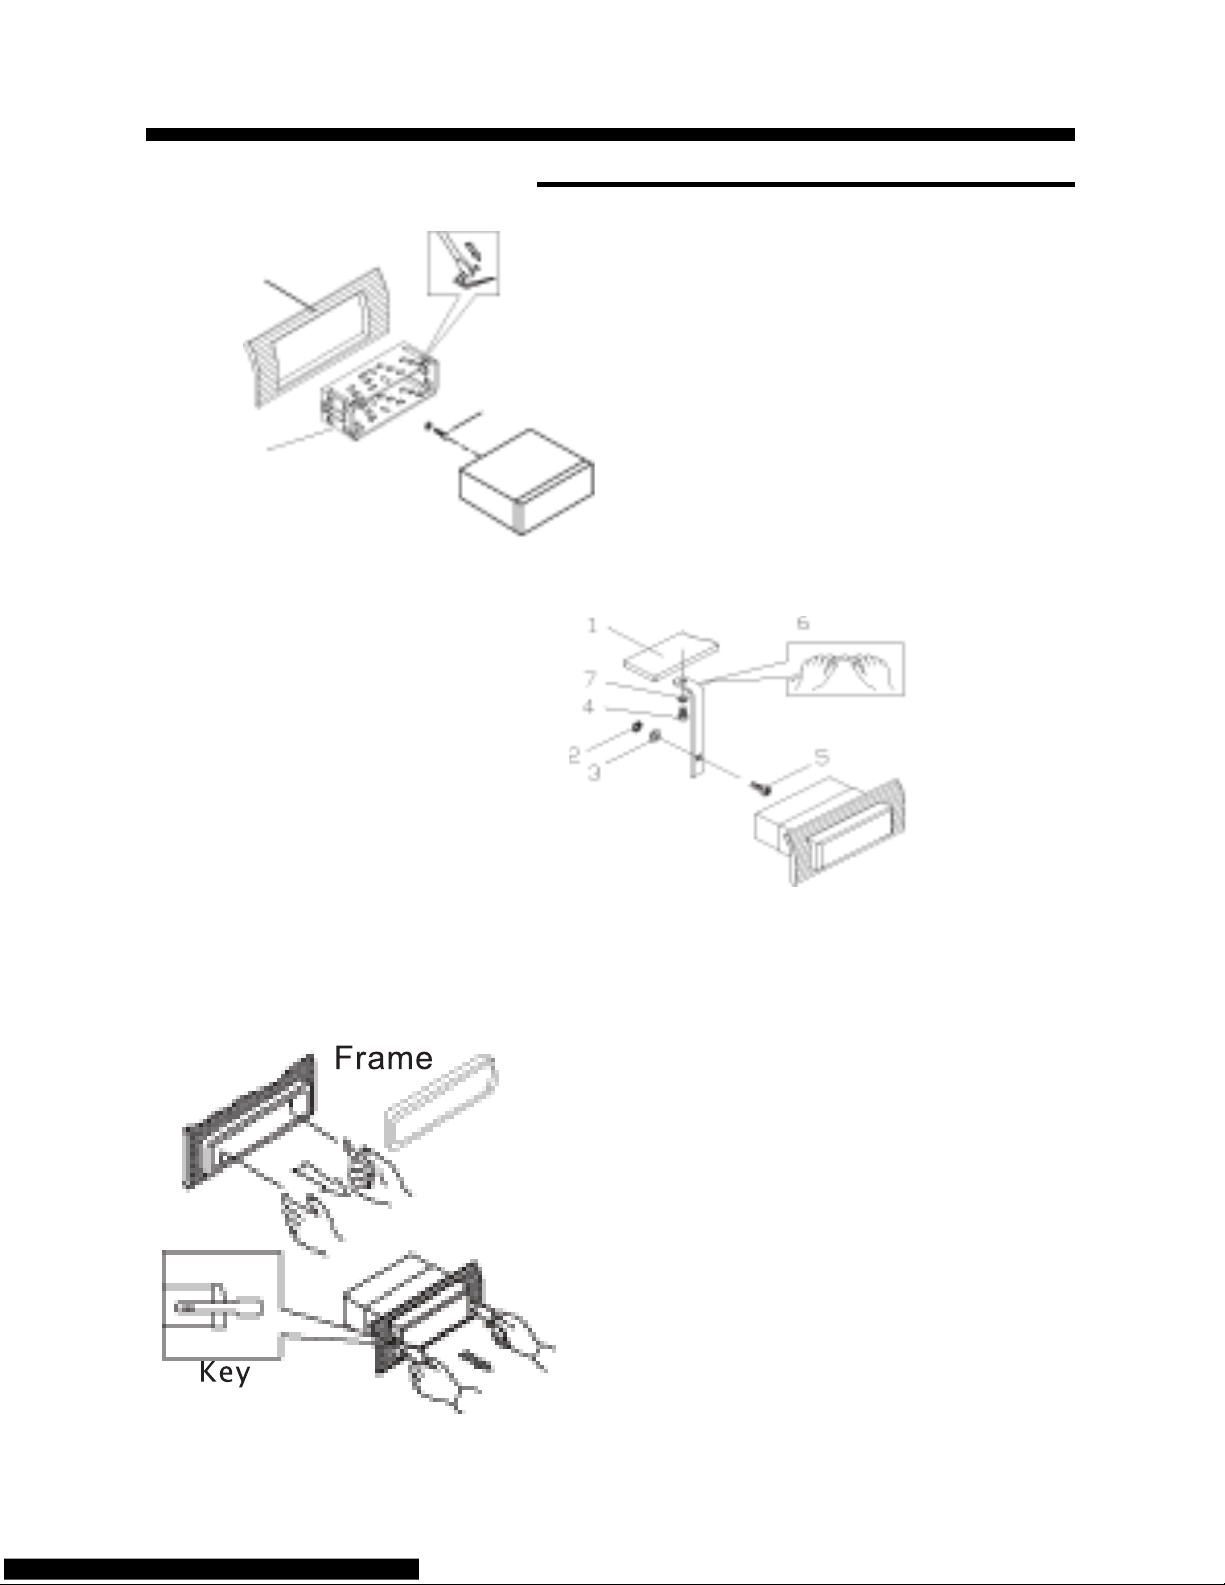
1. Dashboard
2. Nut (5mm)
3. Spring washer
4. Screw (5 x 25mm)
5. Screw
6. Strap
7. Plain washer
INSTALLATION
2. Mounting
Sleeve
3. Screw
1. Dashboard
Bend the tabs
to secure the
Mounting Sleeve
in the dashboard.
DIN FRONT-MOUNT (Method A)
After inserting the Mounting Sleeve
into the dashboard, select tabs on
top, bottom, and sides, then bend
them to secure the mounting sleeve
in the dash board.(Fig. 1)
Fig. 1
Fig. 2
Follow the diagram in Fig. 2 for installing the rear mounting strap to the
head unit. The rear mounting strap
will help keep the head unit from
moving around inside the dashboard.
Insert fingers into the groove in the front of frame to remove it.
Insert the keys supplied with the unit in the
grooves on both sides. The unit can be installed
or removed from the dashboard using these
keys.(Fig. 3)
Fig. 3
5
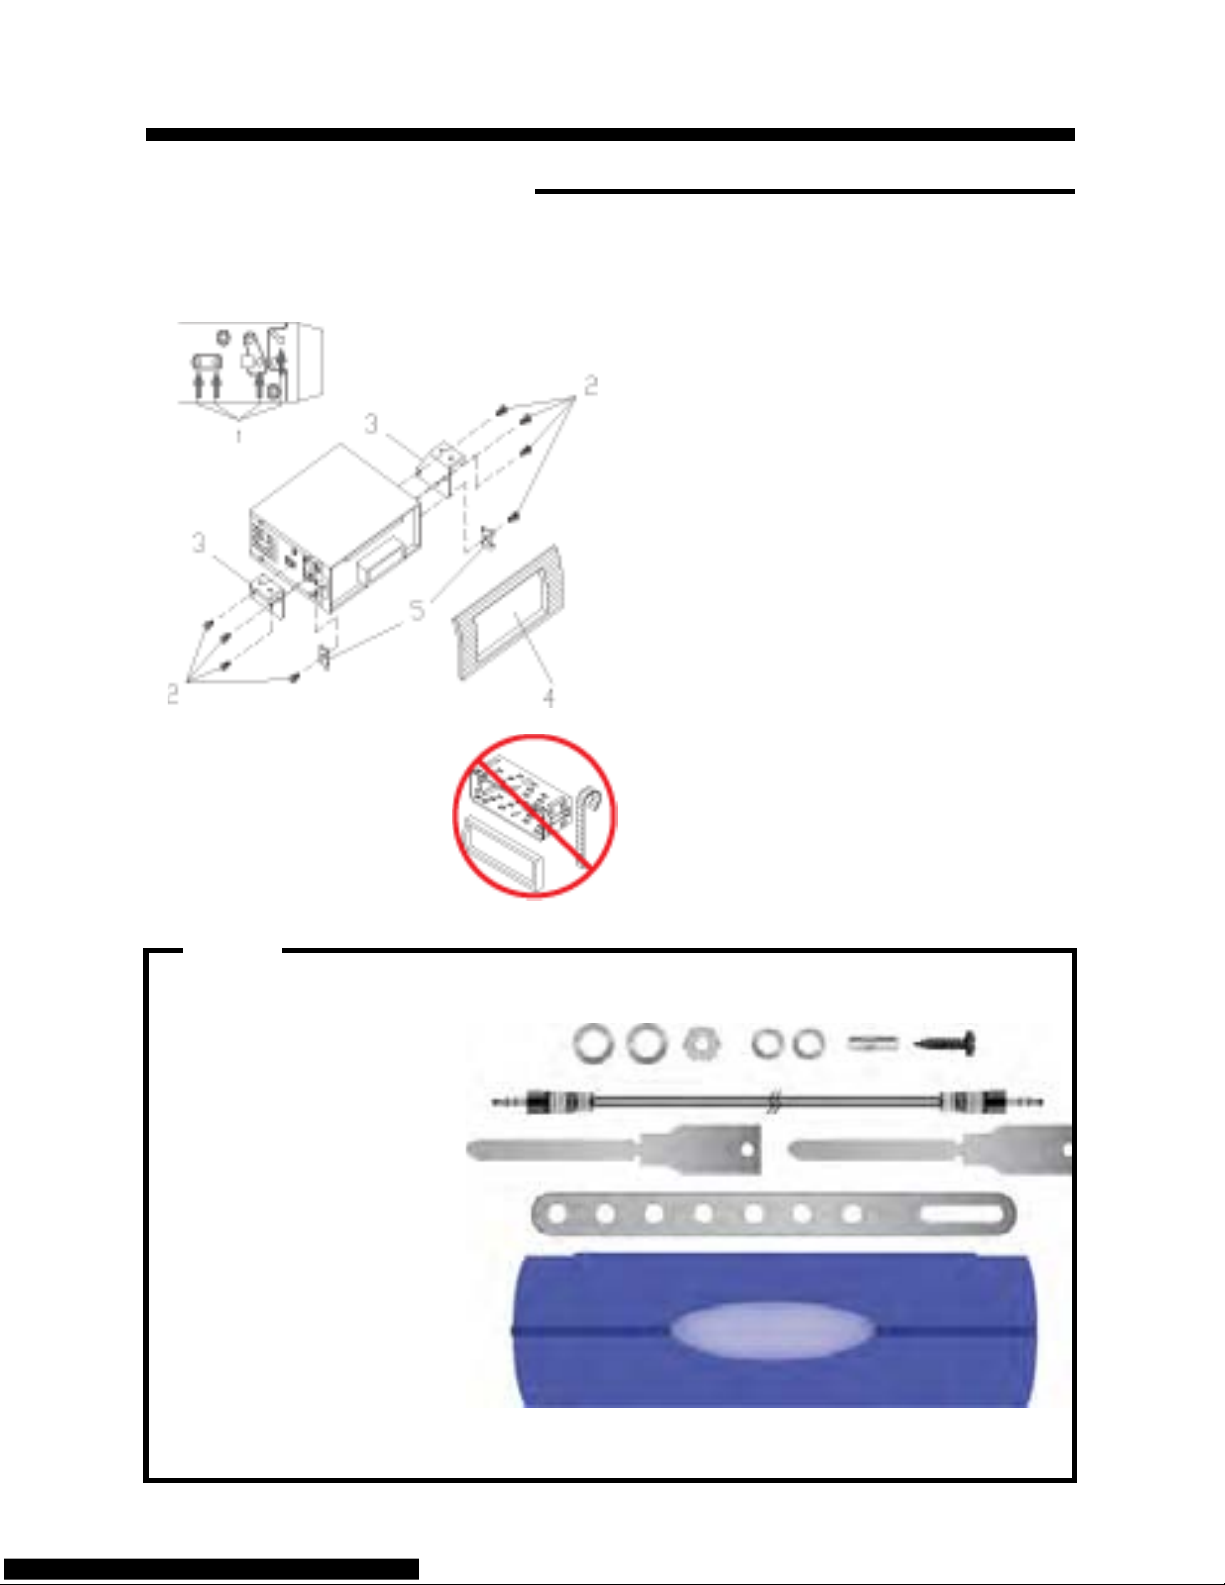
DIN REAR-MOUNT (Method B)
Installation using the screw holes on the both sides of the unit.
1. Screw holes on the side of the unit.
2. Screws. Use either truss screws (5 x
8mm) or flush surface screws (4 x 8mm),
depending on the shape of the screw holes
in the bracket.
3. Vehicle’s Factory Mounting Bracket
4. Dashboard or Console
5 Hook (Remove this part)
Note: The mounting sleeve, outer trim
ring, and the mounting strap are not used
for this method of installation.
INSTALLATION
6
PART S
2 Keys
2 Hex Nuts
2 Lock Washers
1 Sheet Metal Screw
1 Metal Support Strap
1 Flat Washer
1 Mounting Bolt
1 Faceplate Case
1 1/8" Stereo Cable
 Loading...