

Page 1
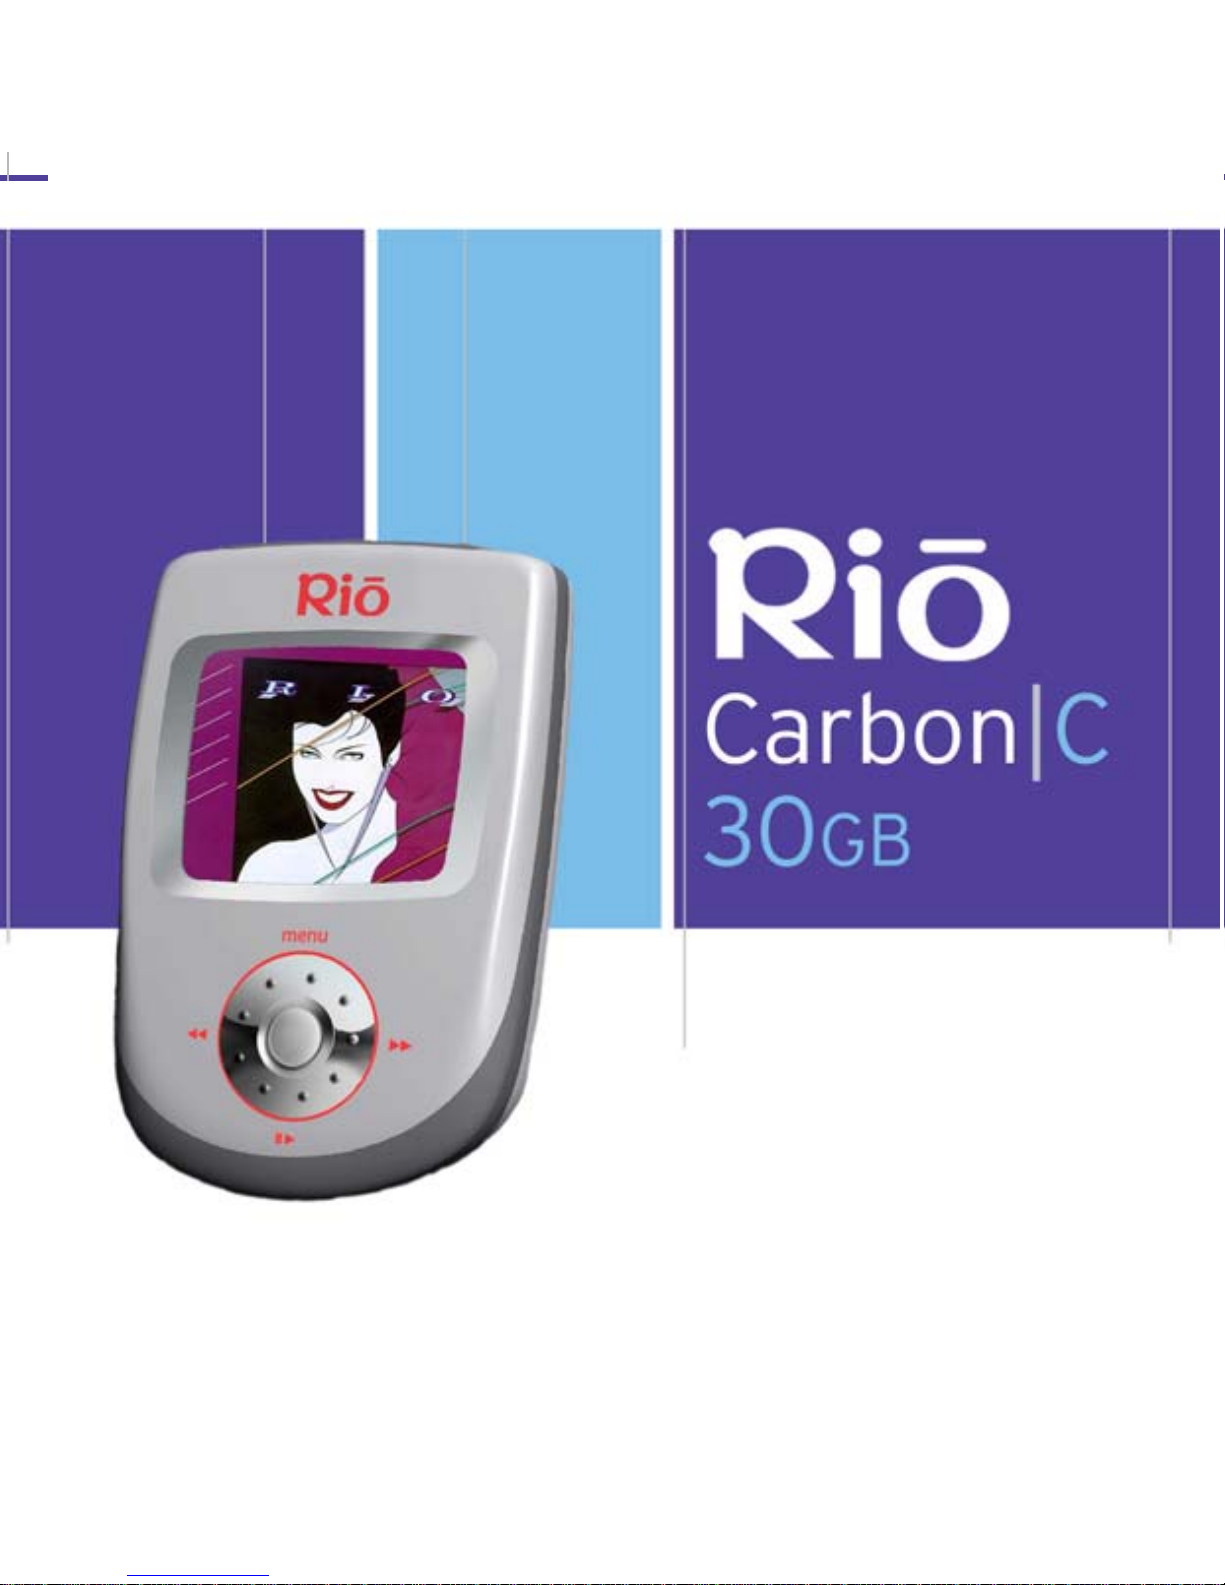
Table of Contents
Getting Started
PlaysForSure™
Using the Rio Carbon C
Rio Music Manager
Help
i
Page 2
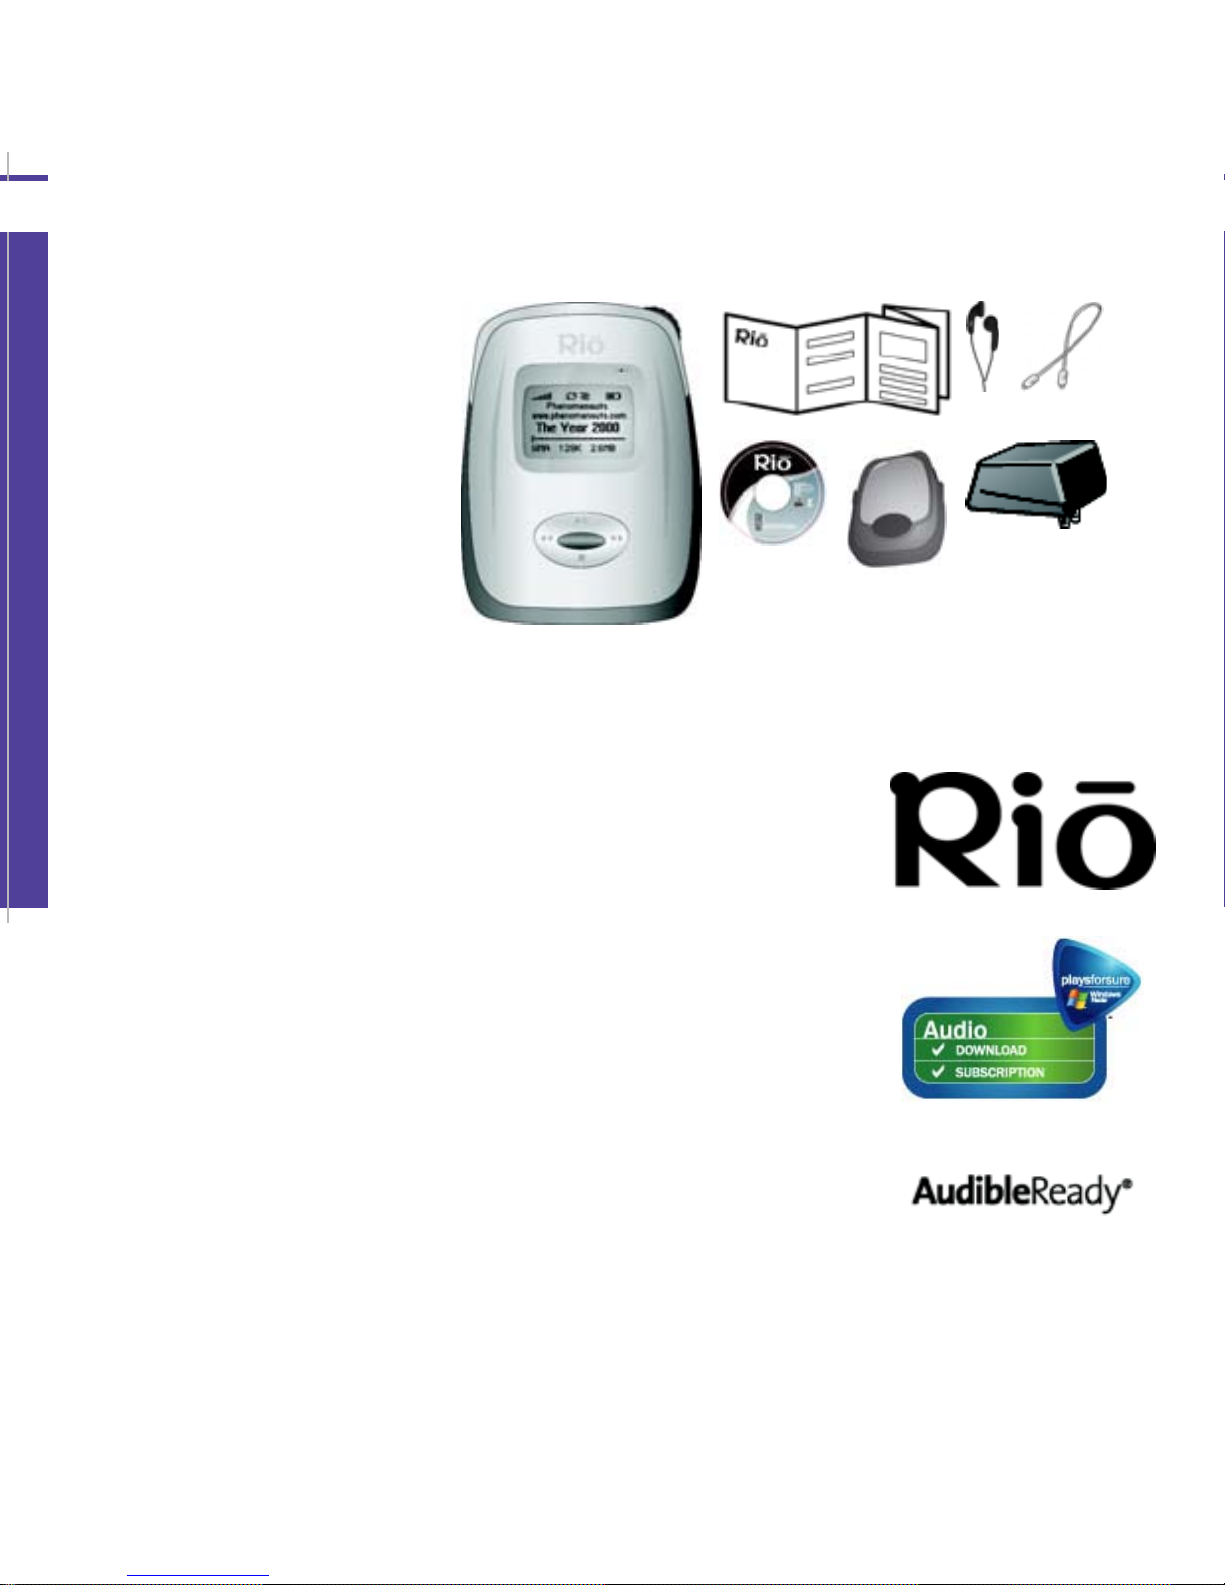
P
ackage Contents
• Rio Carbon C
• Quick Start Poster
• Earphones
• Installation CD
• Carrying Case
• USB-AC Adapter
• Mini USB Cable
Copyright/Trademarks
© 2005 Digital Networks North America, Inc. All rights reserved.
Digital Networks North America, Inc. shall not be liable for any errors contained herein or for any damages arising out of or related to this document or the information contained herein, even if Digital Networks North
America has been advised of the possibility of such damages. This document is intended for informational and instructional purposes only. Digital
Networks North America, Inc. reserves the right to make changes in the
specifications and other information contained in this document without
prior notification. Digital Networks North America, Inc. disclaims any obligation to update the information contained herein. Rio® is a registered
trademark of Digital Networks North America, Inc.
Table of Contents
Microsoft, Windows Media and the Windows Logo are trademarks or registered trademarks of Microsoft Corporation in the United States and/or
other countries.
AudibleReady is a registered trademark of Audible, Inc.
All other product names may be trademarks of the companies with
which they are associated.
P/N 41000968-001
ii
Page 3

Table of Contents
Table of Contents
1 - Getting Started 1
Tour of the Rio Carbon C 2
• Menu Mode 4
• Player Mode 4
Display Overview 5
• Player mode views 5
• Running Order 5
• Play Screens 5
Connections 7
• Earphones 7
• USB-AC 7
• Additional Accessories 8
2 - PlaysForSure™ 9
PlaysForSure Logo 10
Audio Download 11
Audio Subscription 12
3 - Using the
Rio Carbon C 13
Music Library 14
• Artist 15
• Album 15
• Track 15
• Playlist 16
• Folder 16
• Rio DJ 17
• Genre 18
• Year 19
• Composer 19
• Cover Version 19
• Mood 19
• Delete Content 20
Now Playing 21
Settings 23
• Playback 24
• Equalizer 25
• Resume 29
• Play Screen 30
• Display Scheme 31
• Display Brightness 36
• FM Radio Settings 37
• Record Setup 38
• Lock Setup 39
• Power Management 40
• Time & Date 41
• Quick Buttons 42
• Audible Prompts 43
• Hearing Protection 44
• Text Encoding 45
• Transfer Mode 46
FM Radio 48
• FM Controls 49
• Manual 50
• Store Preset 50
• Preset 50
Record 51
• Record Controls 52
Features 53
• Bookmarks 54
• Stopwatch 55
• Troubleshooting 56
Lock Player 57
iii
Page 4

Table of Contents
About 58
4 - Rio Music Manager 59
What is Rio Music Manager? 60
Installing Rio Music Manager 61
Copy CDs 62
Transfer Music to the Rio Carbon
C 63
• Transfer Tracks using Rio Music
Manager 64
• Transfer Tracks using Windows
Explorer 65
• Transfer Tracks using Online
Music Stores 68
Create Playlists 69
Delete Tracks 72
• Industry Canada 84
IMPORTANT SAFETY
INSTRUCTIONS 85
• CAUTION 85
5 - Help 73
Customer Service Information 74
Frequen tl y A s ke d Questions 75
• Music 76
• Battery 77
• Hard Drive 78
• Files 79
• Player-Computer Connections 80
• Frozen Screen 82
• Updates and Reformatting 83
ECC, FCC, and Industry Canada
Compliance 84
• Statement of Compliance 84
• Federal Communications
Commission 84
iv
Page 5

Table of Contents
Getting Started
Tour of the Rio Carbon C
Display Overview
Connections
1
Page 6
Tour of the Rio Carbon C
POWER
Slide to the right to power the
Rio Carbon C on.
Slide to the right an d hold to for
two seconds to place the Rio
Carbon C 30 GB into power
save mode.
Slide to the right and hold for
10 seconds to power the Rio
Carbon C 30G off.
Slide to the left to activate
Lock Mode.
Table of Contents
MENU
In Player mode, press to enter
Menu mode.
In Menu mode, press to return
to Player mode.
CENTER
In Player mode, press to cycle
through Player mode views.
In Menu mode, press to select
options.
PLAY/PAUSE
Press to play or pa use
playback.
FORWARD and
REVERSE
Press to skip to the next or
previous track.
Select and hold to scan
forward or reverse.
WHEEL
In Player mode, rota te to activat e the Wheel
Menu and adjust Volume, Pitchbend, Seek,
and Brightness levels.
In Menu mode, press or rotate to control
menu navigation.
2
STOP
Press to stop playback.
Page 7
Table of Contents
POWER
Slide to the right to power
the
Rio Carbon C on.
Slide to the right and hold
to for two seconds to place
the Rio Carbon C 30 GB
into power save mode.
Slide to the right and hold
for 10 seconds to power the
Rio Carbon C 30G off.
Slide to the left to activate
Lock Mode.
REMOTE
Connects to optional remote
control.
(Sold separately.)
EARPHONES
Connects to earphones,
headphones, or auxiliary
connections.
IN
Records sound when the
Line-In recorder is in use.
DOCK CONNECTOR
Connects to optional
docking station.
(Sold separately.)
USB
Connects to the USB cable.
3
Page 8

Player Mode
Table of Contents
Volume Level
Track Time
Play Indicator
Menu Mode
Artist
Album
Track
Repeat Playback Indicator
Shuffle Playback Indicator
Lock Indicator
Power Indicator
Track Position Bar
Track Number/
Total Number of Tracks
Menu Title
Selected Option
Options
4
Page 9

Display Overview
Player mode views
Press CENTER to cycle
through player mode views.
Play Screens
Use the Play Screens menu
to set the default Player
mode view to Progress
Indicator , Profile Indicator, or
VU Meters view.
Table of Contents
Running Order
5
Page 10

Table of Contents
6
Page 11

Table of Contents
Connections
Earphones
Connect the supplied earphones to the EARPHONES port on the top of the Rio Carbon C.
USB-AC
The Rio Carbon C req uires a USB connecti on to transfer fil es and/or rechar ge its batte ry. If
using a USB hub, connect to a powered USB hub. Unpowered USB hubs may not work.
Use the USB cable to connect the Rio Carbon C to the USB port on your computer to
transfer music or files to and from the Rio Carbon C and your computer. The Rio Carbon C
cannot play music when it is conn ected to the USB port on your computer.
Use the USB cable to connect the Rio Carbon C to the USB port on the USB- AC adapter to
quickly recharge the battery on the Rio Carbon C. When connected to the USB port on the
USB-AC adapter, the Rio Carbon C can play music and recharge its battery at the same
time.
7
Page 12
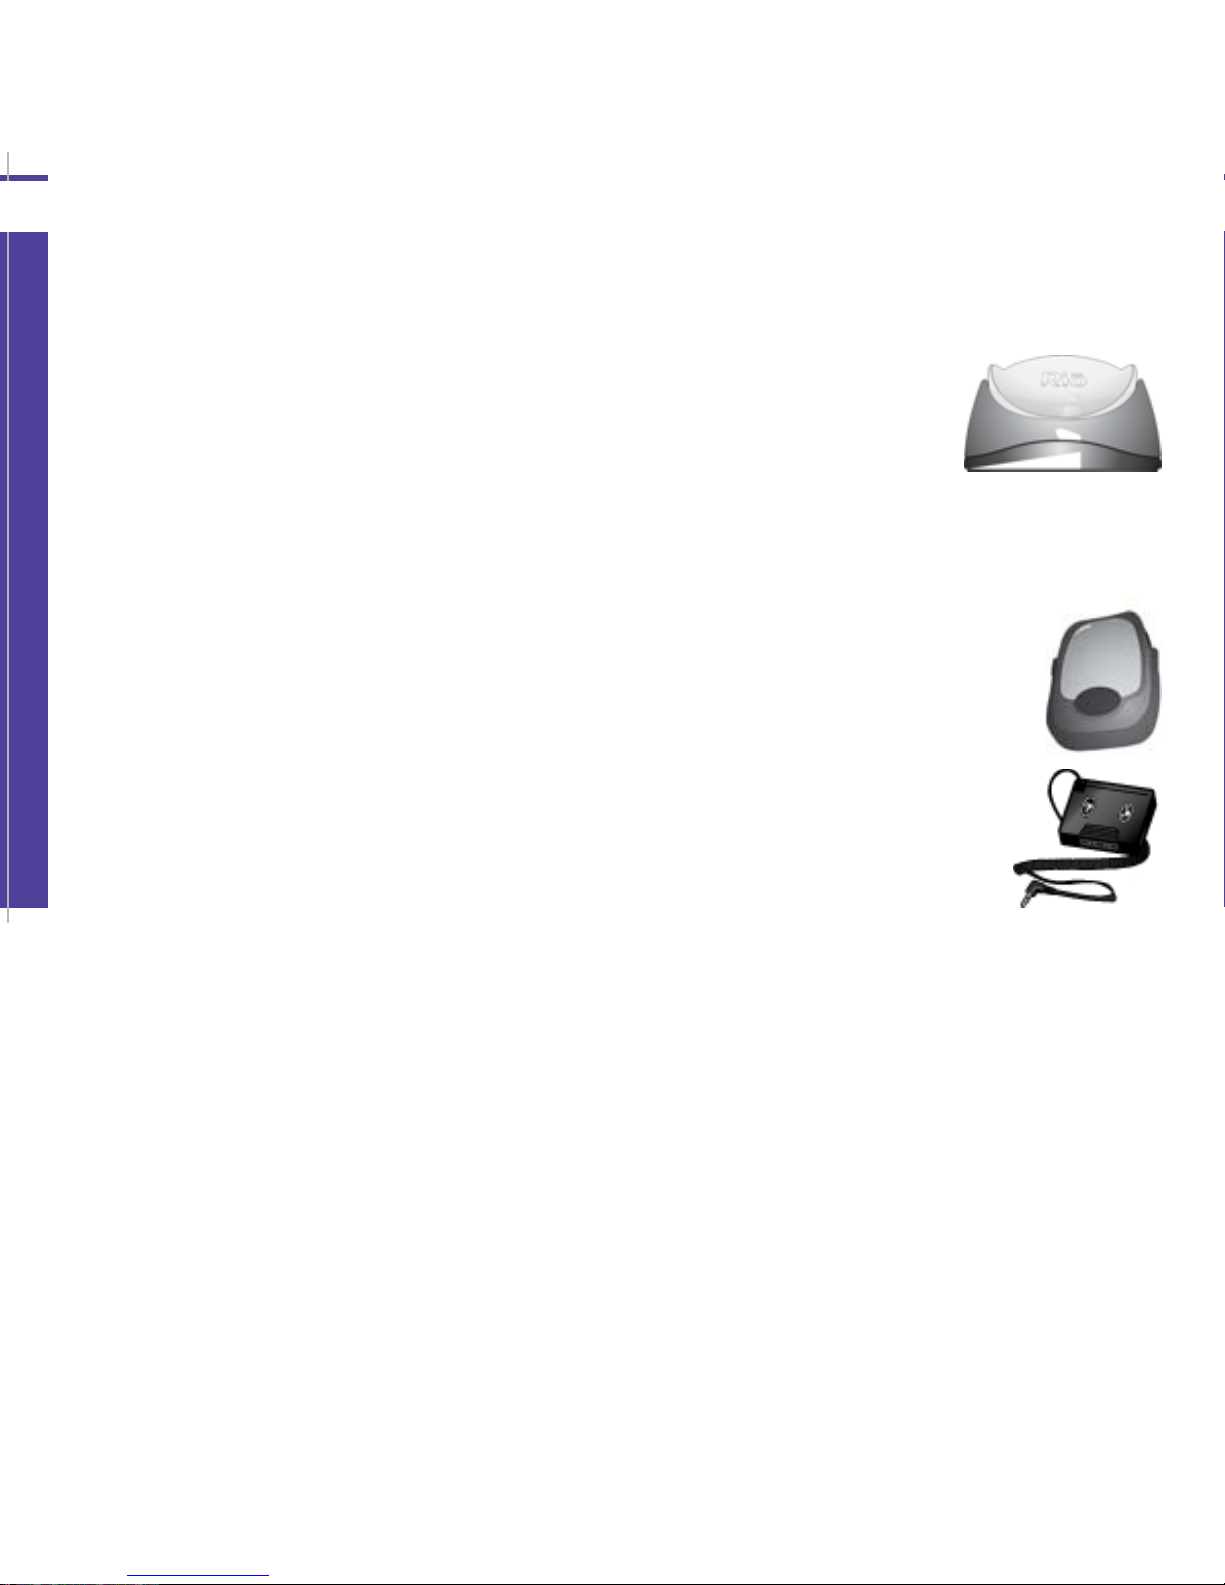
Table of Contents
Additional Accessories
Get the most out of your Rio with additional accessories available online at the Rio website. Some of
the most popular accessories include the following:
• Rio Carbon C Dock
TODO
• Rio Carbon C 30 GB Remote Control
TODO
• Rio Carbon C Carrying Case and Belt Clip
Replace carrying cases tha t hav e bee n w orn do w n by inte nse l y acti ve lif estyles.
• Rio Car Stereo Adapter
Upgrade your ca r stereo for hundreds of dollars less than buying a new MP3 CD
player. The Rio car stereo adapter lets you play your favorite music in any vehicle equipped with a standard cassette deck.
Remote Image
8
Page 13

Table of Contents
PlaysForSure™
PlaysForSure Logo
Audio Download
Audio Subscription
9
Page 14

Table of Contents
PlaysForSure Logo
The PlaysForSure logo assures that digital audio devices and online music stores have been tested
and verified to work properly together. When you see the PlaysForSure logo at your favorite online
music store, you’ll know that audio tracks you purchase from the store will play for sure on your Rio
Carbon C.
The Rio Carbon C is a PlaysForSure device and is fully compatible with PlaysForSure Au dio
Downloads and PlaysForSure Audio Subscriptions.
NOTE: The iTunes Music Service does not use the PlaysForSure logo. Tracks downloaded from the
iTunes Music Service cannot be played on your Rio player.
10
Page 15

Table of Contents
Audio Download
Most online music stores sell digital music that can be downloaded onto your Rio Carbon C. When you
purchase an audio downloa d you pa y once to downlo ad a specific track. Tracks purchased in this way
can be played for an unli mited a moun t of time, subject to the re stricti ons speci fied by th e onli ne musi c
store.
When you see the PlaysForSu re Audio Download logo at an online music store you w ill know that the
online music store has been verified to provide audio download s that will play for sure on the Rio
Carbon C.
11
Page 16

Table of Contents
Audio Subscription
A growing number o f o nl ine m usi c sto res sell subscription services that let you do wn l oa d a n u nli m it ed
number of tracks for a monthly fee. You can download as many tracks as you want, but when you stop
paying your monthly subscription fee and the subscription expires, the tracks cannot be played.
Customers using PlaysForSure Audio Subscription services must connect their Rio Carbon C to their
computer via USB and visit thei r online music subscription store at least once each billing period so
the Rio Carbon C knows that the Audio Subscription has not expired.
When you see the PlaysFor Sure Audio Subscription logo at an online music store you will know that
the online music store has been verified to provide audio subscriptions that will play for sure on the Rio
Carbon C.
Windows Media Player 10 and Windows XP Service Pack 1 (or greater) must be installed on your
computer to use PlaysForSure Audio Subscription tracks.
NOTE: PlaysForSure Audio Subscription tracks cannot be transferred to the Rio Carbon C when the
Rio Carbon C is in MSC mode.
12
Page 17

Table of Contents
Using the Rio
Carbon|C
Music Library
Now Playing
Settings
FM Radio
Record
Features
Lock Player
About
13
Page 18

Table of Contents
Music Library
The Rio Carbon C can play audio tracks using a variety of playback formats. Any format can be used
within a matter of seconds so you can spend more time enjoying tracks and less time arranging them.
Music library options include:
Artist
Album
Track
Playlist
Folder
Rio DJ
Genre
Year
Composer
Cover V ersion
Mood
Delete Content
14
Page 19

Artist
To play tracks from a specific artist please follow these steps:
1 Press MENU.
2 Select Music Library.
3 Select Artist.
4 Select Play All or a specific album.
5 If a specific album is selected, select Play All or a specific track.
Album
To play tracks from specific albums please follow these steps:
1 Press MENU.
2 Select Music Library.
3 Select Album.
4 Select an album.
5 Select Play All or a specific album.
6 If a specific album is selected, select Play All or a specific track.
Table of Contents
Track
To play a specific track please follow these steps:
1 Press MENU.
2 Select Music Library.
3 Select Track.
4 Select Play All or a specific track.
15
Page 20

Table of Contents
Playlist
To play tracks from a playlist, or create a new playlist from the current running order, please follow
these steps:
1 Press MENU.
2 Select Music Library.
3 Select Playlist.
4 Select Select a Playlist to or Create a Playlist.
• Select a Playlist
Select to play tracks from playlists. Select Play All or a specific playlist.
• Create a Playlist
Select to save the curr e nt r un ning order as a playlist to play. Select Play All or a specific playlist.
TIP: Use the Now Playing menu to edit the current runn ing order.
Folder
To locate and play tracks using folders that have been created on the Rio Carbon C please follow
these steps:
1 Press MENU.
2 Select Music Library.
3 Select Folder
4 Select Play All or a specific folder.
5 If a specific folder is selected, select
Play All or a specific track.
Folder view comparison screenshots.
(My Computer and Rio Carbon C)
16
Page 21

Table of Contents
Rio DJ
Use Rio DJ to create innovative track running orders based on tag information. To access Rio DJ:
1 Press MENU.
2 Select Music Library.
3 Select Rio DJ.
4 Select a Rio DJ mix.
5 Select Rio DJ mix settings.
6 Select Done to apply settings or Cancel to return to the Rio DJ menu.
Rio DJ offers the following running order mixes:
•Entertain Me!
Select to create a running order composed of the most frequently played tracks. The track
running order plays for a selectab le amount of time. Settings include 15 minutes (the default
setting), 30 minutes, 1 hour, 2 hours, 3 hours, 4 hours, 8 hours, and Everything.
• Custom Mix
Select to create a running order based on a custom Rio DJ mix or create a new Custom Rio DJ
Mix to be saved and used later. Options include Select, Create, Edit, Delete, and Rename.
•Play All
Select to create a running order that sorts all of the tracks on the player into basic categories.
Settings include Album (the default setting), Artist, Genre, and Year. The track running order
generated is orde red alphabetically or chronologically, based on the selected Play All setting.
• Top Tunes
Select to create a running order co mpose d of a se t n umber of th e mo st fre que ntly playe d tracks.
The most frequently played tracks are played first. Settings include 10 (the default setting), 20,
30, 40, 50, 100, and 250.
•New Music
Select to create a running order composed of the most recently loaded tracks during a set
amount of time. The most recently played tracks are played first. Settings include 1 day (the
default setting), 3 days, 1 week, 2 weeks, 1 month, 6 months, and 1 year.
17
Page 22

Table of Contents
• Memory Lane
Select to create a running order composed of the least frequently played tracks during a set
amount of time. The least recently played tracks are played first. Settings include 1 day (the
default setting), 3 days, 1 week, 2 weeks, 1 month, 6 months, and 1 year.
• Sounds Of...
Select to create a running order composed of tracks from a specific decade. Settings include
1940’s (the de fault setting), 1950’s, 1960’s, 1970’s, 1980’s, 1990’s, and the 2000’s.
• Forgotten Gems
Select to create a running order composed of the most popular, but least recently played, tracks
during a set amount of time. The most recently played tracks are played first. Settings include 1
day (the default setting), 3 days, 1 week, 2 weeks, 1 month, 6 months, and 1 year.
•Déjà Vu
Select to create a running order composed of the most popular and most recently played tracks
during a set amount of time. The most frequently played tracks are played first. Settings include
1 day (the default setting), 3 days, 1 week, 2 weeks, 1 month, 6 months, and 1 year.
• Random Mix
Select to create a running order compo sed of all tracks, in random orde r , o n the playe r. The track
running order will play for a set amount of time. Settings include 15 minutes (the default setting),
30 minutes, 1 hour, 2 hours, 3 hours, 4 hours, 8 hours, and Everything.
Genre
The Genre option only appears in the Music Library when tracks have been tagged with genre
information. To play tracks from a specific genre please follow these steps:
1 Press MENU.
2 Select Music Library.
3 Select Genre.
4 Select Play All or a specif ic genre.
5 If a specific genre is selected, select Play All or a specific track.
18
Page 23

Table of Contents
Year
The Year option only appears in the Music Library when tracks have been tagged with year
information. To play tracks from a specific year please follow these steps:
1 Press MENU.
2 Select Music Library.
3 Select Year.
4 Select Play All or a specific year.
Composer
The Composer option only appears in the Music L ibrary when tra cks have been tagged with composer
information. To play tracks from a specific composer please follow these steps:
1 Press MENU.
2 Select Music Library.
3 Select Composer.
4 Select Play All or a specific composer.
5 If a specific album is selected, select Play All or a specific track.
Cover Version
The Cover V ersion optio n only appears in the Music Library whe n tracks have been tagged with cover
version information. To play tracks that cover other songs please follow these steps:
1 Press MENU.
2 Select Music Library.
3 Select Cov er Version.
4 Select Play All or a specific track.
Mood
The Mood option only appears in the Music Library when tracks have been tagged with mood
information. To play tracks that are applicable to moods please follow these steps:
1 Press MENU.
2 Select Music Library.
3 Select Mood.
4 Select Play All or a specific mood.
19
Page 24

Delete Content
To delete tracks from the Rio Carbon C please follow these steps:
1 Press MENU.
2 Select Music Library.
3 Select Delete Content.
4 Select an Artist, an Album, a Track, or Everything!
Would be nice to add Playlists and Recordings to the list.
Table of Contents
20
Page 25

Table of Contents
Now Playing
Use the Now Playing menu to view and edit the track running order that the Rio C arbon C is currently
using.
1 Press MENU.
2 Select Now Playing.
3 Highlight a track in the running order.
4 Press CENTER.
5 Select a Now Playing option.
• Play
Select to play the selected track.
• About
Select to open the About Track menu to display Title, Artist, Album, Genre, Year, Track #,
Duration, Codec, Bitrate, PCM Format, File Size, Date Loaded, Times Played (and remaining
playbacks), Last Time Played, and Autosync information for the selected track.
• Insert
Select to insert tracks into the running order after the highlighted track. Inserted tracks will be
placed at the end of the running order if Shuffle Mode is on during insertion and later turned off.
• Append
Select to append tracks to the end of the running order.
• Re-order
Select to “grab” the selected track and move it to another position in the running order. Use the
WHEEL to move the selected track up or down the list of tracks in the running order. Press
CENTER to drop the selected track into a new position.
21
Page 26

Table of Contents
• Remove
Select to remove a track or tracks from the running order. Tracks removed from running orders
are not removed from the Rio Carbon C. Remove options include:
Track: Select to remove the highlighted track.
Artist: Select to remove all tracks tagged with the same artist as the highlighted track.
Album: Select to remove all tracks tagged with the same album as the highlighted track.
Genre: Select to remove all tracks tagged with the same genre as the highlighted track.
Year: Select to remove all tracks tagged with the same year as the highlighted track.
Tracks Above: Select to remove all tracks in the running order above the selected track.
Tracks Below: Select to remove all tracks in the running order below the selected track.
Everything: Select to remove all tracks from the running order.
TIP: To delete tracks from the Rio Carbon C, rather than simply removing them from the
running order, use the Delete Content options available in the Music Library menu.
• Make Playlist
Select to save the current running order as a playlist.
22
Page 27

Settings
Playback
Equalizer
Resume
Play Screen
Display Scheme
Display Brightness
FM Radio Settings
Record Setup
Lock Setup
Power Management
Time & Date
Quick Buttons
Audible Prompts
Hearing Protection
Text Encoding
Transfer Mode
Table of Contents
23
Page 28

Table of Contents
Playback
Various playback options can be set to modify the way the Rio Carbon C plays tracks. Tracks can be
shuffled at random and/or repeated continuously.
1 Press MENU.
2 Select Settings.
3 Select Playback.
4 Select Shuffle, Repeat, and/or Cross Fade.
5 Press CENTER to apply settings.
• Shuffle
Set selected tracks to play in standard or random order . Sett ings include Off (the default setting)
and On.
• Repeat
Set selected tracks to repeat playback of all tracks or the current track. Settings include Off (the
default setting), All, and One.
• Cross Fade
Set Cross Fade se ttings that can seamlessly merge th e playback of tracks during the end of one
track and the beginning of another. Settings include Off (the default setting ), and 1 through 5
Seconds.
24
Page 29

Table of Contents
Equalizer
The sound of tracks played on the Rio can be adjusted using various preset and fully customizable
equalizer settings.
Bass & Treble
Preset Equalizer Settings
Custom Equalizer Settings
EQ Mode
Special
25
Page 30

Table of Contents
Bass & Treble
The Bass & Treble feature can be used to adjust Bass an d Treble a total of 12 decibels (dB), from 6dB to +6dB. The Bass & Treble option is only available when the EQ Mode has been set to Bass &
Treble.
1 Press MENU.
2 Select Settings.
3 Select Equalizer.
4 Select Bass & Treble.
5 Select Bass and/or Treble by scrolling WHEEL. Use CONTROL P AD to adjust options.
6 Select Done to apply settings or Cancel to return to the Equalizer menu.
• Bass
Adjusts the low en d of the sound spectrum from -6dB to +6dB.
• Treble
Adjusts the hi gh end of the so und spectrum from -6dB to +6dB.
Preset Equalizer Settings
Select to change the sound of tracks according to preset equalizer settings. The equalizer changes
immediately as each option is highlighted. If no option is selected the equalizer will return to the last
saved setting.
1 Press MENU.
2 Select Settings.
3 Select Equalizer.
4 Select EQ Off, Rock, Pop, Jazz, Classical, or Trance.
26
Page 31

Table of Contents
Custom Equalizer Settings
Custom equalizer optio ns fun cti on the sam e way as pre set eq ualizer settings but are set according to
personal preferences.
Custom equalizer options are only available when the EQ Mode has been set to 5-Band EQ.
1 Press MENU.
2 Select Settings.
3 Select Equalizer.
4 Select Cus tom 1, Custom 2, or Custom 3.
5 Adjust 5-Band parametric EQ settings.
Rotate WHEEL to change frequencies. Move CENTER left or right to adjust decibel levels.
6 Select Done to apply settings or Cancel to return to the Equalizer menu.
Options include 10k, 2.5k, 600, 150, and 40 hertz frequencies.
EQ Mode
EQ Mode allows the player to switch between the standard Bass & Treble settings and custom 5-Band
Parametric settings.
27
Page 32

Table of Contents
Special
Additional audio filters are available in the Special menu.
1 Press MENU.
2 Select Settings.
3 Select Equalizer.
4 Select Special.
5 Select Auto Gain Control, and/or Stereo Separation op tions and settings by usi ng the
CONTROL PAD.
6 Select Done to apply settings or Cancel to return to the Equalizer menu.
• Auto Gain Control
Gain settings affect the overall Gain of the audio to make the audio sound more consistent by
automatically adjusting the volume. Auto Gain Control is great for keeping sounds clear, without
being too strong, even in noisy external environments. Settings include Off (the default setting),
Low, Medium, and High.
• Stereo Separation
Many albums recorded in stereo during the early days of studio production separated all
instruments to on e side an d all voca ls to ano ther. This type of extreme stereo separat ion is found
on many Beatles and Buddy Holly albums. The Stere o Separation option merges the left and
right stereo channels together to compensate for stereo effects that may sound strange when
played on headphone s. Settings include Off (the default setting) Low, Medium, and High.
28
Page 33

Table of Contents
Resume
Use the options in the Resume menu to set the track that the Rio Carbon C will play whenever it is
powered on.
1 Press MENU.
2 Select Settings.
3 Select Resume.
4 Adjust settings.
5 Press CENTER to apply settings and return to Player mode.
• Track
Set the Rio Carbon C to begin playb ack of the last track played bef ore shut down or the fi rst track
in the running orde r whe n the Rio C arb on C is p owere d on. Setti ngs i nclude Current (the default
setting) and First.
• Timecode
Set the Rio Carbon C to begin playback of the last track played at the point th e track was at
during shutdown or at the start of the track. Settings include Current (the default setting) and
Start.
29
Page 34

Table of Contents
Play Screen
When the Rio Carbon C is in Player mode, pressing CENTER will cycle the display through various
Play Screen views.
1 Press MENU.
2 Select Settings.
3 Select Play Screen.
4 Adjust Current Track View, Timer Direction , and/or Timer Mode settings.
5 Select Done to apply settings or Cancel to return to the Settings menu.
• Current Track View
Set the Rio Carbon C’s visualization mode to one of three settings. Settings include Progress
Indicator (the default setting), Profile Indicator, and VU Meters.
• Timer Direction
Settings include Count Up (the default setting) and Count Down.
• Timer Mode
Settings include Single Track (the default setting) and All Tracks.
30
Page 35

Table of Contents
Display Scheme
Change the Background View image and co lor of the text displayed on the Carbon C’s displ ay screen.
1 Press MENU.
2 Select Settings.
3 Select Display Scheme.
4 Select Background or Color Sc heme and adjust settings.
5 Select Done to apply settings or Cancel to return to the Display Themes menu.
• Background
Background views include Plain Color (the default option), Picture, Visualization, and Album Art.
The selected view will determine what additional options are availabl e.
Plain Color view sets the player to the default background view.
Picture view allows the Cycle Background and Picture options to be adjusted. Cycle
Background can be set to Off (the default option ) and Each Track. The displayed picture can
be adjusted by using the Picture option.
31
Page 36

Table of Contents
To add pictures to your Rio Carbon C:
1 Place the Rio Carbon in MSC mode.
2 Connect to your computer via USB.
3 Use My Computer (Windows Explorer) to locate the Rio Carbon C.
Screenshot
4
5 Double click the Rio Carbon C icon.
6 Double click the .rio folder.
Screenshot
If you do not see the .rio folder, turn on the Show hidden files and folders
option. From the My Computer window, click Tools/ Folder Options.../View/
Hidden files and folders, then click the Show hidden files and folders radio
button.
Screenshot
7 Inside the .rio folder, create a folder named wallpaper.
(Right click inside the My Computer window , select New, select Folder, and name
the new folder wallpaper.)
Screenshot
8 Add pictures to the wallpaper folder using copy and paste or drag and drop
methods.
NOTE: Pictures must be in .jpg format.
32
Page 37

Table of Contents
Visualization view allows the Cycle Background and Select Visualization options to be adjusted.
Cycle Background can be set to Off (the default option ) an d Each T rack. The displayed visualizat ion
can be adjusted by using the Visualization option.
Visualization view allows the Cycle Background and Select Visualization options to be adjusted.
Cycle Background can be set to Off (the default option ) an d Each T rack. The displayed visualizat ion
can be adjusted by using the Visualization option.
Album Art view allows the Fit To Screen option. Fit To Screen can be set to Centered (the default
option) or Stretched.
The Rio Carbon C detects album art images embedded into MP3 and WMA tracks as well as specific
album art .jpg images located in the same folder as tracks.
33
Page 38

The Rio Carbon C displays album art based on the following priorities:
The Rio Carbon C displays album art base d on the following priorities:
1 Embedded album art
Embedded album art is encoded directly into MP3 and/or WMA files during the
encoding process.
2 Album art named track.jpg.
.jpg images that are named exactly the same, and located in the same folder, as
the tracks that they are intended to be displayed with.
Screenshot
i.e.
Music Location
Music/Rainer Maria/Long Knives Drawn/Ear Ring.wma
Album Art Location
Music/Rainer Maria/Long Knives Drawn/Ear Ring.jpg
Table of Contents
3 Album art named folder.jpg.
.jpg images that are n amed fo lder.jpg and located in the same folder as the tra cks
that they are intended to be displayed with.
Screenshot
i.e.
Music Location
Music/Rainer Maria/Long Knives Drawn/
Album Art Location
Music/Rainer Maria/Long Knives Drawn/folder.jpg
34
Page 39

Table of Contents
• Color Scheme
Select Color Scheme options to change the colors used on the Rio Carbon C’s displays and
menus. As each color scheme option is highlighted, the display is updated with the appropriate
colors.
Color scheme screenshots
35
Page 40

Table of Contents
Display Brightness
By adjusting the brightness setting, the player can change the amount of light generated by the Rio
Carbon C’s display. Conservative brightness settings will conserve energy and extend the amount of
playback time during each battery charge.
1 Press MENU.
2 Select Settings.
3 Select Display Brightnes s.
4 Adjust Screen Brightness settings.
5 Select Done to apply settings or Cancel to return to the Settings menu.
• Screen Brightness
Adjust the brightness of the Rio Carbon C’s backlight. Setting the brightness to o bright may result
in hazy images. Setting the brightness too dim will result in images that are difficult to see.
36
Page 41

Table of Contents
FM Radio Settings
Select to adjust FM radio settings, including region specific frequencies, FM tuner sensitivity, and
preset station slots.
1 Press MENU.
2 Select Settings.
3 Select FM Radio Setup.
4 Select Options, Store Preset, or Delete Preset option.
5 Select Done to apply settings or Cancel to return to the Settings menu.
• Options
FM Stereo Mode
Settings include On (the default setting), and Off. Selecting Off will place the FM tuner in mono
mode.
Region
Settings include USA (tunes by .2MHz, the default setting), Europe (tunes by .05MHz), and
Japan (tunes by .05MHz).
Sensitivity
Adjust the sensitivity of the FM tuner. If the sensitivity is set too high, the FM tuner m ay detect FM
frequencies that cont ain more st atic than actual FM br oadcast s when s canning for st ations. If the
setting is too low the FM tuner may skip eve n str ong FM broa dca s t s w hen scann i ng fo r stations.
Settings include Medium (the default setting), High, and Low.
• Store Preset
The Rio Carbon C allows programming of up to 8 FM preset slots.
When in Manual mode, tune to a frequency you wish to store to a preset slot.
1 Press and hold CENTER to enter Store Preset mode.
2 Press FORWARD or REVERSE to cycle to th e desired preset station slot.
3 Press CENTER to store the frequency to the selected FM preset slot. After a frequency ha s been
stored to a slot the Rio Carbon C will enter Preset mode.
• Delete Preset
Select to delete stored FM Radio preset channels.
37
Page 42

Table of Contents
Record Setup
Select to set the file format that the Rio Ca rbon C will use when recording FM Radio or Line-In input.
1 Press MENU.
2 Select Settings.
3 Select Record Setup.
4 Select FM Radio or Line-In recording methods.
5 Select ADP CM mono, WAV mono, or WAV no compression.
6 Select Done to apply settings or Cancel to return to the Settings menu.
• ADPCM mono (the default setting)
ADPCM stands for Adaptive Differential Pulse Code Modulation. Recordings made using the
ADPCM mono encoding format take up less space than recordings encoded in WAV mono or
WAV no compression formats.
• WAV mono
Short for waveform, a refere nce to sound waves, .w av is a longsta nding Win dows stand ard used
to encode sound files.
• WAV no compression
Select to record the highest q ua lity sou nd. Reco rd ings create d with ou t co mpression will result in
significantly larger files than compressed recording formats.
38
Page 43

Table of Contents
Lock Setup
Use the options in the Lock Setup menu to enable various controls when the lock is enabled.
1 Press MENU.
2 Select Settings.
3 Select Lock Setup.
4 Select Volume, Center, and Pad options.
5 Press CENTER to apply settings and return to Player mode.
• Volume
Options include Lock (the default setting) and Off. When set to Off, the volume level can be
adjusted even when the Rio Carbon C has been locked.
• Center
Options include Lock (the default setting) and Off. When set to Off, pressing CENTER will scroll
through Time Code View, Track Format View, and Date Views even when the Rio Carbon C has
been locked.
• Pad
Options include Lock and/ (PLAY/PAUSE). When set to/ any CONTROL P AD
movement will be interpreted as the/ control.
39
Page 44

Table of Contents
Power Management
By adjusting Power Management settings the Rio Carbon C can be set to conserve energy. Low
Power Management settings will dramatically extend the amount of playback time during each battery
charge.
1 Press MENU.
2 Select Settings.
3 Select Power Management.
4 Adjust Screen Backlight, and Power off settings.
5 Select Done to apply settings or Cancel to return to the Settings menu.
• Screen Backlight
Set the player to turn off the screen backlight after a set number of seconds. Settings include
Always Off, 2 Seconds, 5 Seconds (the default setting), 10 Seconds, 30 Seconds, and
Always On.
• Button Backlight
Set the player to turn off the button backlights after a set number of seconds. Settings include
Always Off, 2 Seconds, 5 Seconds (the default setting), 10 Seconds, 30 Seconds, and
Always On.
• Auto Standby after set time of no activity
Set the player to shut down and conserve energy after being inactive for a set number of
minutes. Settings include Never, 2 Minutes, 5 Minutes ( the default setting ), 15 Minutes, and 30
Minutes.
40
Page 45

Table of Contents
Time & Date
Use the options in the Time menu to set the Rio Carbon C’s internal clock. Time is set automatically
every time tracks are transferred to the Rio Carbon C using Rio Music Manager.
1 Press MENU.
2 Select Settings.
3 Select Time & Date.
4 Select Set Time, Set Date, or Time & Date Format options.
5 Press CENTER to apply settings and return to Player mode.
• Set Time
Options include Hour, Minute, and AM / PM.
• Set Date
Options include Month, Day, and Year.
• Time & Date Format
Options include 12 hour (the default setting) and 24-hour time formats and USA (the default
setting), Europe, and Japan date formats.
41
Page 46

Table of Contents
Quick Buttons
Use Quick Buttons to setup custom press-and-hold button associations.
1 Press MENU.
2 Select Settings.
3 Select Quick Buttons.
4 Select Wheel, Up, Center, Up, and/or Down.
5 Assign a press-and-hold association to the selected button.
6 Select Done to apply settings or Cancel to return to the Settings menu.
Possible button associatio ns include No Action, Main Menu, Play Music, Rio DJ, Artist, Album, Track,
Playlists, Folders, Quick Buttons, Playback, Equalizer, Bookmark, About Track, Intro Scan, Shuffle,
Stopwatch, and Rotary Popup.
42
Page 47

Table of Contents
Audible Prompt s
The Rio Carbon C can be set to confirm button presses with an audible prompt.
1 Press MENU.
2 Select Settings.
3 Select Audible Prompts.
4 Select On or Off and a Prompt volume setting. (Moving the slider right increases the volume.
Moving the slider left decreases the volume.)
5 Select Done to apply settings or Cancel to return to the Settings menu.
43
Page 48

Table of Contents
Hearing Protection
Select to adjust the maximum possible volume to avoid potentially dangerous loud sounds.
1 Press MENU.
2 Select Settings.
3 Select Hearing Protection.
4 Select Off (the default setting) or On and a Volume setting. Moving the slider right increases the
maximum possible volume. Moving t he slider left decreases the maximum possible volume.
5 Select Done to apply settings or Cancel to return to the Settings menu.
44
Page 49

Table of Contents
Te xt Encoding
Adjust Text Encoding menu setting if the Rio Carbon C displays random alphabet characters instead
of the correct ID3 tag text. The Rio Carbon C supports most Western European and Japanese-based
languages. If ID3 tags are displayed properly then the Text Encoding setting does not need to be
changed.
Rio Music Manager encodes track tags using the Unicode method. Properly tagged (Unicode) tracks
are unaffected by Text Encoding setting changes. All WMA tracks are Unicode.
1 Press MENU.
2 Select Settings.
3 Select Text Encoding.
4 Select Western (the default setting) or Japanese.
5 Press CENTER to apply settings and return to Player mode.
• Western (ISO 8859-1)
Select to read ID3 tags that are encoded using characters from Western European languages.
ISO is an abbreviation for International Standards Organization.
• Japanese (Shift-JIS)
Select to read ID3 tags that are encoded using the Shift-JIS format. Shift-JIS is a character
encoding format created by Microsoft that is based on the Japanese Industrial Standard format.
45
Page 50

Table of Contents
Transfer Mode
Adjust T ransfer Mo de settin gs to chang e the way th e Rio Carb on C commun icates w ith your com puter.
1 Press MENU.
2 Select Settings.
3 Select Transfer Mode .
4 Select Auto (the default setting), MTP, or MSC.
5 Press CENTER to apply settings and return to Player mode.
• Auto (the default setting)
Select to let your Rio Carbon C decide what mode is most appropriate for your computer. If
Windows Media Player 10 (WMP10) and Windows XP Service Pack 1 (SP1) (or greater) are
installed on your computer, the Rio Carbon C will default to MTP mode functionality. If your
computer does not have WMP10 and SP1 (or grea ter) installed, the Rio Carbon C will default to
MSC mode functionality.
• MTP
Select to set your Rio Carbon C to only use the MTP protocol. MTP is an abbreviation for Media
Transfer Protocol.
NOTE: When in MTP mode, the Rio Carbon C cannot communicate properly with your
computer unless it has both WMP10 and Windows XP SP1 (or greater) installed.
When in MTP mode, t he Rio Carbon C cannot display hidden files in folders, cannot
allow transfers to the root Rio Carbon C directory, or allow the creation of new folders.
Folders can be transferred to the Rio Carbon C using drag-and-drop and copy-andpaste methods. When in MTP mode (or Auto mode on Windows XP systems with SP1
(or greater) and WMP10 installed), all audio files transferred to the Rio Carbon C are
automatically placed in a pre-created Media folder and all non-audio files are placed in
a pre-created Data folder.
46
Page 51

Table of Contents
• MSC
Select to set your Rio Carbon C to only use the MSC protocol. MSC is an abbreviation for Mass
Storage Class.
NOTE: When in MSC mode, PlaysForSure™ Audio Subscription tracks cannot be
transferred to the Rio Carbon C. PlaysForSure™ Audio Subscription tracks already on
the Rio Carbon C will play normally.
47
Page 52

Table of Contents
FM Radio
To access FM Radio mode:
1 Press MENU.
2 Select FM Radio.
When in FM Radio mode, the earphone wire acts as the antenna for the FM radio. For best reception,
keep the earphones plugged into the EARPHONE jack whenever the FM radio is in use.
FM Radio features include:
FM Controls
Manual
Store Preset
Preset
TIP: When in FM Radio m od e, the earphone wire acts as the antenna for the FM radio.
For best reception, keep the earphones plugged into the EARPHONE po rt whenever
the FM radio is in use.
48
Page 53

FM Controls
When in FM Radio mode, the following controls function differently:
CENTER
Press to enter Preset mode.
Press again to turn off the
Manual mode strong signal
search. When turned off, no
search is displayed and
selecting and holding
FORWARD or REVERSE will
scan up or down the frequency
range manuall y.
Press and hold to enter
Store Preset mode.
PLAY/PAUSE
Press and release to mute the
FM radio. Pres s and hold to
start or stop FM Radio Record.
WHEEL
???
Table of Contents
MENU
In Player mode, press to enter
Menu mode.
In Menu mode, press to return
to Player mode.
FORWARD and
REVERSE
In Manual mode, pr ess t o tu ne
up or down the frequency
range. In Manual mode, press
and hold to search up or down
the frequency range for
particularly strong signals.
49
Page 54

Table of Contents
Manual
Follow these steps to enter the manual tuner mode:
1 Press MENU.
2 Select FM Radio.
3 Press CENTER.
Store Preset
The Rio Carbon C allows programming of up to 8 FM preset slots.
1 When in Manual mode, tune to a frequency you wish to store to a preset slot.
2 Press and hold CENTER to enter Store Preset mode.
3 Press FORWARD or REVERSE to cycle to th e desired preset station slot.
4 Press CENTER to store the frequency to the selected FM preset slot. After a frequency ha s been
stored to a slot the Rio Forge will enter Preset mode.
Preset
FM Radio preset slots can be accessed within seconds using Preset mode .
1 When in Manual mode, press CENTER to enter Preset mode.
2 Press FORWARD or REVERSE to cycle to th e desired preset station slot.
3 Press CENTER to return to Manual mode.
50
Page 55

Table of Contents
Record
Select to record FM Radio or Line-In audio using the Rio Carbon’s internal recorder. Recording ID3
Tags can be edited using Rio Music Manager.
1 Press MENU.
2 Select Recorder.
3 Select FM Radio or Line-In.
•FM Radio
Select to enter FM Radio mode and begin recording immediately.
Sto p and Splice Functions o nly ava i la bl e after player has been placed in this mode. Currently no
Playback or Delete Functions. Hopefully the immediate recording feature will be changed to
manual.
TIP: When in FM Radio m od e, the earphone wire acts as the antenna for the FM radio.
For best reception, keep the earphones plugged into the EARPHONE po rt whenever
the FM radio is in use.
• Line-In
Select to enter Line-In recorder mode and begin recording immediately.
Sto p and Splice Functions o nly ava i la bl e after player has been placed in this mode. Currently no
Playback or Delete Functions. Hopefully the immediate recording feature will be changed to
manual.
To exit Recorder mode:
1 Press MENU.
2 Select Recorder.
3 Select Stop.
51
Page 56

Record Controls
When in FM Radio mode, the following controls function differently:
Table of Contents
MENU
In Player mode, press to enter
Menu mode.
In Menu mode, press to return
to Player mode.
CENTER
Press to cycle through
Recorder display views.
PLAY/PAUSE
Press to play or pause Press to
begin recording. After
recording has started, press
PLAY/PAUSE to pause
recording.
FORWARD and
REVERSE
Press to select a prerecorded
recording. If a prerecorded
recording is selected, the
current recording will be
appended to the prerecorded
recording.
WHEEL
???
52
Page 57

Features
Bookmarks
Stopwatch
Troubleshooting
Table of Contents
53
Page 58

Table of Contents
Bookmarks
Bookmarks store specific player settings, including the current running order, the current track, the
current time position of the track, and the Playback settings. Users can save these settings in a
bookmark and restore them whenever they use the Rio Carbon C.
Bookmarks are great fo r:
• Placing digital bookmarks in digital audio books or other extended length tracks.
• Maintaining positions in long term running orders.
• Sharing your player with others without losing personal settings.
1 Press MENU.
2 Select Bookmarks.
3 Select Set, Select, Update, or Delete.
•Set
Select a bookmark. Press CENTER to save the current settings to a bookmark.
• Select
Select a bookmark. Press CENTER to restore the selected bookmark settings.
• Update
Select a bookmark. Press the CENTER to replace the bookmark with the current player settings.
• Delete
Select a bookmark. Press CENTER to delete the selected bookmark.
54
Page 59

Table of Contents
Stopwatch
Use the stopwatch to keep track of time-sensitive events while listening to music.
1 Press MENU.
2 Select Features.
3 Select Stopwatch.
4 Press CENTER.
Lap statistics are displayed at the bottom of the Stopwatch screen. When a new lap is set, the
difference, either faster (-) or slower (+) between new lap times and the average laptime is displayed
for a few moments.
When in Stopwatch mode, the controls work in the following ways:
• MENU
Press to return to the Main Menu.
• PLAY/PAUSE
Press to start and stop the timer.
• CENTER
Press to set a lap time. Press and hold to return to single lap display. Multiple laps and lap
averages will be lost.
• STOP
Press to reset timer.
55
Page 60

Table of Contents
Troubleshooting
Troubleshooting description.
1 Press MENU.
2 Select Features.
3 Select Troubleshooting.
Troubleshooting options include:
• Rescan Music
Selecting this option causes the pla y er to rebu ild the entire int ernal d atabase of tracks. Because
this process can take in excess of 5 minutes for around 30 00 tracks, a confirmation dialogue
must be displayed first , a llow ing the us er to can cel if req uir ed. Th e user sho uld on ly ever need to
rebuild the internal database as a troubleshooting step.
• Bad Tracks
This option opens a window that displays tracks present on the player that are known to be
erroneous in some way (e.g. corrupted). A brief description of each problem is also accessible
from this window.
56
Page 61

Table of Contents
Lock Player
Select Lock Player to disab le the R io Ca r bon C’s buttons (based on Lock Setup settings) and prevent
accidental operation.
1 Press and hold MENU and CENTER at the same time, then release.
or
1 Press MENU.
2 Select Lock Player.
To exit Lock Player mode, press and hold MENU and CENTER at the same time, then release.
57
Page 62

Table of Contents
About
The About screen displays information about the Rio Carbon C. Information includes the total amount
of memory on the Rio Carbon C, the amount of free memory, the number of tracks on the Rio Carbon
C, and the Firmware version.
1 Press MENU.
2 Select About.
3 Select Player or Storage.
4 Press CENTER.
About options include:
• Player
Displays firmware version, copyright, and Rio webs ite information.
• Track
Displays Title, Artist, Album, Genre, year, Track #, Duration, Comment, Codec, Bitrate, PCM
Format, File Size, Date Loaded, Times Played, Last Played, and Autosynced information.
• Storage
Press CENTER to cycle through displays of memory usage graphic bar and memory usage (MB
used/MB capacity), the total number of tracks, the total duration of all tracks, the number of
playlists, and the number of personal files on the Rio Carbon C.
58
Page 63

Table of Contents
Rio Music
Manager
What is Rio Music Manager?
Installing Rio Music Manager
Copy CDs
Transfer Music
Create Playlists
Delete Tracks
59
Page 64

Table of Contents
What is Rio Music Manager?
Rio Music Manager is an all-in-one solution that can rip, encode, and manage entire collections of
digital audio tracks. Rio Music Manager provides the following capabilities:
• Save (Rip and Encode) audio CDs into compressed digital audio formats. Rio Music Manager
encodes WMA files by default and MP3 via an optional upgrade pack.
• Automatically Synchronize the music collection on your computer with your Rio Carbon C.
• Edit ID3 Tags and WMA tags on digital audio tracks.
• Organize and manage digital audio tracks on your computer and your Rio Carbon C.
• Search for tracks on your computer and your Rio Carbon C.
• Create custom Playlists.
• Transfer tracks from your computer to your Rio Carbon C.
Complete Rio Music Manager instructions can be fo und using the Rio Music Manager Help menu.
60
Page 65

Table of Contents
Inst alling Rio Music Manager
Software found on the Rio installation disc should be installed on a computer before using the Rio
Carbon C. Rio Music Manager should be installed on computers that use the Windows operating
systems.
Follow these instructions to load Rio Music Manager onto your PC.
1 Place the installation CD label-side up into the computer’s CD-ROM drive.
The Rio installation software launches automati cally.
2 Click Rio Music Manager INSTALL NOW (required) and foll ow the on-screen instructions.
3 If prompted, reboot the computer when the installation is complete.
If the Rio installation software does not display automatically, follow these steps to begin the
installation manually:
4 Double-click the My Computer icon, , on the Windows desktop or Start Menu.
5 Double-click the CD-ROM icon, .
6 Double-click the Install icon, .
7 Go to S tep 2.
61
Page 66

Table of Contents
Copy CDs
Copying tracks from Audio CDs involves two steps commonly kno wn as ripping and encoding . Ripping
and encoding refers to the process of ripping (copying) audio from a CD and encoding (saving) the
audio content into a compressed digital audio format like MP3 or WMA.
1 Launch Rio Music Manager.
2 Insert an Audio CD into your CD-ROM drive.
3 Click the CD-ROM icon, ICON IMAGE, on the Rio Music Manager Device List.
4 Use any of the following techniques to select tracks:
Track Type Technique
Single track. • Click the track.
Multiple tracks. • Press SHIFT+Click or
CTRL+Click.
All tracks. • Press CTRL+A.
No tracks. • Press CTRL+N.
Every track except for the currently selected tracks. • Select Edit, Invert Selection.
5 Click to begin copying tracks to your computer.
62
Page 67

Table of Contents
Transfer Music
There are many ways to transfer tracks onto your Rio Carbon C. You can transfer tracks to the Rio
Carbon C using Rio Music Manager, Windows Explorer, or online music stores that download tracks
directly to the player. Choosing which method is right for you is largely a matter of personal
preference.
Transfer Tracks using Rio Music Manager
Transfer Tracks using Windows Explorer
Transfer Tracks using Online Music Stores
63
Page 68

Table of Contents
Transfer Tracks using Rio Music Manager
Transferrin g tracks from the PC to the Rio Carbon C with Rio Music Manage r involves selecting tracks,
then transferring them onto the Rio Carbon C.
1 Launch Rio Music Manager.
2 Click My Music, ICON IMAGE, in the left frame to access tracks. Rio Music Manager will scan
your computer’s music locations for digital audio files. Files are automatically categorized by
album title and displ ayed in th e Track List. Use the Music Location menu in Rio Music Manager
(Tools/Options/Music Location) to add music locations for Rio Music Manager to scan.
3 Select tracks within a category of tracks. Categories include albums, artists, genres, songs, and
playlists.
For example, if you wish to copy all tracks from a favorite artist onto the Rio Carbon C, click the
Artists tab and then use any of the techniques in Step 4 to select the desired tracks.
4 Use any of the following techniques to select files:
Track Type Technique
Single track. • Click the track.
Multiple tracks. • Press SHIFT+Click or
CTRL+Click.
All tracks. • Press CTRL+A.
No tracks. • Press CTRL+N.
Every track except for the currently selected tracks. • Select Edit, Invert Selection.
5 After the tracks have been selected they can be copied to the Rio Carbon C by clicking .
Complete Rio Music Manager instructions can be fo und using the Rio Music Manager Help menu.
64
Page 69

Table of Contents
Transfer Tracks using Windows Explorer
Folders and files can be transferred to the Rio Carbon C using copy-and-paste and/or drag-and-drop
techniques. These method s are e xcellen t ways to tran sfer fi les to an d from com puters wh en usi ng the
Rio Carbon C as a portable storage device.
Any type of file can be transferred using these methods but to assure full functionality, Playlists and
copy protected music using Digital Rights Management (DRM) should be transferred to the Rio
Carbon C using Rio Music Manager or the applicable online music store manager.
Transferring t racks using Windows Explorer is slightly different depen ding on what Tran sfer Mode (see
page X) the Rio Carbon C is set to use, either MTP or MSC.
MTP mode transfer s
MSC mode transfers
65
Page 70

Table of Contents
MTP mode transfers
If Windows Media Player 10 and Windows XP Service Pack 1 (or greater) are installed on your
computer, the Rio Carbon C will default to MTP mode functionality.
1 Connect the Rio Carbon C to a computer using the supplied USB cable.
2 Double-click My Computer on the Windows Desktop or in the Start Menu.
3 Locate MP3 or WMA audio files on the computer.
4 Select files and/or folders to transfer to the Rio Carbon C.
5 Click Edit.
6 Click Copy.
7 Double-click My Computer on the Windows Desktop or in the Start Menu to open another
window.
8 In the new window, locate the device icon that is associated with the Rio Carbon C.
9 Double-click the Rio Carbon C icon.
10 Select a folder to add tracks to. In MTP mode, audio files must be placed into the folder called
Media and all non-audio files must be placed into the folder called Data. The Media and Data
folders are created automatically by the Rio Carbon C when in MTP mode.
11 Click Edit.
12 Click Paste.
When the Rio Carbon C is in MTP mode (or Auto mode on Windows XP systems with SP1 (or greater)
and WMP10 installed), hidden files on the Rio Carbon C cannot be viewed using Windows Explorer,
transfers cannot be made to the root Rio Car bon C di rectory us ing Wind ows Expl orer, and new folders
cannot be created using Windows Explorer. Folders can be transferred to the Rio Carbon C using
drag-and-drop and copy-and-paste methods.
66
Page 71

Table of Contents
MSC mode transfers
If your computer does not have Windows Media Player 10 and Service Pack 1 (or greater) installed,
the Rio Carbon C will default to MSC mode functionality.
1 Connect the Rio Carbon C to a computer using the supplied USB cable.
2 Double-click My Computer on the Windows Desktop or in the Start Menu.
3 Locate MP3 or WMA audio files on the computer.
4 Select files and/or folders to transfer to the Rio Carbon C.
5 Click Edit.
6 Click Copy.
7 Double-click My Computer on the Windows Desktop or in the Start Menu to open another
window.
8 In the new window, locate the device icon that is associated with the Rio Carbon C.
9 Double-click the Rio Carbon C icon.
10 Select a folder to add tracks to.
11 Click Edit.
12 Click Paste.
NOTE: Playlists on your computer can be transfered to th e Rio Carbon C jus t like audio tracks. When
a playlist is transfered to the Rio Carbon C, a ll of the tracks liste d in t he p l aylist are also tra nsferred to
the Rio Carbon C.
67
Page 72

Table of Contents
Transfer Tracks using Online Music Stores
Most online music stores provide their own unique and proprietary download managers that you can
use to transfer tracks to your computer and your Rio Carbon C.
Some online music stores require that you use their download manager.
Please contact the applicable online music store for information on how to use their download
manager to transfer tracks to your Rio Carbon C.
68
Page 73

Table of Contents
Create Playlists
Custom playlists can be created for later playback on both your computer and your Rio Carbon C.
Creating a playlist on your computer
Creating a playlist on your Rio Carbon C
69
Page 74

Table of Contents
Creating a playlist on your computer
1 Launch Rio Music Manager.
2 Click My Music , ICON IMAGE, in the left frame to access the tracks on your computer.
3 Select tracks to add to a playlist.
4 Use any of the following techniques to select tracks:
Track Type Technique
Single track. • Click the track.
Multiple tracks. • Press SHIFT+Click or
CTRL+Click.
All tracks. • Press CTRL+A.
No tracks. • Press CTRL+N.
Every track except for the currently selected tracks. • Select Edit, Invert Selection.
5 Right-click a highlighted track.
6 Click Add to playlist... .
7 Click New Playlist.
8 Enter a playlist name.
9 Click OK.
10 Click OK.
NOTE: Tracks can also be deleted directly from the folders on the Rio Carbon C by using Windows
Explorer.
70
Page 75

Table of Contents
Creating a playlist on your Rio Carbon C
1 Launch Rio Music Manager.
2 Click Rio Carbon C , ICON IMAGE, in the left frame to access the tracks on your Rio Carbon C.
3 Select tracks to add to a playlist.
4 Use any of the following techniques to select tracks:
Track Type Technique
Single track. • Click the track.
Multiple tracks. • Press SHIFT+Click or
CTRL+Click.
All tracks. • Press CTRL+A.
No tracks. • Press CTRL+N.
Every track except for the currently selected tracks. • Select Edit, Invert Selection.
5 Right-click a highlighted track.
6 Click Add to playlist... .
7 Click New Playlist.
8 Enter a playlist name.
9 Click OK.
10 Click OK.
71
Page 76

Table of Contents
Delete Tracks
You can use Rio Music Manager to delete tracks located on your Rio Carbon C.
1 Launch Rio Music Manager.
2 Click Rio Carbon C, ICON IMAGE, in the left frame to access the tracks on the Rio Carbon C.
3 Select tracks within a category of tracks. Categories in clude Albums, Artists, G enres, Songs, and
Playlists.
For example, if you wish to copy all tracks from a favorite artist onto the player, click the Artists
tab and then use any of the techniques in Step 4 to select the desired tracks.
4 Use any of the following techniques to select tracks:
Track Type Technique
Single track. • Click the track.
Multiple tracks. • Press SHIFT+Click or
CTRL+Click.
All tracks. • Press CTRL+A.
No tracks. • Press CTRL+N.
Every track except for the currently selected tracks. • Select Edit, Invert Selection.
4. Click the delete icon, ICON IMAGE.
72
Page 77

Table of Contents
Help
Customer Service Information
Frequently Asked Questions
ECC, FCC, and Industry Canada
Compliance
IMPORTANT SAFETY
INSTRUCTIONS
73
Page 78

Table of Contents
Customer Service Information
The FAQs below will help you solve common issues with your player. If you do not find the answers
you need here, you can contact our Customer Service Department via any of the following methods:
Web: www.rioaudio.com/support
Technical Support Telephone (United States): (254) 299-2759
Technical Support Telephone (United Kingdom): 0207-744-0802
Technical Support Telephone (Canada): (905) 305-6565
Customer Sales/Presales (United States): (866) 286-3662
Customer Sales/Presales (United Kingdom): 0207-744-0802
Customer Sales/Presales (Canada): (905) 305-6565
With every Rio product you receive the following support services:
Unlimited access to the Rio web-based technical information resources, available 24 hours a day,
every day , at http://www .rioaudio.com/support. Here you will find FAQ files, product updates, and other
useful information.
Unlimited e-mail support for the duration of your Rio product hardware warranty period.
Access to the latest software updates and enhancements for Rio products via our website.
74
Page 79

Frequently Asked Questions
Table of Contents
75
Page 80

Table of Contents
Music
• What type of files can I play with the Rio Carbon C?
The Rio Carbon C can play MP3, WMA, and A udib le #2 and #3 form at fil es.
• Can I add MP3 and WMA files to the player at the same time?
Yes. You can play MP3 and WMA audio content. They can be mixed together.
• What are the differences between MP3 and WMA files?
Because WMA’s use a lower bitrate than equiv alent MP3’s they are generally half as large as
MP3 files and you can store more music in less space on CDs, hard drives, or the Rio Carbon C.
• How much music can I store on the Rio Carbon C?
The amount of music that can be stored on the Rio Carbon C depends on the bitrate of the files
stored. The About menu lists the total amount of space, the amount of free space, and the number of tracks on the Rio Carbon C.
• Will the Rio Carbon C play Variable Bitrate (VBR) files?
Yes. Because there are many standards for VBR files, it cannot be guaranteed that every encoding software package will properly function with the Rio Carbon C. VBR files that do not comply
to standards may lack track time, fast forward, and/or rewin d capabilities.
• Why won’t the Rio Carbon C play PlaysForSure Audio Download, PlaysForSure Audio
Subscription, or other DRM (digital rights management) encoded files?
DRM files may not work properly if the Rio Carbon C’s internal clock is no longer accurate. This
can happen if the rechargeable batteries lose all charge for any period of time. Make sure the
batteries are fully charged, then follow these steps:
1 Connect the Rio Carbon C to the computer using the USB cable.
2 Transfer any track to the player using Rio Music Manager.
3 Connect to the secure service where the DRM encoded files came from.
The Rio Carbon C’s clock should now be in sync with your computer’s clock and DRM files
should play correctly.
• Why can’t I transfer PlaysForSure subscription service tracks to my Rio Carbon C?
When in MSC mode, PlaysForSure subscription service tracks cannot be transferred to the Rio
Carbon C. Change the Transfer Mode settings to put the Rio Carbon C in MTP mode.
76
Page 81

Table of Contents
Battery
• What kind of batteries can I use with the Rio Carbon C?
The Rio Carbon C uses a non-removable rechargeable lithium-ion battery.
• Can I replace the battery in my Rio Carbon C?
No.
• Can I charge the Rio Carbon C’s battery using the USB cable?
Yes. Both USB-USB (Rio player to computer) and USB-AC (Rio player to power socket) connections will power and charge the Rio Carbon C.
• Where is the battery indicator on my Rio Carbon C?
The battery indicator on the Rio Carbon C is located in the top-right corner of the display. The
segments in the battery icon show the remain ing battery power. The illumination of all segments
indicates a fully charged ba tte ry. Non-illuminated segment s in di cat e a ru n down battery. The battery indicator blinks when less than 20% of the charge on the battery remains.
77
Page 82

Table of Contents
Hard Drive
• The drive stops spinning during playback. Is this normal?
Yes. It is normal for the drive to stop spinning during playback. Stopping the drive is part of the
player’s battery life management system. When the drive is stopped, the Rio Carbon C conserves power and plays tracks from a memory buffer.
78
Page 83

Table of Contents
Files
• I can’t find some pictures and work files I copied to my Rio Carbon C. Where are they?
If in MTP mode, all non-au di o file s ar e placed into a folder called Data. The Media an d D ata folders are created automatically by the player when in MTP mode.
If in MSC mode, files remain in the folder they were originally transferred to.
• When using Windows Explorer (i.e. My Computer) to navigate the files and folders on my
Rio Carbon C, many folder options are missing. Why?
The Rio Carbon C communicates with your computer differently in MTP mode than it does in
MSC mode. When in MTP mode, the Rio Carbon C cannot display hidden files in folders, cannot
allow transfers to the root Rio Carbon C directory, and cannot allow the creation of new folders.
(Folders can be transferred to the Rio Carbon C using drag-and-drop and copy-and-paste methods.)
To use traditional folder options, change the Transfer Mode settings to put the Rio Carbon C in
MSC mode.
79
Page 84

Table of Contents
Player-Computer Connections
• Why does my Rio Carbon C experience errors after I unplug the USB cable?
Removing your Rio Car bon C f rom a U SB conn ectio n bef ore Idle i s disp layed on t he scre en m ay
result in a corrupting the player's file system. e.g. All tracks, although different, are assigned the
same name; the player will not power off; etc.
• What should I do if my Rio Carbon C is not detected by my computer?
Verify that the USB cable is securely inserted into the USB port on both the Rio Carbon C and
your computer.
1 Connect the USB cab le to a USB p ort o n the back of your computer ra ther tha n to a USB port on
the front of your computer.
2 If using a USB hub, connect to a powered USB hub. Unpowered USB hub s may not work.
3 Connect the USB cable directly to your PC, bypassing any USB hubs.
4 Remove USB ex tension cables from the connection path.
5 Disconnect other USB devices.
• My Rio Carbon C is in MTP mode but it is not being detected by Windows Explorer (My
Computer) on my Windows XP system. What should I do?
Both Windows XP Service Pack 1 (SP1) (or greater) and Windows Media Player 10 (WMP10)
must be installed for your computer to detect a Rio Carbon C set in MTP mode.
If you do not want to install SP1 (or greater) and WMP10 on your computer you should disconnect the Rio Carbon C and change the Transfer Mode setting to MSC mode.
80
Page 85

Table of Contents
• What should I do if my Rio Carbon C is not detected as a removable drive?
If in MTP mode, the Rio Carbon C is detected as a portable device rather than a portable drive.
The Rio Carbon C cannot be detected as a portable drive unless it is in MSC mode.
If in MSC mode, it is possible that a network drive is preventing the Rio Carbon C from being
mapped properly. This is a known Microsoft problem and has been documented in their knowledge base as KB297694. To resolve this issue and detect the Rio Carbon C as a removable
drive:
1 Click Start on the Taskbar.
2 Right-click My Computer on the Windows Desktop or in the Start Menu.
3 Click Manage.
4 Locate Comput er Management (Local) and click Disk Management.
5 Right-click the new drive.
6 Click Change Drive Letter and Path(s).
7 Click Change.
8 Use the drop-down box to select a drive letter for the new drive that is not assigned to a mapped
network drive.
9 Click OK.
10 Click OK.
• What should I do if my Rio Carbon C is not detected by Rio Music Manager?
Your Rio Carbon C was design ed to work with the version of Rio Music Manager tha t was
included on the Installation CD. Previous versions of Rio Music Manager may not be able to
detect your Rio Carbon C.
• Why can’t I use my computer to play tracks or open non-audio files located on my Rio
Carbon C?
Y o u can use your co mputer to play tracks and open no n-audio files located on your Rio Carbon C
only when it is in MSC mode. Change the Transfer Mode settings to put the Rio Carbon C in
MSC mode.
When in MTP mode, files located on your Rio Carbon C must be transferred to your computer
before they can be opened.
81
Page 86

Table of Contents
Frozen Screen
• What should I do if my Rio Carbon C will not power on (or off)?
Follow these steps to power the Rio Carbon C on if it will not power on normally:
1 Confirm that the Rio Carbon C’s battery have enough charge to power the player on. Connect
the Rio Carbon C to your computer or to USB-AC and charge the player for five minutes.
2 Unplug the Rio Carbon C from the USB connection.
3 Reset the Rio Carbon C by sliding and holding POWER to the right for 10 seconds.
• What should I do if the display permanently locks up, does not display, or displays
UPGRADER?
If you cannot read the display, the Rio Carbon C’s firmware may be corrupted. Corrupted firmware may be caused by a fa i le d f i rm war e upd ate. If the player’s firmware becomes corrup ted for
any reason, follow these steps to start the player in Recovery Mode and proceed with the firmware update.
1 Reset the player by by sliding and holding POWER to the right for 10 seconds.
2 Press POWER. The player should power on as normal.
If the player continues to lock up or does not display properly:
1 Reset the player by sliding and holding POWER to the right for 10 seconds.
2 Press and hold MENU + POWER until UPGRADER is displayed on the screen.
3 Connect the Rio Carbon C player to the computer using the USB cable.
4 Proceed with the Firmware upgrade.
• What should I do if my Rio Carbon C is stuck in to Recorder mode every time I turn it on?
You should download and i nst all the late st fir mwar e onto t he Ri o Carb on C. If yo ur Rio Car bon C
is using the latest firmware, please reinstall it onto the Rio Carbon C.
82
Page 87

Table of Contents
Updates and Reform at tin g
• Can I update the firmware on the Rio Carbon C?
Yes. If available, firmware for your Rio Carbon C can be downloaded online.
NOTE: Quit all applications before running the firmware update. While running the firmware update,
do not close the program, turn off the Rio Carbon C, or unplug the USB cable.
• Downloading the update
1 Visit www.rioaudio.com/support.
2 Click on the link to the Rio Carbon C.
3 Locate UPDATES and click Firmware.
4 Select and download the lates t s oftware.
• Installing the update
1 Connect the player to your computer with the USB cable.
2Wait for Idle to be displayed on the player screen.
3 Double-click the file that you downloaded from the Rio website.
The update should take approximately 30 seconds to load.
• Why would I ever want to reformat my Rio Carbon C?
If for any reason you suspect that your Rio player's file system has been corrupted, reformatting
the player will restore the file system to its original state.
1 Double-click My Computer on the Windows Desktop or in the Start Menu.
2 Locate the icon that is associated with the Rio Carbon C.
3 Right-click the Rio Carbon C icon.
4 Click Format....
5 Click Sta rt
Reformatting your Rio player will result in the deletion of all tracks, settings, and hidden
PlaysForSure Subscription Audio license files on the Rio Carbon C. Reformatting your Rio player
will immediately cancel any transfers currently in progress.
83
Page 88

Table of Contents
ECC, FCC, and Industry Canada Compliance
Statement of Compliance
This product complies with Council Directive 89/336/EEC and Council Directive 72/23/EEC.
Federal Communications Commission
This device complies with Part 15 of the Federal COmmunications Commission (FCC) Rules.
Operation is subject to the following two conditions:
1 This device may not cause harmful interference, and
2 This device must accept any interference received, including interference that may cause
undesired operation.
This equipment has been tested and foun d to comply with the limits for a Class B digital device,
pursuant to Part 15 of the FCC Rules. These limits are designed to provide reasonable protection
against harmful interference in a residential installation. This equipment generates, uses and can
radiate radio frequency energy and, if not installed and used in accordance with the instructions, may
cause harmful inte rferen ce to radio comm unication s. However, there is no guarantee that inte rferen ce
will not occur in a particular installation. If this equipment does cause harmful interference to radio or
television reception, which can be determined by turning the equipment off and on, the user is
encouraged to try to correct the interference by one or more of the following measures:
• Reorient or r elocate the receiving antenna.
• Increase the separation between the equipment and receiver.
• Connect the equipment into an outlet on a circuit different from that to which the receiver is connected.
• Consult the dealer or an experienced radio/TV technician for help.
Industry Canada
This Class B digital apparatus complies with Canadian ICES-003.
Cet appareil numérique de la classe B est conforme à la norme NMB-003 du Canada.
84
Page 89

Table of Contents
IMPORTANT SAFETY INSTRUCTIONS
Read these instructions. Keep these instructions. Heed all warnings. Follow all instructions.
Do not use this apparatus near water.
Clean only with a dry cloth.
Do not block any of the ventila tion openi ngs. Inst all in accordance with the manufa cturer’s instructions.
Do not install near any heat sources such as radiators, heat regi sters, stove s , or other apparatus
(including amplifiers) that produce heat.
Do not defeat the safety purp ose of the polarized-type plu g: A pol a riz e d pl ug has two bl a des w it h on e
wider than the other. The wide blade is provide d for your safety. When the provided plug does not fit
into your outlet, consult an electrician for replacement of the obsolete outlet.
Protect the power cord from being walked on or pinched, particularly at the plug, convenience
receptacle, and the point where they exit from the apparatus.
Only use attachments/accessories specified by the manufacturer.
Use only with a cart, stand, tripod, bracket, or table specified by the manufacturer, or sold with the
apparatus. When a cart is used, use caution when moving the cart/apparatus combination to avoid
injury from tip-over.
Unplug this apparatus during lightening storms or when unused for long periods of time.
Refer all servicing to qualified service personnel. Servicing is required when the apparatus has been
damaged in any way, such as the when power-su pply plug or cord is damag ed, liquid has be en spille d
or objects have fallen onto the apparatus, the apparatus has been exposed to rain or moisture, does
not operate normally, or has been dropped.
To reduce the risk of fire o r electr ic shock, d o not expo se this ap p aratus to rain or moisture. App ara tus
should not be expose d to drippi ng or spla shing and no objects filled with liquids, such as vases, should
be placed on the apparatus.
CAUTION
RISK OF EXPLOSION, DAMAGE OR BATTERY LEAKAGE IS POSSIBLE IF BATTERY IS
REPLACED INCORRECTLY OR BY AN INCORRECT TYPE. NEVER ATTEMPT TO CHARGE A
NON-RECHARGEABLE ALKALINE BATTERY. DISPOSE OF USED BATTERIES ACCORDING TO
INSTRUCTIONS OR LOCAL LAWS.
Use of headp hon es w h il e operating a vehicle is not recommended and is unlawful in some states and
areas. Be careful and attentive while driving. Stop operation of the player if you find it disruptive or
distracting wh ile operating any type of equipment. Listenin g to music at full power over extended
periods of time can be damaging to the hearing of the user.
85
Page 90

 Loading...