

Page 1

Rio 800 User Guide
About the User Guide
The Rio 800 User Guide includes the following information:
Introduction
Using your Rio
Using Rio menu options and settings
Using the Rio software
Understanding digit al audio terms
Frequently asked questions (FAQ) and troubleshooting
Warranty
Regulatory
Customer care
About the User Guide
Page 1
Index
To learn more:
• Refer to the Getting Started Guide for the basics on how to set up and st art using your
Rio.
• Click the RealJukebox, AudibleManager, or SoundJam software Help menus for detailed
step-by-step instructions on how to use the software to convert CD tracks into compressed digital audio formats, get audio from the Internet or transfer tracks to your Rio.
• Visit the Rio Web site
Navigating and printing the Rio 800 User Guide
The User Guide is in Adobe Acrobat (.PDF) file format.
Important: W e strongly recommend that you use Adobe Acrobat Reader version
4.0—available on the Rio softw are CD-ROM—to view and print the Rio User Guide.
Click links
on the World Wide Web.
Using Acrobat toolbar icons
the list to jump to the page in the User Guide that contains the topic.
(blue underlined text) to jump to another location in the document or to a location
Click the Index icon at the top of any page (by the page number) to go to the index—or
you can click the Index bookmark. Click page numbers in the Index to jump to a topic.
Click the Show/Hide Navigation Pane icon in the Acrobat toolbar to show a list of bookmarks. Bookmarks are links to the contents of the User Guide. Click any bookmark in
Click the Print icon in the Acrobat toolbar to print the User Guide. The size of the User
Guide is optimized for printing.
Page 2
About the User Guide
Page 2
Legal notices
Copyright © 2000-2001 SONICblue Incorporated. All Right s Reserved.
SONICblue Incorporated does not assume any responsibility for errors or omissions in this
document or make any commitment to update the information contained herein.
Rio is a registered trademark of RioPort, Inc. in the United States and/or other countries and
is used under license.
The RealPlayer and the RealJukebox are included under license from RealNetworks, Inc.
Copyright 1999. RealNetworks, Inc. Patents pending. All rights reserved.
Microsoft, Windows Media and the Windows Logo are trademarks or r eg-
istered trademarks of Microsoft Corporation in the United S tates and/or
other countries.
All other product names may be trademarks of the companies with which
they are associated.
First Edition, March 2001.
Part Number 75550139-001.
Page 3

Introduction
Page 3
Introduction
The Rio 800 provides the ultimate listening experien ce whil e you exercise, commute, or
relax. Create and mix your favorite selecti ons on your PC or Mac for playback on your Rio.
Your player is simil ar in function to a portable cassette or CD player. However, it has no moving parts, so it delivers skip-free music under any conditions. Plus, the convenient rechargeable battery and voice recording option make the Rio 800 the premier digital audio player.
The Rio interfaces with your computer through the USB port. Use the software included on
the CD-ROM to:
• Organize digital audio tracks on your computer .
• Organize tracks on your Rio.
• Record (encode) your audio CDs.
• Search for tracks on your computer or on the Internet.
• Create a custom CD-ROM—if you have CD burning hardware and your computer sup-
ports it.
In addition, there are many cool accessor ies you can purchase separately to cust omize your
Rio. Visit the Rio Web site
Sources on the Internet for digit al audio content include:
for information about accessories or t o place an order online.
Riohome.com
WindowsMedia.com
Audible.com
—for spoken audio
Page 4
Using your Rio
This section explains what you need to know about:
Using Rio buttons and controls
Using the rechargeable backpack
Using your Rio
Page 4
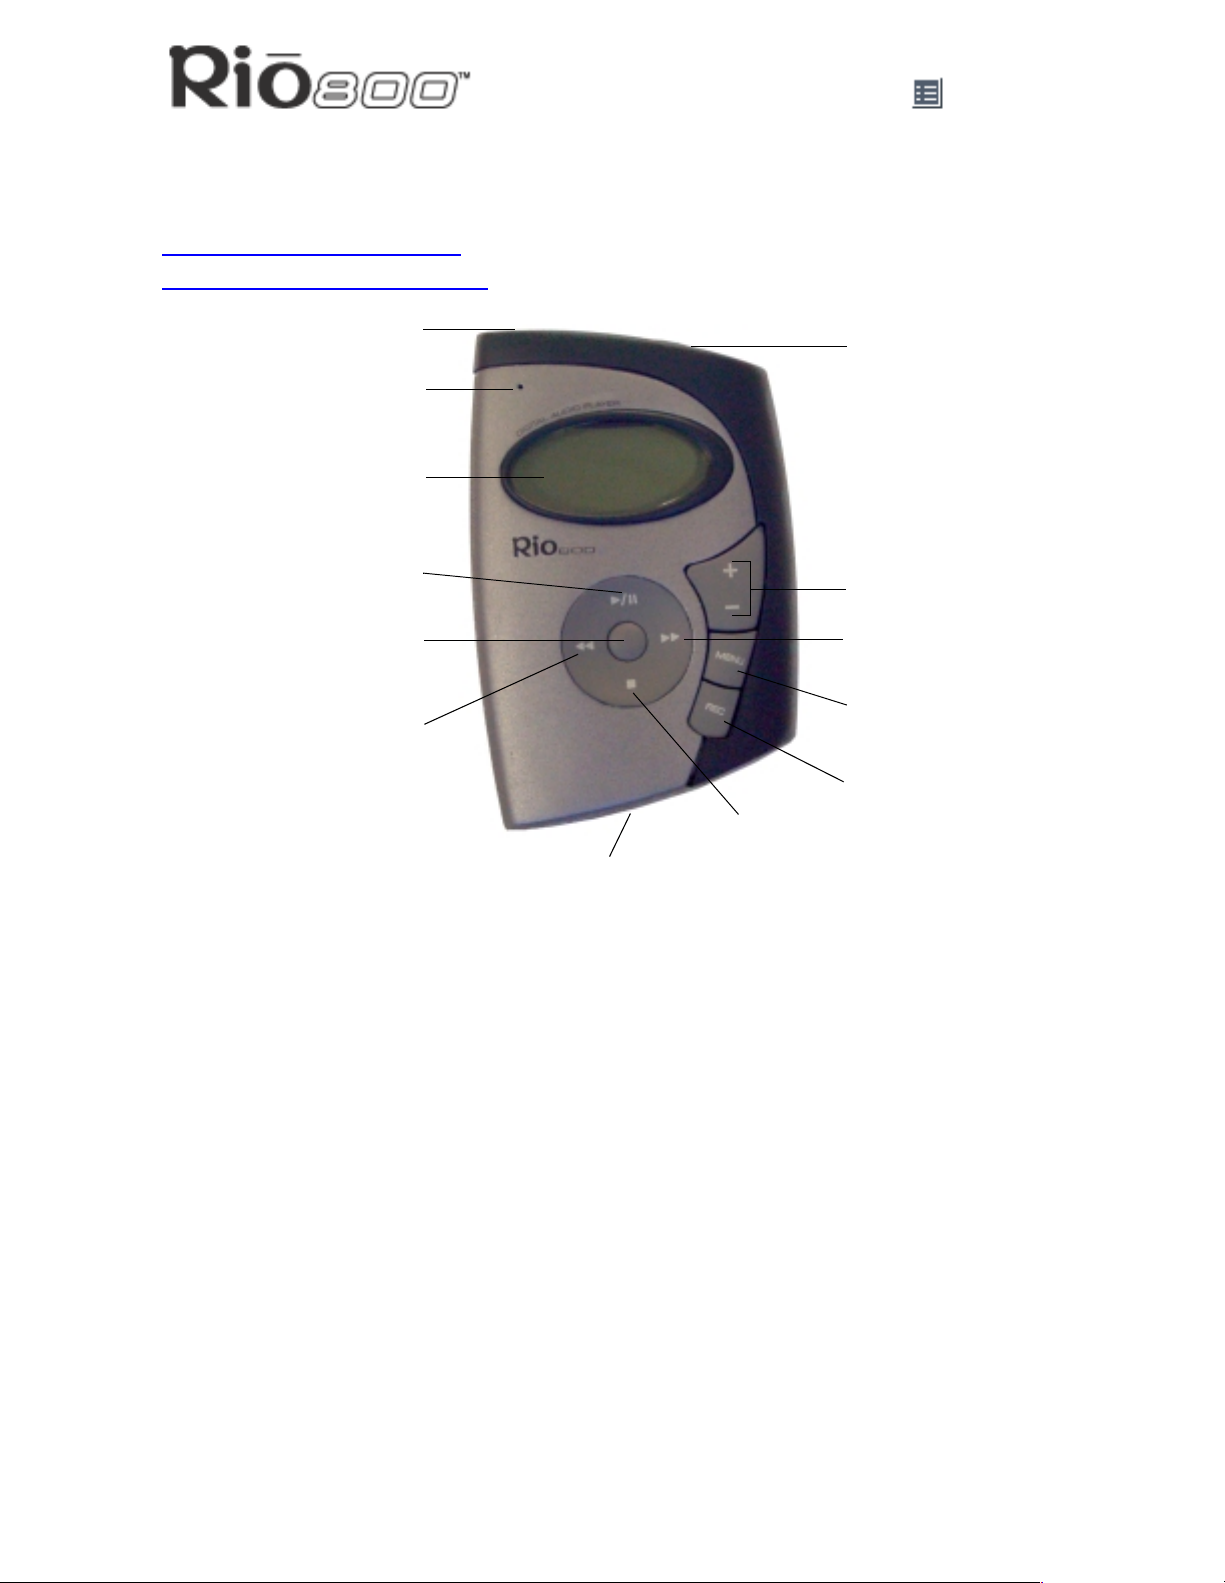
Multifunction port
Microphone
LCD
Play/Pause
Select
Reverse
Backpack charge r port
Using Rio buttons and controls
On/Hold/Off
Volume
Forward
Menu
Record
Stop
• Select: The center navigation button. In play mode, press and hold Select for about two
seconds to jump to a list of tracks you can pick from to play. To set a bookmark, press
Select while the Rio is in p ause mode. In menu mode, pr ess Select to c hoose a menu o r
dialog option.
•
4/;: Play/Pause; the top navigation button. In play mode, press 4/; once to play a
track; press it again to pa use. When paused, the pla y/p ause icon appears as two blinking
vertical bars on the LCD. If your Rio is lef t in Pause mode for an extended period of time,
it goes into sleep mode to conserve battery life. Press
mode. In menu mode, press
<: St op; the bott om navigati on button . In play mode, pres s < to stop pl aying the cur rent
•
track. Press and hold
serve battery life. In menu mode, press
8: Forward; the right navigat ion butt on. In play mode, pr ess and release 8 to skip to the
•
next track on your Rio. Press and hold
ing. In menu mode, press
< for about two seconds to put your Rio into sleep mode to con-
4/; to navigate up through menu options.
< to navigate down through menu options.
8 to fast-forward through the track currently play-
8 to navigate through menu options.
4/; to wake your Rio from sleep
Page 5

Using your Rio
Page 5
• 7: Reverse; the left navigation button. In play mode, press and release 7 to skip to the
beginning of the track currently playi ng on your Rio. Press and hold
through the current track. In menu mode, pres s
7 to navigate through menu options.
7 to fast-rewind
• Menu: Press the Menu button to display the Rio menu opti ons. Press
4/;, 8, 7, and
< to navigate through menu options. Press Select to choose a menu opti on. Generally,
pressing Menu while in menu mode before saving any changes returns the Rio to play
mode without saving.
• Rec: The Record button on the Rio. Press Rec to display the Recorder options menu,
where you can choose to record your voice or play a recording. See the section on
Recording and Playing Voice
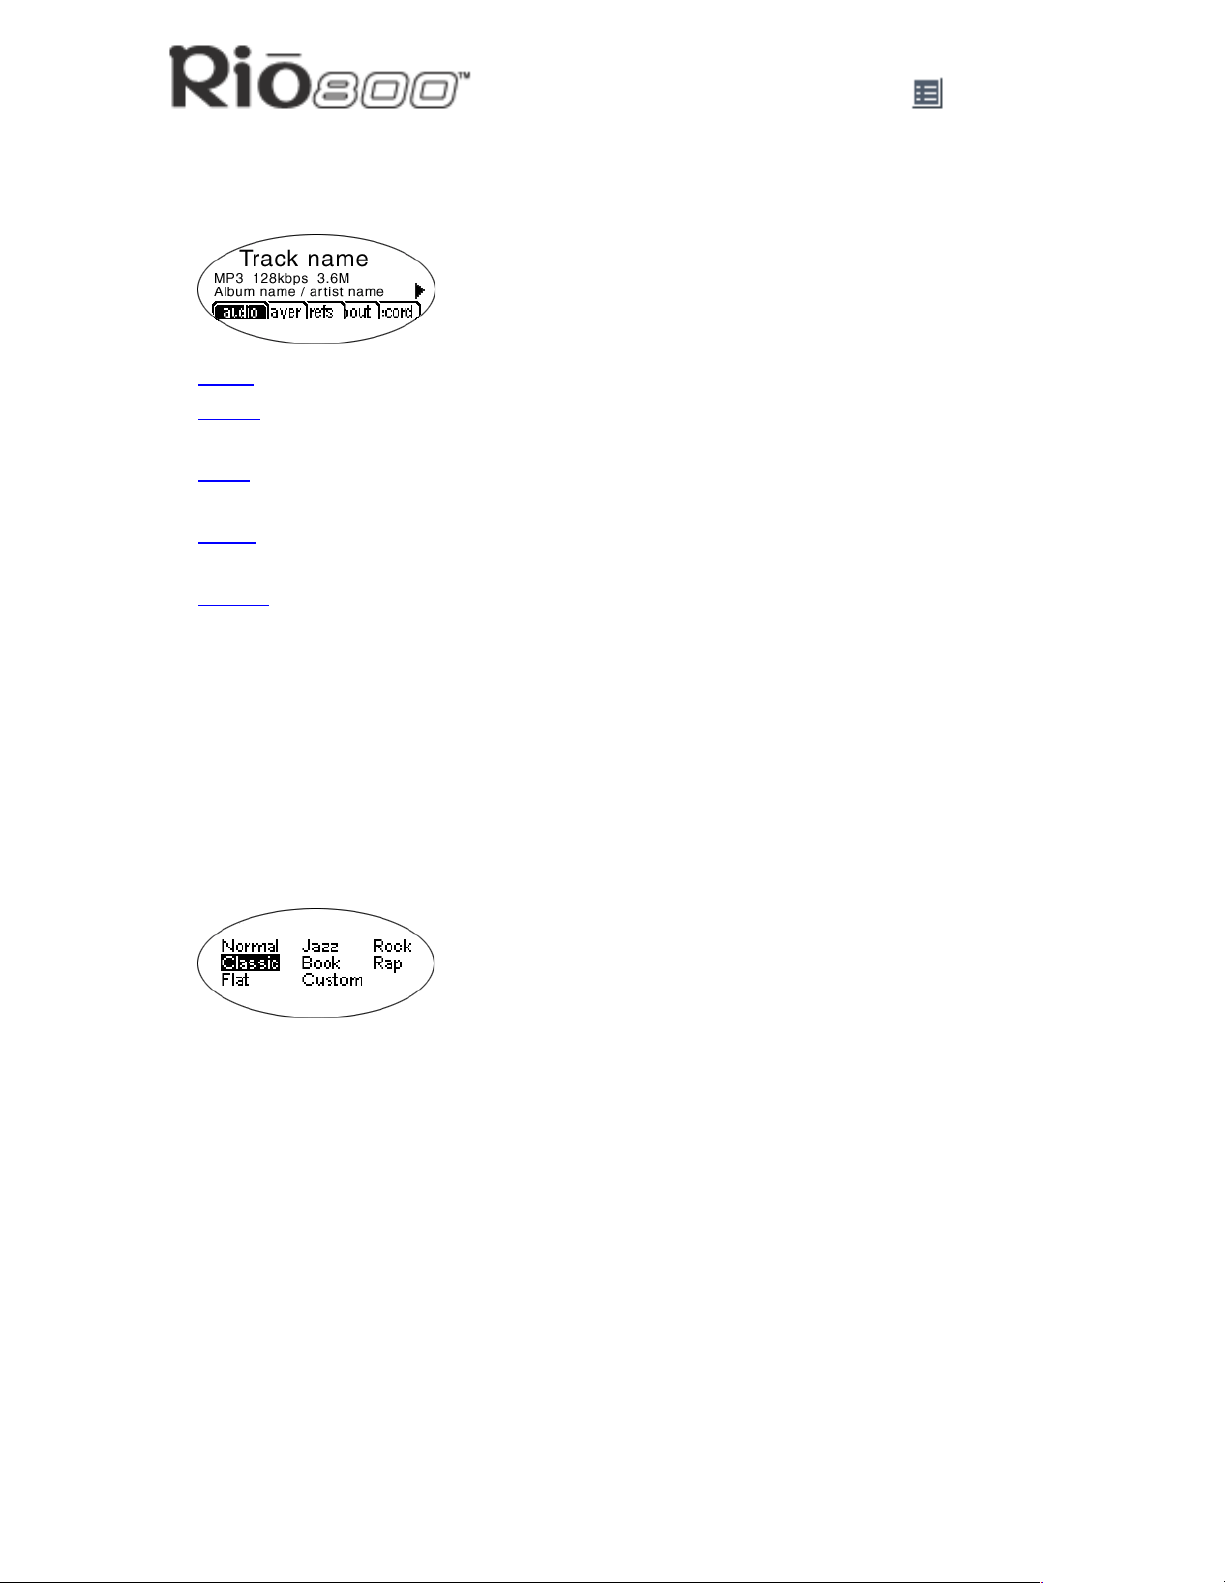
• Liquid Crystal Display (LCD): In play mode , the LCD provides the following informa-
tion—clockwise from the right:
• Play/Pause icon: Displays either a Play icon (triangle) or a Pause icon (two vertical
bars), to show the current action of the Rio.
• Divider line: Graphically organizes the display.
• Current song position: Displays the play locati on in the current track in
minutes:seconds (mm:ss) form. For Audible content the display includes hours
(hh:mm or hh:mm:ss).
for instructions and more information.
• Volume level: Displays the volume setting in both digital and graphic form. The bar-
graph disappears as volume is reduced and re-appears as volume is increased.
Volume level ranges from 0-20.
• Track display: Displays the number of the currently selected track and the total
number of tracks on your Rio. If a playlist is active, the track count shows the number
of tracks in a playlist.
• Album name/artist name: Album name displays in this field for a few seconds,
followed by artist name. If the name is longer than the width of the display, the name
scrolls.
• Track infor mation: T rack inf ormation inclu des the codec type (MP3, WMA, and so on),
the bitrate (XXX kbps), and the file size (XX:XX MB).
• Track name: Displ ays the t itl e of the cur rentl y sele cted t rack. Song n ame scro lls i f the
name is longer than the width of the display.
• Hold icon (key): Appears if the Rio is set to Hold mode. Hold locks all settings except
the Power switch on the Rio.
Page 6

Using your Rio
Page 6
Using the rechargeable backp ack
Calibrating the battery ensures accurate battery level display. The first time you charge the
battery backpack, it is impor tant to calibrate it and give it a full charge overnight or until the
calibration timer expires . You do not need to charge the battery before you calibrate it.
Note: You do not have to calibrate the battery each time you charge it—only the
first time.
See the section on Battery Calibration
for instructions and more inform ation.
For subsequent chargings you can charge the backpack until the charge lamp goes off for a
quick charge—after about 1.5 hours—or leave the AC adapter attached for about 2.5 hours
for a full charge. Full charge allows you to play music for about 10 hours.
You can leave the backpack plugged into the AC adapter after charging is complete to maintain the charge. In addition, you can use your Ri o to play music whil e the backpack is charging.
Warnings:
Do not remove the rechargeable battery from the backpack. Batteries
may explode or leak if disposed of in fire, inserted backwards or disassembled.
Page 7
Using menu options and settings
Using menu options and settings
When the Menu button is pressed, the LCD displays Rio menu options:
Page 7
• Audio
• Player
• Prefs
• About
• Record
: Preset and custom equalizer settings.
: Random and repeat play options, delete track, pick a track, bookmark, and playl-
ist functions.
: Player settings including power saving (time to sleep), LCD display backlight and
contrast, time and date, battery level and calibration, and recorder.
: Various player status information including fi rmware version, internal and external
memory used, battery level, calendar, and codec information.
: Voi ce recording and playback options.
Using Audio functions
Audio functions include built-i n and custom equalizer (EQ) settings. Custom EQ lets you set
the Treble and Bass values on a range from 1 (low) to 9 (high).
Selecting built-in EQ settings
1 Press Menu.
2 Press the
3 Press Select.
4 The EQ settings display.
7 or 8 buttons to navigate to Audio.
5 Press the
• To save the setting press Select.
• To return to play mode without saving any changes, press Menu.
4/;, <, 7 or 8 buttons to highlight the desired setting.
Page 8
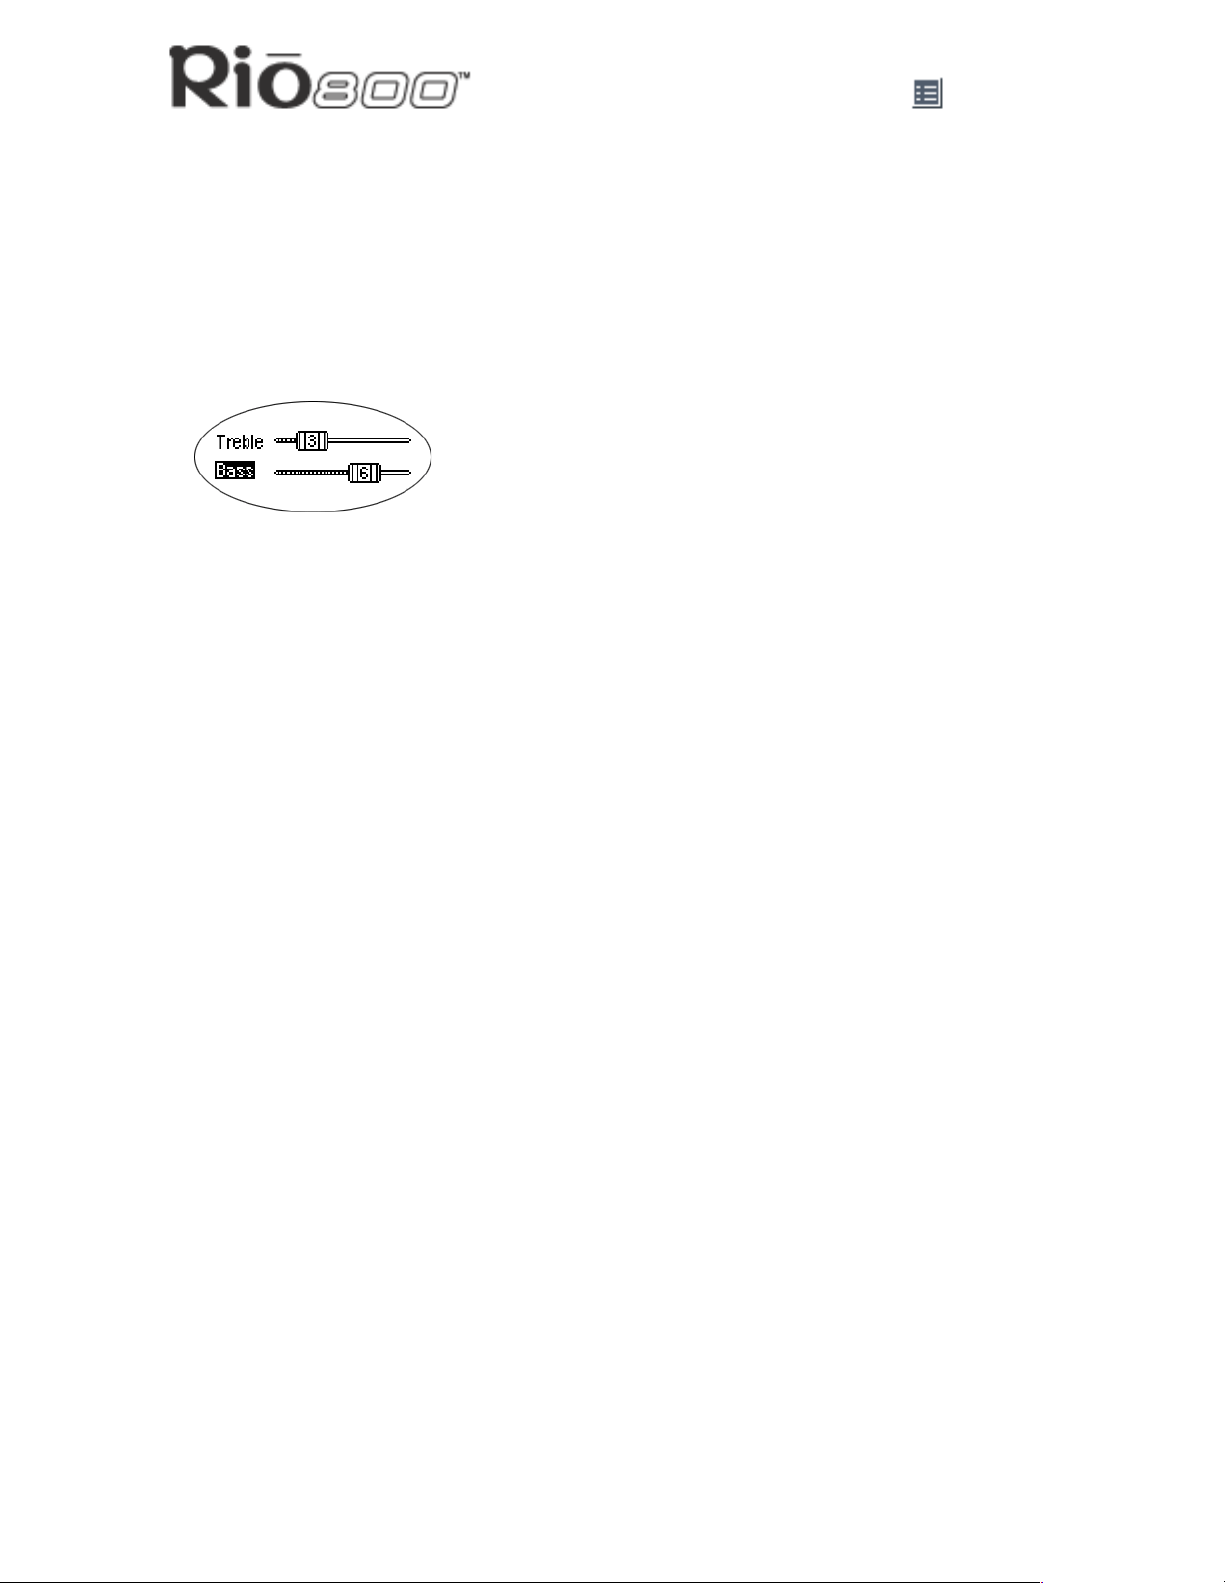
Setting the Custom EQ
1 Press Menu.
Using menu options and settings
Page 8
2 Press the
3 Press Select.
4 The EQ settings display.
5 Press the
6 Press Select.
7 Press the
8 Use the
9 (high).
• To save the settings press Select.
• To return to play mode without saving any changes, press Menu.
7 or 8 buttons to navigate to Audio.
4/;, <, 7 or 8 buttons to navigate to Custom.
4/; or < buttons to navigate between Bass and Treble.
7 or 8 buttons to incr ease or decrease the Bass or Treble value from 1 (low) to
Page 9

Using Player functions
Player functions include:
• Play options
: Repeat or randomize tracks.
Using menu options and settings
Page 9
• Delete tracks
• Pick a track
• Bookmarks
• Playlist
the Rio.
: Remove content from the Rio.
: Select and play a track.
: Play or delete bookmarks.
: Select playlists, create new playlists, manage playlists or remove playlists fr om
Setting Repeat and Random play options
1 Press Menu.
2 Press the
3 Press Select.
4 Navigate to Play Options.
5 Press Select.
6 Press the
7 Press the
Repeat settings include:
• All: All tracks repeat.
• Track: Current track repeats.
• Off: Turns off repeat function.
7 or 8 buttons to navigate to Player.
4/; or < buttons to navigate between Repeat or Random.
7 or 8 buttons to change the Repeat or Random setting.
Random settings include:
• On: All tracks play in random order.
• Off: Turns off random function.
8 Press Select to save the settings . To return to play mode without saving any changes,
press Menu.
Page 10
Deleting tracks from the Rio
1 Press Menu.
Using menu options and settings
Page 10
2 Press the
3 Press Select.
4 Press the navigation buttons to highlight Delete Tracks.
5 Press Select. A list of all tracks displays.
6 Press the
7 Press Select.
• Highlight Yes on the Delete dialog, then press Select to delete the track.
• Highlight No on the Delete dialog, then press Select to return to the track list without
deleting the track.
• To return to play mode without saving any changes, press Menu.
7 or 8 buttons to navigate to Player.
4/; or < buttons to navigate to the track you want to delet e.
Picking a track to play
In play mode, you can press and hold Select for about two seconds to jump to the Pick a
track list.
1 Press Menu.
2 Press the
3 Press Select.
4 Press the navigation buttons to highlight Pick a track.
5 Press Select. A list of tracks displays.
6 Press the
7 Press Select. The track immediately begins playing.
7 or 8 buttons to navigate to Player.
4/; or < buttons to navigate to the track you want to play.
Page 11

Using menu options and settings
Page 11
Adding bookmarks
1 Press 4/; during play back to pause.
2 Press Select to create a new bookmark. If you press and hold Select the Pick a track list
displays.
Playing or deleting bookmarks
1 Press Menu.
2 Press the
3 Press Select.
4 Press the navigation buttons to highlight Bookmarks.
5 Press the
6 Press Select.
• If Play Bookmark is selected, a list of bookmarks displays. Press the
buttons to highlight a bookmark. Press Select to play the bookmark.
• If Delete Bookmark is selected, a list of bookmarks displays. Press the
buttons to highlight a bookmark. Press Select to choose the bookmark to be deleted.
Press the
dialog. Press Select to remove the bookmark and return t o the bookmark list.
7 or 8 buttons to navigate to Player.
4/; or < buttons to highlight Play Bookmark or Delete Bookmark.
7 or 8 buttons to highlight Yes or No on the on the Delete Bookmark?
4/; or <
4/; or <
Page 12
Using menu options and settings
Working with Playlists
Playlist options include:
• Choose: Select a playlist from playlist s stored on the Rio.
• New: Build a new playlist.
• Edit: Modify an existing playlist.
• Remove: Remove a playlist from the Rio.
1 Press Menu.
Page 12
2 Press the
3 Press Select.
4 Navigate to Playlist.
5 Press Select.
6 Press the
options.
7 Press Select.
7 or 8 buttons to navigate to Player.
7, 8, 4/; or < buttons highlight Choose, New, Edit or Remove playlis t
Choosing a playlist
1 Select the Choose playlist opti on. Any existing playlists display.
2 Press the
3 Press Select.
4/; or < buttons to highlight the desired playlist.
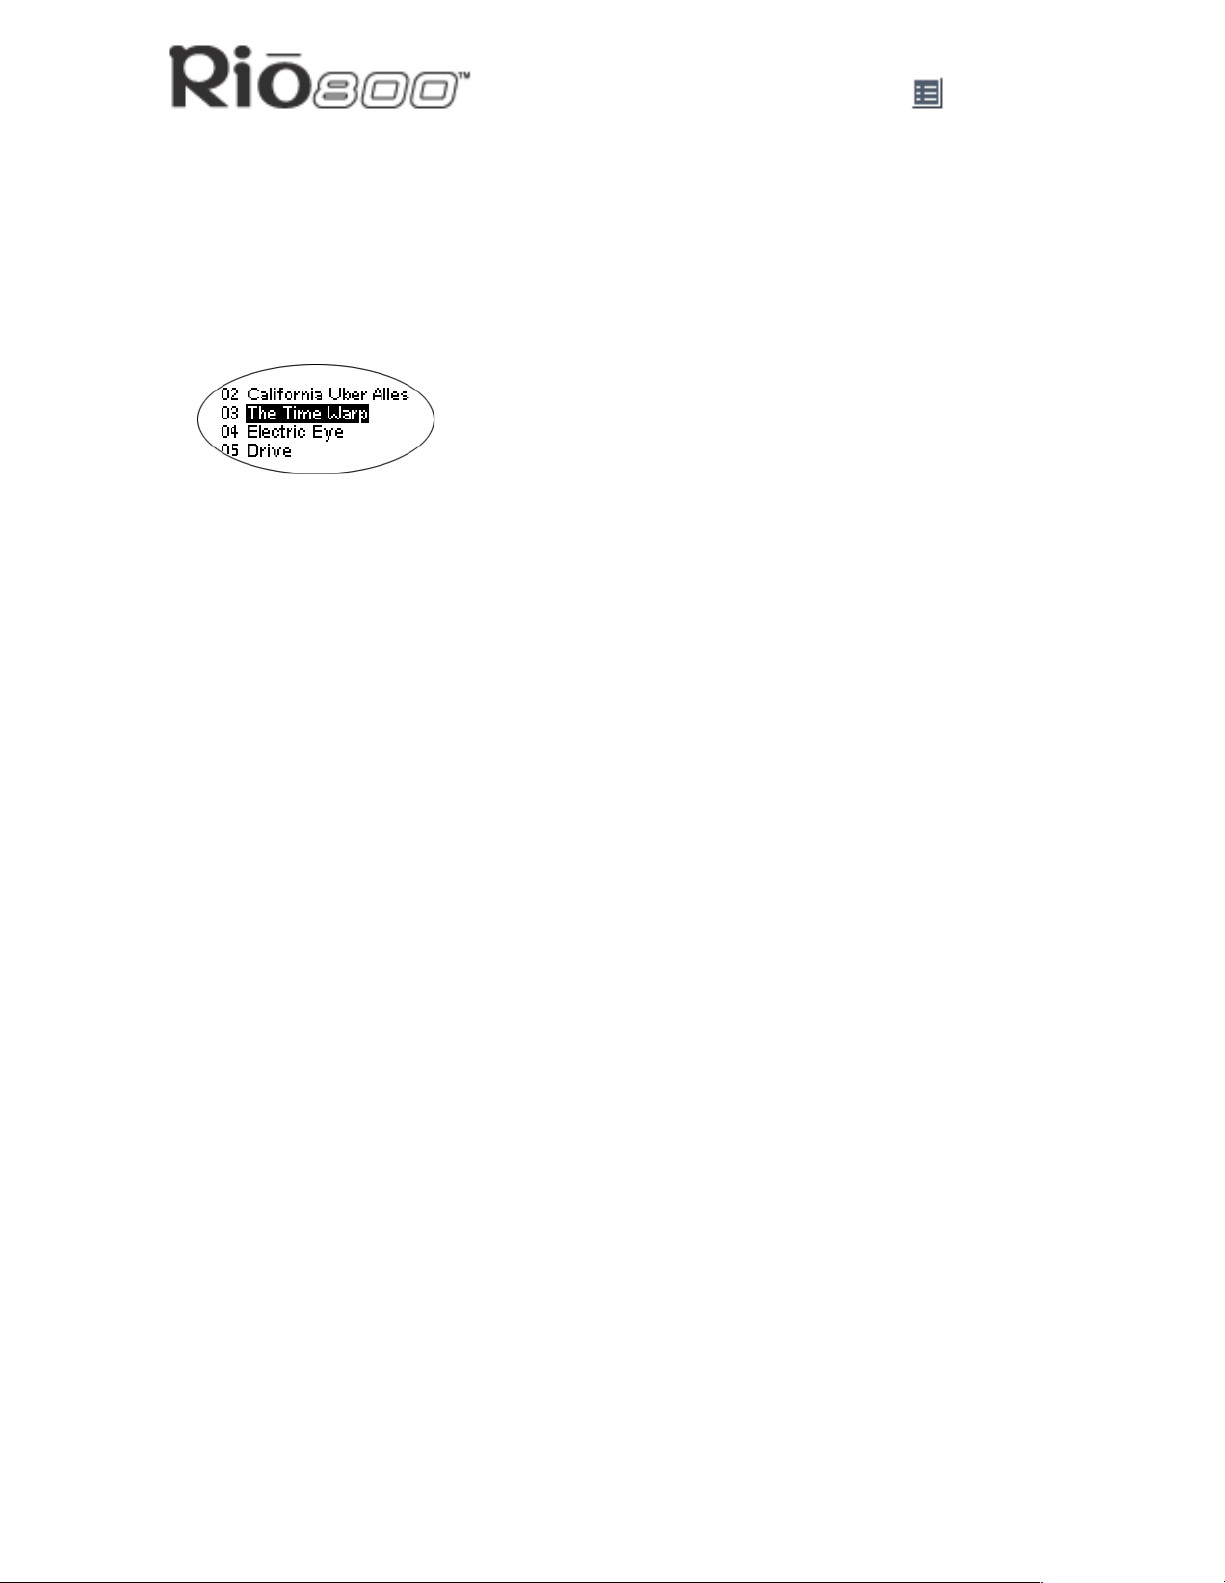
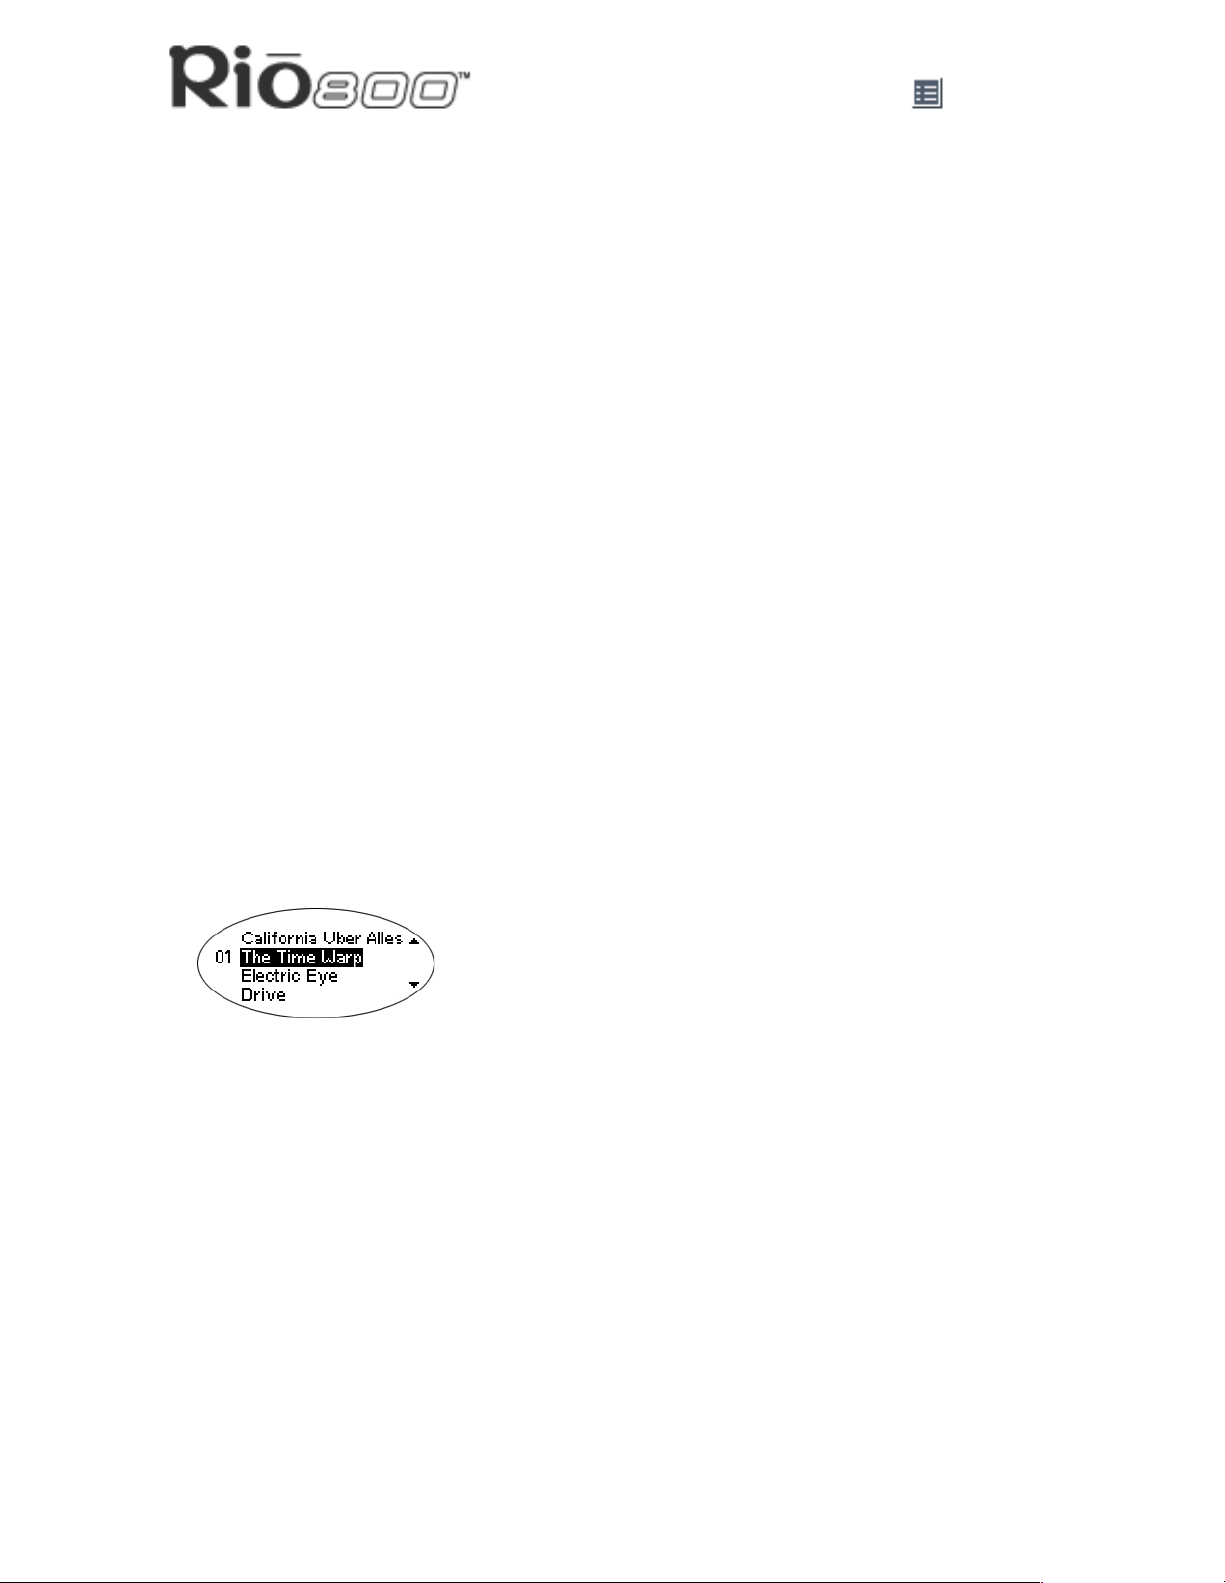
Building a playlist
1 Select the New playlist opti on. New playlists are numbered i n sequential order start ing at
“01”.
2 After a few moments, the playli st editor displays all tracks on the Rio.
3 Press the
• Press Select to assi gn a playlist order number to the track. The numbe r is the order in
which the track plays in the playlist.
• Press the
4 When you are finished, highlight -done editing- at the bottom of the playlist editor, and
press Select to save the new playlist and exit to th e playlist options menu.
4/; or < buttons to highlight a track.
7 or 8 buttons change the track order number.
Page 13

Modifying a playlist
1 Select the Edit playlist option.
Using menu options and settings
Page 13
2 Press the
3 Press Select.
4 The playlist editor displays tracks and their playlist order numbers in the left column.
• To add or remove tracks from the playlist, highlight a track and press Select to tag o r
untag the track wit h a number in t he lef t column. Thi s number is t he order i n which the
track plays in the playlist.
• To change the track order number in the playlist, highlight a track and press the
4/; or < buttons to navigate to the playlist .
7 or
8 buttons.
5 When you are finished, highlight -done editing- at the bottom of the playlist editor and
press Select to save the new playlist and exit to th e playlist options menu.
Removing a playlist
1 Select the Remove playlist option.
2 Press the
3 Press Select.
• Highlight Yes on the Delete dialog, then press Select to delete the playlist.
• Highlight No on the Delete dialog, then press Select to exit without saving any
changes.
• To return to play mode without saving any changes, press Menu.
4/; or < buttons to highlight the playlist you want to delete.
Page 14

Setting Preferences
Preferences include these Rio settings:
• Power saving
(time to sleep).
Using menu options and settings
Page 14
• Time and date
• Display backlight and contrast
• Battery level display and calibrati o n
• Recorder
.
.
.
.
Adjusting the power saving setting
You can adjust the time to sleep (suspend) setting from one to nine minutes. To turn off the
power saving feature, set the time to sleep setting to 0 (zer o).
1 Press Menu.
2 Press the
3 Press Select.
4 Press the navigation buttons to highlight Power Saving.
5 Press Select.
6 Press the
• To save the setting press Select.
7 or 8 buttons to navigate to Prefs.
7 or 8 buttons to adjust the power saving setting.
• To return to play mode without saving any changes, press Menu.
Setting time and date
1 Press Menu.
2 Press the
3 Press Select.
4 Press the navigation buttons to highlight Time/Date.
5 Press Select.
6 Press the
7 Press the
The date field will not roll to a value that is not valid for the selected month and year.
8 Press Select to save the time/date sett ings. To return to play mode without saving any
changes, press Menu.
7 or 8 buttons to navigate to Prefs.
7 or 8 buttons to highlight each of the time and date fields.
4/; or < buttons when any of the fi elds are highlighted to change the value.
Page 15

Adjusting LCD display backlight and contrast
1 Press Menu.
Using menu options and settings
Page 15
2 Press the
3 Press Select.
4 Press the navigation buttons to highlight Display.
5 Press Select.
6 Press the
7 Press the
Backlight settings include:
• timed 1, 2, 5, or 10 seconds.
• always on.
• always off.
Contrast settings range from 1 (minimum) to 9 (maximum).
8 Press Select to save the settings .
7 or 8 buttons to navigate to Prefs.
4/; or < buttons to navigate between Backlight and Contrast.
7 or 8 buttons to adjust the Backlight or Contrast settings.
Page 16

Displaying battery information
1 Press Menu.
Using menu options and settings
Page 16
2 Press the
3 Press Select.
4 Press the navigation buttons to highlight Battery.
5 Press Select.
6 Press the navigation buttons to highlight Power level.
7 Press Select to display battery i n formation:
• Battery type: Rechargeable.
• Battery charge level: The battery’s charge state percentage.
• Run time estimation: The battery’s remaining play time.
• Battery level graphic: A bar graph inside a battery icon displays the approximate
remaining charge.
8 Press Menu to return to play mode.
7 or 8 buttons to navigate to Prefs.
Calibrating the battery
Calibrating the battery ensures accurate battery level display. It is important to calibrate the
battery backpack and give it a full charge overnight or until the calibration timer expires the
first time you charge it. You do not need to charge the battery before you calibrate it.
Note: You do not have to calibrate the battery each time you charge it—only the
first time.
1 Connect the AC adapter into your Rio’s backpack port at the bottom of the backpack.
2 Connect the AC adapter power cord into an electrical outlet. The charge lamp on the
backpack lights up when charging begins.
3 Slide the Rio power switch to On.
4 Press Menu.
5 Press the
6 Press Select.
7 Press the navigation buttons to highlight Battery and press Select.
8 Press the navigation buttons to highlight Calibrate and press Select.
9 Wait overnight or until the timer expires to give the backpack a full char ge.
10 When charging is complete, unplug the AC adapter from the Rio’s backpack port.
7 or 8 buttons to navigate to Prefs.
Page 17

Using menu options and settings
Page 17
Setting recorder sampling rate and volume
Record rate means the sampling rate for r ecordings i n kHz. A higher recor d rate yields bet ter
quality recordings with larger file size. Analog gain refers to the volume of voice recordings.
1 Press Menu.
2 Press the
3 Press Select.
4 Press the navigation buttons to highlight Recorder.
5 Press Select.
6 Press the
7 Press the
• Record Rate settings include 8 kHz and 11 khz.
• Analog Gain settings range from 1 (minimum) to 9 (maximum).
8 Press Select to save the settings .
7 or 8 buttons to navigate to Prefs.
4/; or < buttons to navigate between Record Rate and Analog Gain.
7 or 8 buttons to adjust the Record Rate or Analog Gain setting.
Page 18

Displaying About information
1 Press Menu.
Using menu options and settings
Page 18
2 Press the
3 Press Select. The following information displays:
• Player personalization message defined through the software or Rio model number.
• Firmware version the Rio is using.
• Total internal memory amount installed and a bar graph displ ay of the amount used.
• Total external memory installed and a bar graph display of the amount used.
4 Press
• Battery type: Rechargeable.
• Battery charge level: The battery’s charge state percentage.
• Run time estimation: The battery’s remaining play time.
• Battery level graphic: A bar graph inside a battery icon displays the approximate
remaining charge.
5 Press
7 or 8 buttons to navigate to About.
< to display battery informa ti on including:
< to display clock and calendar information.
6 Press
7 Press Menu to return to play mode.
< to display c o de c in formation.
Page 19

Using menu options and settings
Recording and playing voice
Recording your voice
Note: The recorder automatically turns off the backlight when in use to prevent
background noise from the backlight from interfering with your recording.
1 To record your voice you can either:
• Press the Rec button on the Rio, or
• Press Menu, press the navi gation buttons to highlight Record, then press Select.
2 Highlight New Recording and press Select to start recording.
Page 19
3 Press
The Recording display includes:
• Status Message: Displays “Preparing to Record”, “Recording…”, “Recording Done”,
• Recording time elapsed: Displays duration of the present recording in
• Memory used graph: Displays how much memory is used and free for recording.
• Percentage of memory remaining: Displays how much free flash memory is left.
• Record level meter: Displays relative volume sensed at the micr ophone.
< to stop recording.
and so on.
hours:minutes:seconds (hh:mm:ss).
Playing a recording
1 To play a recording you can either:
• Press the Rec button on the Rio, or
• Press Menu, press the navi gation buttons to highlight Record, then press Select.
2 Highlight Play Recordings and press Select. A list of recordings on the Rio displays:
3 Press
4 Press Select to play the highlighted recording.
5 Press Menu to exit to play mode.
4/; or < to highlight a recording.
Page 20

Using the Rio software
Page 20
Using the Rio software
Using RealJukebox
RealJukebox audio management software i s incl uded on the so f tware CD. Use Real Jukebox
to:
• Organize digital audio tracks on your computer .
• Organize tracks on your Rio.
• Record (encode) your audio CDs.
• Search for tracks on your computer or on the Internet.
• Create a custom CD-ROM—if you have CD burning hardware and your computer sup-
ports it.
To learn more about using RealJukebox, from within the software:
• Click the Help menu or
• Click the Home button, scroll down to Real Jukebox Help, and select Using Real Juke-
box and/or Frequently Asked Questions
Record (encode)
your audio CDs
Organize your tracks
Highlight tracks and
- play on your computer
- organize into playlists
- copy to your Rio
Find tracks on your
computer or on the Web
Page 21

Using the Rio software
Page 21
Copying tracks to your Rio
1 Plug the USB cable into the multifunction port on top of your Rio.
2 Plug the other end of the cable into the USB port on your computer.
3 Slide the power switch on top of your Rio to On.
4 Click the All Tracks button on the Real Jukebox software.
5 Click the desired track(s).
6 Click the right mouse bu tton and select Copy to Device or click Copy to > Device in the
right column on the window. Click OK on the dialog box.
7Click Copy Files in the right column on the window.
Encoding a CD
1 Put an audio CD in your computer’s CD-ROM drive.
2 Click the CD button.
3 The software prompts you and fills in track titles and other informati on via the Gracenote
CDDB Web site.
4 Check the desired track(s) —cli ck the check box to the left of the song title or c li ck Check
All in the right column on the window.
5 Recording begins...use the convenient playback controls at the top of the window to
record, play, pause, and so on.
Using AudibleManager (PC only)
The AudibleManager software supports audio books, lectures, public rad io programs, newspapers, and other spoken word audio programs.
Use AudibleManager to:
• Create an Audible.com account, where you may choose from thousands of spoken word
audio programs.
• Download audio programs from the Internet to your PC.
• Transfer audio programs to your Rio.
For more information, visit the AudibleMana ger Web site
.
Page 22

Using the Rio software
Page 22
Using SoundJam MP (Mac only)
SoundJam MP player and encoder converts music into compres sed digital qual ity MP3’s from
CD, MP2, AIFF, QuickTime™, SMD, Sound Designer, and WA V formats.
Master Playlist
Use the Master Playlist editor to:
• Search your audio collection stored on your Mac.
• Build and manage custom playlists.
Main Window
Use the SoundJam MP Main Window to:
• Listen to audio on your Mac.
• Play music files from your playlist or CD-ROM.
Page 23

Using the Rio software
Converter
Use the Converter window to:
• Encode audio CDs.
• Save tracks into MP3 format to be transferred to and played on yo ur Rio.
Page 23
Connector
The Connector window displays when you plug
your Rio into your Mac with the USB cable. Use
the Connector window to:
• Manage the content on your Rio.
• Export audio to your Rio. Choose the track
by selecting “Add...” or dra g the desired
track to the view window.
Use the help system to learn more
The SoundJam software includes a complete
online Help manual. To learn more about using
the SoundJam MP software:
1 Click the Help Menu.
2 Select SoundJam MP Help.
• Click the topic you are interested in for detailed step-by-step instructions.
• Click How To Use This Help System to understand the basics of using the SoundJam
Help.
For more information about SoundJam, visit the SoundJam Web site.
Page 24

Digital audio terms
Page 24
Digital audio terms
AAC
Advanced Audio Coding (AAC) is one of the audio compression formats defined by the
MPEG-2 specification. AAC used to be called NBC (Non-Backward-Compatible), because it
is not compatible with the MPEG-1 audio formats. AAC may eventually replace MP3 since it
offers better sound quality and greater file compression.
ADPCM
Adaptive Differential Pulse Code Modulation (ADPCM), is a form of pulse code modulation
(PCM) that produces a digital signal with a lower bit rate than standard PCM. The Rio 800
uses ADPCM for voice recordi ng. ADPCM produces a lower bit rate by recording only the difference between samples and adjusting the coding scale dynamicall y to accommodate larg e
and small differences.
Bitrate
Bitrate denotes the number of bits per second used to represent an audio signal. The size
and quality of a digi tal a udio fil e is deter mined by the b itrate us ed when encoding the fi le. The
higher the bitrate used, the higher t he sound quality and t he larger the fil e size. For example,
with MP3, a bitrate of 128k is usually very close to CD quality, and takes up about 1MB per
minute of music. At a 64k bitrate, the sound qualit y is simila r to that of an FM ra dio signal, but
you may get around two minutes of music in that same 1MB of storage space.
CDDB
See Gracenote.
Codec
Depending on the context and kind of technology involved, codec may be defined i n two
ways. In telecommunications, a codec i s usually a “coding/decoding” chip used to translate
between digital and analog transmissions. A modem uses one to interpret incoming analog
signals and converts the digital data stream coming from the computer into analog. A codec
is also defined as a compression/decompression algorithm. Codecs are used to compress
audio data into a file, often for efficient transmission over a network, and then decode it for
playback.
The Rio 800 supports the following digital audio file codecs:
• MP3
• WMA
• ADPCM—for voice recording
• ACELP.net (Audible)
Page 25

Digital audio terms
Page 25
DRM, security
Digital Rights Management (DRM) technologies protect copyright ownership of digi tal information. DRM became an issue with the rise of MP3 technology and Internet distribution of
music. DRM platforms serve as a security “wrapper” around digital audio supporting Internet
distribution while at the same time protecting and managing rights related to that digital information.
The security mechanism in the Rio supports sever al secu re fil e format s. If the audi o management software you a re usi ng supports secure file formats, when you download a secu re track
to the Rio, you must have the license associated with the track. If the Rio doesn't read a corresponding license for a track, the tracks themsel ves contain information on where you can
purchase them. Publishers can program restri ctions on how many times you can play, copy,
or distribute a song directly into the music files. Although the Rio includes security, it is still
able to accept and play standard MP3 files.
Encoding, or Ripping (a CD)
Encoding, or “ripping”, refer s to convert i ng an audio fi le fr om an audio CD into a compr essed
digital audio format, such as MP3 or WMA, that may be played on the Rio or on a computer.
Firmware
Firmware is softw a re –programs or data–that has been written onto read-only memory
(ROM). Firmware is a combination of sof tware and hardware t hat i s compar able to an oper ating system on a computer . The Rio firmware controls every thing from the liquid crystal disp lay
and codec support to the Rio’s many other functions.
To see your Rio’s firmware vers io n :
1 Press the Menu button.
2 Press the
3 Press Select (center navigati on button). The firmware version the Rio is using displays.
How to upgrade the Rio firmware
7 or 8 (Forward or Reverse) navigation buttons to highlight About.
Gracenote
Gracenote, formerly known as the CD Database (CDDB), is a vast database of CD information that includes artist, disc name, song ti tle, and other inf ormation. Gracen ote support s hundreds of third party software CD players. Software programs use a CDs serial number to
search the Gracenote Web site for CD information. Access to the Gracenote service is
offered free of charge to end-users. Visit the Gracenote Web site
for more information.
Page 26

Digital audio terms
Page 26
MP3
MPEG-1, Layer 3 Audio (MP3) is a compressed digital audio file format. This format allows
for near CD quality sound, but at a fraction of the size of normal audi o files. MP3 conversion
of an audio track from CD-ROM reduces the file size by approximately a 12:1 ratio with virtually no loss in quality. This digital sound encoding and compression process was developed
by the Fraunhofer Institut fur Integrierte Schaltungen and Thomson Multimedia. MP3 uses
perceptual audio coding and psychoacoustic compression to remove the r edundant and irrelevant parts of a sound signal that the human ear doesn’t hear. It also adds a Modified Discrete Cosine Transf orm (MDCT) that implements a filter bank, increasing the frequency
resolution 18 times higher than that of layer 2. The MP3 encoding process is well suited for
the transfer of high quality audio fi les with small file size over the Internet.
Playlist
Playlists let you organize lists of tracks to play in the order you choose. Playlists make it easier to manage large collections of music.
Ripping
See Encoding.
SDMI
The Secure Digital Music Initiat ive (SDMI) is a forum of over 130 companies in the fields of
recorded audio content, comput ers, and cons umer e lectr onics, for the pur pose of devel oping
an integrated method of c opyright protection t echnology that can be used worldwi de. SDMI is
working to create a framework for preventing improper usage of audio files and to promote
legal music distribution servic es.
Skin
The skin is the sof t ware opt ion that det ermines h ow di git al audio pl ayer sof tw are appl icat ions
appear on your computer screen. Some applications allow you to cust omize the color and
window design of your software by changing the skin. Some skins omit certain playback controls for simplicity.
USB
Universal Serial Bus (USB) is the external bus st andard that supports data transfer rates of
12 Mbps (12 million bits per second). The Rio uses USB to communicate with the computer.
A single USB port may be used to connect up to 127 peripheral devices, such as mice,
modems, and keyboards. USB also support s Plug-and-Pl ay in stall ation and hot pluggi ng. It is
expected to completely replace serial and parallel ports.
WMA
Windows Media Audio (WMA) is the compressed audio format created by Microsoft as an
alternative to MP3. WMA may replace MP3 since it offers greater file compression—twice
that of MP3—at the same or better sound quality.
Page 27

FAQ and troubleshooting
Page 27
FAQ and troubleshooting
How do you put music on the Rio?
The Rio interfaces with your computer through the USB port. You can get digital audio from
numerous Internet sites or encode your own digital audio tracks from your audio CDs using
the CD-ROM drive on your computer. Use the software included with the Rio to get audio
from the Internet, encode tracks from your audio CDs, or download tracks to your Rio.
How much music will my Rio hold?
Note: Due to different software compression algorithms, the following information
may vary slightly depending on what soft ware you are using and what program the
MP3 was created by.
To determine how much play time your Rio actually has, use the following equation:
Rio Play Time = M / (S x 0.439)
where:
M=Rio memory size in MB (32MB, 64MB, 128MB, and so on).
S=Sampling S peed in kbps (128kbps, 80kbps, and so on).
The higher quality the MP3, the larger its size, causing it to take up more room on your Rio’s
memory.
The following bitrates are supported:
• 256 kbps, CD Quality, 5.6:1 reduction.
• 192 kbps, CD Quality, 7.5:1 reduction.
• 160 kbps, CD Quality, 9:1 reduction.
• 128 kbps, CD Quality, 11.25:1 reduction.
• 96 kbps, Near CD, 15:1 reduction.
• 80 kbps, Near CD, 18:1 reduction.
• 64 kbps, FM Radio, 22.5:1 reduction.
Note: If you use the WMA format instead of the MP3 format, you can have the same
quality at about one half the size. For example, a 64 kbps WMA sounds as good as
a 128 kbps MP3.
Can I use the Rio with Windows 95? I have the USB supplement pack.
No. The Rio USB devices can only be used with Windows 98, Windows ME or Windows 2000
operating systems, or Mac OS 8.6 or later. The Rio requires a newer stand ard of USB that is
not available in Windows 95, even with the USB supplement pack.
Where is the serial number located on the Rio?
The serial number is on the back of the Rio under the backpack. Remove th e backpack from
the Rio to see the serial number (S/N).
Page 28

FAQ and troubleshooting
Page 28
The Rio is connected to the USB, why doesn’t the computer recognize it?
First, make sure the Rio software is runni ng and check to make sure the USB cable is fully
connected to both the Rio and to the computer. Then, turn the Rio off and back on.
Is the Random menu function truly random?
No. The Random function uses an algorithm called pseudo-random which is common to all
computers. The Rio selects a seed number and then enters a list of predetermined random
numbers to play music in a seemingly random order. If the same seed is picked, the Rio may
play songs in the same order.
What does the Rio Hold feature do?
The Hold feature on the Rio locks all buttons and controls except the Power switch. This is
useful at times when the Rio may be bumped or jostled. For example, when exercising.
How do I upgrade the Rio firmware?
Checking your Rio’s firmware version
Important: First deter mine the version of the fi rmware inst alled on your Rio. Do not
“downgrade” your Rio firmware by installing an older version.
1 Press the Menu button.
2 Press the
3 Press Select (center navigati on button). The firmware version the Rio is using displays.
7 or 8 (Forward or Reverse) navigation buttons to highlight About.
Downloading the firmware upgrade from the Rio Web site
1 Go to the Rio Web site
2Click Support, then click Firmware upgrades.
3 Select and download the latest Rio 800 xxxx.exe (PC) or Rio 800 Update xxxx (Mac)
firmware upgrade file to your computer.
Upgrading the Rio firmware (PC)
Important: Quit all other applications before running the firmware upgrade. While
running the firmware upgrade, do not close the progr am, t urn off t he Rio or unplug
the USB cable.
1 Connect the Rio to the computer with the USB cable.
2 Slide the Rio power switch to On.
3 Double-click the Rio 800 xxxx.exe firmware upgrade file.
4 Click the Upgrade Now button on the RioFlasher window.
5Click Yes.
6 When the upgrade is complete, a check of the firmware version displays the new version
number.
Page 29

FAQ and troubleshooting
Page 29
Upgrading the Rio firmwar e (Mac)
Important: Do not close the program, turn off the Rio or unplug the USB cable
during the upgrade.
1 Connect the Rio to the computer with the USB cable.
2 Slide the Rio power switch to On.
3 Double-click the SoundJam icon. The Rio Connector window displ ays.
4 Click the Settings... button on the Rio Connector window. The Rio Settings window dis-
plays.
5 Click the Upgrade Firmware button on the Rio Settings window.
6 Choose the Rio 800 Update xxxx firmware upgrade file.
7 Click the Open button.
8 When the upgrade is complete, a check of the firmware version displays the new version
number.
How do I register my Sound Jam softwar e online?
SoundJam allows 50 encodes prior to free registra tion that unlocks SoundJam for unlimited
MP3 encoding. You must have an Internet connection to complete online registration. At the
time of registration, you may choose to upgrade the features of the software for a small fee.
1 Double click the hard drive icon.
2 Double click the SoundJam folder.
3 Double click the SoundJam MP icon to open the program. You will immediately be
prompted to register online.
4 Click the Register Now button.
5 Follow the instructions on the screen.
6 You will receive your unlock code by e-mail.
Why do I get an error when I click Read a CD to start encoding?
The following factors may interfere wit h the CD encoding process:
1 Over-utilization of the CPU during the encoding process. Close all other software before
encoding.
2 Insufficient RAM to cache the track properly. Generally, 64 MB is fine if no other memory
intensive application is running. Close all other software before encoding. Win 98 uses
about 15-20 MB of RAM at startup depending on what applications you have running.
3 CD-ROM firmware. Even if a CD-ROM dri ve is new, it may require a firmware update from
the manufacturer to correct audio extr action errors.
4 Overclocking. Overclocking t he system—running it faster than i t is ra ted to run—can have
adverse effect s on the periph eral components . If your syst em is overclocked, bring it back
to its normal operating speed.
Page 30

FAQ and troubleshooting
Page 30
How can I get the best sound quality when encoding from a CD?
If you use a significant amount of your computer system ’s resources with other applications,
encoding songs from a CD may result in poor quality recordi ngs. If the song(s) you encode
contain abnormalities, such as pops or skips, close down other applications which are running and encode those songs again. The condition of the audio CD—scratches and so on—
may effect the quality of the recording as well.
Page 31

One Year Limited Warranty
Page 31
One Year Limited Warranty
Our warranty to you
SONICblue Incorporated warrants that your product will be free from defect s in materials and
workmanship for a period of one year from the dat e of origin al ret ail purchase. If you discov er
a defect covered by this warranty, we will repair or replace the product at our option using
new or remanufactured components. SONICbl ue Incorporated’s liability is limited solely to the
repair or replacement of the defecti ve product. This warranty is extended to the original end
user purchaser only and is not assignable or transferable to any other party. Any parts or
boards removed in the replacement or remanufacture pr ocess shall become the property of
SONICblue Incorporated. Out of warranty service may also be available for a fee.
How to obtain service under this warranty
To obtain service under this warranty, please contact the dealer from whom you purchased
this product or call the SONICblue Incorpo rated Customer Care Center at (541) 967-2450 for
return instructions.
Customer Care
• Monday through Friday 5am-7pm, PT.
• Saturday 8am-4pm, PT.
You must deliver the product and the original sale receipt to either the dealer from who you
purchased this product or to SONICblue Incorporated in order to obtain service under this
warranty. If you return the product to us, you must pay for shipping to SONICblue Incorporated.
hours of operation are:
Product failures not covered by this warranty
This warranty covers defect s i n manuf acture th at arise fr om cor rect u se of t he de vic e. It does
not cover damage caused by abuse, misuse, improper modification or repair, moisture,
extreme heat or cold, cor rosive environments, shipping, or high volt age surges from external
sources such as power li ne, telephone line, or c onnected equipment. This warrant y does not
cover wear and tear on covers, housing or wiring. This wa rranty also does not apply to any
product with an altered or defaced serial number.
How to obtain out of warranty service
To obtain out of warranty service, please contact the SONICblue Incorporated Customer
Care Center at (541) 967-2450 (see above for hours of operation).
Out of warranty service is provided for owner s of Rio 800 Perso nal Digit al Music Players who:
• Are unable to provide valid proof of purchase for their Rio Personal Digital Music Player.
• Require repair service after the expiration of the original warranty.
• Require service for product failures not covered under the SONICblue Incorporated war-
ranty on this product.
Out of warranty service is limited to the Personal Digital Music Player only and is not available for headphones, memory cards or other accessories.
The fee for out of warrant y repai rs is p ayable by c redit car d at th e time the se rvice agreement
Page 32

One Year Limited Warranty
Page 32
is created and Return Authorization provided. This fee includes all labor, parts needing
replacement, and return shipping.
You must deliver the product to SONICblue Incorporated in order to obtain out of warranty
service. You must pay for shipping to SONICblue Incorporated. It is recommended that you
use a shipping service providi ng you with trac king cap ability, because we will not be responsible for items lost in the mail. A Return Authorization number is required for all shipments to
SONICblue Incorporated. Please contact our Customer Care Center for more information or
to arrange for out of warranty service.
Limits of liability
We are only responsible for the repair of this product. We will not be liable to you or anyone
else for any damages that result from the failure of this product or from the breach of any
express or implied warranties. These include damage to other equipment, lost data, lost profits, or any consequential, incidental, or punitive damages. IN NO EVENT WILL SONICblue
Incorporated BE LIABLE FOR ANY AMOUNT GREATER THAN THE CURRENTLY SUGGESTED RETAIL PRICE OF THIS PRODUCT.
THIS WRITTEN WARRANTY REPRESENTS THE ENTIRE WARRANTY AGREEMENT
BETWEEN SONICblue Incorporated AND YOU. THIS WARRANTY IS GIVEN IN LIEU OF
ALL OTHER WARRANTIES, EXPRESS OR IMPLIED, INCLUDING WITHOUT LIMITATION
IMPLIED WARRANTIES OF MERCHANTABILITY AND FITNESS FOR A PARTICULAR
PURPOSE. THIS WARRANTY IS LIMITED TO THE TERM SPECIFIED ABOVE. NO WARRANTIES, EITHER EXPRESS OR IMPLIED, WILL APPLY AFTER THIS PERIOD. THIS
WARRANTY MAY NOT BE ALTERED IN ANY WAY OTHER THAN IN WRITING BY AN
OFFICER OF SONICblue Incorporated. This warranty gi ves you specific l egal ri ght s an d you
may also have other rights, which vary, from state to state. Some states do not allow limitations on how long an implied warranty lasts, so the above limitation may not apply to you.
Page 33

Regulatory Information
Page 33
Regulatory Information
Federal Communications Commission (FCC)
The device has been tested and found to comply with limits for a Class B computing devi ce
according to the specificat ions in FCC rul es Part 15. Operat io n is subjec t t o the foll owing two
conditions:
1 This device may not cause harmful interference, and
2 This device must accept any interf erence rec eived, incl uding inter ference that may cause
undesired operation.
If your device needs repairs, you must arrange for the manufacturer to make them if you are
to keep the device’s FCC registration valid. This equipment, like other electronic equipment,
generates and uses radio frequency energy. If not installed and used according to the instruc tions in this manual, this equipment may cause interference with your radio and television
reception. If you think this equipment is causing interference with your radio or television
reception, try turning the equipment off and on. If the interference problems stop when the
equipment is switched off, then the equipment is probably causing the interference. You may
be able to correct the problem by doing one or more of the following:
• Adjust the position of the radio or TV antenna.
• Move the device away from the radio or TV.
If necessary, consult your dealer or an experienced radio or television technician. You may
find this bo ok let helpful: “How to Identify and Resolve Radio and TV Interference Problems”
(St ock No. 004- 000-0 0345-4), prep ared by t he FCC and avail able fr om th e U.S. Govern ment
Printing Office, Washington, DC 20402. See individual devices for FCC ID and registration
numbers.
Industry Canada
This Class B digital appar atus complies with Canadian ICES-003.
Cet appareil numérique de la classe B est conforme à la norme NMB-003 du Canada.
CISPR 22
Warning: This e quipment is bel ongs to class A of CISPR 22 reco mmendation. In a r esidential
environment, it can produce electromagnet ic interferenc e. In that case, it can be requested to
the user to take some appropriated measures.
EU Declaration of Conformity
We
DIAMOND Multimedia Systems Vertriebs GmbH
Moosstrasse 18b
D-82319, Starnberg
GERMANY
On behalf of
SONICblue Incorporated
Page 34

Regulatory Information
Page 34
2841 Mission College Blvd.
Santa Clara, CA 95054 USA
Hereby declare under our sole responsibility that the following product(s) conform to the
requirements of the European Parliament Council Directive 1999/5/EC dated 9th March
1999. And to which this declaration is related the product(s) listed are in conformity with the
following relevant harmonized European Standards or other normative documents, the references of which have been published in the Official Journal of the European Communities /
European Union.
Product (s): RIO 800
Harmonized Standards:
EN 55022: 1994, A1’95, A2’97 S pecification for limits and methods of measurement of radio
interference characteris ti cs of Information Technology (IT) equipment.
EN 50082-1: 1998 Electromagnetic Compatibility, Generic Immunity Standard, Part 1. Resi-
dential, Commercial and Light Industry.
EN 50332-1: 1999 Maximum sound pressure level measurement methodology and limit con-
siderations. Part 1 General method for “one package equipment”.
CEI/IEC 60065: 1998 Audio, V ideo, and similar electronic apparatus Safety Requirements.
In accordance with the terms of Directive 1999/5/ EC, 89/336/EEC, 73/23/EEC and Council
Decision 98/482/EC the original signed Declar ation is retained by us in the product compliance folder. Upon request photocopies may be available.
Date: 02 November 2000
Place: St. Ingbert
Name of Authorizing Person
Scott Naccarato
Regulatory Compliance Manager
Page 35

Customer Care
Technical support
Hours of Operation
Monday-Friday 5am-7pm PT
Saturday 8am-4pm PST
customersupport@riohome.com
Telephone
(541) 967-2450
TDD
(541) 967-2451
Fax
(541) 967-2401
Customer Care
Page 35
Web site
www.riohome.com
Solution Library
Customer service
Hours of Operation
Monday-Friday 6am-5pm PT
customersupport@riohome.com
Telephone
1-800-468-5846 or (541) 967-2450
Fax
(541) 967-2485
Rio Product Support
With every Rio product you receive the following support services:
• Unlimited access to the Rio web-based technical information resources, available 24
hours a day every day at www.riohome.com
base search engine, product updates, and other useful tools.
. Here you will find FAQ files, a knowledge-
• Unlimited e-mail support for the duration of your Rio produc t hardware warranty period.
• Access to the latest software updates and enhancements for Rio product via our Web
site.
Page 36

Customer Care
Page 36
New Product Support
In addition to the services ment ioned above, all retail purchasers of Rio product s receive person-to-person telephone suppor t for the first 90 days of ownership.
To extend support after the expiration of New Product Support, we offer an affordable, feebased, Extended Service Option. Please see the Web site
for details.
Extended Service Option
To extend support after the expiration of New Product Support, we offer an affordable, feebased, Extended Service Option. Please see the Web site
for details.
Premium Support Service
Have a tough question and no time to wait? Rio also offers a Premium Support service. No
hold time and your call is routed directly to our most experienced support technicians. This
service is available at a low per minute fee whether your Rio product is in warranty or not.
(You must be 18 years or older or have your parent’s permission to use this service). Please
see the Web site
for details.
Page 37

Index
Page 37
Index
A
AAC 24
ADPCM 24
analog gain 17
AudibleManager software 21
audio file size 24
audio functions 7
B
backlight 15
backpack 6
battery calibration 16
battery power level 16
bitrate 24
bookmark
add
11
play or delete 11
C
calibrate 16
CDDB 25
CE declaration 33
charge backpack 6
clock
display
set 14
codec (defined) 24
codecs
AAC
ADPCM 24
MP3 26
WMA 26
common questions 27
contrast 15
customer care 35
D
delete
playlist
track 10
display
backlight
battery information 16
contrast 15
firmware version 18
memory information 18
DRM 25
18
24
13
15
E
encode (defined) 25
equalizer
built in
custom 8
EU declaration of conformity 33
7
F
Federal Communications Commission
(FCC)
33
file compression 24
firmware
checking
defined 25
downloading from Web site 28
upgrading 28
forward button 4
frequently asked questions 27
28
G
gracenote 25
I
Industry Canada 33
L
LCD backlight 15
LCD contrast 15
legal notices 2
liquid crystal display (l cd) 5
M
Mac software 22
menu button 5
MP3 26
N
new battery installation 6
O
one year limited warranty 31
P
pick a track 10
play options
random
repeat 9
play/pause button 4
playlist
build
choose 12
defined 26
modify 13
9
12
Page 38

remove 13
power saving 14
R
randomize tracks 9
RealJukebox software 20
rechargeable battery 6
record button 5
record rate 17
recorder volume 17
recording vo ic e 19
regulatory information 33
repeat tracks 9
reverse button 5
Rio software 20
S
sampling rate 17
SDMI 26
select button 4
skins 26
SoundJam MP software 22
stop button 4
T
technical support 35
time and date
display
set 14
time to sleep setting 14
troubleshooting 27
18
U
USB 26
V
voice recording 19
W
warranty 31
WMA 26
Index
Page 38
 Loading...