

Page 1
Rio 600 User Guide
About the Rio User Guide
The Rio User Guide include s the fo ll owing sections:
Introduction
Rio Menu options and settings
Accessories and e-store
Glossary of digital audio ter ms
Frequently asked questions (FAQ) and troubleshooting
Warranty
Regulatory
Customer care
Index
About the Rio User Guide
Page 1
To learn more:
• Refer to the Getting Started Guide for the b asi cs o n how to set up and start using your Rio.
• Click the Rio Audio Manager or SoundJam software Help menus for detailed step-by-step instructions on how to use the software to convert CD tracks into compressed digital audio formats, get
audio from the Internet, or transf er trac ks to and fr om the Rio.
• Visit the Rio Web site
Navigating and printing the Rio User Guide
The online Rio User Guide is in Adobe Acrobat (.PDF) file format.
Important: We strongly recommend that you use Adobe Acrobat version 4.0—available on the
Rio software CD-ROM—to view and pr in t the Ri o user guide.
Click links (blue underlined text) to jump to another location in the document or to a location on the
World Wide Web.
Click the Index icon at the top of any page (by the page number) to go to the index—or you can
click the Index bookmark. Click page numbers in the index to jump to a topic.
Acrobat toolbar icons
Click the Show/Hide Nav ig ati on Pan e icon in the Ac r oba t toolb ar to show book mar ks in the left
column. Bookmarks are links to the contents of the User Guide. Click any bookmark in the list to
jump to the page in the User Guide that contains the topic.
Click the Print icon in the Acrobat toolbar to print the User Guide. The size of the User Guide is
designed for printing —to s ave tr ees.
Page 2
About the Rio User Guide
Page 2
Copyright and trademark
© 2000 S3 Incorporated. All Rights Reserved.
Neither S3 Incorporated nor Diamond Multimedia Systems, Inc. assumes any responsibility for errors
or omissions i n t hi s d oc ume nt . Ne ith e r S3 Inco rp or at ed nor Di am o nd Mu ltim e di a Syst em s, Inc . makes
any commitment to update the information contained herein.
Rio is a registered tradema rk of Rio Po rt. co m, Inc. used by Diamond Multimedia Systems, Inc. under
licence.
Microsoft, Windows Me dia and the Windows Logo are trade mark s or regis tered
trademarks of Microsoft Corporation in the United States and/or other countries.
Macintosh and iMac are trademarks of App le.
Adobe and Acrobat are regis ter ed tr ade mar k s of Adob e Systems, Inc.
All other trademarks belong to their respective owners.
First Edition, May 2000.
Part Number 75510294 -001
Microsoft End User Licence Agreement
You have acquired an item (“Device”) that includes software licenced by S3 Incorporated (“S3”) from
Microsoft Licensing Inc. or its affiliates (“Microsoft”). Those installed software products of MICROSOF T
origin, as well as associ ated me dia , prin ted materials, and “online” or elec tr oni c doc ume nta tio n (“Soft ware”) are protected by copyright laws and international copyright treaties, as well as other intellectual
property laws and treaties. The Software is licenced, not sold.
IF YOU DO NOT AGREE TO THIS END USER LICENCE AGREEMENT (“EULA”), DO NOT USE THE
DEVICE OR COPY THE SOFTWARE. INSTEAD, PROMPTLY CONTACT S3 FOR INSTRUCTIONS
ON RETURN OF THE UNUSED DEVICE(S) FOR A REFUND. ANY USE OF THE SOFTWARE,
INCLUDING BUT NOT LIMITED TO USE ON THE DEVICE, WILL CONSTITUTE Y OUR AGREEMENT TO THIS EULA (OR RATIFICATION OF ANY PREVIOUS CONSENT).
GRANT OF LICENCE. The Software is licenced, not sold. This EULA grants you the following rights to
the Software:
You may use the Software only on the Device.
NOT FAULT TOLERANT. THE SOFTWARE IS NOT FAULT TOLERANT. S3 HAS INDEPENDENTLY
DETERMINED HOW TO USE THE SOFTWARE IN THE DEVICE, AND MICROSOFT HAS RELIED
UPON S3 TO CONDUCT SUFFICIENT TESTING TO DETERMINE THAT THE SOFTWARE IS SUITABLE FOR SUCH USE.
NO WARRANTIES FOR THE SOFTWARE. THE SOFTWARE IS PROVIDED “AS IS” AND WITH
ALL FAULTS. THE ENTIRE RISK AS TO SATISFACTORY QUALITY, PERFORMANCE, ACCURACY, AND EFFORT (INCLUDING LACK OF NEGLIGENCE) IS WITH YOU. ALSO, THERE IS NO
WARRANTY AGAINST INTERFERENCE WITH YOUR ENJOYMENT OF THE SOFTWARE OR
AGAINST INFRINGEMENT. IF YOU HAVE RECEIVED ANY WARRANTIES REGARDING THE
DEVICE OR THE SOFTWARE, THOSE WARRANTIES DO NOT ORIGINATE FROM , AND ARE NOT
BINDING ON, MICROSOFT.
Page 3

About the Rio User Guide
Page 3
Note on Java Support. The Software may contain support for programmes written in Java. Java tech-
nology is not fault tolerant and is not de signed, manufactured, or intended for use or resale as online
control equipment in hazardous environments requiring fail-safe performance, such as in the operation
of nuclear facilities, aircraft navigation or communication systems, air traffic control, direct life support
machines, or w eapons systems, in which the failure of Java technology could lead directly to death,
personal injury, or severe physical or environmental damage. Sun Microsystems, Inc. has contractually
obligated Microsof t to make this di s cl aim er.
No Liability for Certain Damages. EXCEPT AS PROHIBITED BY LAW, MICROSOFT SHALL HAVE
NO LIABILITY FOR ANY INDIRECT, SPECIAL, CONSEQUENTIAL OR INCIDENTAL DAMAGES
ARISING FROM OR IN CONNECTION WITH THE USE OR PERFORMANCE OF THE SOFTWARE.
THIS LIMITATION SHALL APPLY EVEN IF ANY REMEDY FAILS OF ITS ESSENTIAL PURPOSE.
Limitations on Reverse Engineering, Decompilation, and Disassembly. You may not reverse
engineer, decompile, or disassemble the Soft ware, except and only to the extent that such activity is
expressly permitted by applicable law notwithstanding this limitation.
Software Transfer allowed but with restrictions. Yo u may per ma nen tly tran sfer rights under this
EULA only as part of a pe rma nen t sal e or transfer of the Device, and only if the recipient agrees to this
EULA. If the Software is an upgrade, any transfer must also include all prior versions of the Software.
EXPORT RESTRICTIONS. You acknowledge that the Software, or any part thereof, or any process or
service that is the direct product of the Software (the foregoing collectively referred to as the
“Restricted Components”) are of U.S. origin. You agree to comply with all applicable international and
national laws that apply to these products, including the U.S. Export Administration Regulations, as
well as end-user, end-use and destination restrictions issued by U.S. and other governments. For additional information on exporting Microsoft products, see www.Microsoft.com/exporting/.
Page 4

Introduction
Page 4
Introduction
The Rio 600 is a digital audio player that you can take with you anywhere. Create and mix your favorite
music and audio selections on your PC or Mac for playback on the Rio. Listen to music on the Rio
while you exercise, commute, or relax. The Rio is similar in function to a portable cassette or CD
player. However, it has no moving parts, so the Rio does not skip or jitter during playback. It is about
the size of an audio cassette or pager and weighs only a few ounces.
The Rio comes with 32 MB memory built-in. You may expand the Rio memory storage with accessory
backpacks. The Rio interfaces with your computer through the USB port. Use the software included on
the CD-ROM to:
• Create your own custom song mixes to take with you on your Rio.
• Create compressed dig ita l audio track s from you r audio CDs using yo ur compu t er’s CD-ROM
drive.
• Convert and organise the contents of yo ur CD colle ction into compressed digital audi o track s.
• Download digital audio fil es fr om the Internet via your computer to the Rio.
There are many sources on the Internet for digital audio content, including:
Rioport.com
Windows Media.co m
Page 5

Rio Menu options and settings
Page 5
Rio Menu options and settings
Menu options and settings described in this section
• Audio: Adjustments to audio quality (Equalizer settings).
• Player: Includes random, repeat, delete track, and playlist functions.
• Prefs: Player settings including display, time and date, and power saving (time to sleep).
• About: Player status including battery level, firmware version, memory use, and owner information.
Documentation conventions used in this section
• Menu: The Menu button on the player. Press Menu to display menu options. Gener al ly, pressing
Menu while in menu mode before saving any changes returns the player to play mode without
saving.
• Select: The centre player joypad button.
>/||
•
•
: Play/Pause; the top button on the player joypad.
■
: Stop; the bottom button on the player joypad.
>>
•
•
• Liquid crystal display (LCD):
: Forward; the right button on the player joypad.
<<
: Reverse; the left button on the player joypad.
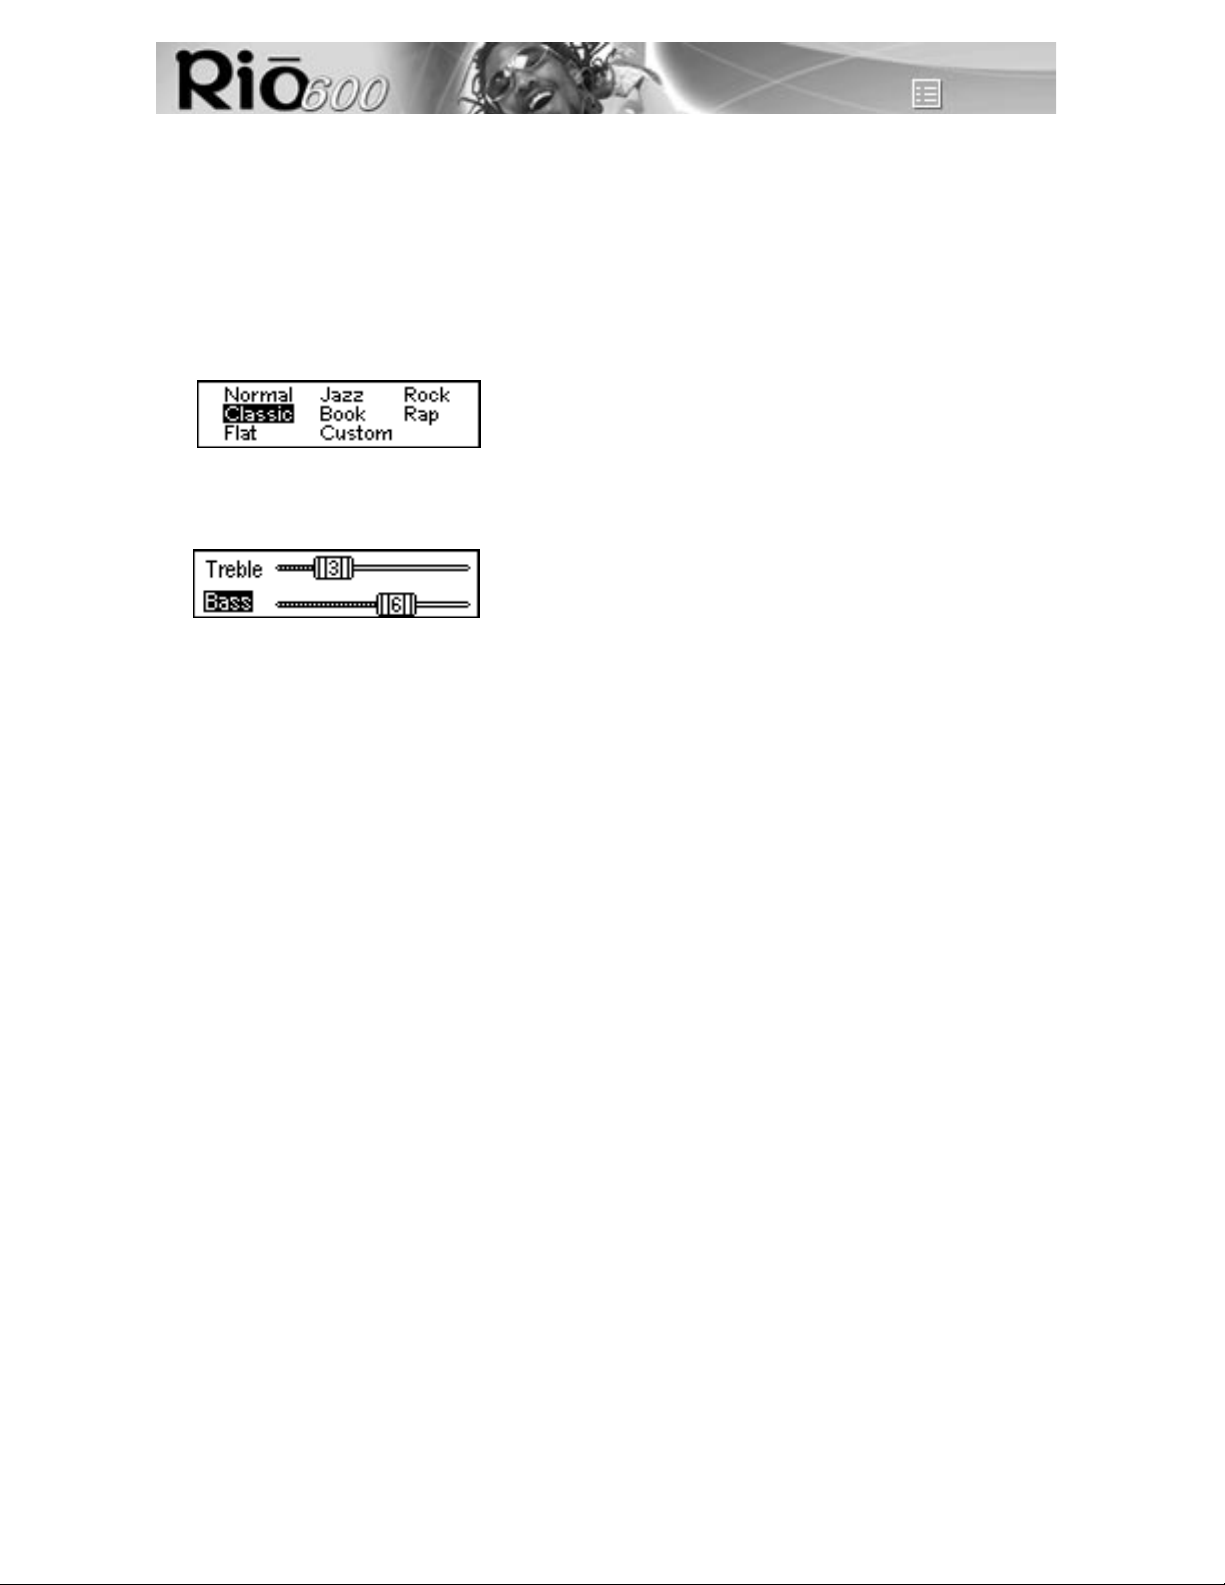
Using Audio functions
Audio functions include built-in and custom equalizer (EQ) settings. Custom EQ lets you set the Treble
and Bass values on a range from 1 (low) to 12 (high).
Selecting built-in EQ settings
1 Press Menu.
2 Press the << or >> joypad buttons to navigate to Audio.
3 Press Select.
4 The EQ settings display.
5 Press the
6 Press Select.
>/||
, ■, << or >> joypad buttons to highlight the desired setting.
Page 6
Rio Menu options and settings
Setting the Custom EQ
Custom EQ lets you set the Treble and Bass values from 1 (low) to 9 (high).
1 Press Menu.
2 Press the << or >> joypad buttons to navigate to Audio.
3 Press Select.
4 The EQ settings display.
Page 6
5 Press the
6 Press Select.
7 Press the
8Use the << or >> joypad buttons to increase or decrease the bass or treble value from 1 (low) to
12 (high).
9 Press Select to choose the setting.
>/||
, ■, << or >> joypad buttons to navi gate to Custom.
>/||
or ■ joypad buttons to navigate between Bass or Treble.
Page 7

Rio Menu options and settings
Page 7
Using Player functions
Player functions inc lude:
• Play options: Rep eat or rando mi se tr acks .
• Delete tracks: Remove content from the Rio.
• Playlist: Create new playlists, manage playlists downloaded from the computer or remove playlists
from the Rio.
Setting Repeat and Random play options
Repeat settings include:
• All: All tracks repeat.
• Track: Current track repeats.
• Off: Turns off repeat function.
Random settings include:
• All: All tracks play in random order.
• Off: Turns off random function.
Repeat-All and Random-All functions may be us ed together, to randomise all tracks on the Rio.
1 Press Menu.
2 Press the << or >> joypad buttons to navigate to Player.
3 Press Select.
4 Navigate to Play Options.
5 Press Select.
6 Press the
7 Press the << or >> joypad buttons to change the Repeat or Random setting .
8 Press Select to save the settings. To return to play mode without saving any changes , press
Menu.
>/||
or ■ joypad buttons to navigate between Repeat or Random.
Page 8
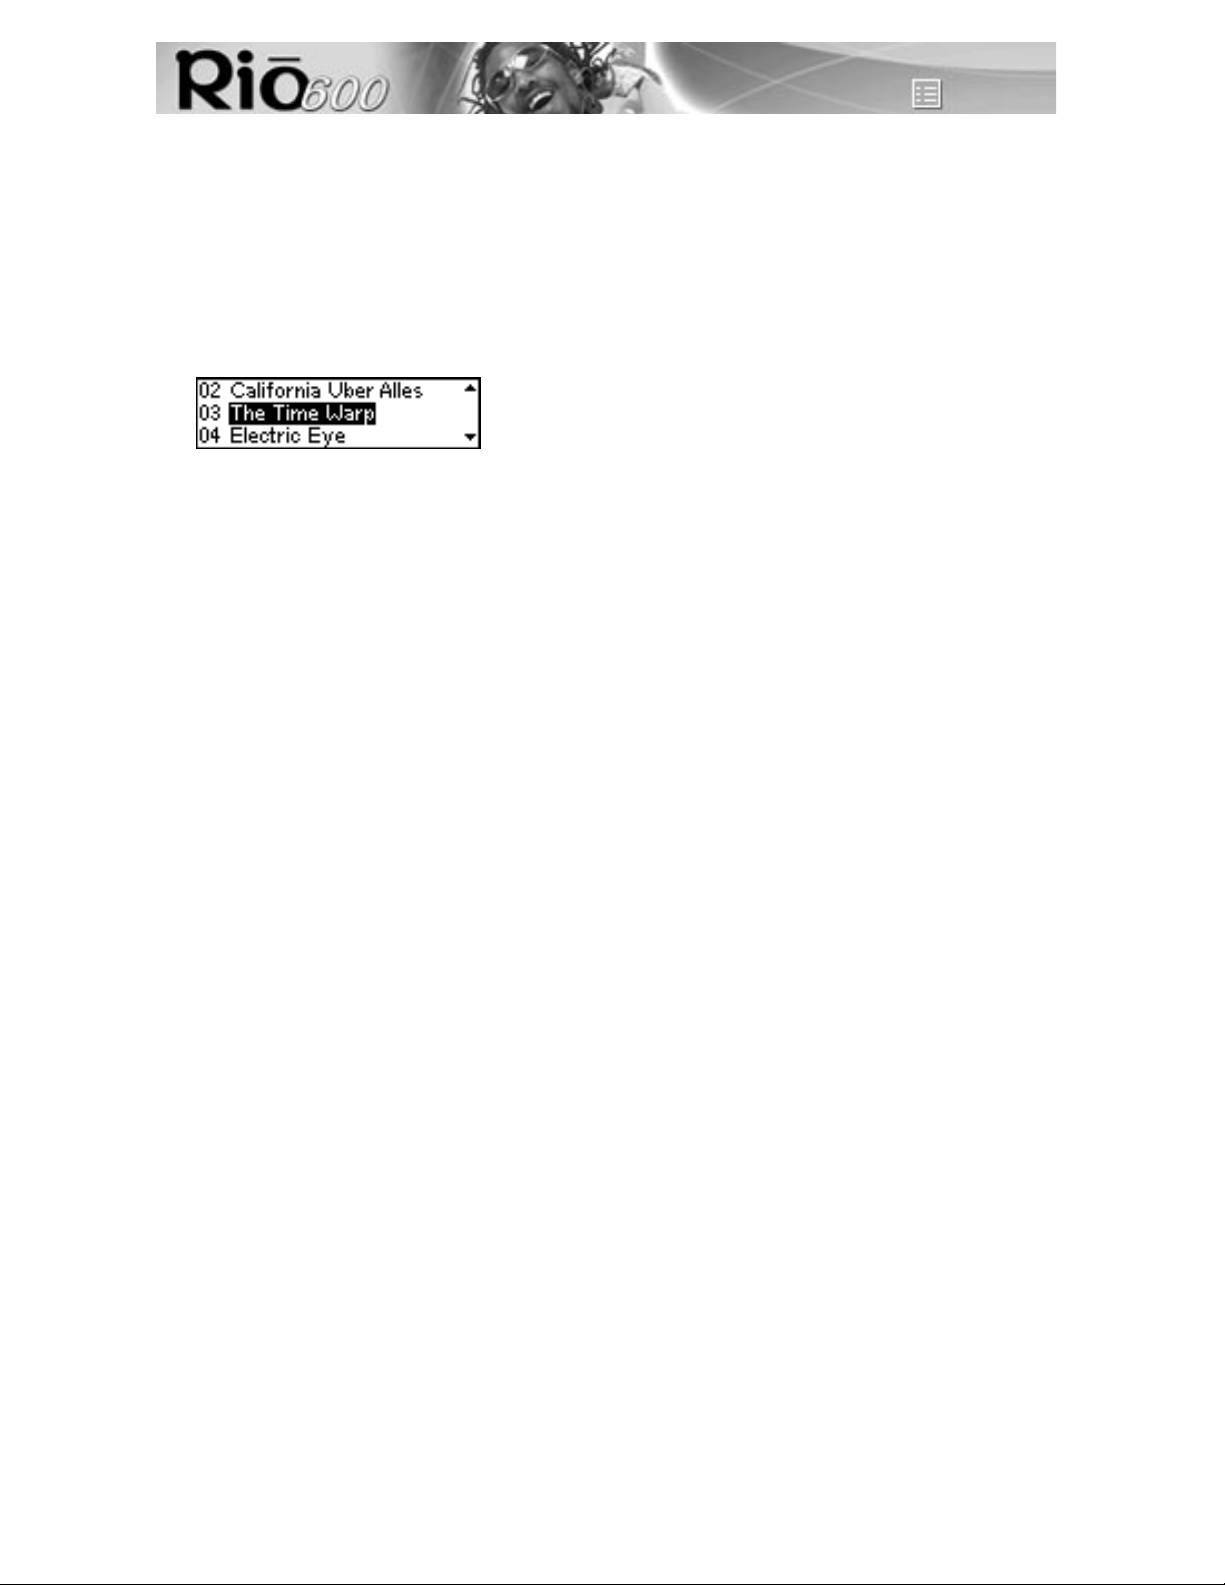
Deleting tracks from the Rio
1 Press Menu.
2 Press the << or >> joypad buttons to navigate to Player.
3 Press Select.
4 Press the joypad buttons to navigate to Delete Tracks.
5 Press Select. A list of all tracks on the Rio displays.
Rio Menu options and settings
Page 8
6 Press the
7 Press Select.
• Choose Yes on the Delete dialogue to delete the track.
• Choose No on the Delete di alo gue to ret urn to pla y mod e withou t delet ing the tr ack.
• To return to play mode without saving any changes, press Menu.
>/||
or ■ joypad buttons to navigate to the track you want to delete.
Page 9
Rio Menu options and settings
Working with Playlists
Playlist option s inclu de:
• Choose: Select a playlis t from playl ists stored on the Rio.
• New: Build a new playlist.
• Edit: Modify an existing playlist.
• Remove: Remove a playlist from the Rio.
1 Press Menu.
2 Press the << or >> joypad buttons to navigate to Player.
3 Press Select.
4 Navigate to Playlist.
5 Press Select.
6 Press the << or >> joypad buttons navigate to the desired playlist option.
7 Press Select.
Page 9
Choosing a playlist
1 Select the Choose playlist option. Any existing playlists display.
2 Press the
3 Press Select.
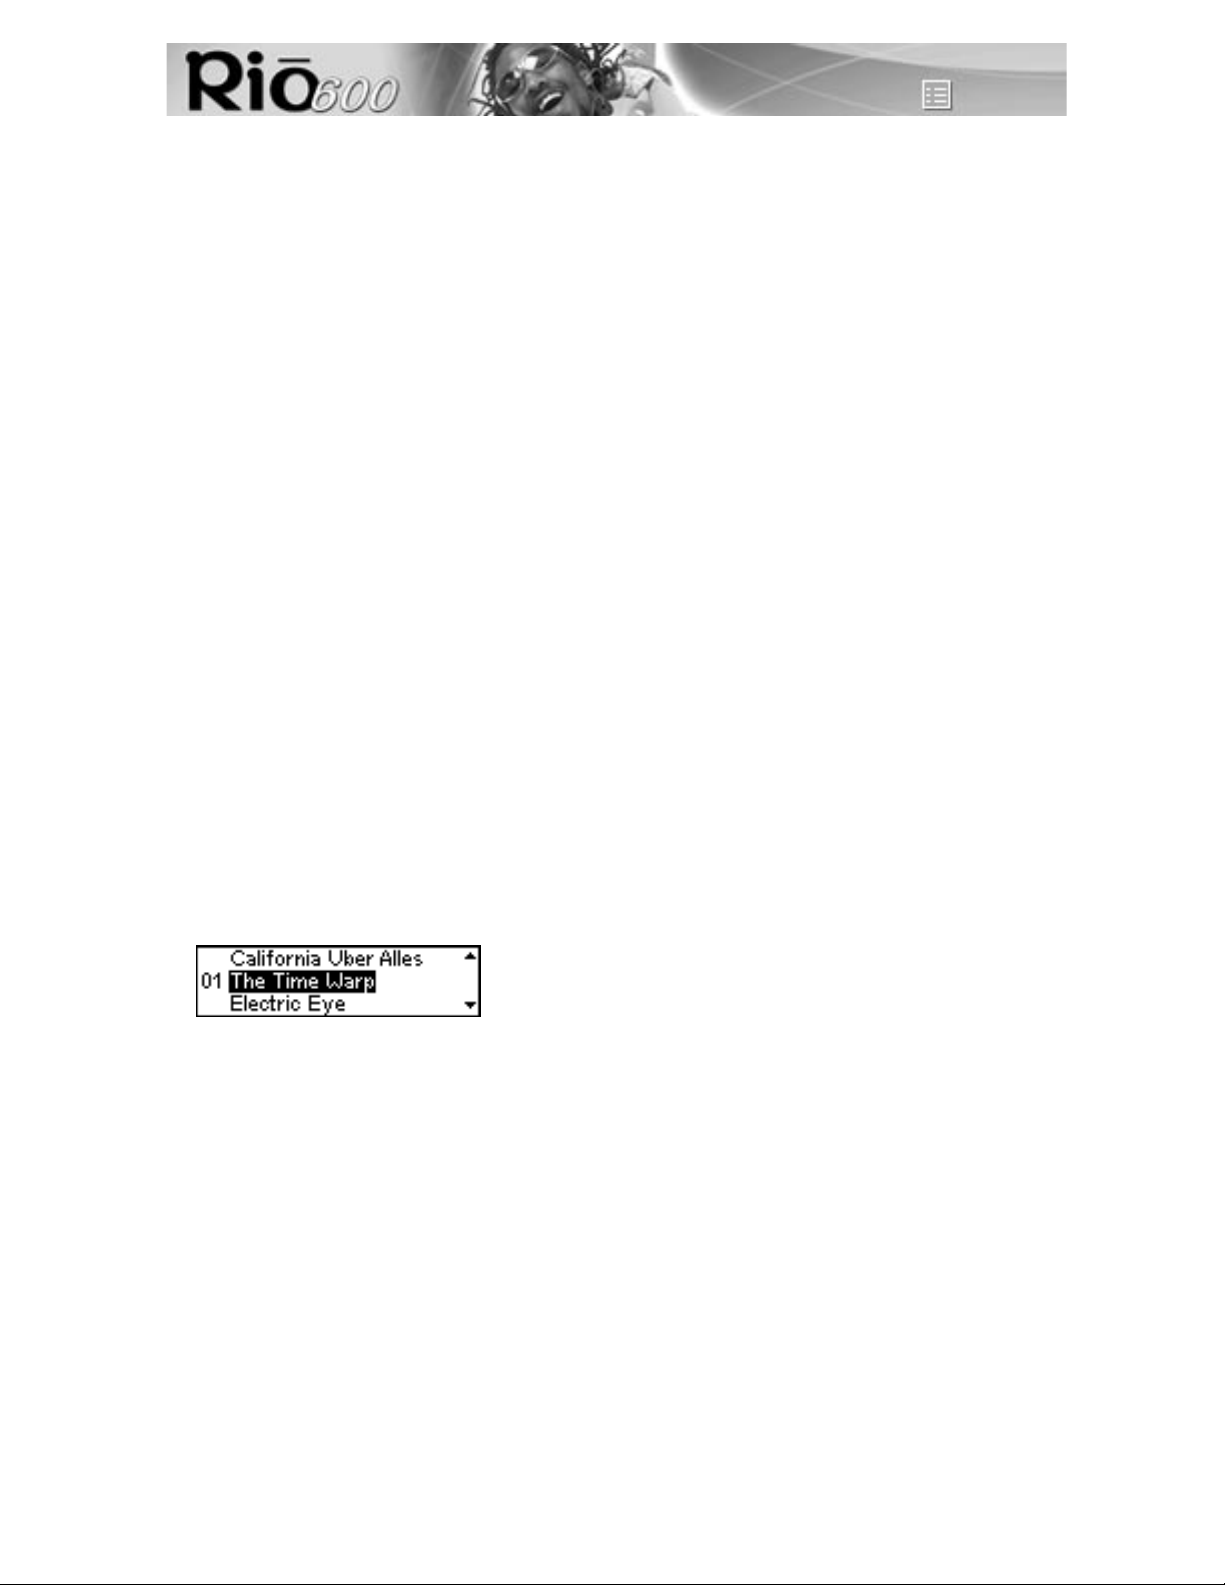
Building a playlist
1 Highlight the New playlist option.
2 Press Select. New playlists are numbered in sequential order starting at “1”.
3 The playlist editor displays all tracks on the Rio.
4 Press the
• Press Select to assign a playlist order number to the track. The number is the order in which
• Press the << or >> joypad buttons change the track order number.
5 When you are finished, select Done at the bottom of the playlist editor.
6Select Yes on the dialogue to sav e the new playl ist and ex it.
>/||
or ■ joypad buttons to highlight the desired playlist.
>/||
or ■ joypad buttons to highlight a track.
the track plays in the pl ayli st.
Page 10

Modifying a playlist
1 Highlight the Edit playlist option.
2 Press Select.
Rio Menu options and settings
Page 10
3 Press the
4 The playlist editor displays tracks and their playlist order numbers in the left column.
• To add or remove tracks from the playlist, highlight a track and press Select to tag or untag the
• To change the track order, highlight a track and press the << or >> joypad buttons change the
5 When you are finished, select Done at the bottom of the playlist editor.
•Select Yes on the dialogue to save the new playlist and exit.
•Select No on the dialogue to return to the playlist editor without saving the changes.
Removing a playlist
1 Select the Remove playlist option.
2 Press the
3 Press Select.
4Select Yes on the dialogue.
>/||
or ■ joypad buttons to navigate to the playlist.
track with a number in the left column. This number is the order in which the track plays in the
playlist.
track order number in the playlist.
>/||
or ■ joypad buttons to highlight a playlist.
Page 11

Rio Menu options and settings
Setting Preferences
Preferences include these player settings :
• Power saving (time to sleep).
• Display backlight .
• Time and date.
Adjusting the power savi ng set t ing
To adjust the time to sleep (suspend) setting from one to nine minutes:
1 Press Menu.
2 Press the << or >> joypad buttons to navigate to Prefs.
3 Press Select.
4 Press the joypad buttons to navigate to Power Saving.
5 Press Select.
Page 11
6 Press the << or >> joypad buttons to adjust the setting from one to nine minutes.
7 Press Select to save the setting. To return to play mode without saving any changes, press Menu.
Adjusting display backlight
1 Press Menu.
2 Press the << or >> joypad buttons to navigate to Prefs.
3 Press Select.
4 Press the joypad buttons to navigate to Display.
5 Press Select.
6 Press the >> joypad button to adjust the backlight time on setting.
7 Press Select to save the setting.
Page 12

Rio Menu options and settings
Setting time and date
1 Press Menu.
2 Press the << or >> joypad buttons to navigate to Prefs.
3 Press Select.
4 Press the joypad buttons to navigate to Time/Date.
5 Press Select.
6 Press the << or >> joypad buttons to highlight each of the time and date fields.
Page 12
7 Press the
value. The date field will not roll to a value that is not valid for the selected month and year.
8 Press Select to save the time/date settings. To return to play mode without saving any changes,
press Menu.
>/||
or ■ joypad buttons when any of the time or date fields is highlighted to change the
Page 13

Rio Menu options and settings
Displaying About information
1 Press Menu.
2 Press the << or >> joypad buttons to navigate to About.
3 Press Select. The following information displays:
• Player per sonalisation message defin ed through the software or Rio model number.
• Firmware version the Rio is using (Vx.x.x).
• Total internal memory amount installed and a bar graph display of the amount used.
• Total external memory backpack installed and a bar graph display of the amount used by
tracks.
4 Press the ■ joypad button to display battery information:
Page 13
• Battery type: Rechargeable or No rma l.
• Battery charge level: The bat ter y’s char ge state.
• Run time estimation: The batt er y’s rem aining play time.
• Battery level graphic: A bar graph inside a battery icon displays the approximate remaining
charge. When the graph shows less than 25% charge remaining, the bar graph blinks to show
a low battery condition. If the battery is rechargeable and attached to an AC adapter, the
battery icon is replaced with an AC adapter icon and the battery and runtime inform ation is
replaced with a “battery chargin g” me ss ag e.
5 Press the ■ joypad button to display clock and calendar information.
6 Press the ■ joypad button to display codec information.
7 Press Menu to return to play mode.
Page 14

Accessories
Page 14
Accessories
Customise your Rio with these cool digital audio accessories:
• External Memory Backpacks
• Car Cassette Adapt er
• FM Tuner Remote
• Headphones
• RioTone Faceplates
• Rio 600 XtraStuff
• Carrying cases and bags
• Rio clothing and gear
Order accessori e s online from the Rio e-store
Approved Rio 600 replacement alkaline batteries
Your Rio 600 is powered by one AA size alkaline battery (included).Your Rio will run longer and perform best when using a good quality battery. Poor quality or leaking batteries can damage the Rio 600.
The following brands of replacement batteries are approved for use with the Rio 600:
• Energiser AA size alkaline
• Duracell Ultra AA size alkaline
External memory backpacks and adapters
Expand the Rio memory storage with 32 MB, 64 MB and 340 MB accessory
backpacks. Storage times vary by audio file codec and bitrate used.
32 MB Backpack
• Expands memory storage by approximately 30 minutes (MP3) to 60
minutes (WMA).
• Recharges with the AC adapter.
Order online from the Rio e-store
64 MB Backpack
• Expands memory storage by approximate ly 60 minutes (MP3) to 120 mi nutes (WMA).
• Recharges with the AC adapter.
Order online from the Rio e-store
AC adapter
Charges the 32 MB and 64 MB rechargeable back pac ks .
Warnings: Bat teries may explode or leak if disposed o f in fire, mix ed with a different battery type,
inserted backwards or disassembled. Never attempt to recharge a non-rechargeable alkaline
battery with the Rio AC adapter. Only use nick el met al hyd r ide ( N iM H) AA si z e rec har ge abl e
batteries with the Rio AC adapter. Do not operate this device in or near water or wet locations.
Order online from the Rio e-store
Page 15

340 MB Backpack and AC adapter
• Expands memory storage by approximately five hours (MP3) to 10 hours (WMA).
• Recharges with its own AC adapte r.
Car Cassette Adapter
• Designed to work with any car stereo cassette player.
• Listen to your Rio in your car through your car’s speakers.
Using the car cassette adapter
1 Plug the stereo plug (male) of the car cassette adapter into the head-
phone jack of the Rio player.
2 Turn the cassette deck on. Set the volume to the lowest position.
3 Insert the car cassette adapter into the cassette deck.
4 Turn on the Rio player and adjust the volume to medium level.
5 Play music on the Rio through your car’s speakers.
6 Adjust the cassette deck vo lume to the desired level.
Accessories
Page 15
Order online from the Rio e-store
FM Tuner Remote
• Includes shirt clip.
• Provides convenient access to Hold, Volume, Menu, Play/Pause, Forward, Stop, Reverse, and FM tuner controls.
• LCD displays track number and co unter, volume level or radio station.
Start using the FM Tuner Remote
1 Plug the stereo connector (male) into the Rio multifunction port.
2 Plug the headphones into the FM tuner remote.
3 To tur n on the remote, press
4 Press Menu (on the right side of the FM tuner remote) to switch between FM tuner and audio func-
tion modes.
Order online from the Rio e-store
>/||
(Play/Pause).
Page 16

Headphones
Choose from:
• Over-the-ear headp hones
• Over-the-head headphones
• Neck band sport headphones
Order online from the Rio e-store
RioTone Faceplates
Available in a variety of colours and designs.
Removing the faceplate
1 Press the button on the back of the Rio 600 to detach the backpack.
2 Remove the backpack from the Rio 600.
3 Small tabs on the back of the faceplate attach it to the front of the Rio.
Holding the Rio in one hand, grasp the left side of the faceplate with your
other hand and pull up to unclip the left side of the faceplate from the front of the Rio.
Accessories
Page 16
4 Remove the faceplate from the front of the Rio.
Attaching the faceplate
1 First, remove the back pac k and any e xi st ing fac ep late att ac hed to the Rio.
2 Insert the tab by the Liquid Crystal Display (LCD) opening on the back of the new faceplate into
the slot on the front of the Rio on the right side by the LCD.
3 Press the faceplate onto the front of the Rio, until the small tabs that clip the faceplate to the Rio
snap completely into place. When the faceplate is attached, a tab is visible in the small window in
the battery well in the back of the Rio.
4 Replace the backpack.
Order online from the Rio e-store
Rio 600 XtraStuff
Includes:
• Carrying case with be lt cli p
• One RioTone faceplate
• Headphone Remote: Provides convenient access to Hold, Volume, Menu, Play/Pause, Forward,
Stop and Reverse controls. Two foot cord includes function control pad, 1/8” right angle stereo
connector (male) and a 1/8” stereo jack (fema le) connects to any headphones.
Order online from the Rio e-store
Page 17

Carrying cases and bags
Carrying Case with belt cl i p
Provides access to buttons and controls whil e protecting your Rio.
Order online from the Rio e-store
Rio Travel Case
• Keeps your Rio player and accessories together when you travel.
• Removable shoulder strap.
Order online from the Rio e-store
Rio clothing and gear
Choose from:
•T-shirt
•Sweatshirt
• Baseba ll hat
• Gym bag
Accessories
Page 17
•Bum pack
Order online from the Rio e-store
Page 18

Digital audio terms
Page 18
Digital audio terms
AAC
Advanced Audio Coding (AAC) is one of the audio compression formats defined by the MPEG-2 specification. AAC used to be called NBC (Non-Backward-Compatible), because it is not compatible with
the MPEG-1 audio formats. AAC may eventually replace MP3 since it offers better sound quality and
greater file compressi on.
Bitrate
Bitrate denotes the average number of bits that one second of audio data will consume. The size of a
digital audio file is determined by the bitrate used when encoding the file. The higher the bitrate used,
the higher the sound quality and the larger the file size. For example, with MP3, a bitrate of 128k is
usually very close t o C D quality, and takes up about 1MB per minute of music. At a 64k bitrate, the
sound quality is similar to that of an FM radio signal, but you may get around two minutes of music in
that same 1MB of stor age sp ac e.
CDDB
CD Database (CDDB) is a vast database of CD information that includes disc name, song titles and
other information. CDDB supports hundreds of different third party software CD players. Access to the
CDDB service is offered free of charge to end-users. Visit the CDDB Web site
for more information.
DRM, security
Digital Rights Management (DRM) technologies protect copyright ownership of digital information.
DRM became an issue with the rise of MP3 technology and Internet distribution of music. DRM platforms serve as a security “wrapper” around digital audio supporting Internet distribution while at the
same time protecting and managing rights related to that digital information.
The security mechanism in the Rio supports several secured file fo rmats. When you download a
secure track from a CD or the Web to the Rio, you must have the licence associated with the track. If
the player doesn't r ead a corre sp ond ing li c ence for a track , the tr ac ks th ems el ves con tai n inform ati on
on where you can purchase them. Publishers can programme restrictions on how many times you can
play, copy, or distribute a song directly into the music files. Although the Rio includes security, i t is still
able to accept and play standard MP3 files.
Codec
Depending on the context and kind of technology involved, codec may be defined in two ways. In telecommunications, a codec is usually a “coding/decoding” ch ip us ed to tran sl ate between digital and
analogue transmission s. A modem uses one to interpret incomi ng anal ogu e signal s and co nv er ts the
digital data stream coming from the computer into analogue. A codec is also defined as a compression/decompression algorithm. Codecs are used to shrink large files or data streams, often for efficient
transmission over a network, and then decode them when they are displayed.
The Rio 600 supports the following digital audio file codecs:
•MP3
•WMA
Page 19

Digital audio terms
Page 19
Encoding, or Ripping (a CD)
Encoding, or “ripping”, refers to converting an audio file from an audio CD into a compressed digita l
audio format, such as MP3 or WMA, that may be played on the Rio or on the computer.
Firmware
Firmware is software–programmes or data–that has been written onto read-only memory (ROM). Firmware is a combination of software and hardware that is comparable to an operating system on a computer. The Rio firmware controls the liquid crystal display, digital audio codec support, and other
functions the Rio supports.
To see you r Rio’s firmwar e version:
1 Press the Menu button.
2 Press the << or
3 Press Select (centre joypad button) . The firmwa re ver sion the R io is us in g (Vx.x .x. ) displ ay s.
How to upgrade the Rio firmware
>>
(Forward or Reverse) joypad buttons to navigate to About.
MP3
MPEG-1, Layer 3 Audio (MP3) is a compressed digital audio file format. This format allows for near CD
quality sound, but at a fraction of the size of normal audio files. MP3 conversion of an audio track from
CD-ROM reduces the file size by approximately a 12:1 ratio with virtually no loss in quality. This digital
sound encoding and compression process was developed by the Fraunhofer Institut fur Integrierte
Schaltungen and Thomson Multimedia. MP3 uses perceptual audio coding and psychoacoustic compression to remove all superfluous information–more specifically, the redundant and irrelevant parts of
a sound signal that the human ear doesn't hear. It also adds a Modified Discrete Cosine Transform
(MDCT) that implements a filter bank, increasing the frequency resolution 18 times higher than that of
layer 2. MP3 shrinks the original sound data from a CD-ROM with a bitrate of 1411.2 kilobits per one
second of stereo music by a factor o f 12 down to 112-128kbps, without sacrificing sound quality. The
MP3 encoding process is well suited for the transfer of high quality audio files with small file size over
telephone or ISDN lines, and over the Internet.
SDMI
The Secure Digital Music Ini tia tiv e (S DMI) i s a forum of over 130 co mpanies in the fields of record ed
audio content, computers, and consumer electronics, for the purpose of developing an integrated
method of copyright protection technology that can be used worldwide. SDMI is working to create a
framework for preventin g improper usage of audio files and to promote legal music distribution ser vices.
Skins
Skins are the colour and window designs of desktop digital audio player software. You can customise
the look of your software by changing the skin. Created by graphic designers all over the world; skins
often omit certain playback controls for simplicity.
Page 20

Digital audio terms
Page 20
USB
Universal Serial Bus (U SB ) is the external bus standard that supp or ts data transfer rates of 12 Mbps
(12 million bits per second). The Rio uses USB to communicate with the computer. A single USB port
may be used to connect up to 127 peripheral devices, such as mice, modems, and keyboards. USB
also supports Plug-and-Play installation and hot plugging. It is expected to completely replace serial
and parallel ports.
WMA
Windows Media Audio (WMA) is the compressed audio format that Microsoft is positioning as a
replacement for MP3. WMA may replace MP3 since it offers greater file compression—twice that of
MP3—at the same or better soun d quality.
Page 21

FAQ/Troubleshooting
Page 21
FAQ/Troubleshooting
How do you get music on the Rio?
The Rio interfaces with your computer through the USB port. You can get digital audio from numerous
Internet sites or encode your own digital audio tracks from your audio CDs using the CD-ROM drive on
your computer. Use the software included with the Rio to download digital audio tracks from your computer to the Rio.
Can I use the Rio with Windows 95? I have the USB supplement pack.
No. The Rio USB devices can only be used with Windows 98, Windows ME or Windows 2000 operating systems, or Mac OS 8.5.1 or later. The Rio requires a newer standard of USB that is not available
in Windows 95, even with the USB supplem ent pack .
The Rio is connected to the USB, why doesn’t the computer recognise it?
First, make sure the Rio software is running and check to make sure the USB cable is fully connected
to both the Rio and the computer. Then, turn the player off and back on.
Where is the serial number located on the Rio player?
The serial number is on the back of the Rio under the backpack. Remove the backpack from the player
to see the serial number (S/N).
How do I upgrade the Rio firmware?
Important: First determine the version of the firmware installed on your Rio. Do not “downgrade”
your Rio firmware by installing an older version.
To chec k yo ur Rio ’s firmware v ersi on:
1 Press the Menu button.
2 Press the << or
3 Press Select (centre joypad button) . The firmwa re v er sion the R io is using (Vx.x.x) displays.
The firmware upgrade consists of a self-extracting compressed executable file, which when expanded,
places two files on your computer:
1 *.exe This util ity communicates with the Rio hardware and uploads the firmware file to the Rio.
This file is placed on your desktop.
2 *.cnt This is the actual firmware file transferred to the Rio. This file is extracted to the folder labeled
C:\Windows\temp.
Instructions
1 Go to the Rio Web site
2 Navigate to the Rio Technical Support Updates page.
3 Download the latest firmware upgrade.
>>
(Forward or Reverse) joypad buttons to navigate to About.
4 Run the self-extracting file.exe which you downloaded from the Internet.
5 Connect the Rio to the computer with the USB cable.
6 Turn on the Rio.
7 Double click the ic on labeled Upgradefirm.
Page 22

FAQ/Troubleshooting
Page 22
8 Click the Browser button on the software window.
9 Select the .cnt file and click Open.
10 The utility will upload the new firmware file to the Rio.
Important: Do not close the programme, turn off the Rio or unplu g the USB cable dur i ng the
upgrade.
11 When the upgrade is complete, close the upgrade utility and restart the Rio to load the new firm-
ware.
12 A check of the firmware version will now display the new version number.
Is the Random menu function truly random?
No. The Random function uses an algorithm called pseudo-random which is common to all computers.
The Rio selects a seed number and then enters a list of predetermined random numbers to play music
in a seemingly random order. If the same seed is picked, the Rio may play songs in the same order.
How do I play animated graphics on my Rio at startup?
Startup animated graphics may be available at www.rioport.com or other Web sites in the future.
Instructions for their use and how to load them on the Rio will be available on the Web site.
I registered the Rio Audio Manager software on my first computer, but when I
install it on another computer, it tells me that the code is not valid.
The licence is system specific. If you plan to use the software on multiple computers, you must register
the software on each computer.
How do I unlock Rio Audio Manager so I can encode more CDs?
1 Double click the Rio Audio Manager Icon to run the programme.
2 Click on the Help menu at the top of the screen.
3 Click Upgrade Online.
4 Follow the instructions on the screen.
5 You will receive your unlock code/certificate number by e-mail.
Note: Register Online is NOT the same as upgrading your software. Y ou must complete the above
steps to receive your unlock code.
How do I register the software online?
The Rio must be connected to the computer and turned on for online software registration.
Rio Audio Manager (PC)
Rio Audio Manager allows 50 free MP3 encodes prior to registration. Register Rio Audio Manager on
each computer you plan to use it with. Double click the Rio Audio Manager Icon to run the pro gramme.
1 Click on the Help menu at the top of the screen.
2 Click Upgrade Online.
3 Follow the instructions on the screen.
4 You will receive your unlock code/certificate number by e-mail.
Page 23

FAQ/Troubleshooting
Page 23
SoundJam (Mac)
SoundJam allows 50 encodes prior to registration.
1 Double click the hard drive icon.
2 Double click the SoundJam folder.
3 Double click the SoundJ am MP icon to open the programme. You will immediately be prompted to
register online.
4 Click the Re gist er Now button.
5 Follow the instructions on the screen.
6 You will receive your un loc k code by e-mail.
Why do I get an error when I click Read a CD to start the encoding process?
The following factors may interfere with the CD encoding process:
1 Over-utilisation of the CPU during the encoding process. Close all other software before encoding.
2 Insufficient RAM to cache the track properly. Generally, 64 MB is fine assuming that no other mem-
ory intensive application is running. Close all other software before encoding. Windows 98 generally assumes control of 15-20 MB of RAM at startup depending on what applications you have
running.
3 CD-ROM firmware. Even if a CD-ROM drive is new, it may require a firmware update from the
manufacturer to correct audio extraction errors.
4 Overclocking. Overclocking the system—running faster than it is rated to run—can have adverse
effects on the peripheral compone nts . If your sys tem is over cl ock ed, br ing it back to its norma l
operating speed.
5 Try manually changing the settings that Rio Audio Manager assigned to your CD Drive. To do this,
go to View / Options / Read CD. If it is set on Digital (WinAspi), try changing it to Digital or viceversa. If all else fails, you may have to change it to Analogue, but only if you have a sound card.
Analogue will be slow, but it should work. If you have to select this mode, you may either need to
check one of the above suggestions or try a different CD ROM drive.
How can I get the best sound quality when encoding from a CD?
If you use a significant amount of your computer system's resources with other applications, encoding
songs from a CD may result in poor quality recordings. If the song(s) you encode contain abnormalities, such as pops or skips, close down other applications which are running and encode those songs
again. The condition of the audio CD—scratches and so on—may effect the quality of the recording as
well.
Page 24

One Year Limited Warranty
Page 24
One Year Limited Warranty
Our warranty to you
Diamond Multimedia Systems, Inc. (“Diamond”) warrants that your product will be free from defects in
materials and workmanship for a period of one year from the date of original retail purchase. If you discover a defect covered by this warranty , we will repair or replace the product at our option using new or
remanufactured components . Diamond's liability is limited solel y to the repair or replacement of the
defective product. This warranty is extended to the original end user purchaser only and is not assignable or transferable to any other party. Any parts or boards removed in the replacement or remanufacture process shall become the property of Diamond. Out of warranty service is also available.
How to obtain service under this warranty
To obtain service under this warr anty, please contact the dealer from whom you purchased this p roduct or call Diamond’s Customer Care Centre at (541) 967-2450 for return instructions.
Customer Care hours of operation are:
• Monday through Thurs day 5a m- 7pm, PST
• Friday 5am-11am and 1pm-7pm, PST
• Saturday 8am-4pm, PST
You must deliver the product and the original sale receipt to the dealer from who you purchased this
product or to Diamond in order to obtain service under this warranty. If you return the product to Diamond, you must pay for shipping to Diamond.
Product failures not covered by this warranty
This warranty covers defects in manufacture that arise from correct use of th e de vic e. It do es not cover
damage caused by abuse, misuse, improper modification or repair, moisture, extreme heat or cold, corrosive environments, shipping, or high voltage surges from external sources such as power line, telephone line, or co nnected equipment. This w a r r an t y d oe s no t co ver wear and tear on covers, housi ng or
wiring. This warranty also does not apply to any product with an al tered or defaced serial number.
Limits of liability
We are only responsible for the repa ir of thi s produc t. We will not be li abl e to yo u or anyone el se for
any damages that result from the failure of this product or from the breach of any express or implied
warranties. These include damage to other equipment, lost data, lost profits, or any consequential,
incidental, or punitive damages. IN NO EVENT WILL DIAMOND BE LIABLE FOR ANY AMOUNT
GREATER THAN THE CURRENTLY SUGGESTED RETAIL PRICE OF THIS PRODUCT.
THIS WRITTEN WARRANTY REPRESENTS THE ENTIRE WARRANTY AGREEMENT BETWEEN
DIAMOND AND YOU. THIS WARRANTY IS GIVEN IN LIEU OF ALL OTHER WARRANTIES,
EXPRESS OR IMPLIED, INCLUDING WITHOUT LIMITATION IMPLIED WARRANTIES OF MERCHANT ABILITY AND FITNESS FOR A PARTICULAR PURPOSE. THIS WARRANTY IS LIMITED TO
THE TERM SPECIFIED AB OVE . NO WARRANTIES, EITHER EXPRESS OR IMPLI ED, WILL APPLY
AFTER THIS PERIOD. THIS WARRANTY MAY NOT BE ALTERED IN ANY WAY OTHER THAN IN
WRITING BY AN OFFICER OF DIAMOND.
Page 25

Regulatory Information
Page 25
Regulatory Information
Federal Communications Commission (FCC)
The device has been tested and found to comply with limits for a Class B computing device according
to the specifications in FCC rules Part 15. Operation is subject to the following two conditions:
1 This device may not cause harmful interference, and
2 This device must ac ce pt a ny in ter fer en ce re ce iv ed, in cl udi ng interference that may cause undes-
ired operation
If your device needs repairs, you must arrange for the manufacturer to make them if you are to kee p
the device’s FCC registration valid. This equipment, like other electronic equipment, generates and
uses radio frequency energy. If not installed and used according to the instructions in this manual, this
equipment may cause interference with your radio and television reception. If you think this equipment
is causing interference with your radio or television reception, try turning the equipment off and on. If
the interference problems stop when the equipment is switched off, then the equipment is pr ob a bly
causing the interfer en ce. You may be able to correct the problem by doing one or more of the following:
• Adjust the position of the radio or TV antenna
• Move the device away from the radio or TV
If necessary, consult your dealer or an experienced radio or television technician.
EU Declaration of Conformity
We
DIAMOND Multimedia Syst ems Vertriebs-GmbH
Moosstrasse 18b
D-82319, Starnberg
GERMANY
On behalf of
S3 + DIAMOND Multimedia Systems Inc.
2880 Junction Avenue
San Jose, CA. 95134-1992
USA
Hereby declare under our sole responsibility that the following product(s) conform to the requirements
of the European Parliament Council Directive 1999/5/EC dated 9th March 1999. And to which this declaration is related the product(s) listed are in conformity with the following relevant harmonized European Standards or other normative documents, the references of which have been published in the
Official Journal of the European Communities / European Union.
Product (s): DIAMOND RIO 600
Harmonized Standar ds :
EN 55022: 1994, A1’95, A2’97 Specification for limits and methods of measurement of radio interfer-
ence characteristics of Informat ion Technology (IT) equipment.
Page 26

Regulatory Information
Page 26
EN 50082-1: 1998 Electromagnetic Compatibility, Generic Immunity Standard, Part 1. Residential,
Commercial and Light Industr y.
EN 50332-1: 1999 Maximu m so und pres su re le vel measurement methodolog y and limit consider-
ations. Part 1 General method for “one package equipment”.
CEI/IEC 60065: 1998 Audio, Video, and similar electron ic ap paratu s Saf ety Req uir em ent s.
In accordan ce wi th the t erms o f Dire ctive 1999/5 /EC, t he ori ginal ly si gned De clarat ion i s retai ned b y us
in the product complia nce fol de r. Upon request photocopie s may be av ail ab le.
Date: 1 June 2000
Signature of Authorizing Person
Signed version on file
Place: St. Ingbert
Name of Authorizing Person
Scott Naccarato
Product Approvals Manager
Page 27

Customer Care
Japan
Telephone Support
03-5695-8405
Hours of Operation: Mon day- Fri day 9:3 0 - 12:00 and 13:00-16:00
Fax:
03-5695-8405
support@diamondmm.co.jp
World Wide Web
http://www.diamondmm.co.jp
FTP
ftp.diamondmm.co.jp
Germany
Telephone Support—all Products
+49-(0)700-0100-1003
Customer Care
Page 27
Hours of Operation: Mon day- Fri day 9 .00 unti l 20.00 CET; Saturday 9.00 until 16.00 CET
Fax Support—all Products
+31-53-484-9536
World Wide Web
http://www.diamondmm.de
England
Telephone Support—all Products
+44-(0)870-870-5727
Hours of Operation: Mon day -F riday 8.00 unti l 19.0 0 GMT; Saturday 8.00 until 15.00 GMT
Fax Support—all Products
+31-53-484-9536
World Wide Web
http://www.diamondmm.co.uk
France
Telephone Support—all Products
+33-155-381616
Hours of Operation: Mon day- Fri day 9 .00 unti l 20.00 CET; Saturday 9.00 until 16.00 CET
Fax Support—all Products
+31-53-484-9536
World Wide Web
http://www.diamondmm.fr (Support area only)
Page 28

Customer Care
Spain
Telephone Support—all Products
+34-91-745-6245
Hours of Operation: Mon day- Fri day 9 .00 unti l 20.00 CET; Saturday 9.00 until 16.00 CET
Fax Support—all Products
+31-53-484-9536
World Wide Web
http://www.diamondmm-europe.com
Other European, Middle Eastern and African countries:
Telephone Support—all Products
+31-53-484-9535
Hours of Operation: Mon day -F riday 8.00 unti l 19.0 0 GMT; Saturday 8.00 until 15.00 GMT
Fax Support—all Products
+31-53-484-9536
World Wide Web
http://www.diamondmm-europe.com
Page 28
Mailing address
S3/Diamond
European Customer Care Centre
P.O. Box 52
7500 AB Enschede
The Netherlands
Page 29

Index
Page 29
Index
A
18
AAC
AC adapter
audio file size
audio functions
B
backlight
backpack
32 MB
340 MB
64 MB
AC adapter
batteries
Rio 600 alkaline re pla ce men t
battery power level
bitrate
C
car cassette ad apt e r
carrying cases
CDDB
CE declaration
clock
display
set
codec (defined)
codecs
AAC
MP3
WMA
D
delete
playlist
track
display
backlight
battery information
firmware version
memory information
DRM
E
encode (defined)
equalizer
built in
custom
F
faceplates
Federal Communications Commission (FCC)
statement
14
18
5
11
14
15
14
14
14
13
18
15
17
18
25
13
12
18
18
19
20
10
8
11
13
13
13
18
19
5
6
16
25
file compression
firmware
defined
how to upgrade
FM tuner remote
frequently asked questi on s
18
19
21
15
H
headphones
16
L
LCD backlight
11
M
19
MP3
O
one year limited warrant y
online software registration
P
play options
random
repeat
playlist
build
choose
modify
remove
power saving
7
7
9
9
10
10
11
R
randomize tracks
regulatory information
repeat tracks
Rio 600 batteries
approved replacement
Rio 600 XtraStuff
RioTone Faceplate
7
25
7
16
16
S
19
SDMI
19
skins
software registration
22
T
time and date
display
set
time to sleep setting
troubleshooting
13
12
11
21
U
20
USB
W
warranty
WMA
24
20
21
24
22
13
Page 30

Index
Page 30
 Loading...