

Page 1

cool
SET TEMP.
ON/OFF
- +
TEMP
Remote Control Operation Manual
Split Type Air Conditioner
Australia Pty. Ltd.
ABN 74 005 138 769
Head Office
100 Atlantic Drive,
Keysborough VIC 3173
P.O. Box 460
Braeside, Victoria 3195
Rinnai has a Service an d Spare Parts network with personne l who are fully trained
and equippe d to give the best service on yo ur Rinnai appliance . If your appliance
requires se rvice, please call ou r National Help Line. Rin nai recommends that th is
appliance be serviced once a year.
Product Sales and Service - National
Phone: 1300 555 545* Fax: 1300 555 655*
Technical Helpline and Spare Parts
National (Mon-Fri 8am - 5.30pm EST)
Phone: 1300 555 545* Fax: 1300 300 141*
*Cost of a local call higher from mobile or public phones.
E-mail: enquiry@rinnai.com.au
For further information visit: www.rinnai.com.au
Part Number: B063803
December 2016
EQPL38586755
Issue A
LOCK RESET
SHORT
CUT
FAN
SPEED
TIMER
ON
TIMER
OFF
LED
To Suit Models
Wall Mounted Cassette
HINRA26M
HINRA35M
HINRA50M
HINRA70M
HINRA80
MODE
SWING
SWING
SLEEP
TURBO
This appliance shall be installed in accordance with:
• Manufacturer’s Installation Instructions
• Current AS/NZS 3000
• Local Regulations and Municipal Building Codes including local OH&S requirements
This appliance must be installed, maintained and removed by an Authorised Person.
For continued safety of this appliance it must be installed and maintained
accordance with the manufacturer’s instructions.
CIN050A
CIN070A
CIN100A
CIN120A
CIN140A
Page 2
CONTENTS
Handling the Remote Control .........................................................
Remote Control Specifications......................................................
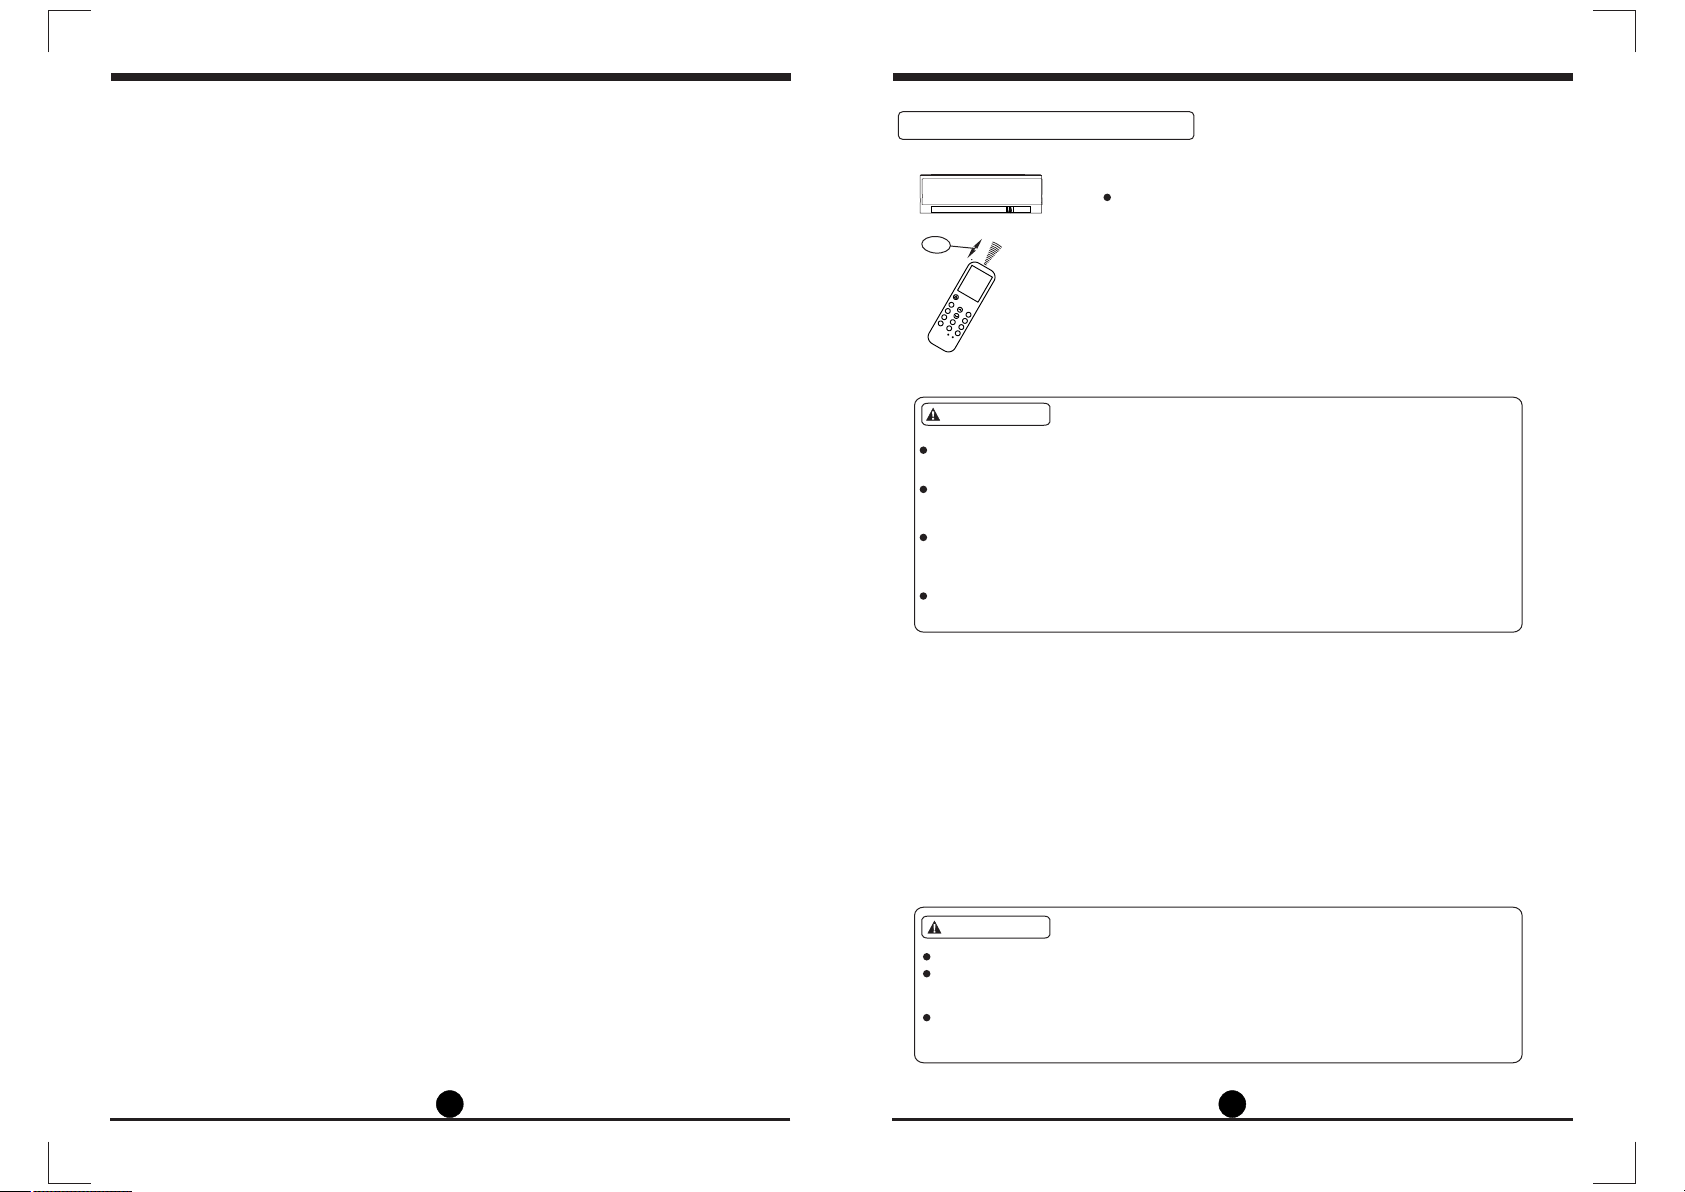
Handling the Remote Control
Location of the remote control.
2
3
8m
Use the remote control within a distance of 8
meters from the appliance, pointing it towards the
receiver. Reception is confirmed by a beep.
Function Buttons .................. .........................................................
Indicators on LCD ..........................................................................
System Operation ............................................................................
Auto Operation.................................................................................
Cooling/Heating/Fan Operation......................................................
Dehumidifying (DRY) Operation ......................................................
Adjusting Air Flow Direction ..........................................................
Timer Operation...............................................................................
10
5
7
MODE
SWING
SHORTCUT
TEMP
DIRECT
FAN
SPEED
TIMER
ON
SLEEP
FRESH
TIMER
TURBO
OFF
SELF CLEAN
LED
FOLLOW ME
RESET
LOCK
8
8
8
9
9
CAUTIONS
The air conditioner will not operate if curtains, doors or other materials
block the signals from the remote control to the indoor unit.
Prevent any liquid from falling into the remote control. Do not expose
the remote control to direct sunlight or heat.
If the infrared signal receiver on the indoor unit is exposed to direct
sunlight, the air conditioner may not function properly. Use curtains to
prevent the sunlight from falling on the receiver.
If other electrical appliances react to the remote control, either move
these appliances or consult your local dealer.
Replacing Batteries
The remote control is powered by two AAA batteries housed under the
removable rear cover.
(1) Remove the cover by pressing and sliding off.
(2) Remove the old batteries and insert the new batteries, placing the (+) and (-)
ends correctly.
(3) Reattach the cover by sliding it back into position.
NOTE: When the batteries are removed, the remote control erases all programming. After inserting new batteries, the remote control must be reprogrammed.
CAUTIONS
Do not mix old and new batteries or batteries of different types.
Do not leave the batteries in the remote control if they are not
going to be used for 2 or 3 months.
Do not dispose batteries as unsorted municipal waste. Batteries can
be taken to specialist waste transfer stations.
1
2
Page 3
Remote Control Specifications
Model
Rated Voltage
Signal Receiving Range
Environment
RG36F5/BGEF
3.0V( 2x AAA 1.5 Volt Batteries)
8m
。 。
-5 C ~ 60 C
Performance Features
1. Operating Modes: AUTO, COOL, DRY, HEAT and FAN.
2. Timer Setting Function in 24 hours.
3. Indoor Setting Temperature Range : 17 C~30 C.
。 。
4. Full function LCD (Liquid Crystal Display).
NOTE:
Remote co ntrol butt on design ma y be sl ightly dif ferent fro m the one
supplie d dependin g on th e individu al model
All the fun ctions des cribed are a sso ciated wit h the relati ve indoor un it.
If the indo or unit does n ot have a part icu lar featur e, there is no
corresp onding ope ration perfor med by the ind oor unit.
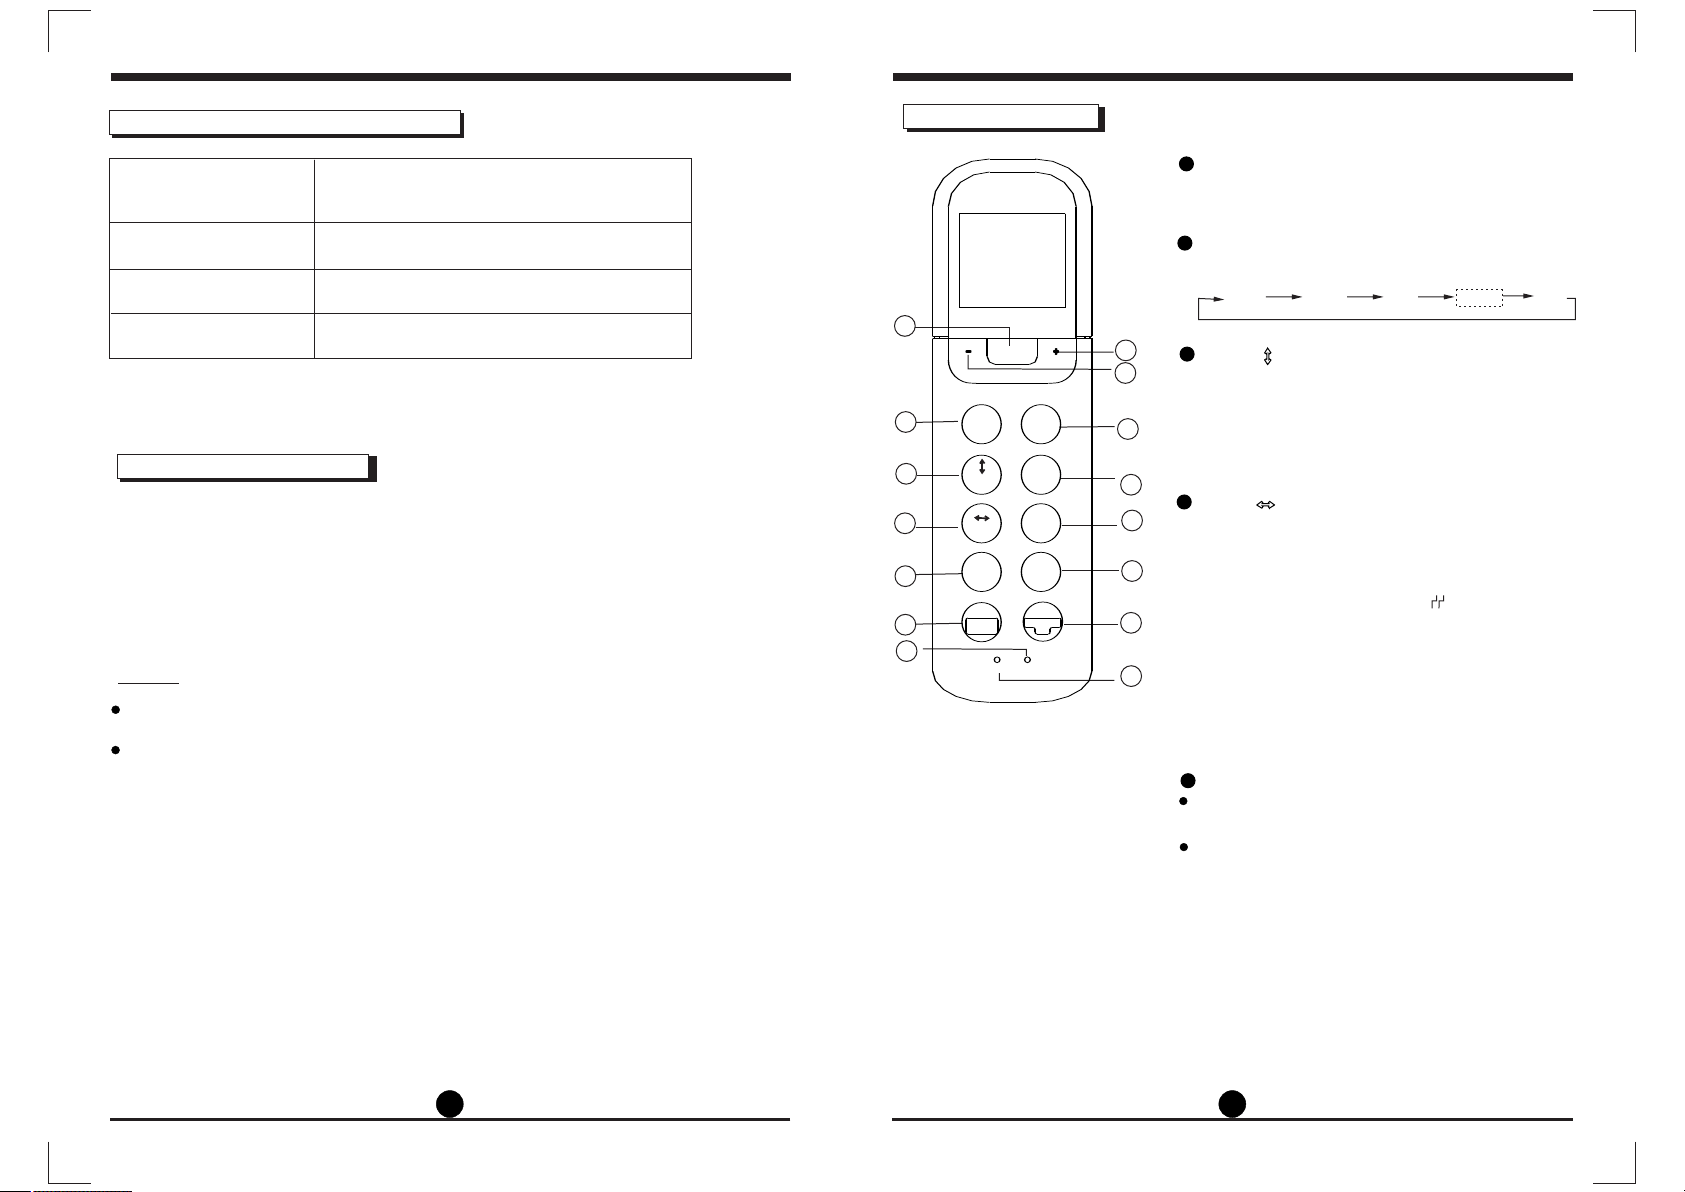
Function Buttons
1
ON/O FF
TEM P
SHORT
2
3
4
5
6
7
MODE
SWING
SWING
SLEEP
TURBO
SELF
CLEAN
LOCK
CUT
FAN
SPEED
TIMER
ON
TIMER
OFF
LED
FOLLOW
ME
RESET
ON/OFF Button
1
Operation starts when this button is pressed
and stops when this button is pressed again.
MODE Button
2
Each time the button is pressed, the operation
mode is selected in a sequence as follows:
8
3
Swing Button
9
Used to stop or start horizontal louver movement or set the desired up/down air flow
10
direction. The louver changes 6 degree in angle
for each press. If pressed for more than 2
seconds, the louver will swing up and down
11
12
automatically.
4
Swing Button
Used to stop or start vertical louver movement
and set the desired left/right air flow direction.
13
The vertical louver changes 6 degree in angle
for each press. And the temperature display
area of indoor unit displays for one
14
second. If pressed for more than 2 seconds,
the vertical louver swing feature is activated.
And the display area of indoor unit displays
15
,
IIII , flashes four times, then the temperature setting reverts back. If the vertical louver
swing feature is stopped, it displays LC and
remains on for 3 seconds.
SLEEP Button
5
Active/Disable sleep function. It maintains the
most comfortable temperature and saves energy.
For details, see “SLEEP operation” in “USER’S
MANUAL”.
NOTE: While in SLEEP mode, the SLEEP mode
is cancelled when the FAN or ON/OFF buttons
are pressed.
AUTO
,
COOL
DRY
HEAT FAN
,
,
,
,
3 4
Page 4

Function Buttons
1
ON/O FF
TEM P
SHORT
2
3
4
5
6
7
MODE
SWING
SWING
SLEEP
TURBO
SELF
CLEAN
LOCK
CUT
FAN
SPEED
TIMER
ON
TIMER
OFF
LED
FOLLOW
ME
RESET
11
6
TURBO/SELF CLEAN Button:
Press this button to initiate the LED function.
Press and hold this button for more than 2
seconds and the FOLLOW ME function is initiated.
When the Follow Me function is activated,
the remote display is actual temperature at
its location. The remote control will send this
signal to the air conditioner at 3 minute intervals
8
9
until you press the FOLLOW ME button again.
The Follow Me function is not available under
DRY and FAN mode.
10
11
12
13
Switching the operational mode or turning off
the unit will cancel the FOLLOW ME function.
7
RESET Button:
When you press the recessed RESET button,
all current settings are cancelled and the
control will return to the initial settings.
UP Button ( )
8
+
Press this button to increase setting temperature or to increase Hours during Timer setting.
14
9
DOWN Button ( )
15
Press this button to decrease setting temperature or to decrease Hours during Timer setting.
SHORTCUT Button
10
-
1
ON/O FF
TEM P
SHORT
2
3
4
5
6
7
MODE
SWING
SWING
SLEEP
TURBO
SELF
CLEAN
LOCK
CUT
FAN
SPEED
TIMER
ON
TIMER
OFF
LED
FOLLOW
ME
RESET
8
9
10
11
12
13
14
15
Used to restore the current settings or resume
previous settings.
When first connected to power, pressing
the SHORTCUT button will activate the AUTO
mode, 24 C, and fan speed is Auto.
O
Pressing this button when unit is on, the
system will automatically revert back to the
previous settings including operating mode,
setting temperature, fan speed level and sleep
feature (if activated).
If pressed and held for more than 2 seconds,
the system will automatically restore the
current operation settings including operating
mode, setting temperature, fan speed level
and sleep feature (if activated).
FAN SPEED Button
Used to select the fan speed in four steps:
AUTO LOW MED HIGH
12
TIMER ON Button
Press this button to initiate the auto-on time
sequence. Each press will increase the
auto-timer setting in 30 minutes increments.
When the setting time displays 10H, each
press will increase the auto-timer setting
60 minutes increments. To cancel the
auto-timer program, simply adjust the
auto-on time to 0.0.
13
TIMER OFF Button
Press this button to initiate the auto-off time
sequence. Each press will increase the
auto-timed setting in 30 minutes increments.
When the setting time displays 10H, each
press will increase the auto-timer setting
60 minutes increments. To cancel the
auto-timer program, simply adjust the
auto-off time to 0.0.
14
LED/FOLLOW ME function
Press this button to initiate the LED function.
Press and hold this button for more than 2
seconds and the FOLLOW ME function is initiated.
When the Follow Me function is activated,
the remote display is actual temperature at
its location. The remote control will send this
signal to the air conditioner at 3 minute intervals
until you press the FOLLOW ME button again.
The Follow Me function is not available under
DRY and FAN mode.
Switching the operational mode or turning off
the unit will cancel the FOLLOW ME function.
15
LOCK Button
When you press the recessed LOCK button,
all current settings are locked in and the
,
,
remote control does not accept any
operation except that of the LOCK. Press
again to cancel the LOCK mode.
5 6
Page 5

Indicators on LCD
System Operation
auto cool dry heat fan
SET TEMP. TIMER ONOFF
silence sleep follow me lock run
F
Transmission Indicator
This transmission indicator lights when remote
control transmits signals to the indoor unit.
Mode Display
Displays the current operation mode. Including
auto( ), cool( ), dry( ), heat( ),
fan ( ) and back to auto ( ).
Temp./Timer Display
Displays the temperature setting(17 C~30 C). When
O O
you set the operating mode to FAN, no temperature
setting is displayed. If in TIMER mode, shows the
ON and OFF settings of the TIMER.
Fan Speed Display
Displays the selected fan speed, AUTO (no display)
and three fan speed levels " " (LOW) " " (MED)
" " (HIGH) can be indicated. The fan speed is AUTO
when the operating mode is either AUTO or DRY.
ON/OFF Display
Displayed by pressing the ON/OFF button.
Press the ON/OFF button again to change.
Lock Display
Displayed when LOCK mode is activated.
FOLLOW ME Display
Displayed when FOLLOW ME function is activated.
Sleep Display
Displayed during SLEEP mode.
Press the SLEEP button again to exit SLEEP mode.
Silence Display (where fitted)
Displayed when SILENCE function is activated.
Note:
All indicators shown in the figure are for the purpose
of presentation. During the actual operation of the
remote control only the relative functional signs are
shown in the display window.
Auto Operation
Ensure th e unit is plug ged in and power is
availab le. The OPER ATION in dicator on t he
display p anel of the in doo r unit will st art
3
flashin g.
1. Press th e MODE butto n to select Auto.
2. Press th e UP/DOWN bu tton to set th e
desired t emperatu re. The temp era ture can
be set with in a range of 17 C~ 30 C in 1 C
O O O
increme nts.
3. Press th e ON/OFFbu tton to star t the air
conditi oner.
NOTE
1. In the Auto mode, the air conditioner will logically
choose Cooling, Fan, or Heating mode
by sensing the difference between the actual
ambient room temperature and the set point
temperature on the remote control.
MODE
SWING
SWING
SLEEP
TURBO
SELF
CLEAN
LOCK
ON/O FF
TEMP
RESET
SHORT
CUT
FAN
SPEED
TIMER
ON
TIMER
OFF
LED
FOLLOW
ME
2
2
1
2. In the Auto mode, you can not control the fan speed.
It is automatically controlled by the unit.
3. If the Auto mode is not comfortable for you , set the
desired mode manually.
Cooling /Heating/Fan Operation
Ensure th e unit is plug ged in and power is
availab le.
4
1. Press th e MODE butto n to select CO OL,
2
HEAT or FAN mo de.
2. Press th e UP/DOWN bu ttons to set t he
desired t emperatu re. The temp era ture can
be set with in a range of 17 C~ 30 C in 1 C
increme nts.
3
3. Press th e FAN button to s elect the fa n spe ed
O O O
in four ste ps- Auto, L ow, Med,or Hi gh.
4. Press th e ON/OFF but ton to start t he air
conditi oner.
NOTE
In the FAN mode, the temperature setting is not
displayed on the remote control, and you are unable
to control the room temperature. In FAN mode, only
steps 1, 3 and 4 may be performed.
MODE
SWING
SWING
SLEEP
TURBO
SELF
CLEAN
LOCK
ON/O FF
TEMP
RESET
SHORT
CUT
FAN
SPEED
TIMER
ON
TIMER
OFF
LED
FOLLOW
ME
2
1
7 8
Page 6

Dehumidifying (DRY) Operation
Ensure th e unit is plug ged i n and power is
availab le. The OPER ATION in dicator on t he
display p anel of the in doo r unit start s flashing .
1. Press th e MODE butto n to select DRY mode .
2. Press th e UP/DOWN bu ttons to set t he
desired t emperatu re. The temp era ture
can be set wi thin a range o f 17 C~ 30 C
O
in 1 C incr ements.
3. Press th e ON/OFF but ton to start t he air
3
conditi oner.
2
NOTE
In Dehumidifying mode, you can not control the
fan speed. It is automatically controlled by the unit.
Adjusting Air Flow Direction
Use the SWING and SWING buttons to adjust
the desired airflow direction.
1. Press the SWING button, and the horizontal
louver changes 6 degree in angle for each push.
Press and hold for more than 2 seconds, and
the louver will automatically swing up and down.
2. Press the SWING button, and the vertical
MODE
SWING
SWING
SLEEP
TURBO
SELF
CLEAN
LOCK
ON/O FF
TEMP
SHORT
CUT
FAN
SPEED
TIMER
ON
TIMER
OFF
LED
FOLLOW
ME
RESET
2
1
O O
MODE
SWING
SWING
SLEEP
TURBO
SELF
CLEAN
LOCK
ON/O FF
TEMP
SHORT
CUT
FAN
SPEED
TIMER
ON
TIMER
OFF
LED
FOLLOW
ME
RESET
1
2
louver changes 6 degree in angle for each push.
Press and hold for more than 2 seconds, and
the louver will automatically swing left and right.
NOTE: When the horizontal/vertical louver swing
moves to a position which may affect
the cooling or heating effect of the air
conditioner, it may automatically change
the horizontal or vertical position.
Press the TIMER ON button to set the auto-on
time of the unit. Press the TIMER OFF button
to set the auto-off time of the unit.
To set the Auto-on time.
1. Press the TIMER ON button. The remote
control shows TIMER ON, the last Auto-on
setting time and the signal "H" will be shown in
the LCD display area. Now it is ready to reset
the Auto-on time to the START time.
2. Press the TIMER ON button again to set desired
Auto-on time. Each time you press the button,
the time increases by half an hour between 0
and 10 hours and by one hour between 10 and
24 hours.
3. After setting the TIMER ON function, there will be a
one second delay before the remote control
transmits the signal to the air conditioner. Then,
after approximately another 2 seconds, the
signal "H" will disappear and the set temperature
will re-appear in the LCD display window.
To set the Auto-off time.
1. Press the TIMER OFF button. The remote
control shows TIMER OFF, the last Auto-off
setting time and the signal "H" will be shown in
the LCD display area. Now it is ready to reset
the Auto-off time to stop time.
2. Press the TIMER OFF button again to set
desired Auto-off time. Each time you press the
button, the time increases by half an hour
Timer operation
between 0 and 10 hours and by one hour
between 10 and 24 hours.
3. After setting the TIMER OFF function, there will be
a one second delay before the remote control
transmits the signal to the air conditioner. Then,
after approximately another 2 seconds, the
signal "H" will disappear and the set temperature
will re-appear in the LCD display window.
9 10
Page 7

!
CAUTION
The effective operation time set by the remote control for the timer function
is limited to the following settings: 0.5, 1.0, 1.5, 2.0, 2.5, 3.0, 3.5, 4.0, 4.5, 5.0,
5.5, 6.0, 6.5, 7.0, 7.5, 8.0, 8.5, 9.0, 9.5, 10, 11, 12, 13, 14, 15,16,17, 18, 19, 20,
21, 22, 23 and 24.
Example of timer setting
TIMER ON
TIMER ON
(Auto-on Operation)
The TIMER ON feature is useful when you want
the unit to turn on automatically before you return
home. The air conditioner will automatically start
operating at the set time.
Start
Off
Example:
Set
6 hours later
To start the air conditioner in 6 hours.
1. Press the TIMER ON button, the last setting
of starting operation time and the signal "H"
will show in the display area.
2. Press the TIMER ON button to display "6.0h"
on the TIMER ON display of the remote
control.
3. Wait for 3 seconds and the digital display
area will show the temperature again. The
"TIMER ON" indicator remains on and this
function is activated.
TIMER OFF
Stop
On
Set 10 hours later
TIMER ON OFF
2 hours later
after setting
Stop
10 hours later
after setting
On
Set
Start
TIMER OFF
(Auto-off Operation)
The TIMER OFF feature is useful when you want the
unit to turn off automatically after you go to bed. The
air conditioner will stop automatically at the set time.
Example:
To stop the air conditioner in 10 hours.
1. Press the TIMER OFF button, the last setting of
stopping operation time and the signal "H" will
show in the display area.
2. Press the TIMER OFF button to display "10h" on
the TIMER OFF display of the remote control.
3. Wait for 3 seconds and the digital display area
will show the temperature again. The "TIMER
OFF" indicator remains on and this function is
activated.
COMBINED TIMER
(Setting both ON and OFF timers simultaneously)
TIMER OFF → TIMER ON
(On → Stop → Start operation)
This feature is useful when you want to stop the air
conditioner after you go to bed, and start it again in
the morning when you wake up or when you return
home.
Example:
To stop the air conditioner 2 hours after setting and
start it again 10 hours after setting.
1. Press the TIMER OFF button.
2. Press the TIMER OFF button again to display
2.0h on the TIMER OFF display.
3. Press the TIMER ON button.
4. Press the TIMER ON button again to display 10h
on the TIMER ON display .
5. Wait for 3 seconds and the digital display area
will show the temperature again. The "TIMER
ON OFF" indicator remains on and this function is
activated.
11
12
Page 8

TIMER ON O FF
TIMER ON → TIMER OFF
(Off → Start → Stop operation)
This feature is useful when you want to start
the air conditioner before you wake up and
stop it after you leave the house.
Set
Off
2 hours later
after setting
Start
Stop
5 hours later
after setting
Example:
To start the air conditioner 2 hours after setting,
and stop it 5 hours after setting.
1. Press the TIMER ON button.
2. Press the TIMER ON button again to display
2.0h on the TIMER ON display.
3. Press the TIMER OFF button.
4. Press the TIMER OFF button again to display
5.0h on the TIMER OFF display .
5. Wait for 3 seconds and the digital display area
will show the temperature again. The "TIMER
ON OFF" indicator remains on and this function
is activated.
This page is intentionally blank
NOTE: The timer setting (TIMER ON or TIMER
OFF) that occurs directly after the set time will
be activated first.
13
14
 Loading...