

Ricoh Pro1106X User Manual

Pro1106X
COPIER GUIDE

BASIC COPY PROCEDURE
1. Place your document on document feeder (face up) or platen glass
(face down)
2. Input copy quantity using the blue number key pad
3. Optional: Choose your settings such as sort (collate), staple, hole
punch or duplex (1-2 sided, 2-2 sided) or press the PROGRAM key to
find preprogrammed settings saved.
4. Press the START key
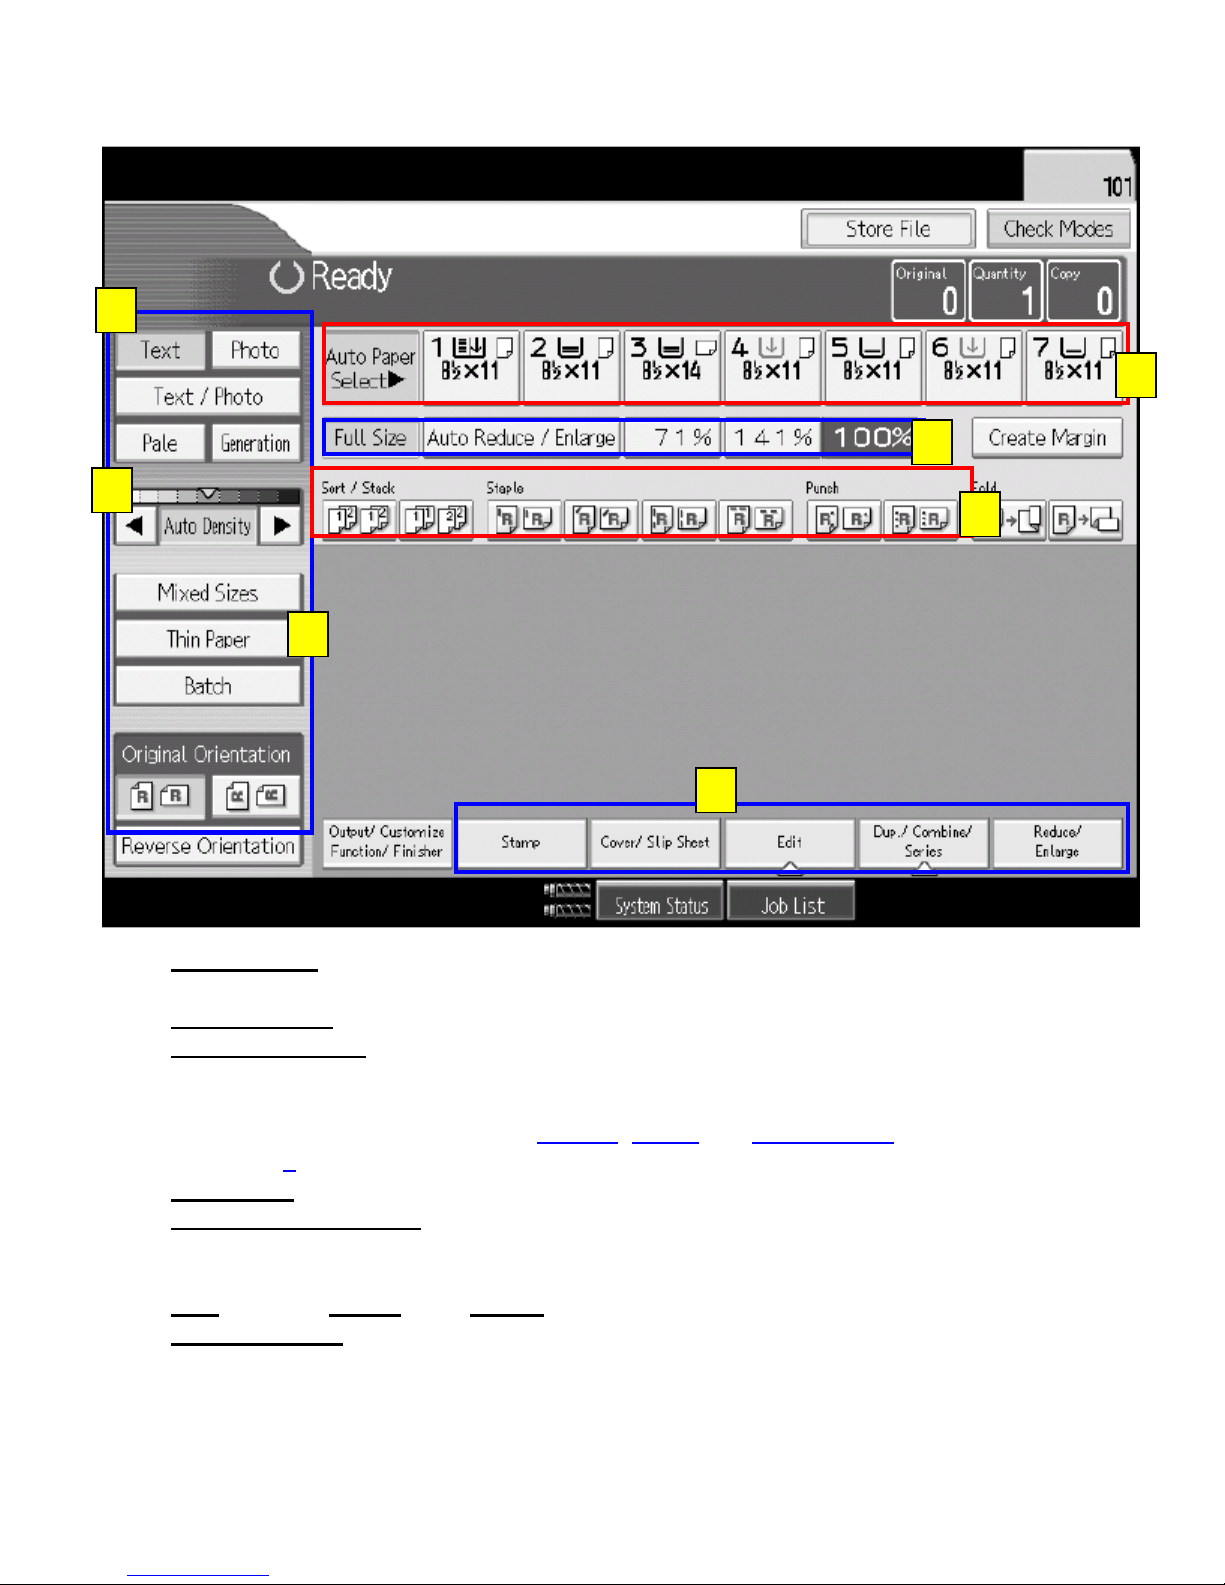
STANDARD DISPLAY SCREEN
1
4
5
2
6
3
1. Original type
Text, Photo, Text/Photo, Pale (for light originals), Generation (for 2ndgeneration originals)
2. Image Density
3. Special Originals:
Mixed Sizes (two different size originals)
Batch (use to combine large files or bound documents in a specific order for multiple
quantities). Must press the BATCH
the #
4. Paper Tray selections
5. Preset reduce/enlarge
Full size (100%), Auto Reduce/Enlarge (will adjust size of the original to the size of the
paper tray selected, and preset percentage keys for reducing or enlarging.
6. Sort
7. Select function
(Collate), Staple, Hole Punch functions
Reduce/Enlarge (preset reduction and enlargement keys and number key to choose the
specific percentage)
Dup/Combine/Series (for 1 sided to 2 sided copies, combining several pages to 1 page,
copy from book and creating a mini book)
Edit (use to erase borders, adjust margins, center documents, repeat images)
Stamp (use this function to stamp preset stamps, date, page numbers and stamp text onto
copies)
(darken or lighten copies by pressing the arrow keys)
key to complete the batch function.
key to display the menu
7
, SORT and input quantity to start then end with
buttons
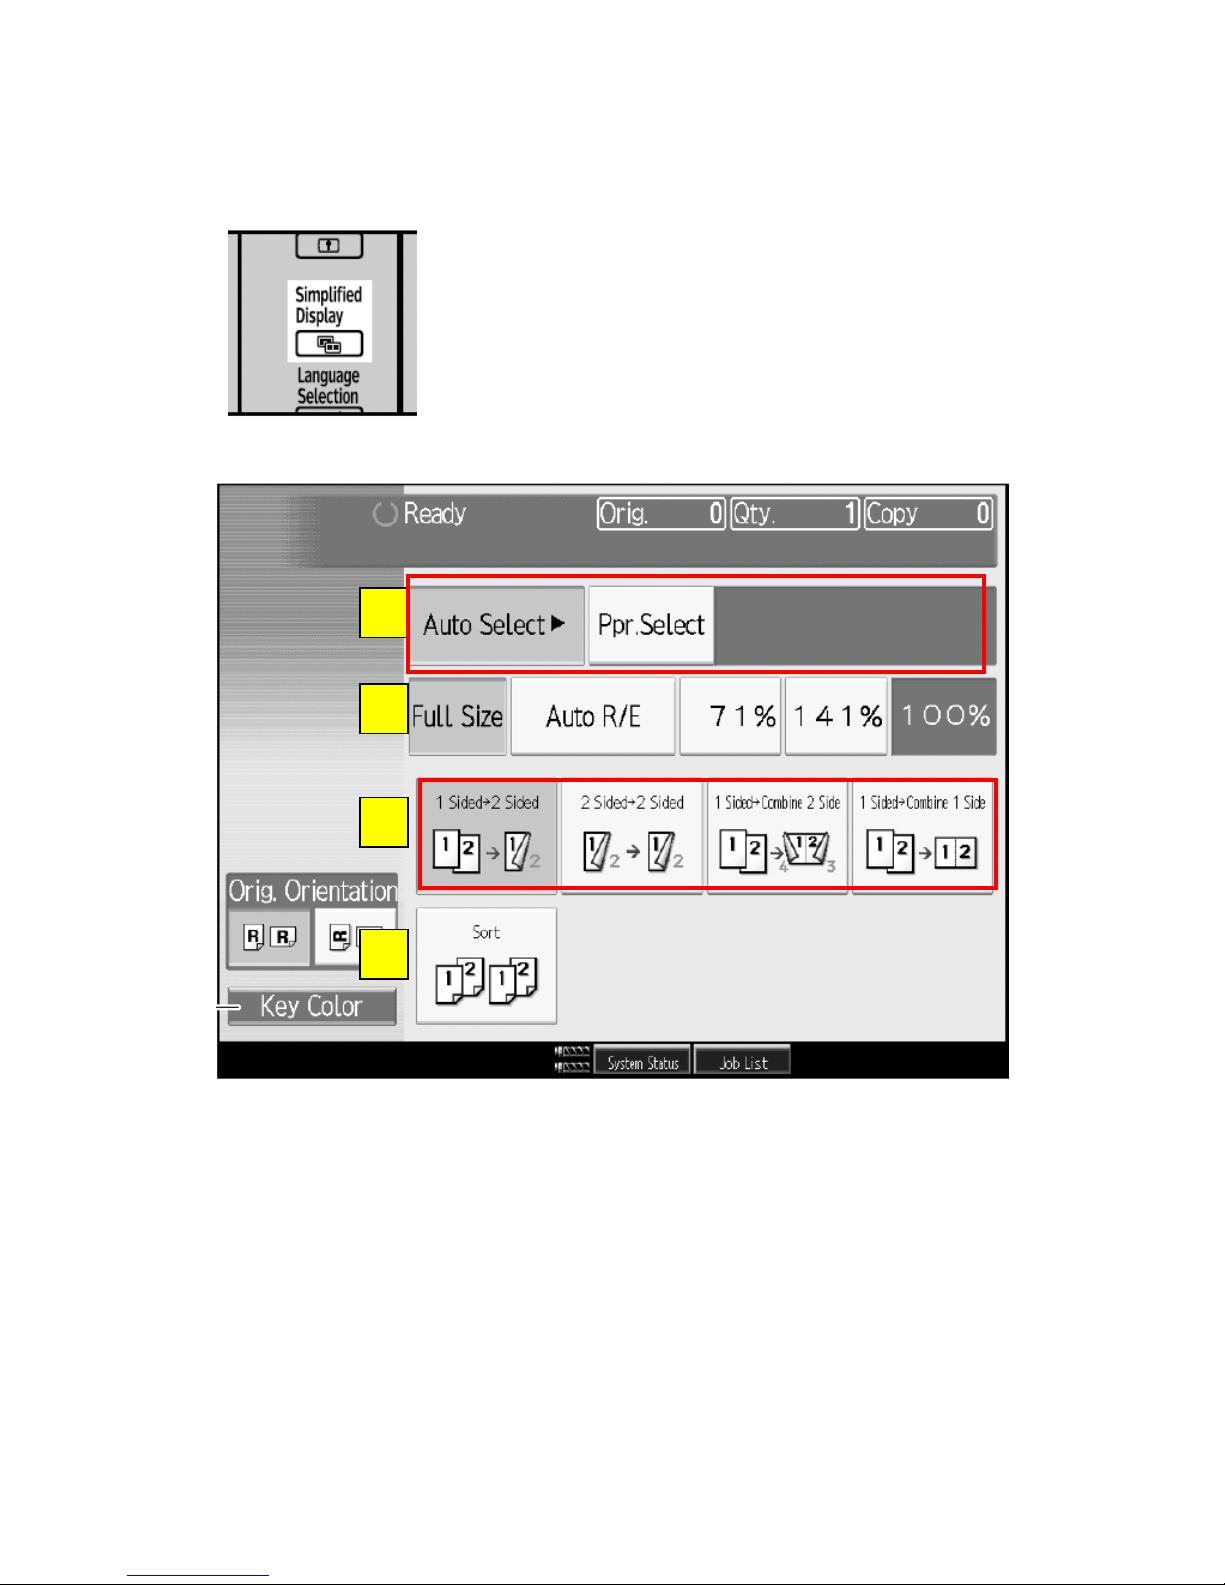
SIMPLIFIED DISPLAY SCREEN
Press the Simplified Display
button to view this window
1
2
3
4
1. Paper Tray selection (Auto Select is the default)
2. Reduce/Enlarge selections
¾ Use Auto R/E to automatically reduce or enlarge
original to the paper size
3. Duplex/Combine shortcut keys
¾ 1 Sided to 2 Sided and 2 Sided to 2 Sided
4. Sort (Collate)
¾ copies are assemble as sets in sequential order
 Loading...