

Page 1
User Guide
What You Can Do with This Machine
Getting Started
Copy
Fax
Print
Scan
Document Server
Web Image Monitor
Adding Paper and Toner
Troubleshooting
Information for This Machine
For safe and correct use, be sure to read the Safety Information in
Read This FIrst before using the machine.
Page 2

Page 3

TABLE OF CONTENTS
How to Read the Manuals.................................................................................................................................7
Symbols Used in the Manuals.......................................................................................................................7
Model-Specific Information...............................................................................................................................8
Names of Major Features..................................................................................................................................9
1. What You Can Do with This Machine
Searching by What You Want to Do............................................................................................................. 11
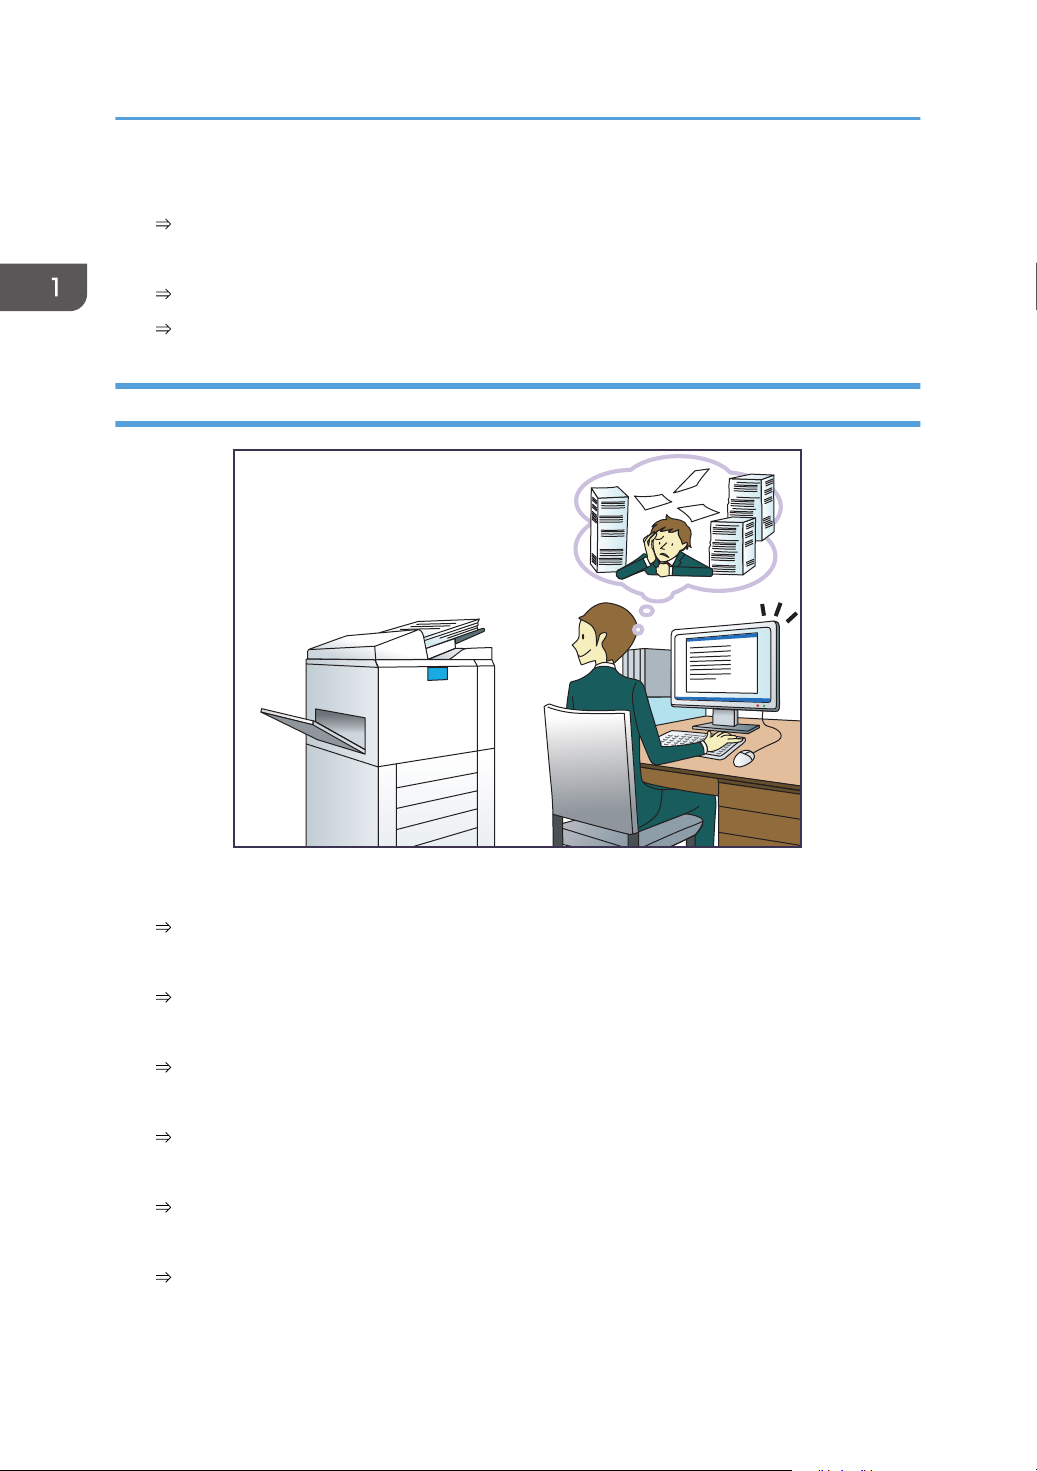
Reducing my Costs.......................................................................................................................................11
Using Scanned Files on the Computer....................................................................................................... 12
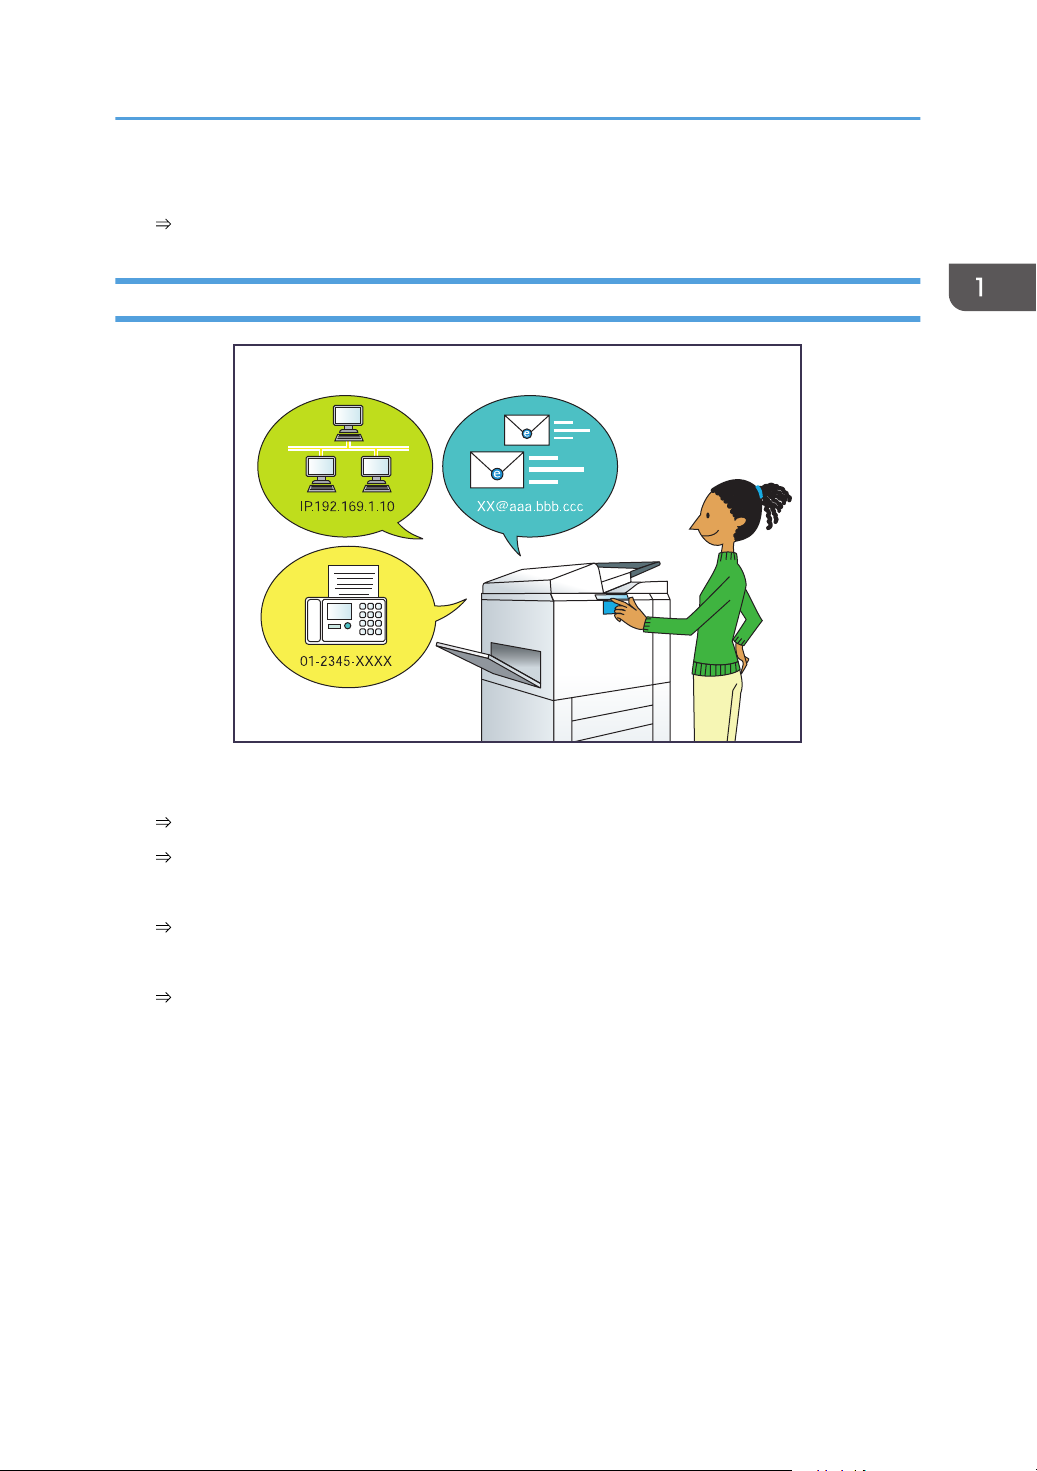
Registering Destinations...............................................................................................................................13
Operating the Machine More Effectively.................................................................................................. 14
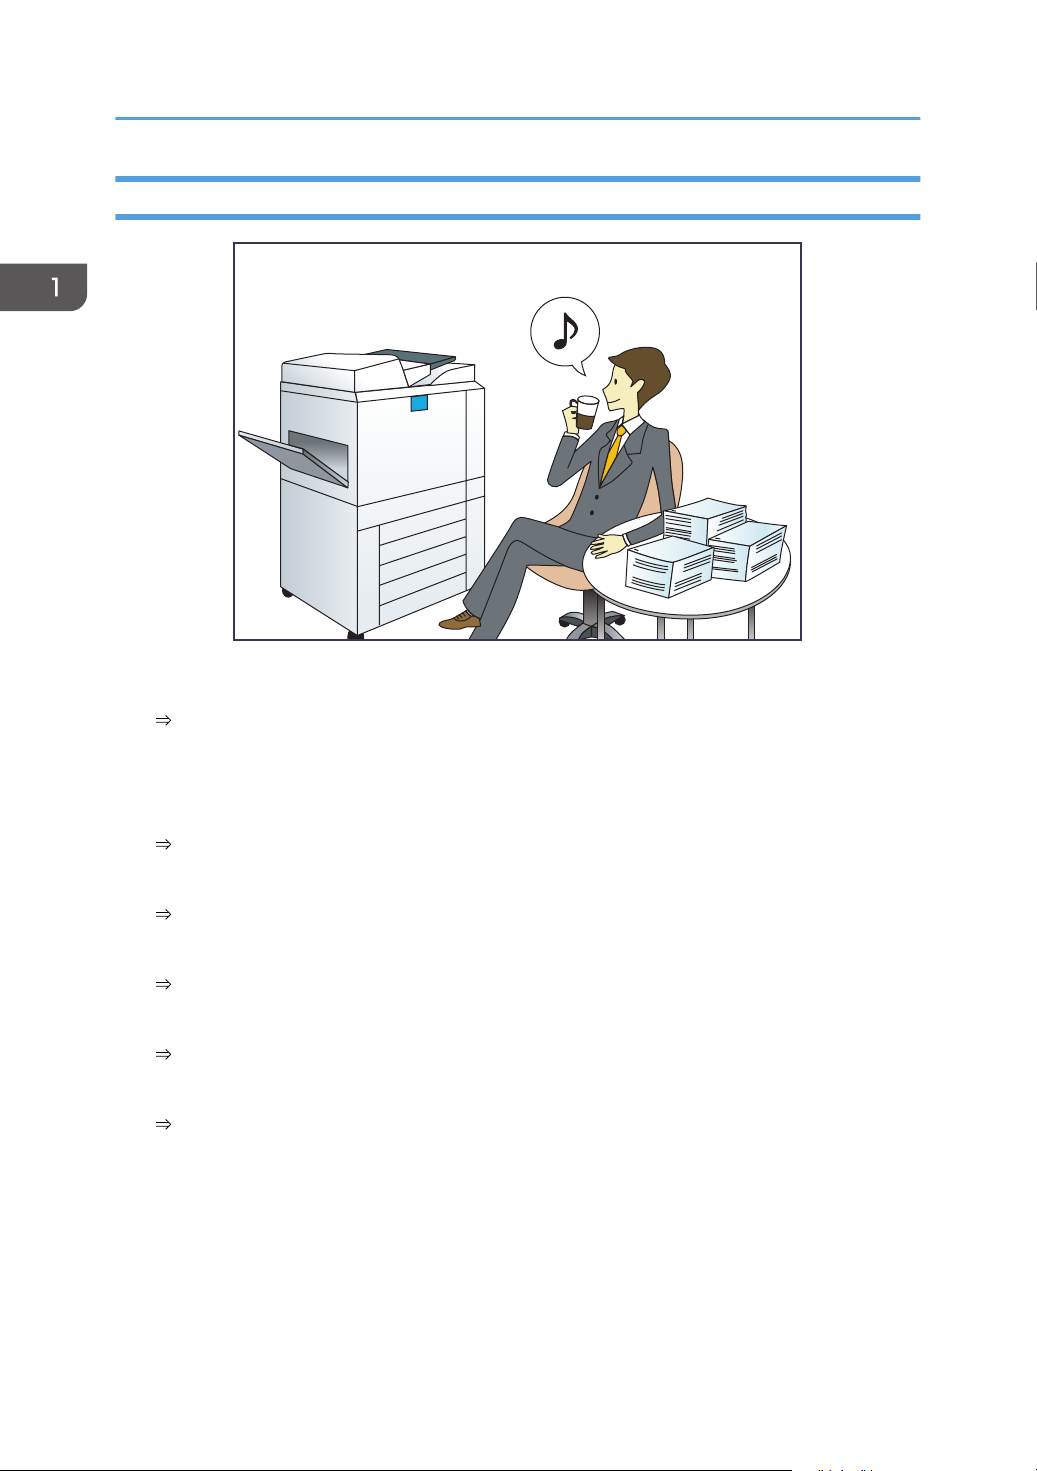
What You Can Do with This Machine............................................................................................................15
Customizing the [Home] Screen.................................................................................................................15
Making Copies Using Various Functions................................................................................................... 16
Printing Data Using Various Functions........................................................................................................17
Utilizing Stored Document.......................................................................................................................... 17
You Can Connect Two Machines for Copying......................................................................................... 18
Sending and Receiving Faxes without Paper............................................................................................ 19
Sending and Receiving Faxes via the Internet...........................................................................................21
Sending and Receiving Faxes by Using the Machine without Fax Unit Installed...................................22
Using the Facsimile and the Scanner in a Network Environment.............................................................23
Embedding Text Information in Scanned Files...........................................................................................23
Preventing Information Leakage (Security Functions)............................................................................... 24
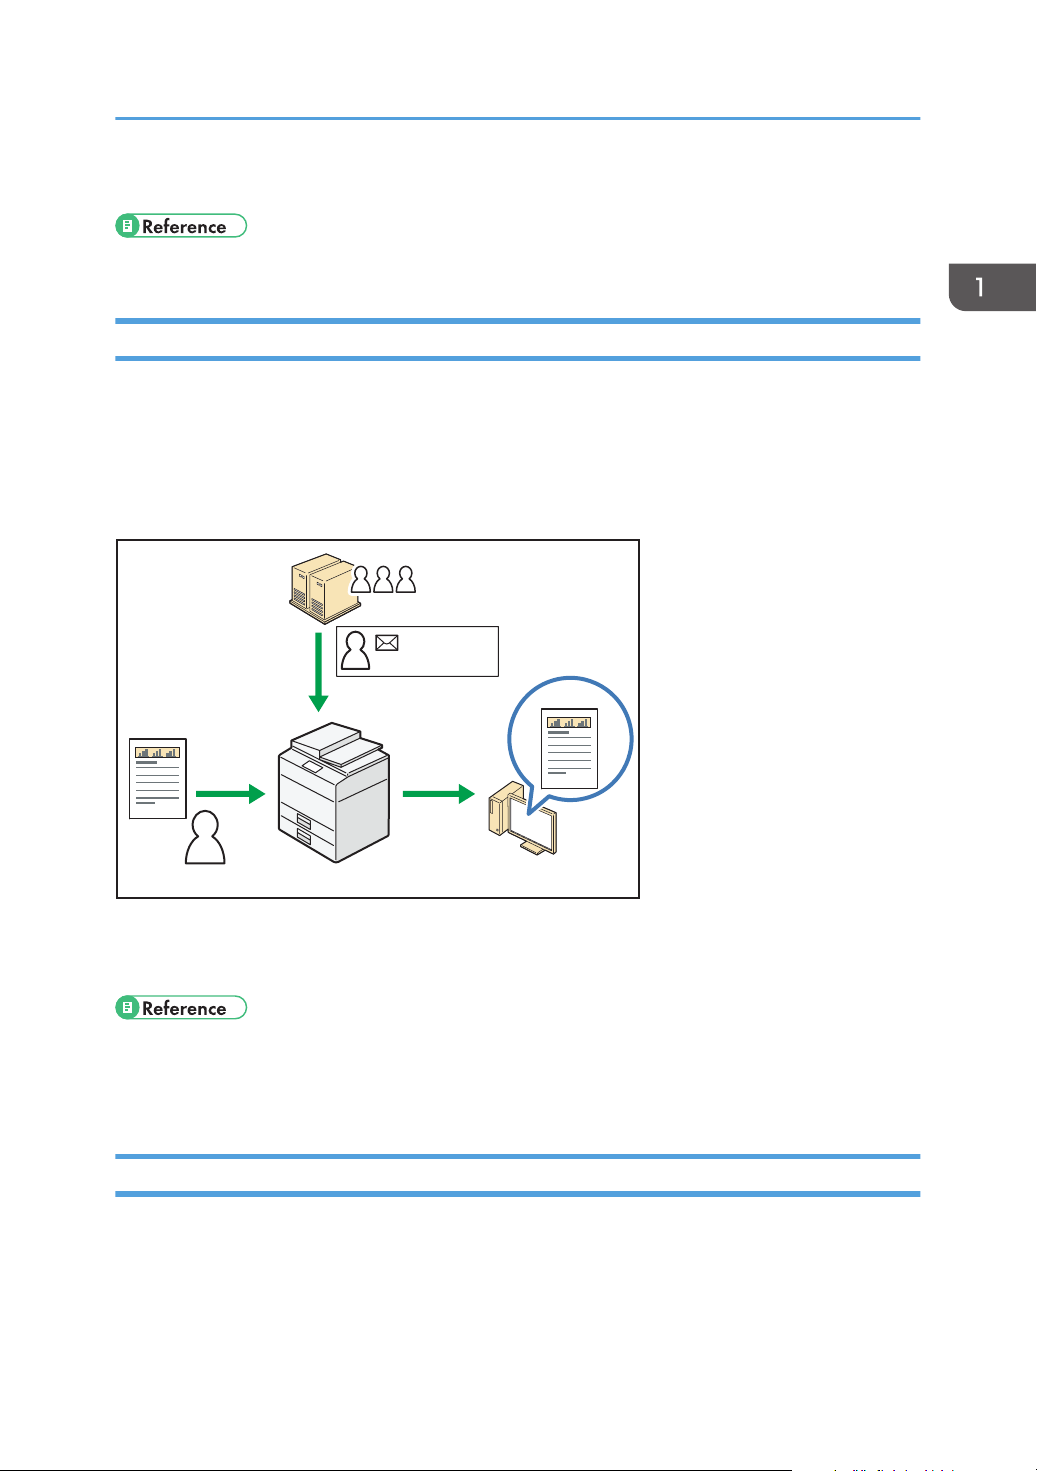
Centrally Controlling Scan Conditions and Distribution...........................................................................25
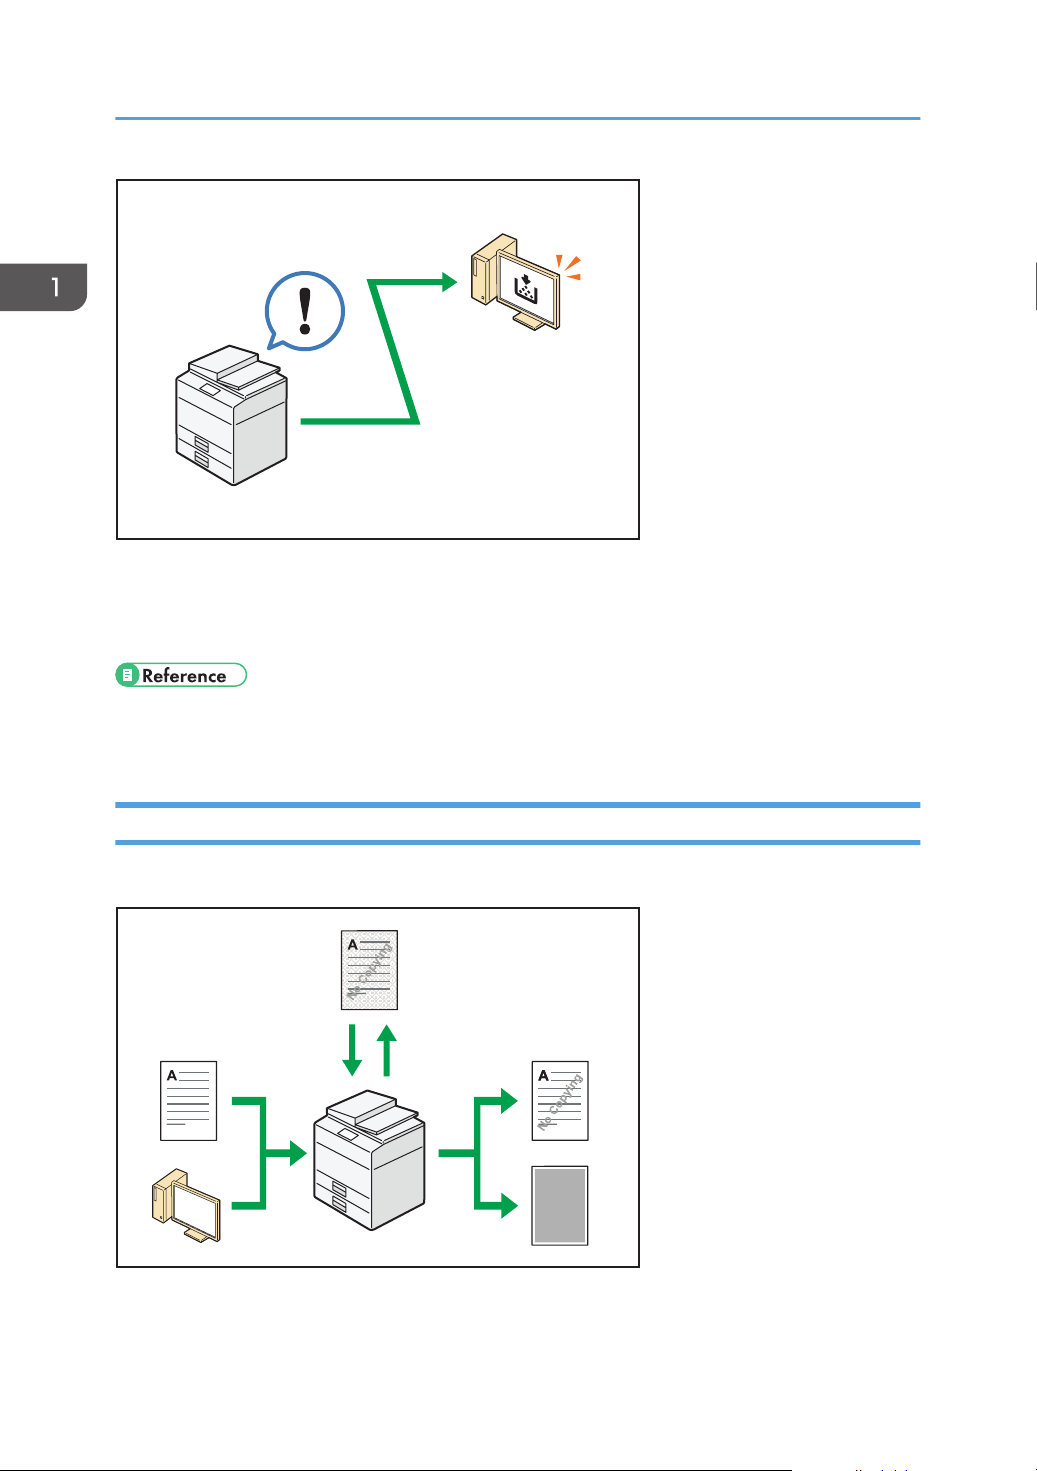
Monitoring and Setting the Machine Using a Computer......................................................................... 25
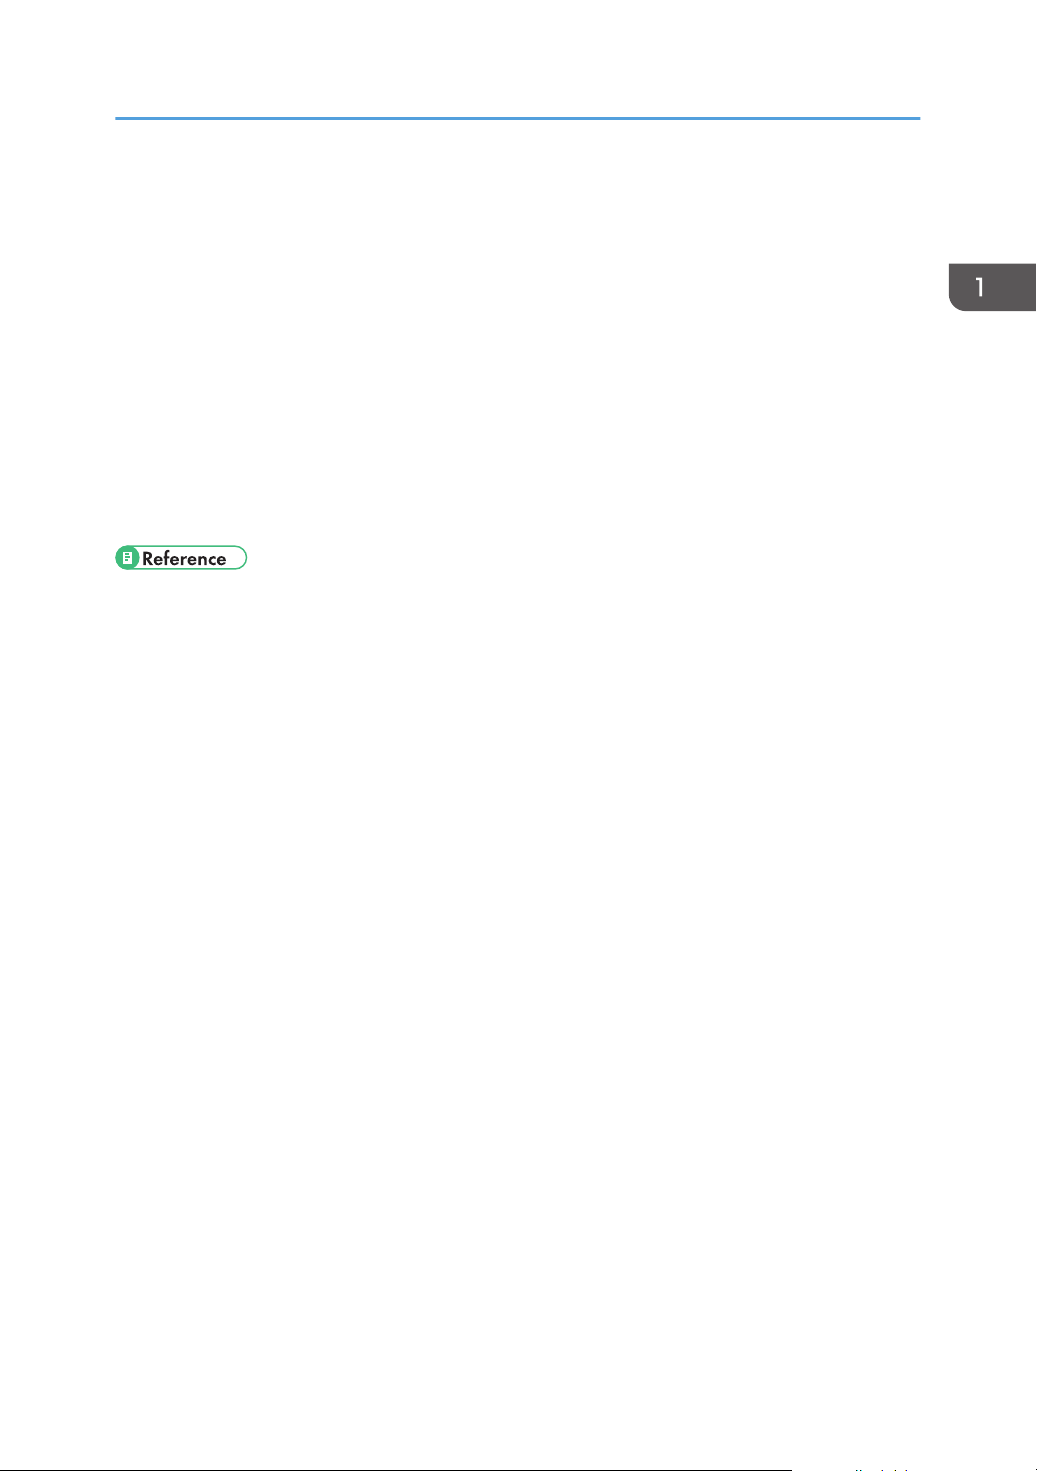
Preventing Unauthorized Copying.............................................................................................................26
2. Getting Started
Guide to Names and Functions of Components............................................................................................29
Guide to Functions of the Machine's Options................................................................................................32
Guide to the Names and Functions of the Machine's Control Panel...........................................................34
Changing the Display Language.................................................................................................................... 35
How to Use the [Home] Screen...................................................................................................................... 36
Possible Operations on the Standard Application Screen.......................................................................38
Adding Icons to the [Home] Screen...........................................................................................................39
1
Page 4

How to Use Each Application.........................................................................................................................42
[Copy] Screen..............................................................................................................................................43
[Fax] Screen................................................................................................................................................. 46
[Scanner] Screen......................................................................................................................................... 51
Registering Functions in a Program.................................................................................................................58
Example of programs (when using the Classic Applications).................................................................. 61
Turning On/Off the Power..............................................................................................................................65
Turning on the Main Power.........................................................................................................................65
Turning Off the Main Power........................................................................................................................65
Logging In the Machine...................................................................................................................................67
When the Authentication Screen is Displayed.......................................................................................... 67
User Code Authentication Using the Control Panel.................................................................................. 67
Logging In Using the Control Panel............................................................................................................67
Logging Out Using the Control Panel.........................................................................................................68
Placing Originals..............................................................................................................................................69
Placing Originals on the Exposure Glass...................................................................................................69
Placing Originals in the Auto Document Feeder....................................................................................... 69
3. Copy
Basic Procedure................................................................................................................................................71
Basic Procedure (Classic)............................................................................................................................71
Auto Reduce / Enlarge....................................................................................................................................73
Procedure for Auto Reduce / Enlarge (Classic)........................................................................................74
Duplex Copying............................................................................................................................................... 75
Procedure for Duplex Copying (Classic)................................................................................................... 76
Specifying the Original and Copy Orientation.........................................................................................77
Combined Copying......................................................................................................................................... 79
One-Sided Combine................................................................................................................................... 80
Two-Sided Combine....................................................................................................................................82
Copying onto Custom Size Paper...................................................................................................................85
Procedure for Copying onto Custom Size Paper (Classic).......................................................................85
Sort.................................................................................................................................................................... 86
Procedure for Sort (Classic)........................................................................................................................ 87
Changing the number of sets...................................................................................................................... 88
2
Page 5

Storing Data in the Document Server............................................................................................................. 89
4. Fax
Basic Procedure for Transmissions (Memory Transmission)..........................................................................91
Procedure for Sending Originals Using the ADF (Classic).......................................................................91
Procedure for Sending Originals Using the Exposure Glass (Classic)....................................................93
Registering a Fax Destination......................................................................................................................94
Deleting a Fax Destination.......................................................................................................................... 95
Transmitting while Checking Connection to Destination (Immediate Transmission)................................... 97
Procedure for Sending Originals Using the ADF (Classic).......................................................................97
Procedure for Sending Originals Using the Exposure Glass (classic).....................................................98
Canceling a Transmission............................................................................................................................. 100
Canceling a Transmission Before the Original Is Scanned....................................................................100
Canceling a Transmission While the Original Is Being Scanned..........................................................100
Canceling a Transmission After the Original Is Scanned.......................................................................101
Storing a Document.......................................................................................................................................103
Sending Stored Documents...................................................................................................................... 104
Printing the Journal Manually....................................................................................................................... 106
Procedure for Printing the Journal Manually (Classic)........................................................................... 106
5. Print
Quick Install....................................................................................................................................................109
Displaying the Printer Driver Properties........................................................................................................110
Standard Printing........................................................................................................................................... 111
When Using the PCL 6 Printer Driver....................................................................................................... 111
Printing on Both Sides of Sheets................................................................................................................... 112
When Using the PCL 6 Printer Driver....................................................................................................... 112
Types of Two-sided Printing......................................................................................................................112
Combining Multiple Pages into Single Page...............................................................................................113
When Using the PCL 6 Printer Driver....................................................................................................... 113
Types of Combine Printing........................................................................................................................113
Saving and Printing Using the Document Server.........................................................................................115
Storing Documents in Document Server.................................................................................................. 115
Managing Documents Stored in Document Server................................................................................116
Using the Quick Print Release Function........................................................................................................117
3
Page 6

Using the Memory Storage Device Function...............................................................................................118
6. Scan
Basic Procedure When Using Scan to Folder............................................................................................. 121
Basic Procedure When Using Scan to Folder (Classic)......................................................................... 121
Creating a Shared Folder on a Computer Running Windows/Confirming a Computer's Information.....
.................................................................................................................................................................... 122
Registering an SMB Folder.......................................................................................................................124
Deleting an SMB Registered Folder.........................................................................................................127
Entering the Path to the Destination Manually........................................................................................ 128
Basic Procedure for Sending Scan Files by E-mail......................................................................................130
Basic Procedure for Sending Scan Files by E-mail (Classic)..................................................................130
Registering an E-mail Destination.............................................................................................................131
Deleting an E-mail Destination................................................................................................................. 132
Entering an E-mail Address Manually..................................................................................................... 133
Basic Procedure for Storing Scan Files........................................................................................................ 135
Checking a Stored File Selected from the List......................................................................................... 136
Specifying the File Type................................................................................................................................ 137
Procedure for specifying the file type (classic)........................................................................................138
Specifying Scan Settings...............................................................................................................................139
Procedure for Specifying Scan Settings (Classic)...................................................................................139
7. Document Server
Storing Data................................................................................................................................................... 141
Printing Stored Documents............................................................................................................................ 143
8. Web Image Monitor
Displaying Top Page..................................................................................................................................... 145
9. Adding Paper and Toner
Loading Paper................................................................................................................................................147
Precautions for Loading Paper................................................................................................................. 147
Loading Paper into Tray 1........................................................................................................................ 147
Loading Paper into the A3/11 × 17 Tray Unit.......................................................................................149
Loading Paper into Trays 2 and 3........................................................................................................... 150
Loading Paper into the Bypass Tray........................................................................................................ 151
Printing from the Bypass Tray Using the Printer Function........................................................................153
4
Page 7

Loading Paper into the Large Capacity Tray.......................................................................................... 156
Loading Orientation-fixed Paper or Two-sided Paper...........................................................................157
Recommended Paper....................................................................................................................................160
Recommended Paper Sizes and Types................................................................................................... 160
Adding Toner................................................................................................................................................. 172
Sending Faxes or Scanned Documents When Toner Has Run Out...................................................... 174
Disposing of Used Toner...........................................................................................................................174
10. Troubleshooting
When a Status Icon Is Displayed..................................................................................................................175
When the Indicator Lamp for [Check Status] Is Lit or Flashing...................................................................177
When the Machine Makes a Beeping Sound.............................................................................................179
When You Have Problems Operating the Machine...................................................................................180
When Multiple Functions Cannot Be Executed Simultaneously............................................................ 185
Messages Displayed When You Use the Copy/Document Server Function...........................................186
When Using the Connect Copy Function................................................................................................188
Messages Displayed When You Use the Facsimile Function.....................................................................191
When Network Setting Problems Occur................................................................................................. 192
When the Remote Fax Function Cannot Be Used...................................................................................198
Messages Displayed When You Use the Printer Function..........................................................................201
Messages Displayed on the Control Panel When You Use the Printer Function..................................201
Messages Printed on the Error Logs or Reports When You Use the Printer Function...........................203
Messages Displayed When You Use the Scanner Function...................................................................... 215
Messages Displayed on the Control Panel When You Use the Scanner Function.............................. 215
Messages Displayed on the Client Computer.........................................................................................225
When Other Messages Appear...................................................................................................................232
When There Is a Problem Scanning or Storing Originals......................................................................233
When the Address Book Is Updated....................................................................................................... 234
When Data Cannot Be Sent Due to a Problem with the Destination.....................................................235
When the Machine Cannot Be Operated Due to a Problem with the User Certificate.......................235
When Problems Occur While Logging In............................................................................................... 237
When the User Lacks Privileges to Perform an Operation..................................................................... 237
When the LDAP Server Cannot Be Used.................................................................................................238
5
Page 8
11. Information for This Machine
Information on Environmental Regulations.................................................................................................. 239
ENERGY STAR Program........................................................................................................................... 239
Energy Saving Functions...........................................................................................................................239
User Information on Electrical and Electronic Equipment (mainly Europe)...................... 242
Note for the Battery and/or Accumulator Symbol (For EU countries only) (mainly Europe)
.................................................................................................................................................................... 243
Environmental Advice for Users (mainly Europe)............................................................... 243
Notes to users in the state of California (Notes to Users in USA) (mainly North America)....
.................................................................................................................................................................... 244
INDEX...........................................................................................................................................................245
6
Page 9

How to Read the Manuals
Symbols Used in the Manuals
This manual uses the following symbols:
Indicates points to pay attention to when using the machine, and explanations of likely causes of paper
misfeeds, damage to originals, or loss of data. Be sure to read these explanations.
Indicates supplementary explanations of the machine's functions, and instructions on resolving user
errors.
This symbol is located at the end of sections. It indicates where you can find further relevant information.
[ ]
Indicates the names of keys on the machine's display or control panels.
(mainly Europe and Asia), (mainly Europe), or (mainly Asia)
(mainly North America)
Differences in the functions of Region A and Region B models are indicated by two symbols. Read the
information indicated by the symbol that corresponds to the region of the model you are using. For
details about which symbol corresponds to the model you are using, see page 8 "Model-Specific
Information".
7
Page 10
Model-Specific Information
DPZ041
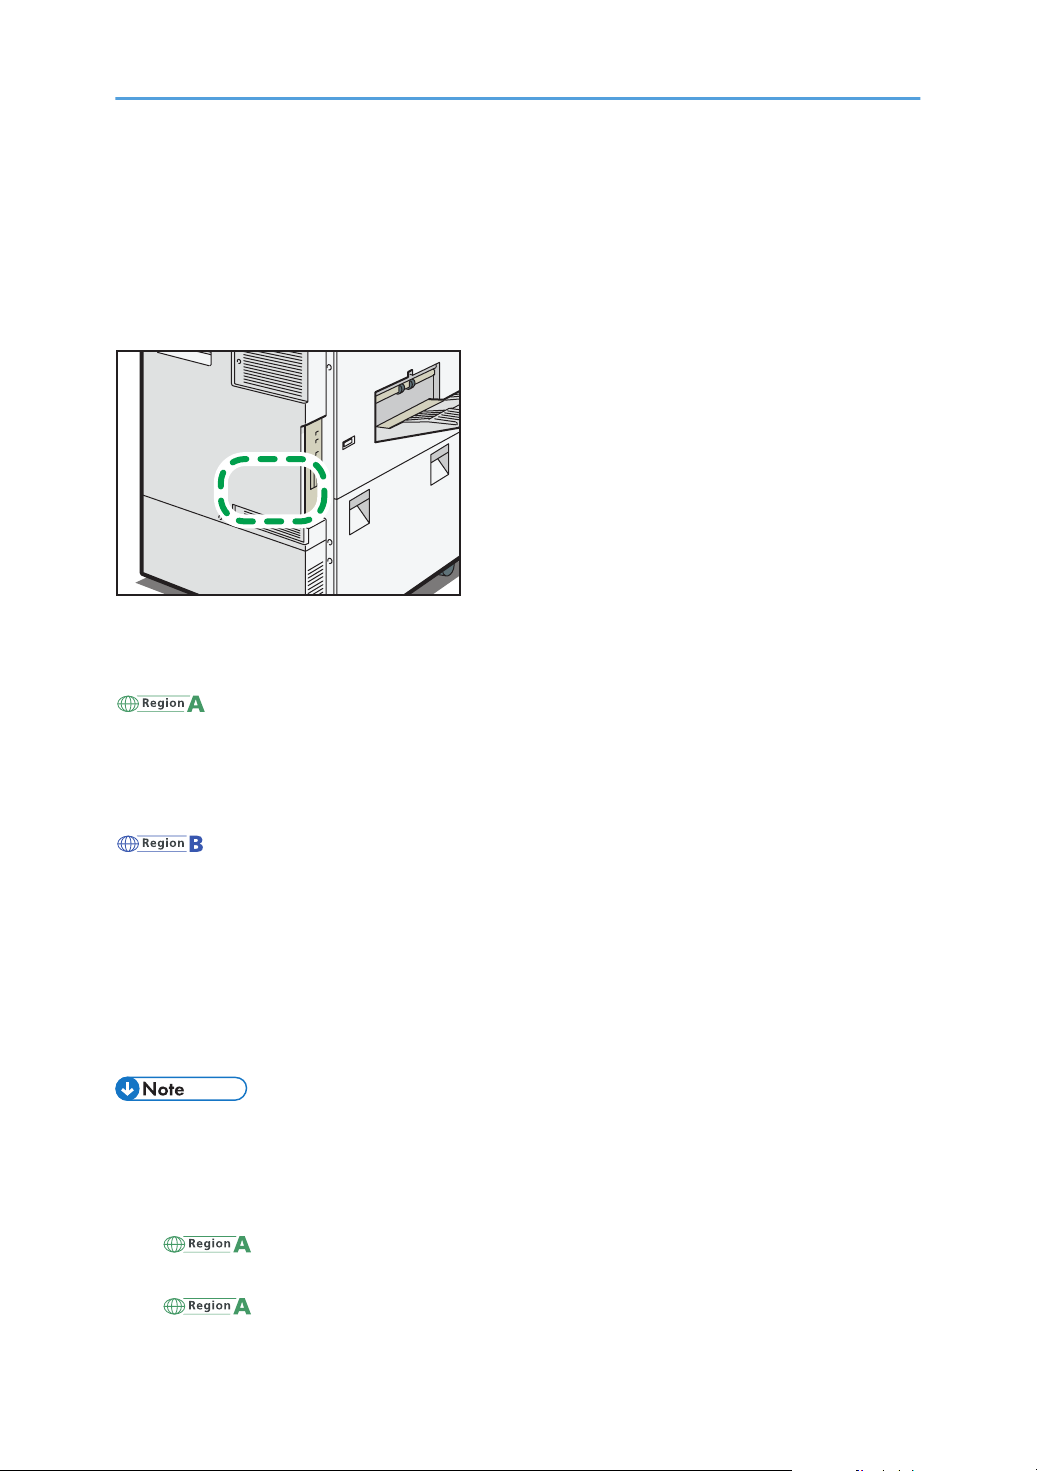
This section explains how you can identify the region your machine belongs to.
There is a label on the rear of the machine, located in the position shown below. The label contains
details that identify the region your machine belongs to. Read the label.
The following information is region-specific. Read the information under the symbol that corresponds to
the region of your machine.
(mainly Europe and Asia)
If the label contains the following, your machine is a region A model:
• CODE XXXX -67, -29
• 220–240 V
(mainly North America)
If the label contains the following, your machine is a region B model:
• CODE XXXX -57
• 120–127 V (Type 1/Type 2)
• 208–240 V (Type 3)
• CODE XXXX -25
• 220–240 V
• Dimensions in this manual are given in two units of measure: metric and inch. If your machine is a
Region A model, refer to the metric units. If your machine is a Region B model, refer to the inch
units.
• If your machine is a region A model and "CODE XXXX -67" is printed on the label, see
" (mainly Europe)" also.
• If your machine is a region A model and "CODE XXXX -29" is printed on the label, see
" (mainly Asia)" also.
8
Page 11

Names of Major Features
In this manual, major features of the machine are referred to as follows:
• Auto Document Feeder ADF (in this manual, "ADF" refers to the ARDF and the one-pass duplex
scanning ADF)
• Large Capacity Tray LCT
9
Page 12

10
Page 13
1. What You Can Do with This Machine
BRL059S
You can search for a description by what you want to do.
Searching by What You Want to Do
You can search for a procedure by what you want to do.
Reducing my Costs
Printing multi-page documents on both sides of sheets (Duplex Copy)
See "Duplex Copying", Copy/ Document Server.
Printing multi-page documents and received faxes on a single sheet (Combine (Copier/Fax))
See "Combined Copying", Copy/ Document Server.
See "Combine Two Originals", Fax.
Printing received faxes on both sides of sheets (2 Sided Print)
See "Two-Sided Printing", Fax.
Converting received faxes to electronic formats (Paperless Fax)
See "Confirming/Printing/Deleting Received and Stored Documents", Fax.
Sending files from the computer without printing them (LAN-Fax)
See "Sending Fax Documents from Computers", Fax.
11
Page 14
BQX138S
1. What You Can Do with This Machine
Checking how much paper is saved ([Information] screen)
See "How to Use the [Information] Screen", Getting Started.
Reducing electricity consumption
See "Saving Energy", Getting Started.
See "Timer Settings", Connecting the Machine/ System Settings.
Using Scanned Files on the Computer
Sending scan files
See "Basic Procedure for Sending Scan Files by E-mail", Scan.
Sending the URL of the folder in which scan files are stored
See "Sending the URL by E-mail", Scan.
Storing scan files in a shared folder
See "Basic Procedure When Using Scan to Folder", Scan.
Storing scan files on media
See "Basic Procedure for Saving Scan Files on a Memory Storage Device", Scan.
Embedding text information in scanned files
See "Embedding Text Information in Scanned Data", Scan.
Converting transmitted faxes to electronic formats and sending them to a computer
See "Overview of Folder Transmission Function", Fax.
12
Page 15
BRL060S
Searching by What You Want to Do
Managing and using documents converted to electronic formats (Document Server)
See "Relationship between Document Server and Other Functions", Copy/ Document Server.
Registering Destinations
Using the control panel to register destinations in the Address Book
See "Registering Entered Destinations to the Address Book", Fax.
See "Registering a destination in the address book manually", Scan.
Using Web Image Monitor to register destinations from a computer
See "Registering Internet Fax Destination Information Using Web Image Monitor", Fax.
Downloading destinations registered in the machine to the LAN-Fax driver destination list
See "Using the machine's Address Book as the LAN-Fax destination list", Fax.
13
Page 16
BQX139S
1. What You Can Do with This Machine
Operating the Machine More Effectively
Registering and using frequently-used settings (Program)
See "Registering Functions in a Program", Convenient Functions.
Registering frequently-used settings as initial settings (Program as Defaults (Copy/Fax/
Scanner/Quick Copy/Quick Fax/Quick Scanner/Copier (Classic)/Document Server/Fax
(Classic)/Scanner (Classic))
See "Changing the Default Functions of the Initial Screen", Convenient Functions.
Registering frequently-used printing settings to the printer driver
See "Using One Click Presets", Print.
Changing the initial settings of the printer driver to frequently-used printing settings
See "Displaying the [Printing Preferences] Dialog Box", Print.
Adding shortcuts to frequently used programs or Web pages
See "Adding Icons to the [Home] Screen", Convenient Functions.
Changing the order of the function and shortcut icons
See "Changing the Order of Icons on the [Home] Screen", Convenient Functions.
14
Page 17
DCH067
What You Can Do with This Machine
What You Can Do with This Machine
This section describes the features of this machine.
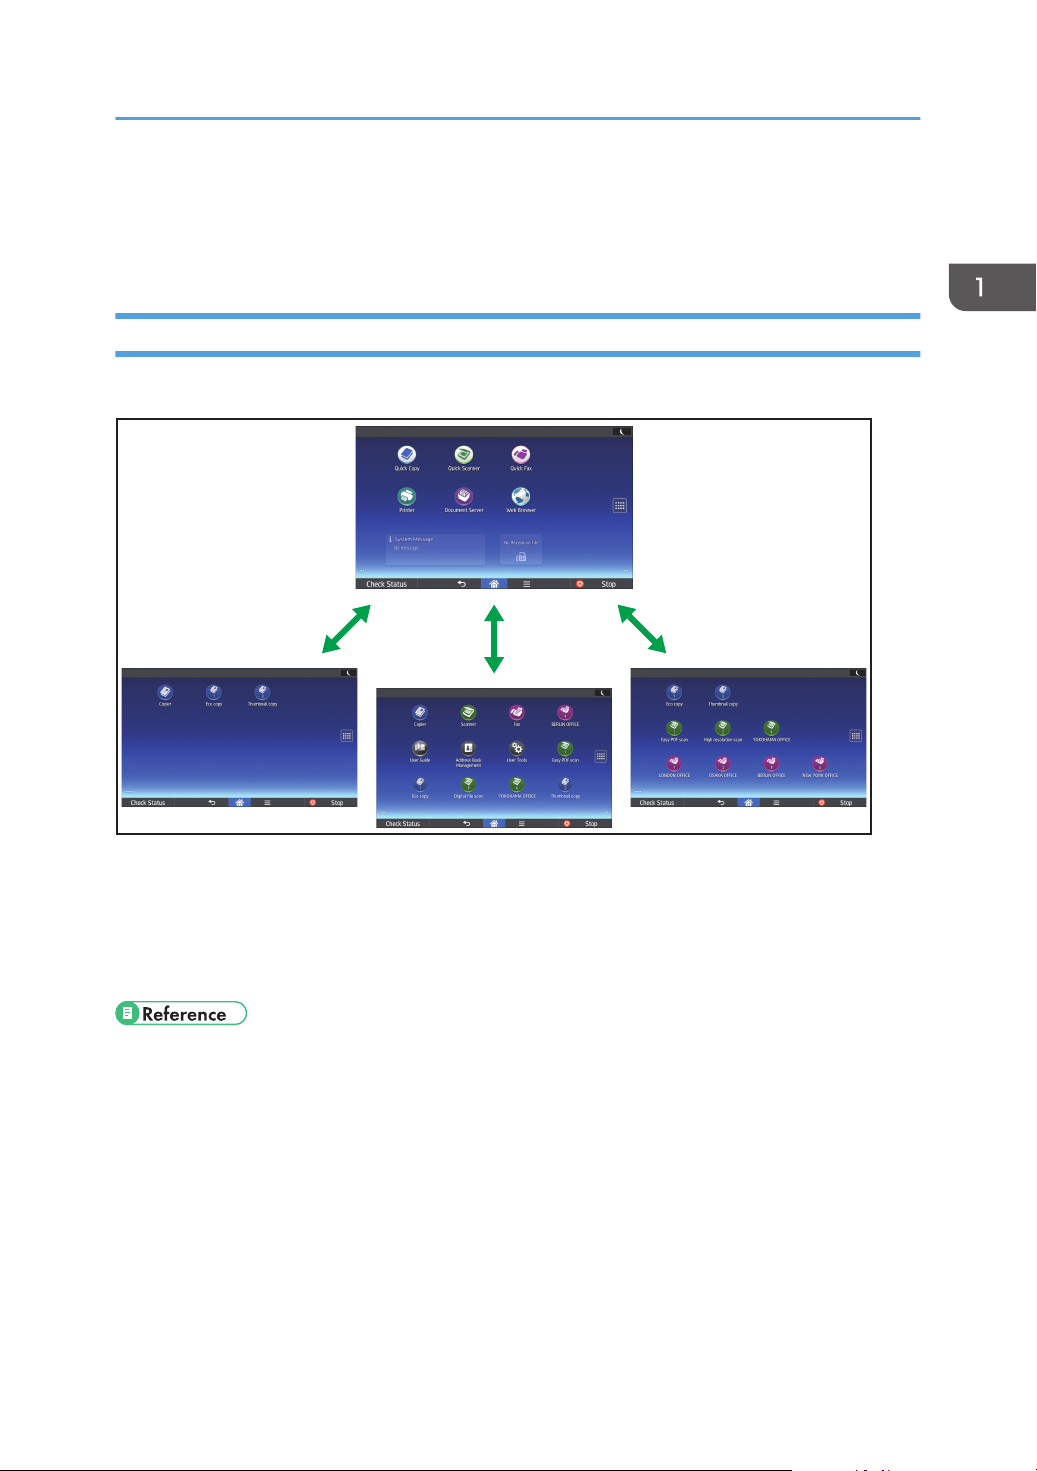
Customizing the [Home] Screen
The icons of each function are displayed on the [Home] screen.
• You can add shortcuts to often used programs or Web pages to the [Home] screen. The programs
or Web pages can be recalled easily by pressing the shortcut icons.
• You can display only the icons of functions and shortcuts that you use.
• You can change the order of the function and shortcut icons.
• For details about the features on the [Home] screen, see "How to Use the [Home] Screen", Getting
Started.
• For details about how to customize the [Home] screen, see "How to Customize the [Home]
Screen", Convenient Functions.
15
Page 18
CJQ601
1. What You Can Do with This Machine
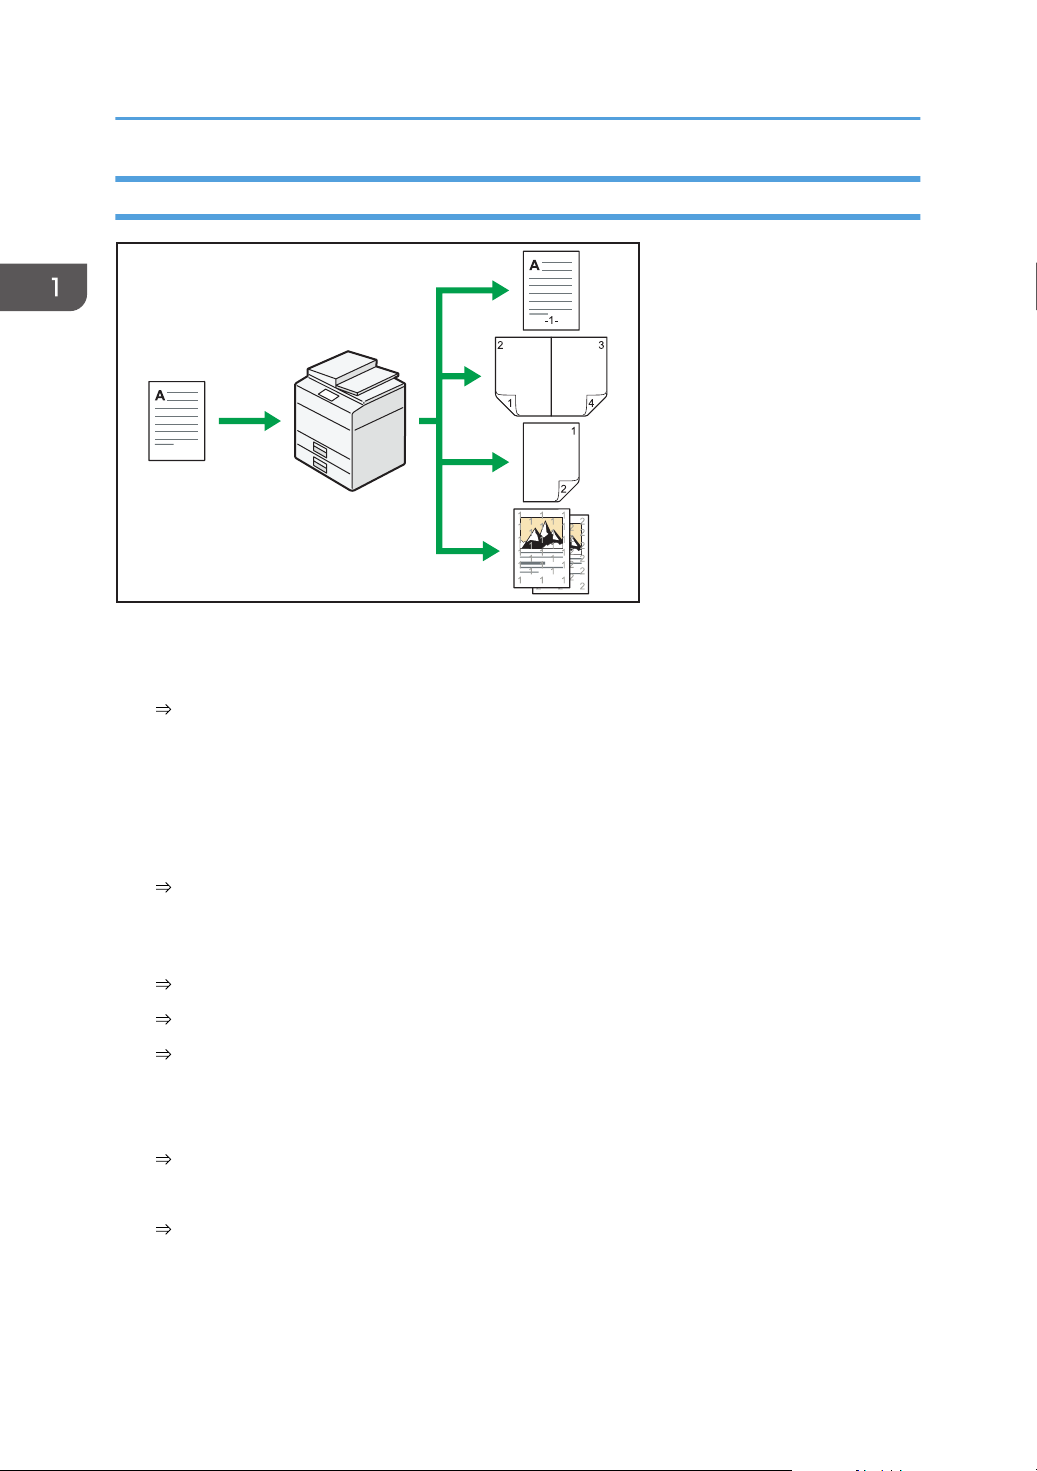
Making Copies Using Various Functions
• You can print stamps on copies. Stamps can include background numbers, scanned images, dates,
page numbers, and texts.
See "Stamps", Copy/ Document Server.
• You can reduce or enlarge the copy image. Auto Reduce / Enlarge function enables the machine
to detect the original size automatically. Also, it enables the machine to select an appropriate
reproduction ratio based on the paper size you specify. If the orientation of the original is different
from that of the paper you are copying onto, the machine rotates the original image by 90 degrees
to match it with the copy paper.
See "Reducing or Enlarging Originals", Copy/ Document Server.
• Copier functions such as Duplex, Combine, Booklet, and Magazine allow you to save on paper by
copying multiple pages onto single sheets.
For details about duplex copying, see "Duplex Copying", Copy/ Document Server.
For details about combined copying, see "Combined Copying", Copy/ Document Server.
For details about the booklet and magazine functions, see "Booklet/Magazine", Copy/
Document Server.
• You can copy onto various types of paper such as OHP transparencies.
See "Copying onto Various Types of Paper", Copy/ Document Server.
• The finisher allows you to sort, staple, and punch holes in your copies.
See "Finishing", Copy/ Document Server.
16
Page 19
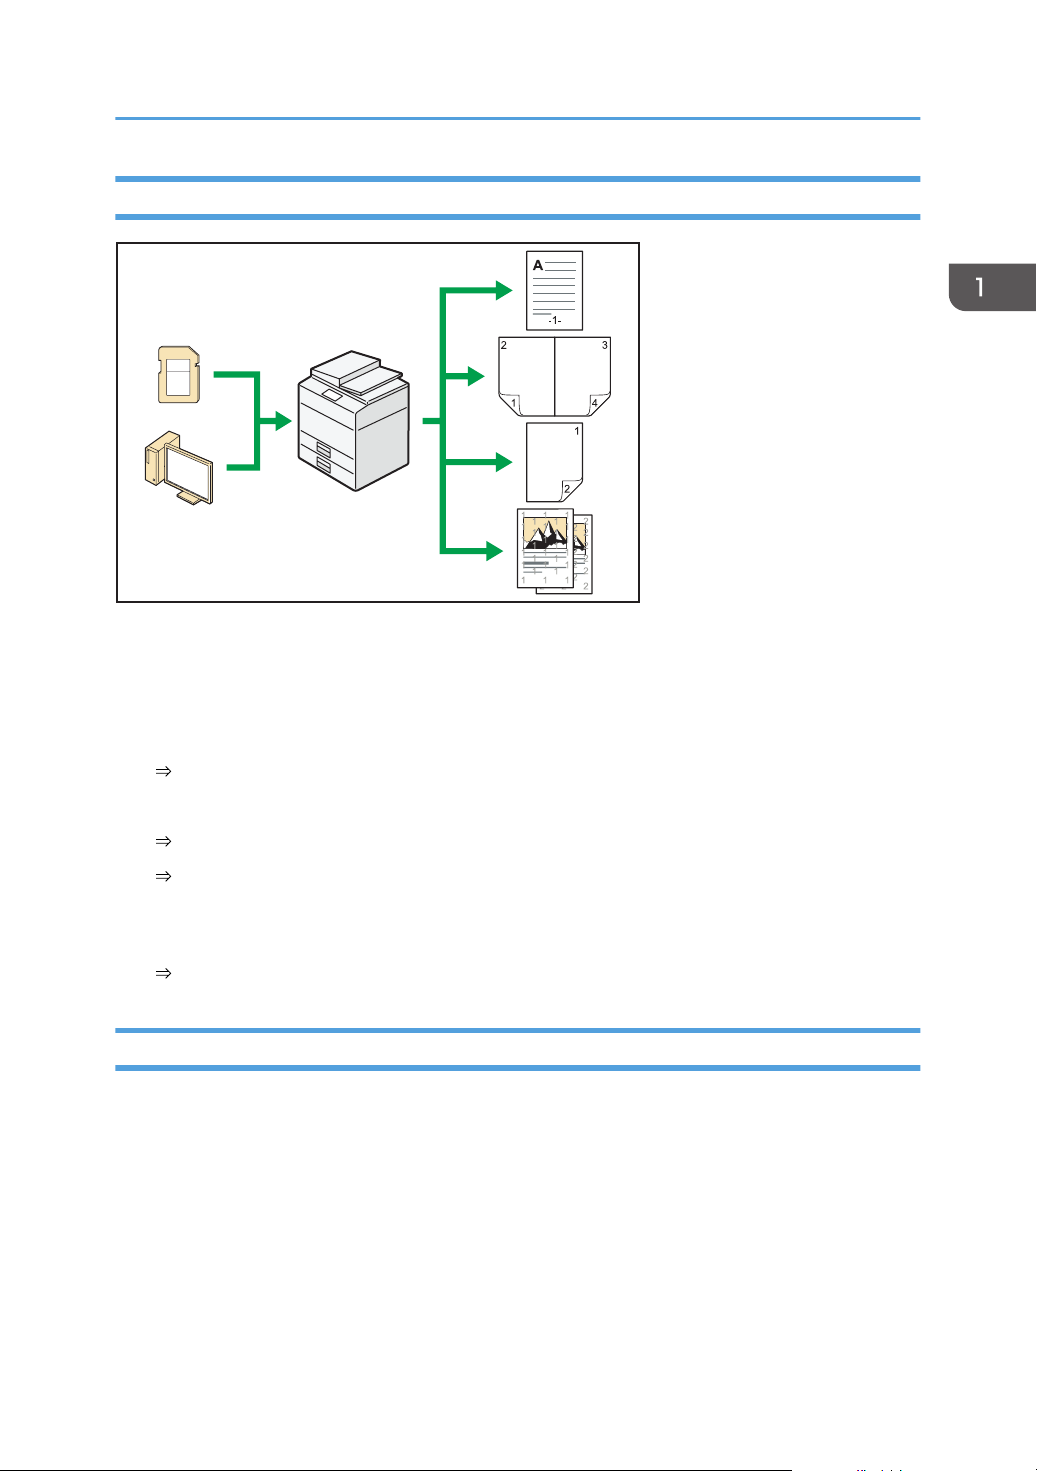
Printing Data Using Various Functions
CJQ614
• This machine supports network and local connections.
What You Can Do with This Machine
• You can print or delete print jobs stored on the machine's hard disk, which have been previously
sent from computers using the printer driver. The following types of print jobs can be selected:
Sample Print, Locked Print, Hold Print, and Stored Print.
See "Storing Documents in the Hard Disk Drive and Printing Them", Print.
• The finisher allows you to collate, staple, and punch holes in your prints.
For details about stapling, see "Staple", Print.
For details about punching, see "Punch", Print.
• You can print files stored on a removable memory device and specify print conditions such as print
quality and print size.
See "Direct Printing from a Memory Storage Device", Print.
Utilizing Stored Document
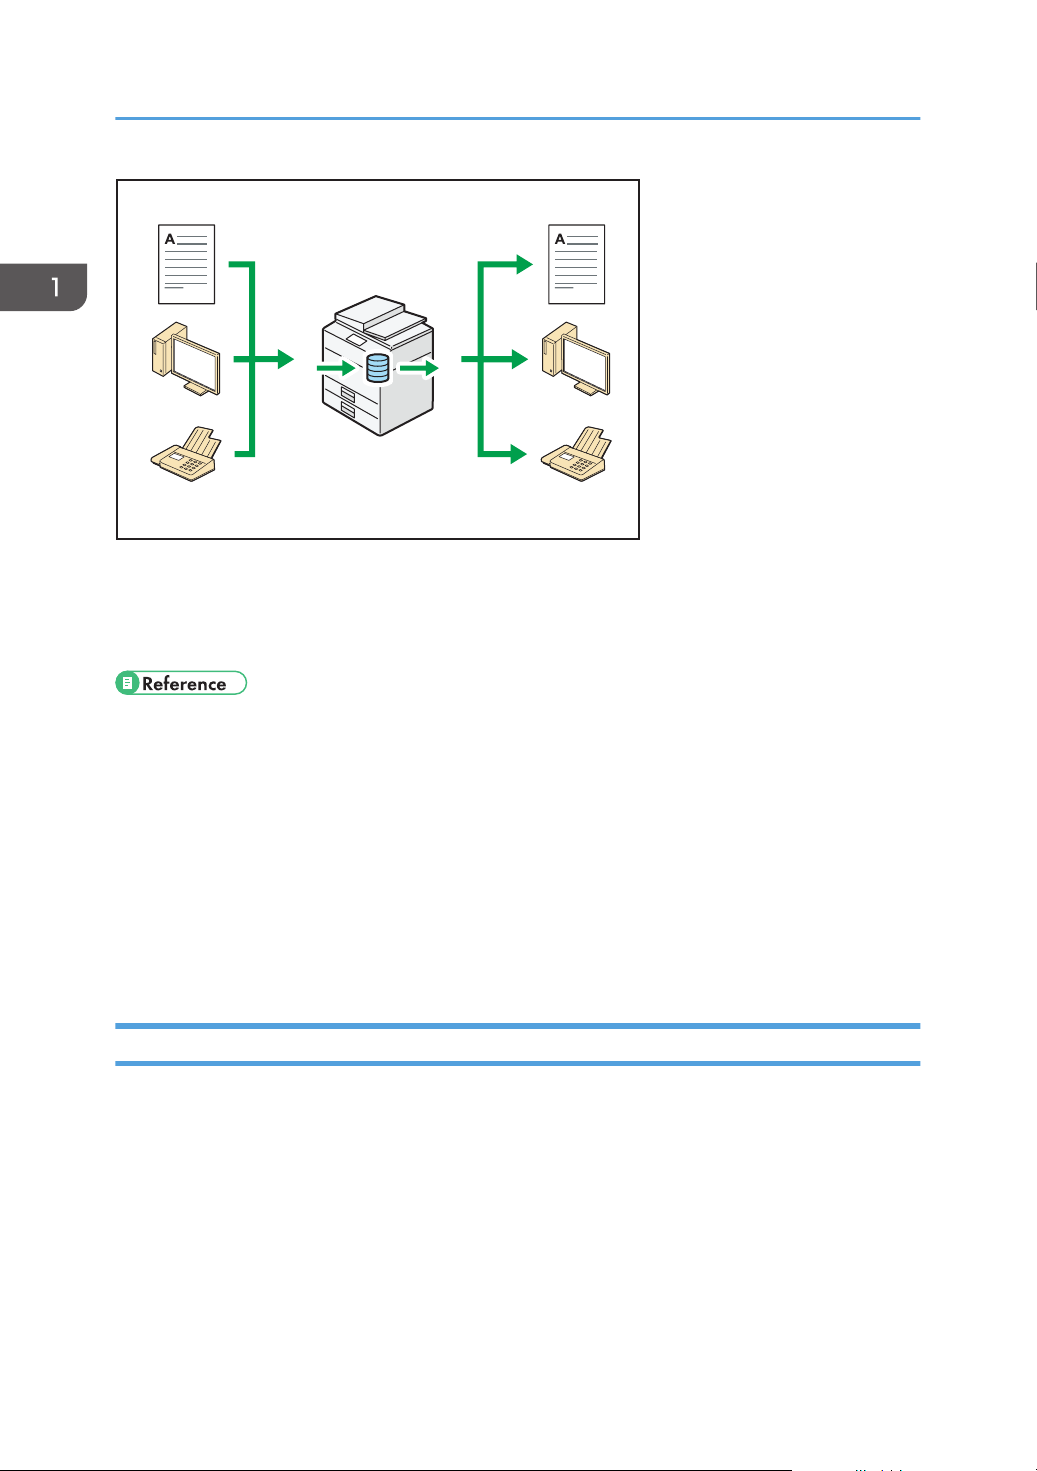
You can store files scanned in copier, facsimile, printer, or scanner mode on the machine's hard disk.
Web Image Monitor allows you to use your computer to search for, view, print, delete, and send stored
files via the network. You can also change print settings and print multiple documents (Document Server).
17
Page 20
CJQ603
1. What You Can Do with This Machine
• You can retrieve stored documents scanned in scanner mode to your computer.
• Using the file format converter, you can download documents stored in copier, Document Server,
or printer mode to your computer.
• For details about how to use the Document Server, see "Storing Data in the Document Server",
Copy/ Document Server.
• For details about the Document Server in copier mode, see "Document Server", Copy/ Document
Server.
• For details about the Document Server in printer mode, see "Saving and Printing Using the
Document Server", Print.
• For details about the Document Server in fax mode, see "Storing a Document", Fax.
• For details about the Document Server in scanner mode, see "Storing and Saving the Scanned
Documents", Scan.
You Can Connect Two Machines for Copying
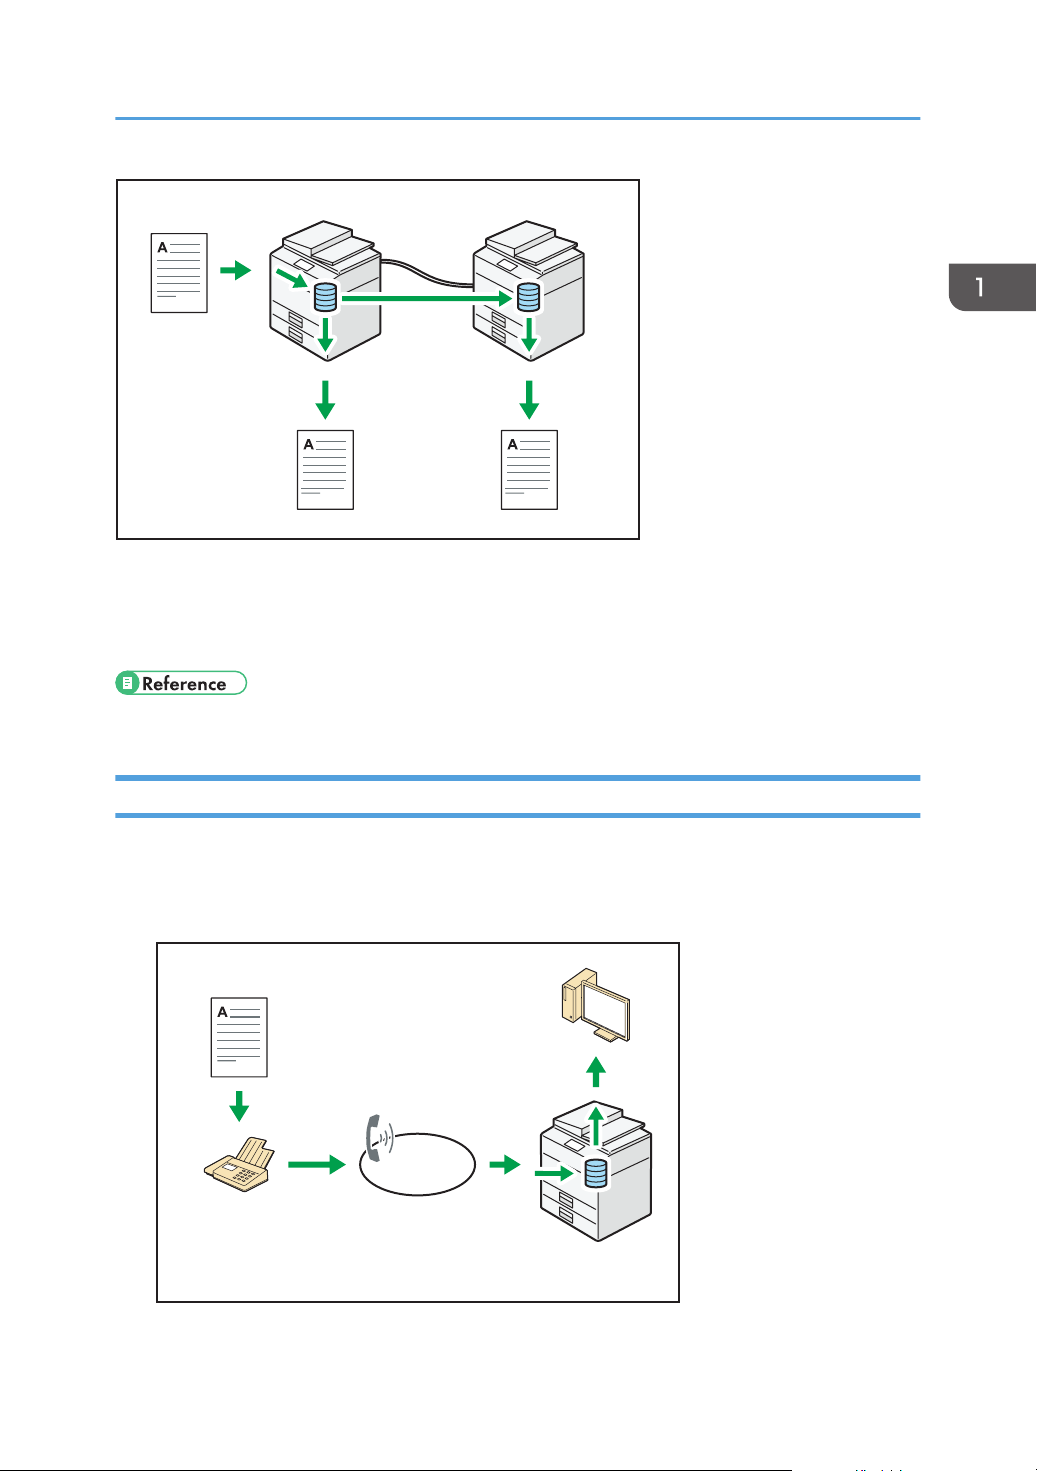
You can connect two machines together with copy connector. When you set up a copy job on one
machine (the main machine), data is transferred to the other (the sub-machine) so that copies can be
made on both machines simultaneously (Connect Copy).
18
Page 21
CJQ101
CJQ604
What You Can Do with This Machine
• You can complete large volume copy runs in shorter time.
• Even if one machine runs out of paper, or stops because of a paper jam, the other machine can still
continue to finish the job.
• See "Connect Copying", Copy/ Document Server.
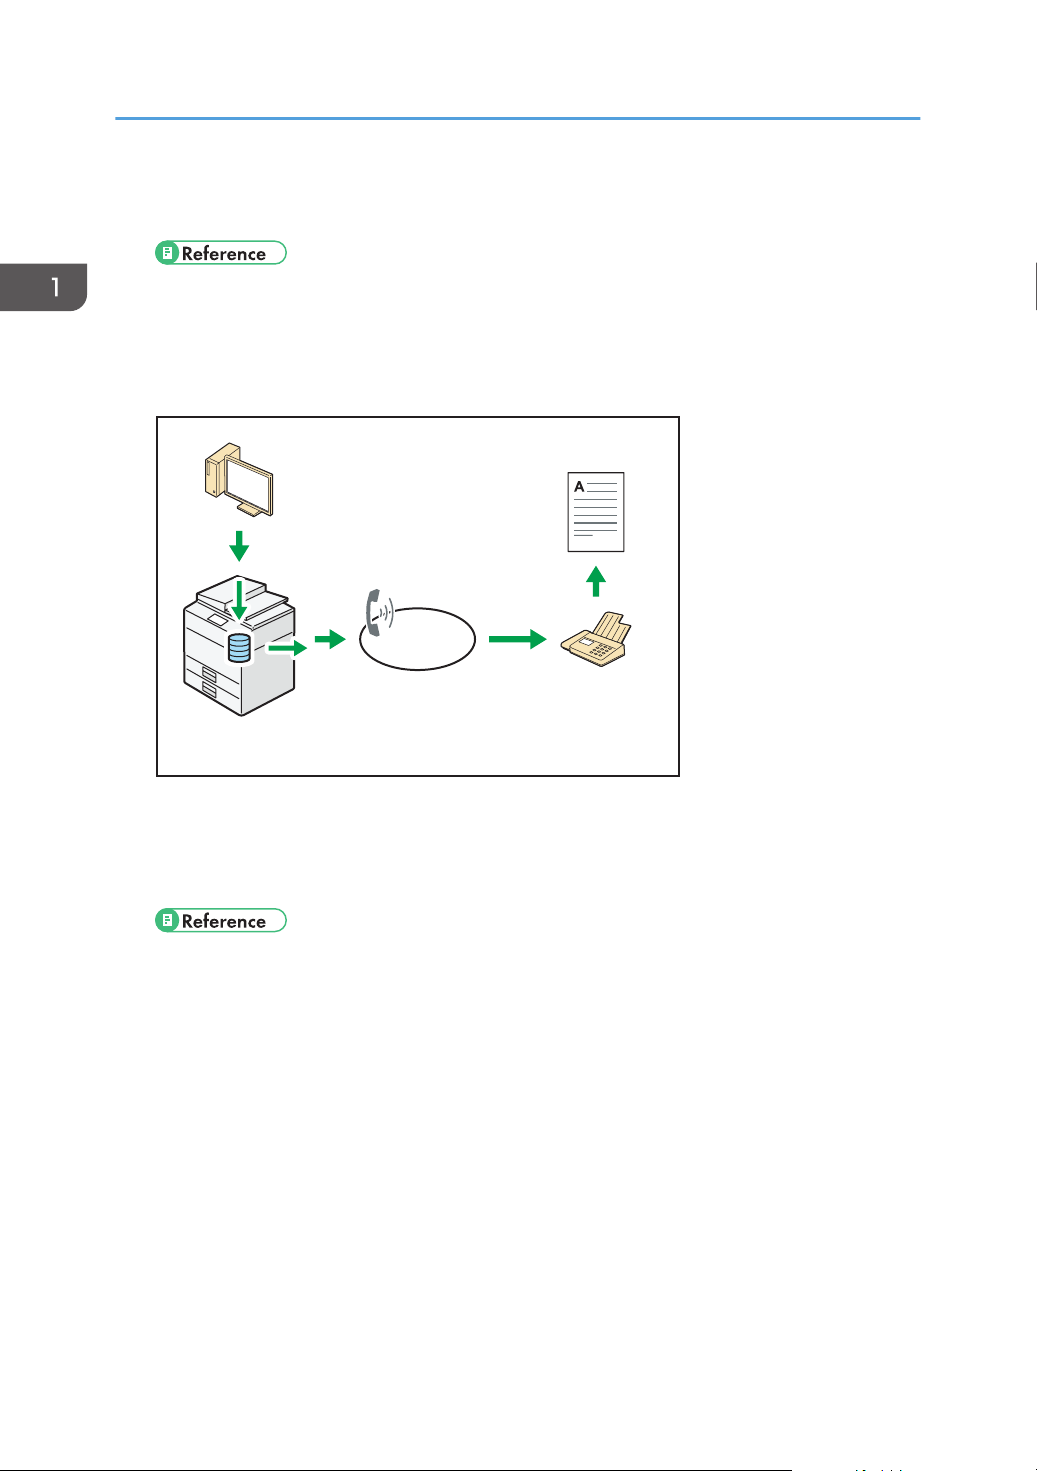
Sending and Receiving Faxes without Paper
Reception
You can store and save received fax documents as electronic formats in the machine's hard disk
without printing them.
19
Page 22
CJQ605
1. What You Can Do with This Machine
You can use Web Image Monitor to check, print, delete, retrieve, or download documents using
your computer (Storing received documents).
• See "Confirming/Printing/Deleting Received and Stored Documents", Fax.
Transmission
You can send a fax from your computer over the network (Ethernet or wireless LAN) to this
machine, which then forwards the fax via its telephone connection (LAN-Fax).
20
• To send a fax, print from the Windows application you are working with, select LAN-Fax as
the printer, and then specify the destination.
• You can also check the sent image data.
• For details about the machine's settings, see "Network Settings Requirements", Connecting the
Machine/ System Settings.
• For details about how to use the function, see "Sending Fax Documents from Computers", Fax.
Page 23

Sending and Receiving Faxes via the Internet
xxx.xxx.xxx.xxx
xxx.xxx.xxx.xxx
xxx.xxx.xxx.xxx
E-mail Transmission and Reception
What You Can Do with This Machine
This machine converts scanned document images to e-mail format, and transmits and receives the
e-mail data over the Internet.
• To send a document, specify an e-mail address instead of dialing the destination telephone
number (Internet Fax and e-mail transmission).
See "Specifying an Internet Fax Destination by Entering It Manually", Fax.
• This machine can receive e-mail messages via Internet Fax or from computers (Internet Fax
Reception and Mail to Print).
See "Receiving E-Mail by Internet Fax/Mail to Print", Fax.
• Internet Fax compatible machines and computers that have e-mail addresses can receive email messages via Internet Fax.
IP-Fax
The IP-Fax function sends or receives documents between two facsimiles directly via a TCP/IP
network.
• To send a document, specify an IP address or host name instead of a fax number (IP-Fax
Transmission).
See "Specifying an IP-Fax Destination by Entering It Manually", Fax.
• This machine can receive documents sent via Internet Fax (IP-Fax Reception).
See "Types of Reception", Fax.
• Using a VoIP gateway, this machine can send to G3 facsimiles connected to the public
switched telephone network (PSTN).
21
Page 24
CJQ612
1. What You Can Do with This Machine
• For details about the machine's settings, see "Network Settings Requirements", Connecting the
Machine/ System Settings.
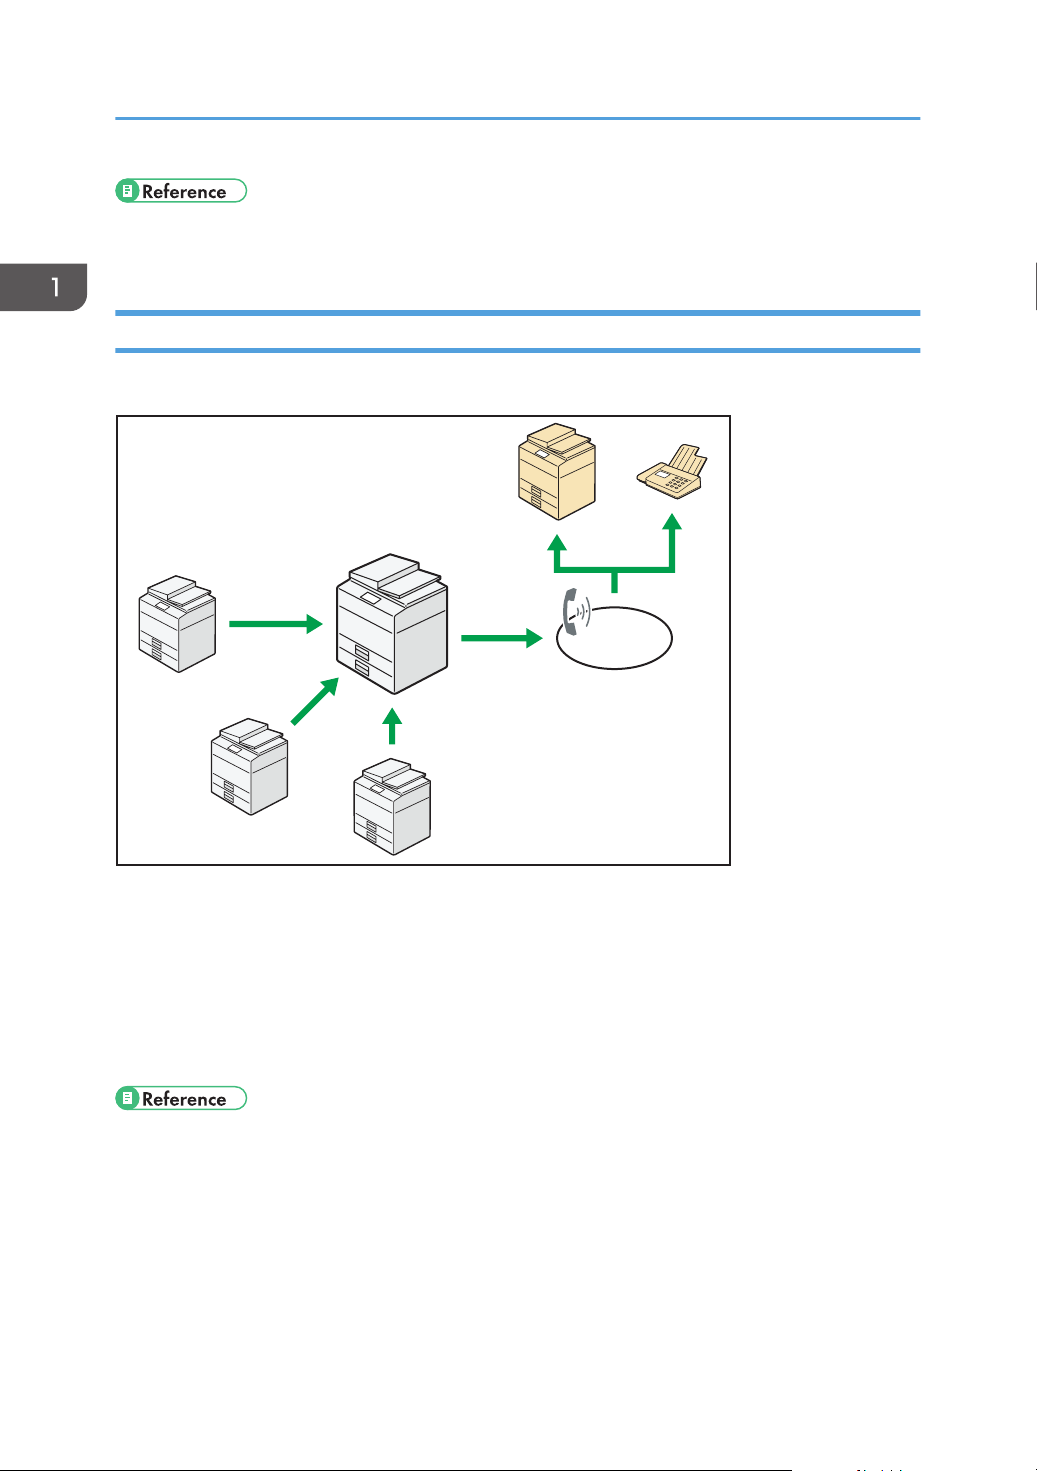
Sending and Receiving Faxes by Using the Machine without Fax Unit Installed
You can send and receive faxes through a different machine's fax functions via a network (Remote Fax).
22
• To use the remote fax function, install the fax connection unit on the main-machine and submachine.
• The procedure for sending faxes is as same as that of for the machine with the fax unit. When a job
has finished, confirm results displayed on sending history or printed on reports.
• You can forward documents received by the main machine with the facsimile function to submachines.
• For details, see "Sending/Receiving Documents Using a Remote Machine (Remote Fax)", Fax.
Page 25
CJQ607
What You Can Do with This Machine
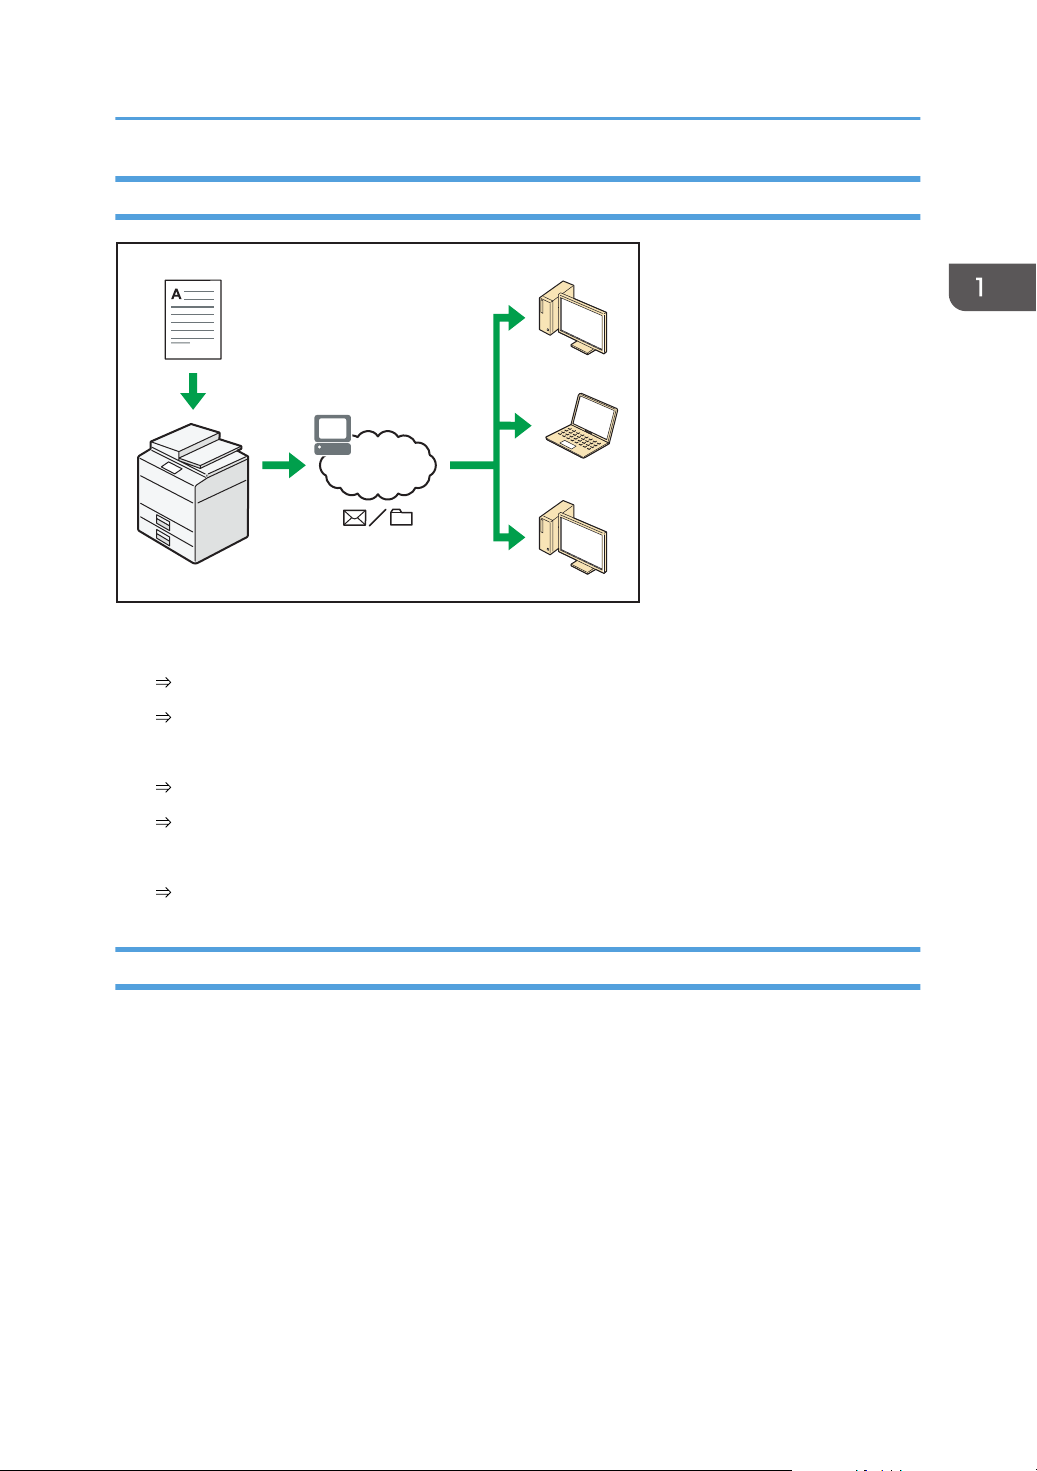
Using the Facsimile and the Scanner in a Network Environment
• You can send scan files to a specified destination using e-mail (Sending scan files by e-mail).
See "Overview of E-Mail Transmission Function", Fax.
See "Basic Procedure for Sending Scan Files by E-mail", Scan.
• You can send scan files directly to folders (Sending scan files by Scan to Folder).
See "Overview of Folder Transmission Function", Fax.
See "Basic Procedure When Using Scan to Folder", Scan.
• You can use Web Services on Devices (WSD) to send scan files to a client computer.
See "Basic Operating Procedure of WSD Scanner (Push Type)", Scan.
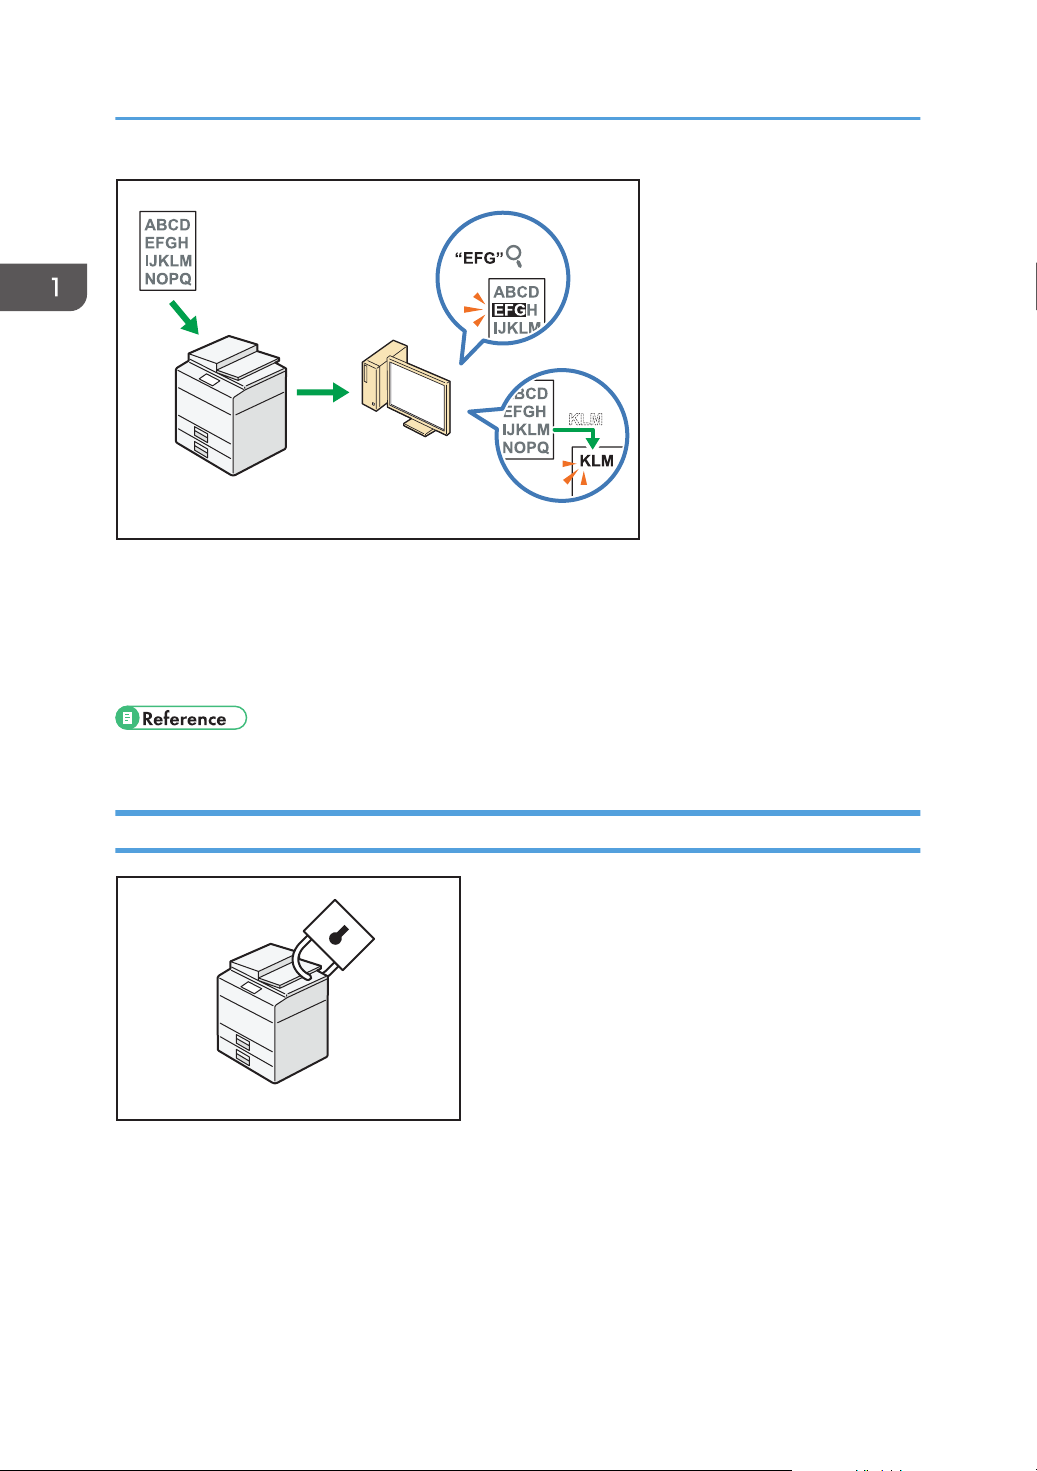
Embedding Text Information in Scanned Files
You can extract text information from a scanned document and embed it in the file without using a
computer.
If you scan a document using this function, embedded text can be searched by using the text search
function or copied to another document.
23
Page 26
CUL003
CJQ608
1. What You Can Do with This Machine
• To use this function, the OCR unit is required.
• You can select a file type from [PDF], [High Compression PDF], or [PDF/A].
• This function can optically recognize characters in various languages and up to approximately
40,000 characters a page.
• See "Embedding Text Information in Scanned Data", Scan.
Preventing Information Leakage (Security Functions)
• You can protect documents from unauthorized access and stop them from being copied without
permission.
• You can control the use of the machine, as well as prevent machine settings from being changed
without authorization.
• By setting passwords, you can prevent unauthorized access via the network.
• You can erase or encrypt the data on the hard disk to minimize the risk of information leakage.
24
Page 27
What You Can Do with This Machine
• You can limit the usage of functions for each user.
• See Security Guide.
Centrally Controlling Scan Conditions and Distribution
You can use the distributed scan management (DSM) system in Windows Server 2008 R2/2012 to
manage the destinations and scan settings for each individual user in a group and to use the information
when distributing scanned data.
You can also use this system to centrally manage information about people using the network and the
machine's scanner functions. Both delivered files and user information can be controlled.
• You must set up and configure a Windows server to use the distributed scan management system.
This system is supported by Windows Server 2008 R2 or later.
• For details about how to deliver files using the distributed scan management system, see
"Managing Scan Conditions and Other Settings in the Block Using Distributed Scan Management",
Scan.
Monitoring and Setting the Machine Using a Computer
Using Web Image Monitor, you can check the machine's status and change the settings.
25
Page 28
CJQ609
CUM003
1. What You Can Do with This Machine
You can check which tray is running out of paper, register information in the Address Book, specify the
network settings, configure and change the system settings, manage jobs, print the job history, and
configure the authentication settings.
• See "Using Web Image Monitor", Connecting the Machine/ System Settings.
• See Web Image Monitor Help.
Preventing Unauthorized Copying
You can print embedded patterns on printouts to prevent unauthorized copying.
26
Page 29
What You Can Do with This Machine
• Using the copier function or the printer driver, you can embed a pattern in the printed document. If
the document is copied on a machine with witch the Copy Data Security unitfunction is enabled,
protected pages are grayed out in the copy. This can minimize the risk of confidential information
being copied. Protected fax messages are grayed out before being transmitted or stored. If a
document protected by unauthorized copy guard is copied on a machine that is equipped with
witch the Copy Data Security unitfunction is enabled, the machine beeps to notify users that
unauthorized copying is being attempted. If the document is copied on a machine without witch the
Copy Data Security Unitfunction is disabled, the hidden text becomes conspicuous in the copy,
showing that the copy is unauthorized.
• Using the copier function or the printer driver, you can embed text in the printed document for
unauthorized copy prevention. If the document is copied, scanned, or stored in a Document Server
by a copier or multifunction printer, the embedded text appears conspicuous in the copy,
discouraging such unauthorized copying.
• For details, see Security Guide.
• For details, see the printer driver Help.
• For details about this function in the copier mode, see "Preventing Unauthorized Copies", Copy/
Document Server.
• For details about this function in the printer mode, see "Printing Documents That Are Not Authorized
for Duplication", Print.
27
Page 30

1. What You Can Do with This Machine
28
Page 31
2. Getting Started
DPZ001
1
2
3
4
5
6
7
8
This chapter describes how to start using this machine.
Guide to Names and Functions of Components
• Do not obstruct the machine's vents. Doing so risks fire caused by overheated internal
components.
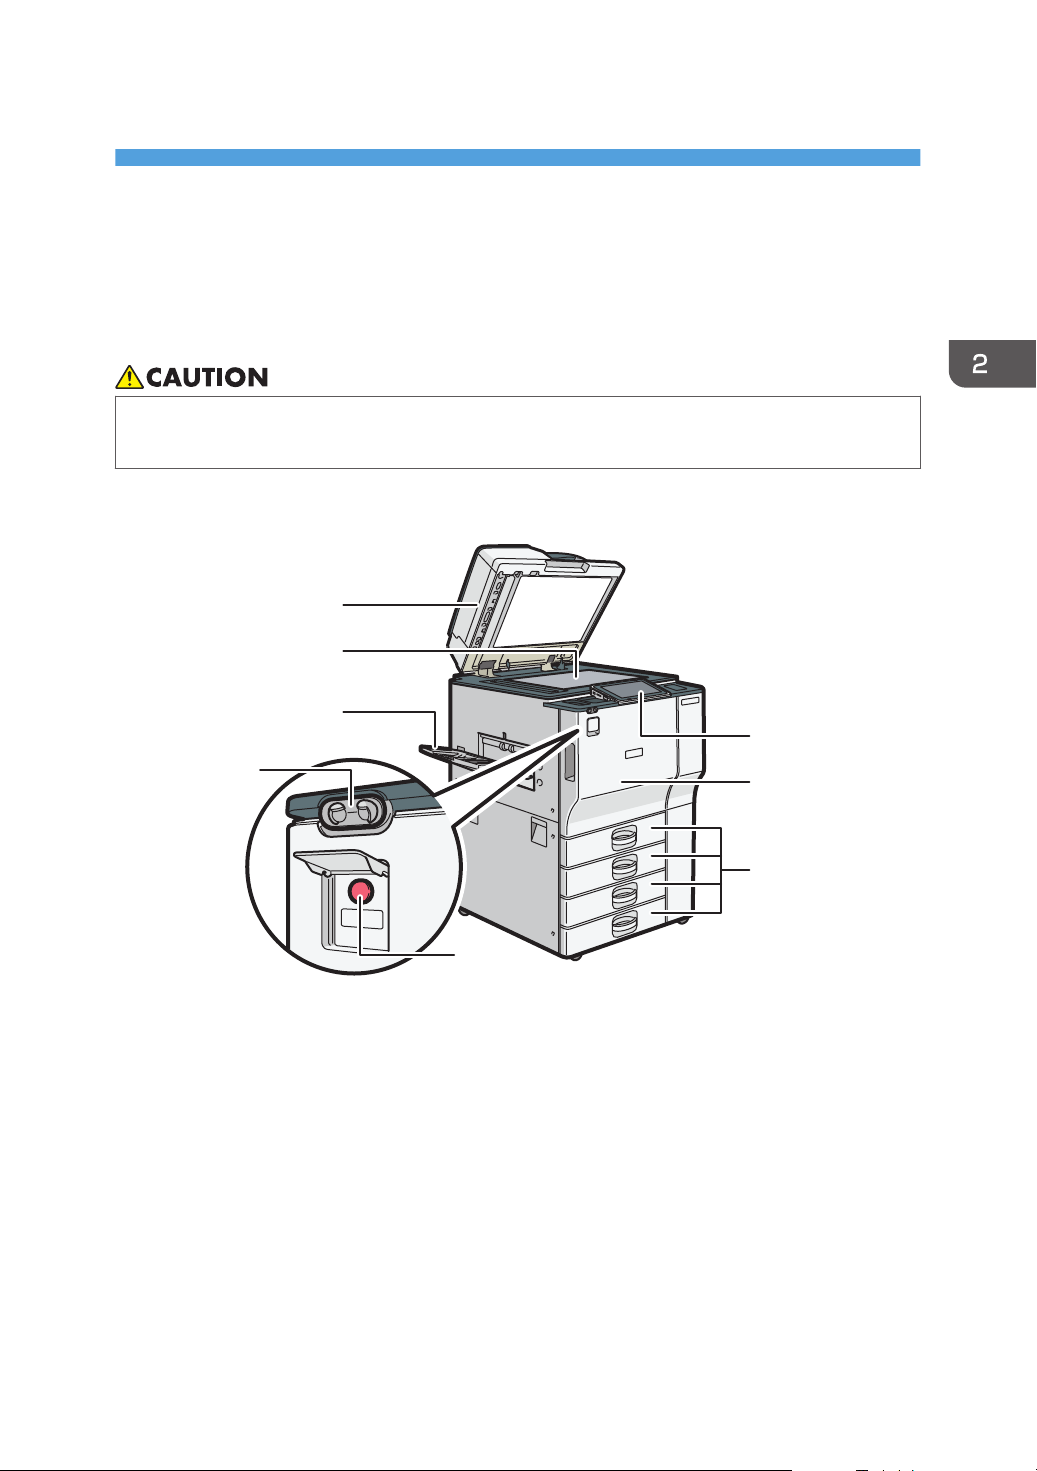
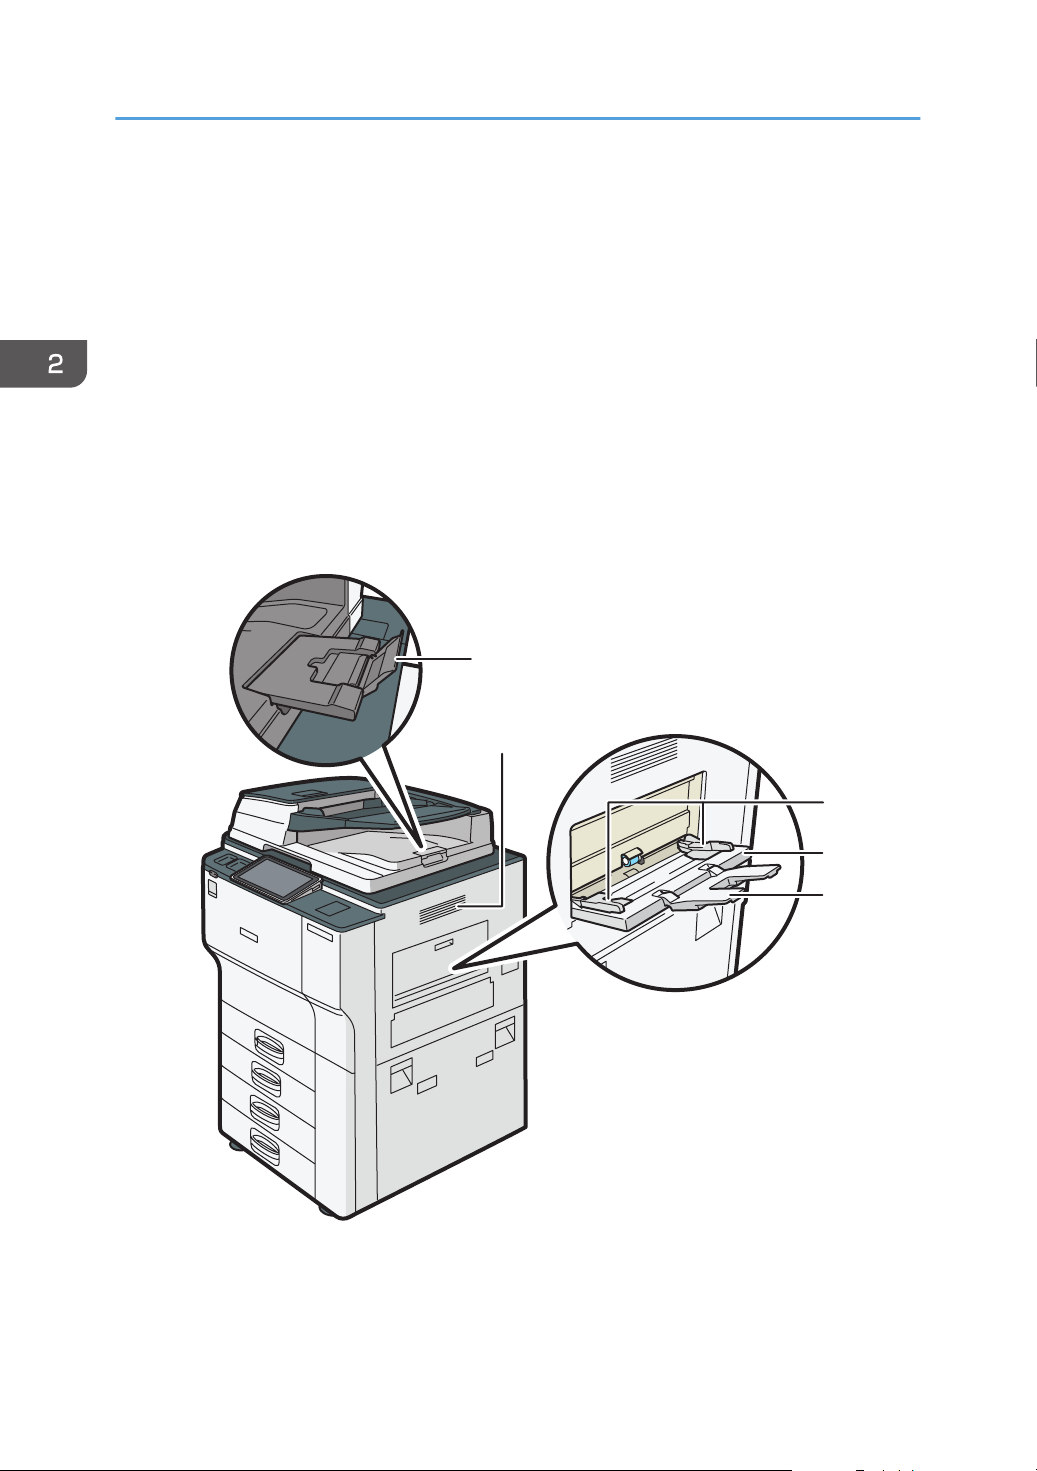
Front and left view
1. ADF
Lower the ADF over originals placed on the exposure glass.
If you load a stack of originals in the ADF, the ADF will automatically feed the originals one by one.
2. Exposure glass
Place originals face down here. For details, see page 69 "Placing Originals on the Exposure Glass".
3. Copy tray
Copied/printed paper and fax messages are delivered here.
4. Human Detect Sensor
The human detection sensor is on the right side of the machine. For details, see "Human Detection Sensor",
Getting Started.
29
Page 32
DPZ002
2
3
4
5
1
2. Getting Started
5. Main power switch
To operate the machine, the main power switch must be on. If it is off, open the main power switch's cover and
turn the switch on.
6. Control panel
See page 34 "Guide to the Names and Functions of the Machine's Control Panel".
7. Front cover
Open to access the inside of the machine.
8. Paper trays (trays 1–3)
Load paper here.
Tray 1 is a tandem tray where paper on the left side automatically moves to the right when paper there has
run out.
Front and right view
30
1. ADF's extender
Pull this extender to support large paper.
Page 33
DPZ003
1
2
Guide to Names and Functions of Components
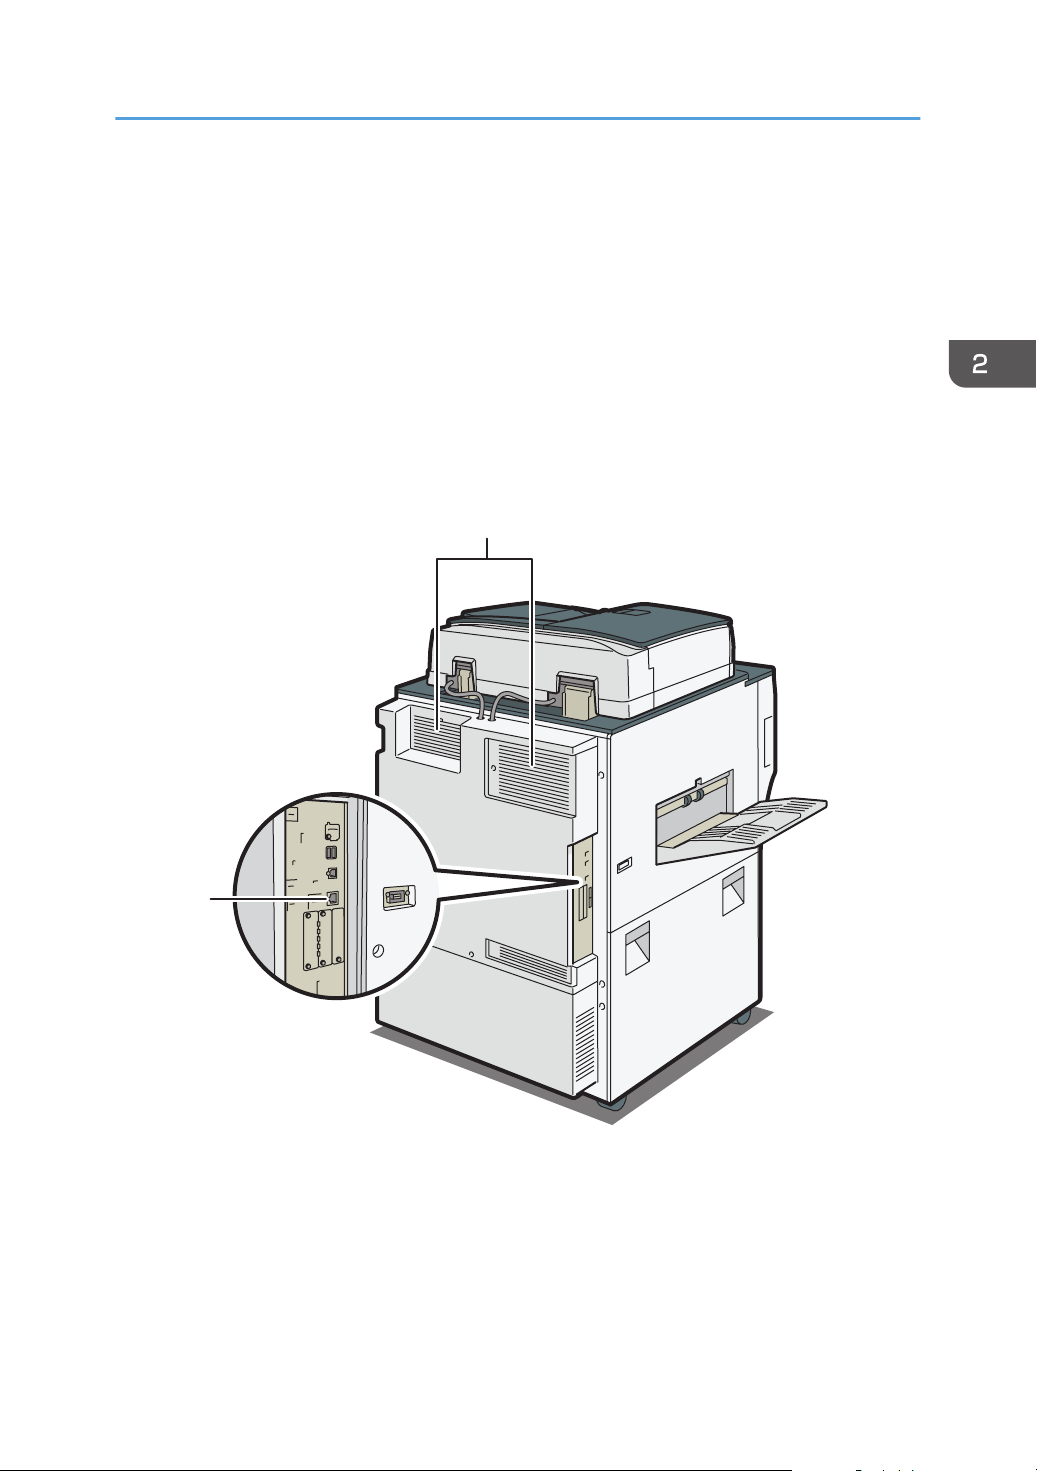
2. Ventilation holes
Prevent overheating.
3. Paper guides
When loading paper in the bypass tray, align the paper guides flush against the paper.
4. Bypass tray
Use to copy or print on OHP transparencies, adhesive labels, and paper that cannot be loaded in the paper
trays. For details, see page XX "Loading Paper into the Bypass Tray".
5. Extender
Pull this extender out when loading paper in the bypass tray.
Rear and left view
1. Ventilation holes
Prevent overheating.
31
Page 34
DQA004
1
2
9
3
45
78
10
12
14
13
11
6
2. Getting Started
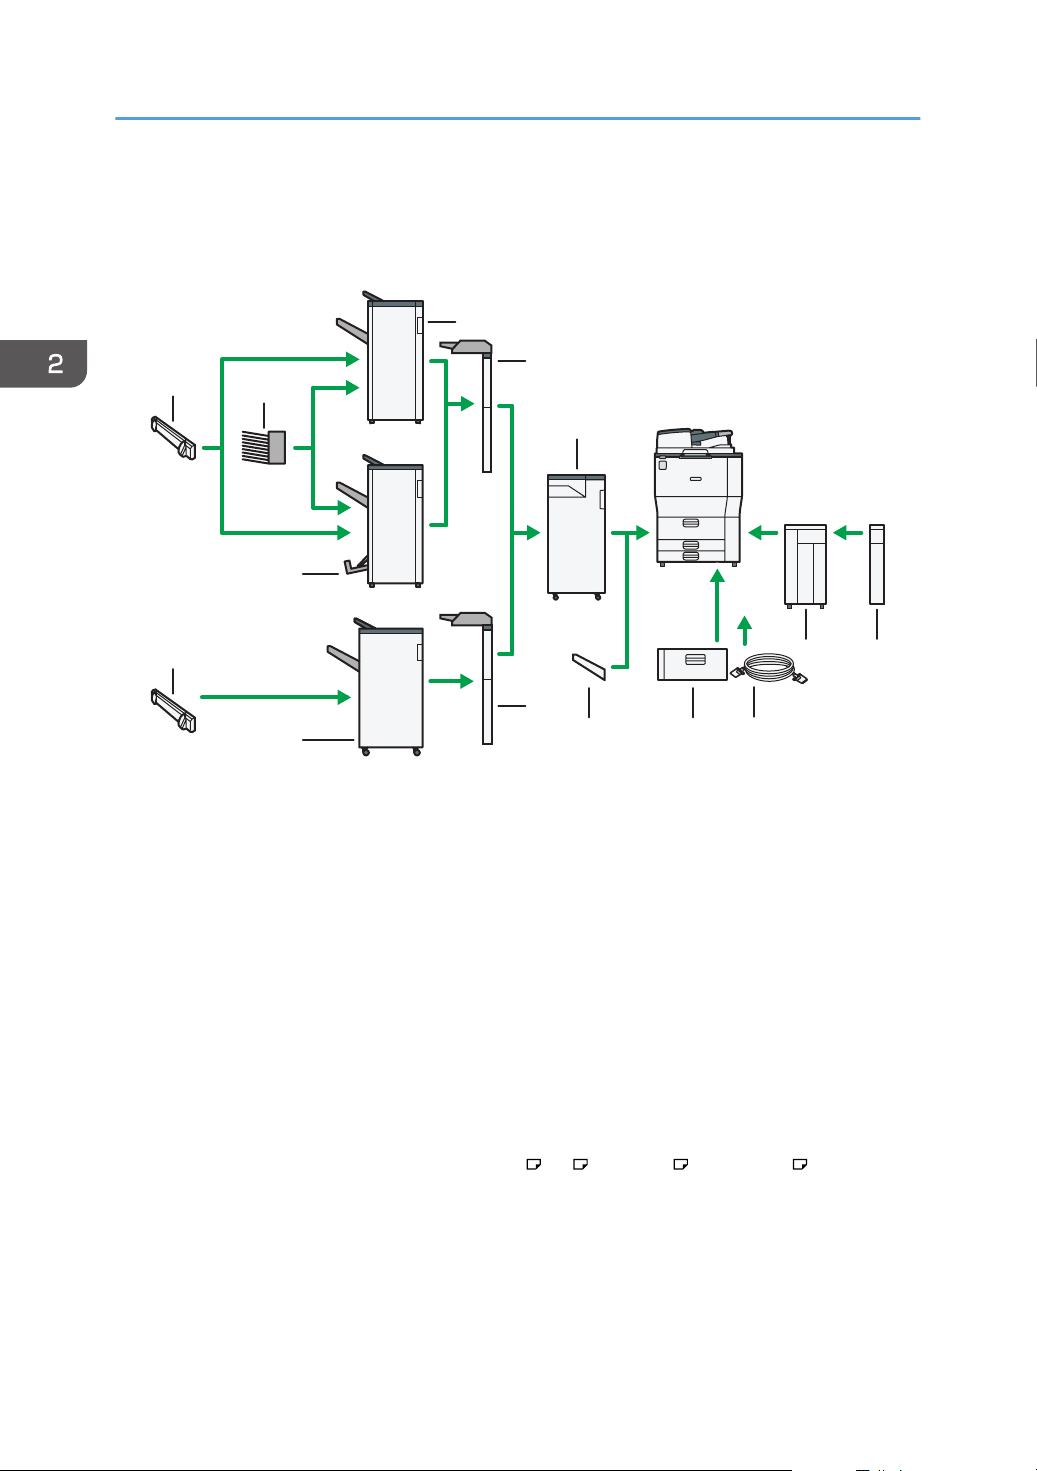
Guide to Functions of the Machine's Options
Check which type of machine you have. See Read This First.
1. Finisher SR4120
Sorts, stacks, and staples multiple sheets of paper. Consists of the following paper trays:
• Finisher upper tray
• Finisher shift tray
2. Interposer (Finisher SR4120, Booklet Finisher SR4130)
Inserts cover or slip sheets into copied or printed paper.
3. Multi-Folding unit
The Multi-Folding unit can apply the following folds: Half Fold, Letter Fold-out, Letter Fold-in, Double Parallel
Fold, Gate Fold, and Z-fold.
To use the Multi-Folding Unit, the Finisher SR4120, the Booklet Finisher SR4130 or the Finisher SR4080 is
required.
4. Extension unit
Attached to the LCT and holds 2,500 sheets of B4 JIS , A4 , 81/2 × 14 , or 81/2 × 11 paper.
5. Large capacity tray (LCT)
Paper is loaded here.
6. Copy connector
Allows you to use the connect copy function.
32
Page 35

Guide to Functions of the Machine's Options
7. A3/11 × 17 tray unit
You can load paper sizes up to A3 or 11 × 17 in Tray 1 using this unit. If you install the A3/11 × 17 tray
unit on your machine, you cannot use it as a tandem tray.
8. Copy tray
If you select this as the output tray, copied/printed paper and fax messages are delivered here face down.
9. Interposer (Finisher SR4080)
Inserts cover or slip sheets into copied or printed paper.
10. Finisher SR4080
Sorts, stacks, and staples multiple sheets of paper. Consists of the following paper trays:
• Finisher upper tray
• Finisher shift tray
11. Output jogger (Finisher SR4080)
Sorts, stacks, staples, and punches multiple sheets of paper. The saddle stitch function can staple multiple
sheets of paper in the center and fold them into booklets. Consists of the following paper trays:
• Finisher upper tray
• Finisher shift tray
• Finisher booklet tray
12. Booklet Finisher SR4130
Jogs the sheets delivered to the finisher shift tray.
13. Output jogger (Finisher SR4120, Booklet Finisher SR4130)
Jogs the sheets delivered to the finisher shift tray.
14. Mailbox
Sorts printed paper. Consists of Mailbox output trays 1 - 9.
33
Page 36
DCH009
21
4
5
6
6
7
3
2. Getting Started
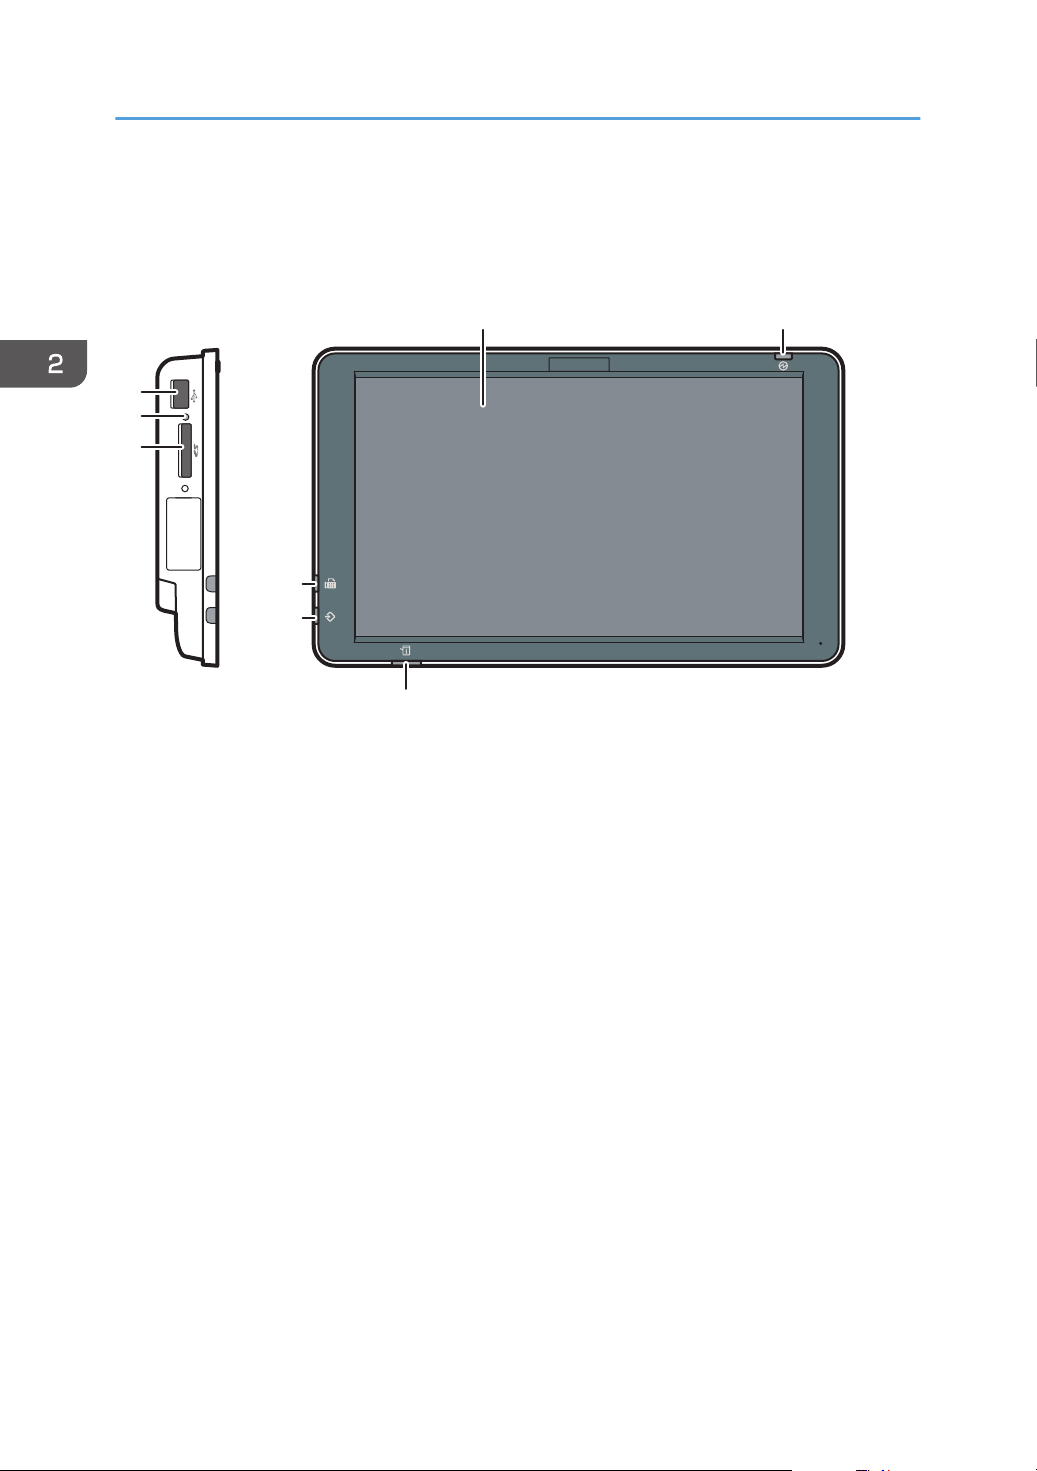
Guide to the Names and Functions of the Machine's Control Panel
1. Display panel
This is a touch panel display that features icons, keys, shortcuts, and widgets that allow you to navigate the
screens of the various functions and applications and provide you with information about operation status and
other messages. See page 42 "How to Use Each Application".
2. Main power indicator
The main power indicator goes on when you turn on the main power switch. When the machine is in Sleep
mode, the main power indicator flashes slowly. In Low Power mode, the main power indicator is lit.
3. Status indicator
Indicates the status of the system. Stays lit when an error occurs or the toner runs out.
4. Data In indicator (facsimile and printer mode)
Flashes when the machine is receiving print jobs or LAN-Fax documents from a computer. See Fax and Print.
5. Fax indicator
Indicates the status of the fax functions. Flashes during data transmission and reception. Stays lit when
receiving a fax via Confidential or Substitute Reception.
6. Media slots
Use to insert an SD card or a USB flash memory device. For details, see "Inserting/Removing a Memory
Storage Device", Getting Started.
7. Media access lamp
Lights up when an SD card is inserted in the media slot.
34
Page 37

Changing the Display Language
You can change the language used on the display. English is set as default.
1. Press [Home] ( ) at the bottom of the screen in the center.
2. Flick the screen to the left, and then press [Change Language].
3. Select the language you want to display.
4. Press [OK].
Changing the Display Language
35
Page 38
DLV029
5
6
12
1 3 4
7891011
2
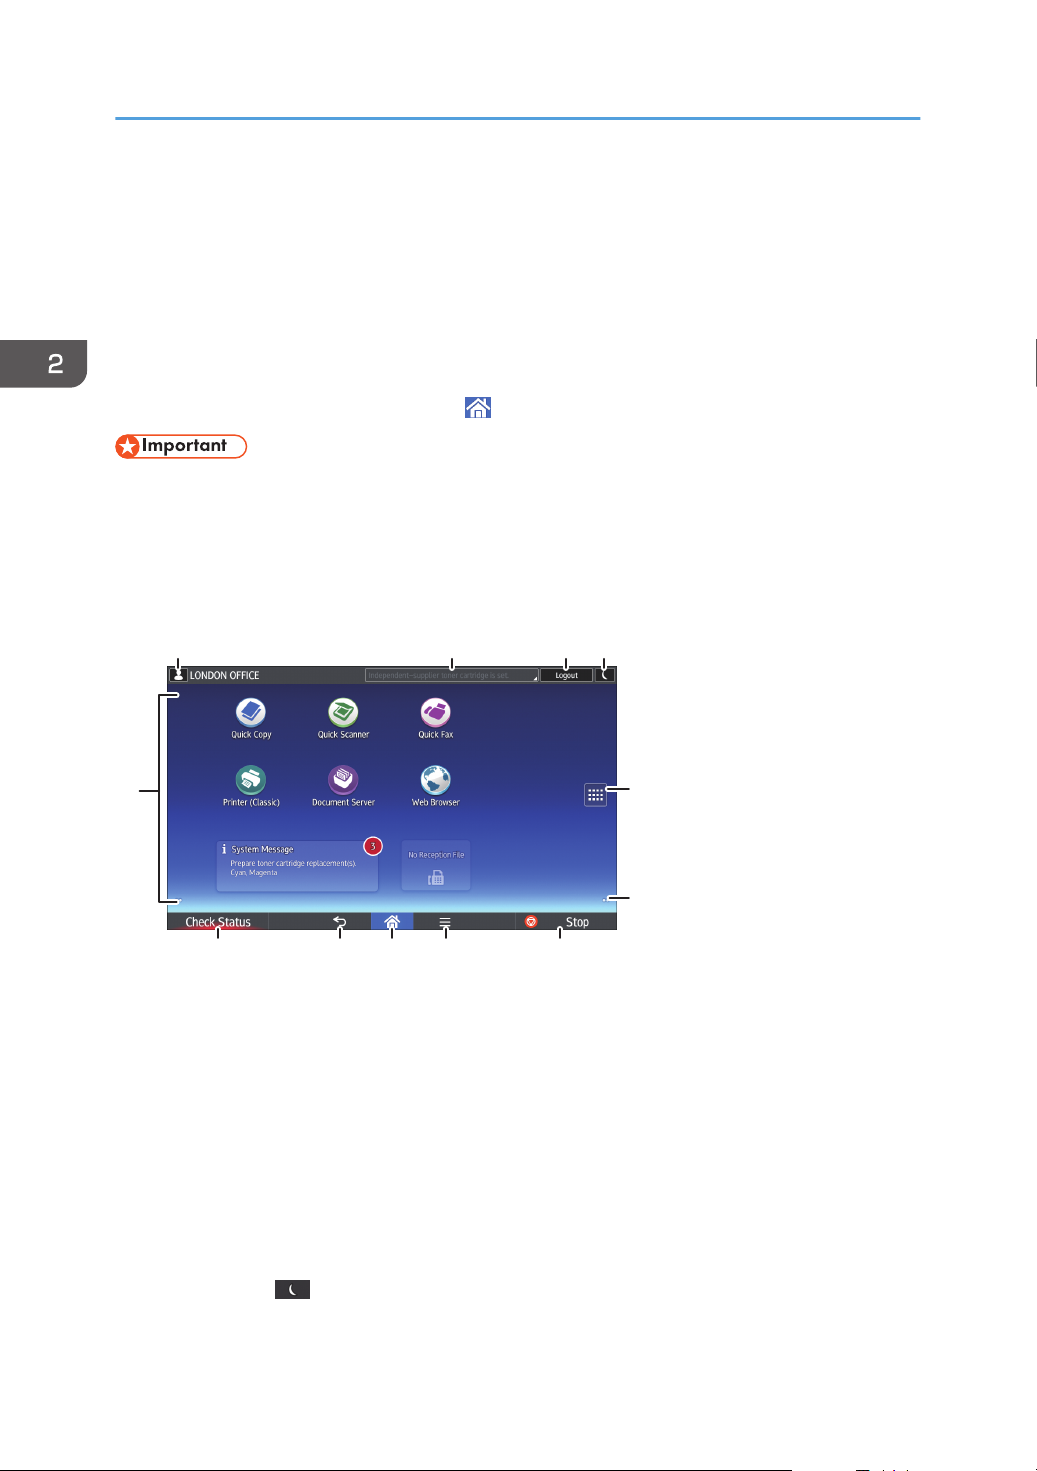
2. Getting Started
How to Use the [Home] Screen
The [Home] screen is set as the default screen when the machine is turned on.
One icon is assigned to each function, and these icons are displayed on the [Home] screen. You can
add shortcuts to frequently used functions or Web pages to the [Home] screen. Also, you can register
widgets such as the Change Langs. Widget to it. The [Home] screen and the screen of each function may
differ depending on the optional units that are installed.
To display the [Home] screen, press [Home] ( ) at the bottom of the screen in the center.
• Do not apply strong impact or force to the screen, or it may be damaged. Maximum force
allowable is approx. 30N (approx. 3 kgf). (N = Newton, kgf = Kilogram force. 1 kgf = 9.8N.)
The [Home] screen consists of five screens, from Home screen 1 to Home screen 5. Home screen 3 is the
default screen that appears first after you press [Home].
To switch between screens, flick your finger to the right or left on the screen.
1. Logged in user icon
When user authentication is enabled, an icon is displayed that indicates that users are logged in.
Press the icon to show the names of the users that are currently logged in.
2. System message
Displays messages from the machine system and applications.
3. [Login]/[Logout]
These keys are displayed when user authentication is enabled. When you press [Login], the authentication
screen appears. If you have been already logged in to the machine, [Logout] appears. To log out of the
machine, press [Logout].
For details about how to log in and out, see page 67 "Logging In the Machine".
4. [Energy Saver]
Press to switch to Low Power mode or Sleep mode.
36
Page 39
How to Use the [Home] Screen
For details about the modes, see "Saving Energy", Getting Started.
5. Application list icon
Press to display the application list. You can create shortcuts to the applications on the [Home] screen.
To use an application displayed in the [Widgets] tab and [Program] tab, create a shortcut for the application
on the [Home] screen. For details, see "Customizing the [Home] Screen", Convenient Functions.
6. Icons to switch between screens
Press to switch between the five home screens. The icons appear at the bottom right and left of the screen, the
number of icons indicates the number of screens on each side of the current screen. For example, when you
view Home screen 3, 2 icons are displayed at both the right and left sides.
7. [Stop]
Press to stop a job in progress, such as copying, scanning, or printing.
8. [Menu]
Displays the menu screen of the application you are using. Depending on the application you are using, this
key may be disabled. You can also press this key in the [Home] screen to restore the [Home] screen's settings
to their defaults.
9. [Home]
Press to display the [Home] screen.
10. [Return]
Press this key to return to the previous screen while Screen Features are enabled or applications are used.
Depending on the application you are using, this key may be disabled.
11. [Check Status]
Press to check the machine's system status, operational status of each function, and current jobs. You can also
display the job history and the machine's maintenance information.
12. Icon display area
Displays the function or application icons and widgets. Displayed icons differ between the five home screens.
For details about icons on each screen, see "Main Icons on the [Home] Screen", Getting Started.
You can also add shortcuts and arrange icons using folders. For details, see "Customizing the [Home]
Screen", Convenient Functions.
• You can change the [Home] screen's wallpaper. For details, see "Changing the [Home] Screen's
Wallpaper", Convenient Functions.
• You can switch modes by pressing icons on the [Home] screen. You can also switch modes by
pressing the function keys. For details about the function keys, see "Changing Modes by Pressing
the Function Keys", Getting Started.
• You cannot switch modes in any of the following situations:
• While scanning an original using the scanner function
• When accessing the following screens:
• Machine Features
37
Page 40
DNE103
DNE104
2. Getting Started
• Counter
• Inquiry
• Address Book Management
• Tray Paper Settings
• Current Job / Job History
• During interrupt copying
• The [Home] screen is set as the default screen when the machine is turned on. You can change this
default setting under Function Priority. See "Screen Features", Connecting the Machine/ System
Settings.
Possible Operations on the Standard Application Screen
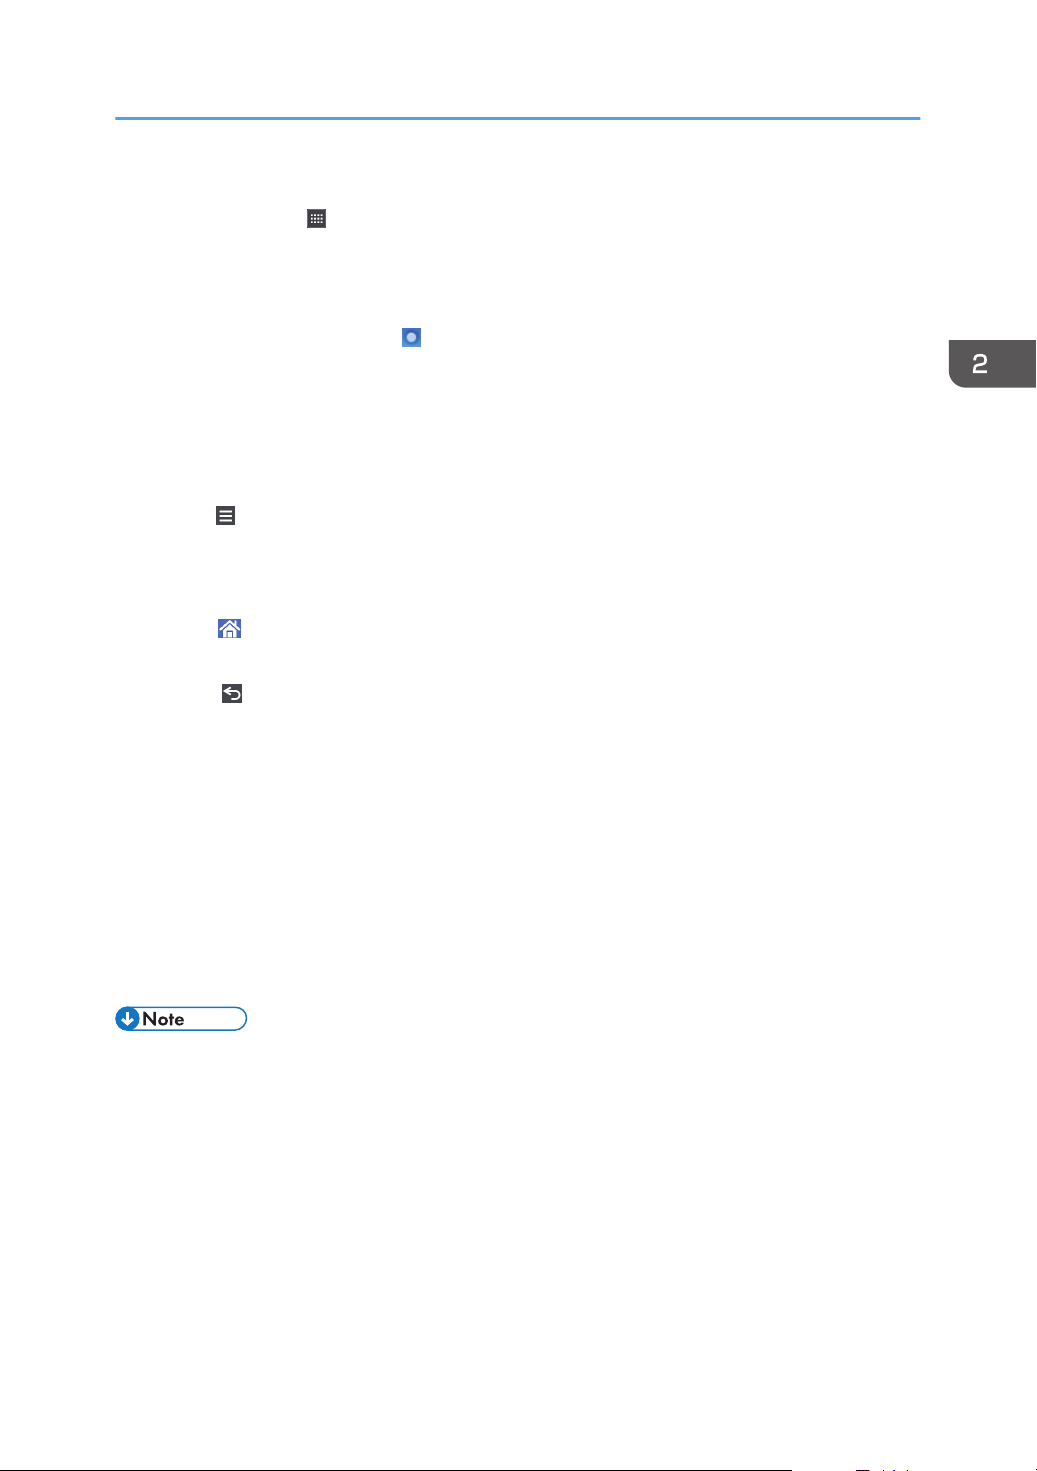
• Pinch-in
Place your thumb and forefinger on the screen, and then pinch the fingers together to zoom out the
screen. Double-tapping can also be effective for this operation.
38
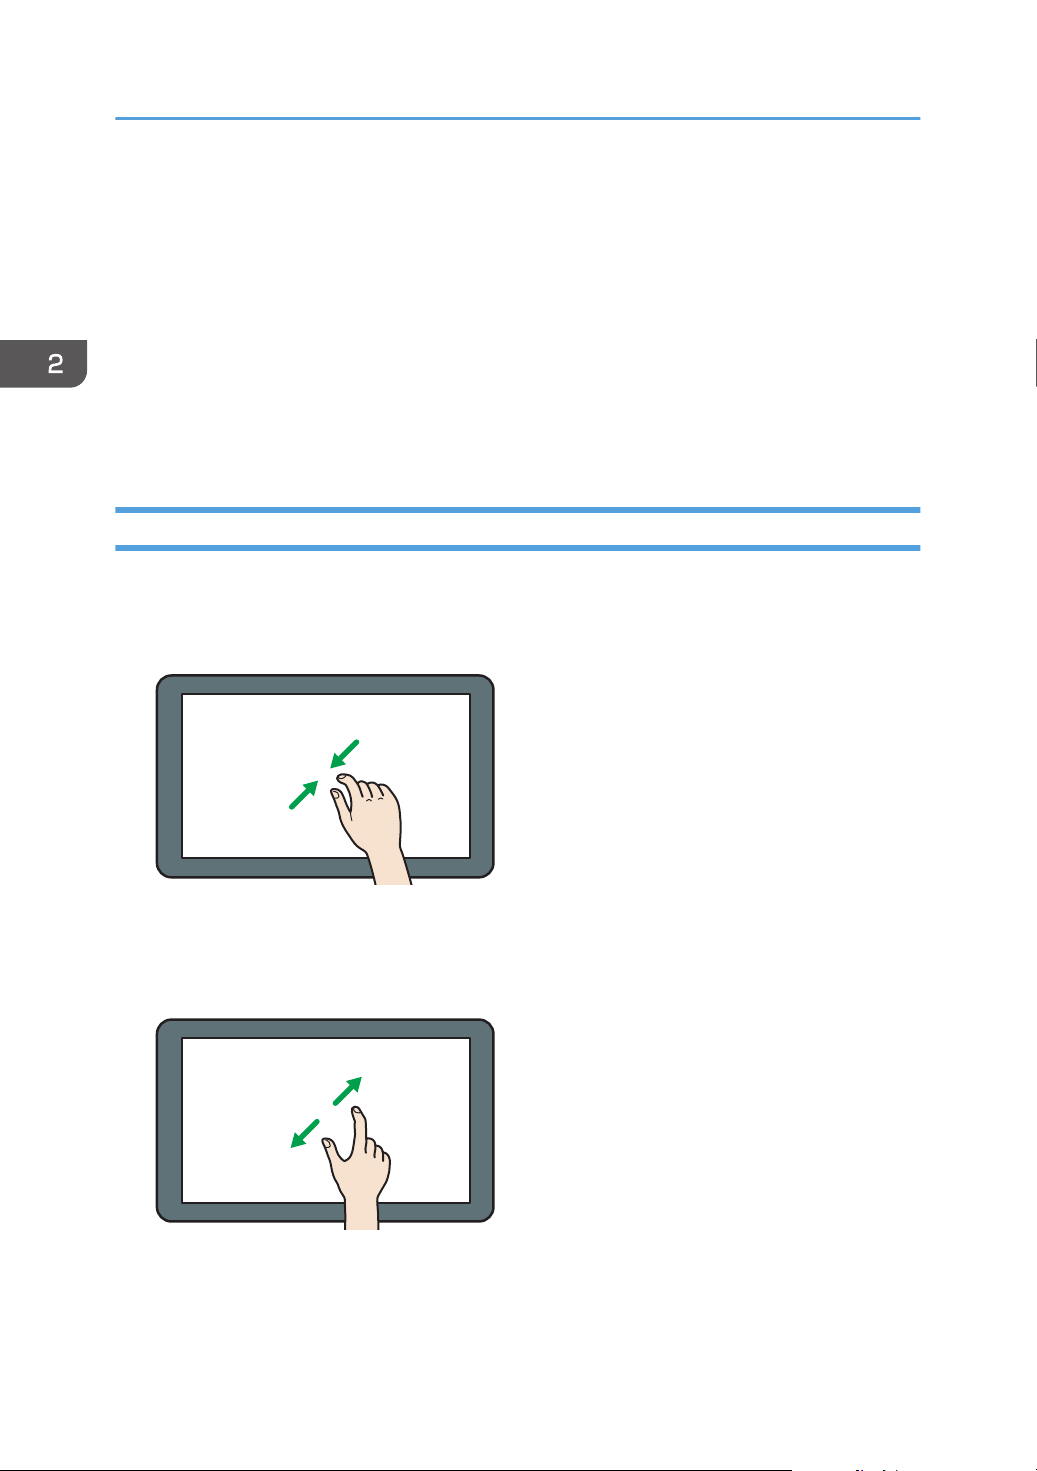
• Pinch-out
Place your thumb and forefinger on the screen, and then spread the fingers apart to zoom in the
screen. Double-tapping can also be effective for this operation.
• Flick
Flick your finger to the right or left on the screen to switch between screens.
Page 41
DNE102
DNE101
DNE111
How to Use the [Home] Screen
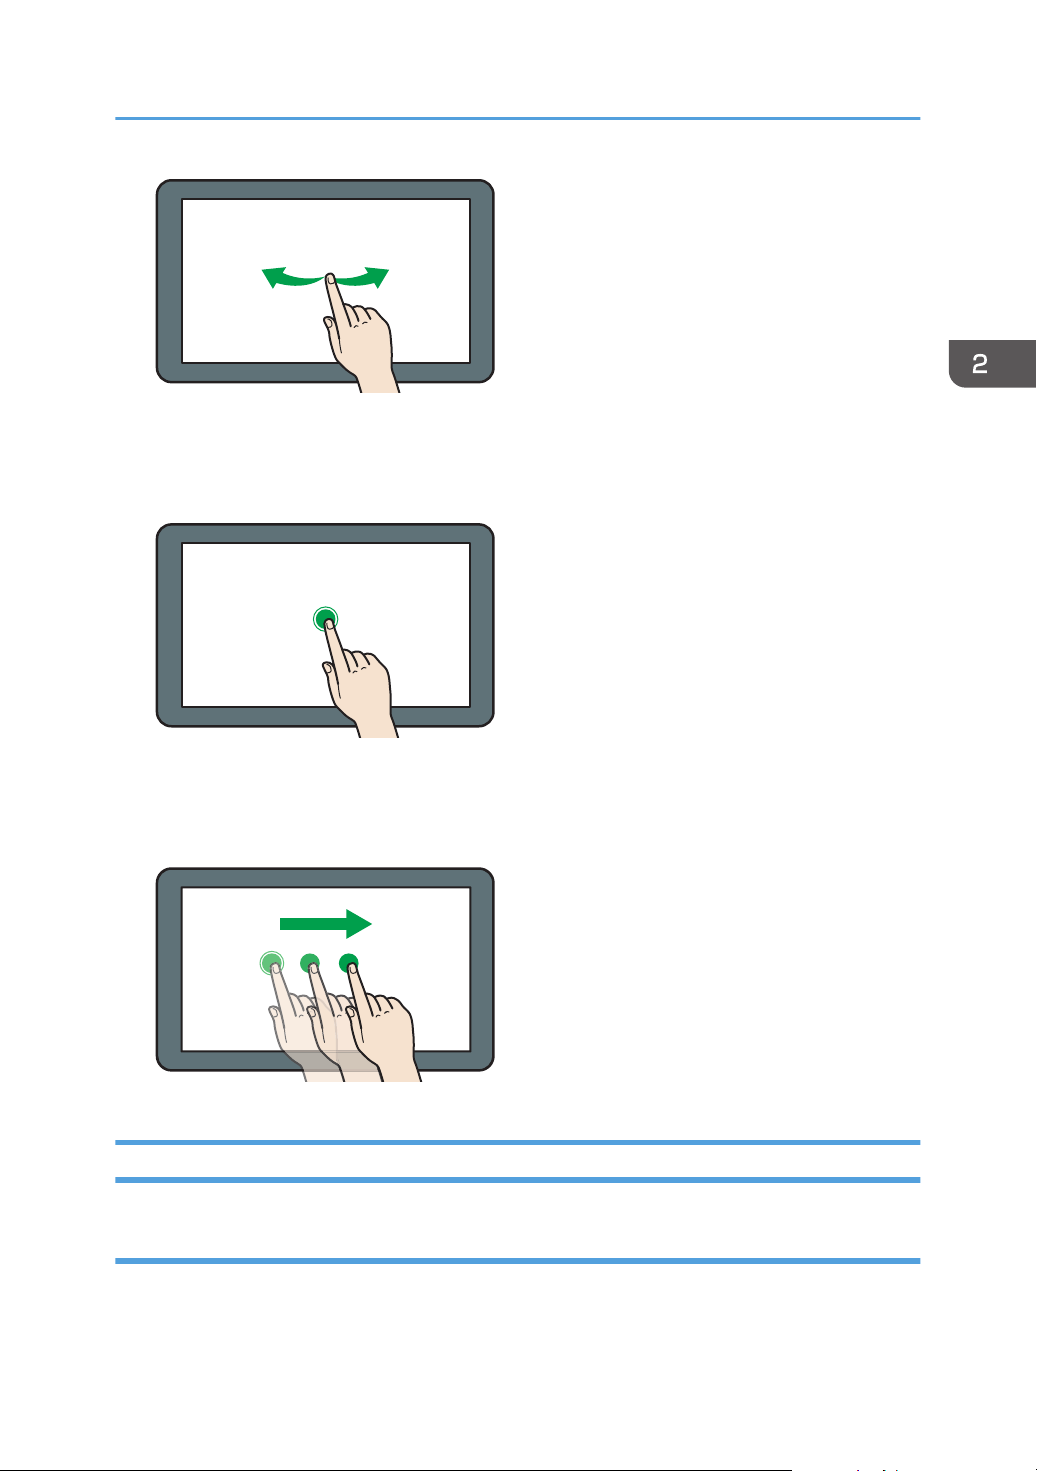
• Long tap
Place your finger on the screen and hold it there until the next screen appears. You can display the
menu screen of the application you are using.
• Drag
Slide your finger while pressing the screen. You can move an icon to where you want to place it on
the screen.
Adding Icons to the [Home] Screen
Adding shortcuts to the [Home] screen
You can add shortcuts to the machine's functions.
39
Page 42

2. Getting Started
You can display the icons for the machine's functions and the embedded software applications after you
delete them from the [Home] screen.
1. Press [Home] ( ) at the bottom of the screen in the center.
2. Press .
3. Press the [Apps] tab to add a shortcut to an application other than the Classic
Applications. Press the [Program] tab to add a shortcut to one of the Classic Applications,
such as [Copier (Classic)] or [Scanner (Classic)].
4. Press and hold down the application icon to add a shortcut to an application other than
the Classic Applications. Press and hold down the [Classic Applications] icon to add a
shortcut to one of the Classic Applications, such as [Copier (Classic)] or [Scanner
(Classic)].
The image of where the shortcut is to be placed on the [Home] screen is displayed.
5. Drag the icon to where you want to place it on the screen.
If you want to add a shortcut to [Copier (Classic)] or the other classic applications, proceed to Step
6.
6. Select the Classic Applications that you want to add from the list.
Adding shortcuts to bookmarks on the [Home] screen
You can add shortcuts to bookmarks that have been registered in favorites in the Web Browser to the
[Home] screen.
1. Press [Home] (
2. Press .
3. Press the [Program] tab.
4. Press and hold down the [Bookmark] icon.
The image of where the shortcut is to be placed on the [Home] screen is displayed.
5. Drag the icon to where you want to place it on the screen.
6. Select the bookmark you want to add from the bookmark list.
) at the bottom of the screen in the center.
Adding shortcuts to programs to the [Home] screen
You can add shortcuts to programs registered on Copier, Facsimile, Scanner mode, or quick
applications.
1. Display the function screen to which you want to register a program.
40
Page 43
How to Use the [Home] Screen
2. When you are using the standard applications or quick applications, press [Menu] ( ) at
the bottom of the screen in the center. When you are using the Classic Applications, press
[Recall/Program/Change Program] on the bottom left of the screen.
3. Register a program.
4. Press [Home] ( ) at the bottom of the screen in the center.
5. Press .
6. Press the [Program] tab.
7. To display a program registered to the standard applications or quick applications, hold
down the application icon. To display a program registered to the [Copier (Classic)] or
[Scanner (Classic)], hold down the [Classic Applications] icon.
The image of where the shortcut is to be placed on the [Home] screen is displayed.
8. Drag the icon to where you want to place it on the screen.
9. Select the program you want to add from the list.
Adding widgets to the [Home] screen
You can add widgets to the [Home] screen to show the remaining amount of toner or change the display
language.
1. Press [Home] (
) at the bottom of the screen in the center.
2. Press .
3. Press the [Widget] tab.
4. Press and hold down the widget icon you want to add.
The image of where the widget is to be placed on the [Home] screen is displayed.
5. Drag the icon to where you want to place it on the screen.
41
Page 44
2. Getting Started
How to Use Each Application
You can open the function screens by pressing icons such as [Copy], [Fax], or [Scanner] on the [Home]
screen.
Three kinds of screens ("Standard Application Screen", "Classic Application Screen", and "Quick
Application Screen") can be used by each function.
Standard Application Screen
Functions and settings that are used frequently are shown on the top screen. Swipe the screen up
and down to select a setting item. When you select an item, the pull-down menu appears, or the
setting item pops up. For details about operations on this screen, page 38 "Possible Operations on
the Standard Application Screen". For details about how to use the screen, see page 43 "[Copy]
Screen", page 46 "[Fax] Screen", and page 51 "[Scanner] Screen".
Classic Application Screen
You can select advanced functions and detailed settings according to the functions and settings you
use frequently. For details about how to use this screen, see "[Copier (Classic)] screen", "[Fax
(Classic)] Screen", "[Scanner (Classic)] screen", "[Printer (Classic)] Screen", and "[Document
Server] Screen", Getting Started. For details about keys that appear on the screen of each Classic
Application, see "Keys that Appear on the Initial Settings Screen and Screens of Each Classic
Application", Getting Started.
Quick Application Screen
You can easily set the basic operations, such as sending scanned documents by e-mail or other
operations. For details about how to use this screen, see "How to Use Each Application", Getting
Started.
Functions usable on each screen
Screen Functions usable
Standard Application Screen • Copier
• Fax
• Scanner
Classic Application Screen • Copier
• Fax
• Scanner
• Printer
• Document Server
42
Page 45
DQA114
9
8
12
3
4
5
67
How to Use Each Application
Screen Functions usable
Quick Application Screen • Copier
• Fax
• Scanner
• [Printer (Classic)] icon and [Quick Scanner] icon are displayed in the Application list. For details
about how to register them to the [Home] screen, see page 39 "Adding Icons to the [Home]
Screen".
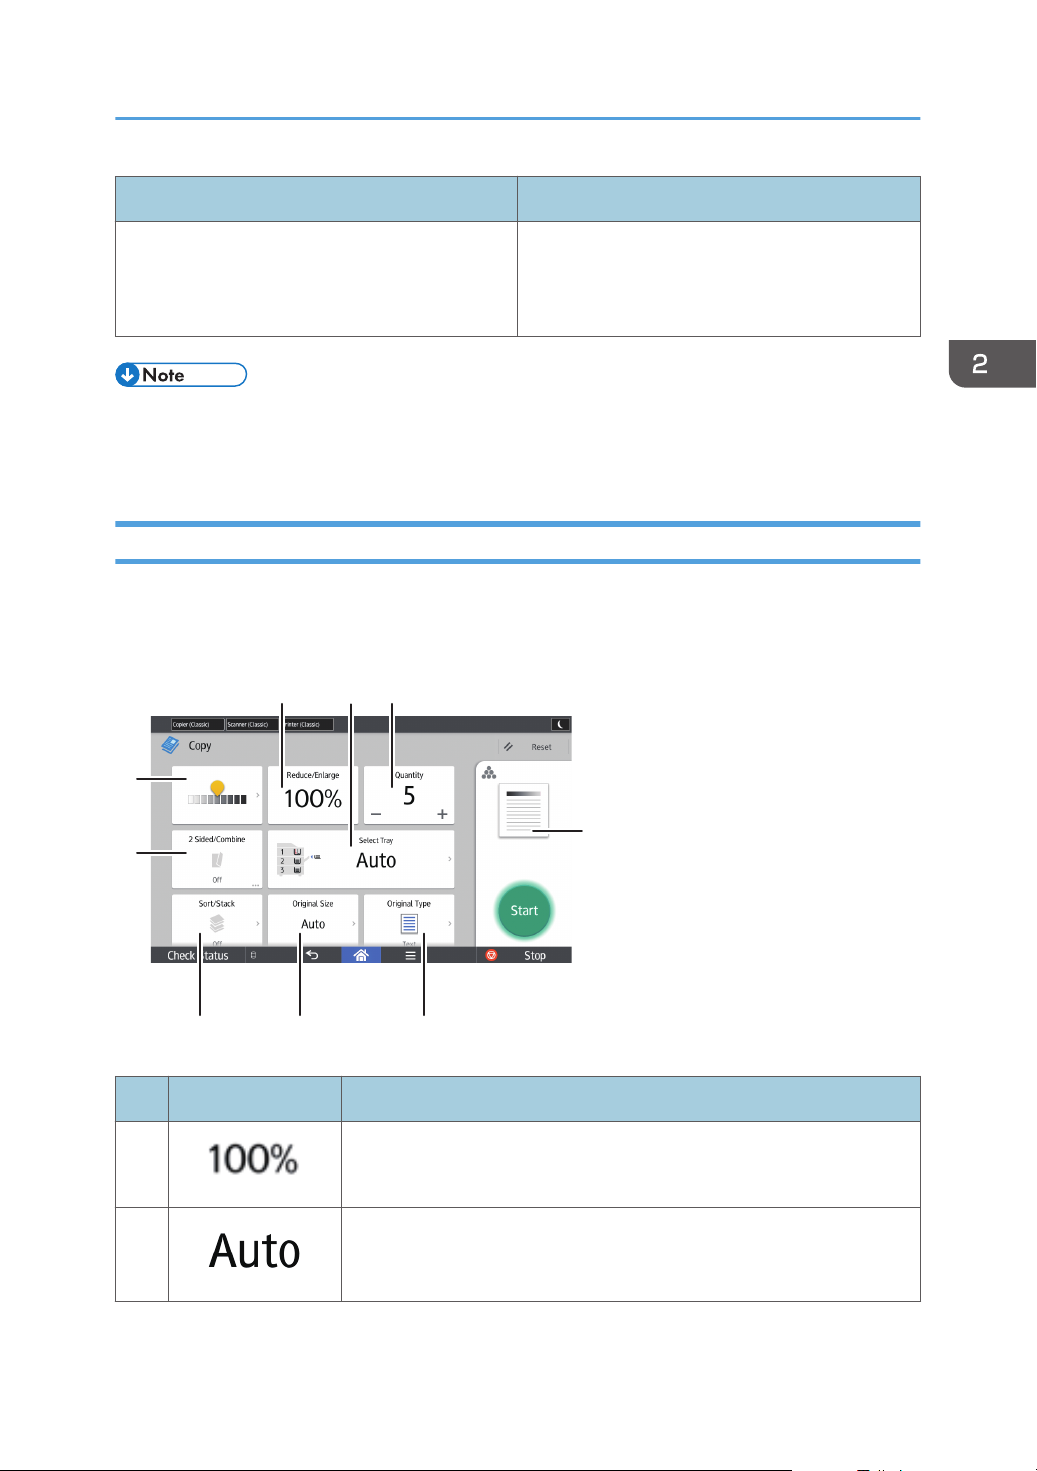
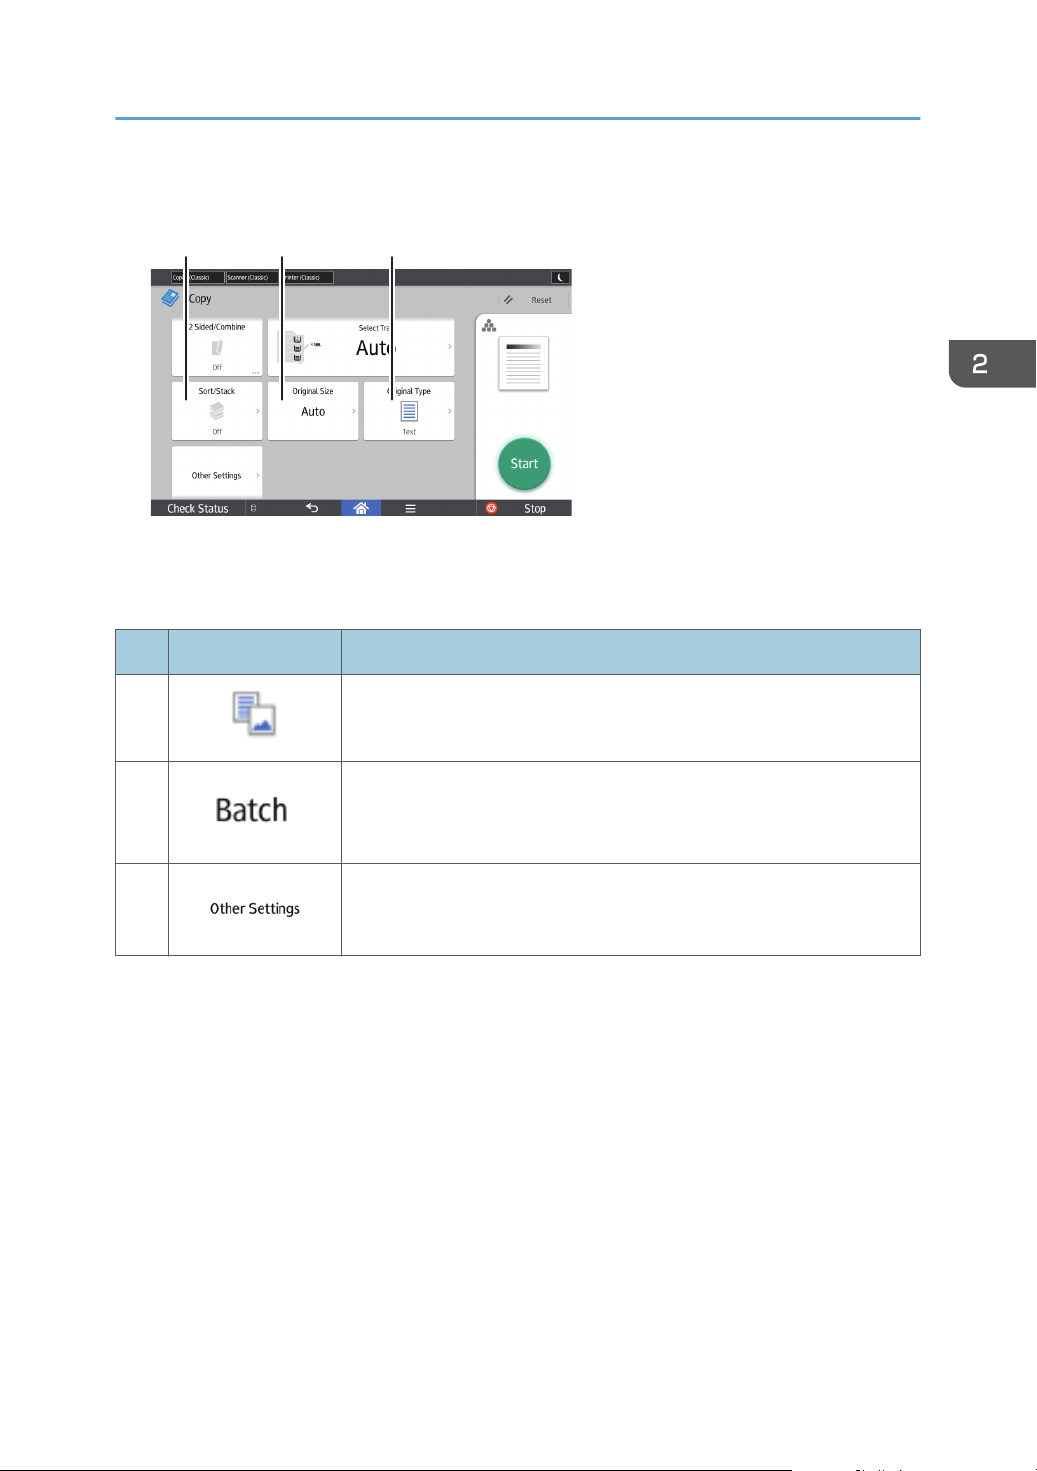
[Copy] Screen
You can switch the two screens described in this section by flicking the screen up or down.
No. Icon Description
You can reduce or enlarge images.
1
You can specify the paper input location containing the paper you want
2
to copy to.
43
Page 46
2. Getting Started
No. Icon Description
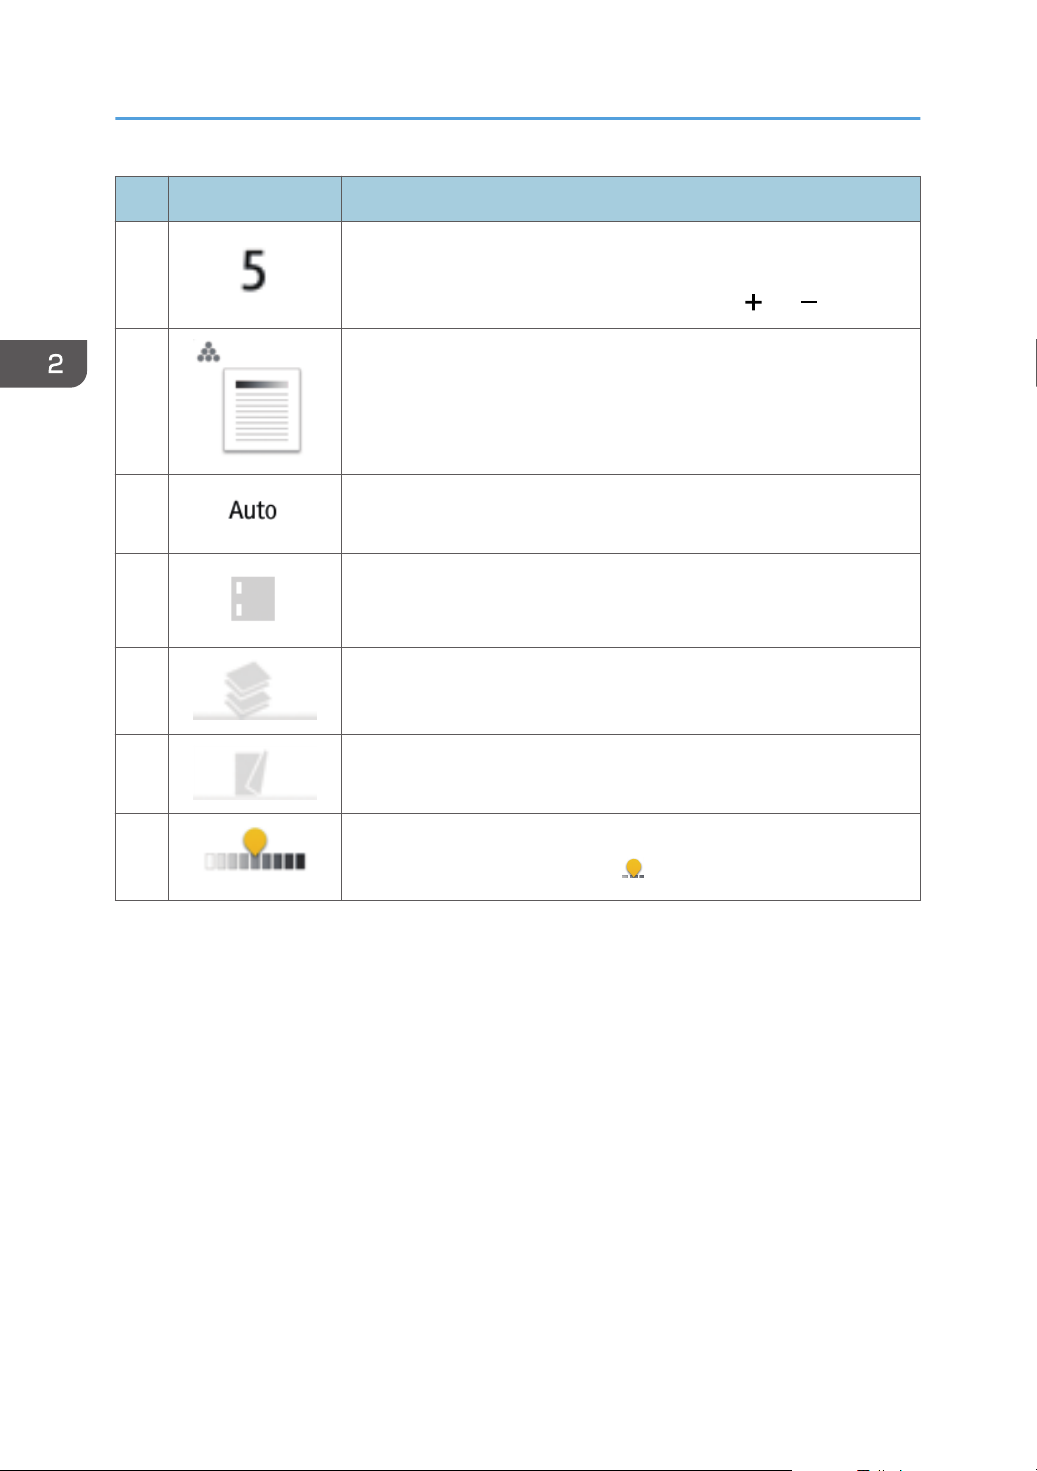
You can specify the numbers of copies to be made.
3
Press a number to enter the number of copies using the keyboard. You
can also specify the number of copies by pressing [ ] or [ ].
Preview prints change according to the settings you make.
4
5
Press to specify the size of the original.
Press to select the staple position.
6
Press to specify settings for sort and stack.
7
Press to specify settings for duplex and combine.
8
You can adjust the density of the overall original in nine steps.
9
Specify the density by touching the icon and dragging it right or left.
44
Page 47
DQA115
11 1210
No. Icon Description
How to Use Each Application
10
11
12
You can select an original type that is suitable for your originals.
Press to use Batch mode.
You can find other settings.
45
Page 48
DLV048
531 4
14
6
8
2
1112
13
7
9
10
2. Getting Started
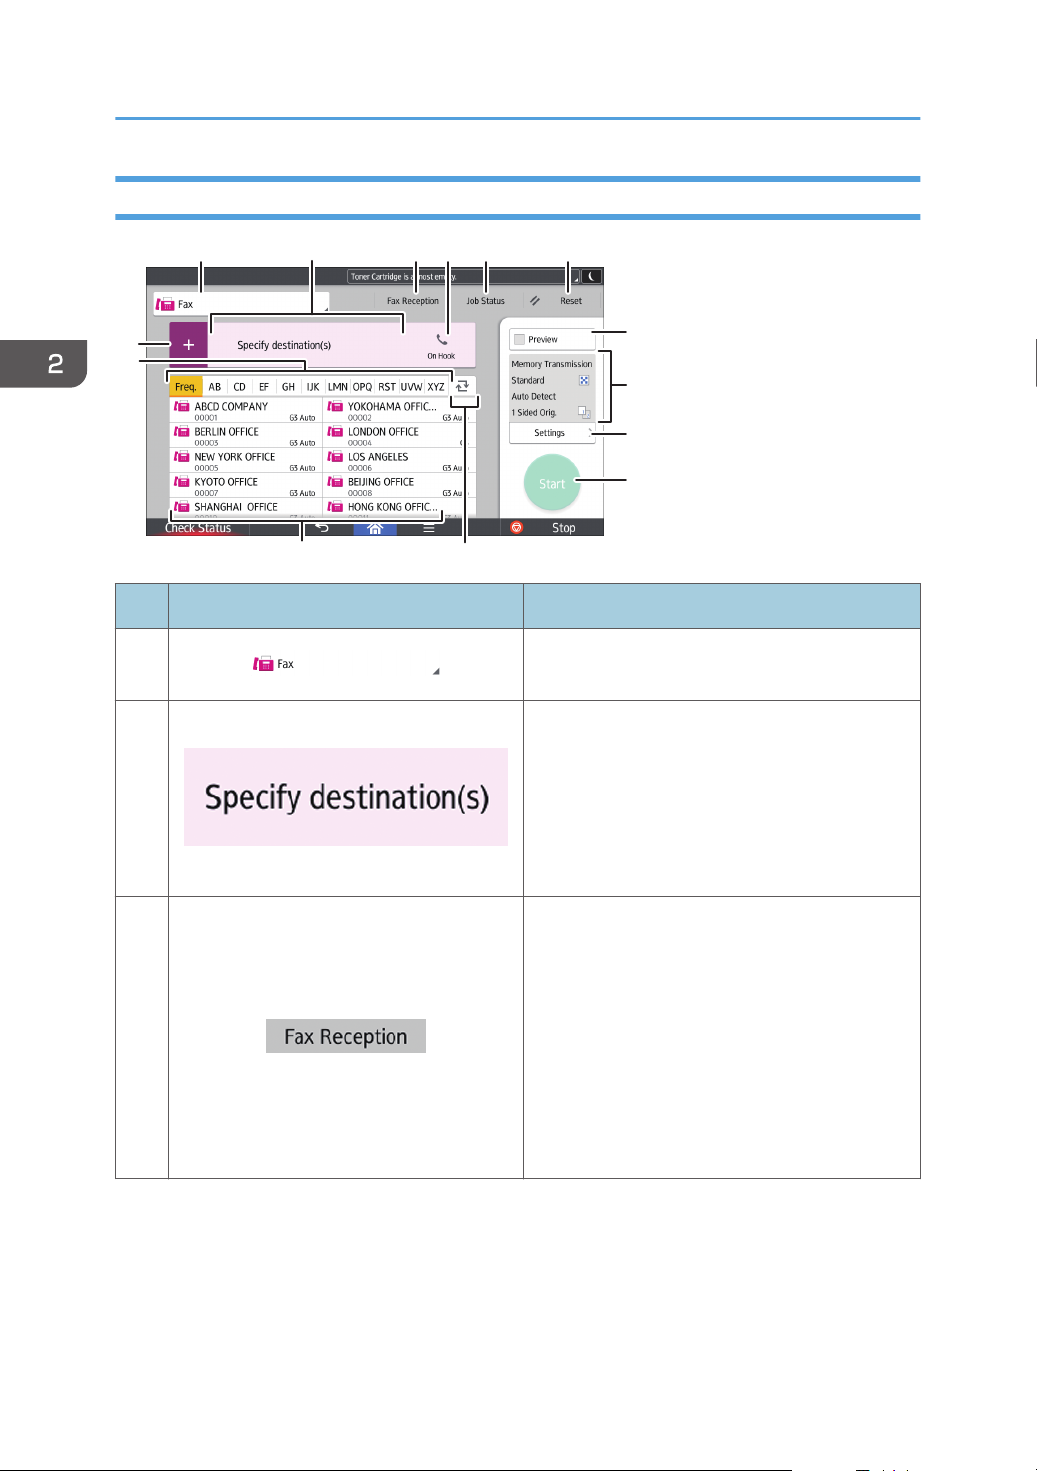
[Fax] Screen
No. Icon Description
1
You can switch between items in type of
transmission.
The specified destination is shown here.
By tapping the destination, you can register it to
2
the Address Book or remove it from the
destinations.
By flicking up and down, you can confirm the
selected destinations.
You can perform the following operations
related to Fax Reception:
• Check Stored Reception Files
• Operate Personal Box
3
• Print ID Required Print Files
• Manual Reception
• Print Memory Lock
• Check Reception File Settings
46
Page 49
How to Use Each Application
No. Icon Description
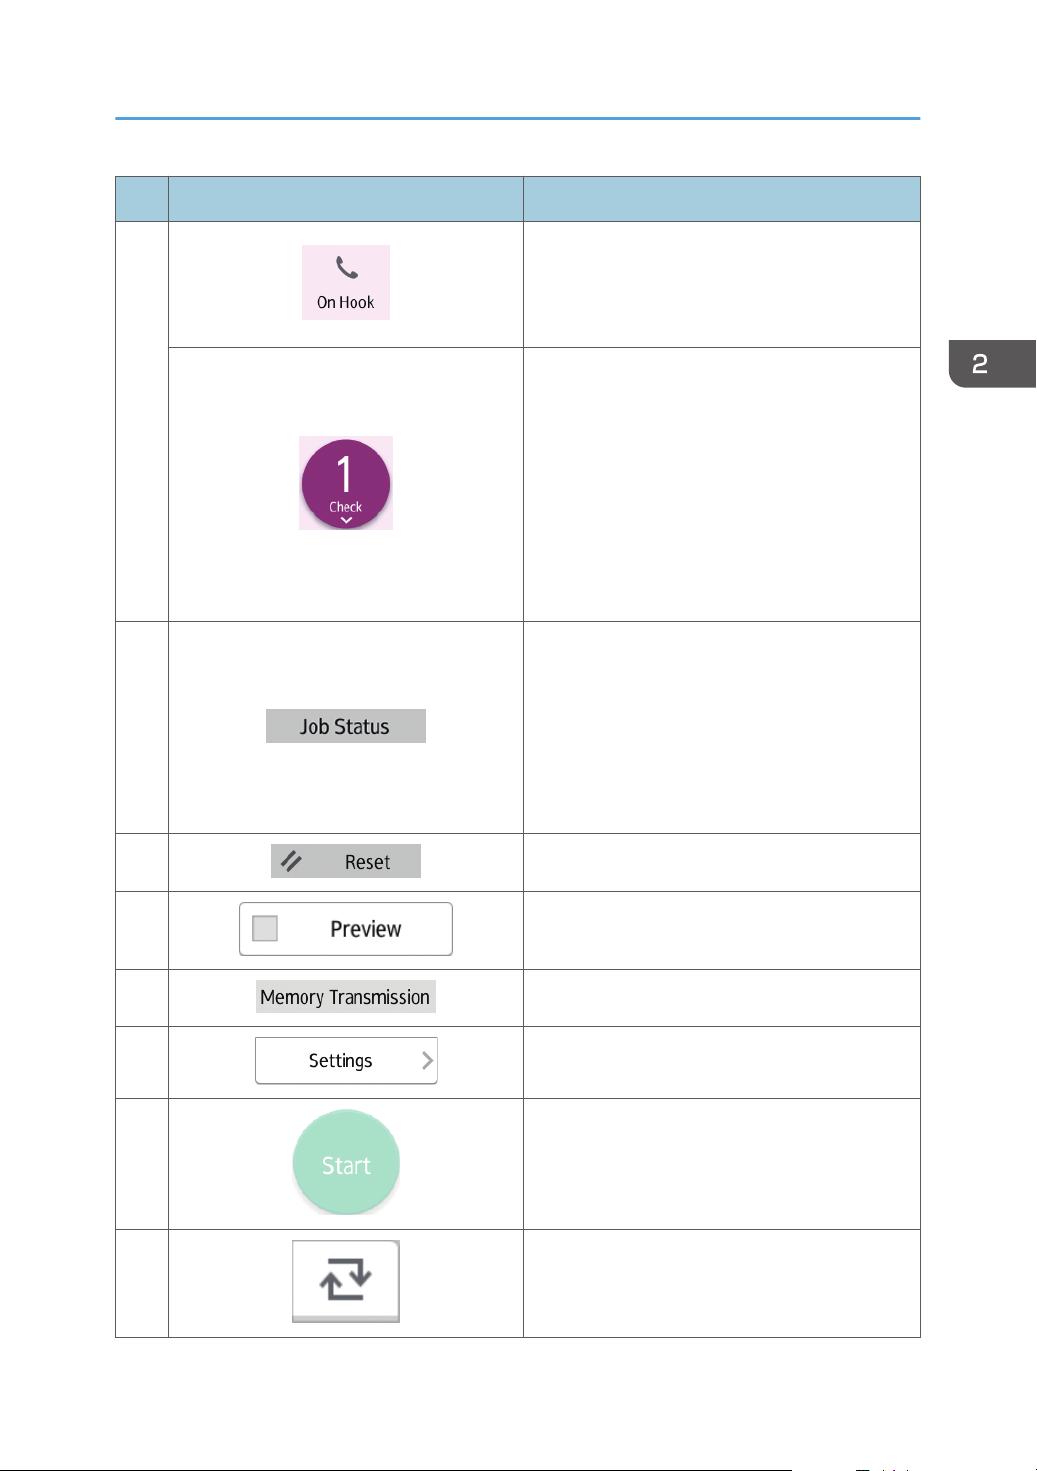
This function allows you to dial while listening to
the dial tone from the internal speaker with the
handset of the machine or external telephone
on-hook.
The total number of the selected destinations
appears.
4
Press to display a screen to confirm destinations.
In the screen to confirm destinations, you can do
the following:
• Register destinations to the Address Book
• Edit destinations
• Remove destinations from the destination list
You can perform the following operations
related to Job Status:
5
6
7
8
9
10
11
• Confirm Transmission Standby Files
• Check Transmission Results
• Check Reception Results
• Print Journals
Press to clear your current settings.
Press to display the preview screen after
scanning originals.
You can check the settings in Settings.
Press to open the settings screen. For details, see
page 48 "[Settings] screen".
Press to scan originals and start sending.
Press to switch the section of the Address Book.
47
Page 50
DLV049
1 2 3
4 5 6
2. Getting Started
No. Icon Description
12
13
14
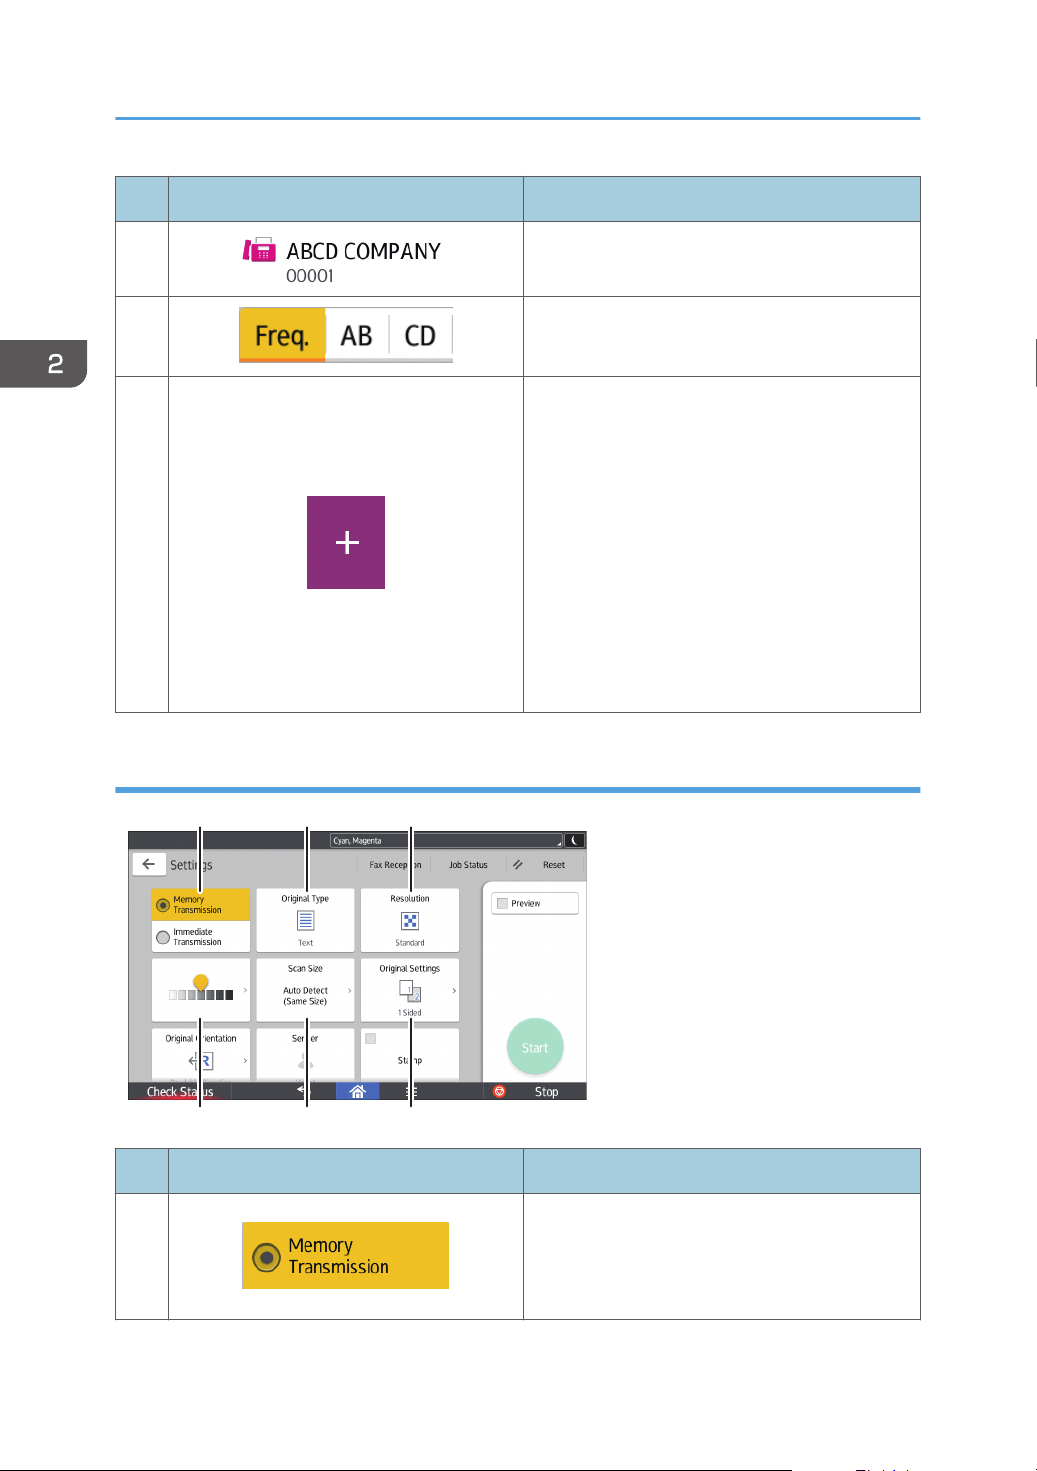
[Settings] screen
Shows the destinations in the Address Book.
The sections of the Address Book.
Press to add a destination.
Destinations can be added as follows:
• Input destinations manually
• Select from the transmission history
• Specify a registration number from the
Address Book
• Search for a destination in the Address
Book or on the LDAP server
• Press to display the Remaining Memory
Information
No. Icon Description
1
48
You can switch to immediate transmission mode.
Unless immediate transmission is selected,
memory transmission mode is selected by
default.
Page 51
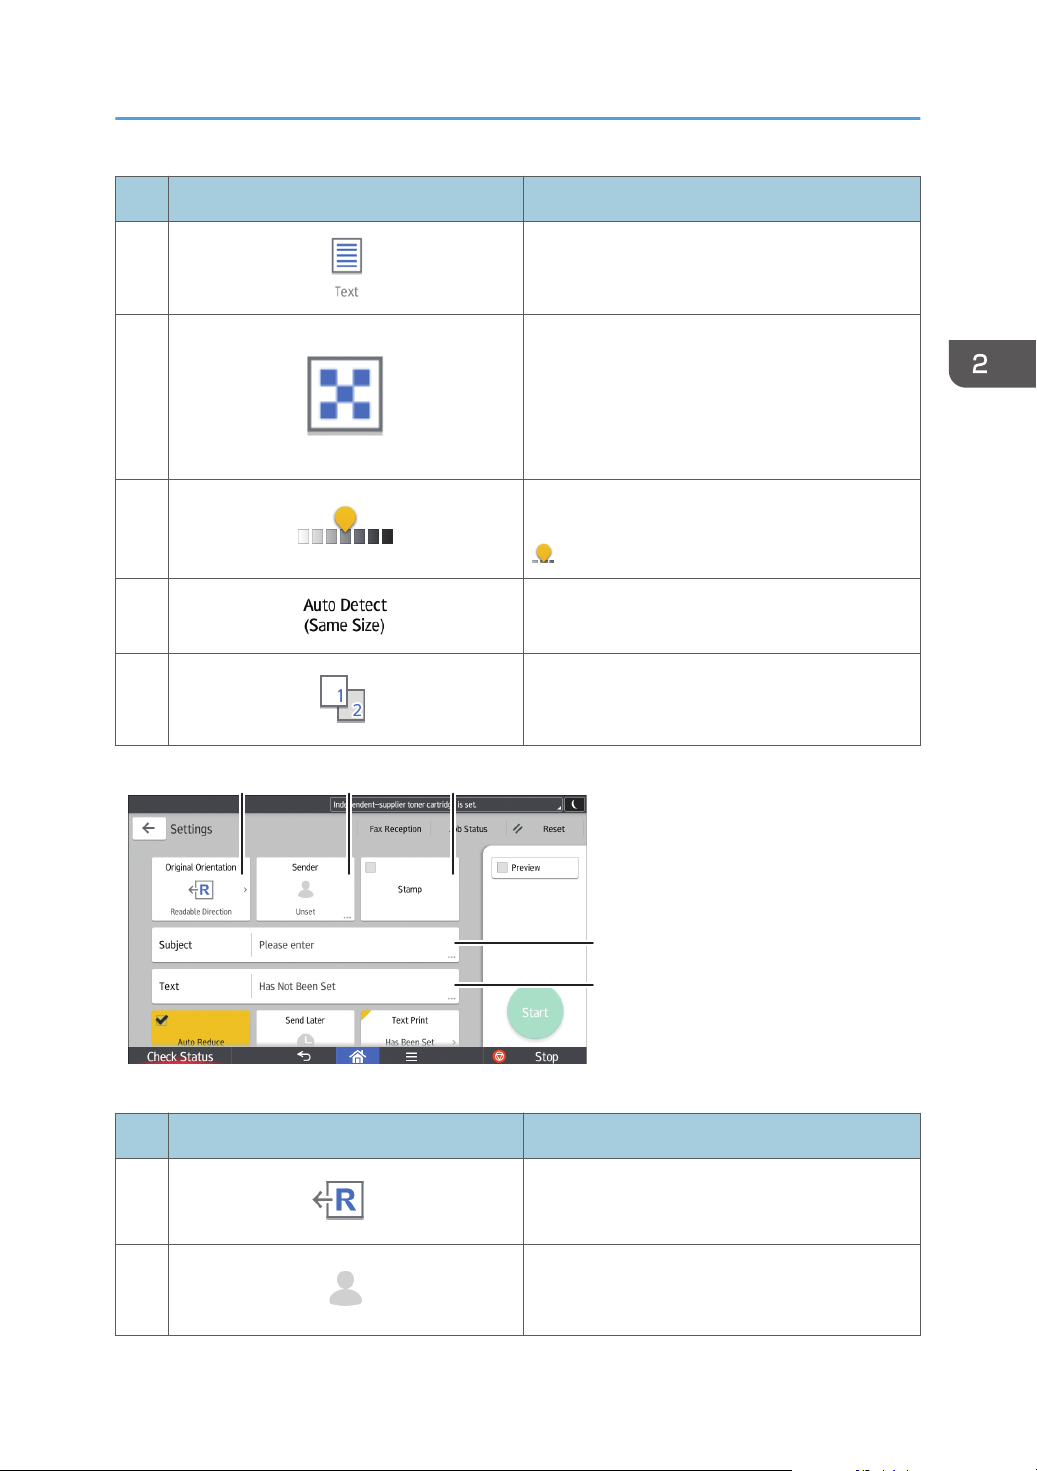
DLV050
11
10
7 8 9
How to Use Each Application
No. Icon Description
You can select an original type that is suitable for
2
your originals.
Press to select the resolution according to the
size of the text on your original.
3
Press to specify the density to scan the original.
4
You can also specify the density by touching the
icon and dragging it right or left.
5
Press to select the scanning size of the original.
Press to select the sides of the original.
6
No. Icon Description
Press to select the orientation of the original.
7
Press to specify the sender.
8
49
Page 52
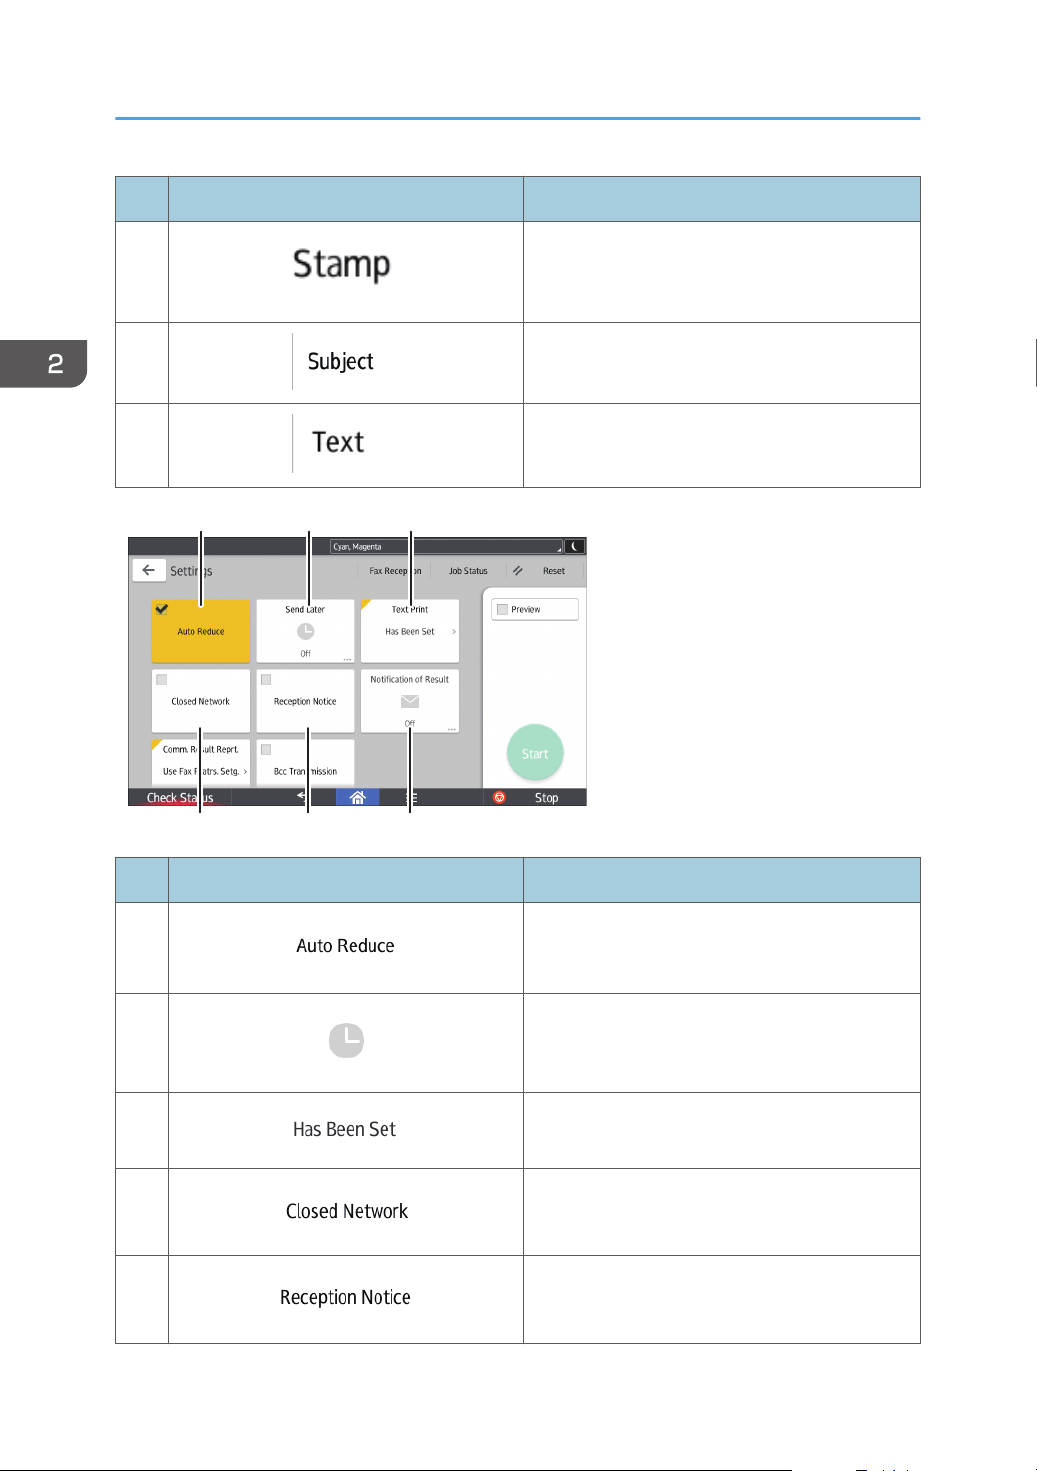
DLV051
15 16 17
12 13 14
2. Getting Started
No. Icon Description
Press to specify settings for stamps.
9
10
Specify the Internet Fax/E-Mail subject.
Specify the Internet Fax/E-Mail Text.
11
No. Icon Description
12
13
14
15
16
50
Page Separation and Length Reduction.
You can specify settings to automatically send
files directly or via F-code confidential
communication at a specified time.
You can select a standard message to be
printed.
You can send files over a closed network.
Requesting Reception Confirmation.
Page 53
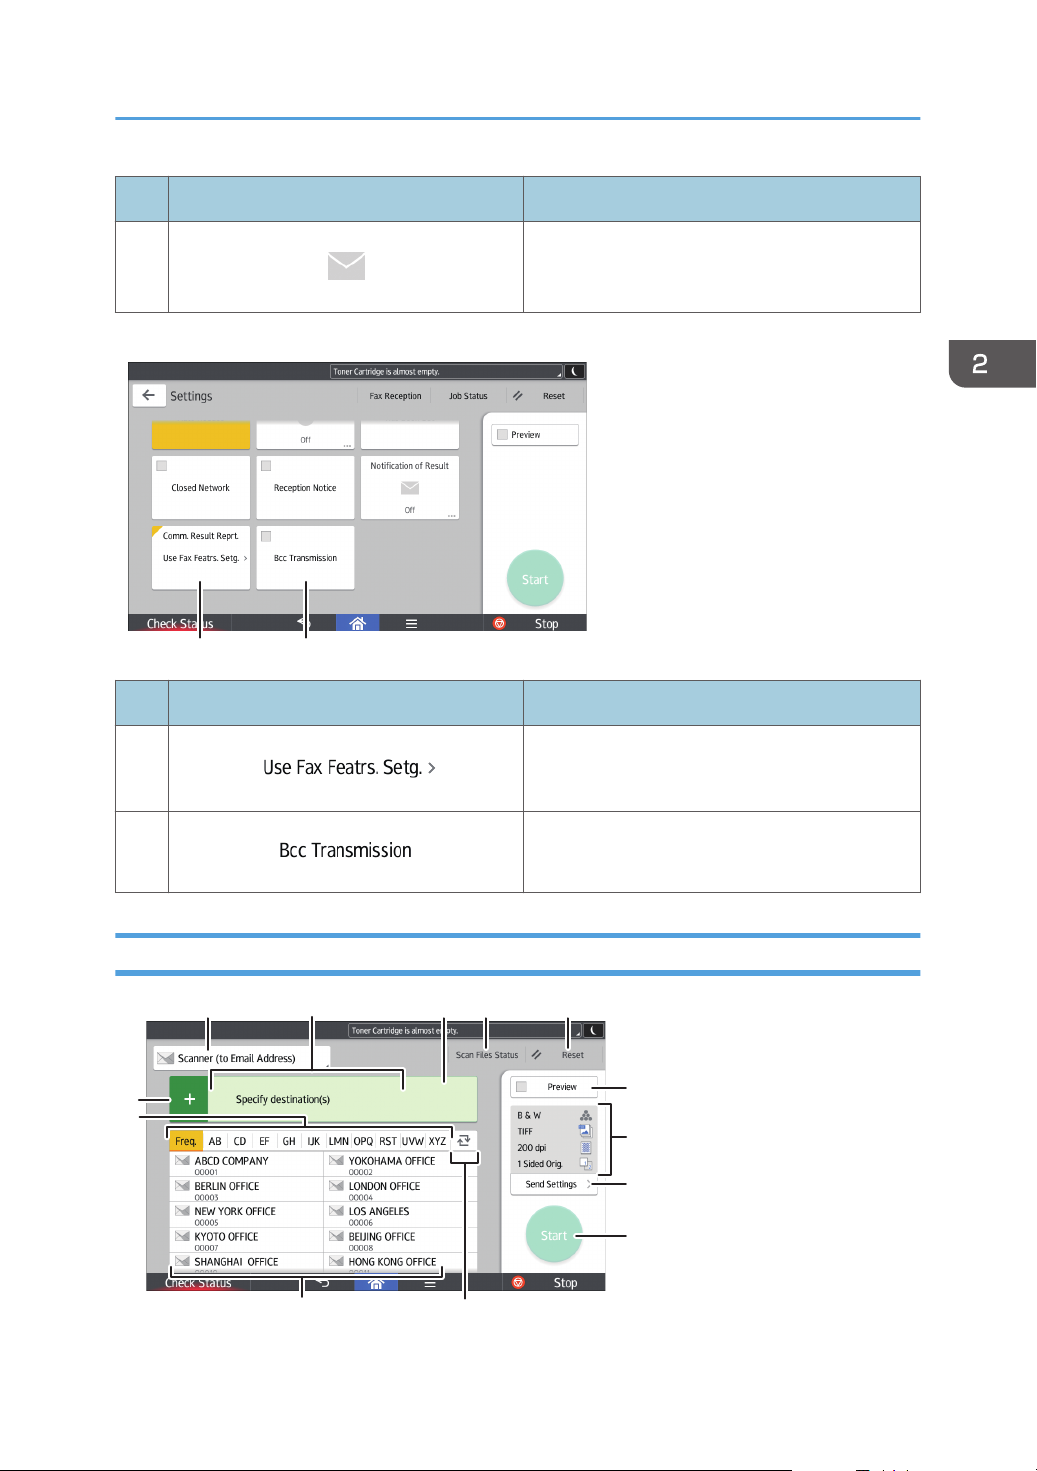
DLV052
18 19
DLV053
1 43
13
5
7
2
1011
12
6
8
9
How to Use Each Application
No. Icon Description
You can receive a transmission notification by e-
17
mail.
No. Icon Description
Once memory transmission is complete, you can
18
have the result printed.
Specifying Internet Fax/E-Mail Destinations as
19
BCC Addresses.
[Scanner] Screen
51
Page 54
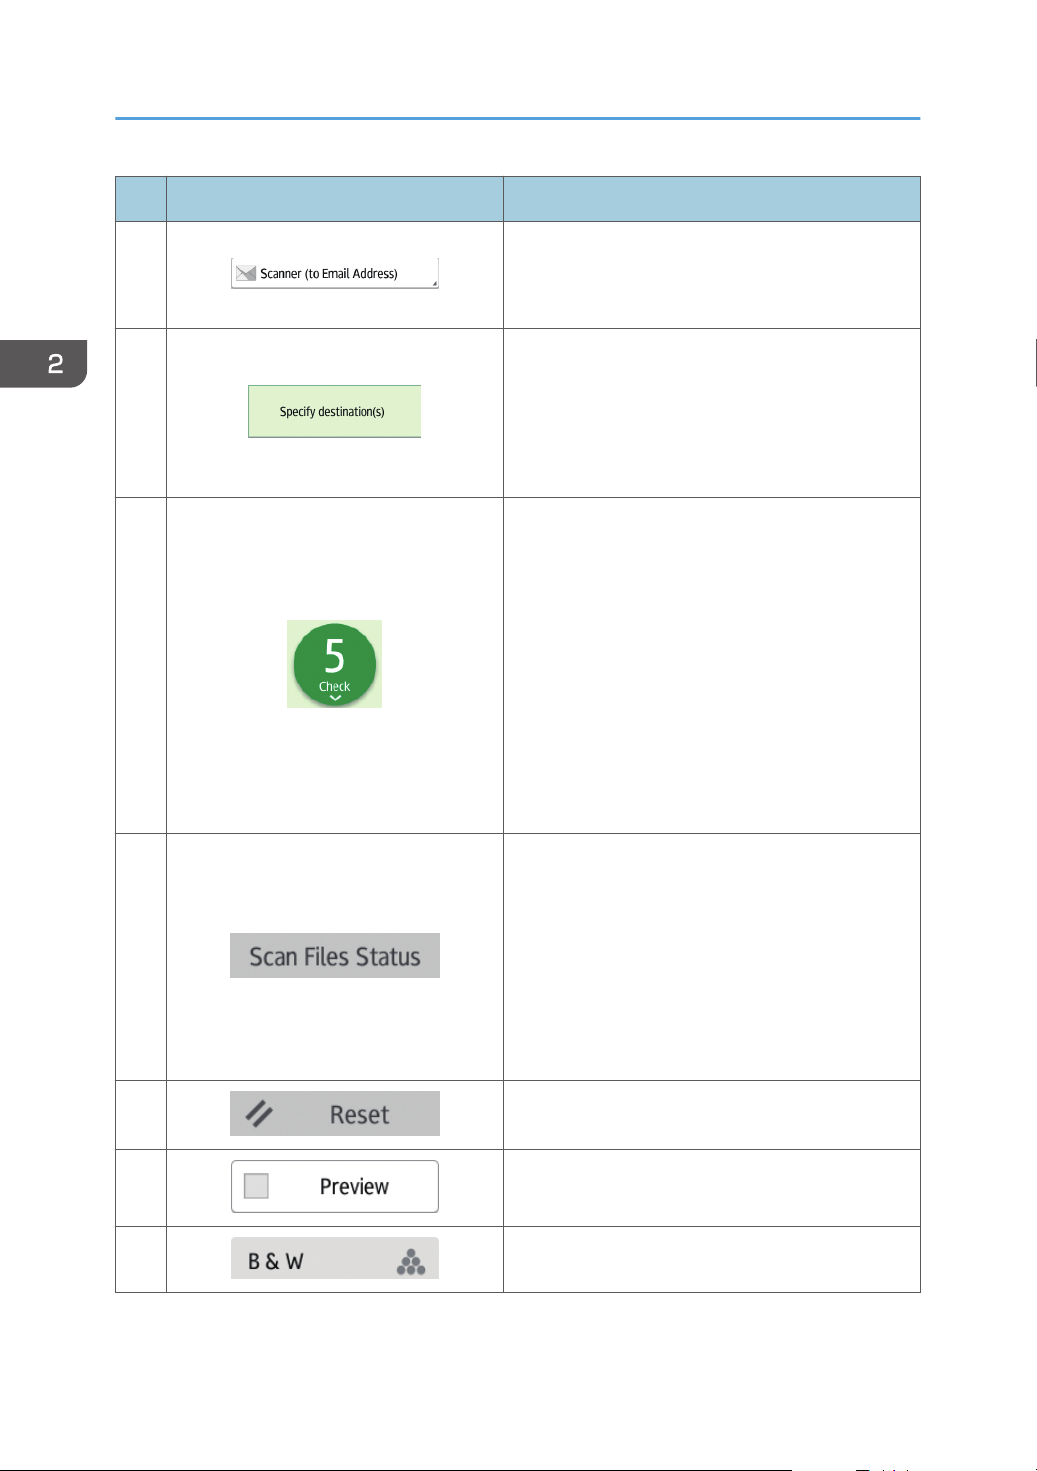
2. Getting Started
No. Icon Description
Displays the type of scanner destination.
1
Press to switch between e-mail destinations and
folder destinations.
The specified destination is shown here.
By tapping the destination, you can register it to the
2
Address Book or remove it from the destinations.
By flicking up and down, you can confirm the
selected destinations.
The total number of the selected destinations
appears.
Press to display a screen to confirm destinations.
In the screen to confirm destinations, you can do
the following:
3
• Switch the "To", "Cc", and "Bcc" fields of the
e-mail destinations
• Register destinations to the Address Book
• Edit destinations
• Remove destinations from the destination list
Press to display the transmission results screen.
In the transmission results screen, you can do the
following:
4
• Check sent jobs
• Check error descriptions
• Cancel transmission of a document in standby
• Print a list of transmission results
5
6
7
Press to clear your current settings.
Press to display the preview screen after scanning
originals.
You can check the settings in Send Settings.
52
Page 55
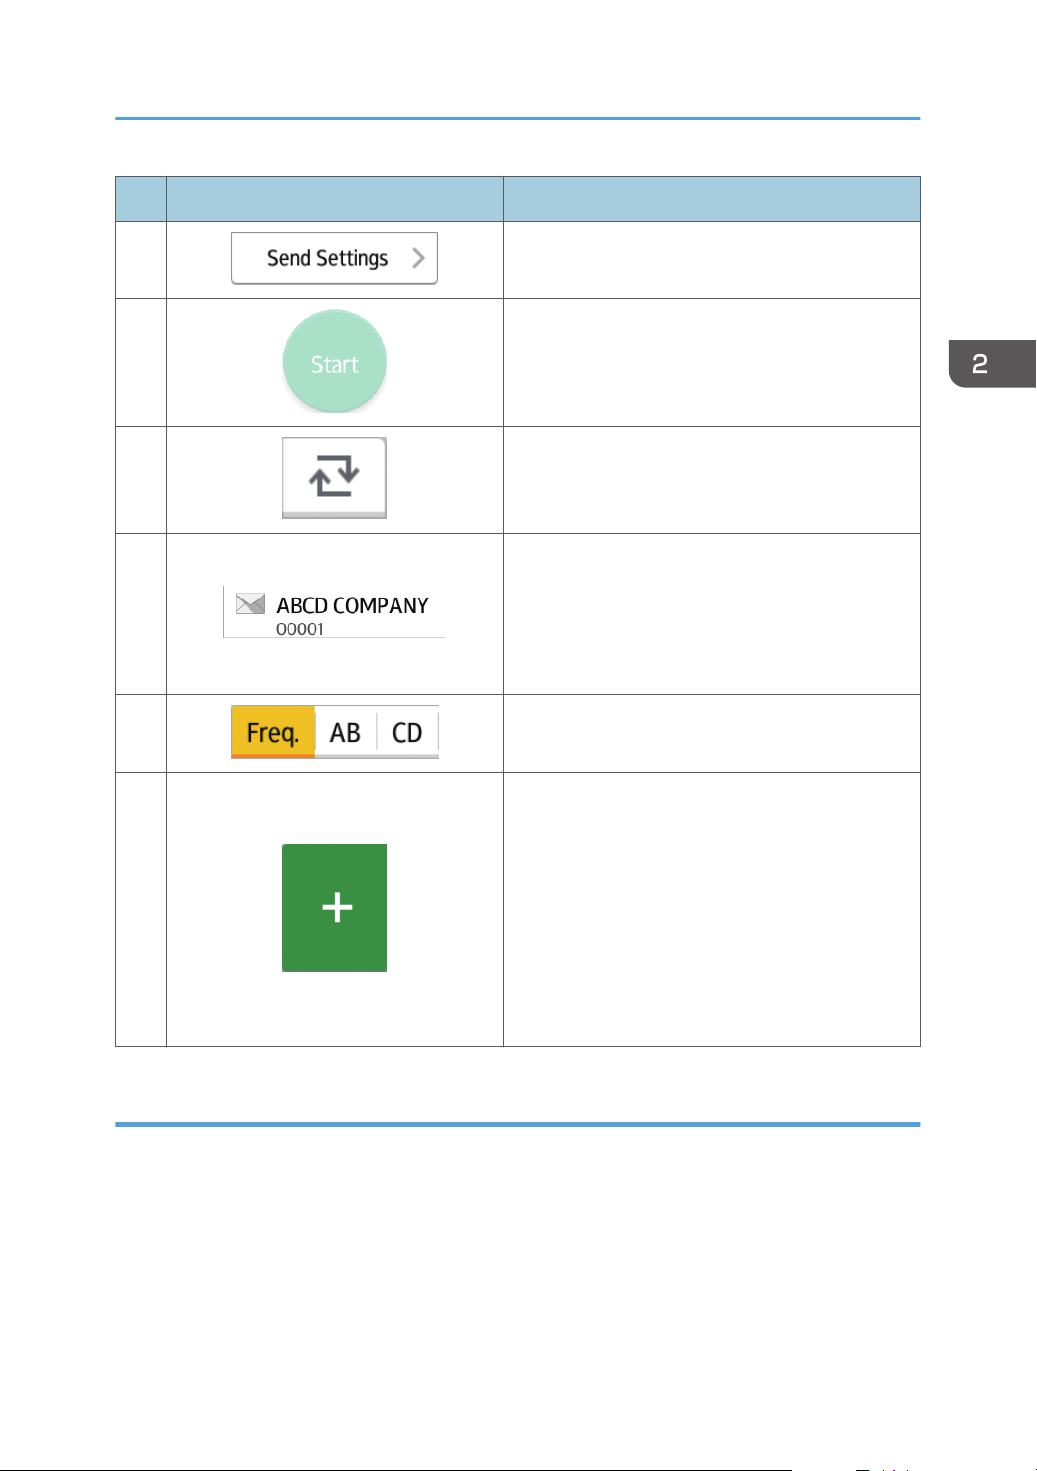
No. Icon Description
How to Use Each Application
8
9
10
11
12
Press to open the send settings screen. For details,
see page 53 "[Send Settings] screen".
Press to scan originals and start sending.
Press to switch the section of the Address Book.
Shows the destinations in the Address Book.
If a password or protection code is specified to a
folder destination, enter the password or protection
code on the screen displayed after tapping the
folder destination.
The sections of the Address Book.
Press to add a destination.
Destinations can be added as follows:
• Input destinations manually
13
• Select from the transmission history
• Specify a registration number from the
Address Book
• Search for a destination in the Address Book
or on the LDAP server
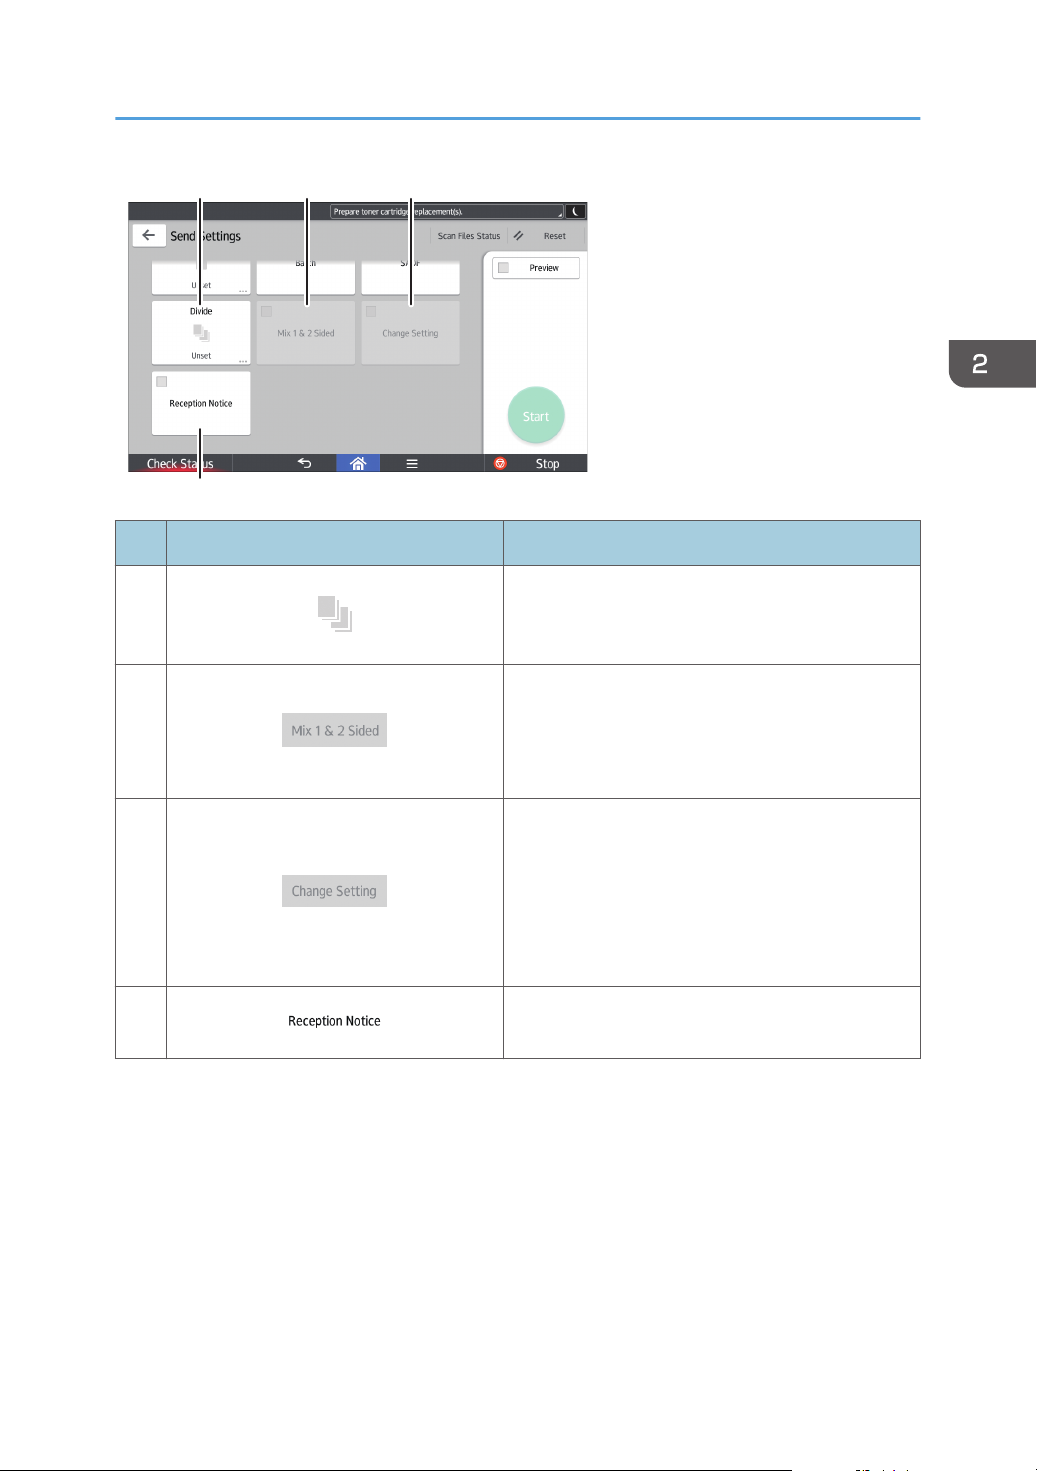
[Send Settings] screen
You can switch the four screens described in this section by flicking the screen up or down.
53
Page 56
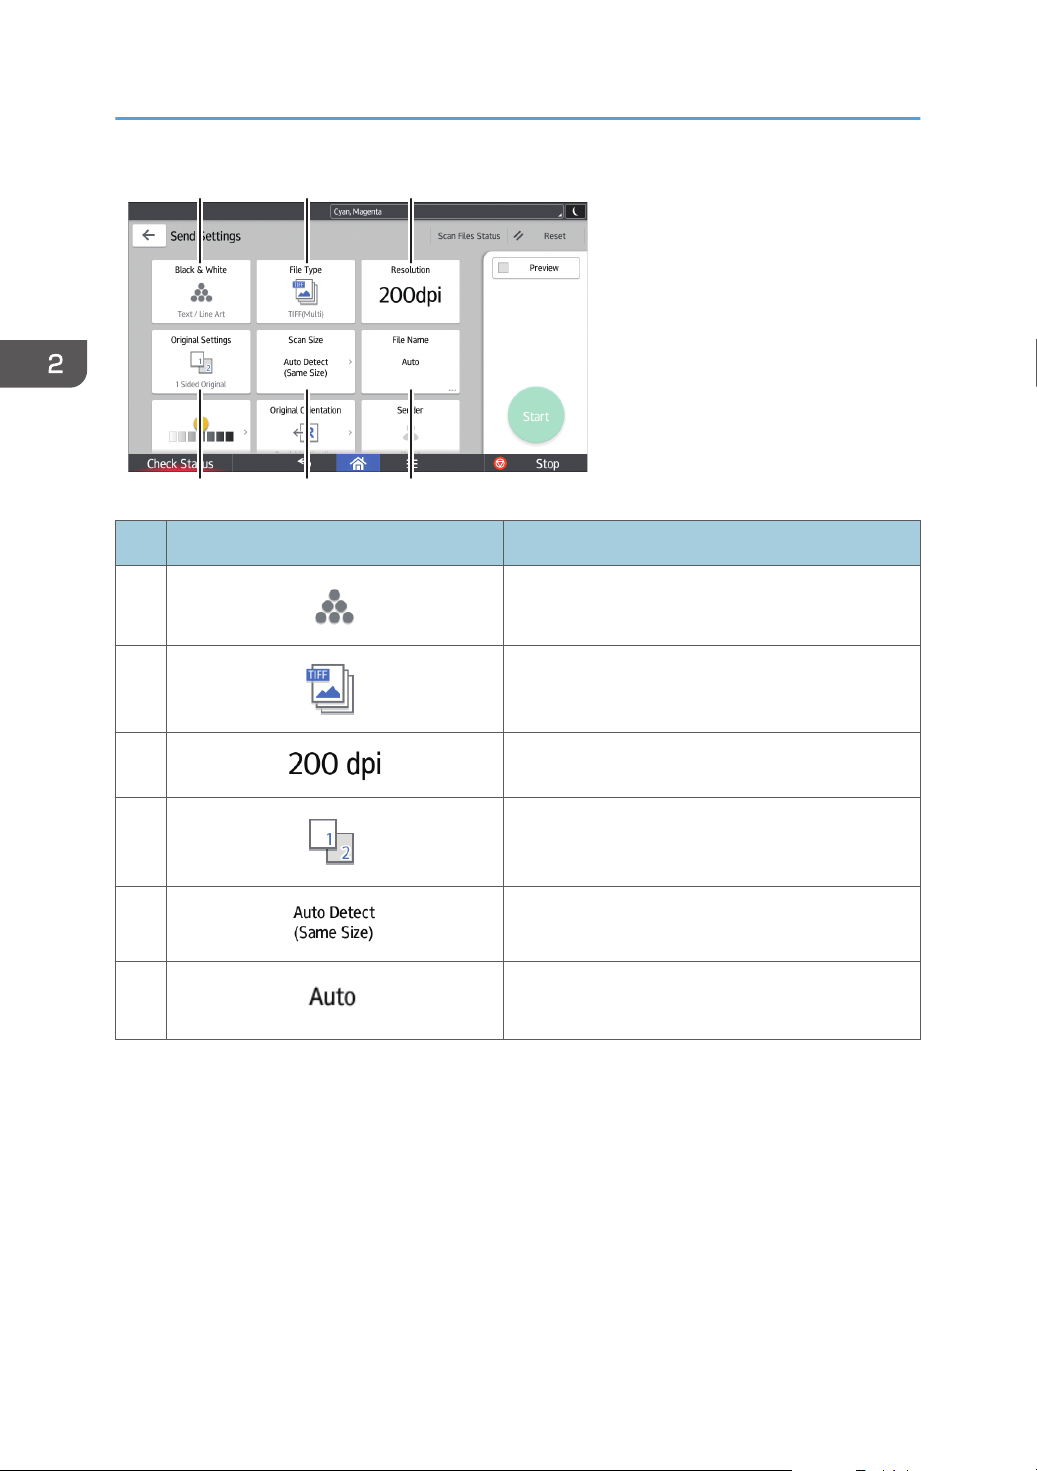
DLV054
1 2 3
4 5 6
2. Getting Started
No. Icon Description
1
2
3
4
5
6
Press to select the settings that are appropriate for
the type of your original and the color mode.
Press to select a file type.
Press to select the resolution to scan the original.
Press to select the sides of the original to scan, such
as one side or both sides.
Press to select the scanning size of the original.
Press to specify a file name.
54
Page 57
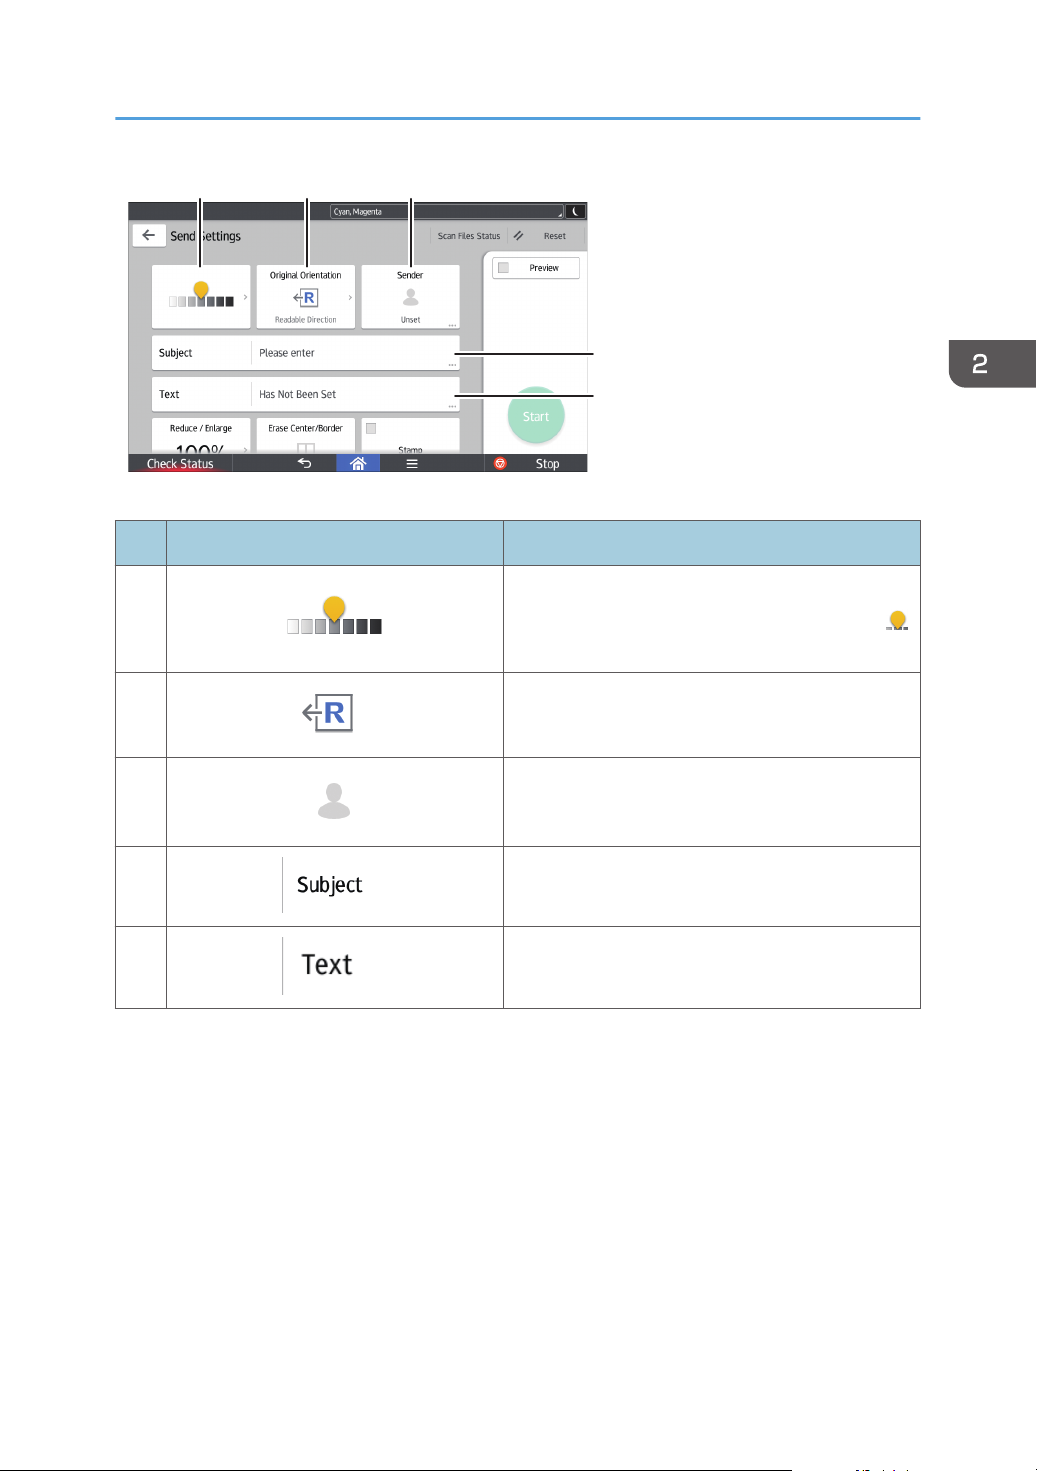
DLV055
7 8 9
10
11
No. Icon Description
Press to specify the density to scan the original.
7
You can also specify the density by touching the
icon and dragging it right or left.
How to Use Each Application
8
9
10
11
Press to select the orientation of the original.
Press to specify the sender.
Press to enter the subject of the e-mail.
Press to enter the main text of the e-mail.
55
Page 58
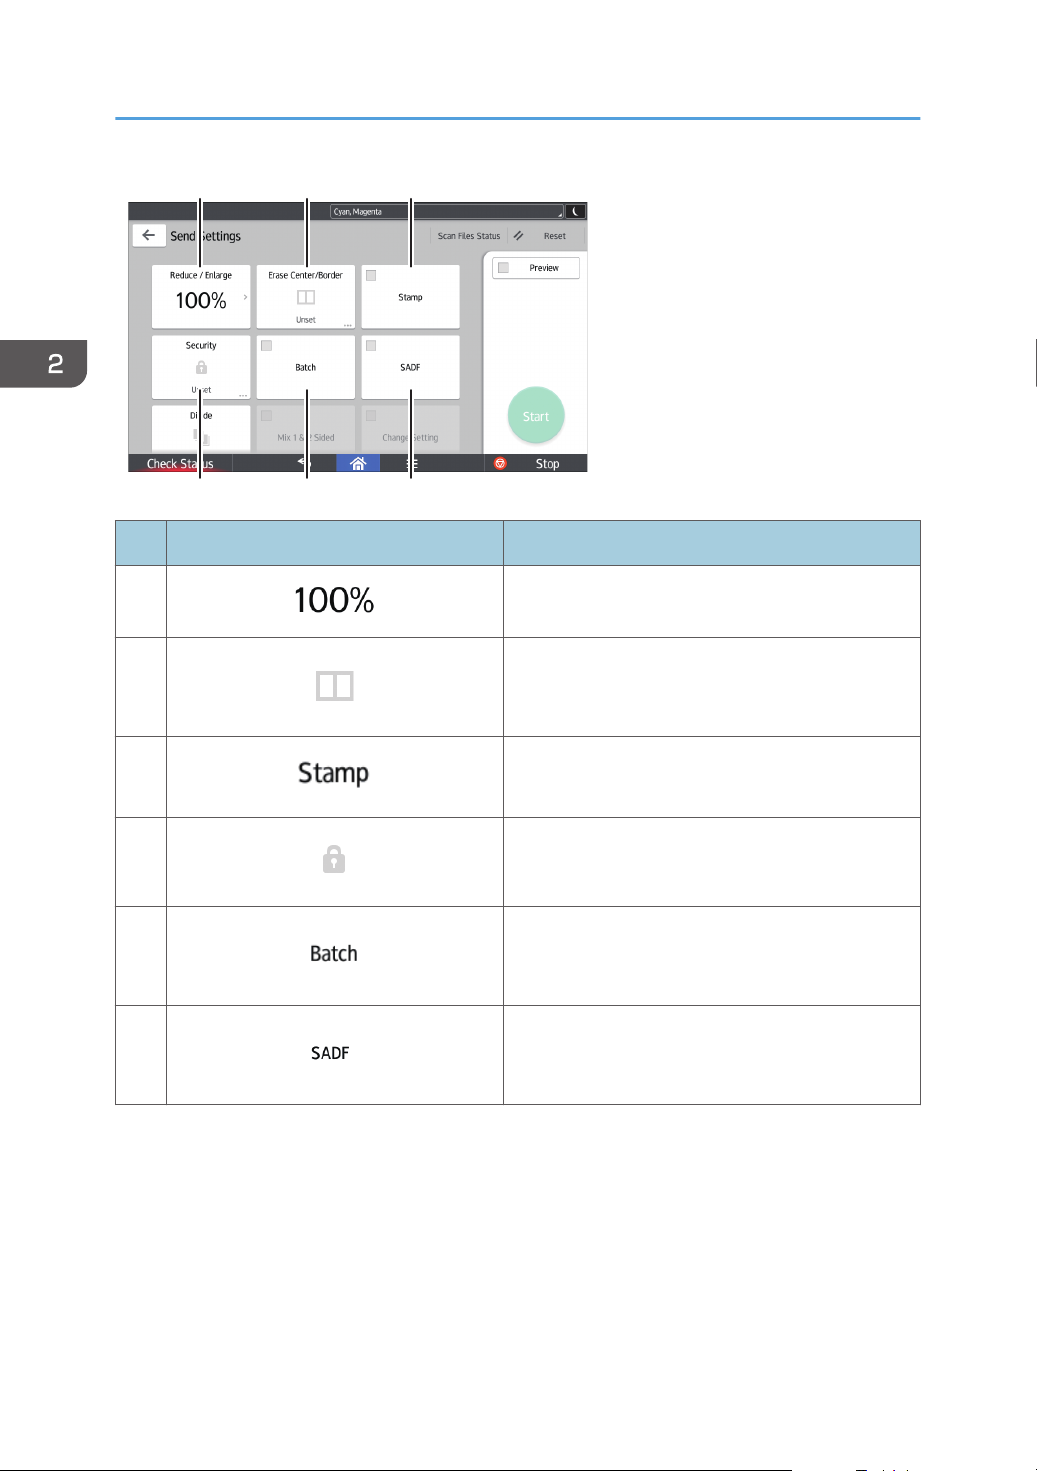
DLV056
12 13 14
15 16 17
2. Getting Started
No. Icon Description
12
13
14
15
16
17
Press to specify the magnification ratio for scanning
the original.
Press to erase the image from a specified width
around the document and in the center of the
document when the document is scanned.
Press to specify settings for stamps.
Press to sign and encrypt the e-mail.
Press to scan a large number of originals in several
batches and send them together as a single job.
You can place multi-page originals in the ADF.
Press to scan a large number of originals in several
batches and send them together as a single job.
Place the originals in the ADF one by one.
56
Page 59
DLV057
18 19 20
21
No. Icon Description
Press to divide a multi-page original into parts of a
18
specified number of pages each, and then send the
documents.
How to Use Each Application
19
20
21
Press to scan multiple originals that consist of onesided and two-sided originals.
You can select this only if [Batch] or [SADF] is also
selected.
Press to switch the scan setting for additional
originals to [1 Sided Original] after scanning one
side of the last page of a set of two-sided originals
using the exposure glass.
You can select this only if [Batch] or [SADF] is also
selected.
Press this to notify the sender that the e-mail
recipient has opened the e-mail.
57
Page 60

2. Getting Started
Registering Functions in a Program
Depending on the functions, the number of programs that can be registered is different.
Standard Applications
• Copy: 25 programs
• Fax: 100 programs
• Scanner: 100 programs
Quick Applications
• Quick Copy: 25 programs
• Quick Fax: 100 programs
• Quick Scanner: 100 programs
Classic Applications
• Copier (Classic): 25 programs
• Document Server: 25 programs
• Fax (Classic): 100 programs
• Scanner (Classic): 25 programs
The following settings can be registered to programs:
Standard Applications
• Copy:
Reduce/Enlarge, Quantity, Density, Paper Tray, 2 Sided, Combine, Sort, Stack,
Staple,Original Size, Original Type, Batch, Other Settings
• Fax:
Destination, Preview, Settings
• Scanner:
Destination, Preview, Send Settings
Quick Applications
• Quick Copy:
Paper Tray, Quantity, Reduce/Enlarge, 2 Sided, Combine, Staple, Density, Original
Orientation
• Quick Fax:
Destination, Line, Density, Resolution, Original Orientation, Original Sides, Scan Size,
Original Type, Preview
• Quick Scanner:
58
Page 61

Destination, Original Type, File Type, Resolution, Original Orientation, Original Sides, Scan
Size, Preview
Classic Applications
• Copier (Classic):
original type, density, Original Settings, paper tray, Store File (except for User Name, File
Name, and Password), Auto Reduce / Enlarge, Create Margin, Finishing, Cover/Slip Sheet,
Edit / Stamp, Dup./Combine/Series, Reduce / Enlarge, number of copies
• Document Server (on the initial document print screen):
2 Sided Copy Top to Top, 2 Sided Copy Top to Bottom, Booklet, Magazine, Finishing,
Cover/Slip Sheet (except for Main Sheet Tray in Designate / Chapter), Edit / Stamp, number
of prints
• Fax (Classic):
Scan Settings, density, Original Feed Type, File Type, Store File (except for User Name, File
Name, and Password), Preview, transmission type, destinations (except for folder
destinations), Select Line, Adv.Features, memory transmission/immediate transmission,
Communi. Result Rep., TX Mode (except for Subject), SMTP
Registering Functions in a Program
• Scanner (Classic):
Scan Settings, density, Original Feed Type, Send File Type / Name (except for Security
Settings and Start No.), Store File (except for User Name, File Name, and Password),
Preview, Destinations selected from the Address Book, Subject / Text, Subject, Security,
Recept. Notice, File Emailing Method
This section explains how to register functions to a program by using each application.
Standard Applications/Quick Applications
1. Press the [Quick Copy] icon. Edit the settings so all functions you want to register to a
program are selected on the [Copy], [Fax], [Scanner], [Quick Copy], [Quick Fax], or
[Quick Scanner] screen.
2. Press [Menu] (
) at the bottom of the screen in the center.
3. Press [Reg. Current Setting to Program].
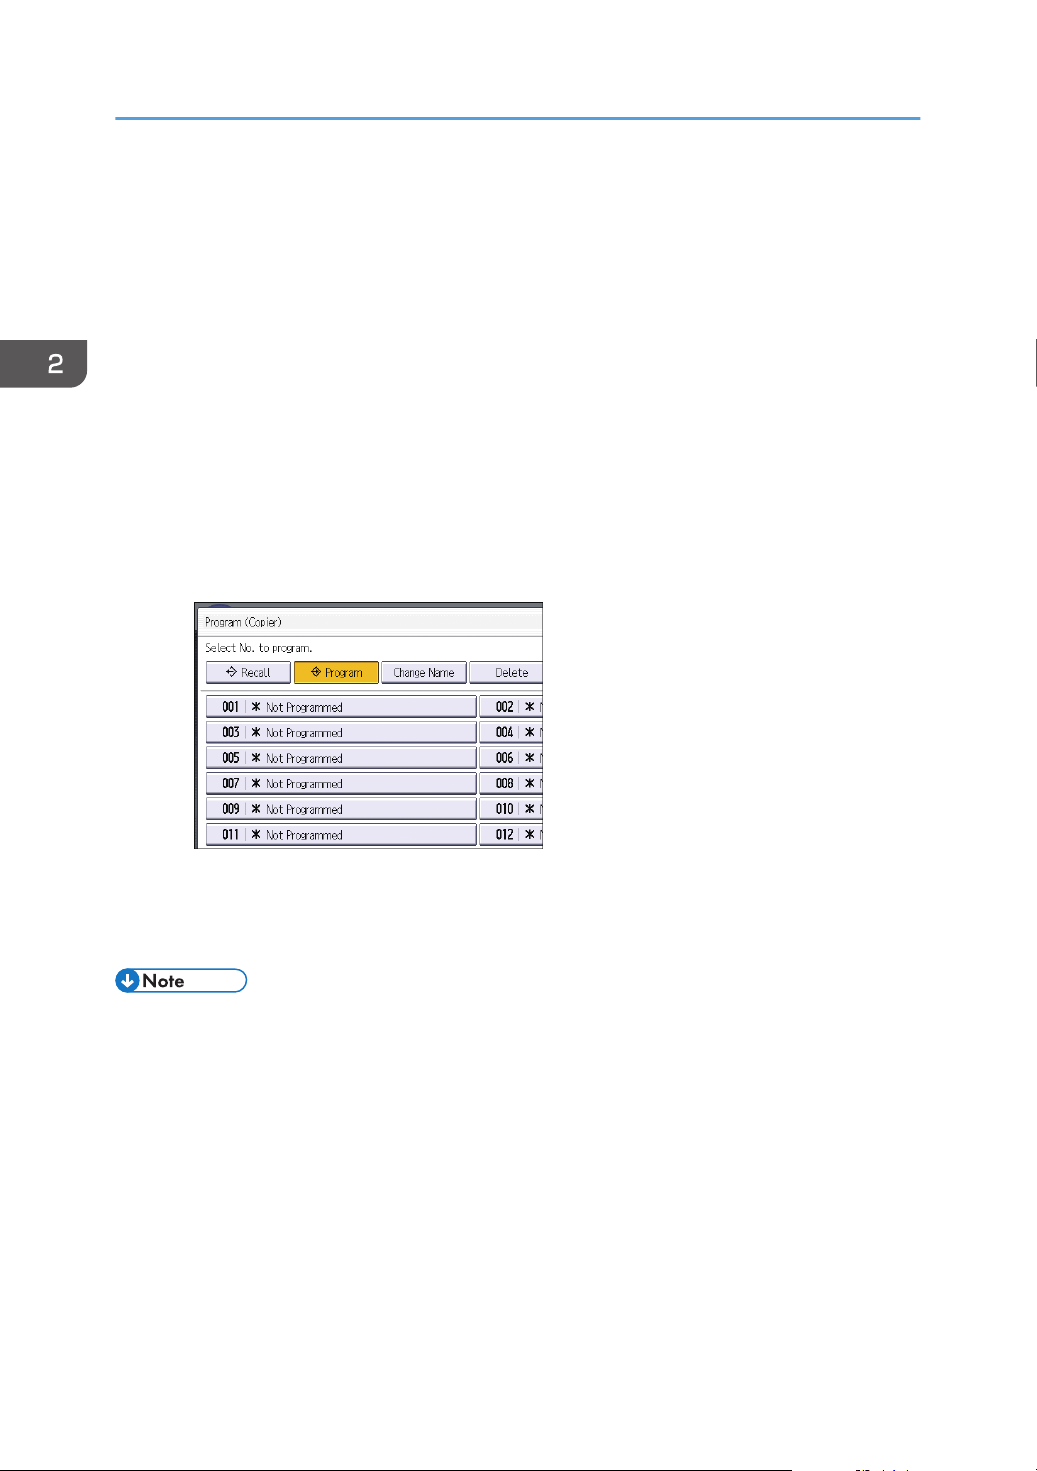
4. Press the program number you want to register.
5. Enter the program name.
6. Select the icon for the program.
7. Press [Previous Screen].
When you are using the quick application, press [Prev. Scrn.].
8. Press [OK].
59
Page 62
2. Getting Started
9. Press [Place].
Even if you select [Do not Place], you can add shortcuts to the program to the [Home] screen
after the program registration is complete.
10. Press [Exit].
Classic Applications
1. Edit the settings so all functions you want to register to a program are selected on the
[Copier (Classic)], [Document Server], [Fax (Classic)], or [Scanner (Classic)] screen.
When you are using the Document Server, edit the settings on the initial document print
screen.
2. Press [Recall/Program/Change Program] on the bottom left of the screen.
3. Press [Program].
4. Press the program number you want to register.
60
5. Enter the program name.
6. Press [OK].
7. Press [Exit].
• The number of characters you can enter for a program name varies depending on the functions as
follows:
• Standard Applications
• Copy: 40 characters
• Fax: 40 characters
• Scanner: 40 characters
• Quick Applications
• Quick Copy: 40 characters
• Quick Fax: 40 characters
• Quick Scanner: 40 characters
Page 63
Registering Functions in a Program
• Classic Applications
• Copier (Classic): 34 characters
• Document Server: 34 characters
• Fax (Classic): 20 characters
• Scanner (Classic): 34 characters
• When a specified program is registered as the default, its values become the default settings, which
are displayed without recalling the program, when modes are cleared or reset, and after the
machine is turned on. See "Changing the Default Functions of the Initial Screen", Convenient
Functions.
• When the paper tray you specified in a program is empty and if there is more than one paper tray
with the same size paper in it, the paper tray prioritized under [Paper Tray Priority: Copier] or
[Paper Tray Priority: Fax] in the [Tray Paper Settings] tab will be selected first. For details, see "Tray
Paper Settings", Connecting the Machine/ System Settings.
• Destinations can be registered to a program of the scanner mode only when [Include Destinations]
is selected for [Program Setting for Destinations] in [Scanner Features]. For details about the setting,
see "General Settings", Scan.
• Folder destinations that have protection codes cannot be registered to a program of the scanner
mode.
• Programs are not deleted by turning the power off or by pressing [Reset] unless the program is
deleted or overwritten.
• When you are using the Classic Applications, program numbers with next to them indicate that
the programs have been registered.
• Programs can be registered to the [Home] screen, and can be recalled easily. For details, see
page 39 "Adding Icons to the [Home] Screen". Shortcuts to programs stored in Document Server
mode cannot be registered to the [Home] screen.
Example of programs (when using the Classic Applications)
Copier (Classic)
Program name Program description Effect
Eco copy Specify [Combine 2 Sides] in
[Dup./Combine/Series].
Dated confidential
copy
In [Edit / Color], specify
[CONFIDENTIAL] under [Preset
Stamp], and [Date Stamp].
You can save paper and toner.
You can increase security
awareness by printing
"CONFIDENTIAL" and the date on
copies.
61
Page 64
2. Getting Started
Program name Program description Effect
Conference
material copy
Specify [Combine 2 Sides] in
[Dup./Combine/Series] and
[Staple] in [Finishing].
Magazine copy In [Dup./Combine/Series], specify
[Magazine] under [Book], and also
specify [xxxx] in [Finishing].
Unified-size copy Specify [Mixed Sizes] in [Original
Settings] and [Auto Reduce /
Enlarge] in the initial display.
Stamping
corporate name
copy
Specify [User Stamp] in [Edit /
Color].
In [Edit / Color], specify [User
Stamp] under [Stamp].
Thumbnail copy In [Dup./Combine/Series], select
[Duplex], and then specify
[Combine 1 Side] under [Combine].
You can copy conference materials
efficiently.
You can save paper. Also, you can
perform printing jobs such as
producing leaflets in-house instead
of having them printed by an
outside printing company.
You can print various size copies
onto one size of paper, so they are
easier to manage.
You can stamp the name of your
company on copies of working or
architectural drawings. Your
company name needs to be preregistered in the machine.
You can copy up to eight pages
onto one side of a sheet, so that you
can save paper.
62
Storage copy:
XXXX
(replace XXXX by a
folder name)
Fax (Classic)
Program name Program description Effect
Transmission result
notification fax
Specified time fax
transmission
Departmental fax
transmission
Specify a folder in [Target Folder to
Store] in [Store File].
You can use folders to organize
stored files by user name or
intended use.
Select [Preview] in the initial display
and specify [E-mail TX Results] in [TX
Mode].
You can check whether the
transmission settings are correct
before and after transmission.
Specify [Send Later] in [TX Mode]. You can send a fax at a specified
time.
In [TX Mode], specify [Fax Header
Print] under [Option Setting].
This setting can be used if the
receiver specifies forwarding
destinations by senders.
Page 65
Scanner (Classic)
Program name Program description Effect
Registering Functions in a Program
Easy PDF scan Select [Full Color: Text / Photo] in
[Scan Settings]. In [Send File Type /
Name], select [PDF] under [File
Type] and enter the business details
such as "London branch: daily
report" under [File Name].
High compression
PDF scan
Select [Full Color: Text / Photo] in
[Scan Settings] and [High
Compression PDF] in [Send File
Type / Name].
Long-term storage
scan
Select [PDF] in [File Type] and
[PDF/A] in [PDF File Setting].
Unified-size scan In [Scan Settings], select [Mixed
Original Sizes] in [Scan Size] and
specify the finished size of scanned
data in [Reduce / Enlarge] under
[Edit].
Digital signature
scan
In [Send File Type / Name], specify
[PDF] in [File Type], and also
specify [Digital Signature].
You can scan documents efficiently.
You can compress the data size of
scanned documents, so that you can
send and store them.
You can easily digitize documents
to "PDF/A" file format, which is
suitable for long-term storage.
You can skip this procedure to unify
the size when reprinting scanned
data.
You can add a digital signature to
an important document such as a
contract, so that any data tampering
can be detected.
Dividing file scan Specify [Divide] in [Original Feed
Type].
High resolution
scan
In [Send File Type / Name], specify
[TIFF]. Also, specify a higher
resolution in [Scan Settings].
Batch document
scan
Select [Batch] in [Original Feed
Type].
You can scan a multiple page
original as one file by splitting it into
groups of a specified number of
pages.
Scanned documents maintain much
of the detail of the originals, but the
size of the data may be quite large.
You can apply multiple scans to a
large volume of originals and send
the scanned originals as a single
job.
63
Page 66
2. Getting Started
Program name Program description Effect
Scan to XXXX
(replace XXXX by
a destination
name)
Storage scan:
XXXX
(replace XXXX by
Select e-mail or folder destinations
from the list that is registered in the
machine's Address Book, and then
specify the scan settings.
Specify a folder in [Target Folder to
Store] in [Store File].
If you register destinations and scan
settings that you use often, you can
skip the procedures to specify them
when sending a scanned file.
You can use folders to organize
stored files by user name or
intended use.
a folder name)
• Depending on the options installed, some functions cannot be registered. For details, see "Functions
Requiring Optional Configurations", Getting Started.
• The names of programs given above are just examples. You can assign any name to a program
according to your objectives.
• Depending on your business details or the type of documents to be scanned, registering a program
cannot be recommended.
64
Page 67
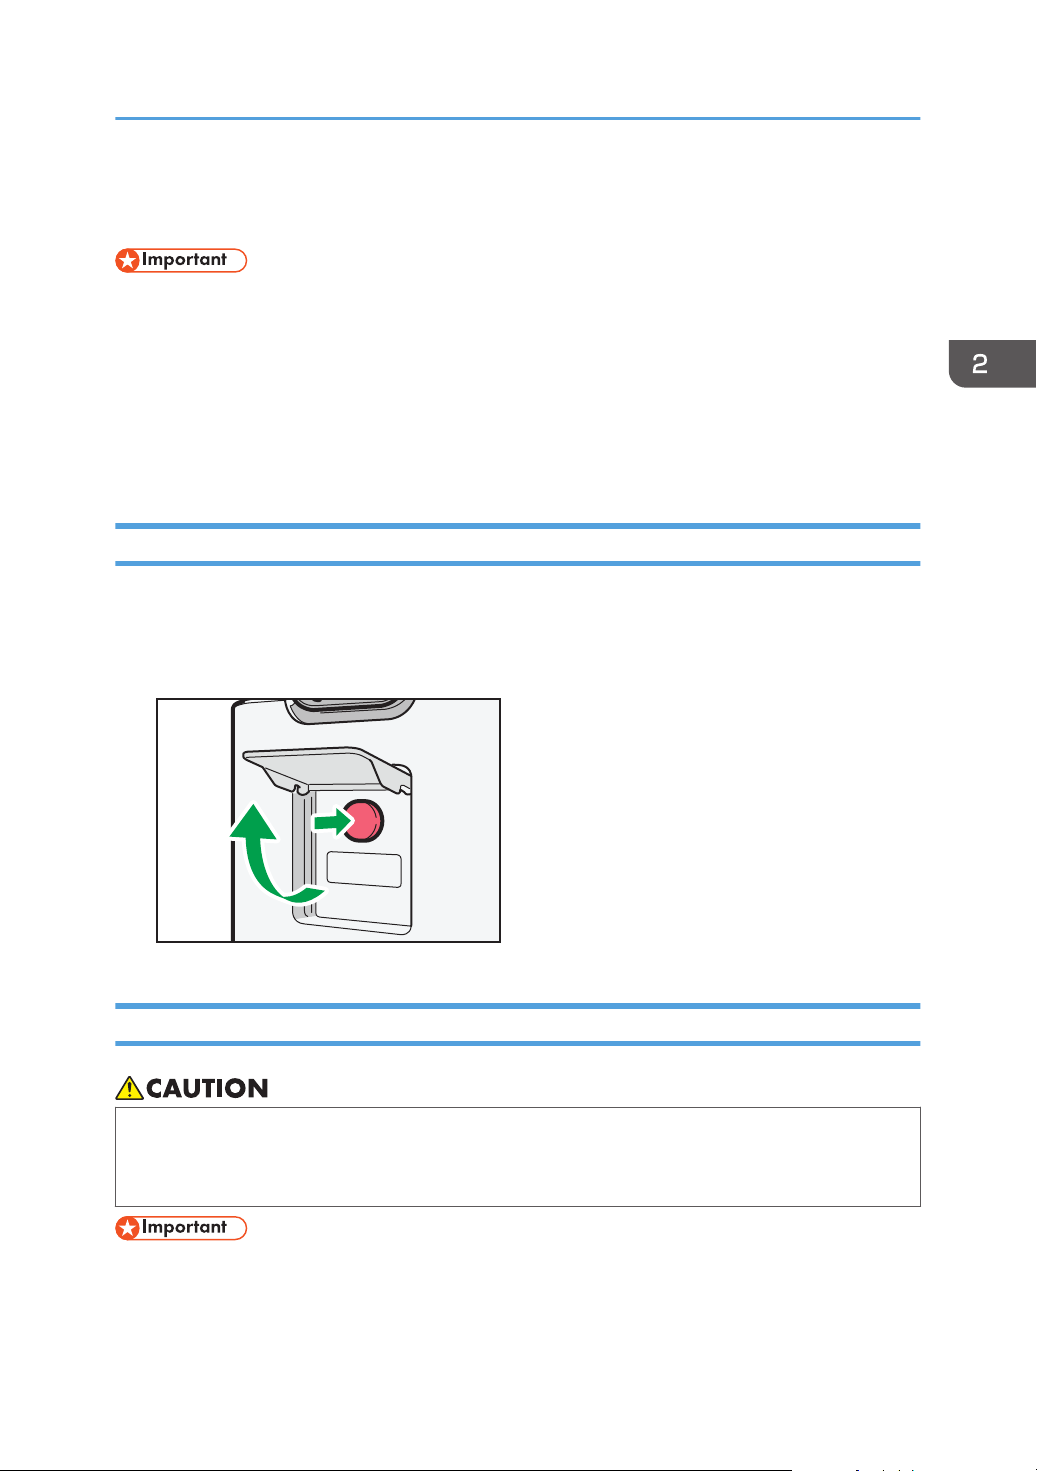
DPZ010
Turning On/Off the Power
Turning On/Off the Power
• When you push the main power switch, wait at least 10 seconds after it is confirmed that the main
power indicator has lit up or gone out.
The main power switch is on the left side of the machine. When this switch is turned on, the main power
turns on and the main power indicator on the right side of the control panel lights up. When this switch is
turned off, the main power turns off and the main power indicator on the right side of the control panel
goes out. When this is done, machine power is off. When the fax unit is installed, fax files in memory
may be lost if you turn this switch off. Use this switch only when necessary.
Turning on the Main Power
1. Make sure the power cord is firmly plugged into the wall outlet.
2. Open the main power switch cover, and push the main power switch.
The main power indicator goes on.
Turning Off the Main Power
• When disconnecting the power cord from the wall outlet, always pull the plug, not the cord.
Pulling the cord can damage the power cord. Use of damaged power cords could result in fire
or electric shock.
• Do not turn off the power while the machine is in operation.
• Do not hold down the main power switch while turning off the main power. Doing so forcibly turns
off the machine's power and may damage the hard disk or memory and cause malfunctions.
65
Page 68

2. Getting Started
1. Open the main power switch cover, and push the main power switch.
The main power indicator goes out. The main power turns off automatically when the machine shuts
down. If the screen on the control panel does not disappear, contact your service representative.
66
Page 69
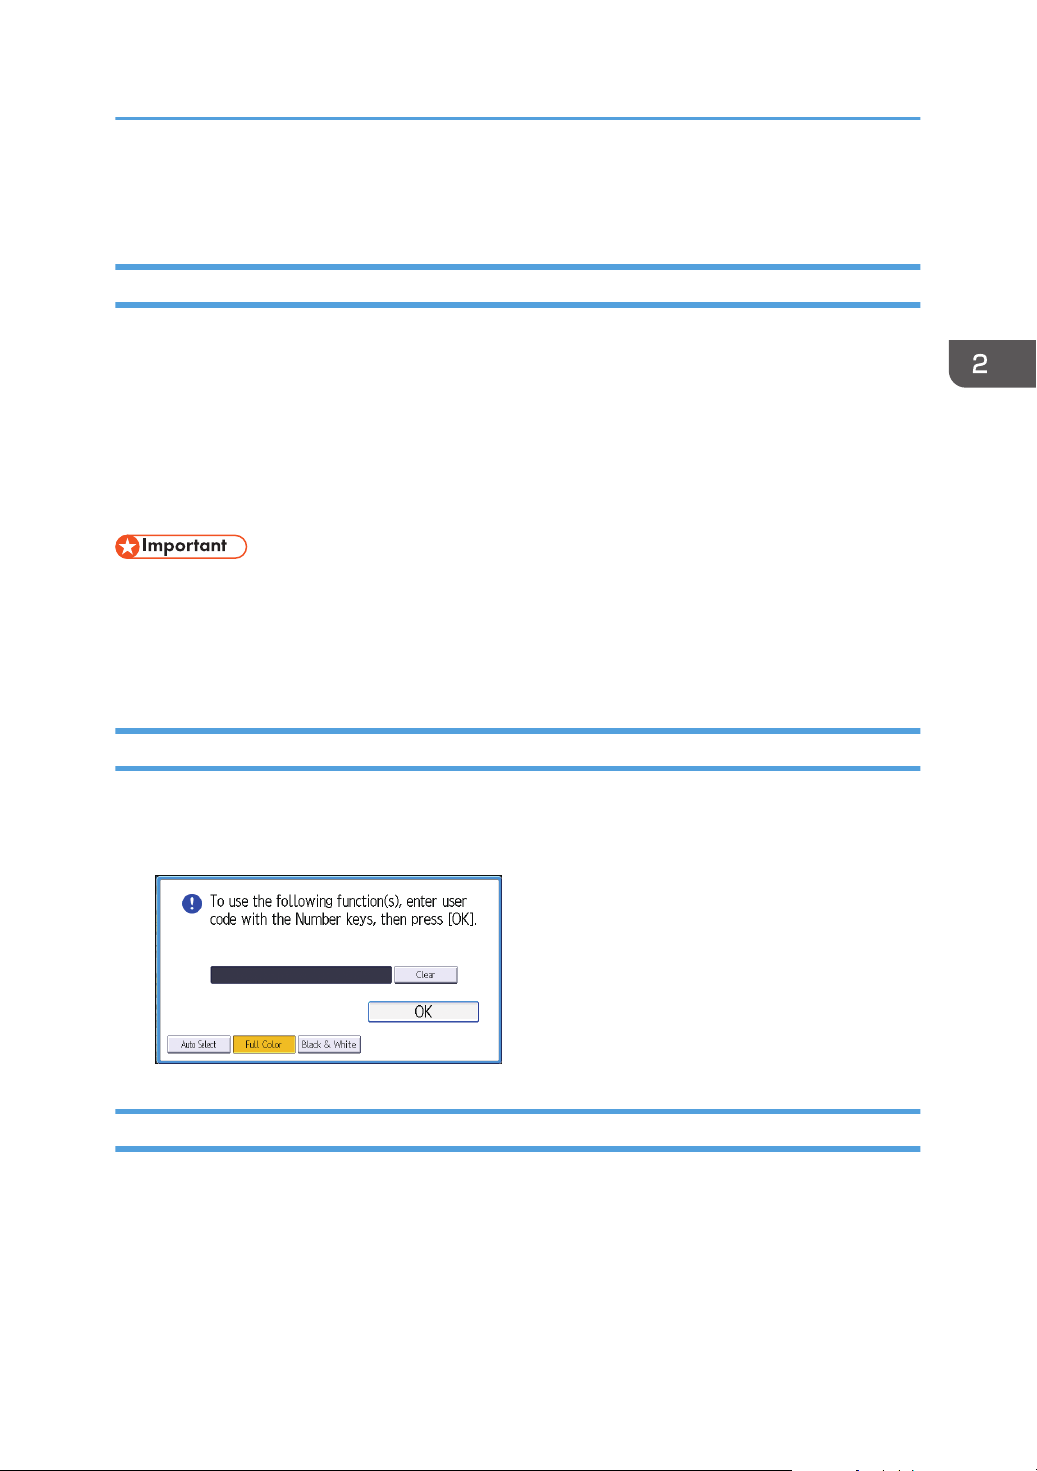
Logging In the Machine
Logging In the Machine
When the Authentication Screen is Displayed
If Basic Authentication, Windows Authentication, or LDAP Authentication is active, the authentication
screen appears on the display. The machine only becomes operable after entering your own Login User
Name and Login Password. If User Code Authentication is active, you cannot use the machine until you
enter the User Code.
If you can use the machine, you can say that you are logged in. When you go out of the operable state,
you can say that you are logged out. After logging in the machine, be sure to log out of it to prevent
unauthorized usage.
• Ask the user administrator for the Login User Name, Login Password, and User Code. For details
about user authentication, see "Configuring User Authentication", Security Guide.
• User Code to enter on User Code Authentication is the numerical value registered in the Address
Book as "User Code".
User Code Authentication Using the Control Panel
If User Code Authentication is active, a screen prompting you to enter a User Code appears.
1. Enter a User Code (up to eight digits), and then press [OK].
Logging In Using the Control Panel
This section explains the procedure for logging in to the machine when Basic Authentication, Windows
Authentication, or LDAP Authentication is set.
67
Page 70
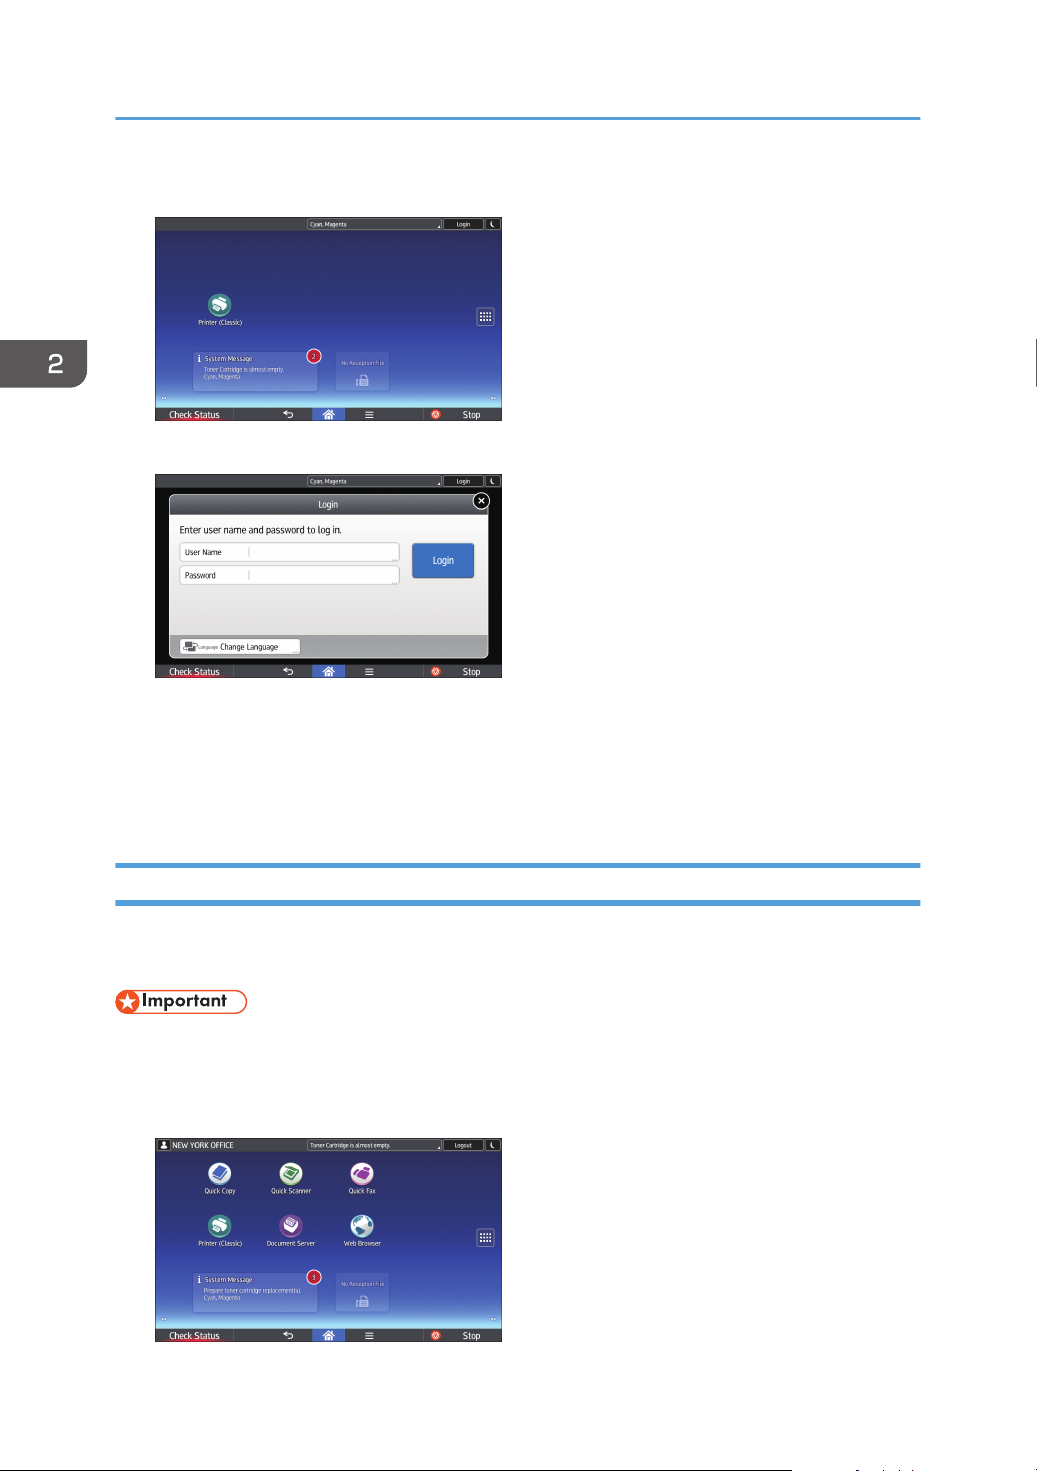
2. Getting Started
1. Press [Login] on the top right on the screen.
2. Press [User Name].
3. Enter a Login User Name, and then press [Done].
4. Press [Password].
5. Enter a Login Password, and then press [Done].
6. Press [Login].
Logging Out Using the Control Panel
This section explains the procedure for logging out the machine when Basic Authentication, Windows
Authentication, or LDAP Authentication is set.
• To prevent use of the machine by unauthorized persons, always log out when you have finished
using the machine.
1. Press [Logout] on the top right on the screen.
68
Page 71
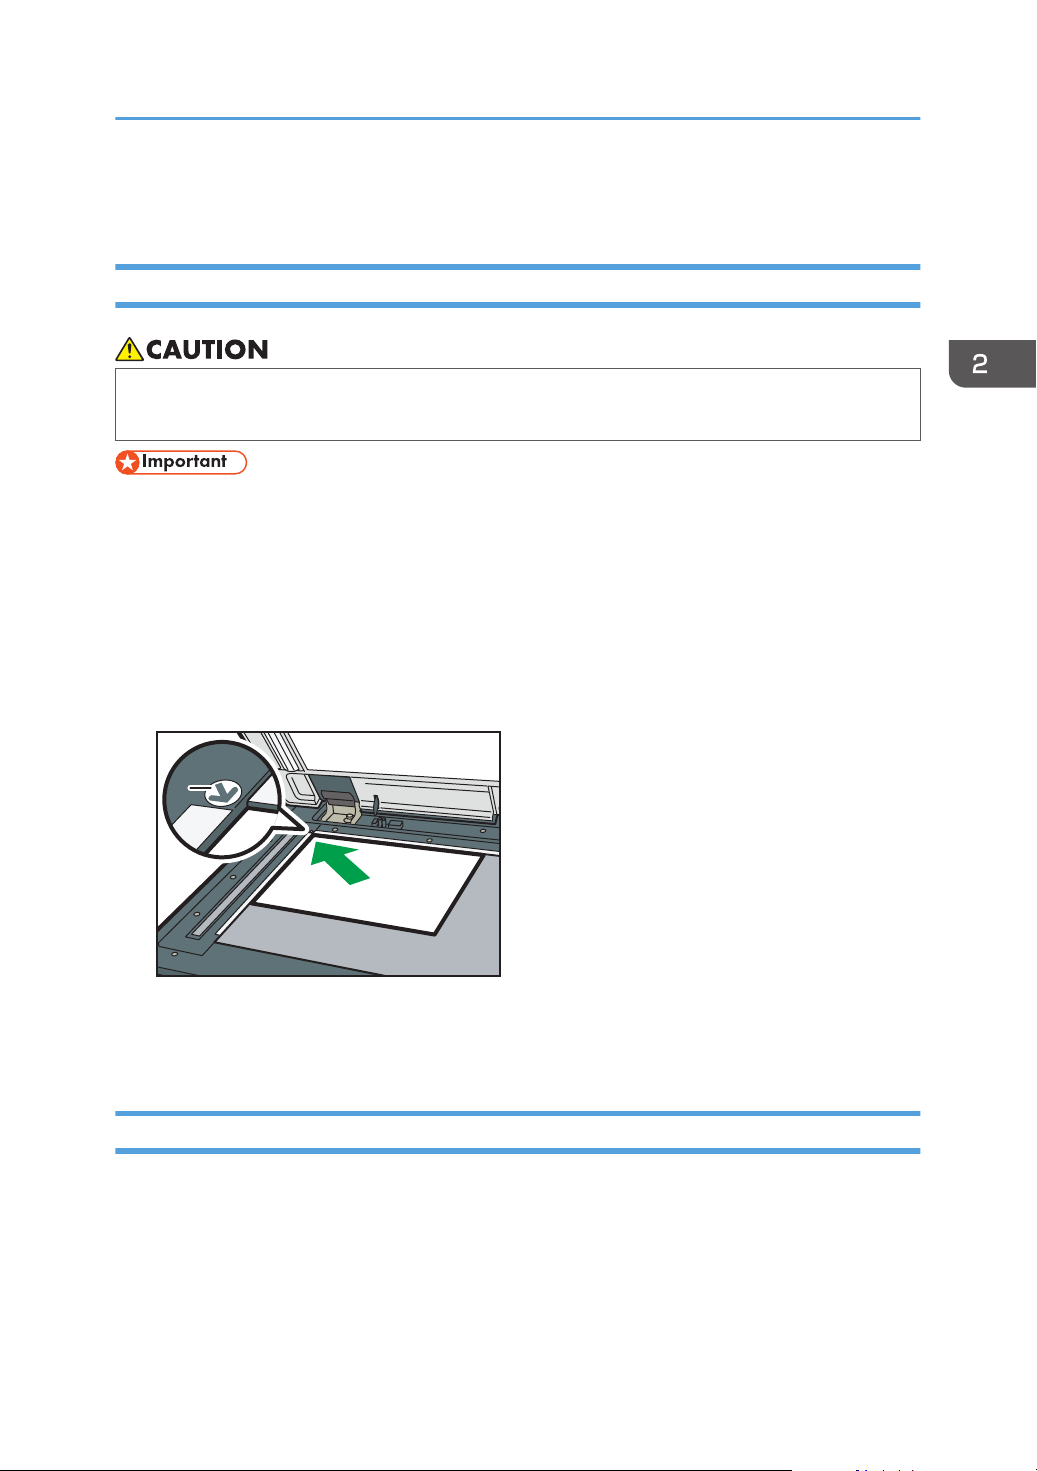
1
1
DPZ017
Placing Originals
Placing Originals
Placing Originals on the Exposure Glass
• Keep your hands away from the hinges and exposure glass when lowering the ADF. Not doing
so may result in an injury if your hands or fingers are pinched.
• Do not lift the ADF forcefully. Otherwise, the cover of the ADF might open or be damaged.
1. Lift the ADF.
Be sure to lift the ADF by more than 30 degrees. Otherwise, the size of the original might not be
detected correctly.
2. Place the original face down on the exposure glass. The original should be aligned to the
rear left corner.
Start with the first page to be scanned.
1. Positioning mark
3. Lower the ADF.
Placing Originals in the Auto Document Feeder
Be sure not to block the sensor or load the original untidily. Doing so may cause the machine to detect
the size of the original incorrectly or display a paper misfeed message. Also, be sure not to place
originals or other objects on the top cover. Doing so may cause a malfunction.
69
Page 72
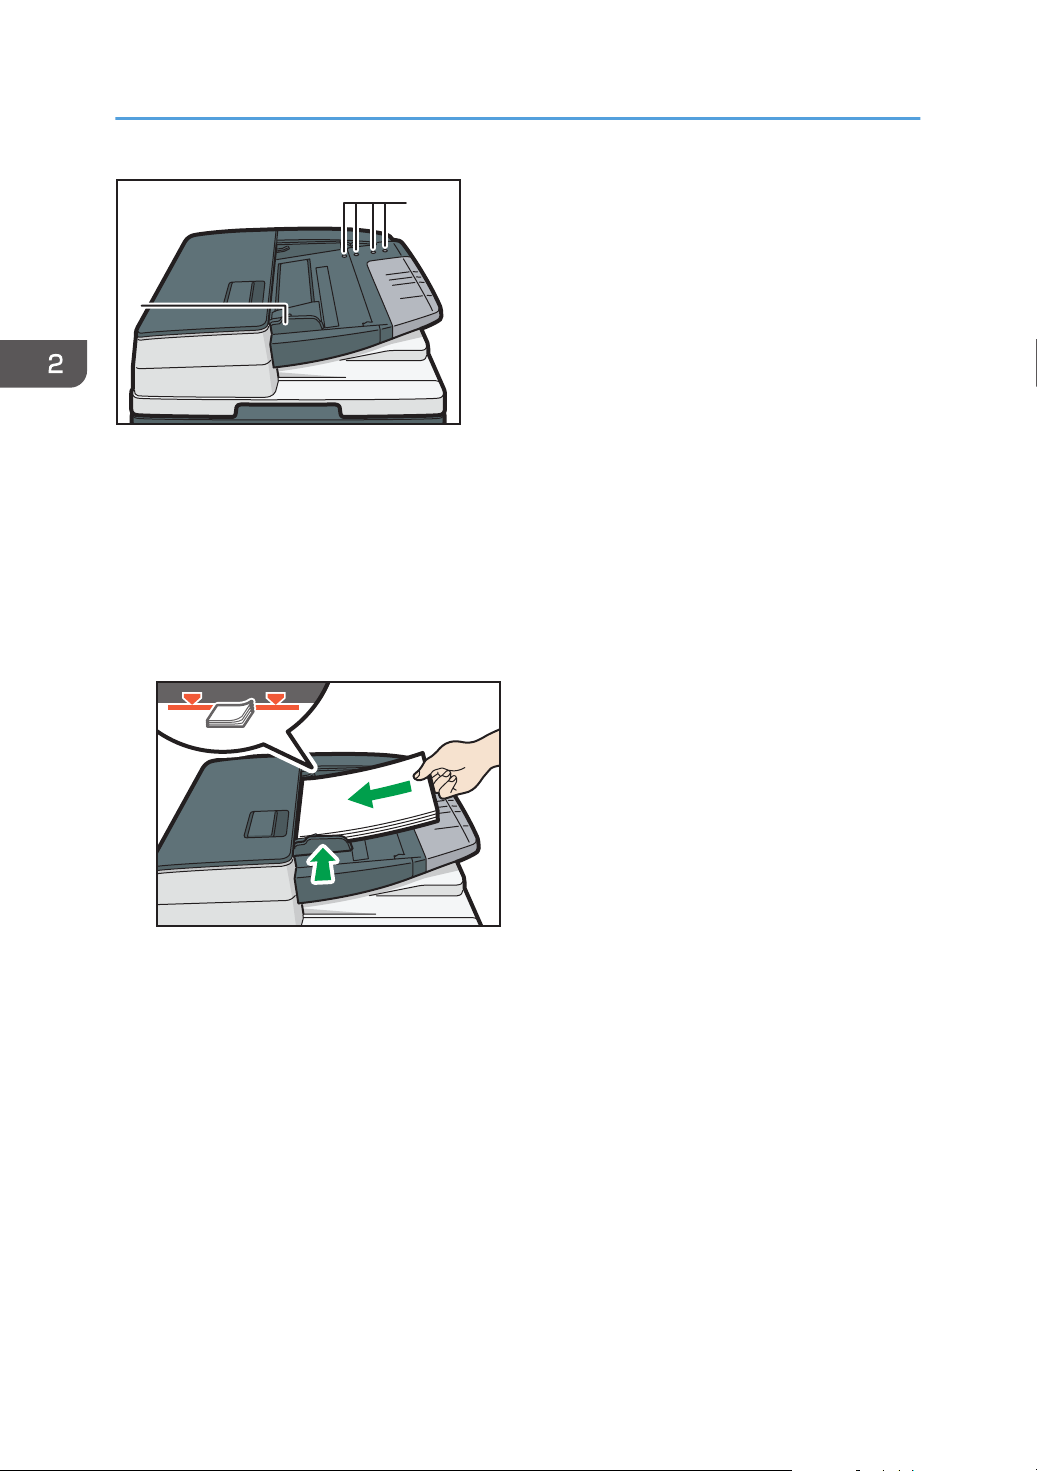
1
DCG008
2
DPZ012
1
2. Getting Started
1. Sensors
2. Original guide
1. Adjust the original guide to the original size.
2. Place the aligned originals squarely face up in the ADF.
Do not stack originals beyond the limit mark.
The first page should be on the top.
1. Limit mark
70
Page 73
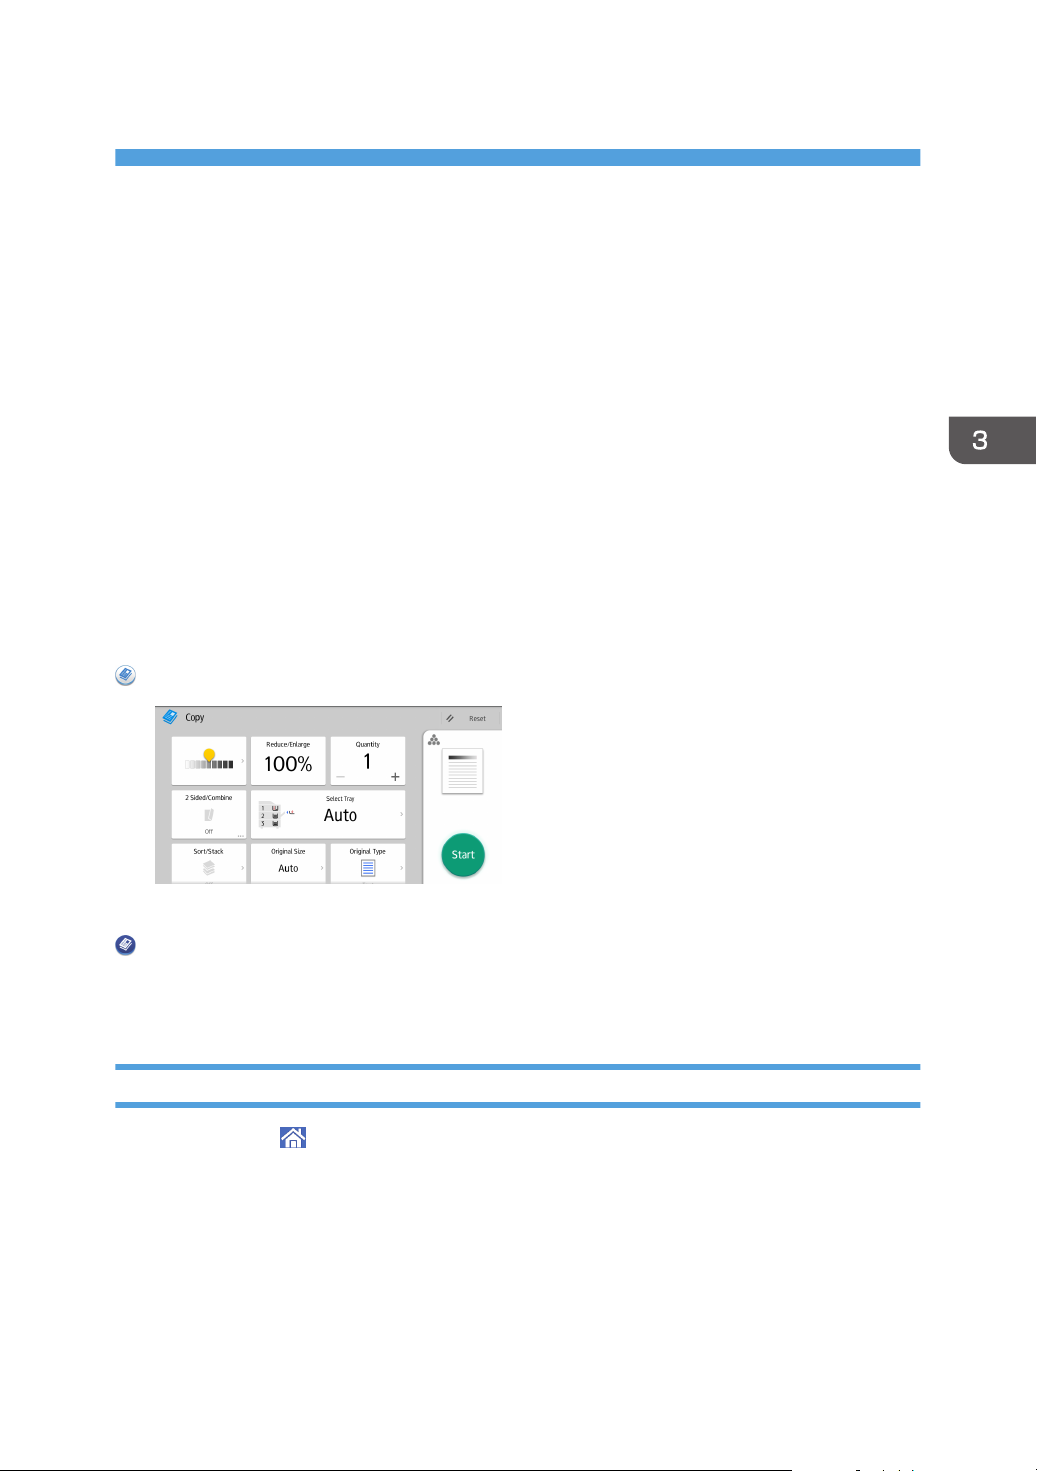
3. Copy
This chapter describes frequently used copier functions and operations. For information not included in
this chapter, see Copy/ Document Server available on our website.
Basic Procedure
To make copies of originals, place them on the exposure glass or in the ADF.
When placing the original on the exposure glass, start with the first page to be copied. When placing
the original in the ADF, place them so that the first page is on the top.
About placing the original on the exposure glass, see page 69 "Placing Originals on the Exposure
Glass".
About placing the original in the ADF, see page 69 "Placing Originals in the Auto Document Feeder".
To copy onto paper other than plain paper, specify the paper type in User Tools according to the weight
of the paper you are using. For details, see "Tray Paper Settings", Connecting the Machine/ System
Settings.
When Using the Copy Application
About how to use the application's screen, see page 43 "[Copy] Screen".
When Using the Copier (Classic) Application
For details about how to use the Classic Copier function, see page 71 "Basic Procedure
(Classic)".
Basic Procedure (Classic)
1. Press [Home] ( ) at the bottom of the screen in the center.
2. Flick the screen to the left, and then press the [Copier (Classic)] icon.
3. Make sure that no previous settings remain.
When there are previous settings remaining, press [Reset].
4. Place the originals.
5. Make desired settings.
71
Page 74
3. Copy
6. Enter the number of copies with the number keys.
The maximum copy quantity that can be entered is 999.
7. Press [Start].
When placing the original on the exposure glass, press [ ] after all originals are scanned. Some
functions such as Batch mode may require that you press [ ] when placing originals in the ADF.
Follow the messages that appear on screen.
8. When the copy job is finished, press [Reset] to clear the settings.
72
Page 75
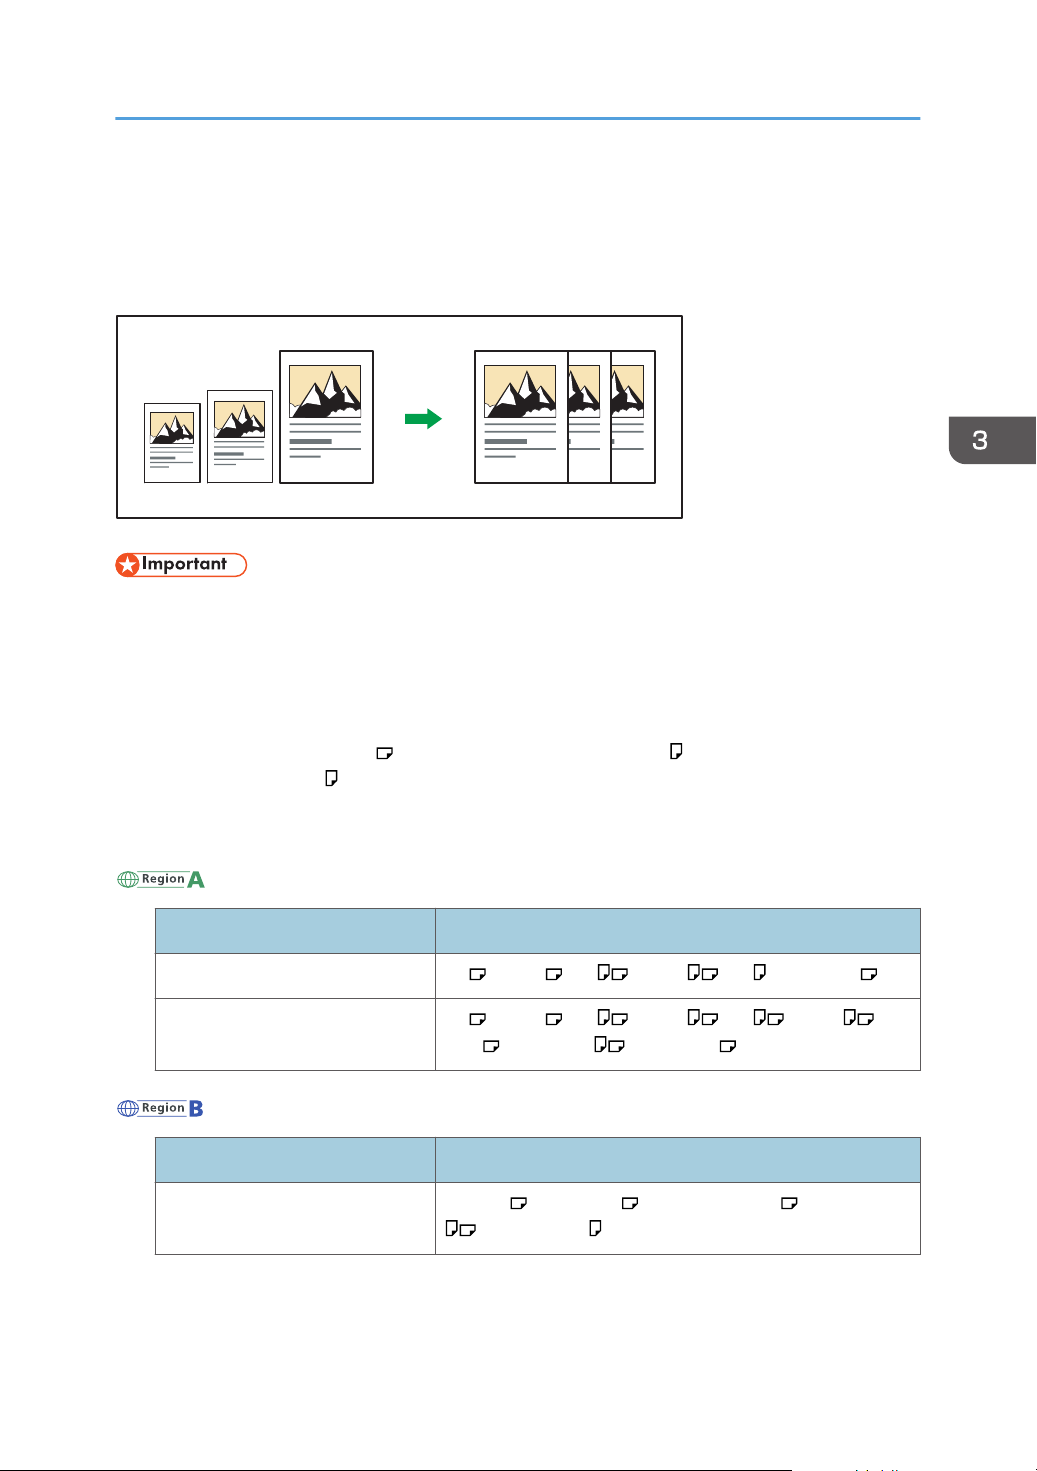
CKN008
Auto Reduce / Enlarge
Auto Reduce / Enlarge
The machine automatically detects the original size and then selects an appropriate reproduction ratio
based on the paper size you select.
• If you select a reproduction ratio after pressing [Auto Reduce / Enlarge], [Auto Reduce / Enlarge]
is canceled and the image cannot be rotated automatically.
This is useful to copy different size originals to the same size paper.
If the orientation in which your original is placed is different from that of the paper you are copying onto,
the machine rotates the original image by 90 degrees and fits it on the copy paper (Rotate Copy). For
example, to reduce A3 (11 × 17) originals to fit onto A4 (81/2 × 11) paper, select a paper tray
containing A4 (81/2 × 11) paper, and then press [Auto Reduce / Enlarge]. The image is
automatically rotated. For details about Rotate Copy, see "Rotate Copy", Copy/ Document Server.
The original sizes and orientations you can use with this function are as follows:
(mainly Europe and Asia)
Original location Original size and orientation
Exposure glass A3 , B4 JIS , A4 , B5 JIS , A5 , 81/2 × 13
ADF A3 , B4 JIS , A4 , B5 JIS , A5 , B6 JIS , 11
× 17 , 81/2 × 11 , 81/2 × 13
(mainly North America)
Original location Original size and orientation
Exposure glass 11 × 17 , 81/2 × 14*1, 81/2 × 132/
, 51/2 × 81/
2
*1
5
, 81/2 × 11
73
Page 76
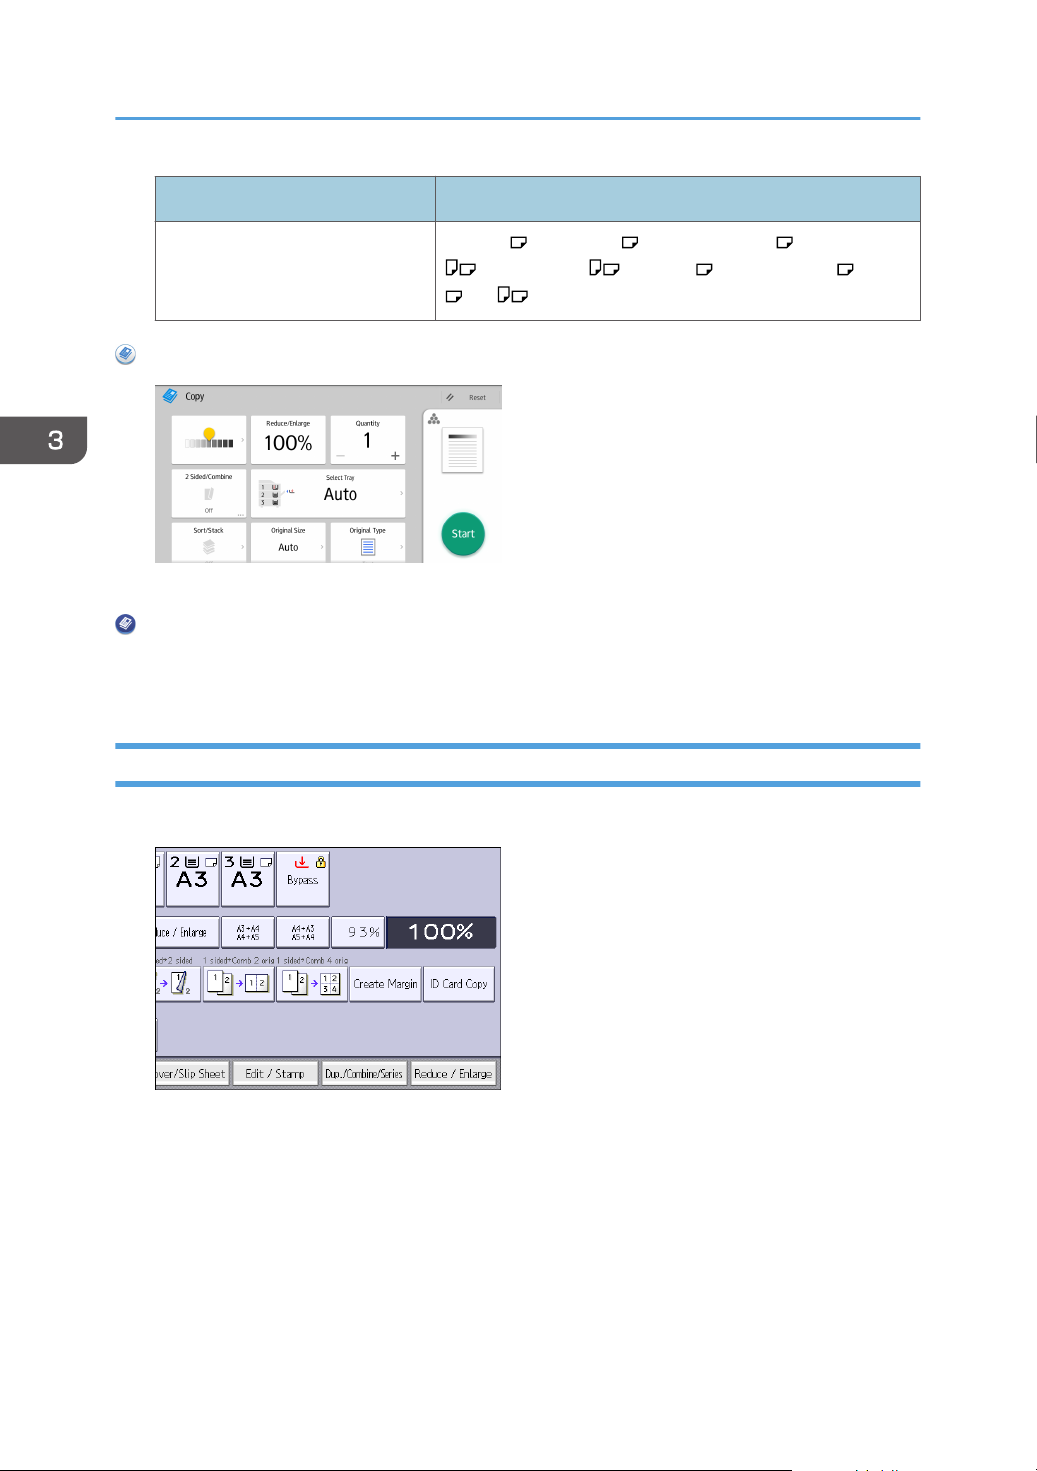
3. Copy
Original location Original size and orientation
ADF 11 × 17 , 81/2 × 14*1, 81/2 ×132/
, 51/2 × 81/
, 10 × 14 , 71/4 × 101/2, A3
2
, A4
When Using the Copy Application
About how to use the application's screen, see page 43 "[Copy] Screen".
When Using the Copier (Classic) Application
For details about how to use the Classic Copier function, see page 74 "Procedure for Auto
Reduce / Enlarge (Classic)".
Procedure for Auto Reduce / Enlarge (Classic)
*1
5
, 81/2 × 11
74
1. Press [Auto Reduce / Enlarge].
2. Select the paper size.
3. Place the originals, and then press [Start].
Page 77
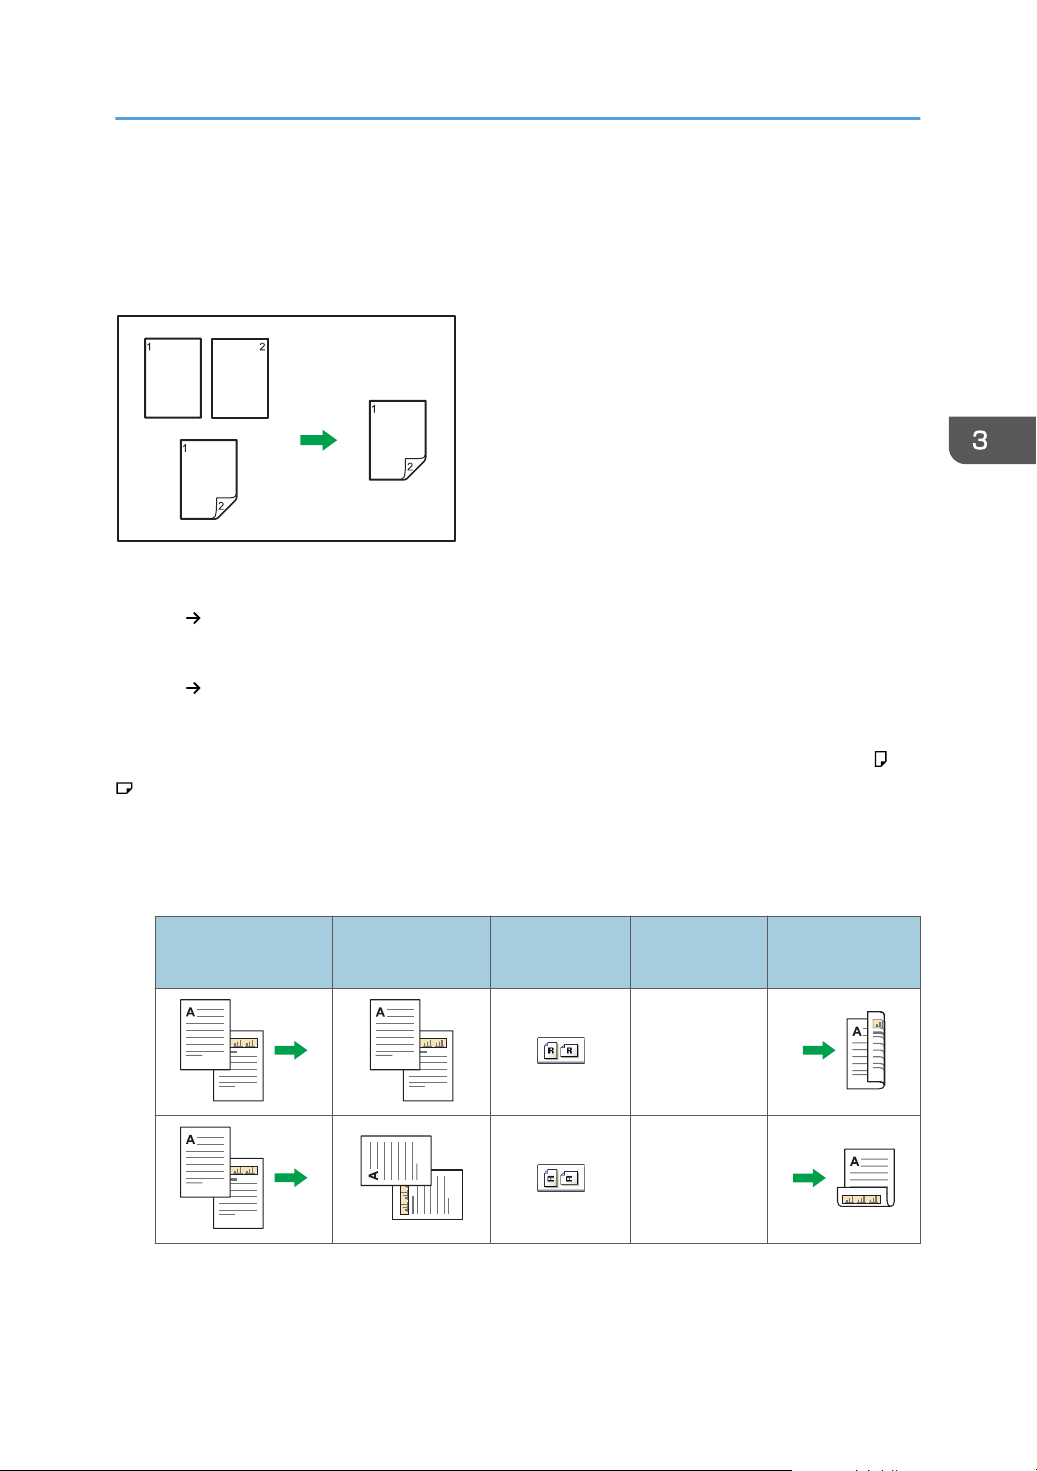
CKN009
Duplex Copying
Duplex Copying
Copies two 1-sided pages or one 2-sided page onto a 2-sided page. During copying, the image is
shifted to allow for the binding margin.
There are two types of Duplex.
1 Sided
2 Sided 2 Sided
The resulting copy image will differ according to the orientation in which you place your originals ( or
).
Original orientation and completed copies
2 Sided
Copies two 1-sided pages on one 2-sided page.
Copies one 2-sided page on one 2-sided page.
To copy on both sides of the paper, select the original and copy orientation according to how you
want the printout to appear.
Original Placing originals
Original
Orientation
Orientation Copy
Top to Top
Top to Bottom
75
Page 78
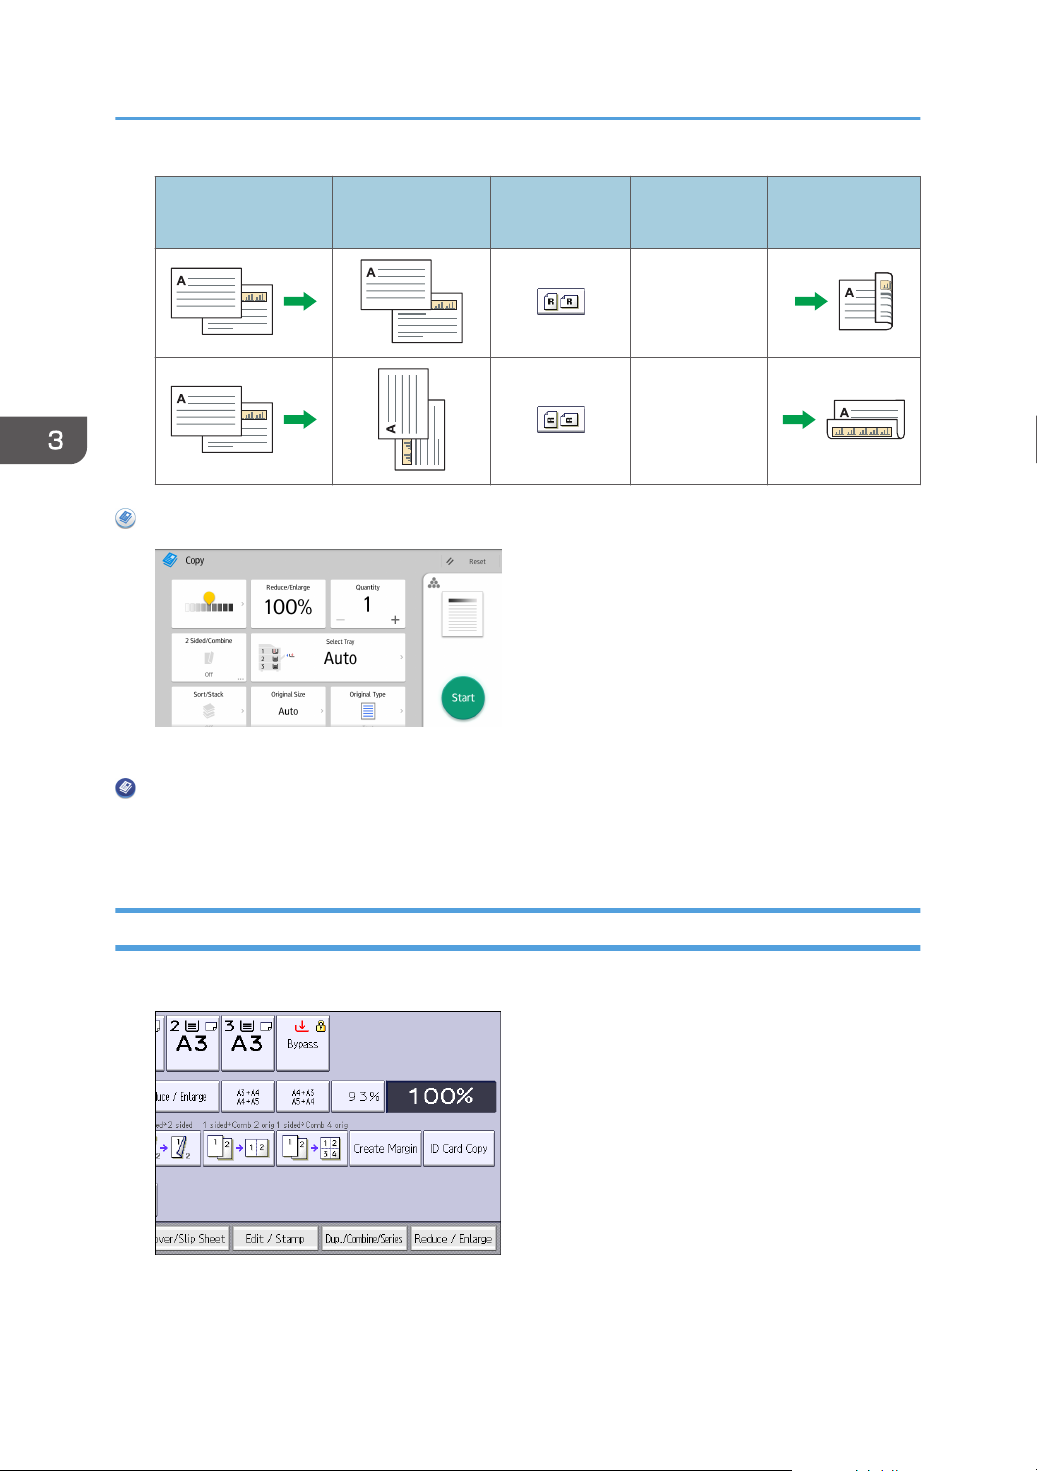
3. Copy
Original Placing originals
When Using the Copy Application
About how to use the application's screen, see page 43 "[Copy] Screen".
Original
Orientation
Orientation Copy
Top to Top
Top to Bottom
When Using the Copier (Classic) Application
For details about how to use the Classic Copier function, see page 76 "Procedure for Duplex
Copying (Classic)".
Procedure for Duplex Copying (Classic)
1. Press [Dup./Combine/Series].
2. Make sure that [Duplex] is selected. If [Duplex] is note selected, press [Duplex].
76
Page 79
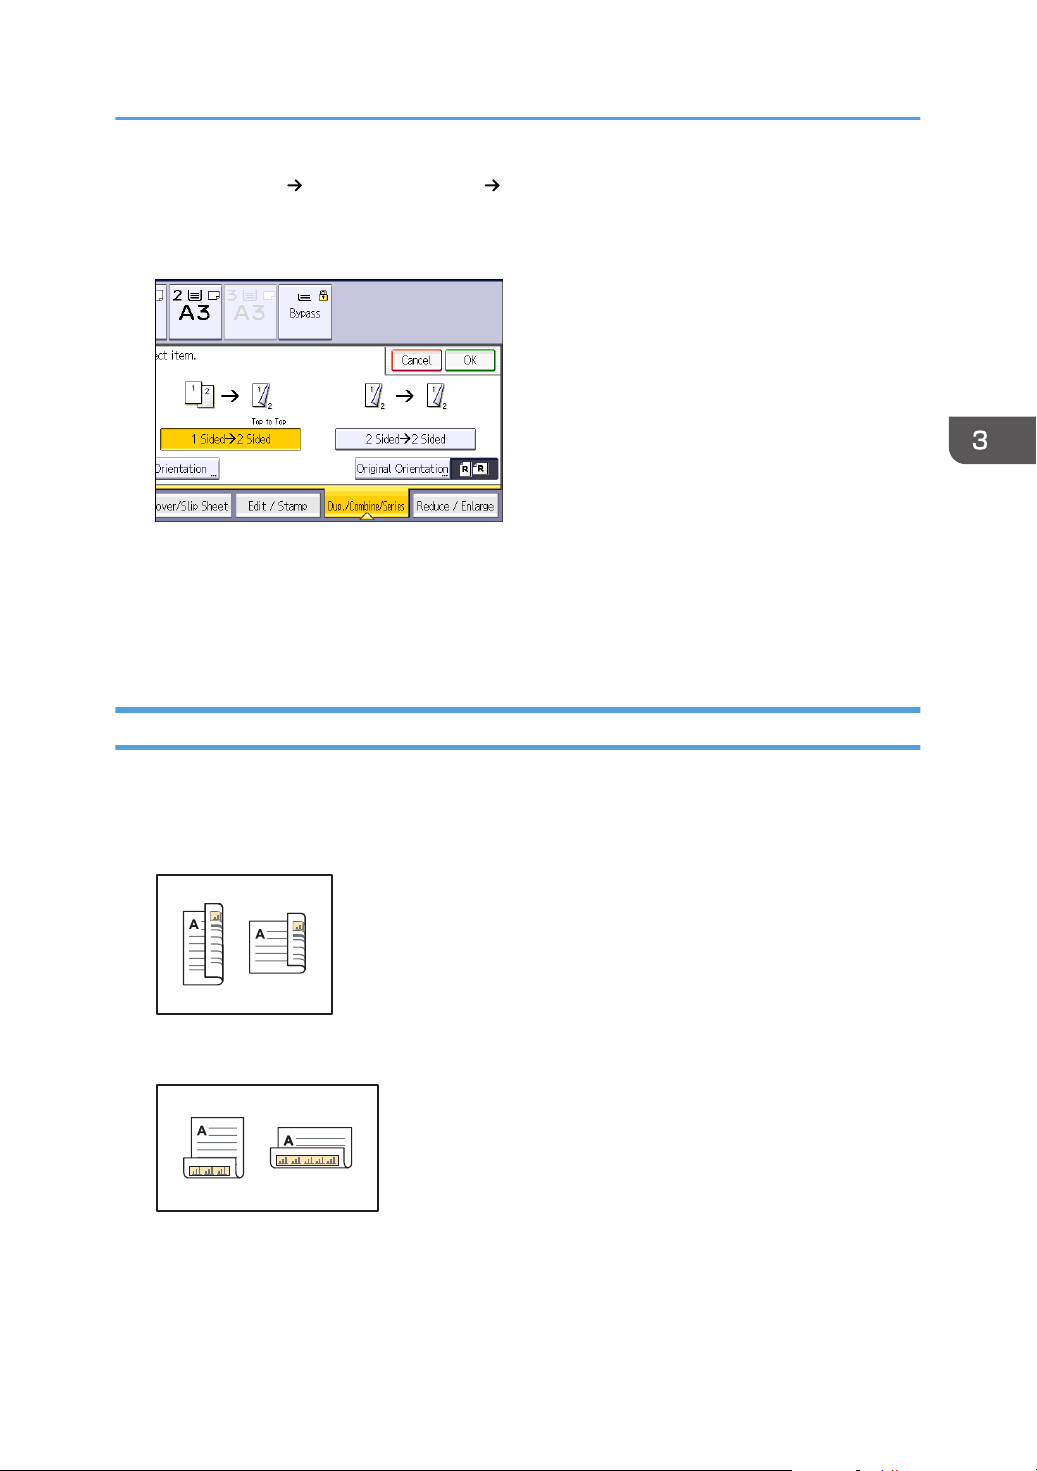
CKN011
CKN012
Duplex Copying
3. Select [1 Sided 2 Sided] or [2 Sided 2 Sided] according to how you want the
document to be output.
To change the original or copy orientation, press [Orientation].
4. Press [Original Orientation].
5. Select the original orientation, and then press [OK] twice.
6. Place the originals.
7. Press [Start].
Specifying the Original and Copy Orientation
Select the orientation of the originals and copies if the original is two-sided or if you want to copy onto
both sides of the paper.
• Top to Top
• Top to Bottom
77
Page 80
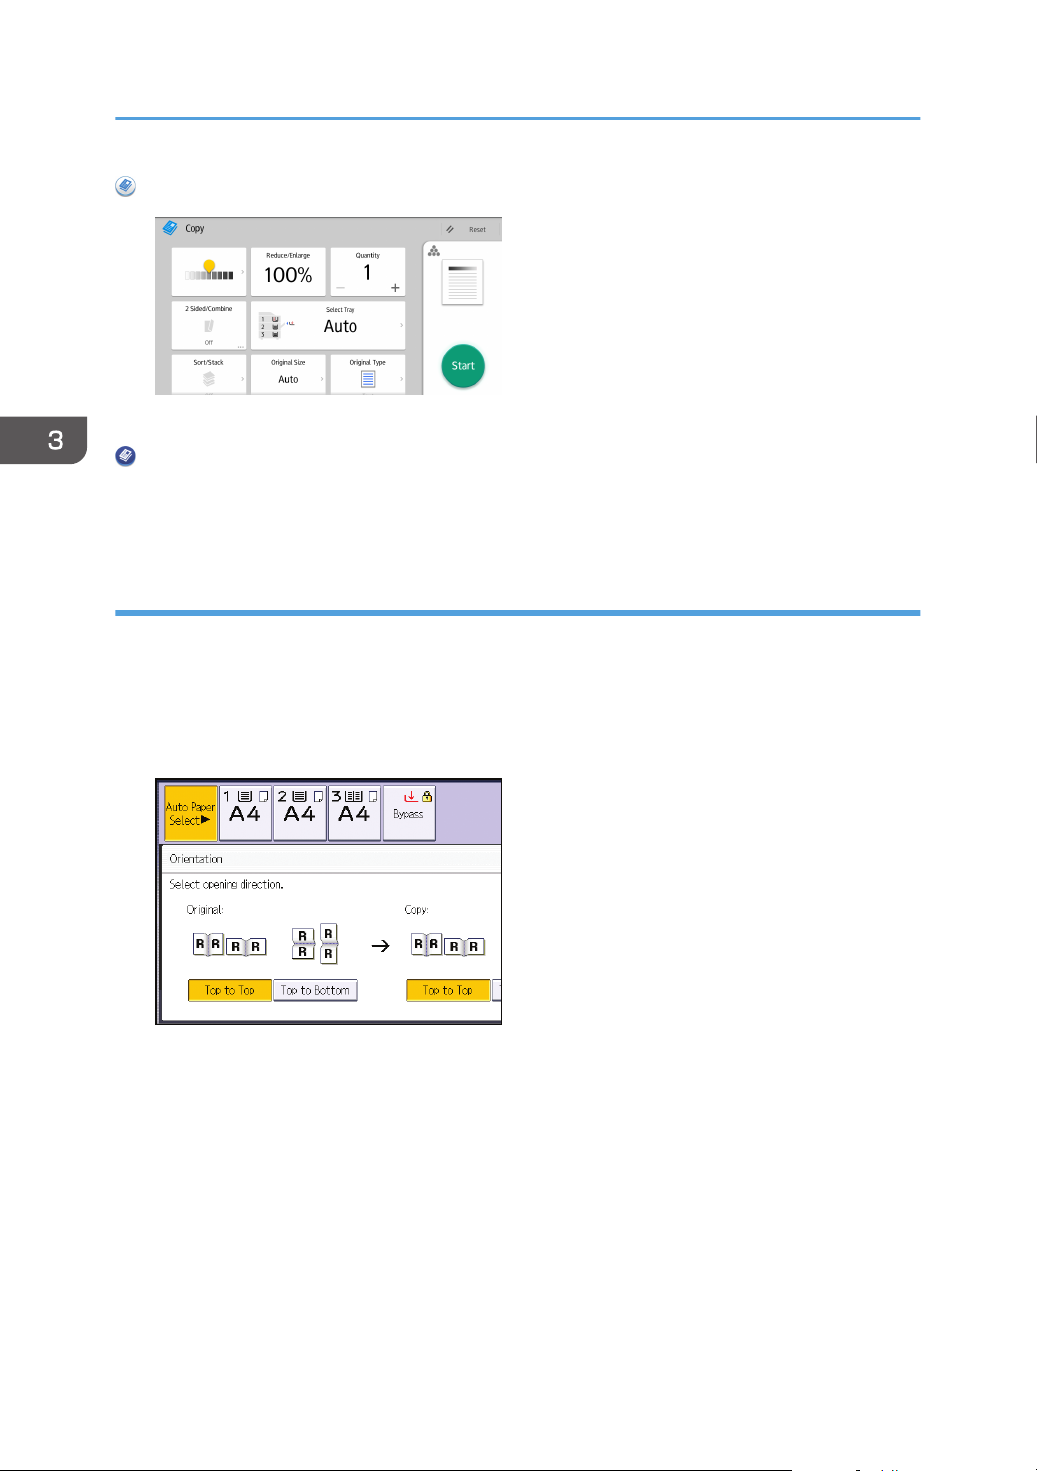
3. Copy
When Using the Copy Application
About how to use the application's screen, see page 43 "[Copy] Screen".
When Using the Copier (Classic) Application
For details about how to use the Classic Copier function, see page 78 "Procedure for specifying
the original and copy orientation (classic)".
Procedure for specifying the original and copy orientation (classic)
1. Press [Dup./Combine/Series].
2. Make sure that [Duplex] is selected. If [Duplex] is not selected, press [Duplex].
3. Press [Orientation].
4. Select [Top to Top] or [Top to Bottom] for [Original:] if the original is two-sided.
5. Select [Top to Top] or [Top to Bottom] for [Copy:].
6. Press [OK].
78
Page 81
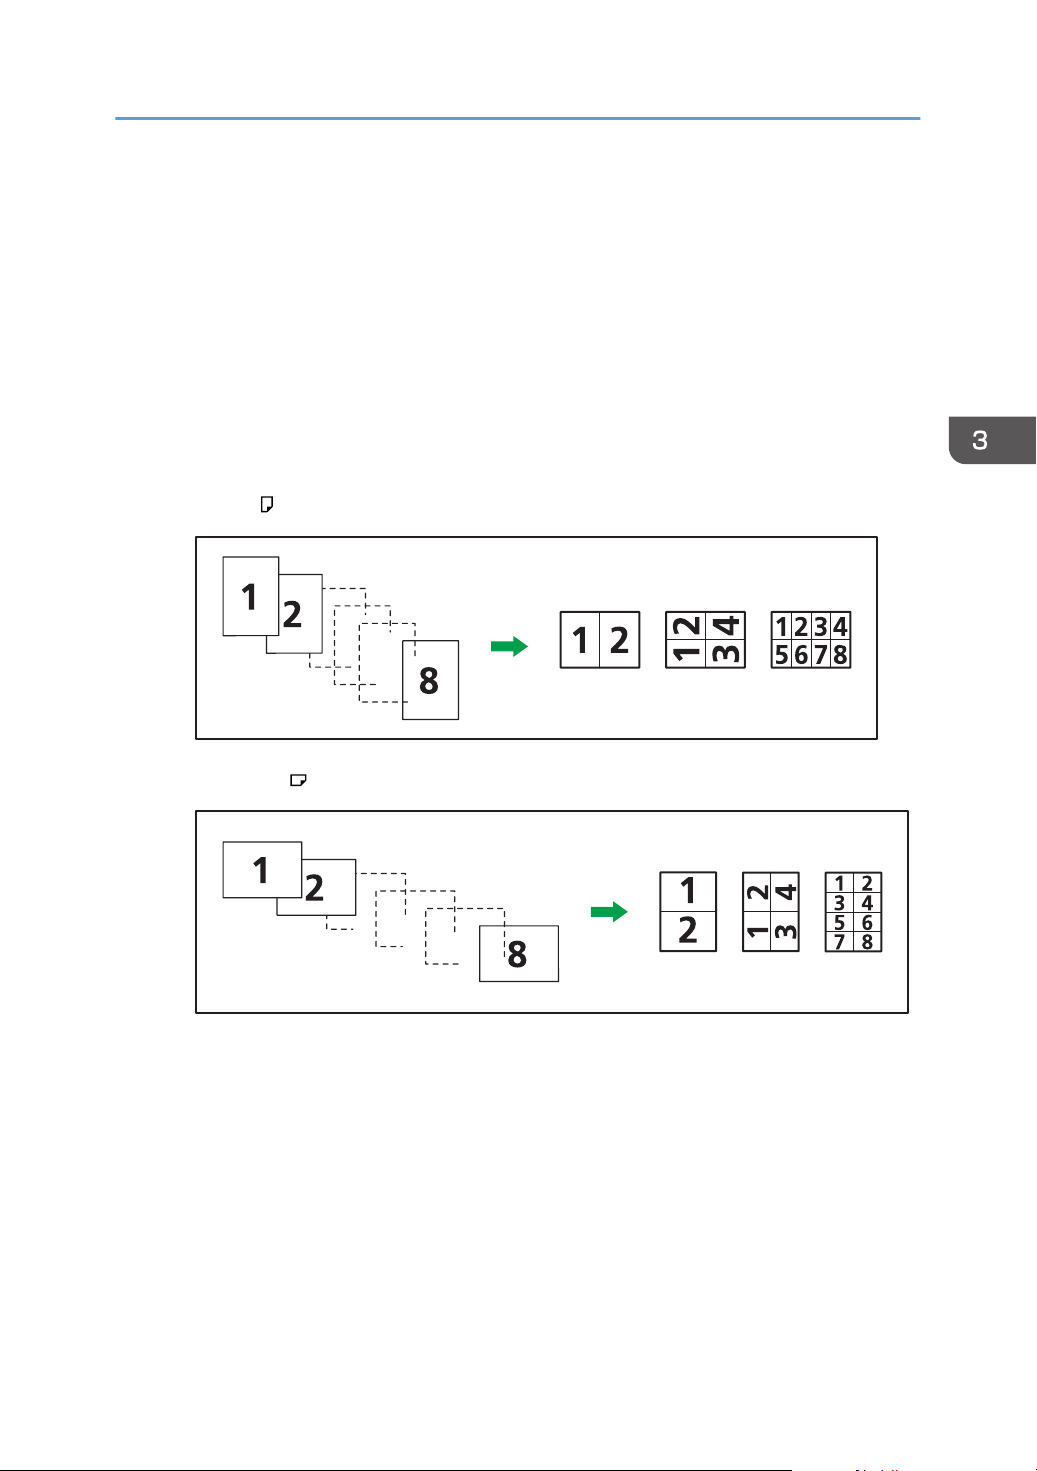
CKN015
CKN016
Combined Copying
Combined Copying
This mode can be used to select a reproduction ratio automatically and copy the originals onto a single
sheet of copy paper.
The machine selects a reproduction ratio between 25 and 400%. If the orientation of the original is
different from that of the copy paper, the machine will automatically rotate the image by 90 degrees to
make copies properly.
Orientation of the original and image position of Combine
The image position of Combine differs according to original orientation and the number of originals
to be combined.
• Portrait ( ) originals
• Landscape ( ) originals
Placing originals (originals placed in the ADF)
The default value for the copy order in the Combine function is [From Left to Right]. To copy
originals from right to left in the ADF, place them upside down.
• Originals read from left to right
79
Page 82
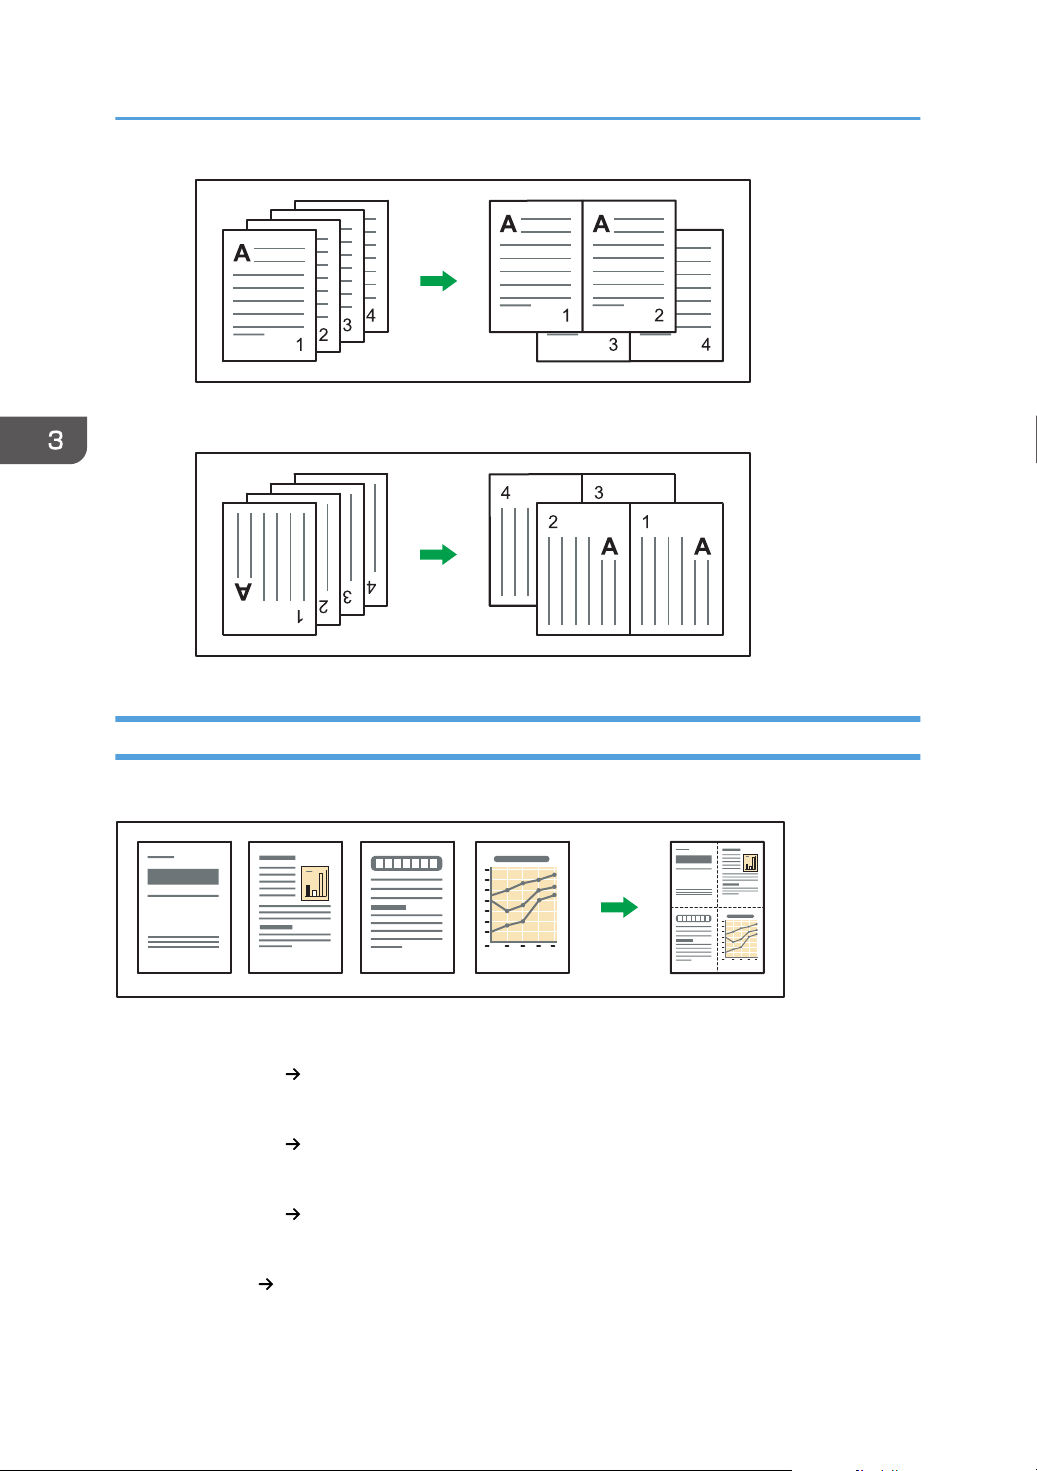
CKN010
CKN017
CKN014
3. Copy
• Originals read from right to left
One-Sided Combine
Combine several pages onto one side of a sheet.
There are six types of One-Sided Combine.
1 Sided 2 Originals Combine 1 Side
Copies two 1-sided originals to one side of a sheet.
1 Sided 4 Originals Combine 1 Side
Copies four 1-sided originals to one side of a sheet.
1 Sided 8 Originals Combine 1 Side
Copies eight 1-sided originals to one side of a sheet.
2 Sided 2 Pages Combine 1 Side
80
Copies one 2-sided original to one side of a sheet.
Page 83
2 Sided 4 Pages Combine 1 Side
Copies two 2-sided originals to one side of a sheet.
2 Sided 8 Pages Combine 1 Side
Copies four 2-sided originals to one side of a sheet.
When Using the Copy Application
About how to use the application's screen, see page 43 "[Copy] Screen".
When Using the Copier (Classic) Application
For details about how to use the Classic Copier function, see page 81 "Procedure for one-sided
combine (classic)".
Combined Copying
Procedure for one-sided combine (classic)
1. Press [Dup./Combine/Series].
2. Press [Combine].
3. Select [1 Sided] or [2 Sided] for [Original:].
If you selected [2 Sided], you can change the orientation.
81
Page 84
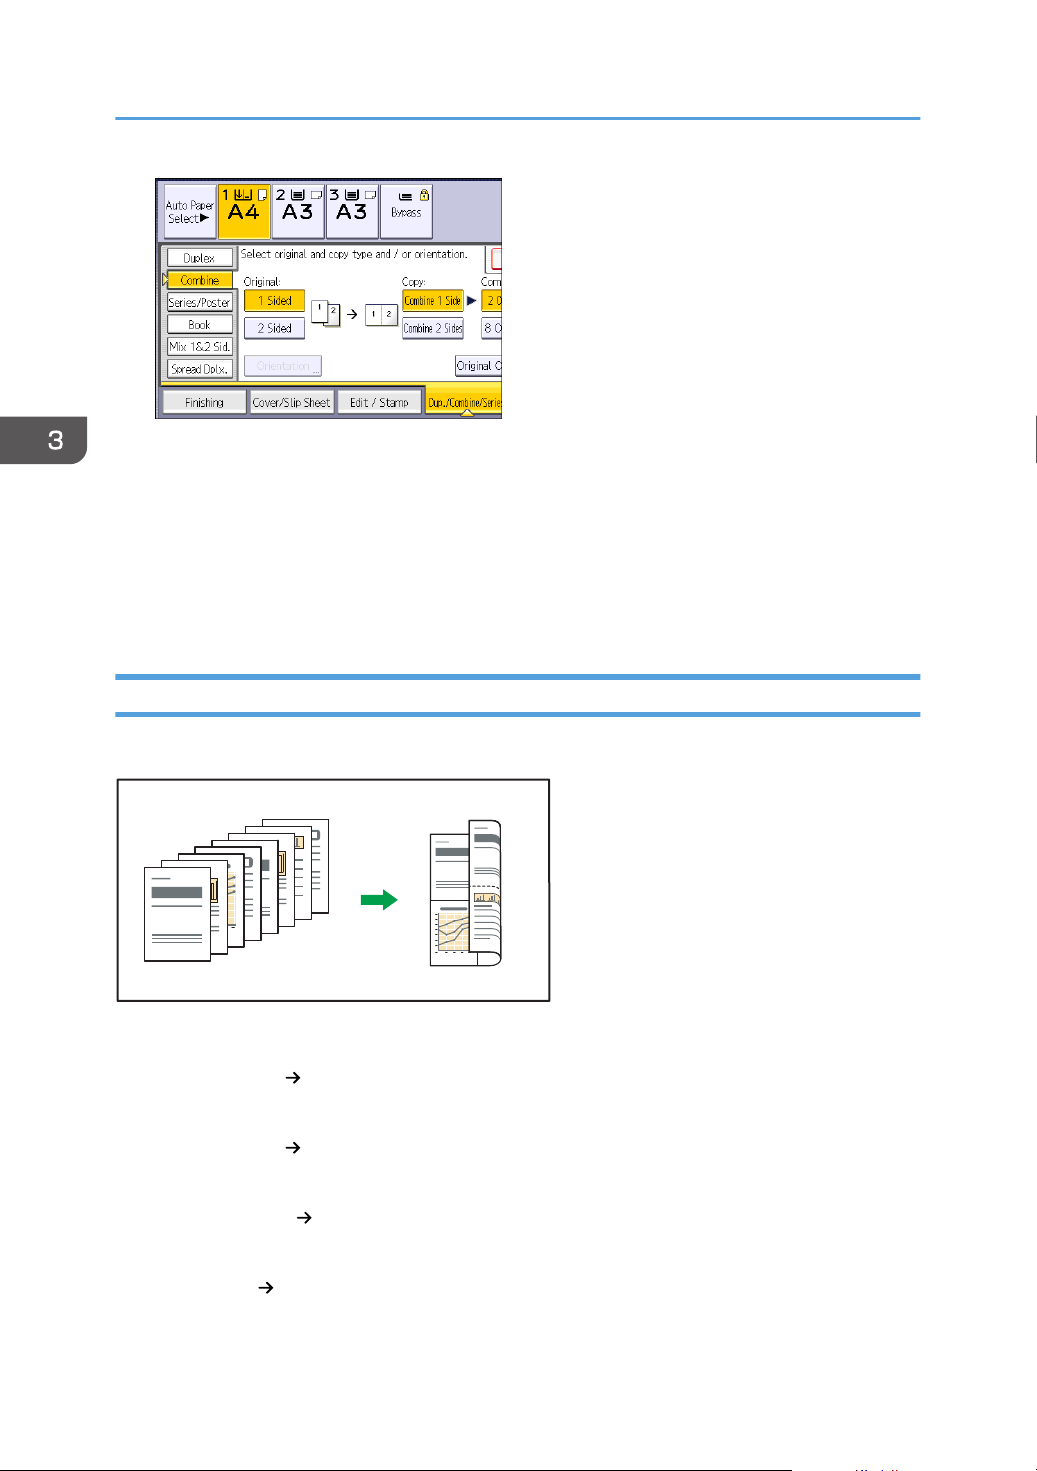
CKN074
3. Copy
4. Press [Combine 1 Side].
5. Select the number of originals to combine.
6. Press [Original Orientation].
7. Select the original orientation, and then press [OK] twice.
8. Select the paper size.
9. Place the originals, and then press [Start].
Two-Sided Combine
Combines various pages of originals onto two sides of one sheet.
There are six types of Two-Sided Combine.
1 Sided 4 Originals Combine 2 Sides
Copies four 1-sided originals to one sheet with two pages per side.
1 Sided 8 Originals Combine 2 Sides
Copies eight 1-sided originals to one sheet with four pages per side.
1 Sided 16 Originals Combine 2 Sides
Copies 16 1-sided originals to one sheet with eight pages per side.
2 Sided 4 Pages Combine 2 Sides
Copies two 2-sided originals to one sheet with two pages per side.
82
Page 85
2 Sided 8 Pages Combine 2 Sides
Copies four 2-sided originals to one sheet with four pages per side.
2 Sided 16 Pages Combine 2 Sides
Copies eight 2-sided originals to one sheet with eight pages per side.
When Using the Copy Application
About how to use the application's screen, see page 43 "[Copy] Screen".
When Using the Copier (Classic) Application
For details about how to use the Classic Copy function, see page 83 "Procedure for two-sided
combine (classic)".
Combined Copying
Procedure for two-sided combine (classic)
1. Press [Dup./Combine/Series].
2. Press [Combine].
83
Page 86
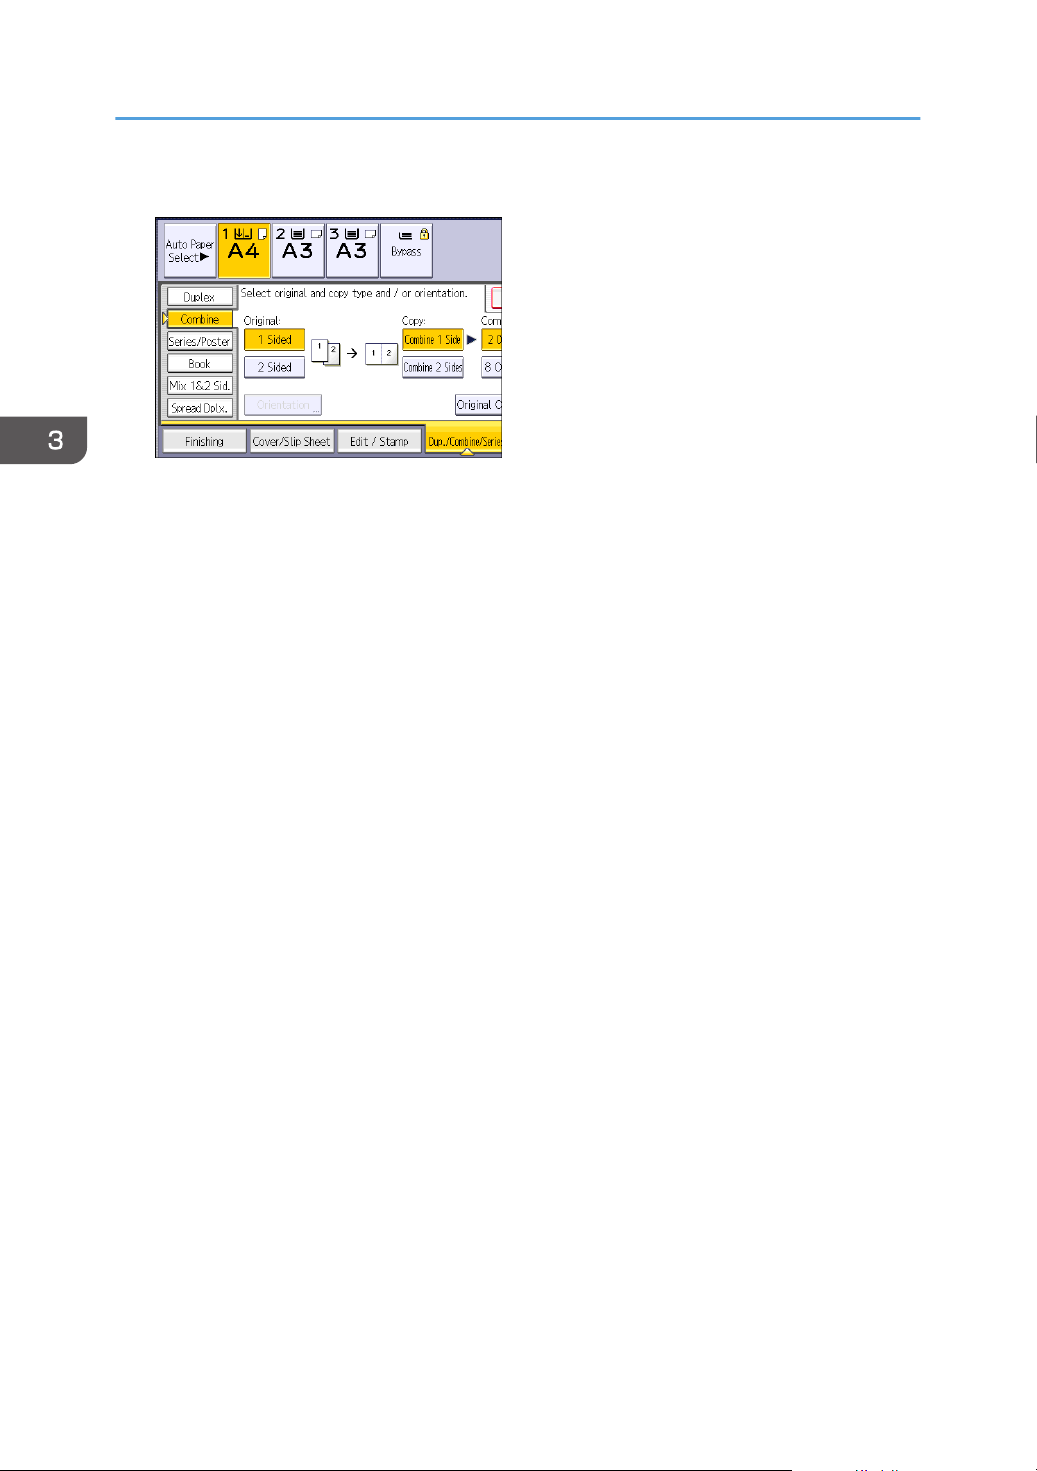
3. Copy
3. Select [1 Sided] or [2 Sided] for [Original:].
4. Press [Combine 2 Sides].
5. Press [Orientation].
6. Select [Top to Top] or [Top to Bottom] for [Original:] if the original is two-sided.
7. Select [Top to Top] or [Top to Bottom] for [Copy:], and then press [OK].
8. Select the number of originals to combine.
9. Press [Original Orientation].
10. Select the original orientation, and then press [OK] twice.
11. Select the paper size.
12. Place the originals, and then press [Start].
84
Page 87
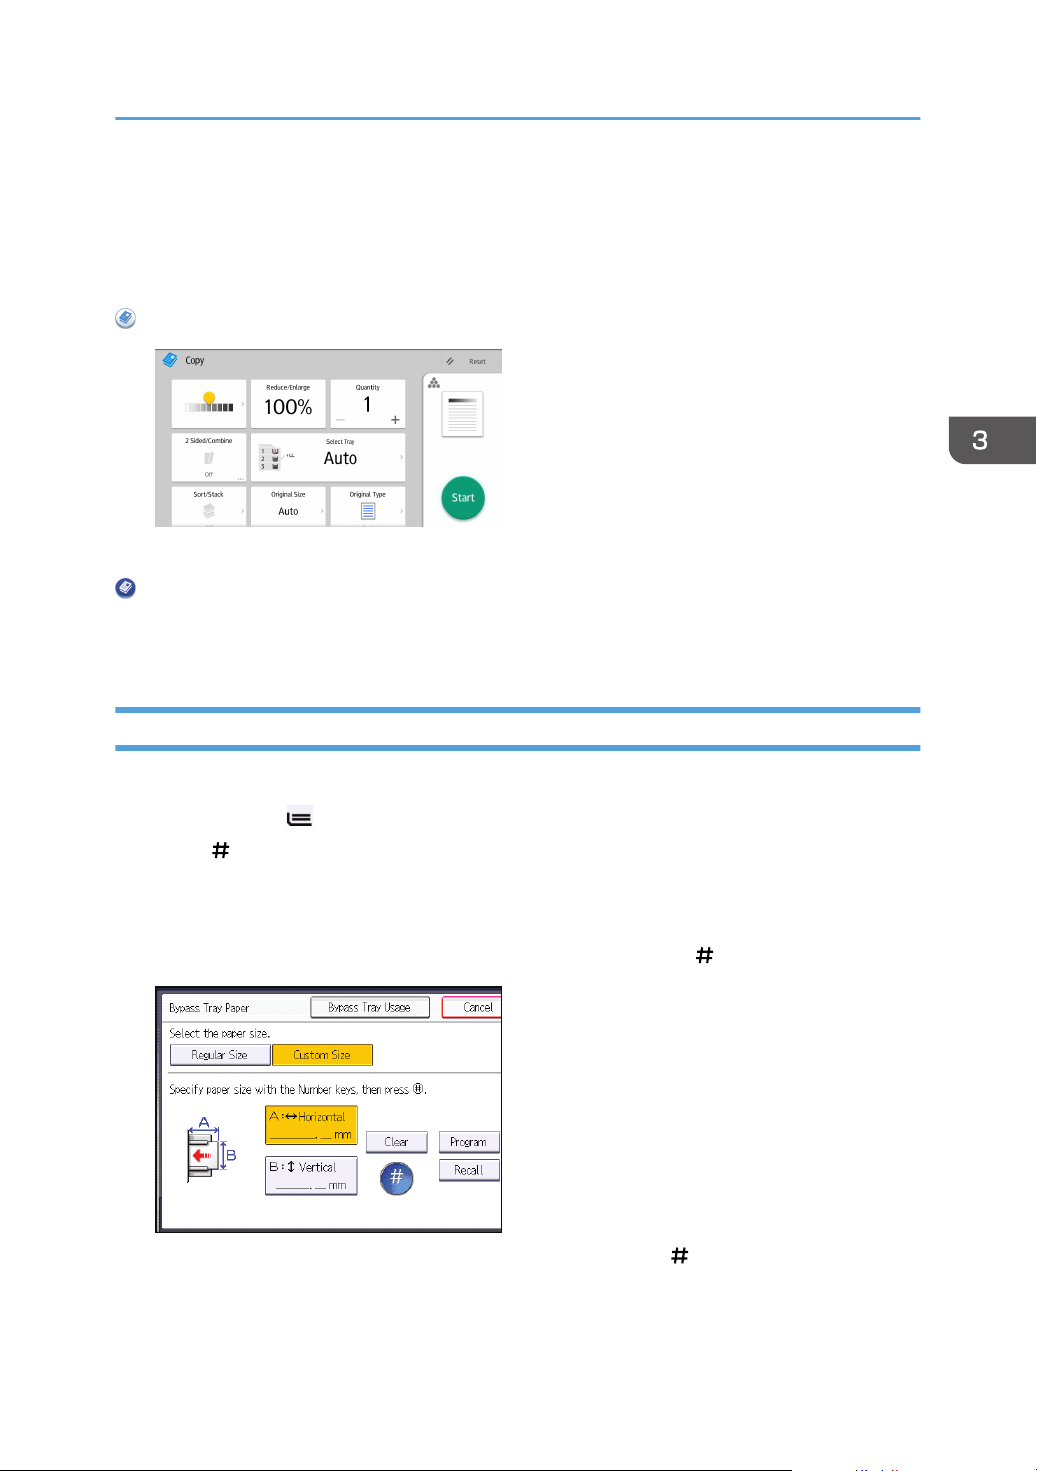
Copying onto Custom Size Paper
Copying onto Custom Size Paper
Paper that has a horizontal length of 139.7–600.0 mm (5.50–23.62 inches) and a vertical length of
100.0–305.0 mm (3.94–12.00 inches) can be fed in from the bypass tray.
When Using the Copy Application
About how to use the application's screen, see page 43 "[Copy] Screen".
When Using the Copier (Classic) Application
For details about how to use the Classic Copier function, see page 85 "Procedure for Copying
onto Custom Size Paper (Classic)".
Procedure for Copying onto Custom Size Paper (Classic)
1. Load the paper face down in the bypass tray.
The bypass tray ( ) is automatically selected.
2. Press [ ].
3. Press [Paper Size].
4. Press [Custom Size].
5. Enter the horizontal size with the number keys, and then press [ ].
6. Enter the vertical size with the number keys, and then press [ ].
7. Press [OK] twice.
8. Place the originals, and then press [Start].
85
Page 88
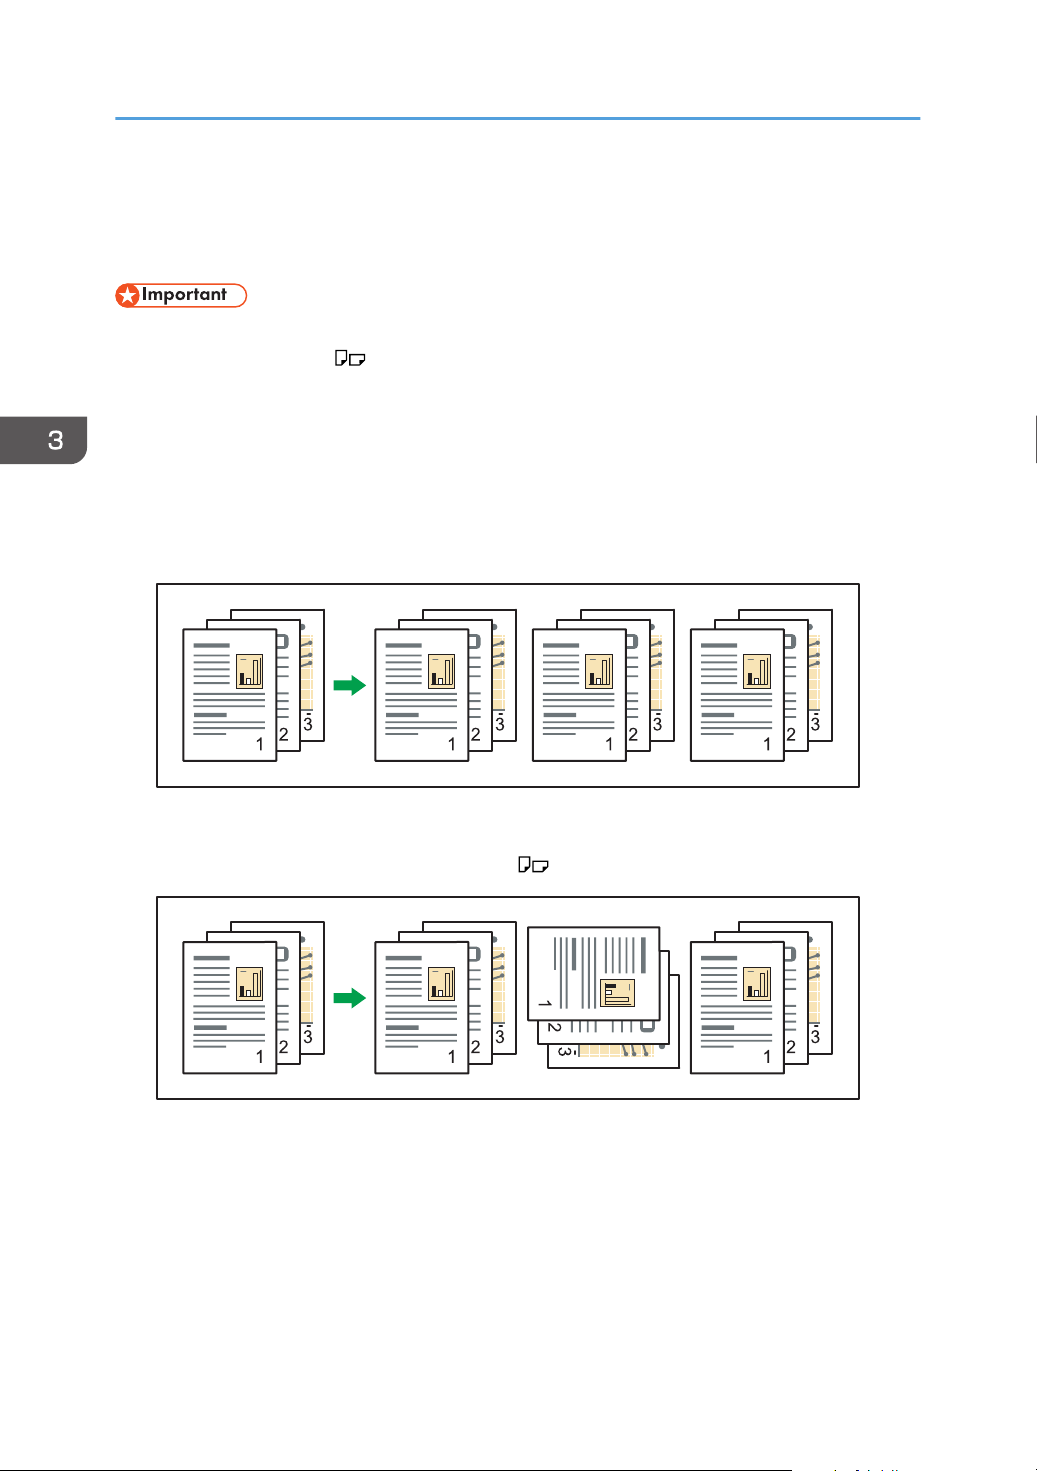
CKN018
CKN019
3. Copy
Sort
The machine assembles copies as sets in sequential order.
• To use the Rotate Sort function, two paper trays loaded with paper of the same size and type, but
in different orientation ( ), are required. For details, see "Tray Paper Settings", Connecting the
Machine/ System Settings.
• You cannot use the bypass tray with Rotate Sort.
Sort/Shift Sort
Copies are assembled as sets in sequential order.
To use Shift Sort, a finisher is required. Each time the copies of one set or a job are delivered, the
next copy is shifted to separate each set or job.
86
Rotate Sort
Every other copy set is rotated by 90 degrees ( ) and delivered to the copy tray.
Page 89
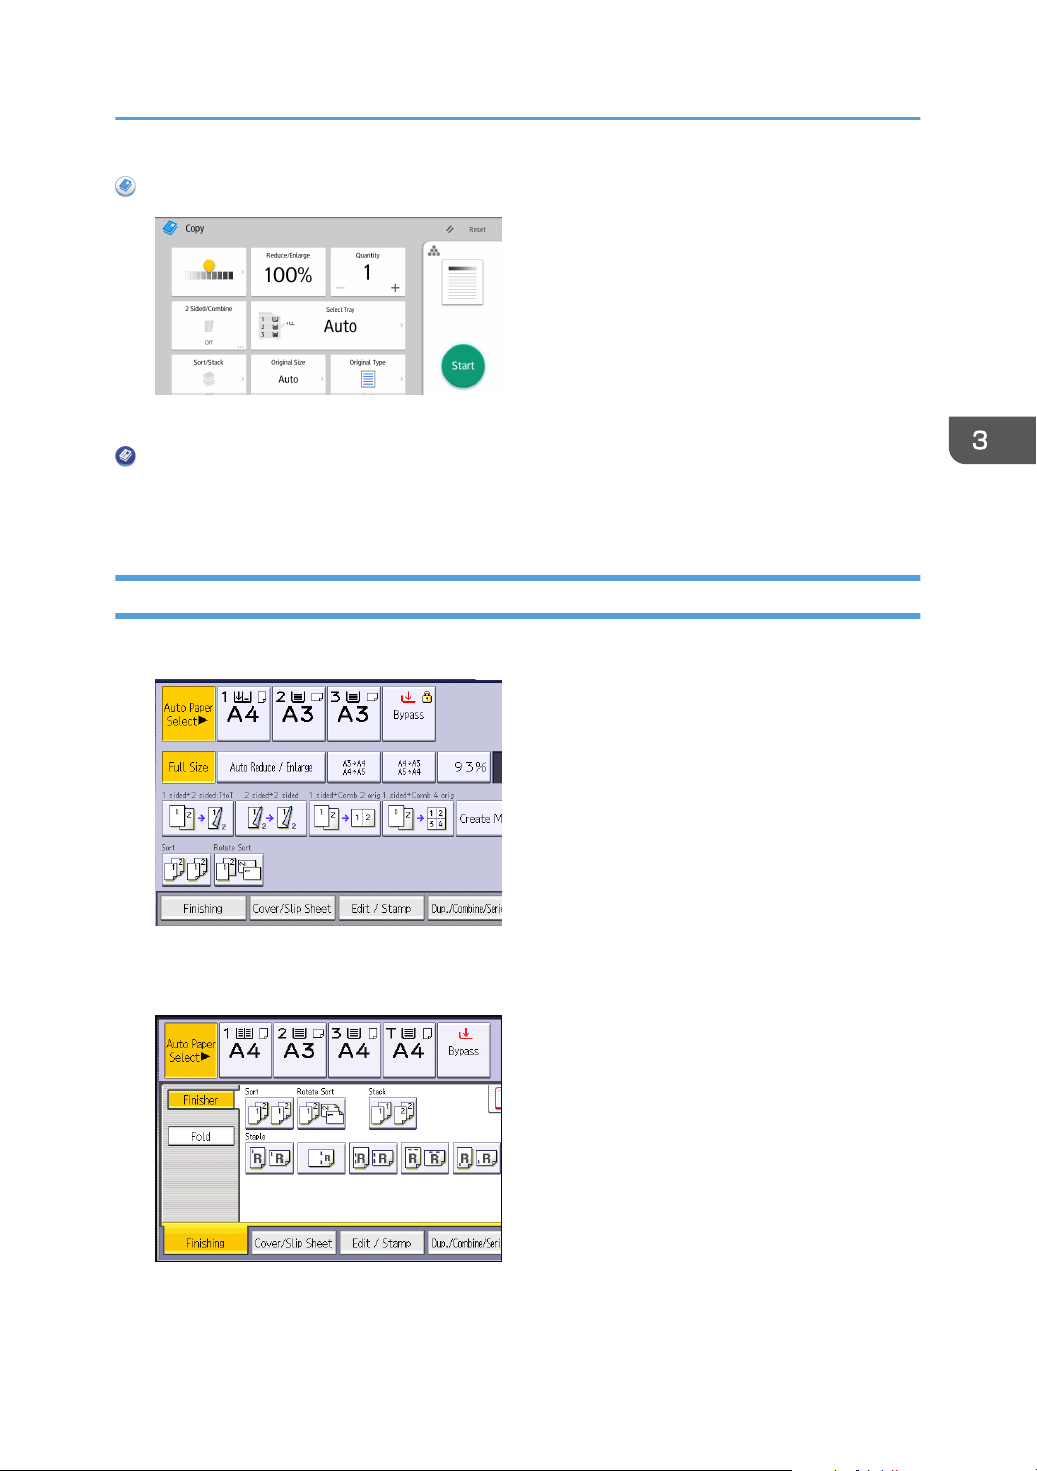
When Using the Copy Application
About how to use the application's screen, see page 43 "[Copy] Screen".
When Using the Copier (Classic) Application
For details about how to use the Classic Copy function, see page 87 "Procedure for Sort
(Classic)".
Procedure for Sort (Classic)
1. Press [Finishing].
Sort
2. Press [Finisher].
3. Select [Sort] or [Rotate Sort], and then press [OK].
4. Enter the number of copy sets using the number keys.
87
Page 90
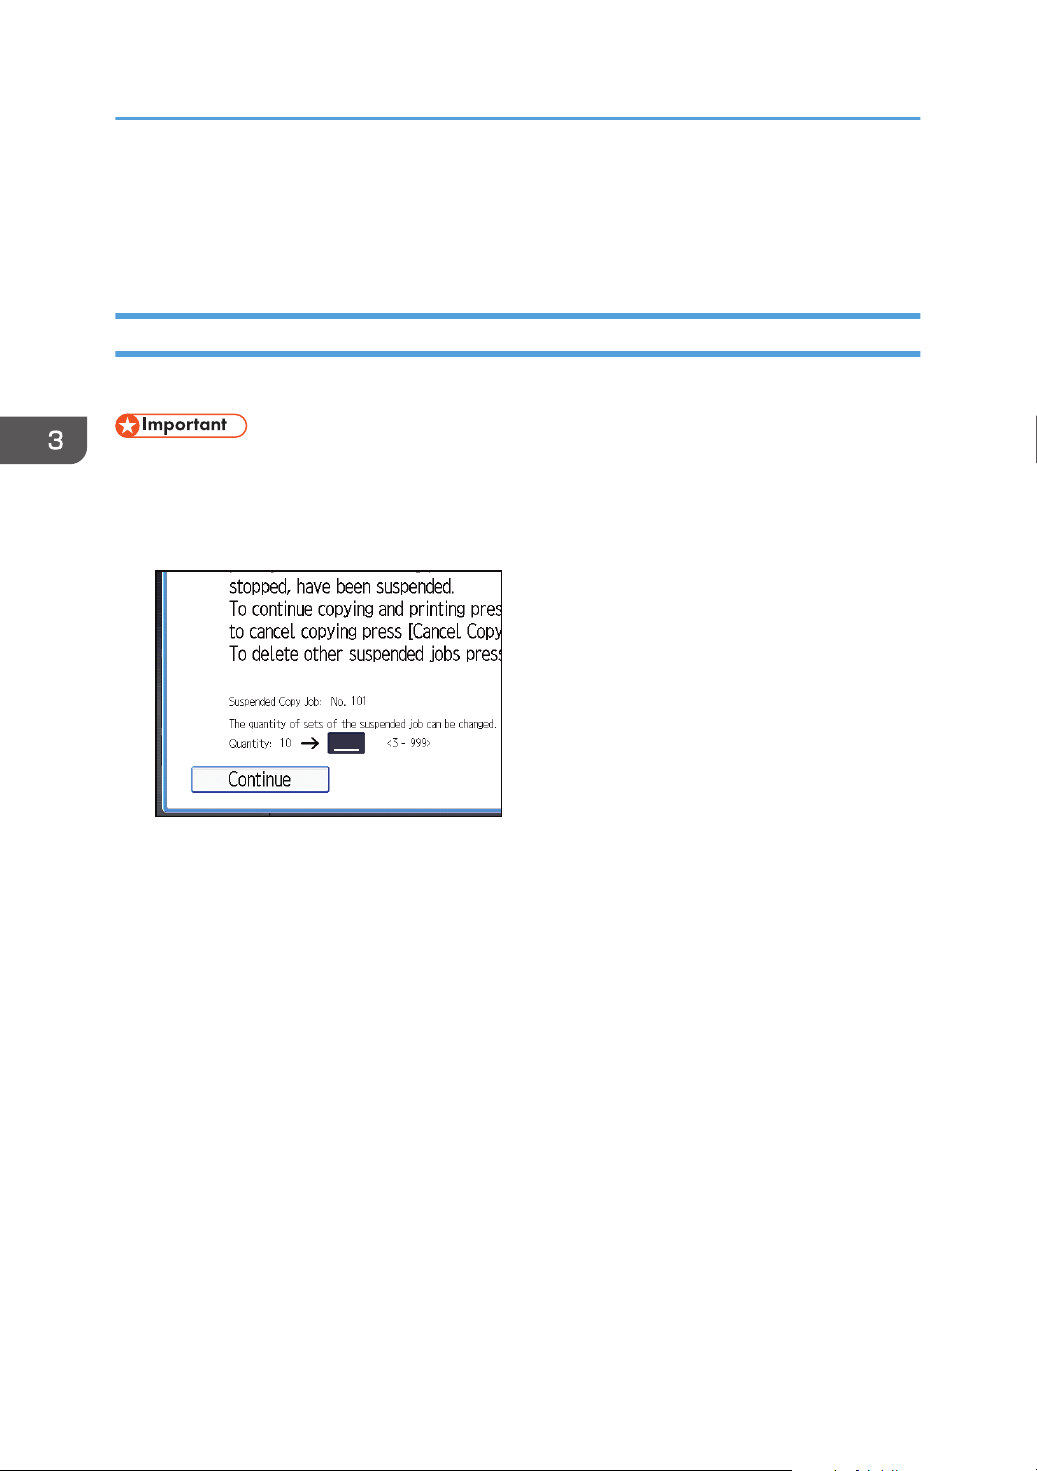
3. Copy
5. Place the originals.
To confirm the type of finishing, press [Sample Copy].
6. Press [Start].
Changing the number of sets
You can change the number of copy sets during copying.
• This function can be used only when the Sort function is selected.
1. While "Copying..." is displayed, press [Stop].
2. Enter the number of copy sets with the number keys.
88
3. Press [Continue].
Copying starts again.
Page 91
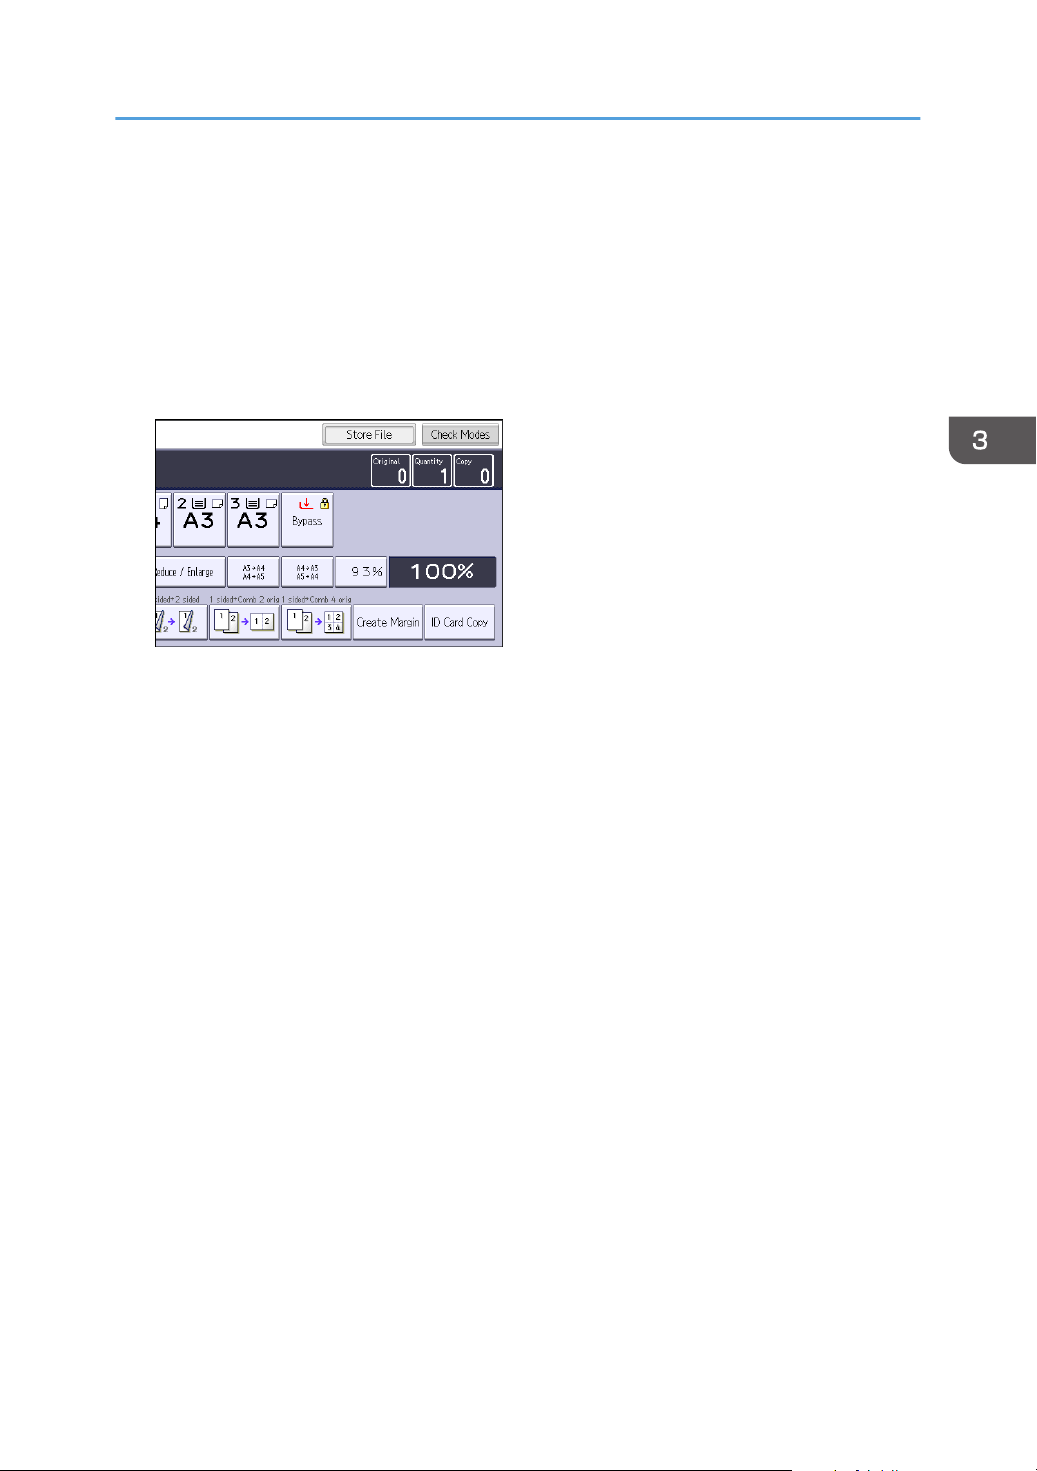
Storing Data in the Document Server
Storing Data in the Document Server
The Document Server enables you to store documents being read with the copy feature on the hard disk
of this machine. Thus you can print them later applying necessary conditions.
You can check the stored documents on the Document Server screen. For details about the Document
Server, see page 141 "Storing Data".
1. Press [Store File].
2. Enter a file name, user name, or password if necessary.
3. Specify a folder in which to store the document if necessary.
4. Press [OK].
5. Place the originals.
6. Make the scanning settings for the original.
7. Press [Start].
Stores scanned originals in memory and makes one set of copies. If you want to store another
document, do so after copying is complete.
89
Page 92

3. Copy
90
Page 93
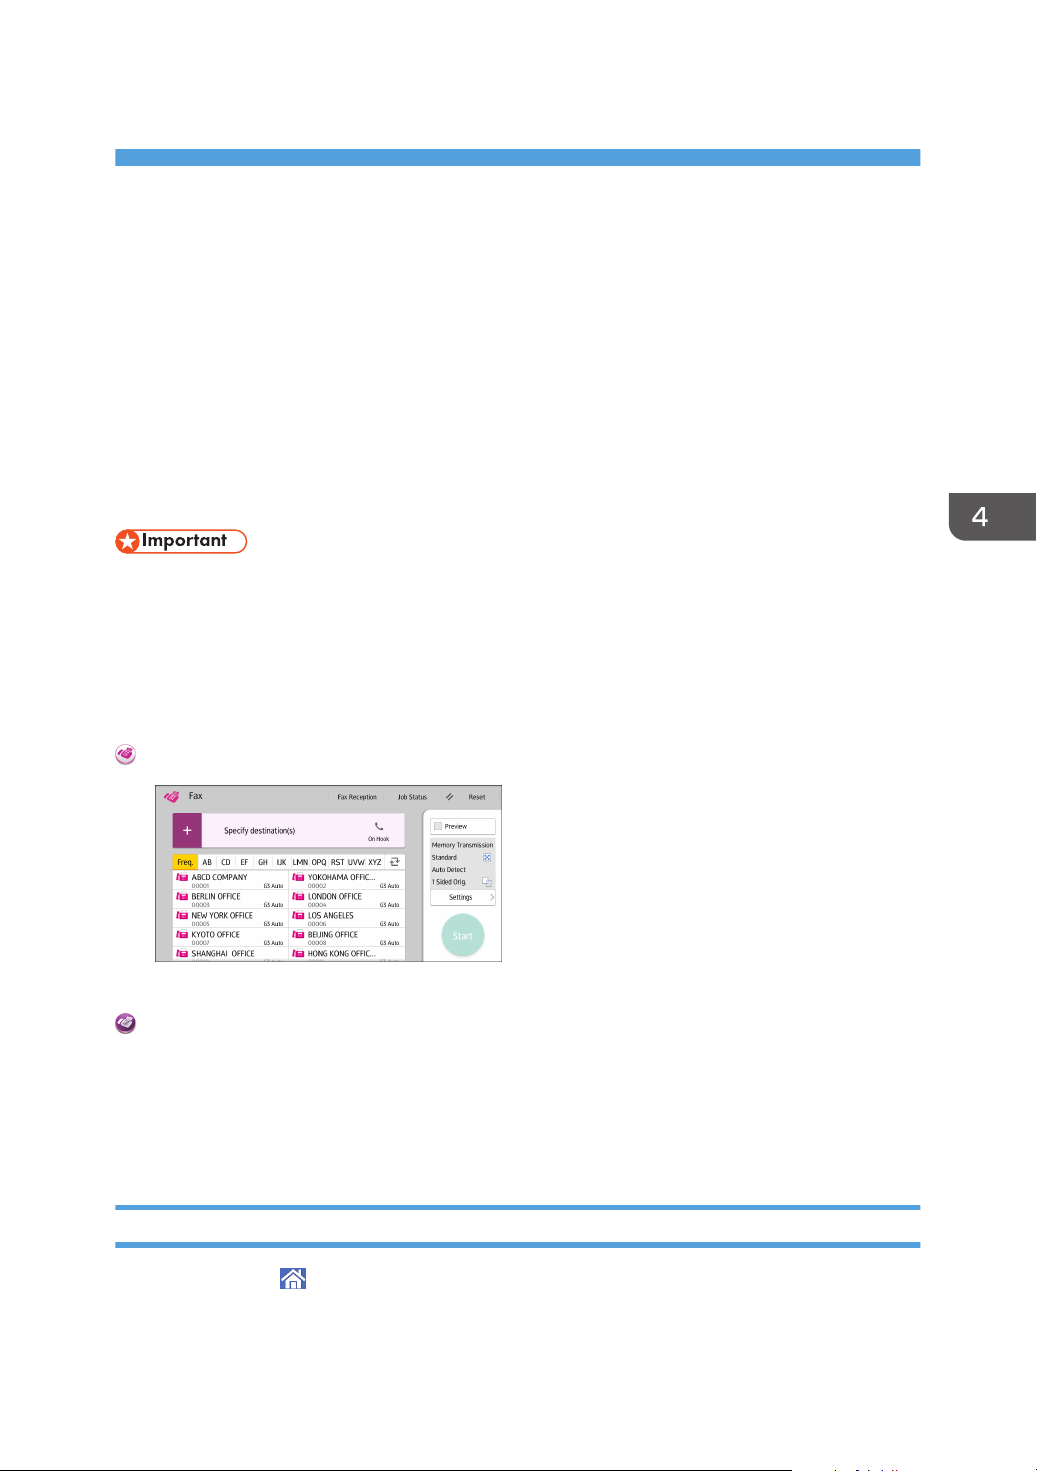
4. Fax
This chapter describes frequently used facsimile functions and operations. For information not included in
this chapter, see Fax available on our website.
Basic Procedure for Transmissions (Memory Transmission)
This section describes the basic procedure for transmitting documents using Memory Transmission.
You can specify the fax, IP-Fax, Internet Fax, e-mail, or folder destinations. Multiple types of destination
can be specified simultaneously.
• It is recommended that you call the receivers and confirm with them when sending important
documents.
• If there is a power failure (the main power switch is turned off) or the machine is unplugged for
about one hour, all the documents stored in memory are deleted. As soon as the main power
switch is turned on, the Power Failure Report is printed to help you check the list of deleted files. See
"When an Error Is Notified via a Report or E-Mail", Troubleshooting.
When Using the Fax Application
About how to use the application's screen, see page 46 "[Fax] Screen".
When Using the Fax (Classic) Application
For details about how to use the classic fax function, see page 91 "Procedure for Sending
Originals Using the ADF (Classic)".
For details about how to use the classic fax function, see page 93 "Procedure for Sending
Originals Using the Exposure Glass (Classic)".
Procedure for Sending Originals Using the ADF (Classic)
1. Press [Home] ( ) at the bottom of the screen in the center.
2. Flick the screen to the left, and then press the [Fax (Classic)] icon.
91
Page 94
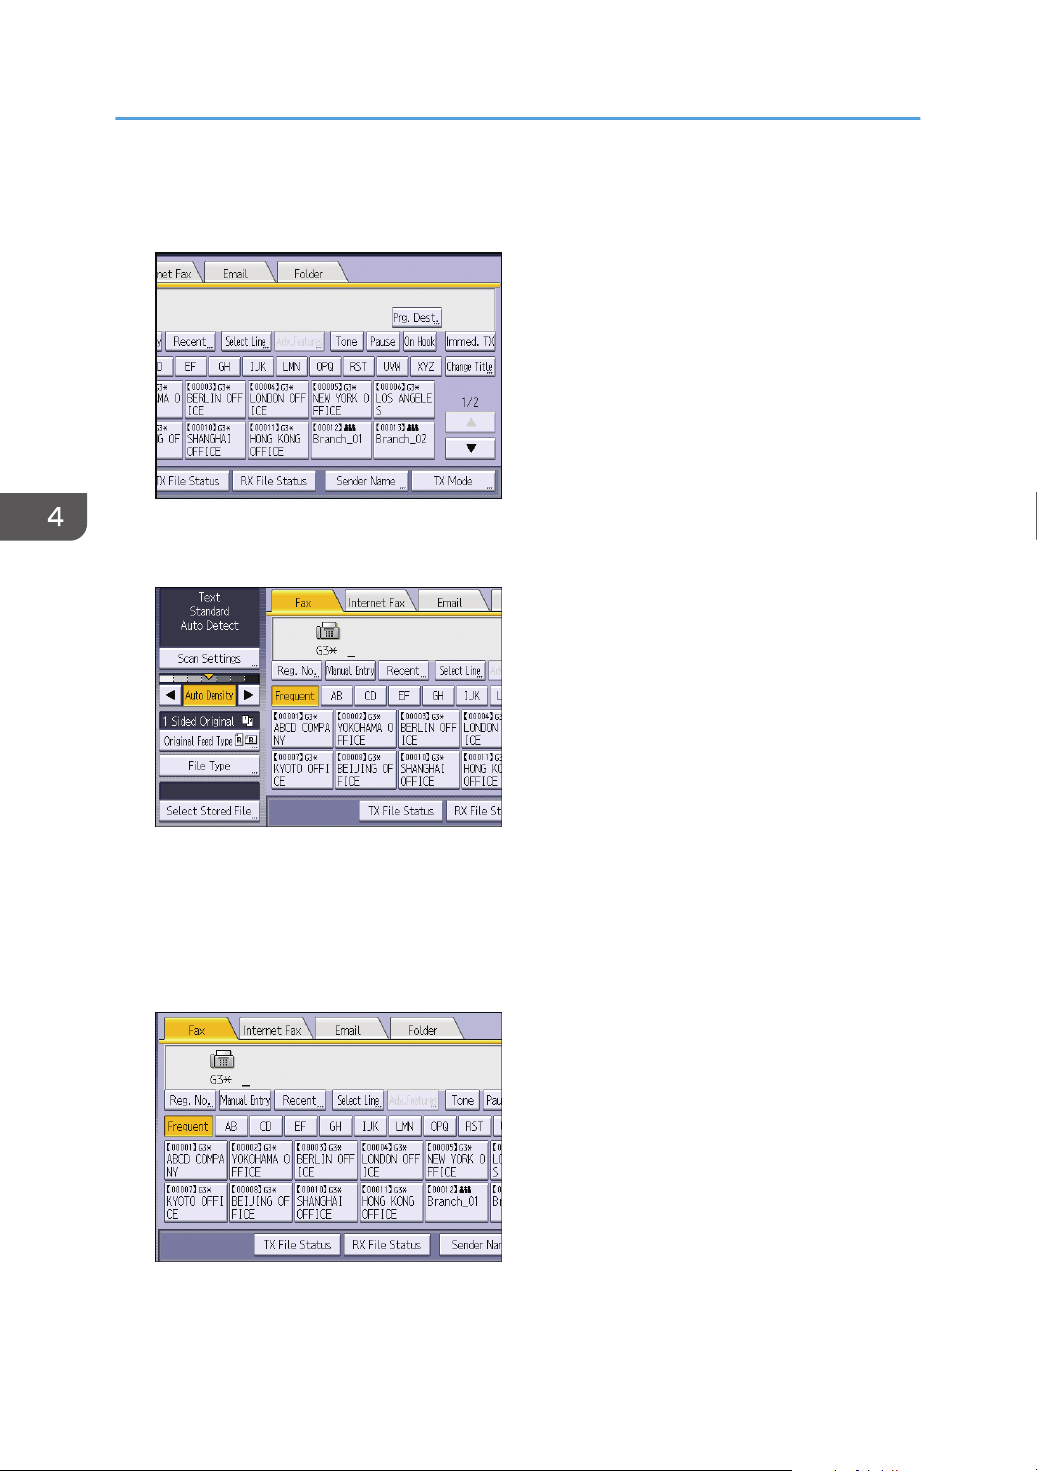
4. Fax
3. Make sure "Ready" appears on the screen.
4. Make sure [Immed. TX] is not highlighted.
5. Place the original into the ADF.
6. Make the scan settings such as scan size and resolution.
92
7. Configure the transmission settings such as [TX Mode] as necessary.
8. Specify a destination.
You can enter the destination's number or address directly or select from the Address Book by
pressing the destination key.
If you make a mistake, press [Clear], and then enter again.
9. When sending the same original to several destinations (broadcasting), specify the next
destination.
Page 95
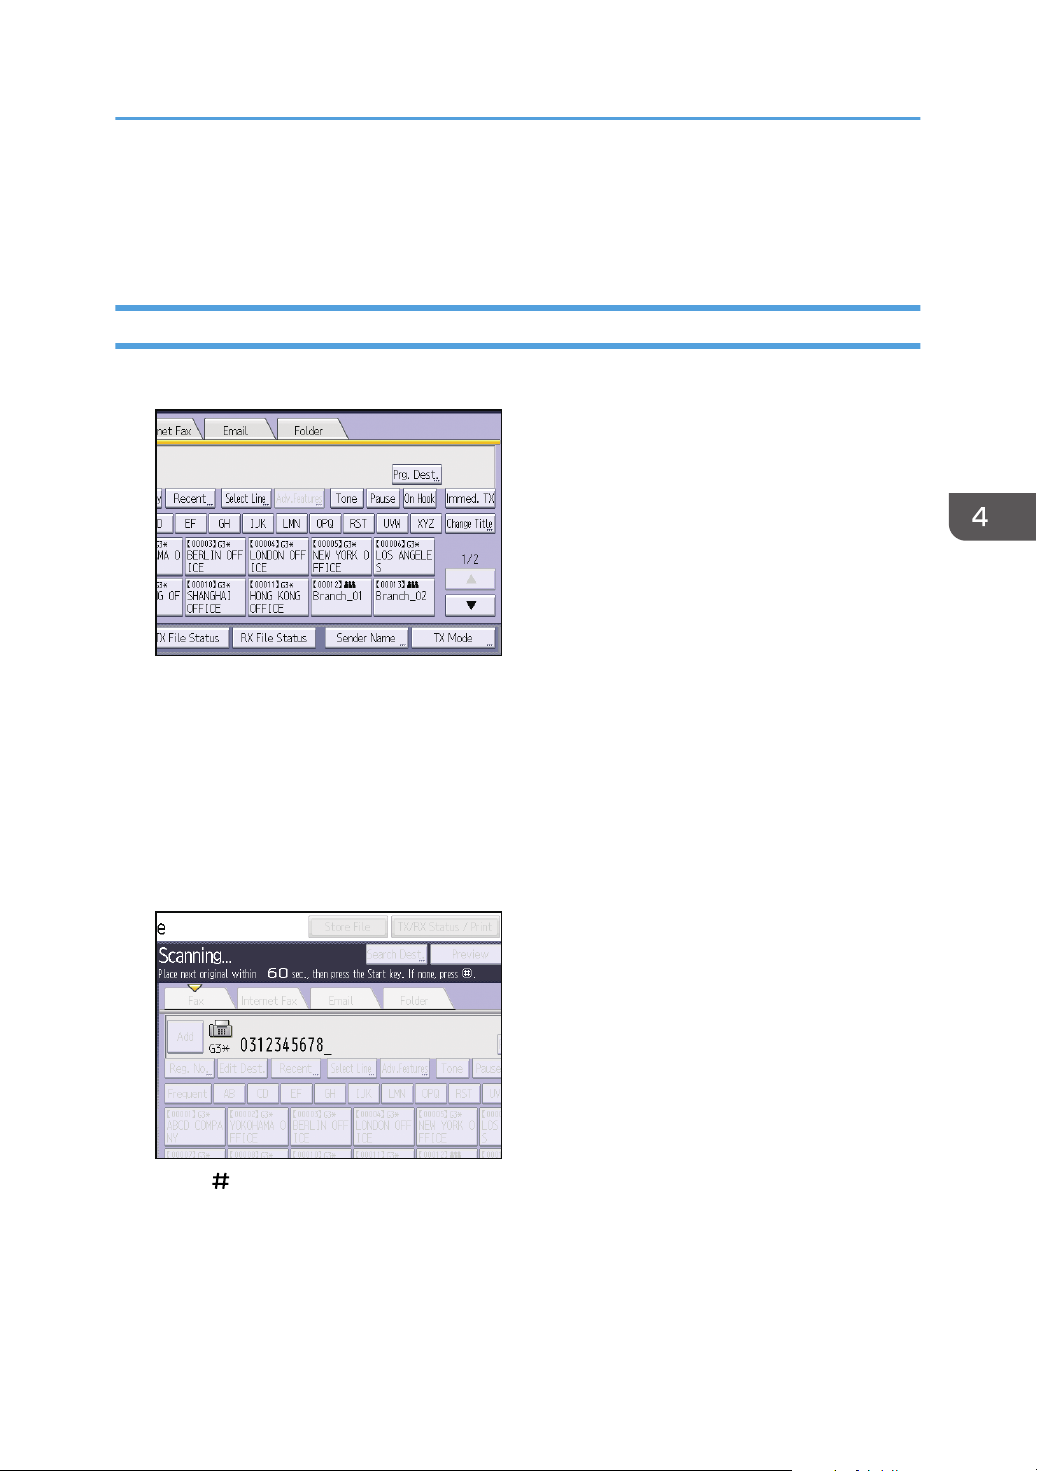
Basic Procedure for Transmissions (Memory Transmission)
10. If you send documents to Internet Fax or e-mail destinations or enable the Email TX
Results function, specify a sender.
11. Press [Start].
Procedure for Sending Originals Using the Exposure Glass (Classic)
1. Make sure [Immed. TX] is not highlighted.
2. Place the first page of the original face down on the exposure glass.
3. Specify a destination.
4. Make the scan settings you require.
5. Press [Start].
6. Place the next original on the exposure glass within 60 seconds when you send multiple
originals, and then repeat Steps 4 and 5.
Repeat this step for each page.
7. Press [ ].
The machine dials the destination and starts transmission.
93
Page 96
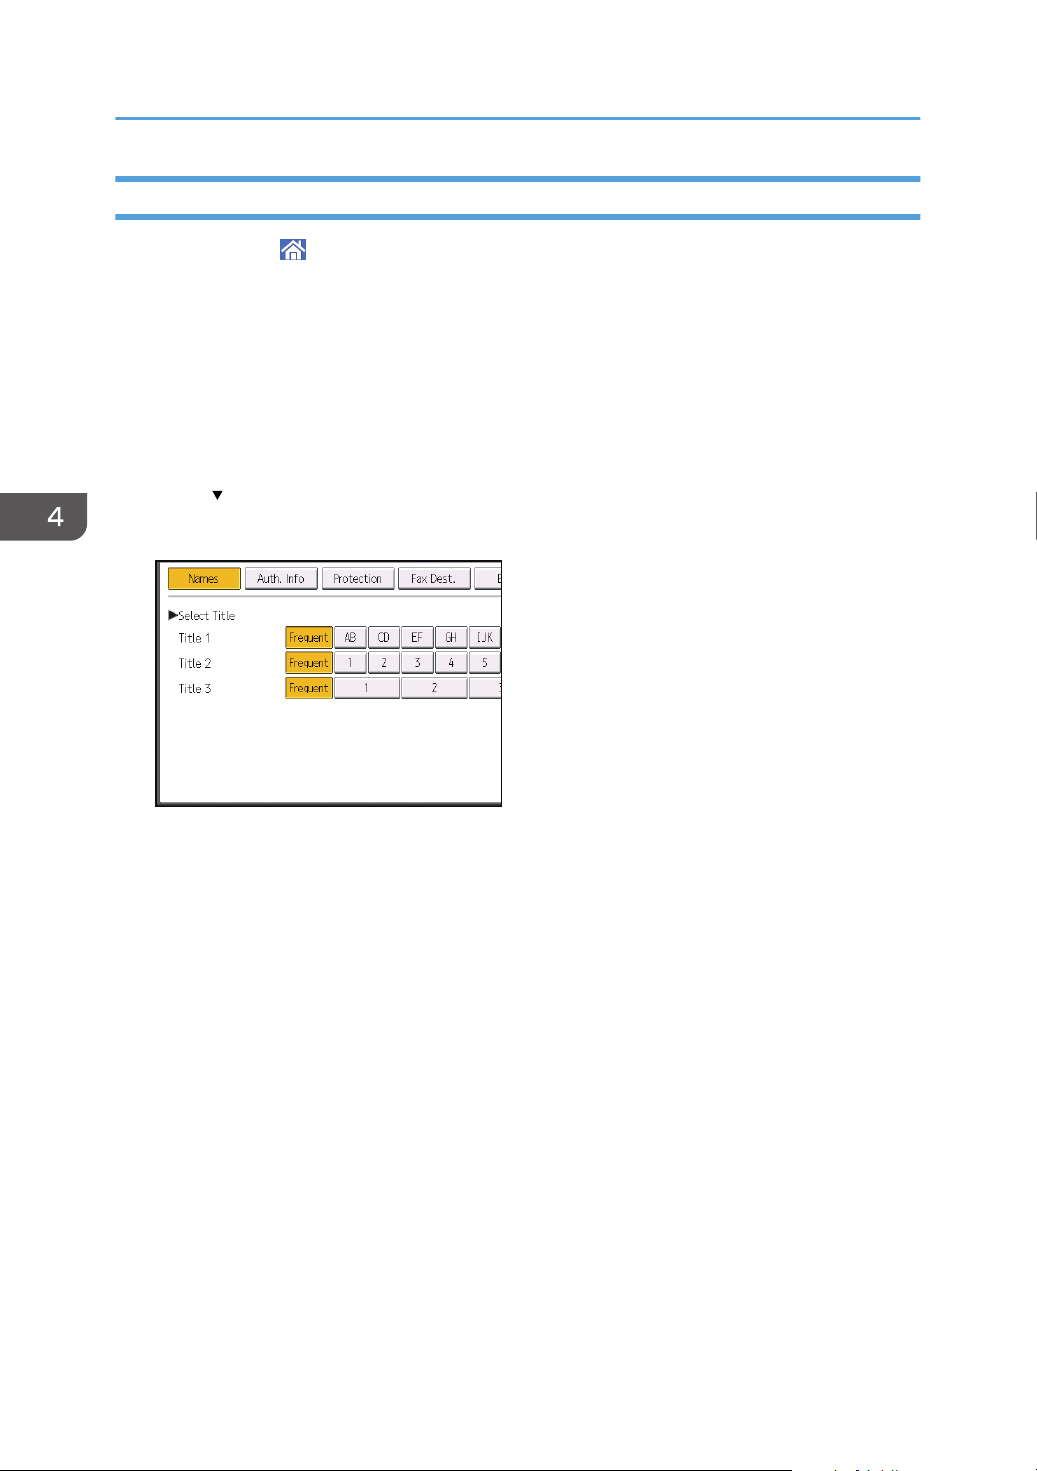
4. Fax
Registering a Fax Destination
1. Press [Home] ( ) at the bottom of the screen in the center.
2. Flick the screen to the left, and then press the [Address Book Management] icon.
3. Check that [Program / Change] is selected.
4. Press [New Program].
5. Press [Change] under "Name".
The name entry display appears.
6. Enter the name, and then press [OK].
7. Press [
8. Press the key for the classification you want to use under "Select Title".
The keys you can select are as follows:
You can select [Frequent] and one more key for each title.
9. Press [Fax Dest.].
10. Press [Change] under "Fax Destination".
Next].
• [Frequent]: Added to the page that is displayed first.
• [AB], [CD], [EF], [GH], [IJK], [LMN], [OPQ], [RST], [UVW], [XYZ], [1] to [10]: Added to the
list of items in the selected title.
94
Page 97
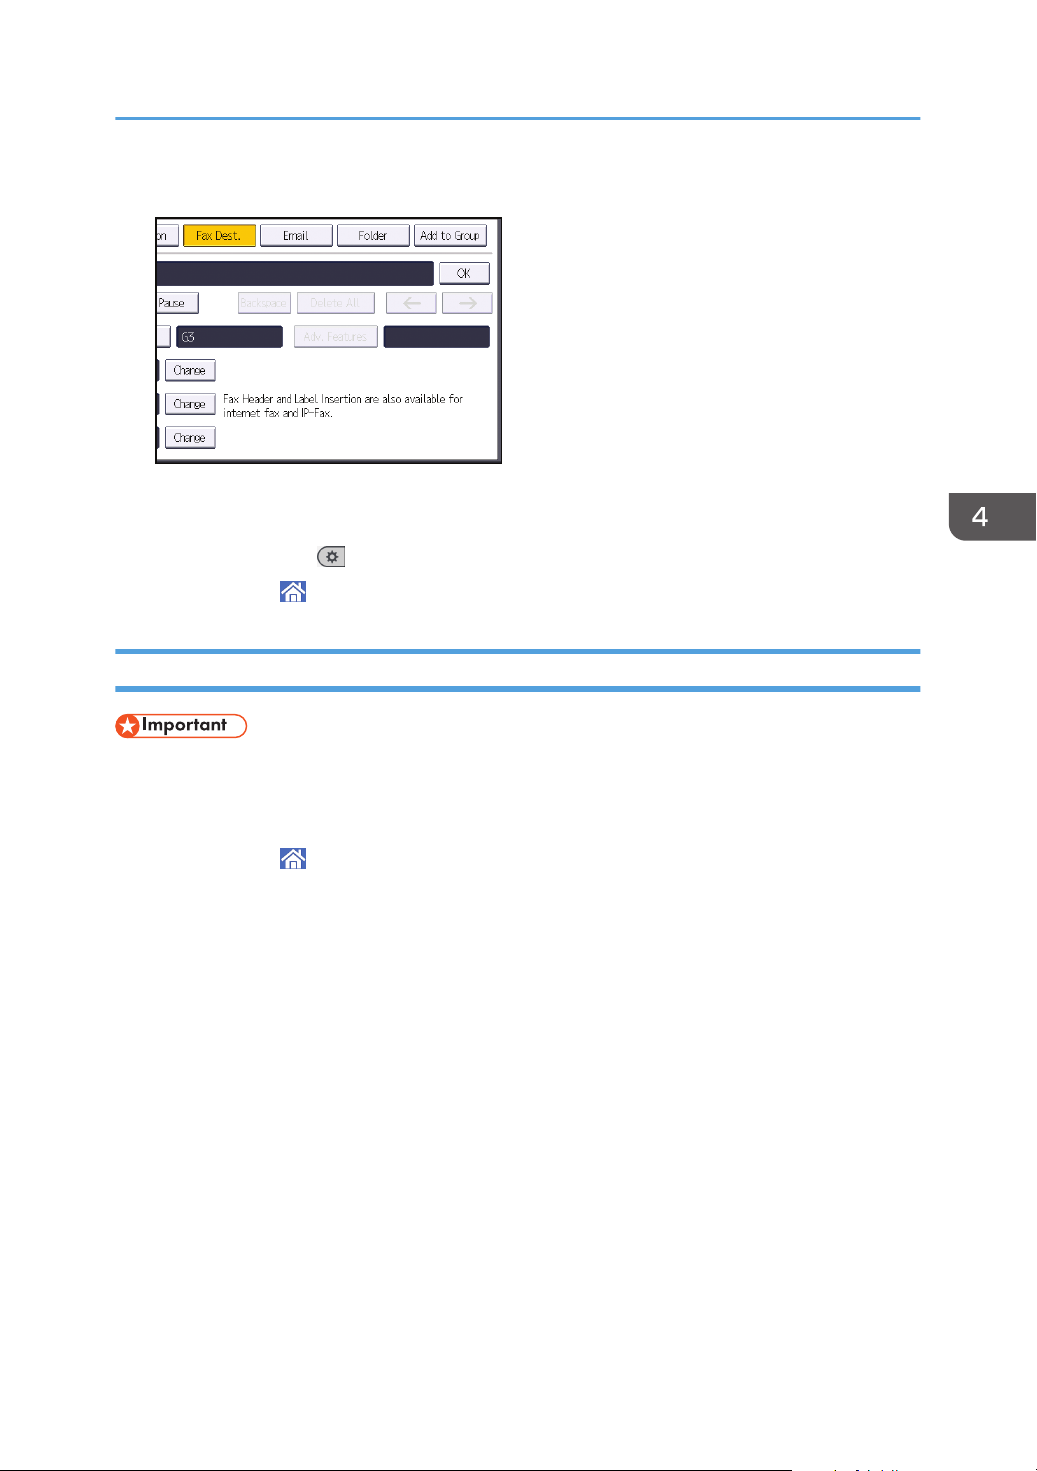
Basic Procedure for Transmissions (Memory Transmission)
11. Enter the fax number using the number keys, and then press [OK].
12. Specify optional settings such as "SUB Code", "SEP Code", and "International TX Mode".
13. Press [OK].
14. Press [User Tools] ( ) on the top right of the screen.
15. Press [Home] ( ) at the bottom of the screen in the center.
Deleting a Fax Destination
• If you delete a destination that is a specified delivery destination, messages to its registered
Personal Box, for example, cannot be delivered. Be sure to check the settings in the fax function
before deleting any destinations.
1. Press [Home] (
2. Flick the screen to the left, and then press the [Address Book Management] icon.
3. Check that [Program / Change] is selected.
4. Select the name whose fax destination you want to delete.
Press the name key, or enter the registered number using the number keys.
You can search by the registered name, user code, fax number, folder name, e-mail address, or IPFax destination.
5. Press [Fax Dest.].
6. Press [Change] under "Fax Destination".
) at the bottom of the screen in the center.
95
Page 98
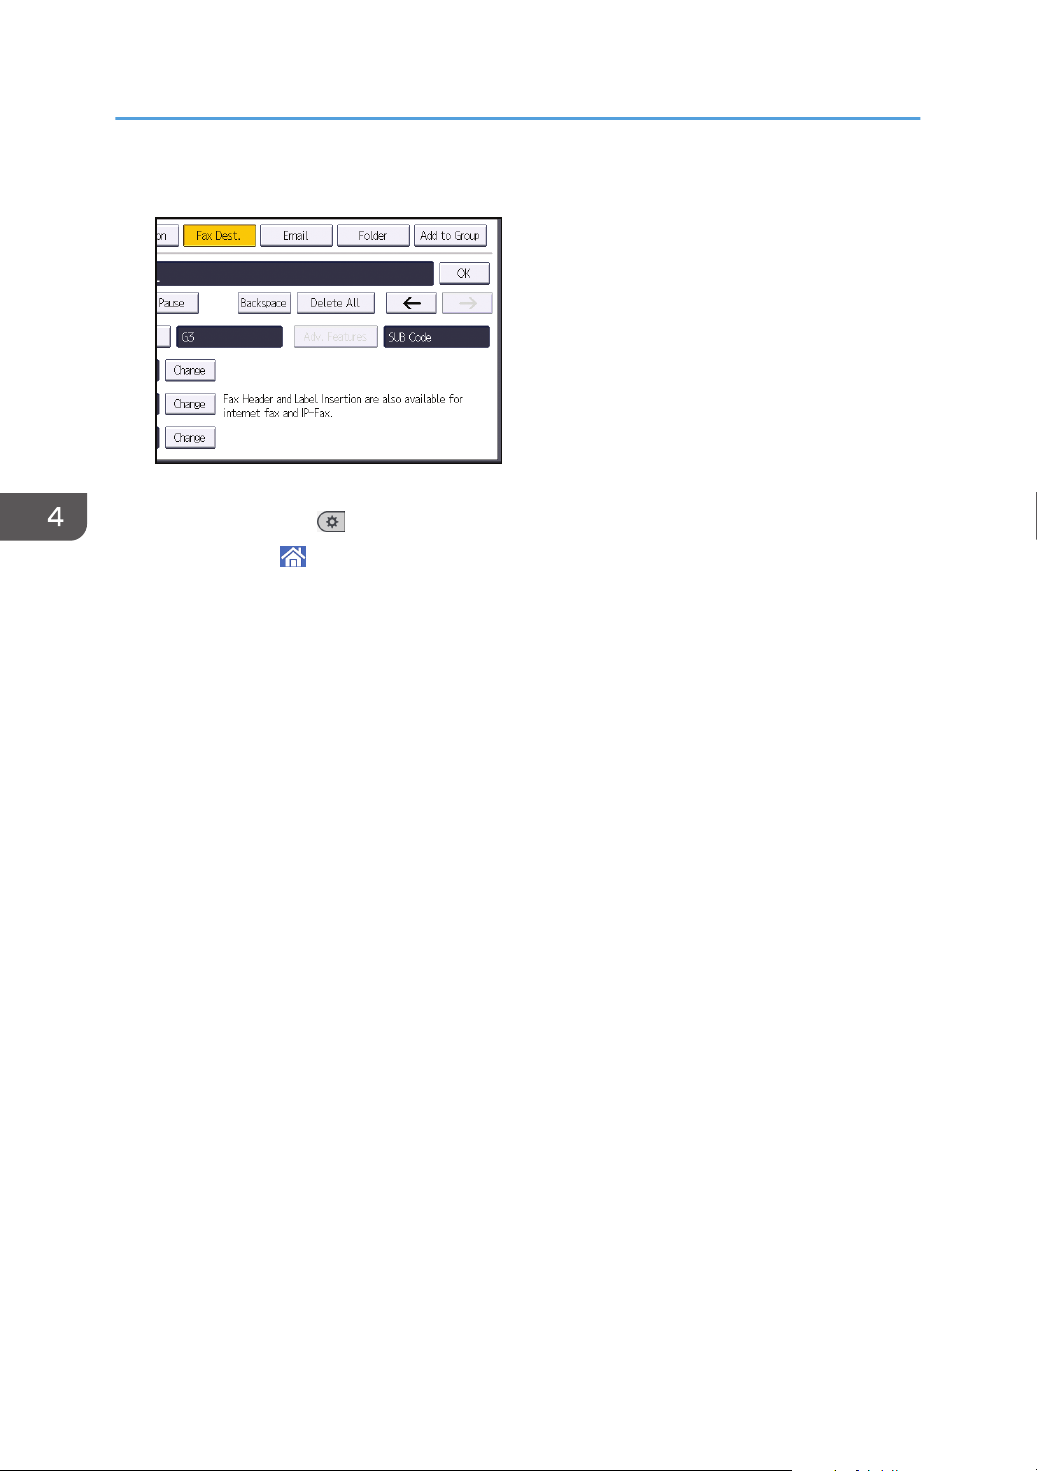
4. Fax
7. Press [Delete All], and then press [OK] under "Fax Destination".
8. Press [OK].
9. Press [User Tools] ( ) on the top right of the screen.
10. Press [Home] ( ) at the bottom of the screen in the center.
96
Page 99
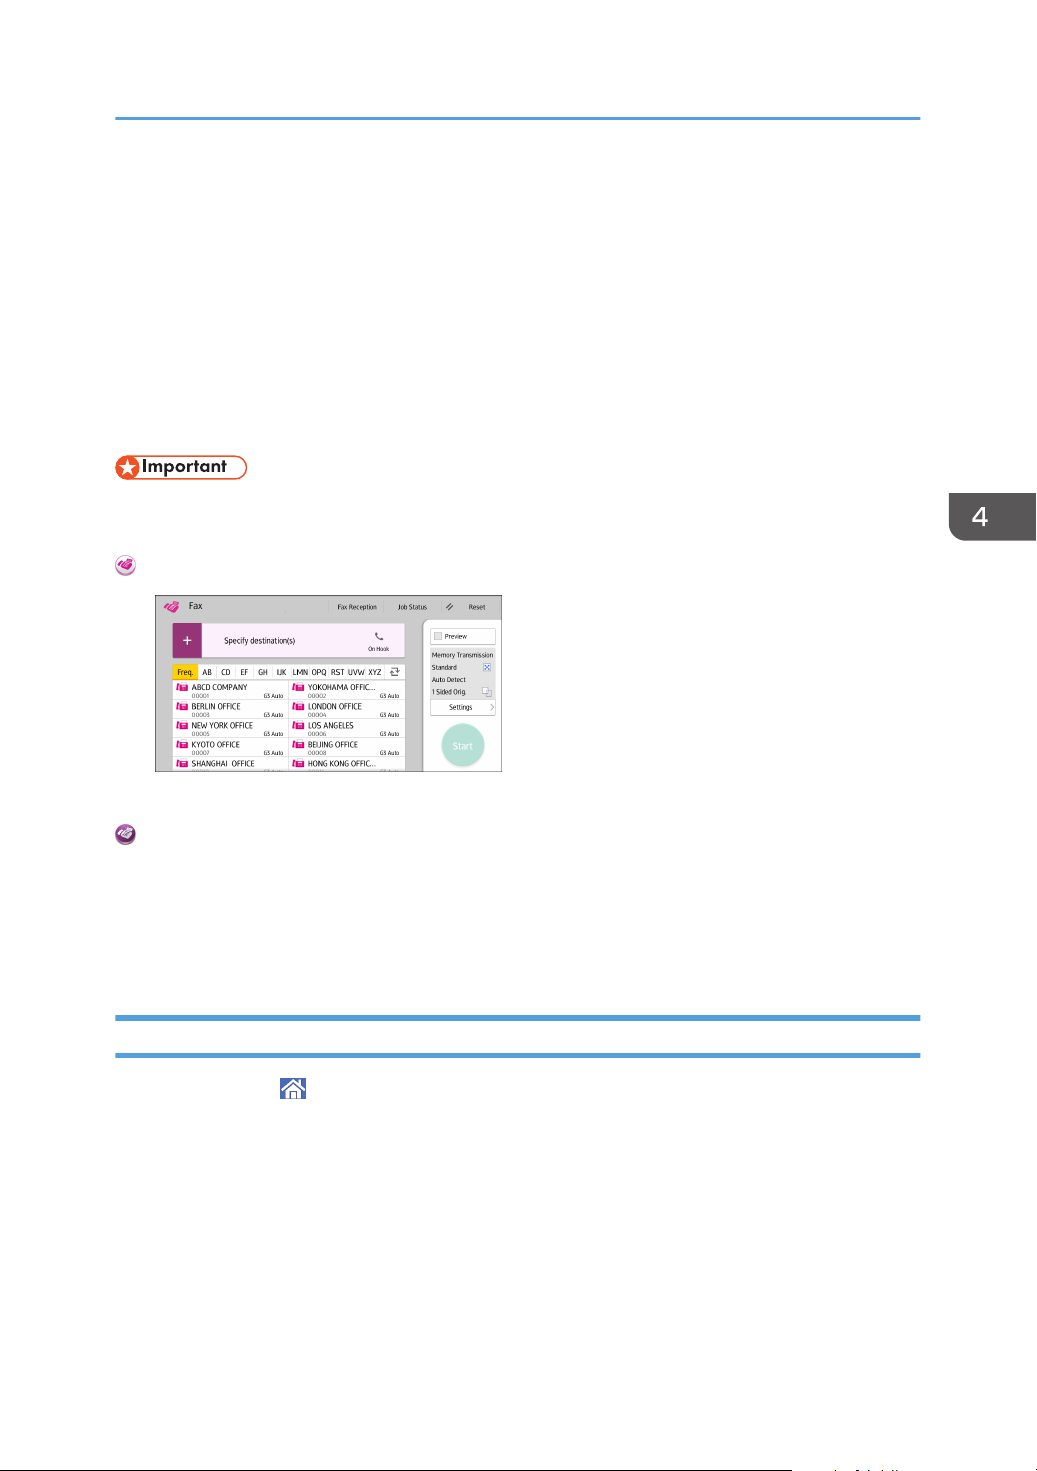
Transmitting while Checking Connection to Destination (Immediate Transmission)
Transmitting while Checking Connection to
Destination (Immediate Transmission)
Using Immediate Transmission, you can send documents while checking the connection to the
destination.
You can specify fax or IP-Fax destinations.
If you specify Internet Fax, e-mail, folder destinations, and group or multiple destinations, the
transmission mode is automatically switched to Memory Transmission.
• It is recommended that you call the receivers and confirm with them when sending important
documents.
When Using the Fax Application
About how to use the application's screen, see page 46 "[Fax] Screen".
When Using the Fax (Classic) Application
For details about how to use the classic fax function, see page 97 "Procedure for Sending
Originals Using the ADF (Classic)".
For details about how to use the classic fax function, see page 98 "Procedure for Sending
Originals Using the Exposure Glass (classic)".
Procedure for Sending Originals Using the ADF (Classic)
1. Press [Home] ( ) at the bottom of the screen in the center.
2. Flick the screen to the left, and then press the [Fax (Classic)] icon.
3. Make sure "Ready" appears on the screen.
97
Page 100
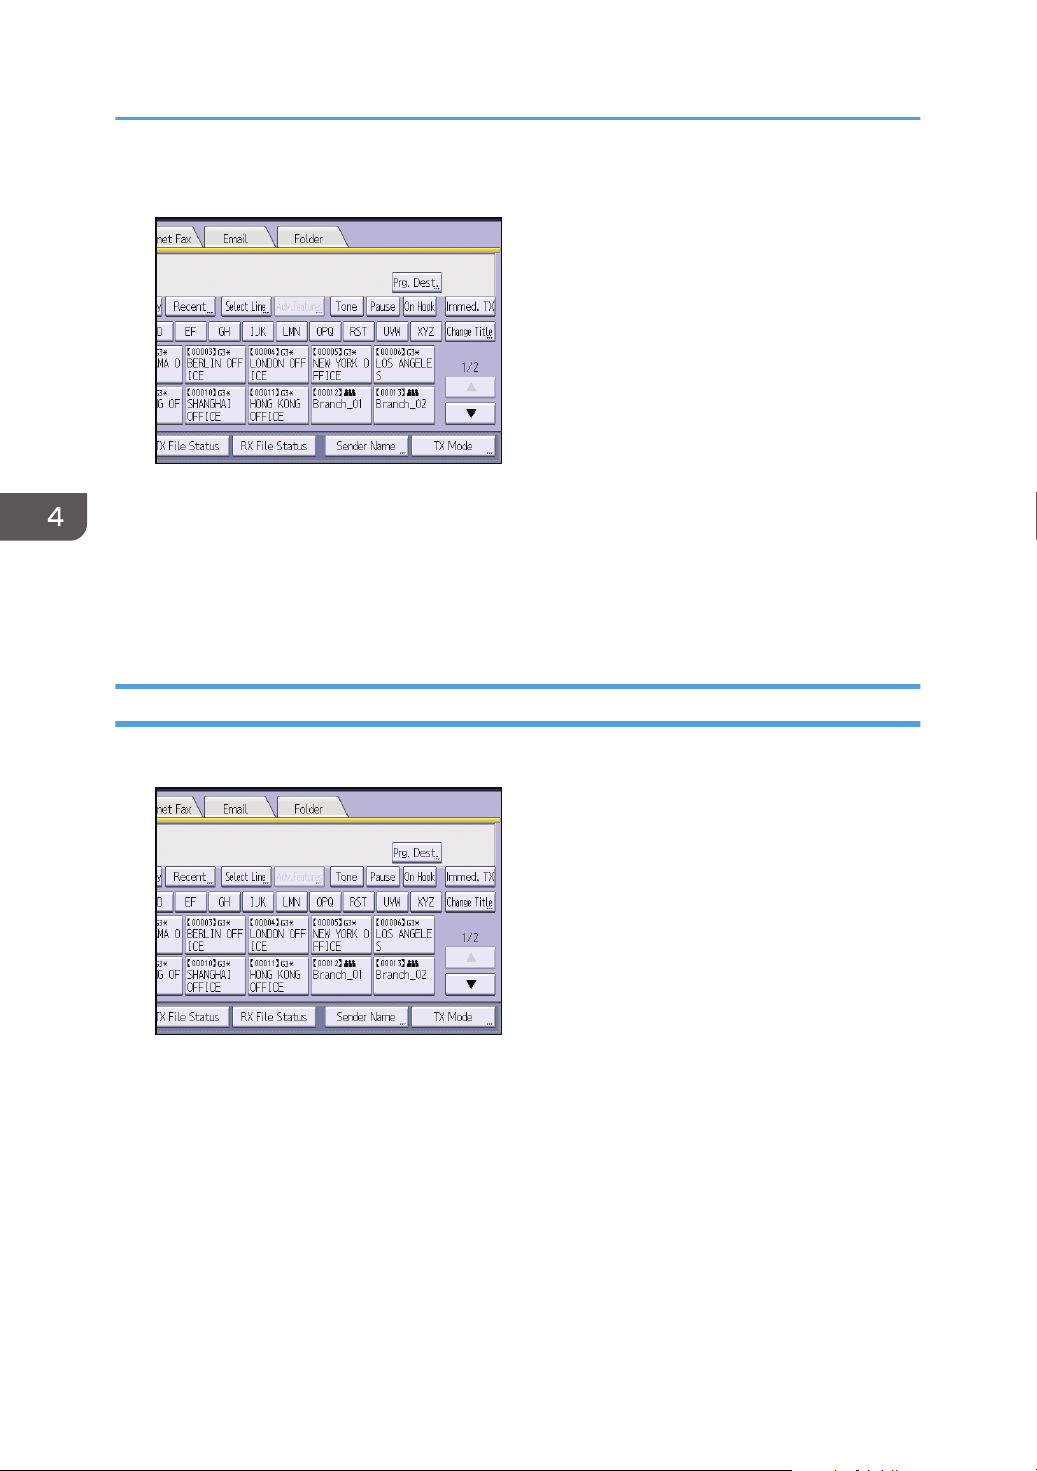
4. Fax
4. Press [Immed. TX].
5. Place the original into the ADF.
6. Select the scan settings you require.
7. Specify a destination.
If you make a mistake, press [Clear], and then enter again.
8. Press [Start].
Procedure for Sending Originals Using the Exposure Glass (classic)
1. Press [Immed. TX].
2. Place the first page face down on the exposure glass.
3. Specify a destination.
4. Make the scan settings you require.
5. Press [Start].
6. Place the next original on the exposure glass within 10 seconds when you send multiple
originals, and then repeat Steps 4 and 5.
Repeat this step for each page.
98
 Loading...