

Page 1
RICOH GROUP COMPANIES
G081/G092
SERVICE MANUAL
001481MIU
Page 2

Page 3

SERVICE MANUAL
G081/G092
®
®
RICOH GROUP COMPANIES
Page 4

Page 5

G081/G092
SERVICE MANUAL
001481MIU
Page 6

Page 7

A
f
r
It is the reader's responsibility when discussing the information contained
within this document to maintain a level of confidentiality that is in the best
interest of Ricoh Corporation and its member companies.
NO PART OF THIS DOCUMENT MAY BE REPRODUCED IN ANY
FASHION AND DISTRIBUTED WITHOUT THE PRIOR
PERMISSION OF RICOH CORPORATION.
ll product names, domain names or product illustrations, including
desktop images, used in this document are trademarks, registered
trademarks or the property of their respective companies.
They are used throughout this book in an informational or editorial fashion
only and for the benefit of such companies. No such use, or the use o
any trade name, or web site is intended to convey endorsement or othe
affiliation with Ricoh products.
2003 RICOH Corporation. All rights reserved.
Page 8

Page 9

p
t
r
g
l
p
WARNING
The Service Manual contains information
regarding service techniques, procedures,
rocesses and spare parts of office equipmen
distributed by Ricoh Corporation. Users of this
manual should be either service trained o
certified by successfully completing a Ricoh
Technical Training Program.
Untrained and uncertified users utilizin
information contained in this service manual to
repair or modify Ricoh equipment risk persona
injury, damage to property or loss of warranty
rotection.
Ricoh Corporation
Page 10

Page 11

LEGEND
PRODUCT CODE COMPANY
G081 C7116 LP020c CL3000 CLP1620
G092
GESTETNER LANIER RICOH SAVIN
– – – –
DOCUMENTATION HISTORY
REV. NO. DATE COMMENTS
*
2/2003 Original Printing
Page 12

Page 13

G081/G092
TABLE OF CONTENTS
INSTALLATION
1. INSTALLATION...............................................................................1-1
1.1 INSTALLATION RE QUIREMENTS...................................................................1-1
1.1.1 ENVIRONMENT.........................................................................................1-1
1.1.2 MACHINE LEVEL......................................................................................1-1
1.1.3 MACHINE SPACE REQUIREMENT.......................................................1-2
1.1.4 POWER REQUIRE MENTS ......................................................................1-3
1.2 MACHINE INSTALLATION ................................................................................1-3
1.2.1 INSTALL ING THE PHOTOCONDUCTOR UNIT ..................................1-3
1.2.2 INSTALLING THE TONER CARTRIDGE ..............................................1-6
1.2.3 LOADING PAPER......................................................................................1-8
1.2.4 CONNECTING TH E POWER CORD...................................................1-10
1.2.5 SELECTING THE PANEL DISPLAY LANGUAGE .............................1-11
1.2.6 PRINTING THE TEST PAGE.................................................................1-13
1.2.7 ADJUSTING THE IMAGE DENSITY....................................................1-14
1.2.8 CONNECTING TH E PRINTER TO A COMPUTER...........................1-16
Connecting the printer to a computer using a network interface cable1-16
Connecting the printer to a computer using a parallel cable .................1-17
1.2.9 CONFIGURING THE PRINTER FOR THE NETWORK ....................1-18
1.2.10 INSTALLING THE PRINTER DRIVERS AND UTILITIES...............1-21
1.2.11 METER CHARGE..................................................................................1-22
1.3 OPTIONAL UNIT INSTALLATION ..................................................................1-23
1.4 MACHINE INSTALLATION ..............................................................................1-24
PREVENTATIVE MAINTENANCE
2. PREVENTATIVE MAINTENANCE ..................................................2-1
2.1 USER REPLACEABLE ITEMS..........................................................................2-1
2.2 SERVICE MAINTEN ANCE.................................................................................2-2
2.2.1 PM TABLE...................................................................................................2-2
2.2.2 RECOMMENDED CLEANING PROCEDURE......................................2-2
REPLACEMENT AND ADJUSTMENT
3. REPLACEMENT AND ADJUSTMENT...........................................3-1
3.1 SPECIAL TOOLS AND LUBRICANTS.............................................................3-1
3.1.1 TOOLS.........................................................................................................3-1
3.1.2 LUBRICATION............................................................................................3-1
3.2 FUSING UNIT.......................................................................................................3-2
3.3 TRANSFER BELT UNIT .....................................................................................3-3
SM i G081/G092
Page 14

3.4 EXTERIOR COVERS..........................................................................................3-3
3.4.1 FRONT DOOR WI TH TRANSFER ROLLER UNIT..............................3-3
3.4.2 TRANSFER ROLLER ASSEMBLY.........................................................3-4
3.4.3 RIGHT COVER...........................................................................................3-4
3.4.4 REAR COVER............................................................................................3-5
3.4.5 LEFT COVER.............................................................................................3-5
3.4.6 TOP COVER AND LCD PANEL..............................................................3-6
3.5 ECB AND DRIVE U NITS....................................................................................3-7
3.5.1 ECB (ENGINE CONTROL BOARD) AND TEMPERATURE/
HUMIDITY SENSOR BOARDS..............................................................3-7
3.5.2 SUB FUSING-FAN AND SUB FUSING-FAN DUCT............................3-8
3.5.3 TONER CARTRIDGE HOLDER..............................................................3-9
3.5.4 TONER CARTRIDGE DRIVE UNIT ......................................................3-10
3.5.5 PAPER PICKUP MOTOR AND MOTOR BRACKET.........................3-10
3.5.6 MAIN DRIVE UNIT...................................................................................3-11
3.5.7 BIAS UNIT.................................................................................................3-17
3.5.8 POWER SUPPLY FAN MOTOR AND PSU FAN MOTOR DUCT...3-17
3.6 LASER SCANNING UNIT.................................................................................3-18
3.6.1 CAUTION DECAL LOCATIONS............................................................3-18
3.6.2 LASER SCANNING UNIT.......................................................................3-19
3.7 PAPER FEED.....................................................................................................3-19
3.7.1 PAPER EXIT.............................................................................................3-19
3.7.2 DISASSEMBLY OF PAPER EXIT SUB ASSEMBLY.........................3-22
3.8 PAPER FEED UNIT...........................................................................................3-22
3.8.2 PAPER FEED UNIT DISASSEMBLY...................................................3-24
3.9 IH (INDUCTIVE HEATER) UNIT .....................................................................3-27
3.10 ELECTRICAL COM PONENTS......................................................................3-28
3.10.1 POWER SUPPLY UNIT........................................................................3-28
3.10.2 POWER SUPPLY UNIT DISASSEMBLY..........................................3-29
3.10.3 MAIN CONTROL BOARD ....................................................................3-30
3.10.4 NVRAM/EEPROM REPLACEMENT PROCEDURES.....................3-30
EEPROM on the ECB..................................................................................3-30
NVRAM on the Controller............................................................................3-31
EEPROM on the ECB and the NVRAM on the Controller.....................3-31
3.10.5 MAIN CONTROL BOARD SHIELD COVERS...................................3-32
3.10.6 HIGH VOLTAGE BOARD AND REGISTRATION SENSOR
BOARD....................................................................................................3-33
3.11 TRANSFER BELT TENSION UNIT..............................................................3-34
3.11.1 TRANSFER BELT TENSION UNIT REMOV AL................................3-34
3.11.2 CHANGER SOLENOID AND CAM RATCHET SOLENOID ...........3-35
3.12 PCU HOLDER..................................................................................................3-37
3.13 FUSING FAN MOT OR....................................................................................3-39
3.14 SENSORS.........................................................................................................3-39
3.14.1 FRONT AND RI GHT COVER OPEN DETECTION SWITCHES...3-39
3.14.2 BY-PASS TRAY HOME POSITION SENSOR AND BY-PASS
TRAY PAPER DETECTION SENSOR BOARDS............................3-40
3.14.3 WASTE TONER CARTRIDGE FULL SENSO R...............................3-40
3.15 STANDARD PAPER CASSETTE.................................................................3-41
G081/G092 ii SM
Page 15

TROUBLESHOOTING
4. TROUBLESHOOTING.....................................................................4-1
4.1 SERVICE CALL CO NDITIONS .........................................................................4-1
4.1.1 SUMMARY..................................................................................................4-1
4.1.2 SC CODE DESCR IPTIONS.....................................................................4-2
4.2 CONTROLLER ERROR.....................................................................................4-6
4.3 TROUBLESHOOTING GUIDE........................................................................4-10
4.3.1 BLANK PRINT ..........................................................................................4-10
4.3.2 ALL-BLACK PRI NT..................................................................................4-10
4.3.3 MISSING CMY COLOR ..........................................................................4-11
4.3.4 LIGHT PRINT............................................................................................4-11
4.3.5 REPEATED SPOTS OR LINES ON PRINTS......................................4-12
4.3.6 DARK VERTICAL LINE IN PRINT........................................................4-12
4.3.7 WHITE HORIZONTAL LINES OR BANDS..........................................4-13
4.3.8 MISSING PARTS OF IMAGES..............................................................4-13
4.3.9 DIRTY BACKGROUND...........................................................................4-13
4.3.10 PARTIAL CMY COLOR DOTS............................................................4-13
4.3.11 DARK IRREGULAR STREAKS ON PRINTS....................................4-13
4.3.12 CMY COLOR IRREGULAR STREAKS..............................................4-14
4.3.13 GHOSTING.............................................................................................4-14
4.3.14 UNFUSED OR PARTIALLY FUSED PRINTS ...................................4-14
4.3.15 IMAGE SKEW ........................................................................................4-14
4.3.16 BACKGROUND STAIN.........................................................................4-15
4.3.17 NO PRINTING ON PAPER EDGE......................................................4-15
4.3.18 IMAGE NOT CENTERED WHEN IT SHOULD BE ..........................4-15
4.4 ELECTRICAL COMPONENT DEFECTS.......................................................4-16
4.4.1 SENSORS.................................................................................................4-16
4.5 BLOWN FUSE CONDITIONS..........................................................................4-18
Power supply unit..........................................................................................4-18
High voltage unit...........................................................................................4-18
4.6 LEDS....................................................................................................................4-18
SERVICE TABLES
5. SERVICE TABLES..........................................................................5-1
5.1 SERVICE PROGRAM MODE............................................................................5-1
5.1.1 SERVICE MODE OPERATION...............................................................5-1
Entering the Service Mode............................................................................5-1
Accessing the Required Program ................................................................5-2
Inputting a Value or Setting for a Service Program...................................5-2
Exiting Service Mode......................................................................................5-2
5.2 PRINTER CONTROLLER SERVICE MODE...................................................5-3
5.2.1 SERVICE (CONT ROLLER SERVICE MODES)...................................5-3
Bit Switch Settings..........................................................................................5-5
Gamma Adjustment........................................................................................5-7
5.3 PRINTER ENGINE SERVICE MODE.............................................................5-10
SM iii G081/G092
Page 16

5.3.1 SERVICE MODE TABLE (“2. ENGINE”)..............................................5-10
SP1-XXX (Feed)...........................................................................................5-10
SP2-XXX (Drum)...........................................................................................5-12
SP5-XXX (Mode)..........................................................................................5-14
SP7-XXX (Data Log)....................................................................................5-20
5.3.2 INPUT CHECK TABLE............................................................................5-24
Table 1: Paper Size Switch.........................................................................5-26
5.3.3 OUTPUT CHECK TABLE.......................................................................5-26
5.4 FIRMWARE UPDATE PROCEDURE.............................................................5-28
5.4.1 TYPE OF FIRMWARE ............................................................................5-28
5.4.2 ERROR RECOVERY..............................................................................5-28
Engine Firmware...........................................................................................5-28
Controller System Firmware:......................................................................5-28
5.4.3 CONTROLLER/ENGINE FIRMWARE UPGRADE.............................5-29
Engine Firmware...........................................................................................5-29
Controller System Firmware........................................................................5-30
5.5 POWER ON SELF-TEST .................................................................................5-32
5.5.1 CONTROLLER SELF-DIAGNOSTIC ....................................................5-32
Overview........................................................................................................5-32
Detailed self-diagnostics..............................................................................5-33
5.5.2 ENGINE SELF-D IAGNOSTIC ................................................................5-33
5.6 USER PROGRAM MODE................................................................................5-34
5.7 DIP SWITCHES .................................................................................................5-35
Controller Board............................................................................................5-35
DETAILED DESCRIPTIONS
6. DETAILED SECTION DESCRIPTIONS.........................................6-1
6.1 OVERVIEW...........................................................................................................6-1
6.1.1 COMPONENT LAYOUT ...........................................................................6-1
6.1.2 PAPER PATH.............................................................................................6-2
6.2 DRIVE MECHANISM...........................................................................................6-3
6.2.1 GENERAL DESCRIPTION.......................................................................6-3
6.2.2 BK MOTOR DRIVE....................................................................................6-4
6.2.3 CMY MOTOR DRIVE ................................................................................6-5
6.2.4 BOARD STRUCTURE ..............................................................................6-6
Overview..........................................................................................................6-6
Descriptions.....................................................................................................6-7
6.3 PRINT PROCESS................................................................................................6-8
6.3.1 OVERVIEW.................................................................................................6-8
6.3.2 CHARGE ...................................................................................................6-10
6.3.3 LASER EXPOSURE................................................................................6-11
Laser scanning..............................................................................................6-11
Polygon motor and laser exposure............................................................6-12
6.3.4 TONER SUPPLY......................................................................................6-13
Toner cartridge..............................................................................................6-13
Paddle shaft switching mechanism............................................................6-14
Toner cartridge and toner end detection...................................................6-15
G081/G092 iv SM
Page 17

6.3.5 DEVELOPMENT......................................................................................6-17
PCU and OPC drum.....................................................................................6-17
6.3.6 TRANSFER BELT UNIT DRIVE............................................................6-19
Belt tension unit.............................................................................................6-19
Four phases...................................................................................................6-20
Belt home position sensor...........................................................................6-20
Monochrome printing and color printing....................................................6-21
6.3.7 BELT TRANSFER AND CLEANING.....................................................6-23
Transfer from drum to belt...........................................................................6-23
Transfer from belt to paper..........................................................................6-24
Belt cleaning ..................................................................................................6-25
6.3.8 WASTE TONER CARTRIDGE ..............................................................6-26
Mechanism.....................................................................................................6-26
Sensor ............................................................................................................6-27
6.3.9 FUSING .....................................................................................................6-28
Fusing process..............................................................................................6-28
Circuit board ..................................................................................................6-29
6.3.10 PAPER FEED.........................................................................................6-34
Drive motors ..................................................................................................6-35
Sensors ..........................................................................................................6-35
Paper size detection switch combination..................................................6-35
Registration clutch........................................................................................6-36
Feeding envelopes.......................................................................................6-36
Paper feed speed..........................................................................................6-36
6.3.11 STANDARD TRAY LOCK MECHANISM...........................................6-37
6.3.12 PAPER EXIT AND PAPER SWITCHBACK.......................................6-38
Normal Printing Mode (Not Duplex Printing Mode).................................6-38
Duplex Printing Mode (Paper Switchback)...............................................6-39
6.3.13 COLOR POINT ADJUSTMENT...........................................................6-40
Adjustment types ..........................................................................................6-40
Adjustment timing .........................................................................................6-41
6.4 CONTROLLER...................................................................................................6-42
6.4.1 OVERVIEW...............................................................................................6-42
6.4.2 BOARD LAYOUT.....................................................................................6-44
6.4.3 PRINT DATA PROCESSING.................................................................6-45
RPCS Driver..................................................................................................6-45
PCL5c Driver.................................................................................................6-45
PS3 Driver......................................................................................................6-46
CMS (Color Management System)............................................................6-46
Gray Correction.............................................................................................6-46
BG/UCR (Black Generation/Under Color Removal)................................6-46
Gamma Correction.......................................................................................6-46
Toner Limitation............................................................................................6-47
Dither Processing and ROP/RIP ................................................................6-47
6.5 CONTROLLER FUNCTIONS...........................................................................6-48
6.5.1 SAMPLE PRINT.......................................................................................6-48
6.5.2 LOCKED PRINT.......................................................................................6-48
6.5.3 PAPER SOURCE SELECTION.............................................................6-49
Tray Priority (Auto Tray Select)..................................................................6-49
SM v G081/G092
Page 18

Tray Lock........................................................................................................6-49
Manual Tray Select.......................................................................................6-49
6.5.4 AUTO CONTINUE ...................................................................................6-50
Auto Tray Select............................................................................................6-50
Manual Tray Select.......................................................................................6-50
ACS (Auto Color Sensing) Mode................................................................6-51
Energy saver mode ......................................................................................6-52
6.6 IEEE1394 INTERF ACE.....................................................................................6-53
6.6.1 SPECIFICATIONS...................................................................................6-53
Hardware Specification................................................................................6-53
System Requirements..................................................................................6-53
6.6.2 IEEE1394 SCSI PRINT...........................................................................6-53
6.6.3 BLOCK DIAGRAM...................................................................................6-54
6.6.4 PIN ASSIGNMENT ..................................................................................6-54
6.6.5 REMARKS.................................................................................................6-55
6.6.6 TROUBLESHOOTING NOTES .............................................................6-55
6.6.7 IP OVER 1394..........................................................................................6-56
6.7 USB......................................................................................................................6-57
6.7.1 SPECIFICATIONS...................................................................................6-57
6.7.2 USB 1.1/2.0...............................................................................................6-57
6.7.3 USB CONNECTOR S...............................................................................6-58
6.7.4 PIN ASSIGNMENT ..................................................................................6-58
6.7.5 REMARKS.................................................................................................6-59
Related SP Mode..........................................................................................6-59
6.8 IEEE802.11B (WI RELESS LAN).....................................................................6-60
6.8.1 SPECIFICATIONS...................................................................................6-60
6.8.2 BLOCK DIAGRAM...................................................................................6-61
6.8.3 TRANSMISSION MODE.........................................................................6-62
Ad Hoc Mode.................................................................................................6-62
Infrastructure Mode ......................................................................................6-62
6.8.4 SECURITY FEAT URES..........................................................................6-63
Using the SSID in Ad hoc mode.................................................................6-63
6.8.5 TROUBLESHOOTING NOTES .............................................................6-64
Communication Status.................................................................................6-64
Channel Settings...........................................................................................6-64
Troubleshooting steps..................................................................................6-65
6.9 BLUETOOTH (WIRELESS).............................................................................6-66
6.9.1 SPECIFICATIONS...................................................................................6-66
6.9.2 BLOCK DIAGRAM...................................................................................6-66
6.9.3 COMMUNICATION USING BLUETOOTH..........................................6-67
Piconet............................................................................................................6-67
Frequency Hopping Spread Spectrum (FHSS) ........................................6-67
Profiles............................................................................................................6-68
6.9.4 SECURITY FEATURES..........................................................................6-68
Public and Private Mode..............................................................................6-68
PIN Code (Personal Identification Number) .............................................6-68
6.10 CONNECTOR PIN DESCRIPTIONS ...........................................................6-69
CN1 (on ECB)/CN1 (on LSU) .....................................................................6-69
CN2 (on ECB)/CN3 (on LSU) .....................................................................6-69
G081/G092 vi SM
Page 19

CN3 (on ECB)/CN2 (on LSU) .....................................................................6-69
CN5 (on ECB)/CN1 (on high voltage board)............................................6-70
CN6 PCU ........................................................................................................6-70
CN7 Front/Right Door Sensor.....................................................................6-70
CN8 Power Supply Unit Fan.......................................................................6-70
CN9 Fusing Fan............................................................................................6-70
CN10 (on ECB)/CN1503 (on Toner Empty Sensor Board)....................6-71
CN11 Toner Cartridge Cover Sensor........................................................6-71
CN12 (on ECB)/CN1 (on CMY Motor)/CN1 (BK Motor).........................6-71
CN13 (on ECB)/CN1509 (PCU Home Sensor)........................................6-72
CN14 (on ECB) / CN1510 (on TB Unit Cam Home Position Sensor)..6-72
CN15 (on ECB)/CN1601 (on Fusing Unit)................................................6-72
CN17 (on ECB)/CN1505 (on Paper Full/Jam Sensor)...........................6-72
CN18 (on ECB) / CN1506 (on Paper Empty/Registration Sensor).......6-73
CN19 Pickup Solenoid.................................................................................6-73
CN20 Registration Clutch............................................................................6-73
CN21 BK Solenoid........................................................................................6-73
CN22 Paper Pickup Motor...........................................................................6-73
CN23 (on ECB)/CN1507 (on By-pass Tray Paper Detection
Sensor)/CN1512 (on By-pass Tray Home Position Sensor)..............6-74
CN24 Mono/Color Changer Solenoid........................................................6-74
CN25 TB Unit Cam Switching Solenoid....................................................6-74
CN26 Switchback Solenoid.........................................................................6-74
CN27 (on ECB)/CN1501 (on Color Registration Sensor) ......................6-75
CN28 Paper Size Detector..........................................................................6-75
CN29 (on ECB)/CN1 (on Humidity/Temperature Sensor).....................6-75
CN30 Sub Fusing Fan..................................................................................6-76
CN31 (on ECB)/CN1 (on Option Paper Feeder Unit) .............................6-76
CN32 (on ECB)/CN2503 (on Power Supply Board)................................6-76
CN33 (on ECB)/CN2505 (on Power Supply Board)................................6-77
CN34 (on ECB)/CN2504 (on Power Supply Board)................................6-77
CN35 LSU Safety Interlock Switch............................................................6-77
CN38 Printer Control Board 1 of 3 .............................................................6-78
CN38 Main Control Board 2 of 3 ................................................................6-79
CN38 Main Control Board 3 of 3 ................................................................6-80
CN39 (on ECB)/CN1508 (on Duplex Unit Jam Sensor).........................6-80
CN43 Toner Supply Solenoid.....................................................................6-81
CN45, CN46 (on ECB)/CN3301 (on LCD Panel) ....................................6-81
CN1502 Waste Toner Full Sensor.............................................................6-82
CN2001 AC Line...........................................................................................6-82
CN2203 (on IH Power Board).....................................................................6-82
CN2204 IH Heater........................................................................................6-82
CN1502 Power Switch.................................................................................6-82
CN1502 (on Power Supply Board)/CN2207 (on IH Power
Supply Board) ............................................................................................6-83
CN2506 Side/Front Door Interlock Switch................................................6-83
SM vii G081/G092
Page 20

SPECIFICATIONS
SPECIFICATIONS............................................................................. 7-1
1. GENERAL SPECIFICATIONS.....................................................................7-1
1.1 SUPPORTED PAPER SIZES ..............................................................7-3
2. SOFTWARE ACCESSORIES .....................................................................7-4
2.1 PRINTER DRIVERS ............................................................................ 7-4
2.2 UTILITY SOFTWARE .......................................................................... 7-4
3. MACHINE CONFIGURATION .................................................................... 7-5
PAPER FEED UNIT TYPE 3000 G342
SEE SECTION G342 FOR DETAILED TABLE OF CONTENTS
G081/G092 viii SM
Page 21

IMPORTANT SAFETY NOTICES
PREVENTION OF PHYSICAL INJURY
1. Before disassembling or assembling parts of the copier and peripherals,
make sure that the printer power cord is unplugged.
2. The wall outlet should be near the printer and easily accessible.
3. Note that some components of the printer and the paper tray unit are
supplied with electrical voltage even if the main power switch is turned off.
4. If any adjustment or operation check has to be made with exterior covers off
or open while the main switch is turned on, keep hands away from electrified
or mechanically driven components.
5. The inside and the metal parts of the fusing unit become extremely hot while
the printer is operating. Be careful to avoid touching those components with
your bare hands.
HEALTH SAFETY CONDITIONS
Toner, including monocomponent toner, and developer are non-toxic, but if you
get either of them in your eyes by accident, it may cause temporary eye
discomfort. Try to remove with eye drops or flush with water as first aid. If
unsuccessful, get medical attention.
OBSERVANCE OF ELECTRICAL SAFETY STANDARDS
1. The printer and its peripherals must be installed and maintained by a
customer service representative who has completed the training course on
the appropriate models.
2. The NVRAM module (option) installed on the controller has a lithium battery
which can explode if replaced incorrectly. Replace the NVRAM only with an
identical one. The manufacturer recommends replacing the entire NVRAM.
Do not recharge or burn this battery. Used NVRAM must be handled in
accordance with local regulations.
Page 22
SAFETY AND ECOLOGICAL NOTES FOR DISPOSAL
1. Do not incinerate toner bottles or used toner. Toner dust may ignite
suddenly when exposed to an open flame.
2. Dispose of or recycle as required, used toner, developer, and organic
photoconductors in accordance with local regulations. (These are non-toxic
supplies.)
3. Dispose of or recycle as required, replaced parts in accordance with local
regulations.
LASER SAFETY
The Center for Devices and Radiological Health (CDRH) prohibits the
repair of laser-based optical units in the field. The optical housing unit
can only be repaired in a factory or at a location with the requisite
equipment. The laser subsystem is replaceable in the field by a qualified
Customer Engineer. The laser chassis is not repairable in the field.
Customer engineers are therefore directed to return all chassis and laser
subsystems to the factory or service depot when replacement of the
optical subsystem is required.
WARNING
Use of controls, or adjustment, or performance of procedures other than
those specified in this manual may result in hazardous radiation exposure.
WARNING
WARNING: Turn off the main switch before attempting any of the
procedures in the Laser Unit section. Laser beams can seriously damage
your eyes.
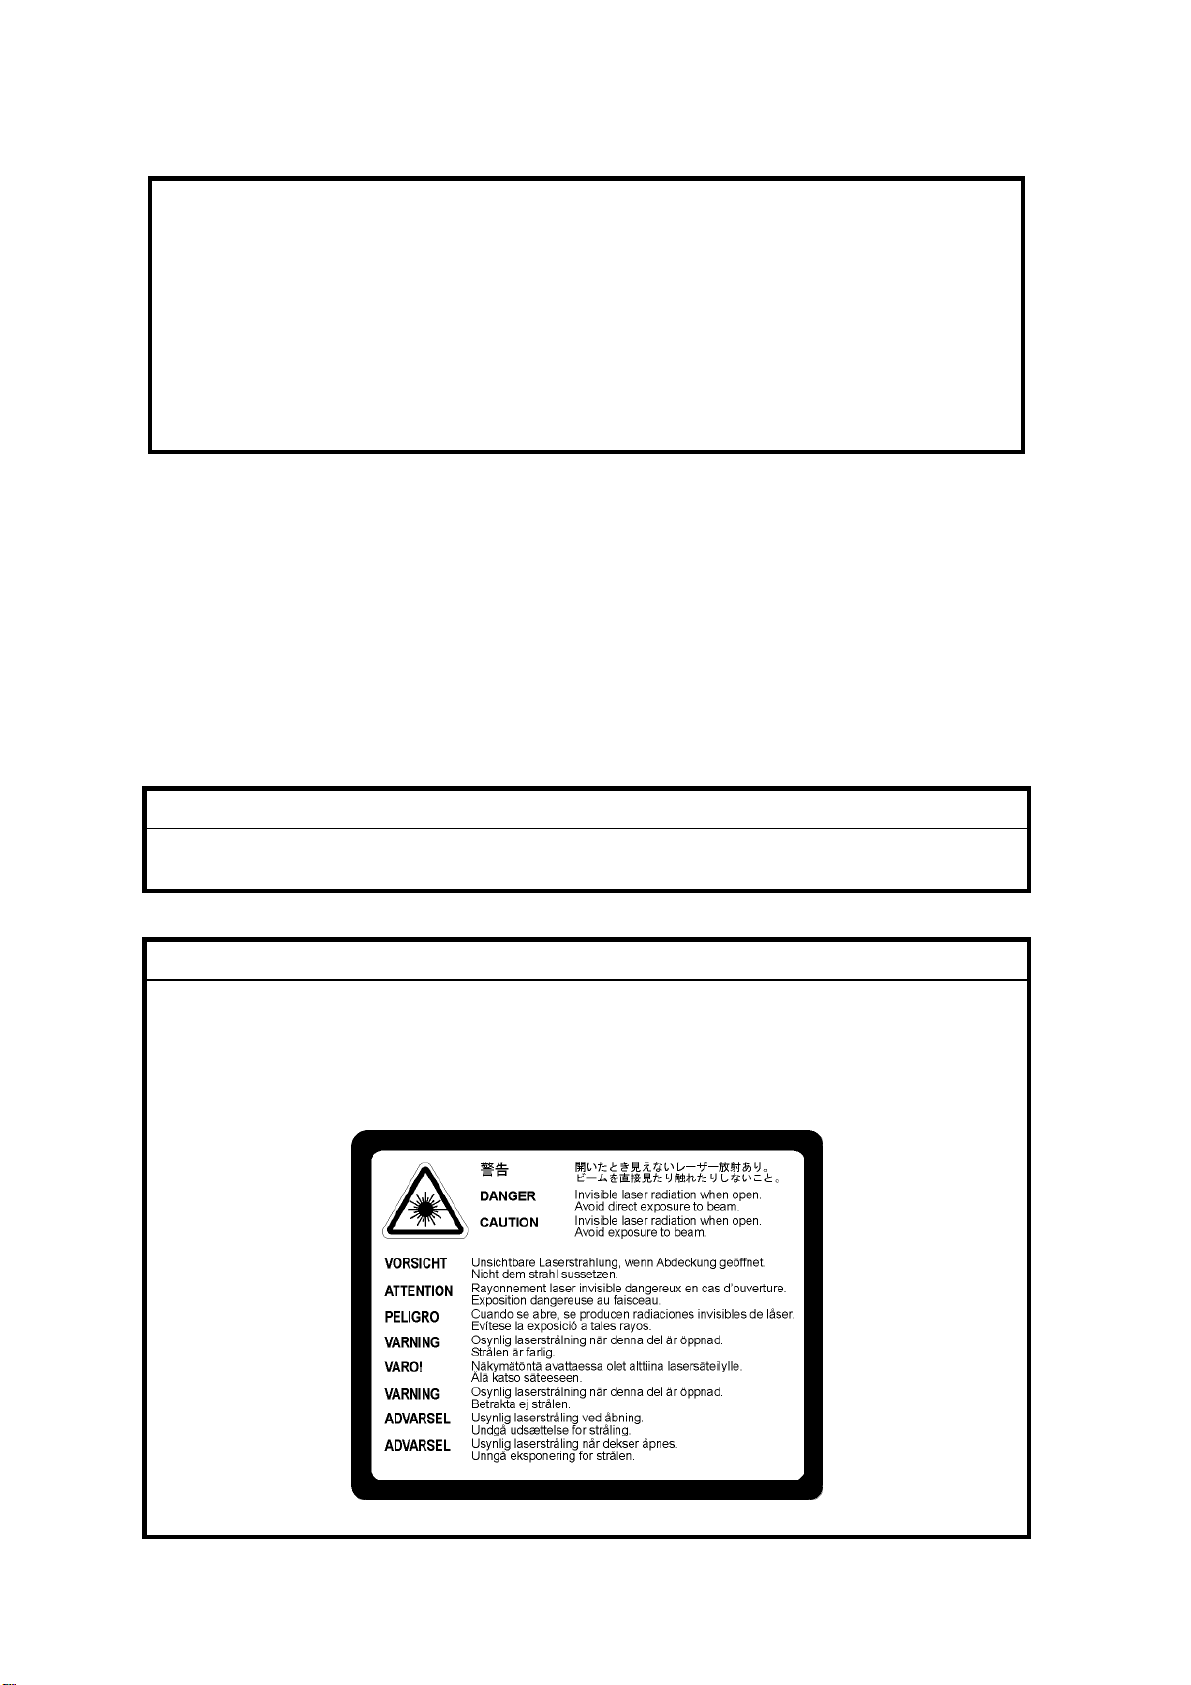
CAUTION MARKING:
Page 23
Conventions in this Manual
This manual uses several symbols.
Symbol What it means
!
Refer to section number
See Core Tech Manual for details
Screw
Connector
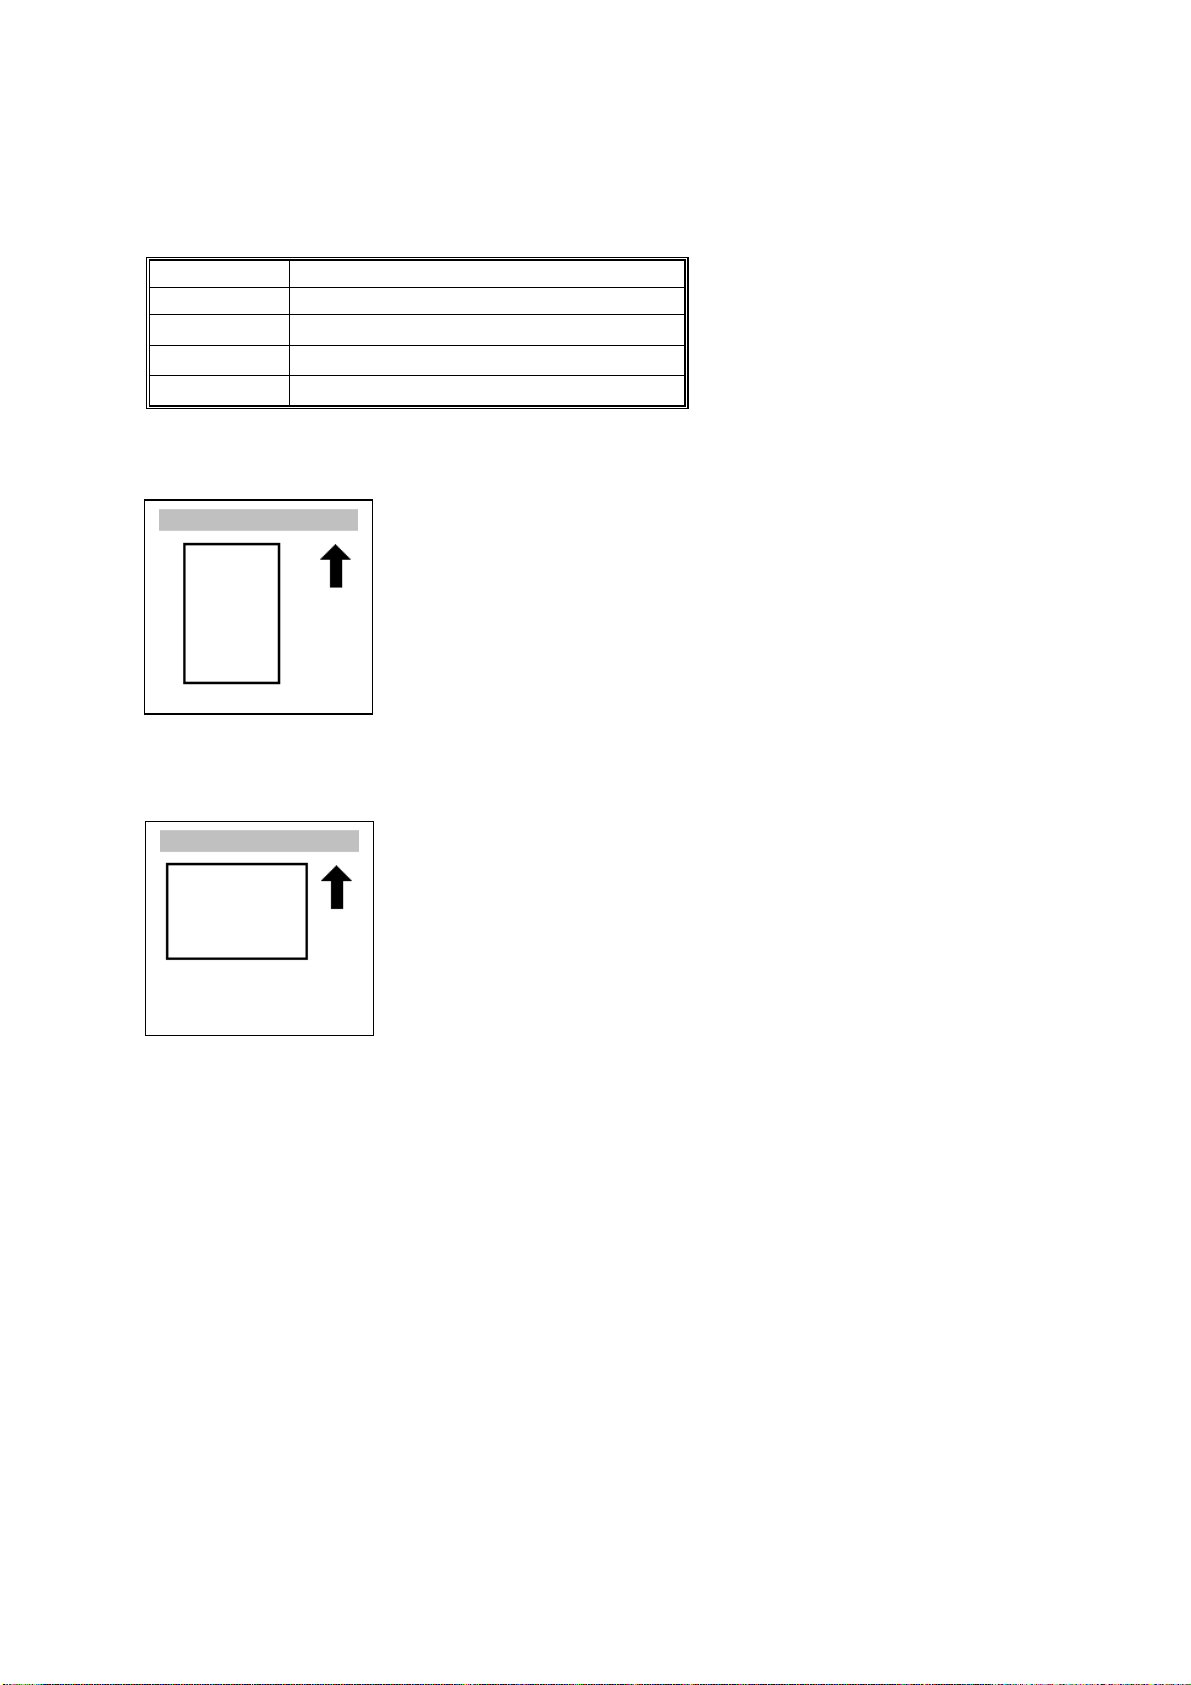
Lengthwise, SEF (Short Edge Feed)
Sideways, LEF (Long Edge Feed)
Page 24

Page 25

INSTALLATION
PREVENTIVE MAINTENANCE
REPLACEMENT AND ADJUSTMENT
TROUBLESHOOTING
TAB
POSITION 1
TAB
POSITION 2
TAB
POSITION 3
TAB
POSITION 4
SERVICE TABLES
DETAILED DESCRIPTIONS
SPECIFICATIONS
PAPER FEED UNIT TYPE 3000 G342
TAB
POSITION 5
TAB
POSITION 6
TAB
POSITION 7
TAB
POSITION 8
Page 26

Page 27

INSTALLATION
Page 28

Page 29

INSTALLATION REQUIREMENTS
1. INSTALLATION
1.1 INSTALLATION REQUIREMENTS
1.1.1 ENVIRONMENT
1. Temperature Range : 10 °C to 32 °C (50 °F to 89.6 °F)
2. Humidity Range : 15 % to 80 % RH
3. Ambient Illumination : Less than 2,000 lux (do not expose to direct sunlight)
4. Ventilation : 3 times/hr/person
5. Avoid areas that are exposed to sudden temperature changes. This includes:
1) Areas directly exposed to cool air from an air conditioner.
2) Areas directly exposed to heat from a heater.
6. Do not place the machine in an area where it will be exposed to any corrosive
gas (i.e. ammonia as used in a print shop).
7. Do not install the machine at any location over 2,500 m (8,125 ft.) above sea
level.
8. Place the machine on a strong, level base. (Inclination on any side should be
no more than 5 mm.)
9. Do not place the machine where it may be subjected to strong vibration.
Installation
1.1.2 MACHINE LEVEL
Front to back : Within 5 mm (0.2") of level
Right to left : Within 5 mm (0.2") of level
SM 1-1 G081/G092
Page 30
INSTALLATION REQUIREMENTS
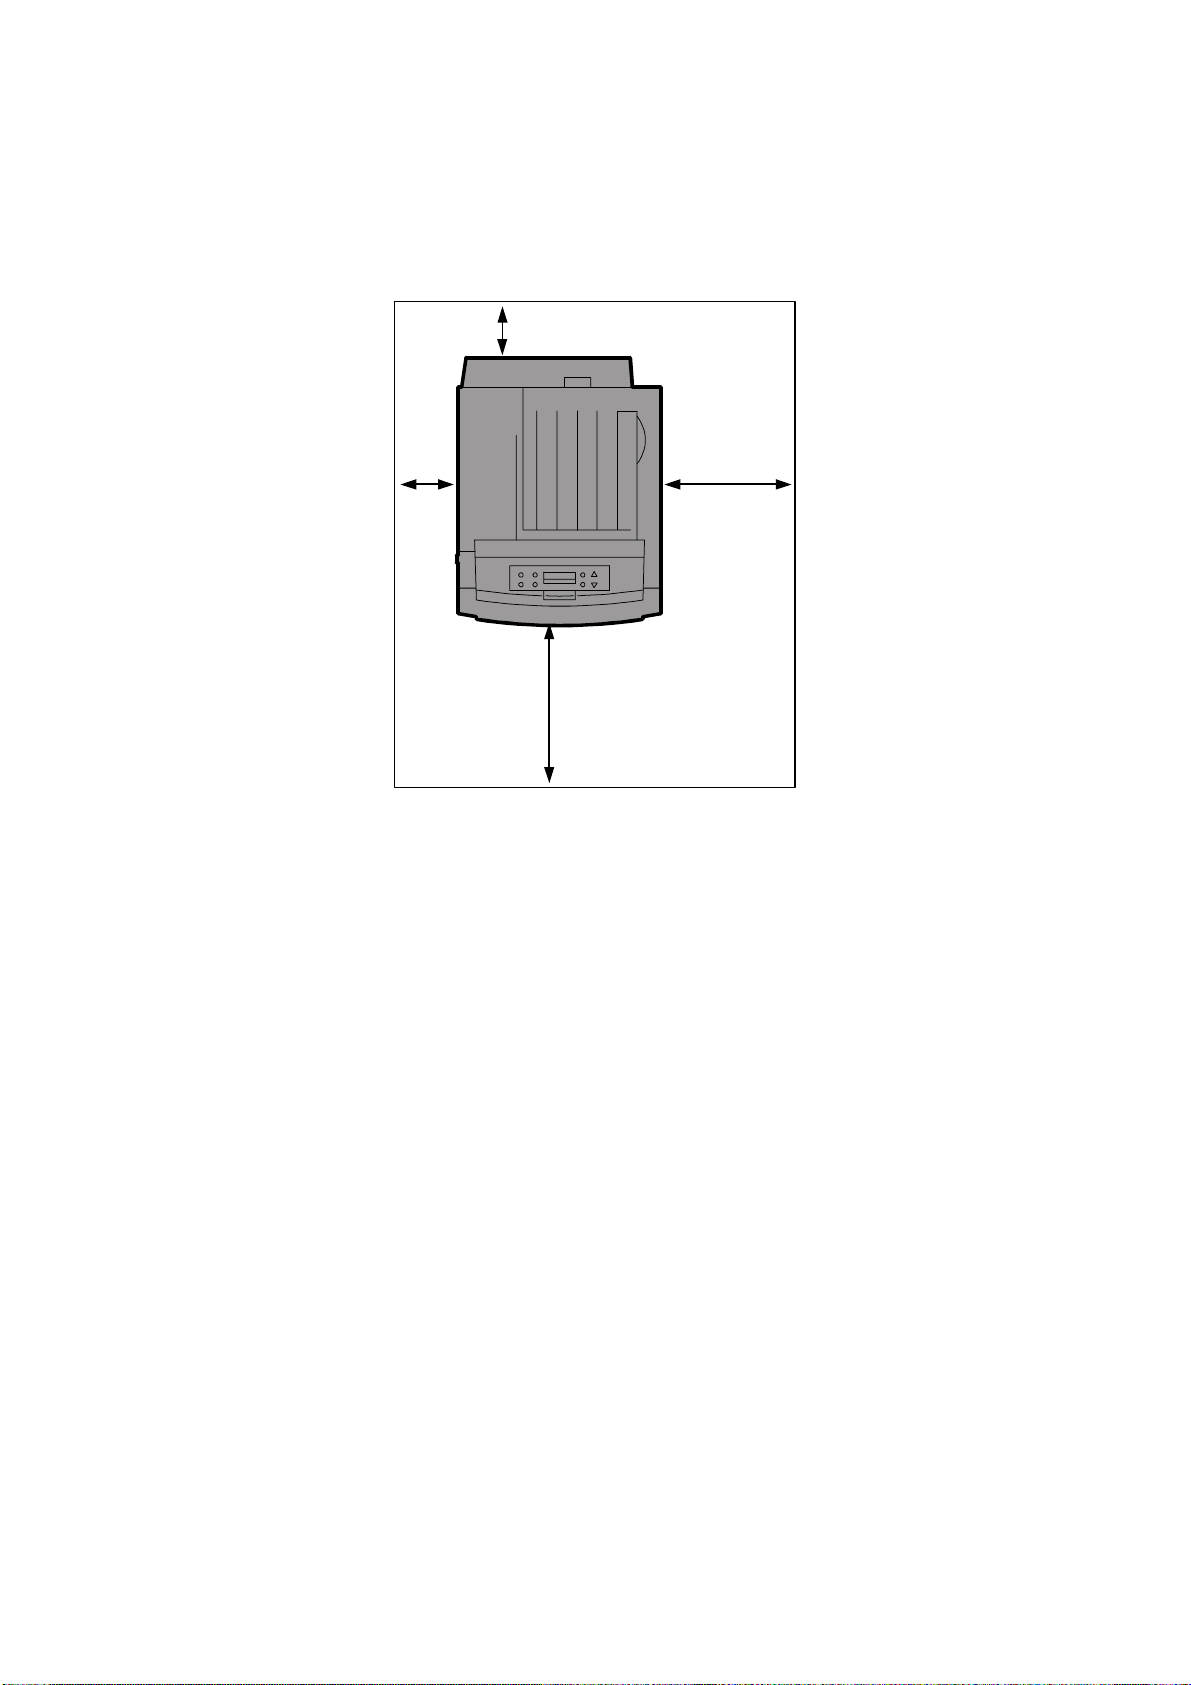
1.1.3 MACHINE SPACE REQUIREMENT
Place the machine near the power source, providing clearance as shown.
B
A
C
D
G081I710.WMF
A (left side) : Over 10 cm (4")
B (rear) : Over 10 cm (4")
C (right side) : Over 55 cm (22")
D (front) : Over 75 cm (30")
G081/G092 1-2 SM
Page 31

MACHINE INSTALLATION
1.1.4 POWER REQUIREMENTS
CAUTION
1. Make sure the plug is firmly inserted in the outlet.
2. Avoid multi-wiring.
3. Be sure to ground the machine.
1. Input voltage level: 120 V, 60 Hz: More than 10 A
220 V to 240 V, 50 Hz/60 Hz: More than 6 A
2. Permissible voltage fluctuation: ±10 %
3. Do not set anything on the power cord.
1.2 MACHINE INSTALLATION
1.2.1 INSTALLING THE PHOTOCONDUCTOR UNIT & WASTE
TONER BOTTLE
1. Open the right cover [A] of the printer.
NOTE: The machine should NOT be
plugged into the power outlet
during installation.
Installation
[A]
2. Pull out the green levers on the left
and right that are fastening the inner
cover [B].
[B]
G081I291.WMF
G081I301.WMF
SM 1-3 G081/G092
Page 32

MACHINE INSTALLATION
3. Lift the inner cover [A] until it stays up.
[A]
4. Remove the black photoconductor unit from its
packing materials.
5. Peel off the tape surrounding the
photoconductor unit, and remove the
top cover [B] on the unit.
NOTE: Do not remove the cover
attached to the bottom of the
photoconductor unit at this
time.
[B]
G081I311.WMF
NOTE: After taking the new
photoconductor unit out of the bag,
immediately install it. Do not expose it to
ambient light for prolonged periods.
NOTE: Before proceeding with the
actual installation of the
development units, observe
the locations for each
photoconductor unit as shown
in this illustration.
when ready, continue to step 6
on the following page.
! Photoconductor unit (black)
" Photoconductor unit (color)
G081I680.WMF
2 1
G081I720.WMF
G081/G092 1-4 SM
Page 33

MACHINE INSTALLATION
6. While holding the photoconductor unit
from the bottom cover in your left
hand, match the green arrow at the tip
of the photoconductor unit [A] to the
rail inside the printer.
NOTE: Make sure the green arrow fits
securely on the rail before
proceeding to the next step.
Do not touch the surface of
the OPC drum(s) with your
hands.
7. Slide the front of the photoconductor
carefully in. Slide the unit on the cover,
and then push the unit in until it stops.
NOTE: If you do not properly attach
the green arrow of the
photoconductor unit securely
to the rail, you may damage
the photoconductor unit.
[A]
G081I370.WMF
Installation
G081I390.WMF
8. Repeat steps 4 through 7 to install the color photoconductor unit.
9. Lower the inner cover [B] slowly,
applying even pressure.
[B]
G081I410.WMF
SM 1-5 G081/G092
Page 34

MACHINE INSTALLATION
10. Push the green lever to fasten the
inner cover [A].
[A]
11. Locate and remove the Waste Toner
Bottle from its shipping materials.
12. Install the Waste Toner Bottle in the
appropriate location below the
photoconductor units (label-side out).
13. Slide the green locking lever to the
locked position.
NOTE: Refer to the Operating
G081I420.WMF
Instructions Maintenance Guide, page 32, for added details.
14. Close the right cover [B] of the printer
slowly. The Waste Toner Bottle will
automatically be pushed upwards into
its proper position.
NOTE: You may wish to save the
lower photoconductor unit
covers and “light-proof”
photoconductor unit shipping
bags to use should removal of
these units become necessary
for servicing.
[B]
G081I430.WMF
1.2.2 INSTALLING THE TONER CARTRIDGE
1. Open the upper left cover [A] of the
printer.
2. Remove the packing tape and foam
strips, attached to the tape, located
inside.
[A]
G081I441.WMF
G081/G092 1-6 SM
Page 35

MACHINE INSTALLATION
3. Locate and remove from the packing
materials one of the toner cartridges.
Hold the cartridge [A] horizontally as
illustrated, and shake it back and forth
about 10 times.
[A]
Installation
NOTE: Be careful of any loose toner
that may be present in the
toner’s shipping bag. If a
large amount of toner is
present inside the bag, check
to ensure that the cartridge’s
G081I460.WMF
shutter is properly closed.
NOTE: Do not open the shutter [B] on
the bottom of the toner
cartridge. Toner may spill out.
4. Check that the toner color and location
are correct, and then insert the toner
cartridge vertically and slowly.
NOTE: Reading the labels on the
printer, you can check the
location for each cartridge.
[B]
G081I470.WMF
G081I481.WMF
SM 1-7 G081/G092
Page 36

MACHINE INSTALLATION
5. Push the toner cartridge [A] in the
direction of the arrow to fasten the
toner cartridge.
[A]
6. Repeat steps 2 through 5 to install the other cartridges.
[B]
7. Close the upper left cover [B] of the
printer.
NOTE: If the toner cartridges are not
set properly, you cannot close
the upper cover of the printer.
G081I491.WMF
G081I500.WMF
1.2.3 LOADING PAPER
CAUTION: When pulling the paper tray out, be careful not to pull it strongly. Doing
so may cause the tray to fall causing personal injury.
1. Pull the paper tray [A] out of the printer
until it stops. Then tilt it upwards
slightly, and remove it completely.
Place it on a flat surface.
NOTE: You cannot pull tray 1 out if
the by-pass tray is open.
[A]
G081I930.WMF
G081/G092 1-8 SM
Page 37

MACHINE INSTALLATION
2. Remove any and all shipping tape
and shipping materials.
3. Press the PUSH sign [A], and adjust
the rear guide to the paper size you
want to load.
4. Adjust the side guides to the paper
size you want to load.
[A]
G081I931.WMF
PUSH
G081I924.WMF
Installation
5. Load paper into the paper tray with the
paper manufacture’s indicated printside up.
NOTE:
1) Make sure that the top of
the stack does not exceed
the limit mark [B] inside the
tray.
2) To avoid paper misfeeds,
[B]
the front and side guides
should be set exactly to the
paper size.
3) Do not load different kinds
of paper in the tray.
6. Slide the paper tray completely into the printer.
NOTE: Be sure to insert the paper tray correctly. Otherwise, misfeeds may
occur, or the front cover may touch the paper tray.
Also remember to only use quality and “fresh” laser paper that is
suitable for color laser printing. Doing this will help ensure quality and
consistent color print results.
G081I932.WMF
G081I923.WMF
SM 1-9 G081/G092
Page 38

MACHINE INSTALLATION
1.2.4 CONNECTING THE POWER CORD
CAUTION
1. It is dangerous to handle the plug with wet hands. Doing this may result
in receiving an electric shock.
2. When you pull the plug out of the socket, grip the plug, not the cord, to
avoid damaging the cord and causing a fire or an electric shock.
NOTE:
1) Be sure to firmly connect the power plug to the socket outlet.
2) The printer must be off when you plug-in or unplug the power cord.
1. Confirm that the printer's power switch
[A] is off.
[A]
G081I730.WMF
2. Locate and remove the power cord from the machines packing materials.
3. Attach the power cord to the socket on the back of the printer.
4. Plug the other end securely into the socket outlet.
G081/G092 1-10 SM
Page 39

MACHINE INSTALLATION
1.2.5 SELECTING THE PANEL DISPLAY LANGUAGE
NOTE:
1) You can select one of the following languages (the default is English):
English, German, French, Italian, Dutch, Swedish, Norwegian, Danish,
Spanish, Finnish, Portuguese, Czech, Polish or Hungarian.
2) If you use the English panel display, it is not necessary to do the
following procedure.
1. Turn on the printer.
NOTE: After the machine warms up, “Ready”
appears on the panel display.
Ready
G081I740.WMF
G081I901.WMF
Installation
2. Press the Menu key [A].
NOTE: The message appears on the panel
display.
[A]
On Line Menu Escape
#
Powe r Er ror Dat a In
Enter
Menu:
Paper Input
G081I937.WMF
G081I902.WMF
SM 1-11 G081/G092
Page 40

MACHINE INSTALLATION
3. Press the “#” or “$” key to display
“Language.”
Menu:
Language
4. Press the Enter key. The message appears on
the panel display.
NOTE: English is the default
Language:
%
English
5. Press the “#” or “$” key to display the language you want to select.
6. Press the Enter key to select. An asterisk (*)
will be displayed next to the selected language.
Menu:
Language
G081I903.WMF
G081I904.WMF
G081I903.WMF
7. Press the On Line key or “Menu” key. “Ready”
(in the language you selected) appears on the
panel display.
Ready
G081I901.WMF
G081/G092 1-12 SM
Page 41

MACHINE INSTALLATION
1.2.6 PRINTING THE TEST PAGE
NOTE: You can check if the printer works properly by printing a test page such as
the configuration page. However, you cannot check the connection
between the printer and the computer by printing the test page.
1. Turn on the printer.
Installation
NOTE: After the machine warms up, “Ready”
appears on the panel display.
2. Press the Menu key.
3. Press the “#” or “$” key to display "List/Test
Print."
Ready
Menu:
Paper Input
Language:
List/Test Print
G081I740.WMF
G081I901.WMF
G081I902.WMF
G081I905.WMF
4. Press the Enter key. The message appears on
the panel display.
5. Confirm that “Config. Page” is on the display,
List/Test Print:
Config. Page
G081I906.WMF
and then press the Enter key.
SM 1-13 G081/G092
Page 42

MACHINE INSTALLATION
6. The test printing starts shortly after.
Printing...
NOTE: If you cannot complete the test print,
G081I907.WMF
check if an error message appears on the panel display. For more
information about error messages, see Section 5 "Troubleshooting" in
the Operating Instructions Maintenance Guide and Section 4 in this
support documentation.
7. Press the “On Line” key. “Ready” appears on
the panel display.
Ready
8. Turn off the printer's power switch.
G081I901.WMF
9. At this point in the installation, you may wish to check and ensure that the
firmware level is current. The firmware version is indicated on the top (third item
under “System Reference”) on the Configuration page.
Refer to the “Firmware Update Procedure” located in Section 5 of this manual.
Update the firmware if necessary. After completing the firmware update return
to this section and continue.
10. Next press the “#" or “$" key to display the “Color Demo Page.” Press the
Enter key. Check to ensure that this page appears as expected (all colors
present)
1.2.7 ADJUSTING THE IMAGE DENSITY
1. Press the “Menu” key. “Menu” appears on the
panel display.
2. Press the “#” or “$” key to display
"Maintenance," then press the Enter key.
3. Press the “#” or “$” key to display “Image
Density”, then press the Enter key.
NOTE: The message appears on the panel
display.
Menu:
Paper Input
G081I902.WMF
Menu:
Maintenance
G081I908.WMF
Maintenance:
Image Density
G081I909.WMF
Image Density:
Prt. Test Sheet
G081I910.WMF
G081/G092 1-14 SM
Page 43

MACHINE INSTALLATION
4. Press the Enter key. When the message
appears on the panel display, press the Enter
key.
Prt. Test Sheet
Press # to Start
G081I911.WMF
NOTE: The test printing will start shortly after.
Printing...
G081I907.WMF
5. Compare the colors on the printed image density test sheet with those on the
Image Density Adjusting Card.
6. Press the “#” or “$” key to select the color
you want to adjust, then press the Enter key.
Image Density:
Black
G081I912.WMF
7. Press the “#” or “$” key to set the image
density value, and press the Enter key. To
adjust another color, repeat steps 6 and 7.
Black:
(-10 +10) 0
G081I913.WMF
Installation
NOTE:
1) You can adjust the image density from -10 to +10. Increasing the
value darkens the printouts and decreasing the value lightens the
printouts.
2) Pressing the “#” or “$” key increases or decreases the value by
one.
8. Print another image density test sheet and check if the colors on the test sheet
now mach those on the Image Density Adjusting Card. If they still do not match,
adjust the image density again.
9. Press the On Line key. “Ready” appears on
Ready
the panel display.
10. At this point in the installation turn to section
1.3 “Optional Unit Installation” in this manual.
G081I901.WMF
Perform any option installation necessary then return to this section and
continue to section 1.2.8 “Connecting the Printer to a Computer” found on the
following page.
SM 1-15 G081/G092
Page 44

MACHINE INSTALLATION
1.2.8 CONNECTING THE PRINTER TO A COMPUTER
Connecting the printer to a computer using a network interface cable
1. Confirm that the printer's power switch
[A] is off.
G081I730.WMF
2. Connect the network interface cable
[B] to the Ethernet port on the back of
the printer.
[B]
G081I934.WMF
3. Connect the other end of the cable to the network (for example, to a hub).
4. Turn on the printer.
[A]
5. Check the LEDs on the Ethernet port.
! Lights when 100 BASE-TX is in use
and does not light when 10 BASE-T is
in use
" Lights when the printer is securely
connected to the network
6. Go to section 1.2.9.
G081I935.WMF
G081/G092 1-16 SM
Page 45

MACHINE INSTALLATION
Connecting the printer to a computer using a parallel cable
NOTE:
1) The parallel cable is not provided with the printer.
2) You must provide the appropriate parallel cable for the computer that
you are using.
3) The printer’s parallel connection is a standard bi-directional interface. It
requires a standard 36-pin parallel cable compliant with IEEE1284 and
the parallel port on the computer.
4) To avoid electrical interference, use a shielded cable.
5) Do not use a parallel cable longer than 2.5 meters (8.2 feet).
1. Confirm that the printer’s power switch
[A] is off.
2. Turn the computer off.
[A]
G081I730.WMF
Installation
3. Attach the parallel cable [B] to the port
of the printer. Secure the cable with
the metal fittings (bale-clips) as shown
in the illustration.
NOTE: The Voltage rating of the
parallel port for the computer
is: Max. DC 5 V.
[B]
G081I936.WMF
4. Attach the other end of the parallel cable to the parallel port of the computer.
Secure the cable. (2 screws)
5. Turn on the printer and the computer.
6. Proceed to 1.2.10.
SM 1-17 G081/G092
Page 46

MACHINE INSTALLATION
1.2.9 CONFIGURING THE PRINTER FOR THE NETWORK
When using the printer in a network environment, you must configure the printer
settings using the printer’s operation panel. The following list is the items you can
set and their default settings.
IP Address 011.022.033.044
Subnet Mask 000.000.000.000
Gateway Address 000.000.000.000
Network Boot None
Frame Type (NW) Auto
Active Protocol TCP/IP
Ethernet Auto
The procedure below shows an example to specify TCP/IP as the active protocol.
1. Press the Menu key. “Menu” appears on the
panel display.
2. Press the “#” or “$” key to display “Host
Interface,” and then press the Enter key. The
interface setting menu appears.
3. Start the protocol for use.
1) Press the “#” or “$” key to display “Network
Setup,” and then press the Enter key.
2) Press the “#” or “$” key to display “Active
Protocol,” and then press the Enter key.
Menu:
Paper Input
G081I902.WMF
Menu:
Host Interface
G081I914.WMF
Host Interface:
Network Setup
G081I915.WMF
Network Setup:
Active Protocol
G081I916.WMF
3) Press the “#” or “$” key to display “TCP/IP,”
and then press the Enter key.
G081/G092 1-18 SM
Active Protocol:
TCP/IP
G081I917.WMF
Page 47

MACHINE INSTALLATION
4) Press the “!” or “"” key to display “Active,”
and then press the Enter key. In about two
seconds, the display returns to the "Active
Protocol" setting screen.
NOTE: * shows the current setting.
5) Set the rest of the protocols for use.
6) When all settings for the protocol are done, press the Escape key. The “Network
Setup” setting screen appears.
NOTE:
1) The default settings for all of the protocols are “Active.”
TCP/IP:
#
Active
G081I918.WMF
Installation
2) It is recommended to set all the unused protocols to “Not Active.”
4. Set the IP address for the printer.
NOTE: Check the IP address with the network
administrator.
1) Press the “!” or “"” key to display “IP
Address,” and then press the Enter key. The
currently selected IP address appears.
NOTE:
1) When the Enter key is pressed, the cursor moves to the next field.
Network Setup:
IP Address
G081I919.WMF
2) When the “!” or “"” key is kept pressed for a few seconds, the value
changes by 10.
3) If DHCP is assigned the IP address can not be changed. Turn
DHCP off, then assign IP address.
2) Press the “!” or “"” key to set the value for
the field.
IP Address:
199.022.033.044
G081I920.WMF
3) Press the Enter key. The cursor moves to the next field.
4) Repeat 2) and 3) to set the value for the rest of the fields.
5. Set “Subnet Mask” and “Gateway Address” by following the same procedure as
for setting the IP address
1)
NOTE:
Check the subnet mask value with the network administrator.
.
2) The gateway address is the address of the host or router that acts as a
gateway when interacting with work stations in another network. Check the
value with the network administrator.
3) If you are not sure of the addresses, do not set them.
SM 1-19 G081/G092
Page 48

MACHINE INSTALLATION
6. When using DHCP with TCP/IP protocol, set network boot, as follows.
1) From within Network Setups press the “!”
or “"” key to display to display “DHCP,” and
then press the Enter key. In about two
Network Setup:
#
DHCP
seconds, the display returns to the "Network
Setup" setting screen.
G081I922.WMF
NOTE: * shows the current setting.
Depending upon the firmware this setting may be located under
“Network Boot.”
7. When all of the settings are done, press the
Ready
On Line key. “Ready” appears on the panel
display.
G081I901.WMF
8. Print the configuration page to confirm the settings made. See 1.2.6 for printing
the configuration page.
G081/G092 1-20 SM
Page 49

MACHINE INSTALLATION
1.2.10 INSTALLING THE PRINTER DRIVERS AND UTILITIES
Install the printer drivers and software using the CD-ROM labeled “Printer Drivers
and Utilities.” The supported operating systems are Windows 95/98/Me, Windows
2000, Windows XP and Windows NT 4.0. (The procedure below may vary slightly
from the procedure you experience based on software version.)
Click Quick Install to install PCL5c and RPCS printer drivers.
When the TCP/IP protocol is used, SmartNet-Monitor for Client will be installed as
well. When using with TCP/IP protocol, confirm the following:
• The printer is connected to a network with the network interface cable.
• TCP/IP protocol is set up.
• The IP address is set for the printer and the computer.
To install the PostScript3 printer driver, click the PostScript3 printer driver button.
For more information about the PostScript3 printer driver, see the Administrator
Reference or the Client Reference manual included on the CD-ROM labeled
“Operating Instructions”.
1.
Insert the CD-ROM labeled “Printer Drivers and Utilities” into the CD-ROM
drive. Auto Run will start the installer.
Installation
2. Select a language, then click [OK]. The following languages are available:
Cestina (Czech), Dansk (Danish), Deutsch (German), English (English),
Espanol (Spanish), Francais (French), Italiano (Italian), Magyar (Hungarian),
Nederlands (Dutch), Norsk (Norwegian), Polski (Polish), Portugues
(Portuguese), Suomi (Finnish), Svenska (Swedish). The default interface
language is English.
3. Select Quick Install. The software license agreement appears in the License
Agreement dialog box.
4. After reading the contents, click “I accept the agreement”, then click Next.
5. In the “Select Printer” dialog box, select the printer model you want to install.
For a network connection with TCP/IP, select the printer whose IP address
NOTE:
1)
is displayed in “Connect to”.
For parallel connection, select the printer whose printer port is displayed in
2)
“Connect to”.
6. Click [Install]. When finished, the Installation Completion dialog box appears.
NOTE:
1) Under Windows 2000, the Digital Signature Not Found dialog box may
appear when installing the printer driver. In this case, click Yes to continue
the installation.
2) Under Windows XP, the Hardware Installation dialog box may appear. In
this case, click Continue Anyway to continue the installation.
7. Click [Finish].
NOTE: A message telling you to restart the computer may appear. In this case,
restart your computer to complete the installation. If no message
appears, go to step 5.
8. Click Exit. The installation is now complete.
SM 1-21 G081/G092
Page 50

MACHINE INSTALLATION
1.2.11 METER CHARGE (MACHINE INSTALLATION)
If the customer has a service contract, change the settings of the following SP
modes depending on the contract type.
Item SP No. Function Default
Meter charge SP5-930-1
Counting method SP5-045-1
Fax No. setting SP5-812-2
Counter reset SP7-825-1 Resets the counters to 0.
Specifies whether the meter charge
mode is enabled or disabled.
Meter charge mode enabled:
• The Counter menu appears
immediately after the Menu key is
pressed.
• The counter type selected by the
counting method (SP5-045-1) can
be displayed with the Counter
menu.
• The counter values can also be
printed with the Counter menu.
• The selected counter starts from a
negative number.
• The PM warning is not displayed
when the replacement time
arrives.
Meter charge mode disabled:
• The Counter menu is not
displayed.
• The total counter starts from 0.
Specifies whether the counting
method used in meter charge mode is
based on developments or prints.
Important:
This SP can only be done before the
negative counters are reset with SP7825-001
Programs the service station fax
number.
The number is printed on the counter
list when the meter charge mode is
selected, so that the user can fax the
counter data to the service station.
Important: This must be done at
installation after all the above settings
have been finished. The negative
counters used in meter charge mode
will be reset to zero.
Off
Developments
NOTE:
1) The default setting for this machine is meter-charge mode off.
2) The meter-charge counter cannot be reset.
G081/G092 1-22 SM
Page 51

OPTIONAL UNIT INSTALLATION
1.3 OPTIONAL UNIT INSTALLATION
The following options are available for this machine. Refer to the appropriate unit’s
Operating Instructions (Option Setup Guide) for how to install these options.
• Paper Feed Unit Type 3000 Unit (G342)
• AD440 Duplex Unit (G343)
• Printer Hard Disk Type 3000 (G345)
• IEEE802.11b Interface Unit Type A (Wireless LAN: G628)
• IEEE1394 Interface Unit Type 4510 (G336)
• Bluetooth Interface Unit Type A (G350)
• 128 MB DIMM Memory Unit Type C (G331)
• 256 MB DIMM Memory Unit Type C (G332)
• NVRAM (User Account Enhancement Unit Type B G311)
• Ethernet LAN option for G092 (G355)
NOTE: The model G092 is not available in the U.S. market
Installation
SM 1-23 G081/G092
Page 52

Page 53

PREVENTIVE MAINTENANCE
Page 54

Page 55

USER REPLACEABLE ITEMS
2. PREVENTATIVE MAINTENANCE
2.1 USER REPLACEABLE ITEMS
If the service contract requires that the user performs some of the PM, the user will
replace the following items.
Item Remarks
Toner 5K (C,M,Y,K)
PCU 13K (CMY,K)
Transfer Belt Unit 83K
Waste Toner Cartridge 36K
Fusing Unit 100K
NOTE: The transfer roller is supplied with the fusing unit.
Chart: A4 (LT), 5%
Mode: Three pages per print job
Environment: Normal temperature and humidity
Yield may change depending on circumstances and print conditions.
Preventive
Maintenance
When the machine’s default settings are used, a message is displayed when a
maintenance counter reaches the value in the PM table shown on the next page.
Important: The customer must clear the maintenance counters for the above
items, except the PCUs (the machine automatically detects new
PCUs).
SM 2-1 G081/G092
Page 56

SERVICE MAINTENANCE
2.2 SERVICE MAINTENANCE
2.2.1 PM TABLE
The following table lists the PM items that must always be done by the technician.
NOTE: The technician may also have to do the PM listed on the previous page, if it
is specified by the service contract.
Symbol C: Clean
Item 50K EM Remarks
Main unit
Registration Roller C C Clean with water
Paper feed unit
Pickup Roller C C Clean with water
By-pass tray
Pickup Roller C C Clean with water
Separation pad C C Clean with water
NOTE: Cleaning the inside of the machine is recommended when replacing the
PCUs and transfer belt unit.
2.2.2 RECOMMENDED CLEANING PROCEDURE
1. Turn off the main switch.
2. Remove the waste toner bottle.
3. Remove the PCUs.
4. Remove the transfer belt unit. Do not touch the transfer belt surface.
5. Remove the fusing unit.
6. Slide out the standard paper cassette.
7. Clean the paper path.
8. Clean all printer rollers with a dampened cloth. Never apply alcohol to the
transfer roller.
9. Clean the laser unit windows with a blower brush.
10. Vacuum the interior of the printer.
11. Carefully clean the area surrounding the transfer roller.
G081/G092 2-2 SM
Page 57

REPLACEMENT AND ADJUSTMENT
Page 58

Page 59

SPECIAL TOOLS AND LUBRICANTS
3. REPLACEMENT AND ADJUSTMENT
CAUTION
Turn off the main power switch and unplug the machine before attempting
any of the procedures in this section.
Important: Before performing the following steps, layout several sheets of clean
paper and remove the 4 toner cartridges (cyan, magenta, yellow, and
black), waste toner bottle, and standard paper cassette from the
printer. Place the toner cartridge and waste toner bottle on the sheets
of paper.
NOTE: This manual uses the following symbols.
! : See or Refer to : Screws : Connector
Adjustment
Replacement &
3.1 SPECIAL TOOLS AND LUBRICANTS
3.1.1 TOOLS
Part Number Description
N8036701 PCMCIA "Flash" Memory Card - 4MB 5.4 1
G0219350 Loop-back connector - parallel 5.5 1
G0819310 Color PCU Skew Adjustment Knob 3.12 1
The following are also recommended.
• PCU shipping cover (for Black and Color); supplied with the PCU
3.1.2 LUBRICATION
Area Part
Main Drive Unit
Transfer Belt Drive
Unit
Paper Exit Roller Roller Supporting Portion 52039501 Grease G501
Gear and Gear Shafts
Grounding Spring Plate
Transfer Cam ( 4 pieces )
Planetary Gear Base – B
Lubricant Part
Number
52039501
G0049668
52039501 Grease G501
Described
Section
Q’ty
Type of Lubricant
Grease G501
Grease KS-660
SM 3-1 G081/G092
Page 60

FUSING UNIT
3.2 FUSING UNIT
CAUTION
1. The fusing unit is hot. To avoid personal injury, wait 1 hour for the
fusing unit to cool after turning the power off.
2. When replacing parts, use only the manufacturer’s specified
components.
3. After servicing, be sure to restore the insulators, shields, etc.
• Open the front door.
[A]: Fusing unit connector
[B]: Release the two fusing unit
levers.
[C]: Fusing unit.
[B]
NOTE: After removing the fusing unit,
use caution not to push the
thermostat [D][E]. The
thermostat is easily broken.
[A]
[D]
[E]
[C]
G081R900.WMF
G081R104.WMF
G081/G092 3-2 SM
Page 61

TRANSFER BELT UNIT
3.3 TRANSFER BELT UNIT
• Open the right cover.
• Waste toner cartridge
• Release the PCU holder.
• Remove the black
photoconductor unit then the
color photoconductor unit.
(Press the green locking tab
down on the color PCU to fully
remove.)
[A]: Transfer belt unit ( x 2)
NOTE: The two screws are
the green thumbscrews located at
either side of the
transfer unit [B].
When removing the
transfer belt unit, take care not to damage the transfer belt.
[B]
[A]
[B]
G081R901.WMF
Adjustment
Replacement &
3.4 EXTERIOR COVERS
3.4.1 FRONT DOOR WITH TRANSFER ROLLER UNIT
[A]: Front support lever
NOTE: Open the front door. Hold the
bottom end of the lever. Slowly
close the door, and the upper
end of the lever comes off the
door.
[B]: Lever spring
[C]: Left door-hinge (1 hook)
[D]: Right door-hinge (1 hook)
[E]: Plastic belt
[F]: Front door
[F]
[D]
[A]
[B]
[E]
[C]
G081R902.WMF
SM 3-3 G081/G092
Page 62

EXTERIOR COVERS
3.4.2 TRANSFER ROLLER ASSEMBLY
[B]
[J]
[K]
[H]
[G]
[A]
[A]: Transfer roller holder ( x 4)
[G]
[E]
G081R903.WMF
[B]: Front door cover
[C]: Transfer roller paper guide
[D]: Transfer roller
NOTE: Using the provided green levers the transfer roller can be easily
unclipped from the bushings.
It is not necessary to remove the front door to replace the transfer
roller. Avoid touching the transfer roller’s surface with your hands.
[E]: Transfer roller right bushing
[F]: Transfer roller left bushing
[G]: Transfer roller spring
[H]: Transfer roller plate
[I]: Lock lever spring
[J]: Front door lock lever
[K]: Plastic belt
[I]
[F]
[C]
[D]
3.4.3 RIGHT COVER
[A]
[A]: Cartridge lever (1 hook, x 1)
[B]: Plastic strap
[C]: Right cover (1 hook at the rear end)
NOTE: Release the three hinges [D].
[C]
[B]
G081R906.WMF
[D]
G081/G092 3-4 SM
Page 63

EXTERIOR COVERS
3.4.4 REAR COVER
• Unplug the optional paper feed unit’s harness connector (if present).
• Open the right cover
[A]: Rear cover ( x 2 (self-tapping),
5 hooks [B])
NOTE: Use a small flat blade screw
driver to assist unclipping the
hooks. Be careful not to
damage the hooks or the
cover.
[C]: Cassette cover
[D]: Harness cover
NOTE: Use a penlight or other
suitable light source to view
how each cover hook is
clipped to the mainframe
before prying the clip to
release.
[B]
[C]
[A]
[D]
G081R907.WMF
Adjustment
Replacement &
3.4.5 LEFT COVER
[A]: x 2
[B]: Release the two hooks.
[C]: Release the openings from the
two projections.
[D]: Left cover with the toner
cartridge cover [E]
[B]
[E]
[D]
[B]
[A]
[C]
SM 3-5 G081/G092
G081R904.WMF
Page 64

EXTERIOR COVERS
3.4.6 TOP COVER AND LCD PANEL
[B]
[C]
[A]
[D]
[D]
[E]
[A]: LCD panel (4 hooks [B], x 2)
[C]: Top cover (7 hooks [D])
NOTE: Use caution not to damage the paper exit sensor [E].
This cover is a very precise fit. Use extra caution and work alternately from
the right and left sides of the top cover to gradually release the cover from
the printer.
G081R905.WMF
G081/G092 3-6 SM
Page 65

ECB AND DRIVE UNITS
3.5 ECB AND DRIVE UNITS
3.5.1 ECB (ENGINE CONTROL BOARD) AND
TEMPERATURE/HUMIDITY SENSOR BOARDS
• Rear covers (! 3.4.4)
• Left cover (! 3.4.5)
• Top cover (! 3.4.4)
[A]: Engine board shield cover
( x 8)
[B]: Engine control board
(All , x 7)
[A]
Adjustment
Replacement &
[B]
G081R912.WMF
NOTE: After replacing the ECB, remove the EEPROM from the old board and
install it on the new board. (If the EEPROM on the old board is defective,
replace the EEPROM (! 3.10.4).)
[C]
[E]
[D]
G081R913.WMF
[C]: Engine board small bracket ( x 3, x 1)
[D]: Engine board large bracket ( x 6)
[E]: Temperature/humidity sensor board ( x 1)
SM 3-7 G081/G092
Page 66

ECB AND DRIVE UNITS
3.5.2 SUB FUSING-FAN AND SUB FUSING-FAN DUCT
[B]
[A]
[C]
• Rear covers (! 3.4.4)
• Left cover (! 3.4.5)
• Top cover (! 3.4.4)
[A]: Sub fusing-fan ( x 2, x 1)
[B]: Jam detection sensor board ( x 1)
[C]: Sub fusing-fan duct ( x 2, x 2)
G081R981.WMF
G081/G092 3-8 SM
Page 67

ECB AND DRIVE UNITS
3.5.3 TONER CARTRIDGE HOLDER
CAUTION: The toner cartridge
[B]
holder assembly
contains toner. Take
care not to spill toner
when handling the
toner cartridge holder
assembly.
[A]: Toner cartridge drive unit (
x 2, x 1)
A
A
[B]: PC guide ( x 1)
[C]: Toner cartridge holder
assembly ( x 2, x 1 [D])
[D]
Lubricating
Lubricate the following parts (Grease G501) when replacing them (values in
parentheses indicate the amount of lubricant):
[B]
G081R908.WMF
[C]
Adjustment
Replacement &
[A]
[C]
[A]: Shaft excluding both ends (0.1 cc)
[B]: Toner cartridge drive base (indicated with arrows) (0.05 cc x 4)
[C]: Gear (0.1 cc x 3)
[D]: Gear (0.1 cc)
[D]
G081R973.WMF
SM 3-9 G081/G092
Page 68

ECB AND DRIVE UNITS
3.5.4 TONER CARTRIDGE DRIVE UNIT
[A]: Toner cartridge drive unit ( x 2,
x 1)
[A]
G081R910.WMF
3.5.5 PAPER PICKUP MOTOR AND MOTOR BRACKET
[A]: Paper pickup motor ( x 1,
x 2)
NOTE: The connector is at
CN22 on the engine
board.
[B]: Paper pickup motor bracket
( x 4)
[C]: Paper pickup drive gear
[D]: Grounding plate ( x 1)
[D]
Lubricating
Lubricate the following parts (Grease G501) when replacing them (values in
parentheses indicate the amount of lubricant):
• The outer cogs on the paper pickup drive gear [C] (0.1 cc)
• The shaft on the paper pickup motor bracket [B] (0.05 cc)
[C]
[B]
[A]
G081R911.WMF
G081/G092 3-10 SM
Page 69

ECB AND DRIVE UNITS
3.5.6 MAIN DRIVE UNIT
[A]
[B]
[D]
[C]
G081R917.WMF
[E]
• Fusing unit (! 3.2)
• Toner cartridge holder (! 3.5.2)
• Engine control board, engine board small bracket, engine board large bracket
(! 3.5.1)
• Toner cartridge drive unit (! 3.5.4)
• Paper pickup drive motor bracket (! 3.5.5)
[A]: Inner cover ( x 2, x 2)
[B]: Fusing unit grounding plate
[C]: Main drive unit ( x 7, x 3)
NOTE: There are 2 motor cables [D] and 1 sensor cable [E].
Adjustment
Replacement &
SM 3-11 G081/G092
Page 70

ECB AND DRIVE UNITS
[A]: Drive unit bracket ( x 8)
[B]: Grounding plate ( x 1).
[A]
[B]
[C]: Feed idle gear
[D]: Cam gear
[E]: Left PC idle gears
[F]: Right PC idle gear
[J]
[F]
[G]: Left transfer-unit idle gears
[H]: Right transfer-unit idle gear
[I]: Joint gear
Lubricating
G081R914.WMF
[C]
[D]
[E]
Lubricate the following parts (Grease 501) when replacing them (values in
parentheses indicate the amount of lubricant):
• The shaft of the feed idle gear [C] (0.05 cc)
• The shaft of the cam gear [D] (0.05 cc)
• The shafts of the left PC idle gears [E] (0.05 cc x 4)
• The shaft of the right PC idle gear [F] (0.05 cc)
• The shafts of the left transfer-unit idle gears [G] (0.05 cc x 2)
• The shaft of the right transfer-unit idle gear [H] (0.05 cc)
• The inside of the PC bushing [J] (0.1 cc)
G081R918.WMF
[I]
[G]
[H]
[G]
G081/G092 3-12 SM
Page 71

ECB AND DRIVE UNITS
(A)
CAUTION: When reinstalling the PCU
idle gears, perform the
following steps, and make
sure that each alignment
mark (A) on the PCU gear
Mark (B)
on Bracket
Alignment Mark
on Gear
is aligned with the mark (B)
as shown.
PCU
Gear
PCU
Gear
1) If gears 1 – 3 are installed,
remove them.
2) Align each mark (A) with the
mark (B) by rotating the PCU
gear.
3) Install gears 1 – 3 in order of
gears 1, 2, and 3.
4) Make sure that each alignment
Gear 1
Gear 2 Gear 3
G081R915.WMF
mark (A) is aligned with the mark (B).
Adjustment
Replacement &
CAUTION: Replace all PCU gears at the same time with the gears provided in the
replacement package. Make sure the gears have the same molding
number (see the illustration below). Print quality will be poor if gears of
different molding numbers are used.
Molding Number
PCU Gear Top Side View
G081R968.WMF
SM 3-13 G081/G092
Page 72

ECB AND DRIVE UNITS
[A]: CMY home lever
[B]: PC home spring
[C]: PC home lever
[D]: PC home position sensor
( x 1)
[C]
[B]
G081R916.WMF
[D]
[E]: Four PCU gears
( x 4)
[F]: Four development gear
[G]
assemblies
[G]: Four bushings
[H]: Fusing unit idle gear
[F]
( x 1)
[H]
Lubricating
Lubricate the following parts (Grease 501) when replacing them (values in
parentheses indicate the amount of lubricant):
[E]
[J]
[I]
G081R921.WMF
[A]
• The shaft of the CMY home lever [A] (0.05 cc)
• The shafts of the PCU gears [E] (0.05 cc)
• The inside of the bushing [G] (0.1 cc x 4)
• The interface with the bushing [G] of the development gear [I] (0.05 cc x 4)
• The shaft of the fusing unit idle gear [H] (0.05 cc)
• The skirt of the left end of the development coupling [J] (0.05 cc x 4)
• The inside of the PC bushing [K] (0.1 cc x 1)
G081/G092 3-14 SM
Page 73

ECB AND DRIVE UNITS
[A]: Drive unit bracket ( x 4)
[A]
G081R922.WMF
[E]
[B]: CMY change gears
[C]: BK change gear
[D]: Hopper change gear
[E]: Hopper gears (A)
[F]: Hopper gears (B)
[G]: Hopper gear (C)
[F]
[G]
[H]: Coupling gear
[I]: Outer gear
[J]: Planetary gears
[D]
[C]
[K]: Planetary gear bracket
[L]: Inner gear
[B]
[K]
[I]
Adjustment
Replacement &
Lubricating
[L]
[J]
[H]
G081R919.WMF
Lubricate the following parts (Grease 501) when replacing them (values in
parentheses indicate the amount of lubricant):
• The inner cogs (0.1 cc x 2) and outer cogs (0.1 cc x 2) on the CMY change gears
[B]
• The shafts of the CMY change gears [B] (0.05 cc)
• The inner cogs (0.1 cc) and outer cogs (0.1 cc) on the BK change gear [C]
• The shaft of the BK change gear [C] (0.05 cc)
• The shaft of the hopper change gear [D] (0.05 cc)
• The shafts of the hopper gears (A) [E] (0.05 cc x 2)
• The shafts of the hopper gears (B) [F] (0.05 cc x 2)
• The shaft of the hopper gear (C) [G] (0.05 cc)
• The inner cogs on the left side of the coupling gear [H] (0.1 cc)
• The cogs on the outer gear [I] (0.1 cc)
• The shaft of the outer gear [I] (0.05 cc)
• The shafts of the planetary gears [J] (0.05 cc x 2)
• The inside (0.1 cc) and outside (0.1 cc) of the right end and the inside (0.1 cc) of
the left end of the inner gear [L]
SM 3-15 G081/G092
Page 74

ECB AND DRIVE UNITS
[J]
[A]: Tension roller spring
[B]: Tension roller bracket ( x 1)
[C]: Tension roller
[D]: Transfer pulley gear
[E]: Transfer pulley gear flange
[F]: Feed pulley gear
[G]: Feed pulley gear flange
[H]: Feed belt
[I]: BK solenoid ( x 2)
[J]: BK clutch spring
[K]: BK clutch arm
Lubricating
Lubricate the following parts (Grease
501) when replacing them (values in
parentheses indicate the amount of
lubricant):
"
[K]
[G]
[A]
&
[F]
[I]
'
[H]
[B]
[E]
G081R920.WMF
$
[C]
[D]
#
• The shaft of the transfer pulley gear
flange [E] (0.05 cc)
• The points
" through # (0.05 cc x 6)
on the tension roller bracket [N]
%
Rear view
G081R972.WMF
G081/G092 3-16 SM
Page 75

ECB AND DRIVE UNITS
3.5.7 BIAS UNIT
• Fusing unit (! 3.2)
• Engine control board (! 3.5.1)
• Toner cartridge holder (! 3.5.2)
• Toner cartridge drive unit
(! 3.5.4)
• Paper pickup motor bracket
(! 3.5.5)
• Main drive unit (! 3.5.6)
[A]: Grounding plate ( x 1)
[B]: Bias unit ( x 2, x 2)
NOTE: The connectors are at CN2
and CN3 on the high
voltage board
(! 3.10.6).
[A]
[B]
G081R925.WMF
Adjustment
Replacement &
3.5.8 POWER SUPPLY FAN MOTOR AND PSU FAN MOTOR DUCT
• Fusing unit (! 3.2)
• Engine control board
(! 3.5.1)
• Toner cartridge holder
(! 3.5.2)
• Toner cartridge drive unit
(! 3.5.4)
• Paper pickup motor bracket
(! 3.5.5)
• Main drive unit (! 3.5.6)
[A]: Fan motor
( x 1, x 2)
[B]: By-pass tray paper detection
sensor cable
[C]: By-pass tray home position
sensor cable
[D]: Fan motor duct ( x 3)
[C]
[D]
[A]
[B]
G081R926.WMF
SM 3-17 G081/G092
Page 76

LASER SCANNING UNIT
3.6 LASER SCANNING UNIT
WARNING
Turn off the main switch and unplug the machine before beginning any of
the procedures in this section. Laser beams can cause serious eye injury.
3.6.1 CAUTION DECAL LOCATIONS
The caution decal is located as shown below.
G081R970.WMF
G081R974.BMP
WARNING
Be sure to turn off the main switch and disconnect the power plug from the
power outlet before beginning any disassembly or adjustment of the laser
unit. This printer uses a class IIIb laser beam with a wavelength of 655 nm
and an output of 7 mW. The laser can cause serious eye injury.
G081/G092 3-18 SM
Page 77

PAPER FEED
3.6.2 LASER SCANNING UNIT
• Rear cover (! 3.4.4)
• Left cover (! 3.4.5)
• Top cover (! 3.4.4)
[A]: Laser scanning unit grounding plate
( x 4)
NOTE: When reassembling, arrange the
wires correctly. The laser
scanning unit wires (shielded
cable) go under the plate; the
other wires go over the plate. Be
sure to re-install using the exact
same screws as removed.
[B]: Laser scanning unit ( x 3, x 3)
[A]
[B]
G081R923.WMF
Adjustment
Replacement &
NOTE:
1) To avoid dust, do not disassemble the laser scanning unit.
2) When reassembling, adjust the position of the CMY PCU (! 3.12).
3.7 PAPER FEED
3.7.1 PAPER EXIT
• All covers (! 3.4)
• Paper pickup motor bracket (! 3.5.5)
[A]: Inner cover ( x 2, x 2)
[B]: Duplex unit detection sensor
[C]: Duplex unit jam detection sensor
board
[B]
[A]
[C]
G081R924.WMF
SM 3-19 G081/G092
Page 78

PAPER FEED
[A]: Paper exit gear cover
( x 3, x 1)
NOTE: The connector is at CN26
[B]
[C]
on the engine board
(! 3.5.1).
[B]: Gears
[C]: Switching lever
[A]
G081R930.WMF
NOTE: When reinstalling the gears on the
paper exit gear cover, reassemble
them as shown in the illustration.
[K]
[A]
See figure-1
[A]: Paper exit roller joint gear
[B]: Double gear
[C]: Switching lever spring
[B]
[E]
[D]: Rotation switching solenoid
[E]: Intermediate gear
[F]: Outer gear x 2
[G]: Inner gear x 4
[C]
[D]
[F]
[G]
[H]: Coupling gear x 2
[H]
CAUTION: The rotation switching gear [I]
differs from the other gear [J] in
Figure-1
[I]
the direction of the gear teeth
(see Figure-1).
[J]
Lubricating
Lubricate the following parts (Grease 501)
G081R931.WMF
when replacing them (values in parentheses indicate the amount of lubricant):
• The shafts on the outer gears [F] (0.05 cc x 6); the cogs on the outer gears [F]
(0.1 cc x 2)
• The cogs on the coupling gears [H] (0.1 cc x 2)
• The shafts on the paper exit gear cover [K] (0.05 cc x 3)
G081/G092 3-20 SM
Page 79

PAPER FEED
[A]: Paper exit roller (with the paper
[A]
stoppers [B])
NOTE: Move it in the direction of the
arrows [", &].
[B]
Lubricating
&
"
Lubricate the following parts (Grease 501)
when replacing them (values in parentheses
indicate the amount of lubricant):
• The right and left ends of the paper exit
roller [A] (0.1 cc x 2) excluding the gear on
the left end
G081R927.WMF
[B]: Paper exit sub assembly ( x 2)
[B]
Adjustment
Replacement &
[C]: Paper full sensor actuator
[D]: Sensor lever spring
[E]: Paper jam sensor levers
[F]: Paper full/Jam sensor board ( x 1)
G081R928.WMF
[C]
[F]
[D]
[E]
G081R929.WMF
SM 3-21 G081/G092
Page 80

PAPER FEED UNIT
3.7.2 DISASSEMBLY OF PAPER EXIT SUB ASSEMBLY
[A]
[A]: Pinch roller (A) x 6
[B]: Pinch roller (B) x 2
[C]: Pinch roller spring x 8
[D]: “Star” rubber x 2
[E]: Paper guide
[F]: Paper stopper
[C]
[E]
3.8 PAPER FEED UNIT
• Fusing unit (! 3.2)
• Front door (! 3.4.1)
• Right cover (! 3.4.3)
• Rear cover (! 3.4.4)
• Left cover (! 3.4.5)
[A]: Registration clutch ( x 1)
[B]: Registration roller coupling
gear ( x 1)
NOTE: The connector is at CN20 on
the engine board (! 3.5).
NOTE: When reinstalling the registration
clutch, tab " of the registration
clutch must be fit over hook &.
G081R934.WMF
[D]
[A]
[B]
&
[B]
"
[F]
G081R932.WMF
[C]: Paper feed unit ( x 2, x 2)
NOTE: The connectors are at CN18
and CN19 on the engine
board.
[C]
G081R933.WMF
G081/G092 3-22 SM
Page 81

PAPER FEED UNIT
Lubricating
Adjustment
Replacement &
[C]
[B]
[A]
[B]
G081R975.WMF
Lubricate the following parts (Grease 501) when replacing them (values in
parentheses indicate the amount of lubricant):
[A]: The cogs on the inner gear (0.1 cc x 2)
[B]: The shafts on the outer gear (0.05 cc x 2)
[C]: The shaft on the gear bracket (0.05 cc x 1)
SM 3-23 G081/G092
Page 82

PAPER FEED UNIT
3.8.2 PAPER FEED UNIT DISASSEMBLY
[A]: Pickup gear
[B]: Inner gear (1 hook)
[C]: Inner gears
[D]: Outer gear
[E]: Gear
[F]: Plastic washer
[G]: Ratchet arm
[H]: Feed gear
[I]: Idle gear
[J]: Screw
[K]: Gear bracket
[L]: Pickup solenoid
[K]
[J]
[G]
[F]
[L]
[I]
[A]
[H]
[E]
[D]
G081R940.WMF
[C]
[B]
[M]: Bushing
[N]: Bushing
NOTE: Unlatch the bushing hook
from the pickup roller shaft
[O].
[N]
[O]
[M]
G081R941.WMF
G081/G092 3-24 SM
Page 83

PAPER FEED UNIT
[A]: Two pickup roller assemblies
NOTE: Unlatch the hook from the
groove in the pickup roller
shaft.
[B]: Pickup roller shaft with the two pins
[C]
[D]: Spring x 2
[E]: Registration roller
[F]: Registration pinch roller
[G]: Paper empty/registration sensor
board
[H]: Registration sensor lever
[I]: Lever spring
[J]: Paper empty sensor actuator
[K]: Varistor
[K]
[A]
[G]
[I]
[A]
[B]
[D]
[H]
[C]
G081R942.WMF
[F]
Adjustment
Replacement &
[E]
[D]
[J]
G081R937.WMF
SM 3-25 G081/G092
Page 84

PAPER FEED UNIT
[A]: Registration paper guide assembly
NOTE: The registration paper guide
assembly [A] is held in place
by the two support tabs [B]
(see Figure-1). While
unlatching the registration
paper guide assembly from
the support tabs, remove it
from the paper feed unit
frame.
[C]: Two bushings
[D]: Paper feed roller
[E]: Paper feed unit frame
[F]: Registration paper guide
[G]: Paper guide spring
[H]: Pinch roller spring x 2
[I]: Pinch roller shaft
NOTE: Slide out the pinch roller shaft
in the direction of the arrow
shown in this illustration.
[I]
[E]
[C]
[H]
[F]
[B]
[D]
Figure 1
[A]
G081R938.WMF
[G]
G081R939.WMF
[C]
G081/G092 3-26 SM
Page 85

IH (INDUCTIVE HEATER) UNIT
3.9 IH (INDUCTIVE HEATER) UNIT
NOTE: After removing the fusing unit, use
caution not to push the thermostat
[A][B]. The thermostat can be
easily broken.
[A]
[B]
• Fusing unit (! 3.2)
• All covers (! 3.4)
[C]: Interlock switch cover
( x 3)
[D]: IH cable shield cover ( x 1)
[E]: Cover ( x 1)
[F]: x 2 (pink+white, black)
[G]: IH harness cover ( x 1)
[H]: IH unit ( x 1, 1 washer)
NOTE: Pull out the IH harness
cable [I] through the
opening in cover [J].
[J]: IH shield cover ( x 1, 2 hooks [K])
[C]
[E]
G081R104.WMF
[D]
[F]
G081R935.WMF
[G]
Adjustment
Replacement &
[H]
[I]
[J]
G081R936.WMF
[K]
SM 3-27 G081/G092
Page 86

ELECTRICAL COMPONENTS
3.10 ELECTRICAL COMPONENTS
3.10.1 POWER SUPPLY UNIT
View (A)
View (A)
"
&
%
[A]
• All covers (! 3.4)
• IH unit (! 3.9)
[A]: Cover ( x 1)
NOTE: Slide out the cover in the arrow % direction.
[B]: Power supply unit ( x 11, x 4)
NOTE: Move the power supply unit in the arrow " direction, and slide it out in
the direction of the arrow &.
[B]
G081R944.WMF
G081/G092 3-28 SM
Page 87

ELECTRICAL COMPONENTS
3.10.2 POWER SUPPLY UNIT DISASSEMBLY
[A]: Power supply shield cover
( x 10)
[B]: Power supply board
( x 2, x 6)
[C]: IH power supply board
( x 1, x 5)
[A]
Adjustment
Replacement &
[B]
[C]
G081R943.WMF
SM 3-29 G081/G092
Page 88

ELECTRICAL COMPONENTS
3.10.3 MAIN CONTROL BOARD
NOTE: After replacing the controller, remove the NVRAM on the old board and
install it on the new board. If the NVRAM on the old board is defective,
replace the NVRAM (! 3.10.4).
[A]: Main control board ( x 2)
[A]
G081R947.WMF
3.10.4 NVRAM/EEPROM REPLACEMENT PROCEDURES
Before beginning the following procedures, make sure you have the printer’s
original SMC report (factory settings) available.
EEPROM on the ECB
1. Enter SP mode and print out the SMC reports with SP5-990 if possible.
2. Turn off the main switch and unplug the power cord.
3. Replace the EEPROM (IC5) on the ECB and reassemble the machine.
4. Execute the RAM clear for the engine settings with SP5-801-2.
5. Enter the SP mode changes from the factory in the field.
6. Input the engine serial number with SP-5-811-4.
G081/G092 3-30 SM
Page 89

ELECTRICAL COMPONENTS
NVRAM on the Controller
1. Enter SP mode and print out the SMC reports with SP5-990 if possible.
2. Turn off the main switch and unplug the power cord.
3. Replace the NVRAM on the controller and reassemble the machine.
4. Execute the RAM clear for the controller settings and counters with SP5-801-3,
-8, -11, and SP7-808-1.
5. Contact your regional representative to enter the machine’s serial number and
destination code.
NOTE: The destination code can only be entered using a secured access
procedure. This is necessary to prevent unauthorized changing of the
product’s destination code.
6. Enter the SP mode data (changes as) indicated on the printer’s original SMC
report and the current SMC report printed in Step 1 of this procedure.
Adjustment
Replacement &
EEPROM on the ECB and the NVRAM on the Controller
1. Enter SP mode and print out the SMC reports with SP5-990 if possible.
2. Turn off the main switch and unplug the power cord.
3. Replace the EEPROM on the ECB and the NVRAM on the controller, and
reassemble the machine.
4. Execute the RAM clear with SP5-801-1 and SP7-808-1.
5. Contact your regional representative to enter the machine’s serial number and
destination code.
NOTE: The destination code can only be entered using a secured access
procedure. This is necessary to prevent unauthorized changing of the
product’s destination code.
6. Enter the SP mode data (changes) as indicated on the printer’s original SMC
report and the current SMC report printed in Step 1 of this procedure.
SM 3-31 G081/G092
Page 90

ELECTRICAL COMPONENTS
3.10.5 MAIN CONTROL BOARD SHIELD COVERS
• All covers (! 3.4)
• Power supply unit (! 3.10.1)
• Engine control board (! 3.5.1)
[A]: Laser scanning unit grounding
plate ( x 4)
[B]: Main control board shield cover
assembly ( x 7)
[C]: Main board shield cover ( x 7)
[D]: Main board shield base cover
[F]: Main board guide rail
[D]
[A]
G081R948.WMF
[E]
[B]
[F]
G081R949.WMF
G081/G092 3-32 SM
Page 91

ELECTRICAL COMPONENTS
3.10.6 HIGH VOLTAGE BOARD AND REGISTRATION SENSOR
BOARD
[D]
[C]
[A]
[B]
• All covers (! 3.4)
• Power supply unit (! 3.10.1)
• Main control shield cover assembly (! 3.10.5)
• Main drive unit (! 3.5.6)
[A]: HV earth plate ( x 1)
[B]: High voltage unit with high voltage board ( x 6, x 4)
[C]: High voltage board shield cover ( x 4)
G081R945.WMF
Adjustment
Replacement &
[E]
[G]
[F]
G081R946.WMF
[D]: High voltage board
[E]: Spring
[F]: Color registration sensor board ( x 2)
[G]: Waste toner bottle sensor actuator
NOTE: After replacing the color registration sensor board, the color registration
values must be reset (SP5-998-002).
SM 3-33 G081/G092
Page 92

TRANSFER BELT TENSION UNIT
3.11 TRANSFER BELT TENSION UNIT
3.11.1 TRANSFER BELT TENSION UNIT REMOVAL
[A]
G081R950.WMF
• Transfer belt unit (! 3.2)
• Rear cover (! 3.4.4)
• Left cover (! 3.4.5)
• Top cover (! 3.4.4)
• Open the right cover.
[A]: Transfer belt tension unit ( x 2, x 3)
NOTE: The cables are wired through the opening of the frame and connected to
the 3 connectors CN14, 24, and 25 on the engine control board. Take care
not to damage the cables when removing the transfer belt tension unit.
G081/G092 3-34 SM
Page 93

TRANSFER BELT TENSION UNIT
3.11.2 CHANGER SOLENOID AND CAM RATCHET SOLENOID
[D]
[E]
[A]
[B]
[C]
[F]
[J]
[G]
Adjustment
Replacement &
[H]
[I]
[H]
G081R953.WMF
[A]: Changer solenoid
[B]: Changer lever
[C]: Changer lever spring
[D]: Transfer cam home position sensor
[E]: Cam solenoid spring
[F]: Cam ratchet (with the washer)
[G]: Cam ratchet solenoid
[H]: Spring supports
[I]: Transfer belt tension unit base
[J]: Bracket
SM 3-35 G081/G092
Page 94

TRANSFER BELT TENSION UNIT
Lubricating
[B]
[A]
[C]
[D]
[F]
[G]
[E]
G081R976.WMF
Lubricate the following parts (Grease 501) when replacing them (values in
parentheses indicate the amount of lubricant):
[A]: The shafts on the planetary gear base (0.05 cc x 4); the inside edge (0.05 cc)
and outside edge (0.05 cc) of the planetary gear base
[B]: The inside of the double teeth gear (0.05 cc)
[C]: The shaft on the cam ratchet bracket (0.05 cc)
[D]: The outside of the paper transfer cam (left) (0.2 cc)
[E]: The outside of the belt transfer cam (left) (0.2 cc)
[F]: The outside of the belt transfer cam (right) (0.2 cc)
[G]: The outside of the paper transfer cam (right) (0.2 cc)
G081/G092 3-36 SM
Page 95

PCU HOLDER
3.12 PCU HOLDER
• Rear cover (! 3.4.4)
• Left cover (! 3.4.5)
• Top covers (! 3.4.4)
• Open the right cover.
[A]: 2 tabs
NOTE: Move in the arrow direction.
[B]: PCU holder assembly ( x 2)
[A]
[B]
[A]
G081R958.WMF
Adjustment
After replacing the PCU holder, adjust the position of the CMY PCU as follows.
1. Remove the left cover (! 3.4.5).
2. Remove the board cover [A] ( x 2).
3. Push the free-run button [B] and hold
it down. One or more sheet of the
[B]
test pattern is output.
NOTE: The number of sheets
depends on how long you
hold the button down.
Adjustment
Replacement &
4. Check that the lines produced by the
K PCU and CMY PCU are aligned
properly.
NOTE: Normally, the color lines (C,
M, and Y) produced by the
CMY PCU are aligned so
closely that they appear as
dark-gray lines.
[A]
G081R103.WMF
SM 3-37 G081/G092
Page 96

PCU HOLDER
5. Confirm that the color lines " or & are
aligned to the black lines. If they are not
aligned, go on to the next step. If they
are aligned %, adjustment is not
required.
NOTE: This procedure ensures that the
black photoconductor unit is
aligned properly (test lines
parallel to paper’s feed edge)
and the color photoconductor
unit is aligned properly to the
black unit. By performing this
adjustment the black PCU and color PCU are angled (skewed) to
ensure that each color horizontal line on the test print overlaps (as
close as possible) each black horizontal line on the test print. Do not
power off the printer during this procedure.
6. Open the front cover, and make sure
the PCU holder is correctly installed.
"
C M Y
K C M Y
C M Y
%
&
7. Loosen the screws [C].
NOTE: You may wish to only loosen
one set of screws at a time.
This way you can adjust the
skew of either the black or
color PCUs individually.
8. Put the Color PCU Skew Adjustment
Knob (G0819310) [D] in the opening
[E], and turn it clockwise or
counterclockwise.
NOTE: The scale [F] indicates 20- to
30-µ steps on the paper.
9. Tighten the screws [C], and close the
right cover.
G081R102.WMF
[E]
[D]
[F]
10. Repeat the steps above until the lines become as aligned as possible (see
step 5).
NOTE: When repeating the adjustment, place the special tool in the opening
first, then loosen the screws [C]. If you loosen the screws first, the
previous adjustment may be lost.
11. Power off the printer, wait several seconds, then power the printer back on.
Confirm adjustment.
[C]
G081/G092 3-38 SM
Page 97

FUSING FAN MOTOR
3.13 FUSING FAN MOTOR
• Rear cover (! 3.4.4)
• Left cover (! 3.4.5)
• Top cover (! 3.4.4)
• Open the right cover.
[A]: Insulation sheet (if present)
[B]: Fusing fan motor ( x 1, x 1)
[A]
G081R960.WMF
[B]
3.14 SENSORS
3.14.1 FRONT AND RIGHT COVER OPEN DETECTION SWITCHES
• Front door (! 3.4.1)
• Rear cover (! 3.4.4)
• Right cover (! 3.4.3)
• Top cover (! 3.4.4)
[A]: Interlock switch cover ( x 3)
[B]: Front door open detection sensor
( x 1)
[C]: Safety interlock switches
( x 2, x 2)
NOTE: The connectors are from the
power supply unit and CN35
on the engine control board.
[D]: Interlock switch bracket ( x 1)
[B]
Adjustment
Replacement &
[D]
[C]
[A]
G081R956.WMF
SM 3-39 G081/G092
Page 98

SENSORS
3.14.2 BY-PASS TRAY HOME POSITION SENSOR AND BY-PASS
TRAY PAPER DETECTION SENSOR BOARDS
• Left cover (! 3.4.5)
• Top cover (! 3.4.4)
• Rear covers (! 3.2)
[A]: Paper pickup motor bracket ( x 1)
[B]: Bypass tray sensor cover ( x 2)
[C]: Bypass tray home position sensor
board ( x 1)
[D]: Bypass tray paper detection sensor
board ( x 1)
[A]
G081R957.WMF
[D]
[C]
[B]
3.14.3 WASTE TONER CARTRIDGE FULL SENSOR
• Open the right cover.
• Waste toner cartridge
[A]: Waste toner cartridge right holder
( x 2)
[B]: Waste toner cartridge full sensor
board ( x 1)
[B]
[A]
G081R963.WMF
G081/G092 3-40 SM
Page 99

STANDARD PAPER CASSETTE
3.15 STANDARD PAPER CASSETTE
[A]: Separation pad unit
NOTE: See the bottom of the paper
cassette.
[B]: Pickup roller unit
NOTE: Unlatch the pickup roller hook
[C] and slide the pickup roller
unit from the pickup roller
shaft [B].
[B]
[C]
[D]
[D]: Gear cover (with the sub tray protector [E]
and protector spring [F]) ( x 2)
[G]: Roller position arm
[H]: Cam gear
[I]: Right cam
[J]: Gear spacer
[K]: Idle gear
[L]: Pickup roller with gear
[M]: Bushing
[M]
[A]
[I]
G081R964.WMF
[K]
Adjustment
Replacement &
[J]
[H]
[F]
[E]
[L]
[G]
G081R961.WMF
[D]
SM 3-41 G081/G092
Page 100

STANDARD PAPER CASSETTE
[A]: Cassette gear bracket
[B]: Paper exit sensor lever
[C]: Left cam (1 hook)
[D]: Cam shaft
[E]: Bushing
[F]: Upper cassette paper guide ( x 1, 2
hooks [E])
[C]
[A]
[F]
[B]
G081R980.WMF
[G]
[D]
[E]
G081R962.WMF
G081/G092 3-42 SM
 Loading...