

Page 1
BOOK FOLDER BF90+
Operating instruction
Read this manual carefully before you use this product and keep it handy for future
reference.
For safety, please follow the instructions in this manual.
Page 2

Part no: 17439
Doc no: x04065
Page 3

3
TABLE OF CONTENTS
What You Can Do with This Machine ............................................................................... 5
Guide To Components ...................................................................................................... 7
Exterior ......................................................................................................................................... 7
Interior ........................................................................................................................................... 8
1. Basics ................................................................................................. 9
Turning On / Off the Main Power ...................................................................................... 9
Emptying the trim bin ...................................................................................................... 10
2. Operating the Book Folder ..............................................................11
Changing settings ........................................................................................................... 11
General ....................................................................................................................................... 11
Setting Mode ............................................................................................................................... 11
Procedure ................................................................................................................ 11
Begin On-line Production ............................................................................................... 12
3. Clearing Misfeed(s) ......................................................................... 13
Clearing misfeed(s) ......................................................................................................... 13
General..................................................................................................................... 13
Inside the Book Folder ........................................................................................... 13
Exit area ................................................................................................................... 13
4. Troubleshooting .............................................................................. 15
Fault codes ...................................................................................................................... 15
General ....................................................................................................................................... 15
Clear Misfeed(s) ...................................................................................................... 15
Close cover(s) ......................................................................................................... 15
Feed errors ................................................................................................................................. 16
5. REMARKS ........................................................................................ 17
Do’s And Don’ts ............................................................................................................... 17
Where to put Your Machine............................................................................................. 18
Machine environment .................................................................................................................. 18
Power connection ....................................................................................................................... 18
Access to machine ..................................................................................................................... 19
Maintaining Your Machine............................................................................................... 20
Cleaning feed belts ..................................................................................................................... 20
6. Specification .................................................................................... 21
Machine Specifications ................................................................................................... 21
Book Folder BF90+ (option)........................................................................................................ 21
INDEX .................................................................................................... 23
Page 4

Page intentionally blank
Page 5
5
What You Can Do with This Machine
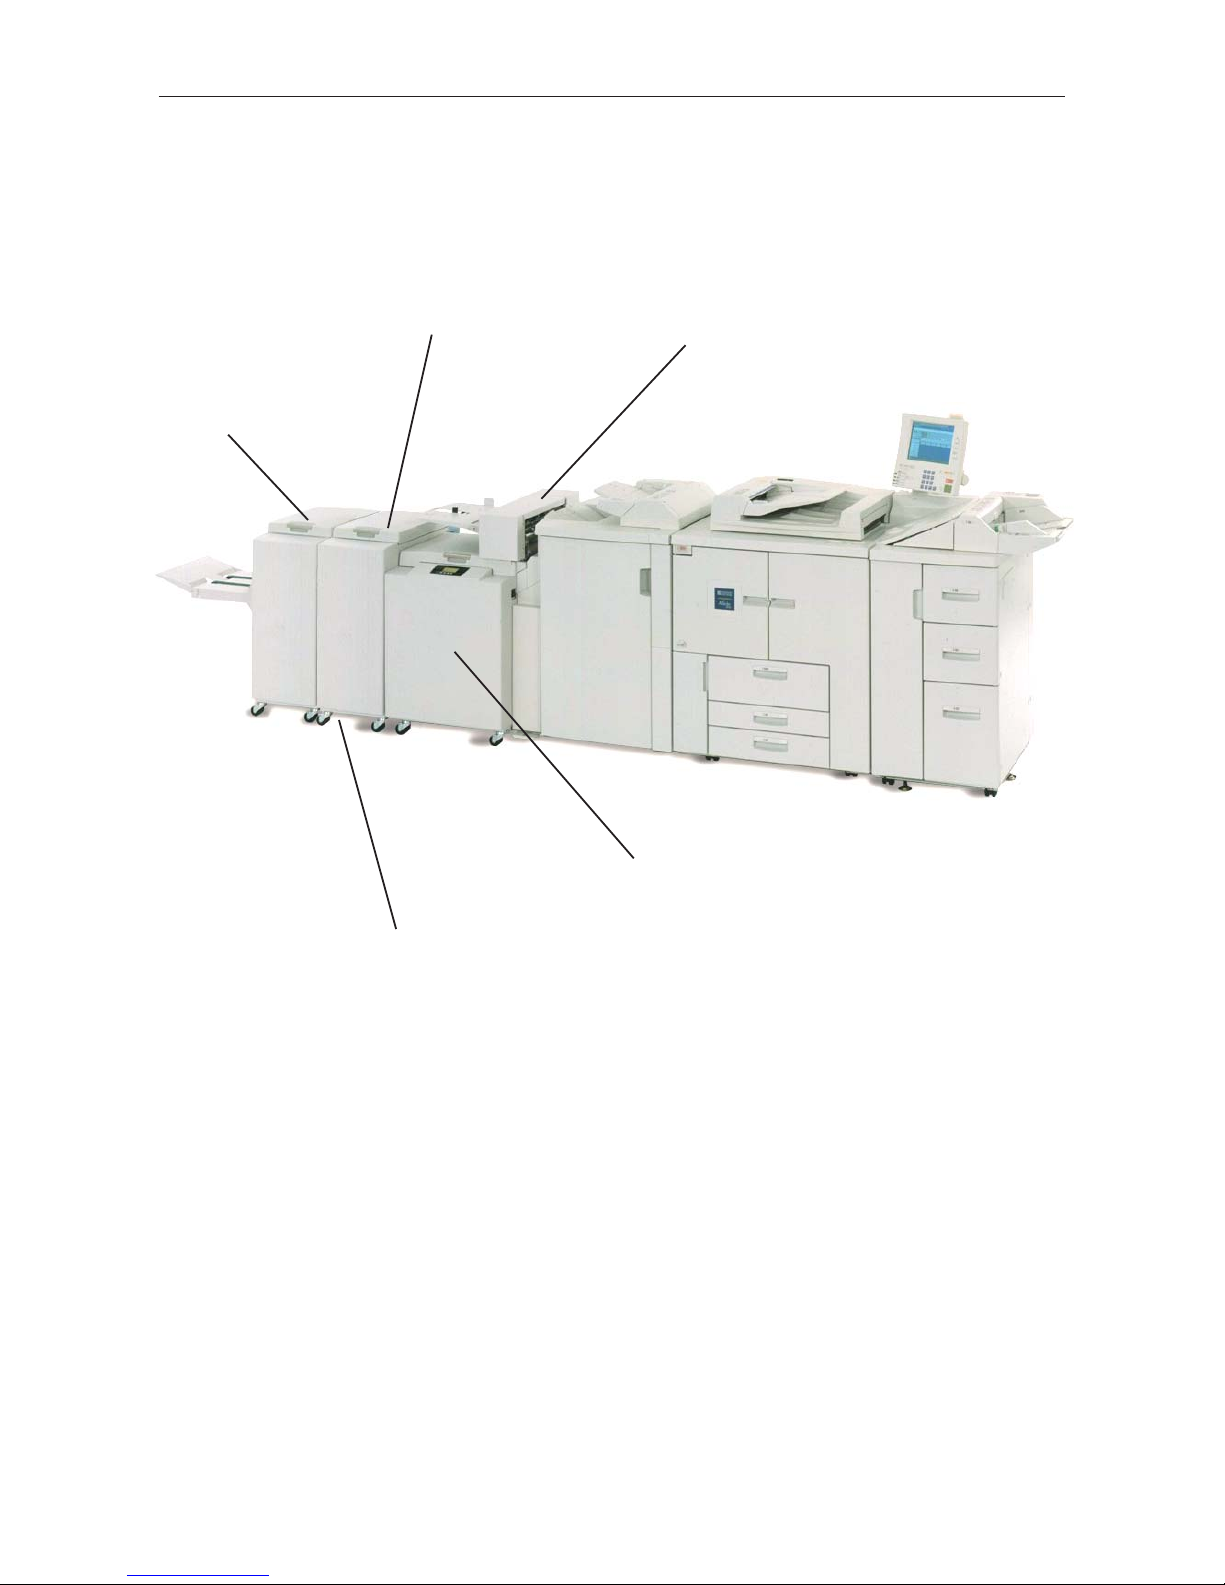
The Book Folder BF90+ is an option to the SR90+ Booklet Making system. The Booklet
Making system works online with the Bellini C2a/b, Martini and Bellini C1a/b.
To install the Book Folder BF90+ you need to have a TR90+ Trimmer installed to the SR90+
Booklet Maker. The printouts, which has been stapled, folded and trimmed will be fed into the
BF90+. The BF90+ will form the spine of the booklet square. The booklets will, after passing
the BF90+, have the look as a perfect bound book.
CF90 Cover Feeder
(option)
TR90+ Trimmer
(option)
SR90+ Booklet Maker
Rail (option)
BF90+ Book Folder
(option)
Page 6
6
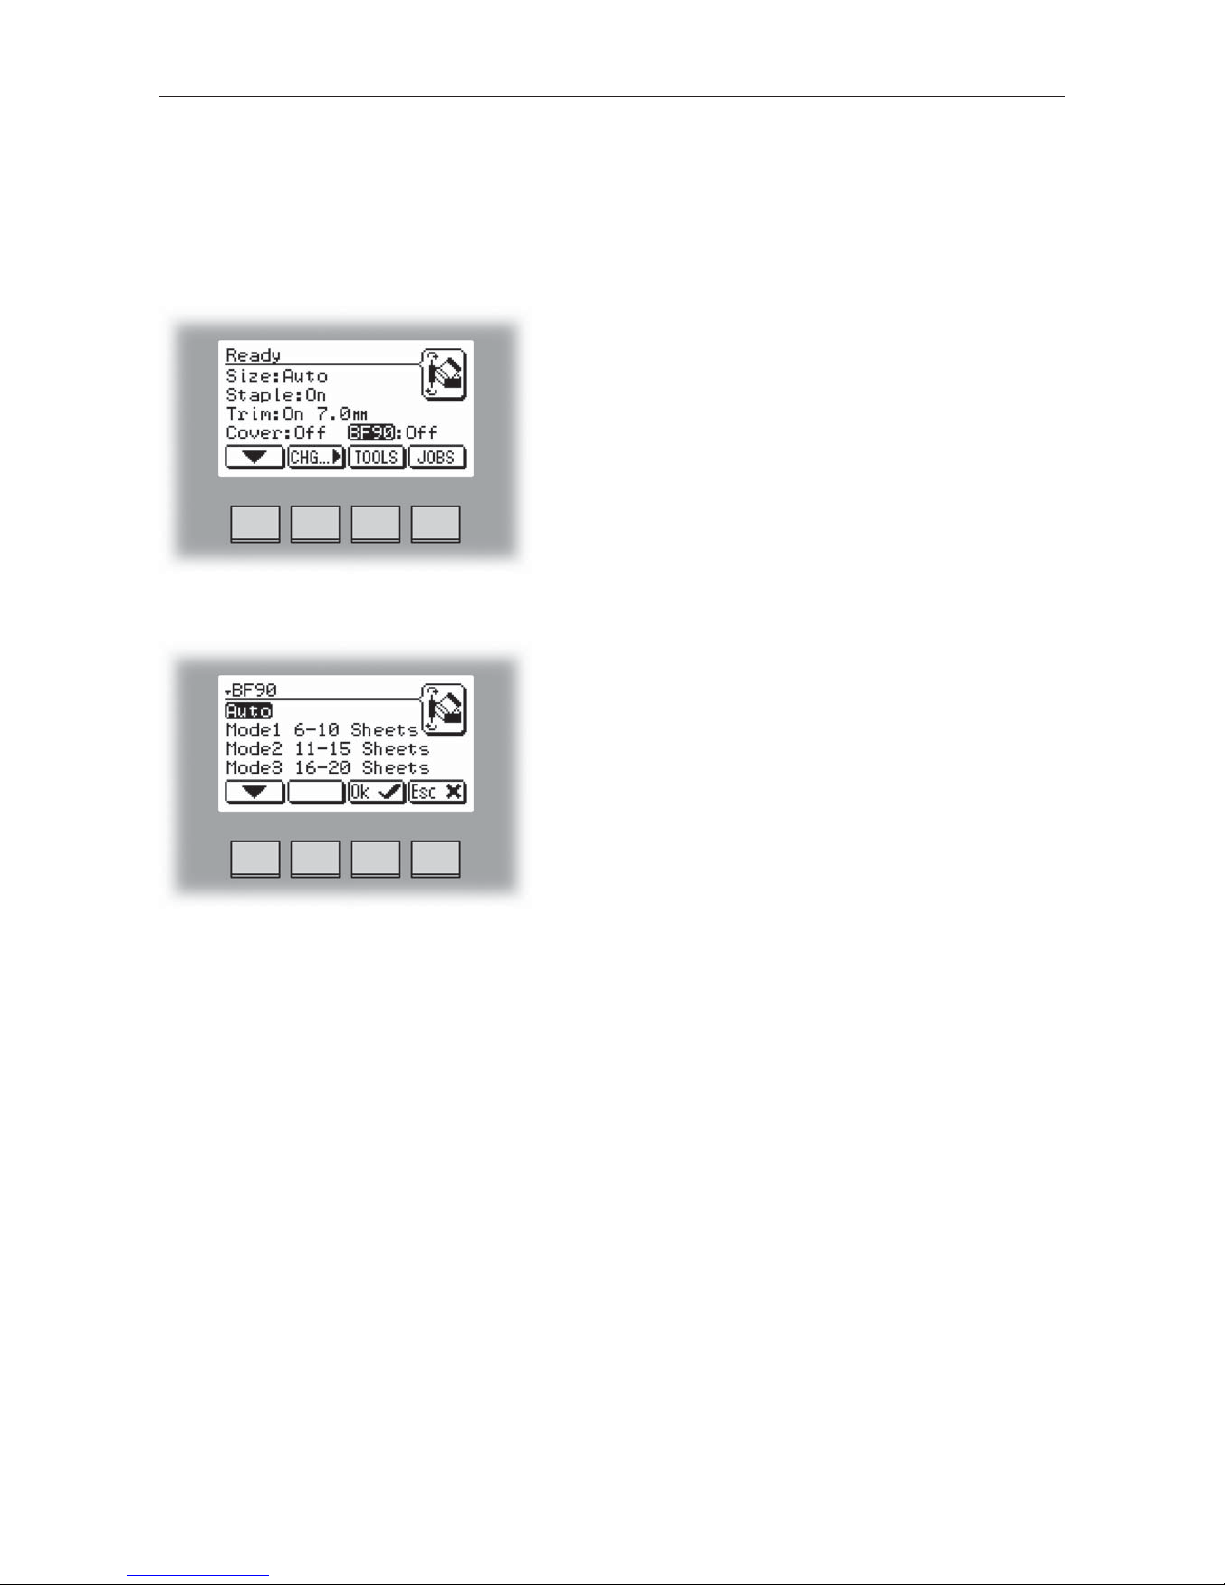
The Book Folder BF90+ is controlled from the single user interface on the Booklet Maker.
This Operator Manual will only cover the specific functions of the Book Folder BF90+.
From the Ready screen, scroll down to BF90+ with the
arrow button and press [CHG] button.
Changing settings.
The BF90+ can be set to five different modes. These
are [Auto], [Off], [Mode 1], [Mode 2] and [Mode 3].
Mode 1 to 3 are referred to as manual settings. Select
mode with the arrow button amd press the [OK] button.
Page 7
7
Guide To Components
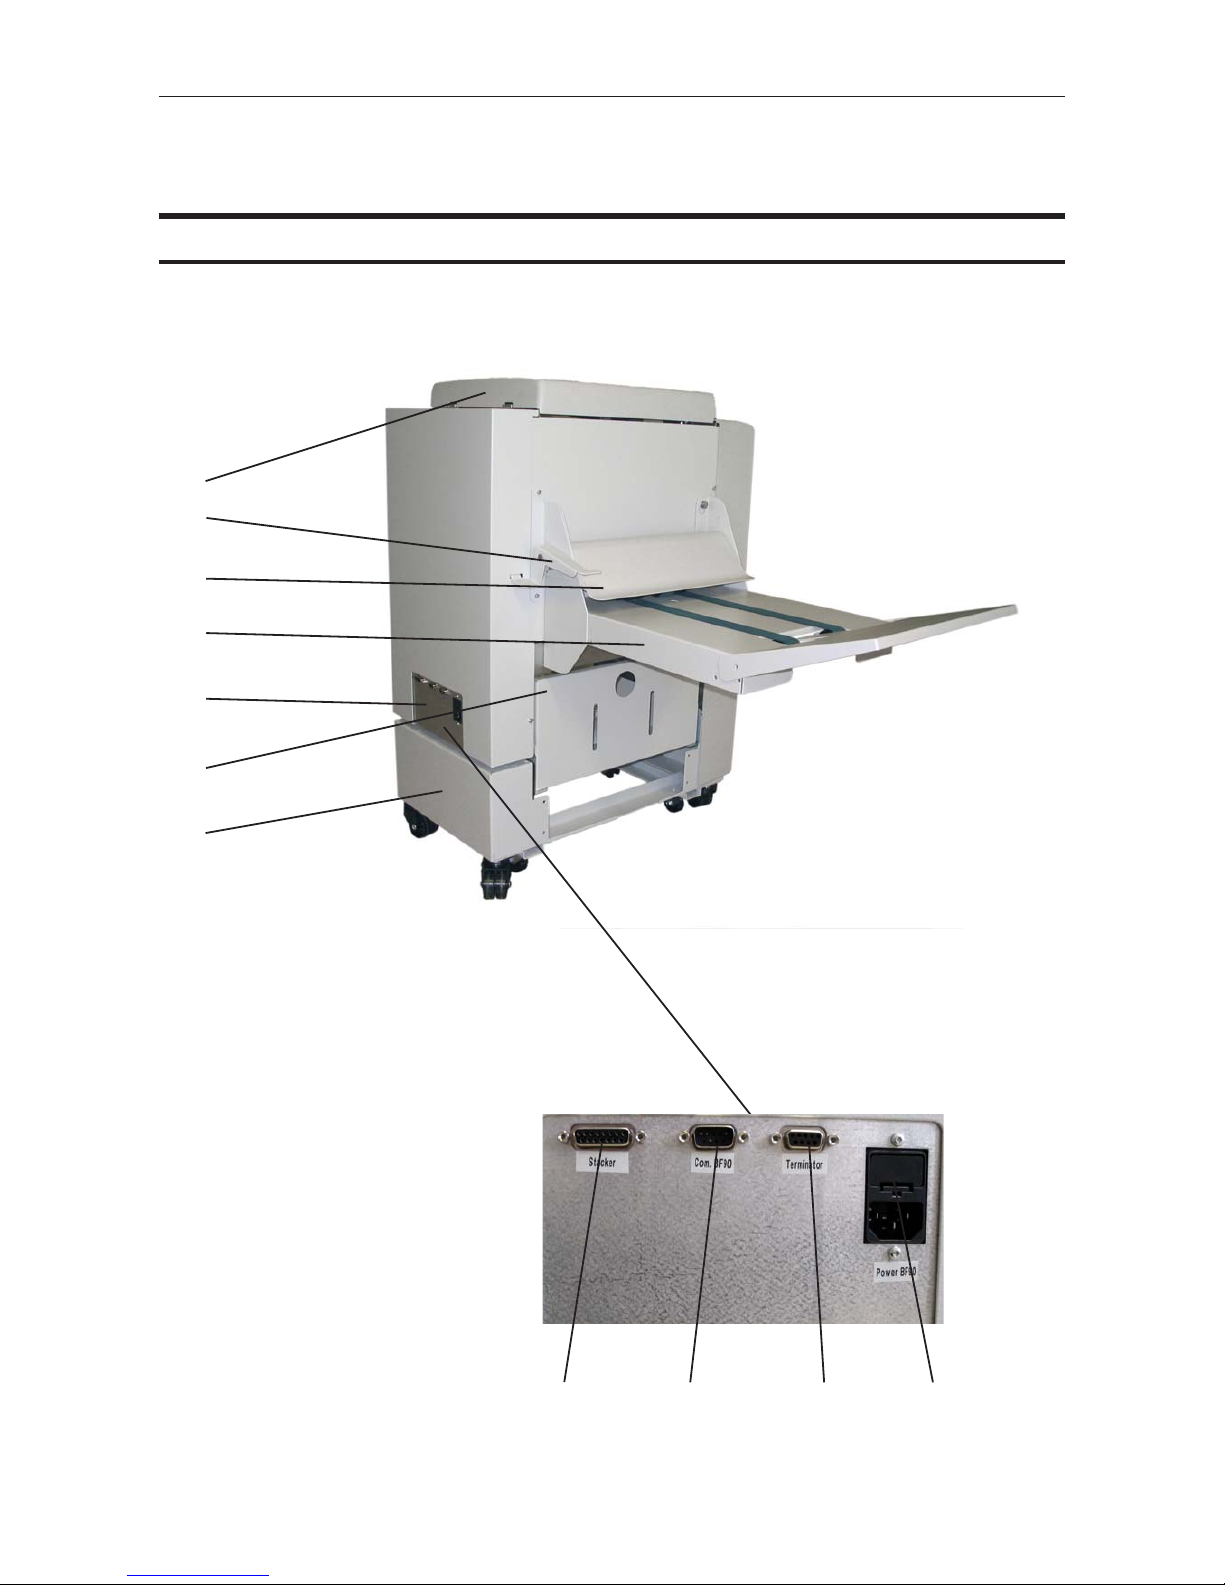
Exterior
1
4
6
1 Top cover
2 Belt stacker interlock
3 Belt stacker, upper part
4 Belt stacker
5 Connections
6 Trim bin
7 Base
7
Stacker COM BF90 Terminator POW BF90
2
3
5
Page 8
8
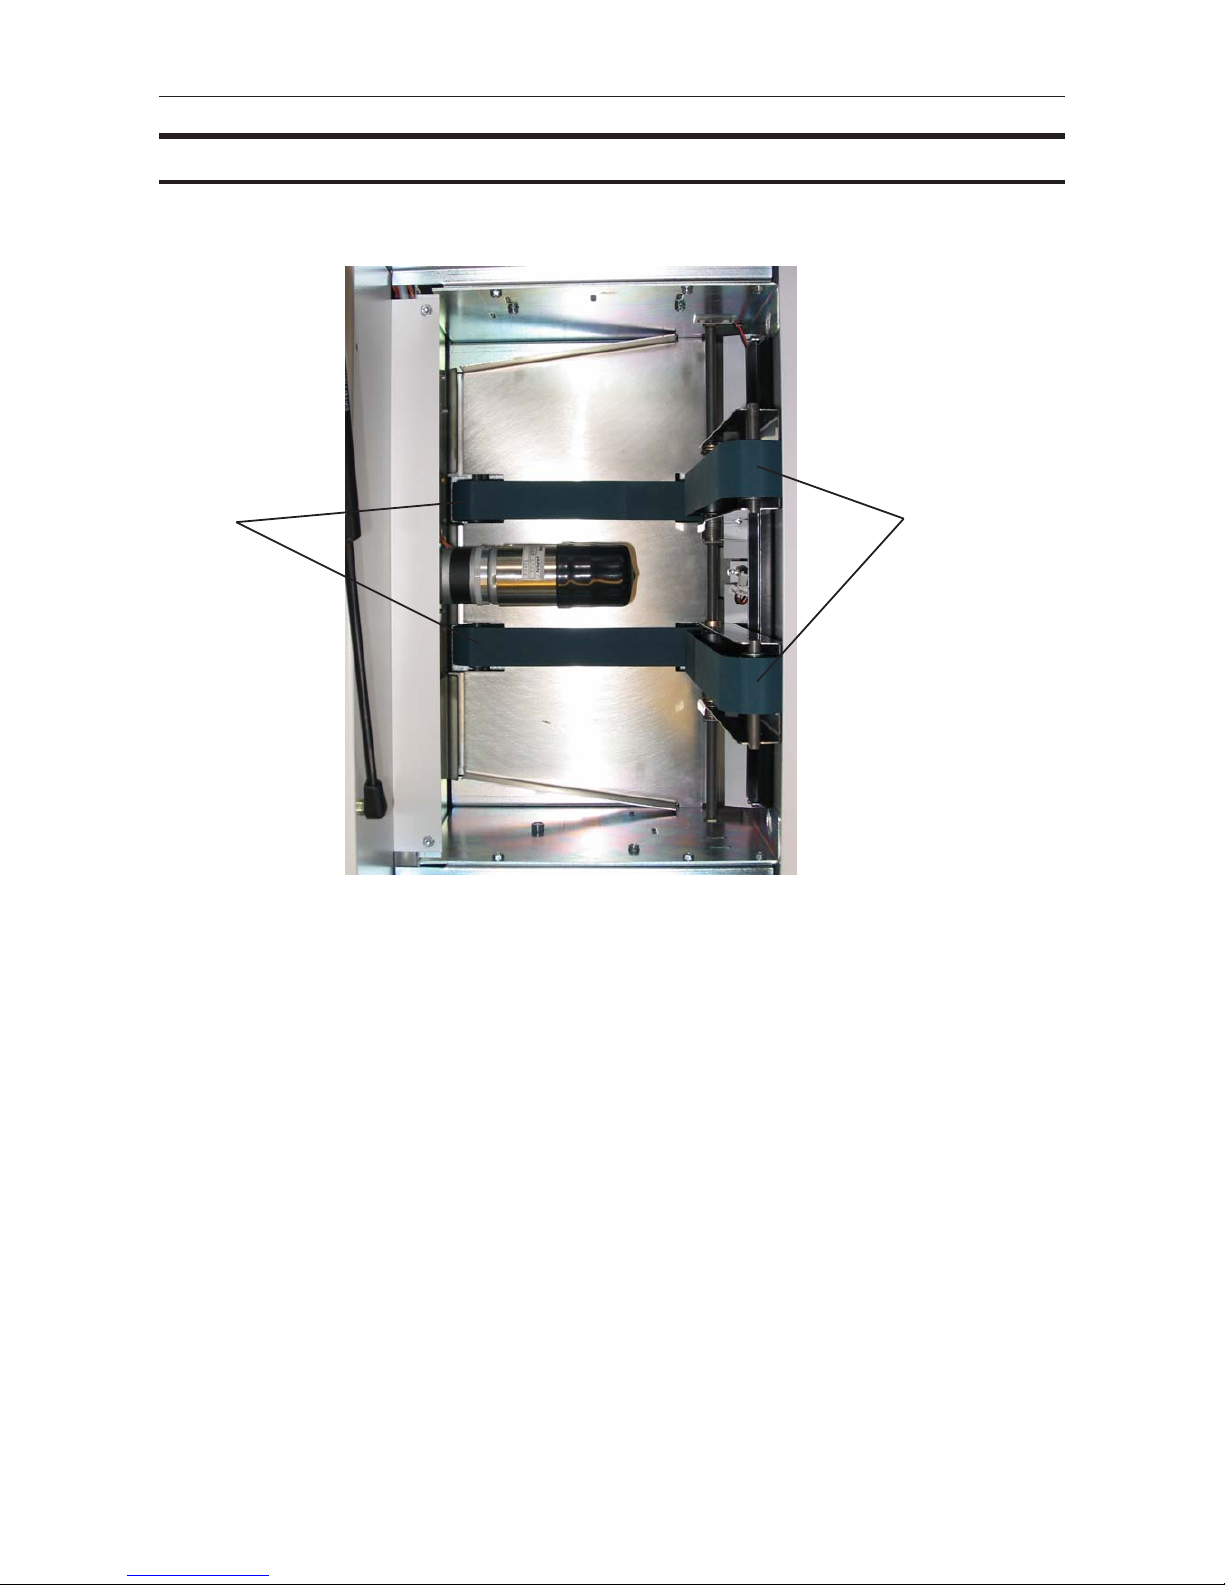
1 Lower feed belts
2 Upper feed belts
12
Interior
Top view,
Upper feed belts in lifted up
Page 9

9
1. Basics
Turning On / Off the Main Power
1
Plug the power cord (1) into the Book Folder.
Set ON/OFF switch (2) on Book Folder to ON
position.
To avoid an Error message, turn ON the BF90+
before switching ON the SR90+.
2
Page 10

1
10
Basics
Emptying the trim bin
Remove the trim bin by pulling it out.
trim bin
Page 11

11
2. Operating the Book Folder
Setting Mode
Procedure
Changing settings
The Book Folder has five different settings. It can be set to [Auto], [Mode 1], [Mode 2],
[Mode 3] or [Off].
In [Auto] mode, the Booklet maker detects how may sheets there are in the booklet, and
automatically set the Book folder to the correct mode.
NOTE: When the Book folder is set to [Auto] and the booklet has less than approximately 6
sheets/booklet, the Book folder will bypass the Square folding action, transporting the booklet
out to the Belt stacker.
Use the manual modes to override the auto function. There are three different manual modes
to select from.
Mode 1: Approximately 6 to 10 sheets. Decreased amount of square forming.
Mode 2: Approximately 11 to 15 sheets. Medium amount of square forming.
Mode 3: Approximately 16 to 20 sheets. Increased amount of square forming.
Select [Off] to bypass the Book Folder
From the Ready screen, scroll down to BF90+ and
press the [CHG] button.
General
Select [Auto], [Mode 1], [Mode 2], [Mode 3] or [Off] with
the [arrow] button and press the [OK] button.
Page 12

2
12
Begin On-line Production
Make sure that the [staple icon] is present on the copier control panel.
If not, turn the Copier, Booklet Maker and Book Folder OFF. First turn the Book Folder
ON, then turn the Booklet Maker ON and last Copier ON.
Make sure that the booklet maker is set to auto paper size. Selecting Auto means that the
Booklet Maker will automatically adjust to the same paper format (A4, A3, 8.5”x11” or
11”x17”) as the copier.
Make sure that the Book Folder is set to [Auto].
Select [Paper tray] (A).
Select [Staple icon] (B).
Select [Dup / Combine / Series] (C).
Select [Book] (D).
Select [1 Sided] (E) if your originals are only printed on one side or [2 Sided] (F) if they
are printed on both sides.
Select [Magazine] (G).
Press the Start key (H).
A. Paper tray
B. Staple icon
C. Dup / Combine / Series
D. Book
F. 2 Sided
E. 1 Sided
G. Magazine
H. Start key
Making Booklets
Page 13

13
3. Clearing Misfeed(s)
Clearing misfeed(s)
Open the top cover.
Lift up both upper feed belts (1).
Remove the misfeeds.
Place the upper feed belts in normal position.
Close the top cover.
Inside the Book Folder
Exit area
Lift up the upper part (2) of the Belt stacker.
Remove the misfeeds.
Place the Belt stacker interlock (1) in normal
position.
1
2
General
If a misfeed condition should occur, it is indicated on
the Booklet Maker display. The message “Clear
Misfeed(s)”, an error code and the location of the
misfeed is displayed. Misfeeds in the Book Folder are
indicated as area E and by the error code BF-XXX.
1
Page 14

14
Page intentionally blank
Page 15

15
4. Troubleshooting
Fault codes
When there is a misfeed or fault condition in the Book Folder, a message will be displayed on
the Booklet Maker user interface. In case there is a problem that can be rectified by the
operator, a fault code and an explanation will be displayed.
Fault codes that can be rectified by the operator:
Book Folder: BF-201 to BF-206.
BF-201 to BF-206 indicates “Clear Misfeed(s)” in the Book Folder
Note
If procedures in this manual do not rectify the problem an authorized technician will be
needed.
General
Clear Misfeed(s)
In general, fault codes indicate a misfeed condition.
When a misfeed occurs, the message “Clear
Misfeed(s)”, a code and the jam area will be displayed.
See section 3. Clearing Misfeeds, for how to clear a
misfeed.
Close cover(s)
When the message “Close Cover(s)” is displayed any
of the interlock switches are actuated.
Check that the top cover is in down position.
Check that the Belt stacker interlock is locked in
normal position. See section 3. Clearing Misfeeds,
exit area.
Page 16

4
16
Feed errors
Troubleshooting
If feed errors occur, the feed belts needs to be cleaned or the pressure on the upper feed
belts needs to be increased. To clean the feed belts, see section 5, REMARKS Maintaining
Your Machine. To increase the pressure on the upper feed belts follow this procedure.
Open the top cover.
Place both springs in the upper position.
Close the top cover.
Spring in normal position Spring in upper position
Page 17

17
5. REMARKS
Do’s And Don’ts
• Always follow all warnings marked on, or supplied with, the equipment.
• Always exercise care in moving or relocating the equipment.
CAUTION:
• Unplug the powercord from the wall outlet and machine before you move or relocate
the equipment.
• Do not remove the covers or guards that are fastened with screws.
• Do not override or bypass electrical or mechanical interlock devices.
• Do not operate the equipment if you notice unusual noises or odours. Disconnect the
powercord from the power source and call your authorized technician to
correct the problem.
WARNING:
• Do not put fingers or other parts of the body between the upper and lower clamp
assemblies.
• Do not switch off the main power switch while machine is running. Make sure machine
cycle has ended.
• Do not open covers while machine is running.
• Do not move machine while machine is running.
Page 18

5
18
Where to put Your Machine
Machine environment
Power connection
REMARKS
• Always connect the equipment to a properly grounded power source. If in
doubt, have the power source checked by a qualified electrician.
• WARNING: Improper grounding of the equipment can result in electrical shock.
• Always locate the equipment on a solid support surface with adequate strength for the
weight of the machine.
• Always keep magnets and all devices with strong magnetic fields away from the
machine.
If the place of installation is air-conditioned or heated, do not place the machine where it
will be:
• Subjected to sudden temperature changes.
• Directly exposed to cool air from air-conditioner.
• Directly exposed to heat from heater.
Page 19

5
19
Access to machine
Where to put Your Machine
Place the machine near the power source, providing clearance as shown.
1. Left: more than 400 mm / 15 3/4”.
2. Front: more than 555 mm / 21 7/8”
3. Right: more than 400 mm / 15 3/4” (off-line use).
1
2
3
Page 20

5
20
REMARKS
Maintaining Your Machine
Never attempt any maintenance function that is not specifically described in this
documentation.
The Feed belts need to be cleaned regularly when in use, and if the unit has not been used for
a period of time. How often this should be done, depends on the paper type and print quality.
An increasing number of misfeeds is one indication of the need to clean. Clean the feed belts
with water and a lint free cloth.
Open the top cover.
Clean the upper feed belts (1). The upper feed belts can easily be rotated in either
direction.
Lift up the upper feed belts to access the lower feed belts.
Clean the lower feed belts (2). Rotate the lower feed belts towards the outfeed side for
complete cleaning.
Place the upper feed belts in normal position.
Close the top cover.
Cleaning feed belts
Upper feed belts lifted up.
2
1
Upper feed belts in normal position.
Page 21

21
6. Specification
Book Folder BF90+ (option)
Machine Specifications
Specifications Remarks
Speed (Online usage) 2 A4/8.5x11” sheets from the copier 800 books/h Maintain engine speed of
SR90+
2 A3/11x17” sheets from the copier 500 books/h Maintain engine speed of
SR90+
Maximum Speed 50 booklets / Min (A4), 33 / Min (A3) (Off line usage)
Standard Paper Sizes A4, A3, 8.5x11”, 8.5x14” & 11x17” Custom sizes are available
(SR90+)
Paper Weight (Minimum) 64 gsm / 17 lb. Bond Engine Duplex: 64 gsm
Paper Weight (Maximum) 240 gsm / 135 lb. Index / 90 lb. Cover Engine Duplex: 163 gsm
Input /Output Sheets 2 - 25 Sheets (80 gsm / 20 lb. Bond, equivalent Stapled
Input /Output Sheets 2 Sheets Non Stapled Folding
Off line use Possible Stitch / Fold (2 staples)
Weight 46 Kg / 101 lbs
Dimensions (LxHxD) 360 x 880 x 620 mm / 14.2 x 34.6 x 24.4” Book Folder only
Power Source 105/115/125/220/230 50-60 Hz ± 10%
Power consumption 200 W or less Continuous Operations
Page 22

22
Page intentionally blank
Page 23

23
INDEX
A
Access to machine 19
B
Basics 9
Begin On-line Production 12
C
Changing settings 11
Cleaning feed belts 20
Clear Misfeed(s) 15
Clearing misfeed(s) 13
Close cover(s) 15
Components, guide to 7
D
Do’s And Don’ts 17
E
Emptying the trim bin 10
F
Fault codes 15
Feed errors 16
G
Guide To Components, exterior 7
Guide to components, interior 8
M
Machine environment 18
Machine Specifications 21
Main power. See Turning On / Off the Main Power
Maintaining Your Machine 20
Misfeed(s), clearing 13, 15
Mode, Setting 11
O
Operating the Book Folder 11
P
Power connection 18
R
REMARKS 17
S
Setting Mode 11
Settings. See Changing settings
Specification 21
T
Table of Contents 3
Trim bin, emptying 10
Troubleshooting 15
Turning On / Off the Main Power 9
W
What You Can Do with This Machine 5
Where to put Your Machine 18
Page 24

 Loading...