

Page 1
AKR091S
J0076603
AKR003S
AKR004S
J007-6603
Quick Installation Guide
Read this sheet carefully before you use this product and keep it handy for future reference. For safe and correct use, please be sure to read the Safety Information in the
Setup Handbook before using the product.
Checking the Computer and
Installation Area
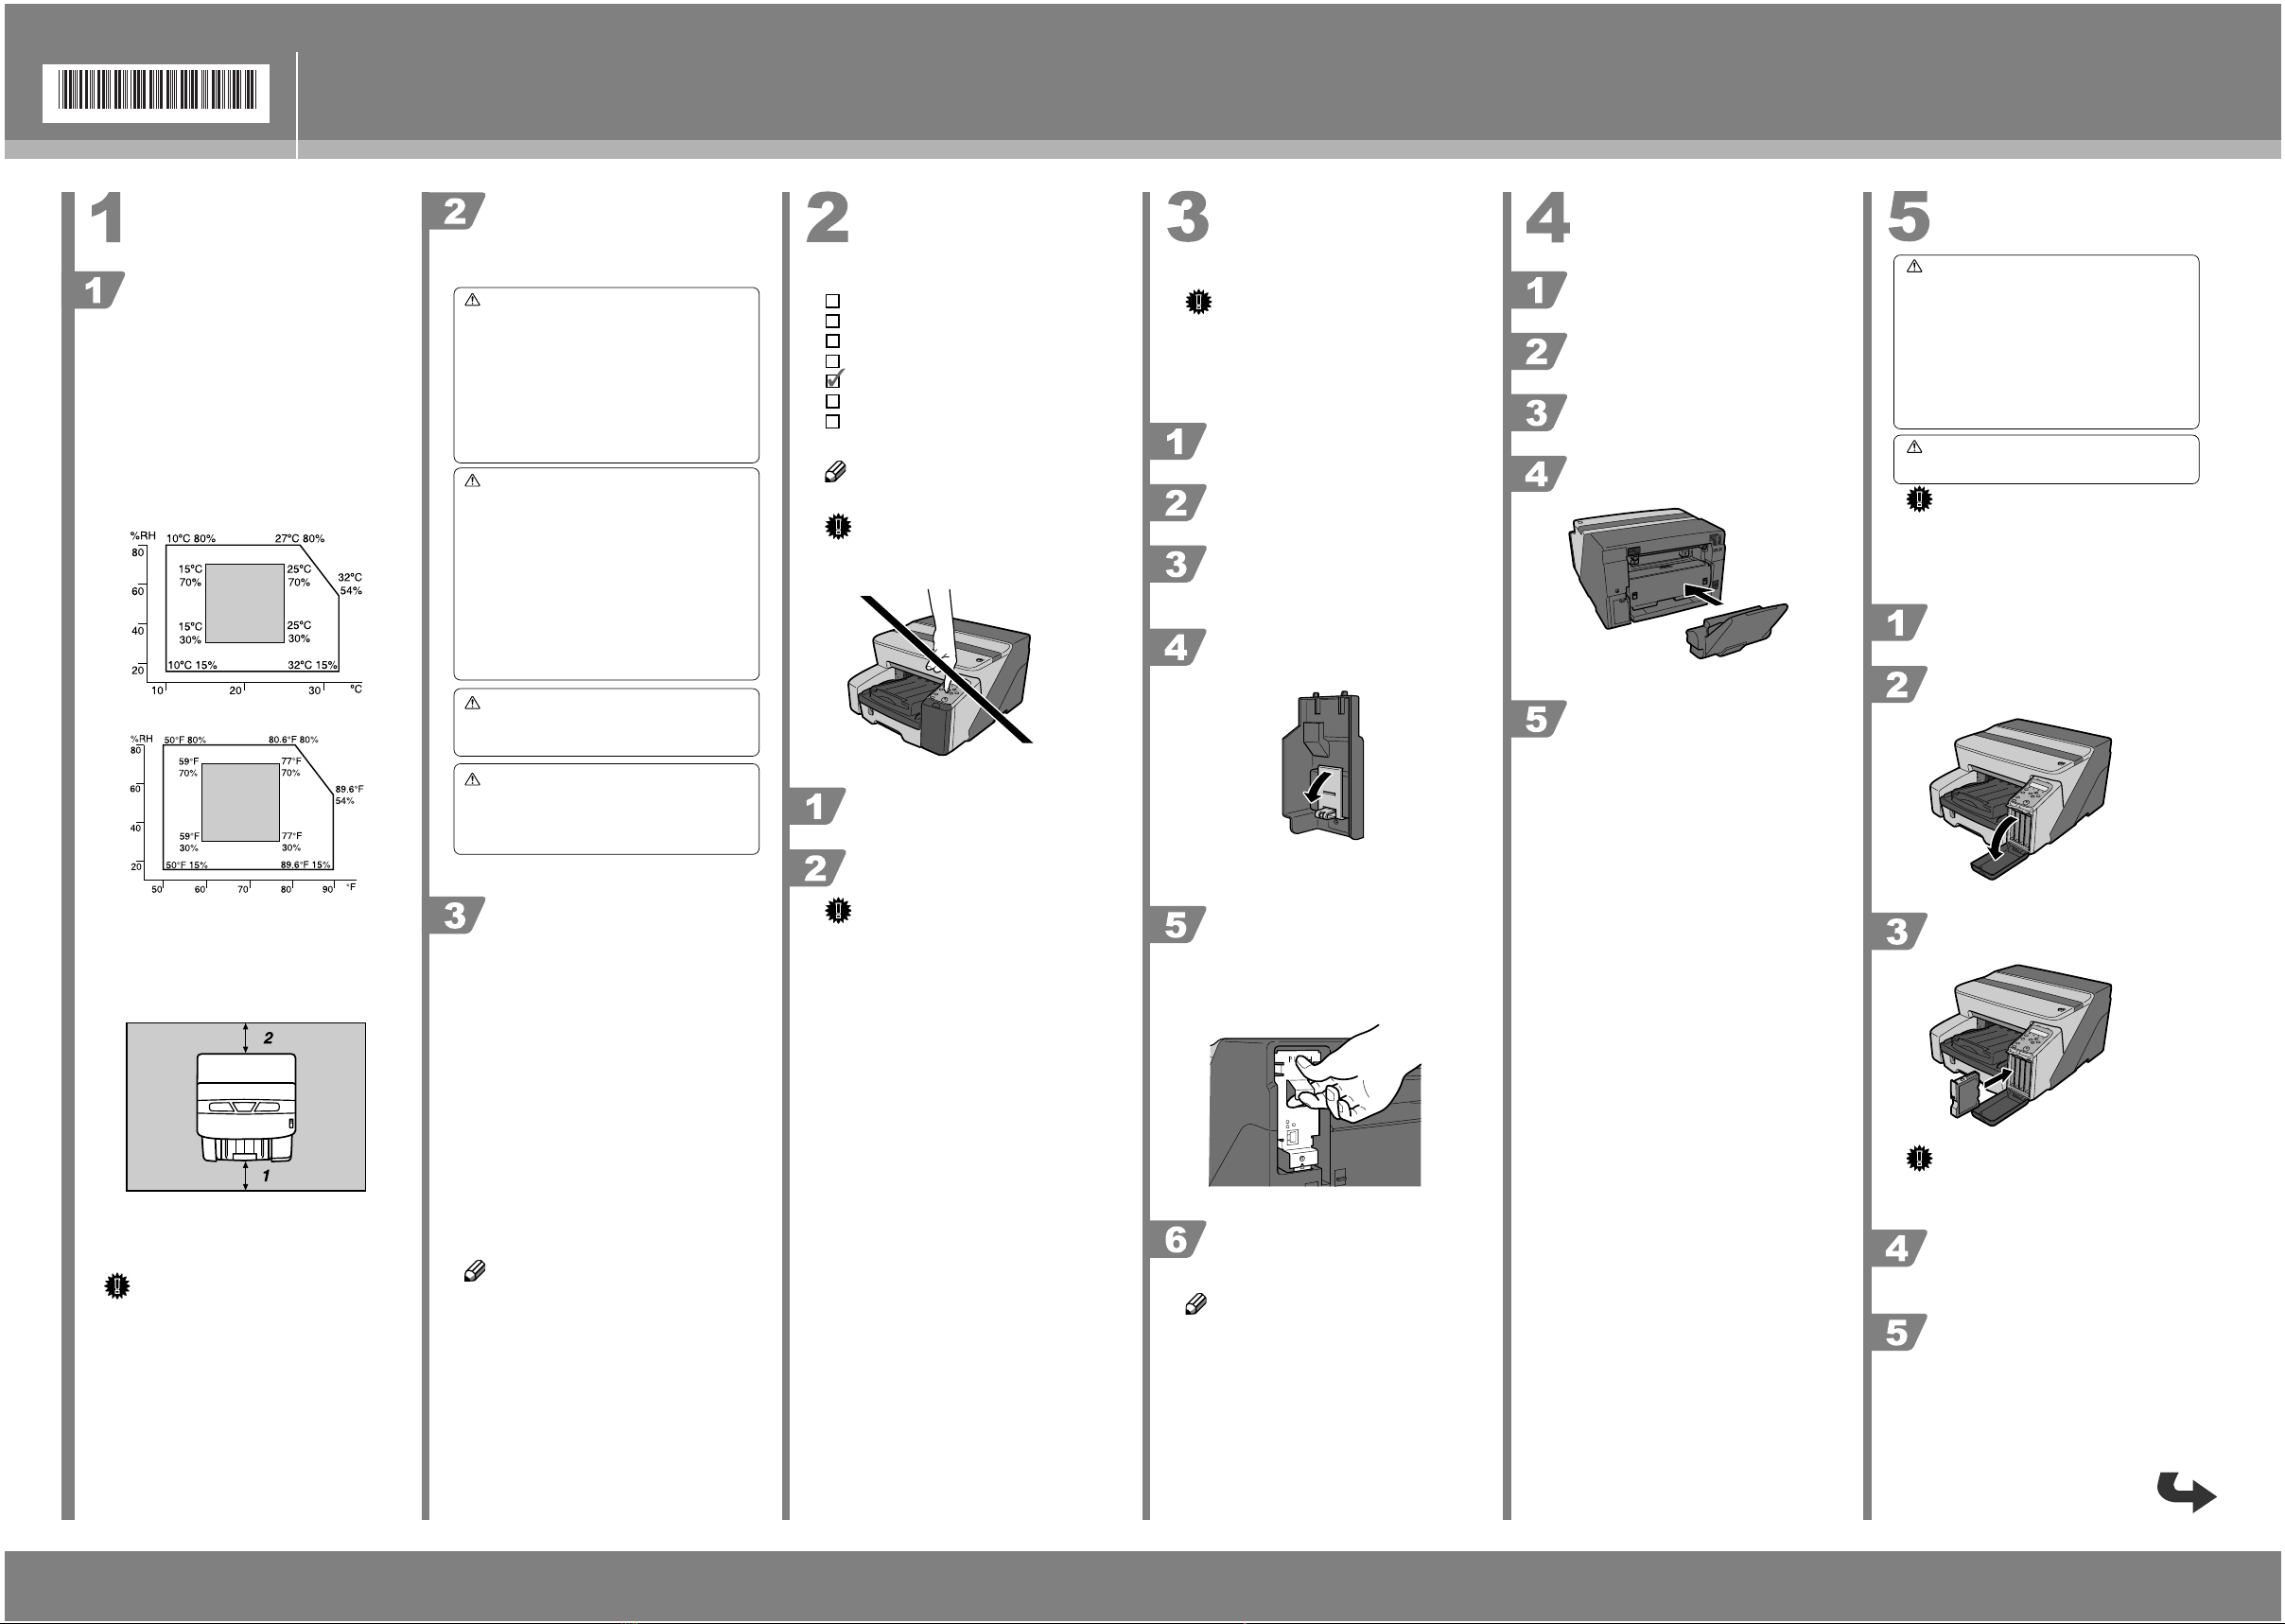
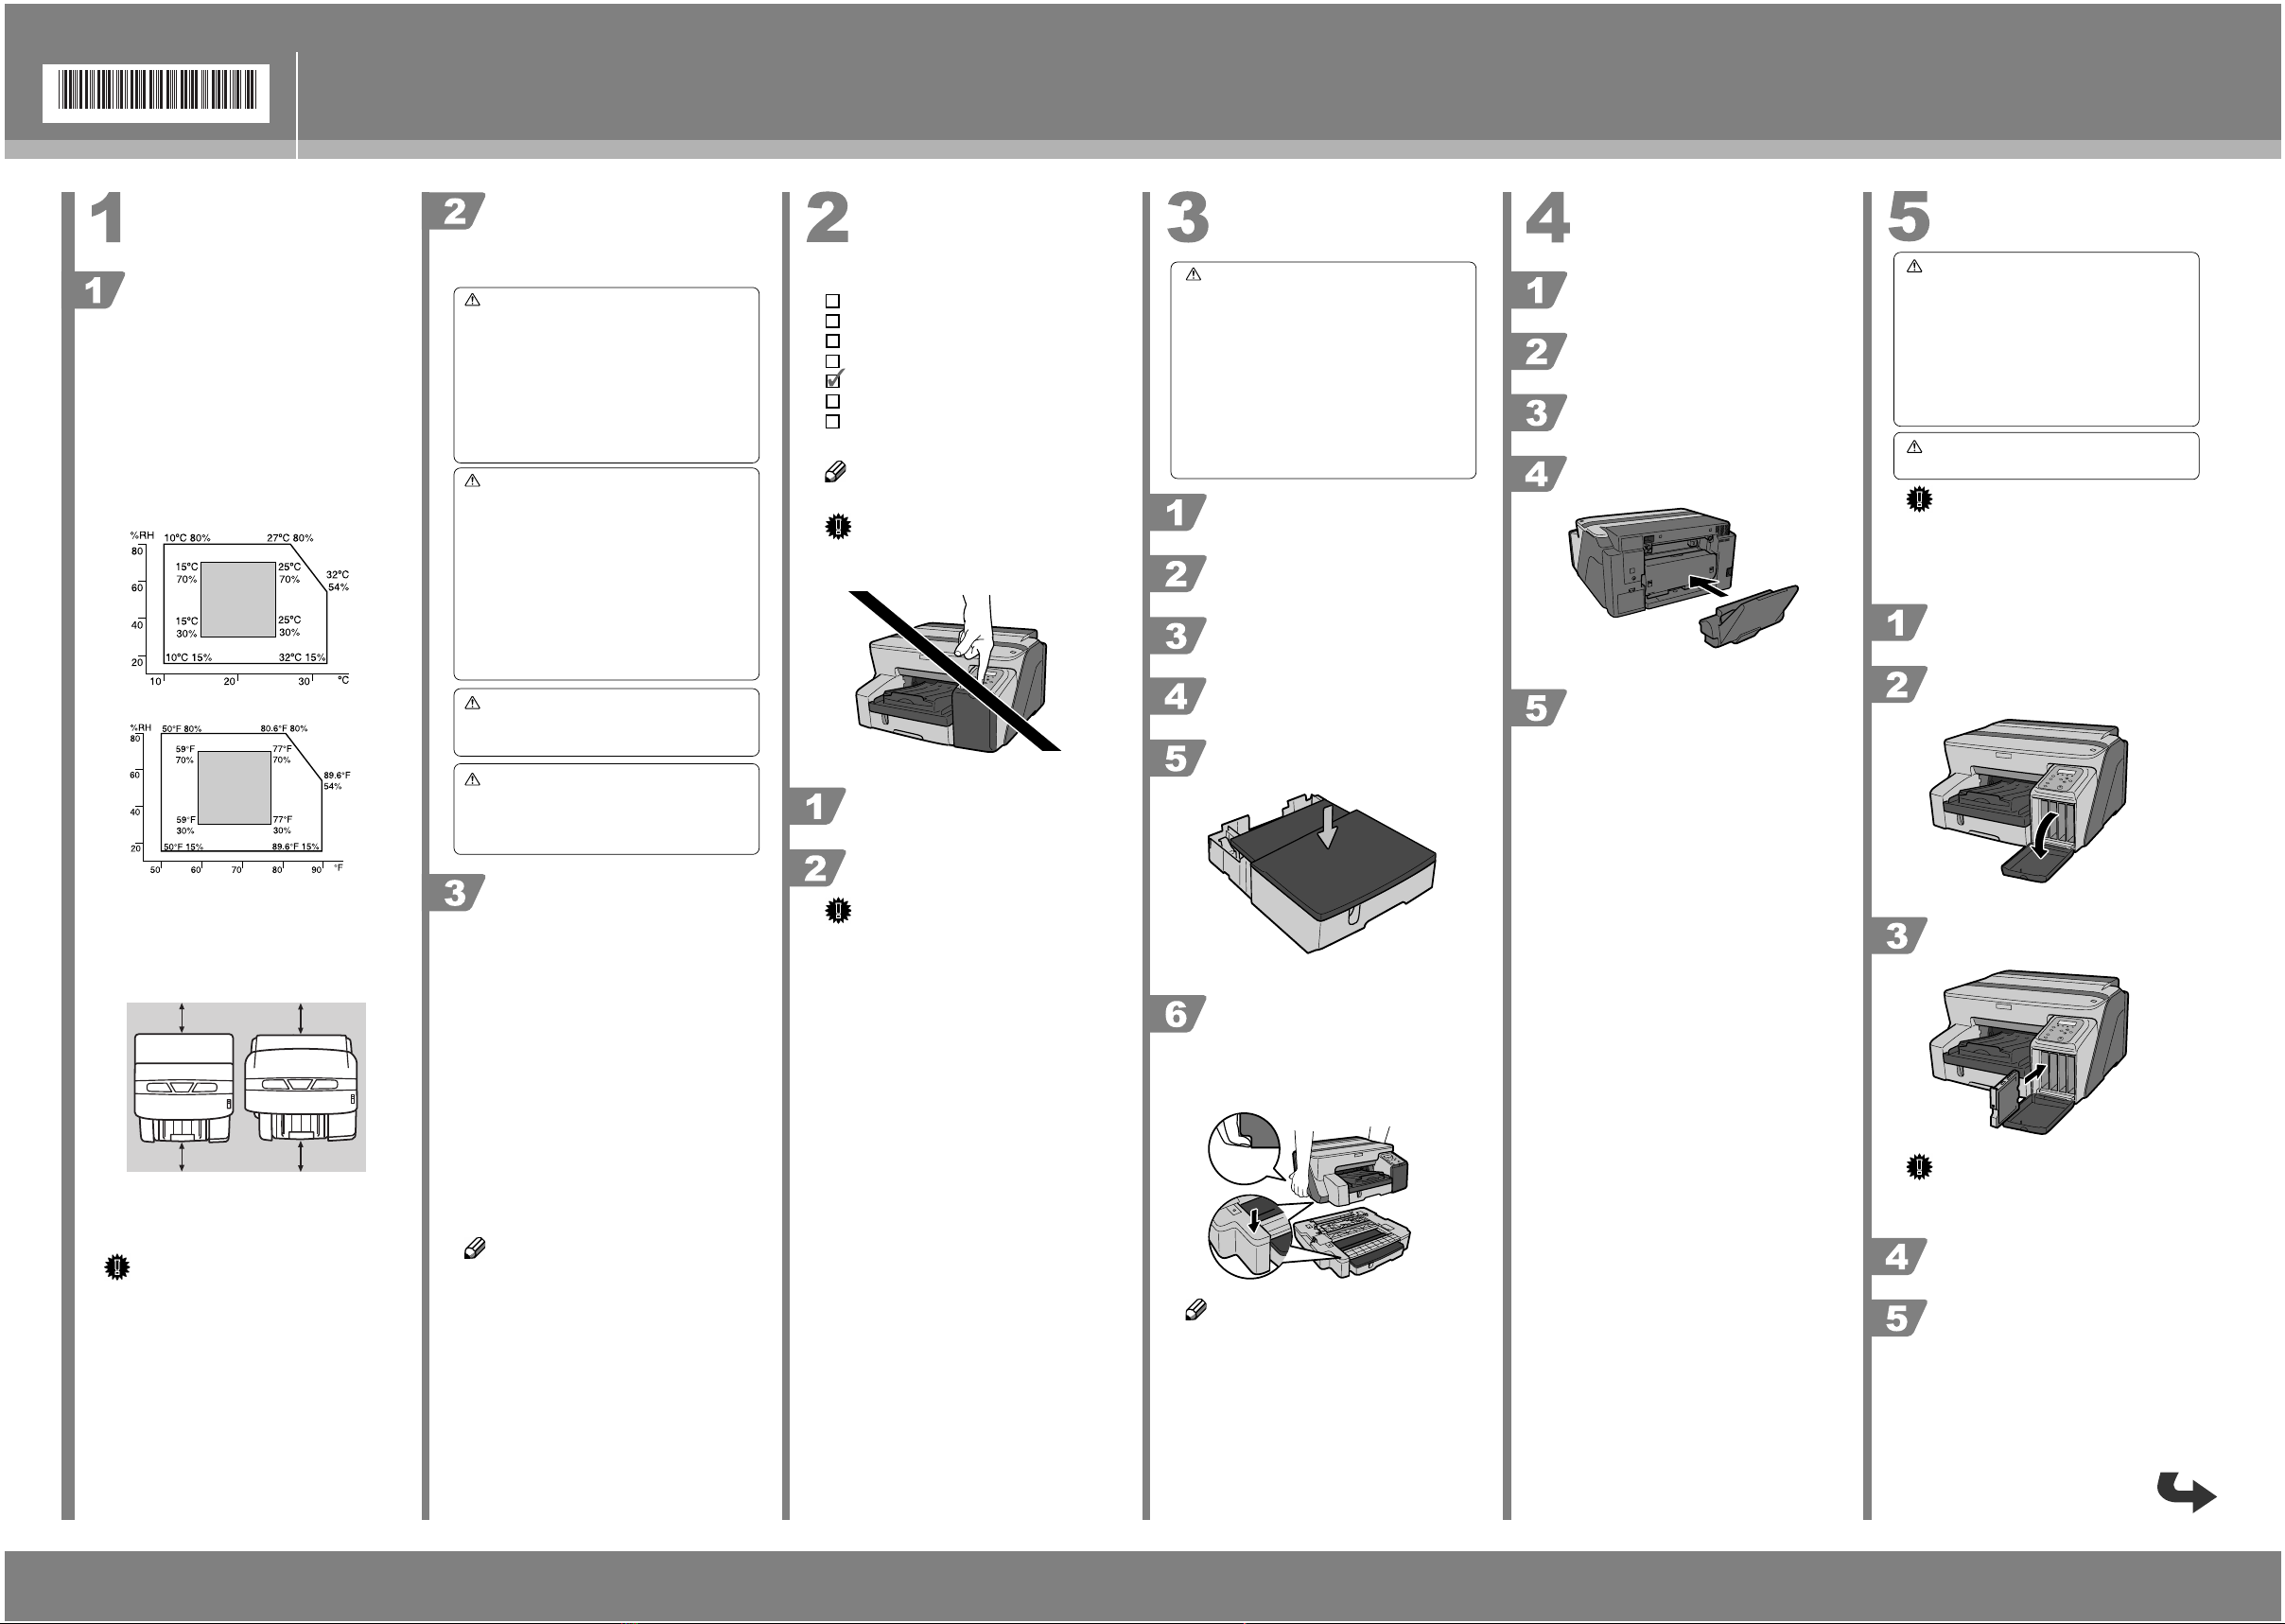
The area where the printer is to be
placed.
Choose a flat, stable area to install the printer. Make
sure that all four printer legs make firm contact with
the surface beneath.
The surface should be level within two degrees, left to
•
right and front to back.
•
To prevent condensation, install the printer in an area
where temperature and humidity conditions do not ex-
ceed those indicated in the diagram below.
•
The printer may cease to print if these limitations are
exceeded.
ZDJX006J
• White area: Permissible Range
• Gray area: Recommended Range
•
The diagram below shows the ideal clearance for load-
ing paper, replacing print cartridges, and removing
jammed paper.
1. At least 19 cm (7.5 inches)
2. At least 12 cm (4.8 inches)
If you attach the multi bypass tray (Option), provide additional clearance of 23 cm (9.1 inches).
Important
❒ To avoid malfunctions, position the printer away
from the following:
• direct sunlight
• flow of air from air conditioners or heaters
• radios, televisions, or other electronic devices
areas of high/low temperature and high/low
moisture
• humidifying appliances
• oil stoves and ammonia-emitting appliances
(such as diazo copiers)
TS4K031E
AKR127S
Check the power source.
The power requirements of this printer are as follows:
100-120V, 50/60Hz, 1A or more.
Warning
•
Keep the machine away from humidity and dust. Oth-
erwise a fire or an electric shock might occur.
•
Place the machine on a strong and level surface. Oth-
erwise, the machine might fall and cause personal
injury.
•
If you use the machine in a confined space, confirm
that there is a continuous flow of air.
Warning
•
Only connect the machine to the power source de-
scribed on this sheet.
•
Avoid multi-wiring.
•
Connect the power cord directly into a wall outlet and
never use an extension cord.
•
Do not damage, break or make any modifications to
the power cord. Do not place heavy objects on it. Do
not pull it hard nor bend it more than necessary. These
actions could cause an electric shock or fire.
Warning
•
Do not plug or unplug the power cord with your hands
wet. Otherwise, an electric shock might occur.
Warning
•
Make sure the wall outlet is near the machine and
freely accessible so that in event of an emergency it
can be unplugged easily.
Checking the Computer to be Connected.
To use this printer, a computer must have an operating environment that meets the following specifications:
MS-DOS/V compatible with USB interface
•
•
Operating system: Windows 98/Me/2000/XP, Windows
Server 2003, Windows NT 4.0 or later
•
80-100 MB (minimum) available hard disk space
❢Limitation
❒ For Windows NT 4.0, IE 4.0 or later is required.
❒ Windows NT 4.0 do not support USB connection
with your printer. Connect your printer via a network in this case.
❒ USB connection is supported by Windows 98/Me/
2000/XP and Windows Server 2003.
❒ USB connection speed under Windows 98/Me is
USB 1.1 equivalent.
Note
❒ To print at the highest quality, the following
memory capacities are required.
• Windows 98/Me (64MB or more recommended)
• Windows 2000/XP (128MB or more recom-
mended)
• Windows Server 2003 (256MB or more recommended)
• Windows NT 4.0 (64MB or more recommended)*1
*1 We recommend at least 128 MB of memory for
high quality printing on glossy paper.
❒ The machine does not support Windows XP 64-
Bit Edition or Windows Server 2003 64-Bit Edition.
Checking the Supplied Items
and Unpacking the Printer
Open the box and take out all supplied items.
Check that all the following items are present:
Starter cartridge - Cyan
Starter cartridge - Magenta
Starter cartridge - Yellow
Starter cartridge - Black
Quick Installation Guide (this manual)
Setup Handbook
"Driver, Manual & Utility" CD-ROM
User Guide is included on this.
Note
❒ USB cable and LAN cables are not supplied.
Important
❒ Do not turn the printer on until you have read how
to do so.
AKR006S
Take off the protective covering.
Remove the orange tape from the
printer body.
Important
❒ Remove all the orange tape, except the tape around
the power cord.
Attaching the Network
Interface Board Type GX2
(Option)
Important
❒ Before touching the network interface board,
ground yourself by touching something metal to
discharge any static electricity.
❒ Do not subject the network interface board to im-
pact or other physical stress.
Check the product and its supplied
components.
Check that the power cord of the
printer is not plugged in.
Using a coin, turn the network interface board cover screw counterclockwise, and then remove the cover.
Remove the spacer in the network interface board cover.
AKR130S
The removed spacer will not be used again.
Align network interface board notch
with the triangular mark on the
printer, and then push in the network
interface board in by pressing the part
marked “PUSH”.
AKR131S
Reattach the network interface board
cover to the printer, and then fasten it
using the screw.
Note
❒ Be sure to push the network interface board fully
into the printer.
❒ If the network interface board is not installed prop-
erly, repeat the entire installation procedure. If you
cannot install it properly even after attempting reinstallation, contact your sales or service representative.
Dispose of the removed component as general plastic
waste or hand it in for collection.
Attaching the Multi Bypass
Tray Type BY1000 (Option)
Check that the power cord of the
printer is not plugged in.
Take the multi bypass tray out of its
box.
Remove the orange tape from multi
bypass tray.
Attach the multi bypass tray by pushing it in until it clicks.
Extend the multi bypass tray.
Installing the Print Cartridges
Caution
•
If ink comes into contact with your eyes, rinse imme-
diately in running water. For other symptoms, consult
a doctor.
•
If ink is ingested, induce vomiting by drinking a strong
saline solution. Consult a doctor immediately.
•
If your skin comes into contact with ink, wash the af-
fected area thoroughly with soap and water.
Caution
•
Keep the ink or ink container out of reach of children.
Important
❒ Print cartridges and supplies comply with the
manufacturer's safety specifications. To ensure
safety and reliability, use genuine print cartridges
and supplies.
Unpack the print cartridges.
Open the Right Front Cover.
Check the cartridge's orientation, and
then gently insert it.
Important
❒ Take care to insert the colors in the right order.
❒ Take care not to touch the cartridge chip.
Push in the cartridge using the PUSH
area.
Repeat steps 3 to 4 for all four cartridges.
1
Page 2
Close the Right Front Cover.
AKR006S
AKR174S
AKR005S
Loading Paper
Loading Paper in the Paper Feed Tray
Note
❒ A4/Letter size paper is loaded here.
❒ Load A4/Letter size paper in
tion.
(portrait) orienta-
Load paper with the print side face
down but not over the limit mark.
AKS012S
Squeeze the front end paper guide, and
then slide it to meet the edge of the paper.
Plugging in the Power Cord
Warning
•
Only connect the machine to the power source de-
scribed on this sheet.
•
Avoid multi-wiring.
•
Connect the power cord directly into a wall outlet and
never use an extension cord.
•
Do not damage, break or make any modifications to
the power cord. Do not place heavy objects on it. Do
not pull it hard nor bend it more than necessary. These
actions could cause an electric shock or fire.
Warning
•
Do not plug or unplug the power cord with your hands
wet. Otherwise, an electric shock might occur.
Remove the orange tape from around
the power cord.
Press the [▲] or [▼] key to display
[List/Test Print], and then press the
[#Enter].
Press the [▲] or [▼] key to display
[Config. Page], and then press the
[#Enter].
The configuration page is printed.
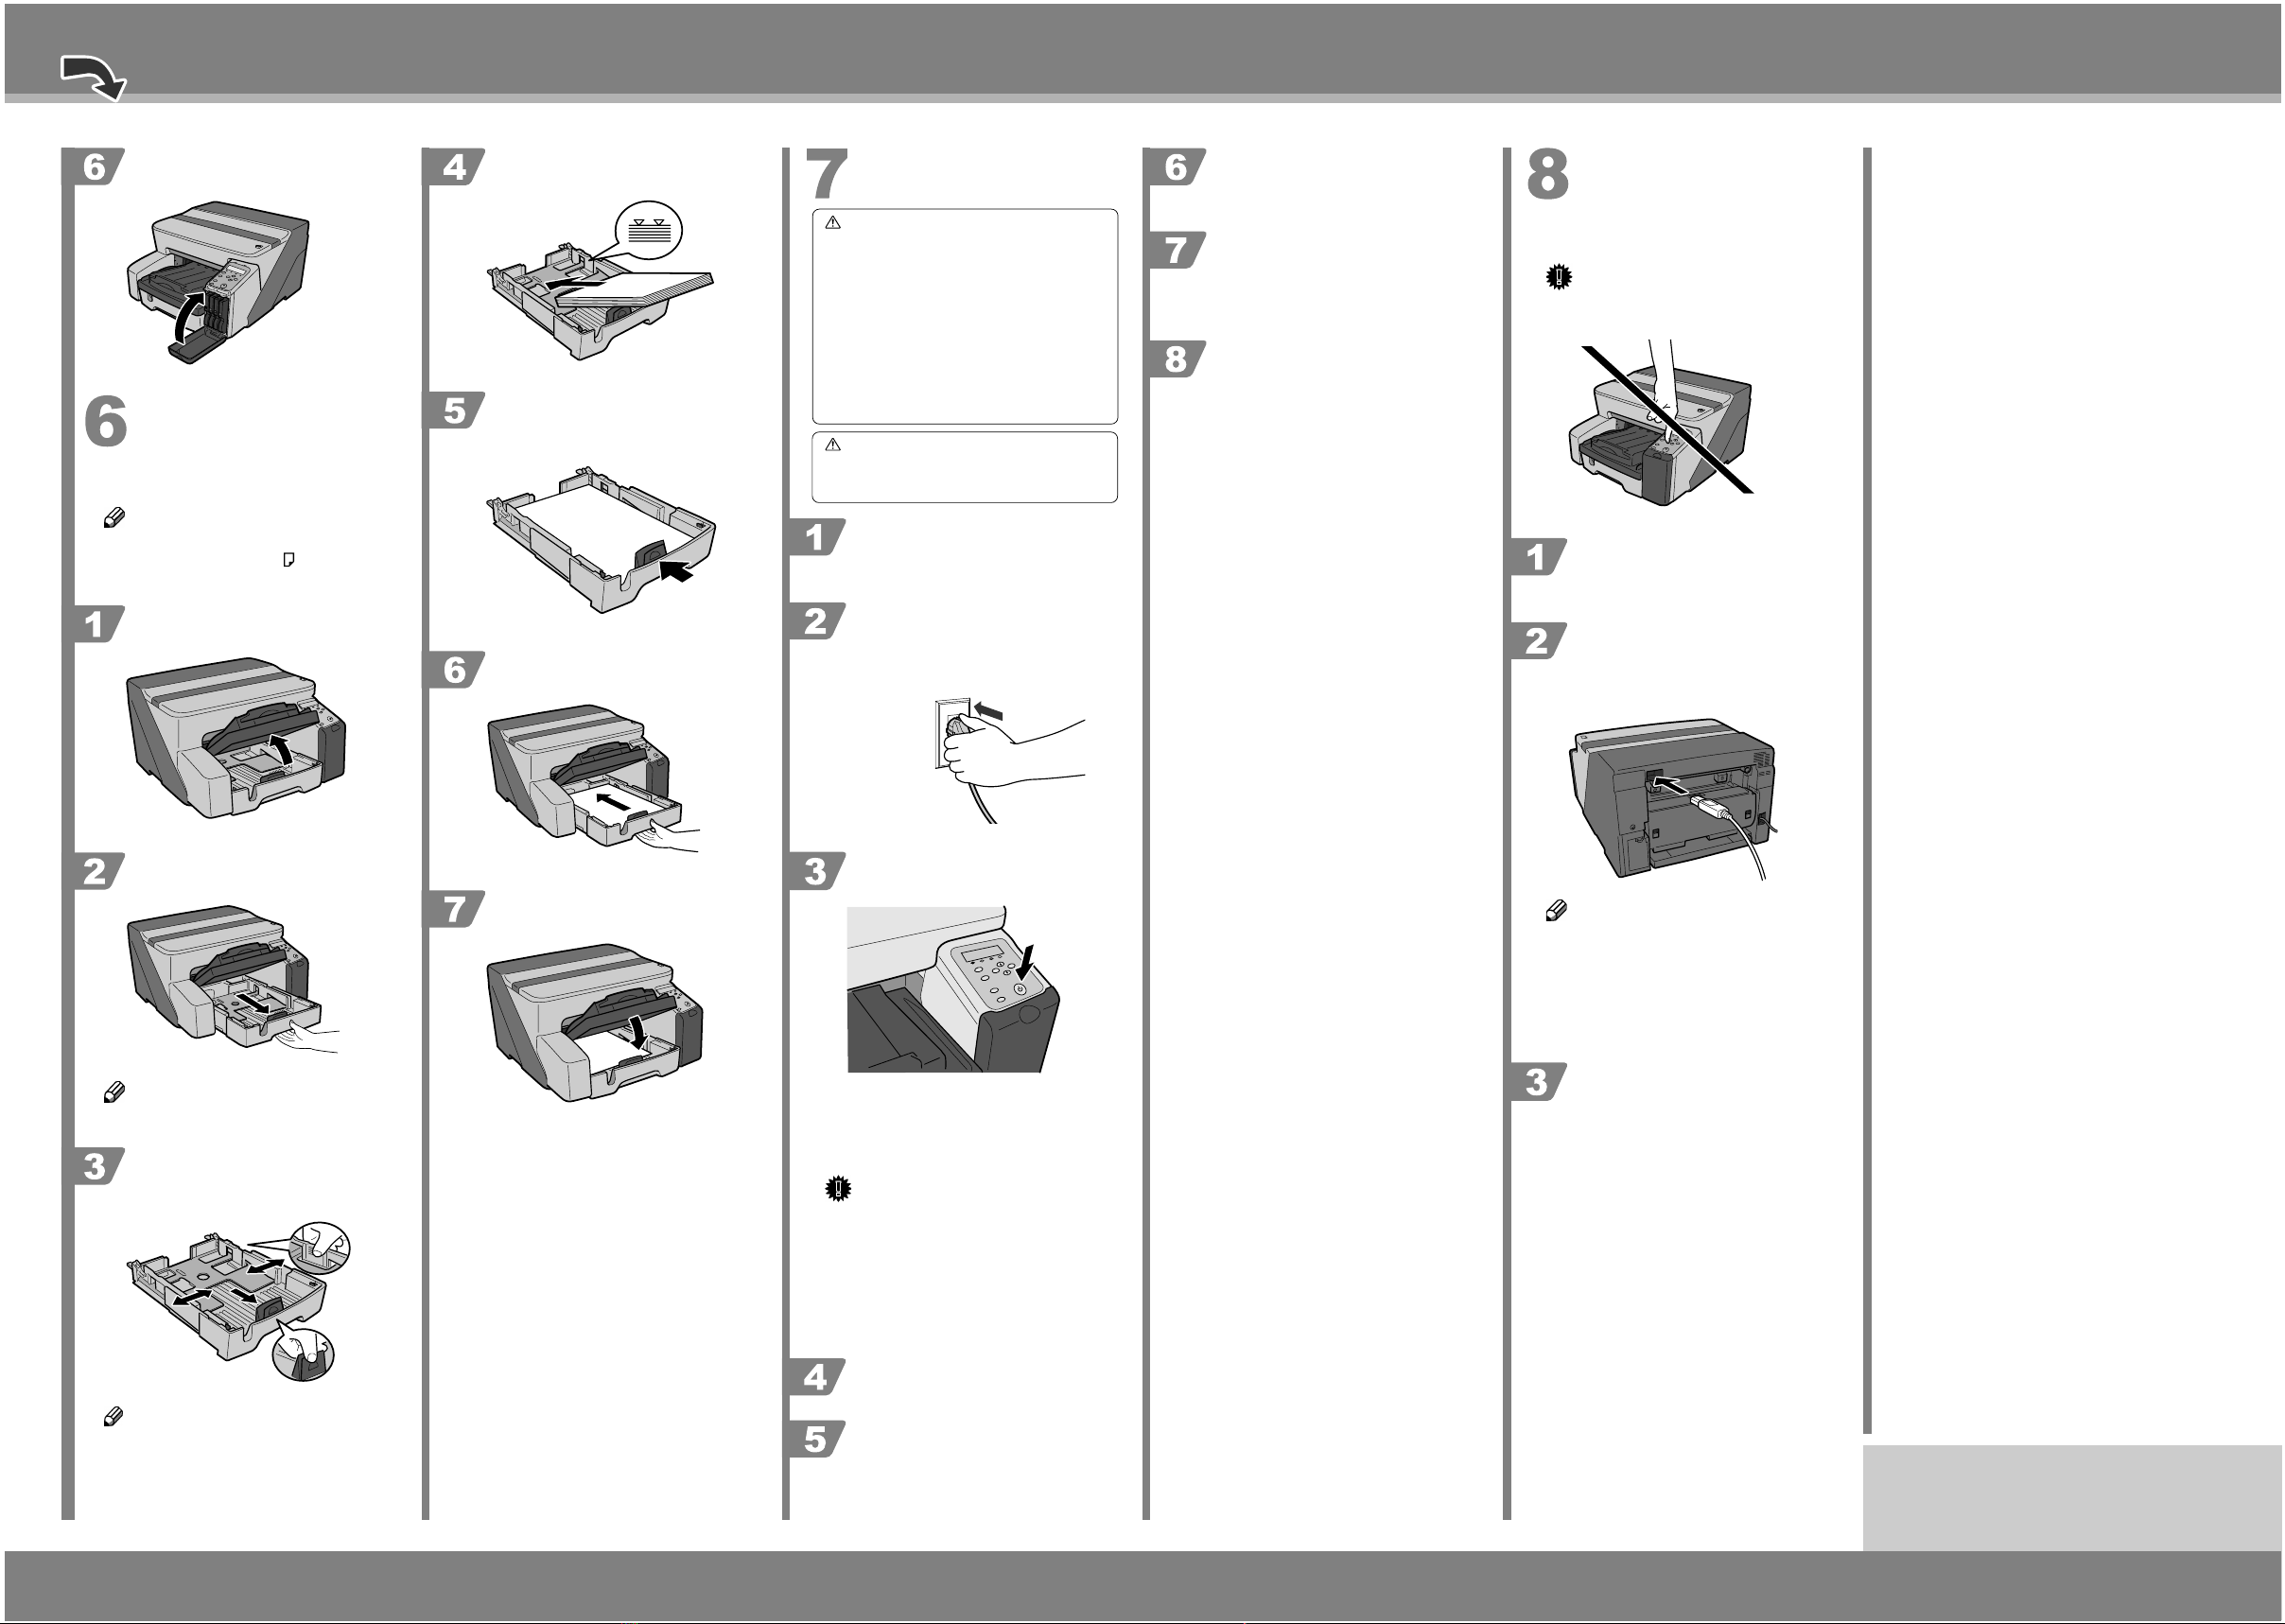
Switch the printer off.
For USB connection, go to 8, “Installing the Printer
Driver (USB)”.
For network connection, switch the printer back on,
and then go to 9, “Installing the Printer Driver (Network Interface Board)”.
Installing the Printer Driver
(USB)
Connecting the Printer via USB
Important
❒ Do not turn the printer on until you have read how
to do so.
Turn on the power of the computer,
and start Windows.
Lift the output tray.
AKR009S
Pull out the paper feed tray.
AKR010S
Note
❒ Pull tray completely out. Take care not to drop it.
Squeeze the paper guide release, and
then slide the side paper guides into
position according to the paper size.
AKS013S
Hold both sides of tray, and push it
gently in until it stops.
AKR014S
Lower the output tray.
AKR015S
Plug the power cord fully into the wall
outlet.
ACW049S
Press the [Power] key.
AKS008S
The printer starts feeding ink into its print-heads (taking approximately 6 minutes).
Make sure the “Ready” message is displayed on the
control panel.
Important
❒ Do not switch off the power of the printer during
this period. Take care that the plug is not unplugged
from the wall outlet.
❒ You might hear a clicking sound while the print
heads are filling. This is not a malfunction. It will
stop after a while.
❒ When ink feed is complete, the [Power] key stops
blinking and remains lit.
Remove the seal on the USB slot located on the rear of the printer, and
then insert the USB cable's hexagonal
(type B) plug firmly into the slot.
Note
❒ Insert the USB cable’s plug with the USB mark
facing down.
❒ Make sure that the USB cable is fully inserted.
❒ Make sure the USB cable is connected properly,
especially if the multi bypass tray is attached to
the printer, because the tray makes connecting the
cable difficult.
Insert the USB cable's rectangular
(type A) plug firmly into the
computer's USB slot.
AKS011S
Note
❒ Before loading paper, make sure to squeeze the
front end paper guide and slide it to an open position.
Print the configuration Page.
Press the [Menu] key.
The [Menu] screen appears.
Go to sheet 2/2.
2
Sheet 1/2
Page 3
Sheet 2/2 (From sheet 1/2)
Quick Install for USB
Follow the procedure below to install the printer driver
and User Guide.
Important
❒ Do not turn the printer on until you have read how
to do so.
AKR006S
❒ To install under Windows 2000/XP or Windows
Server 2003, you must log on as a user with administrator rights.
Note
❒ The following explanation uses Windows 98 as an
example. Procedures under other operating systems
may differ.
❒ Screens vary according to the operating environ-
ment.
❒ For details about driver installation under Windows
NT 4.0, see "Preparing for Printing", User Guide.
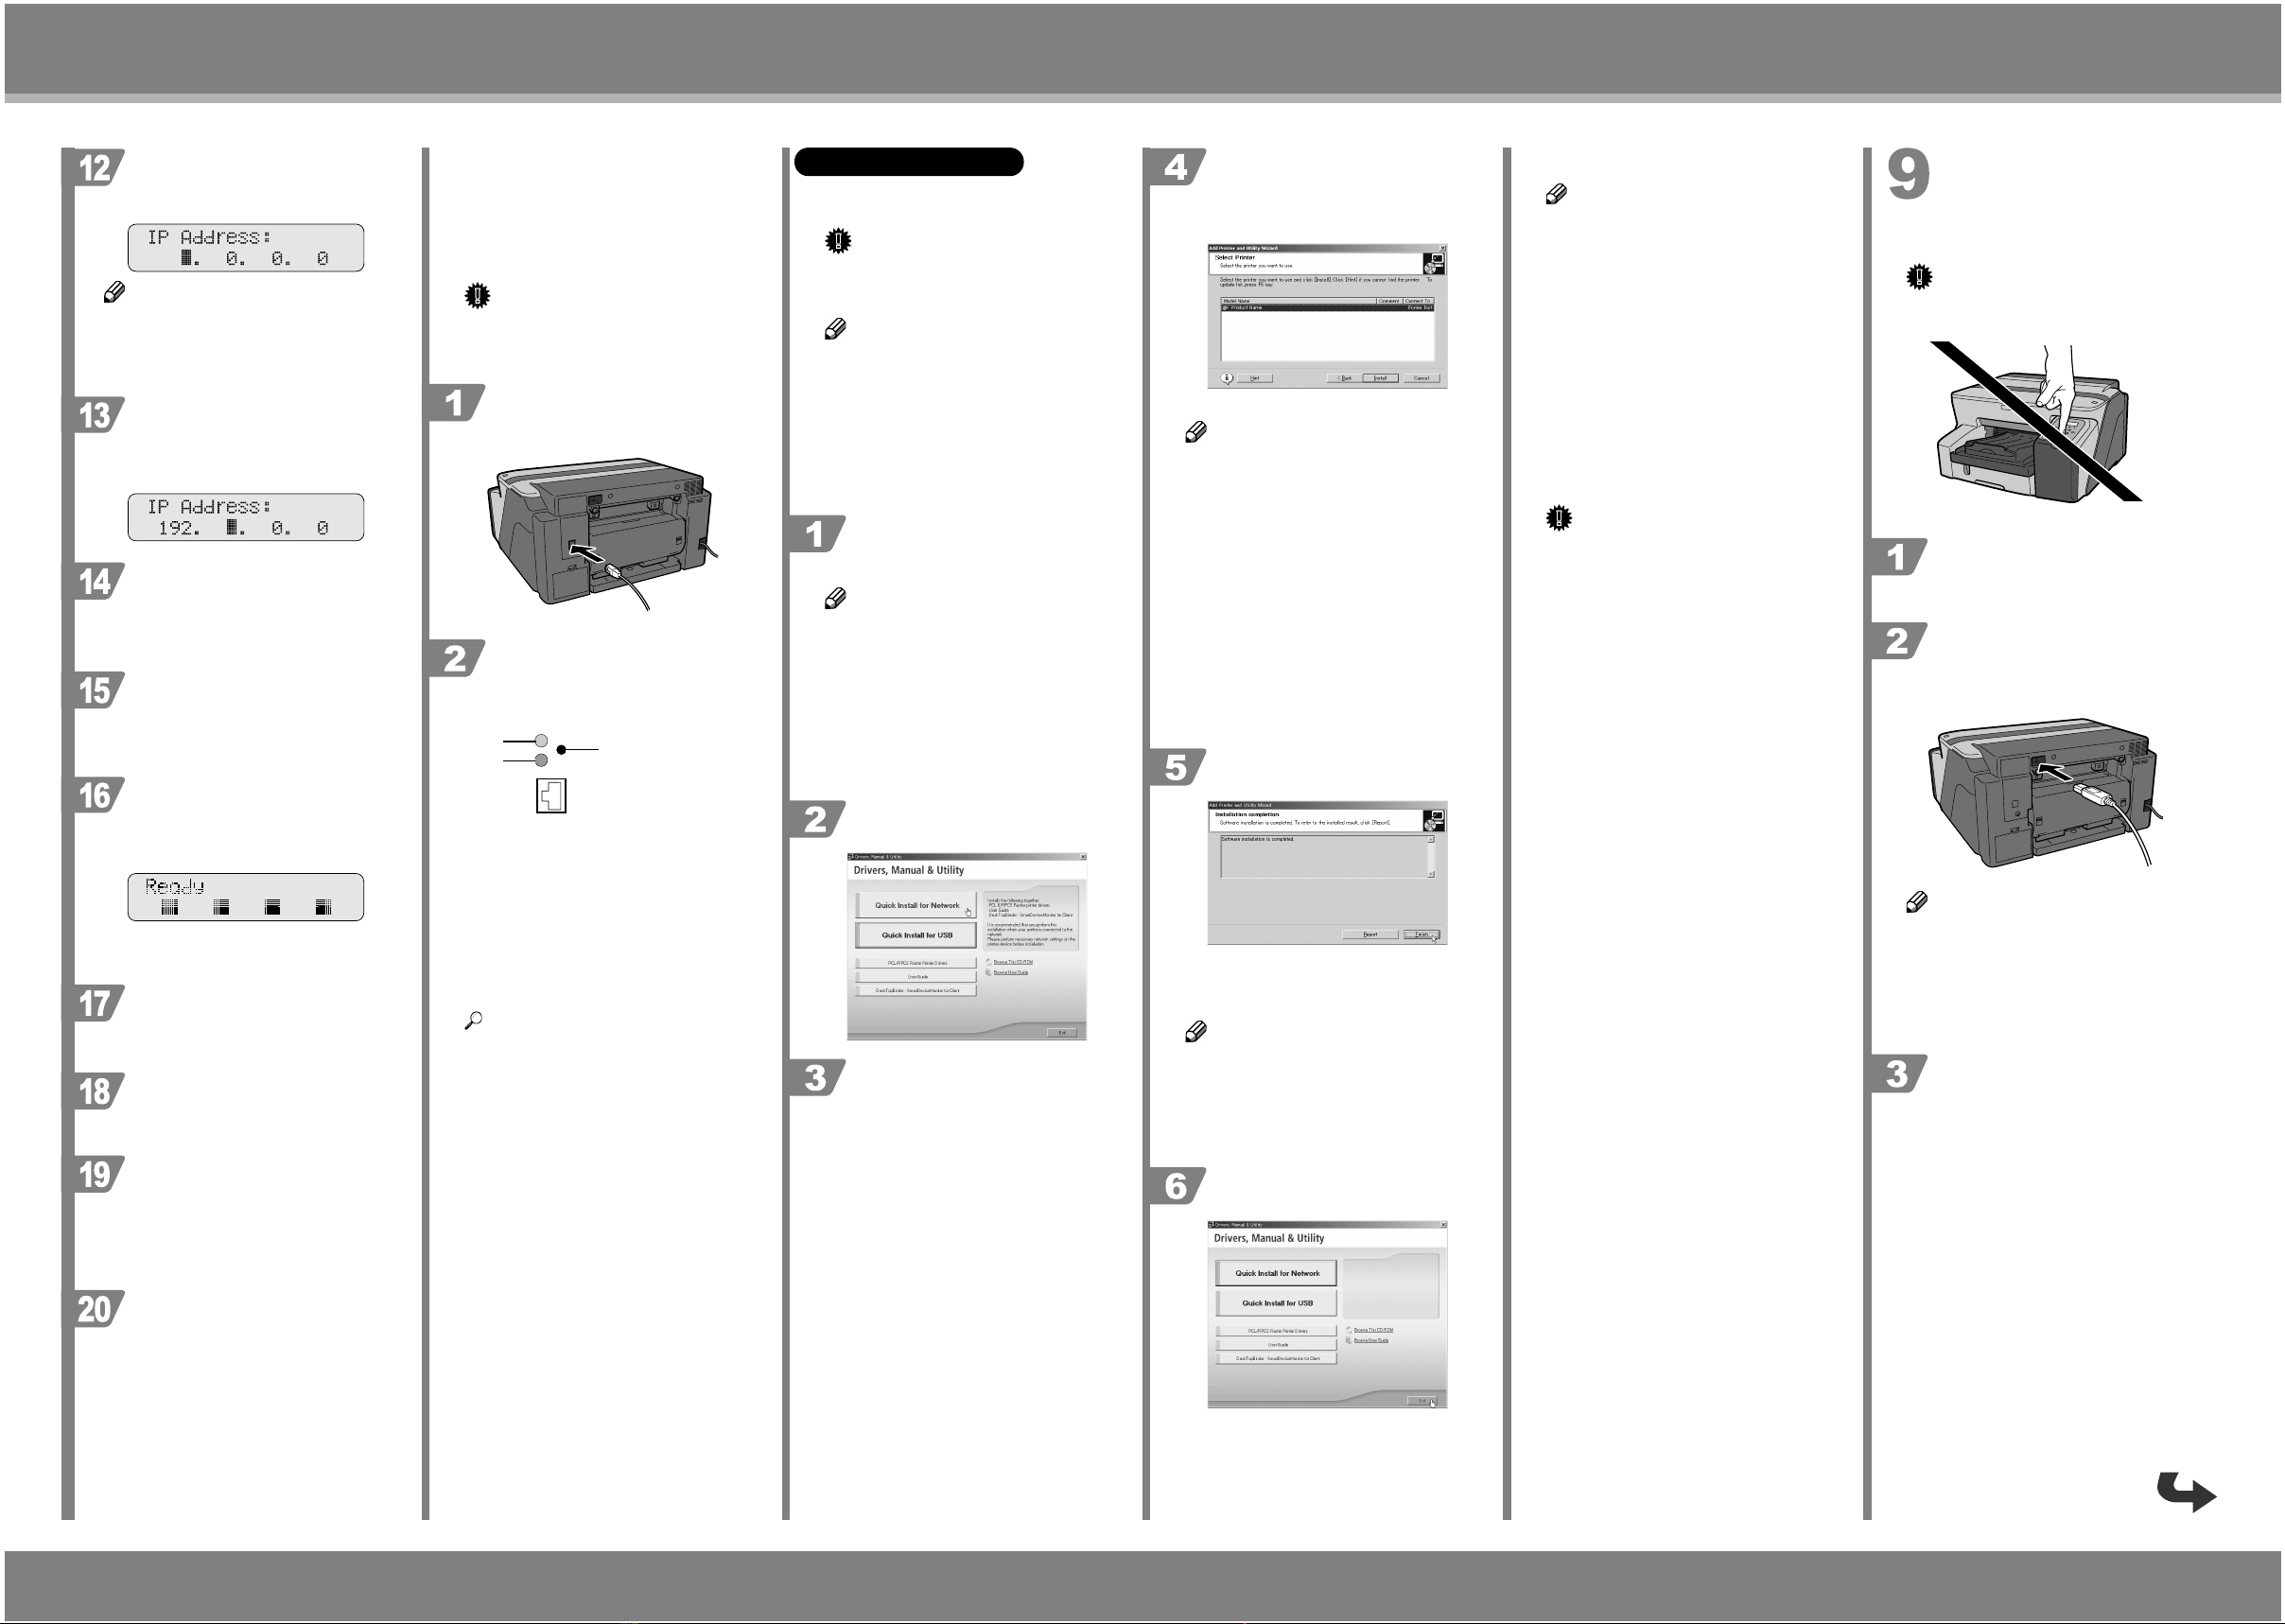
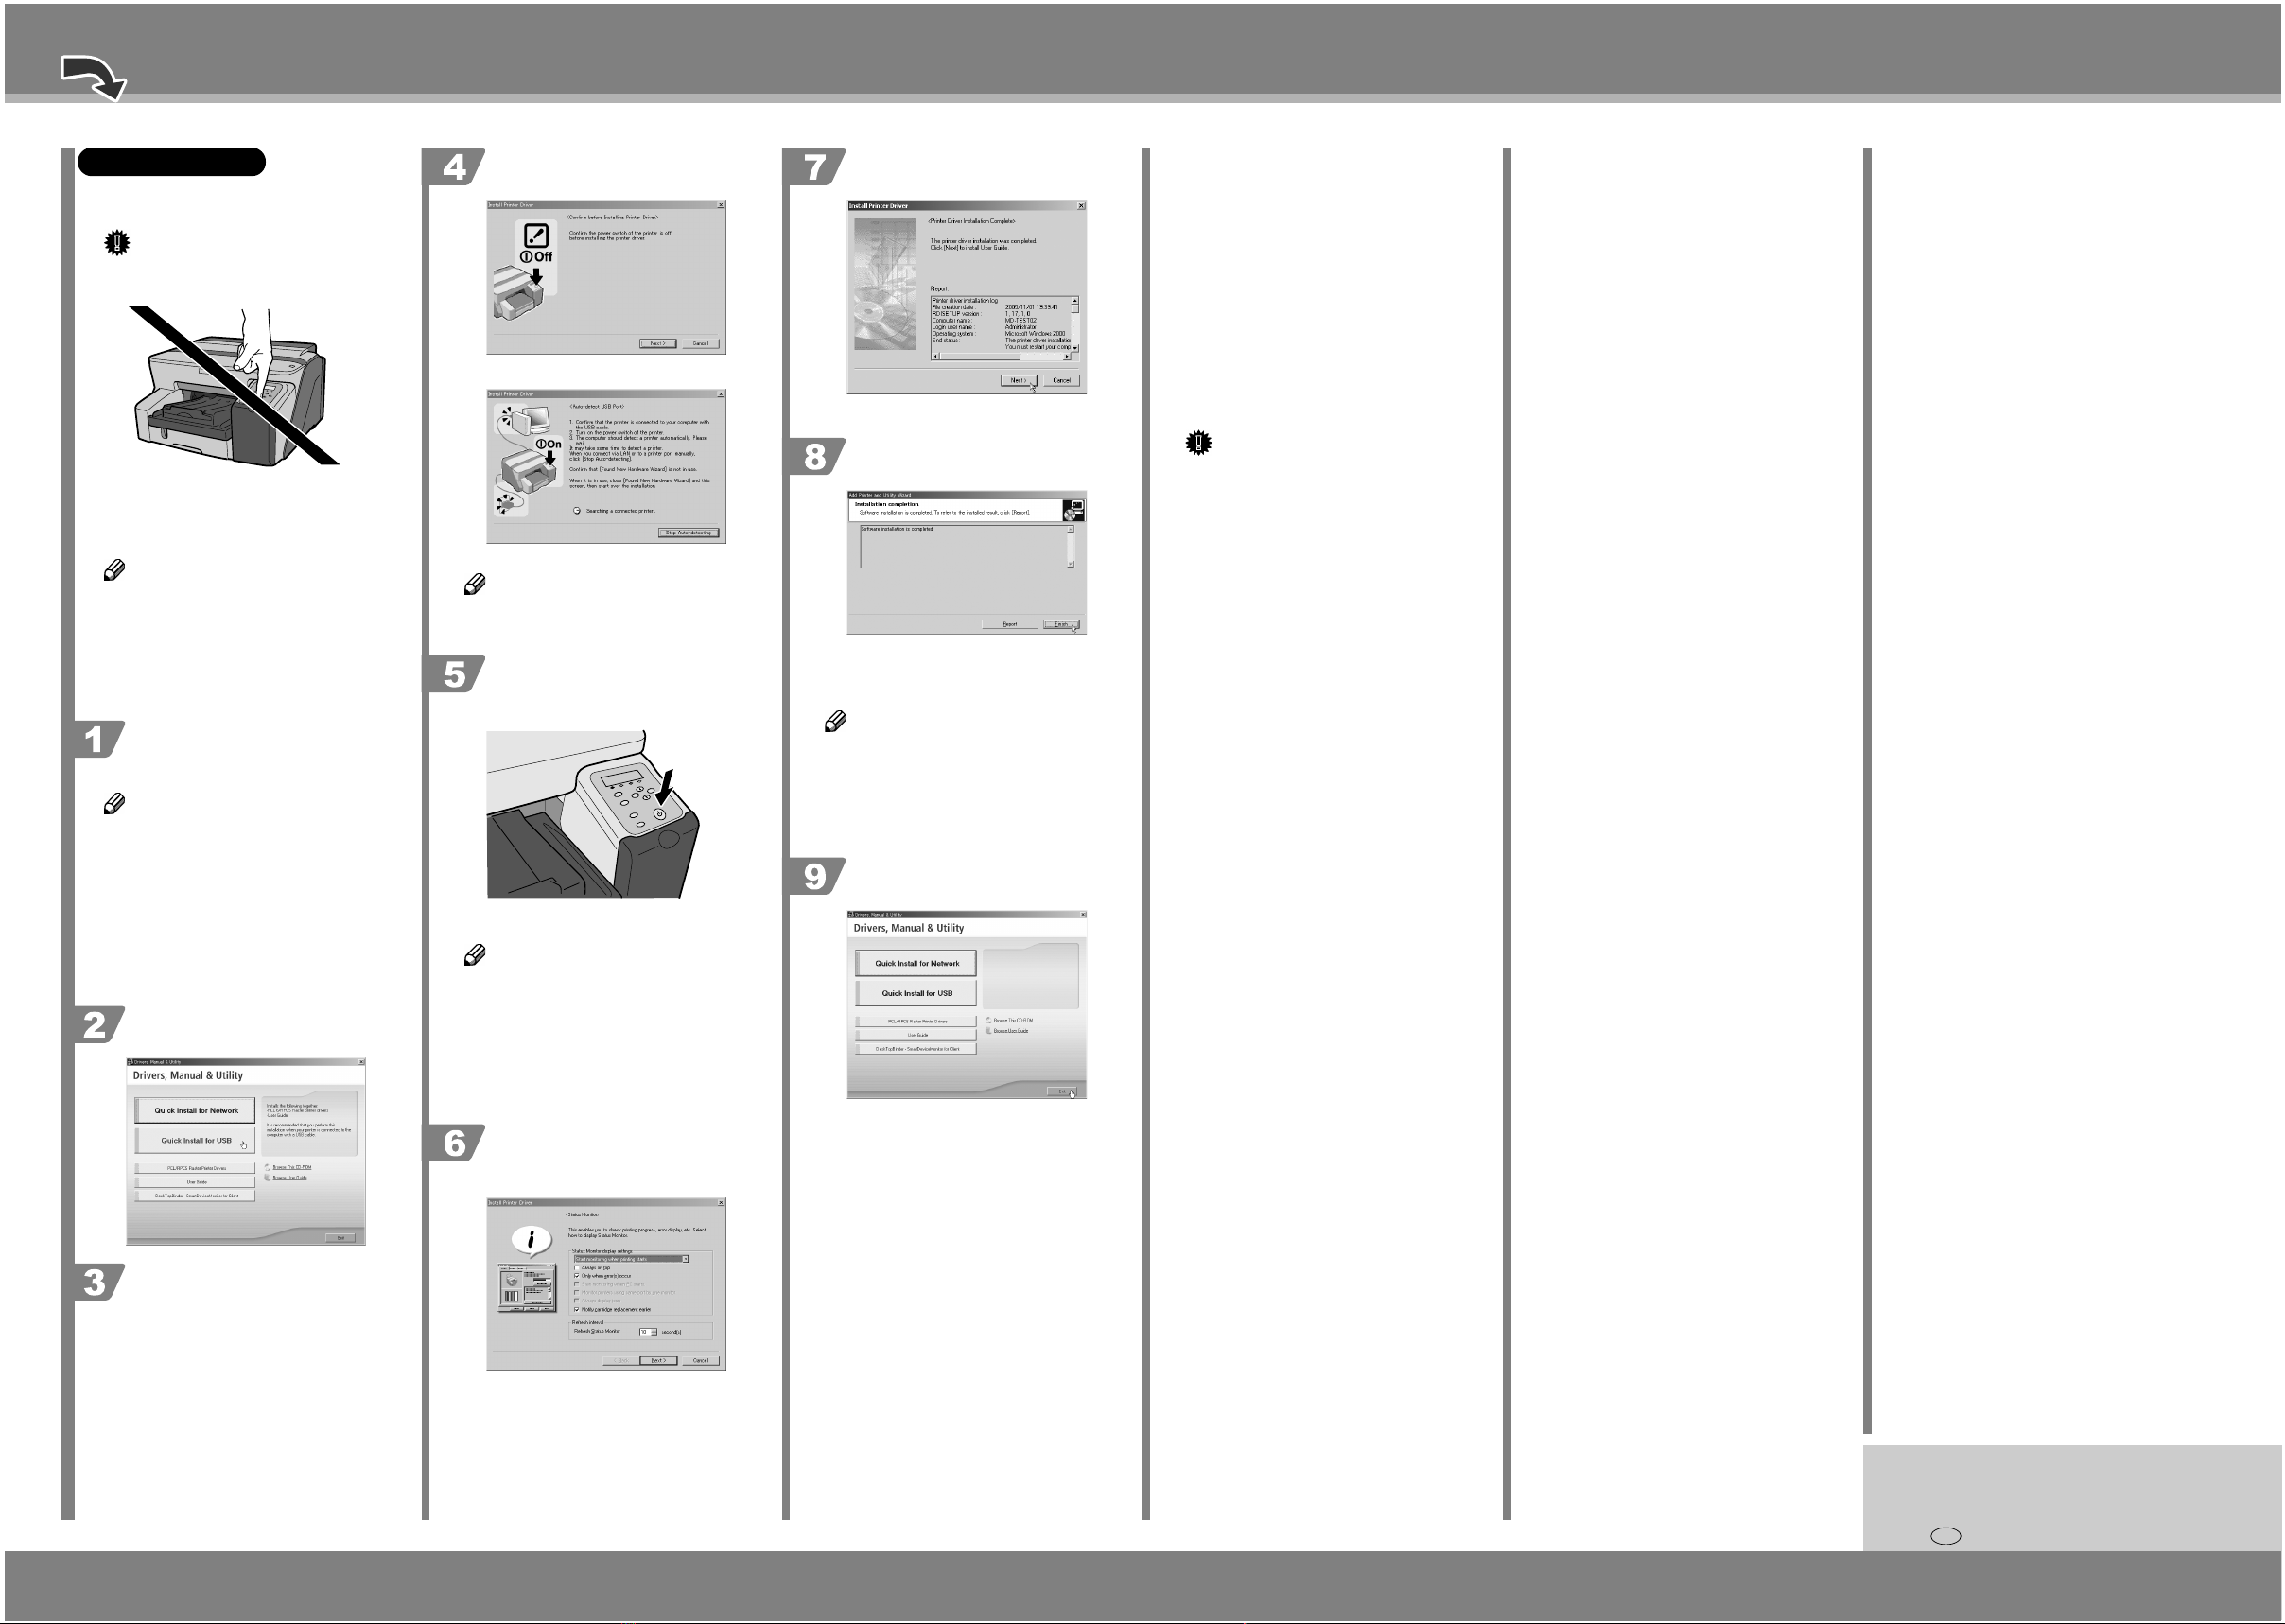
Start Windows, and insert the provided "Driver, Manual & Utility" CDROM into the CD-ROM drive.
Note
❒ Quit all other applications currently running.
❒ When you start Windows, the Add New Hardware
Wizard may appear. If this happens, click [Cancel]. Check again that the power is off, and then
proceed to step 2.
❒ After inserting the CD-ROM, the [Driver, Manual
& Utility] dialog box appears. If it does not,
doubleclick the CD-ROM drive icon under [My
Computer] or [Explorer], and then double-click
[SETUP.EXE].
Click [Quick Install for USB].
Read the license agreement, click [I accept the agreement.], and then click
[Next >].
Check again that the power of the
printer is off, and then click [Next >].
Check that the dialog box below appears.
Note
❒ If the [Software Installation] dialog box appears,
see "Notes on the Installation".
Make sure that the computer and
printer are properly connected, and
then press the [Power] key.
AKS008S
Installation starts.
Note
❒ If the connection to the computer was not con-
firmed, make the port settings again after installation is complete. See "The port connection is not
properly set.", Setup Handbook.
❒ If the message "Digital Signature Not Found" or
the [Found New Hardware Wizard] or [Hardware
Installation] dialog box appears, see "Notes on the
Installation".
Select whether or not to open the
Printer Status monitor automatically,
and then click [Next >].
Confirm the installation result, and
then click [Next>].
Install User Guide.
Click [Finish].
If the message prompting you to restart the computer
appears, restart the computer.
The printer driver and User Guide are now installed.
Note
❒ When installation is complete, User Guide icon
appears on your desktop.
❒ Confirm the printer driver is correctly installed by
checking that the [Power] key of the printer is lit
and performing a test print. See "Test Print", Setup
Handbook.
Click [Exit].
Notes on the Installation
If the message "Digital Signature Not Found" or the
[Software Installation] or [Hardware Installation]
dialog box appears
1. Click [Yes] or [Continue Anyway] to continue the
installation.
If the [Found New Hardware Wizard] dialog box appears
1. Click [Install from a list or specific location (Advanced)], and then click [Next >].
2. Click [Include this location in the search], and then
click [Browse].
3. Browse to find "\XXXXX\ENGLISH\DISK1" on
the CD-ROM, and then click [OK]. Select the
folder appropriate for your operating system.
Important
❒ Be sure to clear the [Search remove media (floppy,
CD-ROM...)] check box.
Installing the Printer Driver
(Network Interface Board)
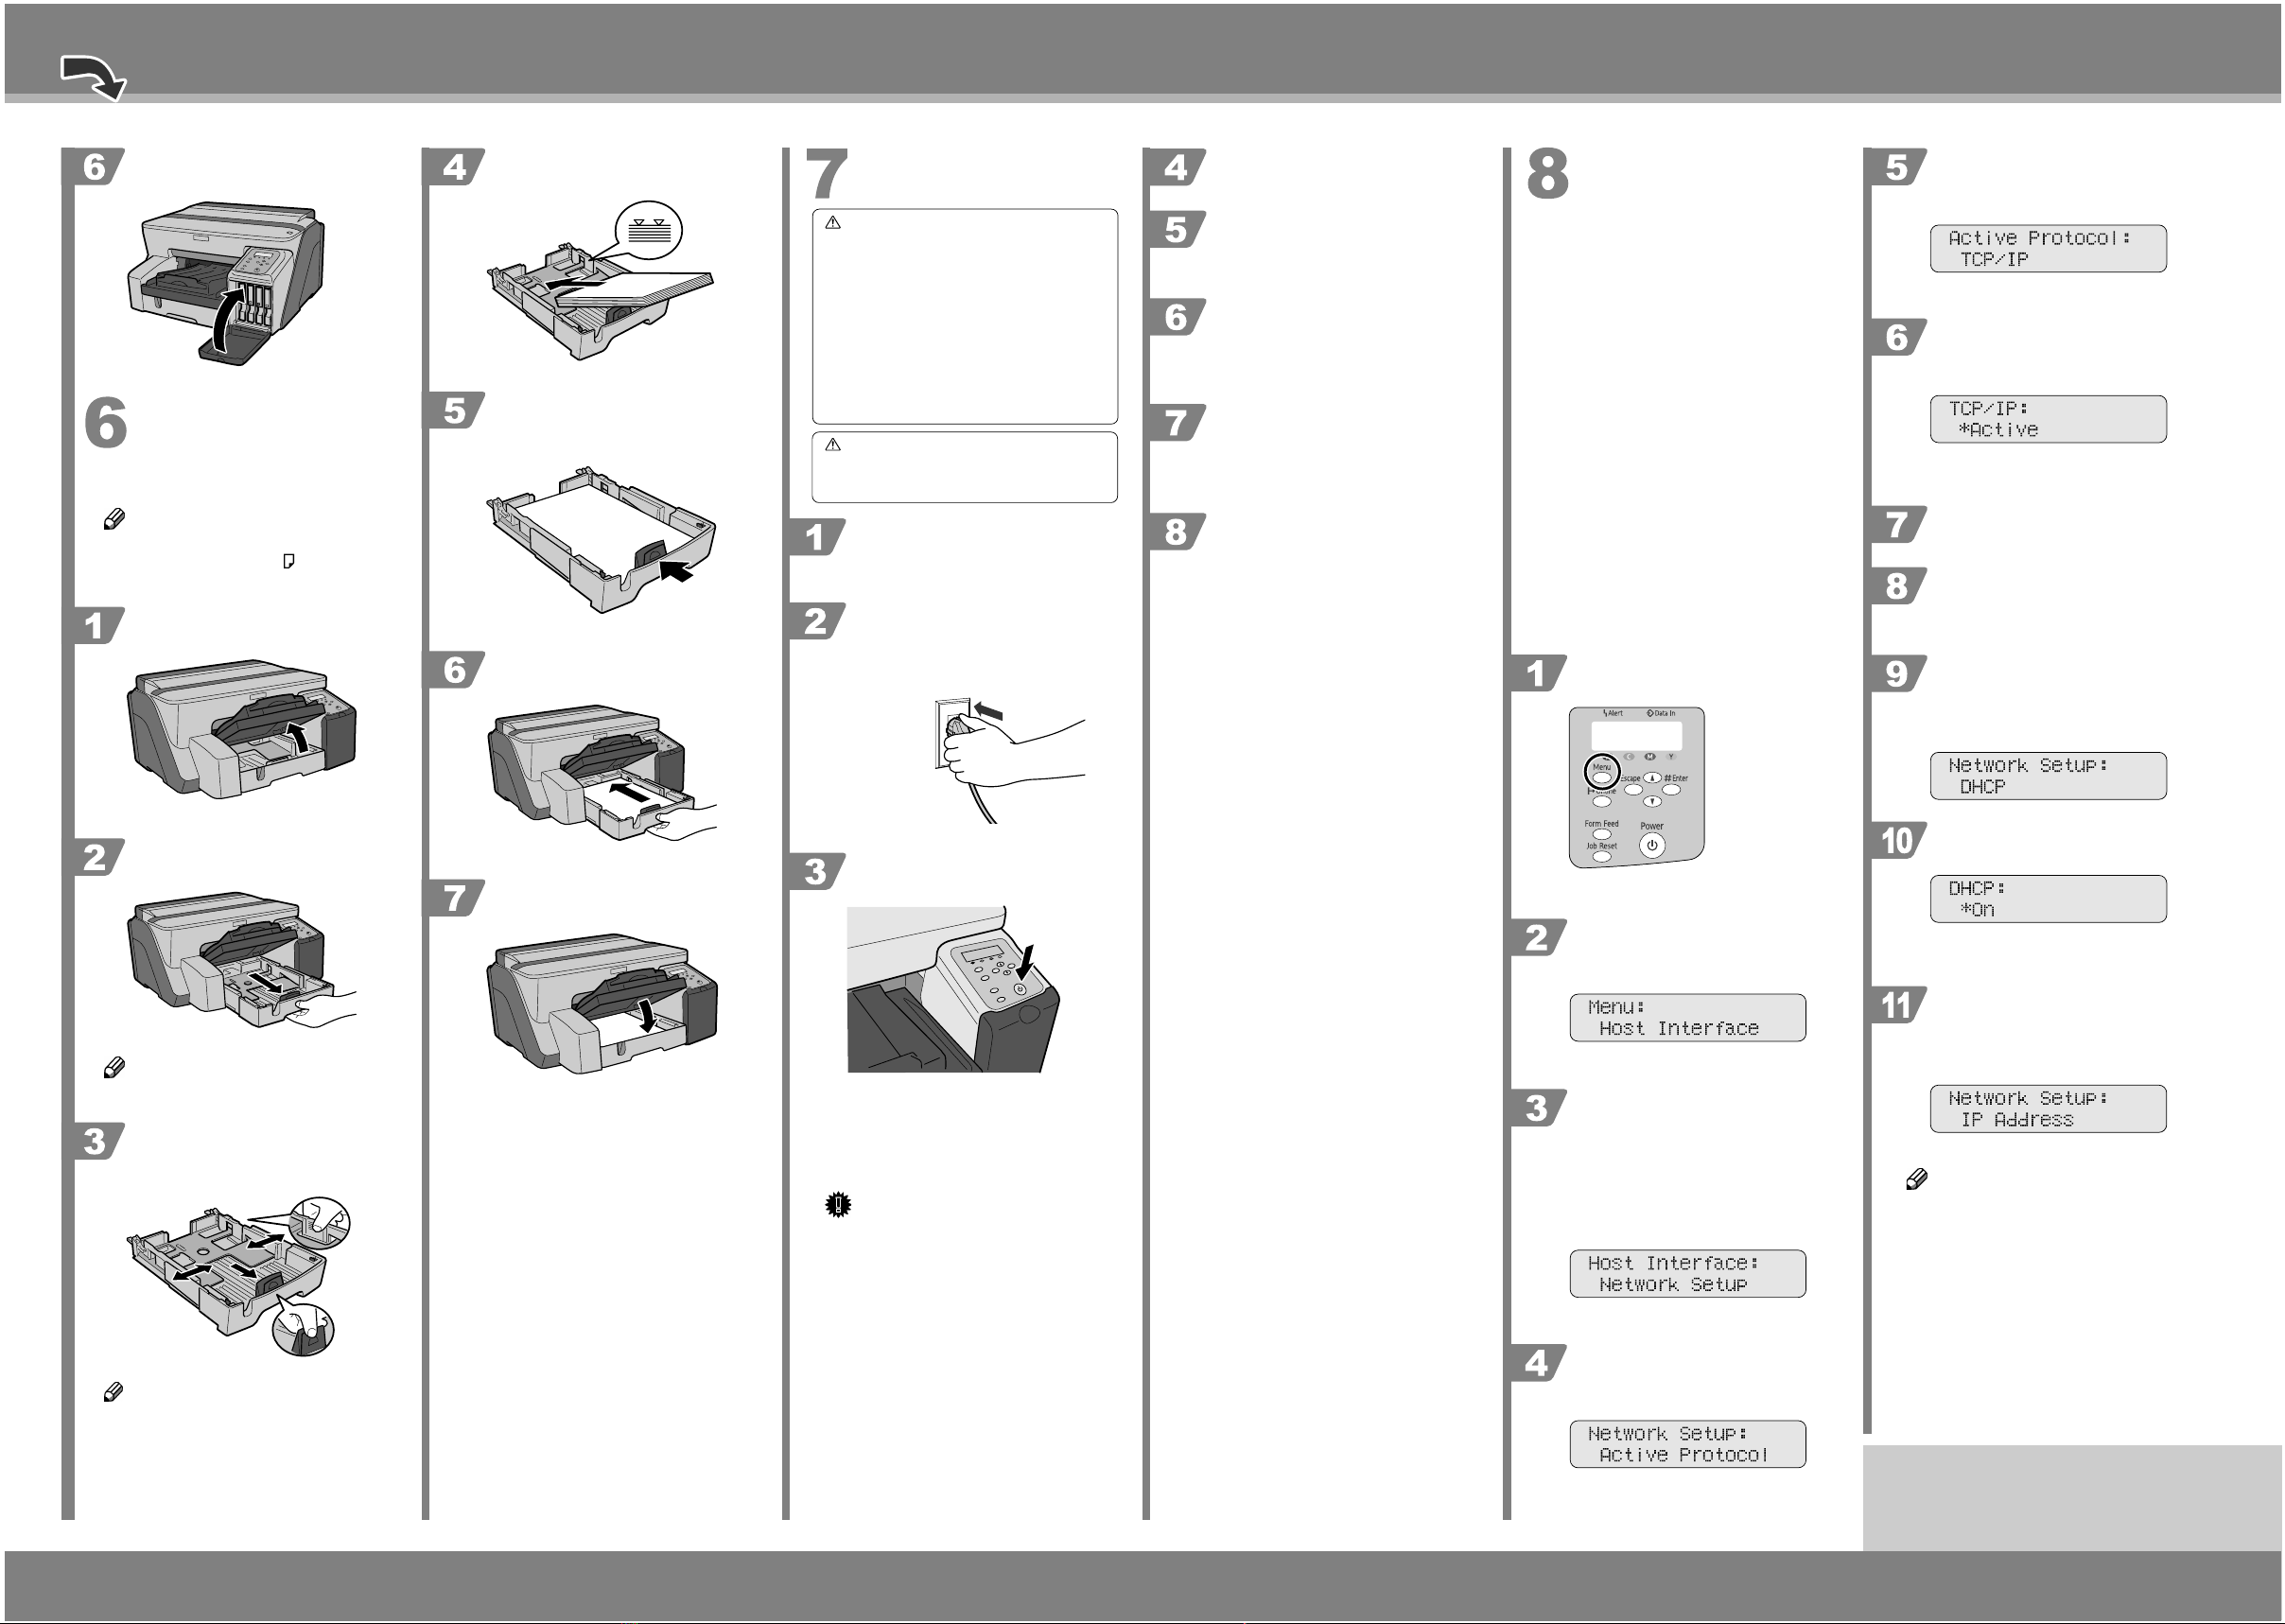
Specifying Settings on the Control Panel
Make the following network settings according to the
network interface you are using.
If connecting the printer via the network, make the
required network environment settings.
The following table shows the control panel settings
and their default values. These items appear in the
[Host Interface] menu.
Setting Name Value
1.DHCP On
2.IP Address 0.0.0.0
3.Subnet Mask 0.0.0.0
4.Gateway Address 0.0.0.0
5.Frame Type (NW) Auto Select
6.Active Protocol TCP/IP Active
SMB Active
7.Ethernet Speed Auto Select
Press the [Menu] key.
AKR902S
The [Menu] screen appears on the display.
Press the [▲] or [▼] key to display
[Host Interface] menu, and then press
the [#Enter].
The interface setting menu appears.
Press the [▲] or [▼] key to display
[Network Setup], and then press the
[#Enter].
Check the default for each setting using the menu
shown at the beginning of this section.
It is recommended that unused protocols be set to “Not
Active”.
The network setup menu appears.
Press the [▲] or [▼] key to display [Ac-
tive Protocol], and then press the [#Enter].
The active protocol settings screen appears.
Press the [▲] or [▼] key to select Active Protocol, and then press the [#Enter].
The following example explains activating TCP/IP.
Press the [▲] or [▼] key to select [Active] or [Not Active], and then press
the [#Enter].
After the settings are made, about two seconds later,
the screen returns to the active protocol menu.
Set other protocols you need to set in
the same way.
Press the [Escape] key, the screen returns to the network setup menu.
The network settings screen appears.
When using TCP/IP and DHCP,
specify DHCP. To do this, press the [▲]
or [▼] key to display “DHCP”, and
then press the [#Enter].
Press the [▲] or [▼] key to display
[On], and then press the [#Enter].
After about two seconds, the display returns to the
network setup menu.
If you use TCP/IP, assign the IP address to the printer. Press the [▲] or
[▼] key to display [IP Address], and
then press the [#Enter].
The current IP address appears on the display.
Note
❒ To get the IP address for the printer, contact your
network administrator.
❒ If “DHCP” is set to “On”, the “IP Address” set-
ting does not appear in the [Host Interface] menu.
Press the [▲] or [▼] key to enter the
left most entry field of the IP address,
and then press the [#Enter].
Note
❒ The value moves by 10 if the [▲] or [▼] key is
kept pressed.
❒ When the [#Enter] key is pressed, the cursor moves
to the next field.
Press the [#Enter].
As the specified value is entered in each field, the
cursor moves to the next field.
Repeating the steps, specify values in
all fields, and then press the [#Enter].
To return to the previous field, press the [Escape] key.
When using TCP/IP, specify “Subnet
Mask” and “Gateway Address” in the
same way as when specifying the IP
address.
After you have made all the settings,
press the [Online] key.
The specified settings are set and the initial printer
screen reappears.
Next, print the configuration page and check the specified settings.
Press the [Menu] key.
The [Menu] screen appears.
Press the [▲] or [▼] key to display
[List/Test Print], and then press the
[#Enter].
Press the [▲] or [▼] key to display
[Config. Page], and then press the
[#Enter].
The configuration page is printed.
Make sure that the IP address is correctly set.
Press the [Online] key.
The initial screen appears.
3
Page 4
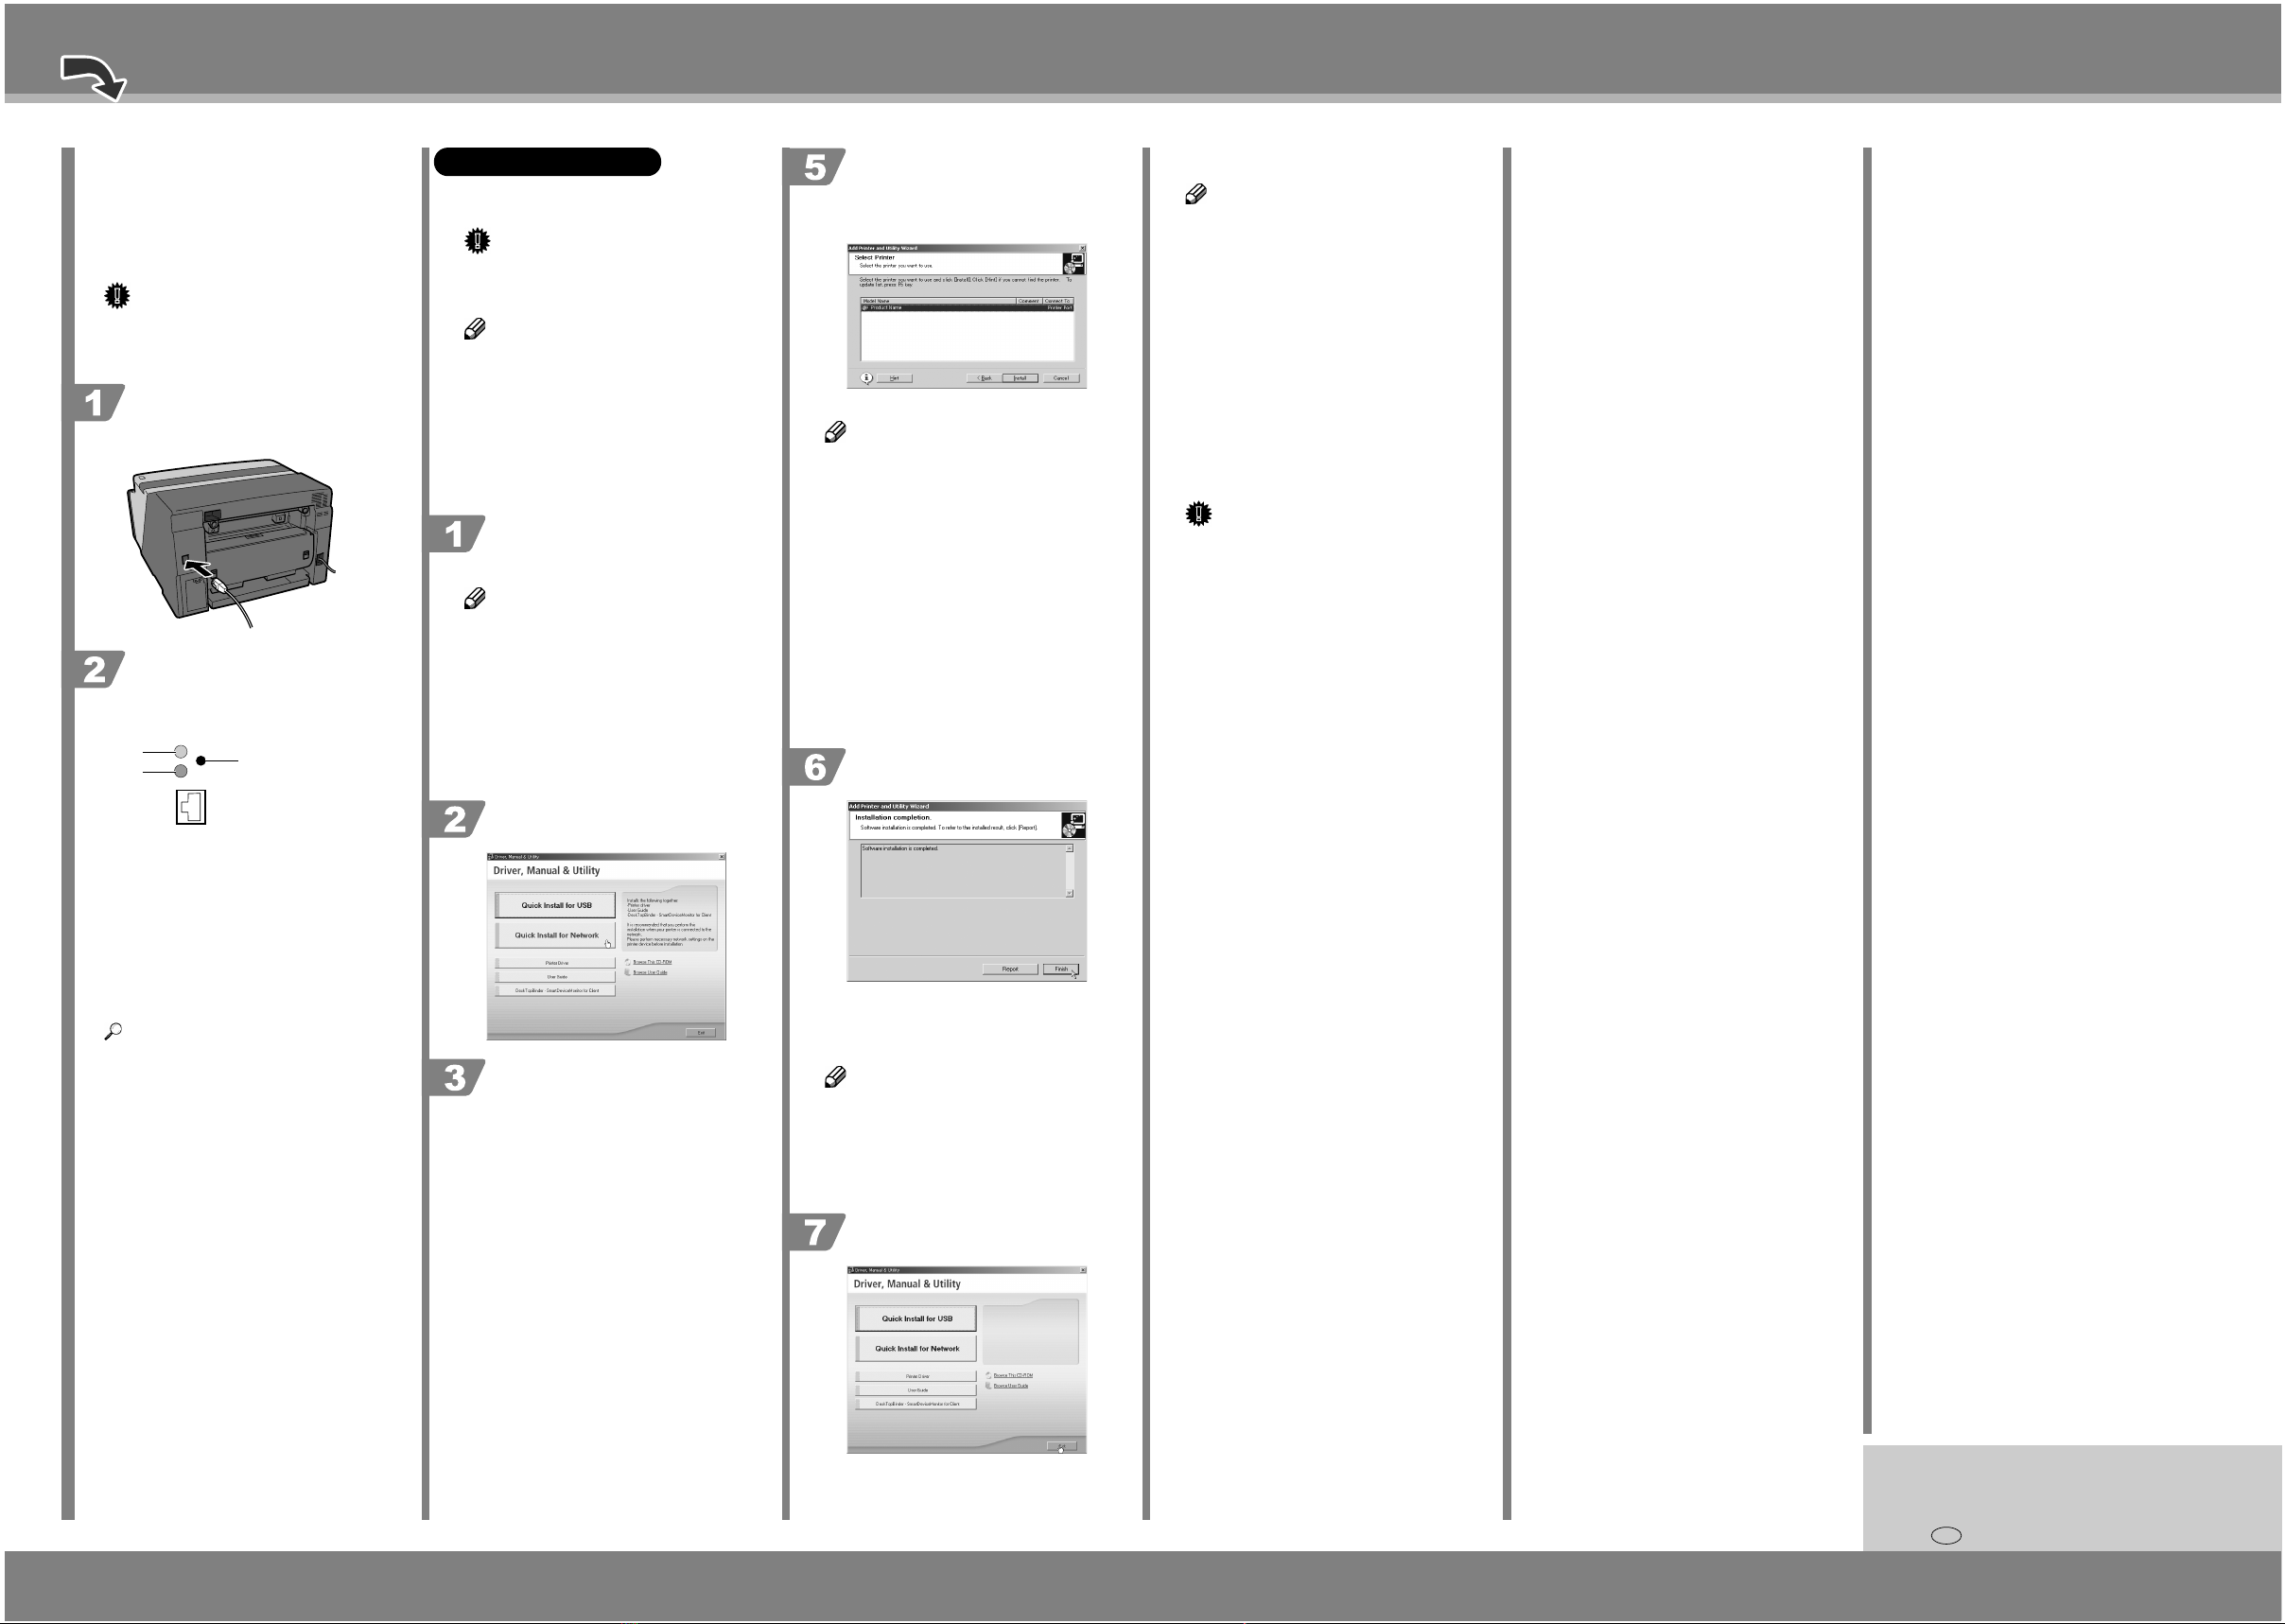
Connecting the Printer via the Network
Be sure to install necessary network equipment, such
as a hub, before connecting the Ethernet cable to the
printer.
You can connect a 10BASE-T or 100BASE-TX cable
to the printer.
Important
❒ Ethernet cable is not supplied with this machine.
Select your cable according to the network environment.
Plug the Ethernet cable into the
Ethernet port on the rear of the
printer.
AKR184S
Connect the other end of the cable to
the printer's network, such as to a hub.
Check the LEDs on the Ethernet port
2
1
3
Quick Install for Network
Follow the procedure below to install the printer driver,
User Guide, and SmartDeviceMonitor.
Important
❒ To install under Windows 2000/XP, Windows
Server 2003, Windows NT 4.0, you must log on as
a user with administrator rights.
Note
❒ The following explanation uses Windows 2000 as
an example. Procedures under other operating systems may differ.
❒ Screens vary according to the operating environ-
ment.
❒ For details about installing only the printer driver,
see “Preparing for Printing”, User Guide.
❒ For details about using the printer as a shared net-
work printer, see "Sharing the Printer", User Guide.
Start Windows, and insert the provided "Driver, Manual & Utility" CDROM into the CD-ROM drive.
Note
❒ Quit all other applications currently running.
❒ When you start Windows, the Add New Hardware
Wizard may appear. If this happens, click [Cancel]. Check again that the power is off, and then
proceed to step 2.
❒ After inserting the CD-ROM, the [Driver, Manual
& Utility] dialog box appears. If it does not,
doubleclick the CD-ROM drive icon under [My
Computer] or [Explorer], and then double-click
[SETUP.EXE].
The search for the network printer
starts. If the selection dialog box appears, select the model of printer you
want to use, and then click [Install].
Installation starts
Note
❒ If the [Software Installation] dialog box appears,
see "Notes on the Installation".
❒ If the printer cannot be found and only “Printer
Port” appears in the printer selection dialog box,
either the printer’s IP address has not been specified or the computer and printer are not on the same
network segment. Before installing the software,
check the printer’s IP address and the network topology. Otherwise, select “Printer Port” in the dialog box, and then install the printer driver. If you
do this, SmartDeviceMonitor for Client will not
be simultaneously installed, so install it afterwards,
and then configure the port.
❒ If the message "Digital Signature Not Found" or
the [Found New Hardware Wizard] or [Hardware
Installation] dialog box appears, see "Notes on the
Installation".
Click [Finish].
Notes on the Installation
Note
❒ The following procedures are explained using
Windows XP dialog boxes. Procedures under other
operating systems may differ.
If the message "Digital Signature Not Found" or the
[Software Installation] or [Hardware Installation]
dialog box appears
1. Click [Yes] or [Continue Anyway] to continue the
installation.
If the [Found New Hardware Wizard] dialog box appears
1. Click [Install from a list or specific location (Advanced)], and then click [Next >].
2. Click [Include this location in the search], and then
click [Browse].
3. Browse to find "\XXXXX\ENGLISH\DISK1" on
the CD-ROM, and then click [OK]. Select the
folder appropriate for your operating system.
Important
❒ Be sure to clear the [Search remove media (floppy,
CD-ROM...)] check box.
1 Indicator (green)
AKR128S
Remains green when the machine is properly connected to the network.
2. Indicator (red)
Turns red when 100 BASE-TX is operating. Turns
off when 10 BASE-T is operating.
3. [Job Reset] key
If you press this, the network interface board is
initialized and rebooted.
Reference
❒ Before you can use the network interface board,
you must set it up from the printer’s control panel.
For details, see “Specifying Settings on the Control Panel”.
Click [Quick Install for Network].
Read the license agreement, click [I
accept the agreement.], and then click
[Next >].
If the message prompting you to restart the computer
appears, restart the computer.
The printer driver and User Guide are now installed.
Note
❒ When installation is complete, User Guide icon
appears on your desktop.
❒ Confirm the printer driver is correctly installed by
checking that the [Power] key of the printer is lit
and performing a test print. See "Test Print", Setup
Handbook.
Click [Exit].
Copyright © 2005
Printed in China
EN USA J007-6603
4
Page 5
AKS091S
J0106603
J010-6603
Quick Installation Guide
Read this sheet carefully before you use this product and keep it handy for future reference. For safe and correct use, please be sure to read the Safety Information in the
Setup Handbook before using the product.
Checking the Computer and
Installation Area
The area where the printer is to be
placed.
Choose a flat, stable area to install the printer. Make
sure that all four printer legs make firm contact with
the surface beneath.
The surface should be level within two degrees, left to
•
right and front to back.
•
To prevent condensation, install the printer in an area
where temperature and humidity conditions do not ex-
ceed those indicated in the diagram below.
•
The printer may cease to print if these limitations are
exceeded.
ZDJX006J
• White area: Permissible Range
• Gray area: Recommended Range
•
The diagram below shows the ideal clearance for load-
ing paper, replacing print cartridges, and removing
jammed paper.
2
1
1. At least 19 cm (7.5 inches)
2. At least 12 cm (4.8 inches)
If you attach the Multi Bypass Tray (Option), provide additional clearance of 23 cm (9.1 inches).
Important
❒ To avoid malfunctions, position the printer away
from the following:
• direct sunlight
• flow of air from air conditioners or heaters
•
radios, televisions, or other electronic devices areas of high/low temperature and high/lo w moisture
• humidifying appliances
• oil stoves and ammonia-emitting appliances
(such as diazo copiers)
TS4K031E
AKR090S
Check the power source.
The power requirements of this printer are as follows:
220-240V, 50/60Hz, 0.5A or more.
Warning
•
Keep the machine away from humidity and dust. Oth-
erwise a fire or an electric shock might occur.
•
Place the machine on a strong and level surface. Oth-
erwise, the machine might fall and cause personal
injury.
•
If you use the machine in a confined space, confirm
that there is a continuous flow of air.
Warning
•
Only connect the machine to the power source de-
scribed on this sheet.
•
Avoid multi-wiring.
•
Connect the power cord directly into a wall outlet and
never use an extension cord.
•
Do not damage, break or make any modifications to
the power cord. Do not place heavy objects on it. Do
not pull it hard nor bend it more than necessary. These
actions could cause an electric shock or fire.
Warning
•
Do not plug or unplug the power cord with your hands
wet. Otherwise, an electric shock might occur.
Warning
•
Make sure the wall outlet is near the machine and
freely accessible so that in event of an emergency it
can be unplugged easily.
Checking the Computer to be Connected.
To use this printer, a computer must have an operating environment that meets the following specifications:
•
MS-DOS/V compatible with USB interface
•
Operating system: Windows 98/Me/2000/XP, Windows
Server 2003, Windows NT 4.0 or later
•
80-100 MB (minimum) available hard disk space
❢Limitation
❒ For Windows NT 4.0, IE 4.0 or later is required.
❒ Windows NT 4.0 do not support USB connection
with your printer. Connect your printer via a network in this case.
❒ USB connection is supported by Windows 98/Me/
2000/XP and Windows Server 2003.
❒ USB connection speed under Windows 98/Me is
USB 1.1 equivalent.
Note
❒ To print at the highest quality, the following
memory capacities are required.
• Windows 98/Me (64MB or more recommended)
• Windows 2000/XP (128MB or more recom-
mended)
• Windows Server 2003 (256MB or more recommended)
• Windows NT 4.0 (64MB or more recommended)*1
*1 We recommend at least 128 MB of memory for
high quality printing on glossy paper.
❒ The machine does not support Windows XP 64-
Bit Edition or Windows Server 2003 64-Bit Edition.
Checking the Supplied Items
and Unpacking the Printer
Open the box and take out all supplied items.
Check that all the following items are present:
Starter cartridge - Cyan
Starter cartridge - Magenta
Starter cartridge - Yellow
Starter cartridge - Black
Quick Installation Guide (this manual)
Setup Handbook
"Drivers, Manual & Utility" CD-ROM
User Guide is included on this.
Note
❒ USB cable and LAN cables are not supplied.
Important
❒ Do not turn the printer on until you have read how
to do so.
AKS006S
Take off the protective covering.
Remove the orange tape from the
printer body.
Important
❒ Remove all the orange tape, except the tape around
the power cord.
Attaching the Paper Feed
Unit Type TK1000 (Option)
Caution
•
Type 1 weighs approximately 14.5 kg (32.0 lb.). Type
2 weighs approximately 15.5 kg (34.2 lb.). Type 1 is
the printer of 29-page per minute print speed. Type 2
is the printer of 30-page per minute print speed.
•
When moving the machine, hold the machine by the
bottom below the two indentations. Lift the machine slowly
in order to avoid straining your body. Lifting the machine
without sufficient strength or assistance or handling it
roughly and dropping it could cause an injury.
Check that the power cord of the
printer is not plugged in.
Take the paper feed unit out of its box.
Position the paper feed unit close to
the printer.
Remove the orange tape from tray.
Place the cover on tray.
AKS069S
Align the connecting parts of the printer
and paper feed unit, and then place the
printer on top of the paper feed unit.
To position the printer, lift carefully with both hands
using the indented sections on the sides' lo wer centers.
AKS070S
Note
❒ Align the paper feed unit and printer using their
left-side corners.
❒ When the printer is placed on top of the paper feed
unit, installation is complete.
❒ Do not tilt the machine.
❒ Be careful not to trap your fingers.
Attaching the Multi Bypass
Tray Type BY1000 (Option)
Check that the power cord of the
printer is not plugged in.
Take the multi bypass tray out of its
box.
Remove the orange tape from multi
bypass tray.
Attach the multi bypass tray by pushing it in until it clicks.
Extend the multi bypass tray.
Installing the Print Cartridges
Caution
•
If ink comes into contact with your eyes, rinse imme-
diately in running water. For other symptoms, consult
a doctor.
•
If ink is ingested, induce vomiting by drinking a strong
saline solution. Consult a doctor immediately.
•
If your skin comes into contact with ink, wash the af-
fected area thoroughly with soap and water.
Caution
•
Keep the ink or ink container out of reach of children.
Important
❒ Print cartridges and supplies comply with the
manufacturer's safety specifications. To ensure
safety and reliability, use genuine print cartridges
and supplies.
Unpack the print cartridges.
Open the Right Front Cover.
AKS003S
Check the cartridge's orientation, and
then gently insert it.
AKS004S
Important
❒ Take care to insert the colors in the right order.
❒ Take care not to touch the cartridge chip.
Push in the cartridge using the PUSH
area.
Repeat steps 3 to 4 for all four cartridges.
1
Page 6
Close the Right Front Cover.
AKS902S
AKS005S
Loading Paper
Loading Paper in the Paper Feed Tray
Note
❒ A4/Letter size paper is loaded here.
❒ Load A4/Letter size paper in
tion.
Lift the output tray.
(portrait) orienta-
Load paper with the print side face
down but not over the limit mark.
AKS012S
Squeeze the front end paper guide, and
then slide it to meet the edge of the paper.
AKS013S
Hold both sides of tray, and push it
gently in until it stops.
Plugging in the Power Cord
Warning
•
Only connected the machine to the power source
described on this sheet.
•
Avoid multi-wiring.
•
Connect the power cord directly into a wall outlet and
never use an extension cord.
•
Do not damage, break or make any modifications to
the power cord. Do not place heavy objects on it. Do
not pull it hard nor bend it more than necessary. These
actions could cause an electric shock or fire.
Warning
•
Do not plug or unplug the power cord with your hands
wet. Otherwise, an electric shock might occur.
Remove the orange tape from around
the power cord.
Plug the power cord fully into the
machine and the wall outlet.
Print the configuration Page.
Press the [Menu] key.
The [Menu] screen appears.
Press the [▲] or [▼] key to display
[List/Test Print], and then press the
[#Enter] key.
Press the [▲] or [▼] key to display
[Config. Page], and then press the
[#Enter] key.
The configuration page is printed.
Switch the printer off.
For network connection, switch the printer back on,
and then go to 8, “Installing the Printer Driver (Network Interface Board)”.
For USB connection, go to 9, “Installing the Printer
Driver (USB)”.
Installing the Printer Driver
(Network Interface Board)
Specifying Settings on the Control Panel
Make the following network settings according to the
network interface you are using.
If connecting the printer via the network, make the
required network environment settings.
The following table shows the control panel settings
and their default values. These items appear in the
[Host Interface] menu.
Setting Name Value
1.DHCP On
2.IP Address 0.0.0.0
3.Subnet Mask 0.0.0.0
4.Gateway Address 0.0.0.0
5.Frame Type (NW) Auto Select
6.Active Protocol TCP/IP Active
SMB Active
7.Ethernet Speed Auto Select
Press the [Menu] key.
Press the [▲] or [▼] key to select Active Protocol, and then press the [#Enter] key.
The following example explains activating TCP/IP.
Press the [▲] or [▼] key to select [Active] or [Not Active], and then press
the [#Enter] key.
After the settings are made, about two seconds later,
the screen returns to the active protocol menu.
Set other protocols you need to set in
the same way.
Press the [Escape] key, the screen returns to the network setup menu.
The network settings screen appears.
When using TCP/IP and DHCP,
specify DHCP. To do this, press the [▲]
or [▼] key to display “DHCP”, and
then press the [#Enter] key.
AKS009S
Pull out the paper feed tray.
AKS010S
Note
❒
Pull tray completely out. Take care not to drop it.
Squeeze the paper guide release, and
then slide the side paper guides into
position according to the paper size.
AKS011S
Note
❒ Before loading paper, make sure to squeeze the
front end paper guide and slide it to an open position.
Lower the output tray.
AKS014S
AKS015S
ACW049S
Press the [Power] key.
AKS008S
The printer starts feeding ink into its print-heads.
• Type 1: Taking approximately 6 minutes
• Type 2: Taking approximately 10 minutes
Make sure the “Ready” message is displayed on the
control panel.
Important
❒ Do not switch off the power of the printer during
this period. Take care that the plug is not unplugged
from the wall outlet.
❒ You might hear a clicking sound while the print
heads are filling. This is not a malfunction. It will
stop after a while.
❒ When ink feed is complete, the [Power] key stops
blinking and remains lit.
The [Menu] screen appears on the display.
Press the [▲] or [▼] key to display
[Host Interface] menu, and then press
the [#Enter] key.
The interface setting menu appears.
Press the [▲] or [▼] key to display
[Network Setup], and then press the
[#Enter] key.
Check the default for each setting using the menu
shown at the beginning of this section.
It is recommended that unused protocols be set to “Not
Active”.
The network setup menu appears.
Press the [▲] or [▼] key to display [Ac-
tive Protocol], and then press the [#Enter] key.
Press the [▲] or [▼] key to display
[On], and then press the [#Enter] key.
After about two seconds, the display returns to the
network setup menu.
If you use TCP/IP, assign the IP address to the printer. Press the [▲] or
[▼] key to display [IP Address], and
then press the [#Enter] key.
The current IP address appears on the display.
Note
❒ To get the IP address for the printer, contact your
network administrator.
❒ If “DHCP” is set to “On”, the “IP Address” set-
ting does not appear in the [Host Interface] menu.
The active protocol settings screen appears.
Go to sheet 2/2.
2
Sheet 1/2
Page 7
Sheet 2/2 (From sheet 1/2)
AKS006S
AKS174S
Press the [▲] or [▼] key to enter the
left most entry field of the IP address,
and then press the [#Enter] key.
Note
❒ The value moves by 10 if the [▲] or [▼] key is
kept pressed.
❒ When the [#Enter] key is pressed, the cursor moves
to the next field.
Press the [#Enter] key.
As the specified value is entered in each field, the
cursor moves to the next field.
Repeating the steps, specify values in
all fields, and then press the [#Enter]
key.
To return to the previous field, press the [Escape] key.
When using TCP/IP, specify “Subnet
Mask” and “Gateway Address” in the
same way as when specifying the IP
address.
After you have made all the settings,
press the [Online] key.
The specified settings are set and the initial printer
screen reappears.
Next, print the configuration page and check the specified settings.
Press the [Menu] key.
The [Menu] screen appears.
Press the [▲] or [▼] key to display
[List/Test Print], and then press the
[#Enter] key.
Press the [▲] or [▼] key to display
[Config. Page], and then press the
[#Enter] key.
The configuration page is printed.
Make sure that the IP address is correctly set.
Connecting the Printer via the Network
Be sure to install necessary network equipment, such
as a hub, before connecting the Ethernet cable to the
printer.
You can connect a 10BASE-T or 100BASE-TX cable
to the printer.
Important
❒ Ethernet cable is not supplied with this machine.
Select your cable according to the network environment.
Plug the Ethernet cable into the
Ethernet port on the rear of the
printer.
AKS184S
Connect the other end of the cable to
the printer's network, such as to a hub.
Check the LEDs on the Ethernet port
2
1
1 Indicator (green)
Remains green when the machine is properly connected to the network.
2. Indicator (red)
Turns red when 100 BASE-TX is operating. Turns
off when 10 BASE-T is operating.
3. [Job Reset] key
If you press this, the Network Interface Board is
initialized and rebooted.
Reference
❒ Before you can use the Network Interface Board,
you must set it up from the printer’s control panel.
For details, see “Specifying Settings on the Control Panel”.
3
AKR128S
Quick Install for Network
Follow the procedure below to install the printer driver,
User Guide, and SmartDeviceMonitor.
Important
❒ To install under Windows 2000/XP, Windows
Server 2003, Windows NT 4.0, you must log on as
a user with administrator rights.
Note
❒ The following explanation uses Windows 2000 as
an example. Procedures under other operating systems may differ.
❒ Screens vary according to the operating environ-
ment.
❒ For details about installing only the printer driver,
see “Preparing for Printing”, User Guide.
❒
For details about using the printer as a shared network printer, see “Sharing the Printer”, User Guide.
Start Windows, and insert the provided “Drivers, Manual & Utility”
CD-ROM into the CD-ROM drive.
Note
❒ Quit all other applications currently running.
❒ When you start Windows, the Add New Hardware
Wizard may appear. If this happens, click [Cancel]. Check again that the power is off, and then
proceed to step 2.
❒ After inserting the CD-ROM, the [Drivers, Manual
& Utility] dialog box appears. If it does not,
doubleclick the CD-ROM drive icon under [My
Computer] or [Explorer], and then double-click
[SETUP.EXE].
Click [Quick Install for Network].
Read the license agreement, click [I
accept the agreement.], and then click
[Next >].
The search for the network printer
starts. If the selection dialog box appears, select the model of printer you
want to use, and then click [Install].
Installation starts
Note
❒ If the [Software Installation] dialog box appears,
see “Notes on the Installation”.
❒ If the printer cannot be found and only “Printer
Port” appears in the printer selection dialog box,
either the printer’s IP address has not been specified or the computer and printer are not on the same
network segment. Before installing the software,
check the printer’s IP address and the network topology. Otherwise, select “Printer Port” in the dialog box, and then install the printer driver. If you
do this, SmartDeviceMonitor for Client will not
be simultaneously installed, so install it afterwards,
and then configure the port.
❒ If the message “Digital Signature Not Found” or
the [Found New Hardware Wizard] or [Hardware
Installation] dialog box appears, see “Notes on the
Installation”.
Confirm the installation result, and
then click [Finish].
The printer driver and User Guide are now installed.
If the message prompting you to restart the computer
appears, restart the computer.
Note
❒ When installation is complete, User Guide icon
appears on your desktop.
❒ Confirm the printer driver is correctly installed by
checking that the [Power] key of the printer is lit
and performing a test print. See "Test Print", Setup
Handbook.
Click [Exit].
Notes on the Installation
Note
❒ The following procedures are explained using
Windows XP dialog boxes. Procedures under other
operating systems may differ.
If the message "Digital Signature Not Found" or the
[Software Installation] or [Hardware Installation]
dialog box appears
1. Click [Yes] or [Continue Anyway] to continue the
installation.
If the [Found New Hardware Wizard] dialog box appears
1. Click [Install from a list or specific location (Advanced)], and then click [Next >].
2. Click [Include this location in the search], and then
click [Browse].
3. Browse to find "\XXXXX\ENGLISH\DISK1" on
the CD-ROM, and then click [OK]. Select the
folder appropriate for your operating system.
Important
❒ Be sure to clear the [Search remove media (floppy,
CD-ROM...)] check box.
Installing the Printer Driver
(USB)
Connecting the Printer via USB
Important
❒ Do not turn the printer on until you have read how
to do so.
Turn on the power of the computer,
and start Windows.
Remove the seal on the USB slot located on the rear of the printer, and
then insert the USB cable's hexagonal
(type B) plug firmly into the slot.
Note
❒ Insert the USB cable’s plug with the USB mark
facing down.
❒ Make sure that the USB cable is fully inserted.
❒ Make sure the USB cable is connected properly,
especially if the multi bypass tray is attached to
the printer, because the tray makes connecting the
cable difficult.
Insert the USB cable's rectangular
(type A) plug firmly into the
computer's USB slot.
Press the [Online] key.
The initial screen appears.
3
Page 8
Quick Install for USB
Follow the procedure below to install the printer driver
and User Guide.
Important
❒ Do not turn the printer on until you have read
how to do so.
AKS006S
❒ To install under Windows 2000/XP or Windows
Server 2003, you must log on as a user with administrator rights.
Note
❒ The following explanation uses Windows 98 as an
example. Procedures under other operating systems
may differ.
❒ Screens vary according to the operating environ-
ment.
❒ For details about driver installation under Windows
NT 4.0, see "Preparing for Printing", User Guide.
Start Windows, and insert the provided “Drivers, Manual & Utility”
CD-ROM into the CD-ROM drive.
Note
❒ Quit all other applications currently running.
❒ When you start Windows, the Add New Hardware
Wizard may appear. If this happens, click [Cancel]. Check again that the power is off, and then
proceed to step 2.
❒ After inserting the CD-ROM, the [Drivers, Manual
& Utility] dialog box appears. If it does not,
doubleclick the CD-ROM drive icon under [My
Computer] or [Explorer], and then double-click
[SETUP.EXE].
Click [Quick Install for USB].
Check again that the power of the
printer is off, and then click [Next >].
Check that the dialog box below appears.
Note
❒ If the [Software Installation] dialog box appears,
see "Notes on the Installation".
Make sure that the computer and
printer are properly connected, and
then press the [Power] key.
AKS008S
Installation starts.
Note
❒ If the connection to the computer was not con-
firmed, make the port settings again after installation is complete. See “The port connection is not
properly set.”, Setup Handbook.
❒ If the message “Digital Signature Not Found” or
the [Found New Hardware Wizard] or [Hardware
Installation] dialog box appears, see “Notes on the
Installation”.
Confirm the installation result, and
then click [Next>].
Install User Guide.
Click [Finish].
The printer driver and User Guide are now installed.
If the message prompting you to restart the computer
appears, restart the computer.
Note
❒ When installation is complete, User Guide icon
appears on your desktop.
❒ Confirm the printer driver is correctly installed by
checking that the [Power] key of the printer is lit
and performing a test print. See "Test Print", Setup
Handbook.
Click [Exit].
Notes on the Installation
If the message "Digital Signature Not Found" or the
[Software Installation] or [Hardware Installation]
dialog box appears
1. Click [Yes] or [Continue Anyway] to continue the
installation.
If the [Found New Hardware Wizard] dialog box appears
1. Click [Install from a list or specific location (Advanced)], and then click [Next >].
2. Click [Include this location in the search], and then
click [Browse].
3. Browse to find "\XXXXX\ENGLISH\DISK1" on
the CD-ROM, and then click [OK]. Select the
folder appropriate for your operating system.
Important
❒ Be sure to clear the [Search remove media (floppy,
CD-ROM...)] check box.
Read the license agreement, click [I accept the agreement.], and then click
[Next >].
Select whether or not to open the
Printer Status monitor automatically,
and then click [Next >].
Copyright © 2006
Printed in China
EN USA J010-6603
4
Page 9
Setup Handbook
Setup Handbook
Using User Guide
Troubleshooting
Model number: Aficio GX 3000
Printed in China
EN USA J007-6604
Read this manual carefully before you use this machine and keep it handy for future reference. For safe and correct use, be sure to read the Safety Information
in this manual before using the machine.
J0076604
Page 10

Introduction
This manual contains detailed instructions and notes on the operation and use of this machine. For your safety and
benefit, read this manual carefully before using the machine. Keep this manual in a handy place for quick reference.
Do not copy or print any item for which reproduction is prohibited by law.
Copying or printing the following items is generally prohibited by local law:
bank notes, revenue stamps, bonds, stock certificates, bank drafts, checks, passports, driver's licenses.
The preceding list is meant as a guide only and is not inclusive. We assume no responsibility for its completeness or accu-
racy. If you have any questions concerning the legality of copying or printing certain items, consult with your legal advisor.
Power Source
100-120V, 50/60Hz, 1A or more
Voltage must not fluctuate more than 10%.
Please be sure to connect the power cable to a power source as above.
Confirm that the wall outlet is near the machine and freely accessible, so that in event of an emergency, it can be un-
plugged easily.
Important
Contents of this manual are subject to change without prior notice. In no event will the company be liable for direct,
indirect, special, incidental, or consequential damages as a result of handling or operating the machine.
Two kinds of size notation are employed in this manual. With this machine refer to the inch version.
For good print quality, the supplier recommends that you use genuine print cartridges from the supplier.
The supplier shall not be responsible for any damage or expense that might result from the use of parts other than
genuine parts from the supplier with your office products.
Trademarks
Adobe and Acrobat are either registered trademarks or trademarks of Adobe Systems Incorporated in the United
States and/or other countries.
Pentium is a registered trademark of Intel Corporation.
Netscape is a registered trademark of Netscape Communication Corporation in the U.S. and/or other countries.
Macromedia and Flash are either registered trademarks or trademarks of Macromedia, Inc. in the U.S. and/or other
countries.
Microsoft, Windows, Windows NT are either registered trademarks or trademarks of Microsoft Corporation in the
U.S. and/or other countries.
Other product names used herein are for identification purposes only and might be trademarks of their respective com-
panies. We disclaim any and all rights to those marks.
• The product name of Windows
• The product name of Windows
• The product names of Windows
• The product names of Windows
• The product names of Windows Server
• The product names of Windows NT
Microsoft
Microsoft
Microsoft
Microsoft
Microsoft
Microsoft
Microsoft
Microsoft
Microsoft
Microsoft
®
Windows® 2000 Professional
®
Windows® 2000 Server
®
Windows® 2000 Advanced Server
®
Windows® XP Home Edition
®
Windows® XP Professional
®
Windows ServerTM 2003 Standard Edition
®
Windows ServerTM 2003 Enterprise Edition
®
Windows ServerTM 2003 Web Edition
®
Windows NT® Workstatio n 4 .0
®
Windows NT® Server 4.0
®
98 is Microsoft® Windows® 98.
®
Me is Microsoft® Windows® Millennium Edition (Windows Me).
®
2000 are as follows:
®
XP are as follows:
TM
2003 are as follows:
®
4.0 are as follows:
Some illustrations in this manual might be slightly different from the machine.
Certain options might not be available in some countries. For details, please contact your local dealer.
Note to users in the United States of America
Note:
This equipment has been tested and found to comply with the limits for a Class B digital device, pursuant to Part
15 of the FCC Rules. These limits are designed to provide reasonable protection against harmful interference in
a residential installation. This equipment generates, uses and can radiate radio frequency energy and, if not
installed and used in accordance with the instructions, may cause harmful interference to radio communications.
However, there is no guarantee that interference will not occur in a particular installation. If this equipment does
cause harmful interference to radio or television reception, which can be determined by turning the equipment
off and on, the user is encouraged to try to correct the interference by one more of the following measures:
• Reorient or relocate the receiving antenna.
• Increase the separation between the equipment and receiver.
• Connect the equipment into an outlet on a circuit different from that to which the receiver is connected.
• Consult the dealer or an experienced radio /TV technician for help.
Caution:
Changes or modifications not expressly approved by the party responsible for compliance could void the user's
authority to operate the equipment.
Declaration of Conformity
Product Name: Printer
Model Number: Aficio GX 3000
Responsible party: Ricoh Corporation
Address: 5 Dedrick Place, West Caldwell, NJ 07006
Telephone number: 973-882-2000
This device complies with Part 15 of the FCC Rules.
Operation is subject to the following two conditions:
1. This device may not cause harmful interference, and
2. this device must accept any interference received,
including interference that may cause undesired operation.
Note to users in Canada
Note:
This Class B digital apparatus complies with Canadian ICES-003.
Remarque concernant les utilisateurs au Canada
Avertissement:
Cet appareil numérique de la classe B est conforme à la norme NMB-003 du Canada.
Properly shielded and grounded cables (STP) and connectors must be used for connections to a host computer (and/
or peripheral) in order to meet FCC emission limits.
In accordance with IEC 60417, this machine uses the following symbols for the main power switch:
means STAND BY.
Copyright © 2005
Page 11

TABLE OF CONTENTS
Safety Information . . . . . . . . . . . . . . . . . . . . . . . . . . . . . . . . . . . . . . . . . . . . . . . . . . . . . . . . . . . . . . 2
Safety During Operation . . . . . . . . . . . . . . . . . . . . . . . . . . . . . . . . . . . . . . . . . . . . . . . . . . . . . . . . . . . . . . 2
. . . . . . . . . . . . . . . . . . . . . . . . . . . . . . . . . . . . . . . . . . . . . . . . . . . . . . . . . . . . . . . . . . . . . . . 3
Warn ing
Caution
. . . . . . . . . . . . . . . . . . . . . . . . . . . . . . . . . . . . . . . . . . . . . . . . . . . . . . . . . . . . . . . . . . . . . . . . 5
ENERGY STAR Program
Positions of WARNING and CAUTION labels
User's Notes
Manuals for This Printer . . . . . . . . . . . . . . . . . . . . . . . . . . . . . . . . . . . . . . . . . . . . . . . . . . . . . . . . . 10
How to Read This Manual . . . . . . . . . . . . . . . . . . . . . . . . . . . . . . . . . . . . . . . . . . . . . . . . . . . . . . . 11
Symbols . . . . . . . . . . . . . . . . . . . . . . . . . . . . . . . . . . . . . . . . . . . . . . . . . . . . . . . . . . . . . . . . . . . . . . . . 11
. . . . . . . . . . . . . . . . . . . . . . . . . . . . . . . . . . . . . . . . . . . . . . . . . . . . . . . . . . . . . . . . . . . . . . . . . . 11
Keys
1. Using User Guide
Installing User Guide . . . . . . . . . . . . . . . . . . . . . . . . . . . . . . . . . . . . . . . . . . . . . . . . . . . . . . . . . . . 13
How to Use User Guide . . . . . . . . . . . . . . . . . . . . . . . . . . . . . . . . . . . . . . . . . . . . . . . . . . . . . . . . . 16
Opening User Guide . . . . . . . . . . . . . . . . . . . . . . . . . . . . . . . . . . . . . . . . . . . . . . . . . . . . . . . . . . . . . . . . 17
Opening from the Icon
Opening from the [Start] Menu
Opening from the Printer Driver
Opening from the CD-ROM
Opening from Printer Status Error Messages
2. Troubleshooting
Software Cannot Be Installed . . . . . . . . . . . . . . . . . . . . . . . . . . . . . . . . . . . . . . . . . . . . . . . . . . . . . 21
Confirming Installation . . . . . . . . . . . . . . . . . . . . . . . . . . . . . . . . . . . . . . . . . . . . . . . . . . . . . . . . . . . . . . . 21
Checking Your Computer Environment
Printer Driver Cannot Be Installed
USB Connection is not Automatically Detected
If Test Print Fails . . . . . . . . . . . . . . . . . . . . . . . . . . . . . . . . . . . . . . . . . . . . . . . . . . . . . . . . . . . . . . . 25
Uninstalling . . . . . . . . . . . . . . . . . . . . . . . . . . . . . . . . . . . . . . . . . . . . . . . . . . . . . . . . . . . . . . . . . . 26
Uninstalling the Printer Driver . . . . . . . . . . . . . . . . . . . . . . . . . . . . . . . . . . . . . . . . . . . . . . . . . . . . . . . . . . . 26
Deleting Devices
Uninstalling User Guide
. . . . . . . . . . . . . . . . . . . . . . . . . . . . . . . . . . . . . . . . . . . . . . . . . . . . . . . . . . . . . . 7
. . . . . . . . . . . . . . . . . . . . . . . . . . . . . . . . . . . . . . . . . . . . . . . . 7
. . . . . . . . . . . . . . . . . . . . . . . . . . . . . . . . . . . . . . . . . . . . . . . . . . . . . . . . . . . . . . . . . . . . . 8
. . . . . . . . . . . . . . . . . . . . . . . . . . . . . . . . . . . . . . . . . . . . . . . . . . . . . . . . . . 17
. . . . . . . . . . . . . . . . . . . . . . . . . . . . . . . . . . . . . . . . . . . . . . . . . . . . . 17
. . . . . . . . . . . . . . . . . . . . . . . . . . . . . . . . . . . . . . . . . . . . . . . . . . . . . 18
. . . . . . . . . . . . . . . . . . . . . . . . . . . . . . . . . . . . . . . . . . . . . . . . . . . . . . . 18
. . . . . . . . . . . . . . . . . . . . . . . . . . . . . . . . . . . . . . . . . . . . . 19
. . . . . . . . . . . . . . . . . . . . . . . . . . . . . . . . . . . . . . . . . . . . . . . . . . . . . 22
. . . . . . . . . . . . . . . . . . . . . . . . . . . . . . . . . . . . . . . . . . . . . . . . . . . . . . . . 24
. . . . . . . . . . . . . . . . . . . . . . . . . . . . . . . . . . . . . . . . . . . . . . . . 24
. . . . . . . . . . . . . . . . . . . . . . . . . . . . . . . . . . . . . . . . . . . . . . . . . . . . . . . . . . . . . . . . . . 28
. . . . . . . . . . . . . . . . . . . . . . . . . . . . . . . . . . . . . . . . . . . . . . . . . . . . . . . . . . . . . . 29
INDEX . . . . . . . . . . . . . . . . . . . . . . . . . . . . . . . . . . . . . . . . . . . . . . . . . . . . . . . . . . . . . . . . . . . . 31
1
Page 12
Safety Information
When using this machine, the following safety precautions should always be followed.
Safety During Operation
In this manual, the following important symbols are used:
Indicates a potentially hazardous situation which, if instructions are not followed, could result in
death or serious injury.
Indicates a potentially hazardous situation which, if instructions are not followed, may result in
minor or moderate injury or damage to property.
2
Page 13

Warning
z
Only connect the machine to the power source described on the inside
front cover of this manual.
z
Avoid multi-wiring.
z
Do not damage, break or make any modifications to the power cord. Do
not place heavy objects on it. Do not pull it hard nor bend it more than
necessary. These actions could cause an electric shock or fire.
z
Do not plug or unplug the power cord with your hands wet. Otherwise,
an electric shock might occur.
z
Connect the power cord directly into a wall outlet and never use an
extension cord.
z
To avoid hazardous electric shock, do not remove any covers or screws
other than those specified in this manual. When the machine needs to be
checked, adjusted, or repaired, contact your service representative.
z
Do not take apart or attempt any modifications to this machine. There is
a risk of fire, electric shock, explosion or loss of sight.
z
If by any chance this machine falls over or a breakage occurs (e.g. the
cover), turn off the main switch, unplug the power cable and contact
your service representative. If you continue to use the machine in this
state it could result in fire or electric shock.
z
If metal, liquid or foreign matter falls into the machine, turn off the operation and main power switches, and unplug the main power cord. Contact your service representative. Do not keep using the machine with a
fault or defect.
z
Do not put any metal objects or containers holding water (e.g. vases,
flowerpots, glasses) on the machine. If the contents fall inside the
machine, a fire or electric shock could occur.
z
Keep the machine away from flammable liquids, gases, and aerosols. A
fire or an electric shock might occur.
z
Disposal can take place at our authorized dealer.
3
Page 14

z
Keep the machine away from humidity and dust. Otherwise a fire or an
electric shock might occur.
z
If you use the machine in a confined space, confirm that there is a continuous flow of air.
z
Make sure the wall outlet is near the machine and freely accessible so
that in event of an emergency it can be unplugged easily.
4
Page 15

Caution
z
Keep the machine away from humidity and dust. Otherwise a fire or an
electric shock might occur.
z
Do not place the machine on an unstable or tilted surface. If it topples
over, an injury might occur.
z
If you use the machine in a confined space, make sure there is a continuous air turnover.
z
Unplug the power cord from the wall outlet before you move the
machine. While moving the machine, you should take care that the
power cord will not be damaged under the machine.
z
When the machine will not be used for a long time, unplug the power
code.
z
When you disconnect the power plug from the wall outlet, always pull
the plug (not the cable).
z
Our products are engineered to meet high standards of quality and functionality, and we recommend that you use only the expendable supplies
available at an autohrized dealer.
z
Deliver to waste product collection areas. Do not dispose of via domestic
refuse collection.
z
The machine weighs approximately 14.5 kg (32.0 lb.).
z
When moving the machine, hold the machine by the bottom below the
two indentations. Lift the machine slowly in order to avoid straining your
body. Lifting the machine without sufficient strength or assistance or handling it roughly and dropping it could cause an injury.
z
Keep the ink collector unit out of reach of children.
z
When you replace the ink collector unit, be careful not to get any ink on
your clothes as it may not wash off easily.
5
Page 16
z
Do not eat or swallow ink.
z
If ink is ingested, induce vomiting by drinking a strong saline solution.
Consult a doctor immediately.
z
If your skin comes into contact with ink, wash the affected area thoroughly with soap and water.
z
If ink comes into contact with your eyes, rinse immediately in running
water. For other symptoms, consult a doctor.
z
Avoid getting ink on your clothes or skin when removing a paper jam or
replacing ink. If your skin comes into contact with ink, wash the affected
area thoroughly with soap and water.
z
If ink gets on your clothing, wash with cold water. Hot water will set the
ink into the fabric and may make removing the stain impossible.
z
Keep the ink or ink container out of reach of children.
z
Be careful not to get ink on your clothes when replacing an ink container. Ink stains on clothes are hard to remove.
z
Rating voltage of the connector for option: Max. DC 37 V.
z
When you use this machine for a long time in a confined space without good ventilation, you
may detect an odd smell. To keep the workplace comfortable, we recommend that you keep it
well ventilated.
6
Page 17
ENERGY STAR Program
As an ENERGY STAR Partner, we have determined that this machine model meets the ENERGY
STAR Guidelines for energy efficiency.
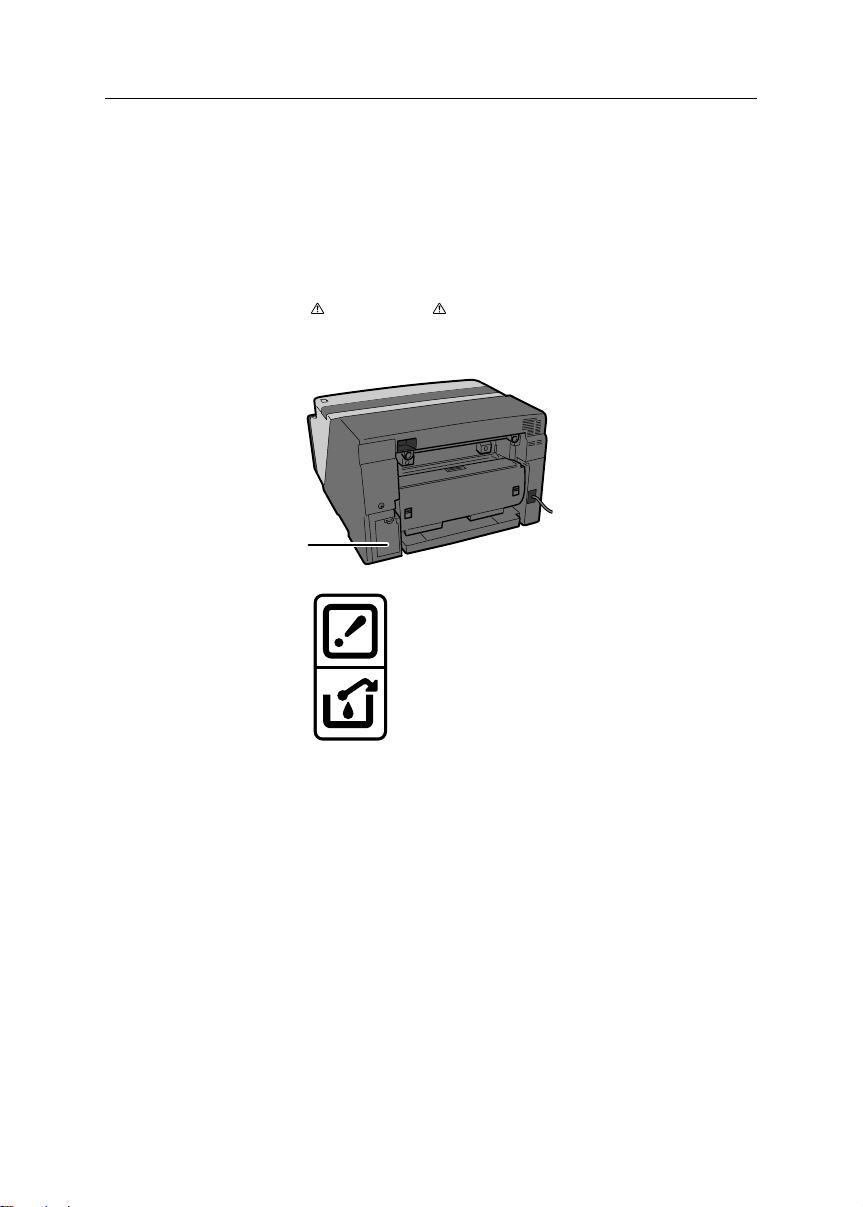
Positions of WARNING and CAUTION labels
This machine has labels for WARNING and CAUTION at the positions shown below. For
safety, please follow the instructions and handle the machine as indicated.
1
1
AKR181S
1 The ink collector unit for storing ink is installed in the printer. Be careful not to spill the ink.
7
Page 18

User's Notes
z
High temperatures inside the printer can cause a breakdown. Do not lean anything against the
vent or block it in any way.
z
Warm air from the vent is normal and not a cause for concern.
z
Do not leave the top cover open. Doing so could cause an injury.
z
During printing, do not move the printer or open its covers.
z
During printing, do not pull out a paper tray. Printing will stop and the paper will jam.
z
Do not touch the feed belt.
z
Take care not to let paper clips and other foreign objects fall inside the printer.
z
During printing, do not turn off the power or unplug the power cord from the wall outlet.
z
During printing, do not subject the printer to external shock such as that caused by tapping paper
on it.
z
When not using the printer, turn off the power.
z
Do not place more than 5 kg (11.1 lb.) on the printer. (The outer surface of the printer can tolerate
up to 20 kg (44.1 lb.).)
z
This printer has a nominal operational life of 5 years if used normally for 8 hours a day to produce up to 2,500 A4 prints a month. Exceeding these limits may reduce the operational life. The
operational life also depends on the environment in which the printer is used.
z
”Total Counter” displays the number of pages printed. Use "Total Counter" to estimate the
number of pages that can be printed within the printer's remaining operational life. The printer's
operational life is calculated based on the number of pages that it can print on plain paper in
[Speed priority] mode.
z
This printer is designed to have an operational life of 5 years or be good for 150,000 pages.
z
Depending on your printing document, the ink collector unit may fill up sooner than normal.
An "Ink Collector almost full" message appears shortly before the ink collector unit is full. Contact
your service representative as soon as possible for a replacement ink collector unit (charge
incurred).
z
The printing yields of print cartridges are as follows: (The yields of the print cartridges packaged
with the printer are lower than the yields described below.)
z
Black: approximately 1500 A4/Letter sheets (5% chart)
z
Cyan: approximately 1000 A4/Letter sheets (5% chart)
z
Magenta: approximately 1000 A4/Letter sheets (5% chart)
z
Yellow: approximately 1000 A4/Letter sheets (5% chart)
Printing yields vary depending on page content, paper type, paper size, and environmental conditions. Also, cartridges may need to be changed before the yields above have been reached
due to deterioration over time. To maintain print quality, cartridges should be opened before their
expiration date and used within six months of being opened.
8
Page 19

z
Ink can remain inside used print cartridges.
z
Color ink may be used even if you print all-black text or if you specify black and white printing. It
may also be used for print head cleaning and refreshing, which are done to maintain printer performance.
z
Print cartridges and supplies comply with the manufacturer's safety specifications. To ensure
safety and reliability, use genuine print cartridges and supplies.
z
Black and white printing also consumes color ink.
z
Printing stops if one of the print cartridges becomes empty. If a cartridge containing a color ink
such as cyan, yellow, or magenta becomes empty, you cannot print, even in black/white.
z
If you print a large number of pages in a day, for instance, hundreds of pages, the nozzles of the
print-heads may be clogged the next day. If this happens, clean the print-heads.
z
This printer performs regular automatic maintenance, after and during printing, to ensure consistent print quality. Maintenance is also performed when printing begins after a period of disuse.
9
Page 20

Manuals for This Printer
This printer is provided with two manuals.
Quick Installation Guide
This manual describes procedures from unpacking the printer to loading paper.
Setup Handbook (this manual)
Topics such as printer installation, connecting to a computer, and basic print operations are
explained.
User Guide (CD-ROM)
This is included on the provided "Driver, Manual & Utility" CD-ROM. Topics such as advanced
features, troubleshooting when printing does not start or is not performed as expected, dealing
with paper jams, and information about paper are explained. We recommend that you install this
manual on computers for your convenience.
z
Depending on the operating system and version used, actual procedures may differ from the procedures explained in these manuals.
10
Page 21

How to Read This Manual
Symbols
The following set of symbols is used in this manual.
This symbol indicates a potentially hazardous situation that might result in death or serious injury
when you misuse the machine without following the instructions under this symbol. Be sure to read
the instructions, all of which are described in the Safety Information section.
This symbol indicates a potentially hazardous situation that might result in minor or moderate injury
or property damage that does not involve personal injury when you misuse the machine without following the instructions under this symbol. Be sure to read the instructions, all of which are described
in the Safety Information section.
* The statements above are notes for your safety.
If this instruction is not followed, paper might be misfed, originals might be damaged, or data might
be lost. Be sure to read this.
This symbol indicates precautions for operation, or actions to take after abnormal operation.
This symbol indicates a reference.
Keys
[
]
Indicates the name of keys and buttons.
11
Page 22

12
Page 23
1. Using User Guide
This section explains how to install and use the User Guide.
Installing User Guide
Follow the procedure below to install User Guide only.
If you installed the software when performing [Quick Install for USB] or [Quick Install for Network],
there is no need to install it again here.
The following explanation uses Windows 2000 as an example. Procedures under other operating
systems may differ.
Screens vary according to the operating environment.
1 Start Windows, and insert the provided "Driver, Manual & Utility" CD-ROM into the CD-ROM drive.
Quit all other applications currently running.
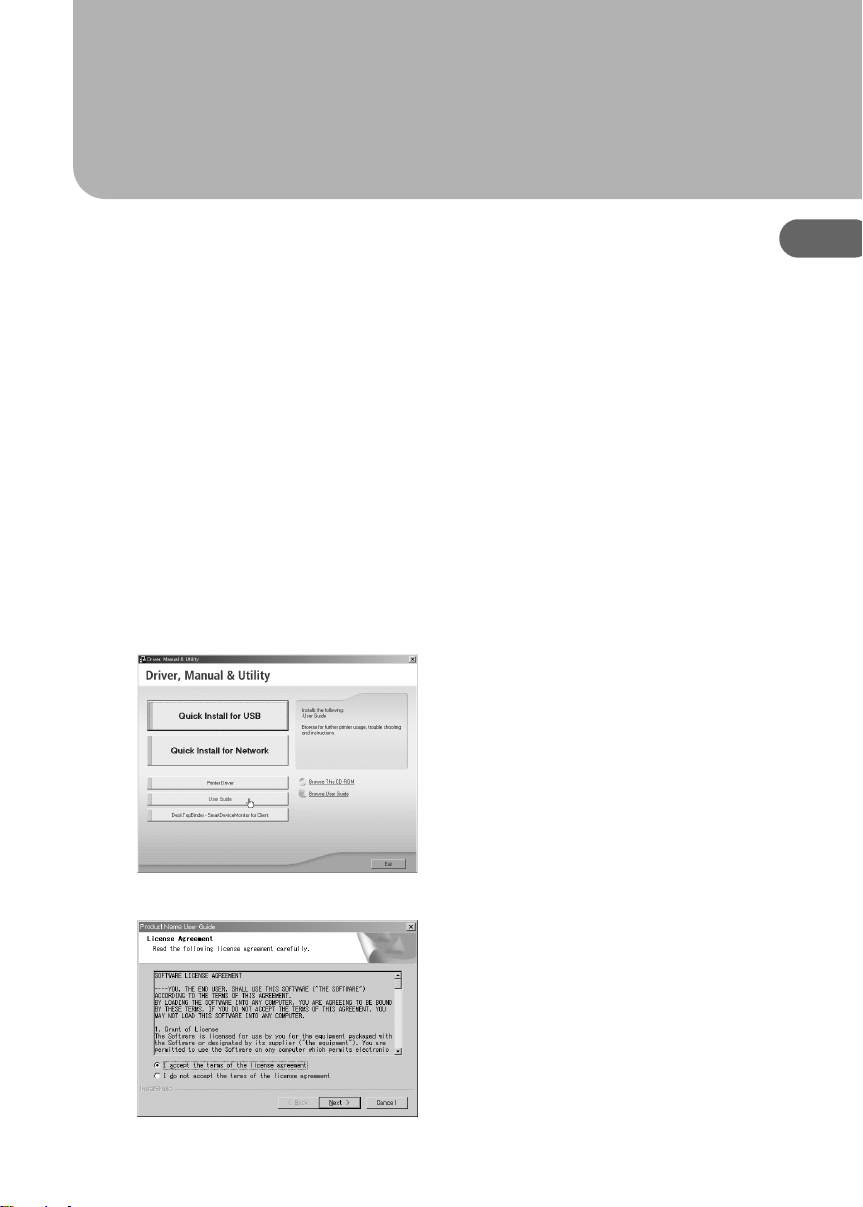
After inserting the CD-ROM, the [Driver, Manual & Utility] dialog box appears. If it does not, doubleclick the CD-ROM drive icon under [My Computer] or [Explorer], and then double-click [SETUP.EXE].
2 Click [User Guide].
1
Read the license agreement, click [I accept the terms of the license agreement], and then click [Next > ]
3
.
13
Page 24
1. Using User Guide
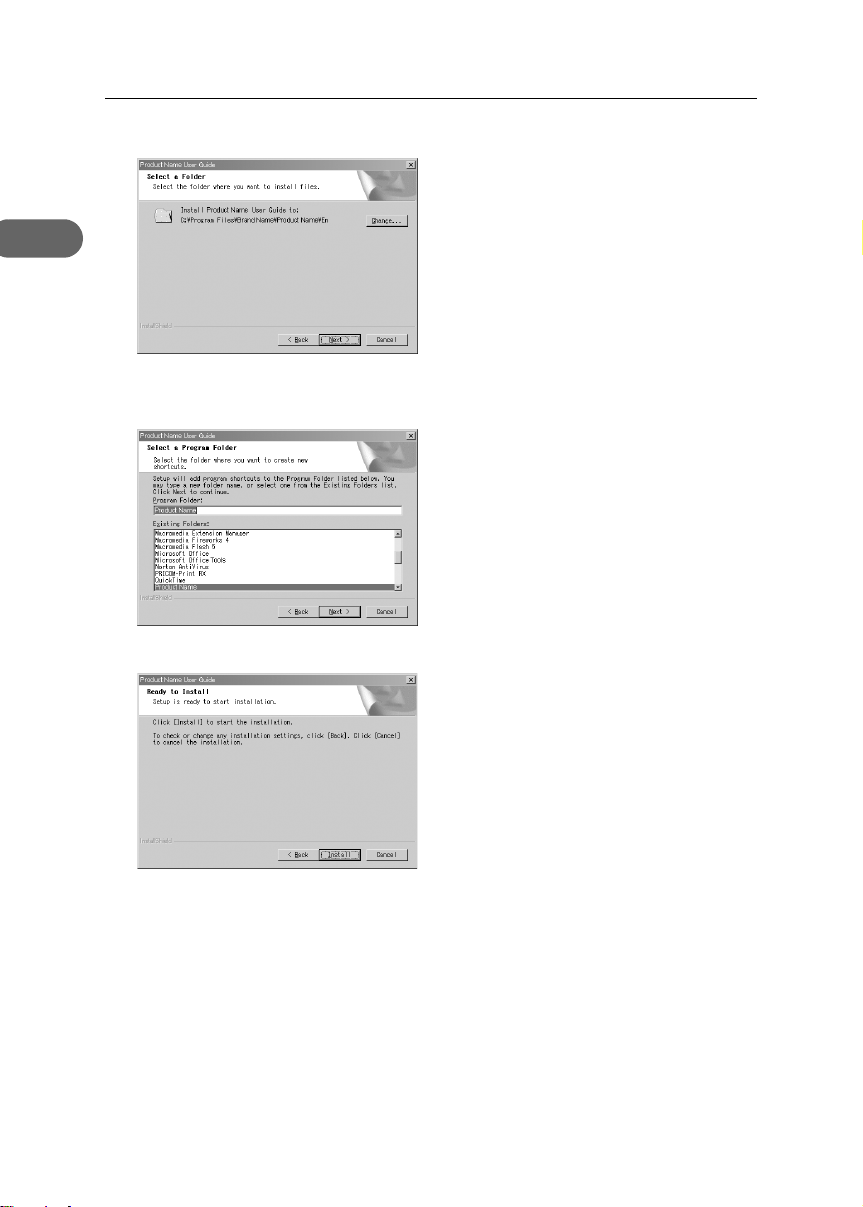
4 Confirm the location in which you want to install User Guide, and then click [Next >].
1
To change the installation location, click [Change...].
5 Confirm the program folder in which you want to install User Guide, and then click [Next >].
6 Click [Install].
Installation starts.
During installation, a message asking whether you want to create a desktop shortcut icon is displayed. Click [Yes] or [No] as appropriate.
14
Page 25

7 When installation is complete, click [Finish].
z
To use the printer, the printer driver must be installed. See “Installing the Printer Driver (USB)”,
User Guide.
Installing User Guide
1
15
Page 26
1. Using User Guide
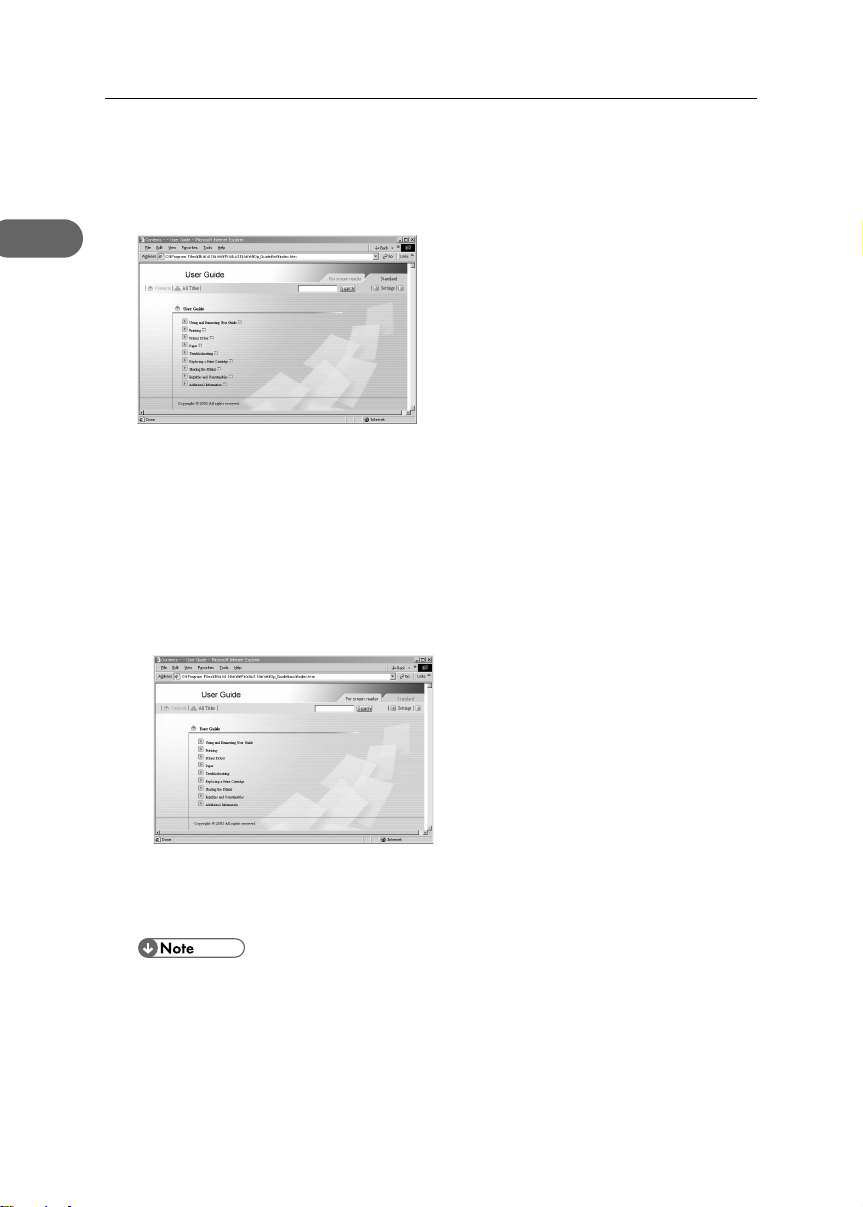
How to Use User Guide
User Guide (on the provided CD-ROM) includes detailed information about this printer and a troubleshooting guide.
1
Use one of the browsers below to display User Guide.
z
Microsoft Internet Explorer Version 4.01 SP2 or later
z
Netscape 6.2 or later
To view the video files of User Guide, Macromedia Flash Player 5 plug-in is required.
When using screen reader software or when you cannot install Macromedia Flash Player plugins
When using screen reader software to listen to User Guide or when video files cannot be displayed because Flash plug-ins cannot be installed, click [For screen reader] to display User
Guide version optimized for screen reader software.
Use the button in the upper right window to change the screen.
When using a non-recommended browser
When using Internet Explorer 3.02 or Netscape Navigator 4.05 or later versions, a simplified
User Guide is displayed.
z
If the simplified User Guide does not automatically appear, in the "Driver, Manual & Utility" CDROM's [unv] folder, open index.htm.
16
Page 27
Opening User Guide
This section explains how to open User Guide.
How to Use User Guide
Opening from the Icon
This section explains how to open User Guide from the desktop icon.
1 Double-click the [User Guide] icon on your desktop.
The browser opens, and then User Guide appears.
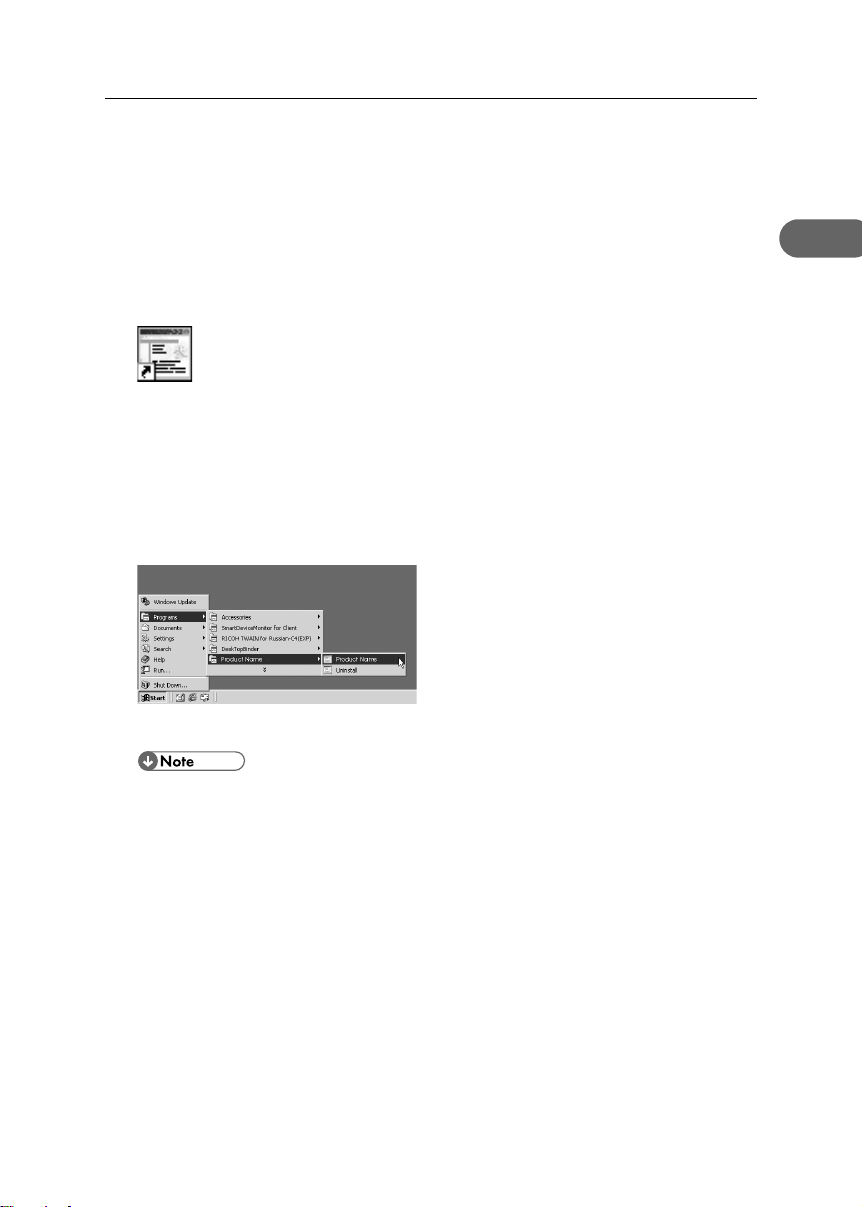
Opening from the [Start] Menu
This section explains how to open User Guide from the Windows Start menu.
1 On the [Start] menu, point to [Programs] (Windows XP: [All Programs]), point to [Product Name],
and then click [Product Name User Guide].
The browser opens, and then User Guide appears.
z
Depending on the settings made during installation, menu folder names may differ.
1
17
Page 28
1. Using User Guide
Opening from the Printer Driver
This section explains how to open User Guide from the printer driver.
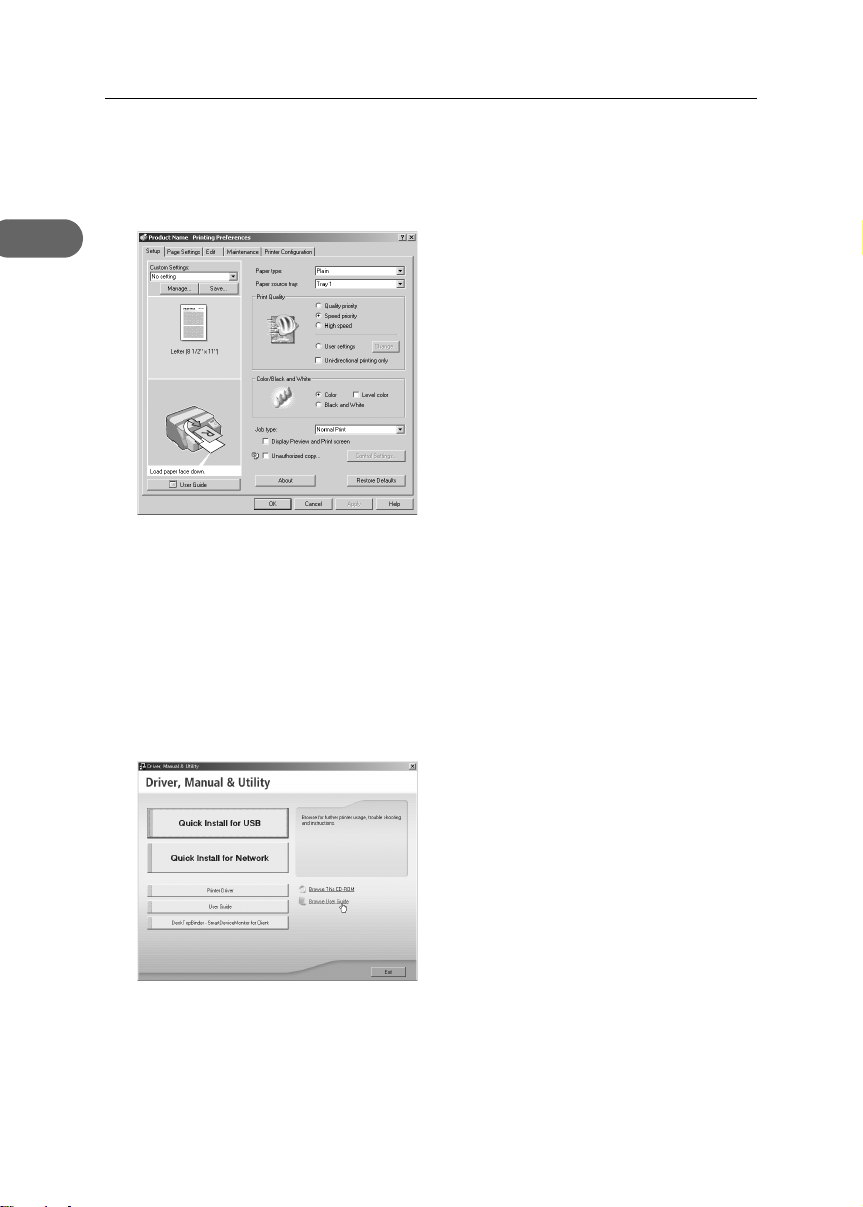
1 In the printer properties dialog box, click [User Guide] on the [Setup] tab.
1
The browser opens, and then User Guide appears.
Opening from the CD-ROM
This section explains how to open User Guide from the supplied CD-ROM.
1 Start Windows, and insert the provided "Driver, Manual & Utility" CD-ROM into the CD-ROM drive.
After inserting the CD-ROM, the [Driver, Manual & Utility] dialog box appears. If it does not, doubleclick the CD-ROM drive icon under [My Computer] or [Explorer], and then double-click [SETUP.EXE].
2 Click [Browse User Guide].
The browser opens, and then User Guide appears.
18
Page 29
Opening from Printer Status Error Messages
This section explains how to open User Guide when Printer Status error message is dispayed.
1 The Status monitor displays an error message if a problem occurs.
2 Click [User Guide].
The browser opens, and then User Guide appears.
Open User Guide from here if a problem occurs while using the printer.
How to Use User Guide
1
19
Page 30

1
1. Using User Guide
20
Page 31

2. Troubleshooting
This section explains how to troubleshoot machine setup problems.
Software Cannot Be Installed
This section explains how to troubleshoot software installation problems under different environments.
Confirming Installation
Check whether the software has been installed.
Checking icons When the printer driver is properly installed, the icon
of the printer appears in the [Printers] folder.
When installation of User Guide is complete, User
Guide icon appears on your desktop.
If the icons do not appear, the software is not properly installed. In this case, you must repeat the installation procedure. See "Quick Install for USB", Quick
Installation Guide.
Checking the software You can install SmartDeviceMonitor for Client by
clicking "Quick Install for Network" or "DeskTopBinder - SmartDeviceMonitor for Client". If SmartDeviceMonitor for Client is installed, the
SmartDeviceMonitor for Client icon appears in the
[SmartDeviceMonitor for Client] folder. To open the
[SmartDeviceMonitor for Client] folder, select [Programs] on the [Start] menu, then select [DeskTopBinder], and then select [SmartDeviceMonitor for
Client].
Checking ports In the printer properties dialog box, check that USB
connection or network printer is selected as a port.
To check the connection, perform a test print. If the
test print is not printed, see p.25 "If Test Print Fails".
2
21
Page 32

2. Troubleshooting
Checking Your Computer Environment
Check the system requirements for installing the software.
Quick Install for USB
The CD-ROM may not be inserted properly. Check that the "Driver, Manual & Utility"
2
The power cord or USB cable may not be properly
connected.
The operating system is incompatible.
There is insufficient hard disk space.
Other applications are not closed. When installing software, quit all other applications.
Windows made USB settings automatically. Open Windows' Device Manager, and then, under
The printer is turned on before installation. Switch the printer off and then on, and then try Quick
Windows NT 4.0 is running.
The USB connection does not work. Switch the printer off, unplug the USB cable from the
CD-ROM is inserted properly. Check also that it is not
damaged and the CD-ROM drive is working properly.
Check that the power cord and USB cable are properly connected and not damaged.
Check that the computer's operating system is fully
compatible with this printer. See "Checking the Computer and Installation Area", Quick Installation Guide.
Installation may be disrupted if other applications
are open. Also, quit any anti-virus applications that
are running.
[Universal Serial Bus controllers], remove any conflicting devices. Conflicting devices have a yellow [!]
or [?] icon by them. Take care not to accidentally
remove required devices. For details, see p.28
"Deleting Devices".
Install for USB again.
z
Windows NT 4.0 do not support USB connection
with the printer. Connect the printer via a network
in this case.
z
[Quick Install for USB] is unavailable. See
“Installing the Printer Driver (USB)”, User Guide.
z
Configure the printer as a shared network printer.
See “Installing the Printer Driver”, User Guide.
z
For details about network printer settings, see
“Sharing the Printer”, User Guide.
printer, launch "Quick Install for USB" again, and
then switch the printer on when the dialog box confirming printer driver installation appears. If this does
not solve the problem, press the [Menu] key on the
control panel, change "USB Setting" in [Host Interface] from [Auto] to [Full Speed], uninstall the printer
driver, delete the device, and then launch "Quick
Install for USB" again.
22
Page 33

Software Cannot Be Installed
An error occurs during software installation. If an error occurs because the printer is detected as
an unidentified device, follow the instructions under
"The USB connection does not work.". If this does not
solve the problem, do the following: First reboot Windows. Then, on the [Start] menu, select [Settings],
and then select [Control Panel]. Double-click the System icon, and then on the [Hardware] tab, click
[Device Manager]. Under [Other Devices], select the
printer, and then open its properties dialog box. On
the [General] tab, click [Reinstall Driver] to reinstall
the printer driver.
Quick Install for Network
The CD-ROM may not be inserted properly. Check that the "Driver, Manual & Utility"
CD-ROM is inserted properly. Check also that it is not
damaged and the CD-ROM drive is working properly.
The power cord or Ethernet cable may not be properly connected.
The operating system is incompatible.
There is insufficient hard disk space.
Other applications are not closed. When installing software, quit all other applications.
The printer's IP address has not been specified.
The computer and printer are not on the same network segment.
Check that the power cord and Ethernet cable are
properly connected and not damaged.
Check that the computer's operating system is fully
compatible with this printer. See "Checking the Computer and Installation Area", Quick Installation
Guide.
Installation may be disrupted if other applications
are open. Also, quit any anti-virus applications that
are running.
If the printer cannot be found and only "Printer Port"
appears in the printer selection dialog box, either the
printer's IP address has not been specified or the
computer and printer are not on the same network
segment. Before installing the software, check the
printer's IP address and the network topology. Otherwise, select "Printer Port" in the dialog box, and then
install the printer driver. If you do this, SmartDeviceMonitor for Client will not be simultaneously
installed, so install it afterwards, and then configure
the port.
2
23
Page 34

2. Troubleshooting
Printer Driver Cannot Be Installed
This section explains how to troubleshoot printer driver installation problems.
The printer driver installer does not start.
z
An error occurs during installation.
2
z
z
z
USB Connection is not Automatically Detected
If the USB connection is not automatically detected, do the following:
1 Delete the printer driver.
2 Delete the device.
3 Run [Quick Install for USB] again.
If the [Driver, Manual & Utility] screen does not
appear even when you double-click the
[SETUP.EXE] icon, or if an error occurs during
installation, access the CD-ROM drive from [My
Computer] or [Explorer]. Double-click the [RDISETUP.EXE] icon, and then install the printer driver
by following the instructions that appear on the
screen.
An error occurs if the path to the location of the
stored data is too long. To install a printer driver
downloaded from a Website or copied from a
CD-ROM, save the printer driver directly on the
hard disk, and then install it.
On the [Start] menu, point to [Settings], and then
click [Printers]. In the [Printers] window, install the
printer driver.
For details, see Windows Help.
z
For details about deleting the printer driver, see p.26 "Uninstalling the Printer Driver".
z
For details about deleting the device, see p.28 "Deleting Devices".
z
For details about [Quick Install for USB], see “Quick Install for USB”, Quick Installation Guide.
If these steps do not solve the problem, contact your sales or service representative.
24
Page 35

If Test Print Fails
This section explains how to troubleshoot Test Print problems.
If Test Print Fails
The power cord or USB cable or Ethernet cable is
not properly connected.
The port connection is not properly set. 1) On the [Start] menu, point to [Settings], and then
Ink feed is incomplete. Ink begins automatically feeding into the print-heads
The printer is offline. Check if the printer’s on-line indicator is lit. If the
A printer error has occurred. Use the control panel to check if a printer error has
Check that the power cord and USB cable, Ehernet
cable are properly connected.
click [Printers].
2) Click the icon of the printer, and then click [Properties] on the [File] menu.
3) Click the [Details] tab (Windows 2000/XP, Windows Server 2003, Windows NT 4.0: the [Ports]
tab) , and then check the printer port.
z
Select USB or network printer in the list
when the selected port connection is something other than USB or network printer.
z
To connect via USB when USB does not
appear in the list, you must re-install the
printer driver. See p.24 "USB Connection is
not Automatically Detected".
when the power of the printer is first turned on or
when a cartridge is replaced.
Wait until ink feed is complete at which point the
[Power] key stops blinking and remains lit.
printer is offline, press the [Online] key on the control
panel to switch the printer to the on-line mode.
occurred. If it has, try printing again.
If you cannot solve the problem, contact sales or service representative.
2
z
If the Status monitor displays an error message, see "Status Monitor Errors", User Guide.
25
Page 36

2. Troubleshooting
Uninstalling
If software was installed incorrectly or incompletely, uninstall and then reinstall it.
z
Before uninstalling software or deleting devices, turn off any other printers connected to your
computer via USB, or disconnect the USB cable to the printers.
2
z
The following explanation uses Windows 98 as an example. Procedures under other operating
systems may differ.
z
Screens vary according to the operating environment.
z
To reinstall the software, restart Windows.
z
When reinstalling the software, see Quick Installation Guide.
Uninstalling the Printer Driver
To update the printer driver, uninstall the old printer driver before installing the new one.
z
The following explanation uses Windows 98 as an example. Procedures under other operating systems may differ.
The Status monitor installed with the current printer driver is uninstalled when the current printer
driver is uninstalled.
Registered custom settings are also deleted. To continue using registered custom settings, save them
as custom settings files before uninstalling.
1 Press the printer's [Power] key to turn the printer off.
AKS008S
2 On the [Start] menu, point to [Settings], and then click [Printers].
26
Page 37

Uninstalling
3 Click the icon of the printer, and then click [Delete] on the [File] menu.
A confirmation message appears.
4 Click [Yes].
The printer driver is uninstalled.
5 Double-click [My computer].
6 On the [View] menu, click [Folder Options...].
7 Click the [View] tab.
8 In the [Advanced Settings:] box, click [Do not show hidden files], and then deselect the [Display the
full path in title bar] check box.
2
9 Click [OK].
10 On the [Start] menu, point to [Find], and then click [Files or Folders...].
11 Click the [Name & Location] tab, and then enter "RCD6D19X.inf" in the [Named:] field.
12 In the [Look in:] box, select the hard disk on which Windows is installed, and then click [Find Now].
13 Right-click the file displayed as the search result, and then click [Delete...].
The INF file is uninstalled.
27
Page 38

2. Troubleshooting
14 After uninstalling the printer driver, restart Windows.
z
For details about storing registered custom settings, see “Saving a Registered Custom Setting in a
File”, User Guide.
z
For details about updating the printer driver, contact your sales or service representative.
2
Deleting Devices
If Windows automatically establishes a USB connection because of an unauthorized device, you
can delete the device and any others like it. Be sure not to delete necessary devices. If USB connection is established normally, you do not need to perform this procedure.
z
The following explanation uses Windows 98 as an example. Procedures under other operating systems may differ.
1 Press the printer's [Power] key to turn the printer on.
AKS008S
2 On the [Start] menu, point to [Settings], and then click [Control Panel].
3 Double-click [System].
4 Click the [Device Manager] tab.
28
Page 39

5 Click [GJ USB Printing Support] or [Product Name].
6 Click [Remove].
A confirmation message appears.
7 Click [OK].
8 Click [Close].
Uninstalling User Guide
Uninstalling
2
If User Guide is installed incorrectly or incompletely, uninstall and then reinstall it.
1 Press the printer's [Power] key to turn the printer off.
AKS008S
2 Open [My Computer], and then open [Control Panel].
29
Page 40

2. Troubleshooting
3 Double-click [Add/Remove Programs].
2
4 Select the installed [Product Name User Guide], and then click [Add/Remove...].
5 Follow the instructions that appear.
30
Page 41

INDEX
C
Checking Your Computer Environment . . . . 22
Confirming Installation . . . . . . . . . . . . . . . . . . . 21
D
Deleting Devices . . . . . . . . . . . . . . . . . . . . . . . . 28
E
ENERGY STAR Program . . . . . . . . . . . . . . . . . . . 7
H
How to Read This Manual . . . . . . . . . . . . . . . 11
How to Use User Guide . . . . . . . . . . . . . . . . . 16
I
If Test Print Fails . . . . . . . . . . . . . . . . . . . . . . . . . 25
Installing User Guide . . . . . . . . . . . . . . . . . . . . 13
K
Keys . . . . . . . . . . . . . . . . . . . . . . . . . . . . . . . . . . 11
M
Manuals for This Printer . . . . . . . . . . . . . . . . . . 10
O
Opening from Printer Status Error Messages
Opening from the CD-ROM . . . . . . . . . . . . . . 18
Opening from the Icon . . . . . . . . . . . . . . . . . . 17
Opening from the Printer Driver . . . . . . . . . . 18
Opening from the Start Menu . . . . . . . . . . . . 17
Opening User Guide . . . . . . . . . . . . . . . . . . . . 17
. . 19
P
S
Software Cannot Be Installed . . . . . . . . . . . . . 21
Symbols . . . . . . . . . . . . . . . . . . . . . . . . . . . . . . . . 11
T
Troubleshooting . . . . . . . . . . . . . . . . . . . . . . . . . 21
U
Uninstalling . . . . . . . . . . . . . . . . . . . . . . . . . . . . . 26
Uninstalling the Printer Driver . . . . . . . . . . . . . 26
Uninstalling User Guide . . . . . . . . . . . . . . . . . . 29
USB Connection is not Automatically Detected
User's Notes . . . . . . . . . . . . . . . . . . . . . . . . . . . . . 8
Using User Guide . . . . . . . . . . . . . . . . . . . . . . . 13
. . 24
Positions of WARNING and CAUTION labels
Printer Driver Cannot Be Installed . . . . . . . . . 24
. . 7
Q
Quick Install for Network . . . . . . . . . . . . . . . . 22
Quick Install for USB . . . . . . . . . . . . . . . . . . . . 22
31
Page 42

MEMO
32
EN USA J007-6604
Page 43

Setup Handbook
Setup Handbook
Using User Guide
Troubleshooting
Model number: GX 3050N/GX 5050N
Printed in China
EN USA J010-6604
Read this manual carefully before you use this machine and keep it handy for future reference. For safe and correct use, be sure to read the Safety Information
in this manual before using the machine.
J0106604
Page 44

Introduction
This manual contains detailed instructions and notes on the operation and use of this machine. For your safety and
benefit, read this manual carefully before using the machine. Keep this manual in a handy place for quick reference.
Do not copy or print any item for which reproduction is prohibited by law.
Copying or printing the following items is generally prohibited by local law:
bank notes, revenue stamps, bonds, stock certificates, bank drafts, checks, passports, driver's licenses.
The preceding list is meant as a guide only and is not inclusive. We assume no responsibility for its completeness or
accuracy. If you have any questions concerning the legality of copying or printing certain items, consult with your legal
advisor.
Power Source
100-120V, 50/60Hz, 1A or more
Voltage must not fluctuate more than 10%.
Please be sure to connect the power cable to a power source as above.
Confirm that the wall outlet is near the machine and freely accessible, so that in event of an emergency, it can be un-
plugged easily.
Important
Contents of this manual are subject to change without prior notice. In no event will the company be liable for direct,
indirect, special, incidental, or consequential damages as a result of handling or operating the machine.
Two kinds of size notation are employed in this manual. With this machine refer to the inch version.
For good print quality, the supplier recommends that you use genuine print cartridges from the supplier.
The supplier shall not be responsible for any damage or expense that might result from the use of parts other than
genuine parts from the supplier with your office products.
Notes
The model names of the machines do not appear in the following pages. Check the type of your machine before reading this manual.
• Type1: Aficio GX 3050N: 29 pages/minute print speed (A4/Letter sheets)
• Type2: Aficio GX 5050N: 30 pages/minute print speed (A4/Letter sheets)
Trademarks
Adobe and Acrobat are either registered trademarks or trademarks of Adobe Systems Incorporated in the United
States and/or other countries.
Pentium is a registered trademark of Intel Corporation.
Netscape is a registered trademark of Netscape Communication Corporation in the U.S. and/or other countries.
Macromedia and Flash are either registered trademarks or trademarks of Macromedia, Inc. in the U.S. and/or other
countries.
Microsoft, Windows, Windows NT are either registered trademarks or trademarks of Microsoft Corporation in the
U.S. and/or other countries.
Other product names used herein are for identification purposes only and might be trademarks of their respective com-
panies. We disclaim any and all rights to those marks.
• The product name of Windows
• The product name of Windows
• The product names of Windows
• The product names of Windows
• The product names of Windows Server
• The product names of Windows NT
Microsoft
Microsoft
Microsoft
Microsoft
Microsoft
Microsoft
Microsoft
Microsoft
Microsoft
Microsoft
®
Windows® 2000 Professional
®
Windows® 2000 Server
®
Windows® 2000 Advanced Server
®
Windows® XP Home Edition
®
Windows® XP Professional
®
Windows ServerTM 2003 Standard Edition
®
Windows ServerTM 2003 Enterprise Edition
®
Windows ServerTM 2003 Web Edition
®
Windows NT® Workstatio n 4 .0
®
Windows NT® Server 4.0
®
98 is Microsoft® Windows® 98.
®
Me is Microsoft® Windows® Millennium Edition (Windows Me).
®
2000 are as follows:
®
XP are as follows:
TM
2003 are as follows:
®
4.0 are as follows:
Some illustrations in this manual might be slightly different from the machine.
Certain options might not be available in some countries. For details, please contact your local dealer.
Note to users in the United States of America
Note:
This equipment has been tested and found to comply with the limits for a Class B digital device, pursuant to Part
15 of the FCC Rules. These limits are designed to provide reasonable protection against harmful interference in
a residential installation. This equipment generates, uses and can radiate radio frequency energy and, if not
installed and used in accordance with the instructions, may cause harmful interference to radio communications.
However, there is no guarantee that interference will not occur in a particular installation. If this equipment does
cause harmful interference to radio or television reception, which can be determined by turning the equipment
off and on, the user is encouraged to try to correct the interference by one more of the following measures:
• Reorient or relocate the receiving antenna.
• Increase the separation between the equipment and receiver.
• Connect the equipment into an outlet on a circuit different from that to which the receiver is connected.
• Consult the dealer or an experienced radio /TV technician for help.
Caution:
Changes or modifications not expressly approved by the party responsible for compliance could void the user's
authority to operate the equipment.
Declaration of Conformity
Product Name: Printer
Model Number: Aficio GX 3050N/GX 5050N
Responsible party: Ricoh Corporation
Address: 5 Dedrick Place, West Caldwell, NJ 07006
Telephone number: 973-882-2000
This device complies with Part 15 of the FCC Rules.
Operation is subject to the following two conditions:
1. This device may not cause harmful interference, and
2. this device must accept any interference received,
including interference that may cause undesired operation.
Note to users in Canada
Note:
This Class B digital apparatus complies with Canadian ICES-003.
Remarque concernant les utilisateurs au Canada
Avertissement:
Cet appareil numérique de la classe B est conforme à la norme NMB-003 du Canada.
Properly shielded and grounded cables (STP) and connectors must be used for connections to a host computer (and/
or peripheral) in order to meet FCC emission limits.
In accordance with IEC 60417, this machine uses the following symbols for the main power switch:
means STAND BY.
Copyright © 2006
Page 45

TABLE OF CONTENTS
Safety Information . . . . . . . . . . . . . . . . . . . . . . . . . . . . . . . . . . . . . . . . . . . . . . . . . . . . . . . . . . . . . . 2
Safety During Operation . . . . . . . . . . . . . . . . . . . . . . . . . . . . . . . . . . . . . . . . . . . . . . . . . . . . . . . . . . . . . . 2
. . . . . . . . . . . . . . . . . . . . . . . . . . . . . . . . . . . . . . . . . . . . . . . . . . . . . . . . . . . . . . . . . . . . . . . 3
Warn ing
Caution
. . . . . . . . . . . . . . . . . . . . . . . . . . . . . . . . . . . . . . . . . . . . . . . . . . . . . . . . . . . . . . . . . . . . . . . . 5
ENERGY STAR Program
Positions of WARNING and CAUTION labels
User's Notes
Manuals for This Printer . . . . . . . . . . . . . . . . . . . . . . . . . . . . . . . . . . . . . . . . . . . . . . . . . . . . . . . . . 10
How to Read This Manual . . . . . . . . . . . . . . . . . . . . . . . . . . . . . . . . . . . . . . . . . . . . . . . . . . . . . . . 11
Symbols . . . . . . . . . . . . . . . . . . . . . . . . . . . . . . . . . . . . . . . . . . . . . . . . . . . . . . . . . . . . . . . . . . . . . . . . 11
. . . . . . . . . . . . . . . . . . . . . . . . . . . . . . . . . . . . . . . . . . . . . . . . . . . . . . . . . . . . . . . . . . . . . . . . . . 11
Keys
1. Using User Guide
Installing User Guide . . . . . . . . . . . . . . . . . . . . . . . . . . . . . . . . . . . . . . . . . . . . . . . . . . . . . . . . . . . 13
How to Use User Guide . . . . . . . . . . . . . . . . . . . . . . . . . . . . . . . . . . . . . . . . . . . . . . . . . . . . . . . . . 16
Opening User Guide . . . . . . . . . . . . . . . . . . . . . . . . . . . . . . . . . . . . . . . . . . . . . . . . . . . . . . . . . . . . . . . . 17
Opening from the Icon
Opening from the [Start] Menu
Opening from the Printer Driver
Opening from the CD-ROM
Opening from Printer Status Error Messages
2. Troubleshooting
Software Cannot Be Installed . . . . . . . . . . . . . . . . . . . . . . . . . . . . . . . . . . . . . . . . . . . . . . . . . . . . . 21
Confirming Installation . . . . . . . . . . . . . . . . . . . . . . . . . . . . . . . . . . . . . . . . . . . . . . . . . . . . . . . . . . . . . . . 21
Checking Your Computer Environment
Printer Driver Cannot Be Installed
USB Connection is not Automatically Detected
If Test Print Fails . . . . . . . . . . . . . . . . . . . . . . . . . . . . . . . . . . . . . . . . . . . . . . . . . . . . . . . . . . . . . . . 25
Uninstalling . . . . . . . . . . . . . . . . . . . . . . . . . . . . . . . . . . . . . . . . . . . . . . . . . . . . . . . . . . . . . . . . . . 26
Uninstalling the Printer Driver . . . . . . . . . . . . . . . . . . . . . . . . . . . . . . . . . . . . . . . . . . . . . . . . . . . . . . . . . . . 26
Deleting Devices
Uninstalling User Guide
. . . . . . . . . . . . . . . . . . . . . . . . . . . . . . . . . . . . . . . . . . . . . . . . . . . . . . . . . . . . . . 7
. . . . . . . . . . . . . . . . . . . . . . . . . . . . . . . . . . . . . . . . . . . . . . . . 7
. . . . . . . . . . . . . . . . . . . . . . . . . . . . . . . . . . . . . . . . . . . . . . . . . . . . . . . . . . . . . . . . . . . . . 8
. . . . . . . . . . . . . . . . . . . . . . . . . . . . . . . . . . . . . . . . . . . . . . . . . . . . . . . . . . 17
. . . . . . . . . . . . . . . . . . . . . . . . . . . . . . . . . . . . . . . . . . . . . . . . . . . . . 17
. . . . . . . . . . . . . . . . . . . . . . . . . . . . . . . . . . . . . . . . . . . . . . . . . . . . . 18
. . . . . . . . . . . . . . . . . . . . . . . . . . . . . . . . . . . . . . . . . . . . . . . . . . . . . . . 18
. . . . . . . . . . . . . . . . . . . . . . . . . . . . . . . . . . . . . . . . . . . . . 19
. . . . . . . . . . . . . . . . . . . . . . . . . . . . . . . . . . . . . . . . . . . . . . . . . . . . . 22
. . . . . . . . . . . . . . . . . . . . . . . . . . . . . . . . . . . . . . . . . . . . . . . . . . . . . . . . 24
. . . . . . . . . . . . . . . . . . . . . . . . . . . . . . . . . . . . . . . . . . . . . . . . 24
. . . . . . . . . . . . . . . . . . . . . . . . . . . . . . . . . . . . . . . . . . . . . . . . . . . . . . . . . . . . . . . . . . 28
. . . . . . . . . . . . . . . . . . . . . . . . . . . . . . . . . . . . . . . . . . . . . . . . . . . . . . . . . . . . . . 29
INDEX . . . . . . . . . . . . . . . . . . . . . . . . . . . . . . . . . . . . . . . . . . . . . . . . . . . . . . . . . . . . . . . . . . . . 31
1
Page 46

Safety Information
When using this machine, the following safety precautions should always be followed.
Safety During Operation
In this manual, the following important symbols are used:
Indicates a potentially hazardous situation which, if instructions are not followed,
could result in death or serious injury.
Indicates a potentially hazardous situation which, if instructions are not followed, may
result in minor or moderate injury or damage to property.
2
Page 47

Warning
z
Only connect the machine to the power source described on the inside
front cover of this manual.
z
Avoid multi-wiring.
z
Do not damage, break or make any modifications to the power cord. Do
not place heavy objects on it. Do not pull it hard nor bend it more than
necessary. These actions could cause an electric shock or fire.
z
Do not plug or unplug the power cord with your hands wet. Otherwise,
an electric shock might occur.
z
Connect the power cord directly into a wall outlet and never use an
extension cord.
z
To avoid hazardous electric shock, do not remove any covers or screws
other than those specified in this manual. When the machine needs to be
checked, adjusted, or repaired, contact your service representative.
z
Do not take apart or attempt any modifications to this machine. There is
a risk of fire, electric shock, explosion or loss of sight.
z
If by any chance this machine falls over or a breakage occurs (e.g. the
cover), turn off the main switch, unplug the power cable and contact
your service representative. If you continue to use the machine in this
state it could result in fire or electric shock.
z
If metal, liquid or foreign matter falls into the machine, turn off the operation and main power switches, and unplug the main power cord. Contact your service representative. Do not keep using the machine with a
fault or defect.
z
Do not put any metal objects or containers holding water (e.g. vases,
flowerpots, glasses) on the machine. If the contents fall inside the
machine, a fire or electric shock could occur.
z
Keep the machine away from flammable liquids, gases, and aerosols. A
fire or an electric shock might occur.
z
Disposal can take place at our authorized dealer.
3
Page 48

z
Keep the machine away from humidity and dust. Otherwise a fire or an
electric shock might occur.
z
If you use the machine in a confined space, confirm that there is a continuous flow of air.
z
Make sure the wall outlet is near the machine and freely accessible so
that in event of an emergency it can be unplugged easily.
4
Page 49

Caution
z
Keep the machine away from humidity and dust. Otherwise a fire or an
electric shock might occur.
z
Do not place the machine on an unstable or tilted surface. If it topples
over, an injury might occur.
z
If you use the machine in a confined space, make sure there is a continuous air turnover.
z
Unplug the power cord from the wall outlet before you move the
machine. While moving the machine, you should take care that the
power cord will not be damaged under the machine.
z
When the machine will not be used for a long time, unplug the power
code.
z
When you disconnect the power plug from the wall outlet, always pull
the plug (not the cable).
z
Our products are engineered to meet high standards of quality and functionality, and we recommend that you use only the expendable supplies
available at an autohrized dealer.
z
Deliver to waste product collection areas. Do not dispose of via domestic
refuse collection.
z
Type 1 weighs approximately 14.5 kg (32.0 lb.). Type 2 weighs approximately 15.5 kg (34.2 lb.).
z
When moving the machine, hold the machine by the bottom below the
two indentations. Lift the machine slowly in order to avoid straining your
body. Lifting the machine without sufficient strength or assistance or handling it roughly and dropping it could cause an injury.
z
Keep the ink collector unit out of reach of children.
z
When you replace the ink collector unit, be careful not to get any ink on
your clothes as it may not wash off easily.
5
Page 50

z
Do not eat or swallow ink.
z
If ink is ingested, induce vomiting by drinking a strong saline solution.
Consult a doctor immediately.
z
If your skin comes into contact with ink, wash the affected area thoroughly with soap and water.
z
If ink comes into contact with your eyes, rinse immediately in running
water. For other symptoms, consult a doctor.
z
Avoid getting ink on your clothes or skin when removing a paper jam or
replacing ink. If your skin comes into contact with ink, wash the affected
area thoroughly with soap and water.
z
If ink gets on your clothing, wash with cold water. Hot water will set the
ink into the fabric and may make removing the stain impossible.
z
Keep the ink or ink container out of reach of children.
z
Be careful not to get ink on your clothes when replacing an ink container. Ink stains on clothes are hard to remove.
z
Rating voltage of the connector for option: Max. DC 37 V.
z
When you use this machine for a long time in a confined space without good ventilation, you
may detect an odd smell. To keep the workplace comfortable, we recommend that you keep it
well ventilated.
6
Page 51

ENERGY STAR Program
As an ENERGY STAR Partner, we have determined that this machine model meets the ENERGY
STAR Guidelines for energy efficiency.
Positions of WARNING and CAUTION labels
This machine has labels for WARNING and CAUTION at the positions shown below. For
safety, please follow the instructions and handle the machine as indicated.
1
1
AKS181S
1 The ink collector unit for storing ink is installed in the printer. Be careful not to spill the ink.
7
Page 52

User's Notes
z
High temperatures inside the printer can cause a breakdown. Do not lean anything against the
vent or block it in any way.
z
Warm air from the vent is normal and not a cause for concern.
z
Do not leave the top cover open. Doing so could cause an injury.
z
During printing, do not move the printer or open its covers.
z
During printing, do not pull out a paper tray. Printing will stop and the paper will jam.
z
Do not touch the feed belt.
z
Take care not to let paper clips and other foreign objects fall inside the printer.
z
During printing, do not turn off the power or unplug the power cord from the wall outlet.
z
During printing, do not subject the printer to external shock such as that caused by tapping paper
on it.
z
When not using the printer, turn off the power.
z
Do not place more than 5 kg (11.1 lb.) on the printer. (The outer surface of the printer can tolerate
up to 20 kg (44.1 lb.).)
z
Type 1 has a nominal operational life of 5 years if used normally for 8 hours a day to produce up
to 2,500 A4 prints a month. Exceeding these limits may reduce the operational life. The operational life also depends on the environment in which the printer is used.
z
Type 2 has a nominal operational life of 5 years if used normally for 8 hours a day to produce up
to 3,300 A4 prints a month. Exceeding these limits may reduce the operational life. The operational life also depends on the environment in which the printer is used.
z
”Total Counter” displays the number of pages printed. Use "Total Counter" to estimate the
number of pages that can be printed within the printer's remaining operational life. The printer's
operational life is calculated based on the number of pages that it can print on plain paper in
[Speed priority] mode.
z
Type 1 is designed to have an operational life of 5 years or be good for 150,000 pages.
z
Type 2 is designed to have an operational life of 5 years or be good for 200,000 pages.
z
Depending on your printing document, the ink collector unit may fill up sooner than normal.
An "Ink Collector almost full" message appears shortly before the ink collector unit is full. Contact
your service representative as soon as possible for a replacement ink collector unit (charge
incurred).
8
Page 53

z
The printing yields of print cartridges are as follows: (The yields of the print cartridges packaged
with the printer are lower than the yields described below.)
Type 2
z
Black (High Yield): approximately 3000 A4/Letter sheets (5% chart)
z
Cyan (High Yield): approximately 2300 A4/Letter sheets (5% chart)
z
Magenta (High Yield): approximately 2300 A4/Letter sheets (5% chart)
z
Yellow (High Yield): approximately 2300 A4/Letter sheets (5% chart)
Type 1, Type 2
z
Black (Regular Yield): approximately 1500 A4/Letter sheets (5% chart)
z
Cyan (Regular Yield): approximately 1000 A4/Letter sheets (5% chart)
z
Magenta (Regular Yield): approximately 1000 A4/Letter sheets (5% chart)
z
Yellow (Regular Yield): approximately 1000 A4/Letter sheets (5% chart)
Printing yields vary depending on page content, paper type, paper size, and environmental conditions. Also, cartridges may need to be changed before the yields above have been reached
due to deterioration over time. To maintain print quality, cartridges should be opened before their
expiration date and used within six months of being opened.
z
Ink can remain inside used print cartridges.
z
Colour ink may be used even if you print all-black text or if you specify black and white printing.
It may also be used for print head cleaning and refreshing, which are done to maintain printer
performance.
z
Print cartridges and supplies comply with the manufacturer's safety specifications. To ensure
safety and reliability, use genuine print cartridges and supplies.
z
Black and white printing also consumes colour ink.
z
Printing stops if one of the print cartridges becomes empty. If a cartridge containing a colour ink
such as cyan, yellow, or magenta becomes empty, you cannot print, even in black/white.
z
If you print a large number of pages in a day, for instance, hundreds of pages, the nozzles of the
print-heads may be clogged the next day. If this happens, clean the print-heads.
z
This printer performs regular automatic maintenance, after and during printing, to ensure consistent print quality. Maintenance is also performed when printing begins after a period of disuse.
9
Page 54

Manuals for This Printer
This printer is provided with two manuals.
Quick Installation Guide
This manual describes procedures from unpacking the printer to loading paper.
Setup Handbook (this manual)
Topics such as printer installation, connecting to a computer, and basic print operations are
explained.
User Guide (CD-ROM)
This is included on the provided "Drivers, Manual & Utility" CD-ROM. Topics such as advanced
features, troubleshooting when printing does not start or is not performed as expected, dealing
with paper jams, and information about paper are explained. We recommend that you install this
manual on computers for your convenience.
z
Depending on the operating system and version used, actual procedures may differ from the procedures explained in these manuals.
10
Page 55

How to Read This Manual
Symbols
The following set of symbols is used in this manual.
This symbol indicates a potentially hazardous situation that might result in death or serious injury
when you misuse the machine without following the instructions under this symbol. Be sure to read
the instructions, all of which are described in the Safety Information section.
This symbol indicates a potentially hazardous situation that might result in minor or moderate injury
or property damage that does not involve personal injury when you misuse the machine without following the instructions under this symbol. Be sure to read the instructions, all of which are described
in the Safety Information section.
* The statements above are notes for your safety.
If this instruction is not followed, paper might be misfed, originals might be damaged, or data might
be lost. Be sure to read this.
This symbol indicates precautions for operation, or actions to take after abnormal operation.
This symbol indicates a reference.
Keys
[
]
Indicates the name of keys and buttons.
11
Page 56

12
Page 57

1. Using User Guide
This section explains how to install and use the User Guide.
Installing User Guide
Follow the procedure below to install User Guide only.
If you installed the software when performing [Quick Install for USB] or [Quick Install for Network],
there is no need to install it again here.
The following explanation uses Windows 2000 as an example. Procedures under other operating
systems may differ.
Screens vary according to the operating environment.
1
Start Windows, and insert the provided "Drivers, Manual & Utility" CD-ROM into the CD-ROM drive.
Quit all other applications currently running.
After inserting the CD-ROM, the [Drivers, Manual & Utility] dialog box appears. If it does not, doubleclick the CD-ROM drive icon under [My Computer] or [Explorer], and then double-click [SETUP.EXE].
2 Click [User Guide].
1
Read the license agreement, click [I accept the terms of the license agreement], and then click [Next > ].
3
13
Page 58

1. Using User Guide
4 Confirm the location in which you want to install User Guide, and then click [Next >].
1
To change the installation location, click [Change...].
5 Confirm the program folder in which you want to install User Guide, and then click [Next >].
6 Click [Install].
Installation starts.
During installation, a message asking whether you want to create a desktop shortcut icon is displayed. Click [Yes] or [No] as appropriate.
14
Page 59

7 When installation is complete, click [Finish].
z
To use the printer, the printer driver must be installed. See “Installing the Printer Driver (USB)”,
User Guide.
Installing User Guide
1
15
Page 60

1. Using User Guide
How to Use User Guide
User Guide (on the provided CD-ROM) includes detailed information about this printer and a troubleshooting guide.
1
Use one of the browsers below to display User Guide.
z
Microsoft Internet Explorer Version 4.01 SP2 or later
z
Netscape 6.2 or later
To view the video files of User Guide, Macromedia Flash Player 5 plug-in is required.
When using screen reader software or when you cannot install Macromedia Flash Player plugins
When using screen reader software to listen to User Guide or when video files cannot be displayed because Flash plug-ins cannot be installed, click [For screen reader] to display User
Guide version optimized for screen reader software.
Use the button in the upper right window to change the screen.
When using a non-recommended browser
When using Internet Explorer 3.02 or Netscape Navigator 4.05 or later versions, a simplified
User Guide is displayed.
z
If the simplified User Guide does not automatically appear, in the "Drivers, Manual & Utility" CDROM's [unv] folder, open index.htm.
16
Page 61

Opening User Guide
This section explains how to open User Guide.
How to Use User Guide
Opening from the Icon
This section explains how to open User Guide from the desktop icon.
1 Double-click the [User Guide] icon on your desktop.
The browser opens, and then User Guide appears.
Opening from the [Start] Menu
This section explains how to open User Guide from the Windows Start menu.
1 On the [Start] menu, point to [Programs] (Windows XP: [All Programs]), point to [Product Name],
and then click [Product Name User Guide].
The browser opens, and then User Guide appears.
z
Depending on the settings made during installation, menu folder names may differ.
1
17
Page 62

1. Using User Guide
Opening from the Printer Driver
This section explains how to open User Guide from the printer driver.
1 In the printer properties dialog box, click [User Guide] on the [Setup] tab.
1
The browser opens, and then User Guide appears.
Opening from the CD-ROM
This section explains how to open User Guide from the supplied CD-ROM.
1 Start Windows, and insert the provided "Drivers, Manual & Utility" CD-ROM into the CD-ROM
drive.
After inserting the CD-ROM, the [Drivers, Manual & Utility] dialog box appears. If it does not, doubleclick the CD-ROM drive icon under [My Computer] or [Explorer], and then double-click [SETUP.EXE].
2 Click [Browse User Guide].
The browser opens, and then User Guide appears.
18
Page 63

Opening from Printer Status Error Messages
This section explains how to open User Guide when Printer Status error message is dispayed.
1 The Status monitor displays an error message if a problem occurs.
2 Click [User Guide].
The browser opens, and then User Guide appears.
Open User Guide from here if a problem occurs while using the printer.
How to Use User Guide
1
19
Page 64

1
1. Using User Guide
20
Page 65

2. Troubleshooting
This section explains how to troubleshoot machine setup problems.
Software Cannot Be Installed
This section explains how to troubleshoot software installation problems under different environments.
Confirming Installation
Check whether the software has been installed.
Checking icons When the printer driver is properly installed, the icon
of the printer appears in the [Printers] folder.
When installation of User Guide is complete, User
Guide icon appears on your desktop.
If the icons do not appear, the software is not properly installed. In this case, you must repeat the installation procedure. See "Quick Install for USB", Quick
Installation Guide.
Checking the software You can install SmartDeviceMonitor for Client by
clicking "Quick Install for Network" or "DeskTopBinder - SmartDeviceMonitor for Client". If SmartDeviceMonitor for Client is installed, the
SmartDeviceMonitor for Client icon appears in the
[SmartDeviceMonitor for Client] folder. To open the
[SmartDeviceMonitor for Client] folder, select [Programs] on the [Start] menu, then select [DeskTopBinder], and then select [SmartDeviceMonitor for
Client].
Checking ports In the printer properties dialog box, check that USB
connection or network printer is selected as a port.
To check the connection, perform a test print. If the
test print is not printed, see p.25 "If Test Print Fails".
2
21
Page 66

2. Troubleshooting
Checking Your Computer Environment
Check the system requirements for installing the software.
Quick Install for USB
The CD-ROM may not be inserted properly. Check that the "Drivers, Manual & Utility"
2
The power cord or USB cable may not be properly
connected.
The operating system is incompatible.
There is insufficient hard disk space.
Other applications are not closed. When installing software, quit all other applications.
Windows made USB settings automatically. Open Windows' Device Manager, and then, under
The printer is turned on before installation. Switch the printer off and then on, and then try Quick
Windows NT 4.0 is running.
The USB connection does not work. Switch the printer off, unplug the USB cable from the
CD-ROM is inserted properly. Check also that it is not
damaged and the CD-ROM drive is working properly.
Check that the power cord and USB cable are properly connected and not damaged.
Check that the computer's operating system is fully
compatible with this printer. See "Checking the Computer and Installation Area", Quick Installation
Guide.
Installation may be disrupted if other applications
are open. Also, quit any anti-virus applications that
are running.
[Universal Serial Bus controllers], remove any conflicting devices. Conflicting devices have a yellow [!]
or [?] icon by them. Take care not to accidentally
remove required devices. For details, see p.28
"Deleting Devices".
Install for USB again.
z
Windows NT 4.0 do not support USB connection
with the printer. Connect the printer via a network
in this case.
z
[Quick Install for USB] is unavailable. See
“Installing the Printer Driver (USB)”, User Guide.
z
Configure the printer as a shared network printer.
See “Installing the Printer Driver”, User Guide.
z
For details about network printer settings, see
“Sharing the Printer”, User Guide.
printer, launch "Quick Install for USB" again, and
then switch the printer on when the dialog box confirming printer driver installation appears. If this does
not solve the problem, press the [Menu] key on the
control panel, change "USB Setting" in [Host Interface] from [Auto] to [Full Speed], uninstall the printer
driver, delete the device, and then launch "Quick
Install for USB" again.
22
Page 67

Software Cannot Be Installed
An error occurs during software installation. If an error occurs because the printer is detected as
an unidentified device, follow the instructions under
"The USB connection does not work.". If this does not
solve the problem, do the following: First reboot Windows. Then, on the [Start] menu, select [Settings],
and then select [Control Panel]. Double-click the System icon, and then on the [Hardware] tab, click
[Device Manager]. Under [Other Devices], select the
printer, and then open its properties dialog box. On
the [General] tab, click [Reinstall Driver] to reinstall
the printer driver.
Quick Install for Network
The CD-ROM may not be inserted properly. Check that the "Drivers, Manual & Utility"
CD-ROM is inserted properly. Check also that it is not
damaged and the CD-ROM drive is working properly.
The power cord or Ethernet cable may not be properly connected.
The operating system is incompatible.
There is insufficient hard disk space.
Other applications are not closed. When installing software, quit all other applications.
The printer's IP address has not been specified.
The computer and printer are not on the same network segment.
Check that the power cord and Ethernet cable are
properly connected and not damaged.
Check that the computer's operating system is fully
compatible with this printer. See "Checking the Computer and Installation Area", Quick Installation Guide.
Installation may be disrupted if other applications
are open. Also, quit any anti-virus applications that
are running.
If the printer cannot be found and only "Printer Port"
appears in the printer selection dialog box, either the
printer's IP address has not been specified or the
computer and printer are not on the same network
segment. Before installing the software, check the
printer's IP address and the network topology. Otherwise, select "Printer Port" in the dialog box, and then
install the printer driver. If you do this, SmartDeviceMonitor for Client will not be simultaneously
installed, so install it afterwards, and then configure
the port.
2
23
Page 68

2. Troubleshooting
Printer Driver Cannot Be Installed
This section explains how to troubleshoot printer driver installation problems.
The printer driver installer does not start.
z
An error occurs during installation.
2
z
z
z
USB Connection is not Automatically Detected
If the USB connection is not automatically detected, do the following:
1 Delete the printer driver.
2 Delete the device.
3 Run [Quick Install for USB] again.
If the [Drivers, Manual & Utility] screen does not
appear even when you double-click the
[SETUP.EXE] icon, or if an error occurs during
installation, access the CD-ROM drive from [My
Computer] or [Explorer]. Double-click the [RDISETUP.EXE] icon, and then install the printer driver
by following the instructions that appear on the
screen.
An error occurs if the path to the location of the
stored data is too long. To install a printer driver
downloaded from a Website or copied from a
CD-ROM, save the printer driver directly on the
hard disk, and then install it.
On the [Start] menu, point to [Settings], and then
click [Printers]. In the [Printers] window, install the
printer driver.
For details, see Windows Help.
z
For details about deleting the printer driver, see p.26 "Uninstalling the Printer Driver".
z
For details about deleting the device, see p.28 "Deleting Devices".
z
For details about [Quick Install for USB], see “Quick Install for USB”, Quick Installation Guide.
If these steps do not solve the problem, contact your sales or service representative.
24
Page 69

If Test Print Fails
This section explains how to troubleshoot Test Print problems.
If Test Print Fails
The power cord or USB cable or Ethernet cable is
not properly connected.
The port connection is not properly set. 1) On the [Start] menu, point to [Settings], and then
Ink feed is incomplete. Ink begins automatically feeding into the print-heads
The printer is offline. Check if the printer’s on-line indicator is lit. If the
A printer error has occurred. Use the control panel to check if a printer error has
Check that the power cord and USB cable, Ehernet
cable are properly connected.
click [Printers].
2) Click the icon of the printer, and then click [Properties] on the [File] menu.
3) Click the [Details] tab (Windows 2000/XP, Windows Server 2003, Windows NT 4.0: the [Ports]
tab) , and then check the printer port.
z
Select USB or network printer in the list
when the selected port connection is something other than USB or network printer.
z
To connect via USB when USB does not
appear in the list, you must re-install the
printer driver. See p.24 "USB Connection is
not Automatically Detected".
when the power of the printer is first turned on or
when a cartridge is replaced.
Wait until ink feed is complete at which point the
[Power] key stops blinking and remains lit.
printer is offline, press the [Online] key on the control
panel to switch the printer to the on-line mode.
occurred. If it has, try printing again.
If you cannot solve the problem, contact sales or service representative.
2
z
If the Status monitor displays an error message, see "Status Monitor Errors", User Guide.
25
Page 70

2. Troubleshooting
Uninstalling
If software was installed incorrectly or incompletely, uninstall and then reinstall it.
z
Before uninstalling software or deleting devices, turn off any other printers connected to your
computer via USB, or disconnect the USB cable to the printers.
2
z
The following explanation uses Windows 98 as an example. Procedures under other operating
systems may differ.
z
Screens vary according to the operating environment.
z
To reinstall the software, restart Windows.
z
When reinstalling the software, see Quick Installation Guide.
Uninstalling the Printer Driver
To update the printer driver, uninstall the old printer driver before installing the new one.
z
The following explanation uses Windows 98 as an example. Procedures under other operating systems may differ.
The Status monitor installed with the current printer driver is uninstalled when the current printer
driver is uninstalled.
Registered custom settings are also deleted. To continue using registered custom settings, save them
as custom settings files before uninstalling.
1 Press the printer's [Power] key to turn the printer off.
AKS008S
2 On the [Start] menu, point to [Settings], and then click [Printers].
26
Page 71

Uninstalling
3 Click the icon of the printer, and then click [Delete] on the [File] menu.
A confirmation message appears.
4 Click [Yes].
The printer driver is uninstalled.
5 Double-click [My computer].
6 On the [View] menu, click [Folder Options...].
7 Click the [View] tab.
8 In the [Advanced Settings:] box, click [Do not show hidden files], and then deselect the [Display the
full path in title bar] check box.
2
9 Click [OK].
10 On the [Start] menu, point to [Find], and then click [Files or Folders...].
11 Click the [Name & Location] tab, and then enter a file name in the [Named:] field.
z
Type 1
Enter "RCD6D19X.inf" as the INF name.
z
Type 2
Enter "RCD7D19X.inf" as the INF name.
27
Page 72

2. Troubleshooting
12 In the [Look in:] box, select the hard disk on which Windows is installed, and then click [Find Now].
13 Right-click the file displayed as the search result, and then click [Delete...].
The INF file is uninstalled.
14 After uninstalling the printer driver, restart Windows.
z
2
For details about storing registered custom settings, see “Saving a Registered Custom Setting in a
File”, User Guide.
z
For details about updating the printer driver, contact your sales or service representative.
Deleting Devices
If Windows automatically establishes a USB connection because of an unauthorized device, you
can delete the device and any others like it. Be sure not to delete necessary devices. If USB connection is established normally, you do not need to perform this procedure.
z
The following explanation uses Windows 98 as an example. Procedures under other operating systems may differ.
1 Press the printer's [Power] key to turn the printer on.
AKS008S
2 On the [Start] menu, point to [Settings], and then click [Control Panel].
3 Double-click [System].
4 Click the [Device Manager] tab.
28
Page 73

5 Click [GJ USB Printing Support] or [Product Name].
6 Click [Remove].
A confirmation message appears.
7 Click [OK].
8 Click [Close].
Uninstalling User Guide
Uninstalling
2
If User Guide is installed incorrectly or incompletely, uninstall and then reinstall it.
1 Press the printer's [Power] key to turn the printer off.
AKS008S
2 Open [My Computer], and then open [Control Panel].
29
Page 74

2. Troubleshooting
3 Double-click [Add/Remove Programs].
2
4 Select the installed [Product Name User Guide], and then click [Add/Remove...].
5 Follow the instructions that appear.
30
Page 75

INDEX
C
Checking Your Computer Environment . . . . 22
Confirming Installation . . . . . . . . . . . . . . . . . . . 21
D
Deleting Devices . . . . . . . . . . . . . . . . . . . . . . . . 28
E
ENERGY STAR Program . . . . . . . . . . . . . . . . . . . 7
H
How to Read This Manual . . . . . . . . . . . . . . . 11
How to Use User Guide . . . . . . . . . . . . . . . . . 16
I
If Test Print Fails . . . . . . . . . . . . . . . . . . . . . . . . . 25
Installing User Guide . . . . . . . . . . . . . . . . . . . . 13
K
Keys . . . . . . . . . . . . . . . . . . . . . . . . . . . . . . . . . . 11
M
Manuals for This Printer . . . . . . . . . . . . . . . . . . 10
O
Opening from Printer Status Error Messages
Opening from the CD-ROM . . . . . . . . . . . . . . 18
Opening from the Icon . . . . . . . . . . . . . . . . . . 17
Opening from the Printer Driver . . . . . . . . . . 18
Opening from the Start Menu . . . . . . . . . . . . 17
Opening User Guide . . . . . . . . . . . . . . . . . . . . 17
. . . 19
P
Q
Quick Install for Network . . . . . . . . . . . . . . . . . 22
Quick Install for USB . . . . . . . . . . . . . . . . . . . . . 22
S
Software Cannot Be Installed . . . . . . . . . . . . . 21
Symbols . . . . . . . . . . . . . . . . . . . . . . . . . . . . . . . . 11
T
Troubleshooting . . . . . . . . . . . . . . . . . . . . . . . . . 21
U
Uninstalling . . . . . . . . . . . . . . . . . . . . . . . . . . . . . 26
Uninstalling the Printer Driver . . . . . . . . . . . . . 26
Uninstalling User Guide . . . . . . . . . . . . . . . . . . 29
USB Connection is not Automatically Detected
User's Notes . . . . . . . . . . . . . . . . . . . . . . . . . . . . . 8
Using User Guide . . . . . . . . . . . . . . . . . . . . . . . 13
. . . 24
Positions of WARNING and CAUTION labels
Printer Driver Cannot Be Installed . . . . . . . . . 24
. . . 7
31
Page 76

MEMO
32
EN USA J010-6604
Page 77

J007 USER GUIDE
Page 78

Page 79

User Guide
TOC
Read This First
About This Product ..........................................................................................................................................................................11
Introduction .................................................................................................................................................................................. 11
Trademarks................................................................................................................................................................................... 11
Disclaimer .....................................................................................................................................................................................12
Manuals for This Printer ............................................................................................................................................................12
How to Read This Manual............................................................................................................................................................13
Screen Navigation..................................................................................................................................................................... 13
Useful Functions...........................................................................................................................................................................14
Symbols.........................................................................................................................................................................................15
Removing the User Guide ........................................................................................................................................................16
Guide to Components....................................................................................................................................................................17
Printer Body.................................................................................................................................................................................. 17
Printer Rear...................................................................................................................................................................................18
Control Panel............................................................................................................................................................................... 19
Option .......................................................................................................................................................................................... 20
Network Interface Board Type GX2 .......................................................................................................................... 20
Multi Bypass Tray Type BY1000 ..................................................................................................................................21
Detaching and Reattaching the Multi Bypass Tray (Optional).............................................................................21
Recommended Functions............................................................................................................................................................. 23
Paper
Compatible Paper Types .............................................................................................................................................................. 25
Loadable Paper Sizes and Quantities ...................................................................................................................................... 26
Copyright © 2005 All rights reserved.J0076605_1.00
1
Page 80

Paper Handling Precautions
Loading Precautions.................................................................................................................................................................. 28
Paper Storage Precautions...................................................................................................................................................... 29
Paper Type Precautions............................................................................................................................................................ 29
Non-compatible Paper............................................................................................................................................................. 30
Printable Area.............................................................................................................................................................................. 31
Loading Paper................................................................................................................................................................................. 32
Loading Paper into Tray 1....................................................................................................................................................... 32
Loading Paper Larger than A4/Letter (Tray1) ..........................................................................................................34
Loading Paper into Bypass Tray (optional) .........................................................................................................................37
........................................................................................................................................................ 28
Replacing Consumables
Replacing a Print Cartridge ......................................................................................................................................................... 39
Checking the Remaining Ink ................................................................................................................................................... 39
Replacing a Print Cartridge .....................................................................................................................................................41
Handling Print Cartridges........................................................................................................................................................ 43
Making Printer Settings
Making Printer Settings Using the Control Panel................................................................................................................... 46
Paper Input Menu.......................................................................................................................................................................47
Changing the Paper Input Menu................................................................................................................................. 48
List/Test Print Menu................................................................................................................................................................... 48
Printing a Configuration Page ...................................................................................................................................... 49
Interpreting the Configuration Page ........................................................................................................................... 49
Maintenance Menu .................................................................................................................................................................. 50
Nozzle Check....................................................................................................................................................................51
Head-clearning................................................................................................................................................................. 52
Head-flushing .................................................................................................................................................................... 53
Head Position.................................................................................................................................................................... 55
Adj.Paper Feed..................................................................................................................................................................57
Registration ........................................................................................................................................................................ 59
System Menu............................................................................................................................................................................... 61
Changing the System Menu.......................................................................................................................................... 63
Host Interface Menu................................................................................................................................................................. 64
Changing the Host Interface Menu ............................................................................................................................ 66
Language Menu ........................................................................................................................................................................ 66
Changing the Language Menu.................................................................................................................................... 66
Maintaining the Printer Using Utilities....................................................................................................................................... 68
Nozzle Check ............................................................................................................................................................................ 68
2
Page 81

Head-cleaning
Head-flushing.............................................................................................................................................................................. 70
Adjust Print-head Positions....................................................................................................................................................... 70
Registration ...................................................................................................................................................................................72
Adjust Paper Feed ......................................................................................................................................................................73
Restore Defaults/Other Settings.............................................................................................................................................75
Restoring the Settings to Their Defaults.......................................................................................................................75
Specifying an I/O Timeout ............................................................................................................................................75
............................................................................................................................................................................ 69
Troubleshooting
Printing Will Not Start ................................................................................................................................................................... 79
Power Cannot Be Turned On ................................................................................................................................................. 79
Paper Will Not Feed Even When the Power Is On .......................................................................................................... 79
An Error Occurs ......................................................................................................................................................................... 79
Points to Remember when Printer Sharing under Windows 98/Me ................................................................. 80
Paper Is Not Fed or Delivered Normally..................................................................................................................................81
Paper Jam......................................................................................................................................................................................... 82
Removing Paper Jammed in the Paper Tray (Tray 1)....................................................................................................... 82
Removing Paper Jammed in the Bypass Tray (optional)................................................................................................. 83
Removing Paper Jammed under the Top Cover ................................................................................................................ 86
Removing Paper Jammed around the Guide Board.........................................................................................................87
Removing Paper Jammed in the Duplex Unit..................................................................................................................... 89
Removing Paper Jammed in the Output Tray ..................................................................................................................... 90
Print Results Are Not Satisfactory............................................................................................................................................... 92
Checking the Condition of the Printer .................................................................................................................................. 92
Printing Is Uneven, Too Heavy, or Too Light ............................................................................................................. 92
Dirty or Blotted Prints ...................................................................................................................................................... 93
Checking the Printer Driver Setting....................................................................................................................................... 93
Changing the Printer Driver Setting ........................................................................................................................... 93
Colours Do Not Match the Displayed Image .......................................................................................................... 95
Positions Do Not Match the Displayed Image......................................................................................................... 96
Error & Status Messages on the Control Panel .......................................................................................................................97
Status Monitor Errors................................................................................................................................................................... 100
Status Monitor Does Not Open .......................................................................................................................................... 100
No Response from Printer...................................................................................................................................................... 100
No Paper/Tray Not Detected (Tray 1).............................................................................................................................. 100
Printing by Form Feed....................................................................................................................................................101
Canceling the Print Job................................................................................................................................................. 102
3
Page 82

No Paper/Tray Not Detected (Bypass Tray)
Press the [#Enter] key.................................................................................................................................................... 103
Paper Size Mismatch/Paper Type Mismatch (Tray 1) .................................................................................................. 103
Printing by Form Feed................................................................................................................................................... 103
Canceling the Print Job................................................................................................................................................. 104
Paper Size Mismatch/Paper Type Mismatch (Bypass Tray)........................................................................................ 105
Printing by Form Feed................................................................................................................................................... 105
Canceling the Print Job................................................................................................................................................. 106
Paper Size Mismatch/Paper Type Mismatch (AutoTray Select)................................................................................. 106
Printing by Form Feed................................................................................................................................................... 107
Canceling the Print Job................................................................................................................................................. 108
Cover Open.............................................................................................................................................................................. 108
Duplex Unit Not Detected..................................................................................................................................................... 109
Cover Open / Print Cartridge(s) Not Detected ...............................................................................................................110
Cartridge End ............................................................................................................................................................................112
Cartridge/Print-head Tank Empty.........................................................................................................................................113
When the Ink Collector Unit is Almost Full/Full................................................................................................................ 114
................................................................................................................... 102
Ink Collector Unit Not Detected ........................................................................................................................................... 114
Out of Printable Temperature Range................................................................................................................................... 115
Printer Error.................................................................................................................................................................................115
Network Interface Board Error .............................................................................................................................................116
Adjusting the Printer...................................................................................................................................................................... 117
Inquiries and Consumables
Where to Inquire ...........................................................................................................................................................................119
Recommended Consumables.................................................................................................................................................... 120
Option and Consumables...........................................................................................................................................................121
Maintaining
Cleaning ......................................................................................................................................................................................... 123
Moving............................................................................................................................................................................................ 124
Moving a Short Distance....................................................................................................................................................... 124
Moving a Long Distance ....................................................................................................................................................... 124
Disposing........................................................................................................................................................................................ 126
When Not Using for a Long Period of Time.......................................................................................................................... 127
Preparing for Printing
Confirming the Connection Method........................................................................................................................................ 129
Local Connection..................................................................................................................................................................... 129
4
Page 83

Network Connection
Using this Printer as the Windows Printing Port ..................................................................................................... 129
Using as a Network Printer ......................................................................................................................................... 130
Installing the Printer Driver (USB)..............................................................................................................................................131
Sharing the Printer........................................................................................................................................................................ 133
Setting Up a Server................................................................................................................................................................. 133
Setting Up a Client Computer .............................................................................................................................................. 133
Using the SmartDeviceMonitor for Client Port...................................................................................................................... 135
Installing SmartDeviceMonitor for Client.......................................................................................................................... 135
Installing the Printer Driver (TCP/IP) ................................................................................................................................... 135
Installing the Printer Driver (IPP)........................................................................................................................................... 136
Changing the Port Settings for SmartDeviceMonitor for Client .................................................................................. 138
Windows 98: .................................................................................................................................................................. 138
Windows 2000 / Windows NT 4.0:....................................................................................................................... 138
Windows XP, Windows Server 2003: ..................................................................................................................... 138
Using the Standard TCP/IP Port ............................................................................................................................................... 140
Installing the Printer Driver .................................................................................................................................................... 140
.............................................................................................................................................................. 129
Using the LPR Port......................................................................................................................................................................... 142
Installing the Printer Driver .................................................................................................................................................... 142
Using as the Windows Network Printer ................................................................................................................................. 143
Installing the Printer Driver .................................................................................................................................................... 143
Using as the NetWare Print Server/Remote Printer............................................................................................................ 145
Form Feed.................................................................................................................................................................................. 146
Banner Page ............................................................................................................................................................................. 146
Printing after Resetting the Printer........................................................................................................................................ 146
If a Message Appears during Installation ............................................................................................................................. 147
Making Option Settings for the Printer ................................................................................................................................... 148
Conditions for Bidirectional Communication.................................................................................................................... 148
If Bidirectional Communication is Disabled...................................................................................................................... 148
Printer Driver
Two Types of Printer Properties Dialog Box ...........................................................................................................................151
Opening the Printer Properties Dialog Box ........................................................................................................................... 152
Opening from the Start Menu .............................................................................................................................................. 152
For Windows 98/Me ................................................................................................................................................... 152
For Windows 2000, Windows NT 4.0................................................................................................................... 152
For Windows XP, Windows Server 2003............................................................................................................... 152
Opening from an Application............................................................................................................................................. 153
5
Page 84

Printing
Printing on Various Paper Types ............................................................................................................................................... 156
Printing on Plain Paper ........................................................................................................................................................... 156
Printing on Inkjet Plain Paper................................................................................................................................................ 156
Printing on Inkjet Transparency............................................................................................................................................ 157
Printing on Glossy Paper....................................................................................................................................................... 159
Printing on Envelopes ............................................................................................................................................................. 162
Printing on Thick Paper........................................................................................................................................................... 164
Canceling Printing ........................................................................................................................................................................ 166
Canceling Printing from the Status Monitor...................................................................................................................... 166
Canceling Printing Using the [Job Reset] Key of the Printer ......................................................................................... 166
Canceling Printing from the Taskbar....................................................................................................................................167
Adjusting Print Quality................................................................................................................................................................. 168
Printing Using Preset Print Quality Settings....................................................................................................................... 168
Printing in Black and White .................................................................................................................................................. 168
Saving Colour Ink When Printing........................................................................................................................................ 169
Printing with Print Quality Settings You Want................................................................................................................... 169
Changing Image Printing Method............................................................................................................................. 169
Correcting the Hue of Digital Photos........................................................................................................................ 170
Printing Low Resolution Images Smoothly............................................................................................................... 170
Changing the Dither Pattern.........................................................................................................................................171
Using Error Diffusion ......................................................................................................................................................171
Changing the Colour Profiling Pattern ......................................................................................................................172
Printing Grayscale Images Using Black or CMYK ................................................................................................172
Printing Text in Black ......................................................................................................................................................173
Using ICM.........................................................................................................................................................................174
Adjusting Brightness, Contrast, and Saturation.......................................................................................................174
Adjusting Colour Balance.............................................................................................................................................175
Printing a Whole Page as an Image..........................................................................................................................176
Changing the Image Data Process ............................................................................................................................176
Printing with Particular CMYK Colours.................................................................................................................... 177
Emphasizing Bold Type According to the Font Size .......................................................................................................178
Changing the Method of Extracting TrueType Fonts.......................................................................................................178
Printing Images Vividly........................................................................................................................................................... 179
Various Print Functions................................................................................................................................................................. 180
Printing Multiple Document Sets.......................................................................................................................................... 180
Collating..................................................................................................................................................................................... 180
6
Page 85

Printing Web Pages
..................................................................................................................................................................181
Reducing and Enlarging to Fit the Paper Size (Fit to paper size)............................................................................... 182
Reducing and Enlarging by a Specified Ratio (Scale, Directional magnification) ................................................ 182
Reducing to A4/Letter Automatically................................................................................................................................. 183
Rotating the Image by 180 Degrees.................................................................................................................................. 184
Printing on Registered Custom Size Paper........................................................................................................................ 184
Printing on Unregistered Custom Size Paper ................................................................................................................... 185
Printing on Both Sides of Paper ........................................................................................................................................... 186
Printing Multiple Document Pages per Sheet (Layout) ...................................................................................................187
Splitting the Document Image across Multiple Sheets (Poster) ....................................................................................187
Printing from the Last Page.................................................................................................................................................... 188
Creating a Binding Margin................................................................................................................................................... 188
Printing Documents with a Header and Footer ............................................................................................................... 189
Printing with a Layout Suitable for Making Booklets ..................................................................................................... 190
Printing Images or Text Superimposed on Prints ............................................................................................................. 190
Creating a New Watermark........................................................................................................................................191
Printing Documents with an Overlay Image Superimposed (Overlay)......................................................................191
Creating a New Overlay Image File........................................................................................................................ 192
Deleting an Overlay Image File ................................................................................................................................192
Creating a New Overlay Set..................................................................................................................................... 193
Unauthorized Copy Control................................................................................................................................................. 193
Using [Data security for copying]...............................................................................................................................194
Specifying Data Security for Copying ..................................................................................................................... 195
Using [Mask type:] ........................................................................................................................................................ 195
Specifying [Mask type:]............................................................................................................................................... 196
Important Notice............................................................................................................................................................ 197
Displaying the Preview before Printing.............................................................................................................................. 197
Custom Settings............................................................................................................................................................................. 198
Printing........................................................................................................................................................................................ 198
Registering ................................................................................................................................................................................. 198
Changing the Name............................................................................................................................................................... 199
Deleting...................................................................................................................................................................................... 199
Changing the Custom Settings Display Order.................................................................................................................200
Saving a Registered Custom Setting in a File...................................................................................................................200
Registering a Custom Setting Using a Custom Setting File........................................................................................... 201
Updating Custom Settings According to the Current Printer Configuration............................................................. 201
Supporting Multi-Languages .....................................................................................................................................................203
7
Page 86

Monitoring and Configuring the Printer
Using the Status Monitor ............................................................................................................................................................ 205
Receiving Notification of Print Job Status via the Status Monitor ...............................................................................205
Using SmartDeviceMonitor for Client..................................................................................................................................... 206
Monitoring Printers.................................................................................................................................................................. 207
Using Notification via SmartDeviceMonitor for Client.................................................................................................. 207
Specifying the Print Server ..........................................................................................................................................207
Specifying the Client Computer Settings .................................................................................................................208
Specifying the Settings for Monitoring the Printer ..........................................................................................................208
Displaying the Printer Status .................................................................................................................................................209
When Using IPP with SmartDeviceMonitor for Client ....................................................................................................210
Using Web Browser......................................................................................................................................................................211
Displaying Top Page................................................................................................................................................................ 211
Menu............................................................................................................................................................................................212
Checking the Printer Status ....................................................................................................................................................213
Changing the Printer Settings ................................................................................................................................................213
Notifying the Printer Status by E-mail ..................................................................................................................................213
Specifying Notification the Printer Status by E-mail...............................................................................................214
E-mail Transmission Function Group 1-4...................................................................................................................216
Recipient Setup ................................................................................................................................................................216
Email Transmission Function Alerts .............................................................................................................................216
About the Web Browser Help...............................................................................................................................................217
Remote Maintenance via Telnet (mshell) ................................................................................................................................218
Procedure....................................................................................................................................................................................218
Telnet Setting Items...................................................................................................................................................................218
Display Status Information........................................................................................................................................... 221
SNMP.............................................................................................................................................................................................. 223
Using a Printer Server
Preparing Printer Server..............................................................................................................................................................225
Printing notification via SmartDeviceMonitor for Client................................................................................................ 225
Setting the Print Server .................................................................................................................................................225
Setting a Client ...............................................................................................................................................................226
Using NetWare............................................................................................................................................................................. 227
Using Print Sever (NetWare 5.1, NetWare 6.5) ............................................................................................................ 227
Using Print Sever (NetWare 5.1, NetWare 6.5 Pure IP Environment) ......................................................................228
Using as a Remote Printer (NetWare 5.1, NetWare 6.5)............................................................................................ 230
8
Page 87

Additional Information
Checking the Current Printer Driver Version.......................................................................................................................... 234
Software on the CD-ROM.......................................................................................................................................................... 235
Files.............................................................................................................................................................................................. 235
RPCS Raster Printer Drivers ................................................................................................................................................... 235
SmartDeviceMonitor for Client........................................................................................................................................... 236
Manuals (HTML files) .............................................................................................................................................................236
Cautions to Take When Using in a Network ........................................................................................................................ 237
Connecting a Dial-up Router to a Network...................................................................................................................... 237
Configuring the Router .................................................................................................................................................237
Using DHCP.............................................................................................................................................................................. 237
Configuring SSL Encryption....................................................................................................................................................... 239
SSL (Secure Sockets Layer) Encryption .............................................................................................................................239
User Settings for SSL (Secure Sockets Layer)................................................................................................................... 239
Installing the Certificate Using SmartDeviceMonitor for Client ..................................................................................240
Specifications................................................................................................................................................................................. 241
Printer Body............................................................................................................................................................................... 241
Option (Bypass tray) ..............................................................................................................................................................243
Option (Network Interface Board)..................................................................................................................................... 243
Electromagnetic Interference.....................................................................................................................................................244
Information about Installed Applications............................................................................................................................... 245
expat ...........................................................................................................................................................................................245
JPEG LIBRARY........................................................................................................................................................................... 245
NetBSD ......................................................................................................................................................................................245
Authors Name List.......................................................................................................................................................... 246
Samba(Ver 2.2.2-1.1) ............................................................................................................................................................ 247
RSA BSAFE
®
............................................................................................................................................................................. 247
OpenSSL.................................................................................................................................................................................... 247
OpenSSL License .....................................................................................................................................................................248
9
Page 88

Read This First
Read This First
About This Product ..........................................................................................................................................................................11
Introduction .................................................................................................................................................................................. 11
Trademarks................................................................................................................................................................................... 11
Disclaimer .....................................................................................................................................................................................12
Manuals for This Printer ............................................................................................................................................................12
How to Read This Manual............................................................................................................................................................13
Screen Navigation..................................................................................................................................................................... 13
Useful Functions...........................................................................................................................................................................14
Symbols.........................................................................................................................................................................................15
Removing the User Guide ........................................................................................................................................................16
Guide to Components....................................................................................................................................................................17
Printer Body.................................................................................................................................................................................. 17
Printer Rear...................................................................................................................................................................................18
Control Panel............................................................................................................................................................................... 19
Option .......................................................................................................................................................................................... 20
Network Interface Board Type GX2 .......................................................................................................................... 20
Multi Bypass Tray Type BY1000 ..................................................................................................................................21
Detaching and Reattaching the Multi Bypass Tray (Optional).............................................................................21
Recommended Functions.............................................................................................................................................................. 23
10J0076605_1.00 Copyright © 2005 All rights reserved.
Page 89

Read This First
About This Product
This section tells you about the product.
Introduction
This manual describes detailed instructions on the operation and notes about the use of this machine. To get maximum versatility from this machine, all operators are requested to read this manual carefully and follow the
instructions. Please keep this manual in a handy place near the machine.
For safe and correct use, please be sure to read the Safety Information in the Setup Handbook that comes with
this machine before using the machine.
Trademarks
Adobe and Acrobat are either registered trademarks or trademarks of Adobe Systems Incorporated in the
United States and/or other countries.
Microsoft, Windows, Windows NT are registered trademarks of Microsoft Corporation in the United States and/
or other countries.
Novell, NetWare are registered trademarks of Novell, Inc.
UNIX is a registered trademark in the United States and other countries, licensed exclusively through X/Open
Company Limited.
®
Citrix
and MetaFrame® are registered trademarks of Citrix Systems, Inc
UPnP is a trademark of the UPnP Implementers Corporation.
IPS-PRINT Printer Language Emulation Copyright© 1999-2000 Oak Technology, Inc., All rights reserved.
Pentium is a registered trademark of Intel Corporation.
Netscape is a registered trademark of Netscape Communication Corporation in the U.S. and/or other countries.
Macromedia and Flash are either registered trademarks or trademarks of Macromedia, Inc. in the U.S. and/or
other countries.
Microsoft, Windows, Windows NT are either registered trademarks or trademarks of Microsoft Corporation in
the U.S. and/or other countries.
Other product names used herein are for identification purposes only and might be trademarks of their respective companies. We disclaim any and all rights to those marks.
z
The product name of Windows® 98 is Microsoft® Windows® 98.
z
The product name of Windows® Me is Microsoft® Windows® Millennium Edition (Windows Me).
z
The product names of Windows® 2000 are as follows:
®
Microsoft
Microsoft
Microsoft
z
The product names of Windows® XP are as follows:
Windows® 2000 Professional
®
Windows® 2000 Server
®
Windows® 2000 Advanced Server
11
Page 90

Read This First
Microsoft® Windows® XP Home Edition
®
Microsoft
z
The product names of Windows ServerTM 2003 are as follows:
Microsoft
Microsoft
Microsoft
z
The product names of Windows NT® 4.0 are as follows:
Microsoft
Microsoft
Windows® XP Professional
®
Windows ServerTM 2003 Standard Edition
®
Windows ServerTM 2003 Enterprise Edition
®
Windows ServerTM 2003 Web Edition
®
Windows NT® Workstation 4.0
®
Windows NT® Server 4.0
Disclaimer
1. Contents of this manual are subject to change without prior notice.
2. In no event will the company be liable for direct, indirect, special, incidental, or consequential damages as
a result of handling or operating the machine.
Manuals for This Printer
Read the appropriate manual according to what you want to do.
Quick Installation Guide
This guide explains how to unpack the printer, set it up, and install options. It also explains basic settings
and operations.
Setup Handbook
This handbook explains how to install and use the User Guide. It also contains troubleshooting procedures
to follow if the installation fails.
User Guide (HTML)
This guide, which is on the "Driver, Manual & Utility" CD-ROM, explains in detail how to use the printer.
The guide explains how to make network and printer driver settings, and how to make and check printer settings using a Web browser and other utilities.
The guide also contains troubleshooting procedures, such as those related to printing and paper jams, and
important information about types of paper and replaceing consumables.
We recommend you install this guide on your computer so you can refer to it easily.
12
Page 91

Read This First
How to Read This Manual
Be sure to read this section before anything else.
Screen Navigation
Read this manual carefully before you use this product and keep it handy for future reference. For safe and correct use, please be sure to read the Safety Information in the Setup Handbook before using the machine.
This section describes the items that appear in the User Guide.
z
The content of this manual is subject to change without prior notice. In no event will the company be liable for direct, indirect, special, incidental, or consequential damages as a result of handling or operating this machine.
1. All Titles
Displays a list including the manual's all titles.
2. Contents
Displays the manual's contents.
3. Back
Returns you to the preceding page.
4. Previous
Takes you to the previous page (according to title order).
5. Next
Takes you to the next page (according to title order).
6. Jump to the linked page.
Takes you to the corresponding HTML page. (Underlines indicate hyperlinks.)
7. Open another window to display the linked page.
Opens the corresponding page in a new window.
13
Page 92

Read This First
8. Top
Takes you to the top of the current page.
# If the page contains references, they appear at the bottom of the page.
z
This User Guide describes procedures using Windows 2000 as an example. Procedures under other operating systems may differ. Screens
vary according to the operating environment.
z
Two kinds of size notation are employed in this manual. With this machine refer to the inch version.
z
Some illustrations in this manual might be slightly different from the machine.
z
Certain options might not be available in some countries. For details, please contact your local dealer.
Useful Functions
1. For screen reader
Click this tab to use screen reader functions, which are optimized for reading the manuals.
2. Search
Use keywords to search for items you want to query. Combined searching via multiple keywords is not possible.
Search results including a keyword's synonyms are also displayed.
3. Settings
You can change the color of the display screen and hide procedure illustrations.
14
Page 93

Read This First
Click [OK]to apply changes.
Symbols
The following set of symbols is used in this manual.
Indicates important safety notes.
Ignoring these notes could result in serious injury or death. Be sure to read these notes.
They can be found in the "Safety Information" section of Setup Handbook.
Indicates important safety notes.
Ignoring these notes could result in moderate or minor injury, or damage to the machine or to property. Be sure
to read these notes.
They can be found in the "Safety Information" section of Setup Handbook.
Indicates points to pay attention to when using the machine, and explanations of likely causes of paper misfeeds,
damage to originals, or loss of data. Be sure to read these explanations.
Indicates supplementary explanations of the machine's functions, and instructions on resolving user errors.
This symbol is located at the end of sections.
It indicates where you can find further relevant information.
Indicates the names of keys and buttons.
15
Page 94

Read This First
Removing the User Guide
Follow the procedure below to remove the User Guide installed on your computer.
Removing the User Guide using its [Uninstall] function
1. Click [Start], and then point to [Programs].
2. Point to the installed [Product name], and then click [Uninstall User Guide].
3. Follow the instructions that appear to remove the User Guide.
Removing the User Guide using [Add/Remove Programs]
1. Open [My Computer], and then open [Control Panel].
2. Double-click [Add/Remove Programs].
3. Select the installed [Product name User Guide], and then click [Change/Remove].
4. Follow the instructions that appear to remove the User Guide.
16
Page 95

Read This First
Guide to Components
The names and functions of parts of the printer body, control panel, and options are explained.
Printer Body
This is a front view of the printer.
1. Top cover
Keep this cover closed during printing. If you cannot locate paper jams, or jammed paper cannot be removed easily,
you can check the condition of paper from the top of the printer.
2. Envelope selector
For envelopes, set the lever to the rear position ; for everything else, set the lever to the forward position .
3. Print cartridge (yellow)
4. Print cartridge (magenta)
5. Print cartridge (cyan)
6. Print cartridge (black)
7. Right front cover
Keep this cover closed during printing. Open to install or replace Print cartridges.
8. Tray 1
Load paper here.
9. Output tray extension
Pull out when using paper larger than A4/Letter to keep the printed paper from falling.
10. Output tray
Prints are delivered to this tray.
When using paper larger than A4/Letter, pull out the output tray extension.
When using paper larger than Letter, pull out the output tray extension.
17
Page 96

Read This First
Printer Rear
This is a rear view of the printer.
1. Duplex unit cover button
Press to open the duplex unit cover.
2. Vent
Air is vented here to prevent the inside of the printer from getting too warm. Do not lean anything against the vent or
block it in any way. If the inside of the printer gets too warm, a breakdown could occur.
3. Paper feed wheel
Use to wind out paper jammed around the guide board.
4. Power cord
Plug the power cord into a wall outlet.
Connect the grounding wire attached to the power plug directly to a grounding terminal.
5. Duplex unit
Turns the paper over when performing duplex printing.
6. Guide board
Open to remove paper jammed inside the printer.
7. Duplex unit cover
Open to remove paper jammed inside the duplex unit.
8. Duplex unit locks
Use to lock or unlock the duplex unit when attaching or detaching it.
9. USB slot
Connect the USB cable from the computer here.
18
Page 97

Read This First
Control Panel
1. [Power] key
z
Press to turn the power on and off.
z
To turn the power on, press the key for one second until it lights.
z
After the power is turned on, the [Power] key will blink until the printer is ready for printing at which point the key
will stop blinking and stay lit.
z
The [Power] key will also blink when the printer is processing data.
z
When the power is turned off, the key will blink slowly until the printer has completely shut down at which point
the key will be dark.
z
means "standby".
2. [Job Reset] key
When the printer is online, press this key to cancel an ongoing print job.
3. [Form Feed] key
When the printer is offline, press this to print all data left in the printer's input buffer.
You can use this to force the printer to print data received in the online status when the paper size or type does not
match the actually set size or type.
4. [Escape] key
Press this key to return to the previous condition on the display.
5. [ Online] key
Indicates whether the printer is online or offline. Press this to switch between online and offline.
When the lamp is lit, the printer is online, enabling data reception from the host computer.
When the lamp is unlit, the printer is offline, disabling data reception from the host computer.
Press to return to the ready condition.
6. [Menu] key
Press this key to make and check the current printer settings.
7. Print Cartridge End LED
Each LED corresponds to a print cartridge. From the left, the LEDs show the status of the black (K), cyan (C), magenta
(M), and yellow (Y) cartridges.
8. Display
Displays current printer status and error messages.
19
Page 98

Read This First
9. Alert indicator
Lights up whenever a printer error occurs. A red light indicates an error has occurred that makes printing impossible; the
yellow light indicates a potential error during printing.
If the red light is on, follow the instructions that appear on the display.
10. [ ] [ ] keys
Use these keys to increase or decrease values on the display when making settings.
Keep the key pressed to quicken scrolling, and increase or decrease values on the display in units of 10.
11. Data In indicator
Blinks when the printer is receiving data from a computer. The Data In indicator is lit if there is data to be printed.
12. [#Enter] key
Press this key to execute menu items selected on the display.
z
For details about switching to Energy Saver mode, see p.61 "System Menu".
Option
Network Interface Board Type GX2
By installing this optional network interface board in the machine, you can print over the network.
1. Ethernet Port
Use a network interface cable to connect the printer to a network.
20
Page 99

Read This First
Multi Bypass Tray Type BY1000
Use this tray to feed in sheets manually.
1. Bypass tray
Load paper here.
2. Bypass tray extension
You can pull this bypass tray extension out by 2 clicks. Pull this out according to the paper size.
Detaching and Reattaching the Multi Bypass Tray (Optional)
To clear a paper jam, you might have to detach the multi bypass tray.
This section explains how to detach and reattach the multi bypass tray.
1. Remove any paper in the bypass tray.
2. Push the bypass tray extension in.
3. Detach the multi bypass tray.
21
Page 100

Read This First
4. Reattach the multi bypass tray.
5. Pull the bypass tray extension out.
6. Load paper in the bypass tray.
22
 Loading...