

Page 1

Read Copier and Facsimile Reference first.
Operator’s Manual
OfficeStyler Reference
Page 2

Important
Parts of this manual are subject to change without prior notice.
In no event will the company be liable for direct, indirect, special, incidental, or consequential
damages as a result of handling or operating the machine.
Trademarks
Microsoft, Windows, and MS-DOS are registered trademarks of Microsoft
Corporation.
PCL and LaserJet are registered trademarks of Hewlett-Packard Company.
DPOS@,EET@,Distney@ are registered trademarks of Destiny Technology Corporation.
PageMaker is a trademark of Adobe Systems Corporation.
OfficeStylerm, WinRefsw are trademarks of Destiny Technology Corporation.
General Notice:
Other product names used herein are for identification purpose only and may be
trademarks of their respective companies. We disclaim any and all rights in those
marks.
Copyright
O Copyright, 1992-1996 Destiny Technology Corp.
Portions 0 copyright 1997 Ricoh Co., Ltd.
O Copyright, WinRefs/PhaseII,l 994-1 995, Destiny Technology Corp. Ver.2.O.
All rights reserved.
No part of this publication may be reproduced, stored in a retrieval system, or
transmitted in any form or by any means, electronic, mechanical, photocopying,
recording, or otherwise, without the prior written permission.
Page 3

Table of Contents
important ...................................................................................................
Trademarks ...............................................................................................2
Copyright ..................................................................................................2
2
INTRODUCTION
How to use this manual
Features
Part Names
OfficeStyler TI O Configuration Overview
Network Configuration Overview
Client Configuration
Server Configuration
Network Configuration Sample
.m . . . ..mmmmmmmm .m. m.. m. mm..... ■ m.m. m.mmmm. m.. . . . . . . . . . . . . . . . . . . . . . . . . . . . . . . .. 9.9
● mmm. mmmm. mmm .m. mm. mmmm. mm . . . . . . . . . . . . . . . . . . . . . . . . . . . . . . . . .
.......................................................
. . . . . . . . . . . . . 9 . . . . 9 . . . . . . . . . . . 9 . 9 . . 9 .9....... . . . . . . . . . . 9 . . . . . . . . . . ..99.....
■ m.m..m.m....m............
..............................................................
...............................................................................
.............................................................................
.............................................................
SETTING UP .. ..................................■ m...,mmmmmm.. ................
Cable connections
System Requirements
Allocating Virtual Memory .................................................
For Windows 3.1 .....................................................................................l0
For Windows 95 ...................................................................................... 11
Installing OfficeStyler TI Osoftware
For Windows 95 ......................................................................................l2
For Windows 3.1
.....................................................................................
Sharing the Printer
Connecting to the shared Printer
Test Printing
. . . . . . . . . . . . . . . . . . . . . . . . . . . . . . . . . . . . . . . . . . . . . . . . . . . . . . . . . . . . . . . . . . ...9.
Removing OfficeStyler TI O tools
...............................................................
.........................................................8
. . . . . . . . . . ...** ■ .mmm. mmmm. mmmm ● mm
ammmmmmmmmmmmmmmm
● mmmmmmmmmmmmmmmm,mmmmsmmmmmmmmmmm■ ■ ■ ■ ■ ■ ■ ■ ■ ■
.....................................
. . . . . . . . . . . . . . . .m. mm. .. m...... . . . . . . . .
1
1
2
3
4
4
5
5
6
7
7
10
12
14
16
18
18
19
PC-PRINTING ■ ■ ■ ■ ■ ■ ■ ■ ■ ■ ■ ■ ■ ■ m.mm. mmmmmmm ■ ■ ■ ■ ■ ■ ■ ■ ■ ■ ■ ■ ■ ● mmmnmmm. .mm. ● .mmmm mm.
Introduction ■ mm. .mmmmmmmmmm ■ mmmmmmmm. .mmmm ■ ■ ■ ■ ■ ■ ■ ■ ■ ■ ■ ■ ■ ■ ■ mmm . . ..mmmmmmmm mmm. mmmm. mmm
Printin?.............................m.m.mmmm....m...............m.m..m.mm.m.m..........
Printing rom a Windows Application
Printing from a DOS Application within Windows ....................................2l
Printing PCL and ASCII Files from MS-DOS
Printing ASCII Text Files .........................................................................2l
Advanced Operation ...............................................................................22
.......................................................2l
..........................................
20
20
20
21
i
Page 4
Selecting the Printing Mode
Changing the printing mode
Changing the printing mode from an application .................................23
Changing the printing mode by using the Printers folder (Windows 95) ......23
Changing the printing mode by using the control panel (Windows 3.1) .......23
Changing the printing mode from the control panel Tab of the
OfficeStyler T1 Oconsole
............,0..,,,,..,, ............................................
.....................................................................24
OfficeStyler TI O Printer console
Local Queue ............................................................................................
Changing the order of print jobs ..........................................................27
Remote Queue ........................................................................................29
Job Log
Control Panel ..........................................................................................
...................................................................................................3l
OfficeStyler TIO Printer Console Menu items .....................................34
.............................................
......................................
Printin modes?..................................................................
GDI Mo e ................................................................................................38
For Windows95 ...................................................................................38
GDI property screen .........................................................................38
Paper tab ......................................................................................39
Adavanced Options tab
lmagetab ......................................................................................43
FormSetting tab
Overlay .............................................................................................45
How to use overlay function
Duplex Printing .................................................................................47
For Windows3. 1
GDI Setup Screen ............................................................................49
Options screen ..............................................................................52
Overlay
PCL Mode .................................................
....................................................................................................
How to use overlay function
Duplex Printing ...................................
No cartridges required ...........................
Saving downloaded fonts and macros ir
PCL Control Panel
........................,,..,,0,.,,,,,..,.,,..,, ,,,,,.,,,.0,,,,.,.,,0,......
..................................................................................
.................................
Device Status Display
............,..0..,,,,...............0,....0....................
.............................................................
.............................................................
.............................................56
.............................................58
.............................................58
PCLmode ...........................58
.............................................59
.............................m.m....m....m.............
22
22
25
26
32
38
41
44
45
49
53
53
62
PC-SCANNING .....................................m.,.mmmm..m.m....m.m
Introduction .m.m..m.m....m..........................................................
Operation
ii
.............................m.m..mmm...mm.m.mm.m,m,,.,.....................
64
64
65
Page 5

Using the TWAIN Driver .................
Introduction
Setting Parameters (User Interface) ..........
During Scanning ......................................
.................................................
........
..........
..........
..........
.m. mm mm.
. . . . . . . . . .
. . . . . . . . . .
. . . . . . . . . .
mmmmmwmm. m.mmmm
............... ....
66
66
...................66
...................67
PC-FAXING
mmmmmmmmmmmmmm
■ mmmnmmmmmmmmm● mmmmmmmmmmmmmWmmmmmmmmmmmmm■ nmmmmmm
Introduction ● mmmmmmmmmmmmmmmm ● mmmmmmmmmmmmmmmm mmmmvmmmmmmmmmmmm ■ ■ ■ ■ ■ ■ ■ ■ ■ ■ ■ ■ ■ ■ ■ ■ ■ mmmm
Setting up the ComRedirector ................................................................68
Operation
.............................m.mm.m..m.m.m............................
Sending a Fax .........................................................................................68
Receiving a Fax
Using the ComRedirector
..........................,,,,..,,,, ...............................................0..
mmmammmmmmmmmmmmmm ● mmmmmmmmmmmmmmmnm mmmmmmmmmmmmmm
introduction .............................................................................................7O
Setting Port (Enable the ComRedirector) in Windows 3.1 ......................71
Disable the ComRedirector .....................................................................7l
OfficeStyler T1OControl Panel
Introduction
. . . . . . . . . . . . . . . ■ mm. mmmmm. mmmam ■ mmmmmmm. mm. mmm . . . . . . . . . . . ...8 ■ ammmmmmmmmm
. . . . . . . . . . . . . ■ ■ ■ ■ ■ ■ ■ ■ ■ ■ ■ ■ ■ ■ ■ ■ ■ ■ ■
Starting the OfficeStyler TIO Control Panel ....................72
Important notes
Setup
Basic setup .............................................................................................73
Night Timer (Energy Saving) setup .........................................................74
User Switch setup
Copying
How to make copies ...............................................................................
....................................*..............................................
. . . . . . . . . . . . . . . . . ..m. mm. mmmm. m ■ mmm. mm. m.mm mm. . . . . . . . . . . . . . . . . . . ...8..99.999 ..9.
..................................................................
...................................................................................
Faxing . . . . . . . . . . . . . . . . . . . . 9 .99.....9 .mm. mmm. mmm. mm. . . . . . . . . . . . . . . . . ...99...9..9.9 ● mmmmmm
How to send a fax message ...................................................................78
Advanced transmission features
Scanning
mmmmmammmmmmmmm ● mmmmmmmmmmmmmw ■ mmm. mmmmmmmmmm mmmmmmmmmmmmmmm mmmmmmmmummmamm ● m
......................0.,..,,,0..,.,.........................
How to scan in an image ........................................................................8O
Phonebook ...............m........mm.m..............■ ............ ..................
How to program a fax number into the Phonebook
How to edit the Phonebook .....................................................................82
How to delete a number from the Phonebook
How to copy numbers from the Phonebook into Quick Dials and Speed
Dials ........................................................................................................84
How to copy numbers from the Phonebook into Groups ........................86
How to print the Phonebook
...................................................................
................................81
........................................83
● .....
68
68
68
69
70
72
72
72
73
76
77
77
78
79
80
81
87
...
Ill
Page 6

How to import numbers into the Phonebook
How to export numbers from the Phonebook .........................................90
Managing fax messages
How to view/print a list of messages recently sent and received ............92
How to resend a message ......................................................................93
How to delete a message that is awaiting transmission
...................................................
OfficeStyler Document Desktop
Introduction
To drag anddropa document: ............................................................95
To find out what a button does quickly:
Starting the OfficeStyler Document Desktop ..........................................95
Screen Layout
Document Window ..............................................................................96
Thumbnails View
Page View
List View .........................................................................................l OO
Applications
Folders ..............................................................................................l O2
To view the contents of a folder.
Tomove a folder: ............................................................................l O2
To create a new folder-
To rename a folder: .........................................................................l O3
To delete a folder.
Status Bar .........................................................................................l O3
Managing documents
To create a new document: ............................................................l O4
To move a document to another folder.
Tocopya document to the same folder: ...........................................105
To delete a document.
To find a document: ...........................................................................l O6
To edit document information.
Printing, faxing and E-mailing documents .............................................l O7
To print, fax or E-mail a document.
Importing and exporting image files ......................................................l O8
To import an image file onto the Desktop.
To export a document on the Desktop to afile: .................................l O9
To word-process a document: ...........................................................l O9
To load the document image directly into an application: ..................110
Preferences ........................................................................................... 110
To view or change the OfficeStyler Document Desktop preferences: ...... 111
Desldop preferences ......................................................................... 111
PC Fax preferences
.............................................................................................
.........................................................................................
..............................................................................97
........................................................................................98
....................................................................................,,,
.................0....................................
. ............0..,,,,..,,,,. ..............,,,..0,,0..,,,,..,,,,..,.,,
..................................................,.,,..,,,, ..,,,,,.,..,....
............................................................................
. ,00....0.,.,.......0....0.0..,,,0..00,0................................
. ...........................................................
.....................................................
........................,,..,,,,..,, ........................,,..,,,,..,, ,,
.,,..,,,,..,.. .............................
,..,,...................!94
. . . . . . . . . . . . . . . ■ m.. .mm. .m. ..m. mm. mmm. 95
...............................................95
..............................................
. .........................................
88
92
95
96
101
102
102
103
104
104
105
106
107
108
111
iv
Page 7

Printer preferences
Wordprocessor (OCR) preferences .................................................. 112
,...........................................................................
112
TROUBLESHOOTING
PC-PRINTING
PC-SCANNING
PC-FAXING
APPENDIX
Specification
Printer Specification ..............................................................................ll8
Interface Specification
Bidirectional Parallel lntedace ........................................................... 119
INDEX
................................................................................
. . . . . . . . . . . 999 . . . . . . . ..9.9.... ■ m.. mm. mmmm. mm. ■ m.. m99mmmm. .mm .mmmmmmm
.m..mmm.mm.m............................................................
....... .........................................................
...........................................m...mm.m..................
■ mm. .mmm. mm. m .m. mm. mmmm mm. ■ mmnmmmmmmmmm ● mmmmmmmm
● mmmammmmmmmmmmmm ■ mmmmmmmmummmmamm ■ mnmmmmmmmmmmammm mmmmmmmmmmmmmmm
.........................................................0...........0....
113
113
115
116
118
118
119
120
v
Page 8

INTRODUCTION
How to use this manual
The Operator’s Manual for this machine is composed of the following 2
manuals.
(1)Operator’s Manual: Copier and Facsimile Reference
(2)Operator’s Manual: OfficeStyler Reference (This manual)
Firstly, read the (1) Operator’s Manual: Copier and Facsimile Reference. It
contains important information for your safety.
This manual (2) explains the operation of this machine when it is connected to
your computer as a PC-Printer.
When using this machine connecting your computer, please refer to this
manual for the operation and refer to another manual for the other information
such as MAINTENANCING or TROUBLESHOOTING.
When using this machine as a standalone Copier machine or FAX machine,
please refer to the separate (1) Operator’s Manual: Copier and Facsimile
Reference.
Page 9
INTRODUCTION
Features
Features
This machine can not only be used separately as a Copier and FAX machine,
but can also be connected to a personai computer which runs Windows (Note)
and, by installing the OfficeStyler T1 O software packed with the machine, can
be used as a laser printer.
Note:
This machine can also be connected a Macintosh by connection to the optional
RS422 Interface Port. For details, see the separate Operator’s Manual
included here in.
(1) PC-PRINTER
It operates as a 300dpi resolution laser printer with a print speed of
10PPM(when printing on A4/LT size sheets).
(2) PC-SCANNER
Using specified scanner software, this machine becomes a TWAIN driver
compatible scanner.
(3) PC-FAX
When BitWare for Windows(included) is installed, this machine makes it
possible to send and receive FAX messages through your personal
computer using specified FAX software.
(4) OfficeStyler T1 O Control PaneI
The OfficeStyler TI O Control Panel lets you copy, scan and send faxes
from your PC Desktop.
Page 10

Part Names
Part Names
INTRODUCTION
\
Parallel interface connector
3
Page 11
INTRODUCTION OfficeStyler T1 OConfiguration Overview
OfficeStyler T1OConfiguration Overview
OfficeStyler T1 O software provides three software configuration options
depending on how you intend to use the printer:
Sewer
Client
Whether you use the Of ficeStyler TIO software printer in a network
configuration or as a non-network printer, your configuration will provide
almost the same print modes and printer features.
A resource is a piece of data, software application, or hardware that can be
accessed and used by multiple users or system components. A resource
provides a service. Two examples of Windows resources are File Manager
and a dialogue box which can provide information or a method of interacting
with the system. Resources, local to the PC, are generally available through
Windows itself. However, resources that are available to other PCs across a
network must be formally shared. The owner of the resource shares the
resource. Those that wish to use the resource connect to the resource.
This function is only valid for those using Windows 95 and Windows for
Workgroups.
Network Configuration Overview
Microsoft’s Windows for Workgroups is designed as a peer-to-peer network.
That is, each connected PC is a peer to every other connected PC in the
workgroup. This peer approach means that no PC in the workgroup acts as a
network administrator. OfficeStyler T1 O software adopts this peer-to-peer
model. However, to provide user configuration flexibility and to save disk space
for some users, OfficeStyler T1 Osoftware can be configured differently when a
user has a connected printer or when a user does not have a connected printer
and uses a printer connected to another peer PC in the workgroup. The PC
that has the printer connected to it performs some additional functions not
needed by PCs without a connected printer. Therefore, we have adopted the
Client/Server terminology to differentiate between those PCs that have a
printer connected to them and those PCs that do not have a connected printer.
A Server is that peer with a connected and shared printer. A Client is a peer
using a printer connected to a Server.
Note:
For a peer to access another peer’s OfficeStyler T1 O software printer, both
peers must have OfficeStyler TI O software installed and selected in their
Windows printer list.
A maximum of 3PCS on the network can use OfficeStyler T1O printer at the
same time.
4
Page 12

OfficeStyler T1 OConfiguration Overview
INTRODUCTION
Client Configuration
The Client is a peer in the workgroup that wants to print to another peer’s
printer. The Client configuration is a subset of the Sewer configuration and is
provided in those cases when saving disk space at the Client is an issue.
If at some point, the PC configured as a Client attaches a OfficeStyler T1 O
software printer, that PC must re-install the OfficeStyler TI O software and
select the Setver option.
Note:
Re-installation can be via installation disks or across the network.
Server Configuration
The Server is the peer in the workgroup that has a printer connected to it. At
installation, the OfficeStyler TI OSet-up Program asks if you wish to configure
the PC as a Server or a Client. You must configure the PC with the attached
OfficeStyler T1 O software printer as a Server.
Note:
If you previously installed and configured your PC as a Client, you must
reinstall your printer as a Server. You can either use your installation disks or
install across the network if there is another Setver configured and running.
Any Server in the workgroup with OfficeStyler T1O software installed can be
effectively both a Server and a Client. As a Server, that PC shares the
connected printer with other peers in the workgroup. However, when that
server opts to print to a printer supported by another Server, that PC is acting
as a Client to the other Server.
Page 13

INTRODUCTION
OfficeStyler T1OConfiguration Overview
Network Configuration Sample
Following figure shows this flexible OfficeStyler T1O software approach. As
seen in the figure, there are two PCs that have attached printers: Peer A with
Printer A and Peer D with Printer D. If Peer B chooses to print to Printer A then
for that print job Peer B is the Client and Peer A is the Server. If Peer A wants
to print to Printer D, then for that print job Peer A becomes a Client to Peer D,
but Peer A remains the Server for Peer B’s print job.This function is only valid
for those using Windows 95 and Windows for Workgroups.
Peer B
(Client)
Printer A Peer A
(Server)
6
Peer C
(Client)
Peer D
(Server)
Printer D
Page 14
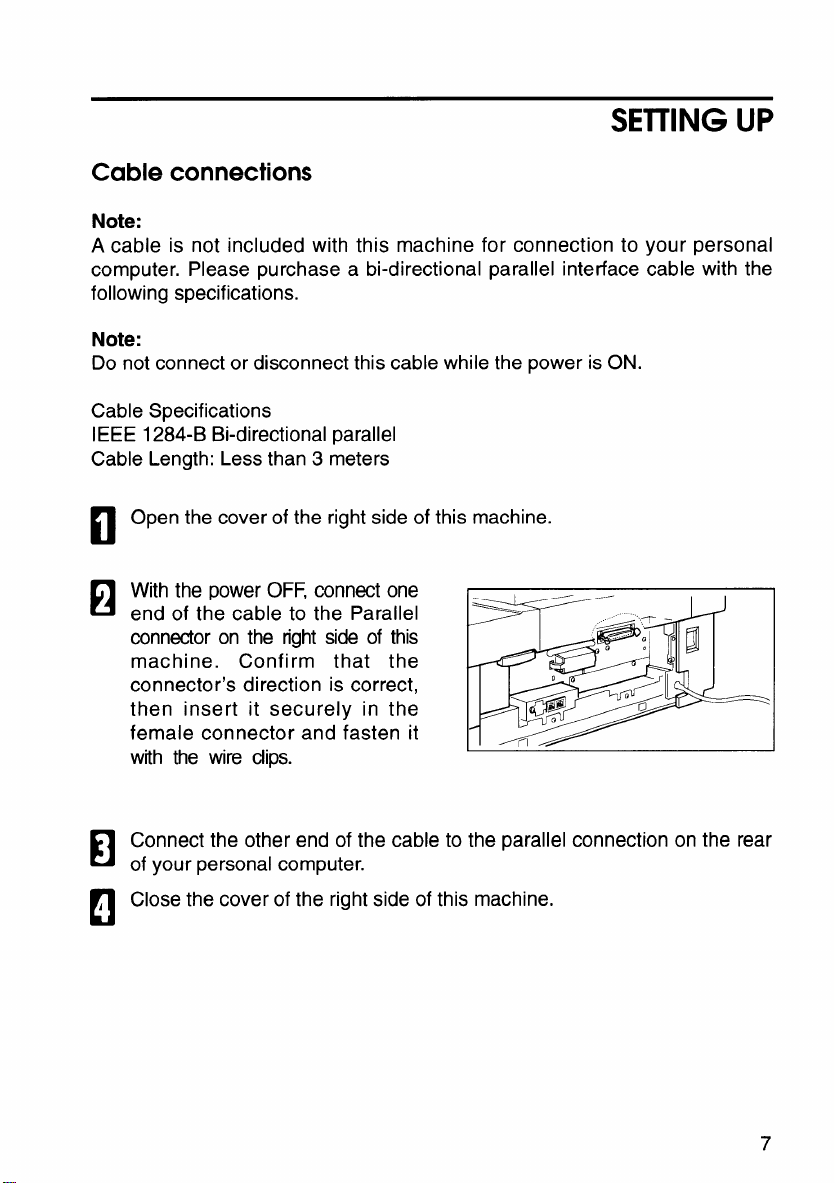
SETTING UP
Cable connections
Note:
A cable is not included with this machine for connection to your personal
computer. Please purchase a hi-directional parallel interface cable with the
following specifications.
Note:
Do not connector disconnect this cable while the power is ON.
Cable Specifications
IEEE 1284-B Bi-directional parallel
Cable Length: Less than 3 meters
Open the cover of the right side of this machine.
El
With the power OFF, connect one
H
end of the cable to the Parallel
connector on the right side of this
machine. Confirm that the
connector’s direction is correct,
then insert it securely in the
female connector and fasten it
with the wire dips.
Connect the other end of the cable to the parallel connection on the real
El
of your personal computer.
Close the cover of the right side of this machine.
A
n
Page 15

SElllNG UP SYstem Requirements
System Requirements
-Windows 3.1:
Operating system:
1.
Windows 3.1 or greater in Enhanced Mode, and MS-DOS 3.3 or later.
2.
Pc:
An lBM-compatible PC with at least a 386SX 16MHz CPU.
3.
!/0:
Standard PC parallel printer port and cable.
4.
Memory:
At least 4 megabytes PC memory (RAM), which is also the minimum
amount of memory recommended by Microsoft for use with Windows.
Adding more memory to your PC will increase overall system and printer
performance.
Disk space:
5.
About 6 megabytes disk space for files, and up to approximately 8.5
megabytes disk space for virtual memory.
Allocating Virtual Memory:
6.
OfficeStyler software requires 12.5 MB of total memory, divided between
your PC memory (a minimum of 4 MB) and your Windows virtual
memory.
7.
Restrictions:
1.Due to the nature of the high-speed interface, the OfficeStyler printer
cannot be shared through a network or switch box.
2. OfficeStyler works with standard parallel cables. Be aware that some
manufacturers cut corners by manufacturing cables that do not
conform to standard parallel specifications.
-Windows 95:
1.
Operating system:
Windows 95.
Pc:
2.
An lBM-compatible PC with at least a 486DX 33MHz CPU.
1/0:
3.
Standard PC parallel printer port and cable.
Memory:
4.
At least 8 megabytes PC memory (RAM), which is also the minimum
amount of memory recommended by Microsoft for use with Windows.
Adding more memory to your PC will increase overall system and printer
Performance.
,
8
Page 16
Svstem Requirements
Disk space:
5.
About 6 megabytes disk space for files, and up to approximately 12
megabytes disk space for virtual memory.
6.
Allocating Virtual Memory:
Off iceStyler software requires 16 MB of total memory, divided between
your PC memory (a minimum of 8 MB) and your Windows virtual
memory.
7.
Restrictions:
1.Due to the nature of the high-speed interface, the OfficeStyler printer
cannot be shared through a network or switch box.
2. OfficeStyler works with standard parallel cables. Be aware that some
manufacturers cut corners by manufacturing cables that do not
conform to standard parallel specifications.
SElllNG UP
Page 17
SElllNG UP
Allocating Virtual Memory
For
Windows 3.1
The OfficeStyler TIO software requires a minimum of 12.5 MB of virtual
memory for Client and Server configurations.
To change the virtual memory, follow the instructions below. For more
information on virtual memory, refer to the Optimizing Windows section in the
Microsoft Windows 3.1 User’s Guide.
Double click on the “Control Panel” icon in the Main group.
Allocating Virtual Memory
a
Double click on the “386 Enhanced” icon.
El
Click the “Virtual Memory” button.
El
The Virtual Memory dialog box will be appeared.
If the size shown in the Virtual Memory dialog box is less than
A
n
12MB, or Type is “temporary” or “none”, then click “Change.”
Otherwise click “Cancel” to exit the dialog box.
Select the Type “Permanent” in the New Swapfile Settings box.
H
Increase the “New” size in the “New Swapfile Setlings” box to at least 8.5
I
n
MB.
Note:
If you cannot increase the New size to the desired figure, then select the Type
“Temporary” and set the virtual memory size.
Click “OK”.
El
s Click “Yes”.
b
n
i Click “Restart Windows” to make the setting effective.
El
10
Page 18

Allocating Vktual Memory
SETTING UP
For Windows 95
It is recommended to let Windows handle virtual memory. If not, you shall
allocate virtual memory by yourself.
To change the vittual memory, follow the instructions below.
Click the “Start” button, move the pointer to “Settings” and click “Control
Panel”.
Double click the “System” icon.
“System Properties” window will be appeared.
Click the “Performance” tab.
Click “Virtual Memory....”.
Click “Let me specify my own virtual memory settings” button.
Increase the Minimum setting to at least 8.
Click “OK”.
Click “Yes”.
Click “Close”.
Click “Yes” to restart Windows.
11
Page 19

SElllNG UP
Installing OfficeStyler T1Osoftware
Installing OfficeStyler T1Osoftware
OfficeStyler TI O includes a software installation program to make setting up
easier. The installation program analyzes your system configuration, installs
the OfficeStyler T1O software, and makes the necessary changes to Windows
startup files.
Once you have started the OfficeStyler T1 Osetup program, you can cancel the
installation at any time. Just click on the Cancel button that appears in the
setup program window.
For Windows 95
Start Windows 95.
Insert OfficeStyler T1O Disk 1 of 4 into your computer’s disk drive.
Click “Start”.
Click “Run”.
Type “A:~nstall” and press “Enter”.
First, the “OfficeStyler TI O“ window appears, and then the “OfficeStyler
T1O setup” window will appear.
If you are installing the software on a Server, click “Printer On”. If on a
client, click “No Printer”.
12
Page 20

Installing OfficeStyler T1Osoftware
The setup program has determined the following user configuration for
El
your OfficeStyler TI Oinstallation.
Make any necessary changes and click “Continue”.
~ User Type
Depending on your computer configuration, select Server or Client .
~ Computer Name
If necessary, type in the computer name.
~ Comments
If necessary, type in any comments. For example, your name or the loca-
tion of your computer.
~ OfficeStyler T1 O Directory
If you want to install in a different directory and/or dtive, type the name
of the ditectory.
SETTING UP
o Make any necessary changes and click “Continue”.
o
fl
13
Page 21

SEITING UP
Installing OfficeStyler T1 Osoftware
Insert disks following the
I
nstructions that appear on the screen.
o
, If you want to install OmniPage (included), insert OmniPage disk
m
following the instructions. If you not, click “Skip”.
For installation of OmniPage, see OmniPage manual.
Remove the inserted disk and click “Restart Now” to restart Windows.
III
Note:
The Installation window lies behind other windows. To bring the installation
window to the front, close other windows.
For Windows 3.1
Start Windows.
c1
Insert OfficeStyler TIO Disk 1 of 4 into your computer’s disk drive.
El
From the Program Manager menu, click “File”. Then click “Run...” option.
El
The Run Program dialog box appears.
Type “A:\install” and press “Enter”.
A
c1
First, the “OfficeStyler T1O“ window appears, and then the “OfficeStyler
T1O setup” window will appear.
14
Page 22
Installing OfficeStvler T1Osoftware
If you are installing the software on a Sewer, click “Printer On”. If on a
H
client, click “No Printer”.
The setup program has determined the following user configuration for
I
t3
your OfficeStyler TI Oinstallation.
Make any necessary changes and click Continue.
c1
User Type
Depending on your computer configuration, select Server or Client.
c1
Computer Name
If necessary, type in the computer name.
n
Comments
If necessary, type in any comments. For example, your name or the loca-
tion of your computer.
OfficeStyler T1 O Directory
c1
If you want to install in a different directory and/or drive, type the name
of the ditectory.
Click “Continue”.
SElllNG UP
El
@
Click “Continue”.
o
fl
Make any necessary changes and click “Continue”.
I
El
Insert disks following the instructions that appear on the screen.
I
m
If you want to install OmniPage (included), insert OmniPage disk
m
following the instructions. If you not, click “Skip”.
For installation of OmniPage, see OmniPage manual.
Remove the inserted disk and click “Restart Now” to restart Windows.
III
15
Page 23

SETTING UP
Sharing the Printer
Sharing the Printer
If you have installed as a Server but do not wish to share the printer, then skip
this section.
Before a Client can print to the OfficeStyler T1 Oprinter, the sewer printer must
be shared and the client must be one of authorized users of the server.
The Server must share the printer resource. To share a printer resource the
Sewer must perform the following steps:
Double-click the “Printer console” icon in the OfficeStyler T1O Tools.
c1
(Windows 3.x)
Click the “Start” button, point to “OfficeStyler T1 O Tools” in “Programs”,
and then click “Printer Console”. (Windows 95)
Click the “Control Panel” tab or select the Network menu.
M
Select “Share Printer”.
H
, Check item(s) you are going to share. (i.e. GDI, PCL).
n
Select “OK”. Printer sharing will be established automatically every time
H
Windows starts up.
Note:
Only one OfficeStyler TI O printer can be attached to any given PC. Therefore,
the Share command automatically selects the attached OfficeStyler TI O
printer at the Server’s PC. If an additional non- OfficeStyler TI Oprinter is also
attached to the Server’s PC then to share that printer the Server uses the
Share menu item in the Network menu of the Windows Print Manager.
To stop sharing printer resource
To stop sharing printer resource, perform the following steps:
Double-click the Printer console icon in the OfficeStyler TIO Tools.
c1
(Windows 3.x)
Click the “Start” button, point to “OfficeStyler T1 O Tools” in “Programs”,
and then click “Printer Console”. (Windows 95)
16
Page 24
Sharing the Printer
Click the “Control Panel” tab or select the Network menu.
El
Select “Share Printer” menu item.
El
, Check off item(s) you want to stop sharing.
D
Select “OK”.
n
To authorize or unauthorized user of sharing printer:
Double-click the “Printer console” icon in the OfficeStyler TIO Tools.
El
(Windows 3.x)
Click the “Start” button, point to “OfficeStyler TI O Tools” in “Programs”,
and then click “Printer Console”. (Windows 95)
Click the “Control Panel” tab.
In
Select the Network menu.
El
SETTING UP
Select “Share Printer” menu item.
A
D
Select “Client” button. Client lists appear.
El
To add authorized user:
I
D
Select users from “Choose from” list box, then select Add button.
(Select Add All will authorize all current and thereafter connected users
to share the printer.)
To remove unauthorized user:
Select users from “Share with” list box, then select Remove button.
(Select Remove All will unauthorized all current users.)
Select OK.
El
17
Page 25

SEllING UP
Connecting to the shared Printer
Connecting to the shared Printer
Before a Client can print the Client must connect to a shared printer resource.
To connect to a shared printer resource, the Client must perform the following
steps:
Double-click the “Printer console” icon in the OfficeStyler TI O Tools.
(Windows 3.x)
Click the “Start” button, point to “OfficeStyler TI O Tools” in “Programs”,
and then click “Printer Console”. (Windows 95)
Click the “Control Panel” Tab.
Select Connect To... from the Network Menu.
Select the remote server to which you want to print.
Select a server you want to connect to.
You may select to use the selected server for all your print mode by
checking the Server of all virtual printers box.
Click on.
Test Printing
When Windows is restarted, you can use the OfficeStyler T1 O printer test
function to make sure the installation was successful. The printer test utility is
available through the Print Test Page button on the Control Panel tab of the
OfficeStyler TI O. The test utility will print a page during the test.
Note:
This function is only valid from a server.
18
Page 26

Removing OfficeStyler T1Otools
To begin a test print you must do the following:
Confirm the printer is cabled to the printer parallel port selected in the
El
installation if you are performing a local print test. Or confirm the server
has been selected for all print mode if you are performing a print test on
client.
Confirm the printer is turned-on.
SElllNG UP
El
Double-click the “Printer Console” icon.
El
Click the “Control Panel” tab.
A
n
Click the “Print Test Page” button.
H
Click “Yes”.
1
n
Removing OfficeStyler T1Otools
If you want to remove the OfficeStyler TI O software, perform the following
steps:
Double-click the “Uninstall Utility” icon in the OfficeStyler TIO Tools.
n
(Windows 3.x)
Click “Start” button, point to “OfficeStyler TI O Tools” in “Programs”, and
then click “Uninstall Utility”. (Windows 95)
Click “Yes”.
El
Remove the one remaining file (delete. exe).
El
19
Page 27

PC-PRINTING
Introduction
●
Windows GDI, PCL soft emulation drivers are built-in.
GDI mode
GDI mode provides fast, what-you-see-is-what-you-get (WYSIWYG) output
by taking advantage of Window’s native graphics and text features.
PCL mode
PCL mode provides compatibility with the popular printer language used in
the Laser Jet @ family. Both Window applications and DOS applications
running under Windows can use PCL mode for printing.
●
OfficeStyler T1O software
OfficeStyler T1 Osoftware provides two configuration options depending on
how you intend to use the printer.This function is only valid for those using
Windows 95 and Windows for Workgroups.
Server: For user the plan to attach the printer to their PC and have, or plan
to have, a network connection, and, many provide printer sharing to other
PC’s on the network.
Client: For users that will not attach the printer to their PC but do plan on
using the printer attached to another PC in the network.
OfficeStyler TI O software provides printer status information and recovery
instructions when a trouble happens.
●
Toner
With Toner Saving turn on, your printer reduces the amount of toner used to
print. This is especially valuable when printing draft copies of your print jobs.
●
With EET turned on, your printer will smooth the jagged edges of text and
line art given the output a very high quality appearance.
Saving
EET (Edge Enhancement Technology)
Printing
Note:
Depending on the type of OHP, the image may not print well, and it may
become easy for several sheets to be fed at the same time.
Caution:
Never copy onto OHP sheets intended for use with color copiers or inkjet
printers —the machine could be damaged.
20
Page 28

Printing
Printing from a Windows Application
Once you have selected your printer mode (GDI or PCL), just print from your
Windows application as you would to any other printer.
Printing from a DOS Application within Windows
OfficeStyler T1O is a Windows printer driver, designed for use with Windows.
In particular, OfficeStyler TI O’s GDI mode is based on Windows and does not
work with MS-DOS. However, OfficeStyler T1 O will work in PCL mode if you
create an MS-DOS session from within Windows, Enter MS-DOS from
Windows (click on the DOS application icon, or click on the MS-DOS icon and
run your application from the command line).
Set up your application to print to the parallel port LPTI (or LPT2 or LPT3 if you
have OfficeStyler set to print to one of these ports instead). Be sure your
application’s PCL driver is installed. Select a printer driver.
When ready to print, start your DOS application and print from your application as
you normally would to LPTI (or whichever port OfficeStyler is connected to).
Printing PCL and ASCII Files from MS-DOS
If you have a file in PCL or ASCII (text) format, you can print it from the
MS-DOS command line within Windows. At the command line prompt, type
PC-PRINTING
COPY/B ame.ext LPTI
where ame.ext is the name of your PCL or ASCll-formatted file. (If you have
configured OfficeStyler to print to a different parallel port, give its name instead
of LPT1 .)
Printing ASCII Text Files
You can output plain ASCII text files to the OfficeStyler T1Oprinter by following
this simple procedure.
Click on the “Notepad” application provided with your Windows 95
c1
system.
Open the file you wish to print.
El
Print the file.
El
Exit without saving changes.
A
c1
21
Page 29
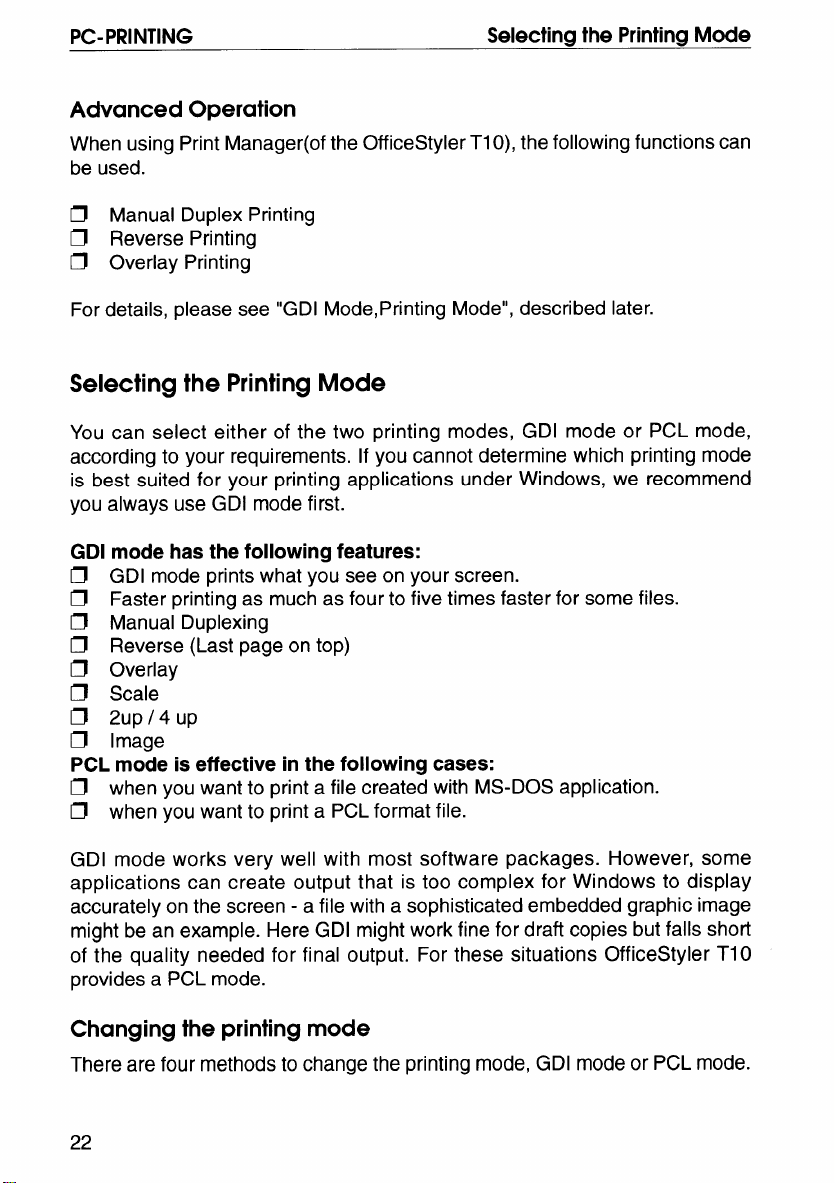
PC-PRINTING
Selecting the Printing Mode
Advanced Operation
When using Print Manager(of the OfficeStyler T1O), the following functions can
be used.
~ Manual Duplex Printing
IJ Reverse Printing
Cl Overlay Printing
For details, please see “GDI Mode, Printing Mode”, described later.
Selecting the Printing Mode
You can select either of the two printing modes, GDI mode or PCL mode,
according to your requirements. If you cannot determine which printing mode
is best suited for your printing applications under Windows, we recommend
you always use GDI mode first.
GDI mode has the following features:
~ GDI mode prints what you see on your screen.
~ Faster printing as much as four to five times faster for some files.
~ Manual Duplexing
~ Reverse (Last page on top)
Cl Overlay
Cl Scale
~ 2up/4up
Cl Image
PCL mode is effective in the following cases:
~ when you want to print a file created with MS-DOS application.
~ when you want to print a PCL format file.
GDI mode works very well with most software packages. However, some
applications can create output that is too complex for Windows to display
accurately on the screen - a file with a sophisticated embedded graphic image
might be an example. Here GDI might work fine for draft copies but falls short
of the quality needed for final output. For these situations OfficeStyler TI O
provides a PCL mode.
Changing the printing mode
There are four methods to change the printing mode, GDI mode or PCL mode.
22
Page 30
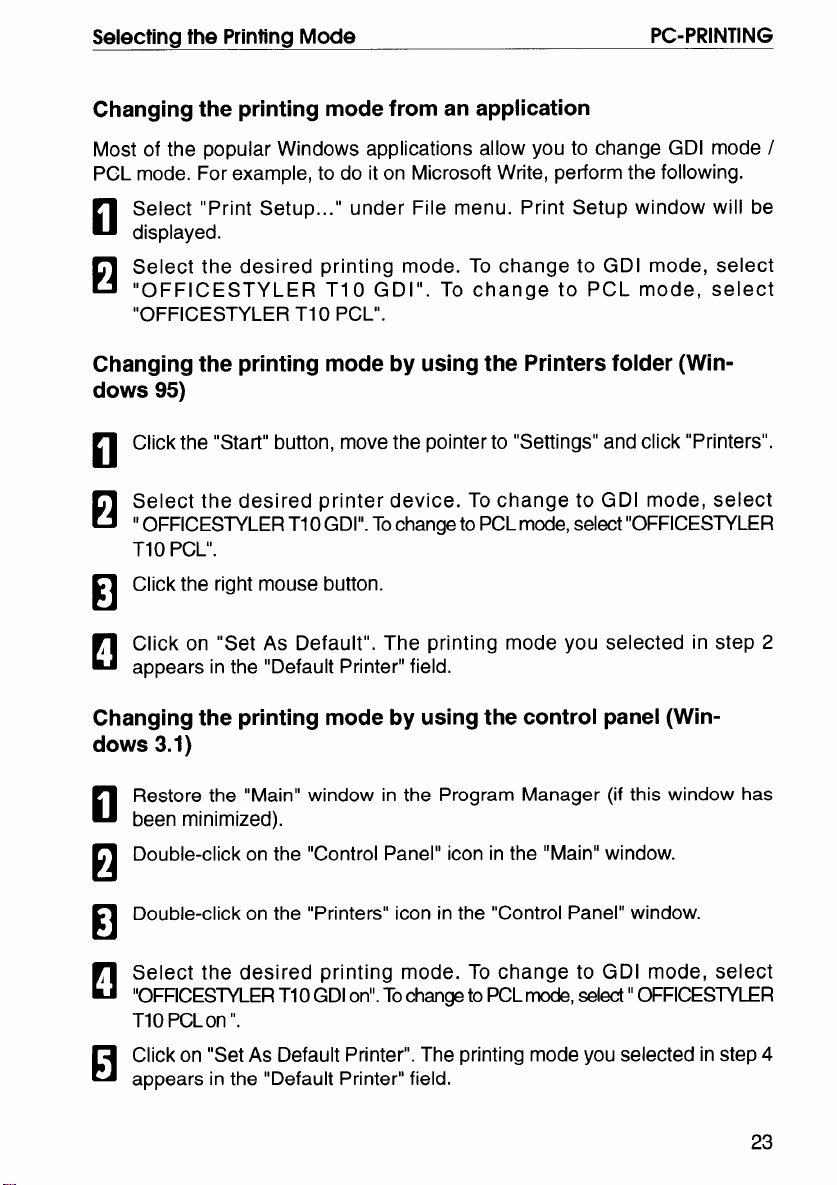
Selecting the Printing Mode
Changing the printing mode from an application
Most of the popular Windows applications allow you to change GDI mode /
PCL mode. For example, to do it on Microsoft Write, perform the following.
Select “Print Setup... ” under File menu. Print Setup window will be
n
displayed.
Select the desired printing mode. To change to GDI mode, select
H
“OFFICESTYLER TIO GDI”. To change to PCL mode, select
“OFFICESTYLER TI OPCL”.
Changing the printing mode by using the Printers folder (Windows 95)
Click the “Start” button, move the pointer to “Settings” and click “Printers”.
PC-PRINTING
a
Select the desired printer device. To change to GDI mode, select
H
“ OFFICESTYLER TIO GDI”. Tochange to PCL mode, select “OFFICESTYLER
TIO PCL”.
Click the right mouse button.
El
Click on “Set As Default”. The printing mode you selected in step 2
A
C!
appears in the “Default Printer” field.
Changing the printing mode by using the control panel (Windows 3.1)
Restore the “Main” window in the Program Manager (if this window has
c1
been minimized).
Double-click on the “Control Panel” icon in the “Main” window.
El
Double-click on the “Printers” icon in the “Control Panel” window.
El
Select the desired printing mode. To change to GDI mode, select
A
c!
“OFFICESMER TIO GDI on”. Tochange to PCL mode, select” OFFICESWLER
TIO PCLon”.
Click on “Set As Default Printer”. The printing mode you selected in step 4
H
appears in the “Default Printer” field.
23
Page 31

PC-PRINTING
Click on Close.
I
n
Changing the printing mode from the control panel Tab of the OfficeStyler TIO console
Double click the OfficeStyler TI O Printer Console icon in the OfficeStyler
El
El
TOOIS.
T1O
Click the “Control Panel” tab in the OfficeStyler TIO Printer Console
window.
Click the Printer list box.
Selectina the Printina Mode
El
Select the desired print mode.
A
n
To change to GDI Mode or PCL Mode, select “GDI> OfficeStyler TI OGDI”
or “PCL> OfficeStyler TI OPCL”,
Click Set As Default.
H
Minimize the OfficeStyler TI OConsole.
I
1
24
Page 32

OfficeStyler T1OPrinter console
The OfficeStyler T1 O Printer Console provides a single access point to the four
major program screens. The purpose of the OfficeStyler TI O Printer Console
is to provide an easy means to configure the OfficeStyler T1O printer and to
monitor and control print jobs.
The OfficeStyler TI O Console is in the OfficeStyler T1 O tools.To activate the
OfficeStyler T1O Console, double-click the OfficeStyler T1O console icon.
Each of the four major program features can be viewed by clicking the tab
under the window menu bar. The four tabs are:
Cl Control Panel
~ Local Queue
Cl Remote Queue
~ Job Log
25
Page 33

PC-PRINTING
OfficeStyler T1 O Printer console
Local Queue
The Local Queue is used to review the status of you queued print jobs. For
Servers, all pending print jobs are local to the Server. For Clients, the Local
Queue represents print jobs that have been queued to a remote Server but are
not yet transferred to that remote Sewer.
Click the “Local Queue” tab in the OfficeStyler T1O Printer Console window,
the local queue features appear.
The Local Queue presents:
~ the print job name
~ the format of the print job (GDI, PCL)
~ the size of the print job in bytes
~ the time the job was sent to the queue
~ the owner of the print job
The job owner category is primarily applicable to the Server.
The Local Queue presents the status of the job currently printing. For Clients,
this status will display only when the Client’s print jobs are printing.
Note:
Print job in the Local Queue will be displayed only when ‘Use OfficeStyler Print
Manager’ is selected in the OfficeStyler TI OGDI window.
26
Page 34

OfficeStvIer T1OPrinter console
Changing the order of print jobs
Both Servers and Clients support drag-and-drop jobs within the Local Queue
to change the job order in the print queue. Drag-and-drop is available for jobs
that have not started printing. To drag-and-drop, perform the following steps:
Place the mouse cursor at the beginning of the print job you want to select.
PC-PRINTING
c1
Press the left mouse button and hold down.
H
While holding the left mouse button down, move the mouse.
El
As you move, print jobs will be highlighted.
Move the mouse to the end of print job you want to select.
A
c1
Release the left mouse button.
H
The print job will remain highlighted.
Return the mouse cursor to the beginning of the selection.
1
n
Note the l-bar cursor turns into an arrow when the cursor is in the
highlighted area.
Depress and hold the left mouse button and hold down.
El
*
While holding the left mouse button down, move the mouse arrow to the
o
n
place you wish to drop the selected print job(s).
Release the mouse button.
I
El
27
Page 35

PC-PRINTING
The following table provides a brief description of the Local Queue button
icons.
OfficeStyler T1 OPrinter console
Icon
II
J!$3U$H
u
b
Regunw
u
@
&d
u
\
II
%
Q?del)s
u
Description
Allows you to pause printing.
Allows you to resume printing.
Allows you to add a print job to the print queue.
Allows you to delete the highligthed print job from the print
queue.
28
Page 36

OfficeStyler T1OPrinter console PC-PRINTING
Remote Queue
The Remote Queue is used to review the status of your queued print jobs at
the remote printer. This queue is primarily for Clients to review their print jobs.
Clients can select from among the shared printers through the “Show Print
Queue for:” list box.
Click the “Remote Queue” tab in the OfficeStyler T1OPrinter Console window,
the Remote Queue features appear.
Show Print Queue for:
Allows the Clients to select from among the shared printers. Clicking the list
box will show you all available shared printers.
Show My Jobs Only
Clicking on the “Show My Jobs Only” check box will only display your print jobs
in box A.
Show Server
Clicking on the “Show Sewer” check box will display the box B. This box will
show you all the servers with their status.
The Remote Queue presents:
~ the print job name
# the format of the print job (GDI, PCL)
~ the size of the print job in bytes
~ the time the job was sent to the queue
~ the owner of the print job
29
Page 37

PC-PRINTING
OfficeStyler T1 O Printer console
The job owner category is primarily applicable to the Server. The
drag-and-drop (reordering the print jobs) feature is not available in the Remote
Queue.
The following table provides a brief description of the Remote Queue button
icons.
Icon Description
Allows you to pause printing.
Allows you to resume printing.
u
u
H
Mu$?l
b
Resurne
Allows you to add a print job to the print queue.
&
&Id
u
Allows you to delete the highligthed print job from the print
queue.
u
Cq?j
Qatwl
30
Page 38

OfficeStyler T1 OPrinter console
PC-PRINTING
Job Log
The Job Log provides a historical log of the last 10 jobs queued for print. To
display the log of the last 10 jobs, click the “Job Log” tab in the OfficeStyler T1 O
Printer Console window, the last 10 jobs appear.
The Job Log presents:
~ the time the job was printed
~ the Server name
~ the job name
~ the format of the print job (GDI, PCL)
~ print result
The Job Log is more useful for Clients in workgroup environments, where
there are multiple printers supporting differing printer characteristics.
31
Page 39

PC-PRINTING
OfficeStyler T1 O Printer console
Control Panel
The Control Panel provides the mechanism to configure and control the
printer. The following screen shows the Control Panel tab of the OfficeStyler
T1O Printer Console. The Control Panel is divided into five button categories,
the Printer information and printer selection display, The Printer group item
presents the currently selected printer and provides a list of additional printer
selections. The printer selections applicable to your printer are:
~ OfficeStyler T1OGDI
~ OfficeStyler T1O PCL
Click the “Control Panel” tab in the OfficeStyler TI O Printer Console window,
the control Panel features appears.
Use the list bar to highlight the print mode you want to use. Then, to apply the
selected printer, click Set As Default. You can also request the current printer
status through the Local Device Status.
32
Page 40

OfficeStyler T1OPrinter console
The following table provides a brief description of the Control Panel buttons
and refers you to the page number that provides detailed information about the
available features.
PC-PRINTING
Icon
~+
❑
din
❑
*
IiiiiiJ
..
$fJj_
?
lWL
d
D#s
e
1--1
liiiiir
DescritXion
With Toner Saving Mode turned on, your printer will reduce the
amount of toner used to print. Black areas and text are
replaced by a light gray shading. This varies depending on the
settinq of the selected sever.
Allows you to adjust the Edge Enhancement setting or turn it
off. Edge enhancement improves the appearance of text and
graphics by smoothing the jagged edges of characters and
line art, resulting in higher quality output. This varies
depending on the setting of the selected sever.
This selection provides the option of three shades of toner
darkness. The default is medium. This varies depending on
the setting of the selected sever.
This selection allows you to configure the printer.
This selection allows you to identify the porl your printer is
connected to, such as LPT1.
This selection presents the PCL Control Panel Menu.
DOS Printing Options
The DOS Printing Options provides print emulation options for
DOS printing. You can select “Spool as PCL 4.5” or “Direct to
Port” in the Printing Mode list box.
Spool as PCL 4.5: makesthe PCL Control Panel settingseffective.
Direct to Port: makes the DOS applications settings effective.
Some applications may not operate properly if the “Spool as PCL
4.5” has been selected. Inthat case, select “Direct to Port”.
This selection allows you to share the printer with Clients.
This selection allows you to connect to a shared printer.
u
:,
::
L
-m%
m
m
This selection allows you to view the Clients connected to the
shared printer.
This selection allows you to select whether you want the
Printer Status window to display when an error occurs.
This selection allows you to print the printer test pages. This
function is only valied from a server.
33
Page 41

PC-PRINTING
OfficeStvler T1O Printer console
OfficeStyler TIO Printer Console Menu Items
The OfficeStyler T1 O software provides the standard Windows menu items
which are available in most Windows applications, as well as
application-specific menu items. Some of the menu items match the buttons
available on one of the tabbed displays. However, there are some printer
functions that can be accessed only through the pull-down menu, such as the
setting of print priority.
File
The File pull-down menu provides selection to exit your application, This menu
also provides selections to pause or resume printing and add or delete a
document to and from the queue,
View
The View pull-down menu allows you to define different ways to display the
print queues. You can view a list of queued print jobs, define the time stamp, or
show a particular print queue.
Settings
The Settings pull-down menu allows you to define the default settings for many
of the following printer features.
Toner Saving Mode
With Toner Saving Mode turned on, your printer will reduce the amount of toner
used to print. Black areas and text are replaced by a light gray shading. This
varies depending on the setting of the selected sever.
Light Text and objects on the page have a black outline along their left
edge.
Medium Text and objects on the page have a black outline along left and right
edges.
Dark Text and objects on the page have a black outline along all edges,
This setting is recommended over Light and Medium if you expect to
fax or photocopy the document.
off
34
This is the default setting and is recommended for the highest print
quality.
Page 42

OfficeStyler T1 OPrinter console
PC-PRINTING
EET (Edge Enhancement Technology)
Allows you to adjust the Edge Enhancement setting or turn it off. Edge
enhancement improves the appearance of text and graphics by smoothing the
jagged edges of characters and line art, resulting in higher quality output.
The settings for Edge Enhancement are Off, Levell ,2,3,
Normally you should not have to adjust Edge Enhancement. However,
because Edge Enhancement modifies the size of dots along the edges of text,
lines, and graphics, the edges might appear too dark or too light.
This varies depending on the setting of the selected sever.
Density
The density options lets you choose from Ligthen to Darken. To make lighter,
choose Lighten. To make darker, choose Darken.
This varies depending on the setting of the selected sever.
Printer Setup
The Printer Setup displays the primary printer settings and configuration
dialogue that also provides advanced setting and features.
Connect Port
The Connect Port lets you select a different parallel port for your printer. You
can choose either LPT1, LPT2, or LPT3. Your PC hardware configuration may
limit your individual options.
PCL Control Panel
The PCL Control Panel displays the PCL Control Panel window. This control
panel provides configuration options for PCL printing from MS-DOS
applications printed from the MS-DOS icon command line under Windows.
This setting is effective only when the “Spool as PCL 4.5” has been selected in
the DOS Printing Option window. See below.
35
Page 43

PC-PRINTING
OfficeStyler T1 O Printer console
DOS Printing Options
The DOS Printing Options provides print emulation options for DOS printing.
You can select “Spool as PCL 4.5” or “Direct to Port” in the Printing Mode list
box.
Spool as PCL 4.5:
Direct to Port:
makes the PCL Control Panel settings effective.
makes the DOS applications settings effective.
Some applications may not operate properly if the “Spool as PCL 4.5” has
been selected. In that case, select “Direct to Port”.
Print Priority
Windows lets you run several applications at the same time. This helps
productivity but means you are sharing your PC resources among several
activities.
The OfficeStyler T1O Printer priority settings let you control the priority of the
printing activity relative to other applications running at the same time.
You can select High, Medium, or Low priority. Printing at high priority produces
output faster but may slow down your system more than the other priority
settings, On the other hand, printing at lower priority lets your other
applications run faster but also means your document will take longer to print.
Network
The Network pull-down menu allows you to share and connect to a network
printer and Clients Monitor (if configured as a Server) and change status
settings, such as print job notifications.
Share Printer
This selection is only available to Server configured users. When selected it
will set the printer as Shared.
Connect to
This selection is available to Client and Server configured users. When
selected it will display a list of available printer Servers that can be selected.
Client Monitor
This selection is available to the Server and provides the capability to monitor
the print activities of Clients using the printer.
36
Page 44

OfficeStyler T1 OPrinter console
Notify
This selection is available to all users and defines the various status selections
and their display options.
Selecting “Remote Status Report” allows you to see the server’s Printer Status
window on the client.
Change Name
This selection is available to all users and allows the user to change the
computer name. You must exit and restart Windows before this change takes
effect. The new computer name must not exceed 15 characters.
Run
The Run pull-down menu allows you to examine the status of the printer and
print a test page.
PC-PRINTING
37
Page 45

PC-PRINTING
Printing modes
Printing modes
GDI
Mode
GDI mode takes advantage of Windows” own internal design to produce
documents faster than most conventional printers can. Othe printer require
Windows to translate a document into a special printer language, such as PCL
on Laser Jer printers. GDI mode reduces overhead by eliminating this
translation step before starting to print. This results in faster printing-as much
as four to five times faster some files.
GDI mode has a speed advantage with documents that have multiple fonts. A
standard printer language such as PostScript must do extra work for each
different font in a document. In contrast, printing the same document in GDI
mode requires only a small amount of additional processing, which means
quick text printing no matter how many fonts are included.
You can select the GDI Mode from an application, through the Control Panel’s
Printer window, or through the Control Panel tab of the OfficeStyler TI OPrinter
Console window. The OfficeStyler T1 O Printer GDI window lets you select
certain settings for your print job.
For Windows95
GDI property screen
You can access the setup screen from the Setup or Print Setup feature of
many applications. You can also reach it from the Printers screen of the
Windows Control Panel.
The setup screen lets you change the following settings:
c1
Copies
c1
Print Resolution
c1
Orientation
rl
Paper Size
Paper Source
CJ
n
Use OfficeStyler Print Manager(Top Page, Manual Duplexing, Overlay)
Print to File
0
u
Scale
c1
2 up/4 up
IJ
Image
38
Page 46

Printing modes PC-PRINTING
Paper tab
Copies
Copies determines how many copies of your doc:ument will be printed.
Orientation
For Orientation, choose Portrait or Landscape. If you choose Portrait, your
output appears with the papers shorter edges at top and bottom. And longer
edges at the side, like a business memo. If you choose Landscape, your
output appears with the longer edges at the top and buttom, and the shorter
edges at the sides. Landscape is sometimes used for graphs, spreadsheets,
and presentation slides.
Paper Size
Size lets you change to a different paper size. First, click on the size box, then
scroll through the selection. When you see the paper size you want, click on it.
Paper Source
Standard Tray, Option Tray and Bypass Tray are the paper sources.
39
Page 47

PC-PRINTING Printing modes
Layout
2up/4up
OfficeStyler TIO lets you print 2 or 4 pages on a single sheet of
paper. Select 2 up if you want OfficeStyler to print two pages on one
sheet of paper.(ln portrait mode, the pages show up side by side as if
ina book.) Select 4 up if you want OfficeStyler to print four pages on
one sheet of paper. Select 1 up if you wish to print normally.
Draw Frame Border
If you clike on Draw Frame Border, OfficeStyler will draw a box around
each page on the paper.
Note:
Selecting 2up/4up may sometimes break the edges of your output. If it
.
occurs, reset the margin.
. If you want to use the Overlay with 2up/4up, create the Overlay file by
2up/4up in advance, then use it for the output of 2up/4up.
Scaling
Use Scaling to reduce or enlarge your output on the printed page. You can
enter a number from 10% to 500%, or click on the arrows to increase or reduce
the setting.
40
Page 48

Adavanced Options tab
Use OfficeStyler Print Manager
Selecting “Use OfficeStyler Print Manager” turns the Print Manager on when
using GDI Mode. The OfficeStyler T1O Print Manager allows you to use:
IJ Top Page (reverse order printing)
~ Duplex Printing
Cl Overlay
U Local Queue both in GDI Mode as well as in PCL Mode
However, the print speed will be slower when the OfficeStyler TIO Print
Manager is activated,
Top Page
The printer normally prints documents in page number order (i.e. page 1 first).
Clicking on the 3,2,1 button in the Top Page box will instruct the printer to print
your output in reverse order.This option ins only available if the officestyler TIO
Print Manager is enabled for GDI printing.
41
Page 49

PC-PRINTING
Duplex Printing
You can print your file on both sides of the paper by first selecting “Manual
Duplexing”, then selecting either Book or Report.
See “Duplex Printing” on page 47.
Print to File
If you select File Name, the output will go to a file instead of the printer.
You can also use “Print to File” to create a form of Overlay feature.
The print file is stored in GDI format. Use the Add button on the Local Queue
of the OfficeStyler T1O Printer Console to print from a file.
Printina modes
42
Page 50

Printina modes
Image tab
PC-PRINTING
The Image Options lets you adjust the appearance of your output. These
adjustments only apply to certain types of images and grayscales, not to text
or black line drawings.
The figure at the left of the screen will change as you move the controls, giving
you a rough idea of the effect of your adjustments.
Note:
This feature may not be effective for some applications.
Print Resolution
Your printer provides only one print quality: 300 dpi.
Brightness
Drag the Brightness knob or click on the arrows to vary the shades of gray,
making the image output appear lighter or darker.
Contrast
Drag the Contrast knob or click on the arrows to make the image output appear
sharper or smoother.
43
Page 51

PC-PRINTING Printing modes
FormSetting tab
Use OfficeSyler Print Manager
See “Advanced Options tab” on page 41.
Print Cover
Select this feature to print a cover page on a separate page before the
remainder of the document.
Print Overlay
This feature will overlay your image on the pages of your document. The effect
is similar to printing your image on a transparency, then putting the
transparency over your document.
Print Trailer
Select this feature to print a trailer page on a separate page after the document
has been printed.
Browse
After selecting Print Cover Page, Print Trailer Page, or Print Overlay, clicking
Browse will let you search for the GDI file in the file system.
44
Page 52

Printing modes
Overlay
The overlay feature is one of the most powerful features of the OfficeStyler
TI O software. This feature lets you overlay an image on top of any document
printed in GDI print mode. You can use this feature to:
H Incorporate your letterhead on the first page of a business letter.
~ Print your logo at the bottom of each page of a set of presentation slides.
H Overlay the word “Confidential” on every page of an important document.
~ Print a special cover page or trailer page for each print job.
Using the Overay feature is a four-step process:
Create the overlay form and print the overlay form to a file.
n
Create the document to be overlaid.
H
Select the overlay feature and give the name of the file to which you
H
printed your overlay form.
, Print the document to be overlaid.
n
PC-PRINTING
How to use overlay function
Using an application such as Paintbrush, CorelDRAW or PageMaker,
n
create and save the graphic file that you want to overlay on a document.
Verify the graphic by printing it, and minimize the application.
El
Select “OfficeStyler T1OGDI”.
El
Click “Printer Setup” in the OfficeStyler T1O Printer console Window.
A
n
The “Properties” window will appear.
Select “Advanced Options” tab, Check in the “Print to file” check box.
H
Click “OK”.
I
B
Click “OK”.
El
45
Page 53

PC-PRINTING
Printing modes
Double click the same application which you minimized in step 2 and
perform the print operation. A screen asking you to enter the file name will
appear.
Enter a new file name or the same file name with the GDI extension (.GDI)
and click OK to store the file as a GDI file.
The GDI file extension must be used to designate the difference between
a GDI file and an application file. Otherwise, the application file will be
overwritten by a GDI file.
Minimize the application.
Perform steps 3 and 4 above.
Disable the “Print to File’’feature by clicking off the check box.
Use the Formsetting tab to chec the “Use Print Manager”, then select
“Overlay”, “Cover Page” and “Trailer Page” and enter the file name.
Click “Browse”. The Browse window will appear.
Double click on the directory in which you saved your graphic file(GDl
file), then select file and click “OK”. The selected file will appear in a box
in the FormSetting tab.
Click “OK” in the OfficeStyler TI OGDI Properties window.
Cilck “OK” in the Print window.
Print the desired document, The graphic will be overlaid on the pages of
your document.
Note:
If you want to use the Overlay with 2up/4up, create the Overlay file by 2up/4up
in advance, then use it for the output of 2up/4up.
46
Page 54

Printina modes
Duplex Printing
You can print your file on both sides of the paper by first selecting “Manual
Duplexing”, then selecting either Book or Report. Book prints out so that if you
opend the document in the manner of a book, pages 2 and 3 would face each
other, Report prints the even-numbered pages upside down, so that if you
opened the document in the manner of a report bound at the top, pages 2 and
3 would face the sama way. Off disables Manual Duplexing.
You can also put an X in the box marked Print Instruction Page. If you do this,
then the OfficeStyler T1 O Printer will print out a sheet of paper giving you
detailed instructions every time you print in manual duplex mode.
Note:
When printing on both sides, the image may not print well, and white areas
.
may become dirty.
. If several sheets are fed through together, feed one sheet at a time.
Click the “Start” button, point to “OfficeStyler T1O Tools” in “Programs”,
c1
and then click “Printer Console”.
Click “Control Panel” tab.
PC-PRINTING
El
Change to GDI mode and click “Set as Default”.
El
Click “Printer Setup” icon.
A
Cl
Click “Use OfficeStyler Print Manager” on the Advanced Option tab in the
H
OfficeStyler TI O GDI Properties window.
Check on “Manual Duplexing” check box and select “Book” or “Report”
I
n
style.
If you wish toget a printout of detailed instructions, check on “Print
Instruction Page” on check box.
Click “OK”.
El
o
Close Printer Console Window.
0
n
Start your Windows application.
I
c1
47
Page 55

PC-PRINTING Printing modes
Print the desired document.
I
m
The printer will print every odd-numbered page. If the Print Instruction Page is
effective, an instruction sheet will be printed after odd pages are printed.When
all odd pages are printed, OfficeStyler TI O Status Display or Show me will
instruct you how to reinsert the paper to print on the other side of th pages.
Pick up the printed sheets, straighten them, and then reinserl them into
m
the printer.
Click on Resume on the Status Display window to resume printing.
m
The printer will print every even-numbered page on the backs of the pages
already printed.
48
Page 56

Printina modes
PC-PRINTING
For Windows3.1
GDI Setup Screen
You can access the setup screen from the Setup or Print Setup feature of
many applications. You can also reach it from the Printers screen of the
Windows Control Panel.
The setup screen lets you change the following settings:
c1
Copies
c1
Print Resolution
c1
Orientation
rl
Paper Size
c1
Paper Source
c1
Use OfficeStyler Print Manager(Top Page, Manual Duplexing, Overlay)
u
Print to File
c1
Scale
c1
2 up/4 up
Image
c1
49
Page 57

PC-PRINTING
Printing modes
Paper Source
Standard Tray, Option Tray and Bypass Tray are the paper sources.
Orientation
For Orientation, choose Portrait or Landscape. If you choose Portrait, your
output appears with the papers shorter edges at top and bottom. And longer
edges at the side, like a business memo. If you choose Landscape, your
output appears with the longer edges at the top and buttom, and the shorter
edges at the sides. Landscape is sometimes used for graphs, spreadsheets,
and presentation slides.
Paper Size
Size lets you change to a different paper size. First, click on the size box, then
scroll through the selection. When you see the paper size you want, click on it.
Copies
Copies determines how many copies of your document will be printed.
Print Resolution
Your printer provides only one print quality: 300 dpi.
Use OfficeStyler Print Manager
Selecting “Use OfficeStyler Print Manager” turns the Print Manager on when
using GDI Mode. The OfficeStyler TI OPrint Manager allows you to use:
~ Last page on top (Reverse Order)
~ Duplex Printing
Cl Overlay
~ Local Queue both in GDI Mode as well as in PCL Mode
However, the print speed will be slower when the OfficeStyler T1 O Print
Manager is activated.
Last Page on top (Reverse Order)
The printer normally prints documents in page number order (i.e. page 1 first).
Clicking on this check box at the left of “Last page on top (Reverse order)will
instruct the printer to print your output in reverse order.This option is only
available if the officestyler TI O Print Manager is enabled for GDI printing.
50
Page 58

Printing modes
PC-PRINTING
Options
This button provides advanced GDI features, such as duplex printing, overlay,
and reverse printing. Also see “Options screen” on page 52.
2 up/4
The printer lets you print 2 or 4 pages on a single sheet of paper.
Also see “Layout” on page 40.
up
About
Click About to display the program version and copyright information.
51
Page 59

PC-PRINTING
Options screen
Printing modes
Duplex Printing
You can print your file on both sides of the paper by first selecting “Manual
Duplexing”, then selecting either Book or Report.
Scaling
Use Scaling to reduce or enlarge your output on the printed page. You can
enter a number from 10% to 500Y0, or click on the arrows to increase or reduce
the setting.
Print to File
If you select File Name, the output will go to a file instead of the printer.
You can also use “Print to File” to create a form of Overlay feature.
The print file is stored in GDI format. Use the Add button on the Local Queue
of the OfficeStyler T1O Printer Console to print from a file.
Image
The Image feature lets you adjust the brightness and contrast of your output.
Refer to “Image tab” on page 43.
52
Page 60

Printing modes
Overlay
The Overlay feature lets you overlay an image on top of any document printed
in GDI Mode.
See “Overlay” below.
Overlay
The overlay feature is one of the most powerful features of the OfficeStyler TI O
software. This feature lets you overlay an image on top of any document
printed in GDI print mode. You can use this feature to:
~ Incorporate your letterhead on the first page of a business letter.
~ Print your logo at the bottom of each page of a set of presentation slides.
~ Overlay the word “Confidential” on every page of an important document.
U Print a special cover page or trailer page for each print job.
Using the Overay feature is a four-step process:
Create the overlay form and print the overlay form to a file.
El
Create the document to be overlaid.
PC-PRINTING
El
Select the overlay feature and give
H
printed your overlay form.
, Print the document to be overlaid.
n
How to use overlay function
Using an application such as Paintbrush, CorelDRAW or PageMaker,
c1
create and save the graphic file that you want to overlay on a document.
Verify the graphic by printing it, and minimize the application.
the name of the file to which you
H
Changing the printing mode to “OfficeStyler T1O GDI”.
El
Click “Setup” in the OfficeStyler T1 O Printer console Window.
A
Cl
The “OfficeStyler T1 O GDI” window will appear.
53
Page 61

PC-PRINTING
Printing modes
Click “Options”.
Select “File Name” by clicking on the check box at the left.
An X mark appears in the check box.
Enter a new file name or the same file name with the GDI extension (.GDI)
and click OK.
The GDI file extension must be used to designate the difference between
a GDI file and an application file. Otherwise, the application file will be
overwritten by a GDI file.
Click “OK”.
Minimize the OfficeStyler T1 O Printer console Window.
Double click the same application which you minimized in step 2 and
perform the print operation.
Your created file will be stored as a GDI file.
PerForm steps 3 and 4 above.
Select “Use OfficeStyler Print Manager” by clicking on the check box.
An X mark appears in the check box.
Click “Options”.
Disable “File Name” by clicking off the check box at the left.
The X mark will be cleared from the check box.
Click Overlay.
The Overlay Options window is displayed.
Click on the desired selection(s).
For example, select Print Cover Page.
54
Page 62

Printing modes
Click “Browse”.
m
The Browse window appear.
I
Double click on the directoty in which you saved your graphic file (GDI
I
m
file), then select the file and click OK.
The selected file will appear in a box in the Overlay Options window.
Click “OK” in the Overlay Options window.
I
m
Click “OK” in the Options windows.
I
1
Click “OK” in the OfficeStyler T1 O GDI window.
m
Minimize the OfficeStyler T1 O Printer Console window.
III
Print the desired document.
M
The graphic will be overlaid on the pages of your document.
PC-PRINTING
Note:
If you want to use the Overlay with 2up/4up, create the Overlay file by 2up/4up
in advance, then use it for the output of 2up/4up.
55
Page 63

PC-PRINTING
Duplex Printing
You can print your file on both sides of the paper by first selecting “Manual
Duplexing”, then selecting either Book or Report. Book prints out so that if you
opend the document in the manner of a book, pages 2 and 3 would face each
other. Report prints the even-numbered pages upside down, so that if you
opened the document in the manner of a report bound at the top, pages 2 and
3 would face the sama way. Off disables Manual Duplexing.
You can also put an X in the box marked Print Instruction Page. If you do this,
then the OfficeStyler TI O Printer will print out a sheet of paper giving you
detailed instructions every time you print in manual duplex mode.
Note:
When printing on both sides, the image may not print well, and white areas
.
may become dirty.
. If several sheets are fed through together, feed one sheet at a time.
Double click “Printer Concole” icon in the OfficeStyler TI O Tools.
Printing modes
c1
Click “Control Panel” tab.
El
Change to GDI mode and Cilck “Set as Default”.
El
Click “Printer Setup” icon.
A
c!
Click “Use OfficeStyler Print Manager” in the OfficeStyler TIO GDI
H
window.
Check on “Manual Duplexing check box and select “Book” or “Report”
I
n
style.
If you wish toget a printout of detailed instructions, check on “Print
Instruction Page” on check box.
Click “OK”.
H
9
Close Printer Console Window.
b
n
Start your Windows application.
I
n
56
Page 64

Printina modes
Print the desired document.
PC-PRINTING
III
The printer will print every odd-numbered page. If the Print Instruction Page is
effective, an instruction sheet will be printed after odd pages are printed.When
all odd pages are printed, OfficeStyler T1O Status Display or Show me will
instruct you how to reinsert the paper to print on the other side of th pages.
Pick up the printed sheets, straighten them, and then reinsert them into
m
the printer.
Click on Resume on the Status Display window to resume printing.
m
The printer will print every even-numbered page on the backs of the pages
already printed.
57
Page 65

PC-PRINTING Printing modes
PCL Mode
No cartridges required
Some conventional printers include cartridge slots that allow you to, for
example, install additional fonts into the printer. Since OfficeStyler T1 Ocreates
printer page images on your system before downloading to the printer,
installing a cartridge could not affect the final printout. Instead, OfficeStyler T1 O
uses the fonts installed in your Windows system.
Saving downloaded fonts and macros in PCL mode
By default, when your application prints using OfficeStylerT10“s PCL mode,
the PCL interpreter will start up, print the document, and then shut itself off
automatically. This means the PCL interpreter does not take up memory on
your PC except when needed.
However, when the PCL interpreter turns itself off, any downloaded fonts or
macros will be lost, just as if you had turned off a regular PCL printer. You can
preserve this information by using the OfficeStyler T1 O Print Manager to keep
the PCL interpreter active.
Double-click Printer Console icon inthe OfficeStyler TIO Tools,(Windows 3,x)
K1
Click the “Start” button, point to “OfficeStyler TI O Tools” in “Programs”,
and then click “Printer Console”. (Windows 95)
Download macros or soft fonts in advance, if desired, using the ADD
H
button to copy the macro or soft font data to the printer. (You can also copy
the files from DOS under Windows, by using the command “COPY/B .ext
LPT1”, where .ext is the name of the file you wish to download.)
Minimize the OfficeStyler T1O Print Manager to an icon, if desired.
El
Start or return to your application and print your document.
A
n
This will preserve your downloaded fonts and macros. Also, if your next print
job also uses PCL, it will take less time to print because the OfficeStyler PCL
interpreter has already been loaded. However, if you switch from PCL to GDI
mode, this information will be lost, just as if you were changing printer
languages in a conventional printer.
58
Page 66

Printing modes
PC-PRINTING
PCL Control Panel
OfficeStyler TIO was designed to print with Windows. However, many
Windows users need to run MS-DOS applications occasionally. OfficeStyler
TIO lets you print from MS-DOS applications you only have to run the
application from Windows, or within the DOS box under Windows. OfficeStyler
T1O also provides a PCL Control Panel for DOS PCL printing. This allows you
to change printer settings for your DOS print jobs. (Note: some DOS
applications may override these settings. ) While the PCL Control Panel is
included primarily for DOS print jobs, it also can affect the default settings for
Windows PCL print jobs. However, the Windows printer driver overrides the
corresponding settings in the PCL Control Panel.
Form Feed
Click on Form Feed if you need to eject a page from the printer. Some PCL
files do not include a form feed (a command to eject a page) at the end of the
file, so if you are printing to a conventional PCL printer, you have to press a
form feed key to see your output. This happens frequently in MS-DOS. For
example, if you use the DIR LPT1: command in the MS-DOS box in Windows,
the job sent to the PCL interpreter will not have a form feed at the end, so that
the last page (or a single page) won’t print.
OfficeStyler TI O puts this form feed key here on the PCL Control Panel.
59
Page 67

PC-PRINTING
Printina modes
Note:
If OfficeStyler T1 O Print Manager (in the program group “OfficeStyler TI O
Tools”) is closed, a PCL file which does not include a form feed at the end of
the file is printed automatically.
Reset
The Reset returns the printer to its reset state. In other words, it clears all data
from the printers memory, including forms, macros, and unprinted page
images. In fact, it works just like the reset key on a conventional printer. Note
that the Reset does not change the printer settings (orientation, paper size,
number of copies, etc.) back to their default values. You will need to click on
the Defaults key to restore these to their defaults.
Paper Source
Standard Tray, Option Tray and Bypass Tray are the paper sources.
Paper Size
lets you change to a different paper size. First, click on the size box, then
Size
scroll through the selection. When you see the paper size you want, click on it.
Orientation
For Orientation, choose Portrait or Landscape. If you choose Portrait, your
output appears with the paper’s shorter edges at top and bottom, and longer
edges at the side, like a business memo. If you choose Landscape, your
output appears with the longer edges at the top and bottom, and the shorter
edges at the sides. Landscape is sometimes used for graphs, spreadsheets,
and presentation slides.
Default Font
Default Font lets you select the default typeface, size, and style for output from
MS-DOS applications run under Windows, and for Windows PCL print jobs.
Both MS-DOS and Windows applications can override the default font
selection. Please note you do not have access to Windows TrueType fonts for
MS-DOS print jobs.
Margins
The Margins settings let you define the top, bottom, left, and right margins for
PCL print jobs, as measured from the edge of the paper. You can select either
centimeters or inches as the unit of measure for these. Please note that DOS
and Windows applications may override these settings.
Copies
Copies determines how many copies of your document will be printed
60
Page 68

Printing modes PC-PRINTING
OK
Click on OK for your changes to take effect. When you exit, the PCL Control
Panel will load the PCL compatible interpreter into
save time when you later print from MS-DOS applications under Windows.
However, you can close the PCL compatible interpreter and recover the
memory, if you wish. Click on the PCL icon, then click on Close. This deletes
the PCL compatible interpreter from memory until you print from an MS-DOS
application under Windows, at which time it will be re-loaded automatically.
your PCs memory. This will
Cancel
Clicking Cancel will lose any changes you have made to PCL printer settings,
and will exit the PCL Control Panel without loading the PCL compatible
interpreter.
Default
Click on Defaults to restore all printer settings on the screen to their default
values.
61
Page 69

Device Status Display
The OfficeStyler TI O Device Status program has two primary functions:
~ To let you monitor the status of the local printer,
~ To alert you in case of a problem with your printer, such as paper out.
To display the OfficeStyler T1 O Device Status window, perform the following.
From the Program Manager double click the OfficeStyler T1 OTools icon.
c1
Double click the OfficeStyler T1 O Printer Console icon.
El
Click the “Control Panel” tab.
H
, Click Local Device Status in the Printer box.
n
62
c
E
F
G
Page 70

Device Status DistdaY PC-PRINTING
A. This box shows an error or status message and corresponding icon.
B. This box lists the name of the printer, the owner of the print job, the format
of the print job, the name of the print job, and the page number for the job
currently being printed.
C. This box displays a picture of
your printer. If a problem has occurred, an
arrow identifies where the printer is affected. The display also provides
corrective action for each error or status message.
D. If you need additional help in resolving the problem, click here. This ani-
mated help feature will walk you through the steps required to get your
printer running once again.
E. The Pause button lets you pause printing. For example, you can pause in
order to cancel the print job from the application.
F. The Resume button lets you resume printing after you have paused print-
ing, or after recovering from an error situation.
G. The Delete button lets you delete the job currently printing. You must
pause the job before you can delete it, unless the printer itself is paused
because of an error.
H. Clicking this button will reduce the displayed screen and the box C will dis-
appear.
63
Page 71

PC-SCANNING
Introduction
With the specified scan software (Note), this machine has the following
specifications as a scanner.
~ It functions as a scanner for TWAIN Driver compatible Windows 95 and
Windows 3.1.
~ It functions as a TWAIN compatible scanner for System 7.0 or later Macin-
tosh (U.S. only: option board is required).
~ 5 scanning Density Adjustment Levels: Lightest, Lighter, Normal, Darker,
Darkest
~ Scanning Modes: Line Art/Error Diffusion/Dither
~ Resolution: 200x 200 dpi, 400 x 400 dpi
Note:
Scanning is available through any Windows application that supports a TWAIN
interface.
64
Page 72

Operation
Operation
Set the document to be scanned.
c1
For details, refer to ‘How to Set the Document “FAXING’” in Copier and
Facsimile Reference.
Fetch the OfficeStyler T1 O Scanner Options from your Scanner Software.
PC-SCANNING
El
Set the following items.
El
CJptitmls `-`-``-````-````"`-```------`-`%`-`--````-`-`-````-"```-`---`""``--`-````-````````````````-````-q
5 can ~ize:
Density/Document Type/Resolution/Scan Size
For details, see “Using the TWAIN Driver,” explained later on.
Press OK to scan the document.
i
n
Note:
Note:
After inputting of the telephone number is begun, the PC Scan
function cannot be used.
When you scan the document from the ADF and your document is
longer than the Scan Size length dimension, the entire length of the
document will be scanned in, and resulting image will be taken from a
longer region than specified.
LT(8.5° x 11 “’]
g~m
65
Page 73

PC-SCANNING
Using the TWAIN Driver
Using the TWAIN Driver
Introduction
TWAIN is both a protocol and application programming interface. Together they
define how application developers can acquire raster data directly into their
application without requiring the user to switch out of the application. Every
TWAIN-compliant driver must provide a user interface specific to its scanner.
Setting Parameters (User Interface)
0 pl..~n~ .. . . . ... .. . . ... .. .. ..
A
B
De~sity:
Clocument Type
c
...............--------------........................-.-.—.
Line Art
20011200
2.! ;
v:
-II ,
D
L.--__-..-..._-._+.---.---.+._.+_.-.--................._.-...-.-._-.__-__-.__+_-
A
Density: Lightest, Lighter, Normal, Darker and Darkest.
Document Type: Line Art (default), Error-Diffusion, Dither.
B
c
Resolution: 200 x 200 dpi, 400 x 400 dpi
D
Scan Size: Select the size of the original you wish to scan.
E
OK: Saves the settings and starts the scanning. Page # indicates the
current page. Below Page # is the progress bar of scanning the current
page. Clicking the Stop Scan button shall stop the scanning.
F
Cancel: Discards the settings.
G
Default: Set Density, Document Type, Resolution, Scan Size back to
default.
i
66
Page 74

Using the TWAIN Driver
During Scanning
Stop Scan: Stop the scanning JOB.
PC-SCANNING
67
Page 75

PC-FAXING
Introduction
By installing the BitWare for Windows or other specified fax application
softwares (Note), you can send and receive FAX transmissions from your
personal computer under the following specifications.
~ Sending and Receiving FAX transmissions in Windows 95, Windows 3.1.
~ Sending and Receiving FAX transmissions with a System 7.0 or later
Macintosh (U.S. Only: option board required),
~ Transmission Speeds: 14400, 12000,9600,7200,4800, 2400 bps
~ Control commands are compatible with the EIA-578 (Usually called Class
1) and Class 2 command systems.
Note:
Note:
Setting
ComRedirector must be set up before using the PC-Fax function, For details,
see “Using the ComRedirector, ” explained later on.
Available fax application softwares are as follows:
~ Windows 95
WinFaxPRO 4.0/7.0
BitWare 3.30F
MS-FAX
~ Windows 3.1
WinFaxPRO 4.0
BitWare 3.30F
Laser Fax 3.1
~ Macintosh
Delrina Fax PRO 1.5.3
For installation of BitWare for Windows and detailed settings, see the
Cheyenne Manual, included herein.
up the ComRedirector
Operation
Sending a Fax
Open the file you want to send as a Fax on your computer.
El
68
Page 76

Operation
Print output destination is set to the FAX application.
Execute Print instruction from the application.
Set the transmission destination, etc. in the FAX application, then execute
a Send (Start/Fax) command.
Receiving a Fax
Set the PC-FAX RECEPTION Mode on the Operation Panel, using the
following procedure.
Press the FUNCTION key, then
n
press [6], [2222], [62].
Press the YES key.
PC-FAXING
H
Press the } key until the opposite
El
display appears.
Press the YES key.
i
n
Select the ON by < } key, then
B
press the YES key.
Note:
, Set the Receiving Mode on in the FAX application.
n
H
Note:
El
If the PC-FAX RECEPTION Mode is not set (if SELECT PC is set in the
above procedure), FAX transmissions cannot be received by your
computer.
Receive the FAX data.
(FAX data can be received automatically.)
Manual Receiving Method
Set Auto Receiving off in the FAX application.
69
Page 77

PC-FAXING
If the telephone receiver is connected to the machine, it will ring when
El
there is an incoming call.
Start Manual Receiving in the FAX application.
Using the ComRedirector
El
Note: Caution if a Pause is inserted
If you desire to insert a pause in the number you are calling, input a
comma (, ) (see the Copier and Facsimile Reference). However, even
if it is possible to set the length of a pause represented by one
comma, that setting will not be valid, but the pause interval will be the
default value of the machine.
Note: In PC-FAX, the One Touch Dialing/Speed Dialing/Group functions
recorded in the machine cannot be used.
Note: When desiring to use tone switching in PC-FAX.
Input a “T” at the spot in the FAX number where you want to set tone
switching.
Using the ComRedirector
Introduction
This is a Utility for using this machine’s internal Modem from a computer which
has ComRedirector installed. When using this machine’s PC-Fax function, be
sure to carry out the following set up procedure and enable ComRedirector.
Note: Be sure to disable ComRedirector when using a different modem.
70
Page 78

Using the ComRedirector
Setting Port (Enable the ComRedirector) in Windows 3.1
Note: For Windows95, this port is automatically set to COM4 when the
OfficeStyler is installed.
Open the OfficeStyler T1OTools window.
c1
PC-FAXING
........
11-
PrinterIhwmle Clocument ControlPanel
II
*..
N
UriimddllUtility
\
~e~kt~p
dzzP
1
Double-click the Setting Port icon.
El
.......................
● Thablg.;
II o
c1 IIIM1
c) C(IM2 =
o HIM3
c1 UIM4
--------------Redirwhr
>
a
LPT1
II
[
Here, in order to enable ComRedirector, select the number of the Serial
El
port which your Fax application software assigned, then click on [OK].
Note: The radio buttons finger the setting ComRedirector port, but the LPT
port automatically gets the current connected port.
Disable the ComRedirector
Select [Disable] in the above Setting Port screen.
71
Page 79

OfficeStyler T1OControl Panel
Introduction
OfficeStyler T1O Control Panel offers:
~ Full access to copy, scan and faxing features from your PC desktop
0 Control over device settings through an easy-to-use graphical interface
~ Phonebook feature for finding fax numbers quickly and easily
~ Browsing and printing of reports and logs on your PC
The next section describes how to set up the machine before you use it for the
first time. The remainder of this manual explains how to carry out various
day-to-day operations. For more details, please consult the Copier/Facsimile
Reference or click on an OfficeStyler Help button.
Starting the OfficeStyler T1OControl Panel
Double-click the “Control Panel” icon in the OfficeStyler T1OTools. (Windows 3.x)
Click the “Start” button, point to “OfficeStyler TI O Tools” in “Programs”, and
then click “Control Panel”. (Windows 95)
Important notes
~ Some features (e.g. faxing) are not possible if the device is busy doing another
job. If you try, OfficeStyler will produce a “Resource busy” message. In this
case, wait until the current job has finished and try again.
~ If the message persists, check that the function key indicator on the machine
operation panel is not lit. If it is lit, press the Function key so the indicator goes
out – the machine must be left in Standby (Ready) mode for OfficeStyler to
work properly.
72
Page 80

Setup OfficeStyler T1OControl Panel
~ We recommend that you do not edit Quick Dials, Speed Dials and Groups
from the operation panel and OfficeStyler at the same time – the results
may be unpredictable.
Setup
Basic setup
Before you connect the device to a public telephone network, you must enter
a few settings and make a few adjustments.
For a detailed explanation of each item, please refer to the Copier/Facsimile
Reference or click on an OfficeStyler help button.
Setting
Language
RDS
Ringing Times
Maximum Copy Number
Receive Mode
Option Memory Use
Monitor Sound Volume
For other settings, see the “Initial Settings and Adjustments” chapter from
page 144 onwards.
Turn PC Reception on if you wish to handle incoming fax messages from your
PC. If turned off, all incoming messages will be received by the fax machine
only.
Click once on the “Preferences” button on the OfTiceSfy/er Control Panel.
Page in Copier/Facsimile Reference
127
110
29
80
27
81
126
c1
73
Page 81

OfficeStyler T1OControl Panel
If not already selected, click on the Basic tab,
Setuk3
El
Fill in any missing information and check that each item is correct.
If necessary, you can enter a pause after the area code in Own Telephone
Number by typing a ‘-’ character.
If you wish to restore the default settings, choose the “Default” button,
If you are happy with these settings, choose “OK”. If not, choose “Cancel”
El
to reject any changes you have made,
Night Timer (Energy Saving) setup
You can have the machine automatically “go to sleep” at certain times to save
on energy. When asleep, less power is used and incoming fax messages
stored in memory and not printed. These messages will be printed when the
machine exits from the energy saving mode.
For more details see the Copier/Facsimile Reference, page 62.
Click once on the “Preferences” button on the Of?jceSt@er COntrO/ Pane/.
n
then choose “Setup Utility”.
74
Page 82

Setm
Click on the Night Timer (Energy Saving) tab.
H
OfficeStyler T1OControl Panel
Make sure the Power Saver
El
it to turn power saving on.
Program the times when you want the heater to turn on and off for each
A
n
day of the week.
ExamD/e
Imagine an office open Monday to Friday, 9 in the morning until 6 in the
evening. Typically, the timer could be programmed to turn the heater on at 9
AM and switch it off at 6 PM on weekdays, while leaving the heater off at the
weekend when nobody is using the machine.
The Night Timer setup would look like:
Timer checkbox is checked, If it is not, click
North American versions do not use the 24 hour clock. In this case, use the
c1
12 hour format.
Cl
To keep the heater on all day, set both timers to On at 12.00 (AM).
IJ
To keep the heater off all day, set both timers to Off at 12.00(AM).
If you are happy with these settings, choose “OK”. If not, choose “Cancel”
El
to reject any changes you have made.
75
Page 83

OfficeStyler T1O Control Panel
User Switch setup
These settings control a wide range of features.
For more details see the Copier/Facsimile Reference, page 122.
Click once on the “Preferences” button on the ~keSty/er Control Panel
n
then choose “Setup Utility”.
~ Click on the User SWtab. The following screen will appear:
u
setuD
If you are happy with these settings, choose “OK”. If not
El
to reject any changes you have made.
76
choose “Cancel”
Page 84

Copying
Copying
For more details about copying, see the Copier/Facsimile Reference.
OfficeStyler T1OControl Panel
Feature
Erase Border/Center
Density and Document Type
Reduce/Enlarge
How to make copies
Place your original on the platen (exposure) glass or into the ADF.
n
Click on the “Quick Copy” button on the OfYiceSty/er Control Panel.
Page in Copier/Facsimile Reference
76
67
71
El
Select any copy settings you require.
El
, Click on the “Start” button.
c1
77
Page 85

Faxing
For further details about faxing, see the Copier/Facsimile Reference, pages 15
and onwards.
How to send a fax message
Set your document on the platen (exposure) glass or in the ADF.
n
Note that you can only send one page from the platen (exposure) glass.
Click on the “Quick Fax” button on the OfficeSty/er Contro/ Panel
El
The following screen will appear:
El
Specify the destination in one of two ways:
From the Phonebook
(i) Find the name and number you are looking for by clicking on the letter tabs
and scrolling through the list if necessary,
(ii) Move the mouse pointer over the number and hold down the left mouse
button. While holding the button down, drag the number onto the Send List
area, then release the mouse button.
78
Page 86

Faxing
Enter directly
Enter the name of the person you wish to send to in the To text box and their
fax number in the F“ text box. Then choose “Add to Send List”. Entering the
name in the To text box is optional.
If you wish to send the same message to more than one destination,
repeat step 3 for each name and number.
Select any other options you require (click on an area of the image above
for more details). If you wish to make use of more advanced fax features,
choose “More ODtlons
Click on the “Start” button to send your fax.
If you have selected Save Image Data (from More Options), you will be
asked to give a name for this message. This name will appear in the
Communication Log.
11
.
OtficeStyler T1OControl Panel
Advanced transmission features
Ifyou click onthe More Options button inthe Fax screen, the following window pops up:
79
Page 87

OfficeStyler T1O Control Panel
For further details, see the Copier/Facsimile Reference.
Scanning
Feature
Send Later
Polling Reception
TTl Print
Scanning
How to scan in an image
Place your original on the exposure (platen) glass or into the ADF.
Page
35
52
36
c1
Click on the “Quick Scan” button on the Ofl~ceSty/er Control Panel.
El
Adjust any settings you need.
El
, Click on the “Start” button. When finished, the OfficeStyler Desktop will
Cl
appear and the image just scanned will be selected.
80
Page 88

Phonebook
OfficeStyler TIO Control Panel
Note:
Phonebook
You can store fax numbers you frequently use in the Phonebook. Then,
whenever you send a fax to that destination you do not have to type the
number in again.
How to program a fax number into the Phonebook
El
When you scan the document from the ADF and your docoment is longer
than the Scan Size length dimension, the entire length of the document
will be scanned in, and the resulting image will be taken from a longer
region than specified.
From the OfficeStyler fax screen choose “Phonebook”.
Alternatively, click once on the “Preferences” button on the OfYiceSty/er
Control Panel,
and choose “Phonebook”.
Click on “New”.
H
81
Page 89

OfficeStyler T1OControl Panel
Enter a name for this number in the Name field and the fax number in the
El
Fax field. Filling the Fax field is necessary, but the others are optional.
If you are happy with these settings, choose “OK”. If not, choose “Cancel”
A
n
to reject any changes you have made.
How to edit the Phonebook
From the OfficeStyler fax screen choose “Phonebook”.
c1
Alternatively, click once on the “Preferences” button on the OfliceSty/er
Control Panel.
and choose “Phonebook”.
Click on the letter tabs and scroll arrows to find the number, then click on
H
it to select it.
Phonebook
82
Page 90

Phonebook
Choose “Edit” and then make any changes you wish to make.
OfficeStyler T1OControl Panel
El
Note that all Phonebook entries require at least a fax number, the other
details are optional.
If you are happy with these settings, choose “OK”. If not, choose “Cancel”
i
n
to reject any changes you have made.
How to delete a number from the Phonebook
c1
83
Page 91

OtficeSMer T1OControl Panel Phonebook
Click on the letter tabs and scroll arrows to find the number, then click on
El
it to select it.
Choose “Delete” then “ OK”.
El
How to copy numbers from the Phonebook into Quick Dials and
Speed Dials
If you always use OfficeStyler for sending faxes, just use the Phonebook for
storing fax numbers. However, if you use the machine operation panel often,
you can copy numbers from the Phonebook into the Quick Dials and
Dials. You can then access these numbers from the operation panel,
Speed
From the OfficeStyler fax screen choose “Phonebook”.
El
Alternatively, click once on the “Preferences” button on the OfllceSty/ef
Control Panel.
and choose “Phonebook”.
Choose “Phonebook”.
El
84
Page 92

Phonebook
If not shown, choose “Expand” to display the Quick Dial, Speed Dial and
El
Group Dial lists.
If necessary, click on the Quick Dial or Speed Dial tabs to switch
A
n
between them.
Move the mouse pointer over a number in the Phonebook that you wish
to copy, and hold down the left mouse button. While holding the mouse
button down, drag the number onto a free space in the Quick Dial or
Speed Dial list window, then release the mouse button.
OfficeStyler TIO Control Panel
Note:
have two choices:
You
Copy another number: repeat steps 4 and 5
n
Finish: choose “OK”
Cl
If you open the Phonebook while some messages are on Standby, the
following message will appear:
“Some dials are used as destinations of waiting files. Do you want to
continue?”
Do not change Quick Dials, Speed Dials or Groups in this situation.
85
Page 93

OfficeStyler T1O Control Panel
How to copy numbers from the Phonebook into Groups
This is a quick way of setting up Groups you wish to dial from the machine
operation panel.
From the OfficeStyler fax screen choose “Phonebook”.
El
Alternatively, click once on the “Preferences” button on the 0f7iceSty/er
Control Panel.
and choose “Phonebook”.
Choose “Phonebook”.
Phonebook
El
If not shown, choose “Expand” to display the Quick Dial, Speed Dial and
El
Group Dial lists.
If necessary, click on the Group tab to display the Group list.
A
Cl
In the top right list box, click once on the name of the Group that you want
H
to add a number to. Any numbers already existing in this Group will
appear in the lower list box,
86
Page 94

Phonebook
Move the mouse pointer over a number in the Phonebook that you wish
to copy, and hold down the left mouse button. While holding the mouse
button down, drag the number onto a free space in the lower Group list
window, then release the mouse button.
You have two choices:
Cl Copy another number: repeat steps 5 and 6
~ Finish: choose “OK”
How to print the Phonebook
From the OfficeStyler fax screen choose “Phonebook”.
c1
Alternatively, click once on the “Preferences” button on the OfiiceSty/er
Control Panel.
and choose “Phonebook”.
OfliceStvler T1OControl Panel
Choose “Print”.
El
87
Page 95

OfficeStyler T1O Control Panel
Select the list/label you want printed.
El
Phonebook
The Telephone Number List is a list of Quick Dials, Speed
Groups.
The Phonebook List contains the contents of the Phonebook.
If you select Quick Dial Label, a label template for the machine operation
panel will be printed.
, Choose “OK”.
n
How to import numbers into the Phonebook
From the OfficeStyler fax screen choose “Phonebook”.
H
Alternatively, click once on the “Preferences” button on the Ofl~ceSty/er
Control Panel.
and choose “Phonebook”,
Dials and
88
Page 96

Phonebook
Choose “Import”.
El
OfliceStyler T1OControl Panel
Select a file and choose “OK”.
El
89
Page 97

How to export numbers from the Phonebook
From the OfficeStyler fax screen choose “Phonebook”.
c1
Alternatively, click once on the “Preferences” button on the 0t7iceSty/er
Control Panel.
and choose “Phonebook”
Choose “Export”.
H
90
Page 98

Phonebook
Enter a filename and choose “OK”.
El
OfficeStyler TIO Control Panel
91
Page 99

OfficeStyler T1 OControl Panel
Managing fax messages
Managing fax messages
For administration purposes, you may wish to keep track of sent and received
messages. OfficeStyler maintains several logs so you can quickly view which
messages have been sent, received or are awaiting transmission (messages
sent using Send Later or Standby for redial).
How to view/print a list of messages recently sent and received
~ Click on the “Communication Log” button on the OfliceSfy/er Ccmtml
Pane/m
U
Click on the Transmission, Receive or Standby tabs
H
the lists.
~ If you wish to print a particular list, click on the “Print Log” button
# If you wish to see more detailed information about a message, click once
on the message to select it and then choose the “Details” button.
to switch between
92
Page 100

Managing fax messages
How to resend a message
Click on the “Communication Log” button on the OfflceSty/er Control
c1
Panel.
Click on the Transmission tab.
OfficeStyler T1OControl Panel
El
Find the message you want to resend and click on it once to select it. If
El
you wish to check the detail, choose the “Details” button.
, Choose “Resend”. Note that you can only resend messages that have
Cl
been sent with Save Image Data selected (the Document field will contain
the name of the saved message).
93
 Loading...