

Page 1

Software User Guide
• For the safe use of your camera, be sure to read the “Safety Precautions” thoroughly before use.
• Types of software installed on your computer varies depending on the method of installation from the Caplio Software
CD-ROM. For details, see the “Camera User Guide”.
Page 2

Using These Manuals
How to Use the
The two manuals included are for your Caplio
500SE.
1. Understanding How to Use Your Camera
“Camera User Guide” (Printed manual)
This guide explains the usage and functions
of the camera. You will also see how to install
the provided software on your computer.
2. Downloading Images to Your Computer
Software User Guide
Display examples:
The LCD Monitor Display examples may be
different from actual display screens.
Terms:
In this guide, still images, movies, and sounds
are all referred to as “images” or “files”.
Symbols:
This guide uses the following symbols and
conventions:
Caution
Caution
This indicates important notices and restrictions for
using this camera.
“Software User Guide”
*This manual (this file)
This guide explains how to download images
from the camera to your computer using the
provided software.
3. Displaying Images on Your Computer
The provided software “ImageMixer” allows
you to display and edit images on your
computer.
For details on how to use ImageMixer, click
the [?] button on the ImageMixer window and
see the displayed manual.
For the latest information about ImageMixer,
access the Web page of Pixela Co., Ltd.
(http://www.imagemixer.com).
Note
This indicates supplementary explanations and useful
tips about camera operations.
Refer to
This indicates page(s) relevant to a particular function.
“P. xx” is used to refer you to pages in this manual.
Term
This indicates terms that are useful for understanding
the explanations.
2
Page 3

Contents
Using These Manuals............................................................................................................................................. 2
1. Understanding How to Use Your Camera.......................................................................................................................... 2
2. Downloading Images to Your Computer ............................................................................................................................ 2
3. Displaying Images on Your Computer ............................................................................................................................... 2
How to Use the Software User Guide..................................................................................................................... 2
Display examples:.................................................................................................................................................................. 2
Terms:.................................................................................................................................................................................... 2
Symbols: ................................................................................................................................................................................ 2
Contents ................................................................................................................................................................. 3
Chapter 1 Downloading Images to Your Computer (Windows)
Connecting the Camera to a Computer .................................................................................................................. 6
Disconnecting the Camera from Your Computer ................................................................................................................... 6
Downloading Images to Your Computer................................................................................................................. 7
Downloading Images Using RICOH Gate La......................................................................................................................... 7
Transferring Images in Mass Storage Mode........................................................................................................................ 10
How to Use RICOH Gate La................................................................................................................................. 11
Starting................................................................................................................................................................................. 11
Exiting .................................................................................................................................................................................. 11
Restarting............................................................................................................................................................................. 11
The RICOH Gate La Window............................................................................................................................................... 11
How to Use the [Option settings] ......................................................................................................................................... 12
How to Use the [Background illustration settings]................................................................................................................ 13
Downloading Images from an SD Memory Card .................................................................................................. 13
Images in an SD Memory Card............................................................................................................................................ 13
Chapter 2 Downloading Images to Your Computer (Macintosh)
Connecting the Camera to a Computer ................................................................................................................ 15
Disconnecting the Camera from Your Computer ................................................................................................................. 15
Downloading Images to Your Computer............................................................................................................... 16
Using the Caplio Software to Download Images.................................................................................................................. 16
Downloading Images Using RICOH Gate La....................................................................................................................... 16
Downloading Images Using the Caplio Mounter.................................................................................................................. 17
Transferring Images in Mass Storage Mode........................................................................................................................ 18
How to Use RICOH Gate La................................................................................................................................. 19
Starting................................................................................................................................................................................. 19
Quitting................................................................................................................................................................................. 19
Restarting............................................................................................................................................................................. 19
The RICOH Gate La Window............................................................................................................................................... 19
How to Use the [Option settings] ......................................................................................................................................... 20
Downloading Images from an SD Memory Card .................................................................................................. 21
Images in an SD Memory Card............................................................................................................................................ 21
3
Page 4

Chapter 3 Shooting with Camera Memos
Section 1 About Camera Memos
Shooting with Camera Memos ............................................................................................................................. 23
Text Camera Memo ............................................................................................................................................................. 23
Voice Memo ......................................................................................................................................................................... 23
How to Use Camera Memos................................................................................................................................................ 24
Section 2 Creating a Camera Memo List
Creating a Camera Memo List.............................................................................................................................. 26
Starting List Editor................................................................................................................................................................ 26
Exiting List Editor ................................................................................................................................................................. 26
How to Use List Editor ......................................................................................................................................................... 26
Using the [List Editor] Dialog Box ........................................................................................................................................ 28
Transferring the Camera Memo List to the Camera ............................................................................................. 29
Transferring from List Editor ................................................................................................................................................ 29
Using a Card Reader............................................................................................................................................ 30
Section 3 Shooting with Camera Memos
Shooting with Camera Memos ............................................................................................................................. 32
To Quit Shooting with Memos.............................................................................................................................................. 33
Create or Edit a Camera Memo Temporarily (Temporary Memo) ........................................................................ 34
Creating a Temporary Memo ............................................................................................................................................... 34
Editing a Temporary Memo.................................................................................................................................................. 36
Editing a Camera Memo to Create a New Temporary Memo .............................................................................................. 37
Viewing/Deleting a Camera Memo Attached to a Still Image ............................................................................... 38
Viewing a Camera Memo..................................................................................................................................................... 38
Deleting a Camera Memo .................................................................................................................................................... 38
Attaching a Camera Memo to a Still Image .......................................................................................................... 39
Displaying and Changing a Camera Memo Attached to a Still Image on the Camera ......................................... 40
Displaying a Camera Memo................................................................................................................................................. 40
Changing a Camera Memo.................................................................................................................................................. 40
Registering (Recording)/Playing Back/Changing a Voice Memo ......................................................................... 42
Registering a Voice Memo................................................................................................................................................... 42
Playing Back a Voice Memo ................................................................................................................................................ 44
Changing a Voice Memo...................................................................................................................................................... 44
Section 4 Viewing/Editing a Camera Memo on a Computer
Displaying/Viewing/Editing a Camera Memo on a Computer ............................................................................... 46
Playing Back and Confirming a Voice Memo Attached to a Still Image ............................................................... 47
Searching for a Camera Memo ............................................................................................................................ 48
Printing a Camera Memo...................................................................................................................................... 48
How to Use the [Details] Dialog Box.................................................................................................................................... 49
Appendices
How to Use the Keyboard..................................................................................................................................... 51
Troubleshooting.................................................................................................................................................... 53
4
Page 5

Chapter 1 Downloading Images to Your Computer (Windows)
This section explains how to download still images and
movies to your computer (Windows).
The software installed to your computer from the Caplio Software CDROM varies depending on the installation method. For more details, see
the “Camera User Guide”.
Caution
This section explains how to download still images and movies using
RICOH Gate La.
For information on how to download still images and movies using
DeskTopBinder Lite or Auto Document Link, which are installed as
standard applications, see the “Auto Document Link Guide”.
Page 6

Connecting the Camera to a Computer
There are two methods for downloading
images from the camera to your computer.
The first method is to use RICOH Gate La. To
use RICOH Gate La, Caplio Software must be
installed.
The second method is to download images
without using RICOH Gate La. In this case, the
camera is recognized by the computer as a
separate drive and appears on [My Computer].
To use RICOH Gate La, select [ORIGINAL]
for [USB CONNECTION] on the camera.
To download images without using RICOH
Gate La, select [MASS STR] for [USB
CONNECTION] on the camera.
For information on how to install Caplio
Software and how to change the [USB
CONNECTION] setting, see the “Camera
User Guide”.
1. Check the setting for [USB
CONNECTION] on the camera’s
SETUP menu.
For how to check the setting, see the
“Camera User Guide”.
At the time of purchase, [ORIGINAL] is
selected. Make settings for [USB
CONNECTION] according to the transfer
method as follows:
4. Connect the USB cable to the
USB terminal of your camera.
Your camera turns on.
If [ORIGINAL] is selected for [USB
CONNECTION] on the camera, RICOH
Gate La starts. Proceed to “Downloading
Images Using RICOH Gate La”. (GP.7)
When [MASS STR] is selected for [USB
CONNECTION], the computer
automatically starts preparation for
recognizing the camera as a new drive.
Proceed to “Transferring Images in Mass
Storage Mode”. (GP.10)
When downloading images from your camera, load a
battery with adequate remaining power in the camera.
Use of the AC adapter (sold separately) is
recommended.
Disconnecting the Camera from Your Computer
Software used for transfer [USB CONNECTION] setting
The computer recognizes
the camera as a drive
without using software.
Auto Document Link ORIGINAL
RICOH Gate La ORIGINAL
MASS STR
2. Turn the camera power off.
3. Connect the USB cable to the
USB port of your computer.
The display is an example of Windows XP.
The terms are different for other operating
systems but the operations are the same.
1. Double-click the [Safely Remove
Hardware] icon at the right end
of the task bar.
2. Select [USB Mass Storage
Device] and click [Stop].
3. Check that [USB Mass Storage
Device] is selected and click
[OK].
4. Click [Close].
5. Unplug the USB cable.
6
Page 7

Downloading Images to Your Computer
When you connect the camera to your
computer, you can download images from the
camera.
Downloading Images Using RICOH Gate La
4. Connect the USB cable to the
USB terminal of your camera.
Images are downloaded to your computer from the
following memory sources.
When no SD memory
card is loaded
Loads from internal
memory
RICOH Gate La automatically creates a folder
called [Caplio] inside your [My Documents]
folder. Downloaded images are saved in
folders with the date of each shot, inside the
[Caplio] folder. Set the correct date and time
on the camera before shooting.
When an SD memory
card is loaded
Loads from the SD
memory card
1. Set [USB CONNECTION] to
[ORIGINAL] on the SETUP menu.
2. Make sure that the camera power
is off.
3. Connect the USB cable to the
USB port of your computer.
The camera turns on, RICOH Gate La
starts, and the RICOH Gate La window
appears.
Image transfer begins automatically.
For details about Ricoh Gate La, see
P.11.
• When transferring images to a computer using
RICOH Gate La, the file being transferred is renamed
and saved.
• File names given by the camera are not used.
• Images are stored with sequential numbers so that
they have unique file names.
• Even when the storage folder is changed, the file
number will be continuous. The number cannot be
initialized.
• When transferring images to a computer using
RICOH Gate La, the files are assigned names like
[RIMG****.jpg] (**** indicates the number of the
image), even if [SEQUENTIAL NO.] is set to [ON].
• If images are not automatically downloaded, check
[Save automatically when connected to USB] in the
RICOH Gate La [Option settings] dialog box.
• For details about the RICOH Gate La [Option
settings] dialog box, see P.12.
• For details about [USB CONNECTION] (MASS STR/
ORIGINAL), see the “Camera User Guide”.
7
Page 8
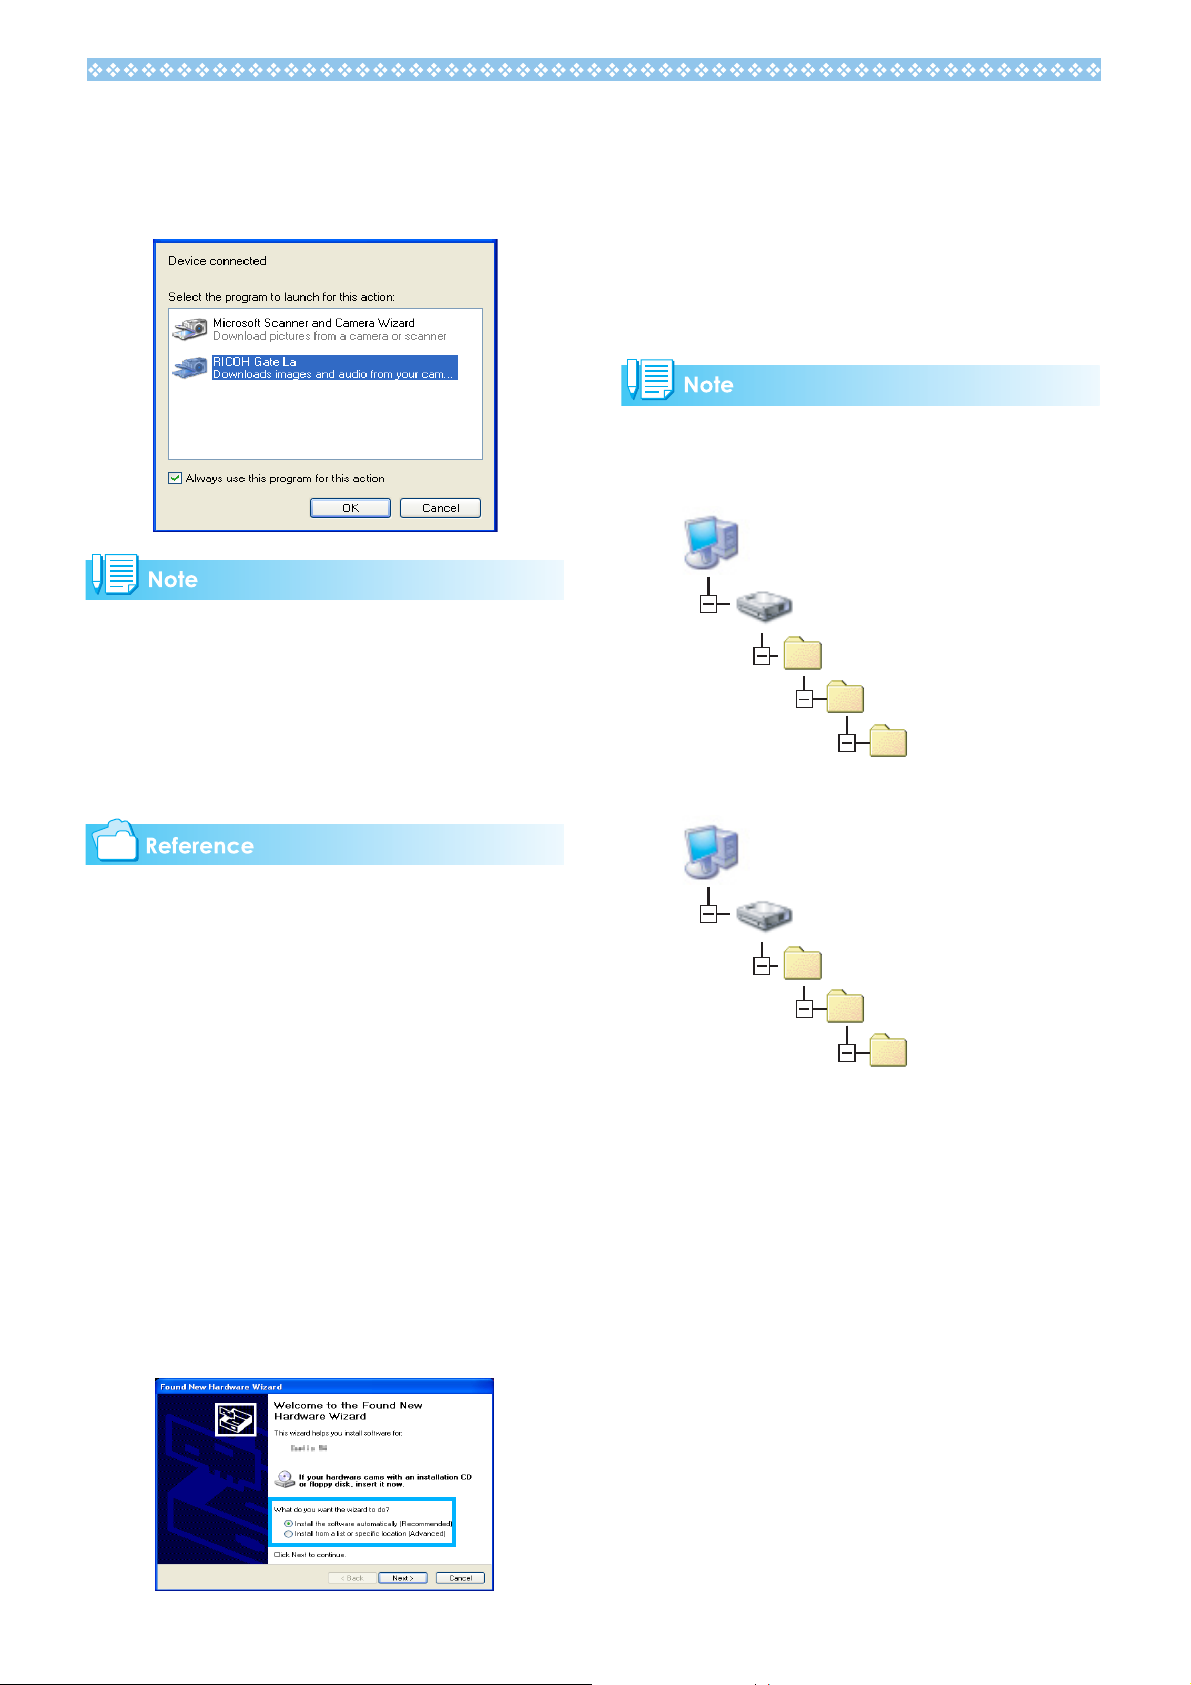
If the screen below appears, select
[RICOH Gate La], check the box next to
[Always use this program for this action]
and then click [OK].
• Before closing RICOH Gate La, if you turn the
camera power off, or unplug the USB cable, the
RICOH Gate La window is minimized and displayed
as an icon on the Windows task bar. If you click the
icon, the window will be displayed again.
• You can change the folder for downloading your
images (Save Destination).
2. Insert the Caplio Software CD-
ROM into the CD-ROM drive on
your computer.
Installation of the WIA driver automatically
starts. If the CD-ROM is already on your
computer when the [Found New
Hardware Wizard] window is displayed,
simply click [Next] to start installation.
By default, the WIA driver is installed in the following
location:
If you have installed the ImageMixer:
My Computer
Local Disk
Program Files
Caplio Software
WIA driver
If you have installed the DeskTopBinder Lite:
• For how to change the Save Destination Folder, see
P.12.
• For how to start RICOH Gate La, see P.11.
• For the RICOH Gate La window, see P.11.
Connecting the Camera to the
Computer for the First Time
The first time you connect your camera to the
computer using a USB cable, the [Found New
Hardware Wizard] screen will appear (only
when [ORIGINAL] is selected for [USB
CONNECTION]).
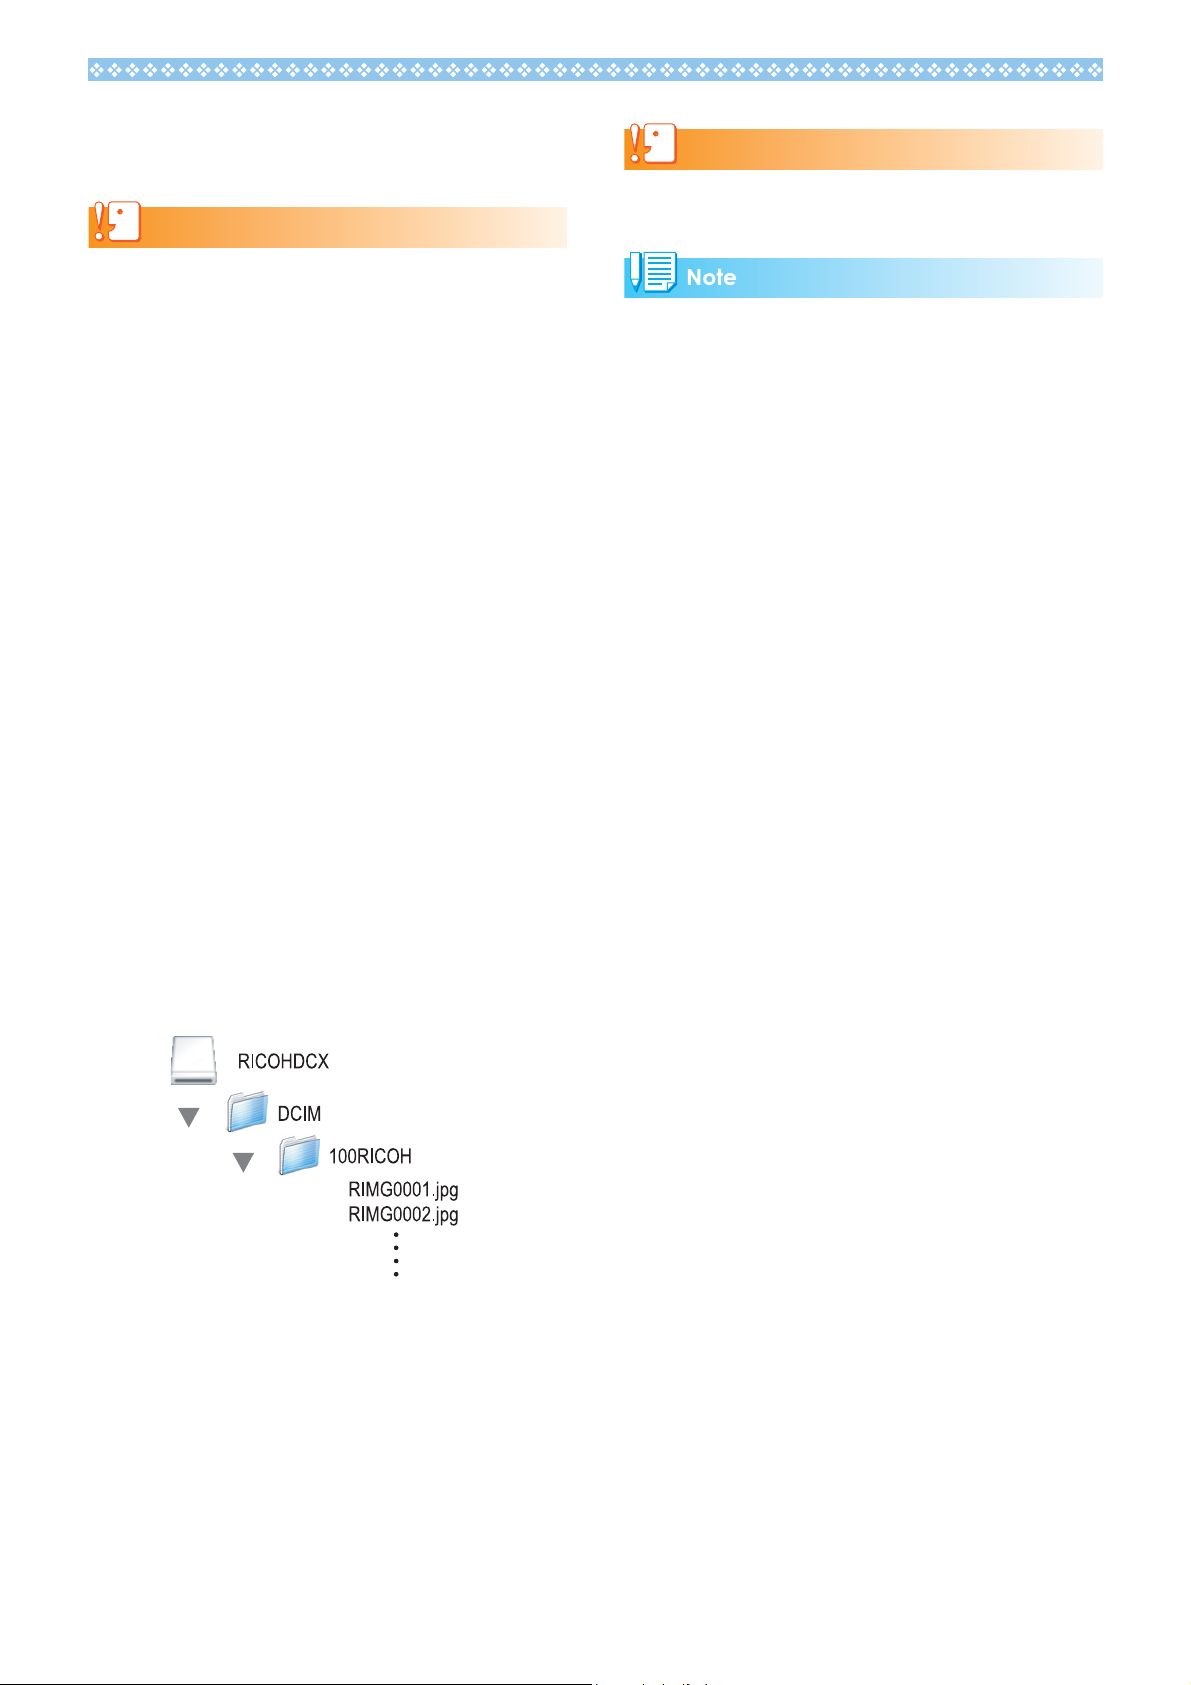
The steps below use screenshots from
Windows XP.
1. Select [Install the software
automatically (Recommended)].
My Computer
Local Disk
Program Files
Caplio Software S
WIA driver
3. Select [RICOH Gate La], check
[Always use this program for this
action] check box, and then click
[OK].
• To load images from the camera with
assistance from the Windows XP
“Scanner and Camera Wizard”, select
[Microsoft Scanner and Camera
Wizard].
• Leaving the [Always use this program
for this action] check box unchecked
will cause the [Caplio 500SE] screen to
be displayed each time you transfer
images from the camera, thereby
allowing you to choose whether to use
[RICOH Gate La] or the [Microsoft
Scanner and Camera Wizard] for
image transfers.
8
Page 9

Warning Messages Under
Windows XP Service Pack 2
When software for Ricoh’s digital camera is
used on a computer with Windows XP Service
Pack 2 installed, the following warning
message may appear at software activation
or USB connection.
Change the setting while referring to the
following.
When warning messages appear:
If you clicked the [Keep Blocking] button:
Follow the steps below to check to see the
Windows Firewall settings.
1. Click [Start] and then [Control
Panel].
2. Double-click [Windows Firewall].
If [Windows Firewall] is not displayed,
click [Switch to Classic View] at the upper
left of the window.
3. Click the [Exceptions] tab.
1. Check the information provided
on the message screen to make
sure that it comes from a
reputable source, and then click
the [Unblock] button.
Caution
If you do not recognize the program, you should block
it because it may be a virus. Click the [Keep Blocking]
button to prevent the program from connecting to the
Internet.
4. Check that the software is in
[Programs and Services].
5. Click the [Add Program] button
to add software that uses the
network.
If you clicked the [Ask Me Later] button:
Each time the program is activated, the
[Windows Security Alert] window appears.
Then you can select [Unblock].
9
Page 10

Transferring Images in Mass Storage Mode
Caution
Mass storage mode is not available on this camera if
you are using Windows 98/98SE.
1. Set [USB CONNECTION] to
[MASS STR] on the SETUP
menu.
2. Make sure that the camera power
is off.
3. Connect the accessory USB
cable to a USB port of your
computer.
4. Connect the USB cable to the
USB terminal of your camera.
Your camera turns on.
Your computer automatically reads the
file necessary for recognizing the camera
as a drive.
After this preparation, the camera is
displayed as a drive at [My Computer].
Caution
Do not turn off the camera or disconnect the USB cable
during image transfer.
• If a file with the same name already exists at the
destination, it is overwritten. If you do not want the file
to be overwritten, rename the file or transfer data to
another folder.
• When an SD memory card is loaded, its files are
displayed. Otherwise, files in the internal memory are
displayed.
Example of the display in Windows XP
5. From the displayed drive, copy a
file to the desired location.
The figure below shows the folder
configuration of the drive.
When the contents of the internal
memory are displayed, the drive name is
[RICOHDCI].
10
Page 11

How to Use RICOH Gate La
RICOH Gate La is a software program to
import images from the camera to a
computer.
By simply connecting the camera to your
computer via a USB cable, images are
automatically imported to the computer.
On the RICOH Gate La window, you can
make various settings including auto-saving
upon connection and the destination folder
(where images will be saved).
Starting
RICOH Gate La is already installed with
Caplio Software.
Connecting the camera to your computer
automatically starts the software and begins
downloading of images from the camera.
Exiting
To exit RICOH Gate La, follow either of the
steps below.
• Click the [MENU] button on the RICOH
Gate La window and select [Exit] from the
displayed menu (see “The RICOH Gate La
Window”).
1[MENU] Button
Click this and the following menu appears.
[Option settings] Specifies where to save
images, or which
application to start after
images have been saved
or when you click the
[Application] button.
(GP.12)
[Background
illustration
settings]
[About] Displays the version of
[Exit] Closes RICOH Gate La.
Changes the background
design in the RICOH
Gate La window.
(GP.13)
RICOH Gate La.
2 [Save] Button
Click this and the images are downloaded
from your camera.
• Right-click the RICOH Gate La icon on the
task bar and select [Exit] from the displayed
menu.
Restarting
To restart RICOH Gate La after exiting, follow
the steps below.
• From the [Start] menu, select [All
Programs] or [Programs] then [Caplio
Software] then [RICOH Gate La].
The RICOH Gate La Window
Once RICOH Gate La starts up, the following
RICOH Gate La window appears on your
computer screen.
Caution
If the message indicating that [CONNECTING...
PRESS [ADJ.] KEY TO DIRECT PRINT] appears on
the camera LCD monitor, do not click the [Save] button.
3 [Application] Button
The application registered in [Option
settings] is started.
4 [Minimize] Button
Minimizes the window and displays its icon
on the Windows task bar. If you click on the
icon, the window will be displayed again.
5 Indicator
The “Indicator” lights if the camera is
connected via USB cable. When lit, if you
move the mouse pointer over the
“Indicator”, [Camera is being connected]
appears. When your camera is not
connected, the “Indicator” is grayed out,
and if you move the mouse pointer over it,
[Camera is being connected] does not
appear.
11
Page 12

How to Use the [Option settings]
If you click the [MENU] button on the RICOH Gate La
window and select [Option settings] from the
displayed menu, the [Option settings] dialog box
appears.
Item Description Initial Setting
1 [Save automatically
when connected to
USB]
2 [Destination folder] Specifies which folder to save your images in. The [Caplio] folder inside [My
3 [Create folder] Specifies how to create a folder.
Select the check box to have images downloaded and saved automatically in your
computer when the camera is connected to your computer with the USB cable.
If you deselect the check box, your images will not be downloaded
automatically when you connect your camera to the computer. For
downloading, activate RICOH Gate La and click the [Save] button.
Documents] is specified initially; if you want to change this, click the
[Browse] button to display the dialog box and then specify the folder.
[Not created]
Your downloaded images will all be saved in the folder specified in item “2
[Destination folder]”.
[For each date photographed]
Creates a new folder assigning the date the images were shot as the
folder name, and saves images shot on the same day in the same folder.
For example, if shot on September 1, 2006: [20060901] folder
[For each time saved]
Creates a new folder each time and save images in the folder. If images
are saved more than once in a day, a new folder is created each time.
The folder name format is “Saving date + Underscore + Three-digit serial
number”.
For example, if you saved twice on September 1, 2006:
[20060901_001] folder, [20060901_002] folder
Save automatically
Create a new
folder for each date
photographed
4 [The same image will
not be saved]
5 [Application software
settings]
6 [Save and start
application software]
7 [Camera’s IP Address] Not used by this model but used by other models of Caplio camera. For
When this check box is selected, images once loaded into your computer
are not loaded again. This check box is enabled only when [Not created] or
[For each date photographed] is selected in [Create folder].
To allow this function to work properly, the camera date and time must be
set correctly.
When this check box is deselected, previously loaded images are loaded again.
To start an application after loaded images have been saved, specify the
application name here. To set an application, click the [Browse] button and
select the application in the displayed dialog box.
When this is checked, the application specified above is started after the
images have been saved.
When this is unchecked, the application is not started.
details, see the documentation that came with the camera.
12
The same image
will not be saved
Application is
started
0.0.0.0
Page 13

How to Use the [Background illustration settings]
You can select a background for the RICOH
Gate La window from three types of patterns.
If you click the [MENU] button on the RICOH
Gate La window and select [Background
illustration settings] from the displayed menu,
the [Background illustration settings] dialog
box appears.
Downloading Images from an SD Memory Card
It is possible to download images from an SD
memory card to computer via a PC card slot
or card reader.
Images in an SD Memory Card
Images are stored on an SD memory card in
a hierarchy, as shown here.
1 [Background illustration pattern]
Select the pattern you wish to use from the
three available.
Image files
Depending on the type of PC card slot or card reader,
a memory card adapter may be required when using an
SD memory card. If the SD memory card can be used
in the PC card slot, no memory card adapter is
required.
Card Reader
This is a device connected to a computer to read the
contents of cards. In addition to the memory card
adapter-type, there are card readers into which you can
directly load an SD memory card.
2[Preview]
You can preview the pattern selected in
[Background illustration pattern].
13
Page 14

Chapter 2 Downloading Images to Your Computer (Macintosh)
This section explains how to download still images and
movies to your computer (Macintosh).
Page 15

Connecting the Camera to a Computer
The following methods can be used to download
images from the camera to your computer.
The first method is to use RICOH Gate La or
Caplio Mounter. To use these software titles,
Caplio Software must be installed.
The second method is to download images
without using software. In this case, the
camera is recognized by the computer as a
separate drive and appears on [My Computer].
To use software to download images, select
[ORIGINAL] for [USB CONNECTION] on the
camera.
To download images without using software,
select [MASS STR] for [USB CONNECTION]
on the camera.
For information on how to install Caplio
Software and how to change the [USB
CONNECTION] setting, see the “Camera
User Guide”.
1. Check the setting for [USB
CONNECTION] on the camera’s
SETUP menu.
For how to check the setting, see the
“Camera User Guide”.
At the time of purchase, [ORIGINAL] is
selected. Make settings for [USB
CONNECTION] according to the transfer
method as follows:
Software used for transfer [USB CONNECTION] setting
4. Connect the USB cable to the
USB terminal of your camera.
Your camera turns on.
If [ORIGINAL] is selected for [USB
CONNECTION] on the camera, the
software starts. Proceed to “Using the
Caplio Software to Download Images”.
(GP.16)
When [MASS STR] is selected for [USB
CONNECTION], the computer
automatically starts preparation for
recognizing the camera as a new drive.
Proceed to “Transferring Images in Mass
Storage Mode”. (GP.18)
When downloading images from your camera, load a
battery with adequate remaining power in the camera.
Use of the AC adapter (sold separately) is
recommended.
Disconnecting the Camera from Your Computer
The computer recognizes
the camera as a drive
without using software.
RICOH Gate La ORIGINAL
Caplio Mounter ORIGINAL
MASS STR
2. Turn the camera power off.
3. Connect the USB cable to the
USB port of your computer.
1. Drag and drop the displayed
drive to the [Trash] icon.
You can also click [Eject] on the [Special]
menu in Mac OS 9 or the [File] menu in
Mac OS X to cancel the connection.
2. Unplug the USB cable.
15
Page 16

Downloading Images to Your Computer
When you connect the camera to your
computer, you can download images from the
camera.
Using the Caplio Software to Download Images
Images are downloaded to your computer from the
following memory sources.
When no SD memory
card is loaded
Loads from internal
memory
Downloading methods differ depending on
the environment used. Refer to the respective
page to download your images.
OS Software used Refer to
Mac OS 8.6 to 9.2.2 RICOH Gate La,
Caplio Mounter
Mac OS X 10.1.2 to
10.4.5
Caplio Mounter P.17
Downloading Images Using RICOH Gate La
For Mac OS 8.6 to 9.2.2
Images downloaded by RICOH Gate La are
saved in folders with the date of each shot,
inside the [Caplio] folder. Set the correct date
and time on the camera before shooting.
In Mac OS 8.6, Mac OS 9.1, or earlier
versions, a folder called [Caplio] is created
inside the root directory on the startup disc.
In Mac OS 9.1 to 9.2.2, a folder called [Caplio]
is automatically created inside the
[Documents] folder on the startup disc.
When an SD memory
card is loaded
Loads from the SD
memory card
P.16
P.17
1. Set [USB CONNECTION] to
[ORIGINAL] on the SETUP menu.
2. Make sure that the camera power
is off.
3. Connect your camera to the
computer using the USB cable.
The camera turns on, RICOH Gate La
starts, and the RICOH Gate La window
appears.
Image transfer begins automatically.
For details about Ricoh Gate La, see
P.19.
• When transferring images to a computer using
RICOH Gate La, the file being transferred is renamed
and saved.
• File names given by the camera are not used.
• Images are stored with sequential numbers so that
they have unique file names.
• Even when the storage folder is changed, the file
number will be continuous. The number cannot be
initialized.
• When transferring images to a computer via RICOH
Gate La, the files are assigned names like
[RIMG****.jpg] (**** indicates the number of the
image), even if [SEQUENTIAL NO.] is set to [ON].
• If images are not automatically downloaded, check
[Automatically save on connection] in the RICOH
Gate La [Option settings] dialog box.
• Before closing RICOH Gate La, if you turn the
camera power off or unplug the USB cable, RICOH
Gate La closes automatically.
• You can change the folder for downloading your
images (Save Destination).
• If you want to start RICOH Gate La when the camera
is not connected, double-click the [RICOH Gate La]
icon in the Control Panel folder, which is inside the
System Folder.
16
Page 17

• For details about the RICOH Gate La [Option
settings] dialog box, see P.20.
• For details about [USB CONNECTION] (MASS STR/
ORIGINAL), see the “Camera User Guide”.
• For how to change the Save Destination Folder, see
P.20.
• For how to start RICOH Gate La, see P.19.
• For the RICOH Gate La window, see P.19.
4. Double-click the displayed icon.
It can be handled in the same way as a
normal drive. If you double-click the icon,
a folder called [DCIM] is displayed and a
folder called [100RICOH] within that
folder is displayed. The image files you
shot are inside the [100RICOH] folder.
You can use drag and drop to copy files
to the hard disk.
Caution
Downloading Images Using the Caplio Mounter
For Mac OS 8.6 to 9.2.2
For Mac OS X 10.1.2 to 10.4.5
When downloading images to a computer
using the Caplio Mounter, you can specify a
folder where the images will be saved.
1. Set [USB CONNECTION] to
[ORIGINAL] on the SETUP menu.
2. Make sure that the camera power
is off.
3. Connect your camera to the
computer using the USB cable.
Your camera turns on.
When no SD memory card is loaded, the
[Caplio] icon is displayed and you can view
the image files stored in internal memory.
When using the Caplio Mounter, you cannot write data
onto an SD memory card.
Example of the display
in Mac OS 10.1.2 to 10.4.5
When an SD memory card is loaded, the
[Caplio.SD] icon is displayed and you can
view the image files stored on the SD
memory card loaded.
Example of the display
in Mac OS 10.1.2 to 10.4.5
17
Page 18
Transferring Images in Mass Storage Mode
Caution
Mass storage mode is not available on this camera if
you are using Mac OS 8.6.
1. Set [USB CONNECTION] to
[MASS STR] on the SETUP
menu.
2. Make sure that the camera power
is off.
3. Connect the accessory USB
cable to a USB port of your
computer.
4. Connect the USB cable to the
USB terminal of your camera.
Caution
Do not turn off the camera or disconnect the USB cable
during image transfer.
• If a file with the same name already exists at the
destination, it is overwritten. If you do not want the file
to be overwritten, rename the file or transfer data to
another folder.
• When an SD memory card is loaded, its files are
displayed. Otherwise, files in the internal memory are
displayed.
Your camera turns on.
Your computer automatically reads the
file necessary for recognizing the camera
as a drive.
After this preparation, the camera is
displayed as a drive on the Desktop.
5. From the displayed drive, copy a
file to the desired location.
The figure below shows the folder
configuration in the drive.
When the contents of the internal
memory are displayed, the drive name is
[RICOHDCI].
18
Page 19

How to Use RICOH Gate La
1 [About RICOH Gate La]
Displays the version of RICOH Gate La.
RICOH Gate La is a software program to
import images from the camera to a
computer.
By simply connecting the camera to your
computer via a USB cable, images are
automatically imported to the computer.
On the RICOH Gate La window, you can
make various settings including auto-saving
upon connection and the destination folder
(where images will be saved).
Starting
Connecting the camera to your computer
automatically starts RICOH Gate La and
begins importing of images from the camera.
Quitting
To quit RICOH Gate La, select [File] and then
[Quit] from the RICOH Gate La menu bar.
Restarting
To restart RICOH Gate La after quitting,
double-click the [RICOH Gate La] icon in the
Control Panel folder in the System Folder.
The RICOH Gate La Window
Once RICOH Gate La starts up, the following
RICOH Gate La menu bar and window
appear on the computer screen.
2[Quit]
Closes RICOH Gate La.
3 [Option settings]
Specifies where to save images, or which
application to start after images have been
saved or when you click the [Application]
button. (GP.20)
[Background illustration]
If you select this, a sub-menu will appear,
allowing you to change the background
design of the RICOH Gate La window.
Sub-menu Figure
4 [Save] Button
Click this and the images are downloaded
from your camera.
5 [Application] Button
The application registered in [Option
settings] is started.
6 Indicator
The “Indicator” lights if the camera is
connected via USB cable.
19
Page 20

How to Use the [Option settings]
If you select [Option settings] from the [RICOH Gate
La Setup] menu, the [Option settings] dialog box
appears.
Item Description Initial Setting
1 [Automatically save on
connection]
2 [Choose] Specifies which folder to save your images in.
3 [Automatically create
folder on saving]
4 [The same image will
not be saved.]
5 [Save and start
application software]
6 [Choose] Specify the name of the application to start after images have been saved.
Select the check box to have images downloaded and saved automatically
in your computer when the camera is connected to your computer with the
USB cable.
If you deselect the check box, your images will not be downloaded
automatically when you connect your camera to the computer. For
downloading, activate RICOH Gate La and click the [Save] button.
For Mac OS 8.6, Mac OS 9.1, or earlier versions, this is the [Caplio] folder in the
root directory on the startup disk. For Mac OS 9.1 to 9.2.2, this is the [Caplio]
folder inside the [Documents] folder on the startup disk. To change the folder,
click the [Choose] button, open the dialog box, and then select the desired folder.
When this check box is selected, a folder to save the loaded images is
automatically created. Use the adjacent pull-down menu in [Destination
settings] to specify how to create the folder.
[For each date photographed]
Creates a new folder assigning the date the images were shot as the
folder name, and saves images shot on the same day in the same folder.
For example, if shot on September 1, 2006: [20060901] folder
[For each time saved]
Creates a new folder for each time images are saved and saves the
images. If images are saved more than once in a day, a new folder is
created each time.
The folder name format is “Saving date + Underscore + Three-digit serial
number”.
For example, if saved twice on September 1, 2006:
[20060901_001] folder, [20060901_002] folder
When this check box is deselected, loaded images are all saved to the folder
specified in “2 [Choose]”.
When this check box is selected, images once loaded into your computer
are not loaded again. This can only be specified when [Automatically create
folder on saving] is deselected or when “3 [For each date photographed]” is
selected as the method for creating the folder.
To allow this function to work properly, the camera date and time must be
set correctly.
When this check box is deselected, previously loaded images are loaded again.
When this is checked, the application specified above is started after the
images have been saved.
When this is unchecked, the application is not started.
Click the [Choose] button to display the dialog box, and then specify which
application to use.
Transfer files
automatically
Create a new
folder for each date
photographed
The same image
will not be saved
Application is not
started
20
Page 21

Downloading Images from an SD Memory Card
It is possible to download images from an SD
memory card to computer via a PC card slot
or card reader.
Images in an SD Memory Card
Images are stored on an SD memory card in
a hierarchy, as shown here.
Image files
Depending on the type of PC card slot or card reader,
a memory card adapter may be required when using an
SD memory card. If the SD memory card can be used
in the PC card slot, no memory card adapter is
required.
21
Page 22

Chapter 3 Shooting with Camera Memos
Section 1 About Camera Memos
You can attach camera memos (information such as
shooting conditions) to the still images you shoot.
This section explains camera memos.
Caution
• Be sure to set the date and time on the camera.
• To use the camera memo function, an SD memory card is required. In
addition, DeskTopBinder Lite must be installed.
• The camera memo function is only for use with Windows.
Use DeskTopBinder Lite to view and edit a camera memo attached to a
still image with a computer. You can view, edit and search for a camera
memo attached to a still image and play back a voice memo attached to
a still image.
For more details, see the Introduction Guide and in the Help menu of
Document Viewer.
Page 23

Shooting with Camera Memos
The image file storing the image shot with a digital camera has an area where additional
information can be stored. The camera memo function uses this area to allow you to attach a
memo to the still image you shoot.
Image
Image file
Camera memo
Additional
information
Attach camera memos to easily identify, search and sort through your still images.
There are two types of camera memos: text and voice memos.
Camera memos cannot be attached to movie or voice files.
Text Camera Memo
• Photographer
• Location, etc.
You can create a list of text camera memos on your computer and transfer it to the camera to use
when shooting images.
If you want to use data not included in the camera memo list, you can make a temporary memo
with the camera. This camera memo is called a “temporary memo”.
You can also edit the contents of a camera memo list using a temporary memo.
Camera memo list
Up to 50 camera memos can be registered under
each of five categories.
Example: Camera memo with product information
Category
• Date of production
• Place of production
•Brand
• Producer
•Size
Camera memo
Large
Medium
Small
:
:
Voice Memo
The voice recorded by the camera can be attached as a camera memo. This is called a “voice
memo”.
Temporary memos and voice memos are deleted when the camera is turned off.
23
Page 24

How to Use Camera Memos
Create a camera memo list using your computer and transfer it to the camera.
1
(GP.26)
• Using the provided software List Editor, add camera memos to create a camera memo list.
• The created camera memo list can be saved on the computer as a camera memo list file
(*.mta).
• Load an SD memory card into the camera, connect the camera to the computer with a
USB cable, and transfer the camera memo list to the SD memory card in the camera.
* A camera memo list can be copied directly from the computer to the SD memory card using a card
reader.
* You cannot use List Editor to transfer a camera memo list to the camera when [USB
CONNECTION] on the camera is set to [MASS STR]. Set [USB CONNECTION] to [ORIGINAL].
Shoot a still image with a camera memo. (G P.32)
2
• Load an SD memory card with a camera memo list into the camera, display a camera
memo list in Shooting Mode, select a camera memo, and begin shooting. (GP.32)
• You can use the voice recording function to create a voice memo and attach it to a still
image. (GP.42)
• You can create a temporary memo and attach it to a still image. (GP.34)
• You can attach a camera memo to a previously shot still image. (GP.39)
• You can change a camera memo attached to a still image to a different one. (GP.40)
Transfer still images to the computer.
3
Connect the camera to the computer using the provided USB cable and transfer still images
to the computer.
• Set [USB CONNECTION] on the camera to [MASS STR], select [Add Document] and
[Import File] on the [File] menu, and specify the files on the card to transfer.
• Use Auto Document Link, which is installed at the same time as DeskTopBinder Lite, to
transfer images. For more details, see the Auto Document Link Guide and help of
DeskTopBinder Lite.
• When using a card reader, select [Add Document] and [Import File] on the [File] menu, and
specify the files on the card to transfer.
If both DeskTopBinder Lite and RICOH Gate La are installed, be sure to uncheck [Save
automatically when connected to USB] in the RICOH Gate La [Option settings] dialog box.
(GP.12)
If [USB CONNECTION] on the camera is set to [MASS STR], you do not need to use RICOH
Gate La or Auto Document Link.
* Still images stored on the SD memory card can be transferred to the computer using a card reader.
Use DeskTopBinder Lite to search for, edit, and print camera memos.
4
You can use DeskTopBinder Lite to search for, edit, and print a camera memo and play back
a voice memo.
For more details, see the Introduction Guide and in the Help menu of Document Viewer.
24
Page 25

Section 2 Creating a Camera Memo List
This section explains how to create a camera memo list.
Page 26

Creating a Camera
How to Use List Editor
Memo List
To create a camera memo list, use the
provided software List Editor.
When creating a camera memo list, first
define categories and next add camera
memos to them.
You can define up to five categories.
Each category can include up to 50 camera
memos.
Caution
List Editor is only for use with Windows.
• A camera memo list file in csv format created by a
different application can be read into the List Editor
and saved on an SD memory card for use by the
camera.
• To read a csv-format camera memo list file into List
Editor, click [Open] on the [File] menu of List Editor,
and then specify the file name.
Up to five categories can be defined for a
camera memo list file. Each category can
include up to 50 text memos and one voice
memo. The voice memo is registered on the
camera.
1. Start List Editor.
2. On the [Item1] tab, enter a
category name in the [Item
Name] box.
Up to 20 characters can be entered for a
category name.
Starting List Editor
1. On the Windows [Start] menu,
select [All Programs] or
[Programs] then [Caplio
Software] then [List Editor] to
start List Editor.
Exiting List Editor
1. You can exit List Editor by
clicking the [×] (Close) button in
the upper-right corner of the
screen or by selecting [Exit] on
the [File] menu.
Click another [Item] tab to switch tabs.
3. Enter a camera memo in [Input]
in [Details].
Up to 32 characters can be entered for a
camera memo.
4. Click the [Add] button.
26
Page 27

5. Repeat steps 3 and 4 to enter all
camera memos
To delete a camera memo, select the
camera memo you want to delete and
click the [Delete] button.
To move a camera memo, select the
camera memo you want to move and
click the [Up] or [Down] button.
6. Click another [Item] tab and
repeat steps 2 to 5 to add
another category or camera
memo.
7. Click the [Save] button on the
toolbar or click [Save As] on the
[File] menu.
Clicking this icon saves a camera memo
list in the computer. You can transfer the
camera memo list to an SD memory card
without saving it, but to prevent losing the
camera memo list, it is recommended to
save it to a computer.
The [Save As] dialog box appears.
8. Select a save destination for the
camera memo list and enter a file
name.
9. Make sure [mta Files (*.mta)] is
selected in the [Save as type]
box.
The file can be saved as a .csv file. To
use the file as a camera memo list for the
camera, an .mta file must be selected.
10.Click the [Save] button.
27
Page 28

Using the [List Editor] Dialog Box
1 Menu bar
You can edit and save a camera memo
and transfer it to the camera.
[Transfer to Camera] button
Clicking this button transfers a camera
memo list to the [TEMPLATE] folder in
the SD memory card.
• If a camera memo list file of the same name already
exists in the SD memory card, the file is overwritten.
• Only one camera memo list for use in the camera can
be used for each SD memory card.
• The camera memo list in the SD memory card may
become unusable if you try to transfer another
camera memo list to the same SD memory card. Be
sure to save the current camera memo list in the SD
memory card to a computer before transferring
another camera memo list.
• A camera memo list will not be deleted even if you
format the SD memory card using the camera’s card
formatting function in the SETUP menu. Use
Windows Explorer to delete the camera memo list.
2 Toolbar
This bar displays main functions on the
menu as buttons for easy use by simply
clicking them.
[New] button
Clicking this button opens the screen
to create a new camera memo.
[Open] button
Clicking this button opens the camera
memo list file saved on the computer.
[Save] button
Clicking this button saves a camera
memo list in the computer.
You can select .mta or .csv file types.
To use the file as a camera memo list
for the camera, save it as an .mta file.
To edit the camera memo list stored in the computer,
open the camera memo list by clicking the [Open]
button, edit the camera memo list, and overwrite it by
clicking the [Save] button.
[Cut], [Copy] and [Paste] buttons
Clicking these buttons cuts, copies or
pastes the selected text.
3 [Item] tab
You can switch between screens for each
category name.
4 [Item Name] box
Enter a list title in this box.
5 Details [Input] box
Enter a camera memo in this box.
6 Details [Input List] box
A list of entered camera memos is displayed.
7[Up] button
Clicking this button scrolls the camera
memo list one row upward in [Input List] in
[Details].
8 [Down] button
Clicking this button scrolls the camera
memo list one row downward in [Input List]
in [Details].
9 [Add] button
Clicking this button adds a new camera
memo in [Input List] in [Details].
10 [Edit] button
Clicking this button allows you to edit a
camera memo selected in [Input List] in
[Details].
11 [Delete] button
Clicking this button deletes the camera
memo selected in [Input List] in [Details].
28
Page 29

Transferring the Camera Memo List to the Camera
Caution
The camera memo list cannot be transferred when
[USB CONNECTION] on the camera is set to [MASS
STR]. Set [USB CONNECTION] to [ORIGINAL].
Transferring from List Editor
1. Exit RICOH Gate La or Auto
Document Link if either is
running. (G P.11)
2. Make sure that the camera is
turned off.
6. Click the [Transfer to Camera]
button on the toolbar or click
[Transfer to Camera] on the
[Tools] menu.
The camera memo list is saved to the SD
memory card in the camera through the
USB cable and the message ["****.mta"
transferred to the camera.] (where **** is
the file name) appears.
7. Click the [OK] button.
3. Insert the SD memory card you
want to use to save the camera
memo list into the camera.
4. Connect the supplied USB cable
to a USB port on your computer.
5. Connect the USB cable to the
USB terminal of your camera.
Your camera turns on.
8. Click [Exit] on the [File] menu.
List Editor closes.
You can also quit List Editor by clicking
the [×] (Close) button in the upper-right
corner of the screen.
9. Press the power button of the
camera to turn off the camera.
10.Disconnect the USB cable
between the camera and
computer.
Now, turning on the camera allows you to
use the camera memo list stored on the
SD memory card.
11.Restart RICOH Gate La or Auto
Document Link if necessary.
(G P.11)
29
Page 30

Using a Card Reader
With a card reader, you can transfer the
camera memo list directly from the computer
to the SD memory card.
Save the camera memo list in the
[TEMPLATE] folder in the SD memory card.
The [TEMPLATE] folder is automatically
created when the SD memory card is
formatted with the camera format function.
1. Connect the card reader to the
computer to ready it for use.
2. Insert an SD memory card into
the card reader.
3. Follow steps 1 to 7 of “How to
Use List Editor”. (GP.26)
4. Select the [TEMPLATE] folder in
the SD memory card inserted in
the card reader, and then enter a
file name.
5. Make sure [mta Files (*.mta)] is
selected in the [Save as type]
box.
6. Click the [Save] button.
The camera memo list is saved into the
SD memory card. By inserting this SD
memory card into the camera, the
camera memo list can be used.
30
Page 31

Section 3 Shooting with Camera Memos
By using a camera memo list stored on an SD memory
card, you can shoot a still image with a memo.
This section explains how to shoot images with camera
memos.
For how to create a camera memo, see P.26.
Page 32

Shooting with Camera
AUTO
297
1280
Memos
8. Press the !" buttons to select a
camera memo, and then press
the MENU/OK button.
You can attach camera memos to the still
images you shoot.
You can create a camera memo on a
computer with the provided software (List
Editor) and record it on an SD memory card.
Even when shooting in Scene Mode, you can
shoot an image with a camera memo.
To shoot an image with a camera memo,
follow the steps below.
1. Make sure that the camera is
turned off.
2. Insert an SD memory card with a
camera memo list into your
camera.
3. Turn the camera on.
4. Turn the mode dial to 5/K.
5. Press the ADJ./MEMO button.
The [CAMERA MEMO] screen appears.
The [CAMERA MEMO] screen displays
the camera memo list category and the
camera memo for each category.
If a temporary memo has been created,
its contents are displayed up to the end of
the first row.
If a voice memo has been attached, a
speaker mark is displayed.
To enter a temporary memo, select
[TEMPORARY]. (G P.34) You can also
record a voice memo by selecting
[RECORD]. (G P.42)
9. Repeat steps 6 to 8 to set the
camera memo for each category.
10.Press the MENU/OK button to
confirm the camera memo.
The [MEMO] mark appears on the
screen.
This mark indicates that images will be
shot with a camera memo.
6. Press the !" buttons to select a
camera memo category and
change its contents.
7. Press the $ button to display the
camera memo list screen.
AUTO
AUTO
55
5
SD
297
297
N
1280
1280
MEMO
11.Press the shutter release button
to shoot the subject.
32
Page 33

To Quit Shooting with Memos
AUTO
297
1280
The [MEMO] mark indicates that images will
be shot with a camera memo.
To clear the [MEMO] mark to quit shooting
with a camera memo, follow the steps below.
1. Turn the mode dial to 5/K.
AUTO
AUTO
55
5
SD
297
297
N
1280
1280
MEMO
• Even when the [CAMERA MEMO] screen is
displayed, you can shoot by pressing the shutter
release button.
• You cannot shoot pictures with camera memos in
any of the following modes:
• Movie shooting
• Voice recording
• Image with sound
• You can also attach a camera memo to a still image
after it is shot.
• For how to view a camera memo attached to a still
image, see P.38.
2. Press the ADJ./MEMO button.
The [CAMERA MEMO] screen appears.
3. Press the DISP. button.
The [MEMO] mark disappears and the
camera memo mode is turned off.
To display the [MEMO] mark and resume
shooting with camera memos, press the
ADJ./MEMO button and then the MENU/
OK button.
• For how to attach a camera memo to a still image,
see P.39.
• For how to register, play back or change a voice
memo, see P.42.
• For how to create a camera memo, see P.26.
• For how to create or edit a temporary memo, see
P.34.
33
Page 34

Create or Edit a Camera Memo Temporarily (Temporary Memo)
Camera memos are edited or corrected on a
computer, but you can create or edit a
temporary memo on the camera and attach it
to a still image when shooting. This camera
memo created and edited with the camera is
referred to as a “temporary memo”.
The temporary memo can be registered for
each category (up to five categories)
registered in the camera memo list.
Caution
• The temporary memo is not stored in the camera
memo list on the SD memory card and is lost when
the camera power is turned off.
• When creating a temporary memo, create a camera
memo list on the computer in advance and transfer
the list to the camera.
4. Press the $ button to display the
camera memo list screen.
When using a new camera memo list file,
the camera memo re-registration
confirmation screen may appear before
the camera memo list screen. Press the
$ button to select [YES], and then press
the MENU/OK button to display the
camera memo list screen.
For how to create a camera memo, see P.26.
Creating a Temporary Memo
To create a temporary memo, follow the steps
below.
1. Turn the mode dial to 5/K or
press the 6 (Playback) button.
2. Press the ADJ./MEMO button.
The [CAMERA MEMO] screen appears.
5. Press the !" buttons to select
[TEMPORARY].
3. Press the !" buttons to select a
category for the temporary
memo.
34
Page 35

6. Press the MENU/OK button.
The edit confirmation screen appears.
7. Press the $ button to select
[YES], and then press the MENU/
OK button.
The keyboard screen appears.
11.Repeat steps 3 to 10 to create a
temporary memo for other
categories.
12.Press the MENU/OK button to
confirm the camera memo.
8. Use the keyboard to enter a
memo.
Move Cursor !"#$ buttons
Enter Character ADJ./MEMO button
Cancel DISP. button
Set MENU/OK button
For instructions on using the keyboard,
see “How to Use the Keyboard”.
(GP.51)
9. After completing the temporary
memo input, press the MENU/OK
button to return to the camera
memo list screen.
For a temporary memo, only one line of
characters appears.
10.Press the MENU/OK button to
return to the [CAMERA MEMO]
screen.
35
Page 36

Editing a Temporary Memo
To edit a temporary memo, follow the steps
below.
1. Turn the mode dial to 5/K or
press the 6 (Playback) button.
2. Press the ADJ./MEMO button.
The [CAMERA MEMO] screen appears.
5. Press the !" buttons to select a
temporary memo (with a +).
6. Press the $ button.
The edit confirmation screen appears.
7. Press the $ button to select
[YES], and then press the MENU/
OK button.
The keyboard screen appears.
3. Press the !" buttons to select a
category of temporary memo for
editing.
4. Press the $ button to display the
camera memo list screen.
When using a new camera memo list file,
the camera memo re-registration
confirmation screen may appear before
the camera memo list screen. Press the
$ button to select [YES], and then press
the MENU/OK button to display the
camera memo list screen.
8. Edit the temporary memo with
the keyboard.
Move Cursor !"#$ buttons
Enter Character ADJ./MEMO button
Cancel DISP. button
Set MENU/OK button
For instructions on using the keyboard,
see “How to Use the Keyboard”.
(GP.51)
9. After editing the temporary
memo, press the MENU/OK
button to return to the camera
memo list screen.
10.Press the MENU/OK button to
return to the [CAMERA MEMO]
screen.
11.Repeat steps 3 to 10 to edit a
temporary memo for other
categories.
12.Press the MENU/OK button to
confirm the camera memo.
36
Page 37

Editing a Camera Memo to Create a New Temporary Memo
A temporary memo can be newly created by
editing an existing camera memo registered
in the camera memo list file.
To create a temporary memo by editing a
camera memo, follow the steps below.
1. Turn the mode dial to 5/K or
press the 6 (Playback) button.
5. Press the !" buttons to select a
camera memo you want to edit.
2. Press the ADJ./MEMO button.
The [CAMERA MEMO] screen appears.
3. Press the !" buttons to select a
category of the camera memo for
editing.
4. Press the $ button to display the
camera memo list screen.
When using a new camera memo list file,
the camera memo re-registration screen
may appear before the camera memo list
screen. Press the $ button to select
[YES], and then press the MENU/OK
button to display the camera memo list
screen.
6. Press the $ button.
The edit confirmation screen appears.
7. Press the $ button to select
[YES], and then press the MENU/
OK button.
The keyboard screen appears.
8. Edit the camera memo by using
the keyboard.
Move Cursor !"#$ buttons
Enter Character ADJ./MEMO button
Cancel DISP. button
Set MENU/OK button
For instructions on using the keyboard,
see “How to Use the Keyboard”.
(GP.51)
9. After editing the camera memo,
press the MENU/OK button to
return to the camera memo list
screen.
For an edited camera memo that is a
temporary memo, only one line of
characters appears.
10.Press the MENU/OK button to
return to the [CAMERA MEMO]
screen.
11.Repeat steps 3 to 10 to edit other
camera memos.
12.Press the MENU/OK button to
confirm the camera memo.
37
Page 38

Viewing/Deleting a
Deleting a Camera Memo
Camera Memo Attached
to a Still Image
You can view and delete a camera memo
attached to a still image.
If a displayed still image has an attached
camera memo, the [MEMO] mark is displayed
in the upper-left corner of the screen.
If a still image has a voice memo, you can
play it back.
To view or delete a camera memo, follow the
steps below.
Viewing a Camera Memo
1. Press the 6 (Playback) button
to select the Playback Mode.
The last shot taken is displayed.
For a movie, the first frame is displayed
as a still image.
1. Display a still image from which
you want to delete a camera
memo.
2. Press the ADJ./MEMO button.
The [CAMERA MEMO] screen appears.
3. Press the DISP. button.
The camera memo is deleted.
2. Press the #$ buttons to view a
still image with a camera memo.
Press the $ button to display the next file.
Press the # button to display the
previous file.
Hold the #$ buttons down for fast
display and positioning.
3. Press the ADJ./MEMO button.
The [CAMERA MEMO] screen appears.
The camera memo attached to the still
image appears.
• For how to shoot an image with a camera memo, see
P.32.
• For how to attach a camera memo to a still image,
see P.39.
• For how to create a camera memo, see P.26.
• For how to register, play back or change a voice
memo, see P.42.
• For how to create or edit a temporary memo, see
P.34.
Pressing the MENU/OK button clears the
[CAMERA MEMO] screen and returns
the display to the original still image.
To playback a voice memo, press the
!" buttons to select the speaker mark,
and then press the ADJ./MEMO button.
38
Page 39

Attaching a Camera Memo to a Still Image
6. Press the !" buttons to select a
camera memo, and then press
the MENU/OK button.
A camera memo can be attached to a shot still
image afterward.
To attach a camera memo to a still image,
follow the steps below.
1. Press the 6 (Playback) button
to select the Playback Mode.
The last shot taken is displayed.
For a movie, the first frame is displayed
as a still image.
2. Press the #$ buttons to view a
still image with a camera memo.
Press the $ button to display the next file.
Press the # button to display the
previous file.
Hold the #$ buttons down for fast
display and positioning.
3. Press the ADJ./MEMO button.
The [CAMERA MEMO] screen appears.
If a temporary memo has been created,
its contents are displayed up to the end of
the first row.
If a voice memo has been attached, a
speaker mark is displayed.
When you do not want to use a camera
memo, click [NO SETTING] on the
camera memo list screen.
7. Repeat steps 4 to 6 to set the
camera memo.
8. Press the MENU/OK button to
confirm the camera memo.
4. Press the !" buttons to select a
category of the camera memo to
attach.
5. Press the $ button to display the
camera memo list screen.
• For how to shoot an image with a camera memo, see
P.32.
• For how to create a camera memo, see P.26.
• For how to register, play back or change a voice
memo, see P.42.
• For how to create or edit a temporary memo, see
P.34.
39
Page 40

Displaying and Changing
With no camera memo
a Camera Memo
Attached to a Still
Image on the Camera
Displaying a Camera Memo
Each time you press the DISP. button for a
still image with camera memo, the LCD
monitor view cycles in the order of normal
symbol display, no display, and camera
memo display.
For a still image with no camera memo, the
LCD monitor view cycles in the order of
normal symbol display, and no display.
With camera memo
Normal symbol display
Normal symbol display
DISP. button
No display
Changing a Camera Memo
To make a change to a camera memo, follow
the steps below.
DISP. button
No display
Camera memo display
:
Category
Category
Sp Ft
Sp Ft
Rooms
Rooms
Garage
Garage
Amenities
Amenities
:
Apartment
Apartment
:
:
610
610
:
:
1 bedroom and
1 bedroom and
:
:
Yes
Yes
:
:
Dishwasher
Dishwasher
1. Press the 6 (Playback) button
to select the Playback Mode.
The last shot taken is displayed.
For a movie, the first frame is displayed
as a still image.
2. Press the #$ buttons to view a
still image with a camera memo
to change.
Press the $ button to display the next file.
Press the # button to display the
previous file.
Hold the #$ buttons down for fast
display and positioning.
40
Page 41

3. Press the ADJ./MEMO button.
The [CAMERA MEMO] screen appears.
4. Press the !" buttons to select a
camera memo category and
change its contents.
5. Press the $ button to display the
camera memo list screen.
When using a new camera memo list file,
the camera memo re-registration
confirmation screen may appear before
the camera memo list screen. Press the
$ button to select [YES], and then press
the MENU/OK button to display the
camera memo list screen.
6. Press the !" buttons to select a
camera memo, and then press
the MENU/OK button.
If a temporary memo has been created,
its contents are displayed up to the end of
the first row.
If a voice memo has been attached, a
speaker mark is displayed.
When you do not want to use a camera
memo, click [NO SETTING] on the
camera memo list screen.
7. Repeat steps 4 and 6 to change
other camera memos.
8. Press the MENU/OK button to
confirm the camera memo.
• For how to shoot an image with a camera memo, see
P.32.
• For how to attach a camera memo to a still image,
see P.39.
• For how to view a camera memo attached to a still
image, see P.38.
• For how to create a camera memo, see P.26.
• For how to register, play back or change a voice
memo, see P.42.
• For how to create or edit a temporary memo, see
P.34.
41
Page 42

Registering (Recording)/ Playing Back/Changing a Voice Memo
One voice memo can be registered for each
category (up to five categories) registered in
the camera memo list. Voice memos can be
as long as eight seconds.
Voice memos can be registered even in the
Scene Mode.
Registered voice memos can be played back/
changed.
With the ADJ./MEMO button, you can register
(record), play, or change a voice memo in
fewer steps compared to ordinary button
operations.
Registering a Voice Memo
To register a voice memo, follow the steps
below.
1. Turn the mode dial to 5/K or
press the 6 (Playback) button.
5. Press the $ button to display the
camera memo list screen.
You can simplify the operating procedure
by pressing the ADJ./MEMO button
instead of the $ button.
By pressing the ADJ./MEMO button, you
can skip steps 6 and 7 and go to step 8.
When voice recording ends, the display
returns to the [CAMERA MEMO] screen.
6. Press the !" buttons to select
[RECORD].
7. Press the MENU/OK button to
display the record screen.
2. In the Playback Mode, display a
still image to which you want to
attach a camera memo.
3. Press the ADJ./MEMO button.
The [CAMERA MEMO] screen appears.
In the Shooting Mode, you can shoot or
zoom images also on this screen.
4. Press the !" buttons to select a
category of the voice memo to
register.
8. Press the shutter release button.
Voice recording starts and can continue
for up to eight seconds.
To stop voice recording halfway, halfpress the shutter release button.
When voice recording is stopped, the
display returns to the camera memo list
screen.
42
Page 43

9. Press the $ button.
The voice playback screen appears.
10.Press the shutter release button.
The recorded voice memo is played back
for confirmation. To stop playback
halfway, press the shutter release button
again.
When playback is stopped or ends, the
re-registration confirmation screen
appears.
• The distance between the sound source and the
microphone must be 20 cm or less.
• Do not block the microphone opening with your
finger.
• For how to shoot an image with a camera memo, see
P.32.
• For how to view a camera memo attached to a still
image, see P.38.
• For how to create a camera memo, see P.26.
11.Select [NO], and then press the
MENU/OK button.
The display returns to the camera memo
list screen.
To record again, select [YES] and press
the MENU/OK button to start from step 8.
12.Press the MENU/OK button.
The display returns to the [CAMERA
MEMO] screen.
13.Repeat steps 4 to 12 to register
and change other voice memos.
14.Press the MENU/OK button to
confirm the camera memo.
43
Page 44

Playing Back a Voice Memo
Changing a Voice Memo
1. Turn the mode dial to 5/K or
press the 6 (Playback) button to
select the Playback Mode.
2. In the Playback Mode, display a
still image for playback of its
voice memo.
3. Press the ADJ./MEMO button.
4. Press the !" buttons to select a
category of the voice memo you
want to play back.
5. Press the $ button to display the
camera memo list screen.
You can simplify the operating procedure
by pressing the ADJ./MEMO button
instead of the $ button.
By pressing the ADJ./MEMO button, you
can skip steps 6 and 7 and go to step 8.
When a voice memo is played back, the
display returns to the [CAMERA MEMO]
screen.
1. Turn the mode dial to 5/K or
press the 6 (Playback) button to
select the Playback Mode.
2. In the Playback Mode, display a
still image to change its voice
memo.
3. Press the ADJ./MEMO button.
4. Press the !" buttons to select a
category of the voice memo you
want to change.
5. Press the $ button to display the
camera memo list screen.
You can simplify the operating procedure
by pressing the ADJ./MEMO button
instead of the $ button.
By pressing the ADJ./MEMO button, you
can skip steps 6 and 7 and go to step 8.
When a voice memo is re-recorded, the
display returns to the [CAMERA MEMO]
screen.
6. Press the !" buttons to select
[PLAYBACK].
7. Press the $ button to display the
playback screen.
8. Press the shutter release button.
Playback begins. When playback ends,
the re-registration confirmation screen
appears.
9. Select [NO], and then press the
MENU/OK button.
The display returns to the camera memo
list screen.
10.Press the MENU/OK button.
The display returns to the [CAMERA
MEMO] screen.
11.Repeat steps 4 to 12 to play back
other voice memos.
A voice memo registered to a camera memo is deleted
when the camera is turned off, but a voice memo
attached to a still image can be played back by
pressing the ADJ./MEMO button in step 5.
6. Press the !" buttons to select
[PLAYBACK].
7. Press the $ button to display the
playback screen.
8. Press the shutter release button.
Playback begins. When playback ends,
the re-registration confirmation screen
appears.
9. Select [YES], and then press the
MENU/OK button.
10.Press the shutter release button
to record again.
When recording ends, the display returns
to the camera memo list screen.
11.Press the MENU/OK button.
The display returns to the [CAMERA
MEMO] screen.
12.Repeat steps 4 to 12 to register
and change other voice memos.
13.Press the MENU/OK button to
confirm the camera memo.
44
Page 45

Section 4 Viewing/Editing a Camera Memo on a Computer
This section briefly explains how to use DeskTopBinder
Lite with camera memos.
Caution
DeskTopBinder Lite is only for use with Windows.
For how to create a camera memo, see P.26.
Page 46

Displaying/Viewing/ Editing a Camera Memo on a Computer
1.
Start DeskTopBinder Lite and
display an image with a camera
memo.
DeskTopBinder Lite treats an image as a
document.
The following methods can be used to
transfer images from the camera to
DeskTopBinder Lite.
• Set [USB CONNECTION] on the
camera to [MASS STR], select [Add
Document] and [Import File] on the
[File] menu, and specify the files on the
camera to transfer.
• Use Auto Document Link, which is
installed at the same time as
DeskTopBinder Lite, to transfer
images.
2. Select an image by clicking it,
and then select [Open in Viewer]
on the [Document] menu.
The selected image appears in Viewer in
DeskTopBinder Lite.
• When using a card reader, select [Add
Document] and [Import File] on the
[File] menu, and specify the files on the
card to transfer.
3. Click [Edit Image] on the
[Section] menu.
46
Page 47

4. Select [Camera Image
Correction] and [Edit Camera
Memo] on the [Section] menu.
The [Edit Camera Memo] dialog box
appears.
• The camera memo edited here is not reflected in the
memo of the properties of DeskTopBinder Lite.
• The edited content of a camera memo is saved until
Viewer in DeskTopBinder Lite is closed even when
[Quit Editing Image] and [Cancel the modifications]
are selected on the [Section] menu of Viewer in
DeskTopBinder Lite. When Viewer in
DeskTopBinder Lite is closed, the edited content is
deleted.
Playing Back and Confirming a Voice Memo Attached to a Still Image
1.
Perform steps 1 to 4 in
“Displaying/Viewing/Editing a
Camera Memo on a Computer”.
(GP.46)
5. Edit the contents displayed in
the [Item:] and [Details:] boxes.
6. Click the [Apply] button.
7. Repeat steps 5 and 6 to edit
other memos.
8. Click the [OK] button.
2. Click a voice memo attached to a
still image you want to play back
from the memo list.
3. Click the [Replay Voice] button.
47
Page 48

Searching for a Camera
Printing a Camera Memo
Memo
When an image with a camera memo is
registered to DeskTopBinder Lite, the camera
memo is copied to the memo column of the
properties. You can search for a memo in the
properties in the following way.
1. Select [Broad Search] on the
[File] menu.
2. The [Broad Search] dialog box
appears. Enter the search
parameters.
Enter a keyword for a memo you want to
find in the [Search string(s)] field.
When an image with a camera memo is
registered to DeskTopBinder Lite, the camera
memo is copied to the memo column of the
document properties. The memo can be
printed with the image on the same page.
Either of the following two printing methods
can be selected:
• Print the camera memo beside the still
image.
• Print the camera memo embedded in the
still image.
1. Select [Extended Features] on
the [Tools] menu.
The [Extended Features] dialog box
appears.
3. Click the [Search] button.
The search result dialog box appears.
4. Click the [List Results] button.
The search results list screen appears.
You can use this screen to open and edit
an image in Viewer in DeskTopBinder Lite.
Caution
A camera memo cannot be copied to a properties
memo when adding Caplio with [Extended Features]
and [Network] on the [Tools] menu of DeskTopBinder
Lite and registering an image from [Caplio] on the tree
view directly to [My Workroom].
2. Click the [Tools] icon, select
[Print Document Image List]
from [Selectable function(s)],
and then click the [Add] button.
[Print Document Image List] is added to
[Available function(s) to use].
3. Click the [OK] button.
4. Select the image to print from
[My Workroom] in
DeskTopBinder Lite.
48
Page 49

5. Select [Print Document Image
List] on the [File] menu.
6. Select (1×3) or (1×1) in [Layout].
If you select (1×3), a camera memo is
printed beside the still image. If you select
(1×1), a memo is embedded in the still
image.
7. If you select (1×3), check
[Remarks] in [Print item]. If you
select (1×1), check [Overlay
remarks on image].
How to Use the [Details] Dialog Box
1 [Print position]
Select the memo position on the image.
2 [Color settings]
Enables you to set the memo color.
[Text]
Opens the [Color] dialog box to enable you
to set the memo text color.
[Background]
Opens the [Color] dialog box to enable you
to set the memo background color.
If you select (1×1) for the layout, you can
specify the memo position and color by
clicking the [Details] button.
8. Click the [OK] button.
[Border line]
Opens the [Color] dialog box to enable you
to set the memo frame color.
[Transparent]
Check this to make the item background
transparent (no filling).
[Print border line]
Check this to print a memo frame.
49
Page 50

Appendices
Page 51

How to Use the Keyboard
Entering a space
1. Press the !"#$ buttons to
select [SPACE].
To use the keyboard, follow the steps below.
Switching among letters, numbers and
symbols
When there is a cursor at the leftmost or
rightmost character on the keyboard, press
the #$ buttons to switch the character type
among numbers, symbols, lowercase letters
and uppercase letters.
Numbers Symbols
$
#
#$ #$
#
2. Press the ADJ./MEMO button.
Inserting a character
1. Press the !"#$ buttons to
select one of the characters at
the top of the keyboard.
2. Press the ! button.
The cursor moves to the right of the input
characters.
$
Uppercase
letters
Entering characters
Lowercase
letters
1. Press the !"#$ buttons to
select a character to input.
2. Press the ADJ./MEMO button.
The input edit area permits input up to the
! mark at the bottom of the area.
3.
Press the
#$
buttons to position
the cursor to the right of the point
where you want to insert a
character.
4. Press the " button to return the
cursor to the keyboard.
5. Press the !"#$ buttons to
select an input character.
6. Press the ADJ./MEMO button.
51
Page 52

Deleting a character
Deleting all input characters
1. Press the !"#$ buttons to
select one of the characters at
the top of the keyboard.
2. Press the ! button.
The cursor moves to the right of the input
characters.
3. Press the #$ buttons to position
the cursor to the right of the
character you want to delete.
1. Press the !"#$ buttons to
select [CLEAR].
2. Press the ADJ./MEMO button.
4. Press the " button to return the
cursor to the keyboard.
5. Press the !"#$ buttons to
select [BS], and then press the
ADJ./MEMO button.
52
Page 53

Troubleshooting
Problem 1 Cannot download images
Solution 1
The [USB CONNECTION] setting on the camera’s SETUP menu may not match the transfer
method preferred. Make settings for [USB CONNECTION] according to the software used for
transfer as follows:
Software used for transfer [USB CONNECTION] setting
The computer recognizes the camera as a drive
without using software.
Auto Document Link ORIGINAL
RICOH Gate La ORIGINAL
MASS STR
Solution 2
Your computer does not recognize the camera correctly.
Follow the steps below.
zFor Windows 98/98SE/Me
Procedure 1: First, follow the steps below.
1. Load the Caplio Software CD-ROM into your computer.
2. Connect your camera via the USB cable to your computer.
3. Click the [Start] button on the Windows taskbar to display the [Start] menu.
4. Select [Settings], and then click [Control Panel].
5. On the Control Panel displayed, double-click the [System] icon.
6. On the [System Properties] screen displayed, click the [Device Manager] tab.
7. On the [Device Manager] tab page displayed, click [+] on the left side of [Other devices].
8. Check if there is [Caplio 500SE] below it. If there is, click [Caplio 500SE], and then click
the [Remove] button at the bottom of the [Device Manager] tab.
The entry [Caplio 500SE] is deleted.
9. Click [Close] to close the [System Properties] screen.
10. When the display returns to the Control Panel, double-click the [Add/Remove Programs]
icon.
11. On the [Add/Remove Programs Properties] screen displayed, select [Caplio Software],
and then click the [Add/Remove] button.
This uninstalls the Caplio Software.
12. Click [OK] to close the [Add/Remove Programs Properties] screen.
13. Click the [×] (Close) button to close the Control Panel.
14. Turn off your camera and computer.
15. Turn your computer back on and reinstall the software from the CD-ROM.
*At this time, do not connect your camera.
16. Connect your camera via the USB cable to your computer.
When the computer recognizes the camera, the [New Hardware Found] screen launches
and your camera is registered by the computer.
53
Page 54

Procedure 2: If your computer still does not recognize the camera, follow the steps below.
1. Load the Caplio Software CD-ROM into your computer.
2. Connect your camera via the USB cable to your computer.
3. Click the [Start] button on the Windows taskbar to display the [Start] menu.
4. Select [Settings], and then click [Control Panel].
5. On the Control Panel displayed, double-click the [System] icon.
6. On the [System Properties] screen displayed, click the [Device Manager] tab.
7. On the [Device Manager] tab page displayed, click [+] on the left side of [Ports (COM &
LPT)] to open.
8. Check whether or not there is an unknown device symbol (!) indicated for [RICOH Camera
Port] below [Ports (COM & LPT)]. If there is, select it, and then click the [Remove] button
at the bottom of the [Device Manager] tab to delete it.
9. Click [+] on the left side of [Universal Serial Bus controllers] to open.
10. Check whether or not there is an unknown device symbol (!) indicated for [RICOH USB
Virtual Com] below [Universal Serial Bus controllers]. If there is, select it, and then click
the [Remove] button at the bottom of the [Device Manager] tab to delete it.
11. Click [Close] to close the [System Properties] screen.
12. When the display returns to the Control Panel, double-click the [Add/Remove Programs]
icon.
13. On the [Add/Remove Programs Properties] screen displayed, select [Caplio Software],
and then click the [Add/Remove] button.
This uninstalls the Caplio Software.
14. Click [OK] to close the [Add/Remove Programs Properties] screen.
15. Click the [×] (Close) button to close the Control Panel.
16. Turn off your camera and computer.
17. Turn your computer back on and reinstall the software from the CD-ROM.
*At this time, do not connect your camera.
18. Connect your camera via the USB cable to your computer.
When the computer recognizes the camera, the [New Hardware Found] screen launches
and your camera is registered by the computer.
54
Page 55

zFor Windows 2000
Procedure 1: First, follow the steps below.
1. Load the Caplio Software CD-ROM into your computer.
2. Connect your camera via the USB cable to your computer.
3. Click the [Start] button on the Windows taskbar to display the [Start] menu.
4. Select [Settings], and then click [Control Panel].
5. On the Control Panel displayed, double-click the [System] icon.
6. On the [System Properties] screen displayed, click the [Hardware] tab.
7. On the [Hardware] tab page displayed, click the [Device Manager] button.
8. On the [Device Manager] screen displayed, click [+] on the left side of [Other devices].
9. Check if there is [Caplio 500SE] below it. If there is, click [Caplio 500SE], and then click
the [Uninstall] from the [Action] menu.
The entry [Caplio 500SE] is deleted.
10. Click the [×] (Close) button to close the [Device Manager] screen.
11. Click [OK] to close the [System Properties] screen.
12. When the display returns to the Control Panel, double-click the [Add/Remove Programs]
icon.
13. On the [Add/Remove Programs] screen displayed, select [Caplio Software], and then click
the [Change/Remove] button.
This uninstalls the Caplio Software.
14. Click the [×] (Close) button to close the [Add/Remove Programs] screen.
15. Click the [×] (Close) button to close the Control Panel.
16. Turn off your camera and computer.
17. Turn your computer back on and reinstall the software from the CD-ROM.
*At this time, do not connect your camera.
18. Connect your camera via the USB cable to your computer.
When the computer recognizes the camera, the [Found New Hardware] screen launches
and your camera is registered by the computer.
55
Page 56

Procedure 2: If your computer still does not recognize the camera, follow the steps below.
1. Load the Caplio Software CD-ROM into your computer.
2. Connect your camera via the USB cable to your computer.
3. Click the [Start] button on the Windows taskbar to display the [Start] menu.
4. Select [Settings], and then click [Control Panel].
5. On the Control Panel displayed, double-click the [System] icon.
6. On the [System Properties] screen displayed, click the [Hardware] tab.
7. On the [Hardware] tab page displayed, click the [Device Manager] button.
8. On the [Device Manager] screen displayed, click [+] on the left side of [Ports (COM & LPT)]
to open.
9. Check whether or not there is an unknown device symbol (!) indicated for [RICOH Camera
Port] below [Ports (COM & LPT)]. If there is, click it, and then click the [Uninstall] from the
[Action] menu.
10. Click the [×] (Close) button to close the [Device Manager] screen.
11. Click [OK] to close the [System Properties] screen.
12. When the display returns to the Control Panel, double-click the [Add/Remove Programs]
icon.
13. On the [Add/Remove Programs] screen displayed, select [Caplio Software], and then click
the [Change/Remove] button.
This uninstalls the Caplio Software.
14. Click the [×] (Close) button to close the [Add/Remove Programs] screen.
15. Click the [×] (Close) button to close the Control Panel.
16. Turn off your camera and computer.
17. Turn your computer back on and reinstall the software from the CD-ROM.
*At this time, do not connect your camera.
18. Connect your camera via the USB cable to your computer.
When the computer recognizes the camera, the [Found New Hardware] screen launches
and your camera is registered by the computer.
56
Page 57

zFor Windows XP
Procedure 1: First, follow the steps below.
1. Load the Caplio Software CD-ROM into your computer.
2. Connect your camera via the USB cable to your computer.
3. Click the [Start] button on the Windows taskbar to display the [Start] menu.
4. Click [Control Panel].
5. On the Control Panel displayed, click [Switch to Classic View].
The display changes its appearance and the [System] icon appears.
6. Double-click the [System] icon.
7. On the [System Properties] screen displayed, click the [Hardware] tab.
8. On the [Hardware] tab page displayed, click the [Device Manager] button.
9. On the [Device Manager] screen displayed, click [+] on the left side of [Other devices].
10. Check if there is [Caplio 500SE] below it. If there is, right-click [Caplio 500SE] to display
the menu and select [Update Driver].
11. Windows will display the [Hardware Update Wizard] screen.
At this point, check that the Caplio Software CD-ROM is inserted in your computer. If the
CD-ROM is not inserted, insert in your computer.
12. Make sure that [Install the software automatically (Recommended)] is selected, and then
click [Next].
13. When the [Completing the Hardware Update Wizard] screen appears, click [Finish].
14. Click the [×] (Close) button to close the [Device Manager] screen.
15. Click [OK] to close the [System Properties] screen.
16. Click the [×] (Close) button to close the Control Panel.
17. Turn off your camera and computer.
18. Turn your computer back on and reinstall the software from the CD-ROM.
*At this time, do not connect your camera.
19. Connect your camera via the USB cable to your computer.
When the computer recognizes the camera, the [New Hardware Found] screen launches
and your camera is registered by the computer.
57
Page 58

Procedure 2: If your computer still does not recognize the camera, follow the steps below.
1. Load the Caplio Software CD-ROM into your computer.
2. Connect your camera via the USB cable to your computer.
3. Click the [Start] button on the Windows taskbar to display the [Start] menu.
4. Click [Control Panel].
5. On the Control Panel displayed, click [Switch to Classic View].
The display changes its appearance and the [System] icon appears.
6. Double-click the [System] icon.
7. On the [System Properties] screen displayed, click the [Hardware] tab.
8. On the [Hardware] tab page displayed, click the [Device Manager] button.
9. On the [Device Manager] screen displayed, click [+] on the left side of [Imaging devices]
to open.
10. Check whether or not there is an unknown device symbol (!) indicated for [Caplio 500SE].
If there is, right-click the unknown device symbol to display the menu and select [Update
Driver].
11. Windows will display the [Hardware Update Wizard] screen.
At this point, check that the Caplio Software CD-ROM is inserted in your computer. If the
CD-ROM is not inserted, insert in your computer.
12. Make sure that [Install the software automatically (Recommended)] is selected, and then
click [Next].
13. When the [Completing the Hardware Update Wizard] screen appears, click [Finish].
14. Click the [×] (Close) button to close the [Device Manager] screen.
15. Click [OK] to close the [System Properties] screen.
16. Click the [×] (Close) button to close the Control Panel.
The driver is installed and your computer recognizes the camera correctly.
58
Page 59

Solution 3
For Windows 98/98SE/Me, the COM Port setting may be wrong.
Follow the steps below.
1. Connect your camera via the USB cable to your computer.
2. Click the [Start] button on the Windows taskbar to display the [Start] menu.
3. Select [Settings], and then click [Control Panel].
4. On the Control Panel displayed, double-click the [System] icon.
5. On the [System Properties] screen displayed, click the [Device Manager] tab.
6. On the [Device Manager] tab page displayed, click [+] on the left side of [Ports (COM &
LPT)] to open.
7. Click [RICOH Camera Port] under [Ports (COM & LPT)], and then click the [Properties]
button at the bottom of the [Device Manager] tab.
8. On the [RICOH Camera Port Properties] screen displayed, Click the [PortSelect] tab.
9. On the [PortSelect] tab page displayed, select a COM Number not being used from
[PortName].
The port (COM number) currently allocated for your camera is indicated by a “*”.
Immediately after installing the USB driver, COM7 should be selected, so select a number
above COM8.
10. Click [OK] to close the [RICOH Camera Port Properties] screen.
11. Click [OK] to close the [System Properties] screen.
12. Click the [×] (Close) button to close the Control Panel.
Solution 4
Your camera may not be recognized correctly if you connect to the USB Port of your computer
via a USB hub.
Follow the steps below to change the USB port.
• Connect your camera directly to the USB port of your computer.
• If there are several root hubs, change to another hub.
If you are using a non-USB hub, try connecting via a USB hub.
Solution 5
The batteries may have worn out.
Check whether the batteries have worn out. If worn out, replace them with new ones.
Solution 6
The free space on the hard disk in your computer may be insufficient.
Check whether the hard disk has sufficient space for running Windows, and whether the drive
where you are loading image files has the same capacity or more as that of the SD memory card
inserted in the camera.
59
Page 60

Problem 2 Even if you check [The same image will not be saved] in the RICOH Gate La
[Option settings], the same images are loaded into your computer.
Solution
The camera’s clock is incorrectly set or the camera’s clock information has been reset.
To allow the [The same image will not be saved] function to work properly, the camera’s clock
information must be set properly. Set it properly.
Problem 3 Files loaded from the camera into the computer were deleted. You
attempted to load the same files from the camera again but failed.
Solution
If [The same image will not be saved] is checked in the RICOH Gate La [Option settings], files
loaded into your computer once cannot be loaded again. In the RICOH Gate La [Option settings],
uncheck [The same image will not be saved].
Problem 4 Cannot play back movies with ImageMixer
Solution
DirectX may not be installed. (Windows 98/98SE/Me/2000) Install DirectX from the Caplio
Software CD-ROM.
Problem 5 RICOH Gate La is always activated when the camera is connected to a
Windows XP computer through a USB cable.
Solution
Connect the camera to the computer through the USB cable, and then open [My Computer] from
the [Start] menu on Windows Taskbar. Right-click the camera icon on the My Computer screen
and click [Properties] to open the camera’s Properties screen. Click the [Events] tab on the
Properties screen. Select [Take no action] or [Prompt for which program to run] for [Actions] and
click [OK]. If [Take no action] is selected, nothing happens when the camera is connected to the
computer. If [Prompt for which program to run] is selected, a screen is displayed each time the
camera is connected to the computer. Then you can choose a program to activate.
Problem 6 [Failed to save.] appears during image loading from the camera into your
computer
Solution
Set the camera to Playback Mode and check that [UNMATCHED FILE] is not displayed for any
file. If [UNMATCHED FILE] is displayed, delete the file from the SD memory card or internal
memory after backing up all files on your computer. For backup, copy all files into your computer
directly by using a commercially-available card reader or by changing the [USB CONNECTION]
setting to [MASS STR] on the SETUP menu. After copying, return the [USB CONNECTION]
setting to [ORIGINAL].
60
Page 61

Problem 7 RICOH Gate La does not appear in the [Device connected] screen when
the camera is connected to a Windows XP computer through a USB cable.
Solution
Set the camera to Playback Mode and check if the message [FORMAT CARD] is displayed.
If the message is displayed, check that the SD memory card does not contain any image you do
not want to delete, and then select [FORMAT [CARD]] (see the “Camera User Guide”) on the
SETUP menu to format the SD memory card.
Problem 8 The Caplio Software CD-ROM is not available when you attempt to connect
your camera via the USB cable to the computer (Windows XP) for the first
time, therefore you cannot install the hardware driver for the camera.
Solution
1. Connect your camera to the computer.
The [Found New Hardware Wizard] window appears.
2. Select [Install from a list or specific location (Advanced)].
3. Click [Next].
4. Select [Search for the best driver in these locations.] and [Include this location in the search],
and then click the [Browse] button.
5.
Browse to the folder where the [WIA driver] was installed (by default this should be C:\Program
Files\Caplio Software\WIA driver) and then select [Next].
6. Select [RICOH Gate La], select the [Always use this program for this action] check box, and
then click [OK].
61
 Loading...