

Ricoh 500 Owner's Manual

5LFRK2ZQHU·V0DQXDO
Donated to www.orphancameras.com
Ricoh 500 Owner’s Manual Page 1 of 14
Donated to www.orphancameras.com
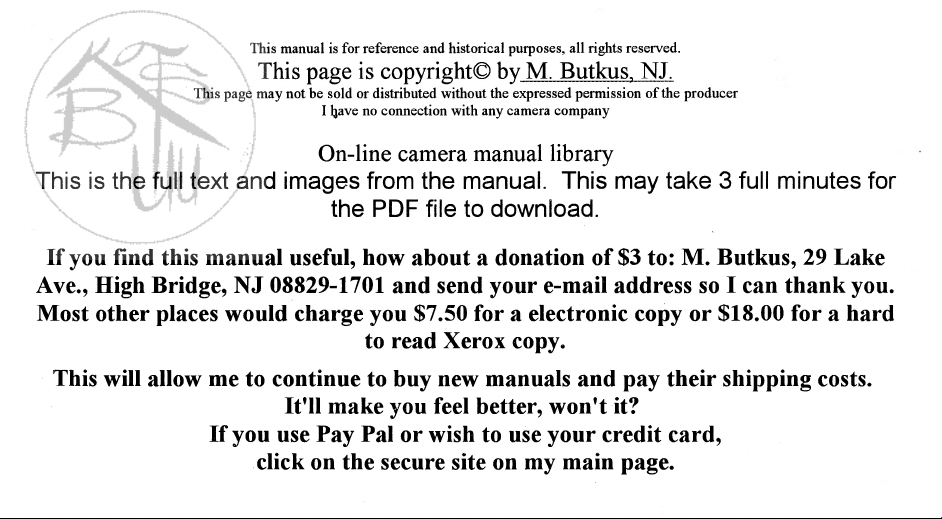
1 Eyelet
2 Range-finder window
3 Bright-frame window
4 DUO-LEVER focusing controls
5 Triggermatic-Action lever
6 View-finder window
7 Flash terminal (European standard)
8 Rapid rewinding crank
9 Accessory shoe
10 Cordless flash contact
11 Shutter release button
12 Film counter
13 Combined synchro setting and self-timer ring
14 Shutter speed setting ring
15 Light value figures
16 Diaphragm setting ring window
17 Light value adjusting ring
18 Distance scale
19 Depth-of-field scale
20 Rewinding spindle
21 View-rangefinder eyepiece
22 Film rail
23 Rewinding release button
24 Sprocket
25 Take-up spool knob
26 Take-up spool slot
27 Back cover locking disc
Ricoh 500 Owner’s Manual Page 2 of 14

28 Tripod bushing (American standard)
Donated to www.orphancameras.com
29 Film pressure plate
30 Cartridge positioning spring
31 Film-type indicator
OPENING AND LOADING THE CAMERA
Avoid direct sunlight.
Use 35mm film in cartridge (not in magazine), 20 or 36 frames.
1 Turn back cover looking discs so that the black marks come
in line with the red O. (See Figure 1.)
Ricoh 500 Owner’s Manual Page 3 of 14
2 Place fingers against both sides of the back cover and pull
Donated to www.orphancameras.com
down gently, holding the camera firmly. When putting on the
cover again, follow a reverse process, making sure it is fully
engaged. Be sure the edges are in position and the film
pressure plate does not catch and get scratched. Turn back
cover locking discs so the; the black marks come in line with
the black C. (See Figure 2.)
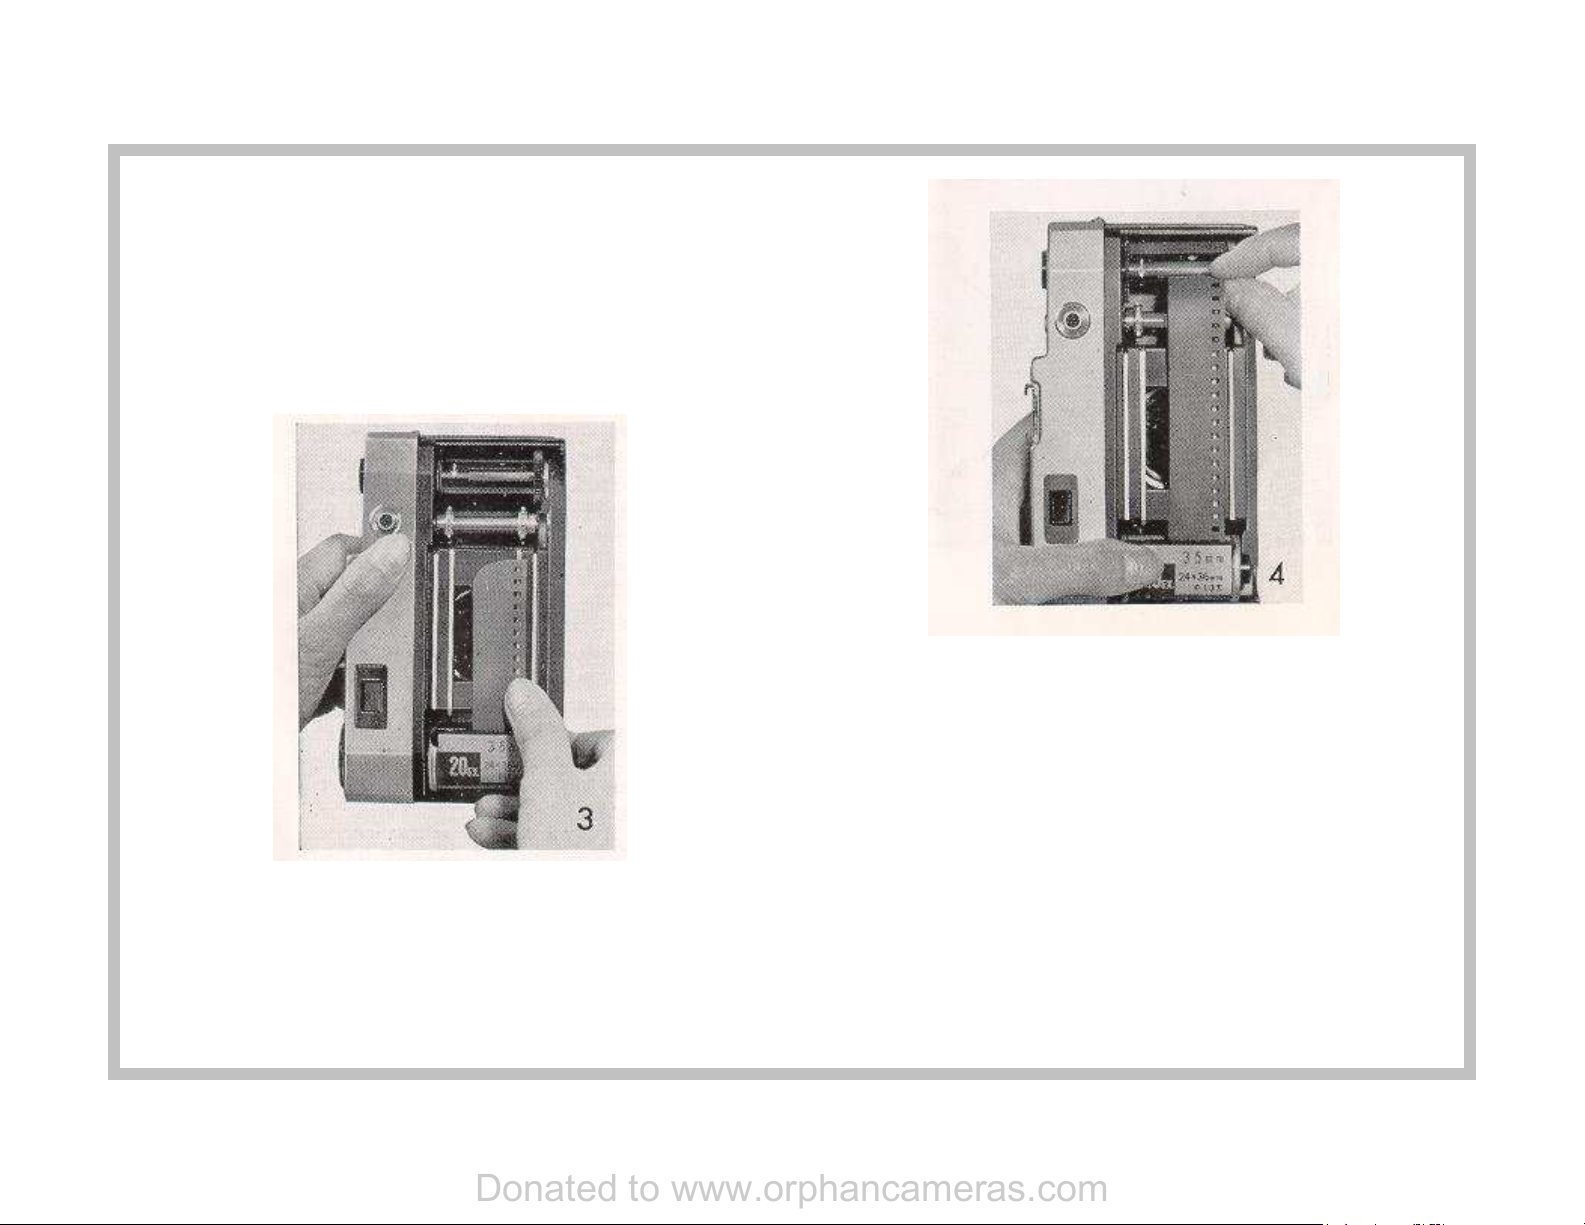
3 Place your new film cartridge in the chamber below the
rewinding spindle. (See Figure 3.)
5 Make sure the perforations on the film are properly engaged
on the teeth of the sprocket, and that the film is properly
centered. While pressing the rewinding release button, turn
the take-up spool knob in the direction indicated by the white
arrow to make sure the film is to be wound properly. (See
Figure 5)
4 Engage the end of your unexposed film firmly in the inner
take-up spool slot. (See Figure 4.)
Ricoh 500 Owner’s Manual Page 4 of 14
 Loading...