

Page 1

Ricoh 2035e/2045 Scanning Installation/Configuration
Installation
To install the scanning drivers for the Ricoh 2035e/2045 multifunction printers please go to
START >> RUN and then copy and paste the links and hit OK
1. Twain scanning driver install (accept all default options):
\\fsvs01\Applications\Public\RicohScan\2035-45\Install\setup.exe
2. Configure your machine to recognize Olin's Ricoh printers:
\\fsvs01\Applications\Public\RicohScan\2035-45\2035-45update.bat
*Please note that if you are off campus, you must be connected over VPN for the installation links to work
Using the Scanner Functionality
1. Open the program you want the scanned images to go to
The scanning functionality works as an import source in applications. This means that you have
to open the program you want to scan into and then use the import options in that program to
trigger the scanning application.
For example:
In Photoshop: File >> Import >> Ricoh 2035-45 Multifunction
In Adobe Acrobat: File >> Create PDF... >> From Scanner >> Ricoh 2035-45 Multifunction
In Microsoft Office: Insert >> Picture >> From Scanner or Camera*
*There is a known issue using Microsoft Office XP applications with the scanner function that does not let you use 'Start from
Scanner' functionality. This is explained further on in this document.
1
Page 2
2. Configure the scanner with your preferences for the scan job
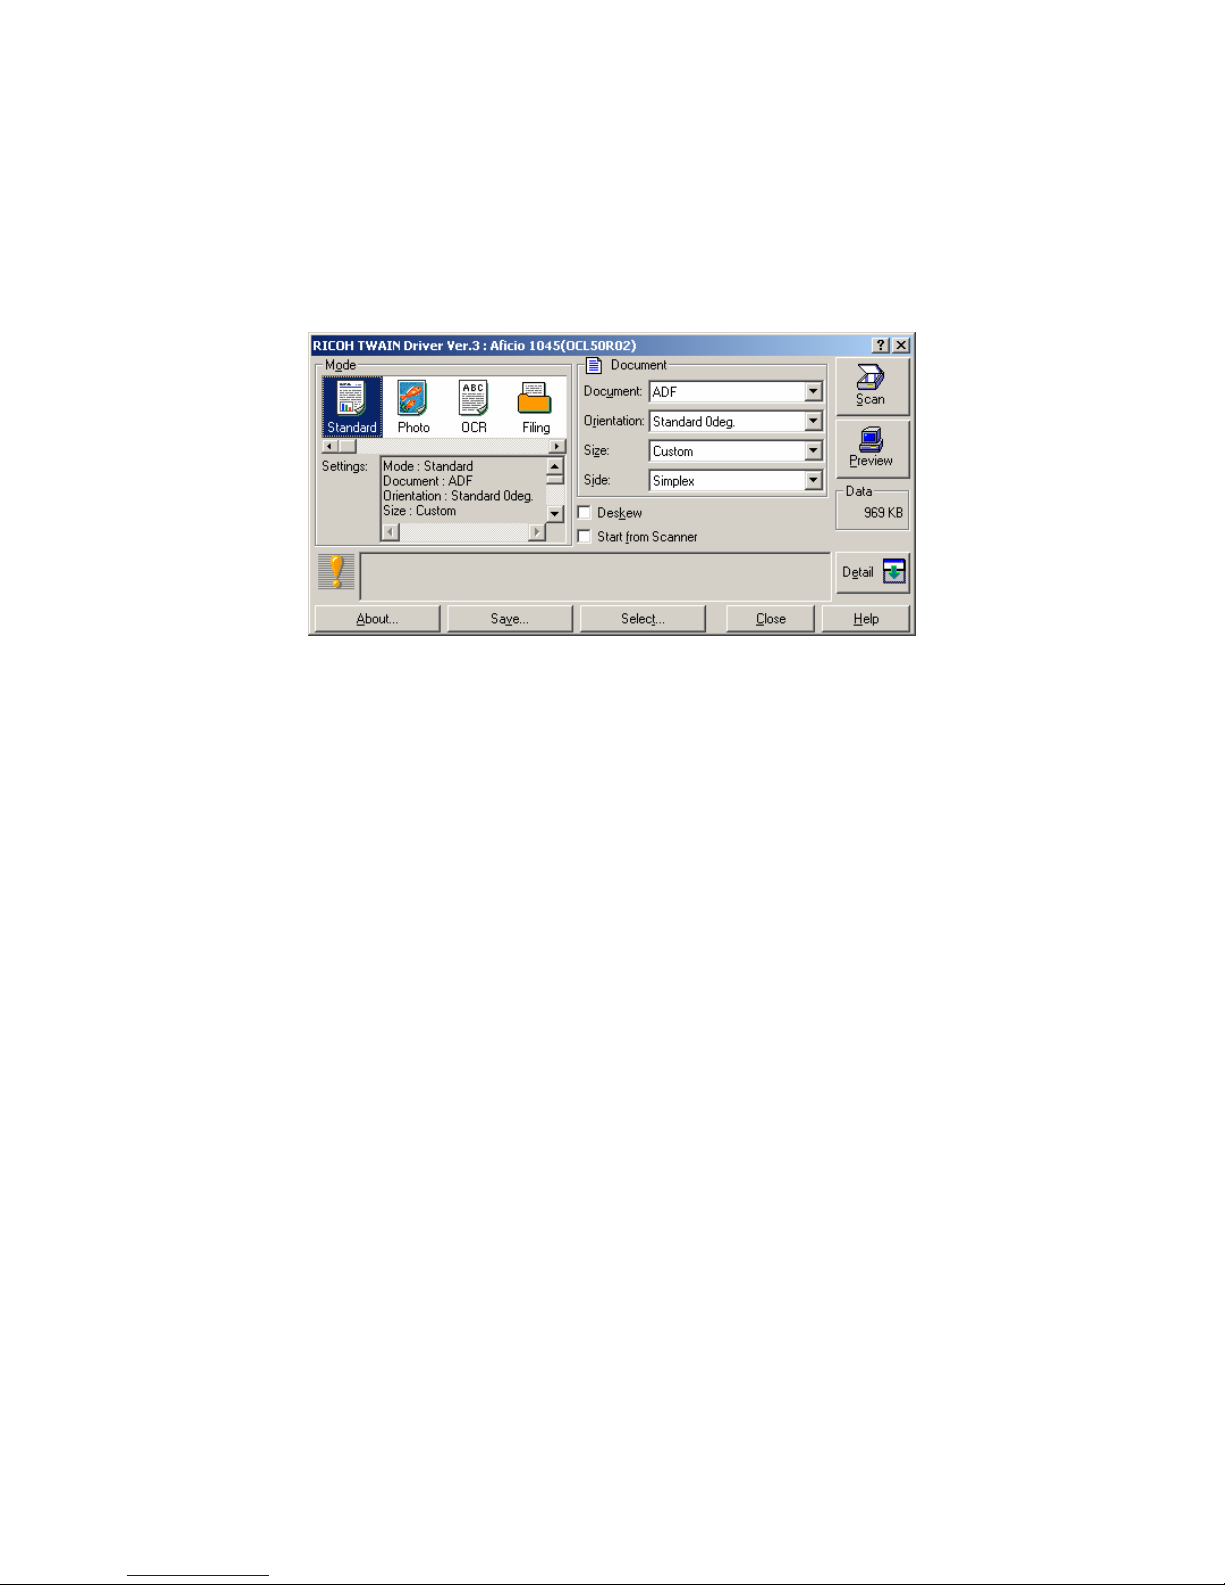
The scanning application will then open to allow you to configure settings and customizations for
your scan job.
The screenshot below shows what the application will look like:
Use the "Select" menu to bring up the selection box for which printer you would like to use for
scanning. The current printer selected will be displayed at the top of the window. The list has
been configured to be displayed according to printer queue names for easy identification.
Here is a sample situation for someone wanting to scan a few pages of text documents
with graphics into Adobe Acrobat:
1. Open Adobe Acrobat and go to File >> Create PDF... >> From Scanner >> Ricoh 1045
Multifunction Printer
2. Use the 'Select' button to bring up the printer menu for which printer you want to use
3. Under 'Mode' we would use 'Photo' since the document has text and graphics
4. For 'Document' we would use ADF (Automatic Document Feeder) to process all pages at once
5. 'Size' would be left as is
6. Make sure the 'Start from Scanner' box is checked
7. Press the 'Scan' button
8. You would then walk over to the printer, put the pages into the page feeder and hit the 'Start'
button, once all the pages have been processed, return to your desk.
All the scanned documents are now scanned electronically and opened in Acrobat!
2
Page 3

How to use MS Office applications with Ricoh scanners
Scanning Problem with MS Office XP and ADF (Automatic Document Feeder)
There is a problem when Twain scanning using the ADF (Automatic Document Feeder) fun ction
and Microsoft Office XP Applications. After originals have been scanned the MFP displays a red
light for the scanner button and a message on the touch screen "Set originals in the ADF
correctly". The only way to clear the message is to press stop on the MFP or cancel on the
computer the initiated the scan. Most applications will then receive what was already scanned but
Microsoft Office XP will not. A message is displays saying there was a problem scanning and the
scanned documents are not inserted into the application. Answer This is a limitation of MS
Office XP. MS Office XP discards data when using "Start from Scanner" option. Previous versions
of MS Office hold image data when using "Start from Scanner". The specification differences
cause the "Start From Scanner" function not to work correctly in MS Office XP environments.
Suggested Workaround:
1. Place originals in the ADF
2. Launch Office XP application such as Word
3. Select Insert >> Picture >> From Scanner or Camera
4. Click “Custom Insert”
5. Select any Twain setting except for "Start From Scanner", which must be unchecked
6. Click Scan, which will automatically insert originals into Office XP application
For more detailed information please consult the following link to the Ricoh Support site:
http://ricoh.custhelp.com/cgibin/ricoh.cfg/php/enduser/std_adp.php?p_sid=B3UIzhgh&p_lva=&p_faqid=2865&p_created=1043099203&p_sp=cF9zcmNoPTEm
cF9ncmlkc29ydD0mcF9yb3dfY250PTc0JnBfc2VhcmNoX3RleHQ9JnBfc2VhcmNoX3R5cGU9MyZwX3Byb2RfbHZsMT02JnBfcHJ
vZF9sdmwyPTc4JnBfY2F0X2x2bDE9fmFueX4mcF9zb3J0X2J5PWRmbHQmcF9wYWdlPTE
Additional Configuration Info
For more information on how to configure your scan job, please use the 'Help' button on the
application.
I have copied the contents of the Help document in this document for a cursory view.
3
Page 4

Settings Window (Easy Mode)
The Settings window shows the basic settings for scanning a document. For mo re advanced
settings, click on the [Detail] button.
Mode
There are four types of ready-to-use Modes. These modes contain scan settings, which are
optimized for certain types of documents,
thereby saving you time and effort creating new ones.
The detailed settings for each Mode are shown in the Mode Set-up List.
Standard
For ordinary documents containing mainly text.
Photo
For documents containing photographs, or graphics with complex shading.
OCR (Optical Character Reader)
For scanning which are to be converted into text files using OCR software.
Filing
For documents which are to be archived.
Document
Use this setting to specify where you wish to set your documents in the scanner.
Platen glass
Select to scan in documents placed face down on the Platen glass.
ADF (Automatic Document Feeder)
Select to scan in documents placed in the ADF. For how to set your documents, see the
instructions shown on the side of the ADF.
ADF (Prefeed Off)
Select this option if the application doesn’t have a multiple document scanning feature.
Note:
· The ADF will not feed documents smaller than B6.
Orientation
You can have your image rotated automatically after it is scanned in. When scanning a duplex
document, confirm that the orientation of the document's binding edge in the ADF in combination
with the orientation settings will produce the required output. Click here for more details.
Size
You can have the scanner detect the size of your document automatically, or specify the size
manually.
Auto Detection (Multi-size)
The scanner automatically detects the size of the document. Use this setting when you place
documents having different lengths and equal widths into the ADF.
Auto Detection (Uni-size)
The scanner automatically detects the scan size. However, when your document is made up of
more than one page, all pages must be of the same size.
4
Page 5

Custom
To specify our own custom size, select Custom then input the desired size in the Document
Scanning Area section of the [Quality] tab.
You can also input this size using the Select Scan Area Tool in the Preview window.
Note:
· Auto Detection does not detect custom size paper.
· Auto Detection does not detect documents smaller than B5 when scanned from the Platen
glass.
· If the number of pixels to be scanned exceeds the capabilities of the scanner, a user-defined
size may not be available. In this case, reduce the X or Y resolution until that size becomes
available.
· With Auto Detection, the scan result may differ according to method used. For example, a
document smaller than A4 will be scanned as its size when using the ADF. When using the
Platen glass, it will be scanned as A4 and will have more white area around the image.
Side
Select which side or sides of your document are scanned when using ADF automatic document
feeders.
Simplex
Scan a single side of the document.
Duplex
Scan both sides of the document simultaneously and then format the data into two consecutive
pages.
Deskew
This feature straightens slanted letters on your document. This is effective when you are using
OCR software.
Start from Scanner
When you click the [Scan] button, scanning does not begin until you press the [Start] button on
the scanner. This function is useful when you wish to check the position of the document before
starting the scan.
[Scan]
Start scanning the document. After you click the [Scan] button, the "Scan in Progress" dialog box
appears. Click on the [Cancel] button to abort the scan.
[Preview]
Use this feature to check the current scan settings before scanning. When you click on the
Preview button, the scan image will be displayed in the "Preview Area".
[Data]
Displays how much memory the image will take up with the current scan settings. Make sure that
you have enough memory available on your PC.
[Detail]
Opens Detailed Settings window where you can make more detailed adjustments.
[About]
Displays the scanner driver information.
5
Page 6

[Save…]
Opens Save / Delete Mode dialog box where you can save the scan settings as a user-defined
Mode.
[Select…]
Scanner devices that can be detected from your PC are displayed.
[Close]
Save the current settings, and close the Scan Settings Set-up window
6
 Loading...