

Page 1

RS-130 Retail Scale Calibration Instruction Sheet
Warning
Authorized distributors and their
employees can view or download this
nual from the Rice Lake Weighing
ma
Systems retail distributor site at
www.ricelakeretail.com.
Procedures described require work
inside the scale enclosure. These
dures are to be performed by
proce
qualified service personnel only.
Weight Calibration
Follow the steps below to complete the calibration process.
1. Turn on power and press and hold the
CHANGE key.
2. Press and hold the
3. Press the
NOTE: The WEIGHT display will not flash CAL-1 if jumper JP1 is in the disable position. See “Setting JP1 to the
ZERO key to enter calibration mode. WEIGHT display flashes CAL-1 and shows UNIT 1.
ZERO key until the WEIGHT display shows SEtUP.
Enable/Disable Position” on page 2. if the WEI
4. Press the
CLEAR key to select the weight unit (default is kg) to be used for calibration.
• Unit 1 - kg (annunciator above kg lit
• Unit 2 - lb (annunciator above lb lit in the UN
• Unit 3 - oz (annunciator above oz lit in the UNIT PRICE $ d
5. Press the
CHANGE key to accept the weight unit. The WEIGHT display shows:
CHANGE key until the WEIGHT display shows 6.3. Release the
GHT display will not flash CAL-1.
in the UNIT PRICE $ display)
IT PRICE $ display)
isplay) - not available in Canada
• 00.000 (kg)
• 000.00 (lb)
• 0000.0 (oz) - not available in Canada
6. Press the
standard weight to calibrate; use the
• key to shift and the CLEAR key to modify the flashing digit. For example, If you use a 30lb
• key to shift the flashing digit to 000.00 and use the CLEAR key to
set the digit to 030.00.
7. Press the
CHANGE key and wait for the WEIGHT display to show 000000 and the UNIT PRICE $
display to show the internal offset value at (xxxxx.)
8. Place selected weight from step six on the platter. WEIGHT
UNIT PRICE $ display shows the internal offset value at (
9. Wait for the span value to become
stable, then press the CHANGE key. Wait for the WEIGHT display to
display shows the internal span value and
xxxxx.)
flash good (twice), quickly remove the weight from the platter. After automatic restart, finish calibration.
10. Disable JP1 to maintain NTEP a
nd Measurement Canada approval See “Setting JP1 to the Enable/
Disable Position” on page 2.
85773 - Rev A
Page 2
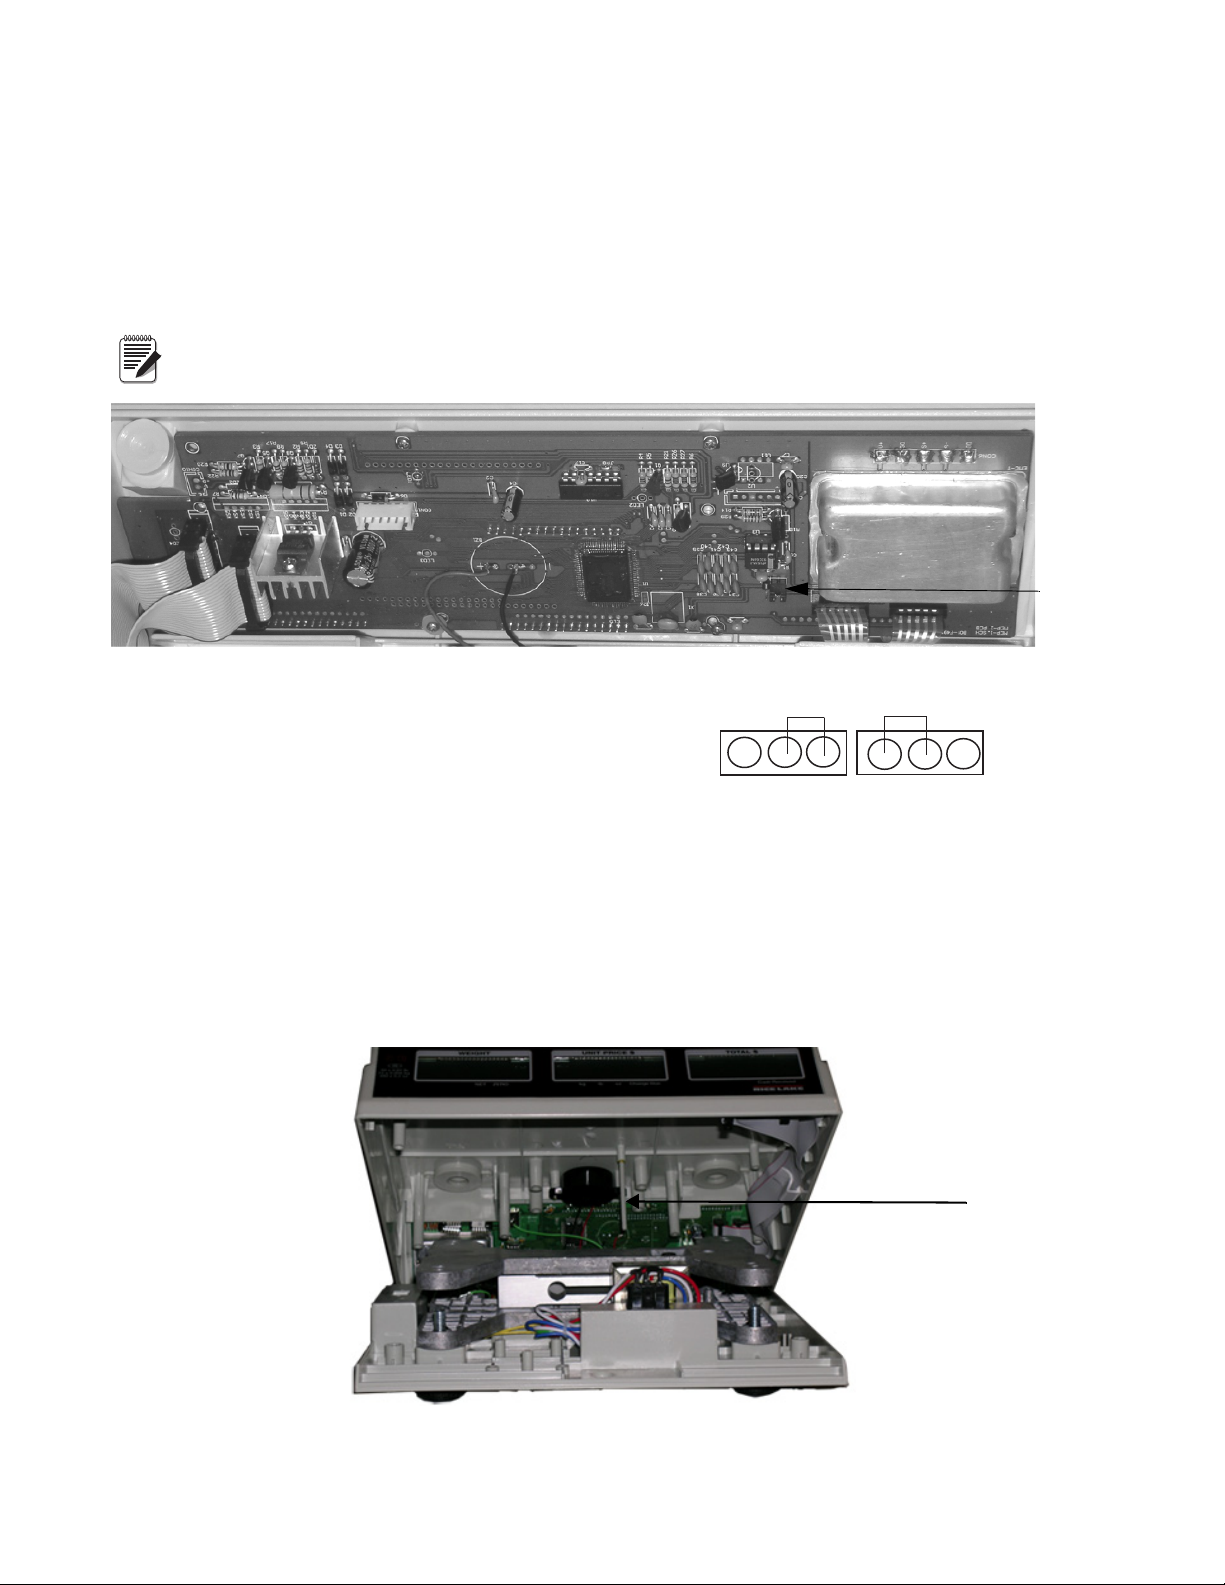
Setting JP1 to the Enable/Disable Position
JP1 Settings
Disable
Enable
JP1
Note
Sealing Pin
Follow the steps below to set jumper JP1 to the enable or disable position.
1. Remove platter and plastic in-use cover.
2. Remove lead-seal located in the center of the base.
3. Remove the 4 screws from the base of the scale.
4. Lift the cover away from the base toward the operator side.
Open slowly, cables are attached.
Figure 1. Jumper JP1 Location
Follow the steps below to re-assemble the scale.
1. Place the cover on top of the base, ensure
that the sealing pin is aligned with the sealing pin hole in the
base.
2. tighten the 4 screws into the
base of the scale.
3. Replace the lead seal in the center of the base, over the sea
4. Replace the platter and plastic in-use cover.
ling pin.
Figure 2. Sealing Pin
 Loading...