

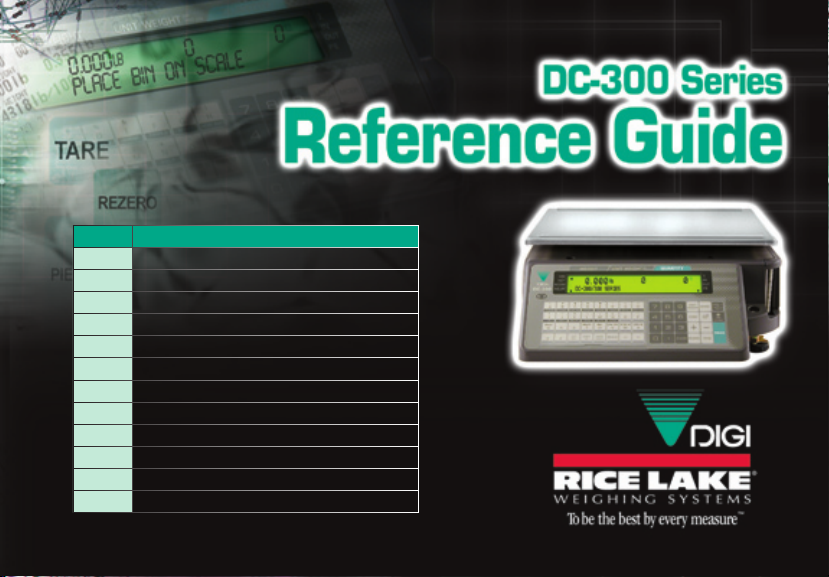
Page 1
PAGE PROCEDURE
1 Keyboard
2 Setpoints
3 - 4 Program an ID Code
5 Sample, Count and Print Label
6 Scan ID Bar Code, Count and Print
7 Add Parts to Inventory
8 Subtract Parts from Inventory
9 Negative Counting
10 Check Inventory Level of a Part
11 Change Label Formats on the Fly
12 Program Factory Name
13 - 14 Job Sequence Prompting
Refer to DC-300 operating manual for more information.
Page 2
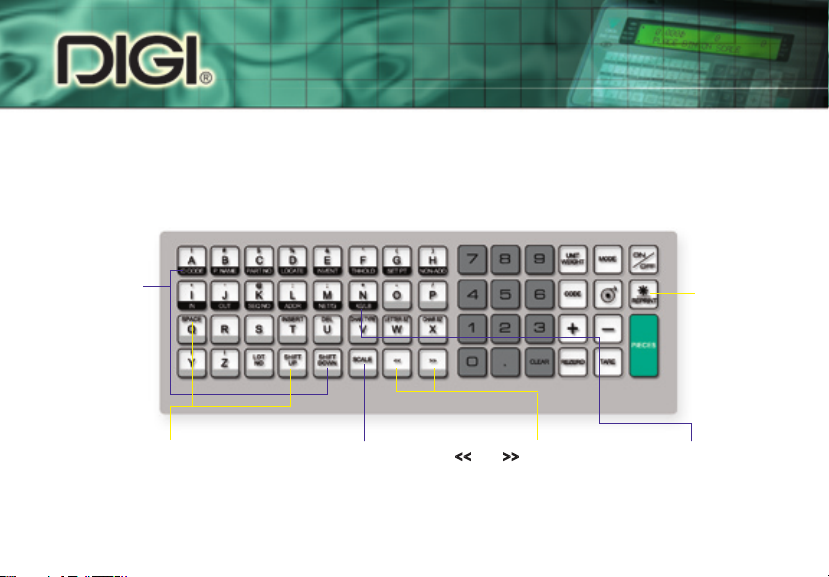
Keyboard
e DC-300 Series counting scales feature a full alphanumeric keyboard with many
functions for managing inventory information.
Pressing SHIFT
DOWN and
a function key
(noted at the
bottom of the
key) allows you
to quickly view
values in respec-
tive registers.
Pressing SHIFT UP and a function key
(noted at the top of the key) allows you
to insert and delete data, and manipu-
late character size, case and spacing.
SCALE key
allows you to switch
between scale
A, B, C or D.
<< and >> moves the cursor
or scrolls though options
when programming.
REPRINT key
allows you to
print labels
and reports.
KG/LB key allows you
to switch between kg
and lb units of measure.
Page 3
Setpoints
e DC-300 Series offers versatile setpoint capabilities. Setpoints are beneficial for increasing
operator speed and lowering error due to over or under counting. Efficiency is improved in
kitting applications with the built-in alarm because the operator only has to listen for the alarm
to sound during filling instead of watching the display. e alarm sounds with a rhythmic
beeping at setpoint one and with a rapid beeping at setpoint two. e DC-300 Series offers
four different setpoint options. See examples* below for each setpoint option.
SETPOINT TYPES % QTY QTY % WEIGHT WEIGHT
SETPOINT 1
SETPOINT 2
EQUATION
SLOW BEEPING
RAPID BEEPING**
* e above examples can be manipulated to fit your application.
** Target Value
80 pcs** 50 pcs 2.0 lb** 1.2 lb
80% 75 pcs** 50% 1.5 lb**
80 x 80% = 64
N/A
2 x 50% = 1.0
64 pcs 50 pcs 1.0 lb 1.2 lb
80 pcs 75 pcs 2.0 lb 1.5 lb
N/A
1
SetpointsKeyboard
2
Page 4
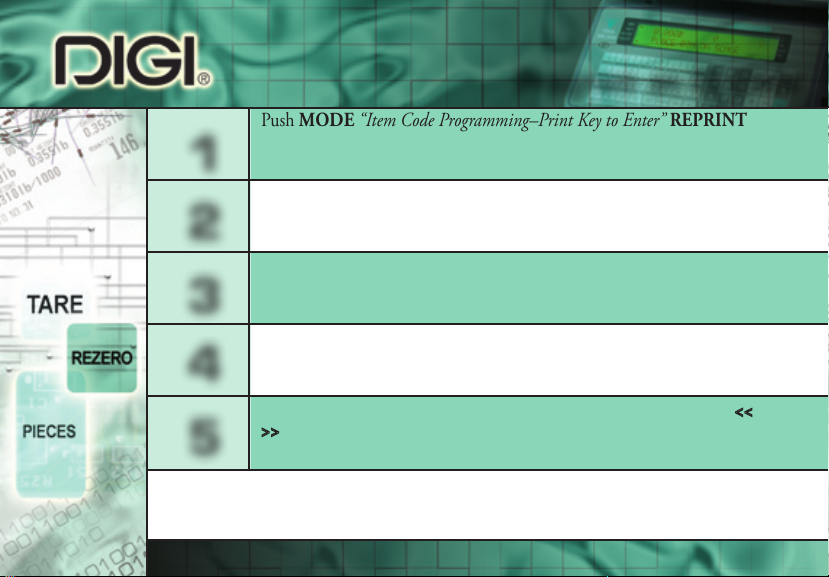
Push MODE “Item Code Programming–Print Key to Enter” REPRINT
1
Key in ID Code to be programmed.
2
3
4
5
* Unit Weight per 1,000 = Unit weight x 1,000
DC-300 COUNTING SCALE
Press REPRINT.
Key in unit weight per 1,000* value or place sample (10 pieces) on scale and
press PIECES.
Press REPRINT.
Key in tare weight or put empty bin on scale and press TARE.
(If tare not required, press REPRINT and move to step 5.)
Press REPRINT.
Display will read, “Program Label Format.” Choose label format using << and
>> keys based on the label’s size. See operation manual appendix for label formats.
Press REPRINT.
Program an ID Code
Page 5
“Program Part Name” – key name. Press REPRINT.
“Program Part Number” – key number. Press REPRINT.
“Program Lot Number” – key number. Press REPRINT.
6
7
“Program Location” – key location. Press REPRINT.
“Program Inventory” – key quantity. Press REPRINT.
“Program reshold” – key value. Press REPRINT.
Program Setpoint 1** (use + key to choose base of setpoint).
Alarm must be enabled (spec 10***). Press REPRINT.
Program Setpoint 2. Press CODE.
8
Press MODE repeatedly to return to normal operation display.
9
DC-300 COUNTING SCALE
** See Setpoint tab (pg 2) for information on setpoint capabilities of the DC-300 Series.
*** Press REZERO and 141 simultaneously. Press 10 and then REPRINT to choose Spec 10 – Setpoint
Buzzer. Use << and >> keys to scroll through options. Choose On and press + to save this informa-
tion. Press CODE and wait a few moments after tone until DC-300 returns to weighing mode.
Program an ID Code
4
Page 6

Sample, Count and
Print Label
Press REZERO.
1
Place empty bin on scale and press TARE.
2
Place a 10 piece sample in bin*. Press PIECES.
3
If 10 pieces are not enough for scale to get an accurate sample, scale prompts
you to add more pieces. Add these pieces and press PIECES again.
Add remaining pieces to be counted into bin.
4
Press REPRINT.
5
* Add the entire 10 piece sample at one time, instead of adding them one or two at a time.
DC-300 COUNTING SCALE
Page 7

Count and Print Label
With the scale turned on and in weighing mode, enter the ID Code
1
by scanning the ID bar code. See Program an ID Code tab (pg 4) for
instructions on how to enter an ID code.
Press REZERO to zero the weight display.
2
Place the product on the platter.
3
Press REPRINT to issue a receipt or label.
4
Incorporate the QuickScan® QS-6000 with the DC-300 offered by DIGI.
is compact 4 oz. scanner is designed for demanding environments, with a
rubber boot encasing the front surface of the scanner for extra durability.
DC-300 COUNTING SCALE
Scan ID Bar Code,
Sample, Count and Print Label
5
Scan ID Bar Code, Count and Print Label
6
Page 8

Add Parts to Inventory
Key in ID Code and press CODE*.
1
Key in known tare weight, or put empty bin on scale and press TARE.
2
3
4
(If tare not required or preprogrammed into ID Code information,
move to step 3)
For accuracy, put parts to be added to inventory into empty bin used
to find tare value in step 2.
If preprogrammed tare, place full container on scale. Count is displayed.
Press SHIFT DOWN, then press I (IN).
e “IN” annunciator is illuminated on the display.
Press REPRINT. e count is added to inventory.
5
You can check inventory by pressing SHIFT DOWN, then press E (INVENT).
DC-300 COUNTING SCALE
* See Program an ID Code tab (pg 4) for instructions on how to enter an ID Code.
Page 9

Subtract Parts from Inventory
Key in ID Code and press CODE.*
1
Key in known tare weight, or put empty bin on scale and press TARE.
2
3
4
(If tare not required or preprogrammed into ID Code information,
move to step 3)
For accuracy, put parts to be subtracted from inventory into empty
bin used to find tare value in step 2.
If preprogrammed tare, place full container on scale. Count is displayed.
Press SHIFT DOWN, then press J (OUT).
e “OUT” annunciator is illuminated on the display.
Press REPRINT. e count is subtracted from inventory.
5
DC-300 COUNTING SCALE
* See Program an ID Code tab (pg 4) for instruction on how to enter an ID Code.
Add Parts to Inventory
7
Subtract Parts from Inventory
8
Page 10

Negative Counting
Enable Spec 2.*
1
2
3
4
* Press REZERO and 141 simultaneously. Press 2 and then REPRINT to choose Spec 2 – Negative
Counting. Use << and >> keys to scroll through options. Choose Yes and press + to save this informa-
tion. Press CODE and wait a few moments after tone until DC-300 returns to weighing mode.
DC-300 COUNTING SCALE
Only required at initial set-up of scale.
Place full container on scale.
Press TARE.
Remove a 10 piece sample from container and press PIECES.
After the unit weight has been calculated, return the 10 piece
sample to the container.
For a total count of a full container:
Key in known tare weight and press TARE. Total count is displayed.
For a total count om a full container:
Remove parts needed. Amount removed is displayed. If label is
required, press + and then TARE.
Page 11

Check Inventory Level of a Part
Key in ID Code and press CODE.
1
Press SHIFT DOWN, then press E (INVENT).
2
Inventory levels are displayed for entered ID Code.
3
Press CLEAR to exit.
4
DIGI’s Inventory Management Software (IMS) is a comprehensive
package that stores and manages data on your PC. It can be used
with the DC-300 Series to create reports containing information
such as inventory, threshold or location. It is designed for operators with minimal computer experience and managers who require
quick and accurate information, yet has the power to control from
DC-300 COUNTING SCALE
1 to 64 counting scales. Scales can be added or moved on-the-fly
without interrupting other scales operating on the network.
Negative Counting
9
Check Inventory Level of a Part
10
Page 12

Change and Print Label
While holding down the REZERO key, press the L key.
1
Use the << and >> keys to scroll through the label format
2
options. See operation manual appendix for label formats.
Press CODE to choose the format you want.
3
e DC-300 offers advanced label and report generation with it’s internal direct thermal printer. An unbelievable 99 custom label formats are
easily formatted to fit your needs via Ethernet and the utility program
included with the DC-300. Report generation includes:
• reshold reports
• Inventory reports
• Item reports
DC-300 COUNTING SCALE
• And more!
Formats on the Fly
Page 13

Program Factory Name
(Thirty-two (32) factory names can be programmed.)
Verify following specifications are set*: Only required at initial set-up of scale.
1
2
Spec 55 – set Factory Name to print
Spec 56 – set Default Factory to 1
Press MODE twice.
Press + key until “Factory Programming – Enter Factory #” is displayed.
Enter 1 to program first factory name. Press REPRINT.
3
Key in 1st line of factory name and press REPRINT.
4
Key in 2nd line of factory name and press REPRINT.
Key in 3rd line of factory name and press CODE to save.
Press MODE repeatedly to return to normal operation display.
5
* Press REZERO and 141 simultaneously. Press 55 and then REPRINT to choose Spec 55 – Factory Name. Use
DC-300 COUNTING SCALE
<< and >> keys to scroll through options. Choose Print by pressing + to advance to Spec 56 – Default Factory
and press 1. Press + to save. Press CODE and wait a few moments after tone to return to weighing mode.
Change and Print Label Formats on the Fly
11
Program Factory Name
12
Page 14

Job Sequence Prompting
Enable Spec 13*. Only required at initial set-up of scale.
1
2
3
4
5
6
DC-300 COUNTING SCALE
Press MODE twice.
Press + repeatedly until “Job Sequence” is displayed.
Press 1 and then REPRINT to enter first prompt.
Program prompt 1.
Key in prompt message** (For example: “Place Bin & Push Tare”)
Press REPRINT.
Use << or >> to assign a key to follow prompt 1. Choose Tare.
Press CODE to save.
Program prompt 2.
Press 2, then REPRINT.
Key in prompt (“Put 10 PCS & press PCS”), press REPRINT.
Use << or >> to assign a key to follow prompt 2. Choose PCS.
Press CODE to save.
Page 15

Program prompt 3.
7
8
9
10
11
* Press REZERO and 141 simultaneously. Press 13 and then REPRINT to choose Spec 13–Job Sequence.
DC-300 COUNTING SCALE
Use << or >> keys to scroll through options. Choose Enable by pressing + to save this information. Press
CODE and wait a few moments after tone until DC-300 returns to weighing mode.
** Prompts cannot exceed 22 characters including spaces.
Press 3, then REPRINT.
Key in prompt (“Put Parts/Push REPRINT”), press REPRINT.
Use << or >> to assign a key to follow prompt 3. Choose Print.
Press CODE to save.
Program prompt 4.
Press 4, then REPRINT.
Key in prompt (“Push Clear Twice”), press REPRINT.
Use << or >> to assign a key to follow prompt 4. Choose Clear.
Press CODE to save.
Press MODE repeatedly to return to normal operation display. e
job sequence prompts will begin.
At the end of each job sequence, press CLEAR to restart the prompts.
Job Sequence Prompting
14
Page 16

230 W. Coleman St. • Rice Lake, WI 54868 • USA
TEL: 715-234-9171 • FAX: 715-234-6967
PN 78891 • 10/09
www.ricelake.com
© 2009 Rice Lake Weighing Systems
 Loading...