

Page 1

USER MANUAL
GEBRUIKERSHANDLEIDING
MODE D’EMPLOI
BEDIENUNGSANLEITUNG
MANUAL DE USUARIO
TAB10-06 10’’ Tablet PC
Page 2

User Manual
Congratulations for buying the TAB10-06
Thank you very much for your trust and your decision to buy our product!
As we constantly update and improve our pad there may be small differences
between the printed manual and your pad in some cases. You have
the option of downloading the current version of the manual and firmware updates
from our website.
Page 3

1
Table of Contents
Safety instructions 2
Device overview 3
Description of the buttons 4
Language settings 4
Power monitoring
and charging the batteries 5
Screen lock 5
Connecting with computer and data transfer 5
Functions of the buttons on the
user interface 6
Programme menu 7
System settings 9
1. Wireless & Networks 9
2. Sound settings 10
3. Display sett ings 10
4. Location & safety 10
5. Application 10
6. Accounts & synchr. 10
7. Data protection 11
8. Memory 11
9. Language & keyboard 11
10. Date & time 11
11. Telephone info 11
Internet 12
Open Source Code & GNU Gener al Public License 12
Technical Data 14
Page 4

2
This user manual contains important safety instructions and
inform a tion for proper use of the device. Pleas e follow the
instructions in this manual carefully.
A Please keep the device away from places with high temperatures,
high humidity or dust.
B In particular please avoid leaving the device in the car during
summer if the doors are closed .
C Avoid shocks and do not let the device fall, as otherwise it may
cause damage to the device.
D The Standby Time of the batteries may vary due to different
environ men t al influences .
E We are not responsible for data losses that are caused by damage
to the produ c t , re pa irs or any other reasons.
F Do not ope n t he h ousing of the device. Doing th is w ill void your
warranty claims.
G Do not use alcohol, thinners or pe trol to clea n t he display
– use only a dry cloth.
Page 5

3
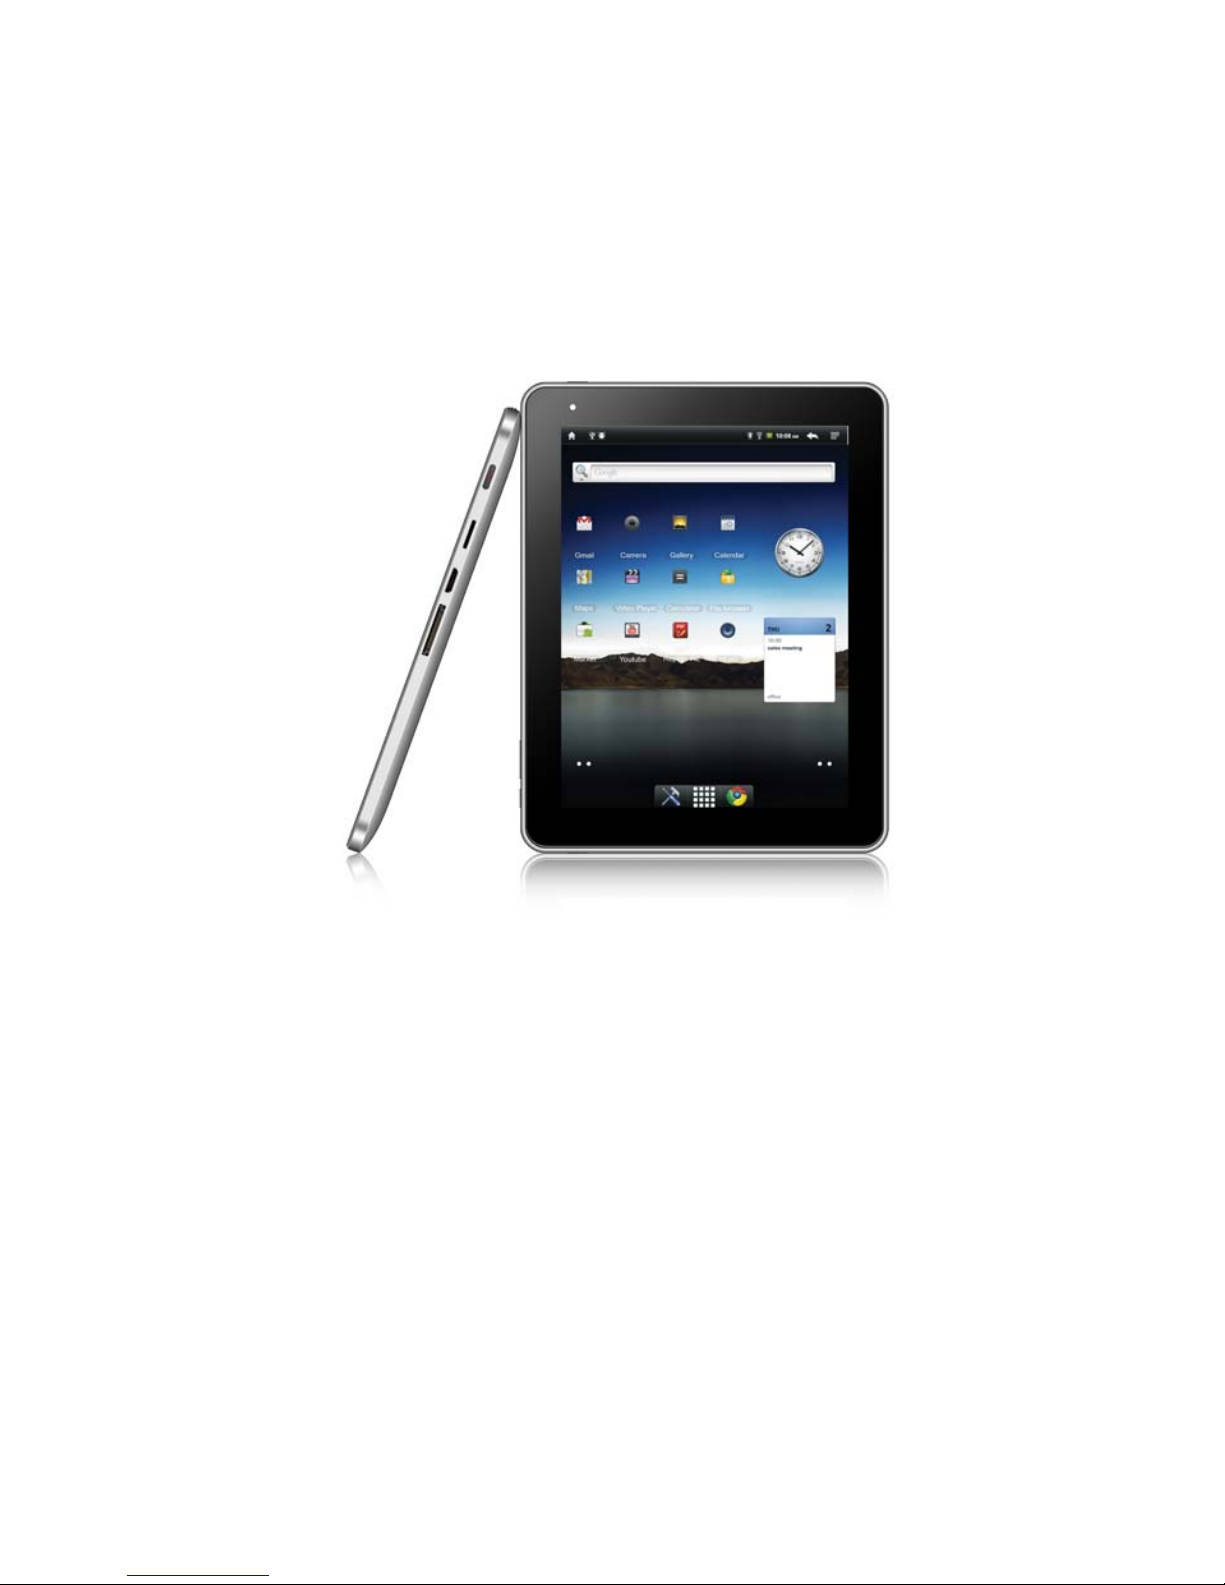
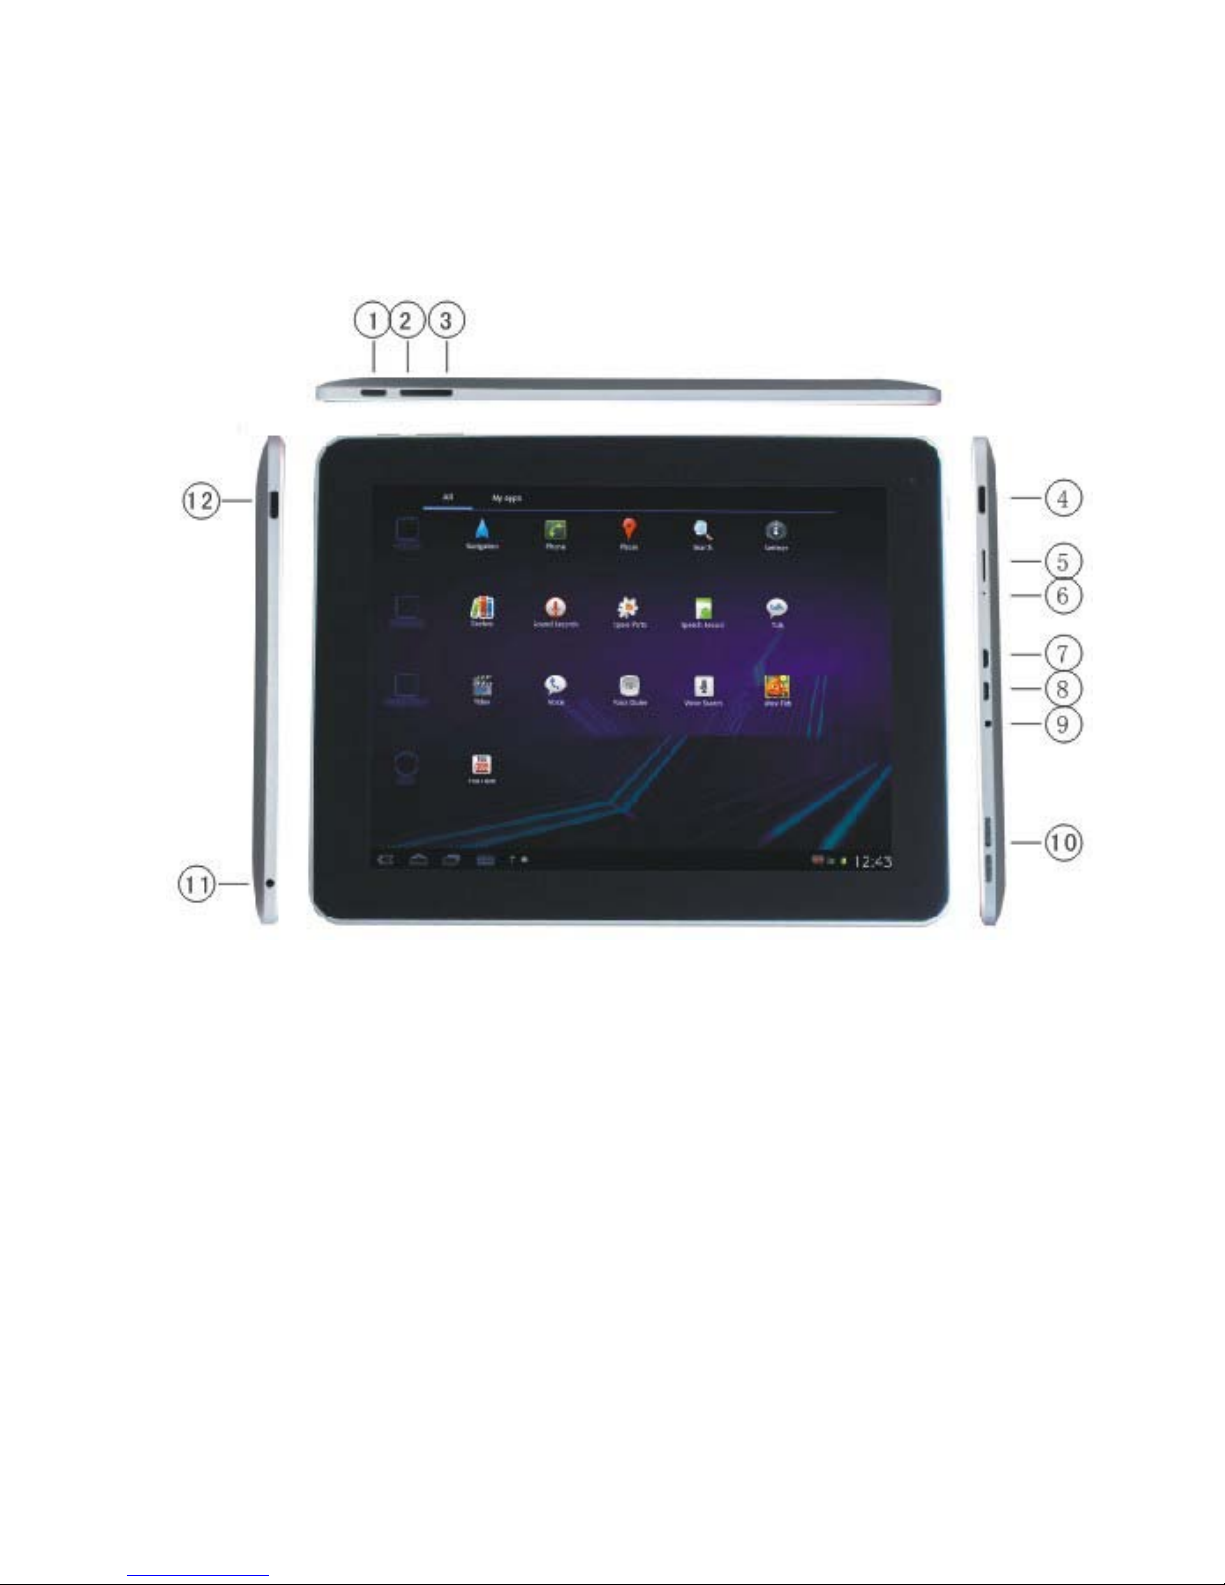
Device overview
1. Manu button 10. Speakers
2. Volume+ Button 11. Earphone
3. Volume- Button 12. Power button
4. Home button
5. Micro SD/SDHC Card Slot
6.Mic
7. USB Port
8. OTG Port: USB from your external HDD
9. DC-in
Page 6
4
Description of the buttons
Volume Buttons:
Here you can increase or reduce the volume.
Power Button:
Press th e button for tw o s e c onds to switch on or s witch off
the device. Press the button briefly to activate or end the StandbyMode. Reset : Pre s s t he but ton for seven se c on d s t o restart
the device.
ESC Button:
To go back to the previous menu
Menu Button:
To open the cont e xt me nu
Home Button:
To go back to the user interface
Languag e setting
TAB10-06 is delivered with English as a default language.
To change the language setting, please do the following:
- Press on the programme menu symbol
on the right side of the s creen.
- Select ‘Settings’ .
- Scroll to the end of the list.
- Sel ect ‘Lan guage & keyboard’.
- Select ‘Select languag e’.
- Type your preferred language.
- Pre s s the ‘H ome’ button to re tu rn to the hom e s creen.
Page 7

5
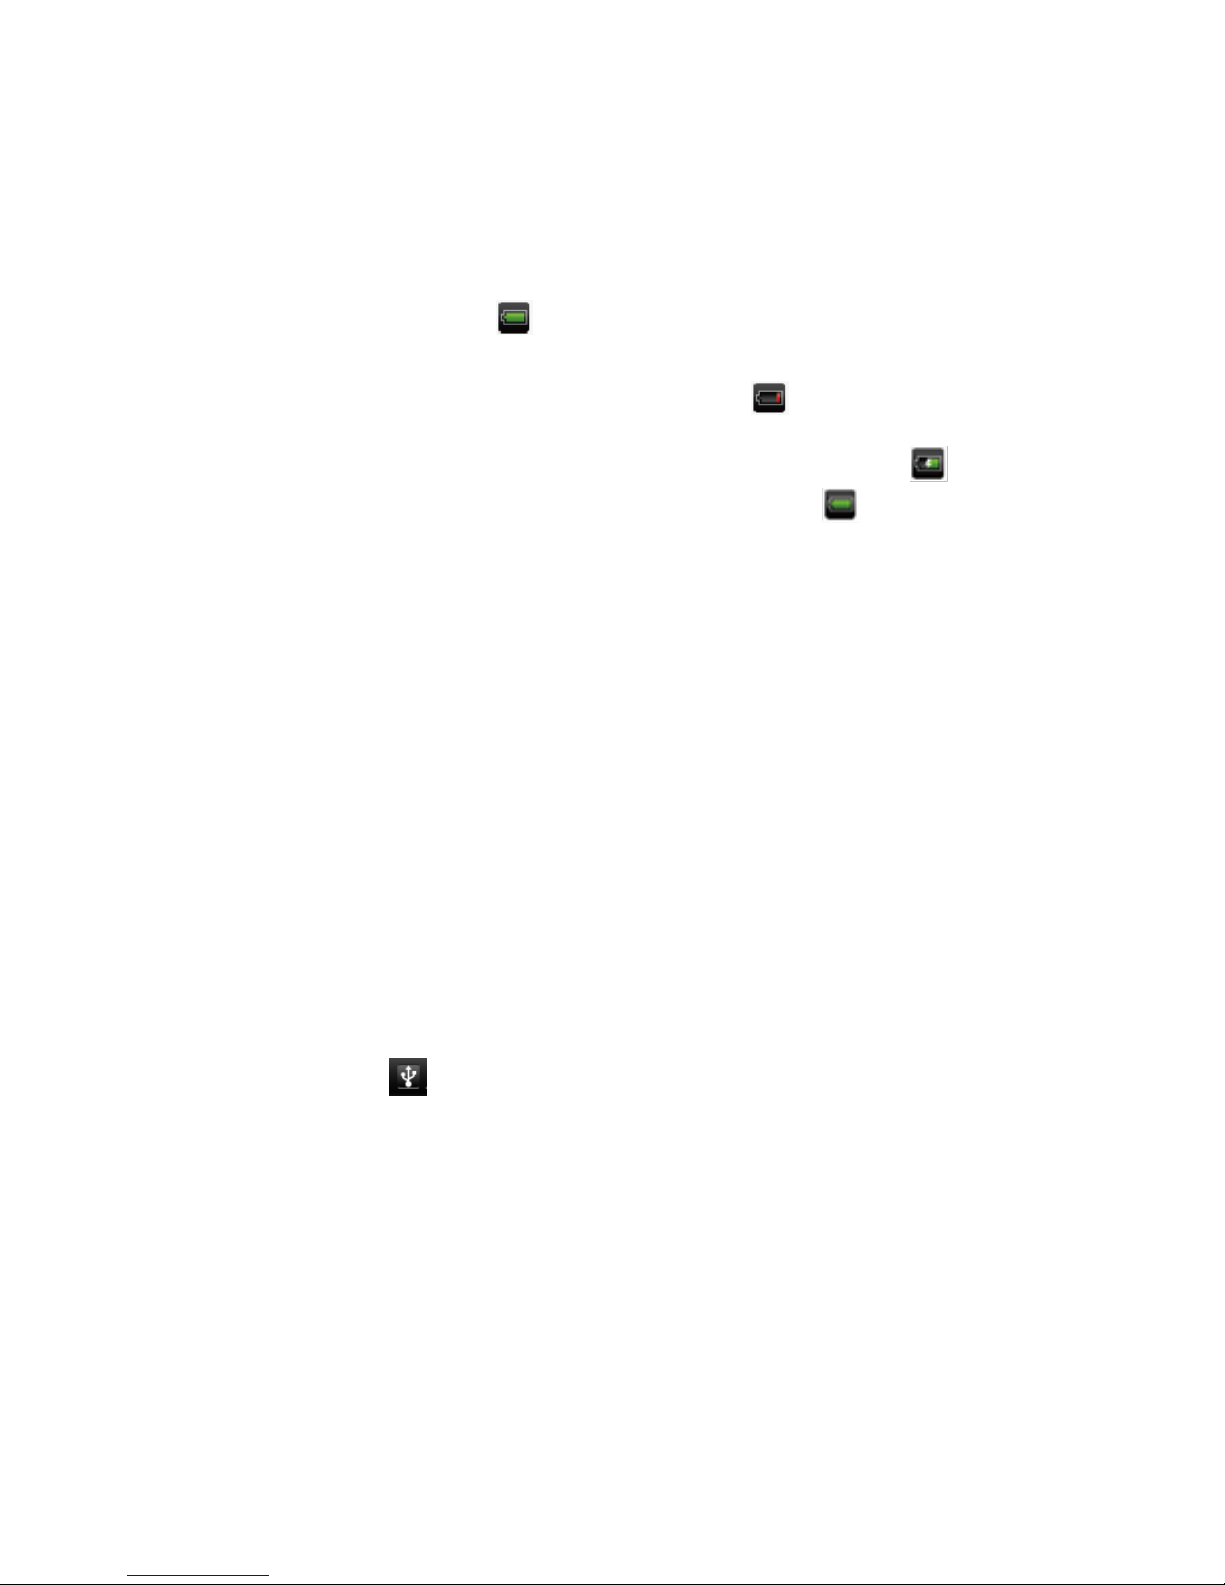
Power monitoring and charging the batteries
The battery charge symbol in on the status bar indicates
the charging status of the batteries.
If the power goes down, the device shuts itself off automatically.
If les s powe r i s s hown, use the pow er adapter or a compute r
via USB to charge the device.
The ch a rgin g ti m e for the battery is approxi mately fou r hours.
Screen lock
If the device is not used for specified time or the ‘Power’ button
is pressed briefly, t he screen is switched off and display lock
is activated.
By pressing the ‘Power’ button briefly the screen will be reactivated.
For locking the screen press the ‘Lock’ button in the specified
direction.
Connecting to the computer and data transfer
EasyPad is equipped with a High-Speed USB2.0 Interface.
After you connect the device to a computer, it appears in
th e status display .
Pull the status bar down and press ‘USB Connection’ to activate
the USB Memory. When using the device for data transfer,
you cannot access the Micro SD/TF Card from EasyPad!
Page 8
6
Functions of the buttons on the user interface:
Home Button :
To go back to the start screen.
Menu Button:
To open the context menu.
/ Volume Buttons:
To i ncrease or reduce the volume.
Back Button:
To go b a ck to the previous menu / pre vi ous page.
Program Menu Button:
To display the programs and applications.
Change Window Button:
The device has five desktops. You can press this button
or push your finger on the touchscreen to the side to navigate
between different desktops.
WIFI / WLAN Signal Icon
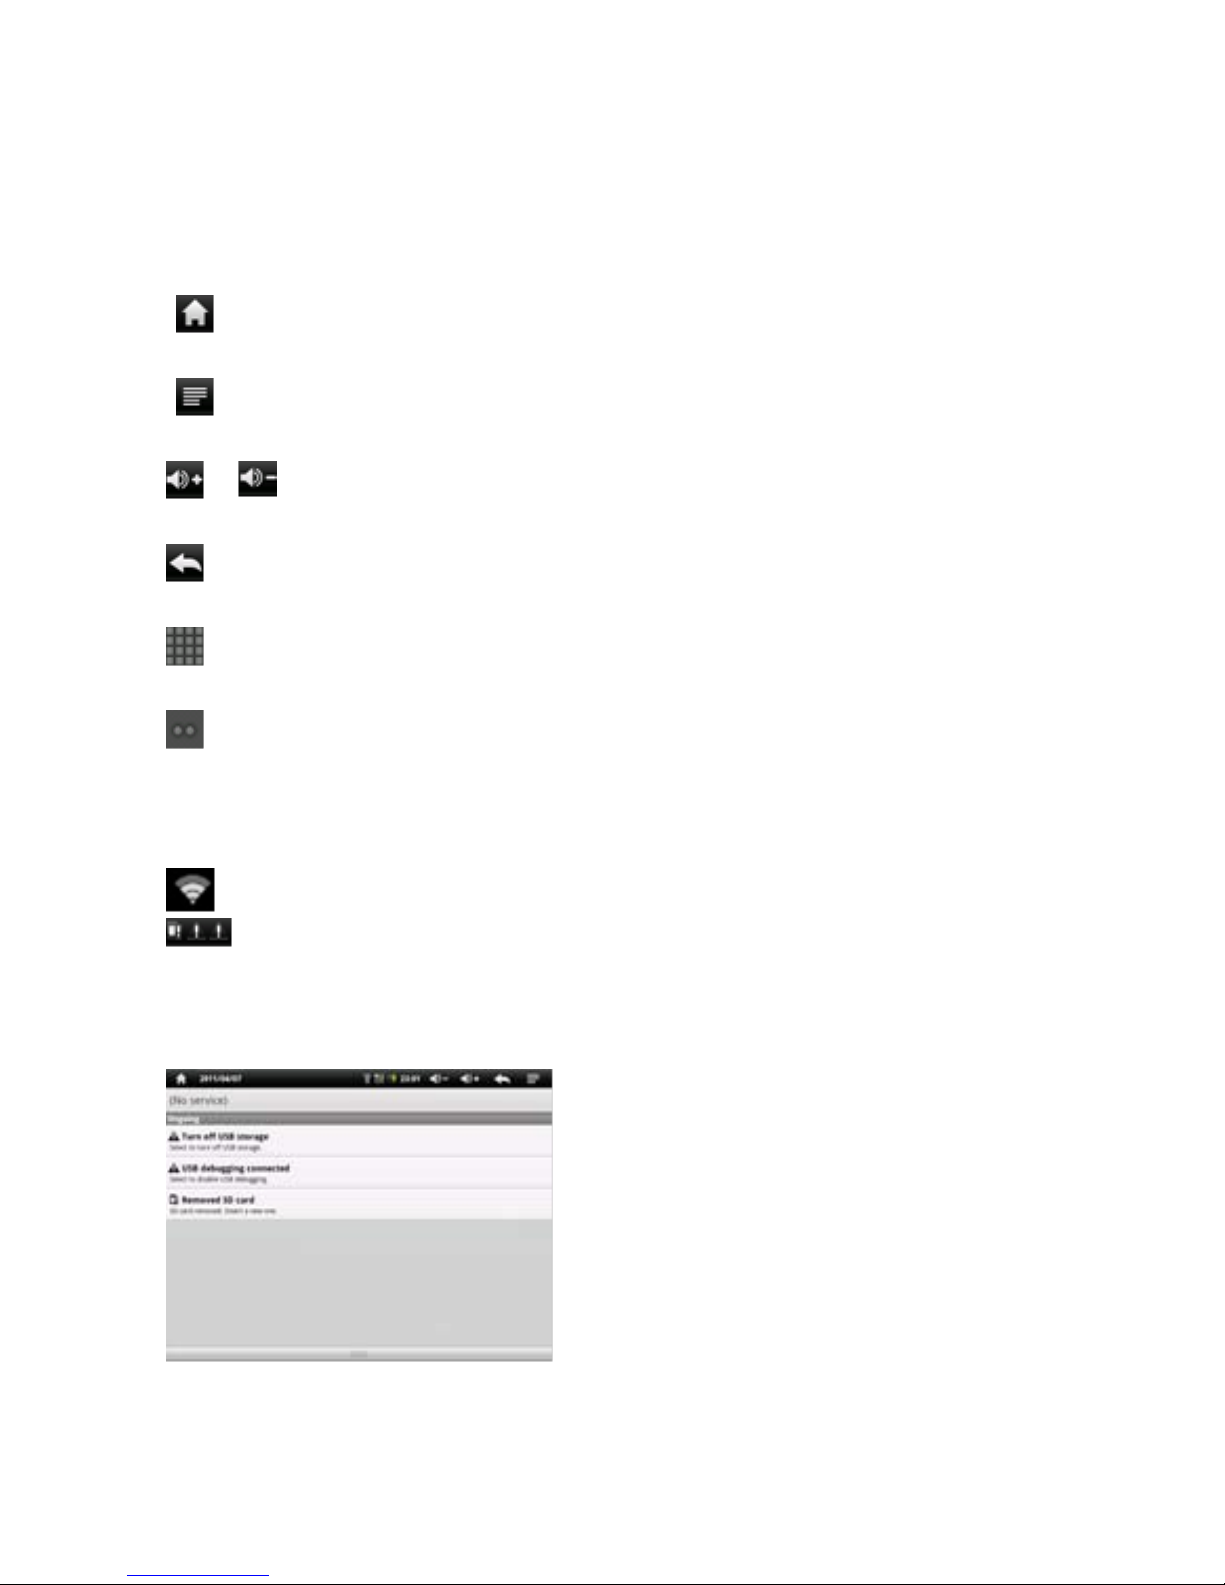
System instructions:
Pull the status bar down to view messages about new e-mails,
downl oade d docu ment s, USB Con ne ction Stat us or oth er in form ati on.
Page 9
7
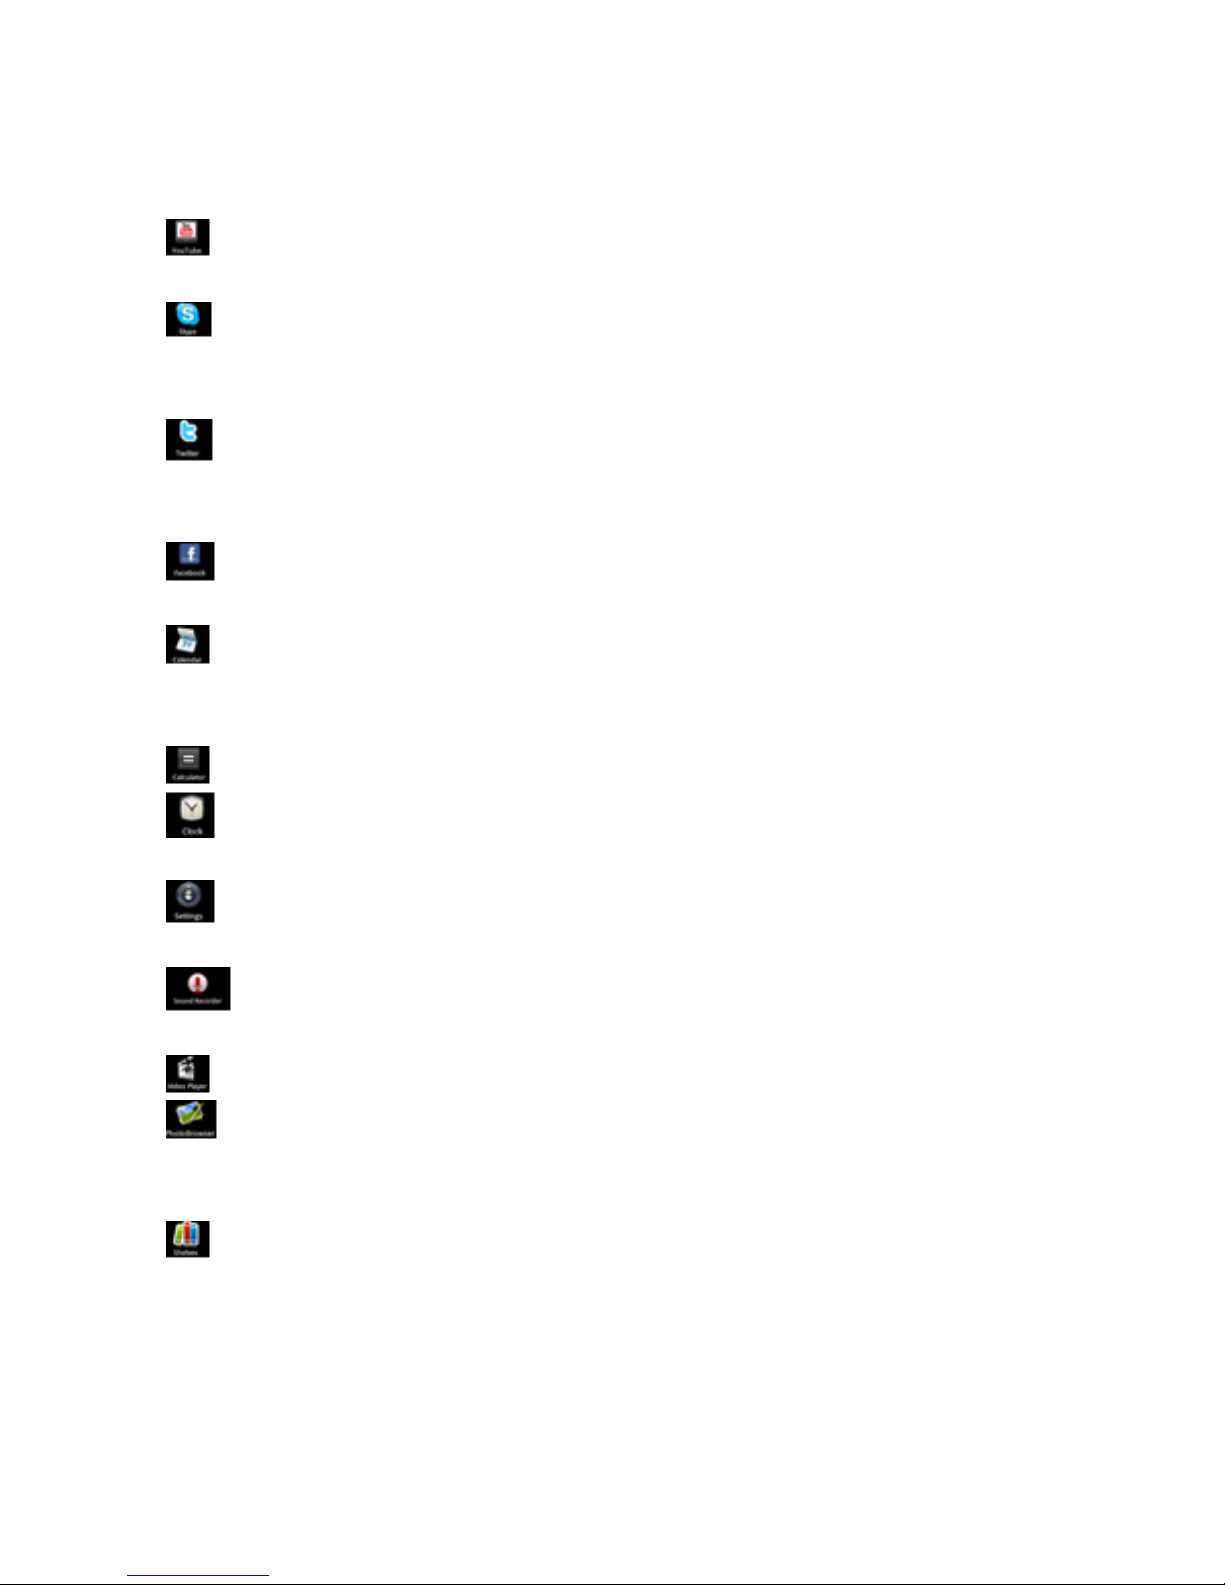
Program menu
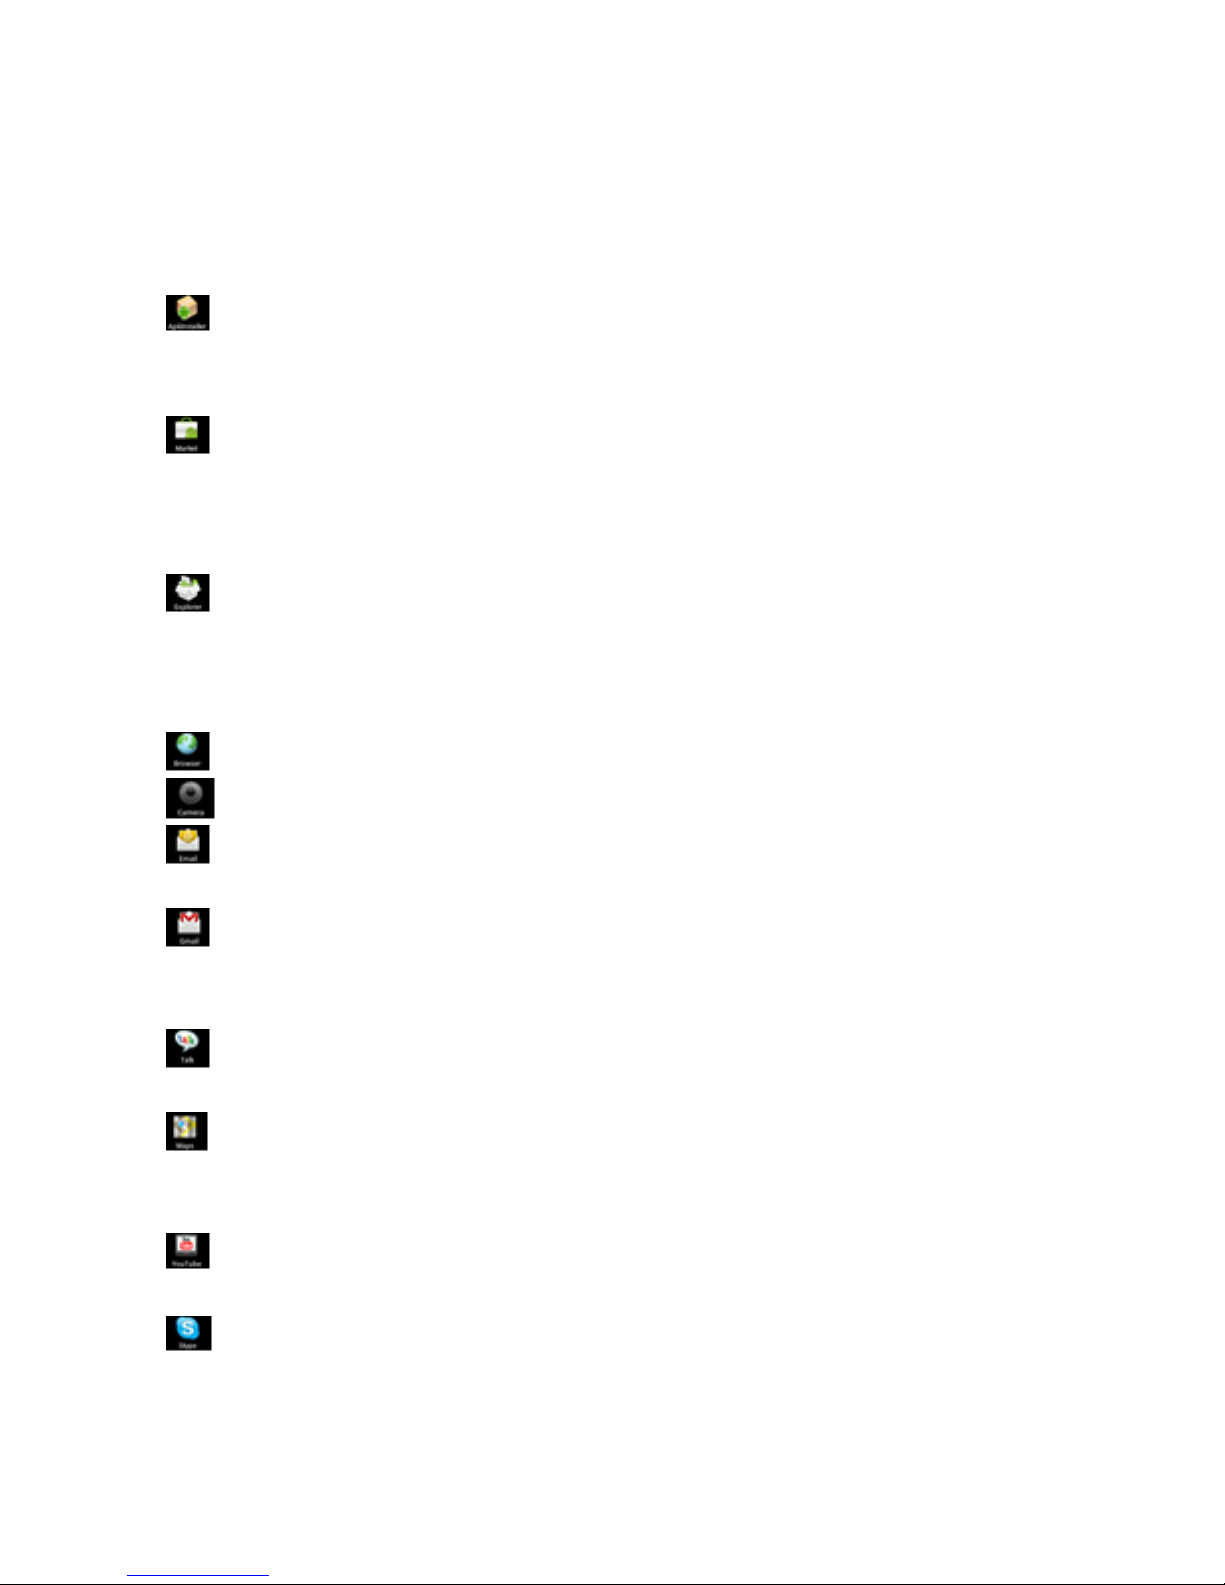
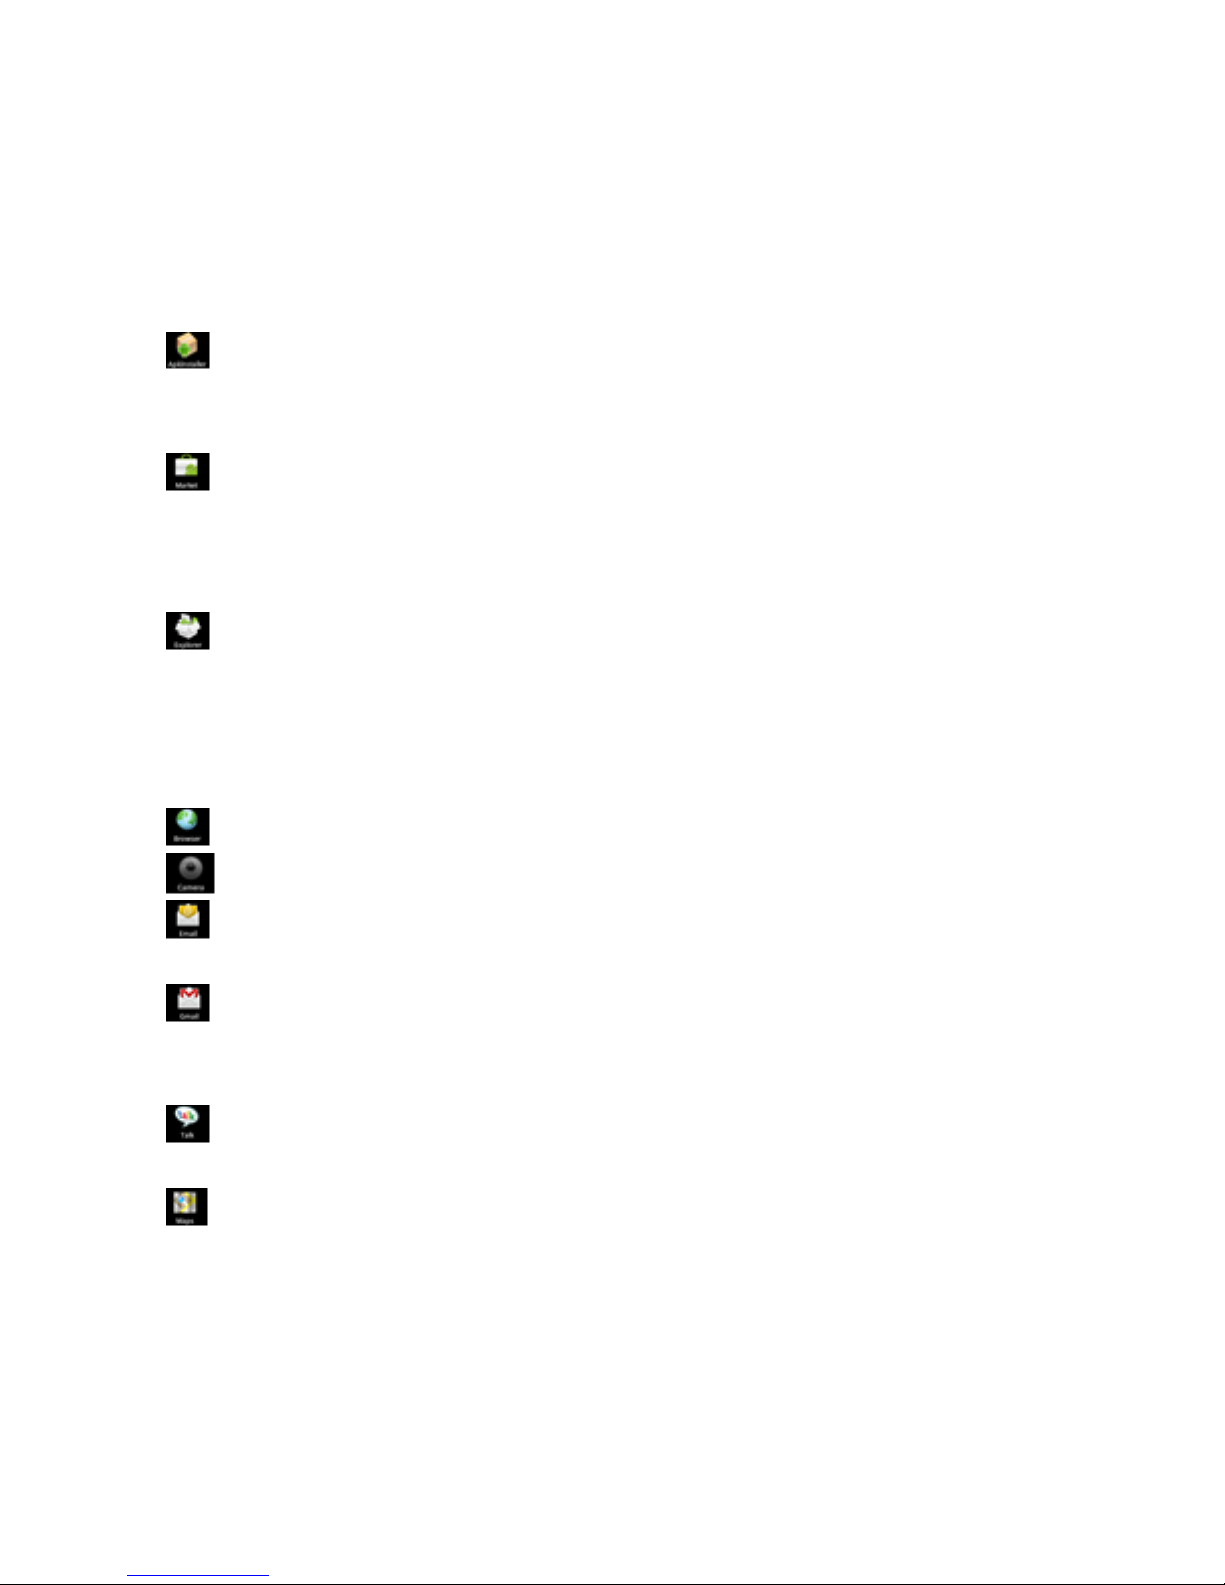
ApkInstaller:
Program for installing and uninstalling Apps that were not
downloaded from the Android Market.
Market:
Load Apps (p rograms ) from t he Androi d Mark e t. You can download
and install apps, games and other applications. Many are free.
Explorer:
Open the Explorer to access Micro SD TF Cards, USB sticks and
other storage media. The Explore r is a practical manager for
documents and all types of data.
Inte rn et browser
Front& back 2.0MP camera
E-mail:
Program for retrieving, process i ng and sending e-mails.
G-mail:
Program for retrieving, process ing and sending e-mails through
Google account.
Google Talk:
Program to chat with ot her Google u sers.
Google Maps:
Program for the displ ay of m a ps or s atellite im a ge s – Route planner.
YouTube:
Program for viewing YouTub e videos.
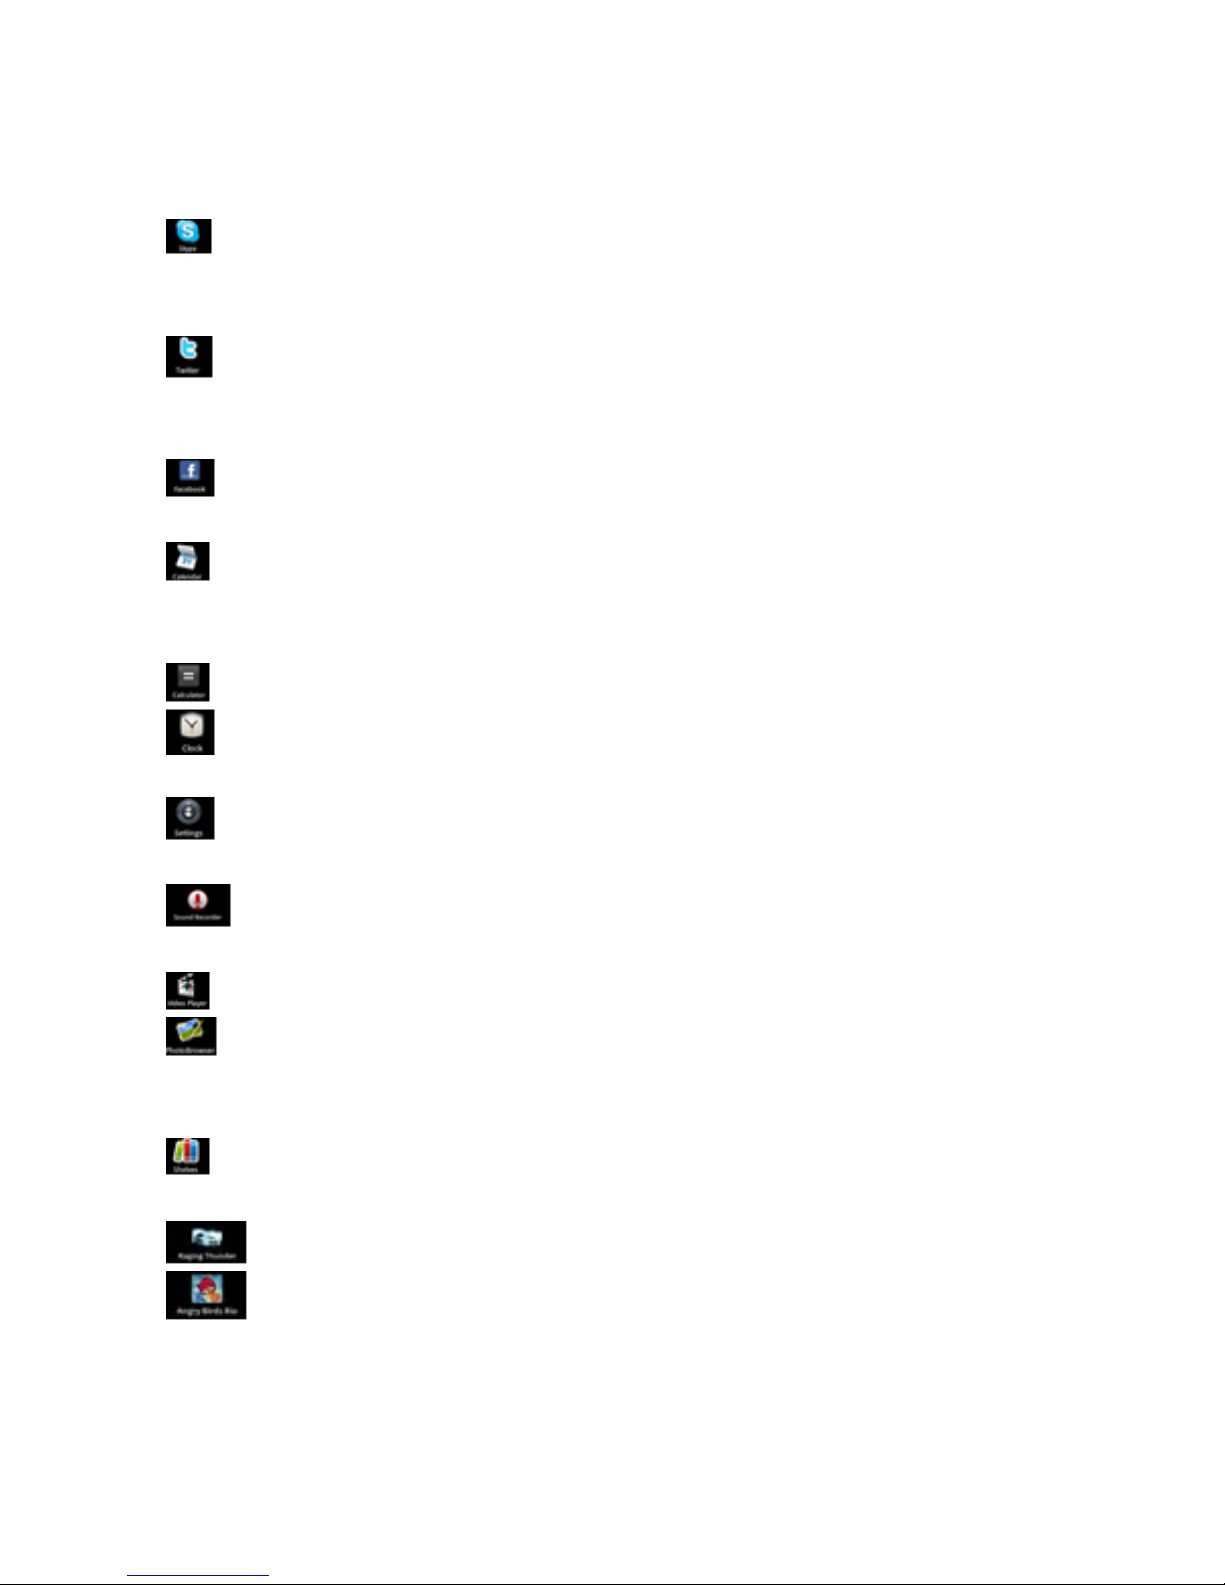
Skype:
Program to chat with ot her S kype users or to m a ke t el e p h one calls
via Internet.
Page 10
8
Twitter:
Appli c a tion for Mic roblogging – Facilitates the display of public
diari es or create a public diary of your own.
Facebook:
Program for using the social net w ork site Facebook.
Calendar:
Managing schedules – can be synchronised automatically with a
Google account.
Pocket Calculator
Time:
Time display and setting alarm functions.
Settings:
Changing the basic settings of EasyPad.
Sound Recorder:
Dictation Device Function.
Video Player
Gallery:
Manage and display images and videos – also enables
synchronisation with Picasa web albums.
Shelves:
A program for reading and managing e-books.
Krazy Kart Rac ing: Car racing game
Angry Bi rd s Rio: Game of skil l
Fruit Ninja: Game of skill
Page 11
9
System settings
Touch the icon for the settings to open the system settings menu:
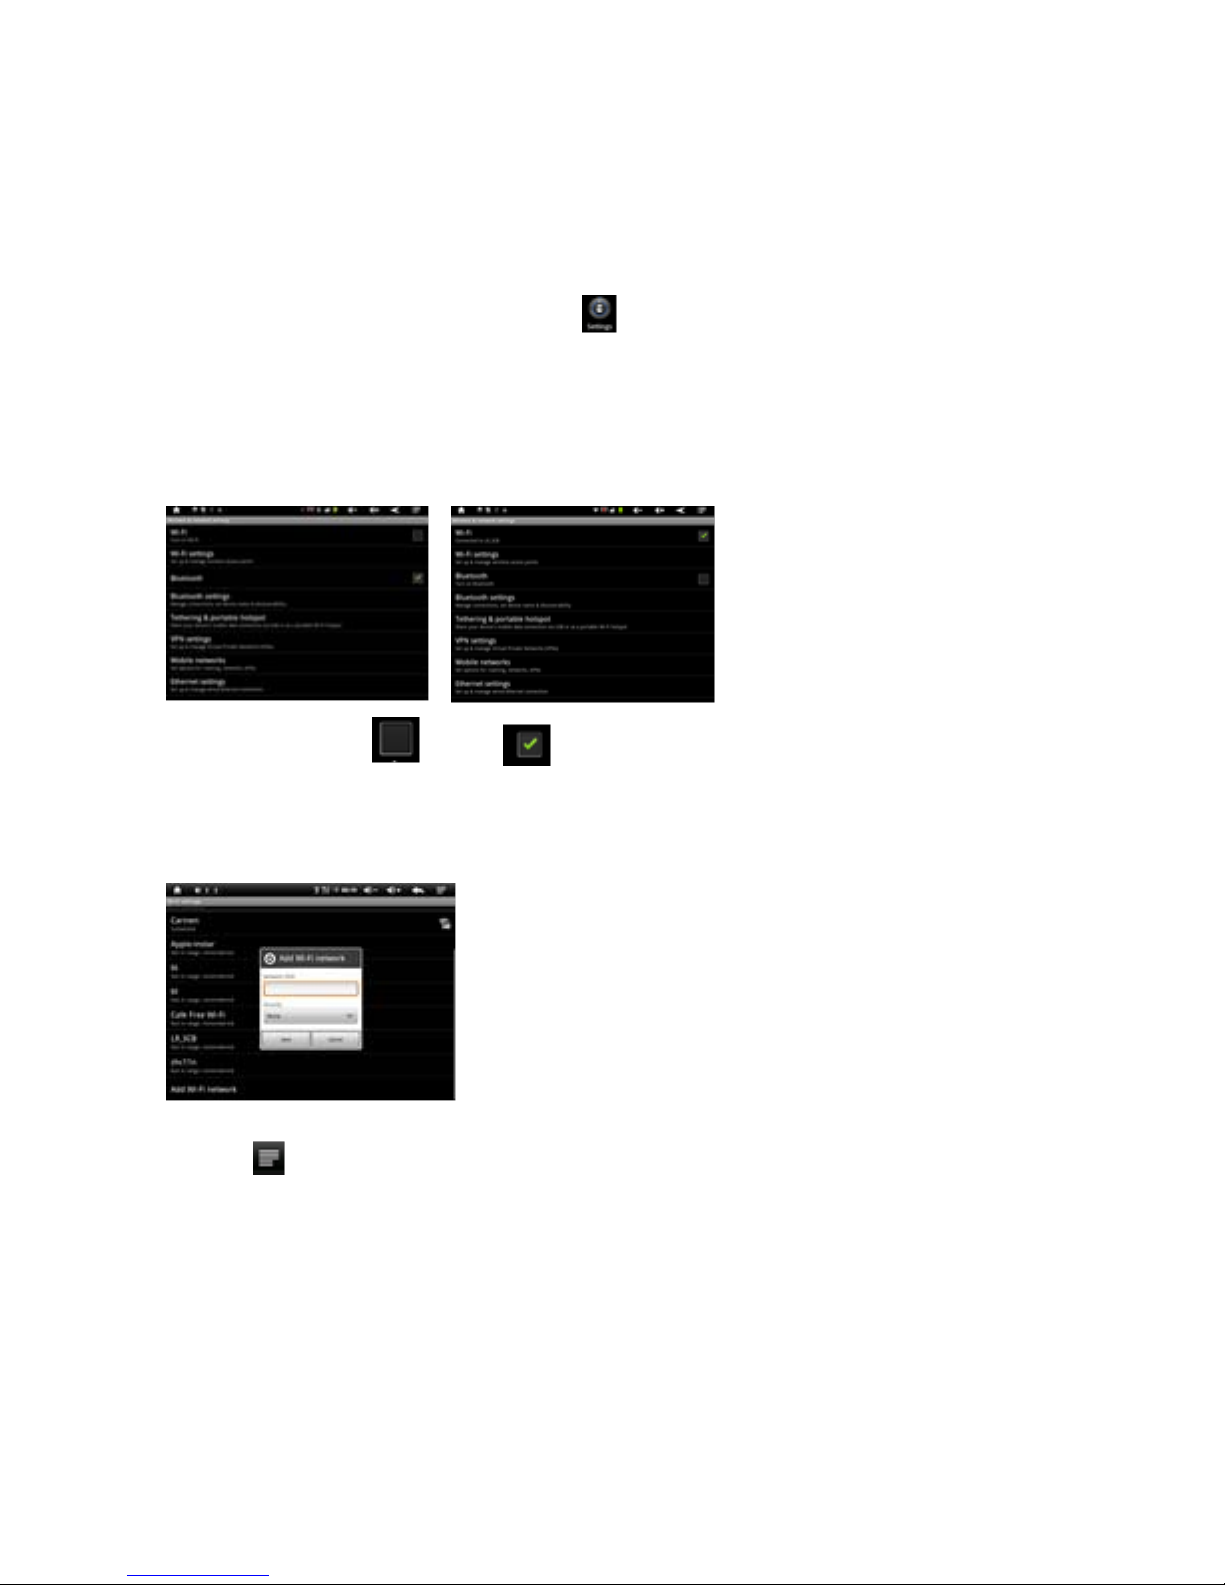
1. Wireless & Networks
Touch ‘Wireless & Networks’.
WLAN: Touch => to switch on the WLAN function.
The device automatically sea rches for available WLAN networks.
WLAN Settings: Select your network here.
If neede d you wi l l be requeste d t o en ter your WLAN pas s w ord:
Advanced WLAN / Wi-Fi settings:
Touch in the menu f o r WLAN / Wi-Fi Settings, the menu for
advanced settings will open up automatically. In the menu for the
advanced settings you can view the current status, the IP address
and oth e r device inform ation.
Page 12

10
2. Sound settings
The ‘Sound’ settings contain the volume control, and selection of
notification sounds, system sounds , signal tones for Micro SD/TF
Cards and USB signal tone.
3. Display settings
Includes brightness, automatic screen rotation (G-sensor),
animations and display timeout time, Switch off display after:
15 seconds, 30 seconds, 1 minute, 2 minutes, 10 minutes or
30 minutes are ava ilable. For example, if you select 30 seconds ,
the display will be switched after 30 seconds of inactivity and screen
lock is activated. Press the ‘Power’ button to reactivate the Display.
Push the ‘Lock’ button up to lift the screen lock.
4. Location & safety
Here you can activate the automatic recognition of the location.
You can also set security passwords which will prevent unauthorised
access to your EasyPad.
5. Application
Here you can manage your apps and define if apps from sources
other than the Android Market are allowed to be installed.
6. Accounts & synchr.
General synchronisation settings:
1. Background data
2. Automatic synchronisation
Account management: Management of user accounts
Page 13

11
7. Data protection
Secure my data: Here you can define if different settings
should be stored on Googl e servers.
Touch ‘Reset to default’ to reset the device to factory settings.
All settings, self-installed apps and data stored on internal memory
can be deleted.
8. Memory
Here the current memory use is disp lay ed .
Touch ‘Remove SD Card’ to remove the Mi c ro SD/TF Card
during use.
9. Language and keyboard
Set the system language and input method.
10. Date and time
If your netw ork does not support au t omatic setting of time,
you can set the time, time zone and date manually after
deactivating automatic settings.
11. Telephone info
Here you can view device internal values such as operating system
version, battery status, signal strength of the mobile network etc.
Page 14
12
Main functions
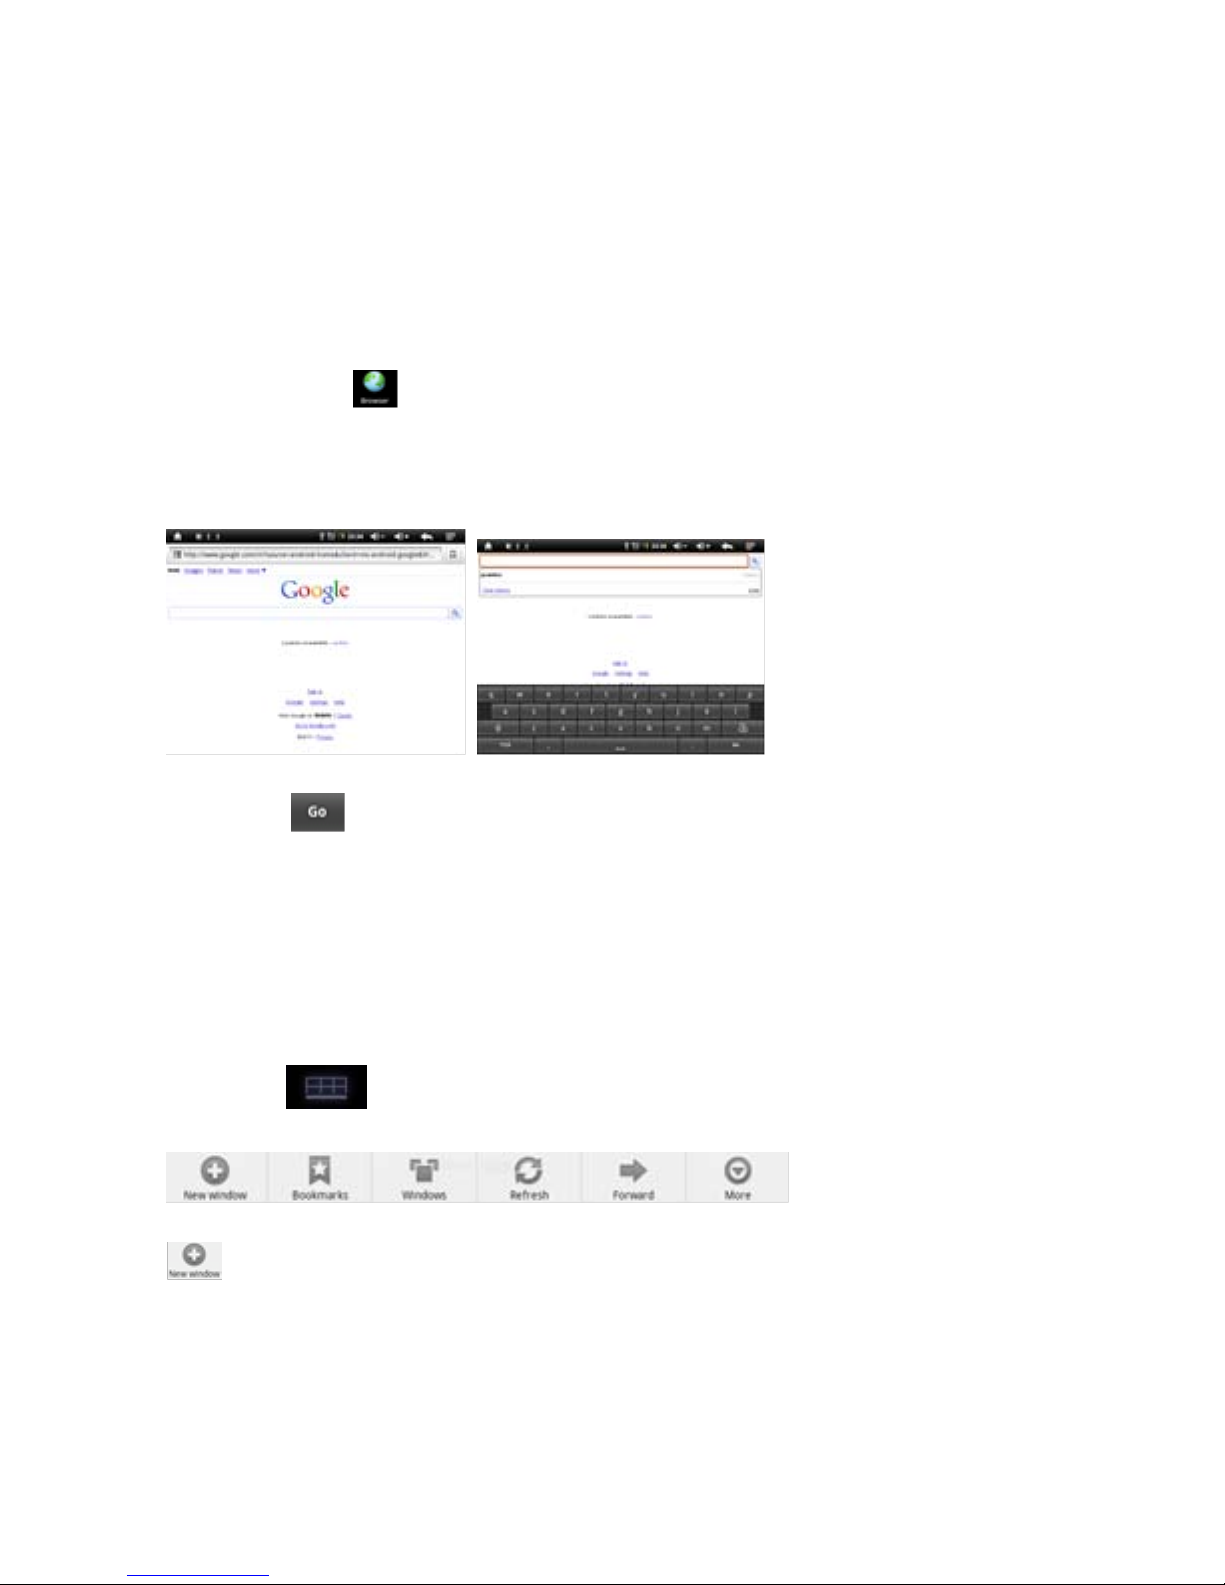
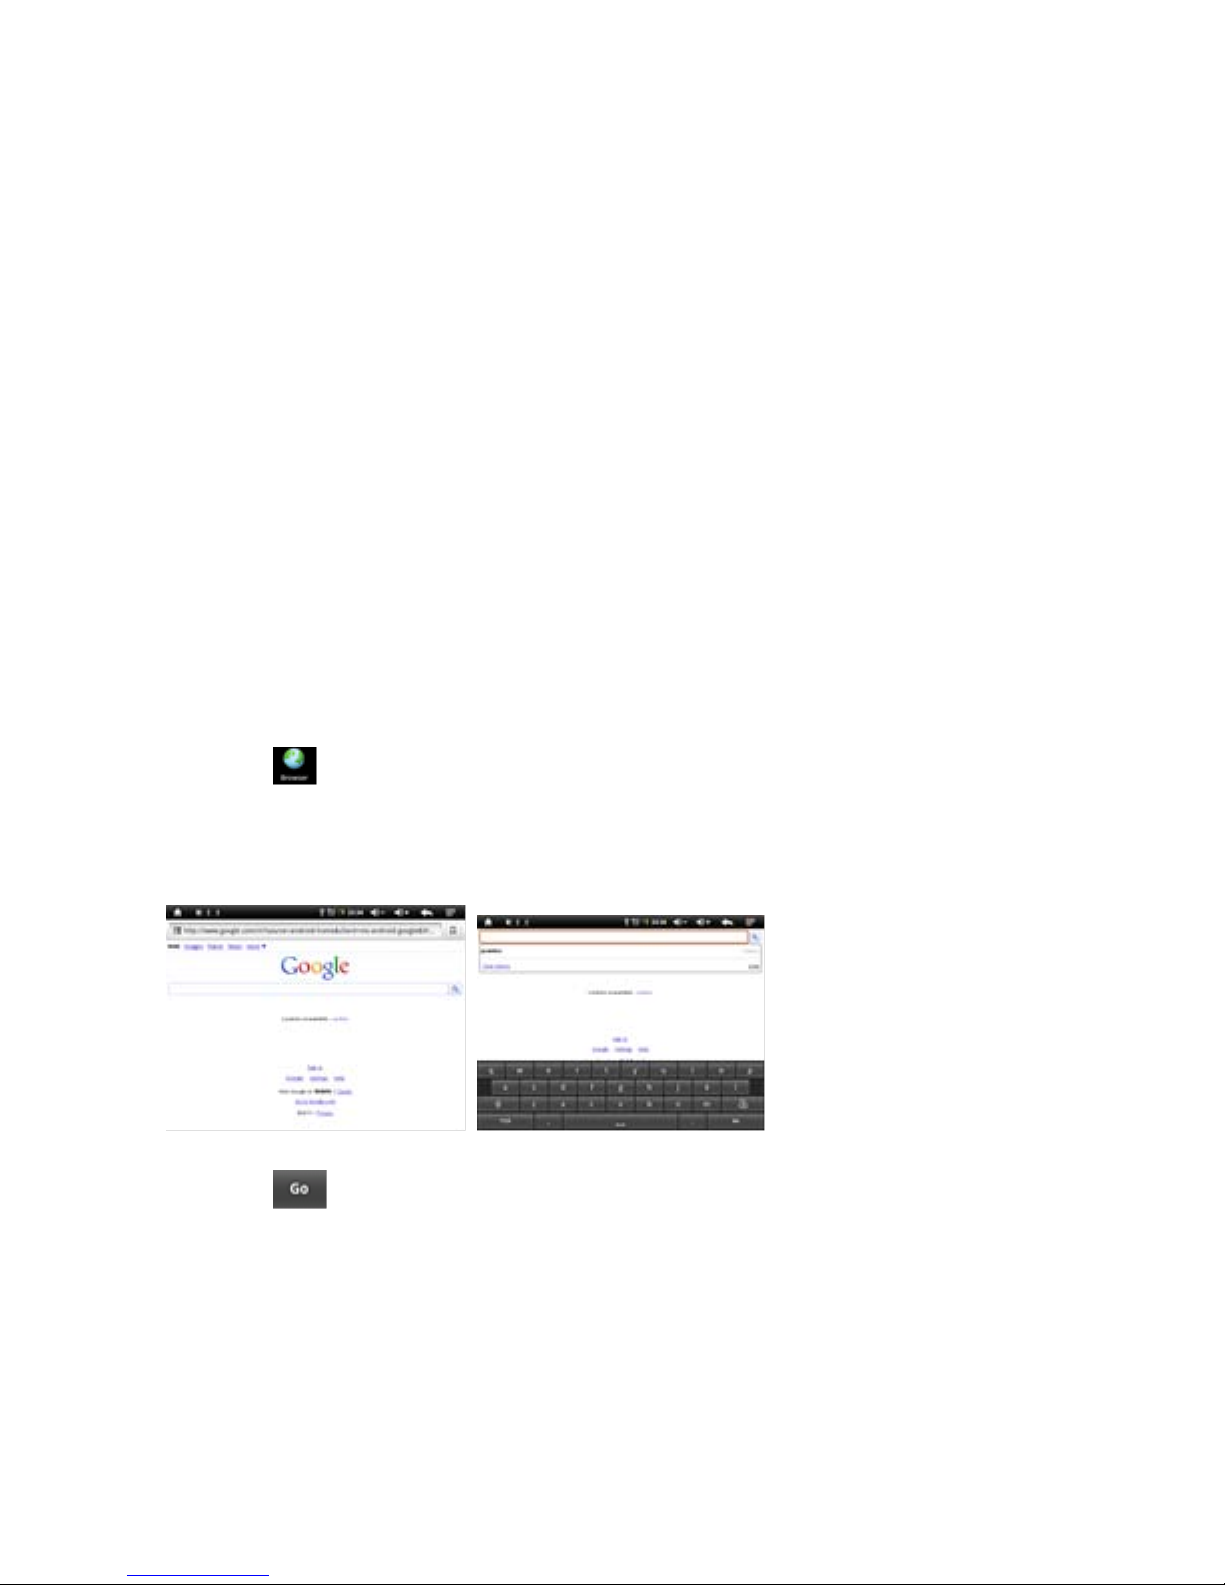
Internet
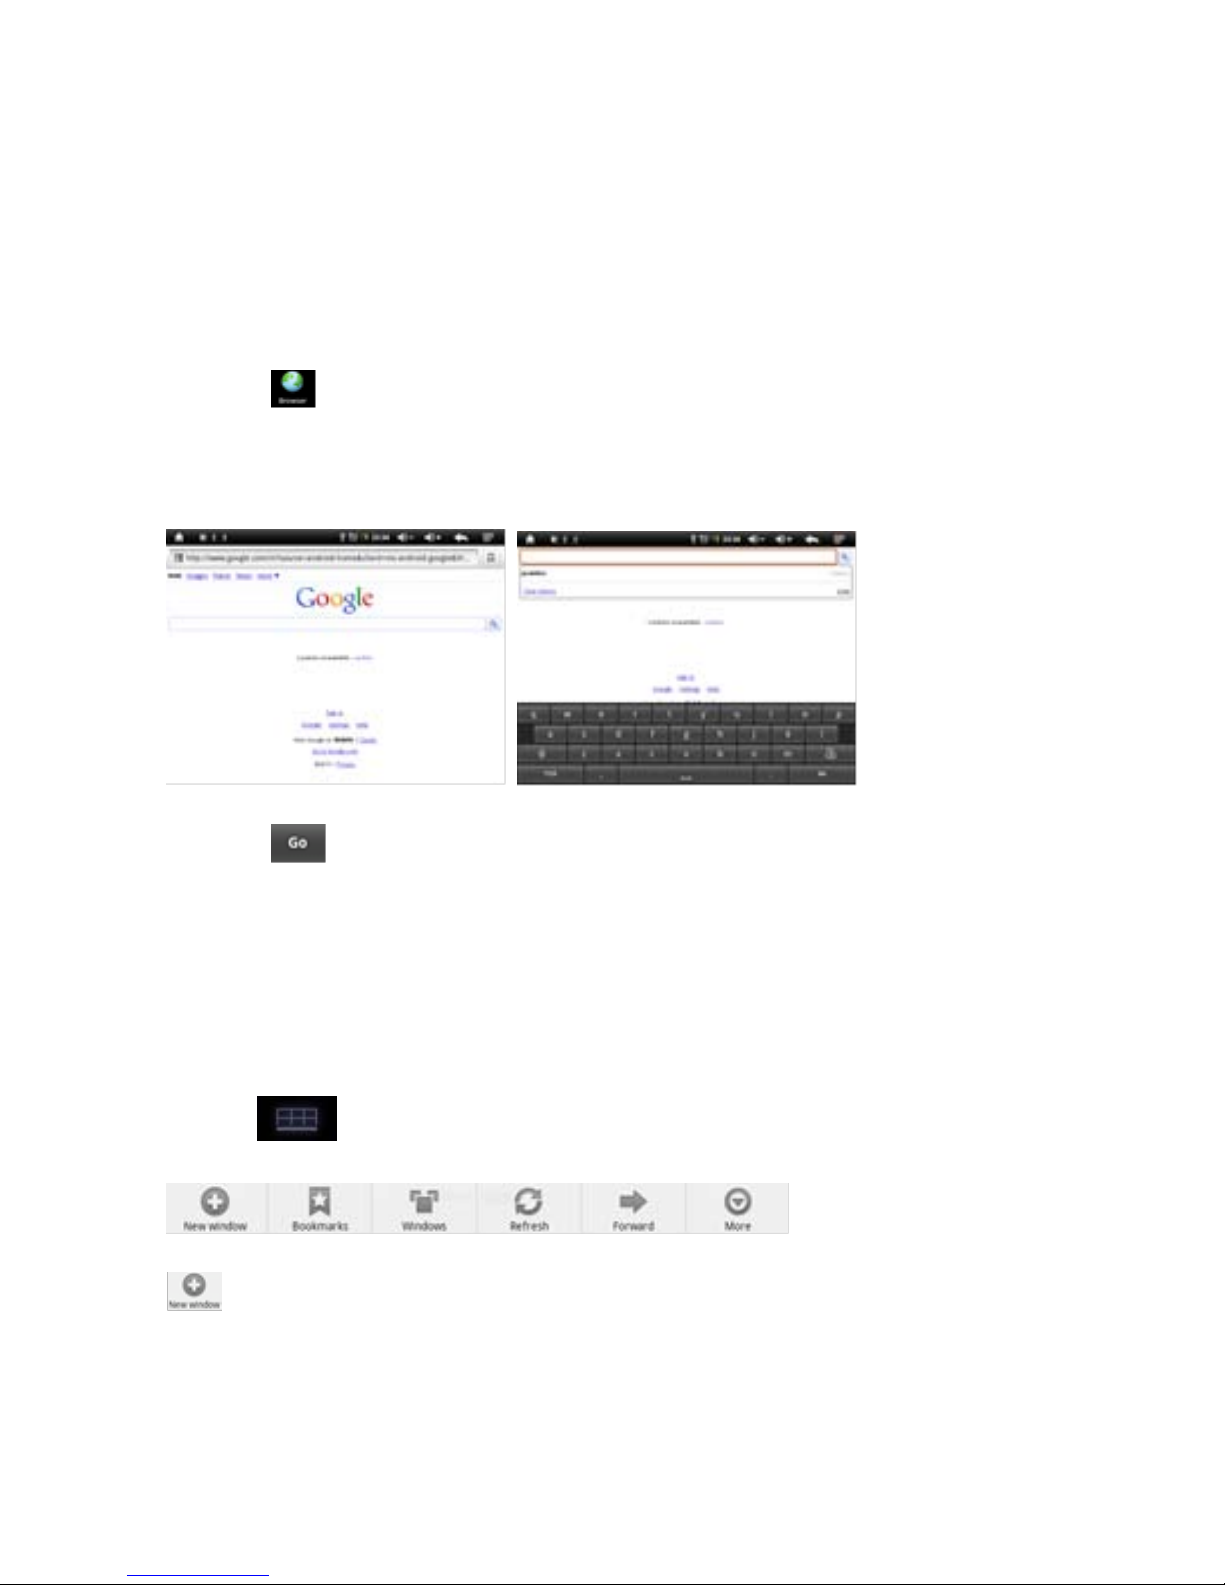
Touch Icon to surf the net.
Google is the default start page.
Touch the input field to disp la y the keyboa r d :
Touch after entering a website address to open the website.
Note: Th e Android keyboard has fe w options for settings such as:
keyboard language, num be rs and icons etc.
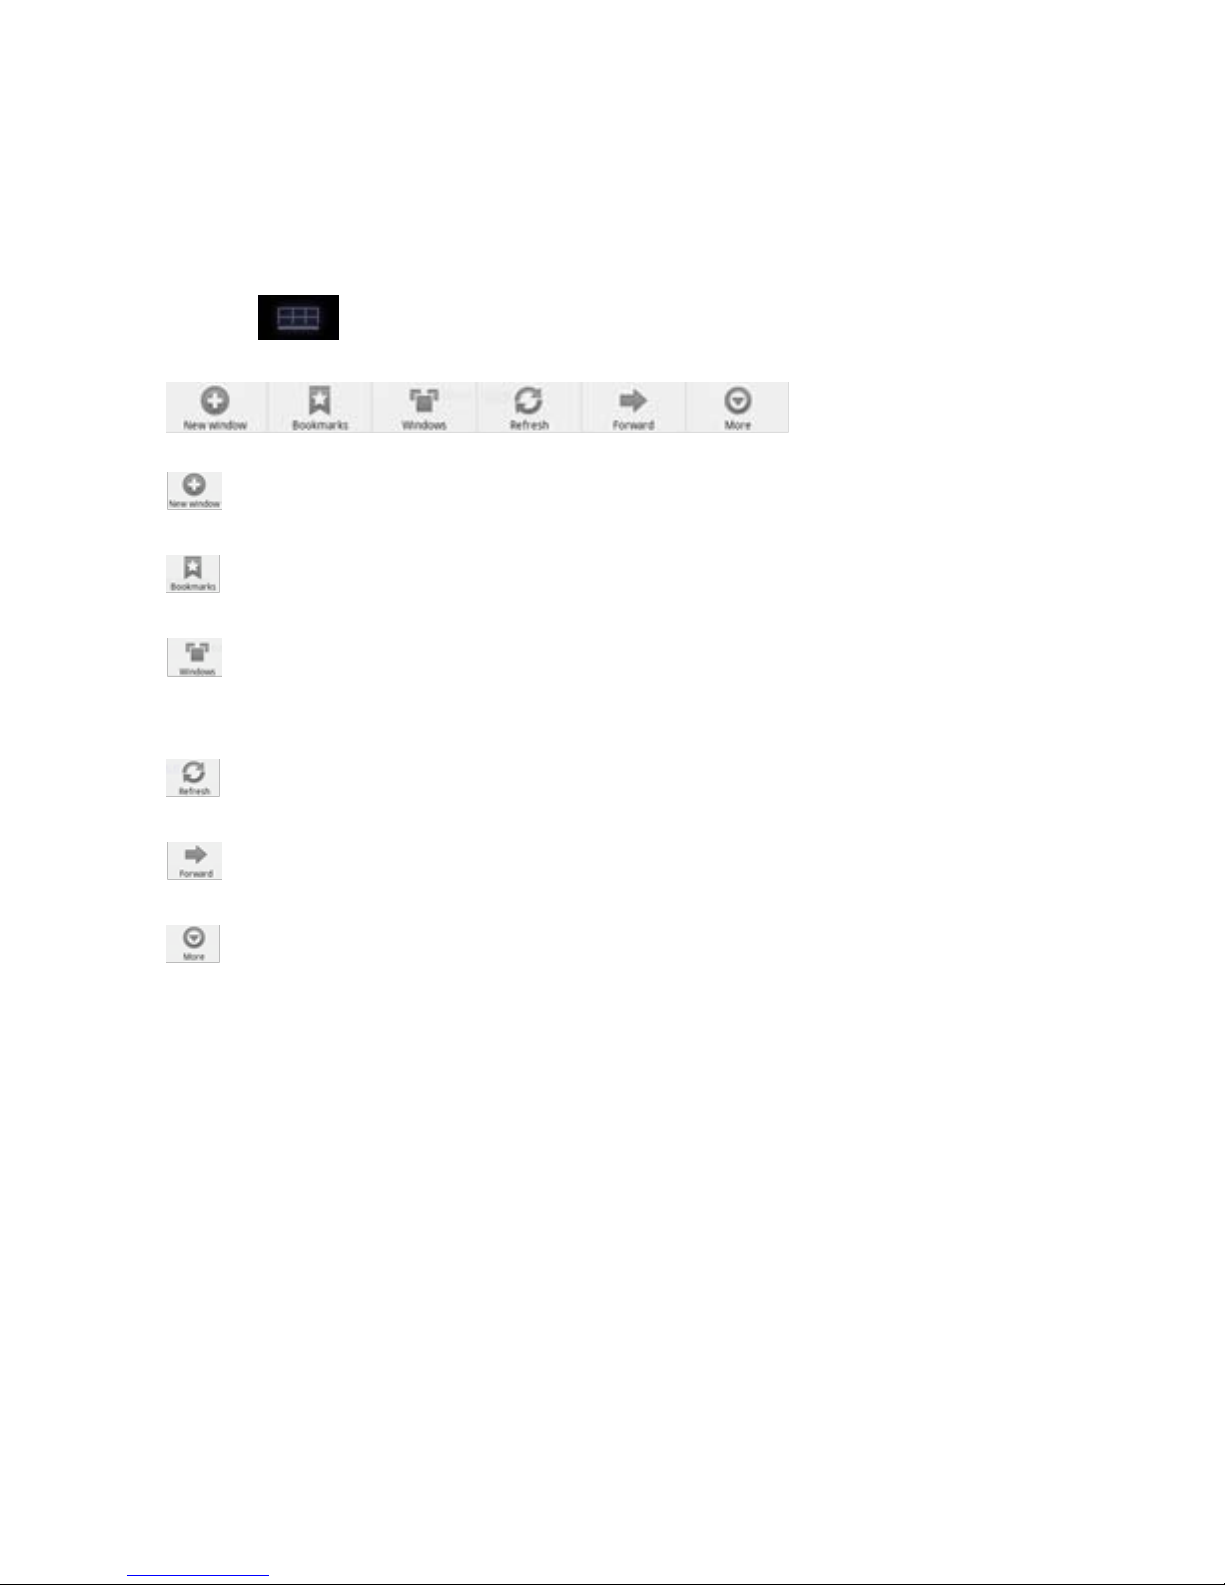
The Internet browse r c a n open four w ebsites sim ul taneou sly;
Touch an d the menu will be displayed as follows:
Touch ‘New Window’ and a new website will be displayed.
Page 15
13
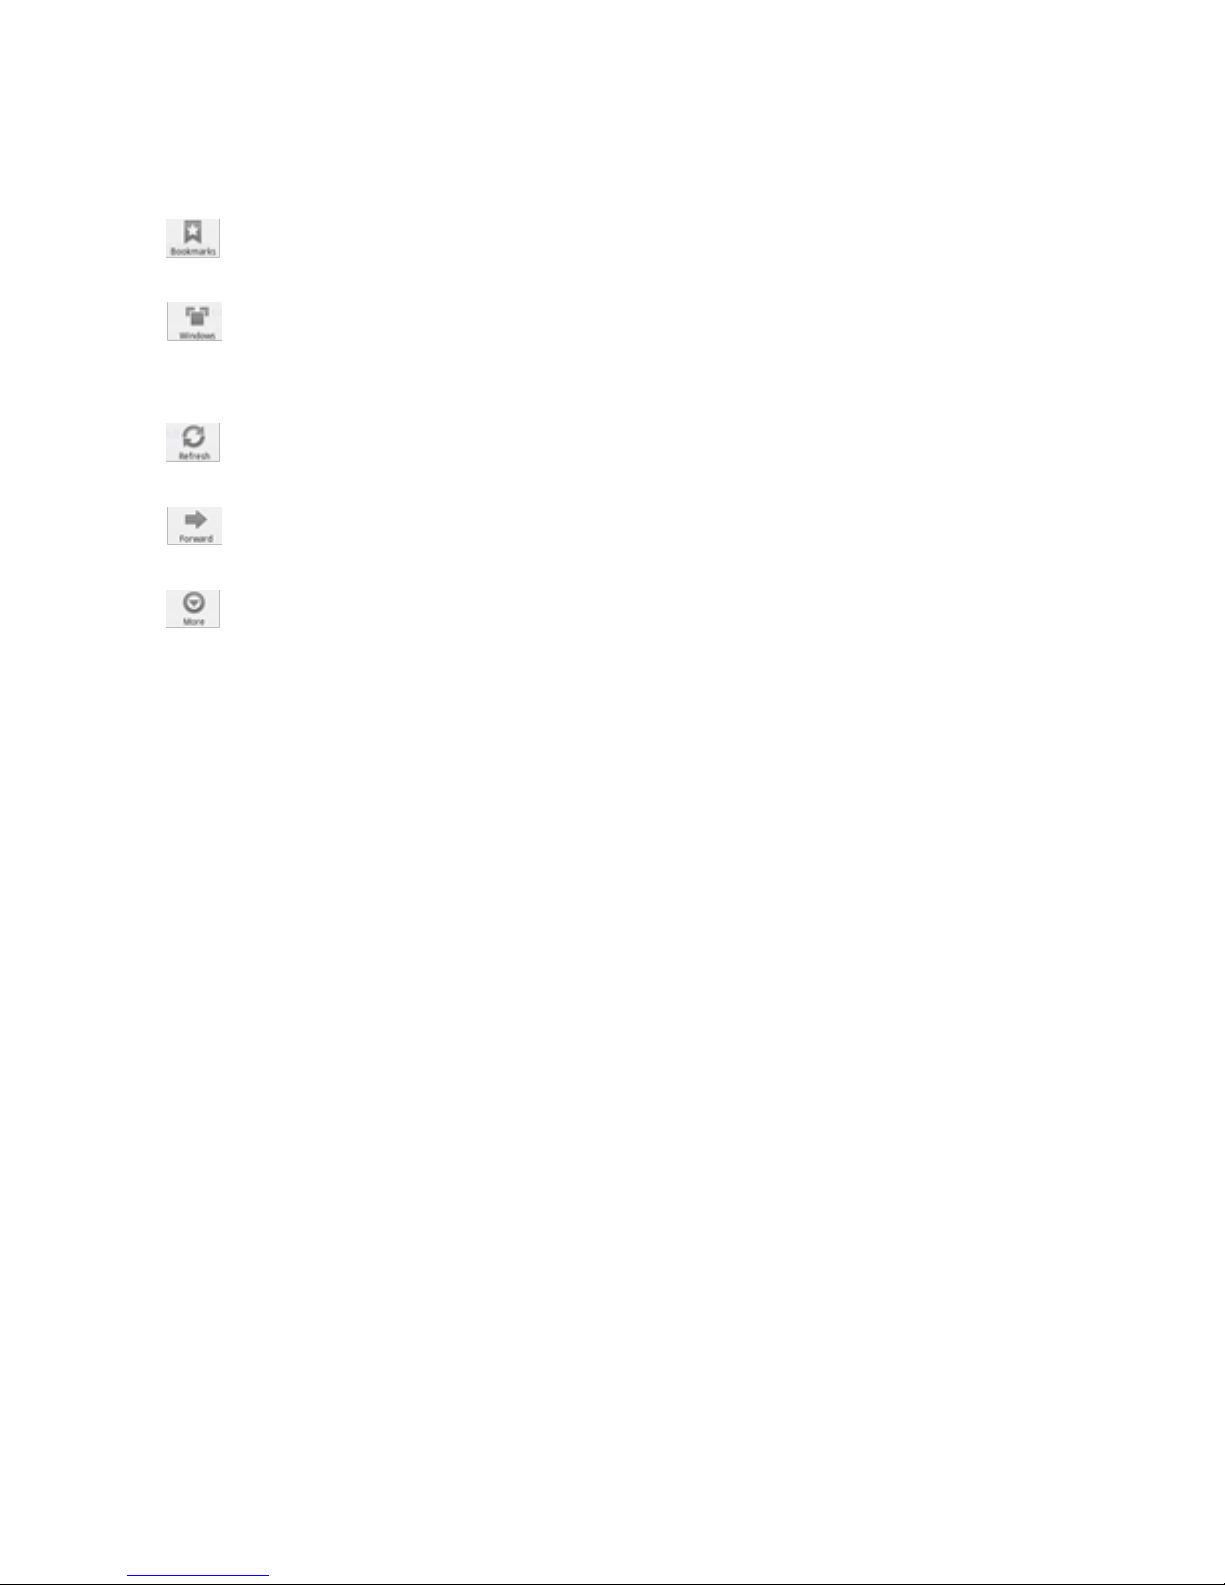
‘Most visited’ and ‘History’ can be found under ‘Bookmarks ’.
Click to navigate between two open windows.
Four differe nt window s are poss ible simultane ou sly.
Touch ‘Refresh’ to refresh the current web page.
A step forwa rd , opp os ite of Ba c k Icon.
’Add bookmarks’, ‘Search on the page’, ‘Select text’ ‘Page
inform a tion’, ‘Page info’, ‘Forward li n k’ ‘Download s’, ‘Setti ngs’.
Page 16

14
Technical Data
TAB10-06 10’’ / 24.7cm Tablet-PC
CPU Rockchip 2918 1.2 GHz
Operating System Android 2.3 – Gingerbread
RAM 1GB DDR3
Internal Memory 4GB NAND Flash
Memory Expansion Micro SD/SDHC up to 32GB
Display 4:3 Capacitive 10-point Multi-Touch-Display
Resolution 1024 x 768 Pixel
G-SENSOR MMA8452Q
Camera Front 2.0MP,Back 2.0MP
Battery 4000 mA/H 7.4V
rechargeable Li-ion Battery
MIC Yes
Internet & Skype Phone-Function
WIFI 802.11b/g/n (high sensitivity)
I/O po
rts 1x DC In, 1x headphone, 1x TF Card-Slot,
2x USB 2.0, 1 host, 1 OTG
Video-Formats H.264, VP8, RV, WMV, AVS, H.263, MPEG4 etc 1080P,
YouTube, 720P, HTML5, Flash 10.3
Office Word / Excel / PDF / PPT, Microsoft Wordpad,
Microsoft SpreadExcel
The software is not on the device and
must be downloaded by the user.
Images JPG, BMP, PNG etc.
Page 17

15
CUSTOMER SUPPORT
You can contact the Ricatech customer service when you have a
question or a probl e m with your Ricatech product. You can contact
us by telephone and email.
Email
For customer support by email, please sent a email to
support@ricatech.com Please make sure that you mention the model
number and serial number of the product, mention your name &
address an d descri b e your questi on or problem clea rl y.
Telephone
For customer support by telephone, please dial +32 3 3265694. One
of our service staff will be ready to s erve you.
For full procedure pl ease visit the website of Ricatech at:
www.ricatech.com
Hereby, Ricatech B.V. declares that this Android Tablet PC is in
compliance with the essential requirements and other relevant
provisions of Directive 1999/5/EC.
Page 18
Gebruikershandleiding
Gefeliciteerd met uw a anschaf van de TAB10-06
Wij danken u voor uw vertrouwen en uw beslissing ons product te kopen!
Omdat we continu onze pad updaten en verbeteren, kunnen er soms kleine
verschillen z ijn tussen de gedrukte handleiding en uw pad. Als u wilt, kunt u de
laatste versie van de handleiding en firmware-updates van o nze website downloaden .
Page 19

1
Inhoudsopgave
Veiligheidsinstructies 2
Apparaatoverzicht 3
Beschrijving van de knoppen 4
Taalinstellingen 4
Energiebeheer en batterijen opladen 5
Schermvergrendeling 5
V erbinden met de computer en gegevensoverdracht5
Functies van de kno p p en op de gebruikersinterface 6
Programmamenu 7
Systeeminstellingen 9
1. Draadloos & Netwerken 9
2. Geluidsinstellingen 10
3. Weergave-instellingen 10
4. Locatie & veiligheid 10
5. Toepassing 10
6. Accountssynchr. 10
7. Gegevensbescherming 11
8. Geheugen 11
9. Taal & toetsenbord 11
10. Datum & tijd 11
11. Telefooninfo 11
Internet 12
Open source code & GNU General Public License 12
Technische gegevens 14
Page 20

2
Deze gebruikershandl eiding bevat belangrijke gebruikershandlei ding
en informatie voor een juist gebruik van het apparaat. Volg de
instructies in deze handleiding nauwkeurig.
A Houd het apparaat weg van hete, vochtige en stoffige plaatsen.
B Laat het apparaat vooral niet ’s zomers in een gesloten auto
achter.
C Voorkom schokken en laat het apparaat niet vallen, omdat dit
schade aan het apparaat kan veroorzaken.
D De stand-by ti jd van de batterijen kan wisselend zijn door
omgevingsinvloeden.
E Wij zijn niet verantwoordelijk voor gegevensverliezen,
veroorzaak t door schade aan het p roduct, reparatie s of door andere
oorzaken.
F Open de behuizin g van het apparaat niet. Hierdoor komt de
gara ntie te ver vallen.
G Gebruik geen alcohol, thinner of wasbenzine om het beeldscherm
te reinig en – gebruik alleen een droge doek.
Page 21
3
Apparaatoverzicht
1. Menuknop 7. USB-aansluiting
2. Knop volume+ 8. OTG-aansluiting: USB van uw
externe harde schijf
3. Knop volume- 9. Stroom in
4. Homeknop 10. Luidsprekers
5. MicroSD/SDHC-kaartsleuf 11. Koptelefoon
6. Microfoon 12. Powerknop
Page 22
4
Beschrijving van de knoppen
Volumeknoppen:
Hiermee kunt u het volume verho gen of verla gen.
Powerknop:
Druk twee seconden op de knop om het apparaat aan of uit te
schakelen. Druk kort op de knop om de stand-bym odus te activere n
of beëindigen. Reset: Druk zeven seconden op de knop om het
apparaat opnieuw te starten.
Esc-knop:
Gaat terug naar het vorige menu
Menuknop:
Opent het contextmenu
Homeknop:
Gaat terug naar de gebruikersinterface
Taalinstellingen
TAB10-06 wordt geleverd met Engels als standaardtaal.
Doe het volgende om de taalinstelling te veranderen:
- D ruk op het programmamenusymbool aan de rechter kant
van het scherm.
- Kies ‘Settings’ .
- Scroll naar het einde van de lijst.
- Kies ‘Language & keyboard’.
- Kies ‘Select language’.
- Type uw gewenste taal.
- D ruk op de ‘Home’-knop om terug te keren naar het beginscherm.
Page 23
5
Energiebeheer en batterijen opladen
Het batterijlaadsymbool op de statusbalk geeft de laadstatus van
de batterij aan.
Als de spanning wegvalt, sluit het apparaat zichzelf automatisch
af. Gebruik, als er minder spannin g w ordt weergegeve n , de adapte r
of een computer via USB om het apparaat op te laden.
De laadtijd voor de batterij is ongeveer vier uur.
Schermvergrendeling
Als het apparaat gedurende een bepaalde ti jd nie t gebrui kt w ordt of
de ‘Power’-knop kort wordt ingedrukt, schakelt het scherm uit en
wordt de sc hermvergrend eling gea cti veerd.
Door op kort op de ‘Power’-kn op te drukken, wordt het sche rm
gereactiveerd. Druk, om het scherm te vergrendelen, op de ‘Lock’knop in de aangegeven richting.
Verbinden met de computer en gegevensoverdracht
EasyPad is uitgerust met een High-Speed USB2.0-aansluiting.
Nadat u het apparaat heet aangesloten op een computer, verschijnt
in de statusbalk .
Tre k de statusbalk omlaag en druk op ‘USB-verbinding’ om het USB-
geheugen te activeren. Tijdens het gebruik van het apparaat voor
gegevens ove rdrach t, kunt u de Mi c roSD/SDHC-kaart niet vanaf
EasyPad benaderen.
Page 24
6
Functies van de knoppen op de gebruikersinterface:
Homeknop:
Gaat terug naar het beginscherm.
Menuknop:
Opent het contextmenu.
/ Volumeknoppen:
Verhoogt of verlaagt het volume.
Terugknop:
Gaat terug naar het vorige menu / de vorige pagina.
Programmamenuknop:
Geeft de programma’s en applicaties weer.
Knop wijzig venster:
Het apparaat heeft vijf bureaubladen. U kunt op deze knop drukken
of met uw vinger op het touch-screen opzij duwen, om te navigeren
tussen verschillende bureaubladen.
WiFi-/WLAN-signaalpictogram
Systeeminstructies:
Trek de statusbalk omlaag om berichten te bekijken over nieuwe emails, gedownl oade documen ten, USB -verbindingstatus of andere
informatie.
Page 25
7
Programmamenu
ApkInstaller:
Programma voor h et installeren en de-i nstall eren van apps die niet
via de Android Market zijn gedownload.
Market:
Laad apps (programma’s) via de Android Market. U kunt apps,
games en andere applicaties downloaden en installeren. Vele zijn
gratis.
Explorer:
Open de Ex plorer om Mi c roSD-TF-kaarten, USB-sticks en andere
opslagmedia te benaderen. De Explorer is een praktische beheerder
voor documenten en alle gegevenssoorten.
Internetbrowser
Voorzijde & achterzijde 2.0MP camera
E-mail:
Programma voor h et ontvangen, verwerken en verwerken van e-mail.
G-mail:
Programma het voor ontvangen, verwerken en verwerken van e-mail
via een Google-account.
Google Talk:
Programma om t e c hatten met and e re Google-gebruikers.
Google Maps:
Programma voor h et weergeven van kaarten of s atellietbeelden –
Routeplanner.
YouTube:
Programma om YouTube-video’s te bekijken.
Skype:
Page 26

8
Programma om te chatten met andere Skype-gebruikers of om
telefoongesprek ke n te vo eren via internet.
Twitter:
Applicatie om te microbl ogge n – Geef t publieke dagboeken we er om
ma ak u w eige n pu blieke dagb oek.
Facebook:
Programma om de s oc iale net w erk-site Facebook te gebruiken.
Calendar:
Agenda’s beheren – kan automati sc h w orde n gesynchronise erd met
een Google-account.
Pocket Calculator
Time:
Tijdsweergave en instellen van alarmfuncties.
Settings:
Wijzigen van de basisinstellingen van EasyPad.
Sound Recorder:
Dicteerapparaatfunctie.
Video Player
Gallery:
Beheer en toon afbeeldingen en video’s – maak ook synchronisatie
met Picasa-webalbums mo g elijk.
Shelves:
Een programma voor het lezen en beheren van e-books.
Krazy Kart Racing: Autoracespel
Angry Birds Rio: Behendigheidsspel
Fruit Ninja: Behendigheidsspel
Page 27

9
Systeeminstellingen
Druk op het pictogram voor de instellingen om het
systeeminstellingenmenu te openen:
1. Draadloos & Netwerken
Raak ‘Draadloos & Netwerken’ aan.
WLAN: Raak = > a an om de WLAN-functie in t e sch akel en.
Het apparaat zoekt automatisch naar beschikbare WLAN-netwerken.
WLAN-instellingen: Kies hier uw netwerk.
Indien nodig, wordt u gevraagd uw WLAN-wachtw oord in te voeren :
Geavanceerde WLAN / WiFi-instellingen:
Raak in het menu vo or WLAN / WiFi-instellingen aan. Het men u
voor geavanceerde instellingen zal automatisch openen. In het menu
voor de geavanceerd instellingen kunt u de huidige status, het IPadres en andere apparaatgegevens zien.
Page 28

10
2. Geluidsinstellingen
De ‘Geluid’-instellingen bevatten volumebesturing, en keuzes voor
berichtgeluiden, s ystee mg e luiden en signaaltonen vo o r
MicroSD/SDHC-kaarte n en USB-signaaltonen.
3. Weergave-instellingen
Bevat helderheid, automatische schermrotatie (G-sensor), animaties
en scher mtime -outtijd. Schakel het beeldscherm uit na:15
seconden, 30 seconden, 1 minuut, 2 minuten, 10 minuten of 30
minuten zijn beschikbaar. Als u bijvoorbeeld 30 seconden selecteert,
zal het beeldscherm worden uitgeschakeld na 30 seconden zonder
activiteit en wordt de schermvergrendeling geactiveerd. Druk op de
‘Power’-knop om het beeldscherm te reactiveren. Druk de Lock’knop omhoog om de schermvergrendeling op te heffen.
4. Locatie & veiligheid
Hier kunt u de automatische locatieherkenning activeren. U kunt ook
veiligheids wachtwoorden instellen die ongeoorloofde toegang tot uw
EasyPad voorkomen.
5. Toepassing
Hier kunt u uw apps beheren en bepalen of a pps van andere
bronnen dan de Android Market kunnen worden geïnstalleerd.
6. Accountssynchr.
Algemene synchronisatie-instellingen:
1. Achtergrondgegev ens
2. Automatische synchronisatie
Accountbeheer: Beheer van gebruikersaccounts
Page 29

11
7. Gegevensbescherming
Beveilig mijn gegevens: Hier kunt u bepalen of diverse instellingen
op Googl e -servers moet e n word e n opgeslagen.
Druk op ‘Terug naar standaard’ om het apparaat te herstellen naar
fabrieksinstellingen.
Alle instellingen, zelf geïnstalleerde apps en op het interne geheugen
opgeslagen gegeven s kunnen w orden gewist .
8. Geheugen
Hier wordt het huidige geheugengebruik weergegeven.
Druk op ‘Verwijde r SD-kaart’ om de Mi c ro SD/SDHC-kaart tijdens
gebruik te verwijderen.
9. Taal en toetsenbord
Stel de systeemtaal en invoermethode in.
10. Datum en tijd
Als uw netwerk het automatisch instellen van tijd niet ondersteunt,
kunt u de tijd, tijdzone en da tum handmat ig instellen na het
deactiveren van de automatische instellingen.
11. Telefooninfo
Hier kunt u interne apparaatwaarden zien, zoals
besturingssysteemversie, batterijstatus, signaalsterke van het
mobiele netwerk, etc.
Page 30
12
Hoofdfuncties
Internet
Druk op he t -pictogram om op het net te surfen.
Google is standaard de startpagina.
Druk op he t invoe rveld om het toe t s enbord weer t e g ev en:
Druk op na het invoeren van een webadres om de webpagina
te openen.
Opmerking: Het Android-toetsenbord heeft e e n paa r op ties voor
instellingen zoals: toetsenbordtaal, nummers en pictogrammen etc.
De internetbrowser kan tot vier websites gelijktijdig openen;
Druk op om het volgende menu weer te geven:
Druk op ‘Nieuw venster’ om een nie uwe w ebsite te tonen.
Page 31
13
‘Meest bezocht’ en ‘Geschiedenis’ kunnen worden gevonden
onder ‘Favorieten’.
Klik om te navigeren tussen twee open vensters.
Vier verschillende vensters zijn gelijktijdig mogelijk.
Druk op ‘Ververs’ om de huidige webpagina te ververs en.
Één stap vooruit, tegengestelde van het terugpictogram.
‘Favorieten toevoege n ’, ‘Zoeken op de pagina’, ‘Selecteer tekst’
‘Pagina-informatie’, ‘Pagina-info’, ‘Link doorsturen’ ‘Downloads’,
‘Instellingen’.
Page 32

14
Technische gegevens
TAB10-06 10’’ / 24,7cm Tablet-PC
CPU Rockchip 2918 1,2 GHz
Besturingssysteem Android 2.3 – Gingerbread
RAM 1 GB DDR3
Intern geheugen 4 GB NAND Flash
Geheugenuitbreiding MicroSD/SDHC tot en met 32GB
Weergave 4:3 Capacitief 10-point Multi-Touch-Display
Resolutie 1024 x 768 pixels
G-SENSOR MMA8452Q
Camera Voor 2,0 MP,Achter 2,0 MP
Batterij
7.4V 4000 mA/H oplaadbare Li-ion batterij
Mic Ja
Internet & Skype telefoonfun
ctie
WiFi 802.11b/g/n (hoge gevoeligheid)
I/O-poorten 1x Stroom in, 1x koptelefoon, 1x TF-kaartsleuf,
2x USB 2.0, 1 host, 1 OTG
Videoformaten H.264, VP8, RV, WMV, AVS, H.263, MPEG4 etc 1080P,
YouTube, 720P, HTML5, Flash 10.3
Office Word / Excel / PDF / PPT, Microsoft Wordpad,
Microsoft SpreadExcel
De software is niet op het apparaat enmoet worden
gedownload door de gebruiker.
Afbeeldingen JPG, BMP, PNG, etc.
Page 33

15
KLANTENONDERSTEUNING
U kunt contact opnemen met Ricatech klantenservice als u een
vraag of een probleem heeft met uw Ricatech product. U kunt
contact met ons opnemen per telefoon en e-mail.
E-mail
Voor klantenonde rs teunin g per e-mail, gelieve een e-mail te sturen
naar supp ort@ric a t ech.com. Zorg ervoor dat u he t m odelnu mmer e n
het serienu mmer van het pro d uc t ver meldt, onder vermelding v a n
uw naam & adres en een duidelijke omschrijving v an uw vraag of
probleem.
Telefoon
Voor telefoni s che kl a nt e nonderst eu ni ng belt u naa r
+32 3 3265694. Een van onze servicemedewerkers zal u dan te
woord staan . Voor de volle dige proced ure kunt u tere c ht op de
website van Ricatech: www.ricatech.com
Hereby, Ricatech B.V. declares that this Android Tablet PC is in
compliance with the essential requirements and other relevant
provi sions of Direc ti ve 1999/5/E C .
Page 34

Mode d’emploi
Félicitations pour votre achat de la tablette TAB10-06
Nous vous remercions pour votre confiance et votre décision d’acheter notre produit !
Notre tablette est constamment améliorée et mise à jour, aussi se peut-il qu’il y ait de
légères différences entre le présent document et votre tablette dans certains cas. Il
vous est possible de t élécharger la version actuelle du manuel ainsi que les mises à
jour de micrologiciels à partir de notre site Web.
Page 35

1
Table des matières
Instructions de sécurité 2
Aperçu de l’appareil 3
Description des boutons 4
Paramètres de langue 4
Suivi de la consommation d’énergie et recharge des batteries 5
V errouillage de l’écran 5
Connexion à un ordinateur et transfert de données 5
Fonctions des boutons de l’interface utilisateur 6
Menu de programme 7
Paramètres système 9
1. Sans-fil & Réseaux 9
2. Paramètres de son 10
3. Paramètres d’affichage 10
4. Localisation & S écurité 10
5. Application 11
6. Comptes & Synchronisation 11
7. Protection des données 11
8. Mémoire 11
9. Langue & Clavier 11
10. Date & Heure 12
11. Informations sur le téléphone 12
Internet 12
Code Open Source & Licence publique générale GNU 12
Caractéristiques techniques 14
Page 36

2
Ce mode d’emploi comporte des instructions de sécurité importantes
et des informations sur l’utilisation correcte de l’appareil. Veuillez
observe r atte ntivement les ins tr uc t ions contenues dans le présent
manuel.
A Veuillez garder l’appareil à l’écart de la chaleur, de l’humidité et
de la poussière.
B Évitez en particulier de laisser l’appareil dans une voiture en été
si les portes sont fermées.
C É vitez les chocs et ne laissez pas tomber l’appareil car cela risque
de l’endommager.
D La durée de vie des batteries en veille peut varier en fonction des
influences extérieures.
E Nous ne sommes pas responsables des pertes de données
causées par des dommages ou des réparations du produit, ou par
toute aut re raison.
F N’ouvrez pas la coque de l’appareil. Cela aurait pour effet
d’annuler la garantie.
G N’utilisez pas d’alcool, de diluants ou de pétrole pour nettoyer
l’affichage. Utilisez exclusivement un chiffon sec.
Page 37

3
Aperçu de l’appareil
1. Bouton Menu 7. Port USB
2. Bouton de Volume + 8. Port OTG : USB à partir de
votre disque dur externe
3. Bouton de Volume - 9. Alimentation CC
4. Bouton Accueil 10. Haut-parleurs
5. Fente Carte Micro SD/SDHC 11. Écouteurs
6. Micro 12. Bouton de marche/arrêt
Page 38

4
Description des boutons
Boutons de volume :
Permettent d’augmenter ou de réduire le volume.
Bouton de marche/arrêt :
Maintenez ce bouton enfoncé pendant deux secondes pour allumer
ou éteindre l’appareil. Appuyez brièvement sur ce bouton pour
activer ou désactiver le mode de veille. Réinitialisation : Maintenez
ce bouton e nfonc é penda nt sept sec onde s pour re dém arrer l ’appa reil.
Bouton E S C :
Pour retourner au menu précédent
Bouton Menu :
Pour ouvrir l e menu contex tu el
Bouton Accueil :
Pour ret ourner à l ’in t erface utilisateu r
Paramètres de langue
La langue par défaut du modèle TAB10-06 à la livraison est l’anglais.
Pour changer les paramètres de langue, veuillez procéder comme
suit :
- Appuyez sur le symbole du menu de programme sur le
côté droit de l’éc ran.
- Sélectionnez ‘Paramètres’ .
- Faites défiler la liste jusqu’ à la fin.
- Sélectionnez ‘Langue & Clavier’.
- Sélectionnez ‘Sélectionner langue’.
- Entrez la langue souha itée.
- Appuyez sur le bouton ‘Accueil’ pour revenir à l’écran d’accueil.
Page 39

5
Suivi de la consommation d’énergie et recharge des batteries
Le symbole de charge de batterie affiché dans la barre d’état
indique l’état de charge des batteries.
Si le niveau d’énergie baisse, l’appareil s’ étein t aut om atiquement.
Si vous voyez que le niveau d’énergie est bas, rechargez l’appareil
au moyen d’un adaptateur d’alimentation ou via USB au moyen d’un
ordinateur.
Le temps de charge de la batterie est d’environ quatre heures.
Verrouillage de l’écran
Si l’appareil n’est pas utilisé pendant un certain temps ou que vous
appuyez brièvement sur le bouton ‘Marche/Arrêt’, l’écran s’éteint et
l’affichage est verrouillé.
En appuyant brièvement sur le bouton ‘Marche/Arrêt’, vous pouvez
réactiver l’écran. Pour verrouiller l’écran, appu yez sur le bout on
‘Verrouillage’ dans la direction indiquée.
Connexion à un ordinateur et transfert de données
L’EasyPad dispose d’une interface USB2.0 Haute Vitesse.
Une fois que l’appareil est connecté à un ordinateur, celui-ci apparaît
dans l’affichage d’état .
Tire z la b arre d’état vers le bas et appuyez su r ‘C onnexion USB’ pour
activer la mémoire USB. Lorsque vous utilisez l’appareil pour
transférer des données, vous ne pourrez pas accéder à la Carte
Micro SD/TF à partir de l’EasyPad !
Page 40

6
Fonctions des boutons de l’interface utilisateur :
Bouton Ac cueil :
Pour retourner à l’écran de dé marrage.
Bouton Menu :
Pour ouvrir l e menu contex tu el.
/ Boutons de vo lume :
Pour augment e r ou rédui re l e volu me .
Bouton Retour :
Pour retourner au menu précédent / à la page précédente.
Bouton Menu de programme :
Pour afficher les programmes et applications.
Bouton de com mutati on de fe n êt re :
L’appareil possède cinq Bureaux. Vous pouvez appuyez sur ce
bouton ou faire glisser votre doigt latéralement sur l’écran tactile
pour commuter entre les différents Bureaux.
Icône de signal WIFI / réseau local sans fil
Instructions système :
Tirez la barre d’état vers le bas pour visualiser les messages
informatifs sur les nouveaux emails, les documents téléchargés, le
statu t de connexion U S B ou d’autres i nforma tion s .
Page 41

7
Menu de programme
ApkInstaller :
Programme permettant d’installer et de désinstaller des applications
qui n’ont pas été télécha rgée s à partir d’Android Market.
Market :
Permet de télécharger des Apps (programmes) à partir d’Android
Market. Vous pouvez télécharger et installer des Apps, des jeux et
d’autres applications. Beaucoup d’applications sont gratuites.
Explorateur :
Ouvrez l ’Explorate u r p our accéde r aux Cartes Mi cro SD TF, aux
dispositifs USB ainsi qu’aux autres éléments de stockage.
L’Explorateur est un outil de gestion pratique pour les documents et
tous types de données.
Navigateur Internet
Appareil photo Avant& arrière 2,0 MP
Email :
Programme permettant de relever, traiter et envoyer des emails.
Gmail :
Programme permettant de relever, traiter et envoyer des emails sur
un comp t e G oogle.
Google Talk :
Programme permettant de chatter avec d’autres utilisateurs Google.
Google Maps :
Programme perme tt an t d’affi cher des cartes ou des images satellites
– Planificateur d’itinéraire.
YouTube :
Programme permettant de visionner des vidéos YouTube.
Page 42

8
Skype :
Programme permettant de chatter avec d’autres utilisateurs Skype
ou de passer des appels téléphoniques sur Internet.
Twitter :
Application de microblogage – Vous facilite l’affichage des messages
ou vous perm et de créer vot re p ropre compte.
Facebook :
Programme d’utili sa tion du site de ré s e au s ocial Facebook.
Calendrier :
Gestion d’emploi du temps – peut être auto matiquement
synch ronisé avec un comp t e Google.
Calculatrice
Time (Heure) :
Fonctions d’affichage de l’heure et de réglage d’alarme.
Setings (Paramètres) :
Modification de s paramètres de base de l’EasyPad.
Sound Recorder (Enregistreur) :
Fonction de Dictaphone.
Video Player (Lecteur vidéo)
Galerie :
Gestion et affichage d’images et de vidéos - permet aussi la
synchronisation avec des albums Web Picasa.
Sh elv es (Bibliothèque) :
Programme de lecture et de gestion de livres électroniques « ebooks ».
Krazy Kart Rac ing : Jeu de course de voiture s
Page 43

9
Angry Bi rd s Rio : Jeu d’adresse
Fruit Ninja : Jeu d’adresse
Paramètres système
Touche z l’icône des paramètres pour ouvrir le menu de
paramètres système :
1. Sans-fil & Réseaux
Touchez ‘Sans-fil & Réseaux’.
Réseau local sans-fil : Touchez => pour activer la
fonction de réseau local sans fil.
L’appareil se met automatiquement à rechercher les réseaux locaux
sans fil disponibles.
Paramètres de réseau local sans fil : Sélectionnez votre réseau ici.
Si nécessaire, vous devrez entrer votre mot de passe de réseau local
sans fil :
Page 44

10
Paramètres de réseau local sans fil / Wifi avancés :
Touchez dans le menu des paramètres réseau local sans fil / Wifi,
le menu des paramètres avancés s’ouvrira automatiquement. Vous
pouvez visualiser le statut actuel, l’adresse IP ainsi que d’autres
informations sur l’appareil dans le menu des paramètres avancés.
2. Paramètres de son
Les paramètres de ‘Son’ comprennent le contrôle du volume, ainsi
que la sélection de tonalités de notification, de système, et des
tonalités de signal pou r les Ca rtes Micro SD/TF et l es disp osi t ifs U SB.
3. Paramètres d’affichage
Concernent la luminosité, la rotat ion aut o ma t ique de l’éc ran
(détecteur de gravité = G-sensor) , les anima tions et la
temporisation d’affichage. Extinction de l’affichage après :15
secondes, 30 secondes, 1 minute, 2 minutes, 10 minutes ou 30
minutes (au choix). Par exemple, si vous sélectionnez 30 secondes,
l’affichage s’éteindra après 30 secondes d’inactivité, et l’écran sera
verrouillé . Appu ye z s ur le bouton ‘Marche/Arrêt’ pour réactiver
l’affichage . Poussez le bouton ‘Verrouill age’ vers le haut p ou r
déverrouiller l’écran.
4. Localisation & Sécurité
Vous pouvez activer ici la reconnaissance automatique de position.
Page 45

11
Vous pouvez également définir des mots de passe de sécurité, qui
empêcheront l’accès non autorisé à votre EasyPad.
5. Application
Vous pouvez gérer ici vos applications, et définir si des applications
de source s a utres qu’Androi d Mark et p euvent être in s t allées.
6. Comptes & Synchronisation
Paramètres généraux de synchronisation :
1. Données d’arri ère-plan
2. Synchronisation automatique
Gesti on de compte s : Gesti on de comptes utilisateurs
7. Protection des données
Sécuriser mes données : Vous pouvez ici définir si différents
paramètres doivent être stockés sur les serveurs Google.
Touchez ‘Retour a ux réglages pa r d éfa ut’ pour réinitiali s er l’appareil
selon les réglages d’usine.
Tous le s paramètres, les applications que vous avez installées ainsi
que les données stockées dans la mémoire interne peuvent être
supprimés.
8. Mémoire
Indique l’utilisation de mémoire actuelle.
Touchez ‘Retirer Carte SD’ pour retirer la Carte Mic ro SD/TF pendant
l’utilisation.
9. Langue et clavier
Définition de la langue du système et de la méthode de saisie au
clavier.
Page 46

12
10. Date et heure
Si votre rése a u ne supporte p as la synchronisation horaire
automatique, vous pour r ez rég ler manu ellem ent l’heure, le fuseau
horaire et la date après avoir désactivé les paramètres automatiques.
11. Informations sur le téléphone
Vous pouvez visualiser ici les valeurs internes de l’appareil, telles
que la version du système d’exploitation, l’état de la batterie,
l’intensité du signal du réseau mobile, etc.
Fonctions principales
Internet
Touchez l’icône pour surfe r sur Internet.
La page de démarrage par défaut est Google.
Touche z le champ de saisie pour afficher le clavier :
Touchez après avoir saisi l’adress e d ’un site pour ouvrir ce site
Web.
Page 47

13
Remarque : Le clavi e r A ndroid propose quelques options de
paramètres, telles que : lang ue du cl avier, nombres et icônes, etc.
Le navigateur Internet peut ouvrir quatre sites simultanément ;
Touchez et le menu s’affichera comme suit :
Touchez ‘Nouvelle fenêtre’ pour afficher un nouveau site Web.
‘Les plus visités’ et ‘Historique’ se trouvent dans ‘Favo ris’.
Cliquez pour naviguer entre des fenêtres ouvertes.
Quatre fenêtres différentes peuvent être ouvertes simultanément.
Touchez ‘Rafraîchir’ pour rafraîchir la page We b actuelle.
Page suivante, contraire de l’icône Retour.
‘Ajouter f avoris’, ‘Rechercher sur la p ag e’, ‘Sélectionner texte’
‘Informations sur la page’, ‘Info page’, ‘Partager lien’
‘Téléchargements’, ‘Paramètres’.
Page 48

14
Caractéristiques techniques
TAB10-06 10’’ Tablette tactile 24,7 cm
ProcesseurRockchip 2918 1,2 GHz
Système d’exploitation Android 2.3 – Gingerbread
Mémoire vive 1 Go DDR3
Mémoire interne 4 Go NAND Flash
Extension de mémoire Micro SD/SDHC jusqu’à 32 Go
Affichage 4:3 Multi-Touch capacitif 10-points
Résolution 1024 x 768 pixels
Détecteur de gravité MMA8452Q
Appareil photo Avant 2.0MP,Arrière 2,0 MP
Batterie Batterie rechargeable Li-ion
7.4V 4000 mA/H
Micro Oui
Fonction Internet & Téléphone Skype
WIFI 802.11b/g/n (haute sensibilité)
Ports d’entrée / sortie 1x Alimentation CC, 1x écouteurs, 1x Fente Carte TF,
2x USB 2.0, 1 hôte, 1 OTG
Formats vidéo H.264, VP8, RV, WMV, AVS, H.263, MPEG4, etc. 1080P,
YouTube, 720P, HTML5, Flash 10.3
Office Word / Excel / PDF / PPT, Microsoft Wordpad,
Microsoft SpreadExcel
Le logiciel n’est pas sur l’appareil etdoit être tél
échargé
par l’utilisateur.
Images JPG, BMP, PNG, etc.
Page 49

15
SERVICE CONSOMMATEUR
Vous pouvez contacter le service consommateur de Ricatech si vous
avez une qu e sti on ou un probl èm e avec vot re p roduit Ric atech. Vous
pouvez nous contac te r pa r t él é p hone ou par email.
Email
Pour une assistance par email, veuillez nous écrire à l’adresse
support@ricatech.com. Assurez-vous de bien nous communiquer le
numé ro de m odèle et le nu méro d e s é rie du produit, vos nom et
adresse ainsi qu’une description claire de votre problème ou votre
question.
Téléphone
Pour contact er le servi ce c onsommate ur par téléphon e,
composez le +32 3 3265694. Un membre de notre personnel se
tiendra à votre service.
Pour toutes le s p roc é dures, rendez vous sur l e si te web de
Ricatech : www.ricatech.com
Hereby, Ricatech B.V. declares that this Android Tablet PC is in
compliance with the essential requirements and other relevant
provi sions of Direc ti ve 1999/5/E C .
Page 50

0
Benutzerhandbuch
Wir gratulieren zum Kauf des TAB 10 -06
Vielen Dank für Ihr Vertrauen und dafür, dass Sie sich fürunser Produkt entschieden
haben!
Da wir kontinuierlich daran arbeiten,unser Pad zu verbessern und upzudaten, kann es
in Einzelfällen zu kleineren Abweichungen zwischen dem Ihnen vorliegenden
Handbuch und Ihrem Pad kommen. Daher haben Sie die Möglichkeit, eine aktuelle
V ersion des Handbuches sowie Firmware-Aktu alisierung en von unserer Webseite
herunterzuladen.
Page 51

1
Inhaltsverzeichnis
Sicherheitshinweise 2
Geräteübersicht 3
Beschreibung der Tasten 4
Spracheinstellungen 4
Stromüberwachung und Aufladen der Batterien 5
Displaysperre 5
Verbindung zum Computer und Datentransfer 5
Funktionen der Schalter auf der Benutzeroberfläche 6
Programm-Menü 7
Systemeinstellungen 9
1. Drahtlose & Netzwerke 9
2. Soundeinstellungen 10
3. Displayeinstellungen 10
4. Sicherheits- & vorkehrungen 10
5. Anwendung 11
6. Benutzerkonten- & verbindung 11
7. Datenschutz 11
8. Speicher 11
9. Sprache & Tastatur 11
10. Datum & Zeit 12
11. Telefoninformation 12
Internet 12
Offener Quellcode & GNU General Public License 12
Technische Daten 14
Page 52

2
Dieses Benutzerhandbuch enthält wichtige Sicherhei tshinweis e und –
informationen für den richtigen Umgang mit dem Gerät. Bitte
befolgen Sie die Anweisungen in diesem Buch genauestens.
A Bitte halten Sie das Gerät fern von zu hohen Temperaturen,
Feuc htigkeit od er Staub.
B Achten Sie besonders darauf, das Gerät im Sommer nicht im
geschlossenen Fahrzeug liegen zu lassen.
C Vermei den Sie St ö βe und lassen Sie das Gerät nicht fallen, da es
sonst beschädigt werden könnte.
D Die Standby-Zeiten der Batterien sind unterschiedlich, je nach
Einflussfaktoren von auβen.
E Wir übernehmen keine Verantwortung für Datenverlust, der
aufgrund von Beschädigungen am Produkt, Reparaturen oder
anderen Gründen auftritt.
F Öffnen Sie niemals das Gehäuse des Gerätes. Sollten Sie dies tun,
so erlischt Ihr Garantieanspruch.
G Benutzen Sie keinen Alkohol, Verdünnungsmittel oder Benzin, um
das Display zu reinigen – benutzen Sie nur ein trockenes Tuch.
Page 53

3
Geräteübersicht
1. Menütaste 7. USB-Anschluss
2. Lautstärke+ Taste 8. OTG-Anschluss: USB von
Ihrem externen HDD
3. Lautstärke- Taste 9. DC-Eingang
4. Home-Taste 10. Lautsprecher
5. Mikro SD/SDHC-Kartenschlitz 11. Kopfhörer
6. Mikrofon 12. Ein-/Aus-Schalter
Page 54

4
Beschreibung der Tasten
Lautstärkeregler:
Hier kann die Lautstärke reguliert werden.
Ein-/Aus-Schalter:
Halten Sie den Schalter für zwei Sekunden gedrückt, um das Gerät
ein- oder auszuschalten. Drücken Sie den Schalter nur k urz, um den
Standby-Modus zu aktivieren oder zu beenden. Zurückstellen:
Halten Sie die Taste sieben Sekunden lang gedrückt, um das Gerät
neu zu starten.
ESC-Schalter:
Zurück zum vorherigen Menü
Menütaste:
Um das Kontext-Menü zu öffnen
Home-Taste:
Zurück zur vorherige n Be nutzeroberfläche
Spracheinstellungen
TAB10-06 wi rd mit Englisch als Standardsprache geliefert.
Um die Spracheinstellungen zu verändern, bitte gehen Sie vor wie
folgt:
- D rücken Sie d as Symbol fü r P rogramm-Menü auf der
rechten Seite des Bildschirms.
- Wählen Sie Einstellungen .
- Scrollen Sie bis zum Ende der Liste.
- Wählen Sie eine Sprach & tastatur.
- Wählen Sie Sprachauswahl.
- Geben Sie die gewünschte Sprache ein.
- D rücken Sie die Home-Taste, um zur Startansicht zurückzukehren.
Page 55

5
Stromüber wachung und Aufladen der Batte rien
Das Batterieaufladesymbol in der Statusleiste zeigt den aktuellen
Aufladestatus d er B at te rie an.
Wenn kein Strom mehr vorhanden ist, so schaltet das Gerät von
allein ab. Falls der Ladestatus wenig Strom anzeigt, so laden Sie das
Gerät mit einem Adapter oder an einem Computer anhand eines
USB-Kabels wied er auf.
Die Aufladezeit der Batterie beträgt ungefähr vier Stunden.
Displaysperre
Sollte das Gerät für eine bestimmte Zeit nicht benutzt werden oder
sollte der Ein-/Aus-Sch alt er durch ku rzes Drücken betätigt we rd en ,
so schaltet das Display automatisch ab und die Displaysperre wird
aktiv.
Durch kurzes Betätigen des Ein-Aus-Schalte rs wird der Bildschirm
wieder aktiviert. Um den Bildschirm zu sperren, drücken Sie die
V er r iegelungstaste in entspre chender Ric htung .
Verbindung zum Computer und Datentransfer
EasyPad ist ausgestattet mit einem High-Speed USB2.0 Inter face.
Nach dem Verbinden des Gerätes zu einem Computer erscheint
dieses in der Statusanzeige .
Ziehen Sie die Statusleiste runter und gehen Sie auf USB-
Verbindungen, um den USB-Speicher zu aktivieren. Während Sie das
Gerät zum Datentransfer benutzen, ist die Mikro-SD/TF-Karte vom
EasyPad aus nicht zugänglich!
Page 56

6
Funktionen der Schalter auf der Benutzeroberfläche:
Home-Taste:
Zurück zur Startanzeige.
Menü-Taste:
Um das Kontext-Menü zu öffnen.
/ Lautstärkeregler:
Lau ter u nd leiser stel len.
Zurück-Taste:
Zurück zum vorheri gen M enü / z u r vorherigen Seite.
Taste Programm-Menü:
Anzeigen der Programme und Anwendungen.
Taste „Fenster Ändern":
Das Gerät verfügt über fünf Desktops. Drücken Sie diese Taste oder
wählen Sie diese mit dem Finger an der Seite Touchscreens an, um
zwischen den verschiedenen Desktops auszuwählen.
Symbol für WIFI / WLAN-Signal
Systemanweisungen:
Ziehen Sie die Statusleiste nach unten, um neue Emails,
heruntergeladene Dokumente, den USB-Verbindungstatus oder
weitere Informationen angezeigt zu bekommen.
Page 57
7
Programm-Menü
Apk-Installierer:
Programm zum Installieren und Deinstallieren von Anwendungen,
die nicht bei Android Market herunte rgeladen wurden.
Markt:
Anwendung en ( Programme) von Android Market herunterladen. Sie
können Anwendungen, Spiele und weiteres Zubehör herunterladen
und installier en. Viele sind kostenfrei.
Explorer:
Öffnen Sie den Explorer, um Zugang zu den Mikro-SD/TF-Karten,
USB-Sticks und weiteren Speichermedien zu erhalten . De r Explore r
erweist sich als praktischer Verwalter von Dokumenten und anderen
Datentypen.
Internetbrowser
Vorderseite& Rückseite 2.0MP-Kamera
Email:
Programm zum Empfangen, Bearbeiten und Versenden von Emails.
G-mail:
Programm zum Empfangen, Bearbeiten und Versenden von Emails
mit einem Google-Benutzerkonto.
Google Talk:
Programm zum Chatten mit anderen Google-Benutzern.
Google Maps:
Programm zum Anzeigen von Landkarten oder Satellitenbildern –
Routenplaner.
Page 58
8
YouTube:
Programm zum Anschauen von YouTube-Videos.
Skype:
Programm zum Chatten mit anderen Skype-Benutzern oder zum
Führen von Telefongesprächen über’s Internet.
Twitter:
Anwendung zum Microblogging – ermöglicht das Anzeigen oder das
eigene Erstellen von öffentlichen Tagebüchern.
Facebook:
Programm zum Benutzen der sozialen Netzwerk-Webseite F aceboo k.
Kalendar:
V er waltung von Stundenplänen – diese können automatisch mit
einem G oogle-Benutzerkonto ver bunden werden.
Taschenrechner
Time (Zeit):
Zeitanzeige und Weckeinstel lunge n.
Settings (Einstellungen):
Grundeins tellungen von EasyP ad ä nd er n.
Sound Recorder (Tonaufnahmegerät):
Funktion Diktiergerät.
Video Player (Video-Wiedergabefunktion)
Gallerie:
Verwalten und Anzeigen von Bildern und Videos – ermöglicht
außerdem die Verbindung zu Picasa-Webalben.
Sh elv es (Regale):
Programm zum Verwalten und Lesen von E-Books.
Page 59

9
Krazy Kart-Rennen: Autoren n s piel
Angry Birds Rio: Geschicklichkeitsspiel
Fruit Ninja: Geschicklichkeitsspiel
Systemeinstellungen
Berühren Sie das Symbol für Einstellungen, um das Menü für
Systemeinstellungen zu öffnen:
1. Drahtlose & Netzwerke
Berühre n Sie Drahtlose & Netzwerke.
WLAN: Berühren Sie = > u m di e WLAN-Funktion
einzuschalten.
Das Gerät wird automatisch nach verfügbaren WLAN-Netzwerken
suchen.
WLAN-Einstellungen: Wählen Sie jetzt ein Netzwerk aus.
Sie werden ggf. dazu aufgefordert, Ihr WLAN-Passwort einzugeben:
Page 60

10
Erw eit erte W LAN / Wi-Fi-Einstellungen:
Berühren Sie im Menü für WLAN / Wi-Fi-Einstellungen, und das
Menü für erweiterte Einstellungen wird sich automatisch öffnen. Im
Menü für erweiterte Einstellungen sieht man den aktuellen Status,
sowie die IP-Adresse un d weit e re Geräteinformationen.
2. Soundeinstell ungen
In den Soundeinstellungen befinden sich die Lautstärkeregelung,
und eine Auswahl an Benachrichtigungstönen, Systemklängen,
Sign alt önen für Mikro SD/TF-Karten un d U S B -Signaltöne.
3. Displayeinstellungen
Funktionen wie Helligkeit, automatische Drehung des Displays (GSensor), A nimationen und Timeout-Ze it des Displays. Display-
Abschaltung nach:15 Sekunden, 30 Sekunden, 1 Minute, 2 Minuten,
10 minuten oder 30 Minuten möglich. Wenn Sie beispielsweise 30
Sekunden auswählen, so schaltet das Display nach 30 Sekunden
Nichtbetätigung automatisch ab und die Displaysperre wird aktiviert.
Drücken Sie den Ein-/Aus-Schalter, um das Display wieder zu
aktivieren. Betätigen Sie die Verriegelungstaste, um das Display zu
verriegeln.
4. Sicherheits- & vorkehrungen
Hier kann die automatische Ortserkennung aktiviert werden. Sie
Page 61

11
können auch Sicherheits-Passwörter einge b en, um nicht
authorisierten Zugang zu Ihrem EasyPad zu verhindern.
5. Anwendungen
Hier können Sie Ihre Anwendungen verwalten und bestimmen, ob
andere Anwendungen, die nicht von Android Market stammen, zur
Installierung zugelassen werden sollen.
6. Benutzerkonten- & verbindung
Allgemeine Verbindungse inst ellungen:
1. Hintergrund-Daten
2. Automatische Verbindung
Benutzerkonten-Verwaltun g: Verwaltung von Benutzerkont e n
7. Datenschutz
Das Sichern meiner Daten: Hier kann bestimmt werden, ob
unterschiedliche Einstellungen bei Google-Servern gespeichert
werden sollen.
Berühren Sie “Zurückstellen auf Standard“, um das Gerät auf
Werkseinstellungen zurückzusetzen.
Alle Einstellungen, selbst installierte Anwendungen und intern
gespeicherte Daten können hierbei gelöscht werden.
8. Speicher
Hier wird der aktuell e Speicherst an d a ngezei gt .
Berühren Sie ”Entfernen der SD-Karte”, um die Mikro-SD/TF-Karte
während des Gebrauchs zu entfernen.
9. Sprache und Tastatur
Einstellen der Systemsprache und der Eingabemethode.
Page 62

12
10. Datum und Zeit
Sollte Ihr Netzwerk nicht über automatische Zeiteinstellung verfügen,
können Sie Zeit, Zeitzone und Datum manuell einstellen, nachdem
Sie die automatischen Einstellungen deaktiviert haben.
11. Telefoninformation
Hier k önn e n Sie geräteinterne Werte einsehen, wie z.B.
Betriebssystem-V er sion, Batteriestatus, S igna ls tär ke des mob ilen
Netzwerks usw.
Hauptfunktionen
Internet
Berühren Sie das -Symbol, um im Internet zu surfen.
Google ist Ihre vo r eingestellte Star tseite.
Berühren Sie das Eingabefeld, um die Tastatur anzuzeigen:
Berühren Sie nach der Eingabe einer Webadresse, um die
entsprechende Webseite zu öffnen.
Anmerkung: Die An droid-Tastatur verfügt über einige Optionen für
Page 63

13
Einstellungen wie: Tastatursprache, Nummern, Symbol e usw.
Der Internetbrowser kann vier Webseiten gleichzeitig geöffnet haben;
Berühren Sie un d das Menü wi rd wie folgt geöff net :
Berühren Sie ‘N eues F enster’, um eine neue Webseite
anzuzeigen.
Die ‘Meist B esuchten’ und ‘History’ befin den sich unter den
‘Lesezeichen’.
Klicken Sie, um zwischen zwei Fenstern zu navigieren.
Man kann bis zu vier Fenster gleichzeitig geöffnet haben.
Berühren Sie ‘Seite aktualisieren’, um die momentan geöffnete
Seite zu aktualisieren.
Einen Schritt weiter geht man, indem man die Gegenseite des
Zurück-Symbol s betätigt.
‘Lesezeichen hinzufügen’, ‘Auf der Seite suchen’, ‘Text
auswählen’, ‘Seiteninformation’, ‘Seiteninfo’, ‘Vorwärts-Link’,
‘Heruntergeladenes’, ‘Einstellungen’.
Page 64

14
Technische Daten
TAB10-06 10’’ / 24,7 cm Tablet PC
CPU Rockchip 2918 1.2 GHz
Betriebssystem Android 2.3 – Gingerbread
RAM 1 GB DDR3
Interner Speicher 4 GB NAND Flash
Speichererweiterung Mikro-SD/SDHC bis zu 32GB
Display 4:3 Capacitive 10-point Multi-Touch-Display
Auflösung 1024 x 768 Pixel
G-SENSOR MMA8452Q
Kamera Front 2.0MP,Back 2.0MP
Batterie
7.4V 4000 mA/H wiederaufladbare Li-Ion-Batterie
MIKROFON Ja
Internet & Skype Telefon/Funktion
WIFI 802.11b/g/n (hochempfindlich)
I/O
-Anschlussstellen 1x DC-Eingang, 1x Kopfhörer, 1x TF-Kartenschlitz,
2x USB 2.0, 1 Host, 1 OTG
Videoformate H.264, VP8, RV, WMV, AVS, H.263, MPEG4 usw. 1080P,
YouTube, 720P, HTML5, Flash 10.3
Office Word / Excel / PDF / PPT, Microsoft Wordpad,
Microsoft SpreadExcel
Die Software ist nicht im Gerät installiert undmuss vom
Benutzer selbst heruntergeladen werden.
Bilder JPG, BMP, PNG, usw.
Page 65

15
KUNDENBETREUUNG
Sollten Sie eine Frage haben oder ein Problem mit Ihrem RicatechProdukt auftauchen, können Sie den Ricatech-Kundenservice
kontaktieren. Sie können uns per Telefon und E-Mail erreichen.
E-Mail
Senden Sie uns für die Kundenbetreuung per E-Mail bitte eine E-Mail
an support@ricatech.com. Achten Sie bitte darauf, dass Sie Ihre
Modellnummer und die Seriennummer des Produkts angeben, tei len
Sie uns außerdem Ihren Namen & Ihre Adresse mit und beschreiben
Sie Ihre Frage ode r P roblem de utlich.
Telefon
Für Kundenbetreuung per Telefon wählen Sie bitte
+32 3 3265694. Ein Mitarbeiter aus unserem Serviceteam wird
Ihnen gern behilflich sein.
Besuchen Sie für ein vollständiges Verfahren die Webseite von
Ricatech unter: www.ricatech.com
Hereby, Ricatech B.V. decl ares that this Android Tablet PC is in
compliance with the essential requirements and other relevant
provi sions of Direc ti ve 1999/5/E C .
Page 66

0
Manual del usuario
Enhorabuen a por haber comprado la TAB10-06
¡Muchas gracias por su confianza y su decisión de comprar nuestro producto!
Debido a la constante actualización y mejora de nuestra tableta, en algunos casos
puede que haya algunas pequeñas diferencias entre la versión impresa del manual y
su tableta. Tiene la opción de descargar la versión actual de su manual y las
actualizaciones de firmware desde nuestra página web.
Page 67

1
Contenido
Instrucciones de seguridad 2
Descripción general del dispositivo 3
Descripción de los botones 4
Ajustes de idioma 4
Control de energía y carga de baterías 5
Bloqueo de la pantalla 5
Conectar con un ordenador y transferencia de datos 5
Función de los botones en el interfaz del usuario 6
Menú del programa 7
Ajustes del sistema 9
1. Funcionamiento inalámbrico & redes 9
2. Ajustes de sonido 10
3. Ajustes de visualización 10
4. Ubicación & seguridad 10
5. Aplicación 11
6. Cuentas & sincron. 11
7. Protección de datos 11
8. Memoria 11
9. Idioma & teclado 11
10. Fecha & hora 12
11. Información telefónica 12
Internet 12
Código Abierto & GNU General Public License 12
Datos técnicos 14
Page 68

2
Este manual del usuario contiene importantes instrucciones de
seguridad e información p ara el u s o correcto del dispositi vo. Por
favor, siga cuidadosamente las instrucciones de este manual.
A Por favor, mantenga el aparato alejado de lugares con altas
temperaturas, alta humedad o polvo.
B Particularmente, evite dejar el aparato dentro del coche durante
el verano si las puertas están cerradas.
C E vite choques y caídas del dispositivo, pues podría causarle daños
si las sufriera.
D El tiempo del modo en espera de las baterías puede cambiar
debido a distintas influencias ambientales.
E No nos hacemos responsables por pérdidas de datos causadas
por daños al produc t o, repa raciones o cualq uier otra razón.
F No abra la carcasa del dispositivo. Si lo hace invalidaría su
derecho a l a garantía.
G No use alcohol, disolventes o gasolina para limpiar la pantalla –
use solamente un paño seco.
Page 69

3
Descripción general del dispositivo
1. Botón Menú 7. Puerto USB
2. Botón Volumen+ 8. Puerto OTG: USB desde su
disco duro externo
3. Botón Volumen- 9. Entrada CC
4. Botón inicio 10. Altavoces
5. Ranura de tarjeta Micro
SD/SDHC
11. Auricular
6. Micrófono 12. Botón de encendido
Page 70

4
Descripción de los botones
Botones de volumen:
Aquí puede subir o bajar el volumen.
Botón de e ncendido:
Pulse el botón durante dos segundos para encender o apagar el
dispositivo. Pul se el botón brevemente para acti var o fi nalizar el
modo de espera. Reiniciar: Pulse el botón durante siete segundos
para reiniciar el aparato.
Botón ESC :
Para volver al menú anterior
Botón Menú:
Para abrir el menú contextual
Botón Inicio:
Para volver a la interfaz del usuario
Ajuste de idioma
TAB10-06 se entrega con el idioma predefinido en inglés.
Para cambiar los ajustes de idioma, por favor haga lo siguiente:
- P ulse en el símbolo del menú del p rogra ma en el lado
derecho de la pantall a .
- Seleccione ‘Ajustes’ .
- Vaya hacia el final de la lista.
- Sel ecci one ‘Idioma & teclado’.
- Sele cc ione ‘S eleccionar idioma’.
- Teclee su idioma de preferencia.
- Pu lse el botón ‘Ini cio’ para vol ver a la pan tal la d e inicio.
Page 71

5
Control de energía y carga de baterías
El símbolo de carga de batería en la barra de estado indica el
estado de carga de las baterías.
Si la energía se agota, el dispositivo se apaga automáticamente.
Si se muestra menos energía, use el adaptador de corriente o un
ordenador por medi o d e un USB pa ra carga r e l dispositivo.
El tiempo de carga de la batería es de aproximadamente cuatro
horas.
Bloqueo de la pantalla
Si no se usa el aparato durante un tiempo especificado o si se pulsa
el botón de ‘encendido’ brevemente, la pantalla se apaga y se activa
el bloqueo de pantalla.
La pantalla se reactivará pulsando el botón de ‘encendido’
brevemente. Para bloquear la pantalla pulse el botón ‘Bloquear’ en la
dirección especificada.
Conexión al ordenador y transferencia de datos
Easypad está equipado con una interfaz USB2.0 de alta velocidad.
Después de conectar el dispositivo a un ordenador, est e aparece en
la pantalla de estado .
Arrastre de la barra de estado hacia abajo y pulse ‘Conexión USB’
para activar la memoria USB. Cuando use el dispositivo para
transferencias de datos, ¡no podrá acceder a la tarjeta Micro SD/TF
desde el EasyPad!
Page 72

6
Función de los bo tones en el interfaz del usuario:
Botón Inicio:
Para volver a la pantalla de inicio.
Botón Menú:
Para abrir el menú contextual.
/ Bo tones de Volumen:
Para subir o bajar el volumen.
Botón Atrás:
Para volver al menú ant e rior / página anterior.
Botón Menú de Programa s:
Para visualizar los programas y las aplicaciones.
Botón Cambio de Ventana:
El dis positivo tiene cinco esc ri torios. Puede p ulsar este botón o
presionar con su dedo hacia un lado de la pantalla táctil para
navegar entre los distintos escritorios.
Icono de señal WIFI / WLAN
Instrucciones del sistema:
Arrastre la barra de estado hacia abajo para ver mensajes sobre emails, descargas de documentos, estado de la conexión USB u otra
información.
Page 73

7
Menú de Programas
ApkInstaller:
Programa para instalar y desinstalar aplicaciones que no se han
descargado de Android Mark et.
Market:
Cargue aplicaci on e s (programas) desde el Android Ma rk et. Pue de
descargar e instalar apps, juegos y otras aplicaciones. Muchas de
ellas son gratuitas.
Explorer:
Abra el Explorador para acceder a las tarjetas Micro SD TF, lápices
de mem oria USB y otros dispositivos de almace n a mi e nt o. El Ex plorer
es un gestor útil pa ra docu me n tos y todo tipo de d atos.
Navegador de inter net
Cámara MP 2.0frontal& trase ra
E-mail:
Programa para recibir, procesar y enviar e-mails.
G-mail:
Programa para recibir, procesar y enviar e-mai ls a través d e un a
cuent a Goog le.
Google Talk:
Programa para conve rs a r con otros us uarios de Google.
Google Maps:
Programa para la visualización de mapas o de imágenes vía satélite
– Planificador de rutas.
YouTube:
Programa para ver vídeos de YouTube .
Page 74
8
Skype:
Programa para conversar con otros usuarios de Skype o para hacer
llamadas telefónicas a través de internet.
Twitter:
Aplicación para Microblogs – Fa cilita la visualización de diarios
públic os o crea un diario público prop io.
Facebook:
Programa para usar la red social Facebook.
Calendario:
Gestor de horarios – puede sincronizarse automáticamente con una
cuent a Goog le.
Calculadora de bolsillo
Time (Hora):
Visualización de la hora y funciones de despertador.
Settings (Ajustes):
Cambiar los ajustes básicos de EasyPad.
Sound Recorder (Grabadora de sonido):
Dispositivo con función de dictado.
Video Player (Reproductor de vídeo)
Galería:
Gestiona y visualiza imágenes y vídeos - también pos ib ilita la
sincronización con álbumes Picasa en la red.
Shelves:
Un programa para leer y gestionar libros electrónicos.
Krazy Kart Rac ing: Juego de carreras de coches
An gry Birds Rio: Juego de habilidad
Page 75

9
Fruit Ninja: Juego de habilidad
Ajustes del sistema
Toque el icono para que los ajustes abran el menú de ajustes del
sistema:
1. Funciones inalámbricas & Redes
Toque ‘Funciones inalámbri c as & red e s '.
WLAN: Toque => para activar la función WLAN.
El dispositivo busca automáticamente redes WLAN disponibles.
Ajustes WLAN: Seleccione aquí su red.
En caso de ser necesario, se le pedirá que introduzca su contraseña
WLAN:
Page 76

10
Ajustes avanzados WLAN / Wi-Fi:
Toque en el menú para los ajustes WLAN / Wi-Fi, el men ú de
ajustes avanzados se abrirá inmediatamente. En el menú de ajustes
avanzados puede ver el estado actual, la dirección IP y otra
inform a ción sobre el dispositivo.
2. Ajustes de sonido
Los ‘ajustes de sonido’ contienen el control de volumen, la selección
de sonidos de notificación, sonidos del sistema, tonos para señales
de tarjetas Micro SD/TF y tono de señal USB.
3. Ajustes de visualización
Incluye brillo, rotación automática de pantalla (G-sensor),
animaciones y el tiempo de desconexión de la pantalla. Están
disponibles l as opci ones de a pagar l a pantalla despué s de: 15
segundos, 30 segundos, 1 minuto, 2 minutos, 10 minutos o 30
minutos. Por ejemplo, si selecciona 30 segundos, la pantalla se
apagará después de 30 segundos de inactividad y se activará el
bloqueo de pantalla. Pulse el botón ‘ de encendido para reactivar la
pantalla. Arrastre el botón ‘Bloqueo’ hacia arriba para abrir el
bloqueo de pantalla.
4. Ubicación & seguridad
Aquí pu e d e acti var el reconocimiento de u bicación automático.
Page 77

11
También puede activar contraseñas de seguridad para prevenir un
acceso no autorizado a su EasyPad.
5. Aplicación
Aquí puede gestionar sus aplicaciones y definir si permite la
instalación de aplicaciones no provenientes de Android Market.
6. Cuenta s & sincro n.
Ajustes generales de sincronización:
1. Datos d e fondo
2. Sincronizaci ón automática
Gestión de cuentas: Gestión de las cuentas de usuarios
7. Protección de datos
Proteger mis datos: Aquí pu e de definir si varios ajustes deben
almacenarse en servidores Google.
Toque ‘Reajustar a predeterminado’ para reajustar el dispositivo a
los ajustes de fábrica.
Se pueden borrar todos los ajustes, aplicaciones auto-instaladas y
los datos almacenados en la memoria interna.
8. Memoria
Aquí se muestra el uso actual de la memoria.
Toque ‘Extraer Tarjeta SD’ para retirar la tarjeta Micro SD/TF durante
su uso.
9. Idioma y teclado
Seleccione el idioma del sistema y el método de entrada.
Page 78
12
10. Fecha y hora
Si su red no es compatible con el ajuste automático de la hora,
puede ajustar la hora, el huso horario y la fecha manualmente una
vez haya desactivado los ajustes automáticos.
11. Información telefónica
Aquí pu e d e ver val ore s in ternos del dispositivo, tales como la versión
del sistema operativo, estado de la batería, potencia de la señal de
la red móvil, etc.
Funciones principales
Internet
Toque el icono para navegar por la red.
Google es la página de inicio predeterminada.
Toque el campo de entrada para visualizar el teclado:
Toque despu é s de introducir una dirección web para abrir la
página web correspondie n te.
Nota: El teclado Android tiene algunas opciones para los ajustes,
como por ejemplo: i dioma del teclado, números e iconos, etc .
Page 79
13
El navegador de internet puede abrir cuatro páginas web
simultáneamente;
Toque y el menú se visualizará del modo siguiente:
Toque ‘Nueva ventana’ y se mostrará una página web nueva.
‘Más visitados’ y ‘Historial’ se pueden encontrar bajo ‘Favoritos’.
Haga clic para navegar entre dos ventanas abiertas.
Se pueden abrir hasta cuatro ventanas simultáneamente.
Toque ‘Actualizar’ para actualizar la página web actual.
Una paso adelante, en el lado opuesto al icono Volver.
‘Añadir favoritos’, ‘Buscar en la página’, ‘Seleccionar texto’
‘Información de la página’, ‘Info. de la página’, ‘Reenviar enlace’
‘Descargar’, ‘Ajustes’.
Page 80

14
Datos técnicos
TAB10-06 10’’ / 24.7cm Tableta-PC
CPU Rockchip 2918 1.2 GHz
Sistema operativo Android 2.3 – Gingerbread
RAM 1 GB DDR3
Memoria interna 4 GB NAND Flash
Expansión de memoria Micro SD/SDHC hasta 32GB
Pantalla Pantalla multi-táctil104:3 de puntos capacitivos
Resolución 1024 x 768 Pixel
G-SENSOR MMA8452Q
Cámara Frontal 2.0MP,Trasera 2.0MP
Batería
7.4V 4000 mA/H Batería de ión de litio recargable
Micrófono Sí
Internet & Función de teléfono Skype
WIFI 802.11b/g/n (alta sensibilidad)
Puertos Entrada/Salida 1x Entrada CC, 1x auriculares, 1x Ranura tarjeta TF,
2x USB 2.0, 1 host, 1 OTG
Formatos de Vídeo H.264, VP8, RV, WMV, AVS, H.263, MPEG4 etc 1080P,
YouTube, 720P, HTML5, Flash 10.3
Office Word / Excel / PDF / PPT, Microsoft Wordpad,
Microsoft SpreadExcel
El software no se encuentra en el dispositivo y debe ser
descargado por el usuario.
Imágenes JPG, BMP, PNG, etc.
Page 81

15
CUSTOMER SUPPORT
You can contact the Ricatech customer service when you have a
question or a probl e m with your Ricatech product. You can contact
us by telephone and email.
Email
For customer support by email, please sent a email to
support@ricatech.com Please make sure that you mention the model
number and serial number of the product, mention your name &
address an d descri b e your questi on or problem clea rl y.
Telephone
For customer support by telephone, please dial +32 3 3265694. One
of our service staff will be ready to s erve you.
For full procedure please visit the website of Ricatech at:
www.ricatech.com
Hereby, Ricatech B.V. declares that this Android Tablet PC is in
compliance with the essential requirements and other relevant
provisions of Directive 1999/5/EC.
 Loading...