

Page 1

USER MANUAL
TAB08 8" Tablet PC
Page 2

Contents
1.Attentions
2.Accessory
3.Hardware specification
4.Product description
5.Power on/off
6.Window
7.Button
8.System setting
* WIFI Interface
* Voice
* Time and date setting
* Screen and standby
9.Install & Delete Operation application program
10. Touch Calibration
11. Music
12. Audio
13. Photo
14. Network
15. Recording
16. Camera
17. E-market
18. Email client
19. Wall paper
20. External equipment
*USB connection
*OTG application
*Keyboard & Mouse
21. Firmware upgrade
22. Common problem processing
Page 3

Attention
﹡This is a high precision electronic product, please do not disassemble.
﹡Avoid intensive beating or collision to the product.
﹡Avoid using this product in the following condition: high and low temperature, damp, dust,
strong magnetic and long-term exposed to sun.
﹡Please use a wet cotton to wipe the product shell gently. No use of chemical cleaning
solution. Avoid dripping or splashing water to the product and should be placed far away
from liquid.
﹡No Long time usage of headphone or high volume are suggested as these may cause
permanent hearing damage.
﹡Please do not use headphones when cross the road, driving motor vehicle or bicycle to
avoid traffic accident.
﹡Please use the original battery charger and accessory in package. Using other accessories
may cause damage to the product and would violate the warranty.
﹡Please follow the relevant local environment regulations to deal with obsolete product and
accessories.
﹡Please free to contact with local distributor or call center directly in the course of any
questions.
﹡Please follow the user manual and keep data backup. No responsibility is assumed in the
course of data loss because of product damage, repair or other causes of memory loss.
Page 4
Hardware
MID hardware parameters
CPU
ALLWINNER TECH A10 high performance ARM-A8 processor.
Frequency: 1.5GHZ, 560MHzDSP
Support OpenGL 2.0
Memory
512MB-1GB DDR3
Flash
Support built-in 4GB/8GB/16GB/32GB
Support external TF card up to 32GB
WIFI
IEEE802.11b/g
USB
USB2.0 OTG
Video output
HDMI1.3
Audio
3.5mm headphone Jack
High-quality stereo loud speaker
Built-in Microphone
Headset Maximum output power: 40mW
Response Frequency:20Hz—20KHz
SNR:more than 90db
Screen
size
210mmX154mmX12mm
resolution
800X600
color
Black and iron gray
operating
Capacitive touch
OS
Android 2.3 up to 4.0 later
Other
dimension
210mmX154mmX12mm
color
weight
530g
battery
3800mAh
Accessories
Power adapter(DC V/A)1pc
USB cable 1pc
QSG 1pc
OTG cable 1pc
HDMI cable(option)
TAB08 3G dongle support list
WCDMA:Huawei E230, Huawei E176G, Huawei E160E, Huawei E182G, Huawei E1782,
Huawei E1750, ZTE MF633BP-1, ZTE MF633BP-1, ZTE MF633, ZTE MF637U
Huawei E1756, Huawei UMG1691
CDMA2000/EVDO: Huawei E150, Huawei EC1261, Huawei EC122, Huawei EC156,
Huawei EC1270, ZTE AC580, ZTE AC2736, ZTE AC2746
Page 5

Page 6
Power on /off
Power on: press power button and system boots as the following photo
The system initiating as the following screen
System enters the main menu after finish initiating finished.
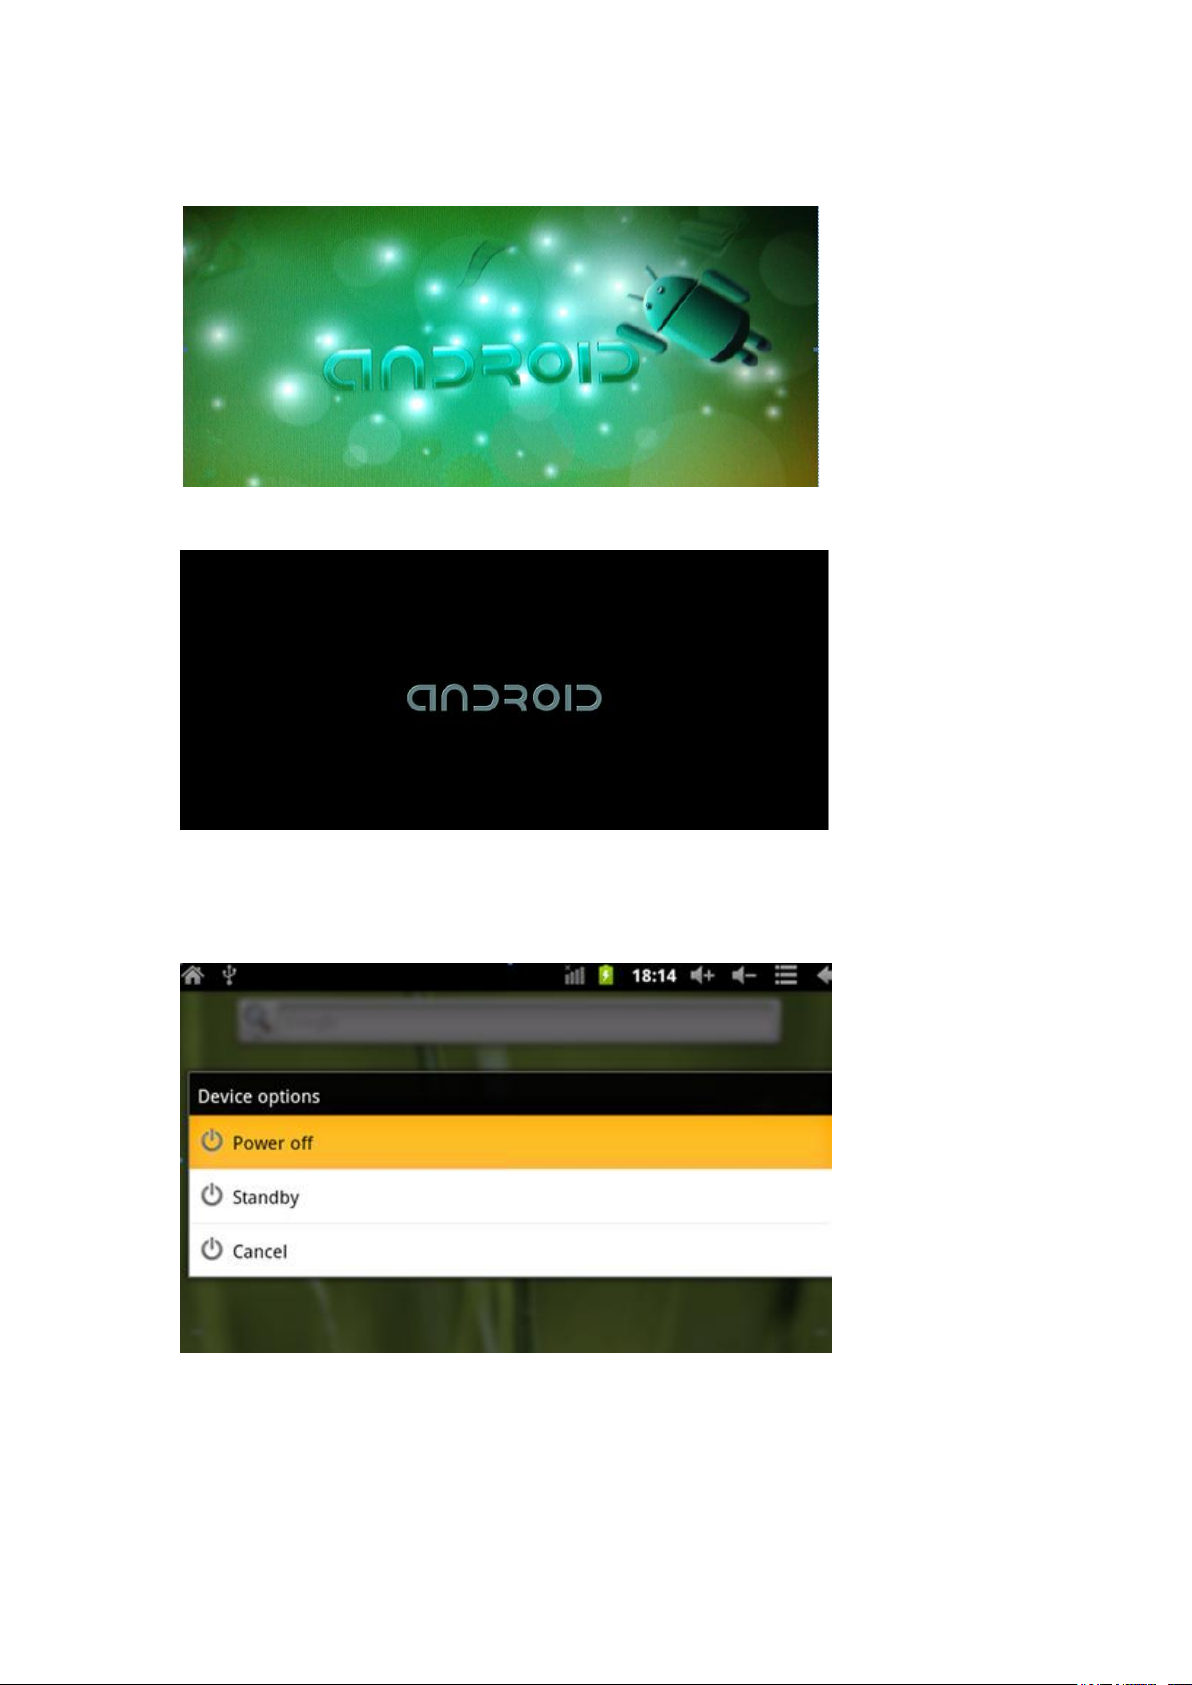
Power off: Long time pressing power button and dialog box prompt as following. Select “power
off” to turn down the product.
Standby: The screen turn off when short time pressing the power key to enter standby mode.
Press power key again to return general working mode.
Desktop
The following desktop displays when the system booting finishes. Status bar, search bar and main
Page 7

Menu label are included in the defaulted desktop.
Status bar is to indicate the current information of the system including network status, battery
volume, time and so on.
Search bar is to search information online with keywords.
Main menu located in the right of screen and main menu display complete when it is clicked.
Button
Volume key: Decrease and increase the volume.
Power key: Long time pressing turns on or off the product. Short time pressing enters or stands by
the product.
Menu key: Display the menu of the current window.
Home key: Return or choose the main menu.
Return key: Return to the previous menu.
Main menu operation
The follow screen displays when the main menu label is clicked.
System setting, application running and installation, screen touch calibration, audio and video
playback, web browser, games are available in the main menu.
Page 8
System settings:
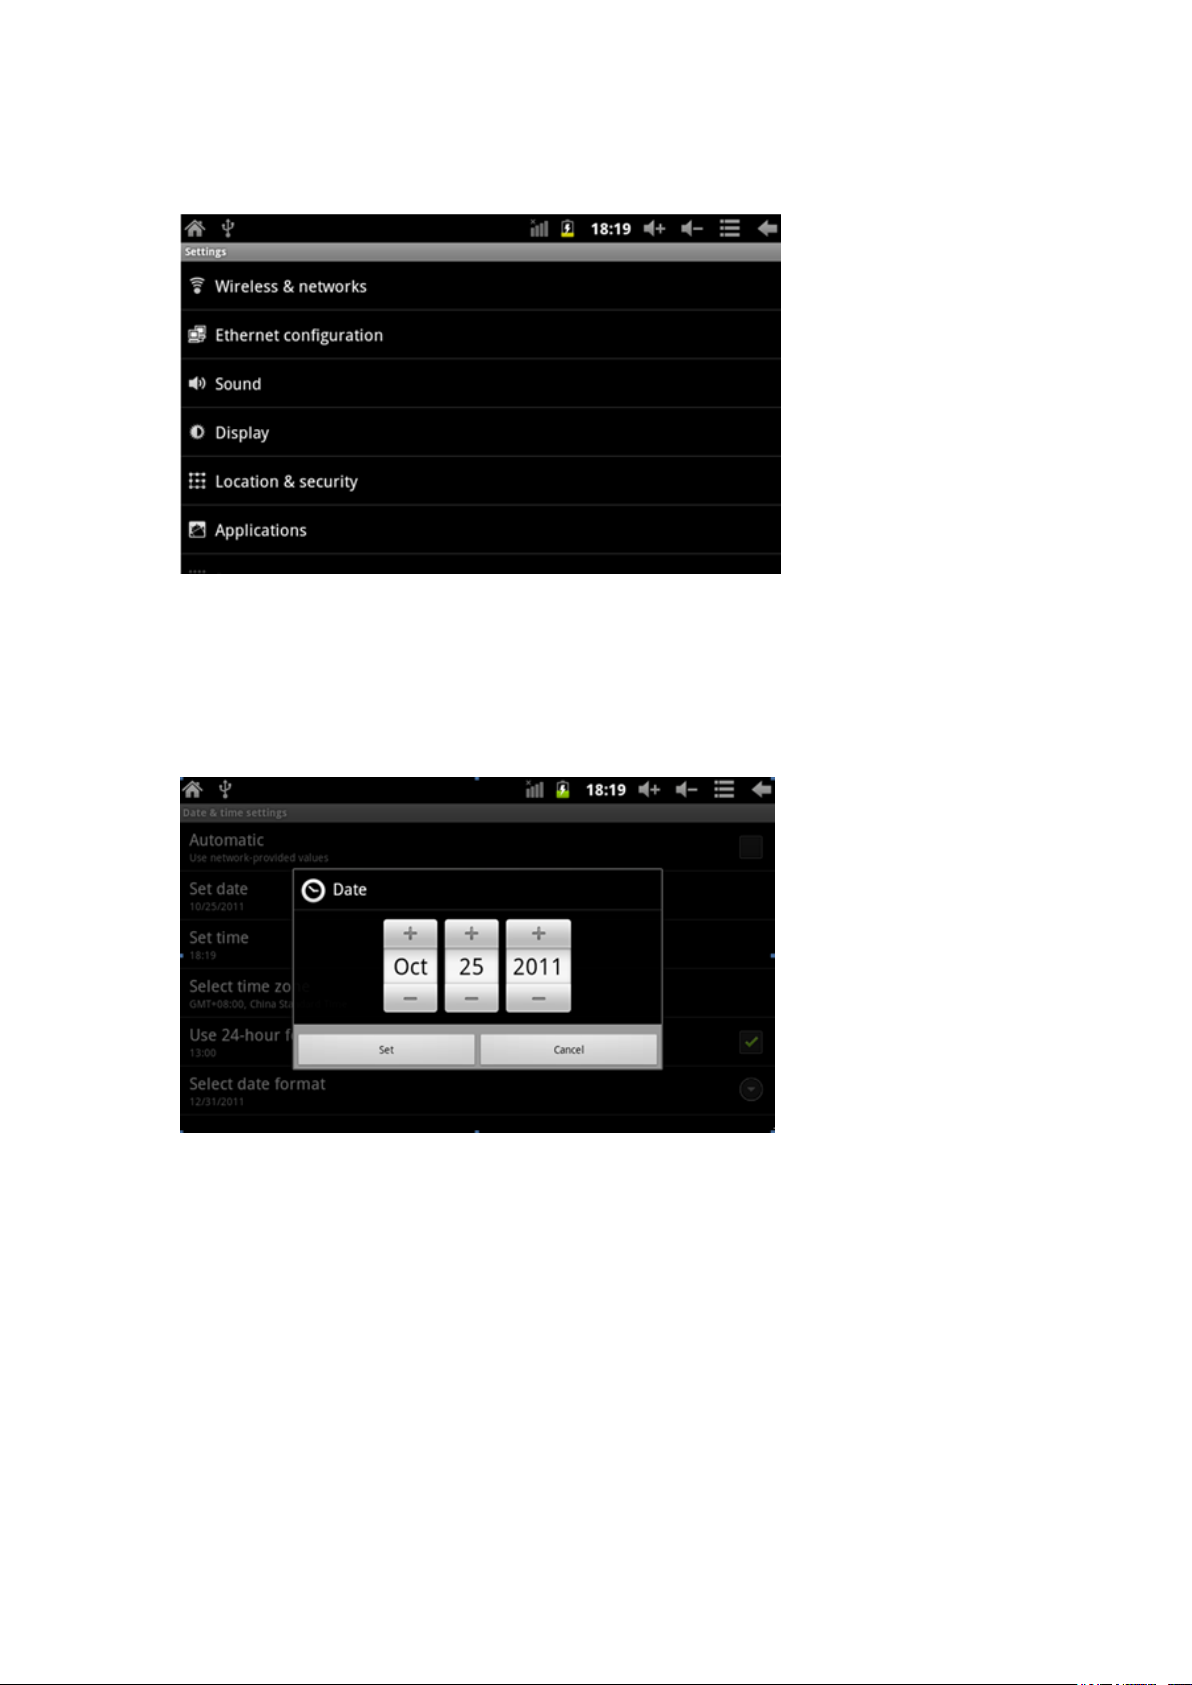
System setting menu displays as following when the setting menu is clicked. Select the item to set.
Time and Date settings
Select item “Time and Date” to enter the menu.
Select “automatic” to use the network time. Date, time, time zone, 24- hour and date format are
available to choose as following.
+:Select the icon to increase by 1
-:Select the icon to decrease by 1
Digital inputting directly is available when select the digital and input as follow.
Page 9

Select “set” to confirm the setting.
Screen brightness
Select “ display setting” to enter the menu, click “ brightness” and move the process bar to choose
the brightness.
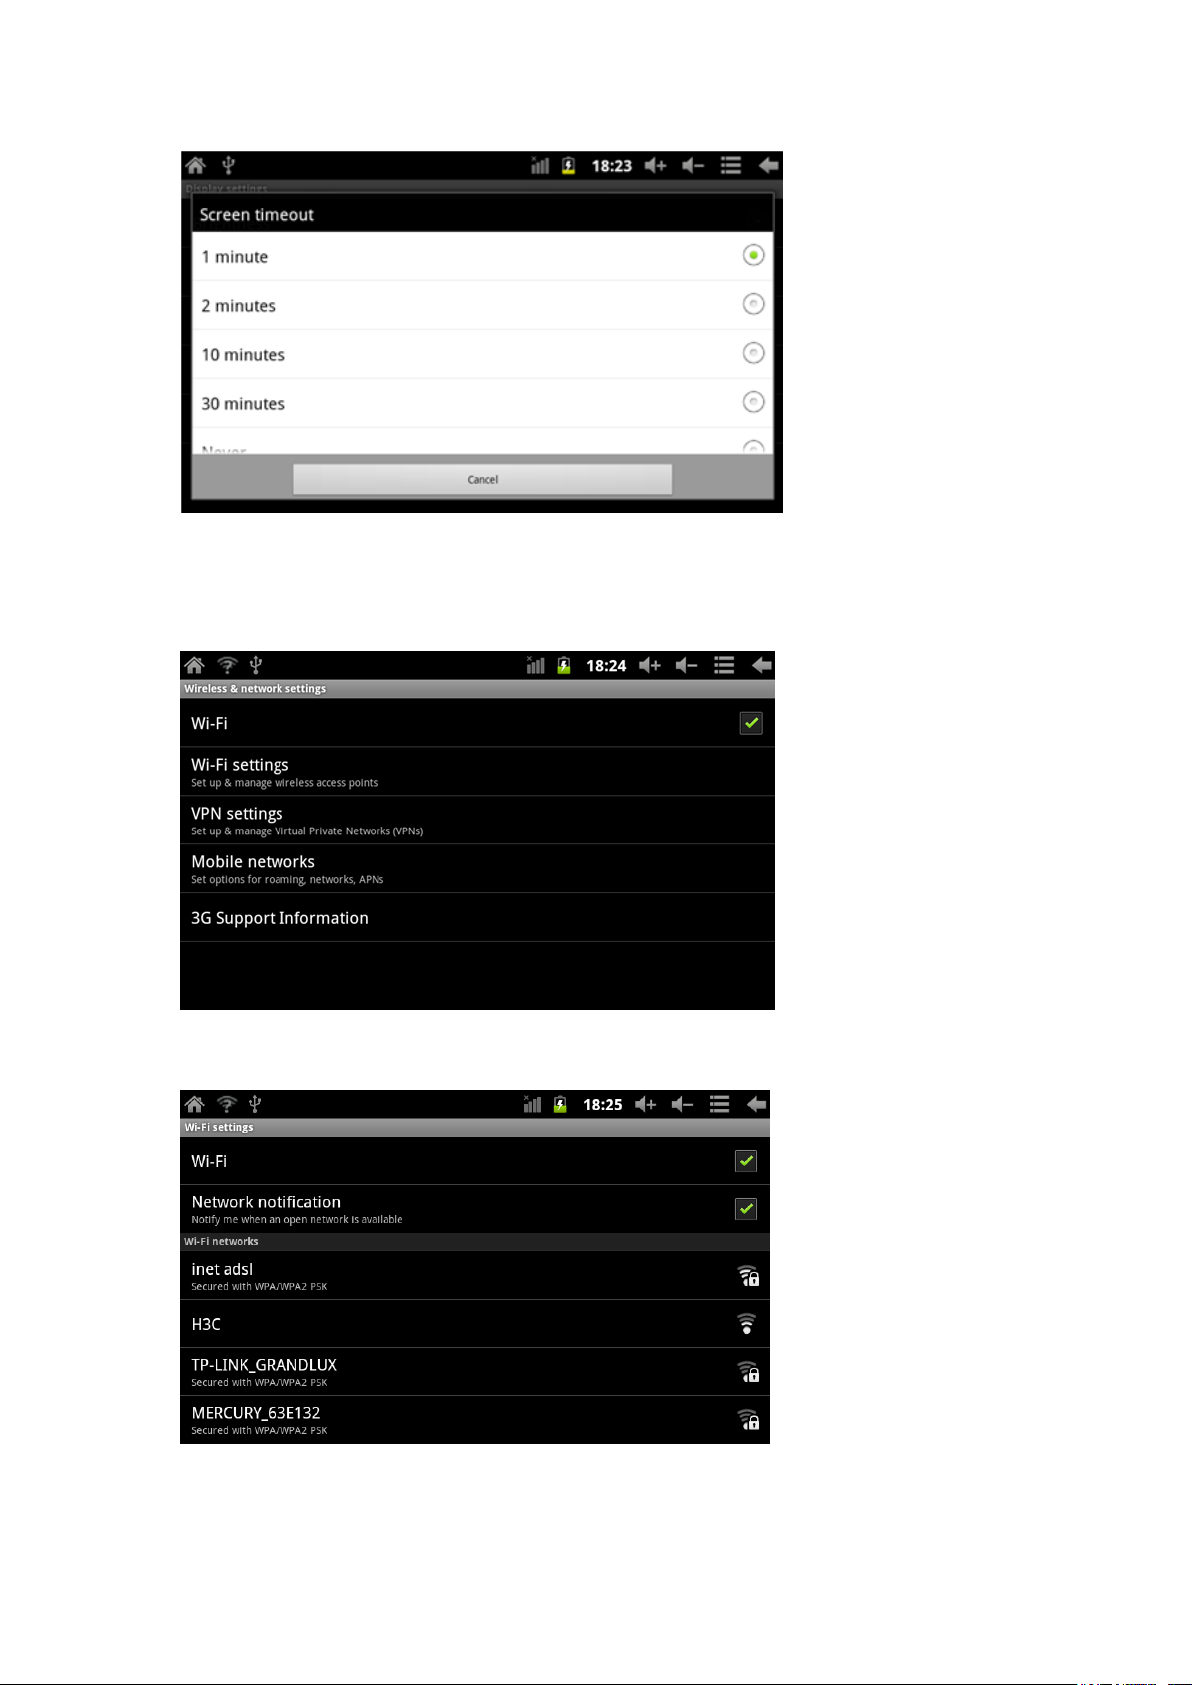
Screen Timeout
Screen Timeout: the delay of automatic screen lock
Select “Display settings” to enter the setup menu, move down the direction bar and select “ screen
timeout” as follow.
Note: This function is invalid when video is playing.
Page 10
Wi-Fi Connection
Click the “setup” icon in the main menu to enter system settings menu. Click “ Wireless &
network setting” and then click “Wi-Fi”. Select “ Wi-Fi setting”.
Click Wi-Fi to turn on or off the Wi-Fi and click “Network notification” to display the wireless
router. Select a wireless network and complete the connection of Wi-Fi according to the notice.
Input password for the encrypted network.
Page 11
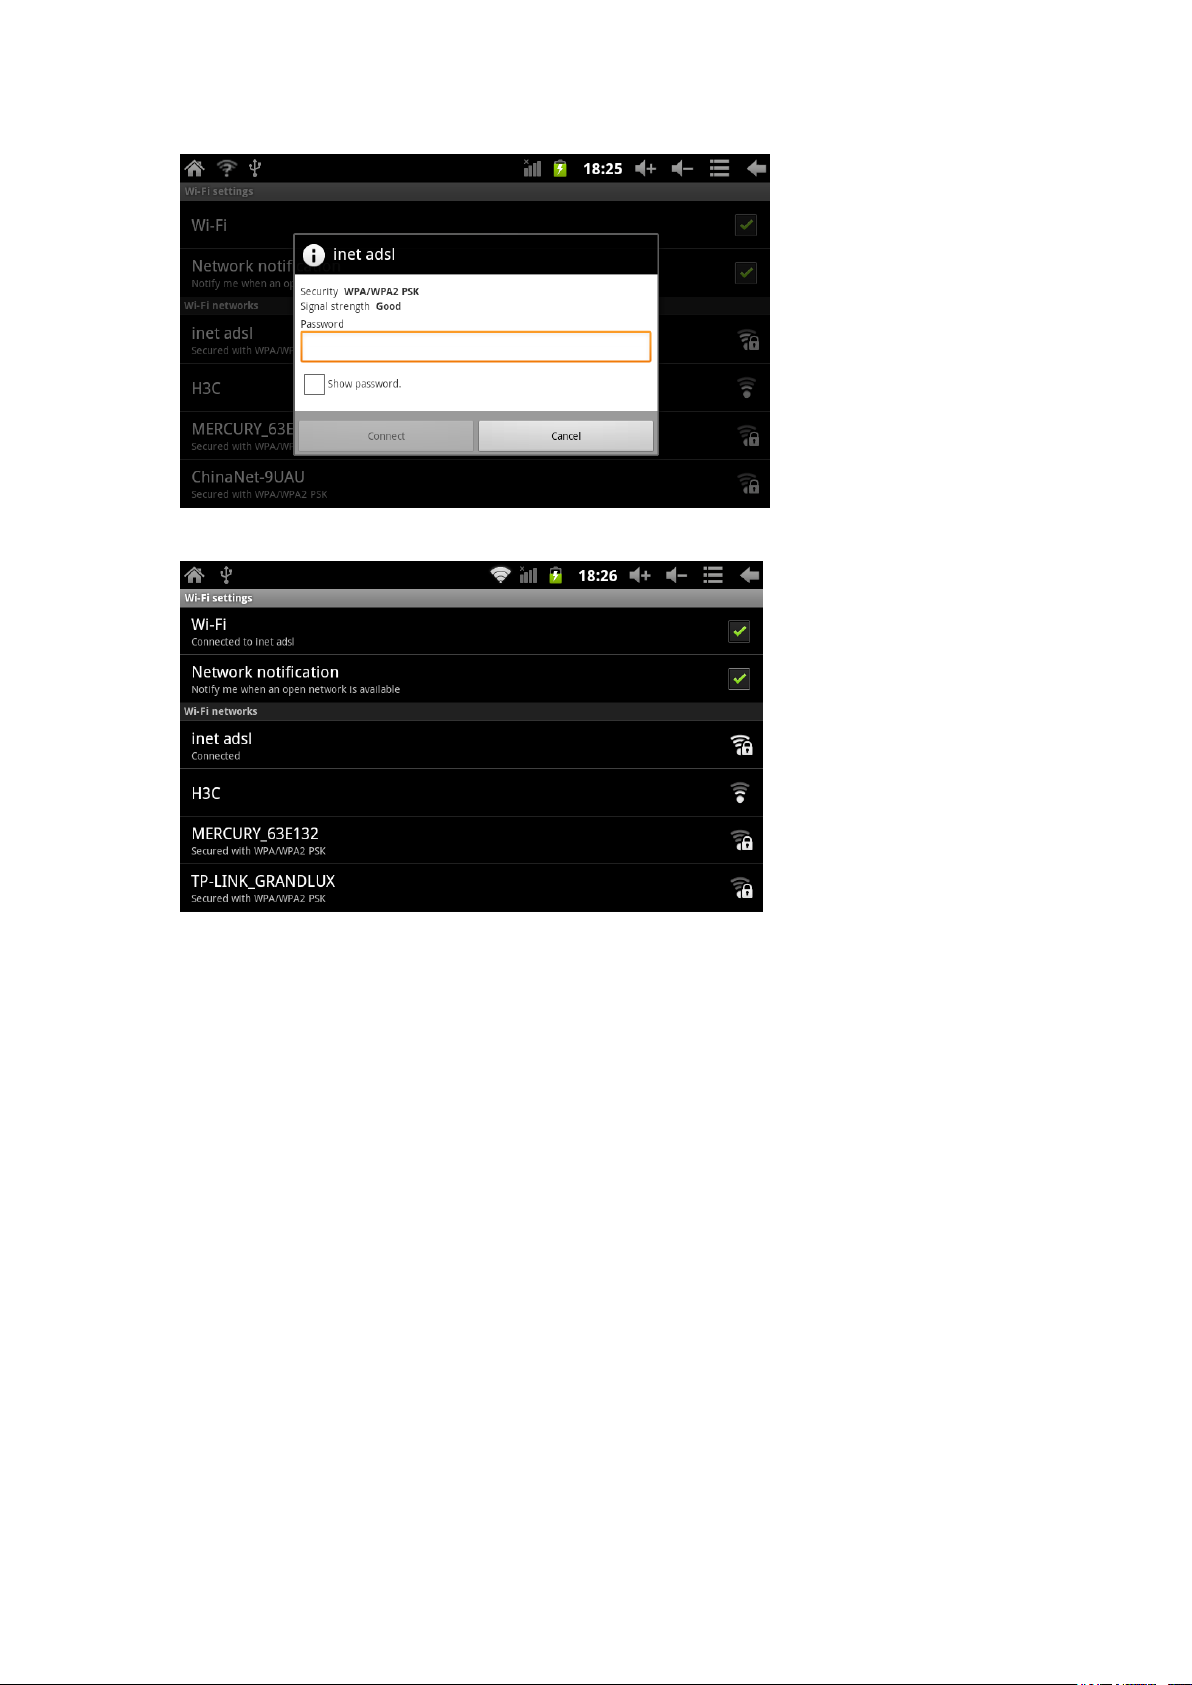
The Wi-Fi connection finalizes and displays as follows:
*HDMI
This product support HDMI
Connect MID to a device with HDMI input through a HDMI cable. The system switches to HDMI
output in 5 seconds and output audio and video. The content is displayed on connected device
after HDMI connection.
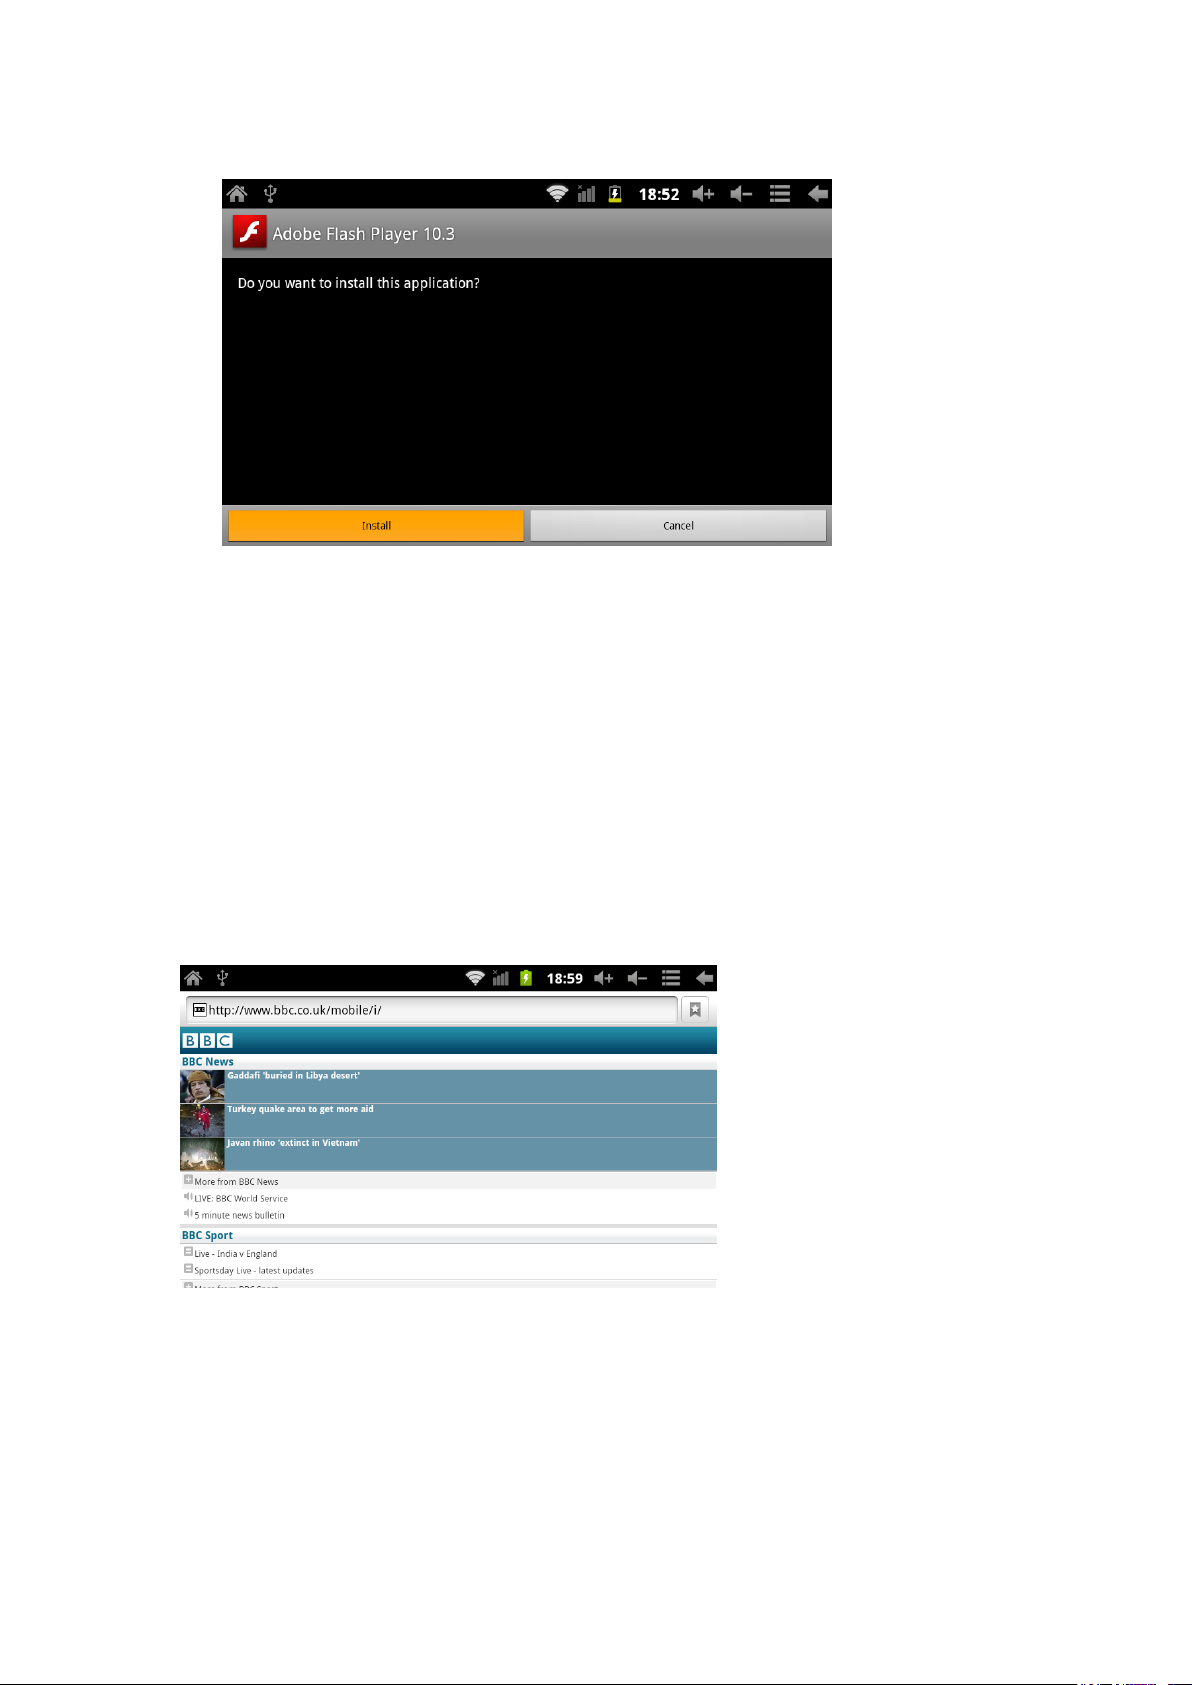
Install, download and run application
*installing:There are many available methods to install Android applications. such as
installing by USB and by the third program. Here a third program Appinstaller is introduced.
1. Enter menu, choose setting and select “Applications”.
Page 12
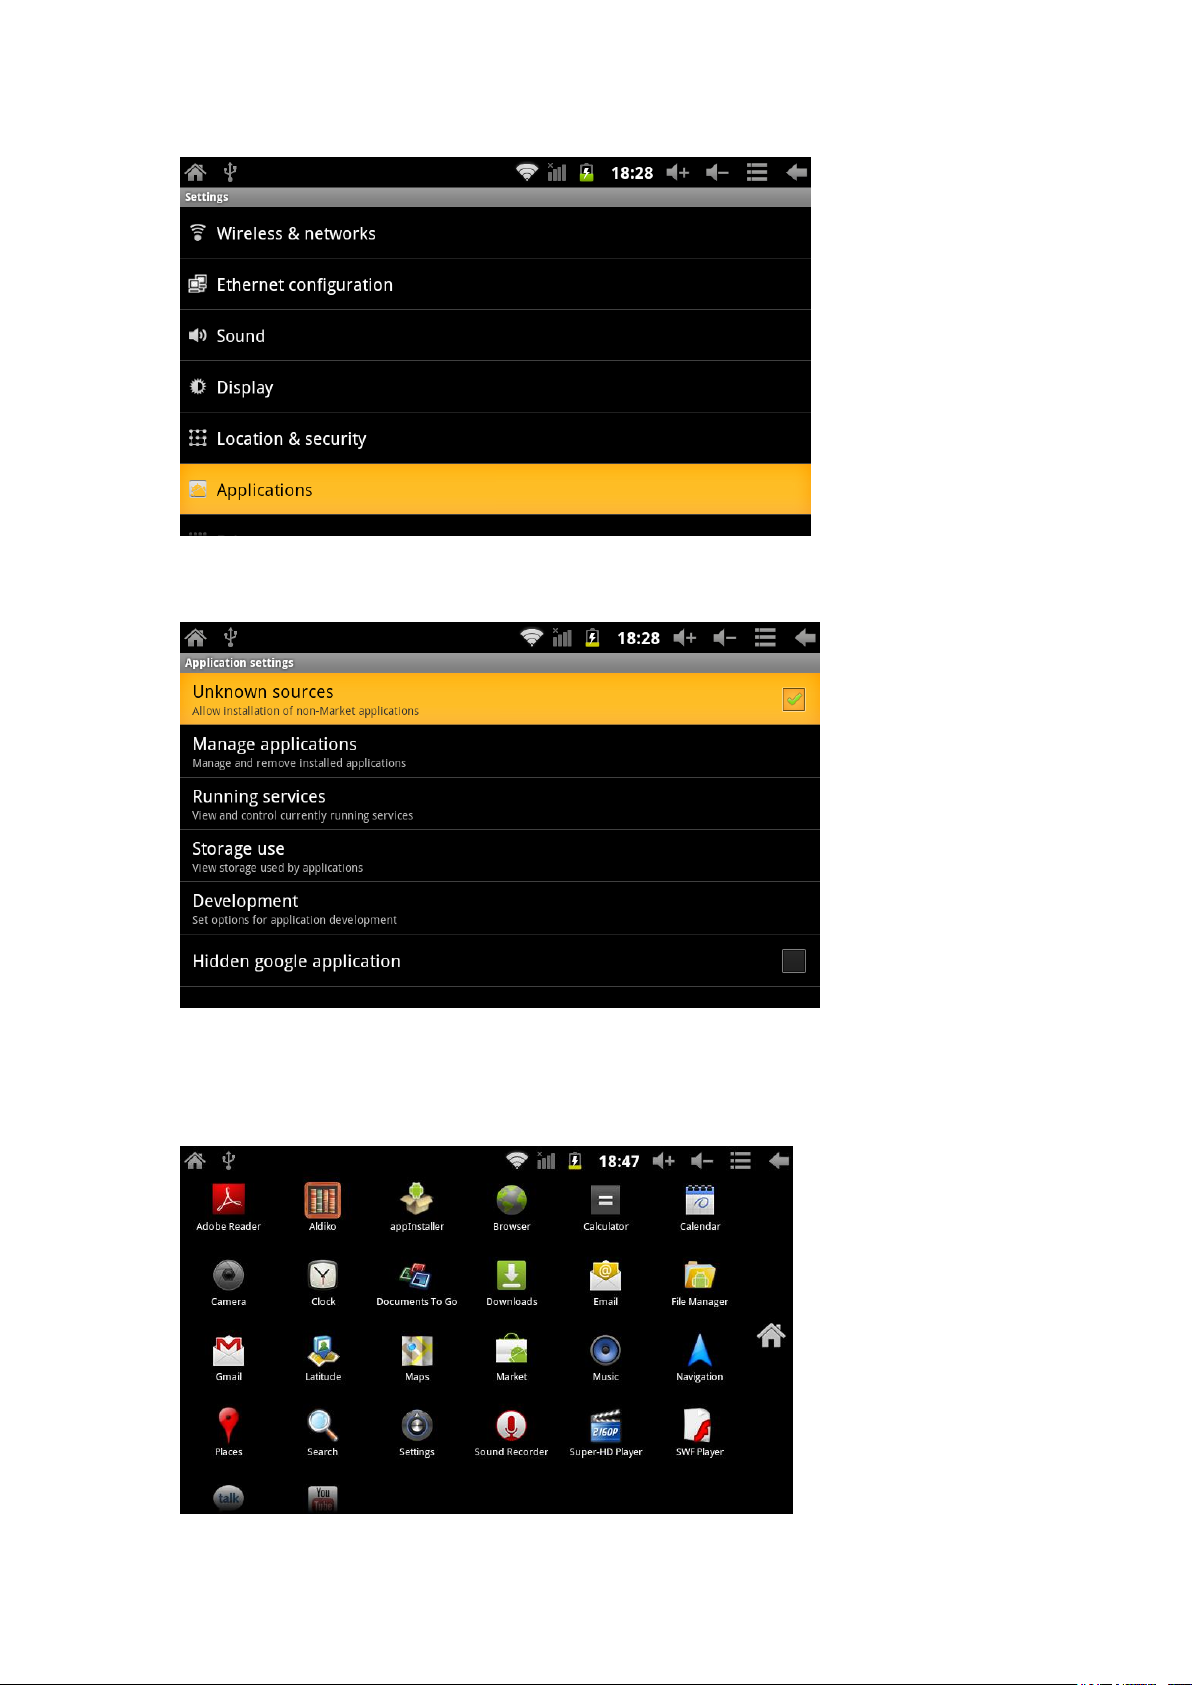
2. click “Unknown sources”,and then click “OK” display as following:
3. Copy the application to a TF card or the NAND FLASH.
4. Choose “Appinstaller” in the main menu:
Page 13
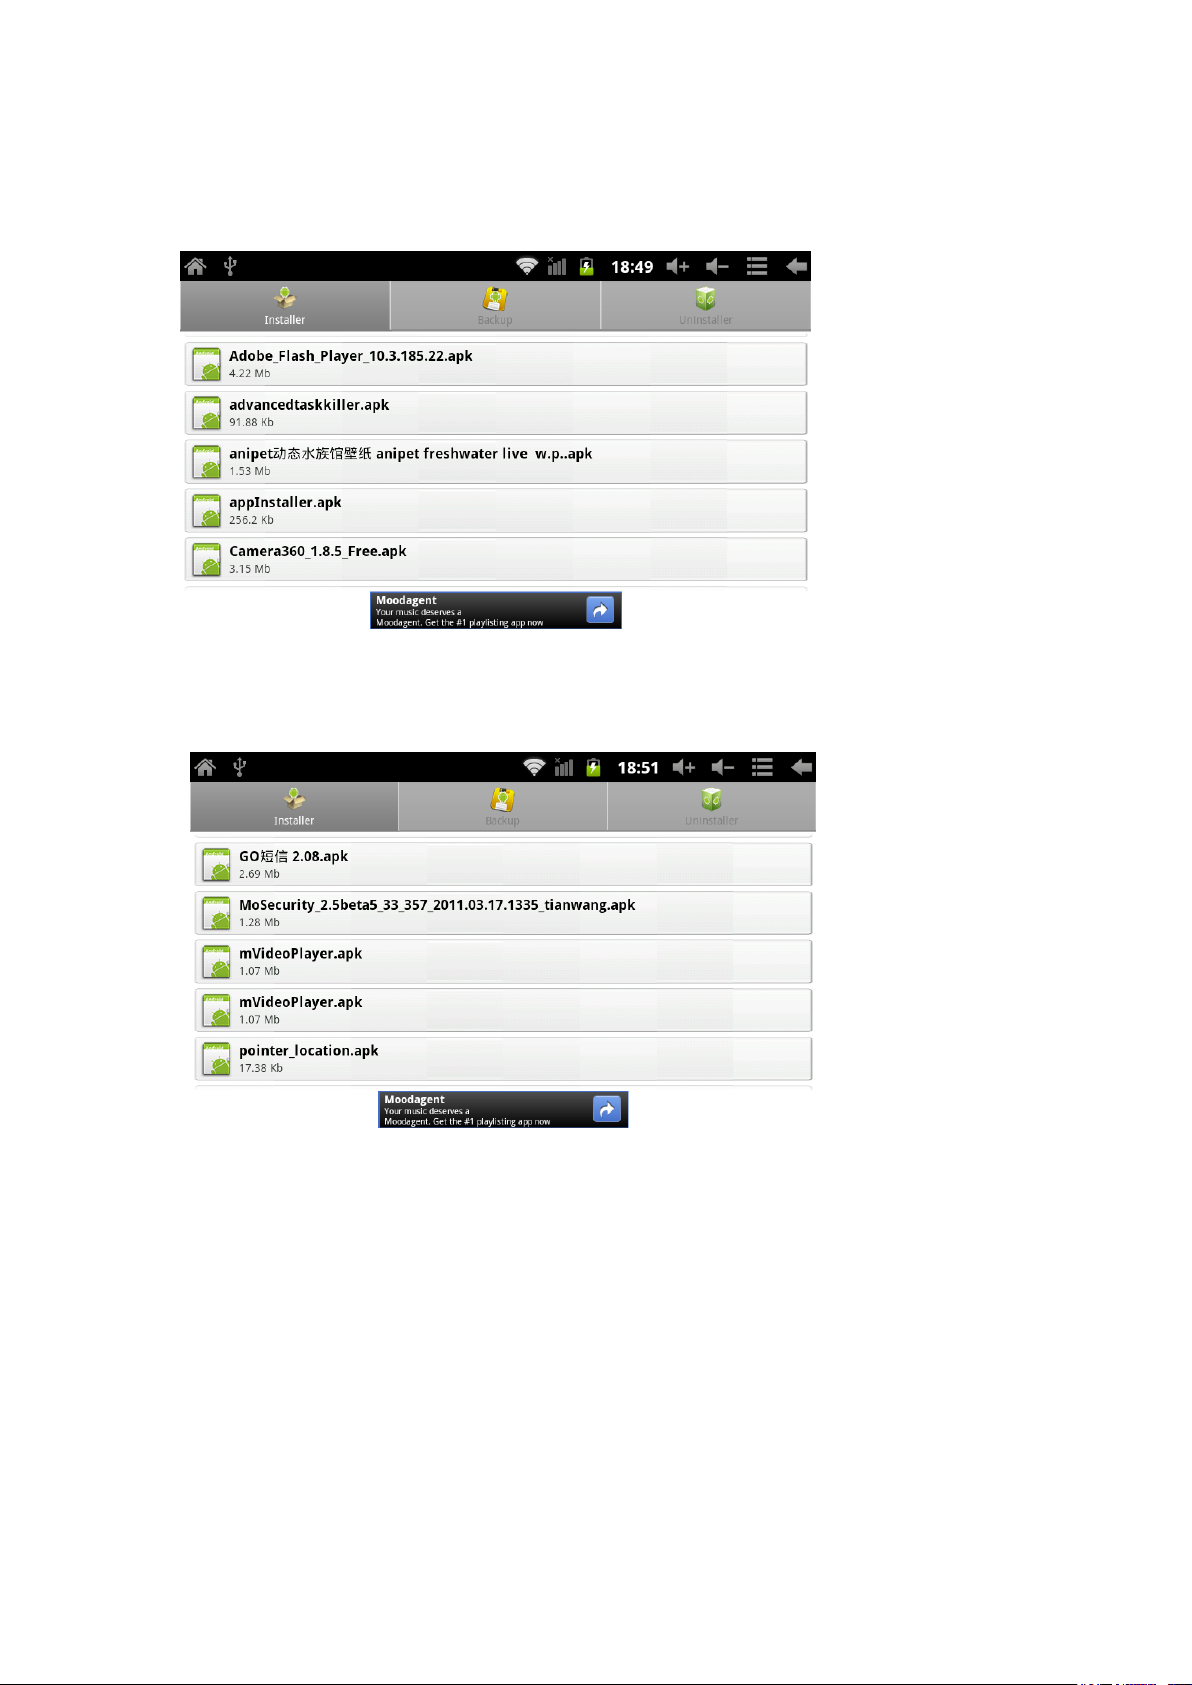
Enter the program installer for the first time, the system confirm NAND FLASH as search
directory.
5. When the APK installer program is stored in the TF Card, the system searches catalogue from
TF card automatically.
6. Select the application which is needed to be installed.
Page 14
User can install application on-line by Android market or computer download or web browser
download.
Uninstall the application program:Applications are able to uninstall by a third-part management
tool or application management software in the device.
Select “setting”, and then “applications”, next “manage applications”, after that choose relevant
application program installed to check the program information or uninstall the applications.
Network:
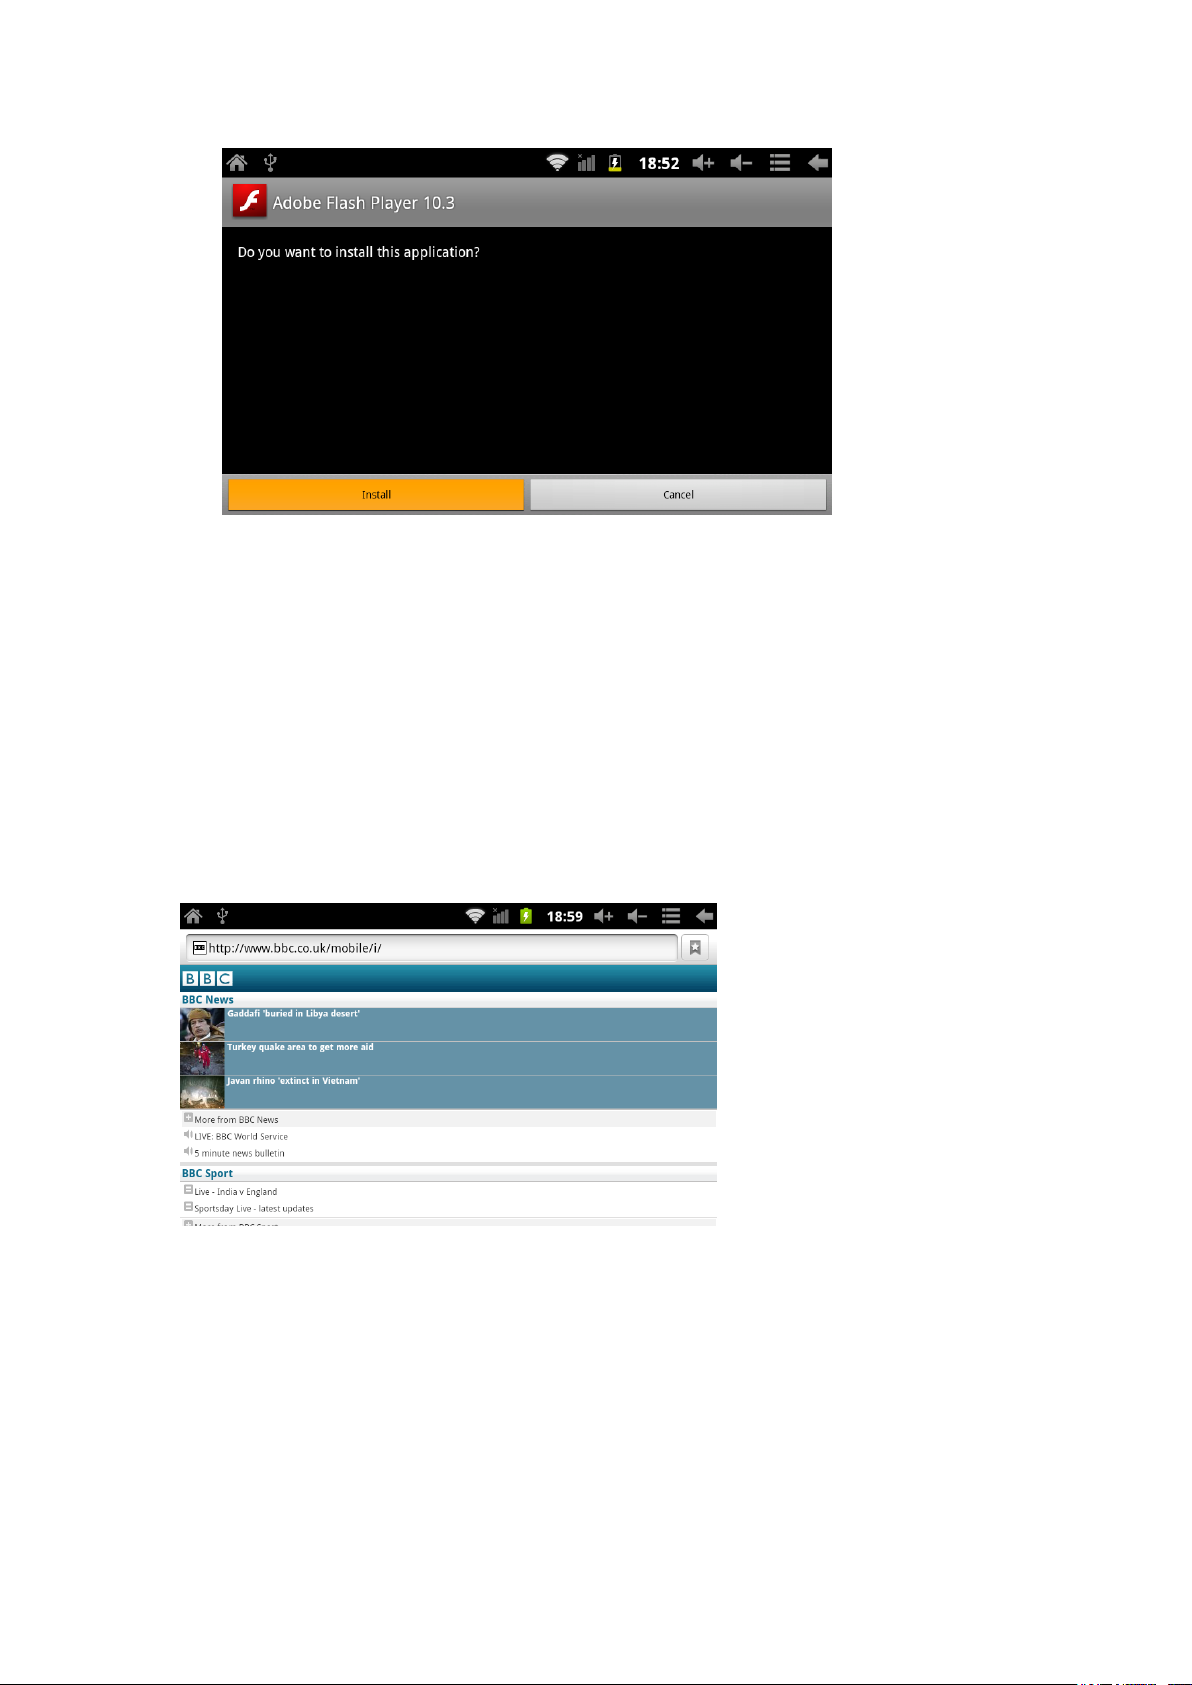
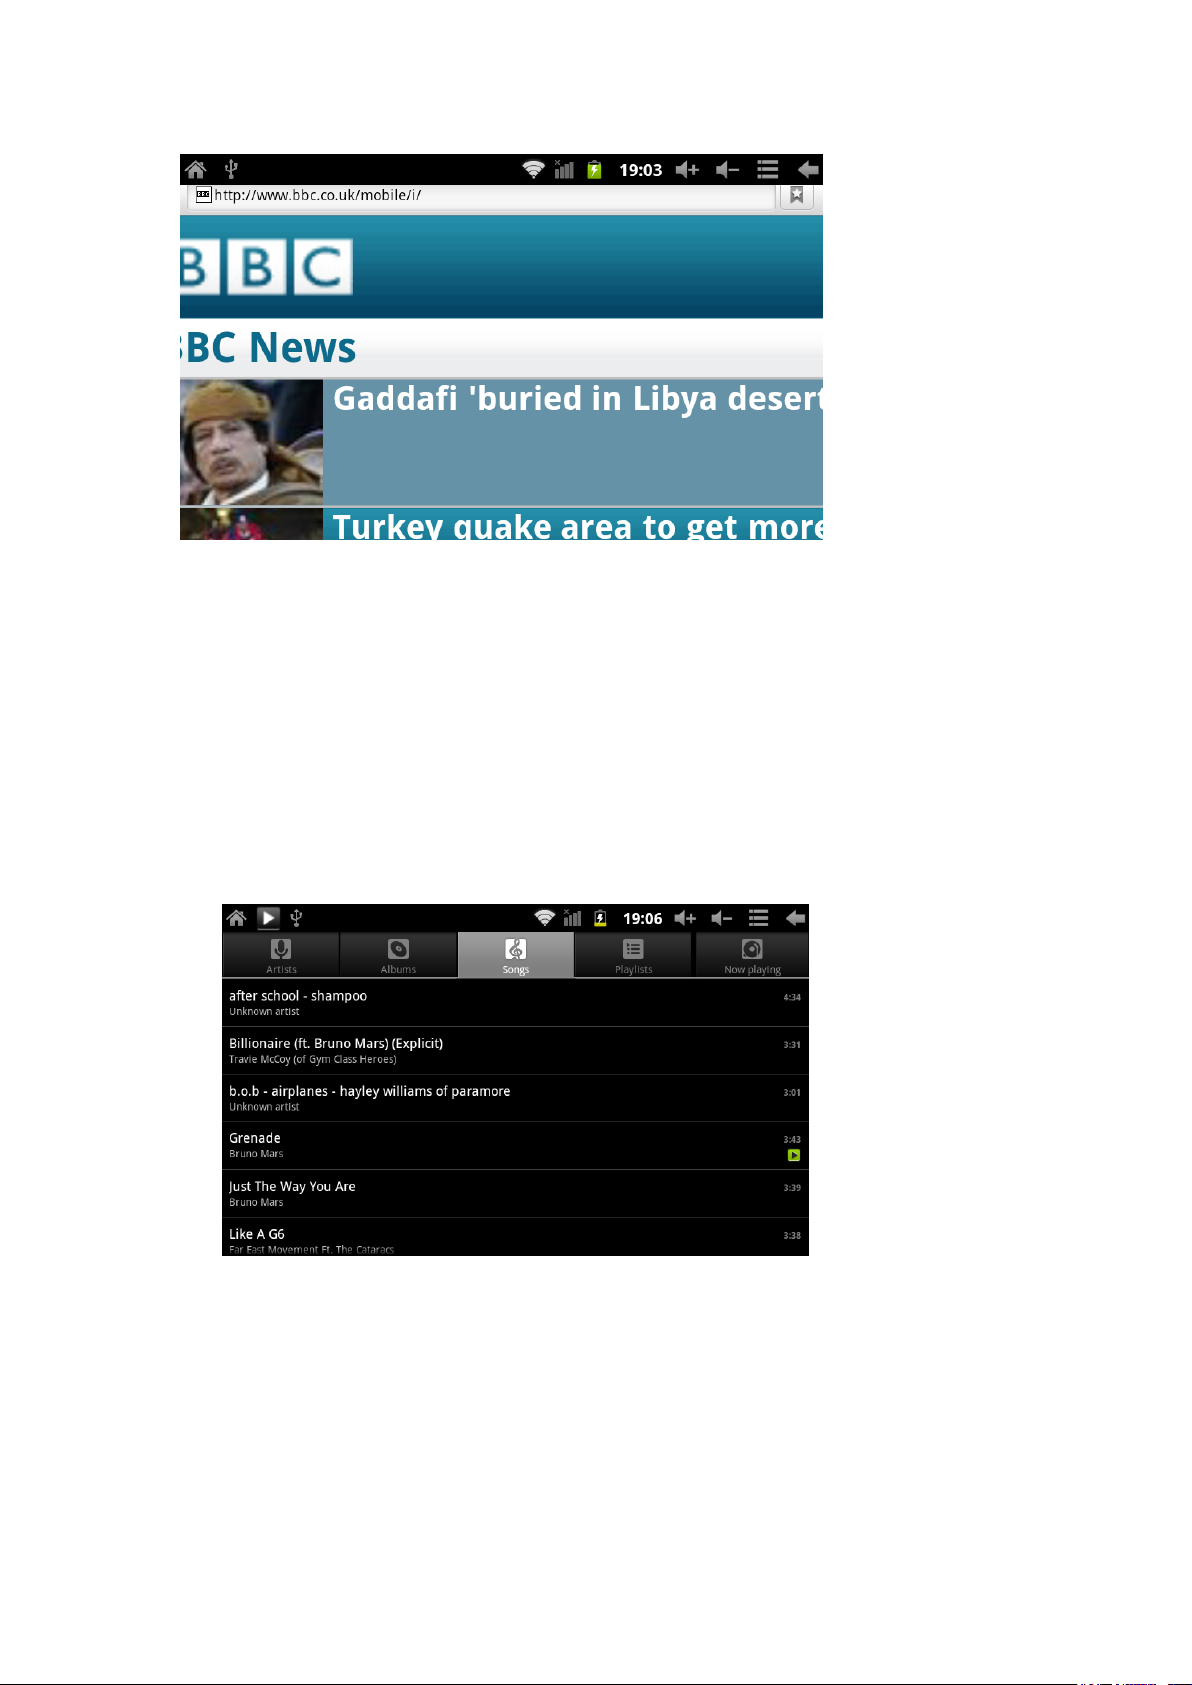
Web browser:
Open the web browser and input the URL when the network is connected.
Web-page can be zoom in or out as follows:
Page 15
Audio on-line
Applications like video player, on-line TV program player, online audio player can be downloaded
from Android market and installed in this product. Run the application to watch video or program
online and listen to radio online.
User can download other third-part network application software including web browse, audio
playback, web client, IM.
Music playback:
Click the icon of "music" in the main menu to enter the interface of music playback. All the audio
files in the system list as default:
Files can by copied from USB device through USB port, SD card or download from network.
Choose the relevant label to check the “Artist”, “Album”, “Music” information and then select the
music to playback.
Page 16

Video playback
Click “Super-HD player” in the main menu, enter the main interface of the “Super-HD player”
and all the video and audio files listed as following:
Choose the video files and enter video playback interface as follows: "playback" ,"stop", "FF".
"FB" are available to control the play back.
Page 17
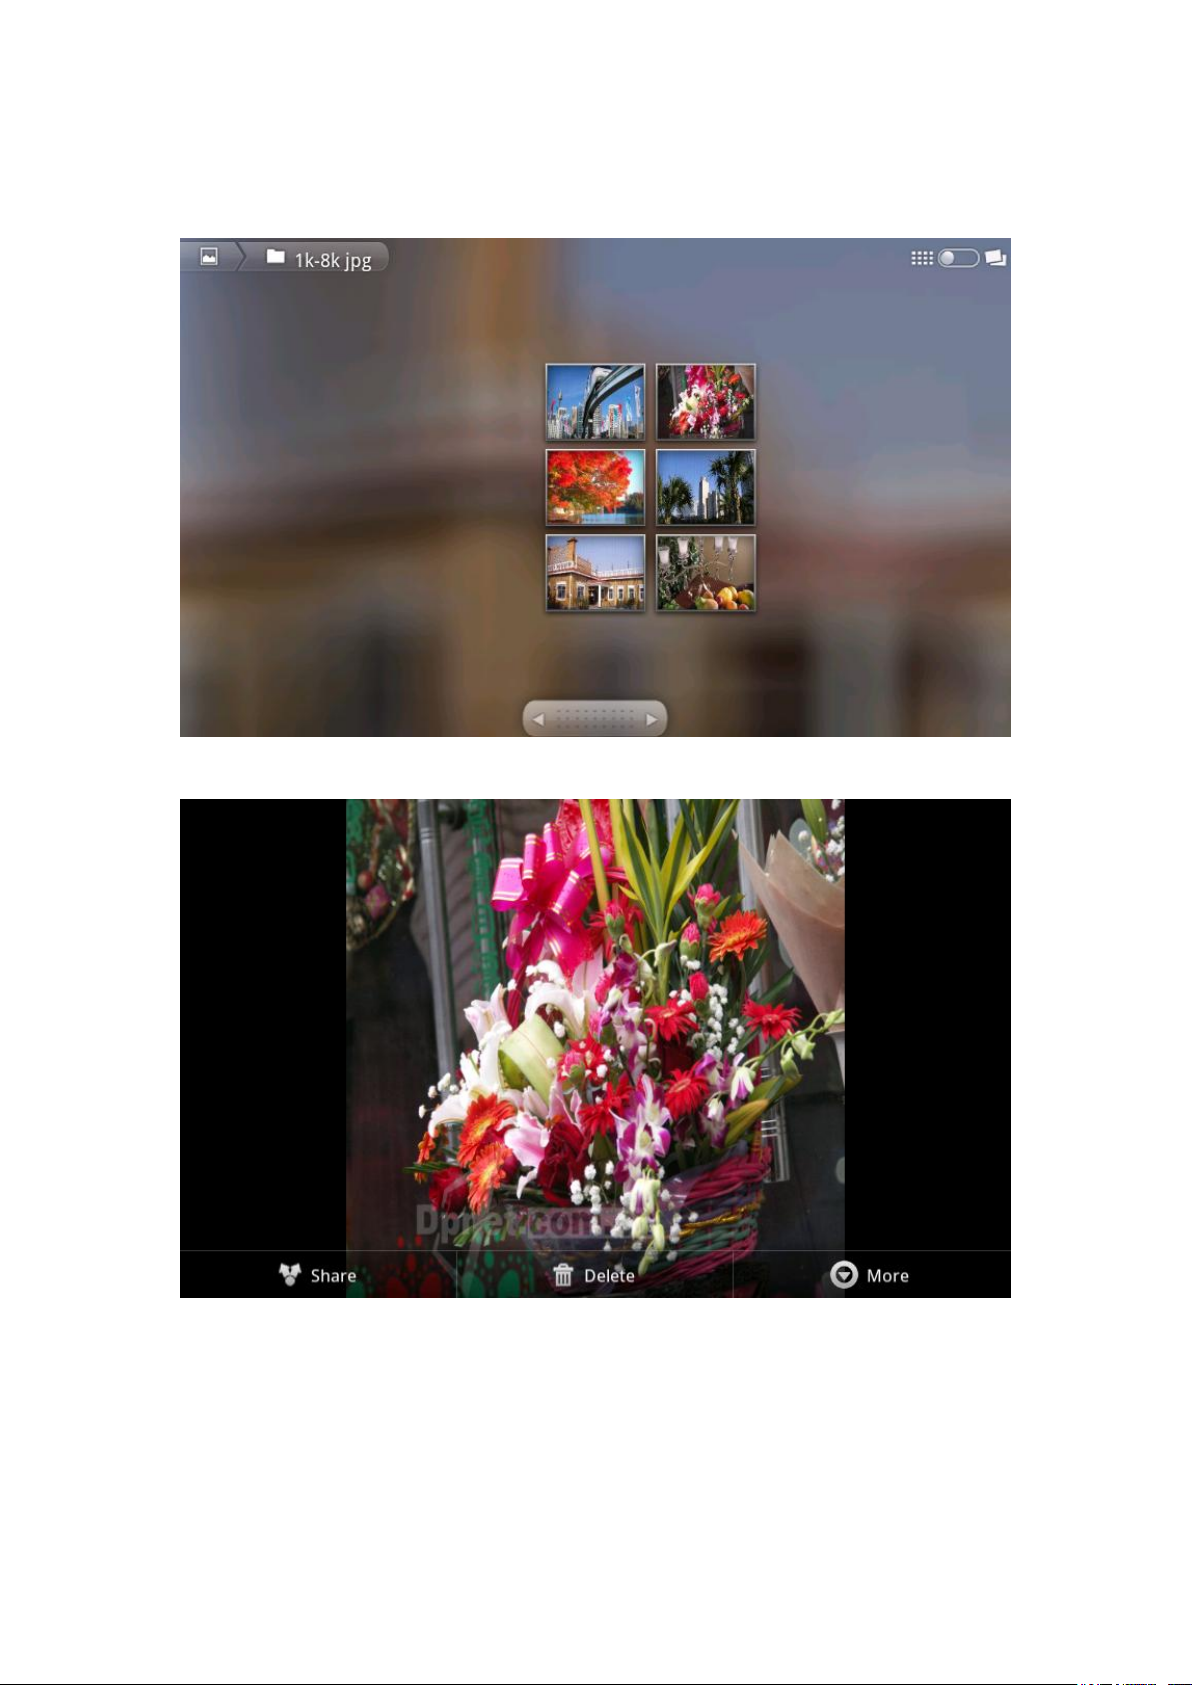
Picture Browse:
Click the "photo gallery" in the main menu to enter the main interface.
All the photos are listed as follows:
Choose the picture file to enter the interface. Options like “share”, “delete” and “more” are
available as follows:
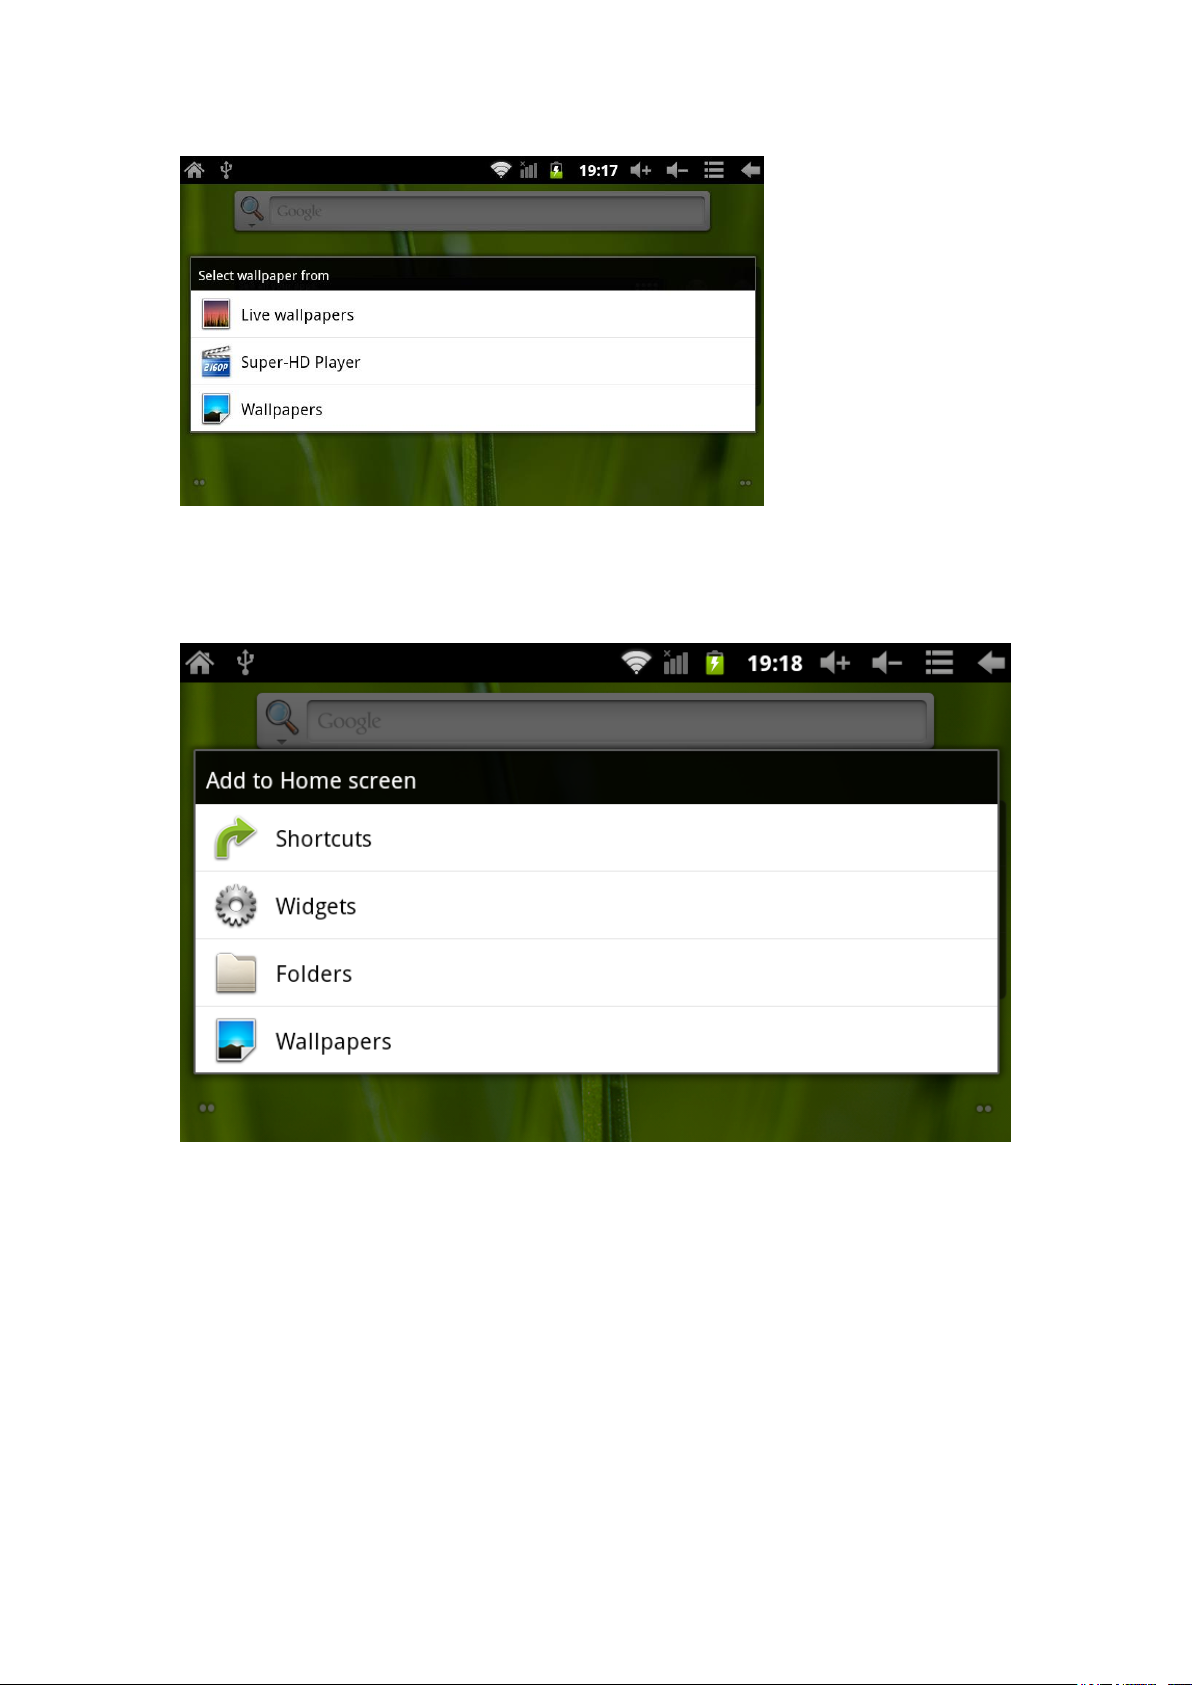
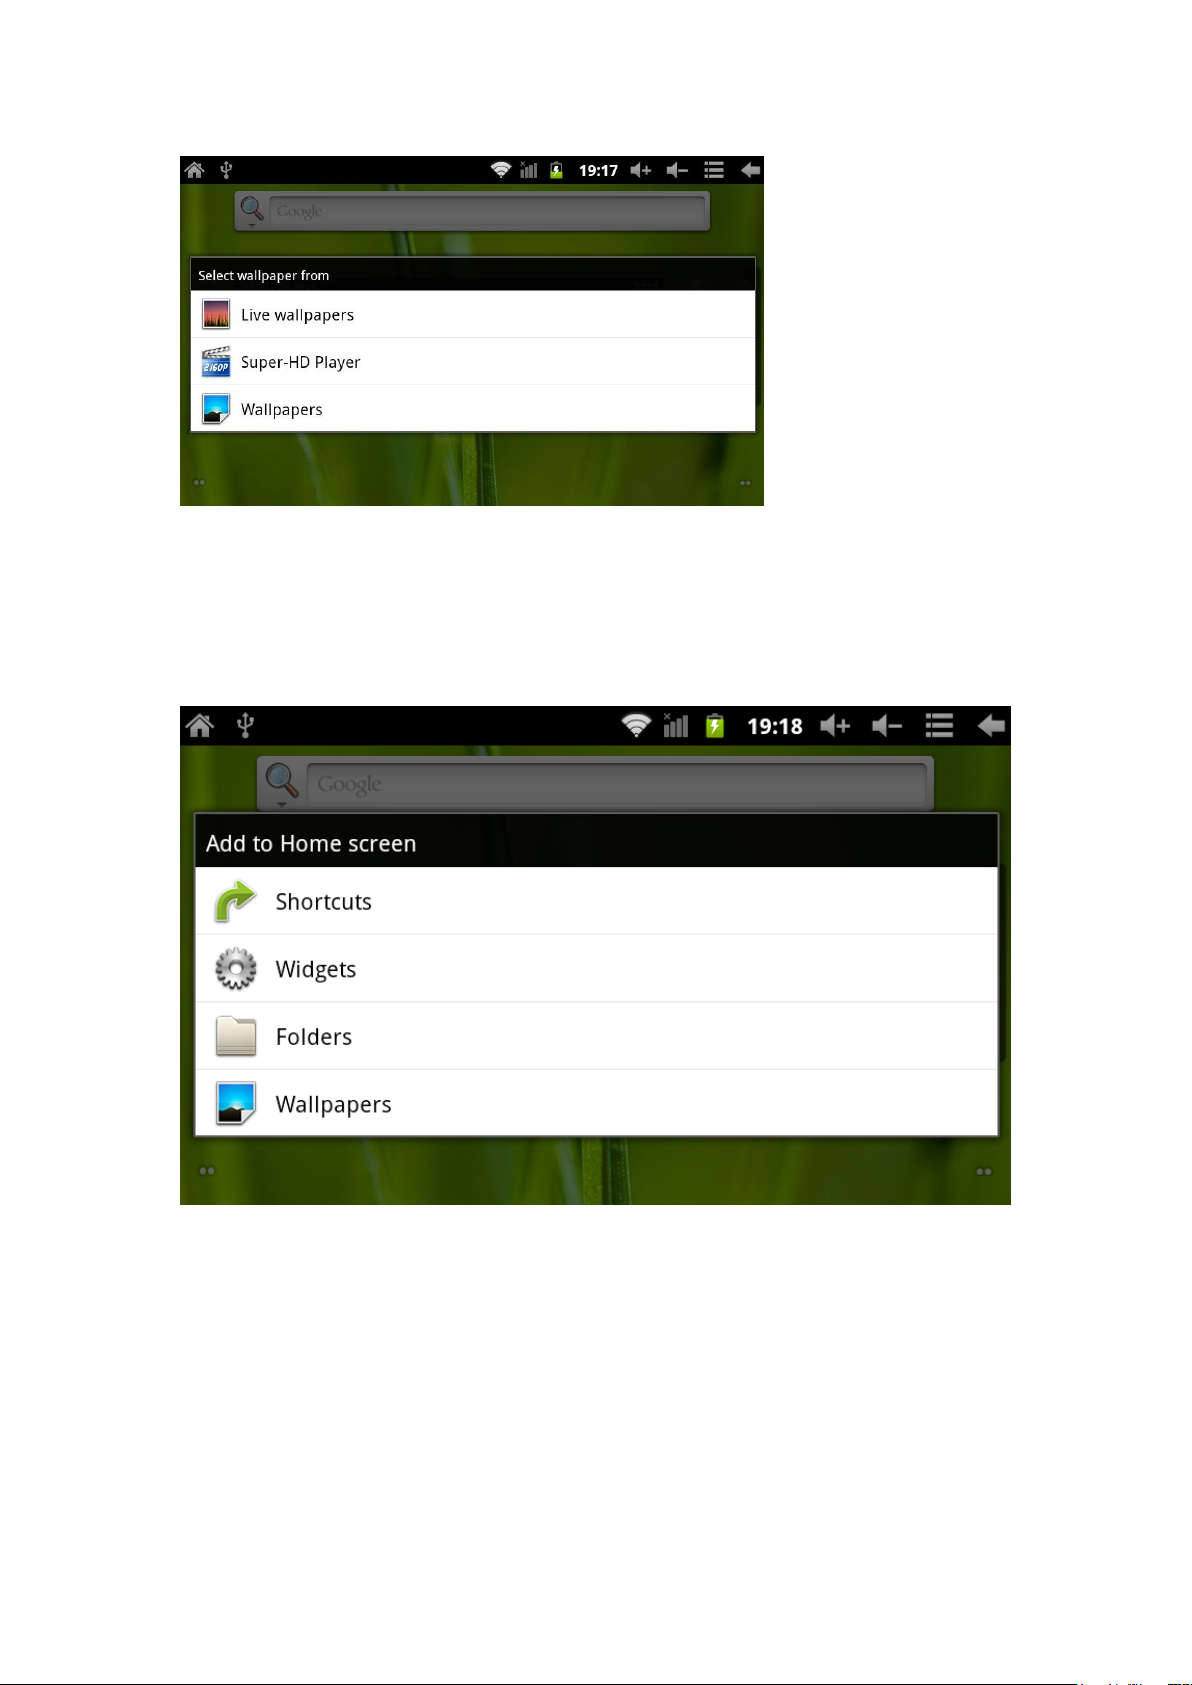
Wallpaper:
The system supports static picture & 3D wallpaper
Press "Menu" in the desktop, choose “wallpaper” option and a prompt box “select wallpaper
from” displays:
Page 18
Choose Wallpaper: you can use the picture as the wallpaper defined.
Choose the live wallpaper: you can choose the 3D wallpaper the system offer.
Choose the photo gallery: You can regard the picture you choose as a static wallpaper.
Press and hold the screen, the prompt box displays as follows:
Enter the above dialog and click the "wallpaper" setting.
Choose as follows:
Choose wallpaper: You can regard picture you use defined as the wallpaper
Choose the live wallpaper: You can 3D wallpaper the system offer.
Choose the dialog , you can regard the pictures offered by the system as the static wallpaper.
Voice recording:
Click “ Record” in the main menu to enter the interface as follows:
Page 19
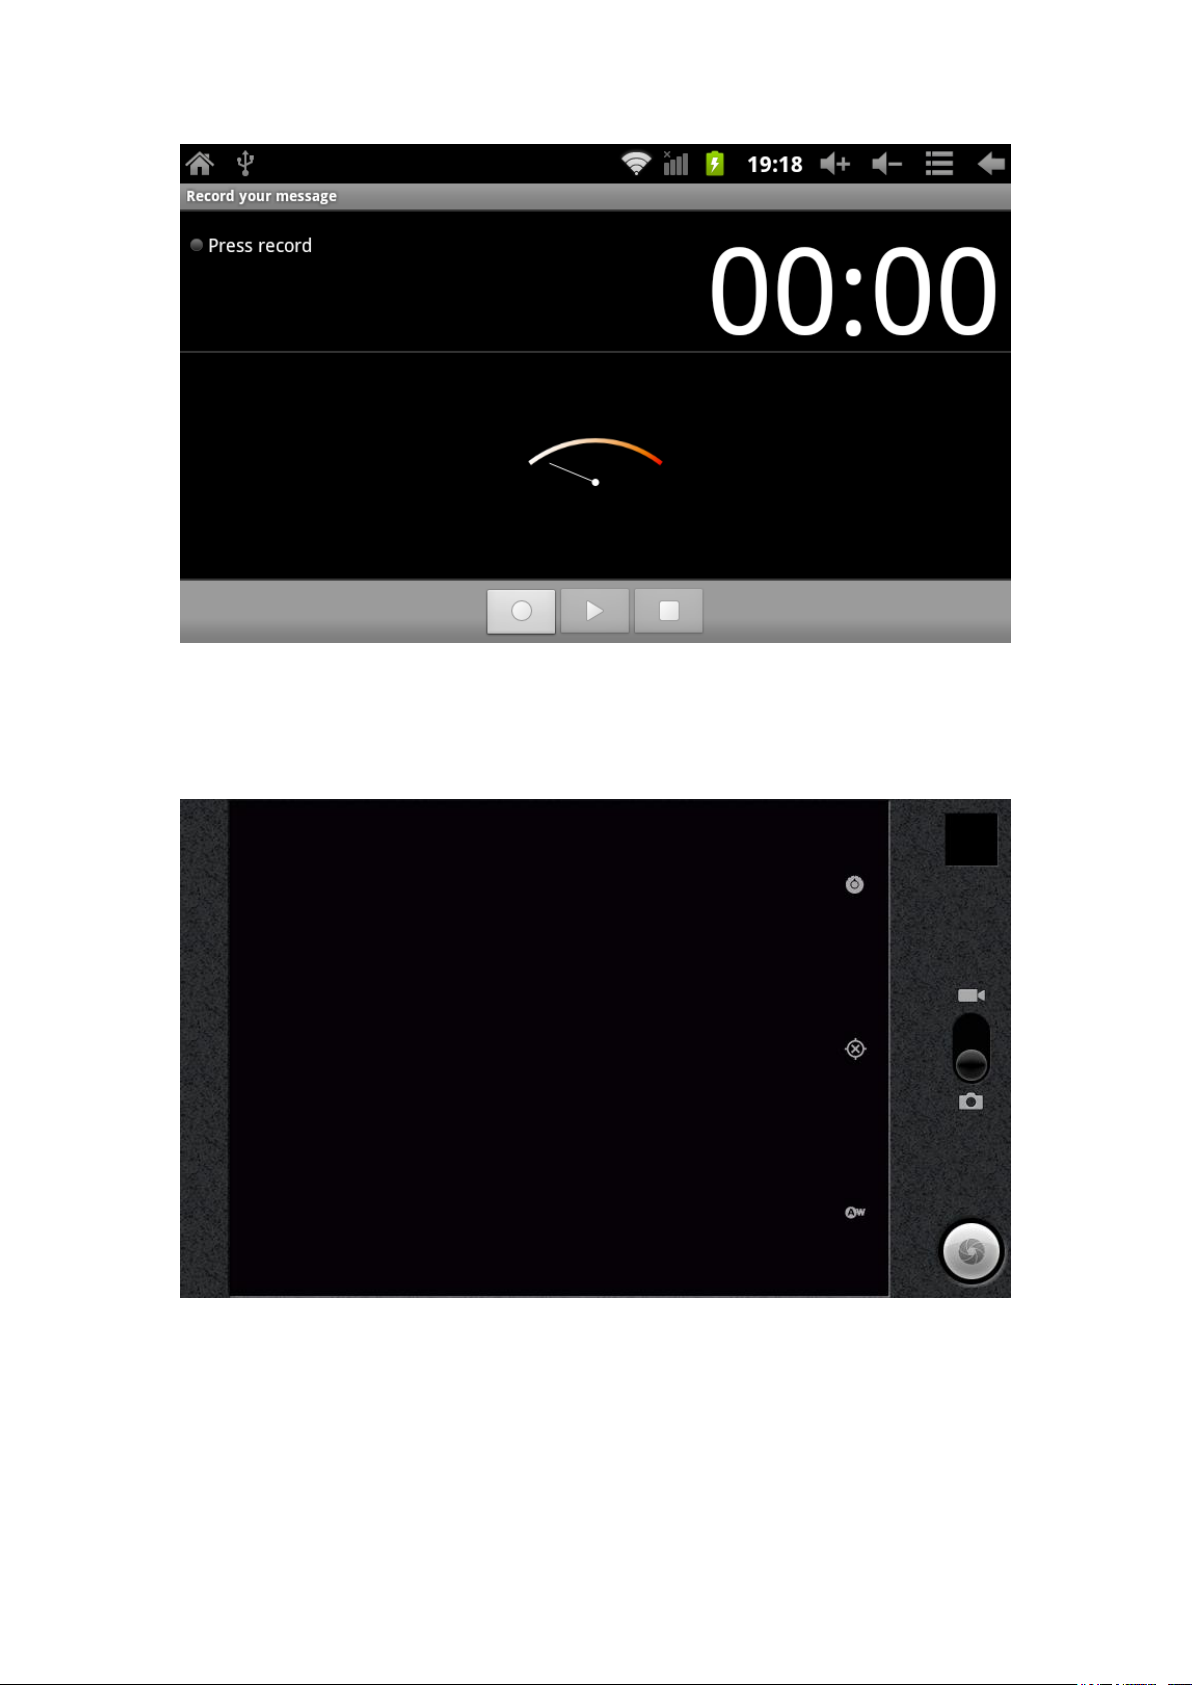
Choose the "Record" button to start and “Stop” when it is finished. Choose "playback" button to
play the voice recorded right now and "using the record" button to store the voice.
Camera:
Please Click the "Camera" icon in the main menu to enter the main interface as follows:
Page 20
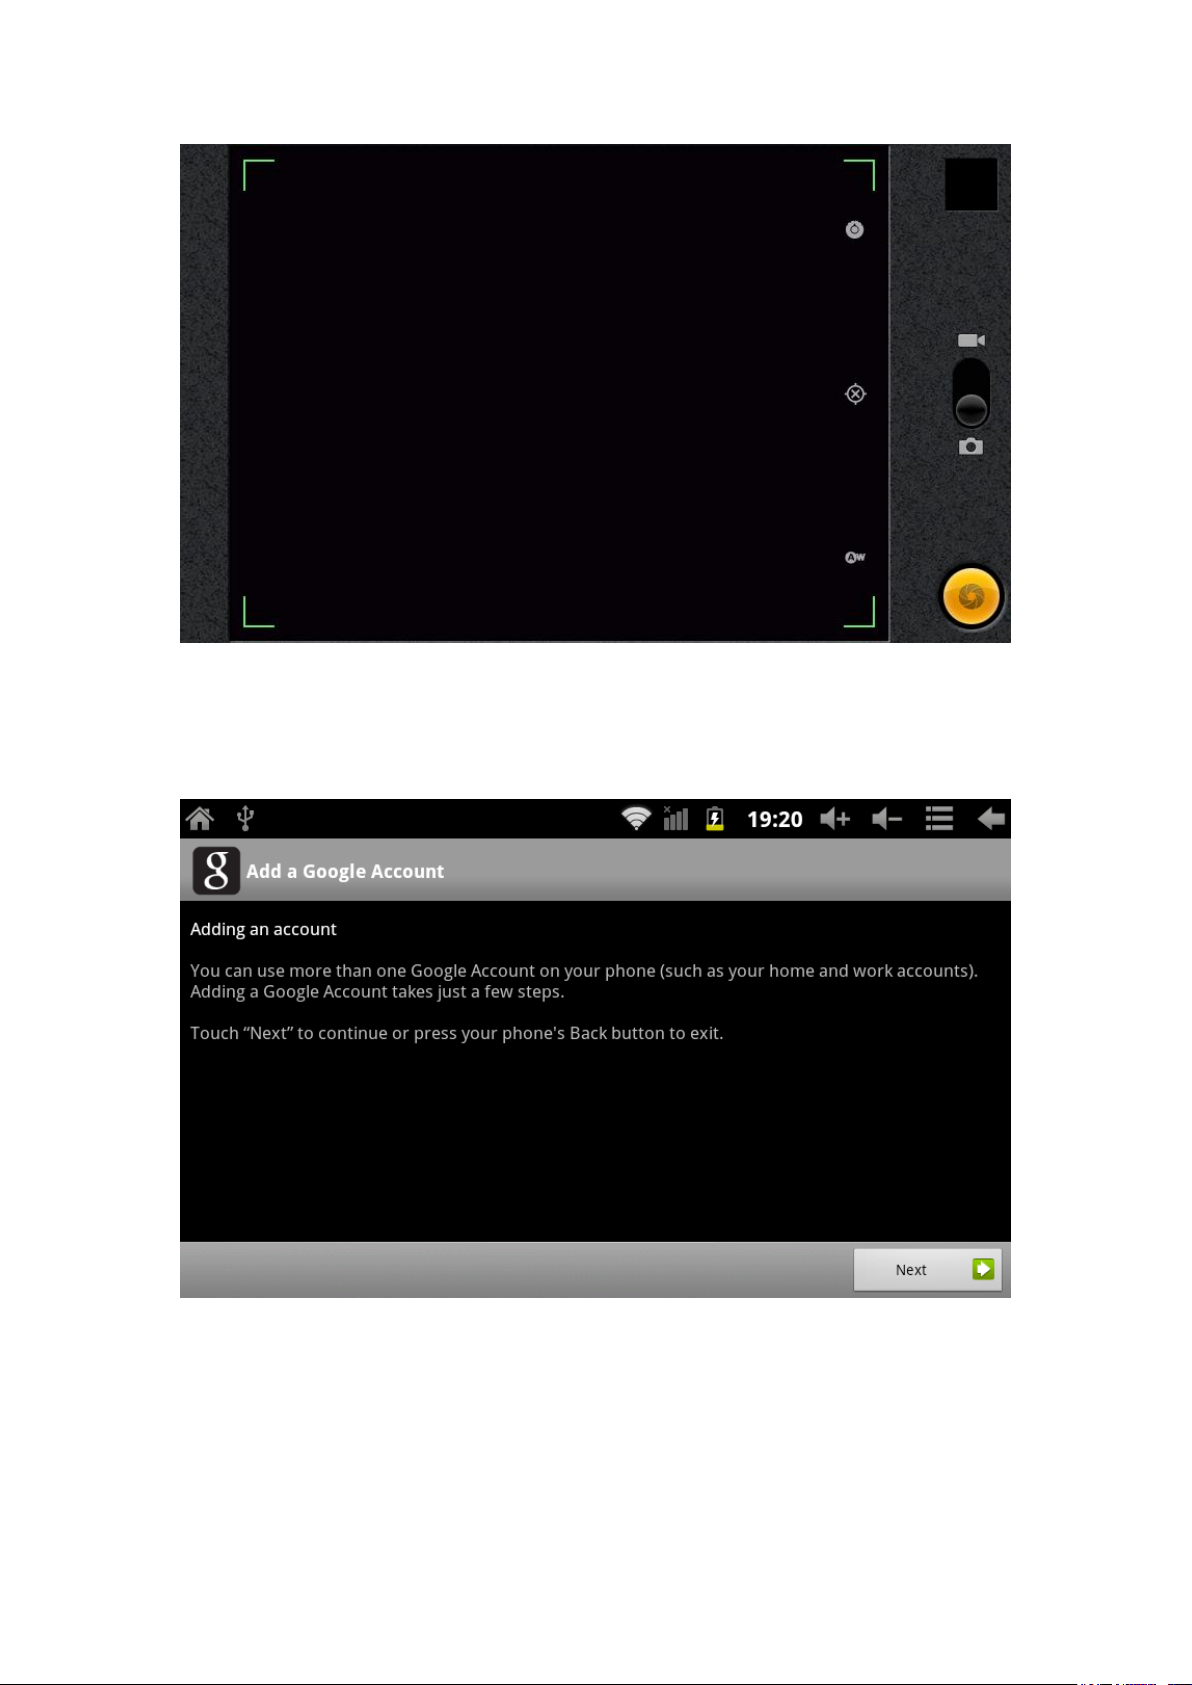
Select the camera buttons in the right corner to take a photo.
E-Market:
Click the E-Market in the main menu to enter the interface as follows:
Choose "next" to process.
Page 21
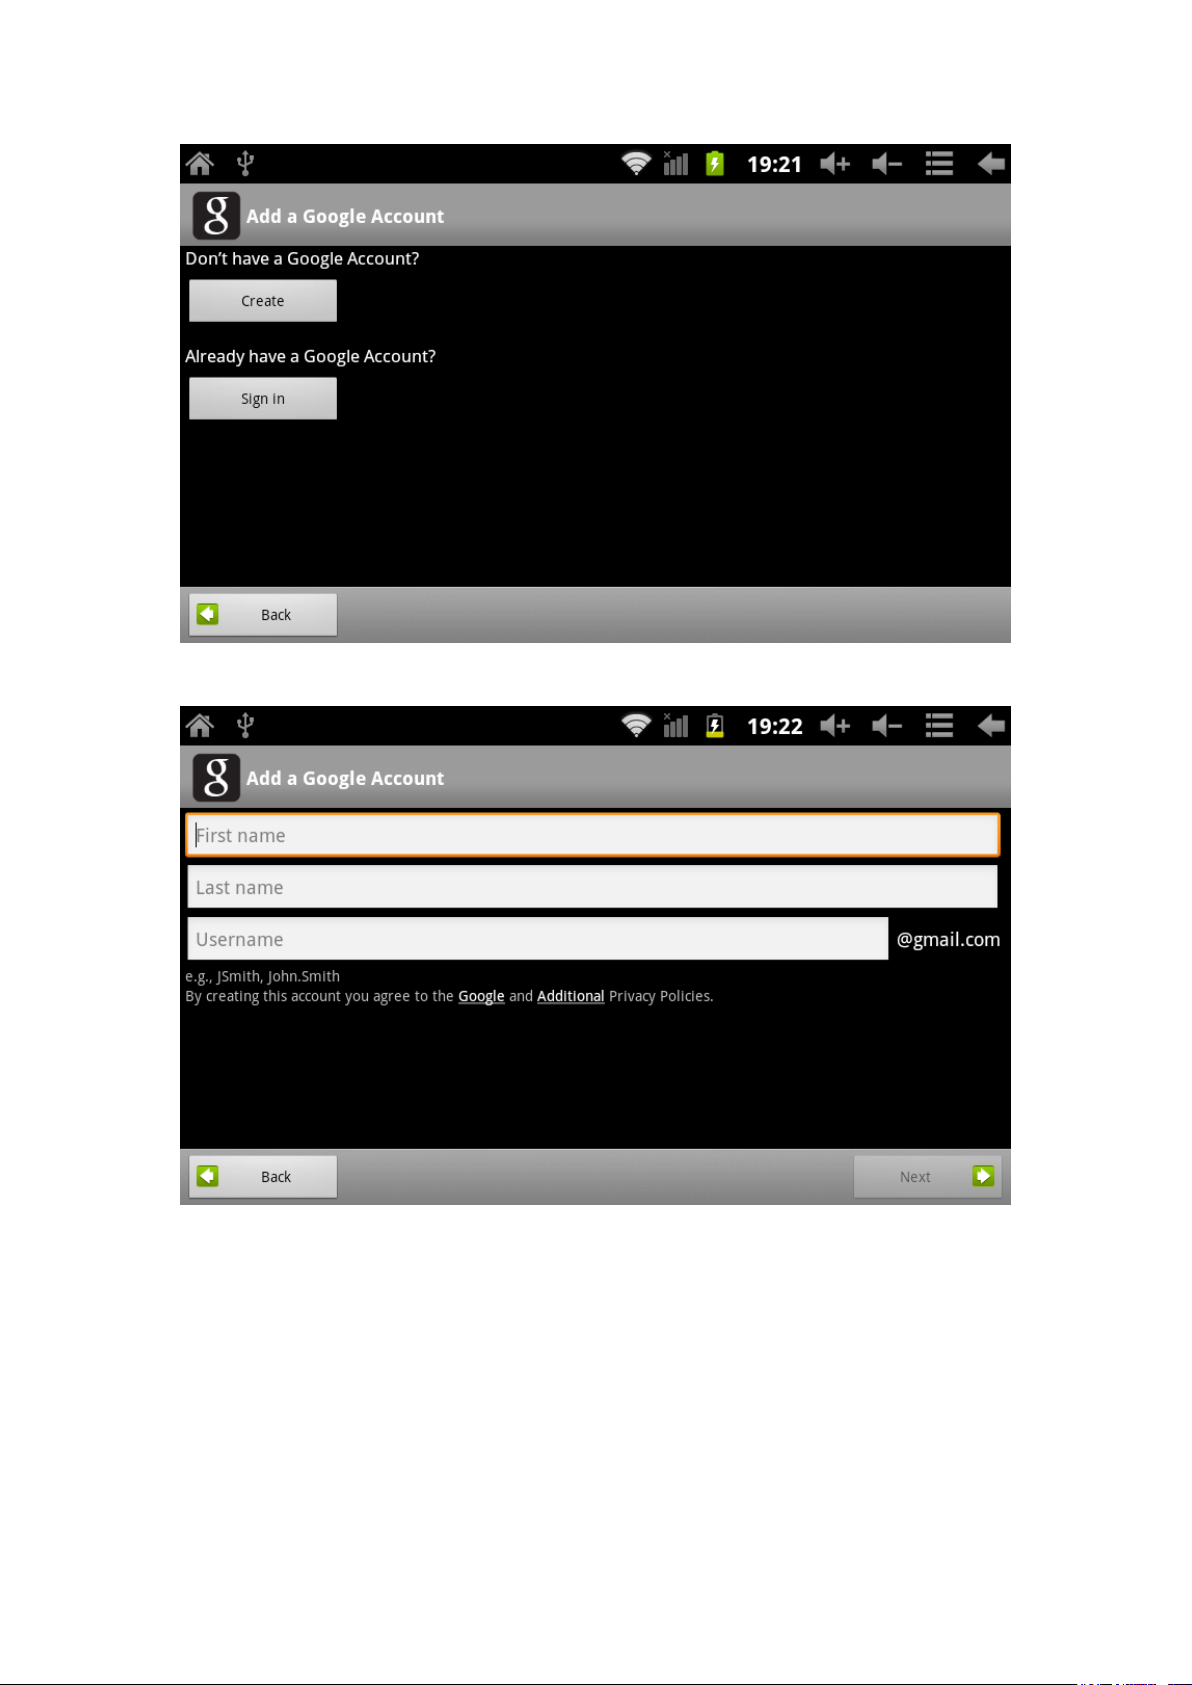
Create a Gmail account when no account exists and the following interface displays:
Set up “Google Account” as follows:
Page 22
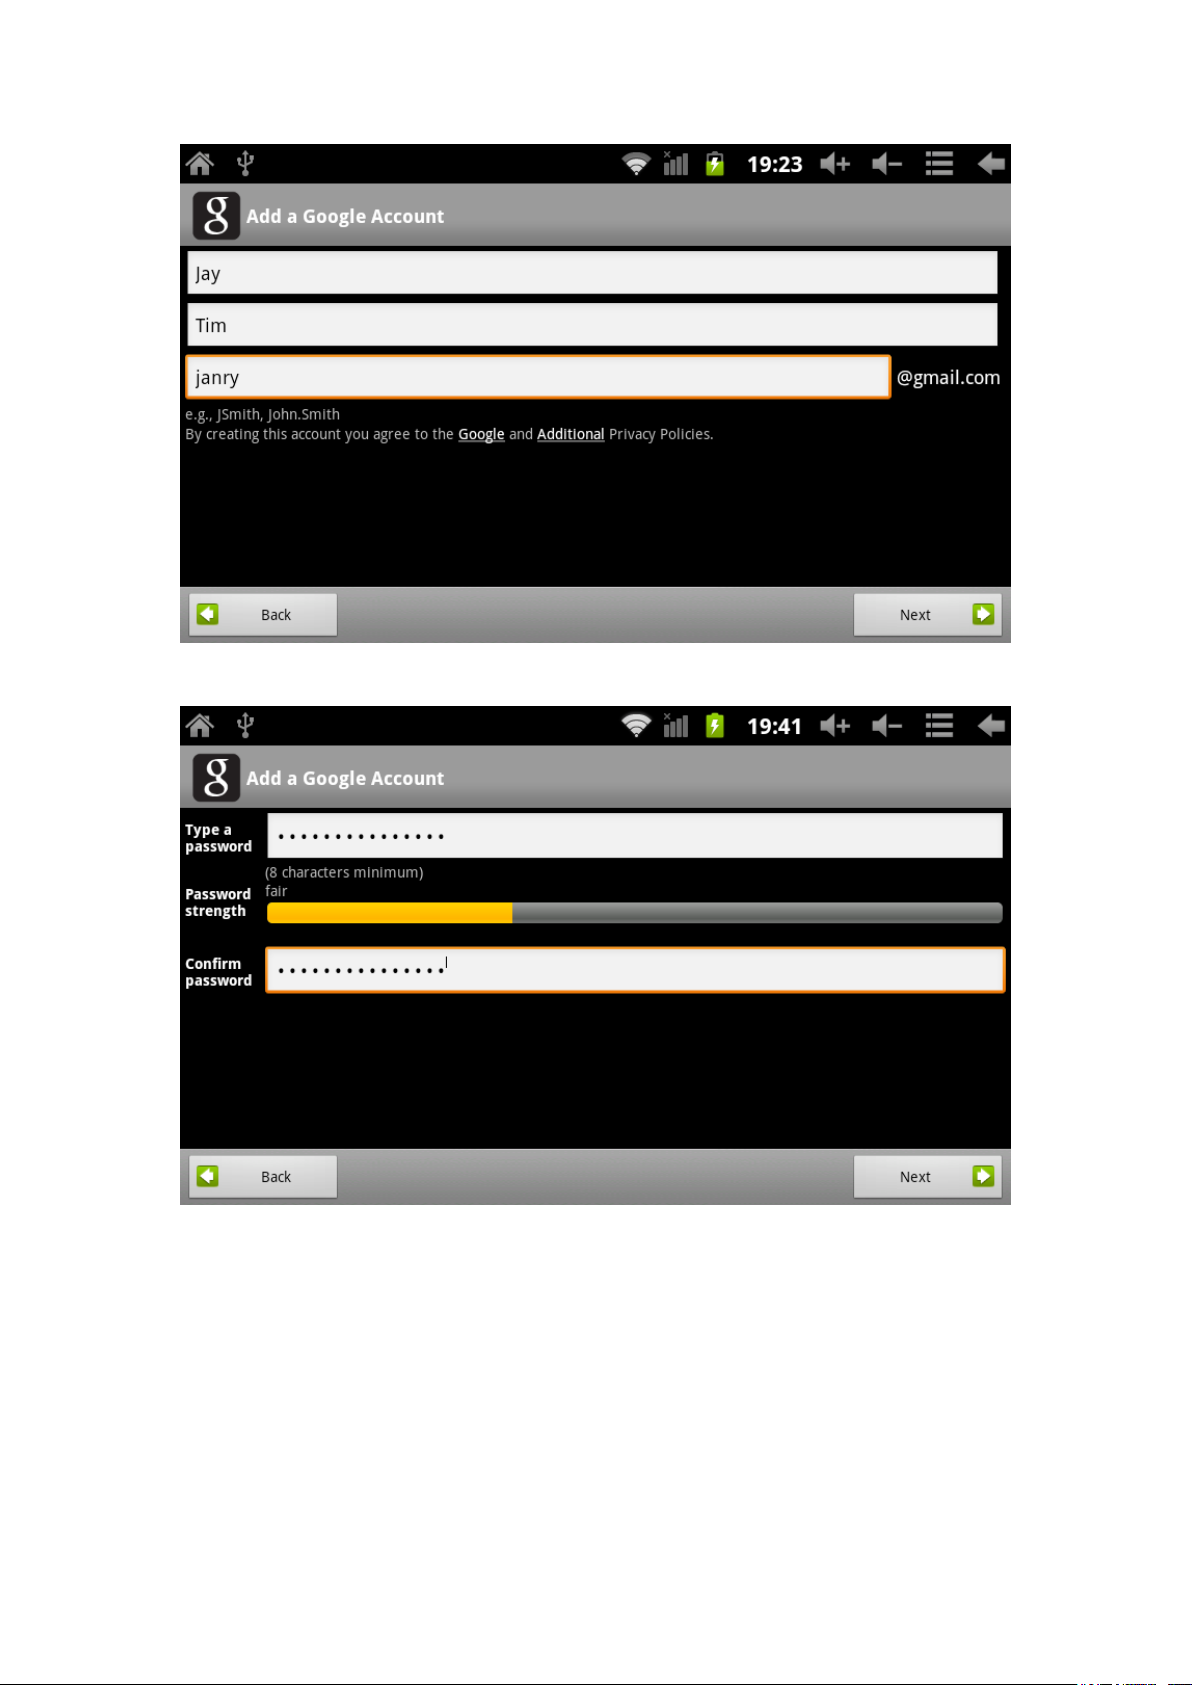
Choose "next" to process.
Finalize the password and then choose "next" to process.
Page 23
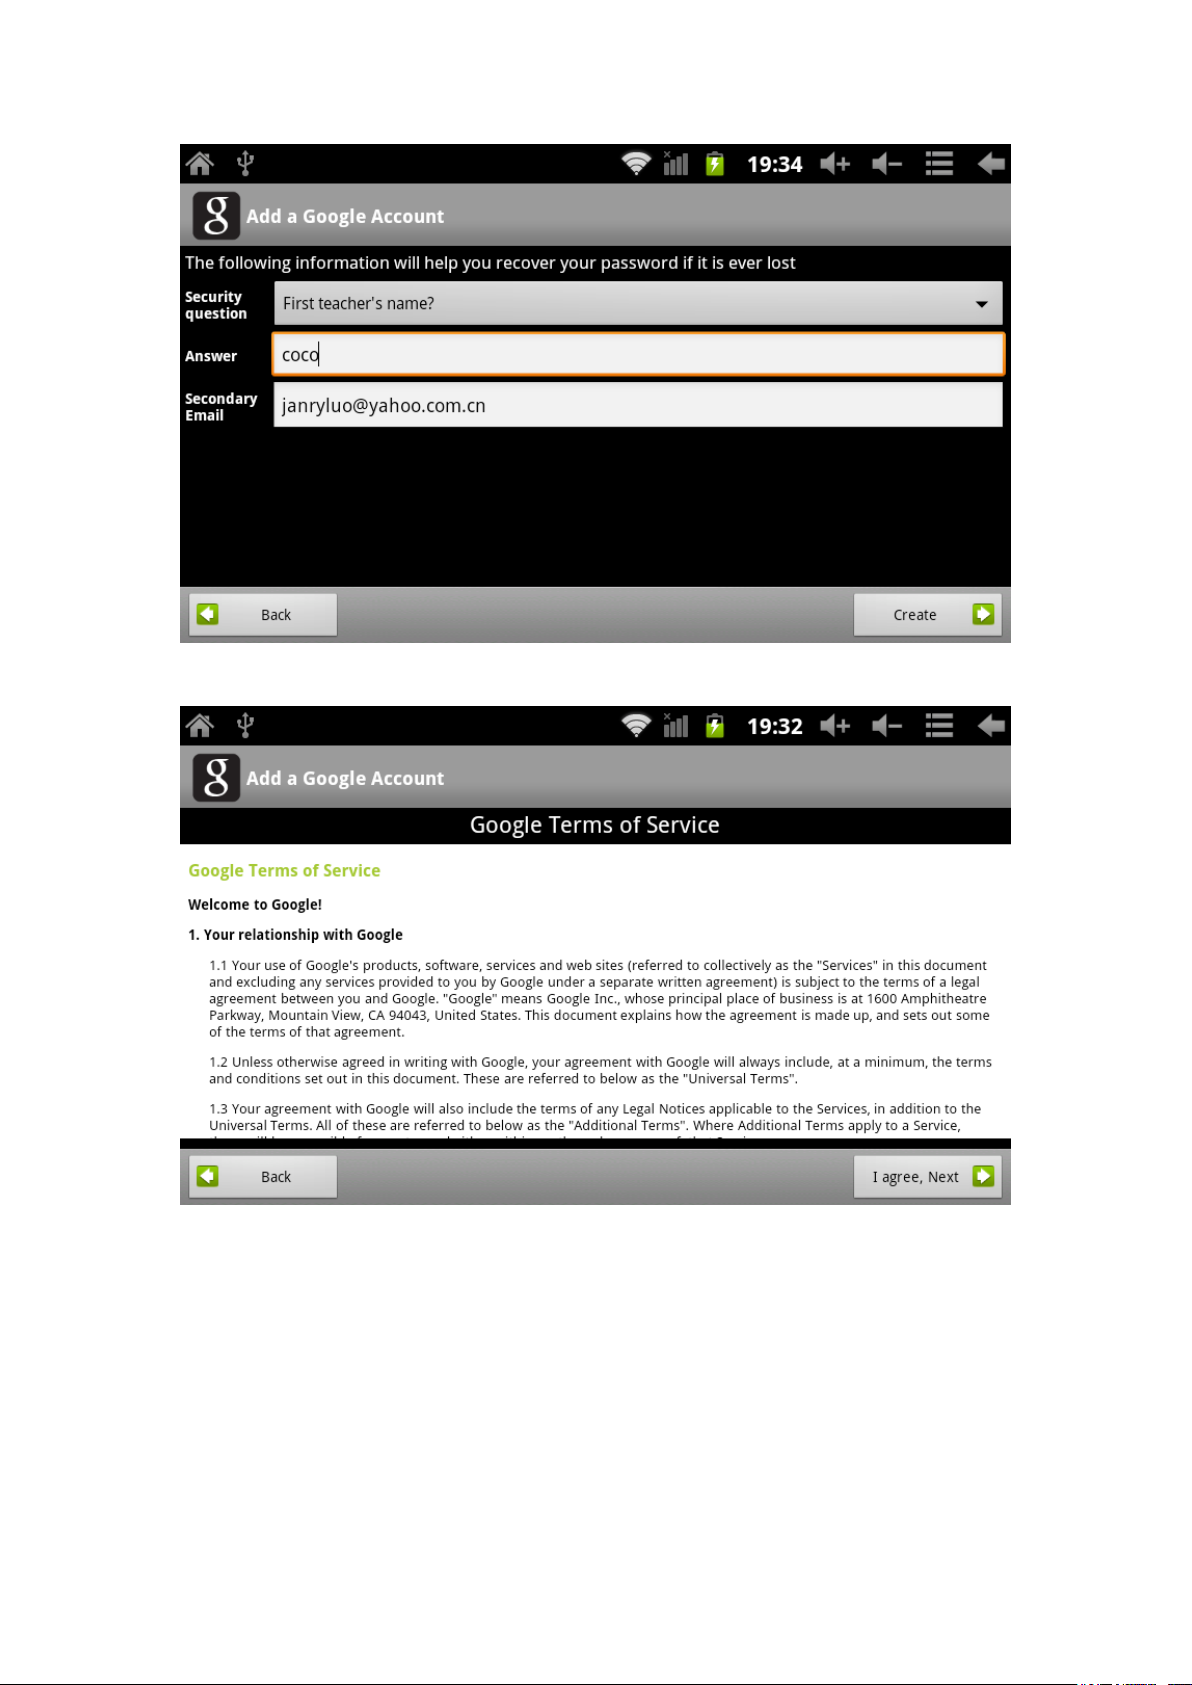
Just add a Gmail account when it exists.
Choose "I agree, Next", and the following will be displayed:
Page 24
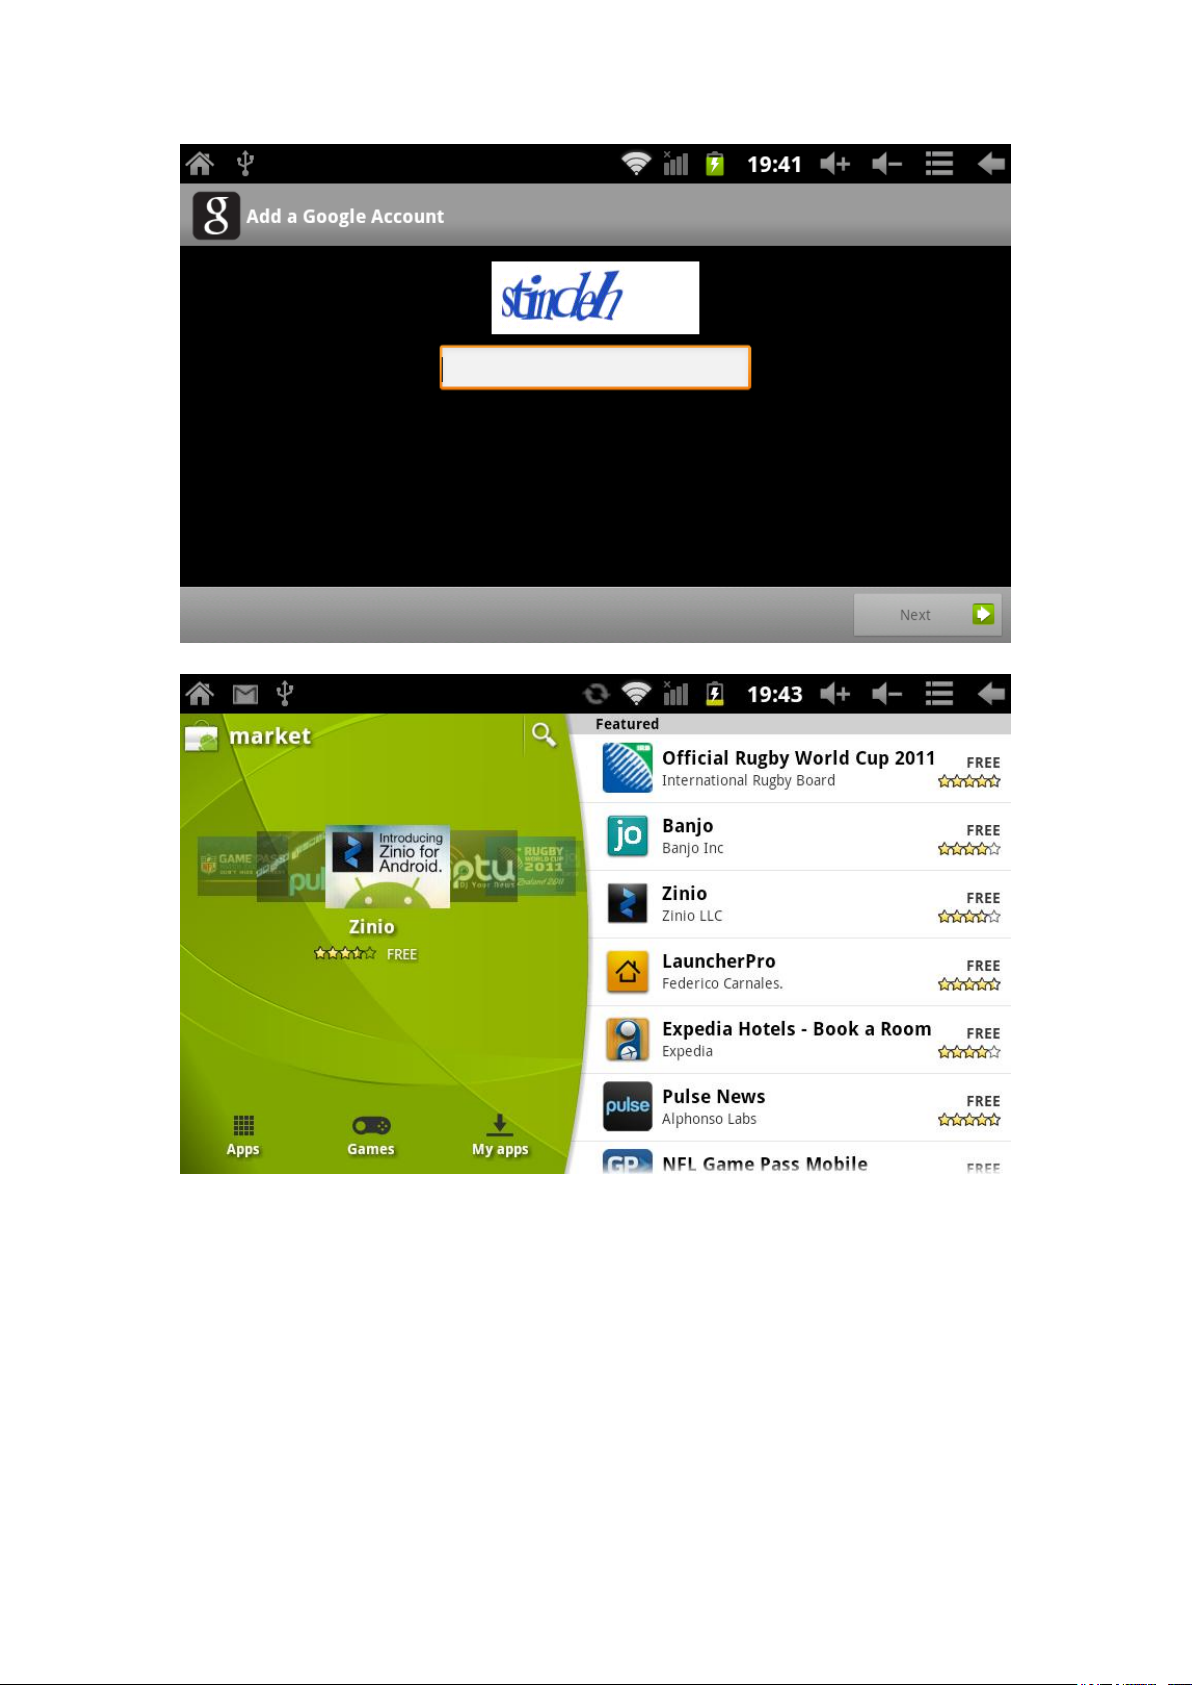
Please write the security code and choose "next" to enter.
Click "search" and input the software you want to install.
Page 25
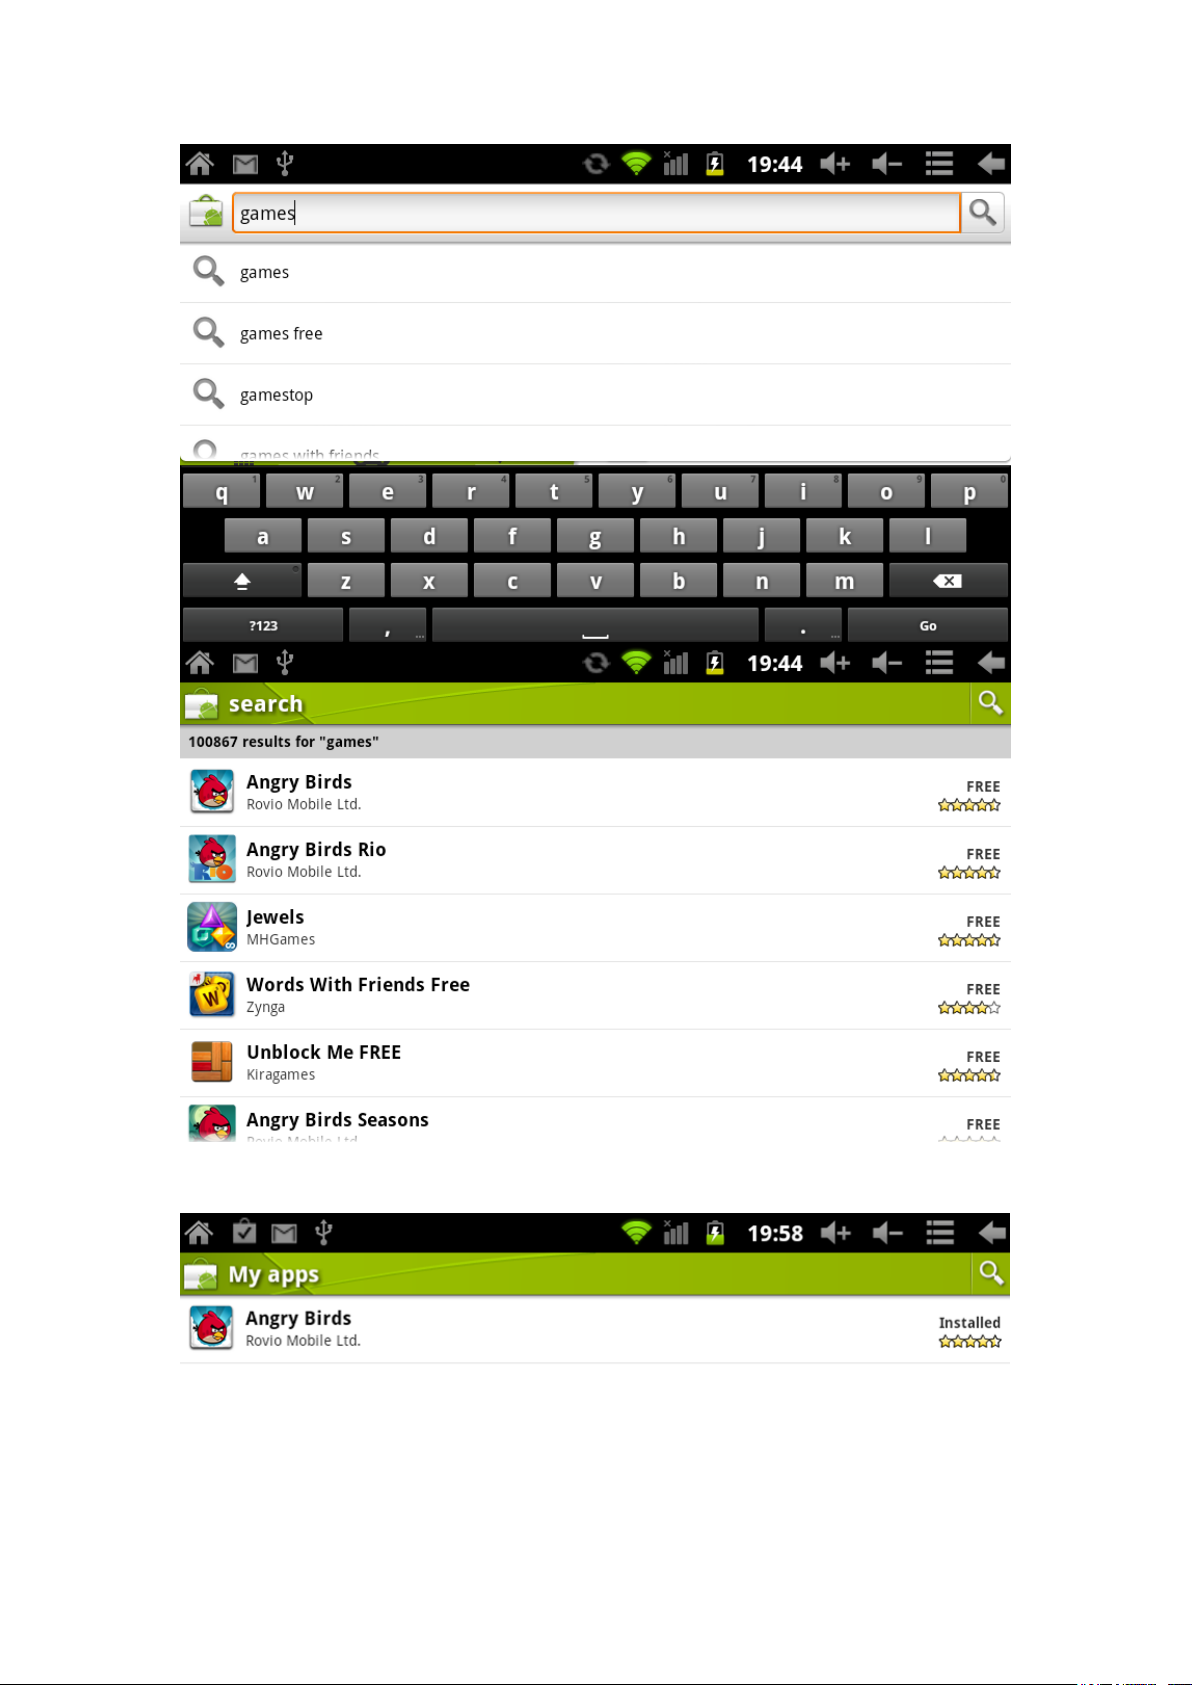
Select the wanted software and install it, find the apl. in the "my application program" as follows:
Page 26
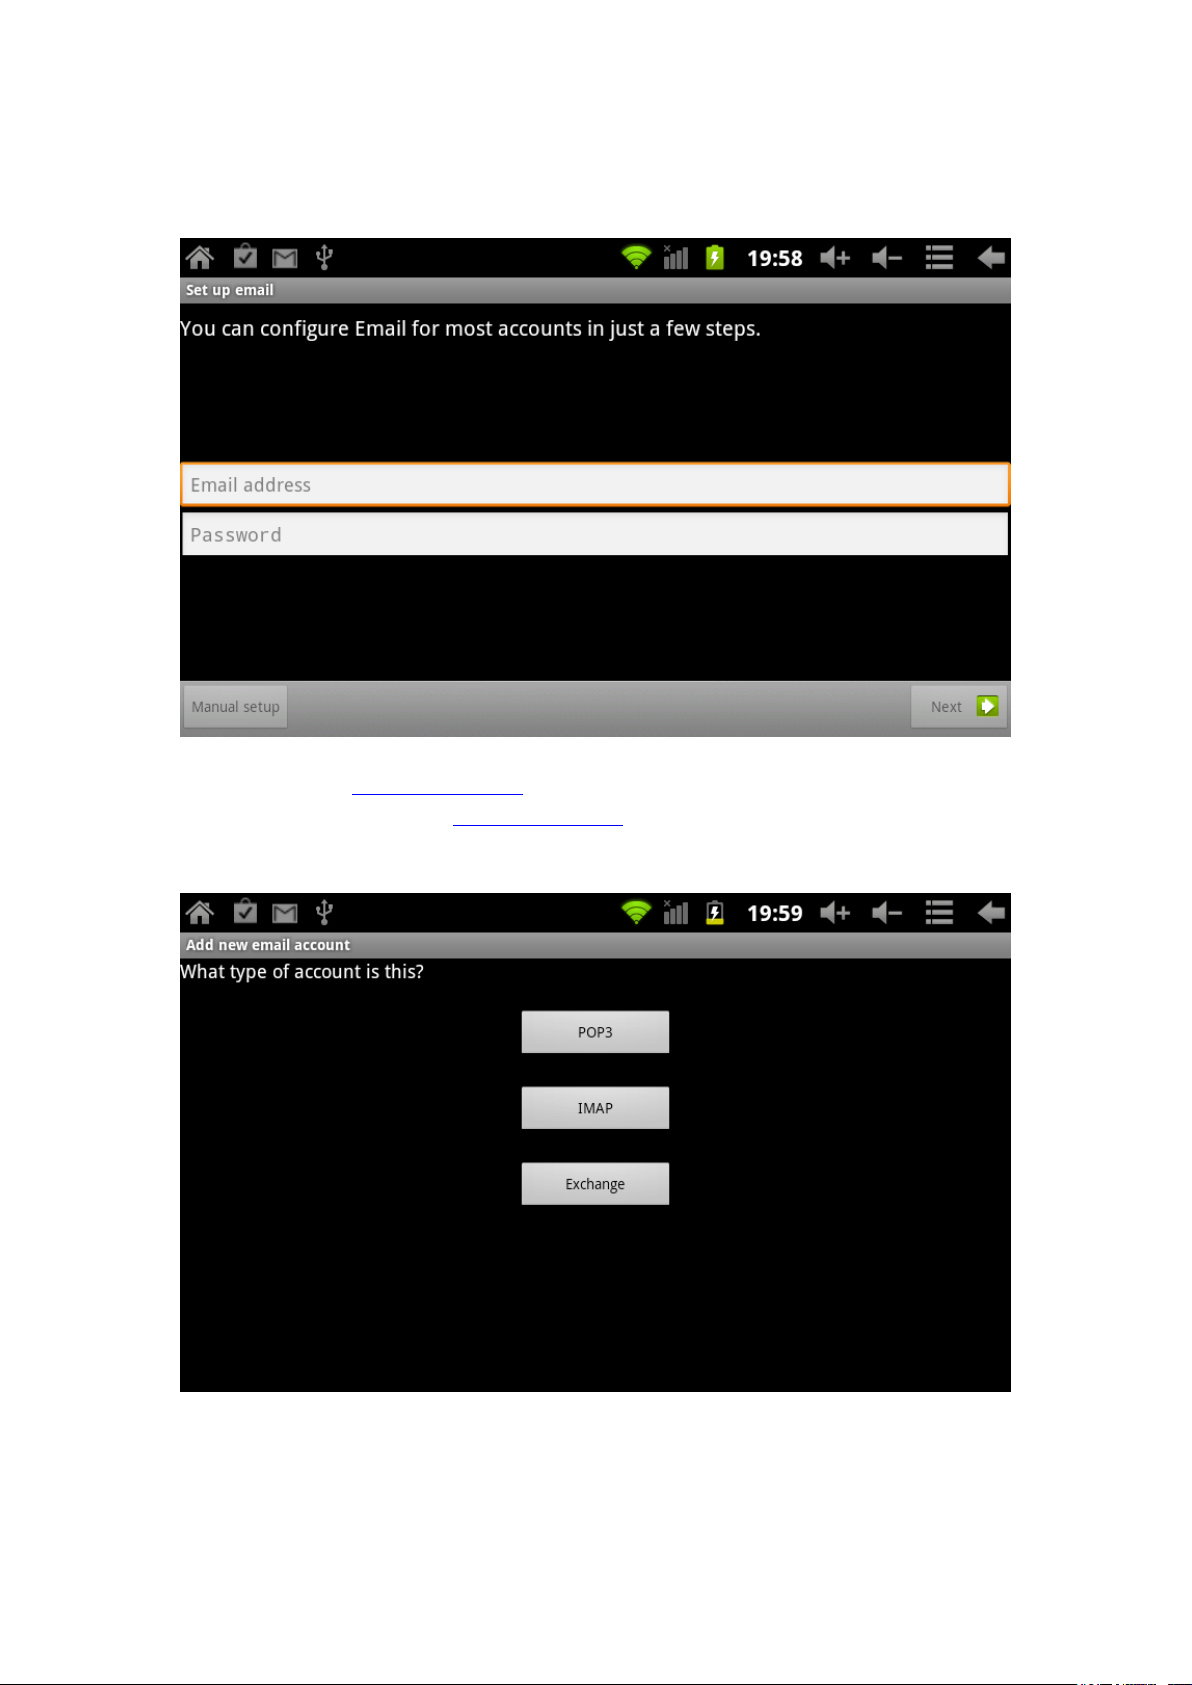
E-mail Client:
Click "e-mail" under main menu to enter the email client. You will be asked to set up the account
information for the first use as following:
Please make sure that the network connected before use Email.
For example Email: whhpwjh@126.com
Type the effective mail address: whhpwjh@126.com
Type your effective password: ********
Then choose : "next" it will appear the type of the account and choose the interface as follows:
When we use the POP3, the accepted server settings will appear in the interface:
Page 27
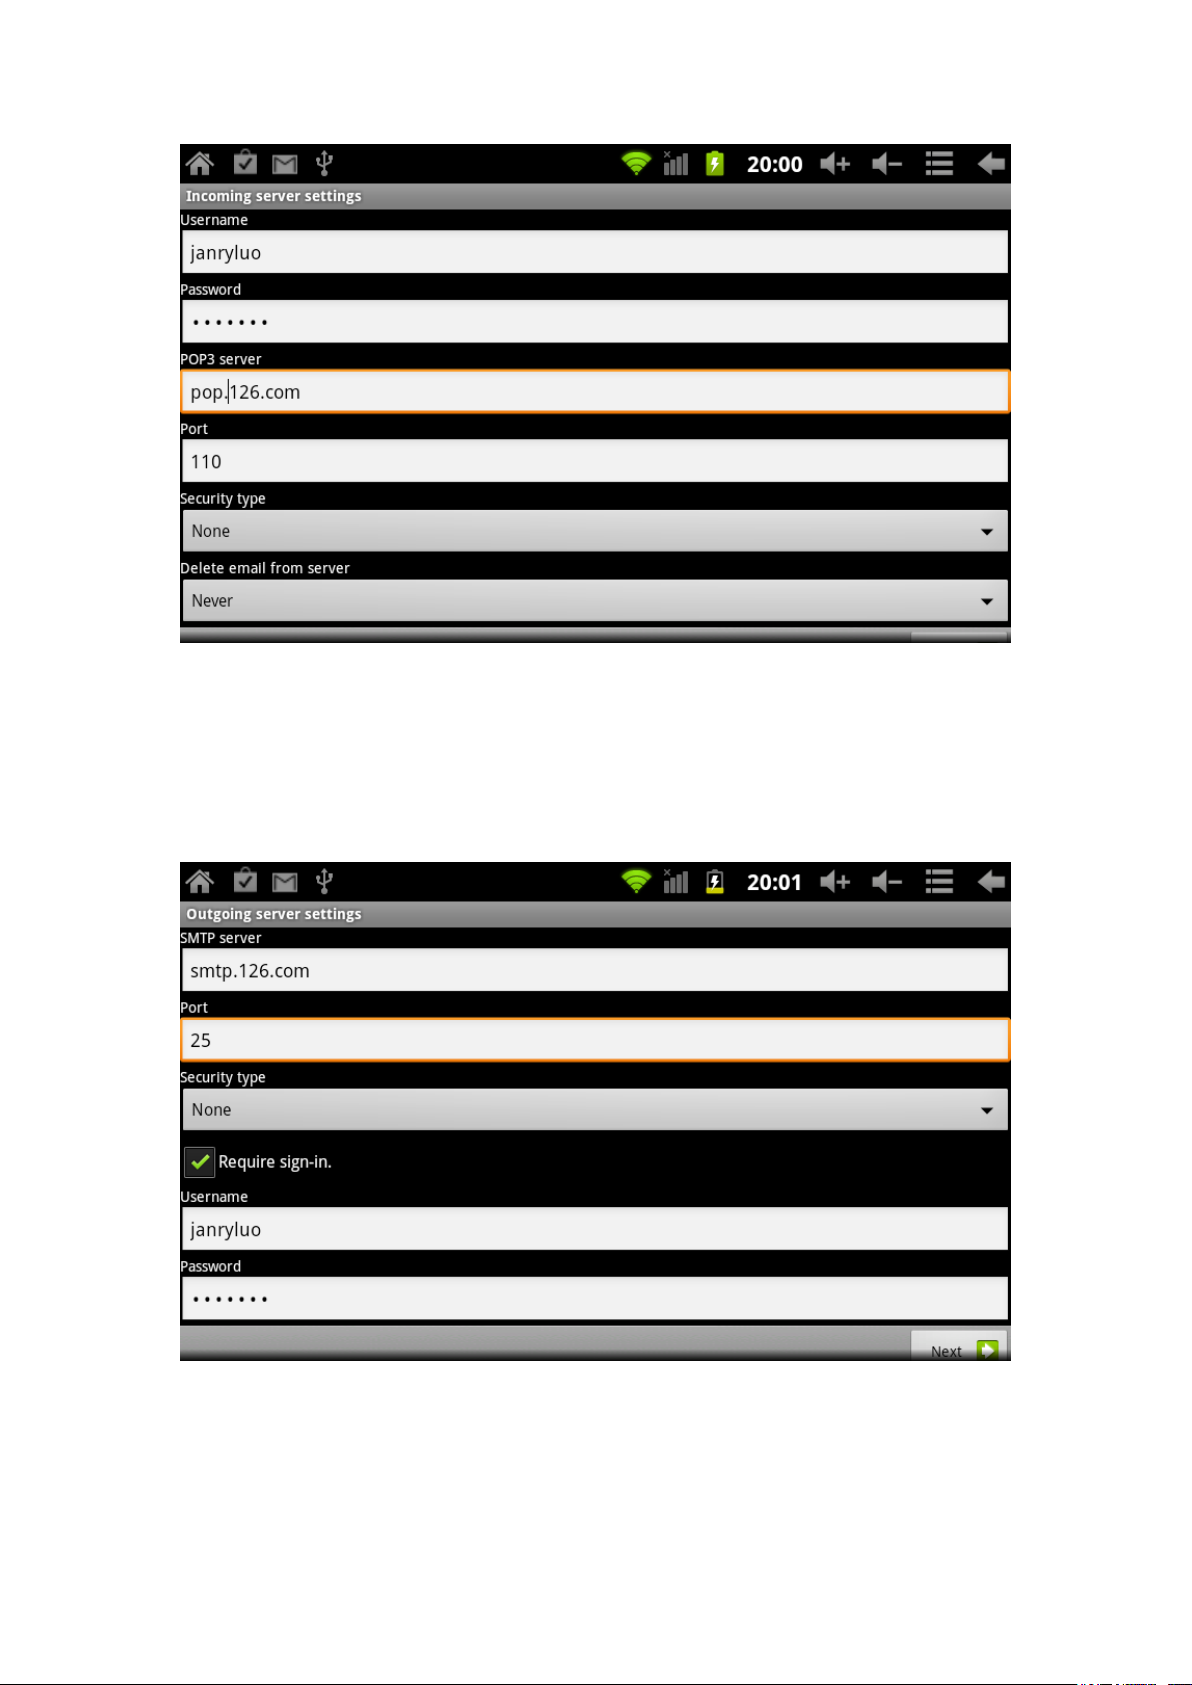
Please set up the different parameter as each information each email supplier offer as following:
Default POP3 server will be "126.com", needed to be change into "pop.126.com"
Port is "110" needed to modify "25" the system default is pop.126.com instead of 126.com PORT
is 110.
Then choose "next", it will enter "check and accept server settings" if it is right, it will appear
“outgoing server setting" as follows:
Modify SMIP, smtp.126.com instead of 126.com
Modify PORT "25" instead of 587
Choose "next", enter set up and check options.
Page 28
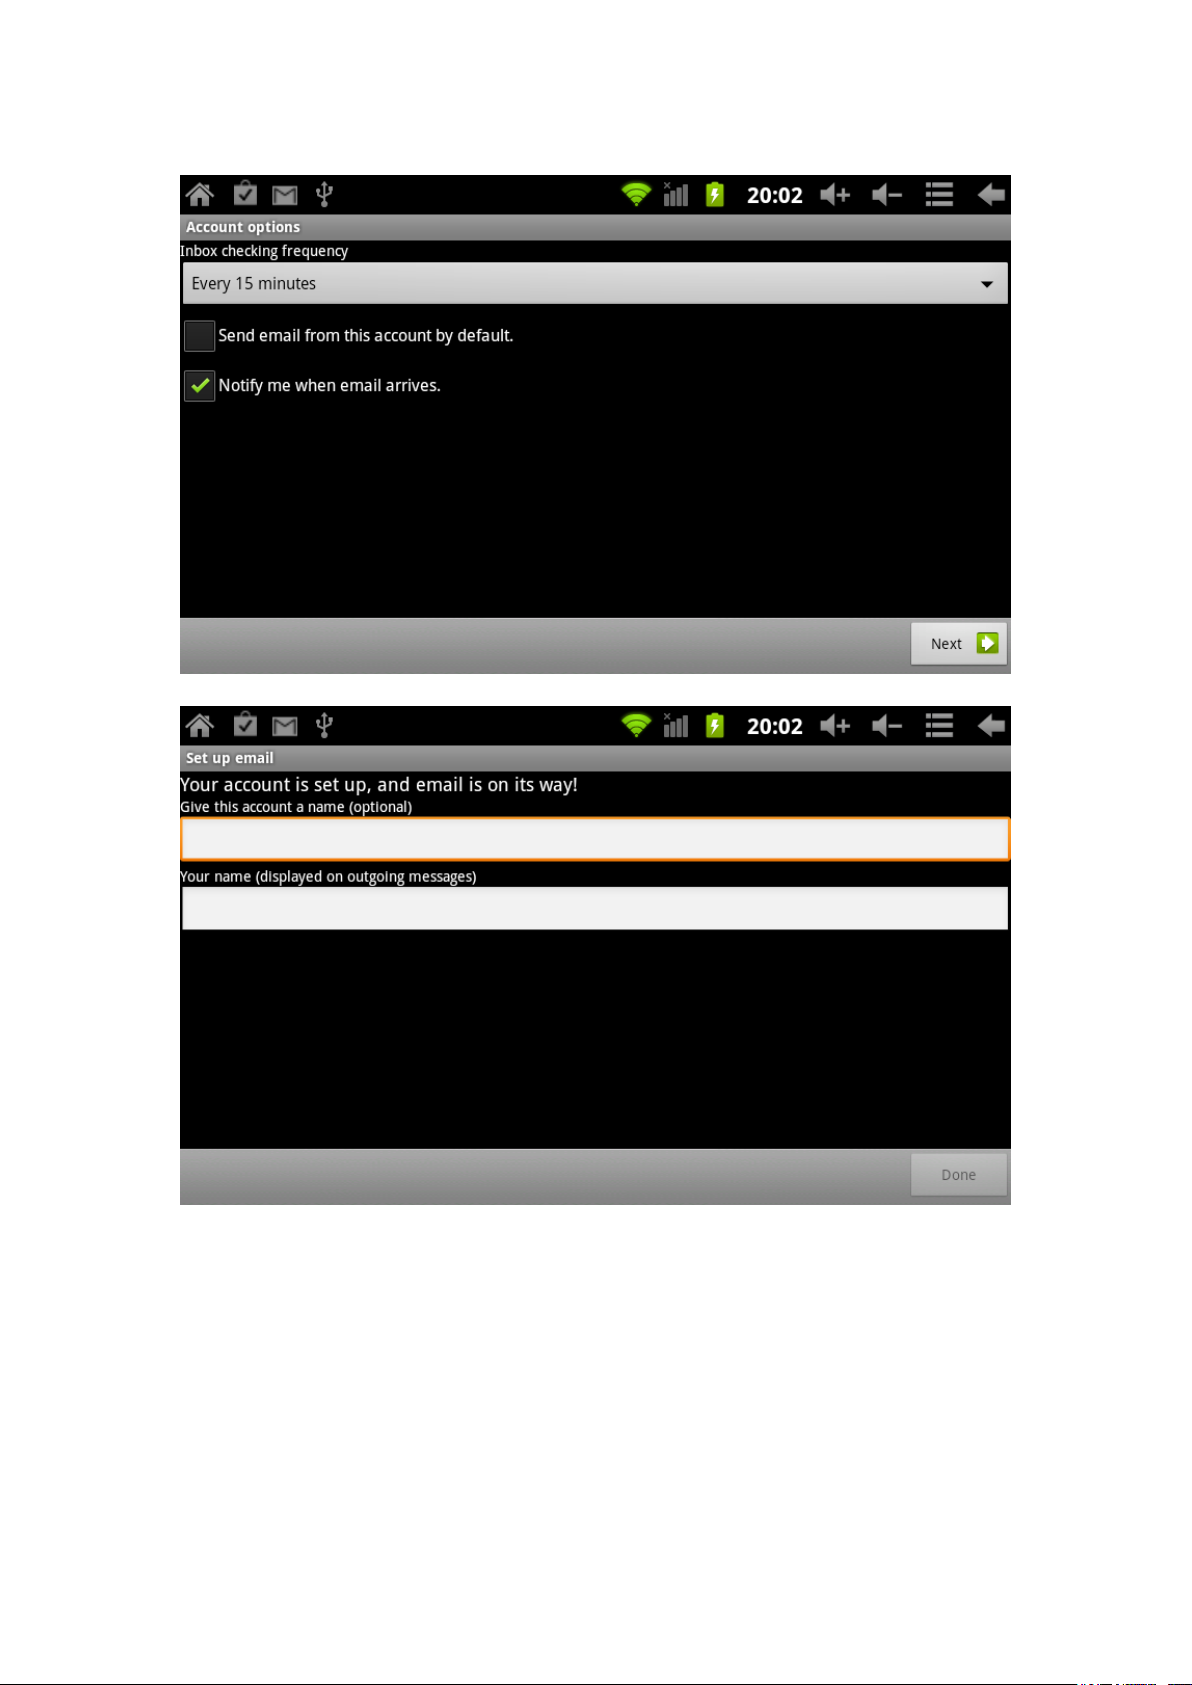
If your set up is correct, it will enter next interface:
Choose "next" you can enter account information definition page.
Please input your name which you expect to display in the email. Then you press "Done" to enter
the email interface. It will upload the email automatically. It will display email list as follows:
Choose one column to check email immediately, you can select "reply", "remove", "more reply"
etc.
Page 29

External device:
*USB connection
To use USB cable to connected MID and PC, the default connector is synchronous mode.
You can glide status bar and glide down.it will appear interface as following:
"USB connected" to show external storage card (SD card)
After loaded, you can see the relevant connection information.
*OTG Apply
Support external storage device in FAT32 Format: like U disc. To connect MID with the
external storage device directly.
To use OTG cable to connect MID and external device.
Page 30

*Keyboard & Mouse:
Supports USB mouse and keyboard.
Hardware upgrade:
During Android updating process, if necessary, please copy the data in advance.
How to use the Upgrade tool
Upgrade files:97F1-D1-H2-H01-N403.img
Upgrade process as below:(for example Windows XP system upgrade)
1: Download and Decompress upgrade tool
2: Download and Decompress upgrade file
3: Under PC Upgrade tool LiveSuit.exe (Please install DRIVE if it indicates “Please install drive
program” in the FWDN list ) as follows:
4. Follow LiveSuit guide to click "hardware" to get update file 97F1-D1-H2-H01-N403.img and
add to hardware list. Login "choosing hardware" as the guide in the Live Suit and add the
acquired upgrade file 97F1-D1-H01-N403 to the hardware list as follows:
5. To keep press "return" button on MID panel during connect PC and MID by USB cable, then
press "POWER" for more than 3 times. At the moment, LiveSuit.exe program in the PC will
appear as follows:
Click "yes" as follows:
Click "yes" as follows:
6. When it upgrades to 100% it will appear the following:
Press "enter" and the system will reboot automatically.
Caution: First time the speed of the boot process is slower, after the system upgrades, it is normal.
Common problems:
1:Android?
Answer: It is the open source operation system that Google declare in the 5th Nov
2007 base on the Linux platform
2:APK?
APK is the abbreviate based on Android Packag, that is Android installation package.
3:How to get APK?
Answer: You can download from Android market or install it online.
4:Operation system version?
Answer: It uses Android 2.3, built in high speed 3D, it can support full Android
application program in the market.
5:It will be recharged by USB?
Page 31

Answer: Yes, you can choose DC 5V adaptor to recharge it.
CUSTOMER SUPPORT
You can contact the Ricatech customer service when you have a question or a problem with your
Ricatech product.You can contact us by telephone and email.
Email
For customer support by email, please sent a email to support@ricatech.com. Please make sure
that you mention the model number and serial number of the product,mention your name &
address and describe your question or problem clearly.
Telephone
For customer support by telephone, please dial +32 3 3265694. One of our service staff will be
ready to serve you.
For full procedure please visit the website of Ricatech at: www.ricatech.com
Hereby, Richtech B.V declares that this Android Tablet PC is in compliance with essential
requirements and other relevant provisions of Directive 1999/5/EC.
Page 32

GEBRUIKERSHANDLEIDING
TAB08 8" Tablet PC
Page 33

Inhoud
1.Mededelingen
2.Accessoire
3.Hardwarespecificatie
4.Productbeschrijving
5.In-/uitschakelen
6.Venster
7.Knop
8.Systeeminstelling
* WI-FI-interface
* Spraak
* Tijd- en datuminstelling
* Scherm en stand-by
10.Bewerking voor installeren & verwijderen van applicatieprogramma
10. Aanraakkalibratie
11. Muziek
12. Audio
13. Foto
14. Netwerk
15. Opnemen
16. Camera
17. E-market
18. E-mailcliënt
19. Achtergrond
20. Externe apparatuur
*USB-verbinding
*OTG-applicatie
*Toetsenbord & muis
21. Firmware-upgrade
22. Oplossen van algemene problemen
Page 34

Opgelet
﹡Dit is een hoogwaardig elektronisch precisieproduct. Demonteer het niet.
﹡Vermijd intensief slaan op of een botsing met het product.
﹡Vermijd in de volgende omstandigheden het gebruik van dit product: hoge en lage
temperaturen, vocht, stof, sterke magnetische velden en langdurige blootstelling aan
zonlicht.
﹡Gebruik een nat wattenschijfje om de buitenkant van het product voorzichtig schoon te
maken. Gebruik geen chemische reinigingsmiddelen. Vermijd druppelend of spattend water
op het product en plaats het product ver uit de buurt van vloeistoffen.
﹡Langdurig gebruik van de koptelefoon of hoge volume-instelling wordt afgeraden, omdat
dit permanente gehoorschade kan veroorzaken.
﹡Gebruik, om een verkeersongeluk te vermijden, de koptelefoon niet bij het oversteken van
de weg, het besturen van een motorvoertuig of fiets.
﹡Gebruik de oorspronkelijke batterijlader en accessoire in de verpakking. Het gebruik van
andere accessoires kan schade aan het product veroorzaken en is in strijd met de garantie.
﹡ Volg de lokale milieuwetgeving voor informatie over het omgaan met verouderde
producten en accessoires.
﹡Neem contact op met uw lokale distributeur of neem rechtstreeks contact op met het
callcenter in geval van vragen.
﹡Volg de gebruikershandleiding en maak een back-up van uw gegevens. Wij aanvaarden
geen verantwoordelijkheid in het geval van gegevensverlies door productschade, reparaties
of andere oorzaken van geheugenverlies.
Page 35

Hardware
MID-hardwareparameters
CPU
ALLWINNER TECH A10 high performance ARM-A8 processor.
Frequentie: 1,5 GHZ, 560 MHz DSP
Ondersteunt OpenGL 2.0
Geheugen
512 MB-1 GB DDR3
Flash
Ondersteunt ingebouwde 4 GB/8 GB/16 GB/32 GB
Ondersteunt externe TF-kaart tot maximaal 32 GB
WI-FI
IEEE802.11b/g
USB
USB 2.0 OTG
Video-uitvoer
HDMI 1.3
Audio
3,5 mm koptelefoonaansluiting
Hoogwaardige stereoluidspreker
Ingebouwde microfoon
Maximum uitvoervermogen headset: 40mW
Responsfrequentie: 20 Hz—20 KHz
SNR: meer dan 90 dB
Scherm
afmeting
210 mm X 154 mm X 12 mm
resolutie
800 X 600
kleur
Zwart en ijzergrijs
aansturing
Capacitief aanraakscherm
besturings-
systeem
Android 2.3 tot 4.0 of hoger
Overige
afmetingen
210 mm X 154 mm X 12 mm
kleur
gewicht
530 g
batterij
3800 mAh
Accessoires
Voedingsadapter(DC V/A)1 st.
USB-kabel 1 st.
QSG 1 st.
OTG-kabel 1 st.
HDMI-kabel (optie)
TAB08 3G-dongle ondersteuning lijst
WCDMA:Huawei E230, Huawei E176G, Huawei E160E, Huawei E182G, Huawei E1782,
Huawei E1750, ZTE MF633BP-1, ZTE MF633BP-1, ZTE MF633, ZTE MF637U
Huawei E1756, Huawei UMG1691
CDMA2000/EVDO: Huawei E150, Huawei EC1261, Huawei EC122, Huawei EC156,
Huawei EC1270, ZTE AC580, ZTE AC2736, ZTE AC2746
Page 36

In-/uitschakelen
Inschakelen: druk op de powerknop en het systeem start op met de volgende foto
Het systeem begint met het volgende scherm
Het systeem gaat na het voltooien van het opstarten naar het hoofdmenu.
Uitschakelen: door lang op de powerknop te drukken verschijnt het volgende dialoogvenster.
Selecteer “uitschakelen” om het product te weigeren.
Stand-by: Het scherm schakelt uit bij het kort indrukken van de powertoets om naar de
stand-bystand te gaan.
Druk opnieuw op de powertoets om naar de algemene werkstand te gaan.
Page 37

Bureaublad
De volgende bureaubladweergaven verschijnen, zodra het opstarten van het systeem is beëindigd.
Statusbalk, zoekbalk en het label van het hoofdmenu bevinden zich op de standaard ingestelde
desktop.
Statusbalk is voor het aanduiden van de huidige systeeminformatie wat betreft netwerkstatus,
batterijvolume, tijd, enz.
Zoekbalk is voor het online zoeken naar informatie met trefwoorden.
Hoofdmenu rechts van het scherm en weergave van het hoofdmenu voltooid wanneer er op wordt
geklikt.
Knop
Volumetoets: Verhoog en verlaag het volume.
Powertoets: Lang indrukken schakelt het product in of uit. Kort indrukken activeert het product of
zet het product in stand-by.
Menutoets: Geeft het menu van het huidige venster weer.
Hometoets: Ga terug naar of kies het hoofdmenu.
Terugtoets: Ga terug naar het vorige menu.
Bediening hoofdmenu
Het volgende scherm wordt weergegeven wanneer op het label van het hoofdmenu wordt geklikt.
Page 38

Systeeminstelling, applicatie uitvoeren en installatie, kalibratie scherm aanraken, audio- en
videoweergave, webbrowser en spelletjes zijn beschikbaar in het hoofdmenu.
Systeeminstellingen:
Het menu systeeminstellingen geeft het volgende weer wanneer op het instellingenmenu wordt
geklikt. Selecteer het in te stellen item.
Instellingen voor tijd en datum
Selecteer het item “Tijd en datum” om naar het menu te gaan.
Selecteer “automatisch” om de netwerktijd te gebruiken. Datum, tijd, tijdzone, 24-uur en
datumnotatie kunnen als volgt worden gekozen.
Page 39

+:Selecteer het pictogram om met 1 te verhogen
-:Selecteer het pictogram om met 1 te verlagen
Rechtstreeks digitaal invoeren is beschikbaar wanneer digitaal en invoer als volgt worden
geselecteerd.
Selecteer “instellen” om de instelling te bevestigen.
Schermhelderheid
Selecteer “weergave-instelling” om naar het menu te gaan, klik op “helderheid” en verplaats de
voortgangsbalk om de helderheid te kiezen.
Page 40

Time-outscherm
Time-outscherm: het uitstellen van automatische schermvergrendeling
Selecteer “Weergave-instellingen” om naar het set-upmenu te gaan, verplaats de richtingsbalk naar
beneden en selecteer “time-outscherm” als volgt.
Opmerking: Deze functie is ongeldig wanneer er een video wordt afgespeeld.
Wi-Fi-verbinding
Klik op het pictogram “set-up” in het hoofdmenu om naar het menu systeeminstellingen te gaan.
Klik op “Instelling voor Draadloos & Netwerken” en klik vervolgens op “Wi-Fi”. Selecteer
“Wi-Fi-instelling”.
Klik op Wi-Fi om Wi-Fi in of uit te schakelen en klik op “Netwerkmelding” om de draadloze
router weer te geven. Selecteer een draadloos netwerk en voltooi de verbinding van Wi-Fi
overeenkomstig de melding.
Page 41

Voer het wachtwoord voor het gecodeerde netwerk in.
De Wi-Fi-verbinding wordt afgerond en wordt als volgt weergegeven:
*HDMI
Dit product ondersteunt HDMI
Sluit MID aan op een apparaat met HDMI-invoer via een HDMI-kabel. Het systeem schakelt in 5
seconden naar HDMI-uitvoer en voert audio en video uit. De inhoud met betrekking tot het
aangesloten apparaat wordt weergegeven na de HDMI-verbinding.
Page 42

Installeren, downloaden en in werking stellen van applicatie
*installeren: Er zijn vele beschikbare methoden voor het installeren van Android-applicaties,
zoals het installeren met behulp van USB en met behulp van programma‟s van derden. Hier wordt
het programma App-installer geïntroduceerd.
1. Ga naar menu, kies de instelling en selecteer “Applicaties”.
2. Klik op “Onbekende bronnen”, klik vervolgens op “OK” en ziet er als volgt uit:
3. Kopieer de applicatie naar een TF-kaart of de NAND FLASH.
4. Kies “App-installer” in het hoofdmenu:
Page 43

Ga voor de eerste keer naar de installer van het programma en het systeem bevestigt NAND FLAS
als zoekdirectory.
5. Wanneer het APK Installerprogramma op de TF-kaart wordt opgeslagen, zoekt het systeem
automatisch in de catalogus van de TF-kaart.
Page 44
6. Selecteer de applicatie die moet worden geïnstalleerd.
De gebruiker kan de applicatie online via Android Market installeren of via de computer
downloaden of via een webbrowser download.
Het installatieprogramma verwijderen: Applicaties kunnen worden verwijderd door een
beheerprogramma van derden of software voor applicatiebeheer in het apparaat.
Selecteer “instelling” en vervolgens “applicaties”, vervolgens “applicaties beheren” en kies daarna
het relevante geïnstalleerde applicatieprogramma om de programma-informatie te controleren of
de applicaties te verwijderen.
Netwerk:
Webbrowser:
Open de webbrowser en voer de URL in wanneer het netwerk is verbonden.
De webpagina kan als volgt worden in- en uitgezoomd:
Page 45

Audio online
Applicaties als videospeler, online tv-programmaspeler, online audiospeler kunnen via Android
Market worden gedownload en op dit apparaat worden geïnstalleerd. Voer de applicatie uit om
video‟s of programma‟s online te bekijken en naar online radio te luisteren.
De gebruiker kan andere netwerkapplicatiesoftware inclusief webbrowser, audioweergave,
webcliënt en IM downloaden.
Muziekweergave:
Klik op het pictogram "muziek" in het hoofdmenu om naar de interface voor het muziekweergave
te gaan. Alle audiobestanden in de systeemlijst als standaard:
Bestanden kunnen van een USB-apparaat via een USB-poort of SD-kaart worden gekopieerd of
via een netwerk worden gedownload.
Kies het relevante label om de informatie van “Artiest”, “Album”, “Muziek” te kiezen en selecteer
vervolgens de af te spelen muziek.
Page 46

Videoweergave
Klik op “Super-HD-speler” in het hoofdmenu, ga naar de hoofdinterface van de
“Super-HD-speler” en alle video- en audiobestanden worden als volgt vermeld:
Kies de videobestanden en ga als volgt naar de interface voor videoweergave: "weergave" ,"stop",
"FF".
"FB" zijn beschikbaar om het afspelen te regelen.
Page 47

Foto’s bladeren:
Klik op “fotogalerij” in het hoofdmenu om naar de hoofdinterface gaan.
Alle foto‟s worden als volgt vermeld:
Kies het fotobestand om naar de interface te gaan. Opties als “delen”, “verwijderen” en “meer”
zijn als volgt beschikbaar:
Achtergrond:
Het systeem ondersteunt statische foto‟s en 3D-achtergronden
Druk op "Menu" in de desktop, kies de optie “achtergrond” en een tekstvak geeft “selecteer
achtergrond uit” weer:
Page 48

Kies achtergrond: u kunt de foto als de gekozen achtergrond gebruiken.
Kies de live achtergrond: u kunt de 3D-achtergrond van het systeem kiezen.
Kies de fotogalerij: U kunt de door u gekozen foto als een statische achtergrond selecteren.
Houd het scherm ingedrukt, het tekstvak geeft het volgende weer:
Ga naar het bovenstaande venster en klik op de instelling ”achtergrond”
Kies als volgt:
Kies achtergrond: U kunt de door u gebruikte foto als de gekozen achtergrond beschouwen
Kies de live achtergrond: U kunt een 3D-achtergrond van het systeem kiezen.
Kies het venster. U kunt de door het systeem aangeboden foto‟s als de statisch achtergrond
beschouwen.
Spraak opnemen:
Klik op “Opnemen” in het hoofdmenu om als volgt naar de interface te gaan:
Page 49

Kies de knop "Opnemen" om te starten en “Stop” wanneer het klaar is. Kies de knop "weergave"
om de spraakopname direct af te spelen en de knop "de opname gebruiken" om de spraakopname
op te slaan.
Camera:
Klik op het pictogram “Camera” in het hoofdmenu om als volgt naar de hoofdinterface te gaan:
Page 50

Selecteer de cameraknoppen in de rechterhoek voor het maken van een foto.
E-Market:
Klik op E-Market in het hoofdmenu om als volgt naar de interface te gaan:
Kies "volgende" om verder te gaan.
Page 51

Maak een Gmail-account aan wanneer er nog geen account bestaat en de volgende interface toont:
Stel “Google-account” als volgt in:
Page 52

Kies "volgende" om verder te gaan.
Maak het wachtwoord af en kies vervolgens "volgende" om verder te gaan.
Page 53

Voeg enkel een Gmail-account toe wanneer het al bestaat.
Kies "Ik ga akkoord, volgende" en het volgende wordt weergegeven:
Page 54

Noteer de beveiligingscode en kies "volgende" om in te voeren.
Klik op "zoeken" en voer de software in die u wilt installeren.
Page 55

Selecteer de gewenste software en installeer het en zoek als volgt de appl. in "mijn
applicatieprogramma":
Page 56

E-mailcliënt:
Klik op "e-mail" onder hoofdmenu om naar de e-mailcliënt te gaan. Omwille van het eerste
gebruik wordt u gevraagd de accountinformatie als volgt in te stellen:
Zorg dat het netwerk is verbonden voordat u e-mail gebruikt.
Bijvoorbeeld e-mailadres: whhpwjh@126.com
Typ het betreffende e-mailadres is: whhpwjh@126.com
Typ uw betreffende wachtwoord in: ********
Kies vervolgens: "volgende". Het accounttype verschijnt en kies de interface als volgt:
Wanneer we POP3 gebruiken, verschijnen de geaccepteerde serverinstellingen in de interface:
Page 57

Stel de verschillende parameters aan de hand van informatie van elke e-mailleverancier als volgt
in:
Standaard POP3-server wordt "126.com" en moet worden gewijzigd in "pop.126.com"
Poort is "110" en moet worden aangepast naar "25". De systeemstandaard is pop.126.com in plaats
van 126.com; POORT is 110.
Kies vervolgens "volgende" en u gaat naar "controleren en accepteren serverinstellingen” als het
goed is en verschijnt “uitgaande serverinstelling" als volgt:
Wijzig SMIP; smtp.126.com in plaats van 126.com
Wijzig POORT; "25" in plaats van 587
Kies "volgende", gaar naar set-up en controleer de opties.
Page 58

Als uw set-up juist is, gaat het naar de volgende interface:
Kies "volgende" en u kunt naar de pagina met een omschrijving van de accountinformatie.
Voer de naam in die u wilt weergeven in de e-mail. Druk vervolgens op "Gereed" om naar de
e-mailinterface te gaan. De e-mail wordt automatisch geüpload. De e-maillijst wordt als volgt
weergegeven:
Kies één kolom om onmiddellijk e-mail te controleren. U kunt "antwoorden", "verwijderen",
"meer antwoorden", enz. selecteren.
Page 59

Extern apparaat:
*USB-verbinding
Om de USB-kabel te gebruiken die met de MID en PC is verbonden, moet de standaard
connector zich in de synchrone stand bevinden. U kunt de statusbalk verschuiven en schuif
omlaag. De interface verschijnt als volgt:
"USB verbonden" om de externe geheugenkaart te tonen (SD-kaart)
Na het laden kunt u de relevante verbindingsinformatie zien.
*OTG-applicatie
Ondersteunt extern opslagapparaat in FAT32-formaat: zoals U-disc. Om MID rechtstreeks
met het externe opslagapparaat te verbinden.
Page 60

Voor gebruik van de OTG-kabel om MID en het externe apparaat te verbinden.
*Toetsenbord & muis:
Ondersteunt USB-muis en -toetsenbord.
Hardware-upgrade:
Kopieer tijdens het Android updateproces van tevoren de gegevens, indien nodig.
Hoe gebruikt u het hulpprogramma voor upgraden
Upgradebestanden: 97F1-D1-H2-H01-N403.img
Upgradeproces als hieronder: (bijvoorbeeld systeemupgrade van Windows XP)
1: Download en decomprimeer het hulpprogramma voor upgraden
2: Download en decomprimeer het upgradebestand
3: Onder hulpprogramma LiveSuit.exe voor PC-upgrade (Installeer DRIVE indien aangeduid.
Installeer het besturingsprogramma in de FWDN-lijst) als volgt:
4. Volg de LiveSuit-gids om op "hardware" te klikken voor het verkrijgen van het updatebestand
97F1-D1-H2-H01-N403.img en voeg aan de hardwarelijst toe. Log in "hardware kiezen"
volgens de gids in de Live Suit en voeg het verkregen updatebestand 97F1-D1-H01-N403 als
volgt aan de hardwarelijst toe:
5. Houd de knop "terug" ingedrukt op het MID-paneel tijdens het verbinden van PC en MID met
behulp van de USB-kabel en druk vervolgens meer dan 3 keer op "POWER". Op het moment
verschijnt het programma LiveSuit.exe in de PC als volgt:
Klik als volgt op "ja":
Klik als volgt op "ja":
6. Wanneer de upgrade 100% heeft bereikt, verschijnt het volgende:
Druk op "enter" en het systeem wordt automatisch herstart.
Waarschuwing: In eerste instantie is de snelheid van het opstartproces langzamer; na de upgrade
van het systeem is het weer normaal.
Algemene problemen:
1: Android?
Antwoord: Het is een open source besturingssysteem dat Google aankondigde op 5
nov. 2007 op basis van het Linux platform
2: APK?
APK is de afkorting op basis van Android Packag, dat is het installatiepakket van
Android.
3: Hoe komt u aan APK?
Page 61

Antwoord: U kunt het downloaden van Android Market of online installeren.
4: Versie besturingssysteem?
Antwoord: Er wordt gebruik gemaakt van Android 2.3, ingebouwde zeer snelle 3D. Het
volledige applicatieprogramma dat op de markt verkrijgbaar is, wordt ondersteund.
5:Vindt het opladen plaats met behulp van USB?
Antwoord: Ja, u kunt voor de DC 5V-adapter kiezen om op te laden.
KLANTENONDERSTEUNING
Voor vragen en problemen kunt u contact opnemen met de klantenservice van Ricatech
U kunt telefonisch en via e-mail contact opnemen.
E-mail
Voor klantenondersteuning per e-mail, stuur een e-mail naar support@ricatech.com. Vergeet niet
het modelnummer en serienummer van het product, uw naam & adres te vermelden en geef een
duidelijke omschrijving van uw vraag of probleem.
Telefoon
Voor telefonische klantenondersteuning, bel naar +32 3 3265694. Ons servicepersoneel staat klaar
om u te helpen.
Bezoek voor de volledige procedure de website van Ricatech: www.ricatech.com
Hierbij verklaart Ricatech B.V. dat deze Android Tablect PC voldoet aan de essentiële vereisten en
andere relevante voorwaarden van Richtlijn 1999/5/EC.
Page 62

MODE D'EMPLOI
Tablette PC TAB08 8"
Page 63

Sommaire
1.Précautions
2.Accessoire
3.Spécifications matérielles
4.Description du produit
5.Marche/arrêt
6.Fenêtre
7.Bouton
8.Paramètres système
* Interface Wifi
* Voix
* Réglage date et heure
* Écran et veille
11.Programme d‟installation et de suppression des applications
10. Calibrage tactile
11. Musique
12. Audio
13. Photo
14. Réseau
15. Enregistrement
16. Appareil photo
17. E-market
18. Client de messagerie électronique
19. Papier-peint
20. Équipement externe
* Connexion USB
* Application OTG
* Clavier & souris
21. Mise à jour du micrologiciel
22. Traitement des problèmes courants
Page 64

Attention
﹡Il s‟agit d‟un produit électronique de haute précision, ne le démontez pas.
﹡Évitez de soumettre le produit à des chocs importants ou à des collisions.
﹡Évitez d‟utiliser le produit dans l‟une de ces conditions : températures chaudes ou froides,
humidité, poussière, champ électromagnétique important ou exposition prolongée au soleil.
﹡Utilisez un coton mouillé pour nettoyer doucement la coque du produit. N‟utilisez aucun
produit de nettoyage chimique. Évitez de renverser de l‟eau et les éclaboussures d'eau sur le
produit. Placez-le à distance de tout liquide.
﹡Nous vous recommandons de ne pas utiliser les écouteurs sur une longue période ou à un
volume sonore élevé. Cela peut provoquer des lésions auditives à vie.
﹡Ne pas utiliser les écouteurs quand vous traversez une route ni lors de la conduite d'un
véhicule à moteur ou un vélo, pour éviter les accidents de la circulation.
﹡Utilisez le chargeur de batterie d‟origine et les accessoires compris dans l‟emballage.
L'utilisation d'autres accessoires peut causer des dommages au produit et contreviendrait à
la garantie.
﹡Conformez-vous à la réglementation locale relative à la protection de l‟environnement pour
mettre au rebut les produits et accessoires qui ne fonctionnent plus.
﹡Pour toute question, n'hésitez pas à contacter un distributeur local ou notre centre d'appels
directement.
﹡ Suivez le mode d'emploi et effectuez une sauvegarde de vos données. Aucune
responsabilité n'est assumée dans le cadre de la perte de données par suite d'un
endommagement du produit, des réparations ou de toute autre cause ayant conduit à la
perte de données.
Page 65

Matériel
Paramètres matériels MID
Processeur
Processeur ARM-A8 ALLWINNER TECH A10 haute performance.
Fréquence : 1,5 GHZ, 560 MHz DSP
Supporte OpenGL 2.0
Mémoire
DDR3 512 Mo à 1 Go
Flash
Supporte 4 Go, 8 Go, 16 Go, 32 Go intégré
Supporte les cartes mémoire externes jusqu‟à 32 Go
WIFI
IEEE802.11b/g
USB
USB2.0 OTG
Sortie vidéo
HDMI1.3
Audio
Prise écouteurs de 3,5 mm
Haut-parleurs stéréo haute qualité
Micro intégré.
Puissance de sortie maximale de casque audio : 40mW
Fréquence de réponse : 20Hz—20KHz
SNR : supérieur à 90db
Écran
taille
210 mm X 154 mm X 12 mm
résolution
800 x 600
couleurs
Noir et gris acier
fonctionnement
Écran tactile capacitif
système
d‟exploitation
Android 2.3 jusqu‟à 4.0 ultérieurement
Autre
dimensions
210 mm X 154 mm X 12 mm
couleurs
poids
530 g
batterie
3800 mAh
Accessoires
Adaptateur secteur(DC V/A)x1
Câble USB x1
QSG x1
Câble OTG x1
Câble HDMI (en option)
TAB08 liste 3G soutien dongle
WCDMA:Huawei E230, Huawei E176G, Huawei E160E, Huawei E182G, Huawei E1782,
Huawei E1750, ZTE MF633BP-1, ZTE MF633BP-1, ZTE MF633, ZTE MF637U
Huawei E1756, Huawei UMG1691
CDMA2000/EVDO: Huawei E150, Huawei EC1261, Huawei EC122, Huawei EC156,
Huawei EC1270, ZTE AC580, ZTE AC2736, ZTE AC2746
Page 66

Mise en marche/arrêt
Mise en marche : Appuyez sur le bouton Marche ; le système démarre de la façon indiquée par la
photo
Le système s‟initialise de la façon indiquée sur l‟écran suivant
Le système entre dans le menu principal après la fin de l‟initialisation.
Arrêt : Appui long sur le bouton Marche ; la boîte de dialogue suivante apparaît. Sélectionnez
« arrêt » pour éteindre l‟appareil.
Veille : L'écran s'éteint après un moment en appuyant sur la touche d'alimentation pour passer en
mode veille.
Appuyez de nouveau sur la touche d'alimentation pour revenir au mode de fonctionnement
Page 67

général.
Bureau
Le bureau suivant apparaît lorsque le phase de démarrage système se termine. Une barre d‟état,
une barre de recherche et un label de menu principal sont inclus dans le bureau par défaut.
La barre d‟état indique les informations actuelles du système, notamment l‟état du réseau, le taux
de charge restant, l‟heure, etc.
La barre de recherche sert à chercher des informations en ligne à l‟aide du clavier.
Le menu principal situé à la droite de l‟écran et arrêt de l‟affichage du menu principal lorsque
vous cliquez dessus.
Bouton
Bouton de volume : Permet d‟augmenter et de diminuer le volume sonore.
Touche d‟alimentation : Un appui long pour démarrer ou arrêter l‟appareil. Un appui court pour
rentrer dans le produit ou le mettre en veille.
Bouton Menu : Afficher le menu de la fenêtre en cours.
Bouton Accueil : Retour ou choisir le menu principal.
Touche Retour : Pour retourner au menu précédent.
Fonctionnement du menu principal
L‟écran suivant s‟affiche lorsque vous cliquez sur le label du menu principal.
Page 68

Les réglages système, l‟exécution et l‟installation d‟applications, le calibrage de l‟écran tactile, la
lecture de fichiers audio et vidéo, le navigateur internet, des jeux sont disponibles depuis le menu
principal.
Paramètres système :
Le menu des paramètres système s‟affiche de la façon suivante lorsque vous cliquez sur le menu
de réglages. Sélectionnez l‟élément à régler.
Réglages heure et date
Sélectionnez l‟élément « Heure et date » pour entrer dans le menu.
Sélectionnez « Automatique » pour régler l‟heure selon les données du réseau. La date, l‟heure, la
zone de décalage horaire, le format 24 heure et le format de date sont peuvent être déterminés de
la façon suivante.
Page 69

+ : sélectionnez cette icône pour incrémenter de 1
- : sélectionnez cette icône pour diminuer de 1
La saisie digitale directe est disponible lorsque vous sélectionnez le digital et la saisie de la façon
suivante.
Sélectionnez « régler » pour confirmer le réglage.
Luminosité de l’écran
Sélectionnez « réglage de l‟affichage » pour entrer dans le menu, cliquez sur « luminosité » et
déplacez le curseur en barre pour régler la luminosité.
Page 70

Délai de verrouillage de l’affichage
Délai de verrouillage de l‟affichage : correspond à la durée qui s‟écoule avant le verrouillage
automatique de l‟écran
Sélectionnez « Réglages d‟affichage » pour entrer dans le menu d‟installation, déplacez la barre de
direction vers le bas et sélectionnez « Délai écran » de la façon suivante.
Remarque : Cette fonction n‟est pas valide lors de la lecture d‟un fichier vidéo.
Connexion Wifi
Cliquez sur l‟icône « Installation » dans le menu principal pour entrer dans le menu des réglages
système. Cliquez sur « Réglages sans fil et réseau », puis cliquez sur « Wifi ». Sélectionnez
« Réglage Wifi ».
Cliquez sur Wifi pour allumer ou éteindre le Wifi, puis cliquez sur « Notifications réseau » pour
afficher le routeur sans fil. Sélectionnez un réseau sans fil et terminez la procédure de connexion
Wifi en suivant la notice.
Page 71

Saisissez le mot de passe pour un réseau encrypté.
La connexion Wifi se finalise et s‟affiche de la façon suivante :
*HDMI
Ce produit est compatible HDMI
Connectez le MID à un produit équipé d‟une entrée HDMI, par l‟intermédiaire d‟un câble HDMI.
Le système passe à la sortie HDMI dans les 5 secondes et sort l‟audio et la vidéo. Le contenu
s‟affiche sur le système connecté après la connexion HDMI.
Page 72

Installer, télécharger et exécuter une application
*installation:Il existe de nombreuses méthodes pour installer des applications Android,
comme l'installation par USB et par un programme tiers. Ici, nous introduisons Appinstaller, un
programme tiers d‟installation d‟applis.
1. Entrez dans le menu, choisissez Réglages et sélectionnez « Applications ».
2. Cliquez sur « Sources inconnues », puis cliquez sur « OK » comme suit :
3. Copiez l‟application sur une carte mémoire ou sur la NAND FLASH.
4. Choisissez « Appinstaller » dans le menu principal :
Page 73

Entrez dans l‟installateur de programmes pour la première fois, le système confirme NAND
FLASH en tant que répertoire de recherche.
5. Si le programme d‟installation APK est stocké sur la carte mémoire, le système recherche
automatiquement dans le catalogue de la carte mémoire.
Page 74

6. Sélectionnez l‟application à installer.
L‟utilisateur peut installer des applications en ligne via l‟Android Market ou à travers un
téléchargement par ordinateur ou à travers un téléchargement via le navigateur internet.
Pour désinstaller l‟application : Les applications peuvent être désinstallées par un outil de gestion
tiers ou par le logiciel de gestion d‟application intégré à l‟appareil.
Sélectionnez « réglage », puis « applications », puis « gérer les applications ». Après quoi,
choisissez le programme installé en question pour vérifier les informations associées ou le
désinstaller.
Réseau :
Navigateur internet :
Ouvrez le navigateur internet et saisissez l‟URL lorsque la connexion est établie.
Vous pouvez zoomer plus ou zoomer moins dans les pages web de la façon suivante :
Page 75

Audio en ligne
Des applications comme un lecteur vidéo, un lecteur de programmes de télévision en ligne, un
lecteur audio en ligne peuvent être téléchargées depuis l‟Android Market et être installées dans ce
produit. Exécutez l‟application pour regarder une vidéo ou un programme en ligne et écouter la
radio en ligne.
L'utilisateur peut télécharger d'autres applications réseau issues de sociétés tierces, notamment
pour la navigation internet, la lecture audio, le client web, la messagerie instantanée
Lecture de musique :
Cliquez sur l‟icône « musique » située dans le menu principal pour entrer dans l‟interface de
lecture de musique. Tous les fichiers audio contenus dans le système sont listés par défaut :
Les fichiers peuvent être copiés depuis un périphérique USB via le port USB, une carte SD ou être
téléchargés depuis le réseau.
Choisissez le label correspondant pour vérifier les informations d‟« Artiste », « Album »,
« Musique » puis sélectionnez la musique à lire.
Page 76

Lecture vidéo
Cliquez sur « Lecteur Super-HD » dans le menu principal, entrez dans l‟interface principale du
« Lecteur Super-HD ». Tous les fichiers vidéo et audio sont alors listés de la façon suivante :
Choisissez les fichiers vidéo et entrez dans l‟interface de lecture vidéo de la façon suivante :
« lecture », « arrêt », « FF ».
Les « FB » sont disponibles pour le contrôle de la lecture.
Page 77

Navigation dans les images :
Cliquez sur la « galerie photo » dans le menu principal pour entrer dans l‟interface principale.
Toutes les photos sont listées de la façon suivante :
Choisissez le fichier d‟image pour entrer dans l‟interface. Des options comme « partager »,
« supprimer » et « plus » sont disponibles comme suit :
Papier-peint :
Le système supporte les images statiques et les papiers-peint en 3D
Appuyez sur « Menu » dans le bureau, choisissez l‟option « papier-peint » et une boîte de dialogue
« Sélectionner le papier-peint dans » s‟affiche :
Page 78
Choisissez le papier-peint : vous pouvez choisir l‟image comme papier-peint défini.
Choisissez un papier-peint animé : vous pouvez choisir le papier-peint en 3D que le système
propose.
Choisissez la galerie de photos : Vous pouvez définir l‟image de votre choix comme papier-peint
statique.
Appuyez sur l‟écran et maintenez, la boîte de dialogue suivante s‟affiche :
Dans la boîte de dialogue ci-dessus, cliquez sur le réglage « papier-peint ».
Choisissez de la manière suivante :
Choisissez un papier-peint : Vous pouvez définir comme papier-peint l‟image utilisée
Choisissez un papier-peint animer : Vous pouvez utiliser le papier-peint 3D que le système
propose.
Choisissez le dialogue, vous pouvez définir les images proposées par le système comme
papier-peint statique.
Page 79

Enregistrement vocal :
Cliquez sur « Enregistrer » dans le menu principal pour entrer dans l'interface comme suit:
Choisissez le bouton « Enregistrer » pour démarrer et « Stop » quand vous avez fini. Choisissez
« lecture » pour jouer la voix enregistrée dès maintenant et « utiliser l'enregistrement » pour
stocker la voix.
Appareil photo :
Cliquez sur l‟icône de l‟ « Appareil photo » dans le menu principal pour entrer comme suit dans
l‟interface principale :
Page 80

Sélectionnez les boutons de l‟appareil photo dans le coin à droite pour prendre une photo.
E-market :
Cliquez sur E-market dans le menu principal pour entrer comme suit dans l'interface :
Choisissez « suivant » pour continuer.
Page 81

Si aucun compte n‟existe, créez un compte Gmail ; l‟interface suivante s‟affiche :
Initialisez le « Compte Google » comme suit :
Page 82

Choisissez « suivant » pour continuer.
Finalisez le mot de passe, puis choisissez « suivant » pour poursuivre.
Page 83

Si vous en possédez un, ajoutez simplement un compte Gmail.
Choisissez « D‟accord, Suivant » et ce qui suit apparaît :
Page 84

Entrez le code de sécurité et choisissez « suivant » pour entrer.
Cliquez sur « recherche » puis saisissez le logiciel à installer.
Page 85

Sélectionnez le logiciel souhaité et installez-le, trouvez comme suit l‟apl. dans « mes
applications » :
Page 86

Client de messagerie électronique :
Cliquez sur « e-mail » sous le menu principal pour entrer le client de messagerie électronique. Il
vous sera demandé d‟établir les informations du compte pour la première utilisation de la manière
suivante :
Assurez-vous que le réseau connecté au préalable utilise/autorise les e-mails.
Exemple d‟e-mail : whhpwjh@126.com
Saisissez l‟adresse e-mail réelle : whhpwjh@126.com
Entrez votre mot de passe réel : ********
Puis choisissez : « suivant » cela apparaîtra le type de compte et choisissez l‟interface de la façon
suivante :
Lorsque nous utilisons le protocole POP3, les paramètres du serveur acceptés apparaissent dans
l'interface:
Page 87

Mettez en place le différents paramètres comme chaque information de chaque fournisseur offre
e-mail comme suit:
Le serveur POP3 par défaut sera « 126.com » et devra être changé en « pop.126.com »
Le port est « 110 » nécessaire de modifier « 25 » la valeur par défaut du système est pop.126.com
à la place de 126.com le PORT est 110.
Ensuite, choisissez « Suivant », ceci permet d‟entrer dans « vérifier et accepter les paramètres du
serveur ». Si les valeurs sont correctes, « paramètre du serveur sortant » apparaîtra comme suit:
Modifier SMIP, smtp.126.com à la place de 126.com
Modifier PORT « 25 » à la place de 587
Choisissez « suivant », entrer l„installation et vérifiez/cochez les options.
Page 88

Si l‟installation s‟est produite correctement, elle va entrer dans l‟interface suivante :
Choisissez « suivant » - vous pouvez entrer dans la page de définition des informations de compte.
Entrez le nom que vous souhaitez voir apparaître dans l‟e-mail. Puis appuyez sur « Fait » pour
entrer l‟interface d‟e-mail. L‟e-mail sera téléchargé automatiquement vers le serveur. Ceci affiche
une liste d‟e-mails comme suit :
Choisissez une colonne pour voir immédiatement les e-mails, vous pouvez sélectionner
« répondre », « retirer », « plus de réponses », etc.
Page 89

Équipement externe :
*Connexion USB
Pour utiliser le câble USB pour connecter le MID au PC, le connecteur par défaut est le mode
synchrone. Vous pouvez faire glisser la barre d‟état, faites-la glisser vers le bas. L‟interface
apparaît comme suit :
« USB connecté » pour montrer la carte de stockage externe (carte SD)
Après le chargement, vous pouvez voir les informations de connexions associées.
*Application OTG
Supporte les dispositifs de stockage externes au format FAT32 comme : l‟U-disc. Pour
connecter directement le MID au système de stockage externe.
Page 90

Pour utiliser le câble OTG pour connecter le MID au périphérique externe.
* Clavier & souris :
Supporte une souris USB et un clavier.
Mise à jour du matériel :
Au cours de la mise à jour d‟Android, copiez les données à l'avance si nécessaire.
Comment utiliser l’outil de mise à jour
Mettez à jour les fichiers:97F1-D1-H2-H01-N403.img
Processus de mise à jour comme ci-dessous : (ex : mise à jour système de Windows XP)
1: Téléchargez et décompressez l‟outil de MAJ
2: Téléchargez et décompressez le fichier de MAJ
3: Sous l‟outil de MAJ pour PC LiveSuit.exe (Installez l‟élément DRIVE si le message
« Installez le programme de pilote » apparaît dans la liste FWDN) comme suit :
4. Suivez la consigne de LiveSuit de cliquer sur « matériel » pour récupérer le fichier
97F1-D1-H2-H01-N403.img de MAJ et ajoutez-le dans la liste matériel. Connectez-vous « du
matériel en choisissant » que le guide au complet en direct et ajouter le fichier de mise à niveau
acquis 97F1-D1-H01-N403 à la liste du matériel comme suit:
5. Pour garder, appuyez sur le bouton « retour » sur le panneau MID au cours de connexion PC
et MID par un câble USB, puis appuyez sur « POWER » plus de 3 fois. Pour le moment, le
programme LiveSuit.exe dans le PC apparaîtra comme suit:
Cliquez sur « oui » comme suit :
Cliquez sur « oui » comme suit :
6. Lorsque la mise à jour atteint les 100%, ce qui suit apparaît :
Appuyez sur « entrer »; le système redémarre automatiquement.
Attention : La première fois que vous rebootez le système après le mise à jour, le démarrage est
plus long. C‟est normal.
Problèmes courants :
1:Android?
Réponse : Il s’agit du système d’exploitation open source de Google déclaré le 5
novembre 2007, basé sur la plate-forme Linux
2:APK?
APK est l‟abréviation d‟Android Package, c‟est à dire : package d‟installation Android.
3:Comment obtenir APK?
Réponse : Vous pouvez l‟obtenir depuis l‟Android market ou l‟installer en ligne.
Page 91

4:Version du système d‟exploitation?
Réponse : Il utilise Android 2.3, en 3D haute vitesse. Il supporte pleinement toutes les
applications Android disponibles dans le market.
5:Peut-on le recharger par USB?
Réponse : Oui, vous pouvez choisir l‟adaptateur secteur 5V pour le recharger.
SERVICE CLIENT
Vous pouvez contacter le service clients Ricatech si vous avez une question ou un problème avec
votre produit Ricatech. Vous pouvez nous contacter par téléphone ou courriel :
Courriel
Pour le support client par e-mail, envoyez un e-mail à support@ricatech.com. N‟oubliez pas de
mentionner le numéro de modèle et le numéro de série du produit, indiquez-nous votre nom et
adresse, puis posez ou décrivez clairement votre question ou le problème que vous rencontrez.
Téléphone
Pour le support client par téléphone, appelez-nous au +32 3 3265694. Un membre de notre service
client sera à votre écoute.
Pour la procédure complète, visitez le site internet de Ricatech : www.ricatech.com
Par la présente, Ricatech B.V déclare que cette tablette PC Android est conforme aux exigences
essentielles, et autres provisions associées, de la directive 1999/5/CE.
 Loading...