

Page 1
RMC350 5 in 1 MUSIC CENTER
910-111041-0030-100
USER MANUAL
GEBRUIKERSHANDLEIDING
MODE D'EMPLOI
BEDIENUNGSANLEITUNG
MANUALE D'USO
Page 2
IMPORTANT SAFEGUARDS FOR AUDIO PRODUCTS
PLEASE READ CAREFULL Y THE FOLLOWING IMPORTANT SAFEGUARDS THA T
ARE APPLICABLE TO YOUR EQUIPMENT.
1. Read Instructions - All the safety and operating instructions should be read before the
appliance is operated.
2. Retain Instructions - The safety and operating instructions should be retained for future
reference.
3. Heed Warnings - All warnings on the appliance and in the operating instructions should
be adhered to.
4. Follow Instructions - All operating and use instructions should be followed.
5. Water and Moisture - The appliance should not be used near water-for
example, near a bathtub,washbowl,kitchen sink,laundry tub, in a wet
basement, or near a swimming pooland the like.
6. Carts and Stands - The appliance should be used only with a cart
or stan that is recommendedby the manufacturer.
6A.An appliance and cart combination should be moved with care.
Quick stops, excessive force, and uneven surfaces may cause
the appliance and cart combination to overturn.
7. Wall or Ceiling Mounting - The appliance should be mounted to a
wall or ceiling only as recommended by the manufacturer.
8. Ventilation - The appliance should be situated so that its location or position does not interfere
with-its proper ventilation.For example, the appliance should not be situated on a bed, sofa,
rug, or similar surface that may block the ventilation openings; or, placed in a built-in installation,
such as a bookcase or cabinet that may impede the flow of air through the ventilation
openings.
9. Heat - The appliance should be situated away from heat sources such as radiators,heat
registers, stoves,or other appliances (including amplifiers) that produce heat.
10.Power Sources - The appliance should be connected to a power supply only of the
type described in the operating instructions or as marked on the appliance.
11.Grounding or Polarization - Precautions should be taken so that the grounding or polarization
means of an appliance is not impeded.
12.Power - Cord Protection - Power-supply cords should be routed so that they are not likely
to be walked on or pinched by items placed upon or against them, paying particular attention
to cords at plugs, and the point where they exit from the appliance.
13.Cleaning - The appliance should be cleaned only as recommended by the manufacturer.
14.This product is designed for use with the antenna attached and should not be connected
to any other external antennas.
15.Nonuse Periods - The power cord of the appliance should be unplugged from the outlet
when left unused for a long period of time.
16.Object and Liquid Entry - Care should be taken so objects do not fall and liquids are not
spilled into the enclosure through openings
17.Damage Requiring Service - The appliance should be serviced by qualified service personnel
when:
A. The power-supply cord of the plug has been damaged;or
B. Objects have fallen, or liquid has been spilled into the appliance;or
C. The appliance has been exposed to rain;or
D. The appliance does not appear to operate normally or exhibits a marked change
inperformance;or
E. The appliance has been dropped, or the enclosure damaged.
18.Servicing - The user should not attempt to service the appliance beyond that described
in the operating instructions. All other servicing should be referred to qualified service
personnel.
40
1
Page 3
GUÍA DE SOLUCIÓN DE PROBLEMAS
PLATO
No hay alimentación
1. El adaptador de CA no está bien conectado.
2. Compruebe que el botón de volumen ENCENDIDO/APAGADO está en la posición ENCENDIDO.
No hay sonido
1. Compruebe el nivel de volumen girando el botón de volumen.
El plato no funciona
1. Asegúrese de que el selector de función está ajustado a “phono”.
2. Pruebe a mover el brazo del tocadiscos hacia la derecha hasta que suene un clic.
3. Asegúrese de haber retirado la cubierta protectora de la aguja.
No se reproduce el CD
1. Asegúrese de haber introducido el CD correctamente (el lado del a etiqueta hacia arriba).
2. Compruebe que la superficie del CD está limpia
3. Asegúrese de que el selector de función está ajustado a CD.
USB - No se reproduce música si se pulsa REPRODUCCIÓN/PAUSA (USB).
1. Asegúrese de que la unidad Flash/dispositivo MP3 ha almacenado archivos de música.
2. La unidad solo reproducirá dispositivos Flash de hasta 4 GB.
3. Reinicie el USB/SD apagando o rotando el SELECTOR DE FUNCIÓN (2) para seleccionar otro modo.
Luego seleccione el modo SD/USB otra vez.
4. Compruebe si el/los archivo/s es/son archivo/s WMA. La unidad no reproduce el formato WMA, sólo
formato MP3.
Especificaciones USB
Interfaz
* USB2.0 Full Speed, host (no compatible con USB HUB)
Memoria Flash correspondiente
* Memoria Flash USB1.1
* Memoria Flash USB2.0 High speed
* Tamaño máximo de la memoria : 4 GByte
* Tamaño mínimo de la memoria : 512MByte (Solo FAT16).
Decodificador MP3
* Compatible con Audio MPEG 1, 2, 2.5
* Compatible con Layer 1, 2, 3
* Compatible con tasa de transferencia de Bit: 8 k ~ 320 kbps
* Subcarpetas anidadas: 8
* Compatible con tasa de muestreo: 8 k, 16 k, 32 k, 11,025 k, 22,05 k, 44,1 k, 12 k, 24 k, 48 kHz
* Número máximo de archivos para la reproducción: 999
* Formato de archivo para la reproducción: *.mp3. *.mp2, *.mp1; no es posible seleccionar el formato
POWER SOURCE
1 Untie the wire on the AC Adaptor
2 Plug the AC Adaptor into appropriate wall outlet.
3 Plug the small end of the adaptor into the ACADAPTOR JACK on the back of the unit.
UNPACKING THE TURNTABLE
1. Remove packing materials from unit.
Note: Save all packing materials.
2. Remove plastic bag covering radio.
3. Remove plastic safety cover from A/C plug.
4. Remove tie from A/C cord and untie antenna wire on back of radio
5. Open lid and remove styrofoam shipping material from turntable.
6. Remove black tie-wrap from under the tone arm.
7. Remove white protective needle cover by gently pulling towards the front of the unit.
8. Untie the FM antenna and allow it to hang down in a straight line for optimum FM reception. If you have
trouble tuning in an FM station, move the external FM antenna for best reception. Do no connect FM
antenna to outside antenna.
TURNTABLE OPERATION
Turn the unit on by rotating the ON/OFF-VOLUME ROTARY KNOB located on the front panel to the ON
position.
1. Rotate the FUNCTION SWITCH to select PHONO mode.
2. Set the SPEED CONTROL SWITCH to desire speed (33 1/3,45 or 78 rpm). Place the record on the
turntable.
3. Use the CUE LEVER to raise the tone arm off its rest. Pull the TONE ARM slightly to the right side until
hear the “click” sound to activate the turntable.
4. Move the TONE ARM by hand over the record and slowly lower it. Adjust the ON/OFF-VOLUME ROTAR Y
KNOB to the desired listening level.
5. At the end of the record, the TONE ARM will stop automatically. You must return to TONE ARM to arm
rest by hand.
Accessory: ADAPTER FOR 45 RPM
1 Place the 45 RPM adaptor over the spindle.
2 Gently place your 45 RPM record onto the turntable.
3 Follow the steps under turntable operation to play your record.
ANTENNA
For FM reception, the unit is provided with a FM WIRE ANTENNA , move the wire until the reception is
clear and with no interferences. For AM reception, the unit is provided with a directional build-in ferrite
antenna. Rotate the set to find the position in which the best reception is obtained. Do not connect the
EXTERNAL FM ANTENNA to any outside antenna.
RADIO OPERATION
1. Rotate the FUNCTION SWITCH to select RADIO mode.
2. Set the AM/FM BAND SWITCH to the desired radio band (AM or FM).
3. Select the desired radio station by rotating TURNING ROTARY KNOB.
4. Adjust the ON/OFF-VOLUME ROTARY KNOB to the desired sound level.
38
USB & SD-CARD OPERATION
SD-Card operation:
1. Insert SD-Card into the SD Card slot.
2. Switch on by turning the ON/OFF-VOLUME ROTARY KNOB from the Off position.
3. Adjust the ON/OFF-VOLUME ROTARY KNOB to the desired volume level.
4. Rotate the FUNCTION SWITCH to SD/USB Mode.
5. Press the PLAY/PAUSE BUTTON (USB/SD) to play the music tracks stored on the SD-card.
6. The green ACC LED will flash whilst the music is playing.
7. To pause the music, press the PLAY/PAUSE BUTTON (USB/SD) again.
8. Press the SKIP+ (USB/SD) / SKIP- (USB/SD) BUTTON to go to the next file during Play Mode.
9. To stop playing the music files stored on the SD-Card , press the PLAY/PAUSE BUTTON (USB/SD).
Note: Power the unit off first before disconnecting the SD-Card. Turning the VOLUME CONTROL to
Off position.
3
Page 4
FUNCIONAMIENTO DEL USB
1. Introduzca el dispositivo MP3 (a través de su cable de conexión – no suministrado) o la unidad Flash
con archivos MP3 en el puerto USB. (Para hacer funcionar el dispositivo MP3/unidad Flash, consulte
su manual de funcionamiento).
2. Encienda la unidad girando el BOTÓN GIRATORIO DE VOLUMEN-ENCENDIDO/APAGADO desde
la posición APAGADO.
3. Ajuste el BOTÓN GIRATORIO DE VOLUMEN-ENCENDIDO/APAGADO al volumen deseado.
4. Gire el SELECTOR DE FUNCIÓN a modo SD/USB.
5. Pulse el botón USB/SD (USB/SD BUTTON) una vez para seleccionar el dispositivo USB.
6. Pulse el BOTÓN DE REPRODUCCIÓN/PAUSA (USB/SD) para reproducir las pistas de música
almacenadas en el dispositivo externo.
7. El LED ACC verde destellará durante la reproducción de música.
8. Para pausar la música, pulse el BOTÓN DE REPRODUCCIÓN/PAUSA (USB/SD) otra vez.
9. Pulse el BOTÓN SALTO+ (USB/SD) / SALTO- (USB/SD) para ir al siguiente archivo durante el modo
Reproducción.
10. Para dejar de reproducir los archivos de música almacenados en la unidad Flash/dispositivo USB, pulse
el BOTÓN DE REPRODUCCIÓN/PAUSA (USB/SD).
Nota: Apague la unidad antes de desconectar el dispositivo USB. Giro del CONTROL DE VOLUMEN
a la posición APAGADO.
ADVERTENCIA:
1) No desconecte el dispositivo USB/SD durante el modo USB/SD, ya que podría dañar el dispositivo o
los archivos.
2) Para desconectar el dispositivo USB/SD de forma segura, apague la unidad primero o cambie a otro modo.
NOTAS:
1) El puerto USB no permite la conexión de un cable de extensión USB.
2) No ha sido diseñado para establecer comunicación directa con el ordenador.
3) No hay garantía de que todos los dispositivos de memoria USB y tarjetas SD funcionen en este sistema
de audio.
Nota:
a) Si no se conecta un dispositivo USB/SD o archivo MP3, se encenderá la luz del LED ERR.
b) La luz del LED ACC destellará mientras los datos MP3 se transfieren durante el modo REPRODUCCIÓN.
c) El USB/SD se reiniciará encendiendo la unidad o cambiando a otro modo si no está funcionando.
*IMPORTANTE:
* Este producto podría no ser compatible con dispositivos USB con múltiples identificadores USB (como
un dispositivo de almacenamiento masivo Hub + USB), es compatible ÚNICAMENTE con dispositivos
USB de almacenamiento masivo.
FUNCIONAMIENTO DEL CD
DURANTE LA REPRODUCCIÓN
1. Gire el SELECTOR DE FUNCIÓN a CD.
2. Pulse el BOTÓN DE ABRIR/CERRAR para abrir la BANDEJA DEL CD. Coloque un disco en la bandeja
con el lado de la etiqueta hacia arriba.
3. Pulse el BOTÓN DE ABRIR/CERRAR otra vez para cerrar la BANDEJA DEL CD. La pantalla mostrará
“—” por unos segundos y luego se visualizará el número total de pistas del disco. Se mostrará “00”
cuando no haya ningún disco en la unidad.
4. Pulse el BOTÓN DE REPRODUCCIÓN para iniciar la reproducción. El INDICADOR DE REPRODUCCIÓN
se iluminará.
5. Ajuste el BOTÓN GIRATORIO DE VOLUMEN al volumen deseado.
6. Para pausar la reproducción, pulse el BOTÓN DE REPRODUCCIÓN/PAUSA. El INDICADOR DE
REPRODUCCIÓN destellará. Pulse el BOTÓN DE REPRODUCCIÓN para reanudar la reproducción.
7. Para detener la reproducción, pulse el BOTÓN DE PARADA. El INDICADOR DE REPRODUCCIÓN
se apagará.
NOTA: No hay garantía de que todos los CD/CD-R funcionen en este sistema de audio.
SALTO DE PISTAS HACIA ADELANTE Y HACIA ATRÁS
1. Pulse el BOTÓN DE SALTO HACIA ADELANTE o el BOTÓN DE SALTO HACIA ATRÁS para seleccionar
una pista.
2. Pulse el BOTÓN DE REPRODUCCIÓN para empezar a reproducir la pista seleccionada
BÚSQUEDA HACIA ADELANTE Y HACIA ATRÁS
DURANTE LA REPRODUCCIÓN
1. Mantenga pulsado el BOTÓN DE SALTO HACIA ADELANTE o el BOTÓN DE SALTO HACIA ATRÁS
para buscar hacia adelante o hacia atrás en la pista seleccionada.
2. Libere el botón en el punto deseado, la reproducción se reanudará automáticamente.
36
REPEAT PLAYBACK
1. To repeat a single track, choose the track that you want to repeat, then press the PLAY BUTTON to
start the track. Press the REPEAT BUTTON once to repeat this track. The REPEAT INDICATOR will
flash.
2. To repeat all tracks, press the PLAY BUTTON to start the CD. Press the REPEAT BUTTON twice to
repeat all tracks. Once the CD ends, it will star over again from the beginning of the CD. The REPEAT
INDICATOR will remain on.
3. To erase the repeat function, press the REPEAT
BUTTON
again until the REPEAT INDICATOR is off.
PROGRAMMED PLAYBACK
1. Press the PROGRAM BUTTON. " 01" will shown on the display and the PROGRAM INDICATOR will
flash.
2. Press the FORWARD SKIP BUTTON or the BACKWARD SKIP BUTTON to select a track.
3. Press the PROGRAM BUTTON again to store the selected track number.
4. Repeat steps 2 and 3 above to program other tracks.
5. Press the PLAY BUTTON to start Programmed playback. The PROGRAM INDICATOR will be on.
6. T o erase the programmed sequence, press the ST OP BUTT ON twice or until the PROGRAM INDICATOR
is off. Programmed tracks will also erase when the CD DOOR is opened.
NOTE: Maximum of 20 tracks can be programmed to play in any order.
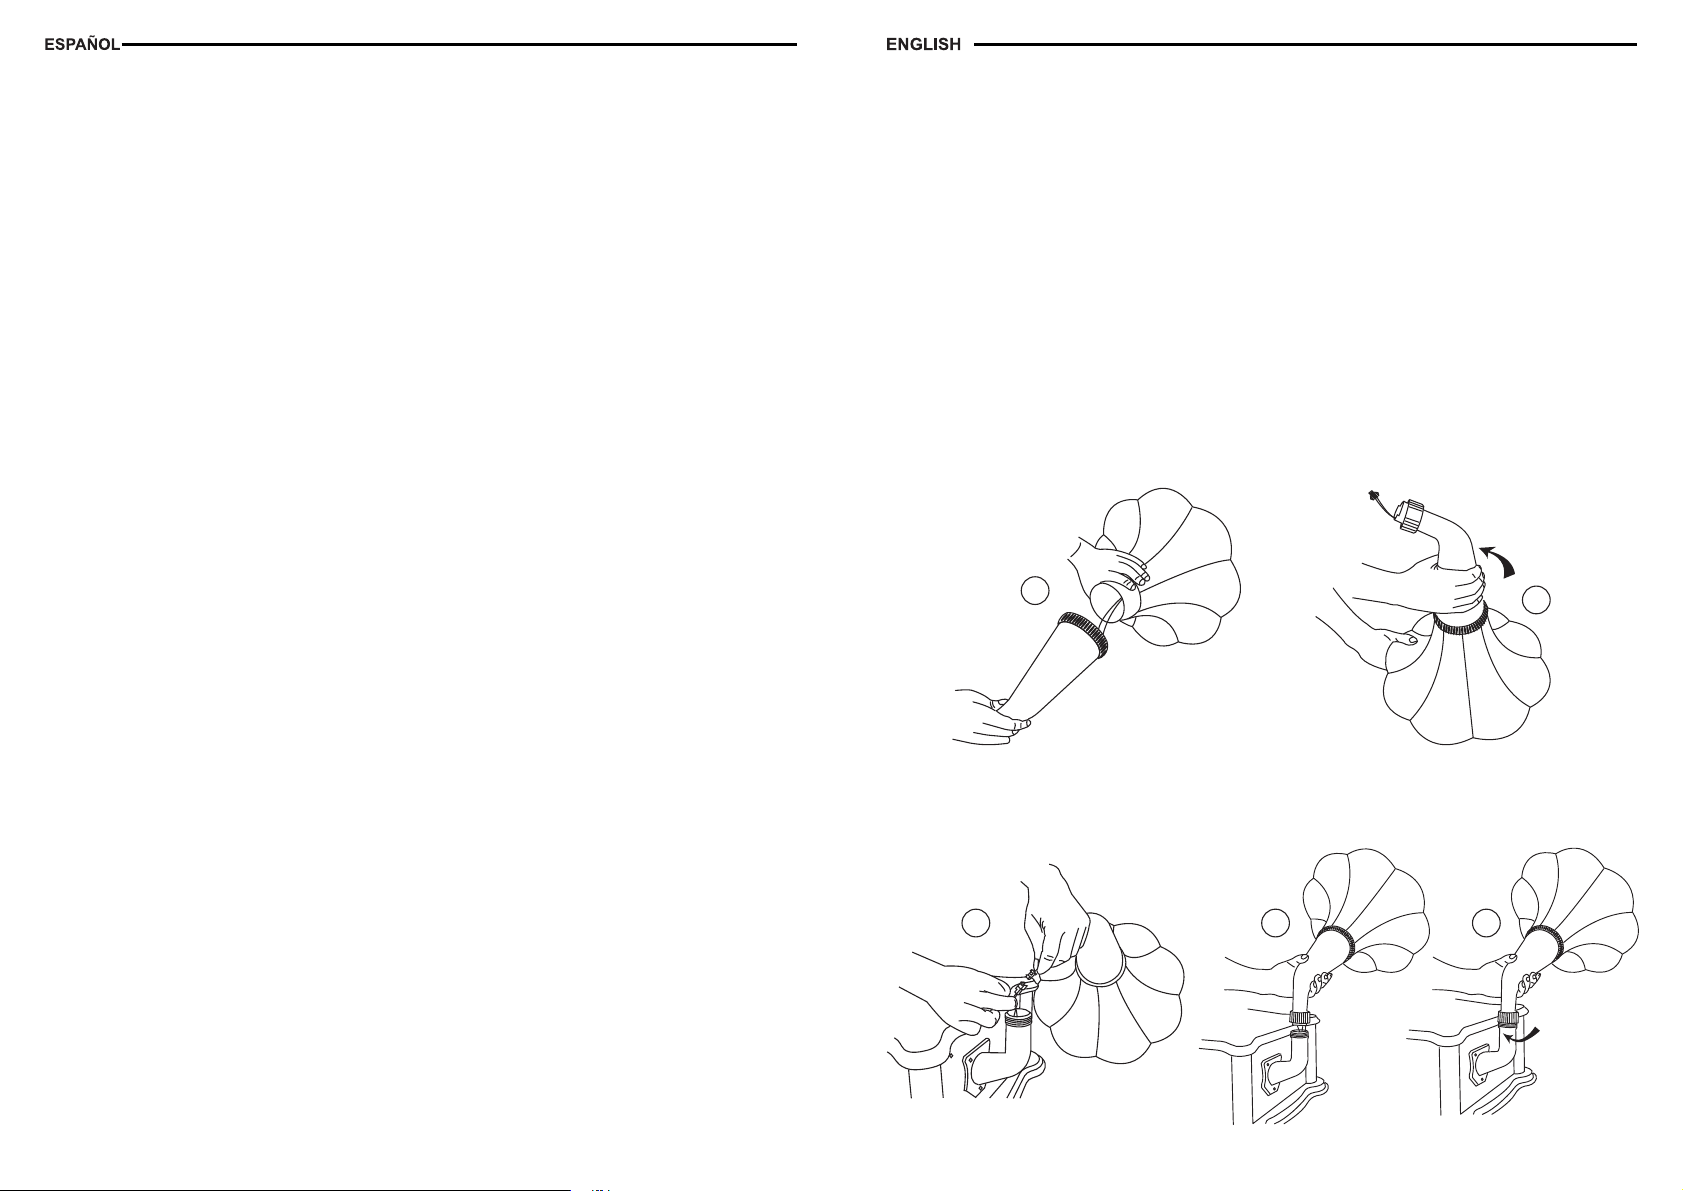
ASSEMBLY OF THE HORN PROCEDURE
1. Push the wire through the Horn holder. Picture (1).
2. Rotate the Horn and the Horn Holder according to the picture direction.Picture (2).
1
3. Plug-in the speaker wire together. Picture (3).
4. Place the Horn Holder over the Horn Base. Picture (4).
5. Rotate the Screw Bushing to tighten according to the picture direction.Picture (5).
2
3 4 5
5
Page 5
ADVERTENCIA:
PARA PREVENIR INCENDIOS O RIESGO DE DESCARGA, NO EXPONGA EL
AP ARATO A LA LLUVIA O LA HUMEDAD. NO RETIRE LA CUBIERTA. PILOTOS
SOLDADOS A LA UNIDAD. NO CONTIENE PIEZAS SUSTITUIBLES POR EL
USUARIO. CONSUL TE EL MANTENIMIENTO CON PERSONAL CUALIFICADO.
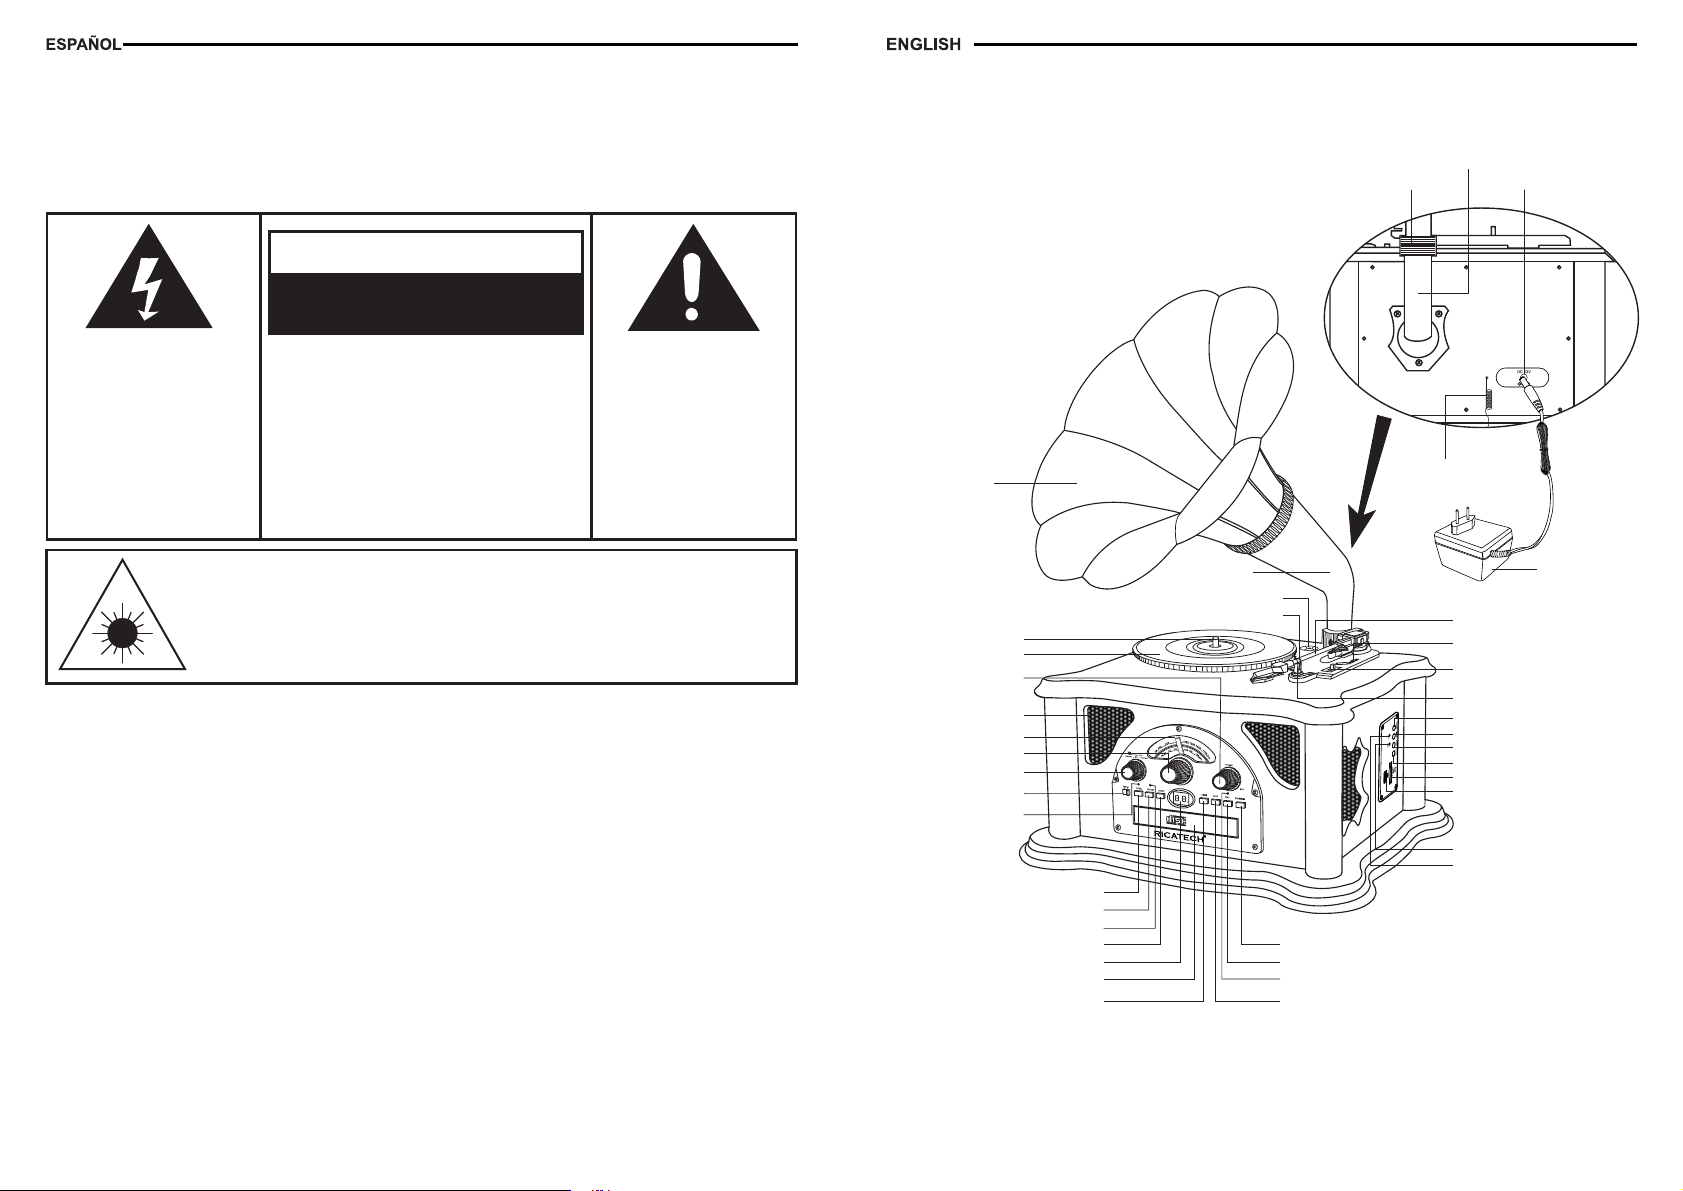
PRECAUCIÓN
RIESGO DE DESCARGA
ELÉCTRICA. NO ABRIR
El símbolo del rayo en un
triángulo equilátero, es para
alertar al usuario de la
presencia de “voltaje
peligroso” sin aislar entre
los contenidos del producto,
que podría ser de magnitud
suficiente para constituir un
riesgo de descarga eléctrica
para las personas.
PRECAUCIONES: PARA
REDUCIR EL RIESGO DE
DESCARGA ELÉCTRICA, NO
RETIRE LA CUBIERTA (O PARTE
POSTERIOR). NO CONTIENE –
PIEZAS SUSTITUIBLES POR EL
USUARIO. CONSULTE EL
MANTENIMIENTO CON
PERSONAL CUALIFICADO.
El signo de exclamación
en un triángulo equilátero
es para alertar al usuario
de la presencia de
importantes instrucciones
de uso y mantenimiento
(servicios) en el folleto
que acompaña al aparato.
LOCATION OF PARTS
HORN
SCREW BUSHING
EXTERNAL ANTENNA
HORN BASE
AC ADAPTOR JACK
PRECAUCIÓN
Solo para unidades de disco compacto:
RADIACIÓN DE LÁSER INVISIBLE AL ABRIR Y ERROR O F ALLO DEL BLOQUEO
INTERNO. EVITE LA EXPOSICIÓN DIRECTA A LA LUZ DEL LÁSER.
ESPECIFICACIONES
RANGO DE FRECUENCIA : FM 88 - 108 MHz
: AM 530 - 1600 KHz
Puerto USB 2.0 : Velocidad 512 MB - 4 GB
(Compatible con FAT16, FAT32)
CONSUMO DE ENERGÍA : 18 W
FUENTE DE ALIMENTACIÓN : Adaptador CA/CC 12 V - ANTENAS CA 230 V / 50 Hz
ANTENA : Antena externa para FM
: Barra de ferrita integrada para AM
ALTAVOZ : 4” Tipo dinámico x 2
: 2 1/2” Tipo Tweeter X1
*DISEÑO Y ESPECIFICACIONES SUJETOS A CAMBIO SIN AVISO PREVIO.
SPINDLE
TURNTABLE
ON/OFF-VOLUME
ROTARY KNOB
SPEAKER
DIAL SCALE
TUNING KNOB
FUNCTION SWITCH
AM/FM BAND SWITCH
PROGRAM INDICATOR
PROGRAM BUTTON
REPEAT BUTTON
REPEAT INDICATOR
HORN HOLDER
ADAPTER FOR 45 RPM RECORD
B.SKIP BUTTON
LED DISPLAY
CD DOOR
F.SKIP BUTTON STOP BUTTON
SECURITY HOOK
OPEN/CLOSE BUTTON
PLAY/PAUSE BUTTON
PLAY INDICATOR
AC ADAPTOR
TONE ARM
CUE LEVER
SPEED CONTROL SWITCH
(331/3, 45, 78 RPM)
ARM REST
PLAY/PAUSE BUTTON(USB/SD)
SKIP+ BUTTON(USB/SD)
SKIP- BUTTON(USB/SD)
USB/SD BUTTON
SD CARD SLOT
USB PORT
ACC LED
ERR LED
34
7
Page 6
BELANGRIJKE VEILIGHEIDSVOORSCHRIFTEN VOOR AUDIOPRODUCTEN
LEES DE VOLGENDE BELANGRIJKE VOORZORGSMAATREGELEN, WELKE VAN
TOEPASSING ZIJN OP UW APPARAAT, AANDACHTIG DOOR.
1. Leesinstructies - Lees eerst alle veiligheids- en bedieningsinstructies voordat het apparaat
wordt bediend.
2. Bewaarinstructies - Bewaar de veiligheids- en bedieningsinstructies voor toekomstig gebruik.
3. Waarschuwingen - Alle waarschuwingen op het toestel en in de bedieningsinstructies
moeten in acht worden genomen.
4. Opvolginstructies - Alle bedienings- en gebruiksinstructies moeten worden opgevolgd.
5. Water en vocht - Gebruik het toestel niet in de nabijheid van water-bijvoorbeeld in de
nabijheid van een bad, wastafel, gootsteen, wasteil, in een vochtige
kelder of nabij een zwembad en dergelijke.
6. Wagentjes en standers - Gebruik het toestel alleen met een
wagentje of stander die wordt aanbevolen door de fabrikant.
6A.De combinatie van een toestel op een wagentje moet voorzichtig
worden verplaatst. Plotseling stoppen, te veel kracht en
ongelijkmatige oppervlakken kunnen ervoor zorgen dat de
combinatie van een toestel met een wagentje omslaat.
7. Wand- of plafondmontage - Monteer het toestel alleen aan een
wand of plafond, zoals aanbevolen door de fabrikant.
8. Ventilatie - Plaats het toestel op zodanige wijze, dat de locatie of positie van het toestel
niet de ventilatie belemmerd. Plaats het toestel bijvoorbeeld niet op een bed, bank, vloerkleed
of gelijkwaardig oppervlak dat de ventilatieopeningen kan blokkeren; plaats het in een
ingebouwde constructie, zoals een boekenkast of kast waardoor de luchtstroom via de
ventilatieopeningen kan worden belemmerd.
9. Warmte - Plaats het toestel niet in de nabijheid van warmtebronnen, zoals radiators,
verwarmingsroosters, fornuizen of andere apparatuur (inclusief versterkers) die warmte
produceren.
10.Voedingsbronnen - Sluit het apparaat alleen op voedingsbronnen aan die staan beschreven
in de gebruiksaanwijzing of zoals vermeld op het toestel.
11.Aarding of polarisatie - Neem de juiste maatregelen, zodat de aardings- en polarisatiemiddelen
van een toestel niet worden belemmerd.
12.Stroom - Snoerbescherming - Leid netsnoeren op zodanige wijze, dat er niet overheen kan
worden gelopen of kunnen worden afgeklemd door items die erop of ertegen zijn geplaatst,
waarbij vooral moet worden gelet op snoeren, stekkers en het punt waar deze het toestel
verlaten.
13.Reiniging - Reinig het toestel alleen volgens de aanbeveling van de fabrikant.
14.Dit product is bedoeld voor gebruik met de bevestigde antenne en mag niet met andere
externe antennes worden verbonden.
15.Perioden van niet gebruik - Haal de stekker van het netsnoer uit het toestel wanneer deze
voor langere tijd niet wordt gebruikt.
16.Voorwerpen en vloeistoffen - Let op dat er geen vloeistof fen worden gemorst of voorwerpen
in de behuizing vallen via de openingen
17.Reparatievereiste schade - Laat het toestel door gekwalificeerd onderhoudspersoneel
repareren wanneer:
A. Het netsnoer van de stekker werd beschadigd; of
B. Vloeistoffen werden gemorst of voorwerpen in het toestel zijn gevallen; of
C. Het toestel werd blootgesteld aan regen; of
D. Het apparaat niet normaal schijnt te werken of een duidelijke verandering in prestaties
vertoont; of
E. Wanneer het apparaat is gevallen of de behuizing is beschadigd.
18.Reparatie - Probeer als gebruiker het toestel niet verder te repareren dan beschreven in
de bedieningsinstructies. Al het andere onderhoud moet worden overgelaten aan gekwalificeerd
onderhoudspersoneel.
32
9
Page 7

FEHLERBEHEBUNG
PLATTENSPIELER
Kein Strom
1. Der Netzadapter ist nicht ordnungsgemäß angeschlossen.
2. Überprüfen Sie, ob sich der EIN/AUS-Lautstärkeknopf in der Position EIN befindet.
Kein Ton
1. Überprüfen Sie die Lautstärke durch Drehen des Lautstärkeknopfes.
Der Plattenspieler funktioniert nicht
1. Überprüfen Sie, ob der Funktionsschalter auf Phono steht.
2. Versuchen Sie, den Tonarm nach rechts zu bewegen, bis Sie einen Klick hören.
3. Überprüfen Sie, ob die Schutzhülle von der Nadel abgenommen ist.
Keine CD-Wiedergabe
1. Überprüfen Sie, ob die CD ordnungsgemäß eingelegt ist (die beschriftete Seite nach oben).
2. Überprüfen Sie die Sauberkeit der Oberfläche der CD
3. Überprüfen Sie, ob der Funktionsschalter auf CD steht.
USB - Wenn PLAY/PAUSE (USB) gedrückt ist, wird keine Musik abgespielt.
1. Überprüfen Sie, ob der MP3-Speicherstick Musikdateien enthält.
2. Das Gerät spielt nur Speichersticks mit bis zu 4 GB maximal ab.
3. Setzen Sie das USB/SD-Speichergerät zurück, indem Sie das Gerät ausschalten oder den
FUNKTIONSSCHALTER (2) in einen anderen Modus umschalten. Wählen Sie dann den USB/SD-Modus
erneut aus.
4. Überprüfen Sie, ob die Datei(en) eine WMA-Datei ist/WMA-Dateien sind. Dieses Gerät kann das WMAFormat nicht wiedergeben, nur das MP3-Format.
USB-Spezifikationen
Schnittstelle
* USB2.0 Full Speed, HOST (USB HUB wird nicht unterstützt)
Entsprechender Flashspeicher
* USB1.1-Flashspeicher
* USB 2.0 Hochgeschwindigkeits-Flashspeicher
* Maximale Speichergröße: 4 GByte
* Minimale Speichergröße: 512 MByte (Entspricht nur FAT16.)
MP3-Decoder
* Kompatibel mit MPEG Audio 1, 2, 2.5
* Kompatibel mit Layer 1, 2, 3
* Kompatibel mit Bitrate: 8 k ~ 320 kbps
* Verschachtelungstiefe der Unterordner: 8
* Kompatibel mit Abtastrate: 8 k, 16 k, 32 k, 11,025 k, 22,05 k, 44,1 k, 12 k, 24 k, 48 kHz
* Maximale Anzahl der Dateien für die Wiedergabe: 999
* Dateiformat für die Wiedergabe: *.mp3. *.mp2, *.mp1; Sie können das Wiedergabeformat nicht auswählen
30
VOEDINGSBRON
1 Maak het draad om de lichtnetadapter los.
2 Steek de stekker van de lichtnetadapter in een geschikt stopcontact.
3 Steek het smalle uiteinde van de adapter in de LICHTNETADAPTERAANSLUITING aan de achterzijde
van het apparaat.
DE PLATENSPELER UITPAKKEN
1. Verwijder de verpakkingsmaterialen van het apparaat.
Opmerking: Bewaar alle verpakkingsmaterialen.
2. Verwijder de plastic zak die de radio bedekt.
3. Verwijder de plastic veiligheidsbescherming van de lichtnetstekker.
4. Verwijder de draad van het lichtnetsnoer en maak de antennedraad
aan de achterzijde van de radio los
5. Open het deksel en verwijder het piepschuimen verpakkingsmateriaal van de platenspeler.
6. Verwijder de zwarte kabelbinder onder de pick-uparm.
7. Verwijder de witte naaldbescherming door deze voorzichtig naar de voorzijde van het apparaat te trekken.
8. Maak de FM-antenne los en laat deze in een rechte lijn naar beneden hangen voor optimaal FMontvangst. Indien u moeilijkheden ondervindt bij het afstemmen op een FM-zender, verplaats dan de
externe FM-antenne naar een plaats met beter ontvangst. Verbind de FM-antenne niet met een
buitenantenne.
BEDIENING PLATENSPELER
Schakel het apparaat in door de AAN/UIT-VOLUMEDRAAIKNOP op het voorpaneel naar de AAN-positie
te draaien.
1. Draai aan de FUNCTIESCHAKELAAR om de PHONO-stand te selecteren.
2. Stel de SNELHEIDSSCHAKELAAR in op de gewenste snelheid (33 1/3,45 of 78 tpm). Plaats de plaat
op de platenspeler.
3. Gebruik de OPTILHENDEL om de pick-uparm van de armsteun te tillen. Beweeg, om de platenspeler
te activeren, de PICK-UPARM iets naar rechts totdat u het “klik” -geluid hoort.
4. Breng handmatig de PICK-UPARM boven de plaat en laat deze langzaam zakken. Stel de AAN/UITVOLUMEDRAAIKNOP af op het gewenste luisterniveau.
5. Aan het einde van de plaat stopt de PICK-UPARM automatisch. U moet de PICK-UPARM handmatig
naar de armsteun terugbrengen.
Accessoire: ADAPTER VOOR 45 TPM
1 Plaats de 45 TPM adapter boven de as.
2 Plaats voorzichtig uw 45 TPM plaat op de platenspeler.
3 Volg de stappen onder bediening platenspeler om uw plaat af te spelen.
ANTENNE
Verplaats voor FM-ontvangst, het apparaat is voorzien van een FM-DRAADANTENNE, de draad tot de
ontvangst duidelijk en vrij van storing is. Voor AM-ontvangst is het apparaat voorzien van een directe
ingebouwde ferrietantenne. Draai de opstelling om de positie met de beste ontvangst te vinden. Verbind
de EXTERNE FM-ANTENNE niet met buitenantennes.
RADIOBEDIENING
1. Draai aan de FUNCTIESCHAKELAAR om de RADIO-stand te selecteren.
2. Stel de AM/FM-BANDSCHAKELAAR in op de gewenste radioband (AM of FM).
3. Selecteer het gewenste radiostation door aan de DRAAIKNOP te draaien.
4. Stel de AAN/UIT-VOLUMEDRAAIKNOP af op het gewenste volumeniveau.
USB&SD-KAARTBEDIENING
SD-kaartbediening:
1. Plaats een SD-kaart in de SD-kaartsleuf.
2. Schakel in door aan de AAN/UIT-VOLUMEDRAAIKNOP vanuit de Uit-positie te draaien.
3. Stel de AAN/UIT-VOLUMEDRAAIKNOP af op het gewenste volumeniveau.
4. Draai de FUNCTIESCHAKELAAR naar de SD/USB-stand.
5. Druk op de AFSPELEN/PAUZE-KNOP (USB/SD) om muziek, opgeslagen op de SD-kaart, af te spelen.
6. De groene ACC LED zal gaan knipperen terwijl de muziek speelt.
7. Druk opnieuw op de AFSPELEN/PAUZE-KNOP (USB/SD) om de muziek te pauzeren.
8. Druk op de SKIP+ (USB/SD) / SKIP- (USB/SD)-KNOP om tijdens het afspelen naar het volgende bestand
te gaan.
9. Druk op de AFSPELEN/PAUZE-KNOP (USB/SD) om het afspelen van muziekbestanden, opgeslagen
op de SD-kaart, te stoppen.
Opmerking: Schakel eerst het apparaat uit alvorens de SD-kaart te verwijderen. De VOLUMEBESTURING
naar de Uit-positie draaien.
11
Page 8

USB-BETRIEB
1. Schließen Sie den MP3-Speicherstick (über dessen Verbindungskabel – nicht im Lieferumfang enthalten)
oder das Flashspeichergerät mit MP3-Dateien an den USB-Anschluss an.(Informationen zum Betrieb
des MP3-Speichersticks finden Sie in dessen Bedienungsanleitung des Herstellers’.)
2. Schalten Sie das Gerät ein, indem Sie den EIN/AUS-LAUTSTÄRKE-DREHKNOPF aus der Position
Aus drehen.
3. Stellen Sie den EIN/AUS-LAUTSTÄRKE-DREHKNOPF auf die gewünschte Lautstärke.
4. Drehen Sie den FUNKTIONSSCHALTER auf den SD/USB-Modus.
5. Drücken Sie die USB/SD-TASTE einmal, um das USB-Speichergerät auszuwählen.
6. Drücken Sie die PLAY/PAUSE-TASTE (USB/SD), um die auf dem externen Gerät gespeicherten
Musikstücke abzuspielen.
7. Die grüne ZUGR-LED blinkt während der Musikwiedergabe.
8. Um die Musikwiedergabe zu unterbrechen, drücken Sie die PLAY/PAUSE-TASTE (USB/SD) erneut.
9. Drücken Sie die SKIP+ (USB/SD) / SKIP- (USB/SD)-TASTE (Vorwärts/Zurück), um im Play-Modus zur
nächsten Datei zu gelangen.
10. Um die Wiedergabe der auf dem USB-Speicherstick gespeicherten Musikdateien anzuhalten, drücken
Sie die PLAY/PAUSE-TASTE (USB/SD).
Hinweis: Schalten Sie das Gerät zuerst aus, bevor Sie das USB-Speichergerät entnehmen. Drehen
Sie den LAUTSTÄRKEREGLER auf die Position AUS.
WARNUNG:
1) Ziehen Sie das USB/SD-Speichergerät während des USB/SD-Modus nicht ab, das kann das Speichergerät
oder die Dateien beschädigen.
2) Um das USB/SD-Speichergerät sicher zu entfernen, schalten Sie das Gerät zuerst aus oder schalten
Sie auf einen anderen Modus.
HINWEISE:
1) Der USB-Anschluss unterstützt keine Verbindungen mit USB-Verlängerungskabel.
2) Es ist nicht für die direkte Kommunikation mit einem Computer gedacht.
3) Wir können nicht garantieren, dass alle USB-Speichergeräte und SD-Karten mit diesem Audiosystem
funktionieren.
Hinweis:
a) Wenn kein USB/SD-Speichergerät oder MP3-Speicherstick angeschlossen ist, leuchtet die Leuchte
ERR-LED auf.
b) Die Leuchte ZUGR-LED blinkt, während die MP3-Daten im PLAY-Modus übertragen werden.
c) Falls USB/SD nicht funktioniert, wird es zurückgesetzt, indem Sie das Gerät ausschalten oder in einen
anderen Modus umschalten.
*WICHTIG:
* Dieses Gerät ist möglicherweise nicht kompatibel mit USB-Speichergeräten mit mehreren USB Identifikatoren
(wie etwa Hub + USB-Massenspeichergerät), es ist NUR mit der USB Massenspeichergeräteklasse kompatibel.
WEERGAVE HERHALEN
1. Om één nummer te herhalen, kies het nummer dat u wilt herhalen en druk vervolgens op de AFSPELENKNOP om het nummer te starten. Druk één keer op de HERHALEN-KNOP om dit nummer te herhalen.
De HERHALEN-AANDUIDING gaat knipperen.
2. Om alle nummers te herhalen, druk op de AFSPELEN-KNOP om de CD te starten. Druk twee keer op
de HERHALEN-KNOP om alle nummers te herhalen. Zodra de CD is beëindigd, wordt de CD vanaf
het begin opnieuw afgespeeld. De HERHALEN-AANDUIDING blijft aan.
3. Druk, om de herhaalfunctie te wissen, opnieuw op de HERHALENuit is.
GEPROGRAMMEERDE WEERGAVE
1. Druk op de PROGRAMMAKNOP. " 01" zal op de display worden getoond en de PROGRAMMAAANDUIDING zal knipperen.
2. Druk op de VOORUIT SKIP-KNOP of de ACHTERUIT SKIP-KNOP om een nummer te selecteren.
3. Druk opnieuw op de PROGRAMMAKNOP om het geselecteerde muzieknummer op te slaan.
4. Herhaal bovenstaande stap 2 en 3 om andere nummers te programmeren.
5. Druk op de AFSPELEN-KNOP om Geprogrammeerde weergave te starten. De PROGRAMMAAANDUIDING blijft aan.
6. Druk, om de geprogrammeerde reeks te wissen, twee keer op de STOPKNOP of totdat de PROGRAMMAAANDUIDING uit is. Geprogrammeerde nummers worden tevens gewist wanneer de CD-DEUR wordt
geopend.
OPMERKING: Maximaal 20 nummers kunnen worden geprogrammeerd voor het afspelen in elke
willekeurige volgorde.
MONTAGE VAN DE HOORNPROCEDURE
1. Duw de draad door de hoornhouder. Afbeelding (1).
2. Draai de hoorn en de hoornhouder volgens de richting in de afbeelding. Afbeelding (2).
1
KNOP
tot de HERHALEN-AANDUIDING
2
CD-BETRIEB
DER WIEDERGABE
1. Drehen Sie den FUNKTIONSSCHALTER auf CD.
2. Drücken Sie die OPEN/CLOSE-TASTE, um das CD-FACH zu öffnen. Legen Sie eine CD mit der
beschrifteten Seite nach oben in das Fach.
3. Drücken Sie die OPEN/CLOSE-TASTE erneut, um das CD-FACH zu schließen. Die Anzeige zeigt einige
Sekunden „—“ an, dann wird die Anzahl der Titel auf der CD angezeigt. „00“ wird angezeigt, wenn Sie
keine CD in das Gerät eingelegt haben.
4. Drücken Sie die PLAY-TASTE, um die Wiedergabe zu starten. Die PLAY-ANZEIGE leuchtet auf.
5. Stellen Sie den LAUTSTÄRKE-DREHKNOPF auf die gewünschte Lautstärke.
6. Um die Wiedergabe zu unterbrechen, drücken Sie die PLAY/PAUSE-T ASTE. Die PLAY -ANZEIGE blinkt.
Drücken Sie die PLAY-TASTE erneut, um die Wiedergabe fortzusetzen.
7. Um die Wiedergabe anzuhalten, drücken Sie die STOP-TASTE. Die PLAY-ANZEIGE erlischt.
HINWEIS: Wir können nicht garantieren, dass alle CD- und CD-R-Formate mit diesem Audiosystem
funktionieren.
VORWÄRTSSPRINGEN UND ZURÜCKSPRINGEN
1. Drücken Sie die FORWARD SKIP-TASTE (V orwärts) oder die BACKWARD SKIP-TASTE (Zurück), um
einen Titel auszuwählen.
2. Drücken Sie die PLAY-TASTE, um die Wiedergabe des gewählten Titels zu starten
VORWÄRTS- UND RÜCKWÄRTSSUCHEN WÄHREND
DER WIEDERGABE
1. Halten Sie die FORWARD SKIP-TASTE (V orwärts) oder die BACKW ARD SKIP-TASTE (Zurück) gedrückt,
um den ausgewählten Titel vorwärts oder rückwärts zu durchsuchen.
2. Wenn Sie die Taste an der gewünschten Stelle loslassen, wird die Wiedergabe an dieser Stelle automatisch
fortgesetzt.
28
3. Verbind de luidsprekerdraden. Afbeelding (3).
4. Plaats de hoornhouder op de hoornbasis. Afbeelding (4).
5. Draai met behulp van de schroefbus vast volgens de richting in de afbeelding. fbeelding (5).
3 4 5
13
Page 9

WARNUNG:
UM FEUER ODER DIE GEFAHR EINES STROMSCHLAGS ZU VERMEIDEN,
SETZEN SIE DIESES GERÄT NICHT REGEN ODER HOHER
LUFTFEUCHTIGKEIT AUS. NEHMEN SIE NIE DIE ABDECKUNG AB. ACHTEN
SIE AUF DIE FEST EINGELÖTETEN LAMPEN. DAS GERÄT ENTHÄLT KEINE
REPARATURFÄHIGEN TEILE. WENDEN SIE SICH IM REPARATURFALL AN
QUALIFIZIERTES KUNDENDIENSTPERSONAL.
VORSICHT
GEFAHR EINES STROMSCHLAGS
BITTE NICHT ÖFFNEN
Das Blitzsymbol in einem
gleichseitigen Dreieck dient
dazu, dem Benutzer die
Existenz nichtisolierter
„gefährlicher Spannung“ im
Innern des Gerätes
anzuzeigen, die hoch genug
sind, um den Benutzern das
Risiko eines Stromschlags
herbeizuführen.
VORSICHT: UM DIE GEFAHR
EINES STROMSCHLAGS ZU
MINDERN, NEHMEN SIE NIE DIE
ABDECKUNG (ODER DIE
RÜCKWAND) AB. KEINE VOM
ANWENDER – ZU WARTENDEN
TEILE IM GERÄT. WENDEN SIE
SICH IM REPARATURFALL AN
QUALIFIZIERTES
KUNDENDIENSTPERSONAL.
VORSICHT
Nur für CD-Player:
UNSICHTBARE LASERSTRAHLUNG NACH DEM ÖFFNEN UND BEI
UMGANGENER ODER ZUNICHTE GEMACHTER ZUGRIFFSSPERRE. SCHAUEN
SIE NIEMALS DIREKT IN DEN LASERSTRAHL.
SPEZIFIKATIONEN
FREQUENZBEREICH : UKW 88 - 108 MHz
: MW 530 - 1600 KHz
USB-Anschluss 2.0 : Geschwindigkeit 512 MB - 4 GB
(FAT16-, FAT32-Unterstützung)
LEISTUNGSAUFNAHME : 18 W
STROMQUELLE : Netzadapter 12 V - Wechselstrom 230 V / 50 Hz
ANTENNEN : Externe Antenne für UKW
: Eingebauter Ferritstab für MW
LAUTSPRECHER : 4” (10 cm) Dynamischer Typ x 2
: 2 1/2” (6 cm) Hochtöner Typ X1
Das Ausrufezeichen in
einem gleichseitigen
Dreieck dient dazu, den
Benutzer auf wichtige
Vorschriften für den Betrieb
und die Wartung (den
Kundendienst) in dem
dieses Gerät begleitenden
Informationsmaterial
hinzuweisen.
LOCATIE VAN DE ONDERDELEN
HOORNBASIS
SCHROEFBUS
HOORN
PLATENSPELER
AAN/UIT-VOLUME
LUIDSPREKER
AFSTEMSCHAAL
AFSTEMKNOP
FUNCTIESCHAKELAAR
AM/FM-BANDSCHAKELAAR
PROGRAMMA-AANDUIDING
AS
DRAAIKNOP
PROGRAMMAKNOP
HERHALEN-KNOP
HERHAAL INDICATOR
A.SKIP-KNOP
LED-DISPLAY
V.SKIP-KNOP
ADAPTER VOOR 45 TPM PLAAT
CD-DEUR
HOORNHOUDER
VEILIGHEIDSHAAK
OPEN/SLUITEN-KNOP
AFSPELEN/PAUZE-KNOP
AFSPELEN-AANDUIDING
STOPKNOP
EXTERNE ANTENNE
LICHTNETADAPTERAAN
SLUITING
LICHTNETADAPTER
PICK-UPARM
OPTILHENDEL
SNELHEIDSSCHAKELAAR
(331/3, 45, 78 TPM)
ARMSTEUN
AFSPELEN/PAUZE-KNOP (USB/SD)
SKIP+ KNOP (USB/SD)
SKIP-KNOP (USB/SD)
USB/SD-KNOP
SD-KAARTSLEUF
USB-POORT
ACC LED
ERR LED
*DAS DESIGN UND DIE SPECIFIKATIONEN KÖNNEN OHNE VORHERIGE
ANKÜNDIGUNG GEÄNDERT WERDEN.
26
15
Page 10

INFORMA TIONS RELATIVES À LA SÉCURITÉ POUR LES PRODUITS AUDIO
VEUILLEZ LIRE ATTENTIVEMENT LES IMPORTANTES CONSIGNES DE SÉCURITÉ
SUIVANTES, QUI S'APPLIQUENT À VOTRE ÉQUIPEMENT.
1. Lire le mode d'emploi - Toutes les informations relatives au fonctionnement de l'appareil
et à la sécurité doivent être lues avant d'utiliser l'appareil.
2. Conserver le mode d'emploi - Les consignes relatives au fonctionnement de l'appareil et
à la sécurité doivent être conservées pour référence ultérieure.
3. Tenir compte des mises en garde - Tous les avertissements relatifs à l'appareil contenus
dans le mode d'emploi doivent être respectés.
4. Suivre les instructions - Toutes les instructions de fonctionnement et d'utilisation doivent
être suivies.
5. Eau et humidité -L'appareil ne doit pas être utilisé à proximité de l'eau –
par exemple, à proximité d'une baignoire, d'un lavabo, d'un évier
de cuisine, d'une cuve à lessive, dans une cave humide, ou à
proximité d'une piscine ou tout équipement équivalent.
6. Chariots et guéridons - Cet appareil ne doit être utilisé qu'avec
un chariot ou un support recommandé par le fabricant.
6A.L'ensemble appareil-chariot doit être déplacé avec soin. Les arrêts
rapides,une force excessive et des surfaces inégales peuvent entraîner
le renversement de l'ensemble appareil-chariot.
7. Montage au mur ou au plafond - L'appareil ne doit être monté au mur ou au plafond que
de la manière préconisée par le fabricant.
8. Aération - L'appareil doit être placé de telle sorte que sa situation ou sa position n'entrave
pas sa propre ventilation. Par exemple, l'appareil ne doit pas être placé sur un lit, un canapé,
un tapis ou toute autre surface similaire qui pourrait obstruer les ouvertures d'aération.
L'appareil ne doit pas être placé dans une installation close, tel qu'un meuble de bibliothèque
ou une armoire, qui peuvent empêcher le flux d'air de traverser les orifices de ventilation.
9. Chaleur - L'appareil doit être situé à l'écart des sources de chaleur, tels que les radiateurs,
les bouches d'entrée d'air, les poêles ou cuisinières ou autres appareils (notamment les
amplificateurs) susceptibles de dégager de la chaleur.
10. Sources d'alimentation - L'appareil doit être connecté à une source d'alimentation seulement
du type décrit dans le mode d'emploi ou indiqué sur l'appareil.
11. Mise à la terre ou polarisation - La mise à la terre ou les moyens de polarisation d'un
appareil doivent faire l'objet d'une attention particulière afin qu'ils ne soient pas empêchés.
12. Alimentation -Protection du cordon d'alimentation - Les cordons d'alimentation doivent être
acheminés de telle sorte qu'ils ne fassent pas obstacle à la circulation, et qu'ils ne soient
pas pincés/écrasés par des objets posés contre ou sur eux. Faites particulièrement attention
aux cordons au niveau des prises électriques et au niveau de la sortie du cordon hors de
l'appareil.
13. Nettoyage - L'appareil ne doit être nettoyé que de la façon préconisée par le fabricant.
14. Ce produit a été conçu pour être utilisé avec l'antenne jointe et ne doit être connecté à
aucune autre antenne externe.
15. Périodes de non-utilisation - Le cordon d'alimentation de l'appareil doit être débranché
de la prise si l'appareil n'est pas utilisé sur une durée prolongée.
16. Liquides et corps étrangers - Des mesures doivent être prises afin que des objets ne
tombent pas et que des liquides ne soient pas déversés dans les enceintes à travers les
ouvertures
17. Dommages nécessitant des réparations - L'appareil doit être porté à un personnel de
réparation lorsque :
A. Le cordon d'alimentation de la prise est endommagé ; ou
B. Des objets sont tombés ou du liquide a été déversé dans l'appareil ; ou
C. L'appareil a été exposé à la pluie ; ou
D. L'appareil ne semble pas fonctionner normalement ou fait preuve d'une détérioration
prononcée de ses performances ; ou
E. L'appareil est tombé, ou l'enceinte est endommagée.
18. Réparation - L'utilisateur ne doit pas essayer de réparer l'appareil au-delà des mesures
décrites dans le mode d'emploi. Toute autre réparation doit être effectuée par un personnel
qualifié.
24
17
Page 11

GUIDE DE DÉPANNAGE
PLATINE
Il n'y a pas d'alimentation électrique
1. L'adaptateur CA n'est pas correctement branché.
2. Vérifiez que le bouton de volume ON/OFF est bien en position ON.
Il n'y a pas de son
1. Vérifiez le niveau de volume sonore en faisant tourner le bouton de volume.
La platine ne fonctionne pas
1. Assurez-vous que le commutateur de fonction est bien réglé sur PHONO.
2. Essayez de déplacer le bras de lecture vers la droite jusqu'à perception d'un déclic.
3. Assurez-vous que le cache-aiguille de protection est retiré.
Le CD n'est pas lu.
1. Assurez-vous que le CD est inséré correctement (face imprimée vers le haut).
2. Vérifiez que la surface du CD est propre
3. Assurez-vous que le commutateur de fonction est bien réglé sur CD.
Mode USB - Aucune musique n'est jouée lorsque le bouton PLAY/PAUSE (USB) est enfoncé.
1. Assurez-vous que le périphérique MP3/à mémoire Flash contient des fichiers musicaux.
2. L'appareil ne lit que les périphériques à mémoire Flash dont la capacité ne dépasse pas 4 Go.
3. Réinitialisez l'USB/SD en mettant l'appareil hors tension ou en faisant tourner le BOUTON FUNCTION
(2) afin de sélectionner un autre mode.Puis sélectionnez de nouveau le mode SD/USB.
4. Vérifiez si le/les fichier(s) est/sont un (des) fichier(s) WMA. L'appareil ne lit pas le format WMA, seul le
format MP3 est reconnu.
Spécifications USB
Interface
* USB 2.0 Full speed, HOST (le format USB HUB n'est pas supporté)
Périphérique à mémoire flash correspondant
* Périphérique à mémoire Flash USB 1.1
* Périphérique à mémoire Flash USB 2.0 High speed
* Taille maximale de la mémoire : 4 Go
* Taille minimale de la mémoire : 512 Mo (seul FAT16 correspond.)
Décodeur MP3
* Compatible MPEG Audio 1, 2, 2.5
* Compatible Layer 1, 2, 3
* Compatible débit binaire : 8 kb ~ 320kb/s
* Nid de sous-dossier : 8
* Compatible avec ces taux d'échantillonnage : 8k, 16k, 32k, 11,025k, 22,05k, 44.1k, 12k, 24k, 48kHz
* Nombre de fichiers maximum pour la lecture : 999
* Format de fichier pour la lecture : *.mp3. *.mp2, *.mp1 : impossible de sélectionner le format
SOURCE D'ALIMENTATION
1 Dénouez le câble de l'adaptateur CA
2 Branchez l'adaptateur CA dans une prise murale appropriée.
3 Branchez la petite extrémité de l'adaptateur dans le JACK DE L'ADAPTATEUR CA situé à l'arrière de
l'appareil.
DÉBALLAGE DE LA PLATINE
1. Retirez le matériel d'emballage de l'appareil.
Remarque : Conservez tous les emballages.
2. Retirez le sac en plastique qui couvre la radio.
3. Retirez le couvercle de sécurité en plastique de la prise C/A.
4. Dénouez le cordon C/A et détachez le câble de l'antenne à l'arrière de la radio
5. Ouvrez le couvercle et ôtez les particules de calage en polystyrène de la platine.
6. Retirez le lien de calage noir du bras de lecture par en-dessous.
7. Retirez le cache-aiguille protecteur blanc en le tirant doucement vers l'avant de l'appareil.
8. Retirez les liens de l'antenne FM et laissez-la pendre en ligne droite pour une réception FM optimale.
Si vous éprouvez des difficultés à régler une station FM, déplacez l'antenne FM externe pour une
meilleure réception. Ne connectez pas l'antenne FM à une antenne extérieure.
FONCTIONNEMENT DE LA PLATINE
Allumez l'appareil en faisant tourner le BOUTON ROTATIF ON/OFF-VOLUME (MARCHE/ARRÊT-VOLUME)
situé sur le panneau avant jusqu'à la position ON (MARCHE).
1. Faites tourner le BOUTON FUNCTION (FONCTION) pour sélectionner le mode PHONO.
2. Réglez le BOUTON SPEED CONTROL (CONTRÔLE DE VITESSE) sur la position désirée (33, 1/3,45
ou 78 tr/min.) Posez le disque sur la platine.
3. Utilisez le LEVIER DE SIGNAL pour lever le bras de lecture de sa base. Tirez doucement le BRAS
DE LECTURE vers le côté droit jusqu'à ce qu'un « clic » soit perceptible pour activer la platine.
4. Déplacez le BRAS DE LECTURE à la main au-dessus du disque et abaissez-le doucement. Réglez le
BOUTON ROTATIF ON/OFF-VOLUME jusqu'à atteindre le volume sonore désiré.
5. À la fin du disque, le BRAS DE LECTURE s'arrête automatiquement. Vous devez replacer le BRAS
DE LECTURE jusqu'au support du bras à la main.
Accessoire : ADAPTATEUR POUR DISQUES 45 TR/MIN
1 Placez l'adaptateur pour disques 45 tr/min sur l'axe.
2 Posez doucement votre disque 45 tours sur la platine.
3 Pour lire votre disque, suivez les étapes décrites pour le fonctionnement de la platine.
ANTENNE
Pour la réception FM, l'appareil est fourni avec une ANTENNE FILAIRE FM. Déplacez l'antenne filaire
jusqu'à ce que la réception soit satisfaisante et exempte d'interférences. Pour la réception AM, l'appareil
est livré avec une antenne directionnelle en ferrite intégrée. Faites tourner l'ensemble jusqu'à atteindre la
position où la réception est la meilleure. Ne connectez l'ANTENNE FM EXTERNE à aucune antenne
extérieure.
FONCTIONNEMENT DE LA RADIO
1. Faites tourner le BOUTON FUNCTION (FONCTION) pour sélectionner le mode RADIO.
2. Réglez le BOUTON AM/FM BAND sur la bande radio souhaitée (AM ou FM).
3. Sélectionnez la station de radio souhaitée en faisant tourner le BOUTON ROTATIF TUNING.
4. Réglez le BOUTON ROTATIF ON/OFF-VOLUME jusqu'à atteindre le volume sonore désiré.
22
FONCTIONNEMENT EN MODE USB & CARTE SD
Fonctionnement en mode carte SD :
1. Insérez une carte SD dans l'emplacement pour carte SD.
2. Allumez l'appareil en faisant tourner le BOUTON ROTATIF ON/OFF-VOLUME (MARCHE/ARRÊTVOLUME) sur la position ON (MARCHE), à partir de la position Off (Arrêt).
3. Réglez le BOUTON ROTATIF ON/OFF-VOLUME jusqu'à atteindre le volume sonore désiré.
4. Faites tourner le BOUTON FUNCTION (FONCTION) pour sélectionner le mode SD/USB.
5. Appuyez sur le BOUTON PLAY/PAUSE (USB/SD) pour lire les pistes musicales de la carte SD.
6. La DEL verte ACC clignote lors de la lecture de la musique.
7. Pour mettre la musique en pause, appuyez à nouveau sur le BOUTON PLAY/PAUSE (USB/SD).
8. Appuyez sur le BOUTON SKIP + (USB/SD) / SKIP - (USB/SD) pour aller au fichier suivant dans le mode lecture.
9. Pour arrêter la lecture des fichiers musicaux stockés sur la carte SD, appuyez sur le BOUTON
PLAY/PAUSE (USB/SD).
Remarque : Mettez l'appareil hors tension avant de déconnecter la carte SD. En faisant tourner le
CONTRÔLE DU VOLUME jusqu'à la position Off.
19
Page 12

WARNING:
TO PREVENT FIRE OR SHOCK HAZARD, DO NOT EXPOSE THIS APPLIANCE TO
RAIN OR MOISTURE. DO NOT REMOVE COVER. PILOT LAMPS SOLDERED IN
PLACE. NO USER SERVICEABLE PARTS INSIDE. REFER SERVICING TO
QUALIFIED SERVICE PERSONNEL.
CAUTION
RISK OF ELECTRIC SHOCK
DO NOT OPEN
The lighting flash with
arrowhead symbol, within
an equilateral triangle, is
intended to alert user to the
presence of uninsulated
"dangerous voltage" within
the product's enclosure that
may be of sufficient
magnitude to constitute risk
of electric shock to persons.
CAUTION: TO REDUCE THE
RISK OF ELECTRIC SHOCK, DO
NOT REMOVE COVER (OR
BACK). NO USER –
SERVICEABLE PARTS INSIDE.
REFER SERVICING TO
QUALIFIED SERVICE
PERSONNEL.
CAUTION
For Compact Disc Units Only:
INVISBLE LASER RADIATION WHEN OPEN AND INTERLOCK FAILED
OR DEFEATED. AVOID DIRECT EXPORSURE TO LASER BEAM.
SPECIFICATION
FREQUENCY RANGE : FM 88 - 108 MHz
: AM 530 - 1600 KHz
USB Port 2.0 : Full Speed 512MB - 4GB
(Support FAT16, FAT32)
POWER CONSUMPTION : 18W
POWER SOURCE : AC/DC 12V Adaptor - AC230V / 50Hz
ANTENNAS : External antenna for FM
: Built-in ferrite bar for AM
SPEAKER : 4” Dynamic type x 2
: 2 1/2” Tweeter type X1
*DESIGN AND SPECIFICATION SUBJECT TO CHANGE WITHOUT NOTICE.
The exclamation point
within an equilateral
triangle is intended to
alert user to the
presence of important
operating and
maintenance (servicing)
instruction in the
literature accompanying
the appliance.
LOCALIZACIÓN DE LAS PIEZAS
BASE DE LA TROMPETA
RODAMIENTO ENROSCABLE
TROMPETA
ADAPTADOR PARA DISCOS DE 45 RPM
EJE
VOLUMEN-ENCENDIDO/APAGADO
BOTÓN GIRATORIO
BOTÓN DE SINTONIZAR
SELECTOR DE FUNCIÓN
INDICADOR DE PROGRAMA
PLATO
ALTAVOZ
ESCALA DE DIAL
SELECTOR DE
BANDA AM/FM
BOTÓN DE PROGRAMAR
BOTÓN DE REPETIR
INDICADOR DE REPETICIÓN
BOTÓN DE SALTO ATRÁS
BOTÓN DE SALTO ADELANTE
PANTALLA LED
BANDEJA DEL CD
GANCHO DE SEGURIDAD
BOTÓN DE ABRIR/CERRAR
BOTÓN DE REPRODUCCIÓN/PAUSA
INDICADOR DE REPRODUCCIÓN
BOTÓN DE PARADA
ANTENA EXTERNA
SOPORTE DE LA TROMPETA
CLAVIJA CA
ADAPTADOR CA
BRAZO DEL TOCADISCOS
PALANCA ELEVADORA
SELECTOR DE CONTROL DE
VELOCIDAD (331/3, 45, 78 rpm)
SOPORTE DEL BRAZO
BOTÓN DE REPRODUCCIÓN/
PAUSA (USB/SD)
SALTO+ BOTÓN (USB/SD)
SALTO- BOTÓN (USB/SD)
BOTÓN USB/SD
RANURA DE LA TARJETA SD
PUERTO USB
LED ACC
LED ERR
2
39
Page 13

USB OPERATION
1. Insert the MP3 device (via its connecting cable – not supplied) or Flash Drive with MP3 files into the
USB Port. (To operate the MP3 device/Flash Drive, please refer to its manufacturer’s operating manual).
2. Switch the unit on by turning the ON/OFF-VOLUME ROTARY KNOB from the Off position.
3. Adjust the ON/OFF-VOLUME ROTARY KNOB to the desired volume level.
4. Rotate the FUNCTION SWITCH to SD/USB Mode.
5. Press the USB/SD BUTTON once to select the USB Device.
6. Press the PLAY/PAUSE BUTTON (USB/SD) to play the music tracks stored on the external device.
7. The green ACC LED will flash whilst the music is playing.
8. To pause the music, press the PLAY/PAUSE BUTTON (USB/SD) again.
9. Press the SKIP+ (USB/SD) / SKIP- (USB/SD) BUTTON to go to the next file during Play Mode.
10. To stop playing the music files stored on the USB device/Flash Drive, press the PLAY/PAUSE BUTTON
(USB/SD).
Note: Power the unit off first before disconnecting the USB device. Turning the VOLUME CONTROL
to OFF position.
WARNING:
1) Do not disconnect the USB/SD device during USB/SD mode, as this may damage the device or files.
2) To disconnect the USB/SD device safely, turn off the unit first or switch to another mode.
NOTES:
1) USB Port does not support connection with USB extension cable.
2) It is not designed for communication with computer directly.
3) It is not guarantee that all USB memory devices and SD cards will work on this audio system.
Note:
a) If there is no USB/SD device or MP3 file connected, the ERR LED light will be on.
b) The ACC LED light will flash whilst the MP3 data is transferring during PLAY mode.
c) The USB/SD will be reset by powering off the unit or switching to another mode if it is not functioning.
*IMPORTANT:
* This product may not comply with USB devices with multiple USB identifiers (such as Hub + USB Mass
Storage Device), it complies with USB Mass Storage Device class ONLY.
REPETIR REPRODUCCIÓN
1. Para repetir una sola pista, elija la pista que quiere repetir y pulse el BOTÓN DE REPRODUCCIÓN
para iniciar la pista. Pulse una vez el BOTÓN DE REPETIR para repetir esta pista. El INDICADOR
DE REPETICIÓN destellará.
2. Para repetir todas las pistas, pulse el BOTÓN DE REPRODUCCIÓN para iniciar el CD. Pulse dos veces
el BOTÓN DE REPETIR para repetir todas las pistas. Una vez termine el CD, empezará de nuevo
desde el principio. El INDICADOR DE REPETICIÓN seguirá encendido.
3. Para borrar la función repetir, pulse otra vez el BOTÓN DE
REPETICIÓN se apague.
REPETIR
hasta que el INDICADOR DE
REPRODUCCIÓN PROGRAMADA
1. Pulse el BOTÓN DE PROGRAMAR. Se mostrará “01” en la pantalla y el INDICADOR DE PROGRAMA
destellará.
2. Pulse el BOTÓN DE SALT O HACIA ADELANTE o el BOTÓN DE SALTO HACIA ATRÁS para seleccionar
una pista.
3. Pulse otra vez el BOTÓN DE PROGRAMA para almacenar el número de pista seleccionado.
4. Repita los pasos 2 y 3 anteriores para programar otras pistas.
5. Pulse el BOTÓN DE REPRODUCCIÓN para iniciar la reproducción programada. El INDICADOR DE
PROGRAMA seguirá encendido.
6. Para borrar la secuencia programada, pulse dos veces el BOTÓN DE PARADA o hasta que el INDICADOR
DE PROGRAMA se apague. Las pistas programadas también se borrarán al abrir la BANDEJA DEL CD.
NOTA: Se pueden programar un máximo de 20 pistas para reproducir en cualquier orden.
PROCEDIMIENTO DE MONTAJE DE LA TROMPETA
1. Pase el cable a través del soporte de la trompeta. Dibujo (1).
2. Gire la trompeta y el soporte en la dirección que indica el dibujo. Dibujo (2).
1
2
CD OPERATION
PLAYBACK
1. Rotate the FUNCTION SWITCH to CD.
2. Press the OPEN/CLOSE BUTTON to open the CD DOOR. Place a disc in the tray with the labeled
side of the disc facing up.
3. Press the OPEN/CLOSE BUTTON again close the CD DOOR. The display will show “—“ for a few
seconds, then the total number of tracks on the disc will be displayed. “00” will be shown when there
is no disc inside the unit.
4. Press the PLAY BUTTON to start playback. The PLAY INDICATOR will light up.
5. Adjust the VOLUME ROTARY KNOB to the desired volume level.
6. To pause playback, press the PLAY/PAUSE BUTTON. The PLAY INDICATOR will flash. Press the PLAY
BUTTON again to resume playback.
7. To stop playback, press the STOP BUTTON. The PLAY INDICATOR will go off.
NOTE:It is not guarantee that all CD/ CD-R will work on this audio system.
SKIP FORWARD AND SKIP REVERSE
1. Press the FORWARD SKIP BUTTON or the BACKWARD SKIP BUTTON to select a track.
2. Press the PLAY BUTTON to start playing the selected track
SEARCH FORWARD AND REVERSE DURING
PLAYBACK
1. Press and hold the FORWARD SKIP BUTTON or the BACKWARD SKIP BUTTON to search forward
or backward though the selected track.
2. Release the button at the desired point, playback will resume automatically.
4
3. Conecte entre sí los cables del altavoz. Dibujo (3).
4. Coloque el soporte de la trompeta sobre la base. Dibujo (4).
5. Gire el Rodamiento Enroscable para apretar como se indica en el dibujo. Dibujo (5).
3 4 5
37
Page 14

TROUBLE SHOOTING GUIDE
TURNTABLE
There is no Power
1. The AC Adaptor is not well connected.
2. Check to see that the ON/OFF volume knob is in the on position.
There is no Sound
1. Check the volume level by turning the volume knob.
Turntable will not work
1. Make sure the function switch is set to phono.
2. Try moving the tone arm to the right until you hear a click.
3. Make sure the protective needle cover is removed.
CD does not play
1. Check to make sure CD is inserted correctly (label side facing up).
2. Check that the surface of the CD is clean
3. Make sure function switch is set to CD.
USB - There is no music playing when PLAY/PAUSE (USB) is pressed.
1. Make sure the MP3 device/Flash Drive has stored music files.
2. The unit will only play Flash Drives up to 4GB max.
3. Reset USB/SD by powering Off or rotate the FUNCTION SWITCH (2) to select another mode.
Then select SD/USB mode again.
4. Check if the file(s) is a/are WMA file(s). The unit does not play WMA format, only MP3 Format.
USB Specification
Interface
* USB2.0 Full speed, HOST (USB HUB is not supported)
Corresponding Flash memory
* USB1.1 Flash memory
* USB2.0 High speed Flash memory
* Maximum memory size : 4GByte
* Minimum memory size : 512MByte (Only FAT16 corresponds.)
MP3 Decoder
* Compatible with MPEG Audio 1, 2, 2.5
* Compatible with Layer 1, 2, 3
* Compatible with Bit rate : 8k ~ 320kbps
* Subfolder nest : 8
* Compatible with Sampling rate : 8k, 16k, 32k, 11.025k, 22.05k, 44.1k, 12k, 24k,48kHz
* Number of maximum files for playback : 999
* File format for playback : *.mp3. *.mp2, *.mp1 It is not possible to select it.
FUENTE DE ALIMENTACIÓN
1 Desate el cable del Adaptador de CA
2 Conecte el adaptador de CA a un enchufe de pared adecuado.
3 Conecte el extremo pequeño del adaptador a la clavija de la parte trasera de la unidad.
DESEMPAQUETADO DEL PLATO
1. Retire el embalaje de la unidad.
Nota: Guarde todos los elementos de embalaje.
2. Retire la bolsa de plástico que cubre la radio.
3. Retire la cubierta plástica de protección del conector A/C.
4. Quite el nudo del cable A/C y desate el cable de antena de la parte trasera de la radio
5. Abra la tapa y retire del plato el material de poliestireno de protección.
6. Retire la brida negra de debajo del brazo del tocadiscos.
7. Retire la cubierta protectora de la aguja, de color blanco, tirando con delicadeza hacia la parte delantera
de la unidad.
8. Desate la antena FM y déjela colgando en línea recta para una recepción FM óptima. Si tiene problemas
para sintonizar una estación FM, mueva la antena FM externa para una mejor recepción. No conecte
la antena FM a antenas exteriores.
FUNCIONAMIENTO DEL PLATO
Encienda la unidad rotando a la posición ENCENDIDO el BOTÓN GIRATORIO DE VOLUMENENCENDIDO/APAGADO situado en el panel frontal.
1. Gire el selector de función (FUNCTION SWITCH) para seleccionar modo PHONO.
2. Ajuste el SELECTOR DE CONTROL DE VELOCIDAD a la velocidad deseada (33 1/3,45 o 78 rpm).
Coloque el disco en el plato.
3. Utilice la PALANCA ELEVADORA para levantar el BRAZO DEL TOCADISCOS de su posición de reposo.
Tire del BRAZO DEL TOCADISCOS ligeramente hacia la derecha hasta oír un “clic” para activar el plato.
4. Mueva el BRAZO DEL TOCADISCOS sobre el disco con la mano y bájelo lentamente. Ajuste el BOTÓN
GIRATORIO DE VOLUMEN-ENCENDIDO/APAGADO al nivel de escucha deseado.
5. Al finalizar el disco, el BRAZO DEL TOCADISCOS se parará automáticamente. Debe retornar el BRAZO
DEL TOCADISCOS a su soporte manualmente.
Accesorio: ADAPTADOR PARA 45 RPM
1 Ponga el adaptador de 45 rpm en el eje.
2 Coloque el disco de 45 rpm en el plato delicadamente.
3 Siga los pasos de funcionamiento del plato para reproducir el disco.
ANTENA
Para la recepción FM, la unidad dispone de una ANTENA FM DE CABLE, mueva el cable hasta que la
recepción sea nítida y sin interferencias. Para la recepción AM, la unidad tiene incorporada una antena
direccional de ferrita. Gire el conjunto para encontrar la mejor posición de recepción. No conecte la ANTENA
FM EXTERNA a ninguna antena exterior.
FUNCIONAMIENTO DE LA RADIO
1. Gire el SELECTOR DE FUNCIÓN para seleccionar modo RADIO.
2. Ajuste el SELECTOR DE BANDA AM/FM a la banda de radio deseada (AM o FM).
3. Seleccione la estación de radio deseada rotando el BOTÓN GIRATORIO DE SINTONIZAR.
4. Ajuste el BOTÓN GIRATORIO DE VOLUMEN-ENCENDIDO/APAGADO al nivel de escucha deseado.
USB & FUNCIONAMIENTO DE LA TARJETA SD
Funcionamiento de la tarjeta SD:
1. Introduzca la tarjeta SD en la ranura para tarjetas SD.
2. Encienda girando el BOTÓN GIRAT ORIO DE VOLUMEN-ENCENDIDO/AP AGADO desde la posición Apagado.
3. Ajuste el BOTÓN GIRATORIO DE VOLUMEN-ENCENDIDO/APAGADO al volumen deseado.
4. Gire el SELECTOR DE FUNCIÓN a modo SD/USB.
5. Pulse el BOTÓN DE REPRODUCCIÓN/PAUSA (USB/SD) para reproducir las pistas de música
almacenadas en la tarjeta SD.
6. El LED ACC verde destellará durante la reproducción de música.
7. Para pausar la música, pulse el BOTÓN DE REPRODUCCIÓN/PAUSA (USB/SD) otra vez.
8. Pulse el BOTÓN SALTO+ (USB/SD) / SALTO- (USB/SD) para ir al siguiente archivo durante el modo
Reproducción.
9. Para dejar de reproducir los archivos de música almacenados en la tarjeta SD, pulse el BOTÓN DE
REPRODUCCIÓN/PAUSA (USB/SD).
Nota: Apague la unidad antes de desconectar la tarjeta SD. Giro del CONTROL DE VOLUMEN a la
posición Apagado.
6
35
Page 15

MEDIDAS DE SEGURIDAD IMPORT ANTES EN PRODUCTOS DE AUDIO
POR FAVOR, LEA ATENTAMENTE LAS SIGUIENTES MEDIDAS DE SEGURIDAD
APLICABLES A SU EQUIPO.
1. Lea las instrucciones - Debe leer todas las instrucciones de seguridad y de funcionamiento
antes de poner en marcha el aparato.
2. Guarde las instrucciones - Debe guardar las instrucciones de seguridad y de funcionamiento
para futuras consultas.
3. Preste atención a las advertencias - Debe respetar todas las advertencias sobre el aparato
y las instrucciones de funcionamiento.
4. Siga las instrucciones - Debe seguir todas las instrucciones de uso y funcionamiento.
5. Agua y humedad - No se debe usar el aparato cerca del agua –por ejemplo, cerca de
labañera, la pileta, el fregadero, el lavadero, en un sótano húmedo,
o en las proximidades de una piscina o similares.
6. Carritos y soportes - El aparato debe ser utilizado únicamente con
un carrito o soporte recomendado por el fabricante.
6A.El conjunto de carrito y aparato debe moverse con cuidado. Paradas
repentinas, fuerza excesiva y superficies irregulares pueden hacer
volcar el aparato y el carrito.
7. Montaje en techo o pared - El aparato se debe montar en techo o
pared solamente de la forma recomendada por el fabricante.
8. Ventilación - El aparato debe situarse de forma que su ubicación o posición no interfiera
con su propia ventilación. Por ejemplo, el aparato no debe situarse en una cama, sofá,
alfombra o superficies similares, que podrían bloquear las aberturas de ventilación; ni
colocarse en una instalación integrada como estanterías o armarios que pueden impedir
el flujo de aire a través de las aberturas de ventilación.
9. Calor - El aparato debe situarse lejos de fuentes de calor como radiadores, calefactores,
estufas u otros aparatos (incluyendo amplificadores) que produzcan calor.
10.Fuentes de alimentación - El aparato debe conectarse solamente al tipo de suministro
eléctrico que se describe en las instrucciones de funcionamiento o como se indica en el
aparato.
11.T oma de tierra o polarización - Se deben tomar precauciones para no obstaculizar la toma
de tierra o polarización del aparato.
12.Alimentación - Protección del cable - Los cables de alimentación deben situarse para evitar
pisarlos o aplastarlos con objetos ubicados sobre o contra ellos, particularmente la parte
del conector y la salida del aparato.
13.Limpieza - El aparato debe limpiarse solamente como recomienda el fabricante.
14.Este producto ha sido diseñado para ser usado con la antena adjunta y no debe ser conectado
a cualesquiera otras antenas externas.
15.Periodos sin usar el aparato - Se debe desenchufar el cable de alimentación del aparato
cuando se deje de usar por un tiempo prolongado.
16.Entrada de objetos y líquidos - Se debe tener cuidado de que no caigan objetos o se
derramen líquidos en la caja a través de las aberturas
17.Daños que requieren asistencia - El aparato debe ser reparado por personal cualificado
cuando:
A. El cable de alimentación del enchufe ha sido dañado; o
B. Han caído objetos o se ha derramado líquido en el aparato; o
C. El aparado ha sido expuesto a la lluvia; o
D. El aparato no parece funcionar con normalidad o se aprecia un fuerte cambio en el
rendimiento; o
E. El aparato se ha caído o la caja ha sufrido daños.
18.Reparaciones - El usuario no debe intentar realizar ninguna reparación más allá de lo
descrito en las instrucciones de funcionamiento. Cualquier otra reparación debe ser realizada
por personal cualificado.
8
33
Page 16

WAARSCHUWING:
STEL DIT APPARAAT NIET BLOOT AAN REGEN OF VOCHT OM BRAND OF GEVAAR
VOOR EEN SCHOK TE VOORKOMEN. VERWIJDER NIET DE AFDEKKING.
CONTROLELAMPJES VASTGESOLDEERD. IN HET APPARAAT ZITTEN GEEN
ONDERDELEN DIE DOOR DE GEBRUIKER KUNNEN WORDEN ONDERHOUDEN.
LAAT ONDERHOUD AAN GEKWALIFICEERD ONDERHOUDSPERSONEEL OVER.
LET OP
GEVAAR VOOR ELEKTRISCHE
SCHOK NIET OPENEN
De bliksemschicht met
pijlpuntsymbool in een
gelijkzijdige driehoek is
bedoeld om de gebruiker
attent te maken op de
aanwezigheid van
ongeïsoleerde "gevaarlijke
spanning" in de behuizing
van het product dat groot
genoeg is om gevaar van
een elektrische schok voor
personen te vormen.
LET OP: OM GEVAAR VAN EEN
ELEKTRISCHE SCHOK TE
VERMINDEREN, VERWIJDER NIET
DE AFDEKKING (OF ACHTERZIJDE).
GEEN GEBRUIKER – TE
ONDERHOUDEN ONDERDELEN IN
HET APPARAAT. LAAT
ONDERHOUD AAN
GEKWALIFICEERD
ONDERHOUDSPERSONEEL OVER.
LET OP
Alleen voor Compact Disc-apparaten:
ONZICHTBARE LASERSTRALING WANNEER OPEN EN VERGRENDLEING
MISLUKT OF VERIJDELD. VERMIJD DIRECTE BLOOTSTELLING AAN
LASERSTRAAL.
SPECIFICATIES
FREQUENTIEBEREIK : FM 88 - 108 MHz
: AM 530 - 1600 KHz
USB-poort 2.0 : Snelheid 512 MB - 4 GB
(Ondersteunt FAT16, FAT32)
STROOMVERBRUIK : 18 W
VOEDINGSBRON : AC/DC 12 V adapter - AC230 V / 50 Hz
ANTENNES : Externe antenne voor FM
: Ingebouwde ferrietstaaf voor AM
LUIDSPREKER : 4” Dynamisch type x 2
: 2 1/2” Tweetertype X1
*ONTWERP EN SPECIFICATIE ONDERHEVIG AAN WIJZIGINGEN ZONDER
VOORAFGAANDE KENNISGEVING.
Het uitroepteken in een
gelijkzijdige driehoek is
bedoeld om de gebruiker
attent te maken op de
aanwezigheid van
belangrijke bedieningsen onderhoudsinstructies
in de literatuur die met
het apparaat is
meegeleverd.
LAGE DER BAUTEILE
SCHALLTRICHTER
ADAPTER FÜR 45-U/min-AUFNAHME
SPINDEL
PLATTENSPIELER
EIN/AUS-LAUTSTÄRKE
DREHKNOPF
LAUTSPRECHER
SKALASCHEIBE
TUNING-KNOPF (Senderwahl)
FUNKTIONSSCHALTER
MW/UKW-UMSCHALTER
PROGRAMMANZEIGE
PROGRAMMTASTE
REPEAT-TASTE (Wiederholen)
WIEDERHOLEN ANZEIGE
B.SKIP-TASTE (Zurück)
LED-ANZEIGE
F.SKIP-TASTE (Vorwärts)
CD-FACH
SICHERHEITSVERRIEGELUNG
SCHALLTRICHTERFUSS
GEWINDEBUCHSE
EXTERNE ANTENNE
SCHALLTRICHTERHALTERUNG
OPEN/CLOSE-TASTE (Öffnen/Schließen)
PLAY/PAUSE-TASTE (Wiedergeben/Anhalten)
PLAY-ANZEIGE (Wiedergabe)
STOP-TASTE (Beenden)
NETZADAPTERBUCHSE
TONARM
LIFTHEBEL
GESCHWINDIGKEITSSCHALTER
(331/3, 45, 78 U/min)
ARMAUFLAGE
PLAY/PAUSE-TASTE (USB/SD)
(Wiedergeben/Anhalten)
SKIP+-TASTE (USB/SD) (Vorwärts)
SKIP-TASTE (USB/SD) (Zurück)
USB/SD-TASTE
SD-KARTENSCHLITZ
USB-ANSCHLUSS
ZUGR-LED (Zugriffsanzeige)
ERR-LED (Fehleranzeige)
NETZADAPTER
10
31
Page 17

USB-BEDIENING
1. Plaats het MP3-apparaat (via de aansluitkabel - niet meegeleverd) of Flash Drive met MP3-bestanden
in de USB-poort. (Raadpleeg de gebruiksaanwijzing van de fabrikant voor bediening van het MP3
apparaat/Flash Drive.)
2. Schakel het apparaat in door aan de AAN/UIT-VOLUMEDRAAIKNOP vanuit de Uit-positie te draaien.
3. Stel de AAN/UIT-VOLUMEDRAAIKNOP af op het gewenste volumeniveau.
4. Draai de FUNCTIESCHAKELAAR naar de SD/USB-stand.
5. Druk één keer op de USB/SD-KNOP om het USB-apparaat te selecteren.
6. Druk op de AFSPELEN/PAUZE-KNOP (USB/SD) om muzieknummers, opgeslagen op het externe
apparaat, af te spelen.
7. De groene ACC LED zal gaan knipperen terwijl de muziek speelt.
8. Druk opnieuw op de AFSPELEN/PAUZE-KNOP (USB/SD) om de muziek te pauzeren.
9. Druk op de SKIP+ (USB/SD) / SKIP- (USB/SD)-KNOP om tijdens het afspelen naar het volgende bestand
te gaan.
10. Druk op de AFSPELEN/PAUZE-KNOP (USB/SD) om het afspelen van muziekbestanden, opgeslagen
op het USB-apparaat/Flash Drive, te stoppen.
Opmerking: Schakel eerst het apparaat uit alvorens het USB-apparaat te verwijderen. De
VOLUMEBESTURING naar de UIT-positie draaien.
WAARSCHUWING:
1) Verwijder het USB/SD-apparaat niet tijdens de USB/SD-stand, omdat dit het apparaat of de bestanden
kan beschadigen.
2) Schakel eerst het apparaat uit of schakel naar een andere stand om het USB/SD-apparaat veilig te
verwijderen.
OPMERKINGEN:
1) USB-poort ondersteunt geen verbinding met USB-verlengkabel.
2) Het is niet bedoeld voor directe communicatie met computer.
3) Het is geen garantie dat alle USB-geheugenapparaten en SD-kaarten op dit audiosysteem werken.
Opmerking:
a) Als er geen USB/SD-apparaat of MP3-bestand is verbonden, zal de ERR LED gaan branden.
b) Het ACC LED-lampje zal knipperen terwijl de MP3-gegevens worden overgezet tijdens het AFSPELEN.
c) Door het apparaat uit te schakelen of naar een andere stand te schakelen, zal de USB/SD worden
gereset als deze niet functioneert.
*BELANGRIJK:
* Dit product voldoet mogelijk niet aan USB-apparaten met meerdere USB-identifiers (zoals een hub +
USB-massaopslagapparaat), het voldoet ALLEEN aan de klasse USB-massaopslagapparaat.
WIEDERHOLTE WIEDERGABE
1. Um einen einzelnen Titel zu wiederholen, wählen Sie den Titel aus, den Sie wiederholen möchten, und
drücken Sie dann die PLAY-TASTE, um die Wiedergabe des Titels zu starten. Drücken Sie die REPEATTASTE einmal, um diesen Titel zu wiederholen. Die REPEAT-ANZEIGE blinkt.
2. Um alle Titel zu wiederholen, drücken Sie die PLAY-TASTE, um die CD zu starten. Drücken Sie die
REPEAT-TASTE doppelt, um alle T itel zu wiederholen. W enn die CD zu Ende ist, beginnt die Wiedergabe
vom Anfang der CD erneut. Die REPEAT-ANZEIGE bleibt an.
3. Um die Wiederholungsfunktion zu deaktivieren, drücken Sie die REPEATANZEIGE aus ist.
TASTE
erneut, bis die REPEAT-
PROGRAMMIERTE WIEDERGABE
1. Drücken Sie die PROGRAMMTASTE. Auf dem Display wird „01“ angezeigt und die PROGRAMMANZEIGE
blinkt.
2. Drücken Sie die FORWARD SKIP-TASTE (V orwärts) oder die BACKWARD SKIP-TASTE (Zurück), um
einen Titel auszuwählen.
3. Drücken Sie die PROGRAMMTASTE erneut, um die gewünschte Titelnummer zu speichern.
4. Wiederholen Sie die Schritte 2 und 3 oben, um die anderen Titel zu programmieren.
5. Drücken Sie die PLAY-TASTE, um die Programmierte Wiedergabe zu starten. Die PROGRAMMANZEIGE
leuchtet auf.
6. Um die programmierte Titelfolge zu löschen, drücken Sie die STOP-TASTE zweimal oder bis die
PROGRAMMANZEIGE erlischt. Die programmierten Titel werden ebenfalls gelöscht, wenn das CDFACH geöffnet wird.
HINWEIS: Maximal 20 Titel können für die Wiedergabe in beliebiger Reihenfolge programmiert werden.
ABLAUF DES AUFBAUS DES SCHALLTRICHTERS
1. Schieben Sie das Kabel durch die Schalltrichterhalterung. Abbildung (1).
2. Drehen Sie den Schalltrichter und die Schalltrichterhalterung in die abgebildete Richtung. Abbildung (2).
1
2
CD-BEDIENING
WEERGAVE
1. Draai de FUNCTIESCHAKELAAR naar CD.
2. Druk op de OPEN/SLUITEN-KNOP om de CD-DEUR te openen. Plaats een disc in de lade met het
etiket van de disc naar boven gericht.
3. Druk opnieuw op de OPEN/SLUITEN-KNOP om de CD-DEUR te openen. Gedurende enkele seconden
toont de display “—” , vervolgens worden het totaal aantal nummers op de disc weergegeven. “00” wordt
getoond wanneer er geen disc in het apparaat is geplaatst.
4. Druk op de AFSPELEN-KNOP om weergave te starten. De AFSPELEN-AANDUIDING gaat branden.
5. Stel de VOLUMEDRAAIKNOP af op het gewenste volumeniveau.
6. Druk op de AFSPELEN/PAUZE-KNOP om weergave te pauzeren. De AFSPELEN-AANDUIDING gaat
knipperen. Druk opnieuw op de AFSPELEN-KNOP om weergave te hervatten.
7. Druk op de STOPKNOP om weergave te stoppen. De AFSPELEN-AANDUIDING gaat uit.
OPMERKING: Het is geen garantie dat alle CD/CD-R op dit audiosysteem zullen werken.
SKIP VOORUIT EN SKIP ACHTERUIT
1. Druk op de VOORUIT SKIP-KNOP of de ACHTERUIT SKIP-KNOP om een nummer te selecteren.
2. Druk op de AFSPELEN-KNOP om het afspelen van het geselecteerde nummer te starten
VOORUIT EN ACHTERUIT ZOEKEN TIJDENS
WEERGAVE
1. Houd de VOORUIT SKIP-KNOP of de ACHTERUIT SKIP-KNOP ingedrukt om vooruit of achteruit te
zoeken, ondanks het geselecteerde nummer.
2. Laat de knop los op het gewenste punt, weergave hervat automatisch.
12
3. Stecken Sie das Lautsprecherkabel zusammen. Abbildung (3).
4. Halten Sie die Schalltrichterhalterung über den Schalltrichterfuß. Abbildung (4).
5. Drehen Sie die Gewindebuchse in die abgebildete Richtung, um den Fuß anzuziehen. Abbildung (5).
3 4 5
29
Page 18

GIDS VOOR PROBLEMEN OPLOSSEN
PLATENSPELER
Er is geen stroom
1. De lichtnetadapter is niet goed aangesloten.
2. Controleer of de AAN/UIT-volumeknop zich in de juiste positie bevindt.
Er is geen geluid
1. Controleer het volumeniveau door aan de volumeknop te draaien.
Platenspeler werkt niet
1. Zorg dat de functieschakelaar op phono staat ingesteld.
2. Probeer de pick-uparm naar rechts te bewegen tot u een klik hoort.
3. Zorg dat de naaldbescherming is verwijderd.
CD speelt niet af
1. Controleer of de CD juist is geplaatst (etiket naar boven gericht).
2. Controleer of het oppervlak van de CD schoon is
3. Zorg dat de functieschakelaar op CD staat ingesteld.
USB - Er wordt geen muziek afgespeeld wanneer AFSPELEN/PAUZE (USB) wordt ingedrukt.
1. Zorg dat het MP3-apparaat/Flash Drive muziekbestanden heeft opgeslagen.
2. Het apparaat speelt alleen Flash Drives tot maximaal 4 GB af.
3. Reset USB/CD door uit te schakelen of draai aan de FUNCTIESCHAKELAAR (2) om een andere
stand te selecteren.Selecteer vervolgens opnieuw SD/USB-stand.
4. Controleer of het bestand(en) een WMA-bestand(en) is/zijn. Het apparaat speelt geen WMAformaat af, alleen MP3-formaat.
USB-specificaties
Interface
* USB2.0 Full speed, HOST (USB HUB wordt niet ondersteund)
Overeenkomstig Flash-geheugen
* USB1.1 Flash-geheugen
* USB2.0 High speed Flash-geheugen
* Maximum geheugengrootte: 4 GByte
* Minimum geheugengrootte: 512 MByte (alleen FAT16 komt overeen.)
MP3-decoder
* Compatibel met MPEG Audio 1, 2, 2.5
* Compatibel met Layer 1, 2, 3
* Compatibel met bitsnelheid: 8k ~ 320 kbps
* Submap nest: 8
* Compatibel met bemonsteringssnelheid: 8k, 16k, 32k, 11,025k, 22,05k, 44,1k, 12k, 24k, 48 kHz
* Maximum aantal bestanden voor weergave: 999
* Bestandsformaat voor weergave: *.mp3. *.mp2, *.mp1; het is niet mogelijk de indeling te selecteren
14
STROMQUELLE
1 Lösen Sie das Kabel vom Netzadapter
2 Stecken Sie den Netzadapter in eine geeignete Wandsteckdose.
3 Stecken Sie das kleine Ende des Netzadapters in die NETZADAPTERBUCHSE an der Rückseite des Gerätes.
AUSPACKEN DES PLATTENSPIELERS
1. Entfernen Sie das Verpackungsmaterial vom Gerät.
Hinweis: Bewahren Sie das Verpackungsmaterial auf.
2. Entfernen Sie die Plastikhülle, die das Radio umgibt.
3. Entfernen Sie die Plastikhülle vom Netzstecker.
4. Entfernen Sie den Binder vom Stromkabel und lösen Sie das Antennenkabel
an der Rückseite des Radios
5. Öffnen Sie den Deckel und entfernen Sie das Styropor-Versandmaterial vom Plattenspieler.
6. Entfernen Sie den schwarzen Plastikverschluss vom Tonarm.
7. Entfernen Sie die weiße Schutzhülle von der Nadel, indem Sie sie vorsichtig zur Vorderseite des Gerätes drücken.
8. Lösen Sie die UKW-Antenne und lassen Sie sie geradlinig hängen, um einen optimalen UKW-Empfang
zu gewährleisten. Wenn Sie Schwierigkeiten bei der Einstellung eines UKW-Senders haben, richten
Sie die externe UKW-Antenne aus, um die beste Empfangsqualität zu erhalten. Schließen Sie die UKWAntenne nicht an eine Außenantenne an.
BETRIEB DES PLATTENSPIELERS
Schalten Sie das Gerät ein, indem Sie den EIN/AUS-LAUTSTÄRKE-DREHKNOPF an der Vorderseite auf
die Position EIN drehen.
1. Drehen Sie den FUNKTIONSSCHALTER, um den PHONO-Modus auszuwählen.
2. Stellen Sie mit dem GESCHWINDIGKEITSSCHALTER die gewünschte Geschwindigkeit ein (33 1/3,
45 oder 78 U/min). Legen Sie die Schallplatte auf den Plattenspieler.
3. Verwenden Sie den LIFTHEBEL, um den T onarm aus einer Auflage anzuheben. Ziehen Sie den TONARM
leicht nach rechts, bis Sie einen „Klick“-Ton hören, um den Plattenspieler in Betrieb zu setzen.
4. Bewegen Sie den TONARM per Hand über die Schallplatte und senken Sie ihn langsam ab. Stellen
Sie den EIN/AUS-LAUTSTÄRKE-DREHKNOPF auf die gewünschte Lautstärke.
5. Zum Ende der Aufnahme hält der TONARM automatisch an. Sie müssen den Tonarm per Hand in die
Armauflage zurücklegen.
Zubehör: ADAPTER FÜR 45 U/min
1 Platzieren Sie den 45-U/min-Adapter über die Spindel.
2 Legen Sie die 45-U/min-Aufnahme vorsichtig auf den Plattenspieler.
3 Befolgen Sie die unter Betrieb des Plattenspielers benannten Schritte, um Ihre Aufnahme abzuspielen.
ANTENNE
Das Gerät ist für den UKW-Empfang mit einer UKW-Drahtantenne ausgestattet, richten Sie den Draht so
aus, dass Sie einen klaren Empfang ohne Störungen erhalten. Für den MW-Empfang ist das Gerät mit einer
eingebauten gerichteten Ferritantenne ausgestattet. Drehen Sie das Gerät so, um die Position für den besten
Empfang zu erhalten. Schließen Sie die EXTERNE UKW-ANTENNE an keinerlei Außenantenne an.
RADIO-BETRIEB
1. Drehen Sie den FUNKTIONSSCHALTER, um den RADIO-Modus auszuwählen.
2. Stellen Sie mit dem MW/UKW-UMSCHALTER das gewünschte Radioband (MW oder UKW) ein.
3. Wählen Sie den gewünschten Radiosender durch Drehen des SENDERWAHL-DREHKNOPFES aus.
4. Stellen Sie den EIN/AUS-LAUTSTÄRKE-DREHKNOPF auf die gewünschte Lautstärke.
USB- & SD-KARTENBETRIEB
SD-Kartenbetrieb:
1. Stecken Sie eine SD-Karte in den SD-Kartenschlitz.
2. Schalten Sie das Gerät ein, indem Sie den EIN/AUS-LAUTSTÄRKE-DREHKNOPF aus der Position Aus drehen.
3. Stellen Sie den EIN/AUS-LAUTSTÄRKE-DREHKNOPF auf die gewünschte Lautstärke.
4. Drehen Sie den FUNKTIONSSCHALTER auf den SD/USB-Modus.
5. Drücken Sie die PLAY/PAUSE-TASTE (USB/SD), um die auf der SD-Karte gespeicherten Musikstücke
abzuspielen.
6. Die grüne ZUGR-LED blinkt während der Musikwiedergabe.
7. Um die Musikwiedergabe zu unterbrechen, drücken Sie die PLAY/PAUSE-TASTE (USB/SD) erneut.
8. Drücken Sie die SKIP+ (USB/SD) / SKIP- (USB/SD)-TASTE (Vorwärts/Zurück), um im Play-Modus zur
nächsten Datei zu gelangen.
9. Um die Wiedergabe der auf der SD-Karte gespeicherten Musikdateien anzuhalten, drücken Sie die
PLAY/PAUSE-TASTE (USB/SD).
Hinweis: Schalten Sie das Gerät zuerst aus, bevor Sie die SD-Karte entnehmen. Drehen Sie den
LAUTSTÄRKEREGLER auf die Position AUS.
27
Page 19

WICHTIGE SICHERHEITSVORSCHRIFTEN FÜR AUDIOPRODUKTE
BITTE LESEN SIE DIE FOLGENDEN WICHTIGEN SICHERHEITSVORSCHRIFTEN
SORGFÄLTIG, DIE FÜR IHR GERÄT GELTEN.
1. Hinweise lesen - Alle Sicherheits- und Betriebsvorschriften sind zu lesen, bevor das Gerät
in Betrieb genommen wird.
2. Hinweise aufbewahren - Die Sicherheits- und Betriebsvorschriften sind zum späteren
Nachschlagen aufzubewahren.
3. Warnungen beachten - Alle Warnungen auf dem Gerät und in den Betriebsvorschriften sind
einzuhalten.
4. Vorschriften befolgen - Alle Betriebsvorschriften und Anweisungen an die Benutzer sind
zu befolgen.
5. Wasser und Feuchtigkeit - Verwenden Sie das Gerät nicht in der
Nähe von Wasser-zum Beispiel nahe einer Badewanne, eines
Waschbeckens, einer Küchenspüle, eines Waschbottichs, in einem
feuchten Keller oder nahe eines Swimmingpools und desgleichen.
6. Wagen und Sockel - Das Gerät ist nur mit Wagen oder Stativen
zu verwenden, die vom Hersteller empfohlen sind.
6A.Eine Kombination des Gerätes mit einem Wagen ist vorsichtig zu
bewegen. Schnelles Abbremsen, übermäßige Beschleunigung und
unebenes Gelände können dazu führen, dass das Gerät im Wagen umstürzt.
7. Wand- oder Deckenmontage - Das Gerät ist nur nach den Herstellervorschriften an eine
Wand oder Decke anzubringen.
8. Belüftung - Das Gerät ist so aufzustellen, dass durch seinen Aufstellort oder seine Lage
stets eine gute Belüftung gewährleistet ist. Beispielsweise darf das Gerät nicht auf einem
Bett, einem Sofa, einem Teppich oder Ähnlichem platziert werden, wo die Belüftungsöffnungen
blockiert werden; oder das Gerät darf nicht irgendwo eingebaut werden, wie zum Beispiel
in einem Bücherregal oder einer anderen Ablage, wo die Luftzufuhr durch die
Belüftungsöffnungen behindert wird.
9. Hitze - Das Gerät ist von Wärmequellen freizuhalten wie zum Beispiel von Heizkörpern,
Heizregistern, Herden und anderen Geräten zur Wärmeübertragung (inklusive Verstärkern).
10.Stromversorgung - Das Gerät ist nur mit der angegebenen Netzspannung zu betreiben,
die in der Bedienungsanleitung beschrieben ist oder auf dem Gerät aufgeführt ist.
11.Erdung oder Polarisation - Alle Sicherheitsvorkehrungen sind so einzuhalten, dass die
Mittel zur Erdung oder Polarisation des Gerätes nicht behindert werden.
12.Schutz - des Stromkabels - Die Stromkabel sind so zu verlegen, dass man höchstwahrscheinlich
nicht darauf treten kann oder es durch irgendwelche Gegenstände auf oder neben ihm
eingeklemmt wird, richten Sie Ihre besondere Aufmerksamkeit auf das Kabel am Stecker
und die Stelle, wo das Kabel aus dem Gerät herauskommt.
13.Reinigen - Das Gerät ist ausschließlich nach den Empfehlungen des Herstellers zu reinigen.
14.Dieses Gerät ist für die Verwendung mit der angebrachten Antenne vorgesehen und darf
nicht an irgendwelche anderen externen Antennen angeschlossen werden.
15.Zeiten der Nichtbenutzung - Das Stromkabel des Gerätes ist von der Steckdose abzuziehen,
wenn das Gerät über einen längeren Zeitraum nicht benutzt werden soll.
16.Eindringen von Gegenständen und Flüssigkeiten - Achten Sie sorgfältig darauf, dass
keine Gegenstände und verschütteten Flüssigkeiten durch die Öffnungen in das Gehäuse
eindringen.
17.Beschädigungen, die Wartungsarbeiten erforderlich machen - Wenden Sie sich in
folgenden Fällen an qualifiziertes Kundendienstpersonal:
A. Wenn das Stromkabel oder der Stecker beschädigt ist; oder
B. Wenn Gegenstände in das Gerät gefallen sind oder Flüssigkeiten in das Gerät gelaufen
sind; oder
C.Wenn das Gerät Regen ausgesetzt war; oder
D.Wenn das Gerät scheinbar nicht ordnungsgemäß funktioniert oder es eine spürbare
Einbuße seiner Leistungsfähigkeit aufweist; oder
E. Wenn das Gerät heruntergefallen ist oder das Gehäuse beschädigt ist.
18.Wartung - Versuchen Sie nicht, das Gerät über das hinaus, was in der Bedienungsanleitung
beschrieben ist, selbst instand zu setzen. Überlassen Sie alle anderen Wartungsarbeiten
qualifiziertem Kundendienstpersonal.
16
25
Page 20

AVERTISSEMENT :
POUR ÉVITER TOUT RISQUE D'INCENDIE OU D'ÉLECTROCUTION, N'EXPOSEZ
PAS CET APPAREIL À LA PLUIE OU À L'HUMIDITÉ. NE RETIREZ PAS LE
COUVERCLE. LAMPES PILOTES SOUDÉES EN PLACE. AUCUN COMPOSANT
INTERNE NE PEUT ÊTRE RÉPARÉ PAR L'UTILISATEUR. CONFIEZ LA
MAINTENANCE À UN PERSONNEL QUALIFIÉ.v
PRÉCAUTION
RISQUE D'ÉLECTROCUTION
NE PAS OUVRIR
Le symbole représentant un
éclair avec une extrémité en
forme de flèche, dans un
triangle équilatéral, doit
alerter l'utilisateur de la
présence d'une « tension
dangereuse » non-isolée, à
l'intérieur de l'enceinte du
produit et qui peut être d'une
magnitude suffisante pour
constituer un risque
PRÉCAUTION : POUR RÉDUIRE
LE RISQUE D'ÉLECTROCUTION,
NE PAS RETIRER LE
COUVERCLE (OU ARRIÈRE).
AUCUN COMPOSANT INTERNE
NE PEUT ÊTRE RÉPARÉ PAR
L'UTILISATEUR. CONFIEZ LA
MAINTENANCE À UN
PERSONNEL QUALIFIÉ.
PRÉCAUTION
Uniquement pour les lecteurs de disques compacts :
RAYONNEMENT LASER INVISIBLE LORSQUE LE LECTEUR EST OUVERT ET
PANNE OU ÉCHEC INTERVERROUILLAGE. ÉVITER TOUTE EXPOSITION
DIRECTE AU RAYON LASER.
SPÉCIFICATIONS
PLAGE DE FRÉQUENCES : FM 88 à 108 MHz
: AM 530 à 1600 KHz
Port USB 2.0 : Vitesse de 512 Mo à 4 Go
(Support FAT16, FAT32)
CONSOMMATION ÉLECTRIQUE : 18 W
SOURCE D'ALIMENTATION : Adaptateur 12 V CA/CC -
ANTENNES CA 230 V / 50 Hz
ANTENNE : Antenne FM externe
: Antenne solide AM en ferrite intégrée
HAUT-PARLEUR : 4” Type dynamique x 2
: 2 1/2” Type aigus X1
Le point d'exclamation
dans un triangle
équilatéral doit alerter
l'utilisateur sur
l'existence d'une
instruction importante
relative au
fonctionnement et à la
maintenance
(réparation) dans la
documentation fournie
avec l'appareil.
EMPLACEMENT DES COMPOSANTS
BASE DE LA CORNE
DOUILLE À VIS
CORNE
AXE
PLATINE
ON/OFF-VOLUME
BOUTON ROTATIF
HAUT-PARLEUR
BANDE DE FRÉQUENCES
BOUTON DE RÉGLAGE
BOUTON FUNCTION
COMMUTATEUR
BANDES AM/FM
TÉMOIN PROGRAM
(PROGRAMME)
BOUTON PROGRAM (PROGRAMME)
(RÉPÉTITION DE LA LECTURE)
INDICATEUR DE RÉPÉTITION
BOUTON AVANCE RAPIDE
TIROIR DU LECTEUR DE CD
BOUTON AVANCE RAPIDE
ADAPTATEUR POUR DISQUES 45 TR/MIN
BOUTON REPEAT
AFFICHAGE DEL
SUPPORT DE LA CORNE
CROCHET DE SÉCURITÉ
BOUTON OUVRIR/FERMER
BOUTON PLAY/PAUSE
TÉMOIN PLAY
BOUTON STOP
ANTENNE EXTERNE
BRAS DE LECTURE
LEVIER DE SIGNAL
BOUTON DE CONTRÔLE DE
VITESSE (331/3, 45, 78 TR/MIN)
SUPPORT DU BRAS
BOUTON PLAY/PAUSE (USB/SD)
BOUTON SKIP+ (USB/SD)
BOUTON SKIP- (USB/SD)
BOUTON USB/SD
EMPLACEMENT CARTE SD
PORT USB
DEL ACC
DEL ERR
JACK DE L'ADAPTATEUR CA
ADAPTATEUR CA
*LA CONCEPTION ET LES SPÉCIFICATIONS SONT SUSCEPTIBLES D'ÊTRE
MODIFIÉES SANS PRÉAVIS.
18
23
Page 21

FONCTIONNEMENT EN MODE USB
1. Insérez le périphérique MP3 (via son câble de connexion – non fourni) ou le périphérique à mémoire
Flash contenant des fichiers MP3 dans le port USB. (Pour faire fonctionner le périphérique MP3/le
périphérique à mémoire Flash, veuillez vous référer au mode d'emploi du fabricant.)
2. Allumez l'appareil en faisant tourner le BOUTON ROTATIF ON/OFF-VOLUME sur la position ON, à
partir de la position Off.
3. Réglez le BOUTON ROTATIF ON/OFF-VOLUME jusqu'à atteindre le volume sonore désiré.
4. Faites tourner le BOUTON FUNCTION (FONCTION) pour sélectionner le mode SD/USB.
5. Appuyez une fois sur le BOUTON USB/SD pour sélectionner le périphérique USB.
6. Appuyez sur le BOUTON PLAY/PAUSE (USB/SD) pour lire les pistes musicales stockées sur le
périphérique externe.
7. La DEL verte ACC clignote lors de la lecture de la musique.
8. Pour mettre la musique en pause, appuyez à nouveau sur le BOUTON PLAY/PAUSE (USB/SD).
9. Appuyez sur le BOUTON SKIP + (USB/SD) / SKIP - (USB/SD) pour aller au fichier suivant dans le mode lecture.
10. Pour arrêter la lecture des fichiers musicaux stockés sur le périphérique USB/le périphérique à mémoire
Flash, appuyez sur le BOUTON PLAY/PAUSE (USB/SD).
Remarque : Mettez d'abord l'appareil hors tension avant de déconnecter le périphérique USB. En faisant
tourner le CONTRÔLE DU VOLUME jusqu'à la position OFF.
AVERTISSEMENT :
1) Ne déconnectez pas le périphérique USB/SD lorsque le mode USB/SD est actif, cela pourrait endommager
le périphérique ou les fichiers.
2) Pour déconnecter en toute sécurité le périphérique USB/SD, éteignez d'abord l'appareil ou passez à
un autre mode.
REMARQUES :
1) Le port USB ne supporte pas les connexions avec des rallonges de câbles USB.
2) Il n'est pas conçu pour communiquer directement avec un ordinateur.
3) Il n'est pas garanti que tous les périphériques à mémoire USB ni que toutes les cartes SD puissent
être reconnus par ce système audio.
Remarque :
a) Si aucun périphérique USB/SD n'est connecté ou si aucun fichier MP3 n'est reconnu, la DEL ERR s'allume.
b) Le témoin DEL ACC clignote lors du transfert des données MP3 dans le mode PLAY (LECTURE).
c) Si le mode USB/SD ne fonctionne pas, réinitialisez le mode USB/SD en mettant l'appareil hors tension
ou en passant à un autre mode.
*IMPORTANT :
* Ce produit peut ne pas être compatible avec les périphériques USB à identifiants USB multiples (tels
que les périphériques à stockage de masse hub + USB). Il se conforme UNIQUEMENT à la classe de
périphériques de stockage de masse USB.
FONCTIONNEMENT EN MODE CD
LECTURE
1. Faites tourner le BOUTON FUNCTION (FONCTION) pour sélectionner le mode CD.
2. Appuyez sur le BOUTON OPEN/CLOSE (OUVERTURE/FERMETURE) pour ouvrir le TIROIR DU
LECTEUR CD. Placez un disque sur la platine, face imprimée du disque vers le haut.
3. Appuyez de nouveau sur le BOUTON OPEN/CLOSE (OUVERTURE/FERMETURE) pour fermer le
TIROIR DU LECTEUR CD. L'affichage indique « — » pendant quelques secondes puis le nombre total
de pistes du disque s'affiche. « 00 » apparaît lorsqu'il n'y a aucun disque dans l'appareil.
4. Appuyez sur le BOUTON PLAY (LECTURE) pour commencer la lecture. Le TÉMOIN PLAY s'allume.
5. Réglez le BOUTON ROTATIF DU VOLUME jusqu'à atteindre le volume sonore désiré.
6. Pour mettre la lecture en pause, appuyez sur le BOUTON PLAY/PAUSE. Le TÉMOIN PLAY clignote.
Appuyez de nouveau sur le BOUTON PLAY (LECTURE) pour reprendre la lecture.
7. Pour arrêter la lecture, appuyez sur le BOUTON STOP. Le TÉMOIN PLAY s'éteint.
REMARQUE : Il n'est pas garanti que tous les CD/ CD-R sont compatibles avec ce système audio.
RÉPÉTITION DE LA LECTURE
1. Pour répéter une seule piste, choisissez la piste souhaitée puis appuyez sur le BOUTON PLAY pour
commencer la lecture de la piste. Appuyez une fois sur le BOUTON REPEAT (RÉPÉTITION) pour
répéter la lecture de cette piste. Le TÉMOIN REPEAT clignote.
2. Pour répéter toutes les pistes, appuyez sur le BOUTON PLAY pour commencer la lecture du CD.
Appuyez deux fois sur le BOUTON REPEAT (RÉPÉTITION) pour répéter la lecture de toutes les pistes.
Lorsque la lecture du CD s'achève, la lecture recommence à partir du début du CD. Le TÉMOIN REPEAT
reste allumé de façon continue.
3. Pour annuler la fonction de répétition, appuyez de nouveau sur le BOUTON
le TÉMOIN REPEAT s'éteigne.
REPEAT
jusqu'à ce que
LECTURE PROGRAMMÉE
1. Appuyez sur le BOUTON PROGRAM (PROGRAMME). « 01 » apparaît à l'écran et le TÉMOIN PROGRAM
clignote.
2. Appuyez sur le BOUTON D'A V ANCE RAPIDE ou sur le BOUT ON DE RETOUR RAPIDE pour sélectionner
une piste.
3. Appuyez de nouveau sur le BOUTON PROGRAM pour mémoriser le numéro de la piste.
4. Répétez les étapes 2 et 3 ci-dessus pour programmer les autres pistes.
5. Appuyez sur le BOUTON PLAY (LECTURE) pour commencer la lecture programmée. Le TÉMOIN
PROGRAM est allumé en continu.
6. Pour supprimer la séquence programmée, appuyez deux fois sur le BOUTON STOP ou jusqu'à ce que
le TÉMOIN PROGRAM s'éteigne. Les pistes programmées sont également supprimées à l'ouverture
du TIROIR DU LECTEUR DE CD.
REMARQUE : Un maximum de 20 pistes peut être programmé pour être joué dans n'importe quel ordre.
PROCÉDURE DE MONTAGE DE LA CORNE
1. Faites passer le câble à travers le porte-corne. Image (1).
2. Faites tourner la corne et le porte-corne dans le sens indiqué sur l'image. Image (2).
1
3. Branchez les câbles de l'enceinte ensemble. Image (3).
4. Placez le porte-corne sur la base de la corne. Image (4).
5. Faites tourner la douille à vis dans le sens indiqué sur l'illustration. Image (5).
2
3 4 5
AVANCE RAPIDE ET RETOUR RAPIDE
1. Appuyez sur le BOUTON D'AVANCE RAPIDE ou sur le BOUTON DE RETOUR RAPIDE pour sélectionner
une piste.
2. Appuyez sur le BOUTON PLAY pour commencer la lecture de la piste sélectionnée
LECTURE RAPIDE ET LECTURE INVERSÉE EN COURS DE
LECTURE
1. Appuyez et maintenez enfoncé le BOUTON D'AVANCE RAPIDE ou le BOUTON DE RETOUR RAPIDE
pour rechercher en avant ou en arrière dans la piste sélectionnée.
2. Relâchez le bouton lorsque vous atteignez le passage souhaité, la lecture reprend automatiquement.
20
21
 Loading...