

Page 1
1 -
RC650 MP4 PLAYER
User Manual
Page 2

2 -
Introduction
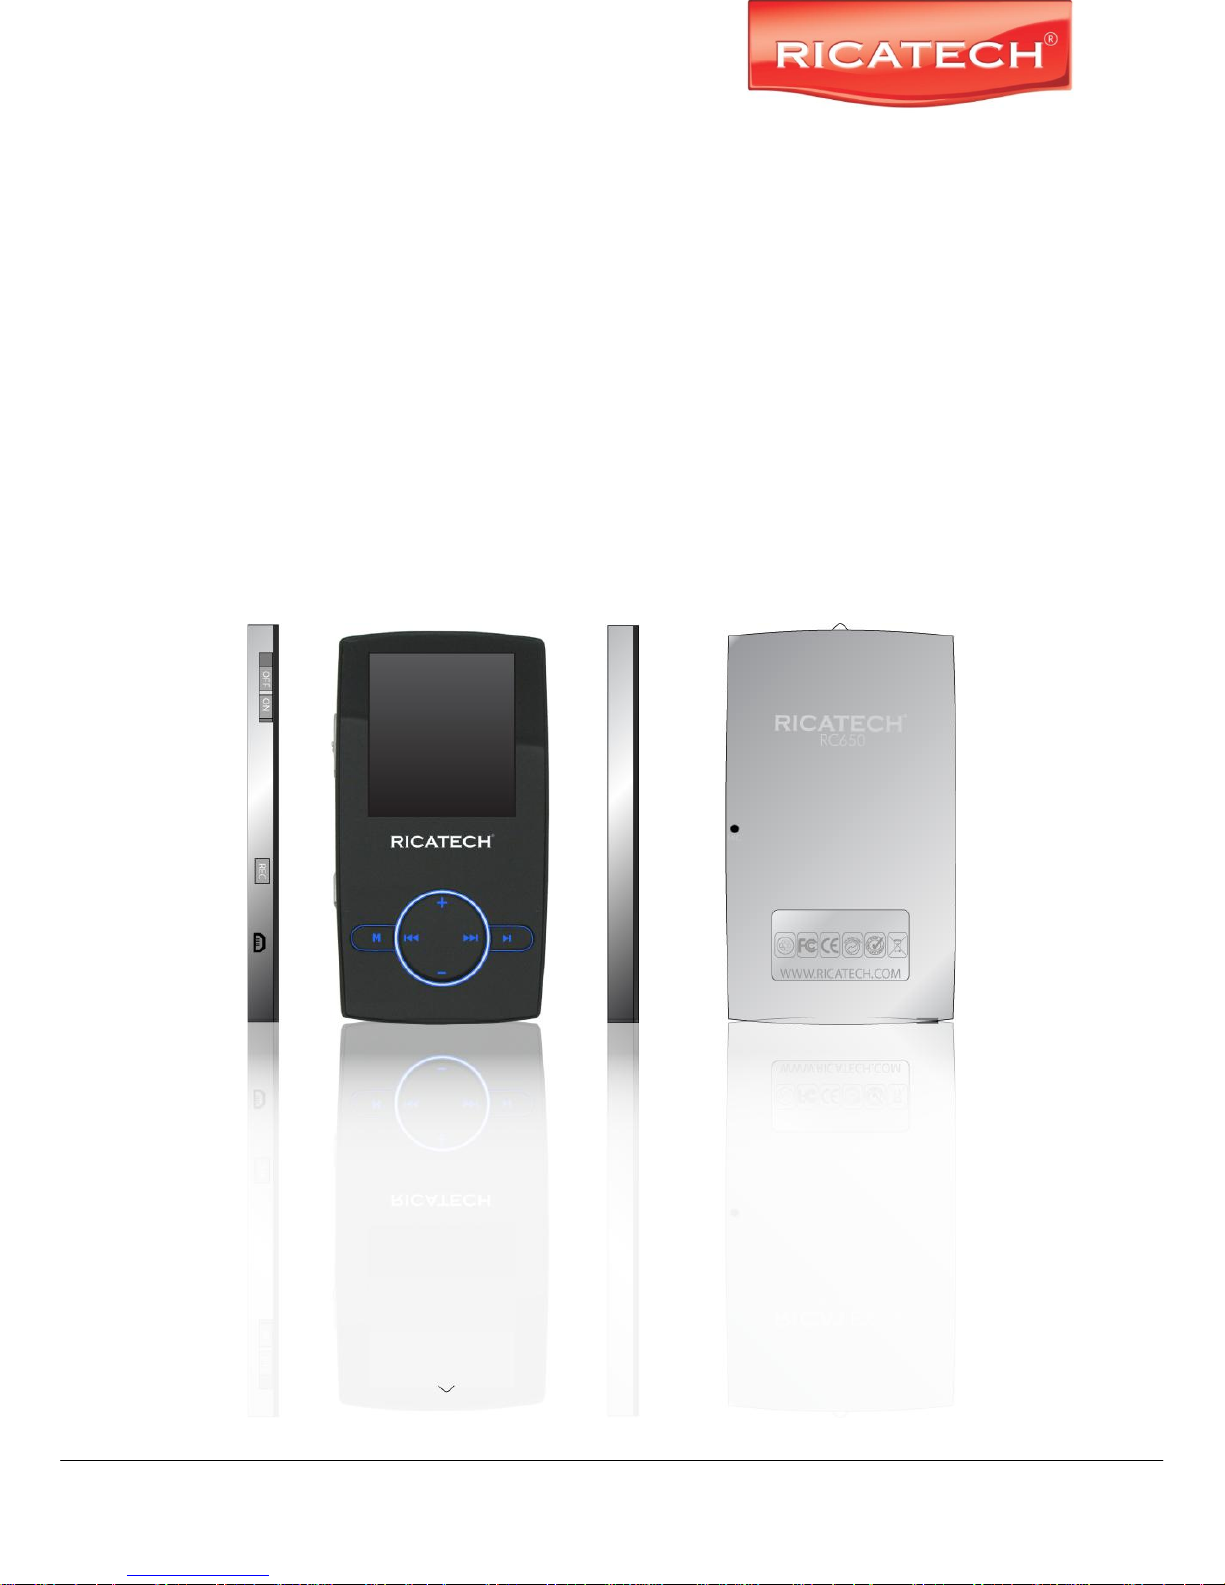
Congratulation with purchasing of the RICATECH RC650 Player. The smart integration of components
reduces the device weight and dimensions making possible a sleek design and comfortable useage. The
FLASH memory allows using the MP4 player in every situation without any change of damaging internal
moving components. The big 1.8” display with CSTN technology offers a clear and sharp display of
information and the USB 2.0 High Speed interface make data transfer from/to the computer easy and fast.
The RICATECH RC650 MP4 Player has built-in a Lithium battery rechargeable by your computer or the
optional adapter model : Ricatech RCCH03 By the built-in microphone, it is possible to record your voice
messages and play them directly with the device or from your computer.
Before using this product, please read this manual carefully and retain the instruction for future reference.
1. Important safety instruction
Here below you will find important safety instructions. Please read the following information carefully.
1. Do not place or use the product near any heat sources.
2. Do not expose directly to heat sources.
3. Do not expose directly to magnetic fields because the built-in flash memory could be damaged.
4. Do not bump or drop the player as it could be damaged.
5. Do not use this product near water or a damp environment, and be sure to prevent this product from
being exposed to any dripping and splashing.
6. Do not fold or deform the plastic case because it could be damage the LCD panel or components.
7. Do not try to open or repair the product itself. Contact qualified personnel when servicing is needed.
Opening the player yourself will void warranty!!
8. Extensive listening to music at high volume will cause permanent damage to your ears, therefore
set the player to a comfortable level, and stop listening immediately when experiencing beeping in
your ears. When hearing beeping, damage has already been done.
9. Do not throw the player or internal battery in an open fire the product because the built-in battery can
explode and it could be damage people and/or objects.
10. To prevent battery leakage which may result in bodily injury, property damage or damage to the
product do not pierce the product casing.
Page 3

3 -
2. Package contents
Before start using this product, please check if following items are there
1. MP4 Player
2. USB data cable
3. Earphones with audio cable
4. CD-ROM
5. User manual
3. Minimum system requirements
To use your RC650 MP4 Player it is necessary to have a computer with the following hardware configuration:
1. PC IBM® or 100% compatible with an Intel® Pentium® II CPU at 233 MHz or more.
2. One free USB port. (Please note the player will not charge using a unpowered USB hub)
3. 64 MByte of RAM.
4. 30 MByte of free Hard Disk space.
5. A CD-ROM or DVD-ROM drive.
6. Operating System Windows® 98 SE, Windows® ME, Windows® 2000 or Windows® XP, Vista.
Note : Driver installation is needed for Windows 98 only.
-When using Windows XP~Vista the device will be recognized as an “Removable disk” in the “My Computer”
menu.
-When Using Mac OSX the device will be added as a removable disk on your desktop.
The Provided video conversion software is NOT compatible with MacOS.
Page 4
4 -
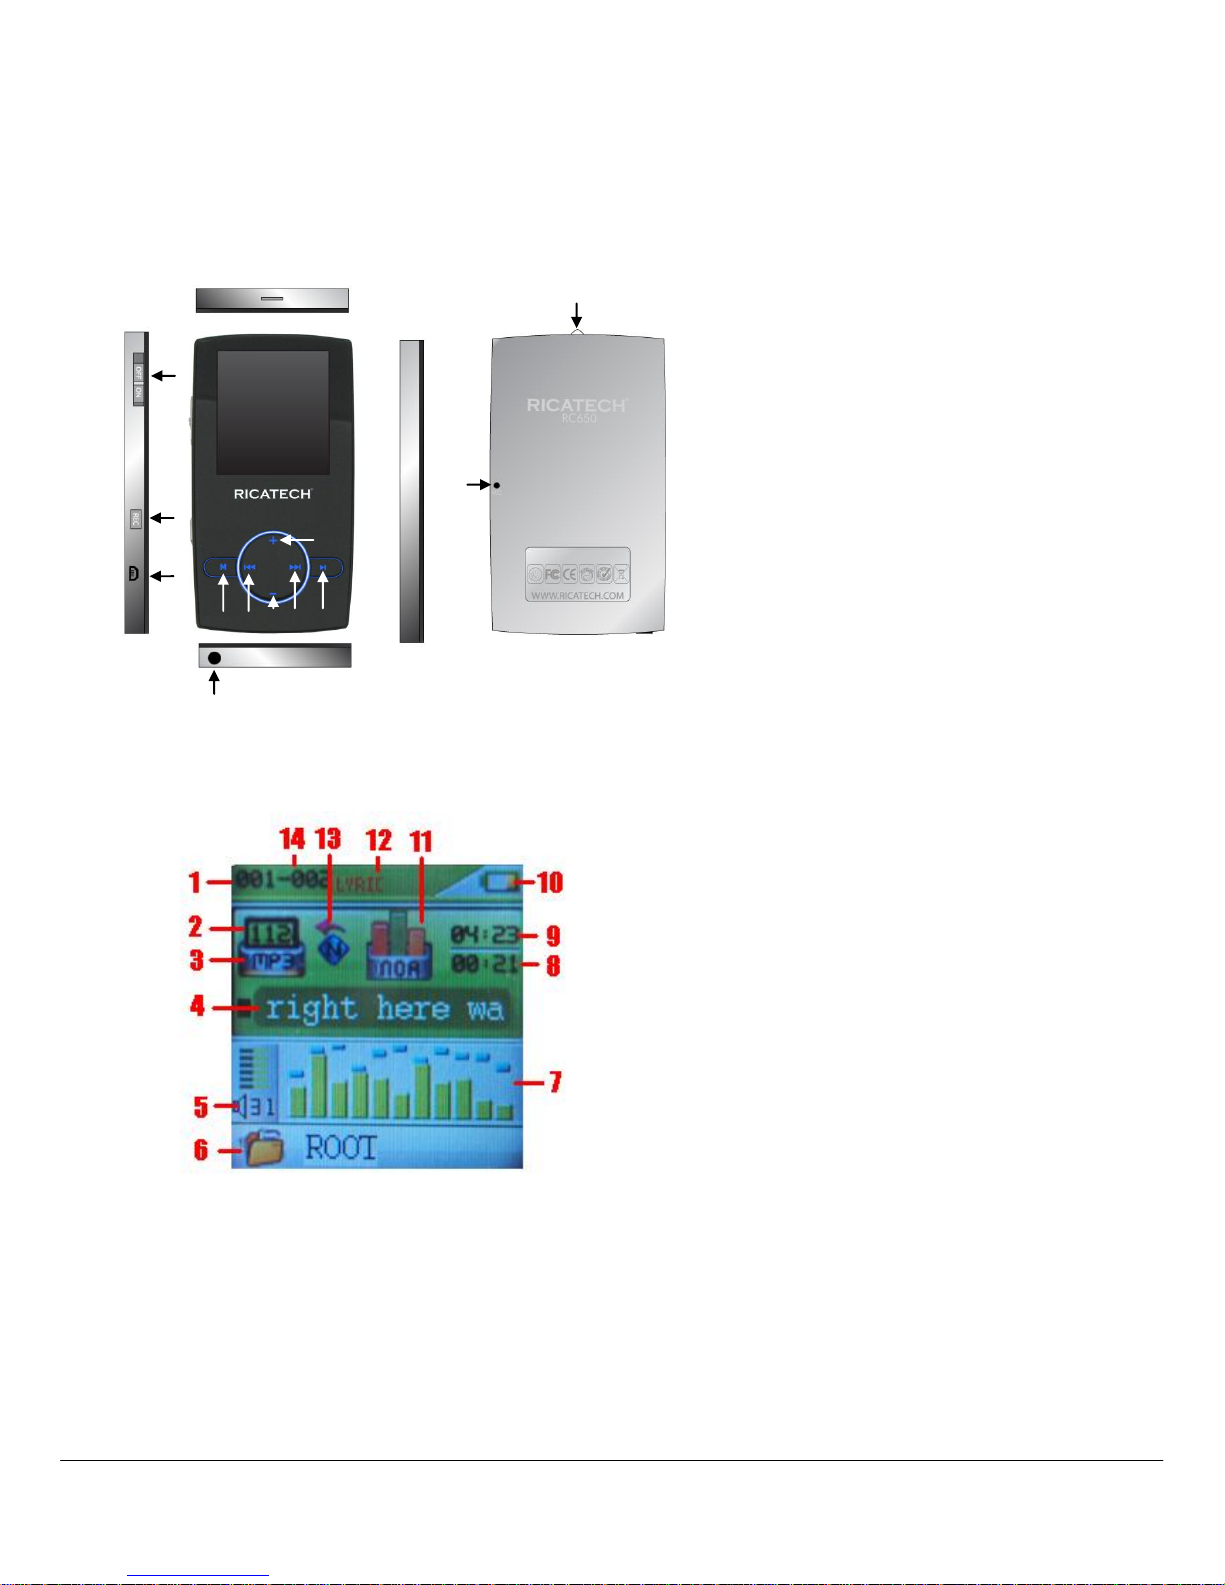
Description
Here below you will find a product description
4. Display
Here below you will find a display description
1. On / Off
2. Record
3. VOL – (Decrease the Volume)
4. Previous [] / Backward []
5. Menu
6. VOL +(Increase the Volume)
7. Next [] / Forward []
8. Play [] / Pause []
9. Display
10. Strap eyelet
11. Earphone Connector
12. Microphone
13. USB Connector
1. Current Song Location
2. Play Rate
3. File Format
4. Song Name
5. Volume
6. Folder Location
7. EQ Animation
8. Elapsed Time
9. Total Time
10. Battery Life
11. EQ Mode
12. Lyrics Availability
13. Repeat Mode
14. Total Number of Songs
1
11
2
13
12
10 6 8
7
3
4
5
Page 5

5 -
5. Use
5.1 Power ON/OFF
The MP4 player has built-in a rechargeable battery. At the first use we suggest to recharge the battery for a
long period (around 8 hours). To recharge the battery please connect the MP4 player to USB computer port.
Powering On:.
1. Turn on On/Off button to On position
Powering Off:
1. Hold the Play [] / Pause [] key until the power-off animation begins
2. Then, turn the On/Off button to Off position.
3. Under the state of stop, the player may power off automatically if a sleep time is predefined in
System Menu
Page 6
6 -
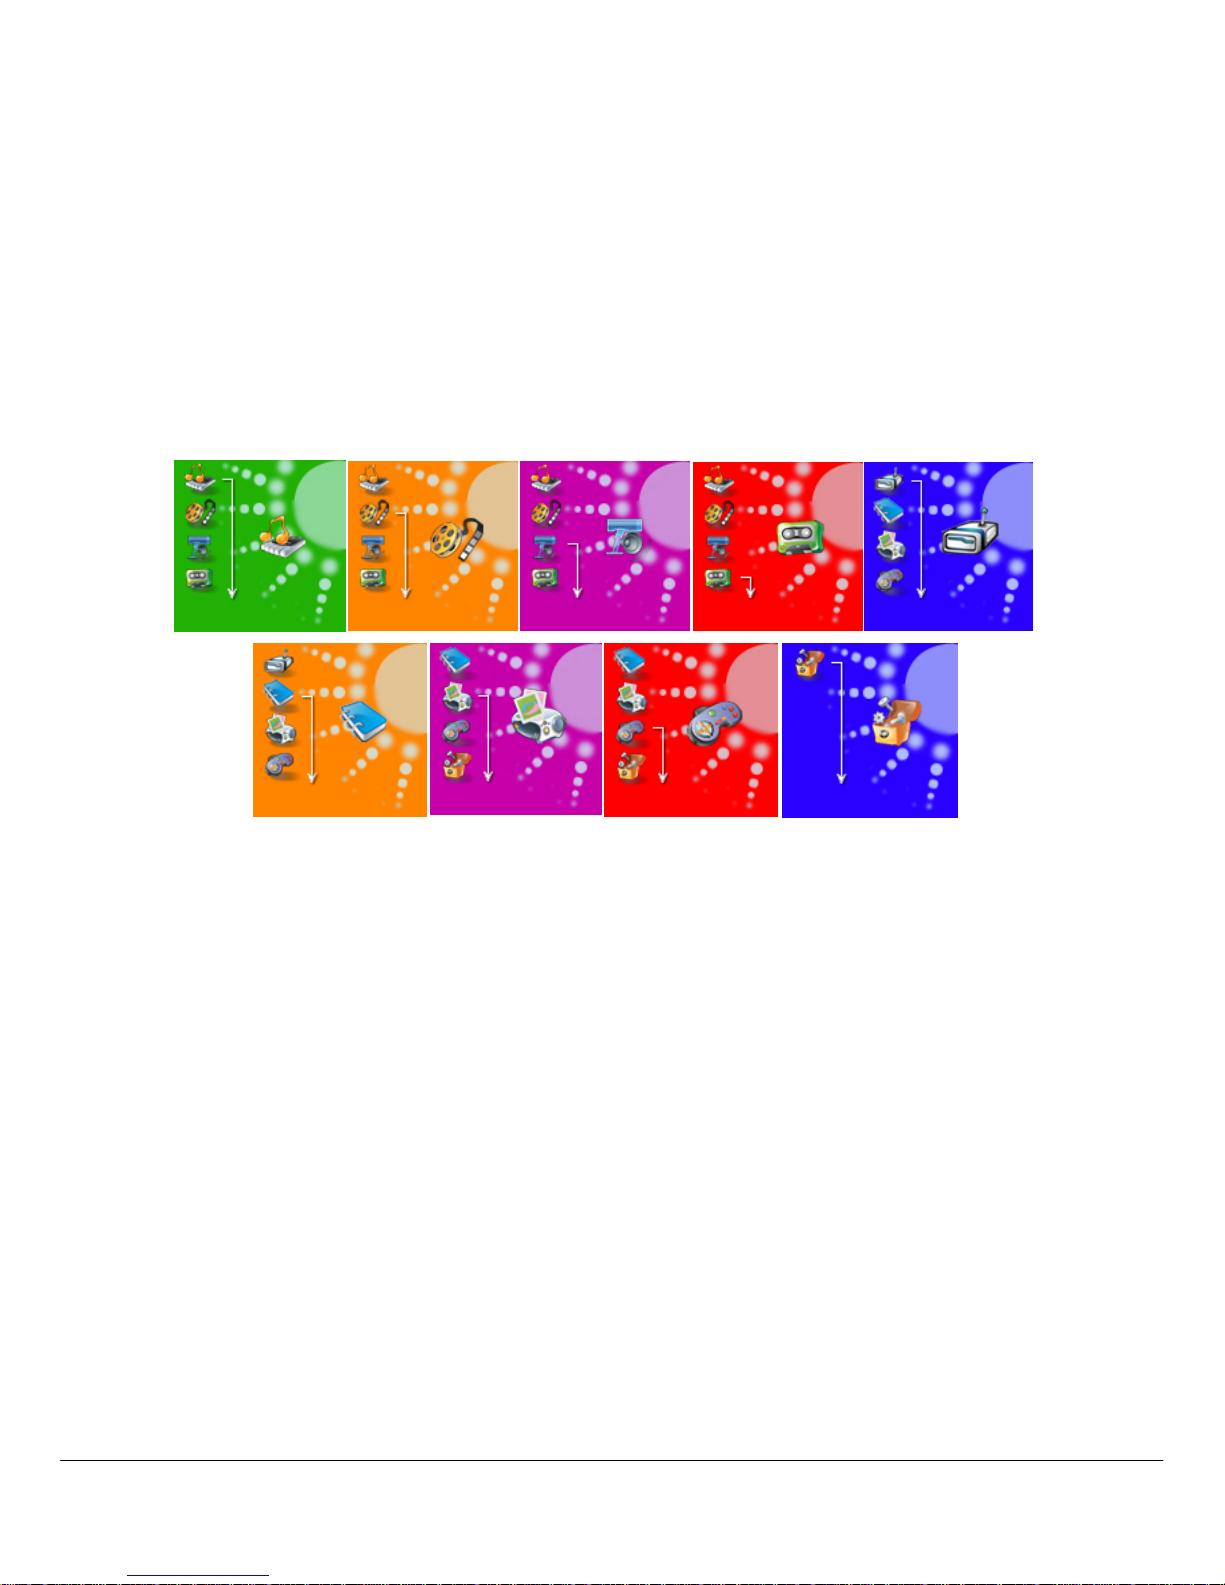
Main Menu
After powering on the MP4 player, you can see the main menu with 9 submenus (optional), which allow you
to select different functions and options.
By using the [] or [] buttons, you can select the desire option, and then press Play button to confirm the
selection.
To access at the main menu while you are inside any of these submenus, press and hold MENU [M] switch
for a few seconds. (Short pressing the MENU [M] switch usually opens the submenu option of each
submenus)
The available options are:
Music:
Select this option to play song.
AMV Mode:
Select this option to play AMV video.
Record:
Select this option to record voice messages by the microphone inside.
Voice:
Select this option to play recorded voice message.
FM:
Select this option to use the FM radio.
E-Book:
Select this option to read text.
Games:
Select this option to play game.
Album:
Select this option to browse and see photos.
System:
Select this option to access at system setup.
Page 7
7 -
5.2 Music Mode
The music player option allows playing songs. To activate this option please
follow here below instruction:
1. Power ON the MP4 Player, the screen will display the main menu
2. By using [] or [] buttons, select MUSIC PLAY option then press
[PLAY] button.
3. Press PLAY [] button to start to play the first song available.
5.2.1 Key Function at Music Mode
During the song play it is possible to activate the following controls.
PLAY [►]:
Press the play [] to start to play a song. Press the play button again to
pause the song. To restart to play the song press play button again.
Hold the play button for longer time will eventually turn off the player
REW & FFWD []
Press [] or [] to select the previous or the next song.
Press and Hold the [] or [] buttons to rewind or fast forward the song.
Volume (VOL+ and VOL-):
Press [VOL+] button to increase the volume and press [VOL-] button to
decrease the volume.
Speaker:
Press and hold [VOL+] button to activate the speaker; press and hold [VOL-]
button to de-activate the speaker.
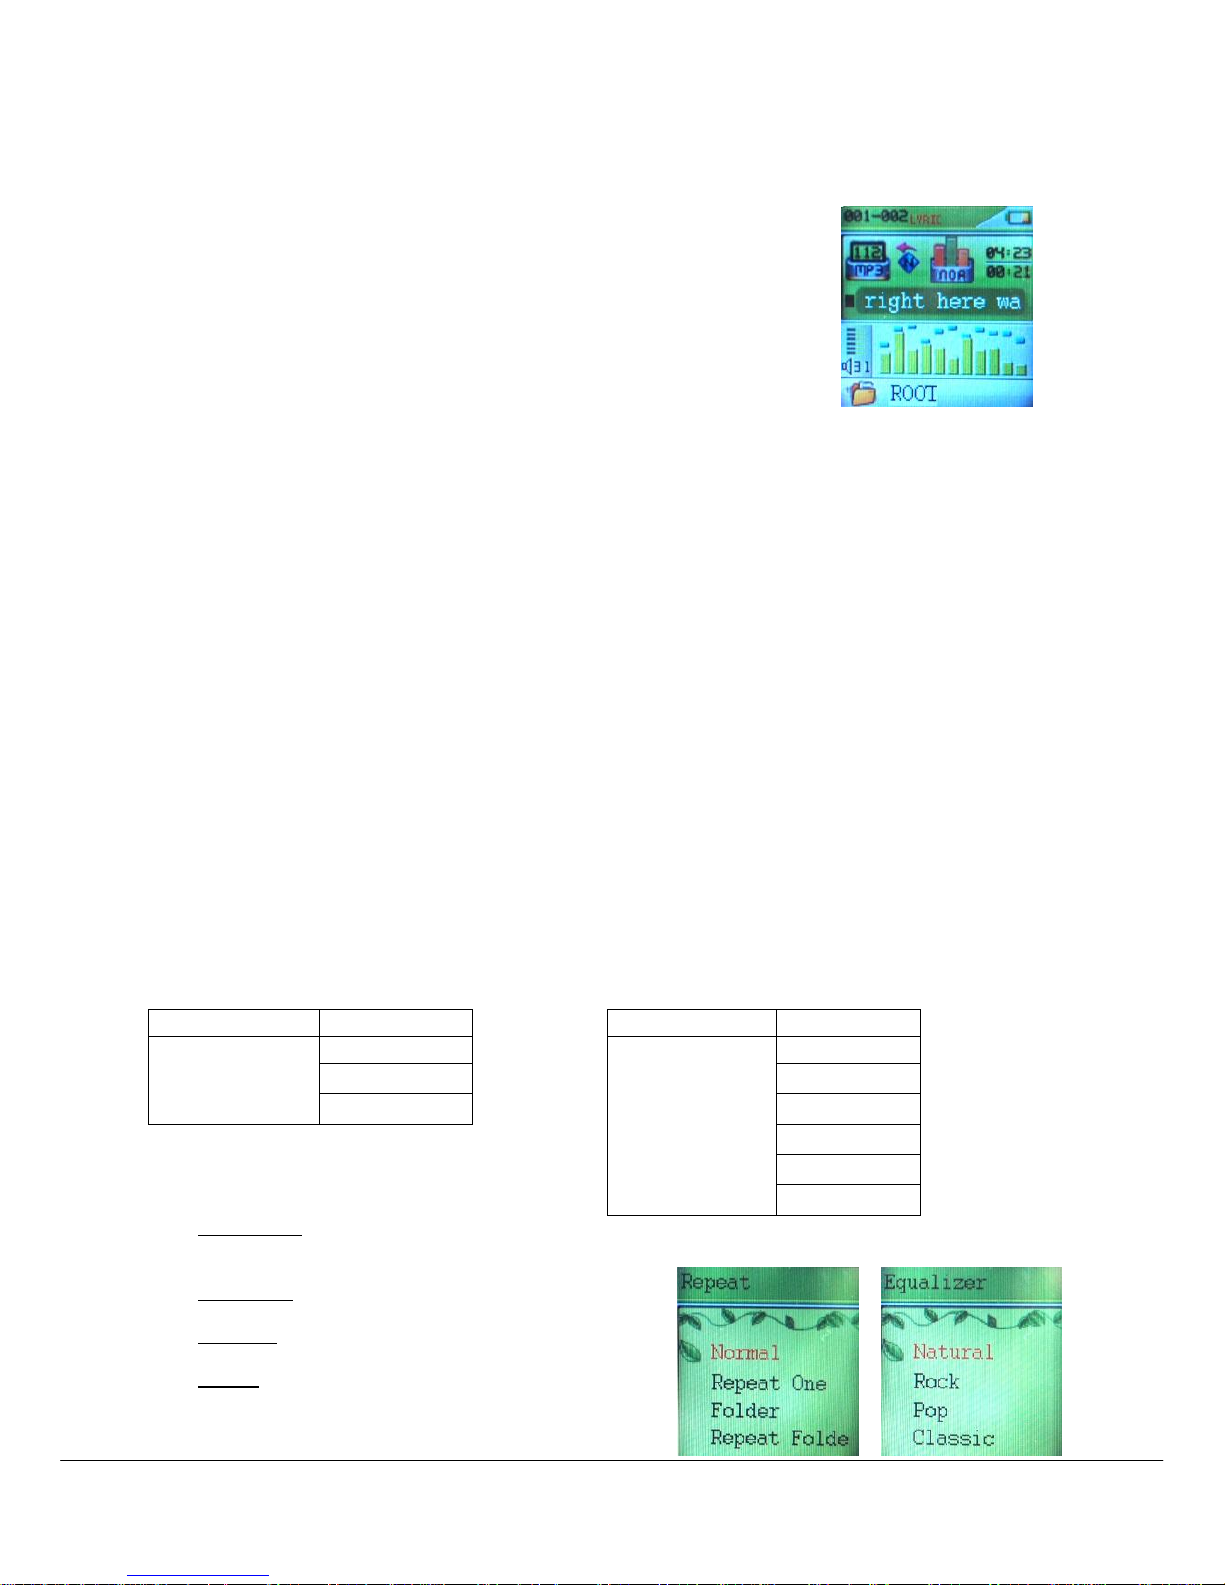
5.2.2 Music Submenu
By short pressing the MENU [M] button, you can find the following music submenus. Press [] or [] to
choose, and then press PLAY [] key to confirm each submenus. Use the same technique to navigate
inside each of the submenus.
Status
Submenu Options
Status
Submenu Options
While Music is paused
Local Folder
While music is on
Repeat
Delete File
Equalizer
Delete All
Tempo Rate
Replay
Replay Times
Replay Gap
Local Folder:
Under this directory, you can choose to go up a folder level by pressing PLAY [] to confirm. And
then you can choose the folder you want to play
Delete File:
Delete specific song you want.
Delete All:
Delete all music files using this option.
Repeat:
Seven repeat modes are listed including Normal,
Repeat One, Folder, Repeat Folder, Repeat All,
Random and Intro.
Page 8

8 -
Equalizer
With preset 7 equalizers including Natural, Rock, Pop, Classic, Soft, Jazz and DBB
Tempo Rate:
You can alter the Tempo Rate of the Song.
5.2.3 A-B Repeat Function
The player can loop-playing a specified music interval of a song. While Playing Music, Press RECORD
[REC] button to set repeat start point A, and then press RECORD [REC] again to set repeat end point B. The
player will then loop-play the content between point A and B.
5.2.4 Lyric Display
The Player supports Lyrics Display, in which the lyrics would be shown synchronizing with the actually lyrics
of the song. The file format should be “.Irc”, and the file name should be exactly the same with the song’s file
name and place within the same folder with the song. To activate this option, please follow here below
instruction:
1. While playing song, press and hold MENU [M] to activate lyrics display
2. Short press MENU [M] button again to de-activate the lyrics display and return to music play menu.
5.3 AMV Mode
The AMV MODE allows to play movies in AMV Format. To activate this option please
follow here below instruction:
1. Power ON the MP4 Player, the screen will display the main menu.
2. By using [] or [] buttons, select AMV MODE option then press PLAY
[] button.
3. Press PLAY [] button to start to play the first movie available.
Note
The Movie Player only plays AMV files, you need conversion from other file format in order to watch the movie
you like.
5.3.1 Key Function at AMV Mode
During the song play it is possible to activate the following controls.
PLAY [►]:
Press the PLAY [] to start to play a movie. Press the play button again to
pause the movie. To restart to play the movie press play button again.
Hold the play button for longer time will eventually turn off the player
REW & FFWD []
Press [] or [] to select the previous or the next movie.
Press and Hold the [] or [] buttons to rewind or fast forward the movie.
Volume (VOL+ and VOL-):
Press [VOL+] button to increase the volume and press [VOL-] button to
decrease the volume.
Speaker:
Press and hold [VOL+] button to activate the speaker; press and hold [VOL-]
button to de-activate the speaker.
Page 9

9 -
5.3.2 AMV Submenu
By short pressing the MENU [M] button, you can find the following AMV submenus. Press [] or []to
choose, and then press PLAY [] key to confirm each submenus. Use the same technique to navigate
inside each of the submenus.
Status
Submenu Options
While Video is paused
Local Folder
Delete File
Delete All
Local Folder:
Under this directory, you can choose to go up a folder level by pressing PLAY [] to confirm. And
then you can choose the folder you want to play
Delete File:
Delete specific video you want.
Delete All:
Delete all videos using this option.
5.3.3 How to transfer the movie file to AMV
The AMV converter allows you to convert
movie files into AMV files. It is compatible
with AVI, ASF, MPG, MPEG, DAT, RM, RAM,
RMVB, MOV, VOB, SWF. Please follow the
below procedure to do the conversion.
1. From the provide CD-Rom, find VeeJay
4150/ Driver and Video Converter/
setup.exe, double click it to start
installing MP3 PLAYER UTILITIES
2. Follow the instruction to install the programme, .
Page 10

10 -
3. After installation finished, select and run MP3
PLAYER UTILITIES -> AMV Converter
4. Choose the video file you want to be converted in
“INPUT FILE”.
5. Choose the output destination folder in the
“OUTPUT FILE”.
6. You can set the size, quality and rotation for the
conversion. The screen resolution of this player is
128x128 pixels, so please set the size accordingly.
The higher quality produces larger AMV file size,
better video quality and vice versa.
7. Choose BEGIN to start converting the file. And you
can see the conversion status in the PROGRESS
Bar.
8. After conversion complete, you will see the
converted file in your output destination folder.
ATTENTION
When you are trying to convert rm, ram, rmvb, mov and vob, you need particular decoder.
You can check if your Windows Media Player is able to play these files. If no, a decoder is
needed
5.4 Record (Voice messages recorder)
This option allows to record voice messages by using the microphone inside. To
record voice message, please follow here below instruction:
1. Power ON the MP4 Player, the screen will display the main menu.
2. By using [] or [] buttons, select RECORD option then press PLAY []
button.
3. Press PLAY [] or RECORD [REC] button to start to recording.
4. You can listen to your wave file under the VOICE submenu. (Please refer to chapter 8.4 for more
details.
Page 11

11 -
During recording, Press the PLAY [] / RECORD [REC] to start recording. Press the play button again to
pause recording. Hold the PLAY [] / RECORD [REC] button for longer time will eventually stop recording.
By short pressing the MENU [M] button, you can find the LOCAL FOLDER and REC TYPE. Press [] or []
to choose, and then press PLAY [] key to confirm each submenus. Use the same technique to navigate
inside each of the submenus.
1. Under the LOCAL FOLDER submenu, you can choose to go up a folder level by pressing PLAY
[] to confirm. And then you can choose the folder you want to play
2. Under the REC TYPE submenu, you can choose the recording quality including FINE and LONG.
5.5 Voice (Voice Messages Player)
The voice option allows to play the voice messages recorded by the MP4 Player. To
activate this option, please follow here below instruction:
1. Power ON the MP4 Player, the screen will display the main menu.
2. By using [] or [] buttons, select VOICE option then press PLAY []
button.
3. Press PLAY [] button to start to play the first recording available.
NOTE
The VOICE option can play Wave files (.Wav) coded by ADPCM CODEC and stored in the RECORD -> VOICE
folder available in the MP4 Player memory.
5.5.1 Key Function at VOICE Mode
During the recording play it is possible to activate the following controls.
PLAY [►]:
Press the PLAY [] to start to play a recording. Press the play button again
to pause the recording. To restart to play the recording press play button
again.
Hold the play button for longer time will eventually turn off the player
REW & FFWD []
Press [] or [] to select the previous or the next recording.
Press and Hold the [] or [] buttons to rewind or fast forward the recording.
Volume (VOL+ and VOL-):
Press [VOL+] button to increase the volume and press [VOL-] button to
decrease the volume.
Speaker:
Press and hold [VOL+] button to activate the speaker; press and hold [VOL-]
button to de-activate the speaker.
5.5.2 VOICE Submenu
By short pressing the MENU [M] button, you can find the following music submenus. Press [] and [] to
choose, and then press PLAY [] key to confirm each submenus. Use the same technique to navigate
inside each of the submenus.
Page 12

12 -
Status
Submenu Options
Status
Submenu Options
While Music is paused
Local Folder
While music is on
Repeat
Delete File
Tempo Rate
Delete All
Replay
Local Folder:
Under this directory, you can choose to go up a folder level by pressing PLAY [] to confirm. And
then you can choose the folder you want to play
Delete File:
Delete specific voice file you want.
Delete All:
Delete all voice files using this option.
Repeat:
Seven repeat modes are listed including Normal, Repeat One, Folder, Repeat Folder, Repeat All,
Random and Intro.
Tempo Rate:
You can alter the Tempo Rate of the Song.
5.5.3 A-B Repeat Function
The player can loop-playing a specified music interval of a recording. While playing a recording, Press
RECORD [REC] button to set repeat start point A, and then press RECORD [REC] again to set repeat end
point B. The player will then loop-play the content between point A and B.
5.6 FM (FM Radio)
When the FM Radio mode is activated it is possible to hear radio programs.
This option allows us to enjoy FM radio programs. To use it, please follow here
below instruction:
1. Power ON the MP4 Player, the screen will display the main menu
2. By using [] or [] buttons, select FM option then press PLAY [] button
to confirm.
3. If there are preset channels, press PLAY [] button to play the first
channel, press again for the next channel.
5.6.1 FM Submenu
By short pressing the MENU [M] button, you can find the following FM submenus. Press [] and [] to
choose, and then press PLAY [] key to confirm each submenus. Use the same technique to navigate
inside each of the submenus.
Page 13

13 -
Here below you will find the FM radio option list.
AUTO SERACH:
Select this option to start auto-searching for radio channels.
SAVE:
Select this option to save radio channels
DELETE:
Select this option to delete radio channels.
DELETE ALL:
Select this option to delete all radio channels.
NORMAL BAND:
Select this option to activate normal FM band.
JAPAN BAND:
Select this option to activate Japan FM band.
RINE REC:
Select this option to start FM recording.
5.6.2 Automatic Search
To scan automatically all the available channels, please follow here below instruction:
1. When the FM Mode is activated, press MENU [M] button to select AUTO SEARCH option.
2. Press PLAY [] button to start the automatic search. The MP4 Player will store the first 20 radio
programs available.
5.6.3 Manual Search and Storing Channels
To scan manually the frequencies please follow here below instruction:
1. When the FM Mode is activated, long pressing the [] or [] buttons to start auto scanning.
Scanning stops as an available channel is found.
2. By short pressing the [] or [] buttons to step-up scanning.
3. Press MENU [M] button to select SAVE option.
4. Press PLAY [] and this specific channel will be saved as the last channel
5. Repeat the step from 1 to 4 for each desired radio program by keeping in mind that the MP4 Player
has 20 memory positions.
5.6.4 FM Radio Record (REC)
To record FM radio program please follow here below instruction:
1. When the FM Radio Mode is activated, press MENU [M] button to select FINE REC option.
2. Press PLAY [] button to start the recording.
3. Press PLAY [] button to pause the recording and press it again to restart the recording.
4. To stop and save the recording, long press PLAY [] button, will return to FM mode.
5. You can also press RECORD [REC] while listening to radio channels to start recording it.
ATTENZIONE
To play FM recording files please use VOICE function. For more information about it please refer to chapter 8.4.
The MP4 Players stores the FM record files in the FM folder.
In order to use the FM transmission and FM Radio function you must connect an earphone to the MP4 player,
which serves as antenna
5.6.5 Speaker
Press and hold [VOL+] button to activate the speaker; press and hold [VOL-] button to de-activate the
speaker.
Page 14

14 -
5.7 E-Book
The Ebook option allows reading text file. To activate this option please follow here
below instruction:
1. Power ON the MP4 Player, the screen will display the main menu.
2. By using the [] or [] buttons select E-book, and then press PLAY []
button to confirm
3. Use [] or [] buttons to choose the file
4. Press PLAY [] button to start reading the file
5.7.1 E-Book Submenu
By short pressing the MENU [M] button, you can find the following music submenus. Press [] or [] to
choose, and then press PLAY [] key to confirm each submenus. Use the same technique to navigate
inside each of the submenus.
Status
Submenu Options
While Video is paused
Local Folder
Play Set
Delete File
Delete All
Local Folder:
Under this directory, you can choose to go up a folder level by pressing PLAY [] to confirm. And
then you can choose to folder you want to play
Play Set:
You can choose between manual play and auto play. For auto play, you can set the playing time from
1 to 10 seconds for each page of the E-book.
Delete File:
Delete specific text file you want.
Delete All:
Delete all text files using this option.
5.8 ALBUM (Photo Viewer)
The Photo option allows viewing photos. To activate this option please follow here
below instruction:
1. Power ON the MP4 Player, the screen will display the main menu.
2. By using the [] or [] buttons select ALBUM, and then press PLAY []
button to enter the PHOTO MENU.
Page 15

15 -
5.8.1 ALBUM Submenu
By short pressing the MENU [M] button, you can find the following music submenus. Press [] or [] to
choose, and then press PLAY [] key to confirm each submenus. Use the same technique to navigate
inside each of the submenus.
Status
Submenu Options
While Video is paused
Local Folder
Play Set
Delete File
Delete All
Local Folder:
Under this directory, you can choose to go up a folder level by pressing PLAY [] to confirm. And
then you can choose to folder you want to play
Play Set:
You can choose between manual play and auto play. For auto play, you can set the playing time from
1 to 10 seconds for each page of the E-book.
Delete File:
Delete specific photo you want.
Delete All:
Delete all photos using this option.
5.9 GAMES
The GAMES option allows playing games. To activate this option please follow here
below instruction:
1. Power ON the MP4 Player, the screen will display the main menu.
2. By using the [] or [] buttons to select GAMES, and then press PLAY
[] button to enter the GAME MENU.
Inside the game menu, there are three games for you to choose including Mine, Hungry Snake and Russia
Brick (OPTIONAL). By using the [] or [] buttons to select the game you want to play, and then press
PLAY [] button to confirm
5.10 System Set (Setup)
The SETTING option allows to access to MP4 Player setup system. To access at
system setup please follow here below instruction:
1. Power ON the MP4 player, button, the screen will display the main menu.
2. By using the [] or [] select SYSTEM option then press PLAY [] button
to enter the SYSTEM MENU.
3. By using the [] or [] select the system setup parameter and press PLAY
[] button.
Page 16

16 -
The parameters available in the setup system are:
System Time:
This option allows setting of the system date and time.
LCD set:
This option allows setting the brightness, darkly and black screen of the LCD panel.
Language:
This option allows setting the Language of the User Interface.
Power Off:
This option allows setting the off time and sleep time.
Memory Info:
This option allows checking the memory usage.
Firmware Ver:
This option allows checking the firmware version.
Firmware Upg:
This option allows to upgrade the firmware.
5.10.1 System Time Set
This option allows setting of the system date and time. The upper case display the date in Year : Month : Day
Format, and the lower case display the Time in Hour : Minute : Second format. To change the Date and time,
please follow here below instruction:
1. Under the SYSTEM MENU, choose SYSTEM TIME by pressing [] or [] and press PLAY [] to
confirm
2. Press [VOL+] and [VOL-] to choose the parameter you want to adjust
3. press [] or [] to change the value. Press MENU [M] to confirm.
5.10.2 Power Off Set
This option allows setting the off time and sleep time. By setting Off Time, it is possible to enable (30s, 60s,
90s and 120s) or disable the power management features to automatically shut down your player if it is not
used. By setting Sleep Time, it is possible to set power off the unit after a specified time (30s, 60s, 90s, 120s)
from the moment you confirm about this selection.
To modify this parameter please follow here below instruction:
1. Under the SYSTEM MENU, choose POWER OFF by pressing [] or [] and press PLAY [].
2. By using the [] or [] buttons, select OFF TIME or SLEEP TIME and press PLAY [] button.
3. Choose the desired OFF TIME or SLEEP TIME (30s, 60s, 90s, 120s) and press PLAY [] to
confirm..
Page 17

17 -
6. Computer installation
This chapter describes how to install the MP4 player in your computer system in order to transfer songs file
in the memory device. The following instructions are intended a PC where at the CD-ROM drive is assigned
“D:” letter. If in your computer at the CD-ROM drive is assigned a different letter please replace “D:” with the
correct one (for example E: or F:). To know the letter assigned to your CD-ROM drive please use “My
Computer” or “Windows Explorer”. For more information please refer to Windows® documentation and/or
help on-line.
6.1 Windows® 98 Second Edition – Installation
NOTE
During the hardware installation wizard should be request the Windows® 98 SE CD-ROM. Take it availabale and
insert it when requested.
To install the MP4 player in a computer with Windows® 98 SE please follow here below instruction:
1. Power ON the computer without connect the MP4 Player to USB port.
2. When the operating system is ready insert the MP4 Player CD-ROM in the drive, find VeeJay 4150/
Driver and Video Converter/ setup.exe, double click it to start installing MP3 PLAYER UTILITIES.
3. The installation program will start, follow the instruction on the screen and when the installation is
finished close the session and restart the PC.
4. When the operating system is ready connect the MP4 Player to USB port by using the USB data
cable available. The system will detect the new hardware and it will install the device driver
automatically.
5. Now it is possible to browse the MP4 Player memory by using “My Computer” or “ Windows
Explorer”.
Page 18

18 -
6.1.1 Windows® 98 Second Edition – Safety Remove Hardware
The Windows® 98 SE driver install the Safety Remove utility in the systray
Before to disconnect the MP4 Player to USB port please follow here below instruction:
1. Double click the utility available in the systray.
Windows® 98 SE – Systray
2. Select the MP4 Player unit then click on YES button (see the picture 2).
3. Now you can disconnect the MP4 Player to the computer.
Windows® 98 SE – Hardware Safety Remove
6.2 Windows® ME, Windows® 2000 and Windows® XP
NOTE
Under Windows® 2000 and Windows® XP to install a new hardware device it is necessary to logon to the
system as “Administrator” or user with administrator rights. For more information about user account please refer
to Windows® documentation or to you network administrator.
To install the MP4 player in a computer with Windows® ME, Windows® 2000 or Windows® XP please follow
here below instruction:
1. Power ON the computer without connecting the MP4 Player to USB port.
2. When the operating system is ready connect the MP4 Player to USB port. The system will detect the
new hardware and it will install the device driver automatically.
3. Now you can browse the MP4 Player memory content by using “My Computer” or “Windows
Explorer”.
Page 19

19 -
6.3 File transfer
When the MP4 Player is connected to the computer, “My Computer” has a new “Removable Disc”. This
removable disc is the MP4 player. The operating system assigns automatically a drive letter to removable
device (the picture below shows an MP4 Player where the operating system has assigned the H: letter).
Windows® XP – My Computer
To transfer song files to MP4 Player please follow here below instruction:
1. Run “Windows Explorer”.
2. Select the hard disk folder where there are the song files.
3. Select the song file with right mouse button and drag the file to the MP4 Player drive letter.
4. Release the right button and from pop-up menu select “Copy here…”. Now the song file is copied in
the MP4 Player memory.
5. Repeat the steps nr.3 and nr.4 for each song file that you want to copy in the MP4 player memory.
Windows® XP – Windows Explorer
NOTE
Windows® offers different ways to copy files. For more information please refer Windows® documentation or
help on-line.
Page 20

20 -
7. Firmware upgrade
To upgrade the firmware please follow here below instruction:
1. From the provide CD-Rom, find
RICATECH RC650 Driver and Video
Converter/ setup.exe, double click it to
start installing MP3 PLAYER UTILITIES
2. Follow the instruction to install the
programme, .
3. After intallation finished, select and run
MP3 PLAYER UTILITIES -> MP3 PLAYER
UPGRADE TOOL
4. Turn off the MP4 player and connect it to
the PC using the provided USB cable.
5. Wait until the PC detects the MP4, you will
see a pop up screen showing the content
of MP4 as an external driver.
6. Close the Pop up screen and choose
SELECT NEW FIRMWARE FILE
7. Select the specific firmware, and the
update tool will then detects the DEVICE
FIRMWARE VERSION and the
UPGRADED FIRMWARE INFORMATION.
8. Choose BEGIN UPGRADING to start
upgrade.
9. After completion, closed the upgrade tool
10. Do not disconnect the MP4 player, wait for
the MP4 player to restart.
11. After restarting, you can disconnect the
MP4 and begin using it.
Page 21

21 -
 Loading...