

Page 1

R6GD SERIES
USER’s MANUAL & INSTALLATION INSTRUCTIONS
Single Package Gas Heating / Electric Cooling - 3 Phase
13 SEER
Premium Model Shown
!
WARNING:
FIRE OR EXPLOSION HAZARD
• Failure to follow safety warnings exactly
could result in serious injury or property
damage.
• Installation and service must be performed
by a qualifi ed installer, service agency or the
gas supplier.
• Do not store or use gasoline or other
fl ammable vapors and liquids in the vicinity
of this or any other appliance.
DO NOT DESTROY. PLEASE READ CAREFULLY AND KEEP IN A SAFE PLACE FOR FUTURE REFERENCE.
ATTENTION INSTALLERS:
It is your responsibility to know this product better than your customer. This includes being able to install the product according
to strict safety guidelines and instructing the customer on how to operate and maintain the equipment for the life of the product.
Safety should always be the deciding factor when installing this product and using common sense plays an important role as
well. Pay attention to all safety warnings and any other special notes highlighted in the manual. Improper installation of the unit
or failure to follow safety warnings could result in serious injury, death, or property damage. These instructions are primarily
intended to assist qualifi ed individuals experienced in the proper installation of this appliance. Some local codes require
licensed installation/service personnel for this type of equipment. After completing the installation, return these instructions to
the customer’s package for future reference.
• Do not try to light any appliance.
• Do not touch any electrical switch; do not
• Leave the building immediately.
• Immediately call your gas supplier from a
neighbors phone. Follow the gas suppliers
instructions.
• If you cannot reach your gas supplier, call
the fi re department.
WHAT TO DO IF YOU SMELL GAS
use any phone in your building.
Page 2

USER INFORMATION
Important Safety Information ....................................4
Operating Instructions ...............................................4
Cooling Operation .....................................................4
Heating Operation .....................................................4
Turning the Air Conditioner Off ..................................4
Operating the Indoor Blower Continuously ................4
Air Conditioner Maintenance .....................................4
Troubleshooting ..........................................................4
WARRANTY INFORMATION
A warranty certifi cate with full details is included with the
Air Conditioner. Carefully review these responsibilities with
your dealer or service company . The manufacturer will not
be responsible for any costs found necessary to correct
problems due to improper setup, improper installation,
adjustments, improper operating procedure on the part
of the user, etc. Some specifi c examples of service calls
which are not included in the limited warranty are:
• Correcting wiring problems in the electrical circuit
supplying the Air Conditioner.
• Resetting circuit breakers or other switches.
• Adjusting or calibrating of thermostat.
2
Page 3

INSTALLER INFORMATION
IMPORTANT SAFETY INFORMATION .......................5
REQUIREMENTS & CODES .......................................6
GENERAL INFORMATION ..........................................7
Before You Install this Unit .........................................7
Locating the Equipment.............................................7
Heating Load ............................................................7
Combustion Air Requirements .................................7
Venting Requirements ..............................................8
Circulating Air Supply .............................................10
Air Ducts .............................................................10
Air Filter Requirements ........................................10
Unconditioned Spaces .........................................10
Acoustical Duct Work ...........................................11
UNIT INSTALLATION ................................................11
Packaging Removal .................................................11
Rigging and Hoisting ...............................................11
Clearances to Combustible Materials ......................11
Ground Level ...........................................................11
Rooftop ....................................................................11
Condensate Drain ..................................................11
Horizontal to Downfl ow Conversion .........................11
Removal of Internal Filter Rack ...............................12
Installing Filters in the Filter Rack ...........................12
Removing Filters from the Filter Rack .....................12
ELECTRICAL WIRING ...............................................13
Pre - Electrical Checklist .........................................13
Line Voltage .............................................................13
Grounding................................................................14
Thermostat / Low Voltage Connections ...................14
Checking Heat Anticipator Settings ......................15
Optional Outdoor Thermostat ...............................15
Blower Speed ..........................................................15
Unbalanced 3-Phase Supply Voltage ......................15
Optional Humidistat .................................................16
GAS SUPPLY & PIPING ............................................16
Leak Check .............................................................17
High Altitude Conversion .........................................17
Lp/Propane Gas Conversion ...................................17
STARTUP & ADJUSTMENTS ...................................18
Pre - Start Checklist ................................................18
Start-up Procedure ..................................................18
Air Circulation .......................................................18
System Cooling ....................................................18
System Heating ....................................................18
Verifying & Adjusting Temperature Rise ..................18
Verifying & Adjusting Firing Rate .............................19
Verifying Operation of Over-Temperature
Limit Control ............................................................19
Verifying Burner Operation ......................................19
Refrigerant Charging ...............................................19
Manifold Pressure Adjustment ................................20
OPERATING SEQUENCE .........................................20
Heating Mode ..........................................................20
Cooling Mode ..........................................................21
Fan Mode ................................................................21
EQUIPMENT MAINTENANCE ...................................21
Cleaning of Heat Exchanger ...................................22
Cleaning of Burners ................................................22
COMPONENT FUNCTIONS ......................................23
TROUBLESHOOTING ...............................................23
REPLACEMENT PARTS ............................................23
FIGURES & TABLES .................................................24
Figure 10. R6GD Dimensions ..............................24
Table 9. Center of Gravity & Shipping Weights .....24
Airfl ow Information ...................................................25
Table 10. Nominal Airfl ow Rates & Temp Rises ...25
Gas Information .......................................................26
Table 11. Gas Pipe Capacities .............................26
Table 12. Gas Flow Rates ....................................26
Figure 11. R6GD Gas Valve Label .......................27
Electrical Information ...............................................28
Figure 12. Wiring Diagram for 208/230 V Units ....28
Figure 13. Wiring Diagram for 460 V Units ...........29
R6GD Charging Charts ...........................................30
Figure 14. Charging Chart for 3 Ton Units ............30
Figure 15. Charging Chart for 4 Ton Units ............30
Figure 16. Charging Chart for 5 Ton Units ............31
FRENCH TRANSLA TIONS ........................................32
INSTALLATION/PERFORMANCE CHECKLIST .......36
3
Page 4
USER INFORMATION
IMPORTANT SAFETY INFORMATION
Safety markings are used frequently throughout this
manual to designate a degree or lev el of seriousness and
should not be ignored. WARNING indicates a potentially
hazardous situation that if not avoided, could result in
personal injury or death. CAUTION indicates a potentially
hazardous situation that if not avoided, ma y result in minor
or moderate injury or property damage.
OPERATING INSTRUCTIONS
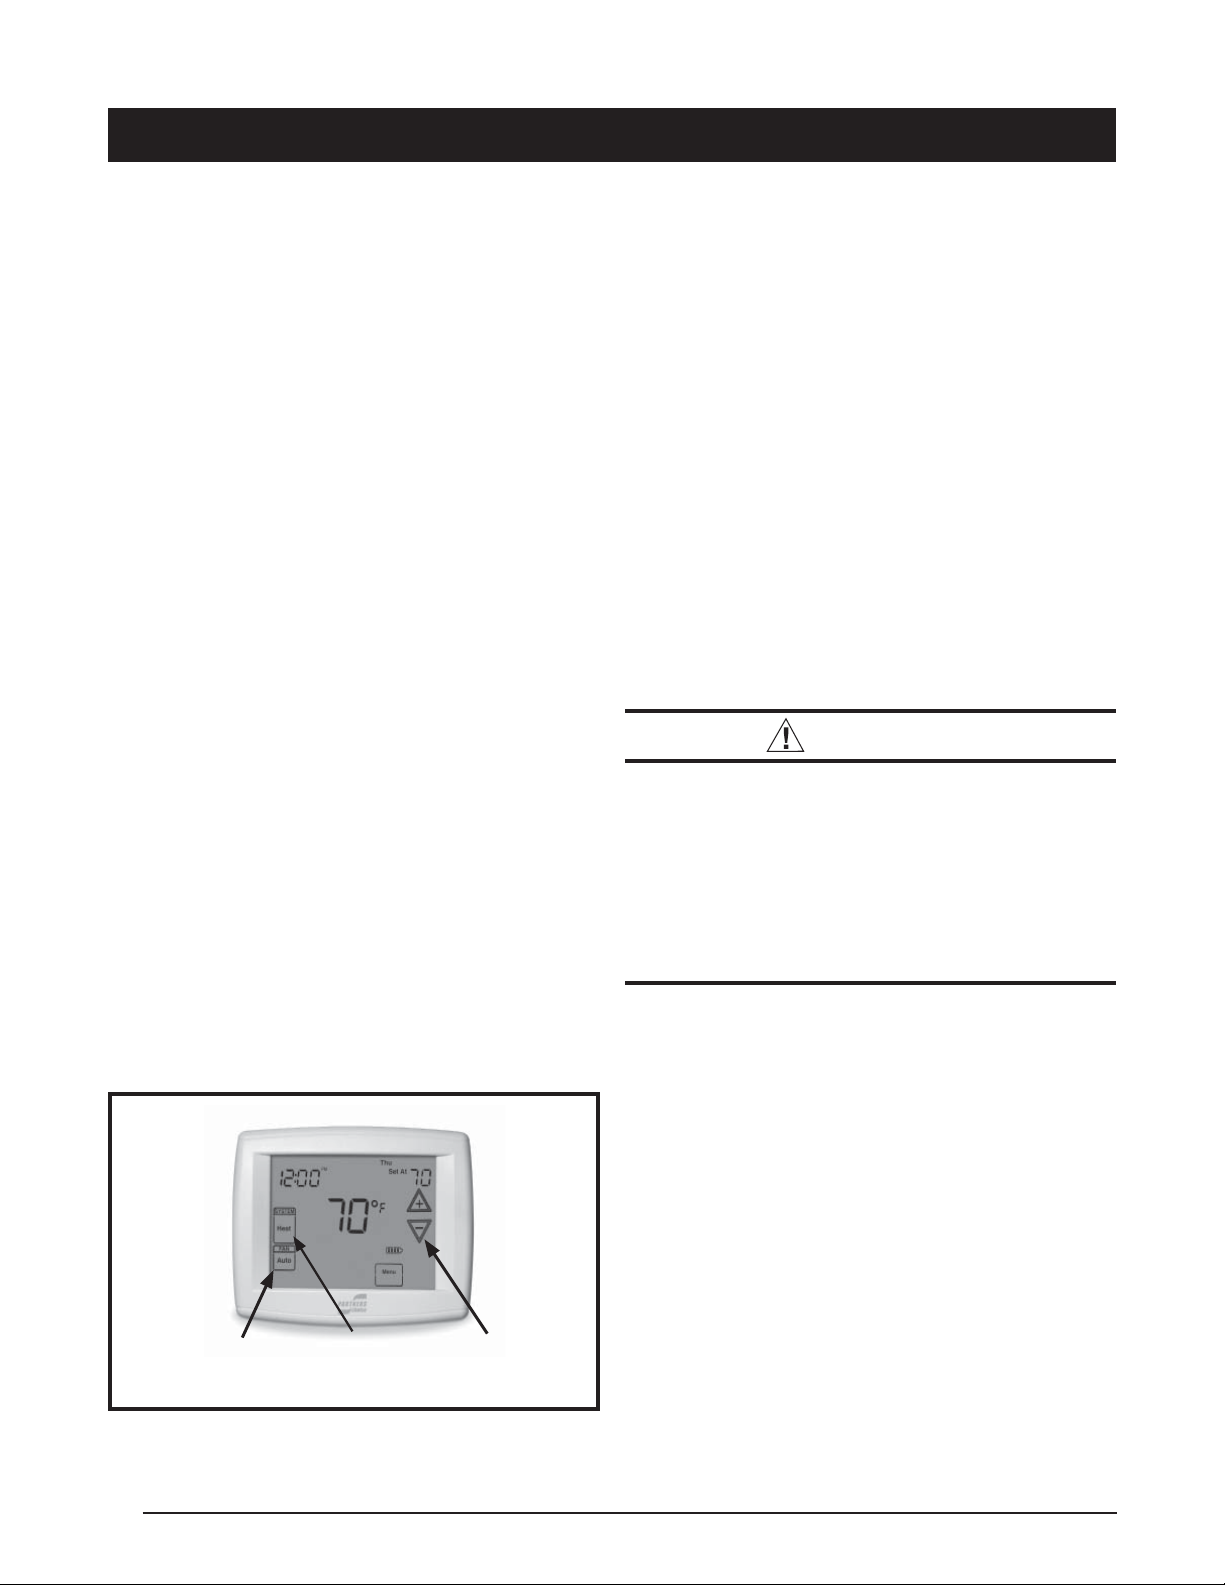
NOTE: Thermostat styles vary. Some models may not
include the AUTO mode and others will have the AUTO
in place of the HEAT and COOL. Others may include all
three. Please refer to the thermostat manufacturer’ s User
manual for detailed programming instructions.
NOTE: If the temperature level is re-adjusted, or the
system mode is reset, the fan and compressor in the
outdoor unit may not start immediately . A protective timer
circuit holds the compressor and the outdoor fan off for
approximately three minutes following a previous operation
or the interruption of the main electrical power.
Cooling Operation
1. Set the thermostat’s system mode to COOL or A UTO
and change the fan mode to AUTO. See Figure 1.
2. Set the temperature selector to the desired temperature
level. The outdoor fan, compressor, and blower
motor will all cycle on and off to maintain the indoor
temperature at the desired cooling level.
Heating Operation
1. Set the thermostat’s system mode to HEAT or AUTO
and change the fan mode to AUTO. See Figure 1.
2. Set the temperature selector to the desired temperature
level. The compressor, outdoor fan, and blo wer motor
will cycle on and off to maintain the indoor temperature
at the desired heating level.
Turning the Unit OFF
Change the thermostat’s system mode to OFF and the fan
mode to AUT O (See Figure 1). NOTE: The system will not
operate, regardless of the temperature selector setting.
Operating the Indoor Blower Continuously
The continuous indoor blower operation is typically used to
circulate the indoor air to equalize a temperature unbalance
due to a sun load, cooking, or fi replace operation.
Set the thermostat fan mode to ON (Figure 1). The indoor
blower starts immediately, and will run continually until
the fan mode is reset to AUTO.
The continuous indoor blower operation can be obtained
with the thermostat system mode set in any position,
including OFF.
UNIT MAINTENANCE
Proper maintenance is most important to achieve the best
performance from the appliance and should be performed
frequently at the beginning of each air conditioning season.
W ARNING:
Your equipment contains liquid and gaseous
refrigerant under pressure. Installation and
servicing should only be attempted by qualifi ed,
trained personnel thoroughly familiar with the
equipment and safe responsible refrigerant
handling procedures. Failure to comply with
this warning could result in equipment damage,
personal injury, or death.
• Keep the outdoor unit clean. Hose off periodically and
keep unit fi ns clear of leaves and grass clippings.
• Keep the outdoor unit clear of obstructions.
DO NOT obstruct airfl ow with tall plants or shrubs. DO
NOT store gasoline or other fl ammable materials on or
near the outdoor unit.
• Never operate the appliance without a fi lter installed in
the return air duct. Inspect fi lters frequently and replace
when necessary with fi lter of same dimensional size.
TROUBLESHOOTING
If the unit fails to operate, check the following:
• Check the thermostat setting. Make sure the system
mode and temperature settings are correct.
Fan
Mode
Figure 1. Digital Thermostat
4
System
Mode
Temperature
Selector
• Check the electrical panel for tripped circuit breakers.
• Check the fi lters for dust accumulation.
• Check the outdoor unit and make sure it is clean and
not covered with grass or leaves.
• If the items above don’t resolve your problems, then
call your nearest service technician.
Page 5
INSTALLER INFORMATION
IMPORTANT SAFETY INFORMATION
Please read all instructions before servicing this equipment.
Pay attention to all safety warnings and any other special
notes highlighted in the manual. Safety markings are
used frequently throughout this manual to designate a
degree or level of seriousness and should not be ignored.
WARNING indicates a potentially hazardous situation that
if not avoided, could result in personal injury or death.
CAUTION indicates a potentially hazardous situation that
if not avoided, may result in minor or moderate injury or
property damage.
W ARNING:
Improper installation, service, adjustment, or
maintenance may cause explosion, fi re, electrical
shock or other hazardous conditions which ma y
result in personal injury or property damage.
Unless otherwise noted in these instructions,
only factory authorized kits or accessories may
be used with this product.
CAUTION:
This unit uses refrigerant R-410A. DO NOT use
any other refrigerant in this unit. Use of another
refrigerant will damage the unit.
W ARNING:
Shut off all electrical power to the unit before
performing any maintenance or service on the
system. Failure to compl y may result in personal
injury or death.
W ARNING:
These units are fully charged with R-410A
refrigerant and ready for installation. When
a system is installed according to these
instructions, no refrigerant charging is required.
If repairs make it necessary for evacuation
and charging, it should only be attempted by
qualifi ed, trained personnel thoroughly familiar
with this equipment. Some local codes require
licensed installation service personnel to
service this type of equipment. Under no
circumstances should the homeowner attempt
to install and/or service this equipment. Failure
to comply with this warning could result in
equipment damage, personal injury, or death.
W ARNING:
Do not place combustible material on or against
the unit cabinet. Do not place combustible
materials, including gasoline and any other
fl ammable vapors and liquids, in the vicinity of
the unit.
WARNING:
PROPOSITION 65 WARNING: This product
contains fi berglass wool, a product kno wn to the
state of California to cause cancer. Disturbing
the insulation of this product during installation,
maintenance, or repair will expose you to
fi berglass wool.
• Breathing this material may cause respiratory
irritations or may cause lung cancer.
• Fiberglass wool may also cause eye
irritation, skin sensitization, or other allergic
responses in susceptible individuals.
• Always wear goggles, disposable gloves,
long sleeved shirt, and appropriate breathing
protection when working near this insulation.
If contact with skin occurs, wash immediately
with soap and water. In case of contact with
eyes, fl ush immediately with water for at
least 15 minutes. Contact a physician if needed.
W ARNING:
The information listed below and on the next
page must be followed during the installation,
service, and operation of this unit. Unqualifi ed
individuals should not attempt to interpret these
instructions or install this equipment. Failure
to follow safety recommendations could result
in possible damage to the equipment, serious
per
sonal injury or death
• The installation must conform with the National Fuel Gas
Code (ANSI 2223.1, NFPA-54). Canadian installations
must conform with CAN/CGA-B149 installation codes.
• The installer must comply with all local codes and
regulations which govern the installation of this type
of equipment. Local codes and regulations take
precedence over any recommendations contained in
these instructions. Consult local b uilding codes and the
National Electrical Code (ANSI CI) for special installation
requirements.
.
5
Page 6

• This equipment contains liquid and gaseous refrigerant
under high pressure. Installation or servicing should only
be performed by qualifi ed trained personnel thoroughly
familiar with this type equipment.
• All electrical wir ing must be completed in accordance
with local, state and national codes and regulations and
with the National Electric Code (ANSI/NFPA 70) or in
Canada the Canadian Electric Code Part 1 CSA C.22.1.
• Air Ducts must be installed in accordance with the
standards of the National Fire Protection Association
“Standards for Installation of Air Conditioning and
Ventilation Systems” (NFPA 90A), “Standard for
Installation of Residence T ype Warm Air Heating and Air
Conditioning Systems” (NFPA 90B), these instructions,
and all applicable local codes.
• Install this unit only in a location and position as specifi ed
on page 7. This unit is designed only for outdoor
installations and should be located with consideration
of minimizing the length of the supply and return ducts.
Consideration should also be given to the accessibility
of fuel, electric power, service access, noise, and shade .
• Before beginning the installation, verify that the unit
model is correct for the job. The unit model number
is printed on the data label. Follow all precautions in
the literature, on tags, and on labels provided with
the equipment. Read and thoroughly understand
the instructions provided with the equipment prior to
performing the installation and operational checkout of
the equipment.
• Use only with the type of gas approved for this unit.
Refer to the unit rating plate.
• Provide adequate combustion and ventilation air to the
unit. See pages 7 - 9.
• Provide adequate clearances around the air v ent intake
terminal. See page 8.
• Combustion products must be discharged outdoors.
Connect this unit to an approved vent system only, as
specifi ed on page 8.
• Never test for gas leaks with an open fl ame. Use a
commercially available soap solution to check all
connections (See page 17).
• Consult Table 10 (page 25), and the r ating plate for the
proper circulating air fl ow and temperature rise. It is
important that the duct system be designed to provide
the correct fl ow rates and external pressure rise. An
improperly designed duct system can result in nuisance
shutdowns, and comfort or noise issues.
• Installation of equipment may require brazing operations.
Installer must comply with safety codes and wear
appropriate safety equipment (safety glasses, work
gloves, fi re extinguisher , etc.) when perf orming brazing
operations.
• This equipment is NOT to be used for temporary heating
of buildings or structures under construction.
REQUIREMENTS AND CODES
This unit must be installed in accordance with
instructions outlined in this manual, all applicable
local building codes, and the current revision of the
National Fuel Gas Code (NFPA54/ANSI Z223.1) or
the Natural Gas and Propane Installation Code, CAN/
CGA B149.1.
Additional codes listed below are for ref erence purposes
only and do not necessarily have jurisdiction over local or
state codes. Local codes and regulations take precedence
over any recommendations contained in these instructions.
Always consult with local authorities before installing an y
gas appliance.
Combustion and Ventilation Air
• US: National Fuel Gas Code (NFGC), Air for Combustion
and V entilation
• CANAD A: Natural Gas and Propane Installation Codes
(NSCNGPIC), Venting Systems and Air Supply for
Appliances
Duct Systems
• US and CANADA: Air Conditioning Contractors
Association (ACCA) Manual Q, Sheet Metal and
Air Conditioning Contractors National Association
(SMACNA), or American Society of Heating,
Refrigeration, and Air Conditioning Engineers
(ASHRAE) Fundamentals Handbook
Electrical Connections
• US: National Electrical Code (NEC) ANSI/NFPA 70
• CANADA: Canadian Electrical Code CSA C22.1
Gas Piping and Gas Pipe Pressure Testing
• US: NFGC and National Plumbing Codes
• CANADA: NSCNGPIC
General Installation
• US: Current edition of the NFGC and the NFP A 90B . For
copies, contact the National Fire Protection Association
Inc., Batterymarch Park, Quincy , MA 02269; or American
Gas Association, 400 N. Capitol, N.W ., Washington DC
20001 or www.NFPA.org.
• CANADA: NSCNGPIC. For a copy, contact Standard
Sales, CSA International, 178 Rexdale Boulevard,
Etobicoke (Toronto), Ontario, M9W 1R3 Canada
Safety
• US: (NFGC) NFPA 54–1999/ANSI Z223.1 and the
Installation Standards, Warm Air Heating and Air
Conditioning Systems ANSI/NFPA 90B.
• CANADA: CAN/CGA-B149.1–and .2–M00 National
Standard of Canada. (NSCNGPIC)
6
Page 7
GENERAL INFORMATION
The R6GD Single Package Gas Heating / Electric Cooling
Unit is designed only for outdoor rooftop or ground level
installations and can be readily connected to the high
static duct system of a home. This unit has been tested
for capacity and effi ciency in accordance with A.R.I.
Standards and will provide many years of safe and
dependable comfort, providing it is properly installed
and maintained. With regular maintenance, this unit will
operate satisfactorily year after year . Abuse, improper use,
and/or improper maintenance can shorten the life of the
appliance and create unsafe hazards.
T o achieve optimum performance and minimize equipment
failure, it is recommended that periodic maintenance be
performed on this unit. The ability to properly perform
maintenance on this equipment requires certain tools
and mechanical skills.
Before you install this unit
The cooling load of the area to be conditioned must be
calculated and a system of the proper capacity selected.
It is recommended that the area to be conditioned be
completely insulated and vapor sealed.
Check the electrical supply and verify the power supply
is adequate for unit operation. Consideration should be
given to availability of electric power, service access,
noise, and shade. If there is any question concerning
the power supply, contact the local power company.
All units are securely packed at the time of shipment and
upon arrival should be carefully inspected for damage
prior to installing the equipment at the job site. Verify
coil fi ns are straight. If necessary , comb fi ns to remove
fl attened or bent fi ns. Claims for damage (apparent or
concealed) should be fi led immediately with the carrier.
Survey the job site to determine the best location for
mounting the outdoor unit. Choose an appropriate
location that minimizes the length of the supply and
return air ducts.
The indoor unit (air handler, furnace, etc) should be
installed before routing the refrigerant tubing. Refer
to the indoor unit’s instruction manual for installation
details.
Please consult your dealer for maintenance inf ormation
and availability of maintenance contracts . Please read
all instructions before installing the unit.
Locating the Equipment
• Select a solid, level position, preferably on a concrete
slab, slightly above the grade level, and parallel to the
home. DO NOT PLACE UNIT UNDER THE HOME.
• Overhead obstructions, poorly ventilated areas, and
areas subject to accumulation of debris should be
avoided. Do not place the unit in a confi ned space or
recessed area where discharge air from the unit to recirculate into the condenser air inlet, through the coil.
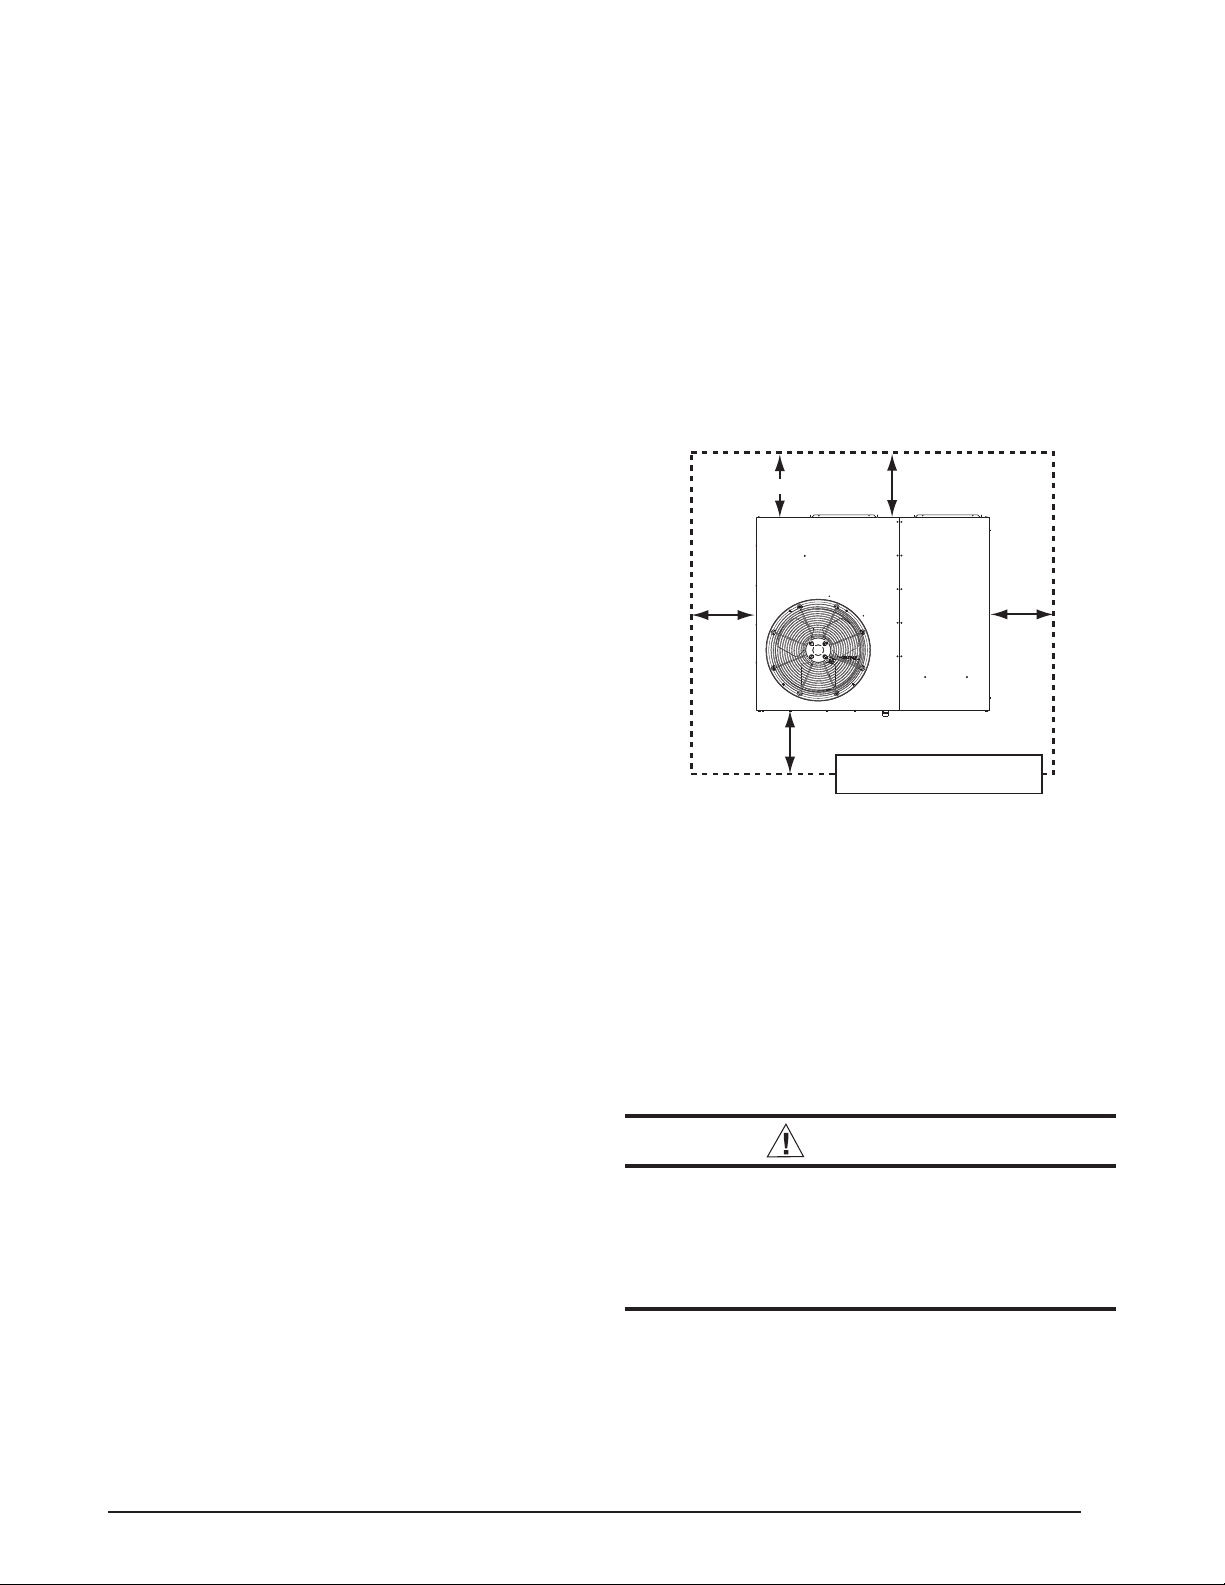
• Suffi cient clearance for unobstructed airfl ow through the
louvered control access panel and outdoor coil must be
maintained in order to achieve rated perf ormance. See
Figure 2 for minimum clearances to obstructions.
• A clearance of at least 36 inches from the blower access
panel and from the louvered control access panel is
recommended for servicing and maintenance. Where
accessibility to combustibles clearances are greater
than minimum clearances, accessibility clearances
must take preference.
• The hot condenser air must be discharged up and awa y
from the home, and if possible, in a direction with the
prevailing wind.
• If practical, place the air conditioner and its ducts in an
area where they will be shaded from the afternoon sun,
when the heat load is greatest.
36” For Coil Only
36"
36"
0"
36"
TO BE
TOP OF UNIT
UNOBSTRUCTED
Minimum Required
Clearances to Combustibles
Figure 2. Clearance Requirements
Heating Load
This unit should be sized to provide the design heating
load requirement. Heating load estimates can be made
using approved methods available from Air Conditioning
Contractors of America (Manual J); American Society of
Heating, Refrigerating, and Air Conditioning Engineers;
or other approved engineering methods. For installations
above 2,000 ft., the unit should have a sea level input
rating large enough that it will meet the heating load after
deration for altitude.
Combustion Air Requirements
W ARNING:
Installation methods other than those described
in the following sections must comply with the
National Fuel Gas Code and all applicable local
codes for providing suffi cient combustion air to
the furnace.
Provisions must be made during the installation of this
unit that provide an adequate supply of air for combustion.
• Instructions for determining the adequacy of an
installation can be found in the current revision of the
NFGC (ANSI Z223.1 / NFPA54). Consult local codes
for special requirements. These requirements are f or
US installations as found in the NFGC.
7
Page 8
• The requirements in Canada (B149.1) are structured
differently. Consult with B149.1 and local code offi cials
for Canadian installations.
Air openings in the door of the unit, warm air registers, and
return air grilles must never be restricted. If the unit does
not receive an adequate supply of air for comb ustion, the
fl ame roll-out control located above the burners will open,
turning off the gas supply to the burners. This safety device
is a manually reset switch. IMPOR T ANT NO TE: DO NO T
install jumper wires across this control to defeat its
function or reset the control without identifying and
correcting the fault condition.
If this control must be replaced, use only factory authorized
replacement parts. See the Replacement Parts List on
page 23.
W ARNING:
Combustible air must not be drawn from a
contaminated atmosphere. Excessive exposure
to contaminated combustion air will result in
safety and performance related problems.
To maximize heat exchanger life, the combustion air
must be free of chemicals that can form corrosive acidic
compounds in the combustion gases. The recommended
source of combustion air is to use clean air from outside.
DO NOT place any chemicals with fl ammable or caustic
vapors or these other corrosive chemicals near the
vent termination:
• Gasoline/Kerosene
• Permanent wave solutions
• Chlorinated waxes and cleaners
• Chlorine based swimming pool chemicals
• Water softening chemicals
• De-icing salts or chemicals
• Carbon tetrachloride
• Halogen type refrigerants
• Cleaning solvents
• Cements, glues, paint removers, varnishes, etc.
• Hydrochloric acid
• Masonry acid washing materials
• Plumbing Stack
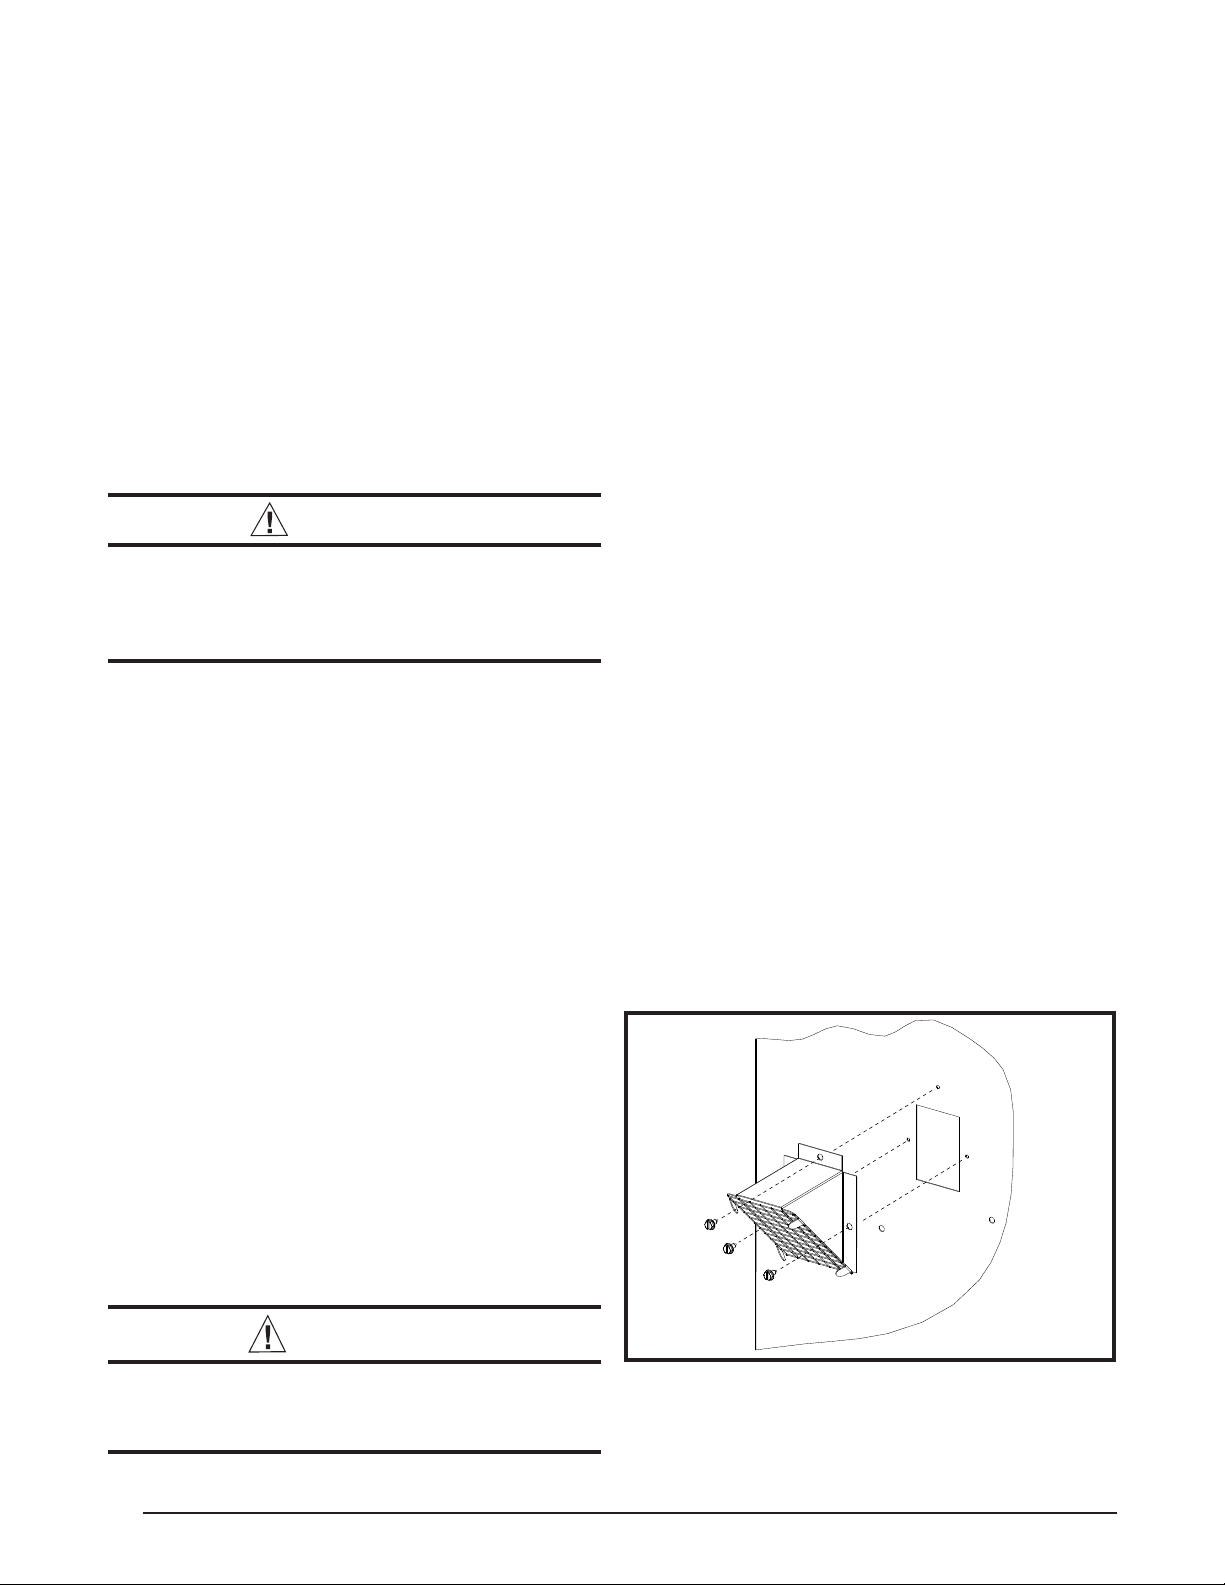
A vent cover assembly has been supplied with the unit.
and can be found secured to the gas controls within the
control area of this unit. The vent co ver assembly must
be installed to assure proper operation of the unit.
The following list summarizes the requirements for the
location of the vent system termination:
• The location of the v ent termination must be consistent
with the National Fuel Gas Code (ANSI Z223.1) or CAN/
CGA-B149 Installation Codes.
• The vent termination must be located at least 4 feet
horizontally from any electric meters, gas meters,
regulators, and relief equipment.
• The vent termination must be located at least 3 feet
above any forced air inlet located within 10 feet.
• The vent termination must be located at least 4 feet
below , 4 feet horizontally from, or 1 foot abov e any door,
window, or gravity air inlet into any building.
• The vent termination must be located at least 1 foot
above grade.
• The unit should be installed in a way that prev ents any
obstruction of the vent termination during accumulating
snow.
• The unit installation shall avoid areas where condensate
drainage may cause problems b y dropping on planters
or patios, etc. Also verify exhaust gases will not
impinge on windows or building surfaces, which may
be compromised or damaged by condensation.
• Do not install the unit such that exhaust from the vent
termination is directed into window wells, stairwells,
under decks, or in alcov es or similarly recessed areas.
The vent termination must not be located above any
public walkways.
Figure 3 shows the proper installation of the vent cover
assembly over the vent outlet on the exterior of the
corner panel. The fasteners used to secure the vent cov er
assembly have been included in the owner’s package.
Venting Requirements
This unit has been equipped with an integral venting
system and designed to operate only with this venting
system. No additional venting shall be used. This unit
must be vented to the outdoors.
WARNING:
This unit is intended for outdoor installation
only . Do not vent the unit thr ough a conventional
venting system.
8
Figure 3. Vent Assembly
Page 9
WARNING:
AVERTISSEMENT:
CARBON MONOXIDE POISONING HAZARD
Failure to follow the steps outlined below
for each appliance connected to the venting
system being placed into operation could result
in carbon monoxide poisoning or death. The
following steps shall be followed with each
individual appliance connected to the venting
system being placed in operation, while all
other appliances connected to the venting
system are not in operation:
1. Seal any unused openings in the venting
system.
2. Inspect the venting system for proper size and
horizontal pitch, as required in the National Fuel
Gas Code, ANSI Z223.1/NFPA 54 or the CSA
B149.1, Natural Gas and Propane Installation
Codes and these instructions. Determine that
there is no blockage or restriction, leakage,
corrosion and other defi ciencies which could
cause an unsafe condition.
3. As far as practical, close all building doors
and windows and all doors between the space
in which the appliance(s) connected to the
venting system are located and other spaces
of the building.
4. Close fi replace dampers.
5. Turn on clothes dryers and any appliance not
connected to the venting system. Turn on
any exhaust fans, such as range hoods and
bathroom exhausts, so they are operating at
maximum speed. Do not operate a summer
exhaust fan.
6. Follow the lighting instructions. Place the
appliance being inspected into operation.
Adjust the thermostat so appliance is operating
continuously.
7. Test for spillage from draft hood equipped
appliances at the draft hood relief opening
after 5 minutes of main burner operation. Use
the fl ame of a match or candle.
8. If improper venting is observed during any of
the above tests, the venting system must be
corrected in accordance with the National Fuel
Gas Code, ANSI Z223.1/NFPA 54 and/or CSA
B149.1, Natural Gas and Propane Installation
Codes.
9. After it has been determined that each appliance
connected to the venting system properly vents
when tested as outlined above, return doors,
windows, exhaust fans, fi replace dampers and
any other gas-fi red burning appliance to their
previous conditions of use.
RISQUE D’EMPOISONNEMENT AU
MONOXYDE DE CARBONED
Le non-respect des consignes suivantes portant
sur chacun des appareils raccordés au système
d’évacuation mis en service pourrait entraîner
l’empoisennement au monoxyde de carbone ou
la mort. Les consignes suivantes doivent être
observées pour chaque appareil raccordé au
système d’évacuation mis en service si les autres
appareils raccordés au système ne sont pas en
service:
1.
Sceller toute ouverture non utilisée de la systéme
d’évacuation;
2.
S’assurer que la systéme d’évacuation présente
des dimensions et une pente horizontale
conformes à la norme ANSI Z223.1/NFPA
54, intitulée National Fuel Gas Code ou aux
codes d’installation CSA-B149.1, ainsi qu’aux
présentes instructions. S’assurer que la systéme
d’évacuation n’est pas bloquée, restreinte,
corrodée, qu’elle ne fuit pas et qu’elle ne présente
aucun autre défaut potentiellement dangereux;
3.
Dans la mesure du possible, fermer toutes les
portes et fenêtres du bâtiment, et toutes les
portes entre la pièce où se trouve l’appareil
raccordé à la systéme d’évacuation et les autres
pièces du bâtiment.
4.
Fermer les registres des foyers;
5.
Mettre en service les sécheuses et tout autre
appareil qui n’est pas raccordé à la systéme
d’évacuation. Faire fonctionner à régime
maximal tout ventilateur d’évacuation, tel que
les hottes de cuisinière et les ventilateurs de
salles de bains. Ne pas mettre en service les
ventilateurs d’été.
6.
Respecter les instructions d’allumage. Mettre en
service l’appareil à l’essai. Régler le thermostat
de manière à ce que l’appareil fonctionne sans
interruption;
7.
Vérifier s’il y a débordement à l’orifice
d’évacuation du coupe tirage des appareils dotés
d’un coupe tirage 5 minutes après l’allumage
du brûleur principal. Utiliser la fl amme d’une
allumette ou d’une chandelle.
8.
Si l’on constate, au cours de l’un des essais
qui précèdent, que l’évacuation est défi ciente,
corriger le système d’évacuation conformément
à la norm ANSI Z223.1/NFPA 54, National Fuel
Gas Code, et (ou) aux codes d’installation CSA
B149.1.
9.
Après avoir déterminé que tous les appareils
raccordés à la systéme d’évacuation évacuent
correctement tel que prescrit ci-dessus,
rouvrir les portes et les fenêtres et remettre les
ventilateurs d’évacuation, les registres de foyers
et tout autre appareil fonctionnant au gaz à leur
état de fonctionnement initial.
9
Page 10
Circulating Air Supply
W ARNING:
Products of combustion must not be allo wed to
enter the return air ductwork or the circulating air
supply . Failure to prevent products of combustion
from being circulated into the living space can
create potentially hazardous conditions including
carbon monoxide poisoning that could result in
personal injury or death.
All return ductwork must be adequately sealed,
all joints must be taped, and the ductwork must
be secured to the unit with sheet metal screws.
When return air is provided through the bottom
of the unit, the joint between the unit and the
return air plenum must be air tight.
The roof curb or cement pad on which the unit is
mounted must provide sound physical support of
the unit with no gaps, cracks, or sagging between
the unit and the curb or pad.
Return air and circulating air ductwork must not
be connected to any other heat producing device
such as a fi replace insert, stove, etc. Doing so
may result in fi re, explosion, carbon monoxide
poisoning, personal injury, or pr operty damage.
Air Ducts
This unit is designed only for use with a supply and return
duct. Air ducts should be installed in accordance with the
standards of the National Fire Protection Association
“Standard for Installation of Air Conditioning Systems”
(NFP A 90A), “Standard for Installation of Residence Type
Warm Air Heating and Air Conditioning Systems” (NFPA
90B), and all applicable local codes. NFPA publications are
available b y writing to: National Fire Protection Association,
Batterymarch Park, Quincy , ME 02269 or visit www.NFP A.
org on the web.
• Design the duct work according to Manual D by the Air
Conditioning Contractors of America (ACCA).
• The ducts must be properly sized and not exceed 0.2”
W.C. pressure drop at 400 scfm per nominal ton of
cooling capacity.
• Duct work should be attached directly to the unit fl anges
for horizontal applications.
• If roof curb is installed, the ducts must be attached to
the curb hangers, not the unit.
• It is recommended that the outlet duct be provided
with a removable access panel. The opening should
be accessible when the unit is installed in service and
shall be sizes so that smoke or refl ected light may be
observed inside the casing to indicate the presence of
leaks in the heat exchanger . The co v er f or the opening
shall be attached in a way that will prevent leaks.
• If outside air is utilized as return air to the unit for
ventilation or to improve indoor air quality, the system
must be designed so that the return air to the unit is
not less than 50° F (10° C) during heating operation.
• If a combination of indoor and outdoor air is used, the
ducts and damper system must be designed so that the
return air supply to the furnace is equal to the return air
supply under normal, indoor return air applications.
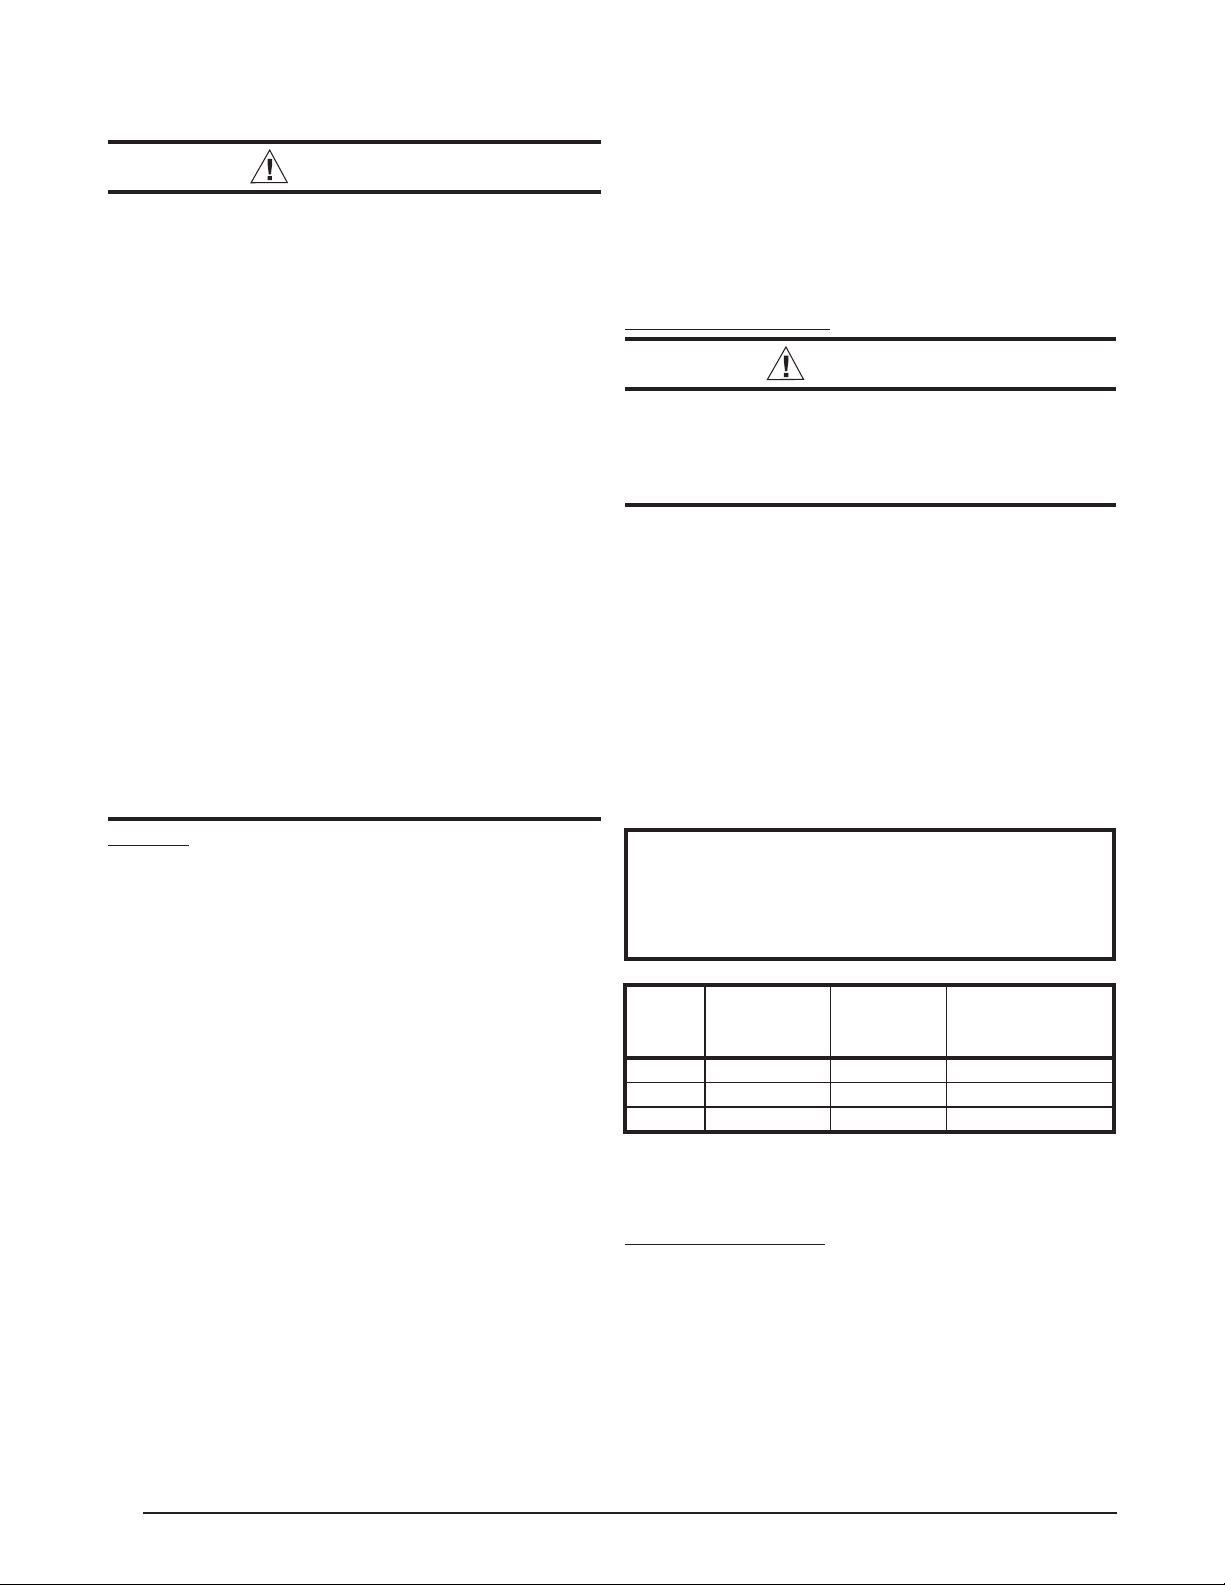
Air Filter Requirements
W ARNING:
Never operate the unit without a fi lter in place.
Dust and lint could accumulate on internal parts,
resulting in loss of effi ciency , equipment damage
and possible fi re.
• A suitable air fi lter must be installed upstream of the
evaporator coil of the return air system. Refer to Table
1 for recommended fi lter sizes.
• All return air must pass through the fi lters before entering
the evaporator coil.
clean and replaced frequently to ensure proper operation
of unit. Dirty or clogged fi lters will reduce the effi ciency
of the unit and result in unit shutdowns.
• Air fi lter pressure drop must not exceed 0.08 inches WC .
• Downfl ow Installations require an internal fi lter accessory
kit to be installed.
• Hor izontal Installations require the air fi lter system be
installed in the return air ductwork.
NOTE TO INSTALLER: After installing or replacing the
fi ltration system for this unit, add the f ollowing statement
on or adjacent to the fi lter service panel: “Replace
fi lter(s) installed in your system only with the same
dimensional size fi lters that are being replaced.”
Nominal
Cooling
(Tons)
3.0 1,100 - 1,300 625 25 x 25
4.0 1,400 - 1,800 850 18 x 24 (2 required)
5.0 1,800 - 2,200 1,000 20 x 25 (2 required)
* Based on velocity of 300 ft/min for disposable fi lters and
500 ft/min for high velocity (cleanable) Filters.
Unconditioned Spaces
All duct work passing through unconditioned space must
be properly insulated to minimize duct losses and prevent
condensation. Use insulation with an outer v apor barrier .
Refer to local codes for insulation material requirements.
Approximate
Air Flow
Range (CFM)
Table 1. Air Filter Requirements
It is important that all fi lters be kept
Approximate
Filter Area
(Sq. In.)*
Recommended
Filter Size
(In. x In.)
10
Page 11
Acoustical Duct Work
Certain installations may require the use of acoustical
lining inside the supply duct work.
• Acoustical insulation must be in accordance with the
current revision of the Sheet Metal and Air Conditioning
Contractors National Association (SMACNA) application
standard for duct liners.
• Duct lining must be UL classifi ed batts or blankets with
a fi re hazard classifi cation of FHC-25/50 or less.
• Fiber duct work may be used in place of internal duct
liners if the fi ber duct work is in accordance with the
current revision of the SMACNA construction standard
on fi brous glass ducts. Fibrous duct work and internal
acoustical lining must be NFPA Class 1 air ducts when
tested per UL Standard 181 for Class 1 ducts.
UNIT INSTALLATION
Packaging Removal
Remove the shipping carton and User’s Manual from the
equipment. Take care not to damage the tubing connections
when removing the carton. For rooftop installations, remove
and discard the two supports attached beneath the unit.
Rigging and Hoisting
W ARNING:
To avoid the risk of property damage, personal
injury, or death, it is the rigger’s responsibility
to ensure that whatever means are used to hoist
the unit are safe and adequate:
• The lifting equipment must be adequate for the
load. Refer to T able 9 (page 24) for unit weights.
• The unit must be lifted from the holes in the
base rails using cables or chains.
• Spreader bars are required to protect the unit
and ensure even loading.
• Keep the unit in an upright position at all times.
The rigging must be located outside the units
center of gravity. Refer to Figure 10 (page 24)
for locating the center of gravity.
• All panels must be securely in place during
rigging and hoisting.
Clearances to Combustible Materials
R6GD units are certifi ed as combination heating and
cooling equipment for outdoor rooftop or ground level
installations. Units may be installed on combustible
fl ooring or Class A, B, or C roofi ng material when used
with bottom supply and return air ducts as long as the
following requirements are met:
• If using horizontal supply and return air ducts, the
horizontal roof curb kit and return air kit must be installed
prior to unit installation. Horizontal roof curb is required.
• If using bottom discharge with return air ducts a roof curb
must be installed prior to unit installation. See Rigging
and Hoisting section for setting of the unit.
• Suffi cient clearance for unobstructed airfl ow through
the outdoor coil must also be maintained in order to
achieve rated perf ormance. See page 7 for inf ormation
about locating the equipment.
Ground Level
Ground level installations must be located according to
local building codes or ordinances and these requirements:
• Clearances must be in accordance with those shown
in Figure 2 (page 7).
• A suitable mounting pad (Figure 4, page 12) must be
provided and be separate from the building f oundation.
The pad must be level to ensure proper condensate
disposal and strong enough to support the unit’s weight.
The slab height must be a minimum of 2” (5cm) abo v e
grade and with adequate drainage.
• Units require hor izontal roof curb and return air kit for
horizontal installations.
• Ductwork should be attached directly to fl anges on
panels supplied in horizontal duct conversion kits.
Rooftop
Rooftop installations must be located according to local
building codes or ordinances and these requirements:
• The roof must be capable of handling the weight of the
unit. F or unit w eights, see Tab le 9. Reinforce the roof if
necessary.
• The appropriate accessory roof curb (Figure 5, page 12)
must be installed prior to unit installation. The roof curb
must be square and level to ensure proper condensate
drainage. Please follo w all instructions provided with
the kit.
• Secure roof curb or frame to roof using acceptable
mechanical methods per local codes. NOTE:
the two supports beneath the unit have been removed.
Condensate Drain
Condensate is removed from the unit through the 3/4”
female pipe fi tting (Figure 6, page 12) located on the front
side of the unit. Install a 2 inch condensate trap in the
drain line of the same size and prime with water. When
connecting rigid drain line, hold the female fi tting with a
wrench to prevent twisting. Do not over tighten! Refer
to local codes and restrictions for proper condensate
disposal requirements.
Horizontal to Downfl ow Conversion
The unit is shipped ready for horizontal duct connections.
If down fl ow ducts are required, the unit must be converted
following the steps below for both the supply and return
ducts.
1. Remove the horizontal duct cap.
2. Locate the duct cap inside the duct openings and
remove the screw holding it in place.
3. Lift the cap out of the unit. (Hint: The cap can be pushed
up from the bottom by reaching through the fork slot).
4. Cover the horizontal duct opening with the horizontal
duct cap. The insulation will be on the indoor side.
5. Fasten the cover with screws to seal.
Make sure
11
Page 12

Figure 4. Ground Level Installation
Figure 5. Roof Top Installation
Removal of Internal Filter Rack (3 Phase Only)
1. Remove the return air panel from the unit.
2. Remove the height adjustment screw from the inside
of the rack.
3. Remove (1) screw securing the assembly to the coil
located on the left leg of the rack. NOTE: The assembly
can now be easily collapsed and removed from the unit.
See Figure 7 for fi lter rack securing screw locations.
Securing
Screws
Figure 7. Internal Filter Rack Location
Installing Filters in the Filter Rack (3 Phase Only)
1. Remove access panel screws from return air panel.
(Hint: Loosen the unit’s top panel screws near the
top edge of the access panel. The access panel was
designed to be captured underneath the top panel.)
2. Slide the fi rst fi lter between both guide channels of
fi lter rack and allow the fi lter to drop easily into place .
3. Verify the bottom of the fi lter is within the channels of
the rack.
4. Slide the 2nd fi lter between both guide channels of
fi lter rack.
5. Verify the bottom of the fi lter is within the channels of
the rack.
6. Replace access cover by sliding the top edge of panel
under the lip of the unit’s top panel. Secure access
panel by replacing the screws.
Removing Filters from Filter Rack (3 Phase Only)
1. Remove access panel screws from return air panel.
(Hint: Loosen the unit’s top panel screws near the
top edge of the access panel. The access panel was
designed to be captured underneath the top panel.)
2. Remove upper fi lter by gently pulling fi lter through the
access panel opening.
3. Remove lower fi lter by lifting media to top of fi lter rack.
Remove in the same manner as described in step 2.
4. Install new fi lter in the fi lter rack as described in the
previous section.
Condensate Drain
Figure 6. Condensate Drain Location
12
Unit Size Internal Filter Size
R6GD-X36
R6GD-X48 / X60
Table 2. Internal Filter Sizes
(2) 16” x 25” x 1”
or
(2) 16” x 25” x 2”
(2) 18” x 25” x 1”
or
(2) 18” x 25” x 2”
Page 13

ELECTRICAL WIRING
W ARNING:
T o avoid risk of electrical shoc k, personal injury ,
or death, disconnect all electrical power to the unit
before performing any maintenance or service.
The unit may have more than one electrical supply .
Label all wires prior to disconnection when
servicing the unit. Wiring errors can cause
improper and dangerous operation
• All electrical connections must be in compliance with
all applicable local codes and ordinances, and with
the current revision of the National Electric Code
(ANSI/NFPA 70).
• For Canadian installations the electrical connections
and grounding shall comply with the current Canadian
Electrical Code (CSA C22.1 and/or local codes).
Pre-Electrical Checklist:
Verify the voltage, frequency, and phase of the supply
source match the specifi cations on the unit rating plate.
Verify that the service provided by the utility is suffi cient
to handle the additional load imposed by this equipment.
See Table 3 or the unit wiring label for proper high and
low voltage wiring.
V erify factory wiring is in accordance with the unit wiring
diagram (Figures 12 - 13, pages 28 - 29). V erify none of
the connections loosened during shipping or installation.
Line V oltage
• The line voltage to the unit should be supplied from a
dedicated branch circuit containing the correct fuse or
circuit breaker for the unit.
• An electrical disconnect must be located within sight
of and readily accessible to the unit. This switch shall
be capable of electrically de-energizing the outdoor unit.
See unit data label for proper incoming fi eld wiring. Any
other wiring methods must be acceptable to authority
having jurisdiction.
• Use only copper wire for the line voltage power supply
to this unit (T ab le 4, page 14). Use proper code agency
listed conduit and a conduit connector for connecting
the supply wires to the unit. Use of r ain tight conduit is
recommended.
• Provide power supply for the unit in accordance with
the unit wiring diagram and the unit rating plate.
• Overcurrent protection must be provided at the branch
circuit distribution panel and sized as shown on the unit
rating label and according to applicable local codes. See
the unit rating plate for maximum circuit ampacity and
maximum overcurrent protection limits.
• A wir ing diagram i s lo cated on th e inside c over of th e
control access panel of the outdoor unit. The installer
should become familiar with the wiring diagram be fore
making any electrical connections to the outdoor unit.
See Figures 12 - 13.
• If any of the original wires supplied with the unit must
be replaced, they must be replaced with material of the
same gauge and temperature rating.
• Units are shipped from the factory wired for 240 volt
transformer operation. For 208V operation, remo ve the
lead from the transformer terminal marked 240V and
connect it to the terminal marked 208V. Three phase,
460V units are shipped wired for 460V operation.
• Internally mounted circuit breakers are available as fi eld
installed options. These circuit breakers can be used
as an electrical disconnect.
• Connect the line-voltage leads to the terminals on the
contactor (or the circuit breaker if the fi eld installed circuit
breaker kits are used) inside the control compartment.
Model
Number
R6GD-X36C
R6GD-X48C
R6GD-X60C
R6GD-X36D
R6GD-X48D
R6GD-X60D
Note: FLA = Full Load Amps; LRA = Lock Rotor amps; RLA = Rated Load Amps.
Heating Input
(BTUh)
72,000 208/-230/60/3 187 253 11.6 73.0 1.2 4.1 21.2 30
96,000 208/-230/60/3 187 253 11.6 73.0 1.2 4.1 21.2 30
96,000 208/-230/60/3 187 253 15.3 83.1 1.2 6 27.7 40
120,000 208/-230/60/3 187 253 15.3 83.1 1.2 6 27.7 40
96,000 208/-230/60/3 187 253 17.4 110.0 1.2 7.6 31.9 45
120,000 208/-230/60/3 187 253 17.4 110.0 1.2 7.6 31.9 45
72,000 460/60/3 414 506 6.4 38 0.6 2.1 12.1 15
96,000 460/60/3 414 506 6.4 38 0.6 2.1 12.1 15
96,000 460/60/3 414 506 6.9 41 0.6 3.2 13.8 20
120,000 460/60/3 414 506 6.9 41 0.6 3.2 13.8 20
96,000 460/60/3 414 506 8.6 52 0.6 4.0 16.7 25
120,000 460/60/3 414 506 8.6 52 0.6 4.0 16.7 25
Nominal
Electrical
Supply
Voltage Range Compressor
Min. Max. RLA LRA
Table 3. Electrical Data.
Fan
Amps
Blower
Motor
Amps
Minimum
Circuit
Ampacity
Maximum
Over-current
Protection
13
Page 14

COPPER WIRE SIZE — AWG
(1% V oltage Drop)
Supply Wire Length-Feet
200 150 100 50
6 8 10 14 15
46812 20
46810 25
44610 30
3468 35
3468 40
2346 45
2346 50
2346 55
1234 60
Wire Size based on N.E.C. for 60° type copper conductors.
Supply Circuit
Ampacity
Table 4. Copper Wire Size
Grounding
W ARNING:
The unit cabinet must have an uninterrupted or
unbroken electrical ground to minimize personal
injury if an electrical fault should occur. Do not
use gas piping as an electrical ground
This unit must be electrically grounded in accordance
with local codes or, in the absence of local codes, with
the National Electrical Code (ANSI/NFP A 70) or the CSA
C22.1 Electrical Code. Use the g rounding lug provided in
the control box for grounding the unit.
!
Thermostat / Low Voltage Connections
• The R6GD unit is designed to operate from a 24 VAC
Class II control circuit. The control circuit wiring must
comply with the current provisions of the NEC (ANSI/
NFPA 70) and with applicable local codes having
jurisdiction. Thermostat connections should be made
in accordance with the instructions supplied with the
thermostat and the indoor equipment.
• The low voltage wires must be properly connected.
Route 24V control wires through the sealing grommet
near the power entrance. Recommended wire gauge
and wire lengths for typical thermostat connections are
listed in Table 5.
• Several thermostat options are available depending
on the accessories installed with the unit. Select a
thermostat that operates in conjunction with the installed
accessories.
• Back-up fossil fuel heat capability is required with the
Dual Fuel iHybrid™ heat pump packaged system. This
system is capable of providing two stages of cooling, two
stages of heating in heat pump mode, and an additional
two stages of secondary gas heating.
Recommended T -Stat Wire
Thermostat
Wire Gauge
24 55 25
22 90 45
20 140 70
18 225 110
Length (Unit to T-Stat)
2-Wire
(Heating)
5-Wire
(Heating/Cooling)
Table 5. Thermostat Wire Gauge
14
Gray
Black
Blue
1
2
3
4
5
6
7
8
9
Green
Yellow
Economizer Plug
Furnace Board
R C Y G W
Gas
Valve
Indoor Thermostat
Sub-Base
Figure 8. Typical Thermostat Connection for 1-Stage Cool / 1-Stage Heat
X
(Optional, Check thermostat Instructions)
Y2
Y1
R
G
W1
Page 15

• The thermostat should be mounted about 5 feet above the
fl oor on an inside wall. DO NOT install the thermostat on
an outside wall or any other location where its operation
may be adversely affected by radiant heat from fi replaces,
sunlight, or lighting fi xtures, and convective heat from
warm air registers or electrical appliances. Ref er to the
thermostat manufacturer’s instruction sheet f or detailed
mounting information.
Checking Heat Anticipator Settings
• Add the current draw of the system components.
OR
• Measure the current fl ow on the thermostat R-W circuit
after the circulating blower motor has started. Set the heat
anticipator according to the thermostat manufacturer’s
instructions for heat anticipator settings.
Optional Outdoor Thermostat
If two stage heating is desired, an outdoor thermostat
can be installed in the fi eld with 2-stage electric heat. To
install the outdoor thermostat, remove the orange wire
from the E terminal on the terminal block, and connect
to the outdoor thermostat. Connect the other side of the
outdoor thermostat to W2 from the thermostat.
Blower Speed
The blower speed is preset at the f actory for operation at
the same speed for heating and cooling. These factory
settings are listed in Table 10 (page 25). For optimum
system performance and comfort, it may be necessary
to change the factory set speed.
Unbalanced 3-Phase Supply Voltage
V oltage unbalance occurs when the voltages of all phases
of a 3-phase power supply are no longer equal. This
unbalance reduces motor effi ciency and performance.
Some underlying causes of voltage unbalance may include:
Lack of symmetry in transmission lines, large single-phase
loads, and unbalanced or overloaded transformers. A
motor should never be operated when a phase imbalance
in supply is greater than 2%.
Perf orm the follo wing steps to determine the percentage
of voltage imbalance:
1. Measure the line
voltages of your 3-phase
Example
:
power supply where it
enters the building and
at a location that will
only be dedicated to the
AB = 451V
BC = 460V
AC = 453V
unit installation. (at the
units circuit protection or
disconnect).
2. Determine the average voltage in the power supply.
In this example, the measured line voltages were
451, 460, and 453. The aver age would be 454 volts
(451 + 460 + 453 = 1,364 / 3 = 454).
3. Determine the maximum deviation:
CAUTION:
To avoid personal injury or property damage,
make sure the motor leads do not come into
contact with any uninsulated metal components
of the unit.
1. Shut off all electrical power to the unit and remove the
blower panel. Locate the orange, red and blue wires
terminated to the blower motor. NOTE: The orange wire
controls cooling operation while the red wire controls
heating operation. The blue wire controls fan-only
operation.
2. V erify the required speed from the airfl ow data found in
Table 10. Place appropriate wire on the correct motor
speed tap for the required airfl ow point.
3. The integrated furnace control can be set to a 2 or 3
speed mode. When a G only call is received from the
thermostat (indicating a continuous fan mode), the
blower will run the heating speed when the 2-SPD
mode is selected using the jumper on the control
board (factory setting). When 3-SPD mode is selected,
the fan only speed may be different than the heating
or cooling speed. If no jumper is present, the control
defaults to the 2-SPD mode of operation. A call for
heating or cooling takes priority over fan only mode
Example:
From the v alues given in step 1, the BC voltage
(460V) is the greatest difference in value from
the average:
460 - 454 = 6
Highest Value
454 - 451 = 3
454 - 453 = 1
4. Determine percent of
voltage imbalance by
using the results from
steps 2 & 3 in the following
equation.
% Voltage Imbalance
=100x
Example:
100
x
= 1.32%
6
454
max voltage deviation
from average voltage
average voltage
The amount of phase imbalance (1.32%) is satisfactory
since the amount is lower than the maximum allowable
2%. Please contact your local electric utility company if
your voltage imbalance is more than 2%.
15
Page 16

Optional Humidistat
An optional humidistat may be installed in the return
air duct for humidity control (when needed), maximum
system capacity and energy effi ciency. The humidistat
senses when humidity in the return air stream is above
a preset level and sends a signal to the motor to reduce
airfl ow. This allows more moisture to be remov ed until the
humidity level drops.
NOTE: The packaged heat pump unit is pre-programmed
for humidistat operation. Remove the jumper connector
between the two terminals marked HUM on the variable
speed board.
Install the humidistat in the return air duct as directed in
the installation instructions included with the kit. Wire the
humidistat through the low-voltage wire entrance in the
packaged heat pump unit to the quick-connect terminals
marked HUM. Wire the humidistat to open on rise in
humidity.
CAUTION:
To avoid personal injury or property damage,
make certain that the motor leads cannot
come into contact with any uninsulated metal
components of the unit.
Check all factory wiring to the units wiring diagram. Inspect
the factory wiring connections to be sure none loosened
during shipping or installation.
GAS SUPPLY AND PIPING
• All gas piping must be installed in compliance with
local codes and utility regulations. In the absence
of local codes the gas line installation must comply
with the latest edition of the National Fuel Gas Code
ANSI Z223.1 or CAN/CGA B149 Installation Codes.
• Some local codes require the installation of a manual
main shut-off valve and ground joint union external
to the furnace (Figure 9). The shut-off v alve should
be readily accessible for service and/or emergency
use. Consult the local utility or gas supplier for
additional requirements regarding placement of the
manual main gas shut-off.
• The manifold pressure must be set to the appropriate
value for your installation. Refer to the Manifold
Pressure Adjustment section (page 20) for
adjustment instructions.
• Gas piping must never run in or through air ducts,
chimneys, gas vents, or elevator shafts.
• Compounds used to seal joints on gas piping m ust
be resistant to the actions of LP propane gas.
• The main gas valve and main power disconnect to
the furnace must be properly labeled b y the installer
in case emergency shutdown is required.
• An 1/8 inch NPT plugged tap must be installed in
the gas line immediately upstream of the gas supply
connection to the furnace for use when measuring
the gas supply pressure. The plug should be readily
accessible for service use.
• A drip leg should be installed in the vertical pipe
run to the unit (Figure 9).
Automatic Gas Valve
(with manual shut-off)
Burner
Assembly
Manifold
Figure 9. Typical Gas Hookup - Right Side Entry
Shut-Off V alve
with 1/8 NPT
plugged tap
Ground
Joint
Union
Some utilities
require Shut-Off
Valve to be
4 to 5 feet
above floor
Dripleg
16
Page 17

This unit only has right side gas entry. When connecting
the gas, provide clearance between the gas supply line
and the entry hole in the unit’s casing to avoid unw anted
noise and/or damage to the unit. A typical gas service
hookup is shown in Figure 8.
Table 11 (page 26) lists gas pipe capacities for standard
pipe sizes as a function of length in typical applications
based on nominal pressure drop in the line.
Leak Check
WARNING:
FIRE OR EXPLOSION HAZARD
Never test for gas leaks with an open fl ame. Check
all connections using a commercially available
soap solution. A fi re or explosion may result
causing property damage, personal injury or
loss of life. Failure to f ollow the safety warnings
exactly could result in serious injury, death or
property damage.
After the gas piping to the unit is complete, all connections
must be tested for gas leaks. This includes pipe connections
at the main gas valve, emergency shutoff valve and
other gas connectors. A soap and water solution can be
applied on each joint or union using a small paintbrush.
If any bubbling is observed, the connection is not sealed
adequately and must be retightened. Repeat the tightening
and soap check process until bubbling ceases.
• If pressure testing the gas supply lines at pressures
greater than 1/2 psig (14 inches WC), the unit must
be disconnected from the gas supply piping system
to prevent damage to the gas valve.
• If the test pressure is less than or equal to 1/2 psig
(14 inches WC), the unit must be isolated from the
gas supply line by closing the manual shut-off v alve.
High Altitude Conversion
Conversion of this unit must be performed by qualifi ed
service personnel, using only approved parts. All
installations must be made in accordance with the National
Fuel Gas Code and/or local jurisdiction codes.
WARNING:
The reduction of input rating necessary for high
altitude installation may only be accomplished
with factory supplied orifi ces. Do not attempt to
drill out orifi ces in the fi eld. Improperly drilled
orifices may cause fire, explosion, carbon
monoxide poisoning, personal injury or death.
High altitude conversion can be fi eld performed by a
simple adjustment of manifold pressure or a change of
the orifi ces (if necessary) as described on page 20. The
changes required depend on the installation altitude and
the heating value of the gas (based on sea level) which
can be obtained from your local gas utility. The heating
value of gas at high altitude is alwa ys low er than the sea
level heating value. The heating values listed in Tables 6
& 7 (page 20) are based on sea level values.
If installing this unit above 2,000 f eet, the input rate must
be reduced 4% per 1,000 feet of altitude (Example: 12%
at 3,000 feet, 16% at 4,000 feet, etc). NOTE: Deration is
necessary to compensate for low atmospheric pressure
at high altitudes.
For altitudes between 5,000 and 10,000 feet above sea
level, the unit can be con verted by adjusting the furnace
manifold pressure. See T ables 6 or 7 for the correct manifold
pressure settings.
LP/Propane Gas Conversion
W ARNING:
This unit was equipped at the factory for use
with natural gas only. A special kit, supplied by
the manufacturer , is required to con vert the unit
to operate on LP/propane gas. F ailure to use the
proper conver sion kit can cause fi re, explosion,
property damage, carbon monoxide poisoning,
personal injury, or death.
Conversion of this equipment to LP/Propane gas must
be made by qualifi ed service personnel, using approved
factory parts. Conversion to LP can be accomplished by
replacing the natural gas orifi ces with the appropriate LP/
Propane orifi ces and then adjusting the manifold pressure
(page 20).
altitude) is detailed in the installation instructions provided
with the conversion kit. Please follow the instructions
provided in each kit. Approved conversion kits are:
• The United States LP/Propane Gas Sea Level and High
Altitude Conversion Kit is f or LP/propane conversion in
the United States at altitudes between zero and 10,000
ft. above sea level.
• The Canadian LP/Propane Gas Sea Level and High
Altitude Conversion Kit is for LP/propane conversions
in Canada at altitudes between zero and 4,500 ft. above
sea level.
For installations between zero and 4,999 ft. above sea
level, a #54 drill size orifi ce should be used. Installations
5,000 ft. above sea level require a # 55 drill size orifi ce.
Table 7 (page 20) lists the correct orifi ce size to use at
different altitudes.
After changing the orifi ces, it is required that you measure
the gas input rate by clocking the gas meter and using
the local gas heating value. See Verifying and Adjusting
the Firing Rate section on page 19.
Con version to LP/Propane (sea lev el and high
17
Page 18

START UP AND ADJUSTMENTS
Pre-Start Check List
Verify the unit is level and allows condensate to drain.
Verify all clearance requirements are met and there is
free airfl ow to and from the outdoor coil.
V erify that the duct work is sealed to prev ent air leakage.
Verify that the line voltage power leads are securely
connected and the unit is properly grounded.
V erify that the low voltage wires are securely connected
to the correct leads in the low voltage area of the control
box.
Verify that the gas line service pressure does not exceed
10.0 inches WC (0.36 psig), and is not less than 4.5
inches WC (0.16 psig) for natural gas. For LP gas the
line service pressure must not exceed 14 inches WC
(0.51 psig) and must not be less than 11.0 inches WC
(0.40 psig).
Verify that the fl ame roll-out control is closed. If necessary,
press the red button to reset the control. DO NOT install
a jumper wire across the control to defeat its function.
If the control reopens upon start-up, DO NOT reset
the control without identifying and correcting the fault
condition which caused the control to trip.
Verify that the gas line has been purged and all
connections are leak tight.
Verify that all exterior panels are replaced and securely
fastened.
Verify that the outdoor fan turns freely.
Verify that the power supply branch circuit ov ercurrent
protection is sized properly.
Verify that the thermostat is wired correctly. The
thermostat function switch should be set to OFF and
the thermostat fan switch should be set to AUTO.
Start-Up Procedure
WARNING:
If this unit is equipped with crankcase heaters,
allow 24 hrs for heating of the refrigerant
compressor crankcase prior to start up or anytime
the power has been removed for more than 12
hrs. Failure to comply may result in damage or
cause premature failure of the system.
• Check all electrical wiring for loose connections and
tighten as required.
• Check unit for return air fi lters and condensate trap.
• Close all electrical disconnects to energize the system.
Air Circulation
Leave the thermostat system mode on OFF, and set the
fan mode to ON. Blower should run continuously. Check
the air delivery at the supply registers and adjust register
openings for balanced air distribution. Examine ductwork
for leaks or obstruction if insuffi cient air is detected. Set
the thermostat fan mode to AUTO. The blower should
stop running.
System Cooling
1. Set the thermostat’s system mode to COOL and the
fan mode to AUTO. Gradually lower the thermostat
temperature setpoint below room temperature and verify
the compressor, fan and indoor blower energize.
2. Feel the air being circulated by the indoor blower and
verify that it is cooler than ambient temperature. Listen for
any unusual noises. If unusual sounds occur, determine
the source of the noise and correct as necessary.
3. Allo w the cooling system to operate for sev eral minutes
and then set the temperature selector above room
temperature. Verify the fan and compressor cycle off
with the thermostat. NOTE: The blower will also stop
after an 85 - 90 second delay.
System Heating
1. Set the thermostat to the lowest setting.
2. Follow the procedures given on the operating instruction
label, this manual or attached inside the louvered control
access panel.
3. Set the thermostat above room temper ature and verify
the Operating Sequence. See page 20.
4. Verify that the compressor and outdoor fan motor are
not energized.
5. After the unit has run for approximately fi ve minutes,
set the thermostat below room temperature and verify
the shutdown sequence; steps 10 -12 in the Oper ating
Sequence section (page 20).
Verifying and Adjusting Temperature Rise
Verify the temperature rise through the unit is within the
range specifi ed on the unit data label. Temperature rises
outside the specifi ed range could result in premature heat
exchanger failure.
1. Place thermometers in the return and supply air stream
as close to the unit as possible. The thermometer on the
supply air side must be shielded against direct radiation
from the heat exchanger to avoid false readings.
2. Adjust all registers and duct dampers to the desired
position. Run the unit for 10 to 15 minutes before
taking any temperature readings. The temperature
rise is the difference between the supply and return
air temperatures.
NOTE: F or typical duct systems, the temperature rise will
fall within the range specifi ed on the data label (with the
blower speed at the f actory recommended setting) shown
in T able 10 (page 25). If the measured temperature rise falls
outside the specifi ed range, it may be necessary to change
the blower speed. Lowering the blower speed increases
the temperature rise and a higher speed decreases the
temperature rise.
The unit is equipped with a variable speed motor . Speed
selection is made by moving the leads on the blo wer motor
terminal block. The speed taps for adjusting the motor
speed are shown in the unit wiring diagram or Figures 12
& 13 (pages 28 - 29). Ref er to the Blo wer Speed Section
(page 15) for additional information.
18
Page 19

The integrated control starts the circulating air blower 30
seconds after the gas valve is opened. The control is factory
wired to turn the blower motor off 135 seconds after the
gas valve is closed. NOTE: The heating blower off delay
is factory set at 90 seconds. An additional 45 second off
delay is programmed into the X-13 blower motor for a
total of 135 seconds.
3. Remove the close-off plate immediately after the overtemperature limit control opens. If the unit operates
for more than four minutes with no return air, set the
thermostat below room temperature, shut off power to
the unit, and replace the over-temperature limit control.
Verifying Burner Operation
Verifying and Adjusting Firing Rate
CAUTION:
Do not re-drill the burner orifi ces. If the orifi ce
size must be changed, use only new orifi ces.
The fi ring rate must be verifi ed for each installation to
prevent over-fi ring of the furnace. The fi ring rate must
not exceed the rate shown on the unit data label. To
determine the fi ring rate, follow the steps below:
1. Obtain the gas heating value (HHV) from the gas supplier.
2. Shut off all other gas fi red appliances.
3. Start the unit in heating mode and allow it to run for at
least 3 minutes.
4. Measure the time (in seconds) required for the gas
meter to complete one revolution.
5. Convert the time per revolution to cubic feet of gas per
hour using Table 13 (page 27).
6. Multiply the gas fl ow rate in cubic feet per hour by the
heating value of the gas in Btu per cubic foot to obtain
the fi ring rate in Btu per hour. See Example.
Example:
• Time for 1 revolution of a gas meter with a 1 cubic
foot dial = 40 seconds.
• From Table 13, read 90 cubic feet gas per hour.
• Local heating value of the gas (obtained from gas
supplier) = 1,040 Btu per cubic foot.
• Input rate = 1,040 x 90 = 93,600 Btuh.
7. Adjust the manifold pressure if necessary . See Manif old
Pressure Adjustment instructions on page 20. For
additional information about elevations above 2,000
feet, see page 17.
Verify Over-Temperature Limit Control Operation
1. Verify the louvered control access panel is in place and
that there is power to the unit.
2. Block the return airfl ow to the unit by installing a closeoff plate in place of or upstream of the fi lter .
3. Set the thermostat abov e room temperature and v erify
the units operating sequence (page 20).
NOTE: The o ver-temper ature limit control should turn off
the gas valve within appro ximately four minutes (exact time
depends on the effi ciency of the close-off when blocking
the return air). The circulating air and combustion blowers
should continue to run when the over-temperature limit
control switch opens.
W ARNING:
Uninsulated live components are exposed when
louvered control access panel is removed.
1. Remove the louvered control access panel and verify
there is power to the unit.
2. Set thermostat above room temperature and observe
the ignition sequence. NOTE: The b urner fl ame should
carry over immediately between all burners without
lifting off, curling, or fl oating. The fl ames should be blue,
without yellow tips. Make sure the fl ame is drawn into
the center of the heat exchanger tube. In a properly
adjusted burner assembly, the fl ame bends down and
to the right at the end of the heat exchanger tube. The
end of the fl ame will be out of sight around the bend.
3. After validating fl ame characteristics, set the thermostat
below room temperature and verify the burner fl ame
extinguishes completely.
Refrigerant Charging
W ARNING:
R6GD units are shipped fully charged with
R-410A refrigerant and ready for installation.
When a system is installed according to these
instructions, no refrigerant charging is required.
If repairs make it necessary for evacuation and
charging, it should only be done by qualifi ed,
trained personnel thoroughly familiar with this
equipment. Some local codes require licensed
installation/service personnel to service this type
of equipment. Under no circumstances should
the owner attempt to install and/or service this
equipment. Failure to comply with this warning
could result in property damage, personal injury ,
or death.
CAUTION:
This unit uses refrigerant R-410A. DO NOT use
any other refrigerant in this unit. Use of another
refrigerant will damage the unit.
The system refrigerant charge can be checked and
adjusted through the service por ts provided at the front
panel. Use only gauge lines which have a “Schrader”
depression device present to actuate the valve. Draw a
vacuum on gauge lines to remove air before attaching
19
Page 20

them to the service ports on the unit. Refrigerant charging
must be done by qualifi ed personnel familiar with safe
and environmentally responsible refrigerant handling
procedures.
Manifold Pressure Adjustment
The manifold pressure must be set to the appropriate
value for y our installation. T o adjust the manifold pressure:
1. Obtain the required manifold pressure setting. Use
Table 6 for natural gas or Table 7 for LP/propane gas.
NOTE: The values listed in the tables are based on sea
level v alues. At higher altitudes, the heating v alue of gas
is lower than the sea level heating value.
2. Remove the regulator cap. Turn the high fire
adjusting screw clockwise to increase the pressure or
counterclockwise to reduce the pressure.
3. Replace the regulator cap after adjustments are
complete.
Manifold Pressure (in W.C.) for
Natural Gas Installations
Altitude above
sea level
zero to 1,999 FT
2,000 to 4,999 FT 3.5 3.5 3.5
5,000 to 5,999 FT 3.5 3.5 3.0
6,000 to 7,999 FT 3.5 3.2 2.8
8,000 to 10,000 FT
Heating Value Btu/cu. ft.
800 to 899 900 to 999 1,000 to 1,100
3.5 3.5 3.5
3.0 2.8 2.5
Table 6. Manifold Pressure (in W.C.) for Natural Gas
Manifold Pressure (in W.C.) and Orifi ce Sizes
for LP/Propane Gas Installations
Altitude above
sea level
zero to 1,999 FT
2,000 to 4,999 FT 8.5 54
5,000 to 5,999 FT 10.0 55
6,000 to 7,999 FT 9.0 55
8,000 to 10,000 FT
NOTE: Manifold pressure based on sea level LP heating value
of 2,500 Btu/cu. ft.
Manifold
Pressure
10.0 54
8.5 55
3
Orifi ce
Size
Table 7. Manifold Pressure (in W.C.) for LP Gas
OPERATING SEQUENCE
The operating sequences for the heating, cooling, and
fan modes are described below. Refer to the fi eld and
furnace wiring diagrams (Figures 12 or 13, pages 28 - 29).
Heating Mode
1. On a call for heat, the thermostat closes and applies
24 VAC to terminal W on the control board.
2. The control board checks for continuity on the 24 V A C
limit control circuit, over-temperature limit s witch, fl ame
rollout switches, and bloc ked vent switch in series. If an
open limit is detected, the control board will energize
the inducer blower. All other system functions will be
inoperable until the limit circuit closes. While the limit
is open, the red LED will pulse at a rate of 1 blink per
unit time.
3. The furnace control checks for continuity (24 VAC)
across the pressure switch. If the pressure switch is
closed, the heat mode sequence will not continue. If it
remains closed for 10 seconds, the red LED will fl ash
3 times repetitively until the fault condition clears.
4. The inducer energizes (if pressure switch is open).
5. The pressure switch will close. If the pressure switch
does not close after 10 seconds, the fault LED will
fl ash 2 times and the inducer will continue to run until
the switch is closed.
6. The inducer will pre-purge for 30 seconds and then
the igniter will start its warm-up as follows:
Initial Pow er up: After 30 seconds of igniter w arm-up,
the gas valves (24 VAC) will open. The igniter circuit
will stay energized for 3 seconds after the gas valve
opens.
After Initial Pow er up: The control has a programmed
adaptive ignition feature which varies the warm-up
period as follows: If ignition is successful the warm-up
is reduced by 3 seconds on each subsequent call for
heat until ignition failure occurs. Upon ignition failure,
the warm-up is increased by 3 seconds on the next try .
If successful, the timing remains fi xed at this level. In
general, whenever ignition f ailure occurs the warm-up
interval is increased by 3 seconds on the next try . And
if successful, it remains there. Minimum and maximum
warm-up time limits are set at 6 and 54 seconds.
7. The fur nace control must prove fl ame via the fl ame
sensor 5 seconds after the gas valves open. If fl ame
is sensed, burners are on and the igniter cools off. If
no fl ame is sensed, the gas valv e closes immediately
and the inducer continues to run. A second trial for
ignition (step 6) begins. If no fl ame is sensed on the
fi fth try for ignition, the furnace control is locked and the
red LED will blink 4 times repetitively. The thermostat
must be opened for at least ten seconds to reset the
furnace control after a lock out. Otherwise , the furnace
will attempt another ignition sequence in 1 hour.
20
Page 21

8. After the gas valve opens (30 seconds), the blower will
ramp to the selected airfl ow and continues to run.
9. When the thermostat has been satisfi ed, the W terminal
on the integrated control is de-energized.
10. The gas valve circuit is de-energized and the gas
vallve closes.
11. The inducer motor will continue to run for the post
purge period of 25 seconds.
12. The main blower will continue to run for the BLO WER
OFF delay of 135 seconds.
13. After the BLOWER OFF timer has been satisfi ed, the
integrated control de-energizes the main circulating
blower circuit.
Cooling Mode
1. On a call f or cooling, the thermostat closes and applies
24 V AC to the green and y ellow leads in the low voltage
area.
2. The green lead applies 24VAC to the G terminal of
the integrated control, energizing the main circulating
blower circuit at the cooling speed.
3. The yellow lead applies 24VAC to the contactor.
4. When the thermostat is satisfi ed, the contactor and
integrated control de-energize.
5. The circulating blower motor de-energiz es after a 8590 second delay.
Fan Mode
1. On a call for fan operation, the thermostat applies 24
V AC to the green lead connected to the G terminal of
the integrated control.
2. The circulating blower is energized immediately at the
heating speed if 2-SPD is selected or fan only speed
if 3-SPD is selected on the control. NOTE: If a call for
heat occurs, the circulating blower de-energiz es prior
to normal heating cycle.
EQUIPMENT MAINTENANCE
W ARNING:
T o avoid risk of electrical shoc k, personal injury ,
or death, disconnect all electrical power to the unit
before performing any maintenance or service.
The unit may have more than one electrical supply .
Label all wires prior to disconnection when
servicing the unit. Wiring errors can cause
improper and dangerous operation
CAUTION:
Use care when removing parts from this unit.
Personal injury can result from sharp metal
edges present in all equipment of sheet metal
construction.
Proper maintenance is important to achieve optimum
performance from the system. The ability to properly
perform maintenance on this equipment requires certain
mechanical skills and tools. If you do not possess these
skills, contact your dealer for maintenance. Consult y our
local dealer about the availability of maintenance contracts.
Routine maintenance should include the following:
CAUTION:
The unit should never be operated without a
fi lter in the return air system. Replace disposable
fi lters with the same type and size.
• Inspect, clean or replace air fi lters at the beginning of
each heating and cooling season, or more frequently
if required.
• Inspect the condensate drain and outdoor coil at the
beginning of each cooling season. Remo ve any debris.
Clean the outdoor coil and louvers as necessary using
a mild detergent and water. Rinse thoroughly with water.
• Inspect the electrical connections for tightness at the
beginning of each heating and cooling season.
• The blower compartment should be cleaned monthly
during the heating and cooling seasons to remove any dirt
and lint that may hav e accumulated in the compartment
or on the blower and motor. Buildup of dirt and lint on
the blower and motor can create excessive loads on
the motor resulting in higher than normal operating
temperatures and possible shortened service life.
• Maintain heat exchanger and burners. The unit should
operate for many y ears without excessive scale buildup
in the heat exchanger , however , the heat exchanger, the
vent system, and the burners should be inspected and
cleaned (if required) by a qualifi ed serviceman annually
to ensure continued safe operation. P articular attention
must be given to identify deterioration from corrosion
or other sources.
21
Page 22

• The motors for the circulating air blower, outdoor fan,
and combustion blower are pre-lubricated at the f actory .
No further oiling is required for the life of this product.
• Inspect and clean the screen of the vent cover assemb ly
at the beginning of each heating and cooling season.
Cleaning of Heat Exchanger
W ARNING:
Holes in the heat exchanger can cause products
of combustion to enter the home. Replace the heat
exchanger if leaks are found. Failure to prevent
products of combustion from being circulated
into the living space can create potentially
hazardous conditions including carbon monoxide
poisoning that could result in personal injury or
death.
If the heat exchanger must be cleaned due to soot or
scale build up, follow the steps below.
1. Shut off the gas supply to the unit at the meter or at
the manual valve in the gas supply piping.
2. T urn off all power to the unit and set the thermostat to
the lowest temperature setting.
3. Remove the louvered access panel from the unit.
4. Turn the gas control knob (gas valve) to the OFF
position. See Figure 11 (page 27) for gas valve shut
off instructions.
5. Disconnect the wires from the gas valve, ignitor , fl ame
sensor, combustion air motor, fl ame roll-out control,
over-temperature limit switch, and pressure switch.
6. Remove the silicone rubber tube from the collector
pan to the pressure switch.
7. Remove 4 n uts securing the combustion blower to the
collector pan. Remove the combustion blower.
8. Remove all screws securing the collector pan to the
unit. Remove the collector pan from the unit.
CAUTION:
To prevent damage to the unit or internal
components, it is recommended that two
wrenches be used when loosening or tightening
nuts. Do not over tighten!
9. Using 2 wrenches, separate the ground-joint union in
the gas supply piping at the unit.
10. Remove the piping between the gas valve and the
ground-joint union, if necessary.
11. Remove the scre ws that secure the burner assembly
in place and the burner assembly. BE EXTREMELY
CAREFUL NOT TO DAMAGE THE IGNITOR WHILE
REMOVING THE BURNER ASSEMBLY.
12. Attach a round wire brush to a length of high grade
stainless steel cable, such as drain clean-out cable.
Attach the other end of the spring cable to a variable
speed reversible drill. Slowly insert and rotate the cable
into the top portion of the heat exchanger. Operate the
drill alternating between forward and rev erse, working
the cable in and out sev eral times to obtain suffi cient
cleaning. Repeat this process at each e xchanger tube.
13. Remove all loosened debris from the heat exchanger
tubes using high pressure air and vacuum cleaner.
14. Using a light, check the condition of the upper and
lower sections of the heat exchanger tube.
15. Inspect the burners and if necessary, clean them
carefully with a soft wire brush and/or the nozzle of a
vacuum cleaner. DO NO T DAMAGE THE IGNITOR OR
FLAME SENSOR WHILE CLEANING THE BURNER.
16. Replace all the parts in reverse order from which they
were removed.
17. Follow the operating instructions found on the right
side door and the User’s Inf ormation Manual to return
the unit to operation.
Cleaning of Burners
If the burners must be cleaned, follow the steps below.
1. Shut off the gas supply to the unit either at the meter
or at a manual valve in the supply piping.
2. Turn off all power to the unit and set the thermostat to
the lowest temperature setting.
3. Remove the louvered control access panel from the
unit.
4. Turn the gas control knob to the OFF position. See
Figure 11 for gas valve shut off instructions.
5. Disconnect the wires from the gas valve, ignitor, and
fl ame sensor.
CAUTION:
To prevent damage to the unit or internal
components, it is recommended that two
wrenches be used when loosening or tightening
nuts. Do not over tighten!
6. Using two wrenches, separate the ground-joint union
in the gas supply piping at the unit.
7. Remove the piping between the gas valve and the
ground-joint union (if applicable).
8. Remove all screws securing the burner assembly to
the furnace.
9. Carefully remove the burner assembly from the furnace.
DO NOT D AMAGE THE IGNITER WHILE REMO VING
THE BURNER ASSEMBLY.
10. Inspect the burners for accumulated dust or debris.
If necessary carefully clean them with a soft wire
brush and a vacuum cleaner. DO NOT D AMAGE THE
IGNITER WHILE CLEANING THE BURNER.
11. Replace all the parts in reverse order from which they
were removed.
12. Follow the lighting instructions found on the lower unit
door to return the unit to operation.
13. Verify proper operation after servicing.
22
Page 23

COMPONENT FUNCTIONS
Flame Roll-Out Control
The fl ame roll-out control acts to verify that the burner
fl ame is being drawn into the heat exchanger tubes. If the
burner fl ame is not being dra wn into the heat exchanger
tubes, the roll-out control will open within sev eral seconds
and the integrated control diagnostic light will fl ash one
time. The circulating air blower and combustion blower
will continue to operate if the fl ame roll-out control opens.
Flame Sensor
The fl ame sensor acts to prove that fl ame has carried
over from the ignitor to the right-most burner . If no fl ame
is sensed, the unit will be shut down automatically.
Gas Valve
The gas valve controls the fl ow of gas to the burners in
both low and high fi re. When the gas valve is energized
it automatically opens and regulates the gas pressure in
the manifold.
Pressure Switch
The pressure switch verifi es that the inducer motor is
drawing the combustion gases through the heat e xchanger
tubes and venting the gases through the vent system.
Over-Temperature Limit Control
The over-temperature limit control prevents the air
temperature leaving the unit from exceeding the maximum
outlet air temperature. If the limit opens, the integrated
control diagnostic will fl ash one time. The circulating air
blower and combustion blower will continue to operate if
the over-temperature limit control opens.
REPLACEMENT PARTS
Replacement parts are available through all Nordyne
distributors. Please have the complete model and serial
number of the unit when ordering replacement parts.
ELECTRICAL:
Capacitors Pressure Switches
Compressors Relays
Contactors Temperature Limit Switches
Gas V alves Thermostats
Ignition Controls Time Delay Relays
Ignitors/Flame Sensors Transformers
MOTORS:
Blower Motor
Fan Motor
Inducer Blower Motor
COMPONENTS:
Blower Assembly Fan Grille
Burner Manifold Filter/Driers
Burners/Orifi ces Gaskets
Cabinet Panels Heat Exchanger
Expansion V alves
TROUBLESHOOTING
If the unit does not operate in the cooling mode, check
the following:
• The thermostat is operating properly
• Electrical power to the unit is turned on
• The fi lters are not dirty
• The service doors are in place
• The 3 amp fuse is operational
If the unit does not operate in the heating mode, check
the following:
• The thermostat is operating properly
• Electrical power to the unit is turned on
• The fi lters are not dirty
• The gas is turned on and the manual shut-off valve
is open
• The service doors are in place
• The fl ame roll-out control is closed
• The diagnostic codes listed in T ab le 7 or on the wiring
diagrams (Figures 12 or 13, pages 28 - 29).
• The 5 amp fuse is operational
STATUS LIGHT
(Red LED)
On Power On
1 Flash Limit Circuit Open
2 Flashes Pressure Switch Stuck Open
3 Flashes Pressure Switch Stuck Closed
4 Flashes Ignition Failure (Check Ground)
5 Flashes
Continuous Flash False Flame or Gas Relay Shorted
Off Power Off
STATUS LIGHT
(Yellow LED)
Continuous Flash Low Flame Sensor Signal
On Flame Present
230 VAC & Neutral Reversed or
no ground
FAULT CONDITION
FAULT CONDITION
Table 8. Diagnostic Codes
23
Page 24

FIGURES & TABLES
24 9/10
DOWNFLOW
SUPPLY DUCT
OPENING
3/4" NPT Female
Drain Connector
29.75
23.75
1.8
15.75
2.9
Electric
Supply Entry
Low Voltage Entry
Gas Supply
Entry
47.5
Side View
B
13 3/10
4.0
Back View
47 1/2
13 1/2
CG
16
13 1/2
16
12
12
A
23 1/2
DOWNFLOW
RETURN DUCT
OPENING
T op View
1.75
13.5
4.0
Condensing
Coil
Horizontal
Supply Duct
Opening
C
16.0
16.0
13.5
8.75
Horizontal
Return Duct
Opening
16.0
Model Number
R6GD-
X36*072
X36*072
X36*072
X36*072
X36*072
X36*072
* Denotes “C” or “X”
† Denotes “C” or “D”
24
12.45
9.75 24.75
12.45
D
4.0
Figure 10. R6GD Dimensions
Unit
Weight
†
†
†
†
†
†
470 480 26.5 26.5 39.0 35.3
485 495 26.5 26.5 39.0 35.3
540 550 27.5 26.5 43.0 39.3
555 565 27.5 26.5 43.0 39.3
560 570 27.5 26.5 43.0 39.3
575 585 27.5 26.5 43.0 39.3
Shipping
Weight
Center of Gravity
AB
with base rails without base rails
Height (in inches)
C
D
Table 9. Center of Gravity & Unit Shipping Weights
Page 25

(° F)
(cfm
(° F)
cfm
(° F)
(cfm
(° F)
(cfm
(° F)
(cfm
(° F)
AIRFLOW INFORMATION
Rise
Rise
Rise
Rise
Rise
Rise
External Static Pressure Drop - inches water column
(cfm
(° F)
Rise
(cfm
(° F)
Rise
0.1 0.2 0.3 0.4 0.5 0.6 0.7 0.8
CFM
T1 1124 47.45 1049 50.84 956 55.79 883 60.40 831 64.18 784 68.03 714 - 654 -
Tap
Motor
HP
Motor
Size
Blower
(Btu/h)
Output
Cooling
(° F)
Rise
Range
Heating
(Btu/h)
Output
Heating
**T2 1323 40.31 1261 42.29 1189 44.86 1117 47.75 1040 51.28 980 54.42 926 57.60 896 59.52
*T3 1471 - 1413 - 1366 - 1303 40.93 1253 42.56 1199 44.48 1142 46.70 1090 48.93
T4 1461 - 1407 - 1334 - 1259 42.36 1183 45.08 1112 47.96 1072 49.75 1028 51.88
T5 1592 - 1526 - 1475 - 1403 - 1326 40.22 1261 42.29 1200 44.44 1129 47.24
T1 1124 63.27 1049 67.79 956 74.38 883 - 831 - 784 - 714 - 654 -
T2 1323 53.75 1261 56.39 1189 59.81 1117 63.66 1040 68.38 980 72.56 926 - 896 -
*T3 1471 48.34 1413 50.33 1366 52.06 1303 54.57 1253 56.75 1199 59.31 1142 62.27 1090 65.24
**T4 1461 48.67 1407 50.54 1334 53.31 1259 56.48 1183 60.11 1112 63.95 1072 66.33 1028 69.17
T5 1592 - 1526 46.60 1475 48.21 1403 50.69 1326 53.63 1261 56.39 1200 59.26 1129 62.99
T1 1185 60.01 1110 64.06 1035 68.71 980 72.56 925 - 875 - 820 - 785 -
T3 1525 46.63 1450 49.04 1370 51.91 1320 53.87 1270 55.99 1210 58.77 1150 61.84 1100 64.65
T4 1650 - 1585 - 1520 46.78 1465 48.54 1405 50.61 1340 53.07 1280 55.56 1235 57.58
T1 1185 75.00 1110 - 1035 - 980 - 925 - 875 - 820 - 785 -
T3 1525 58.29 1450 61.30 1370 64.88 1320 67.34 1270 69.99 1210 73.46 1150 - 1100 -
T4 1650 53.87 1585 56.08 1520 58.48 1465 60.68 1405 63.27 1340 66.33 1280 69.44 1235 71.97
**T2 1410 50.43 1330 53.47 1250 56.89 1195 59.51 1140 62.38 1085 65.54 1030 69.04 975 72.93
*T5 1775 - 1715 - 1650 - 1600 - 1540 46.18 1460 48.71 1375 51.72 1330 53.47
T1 1259 56.48 1187 59.91 1130 62.93 1069 66.52 1015 70.06 955 74.46 923 - 869 -
**T2 1410 63.04 1330 66.83 1250 71.11 1195 74.38 1140 - 1085 - 1030 - 975 -
*T5 1775 50.08 1715 51.83 1650 53.87 1600 55.56 1540 57.72 1460 60.88 1375 64.65 1330 66.83
**T2 1583 - 1521 46.75 1467 48.47 1416 50.22 1360 52.29 1306 54.45 1265 56.21 1212 58.67
*T3 1827 - 1771 - 1703 - 1656 - 1565 45.44 1461 48.67 1363 52.17 1237 57.49
T4 2009 - 1931 - 1834 - 1761 - 1639 - 1525 46.63 1441 49.35 1293 55.00
T5 2076 - 1967 - 1870 - 1758 - 1662 - 1556 45.70 1450 49.04 1331 53.43
T1 1259 70.60 1187 74.89 1130 - 1069 - 1015 - 955 - 923 - 869 -
**T2 1583 56.15 1521 58.44 1467 60.59 1416 62.77 1360 65.36 1306 68.06 1265 70.27 1212 73.34
*T3 1827 48.65 1771 50.19 1703 52.20 1656 53.68 1565 56.80 1461 60.84 1363 65.22 1237 71.86
T4 2009 - 1931 46.03 1834 48.47 1761 50.48 1639 54.23 1525 58.29 1441 61.69 1293 68.75
T5 2076 - 1967 45.19 1870 47.53 1758 50.56 1662 53.48 1556 57.13 1450 61.30 1331 66.78
Input
(Btu/h)
Heating
Model
R6GD-
Number
X36(†)072 72,000 57,600 40-70 36,000 10 x 10 1/2
X36(†)096 96,000 76,800 45-75 36,000 10 x 10 1/2
X48(†)096 96,000 76,800 45-75 47,800 10 x 10 3/4
X48(†)120 120,000 96,000 45-75 47,800 10 x 10 3/4
Table 10. Nominal Airfl ow Rates and Temperature Rises (° F)
X60(†)096 96,000 76,800 45-75 56,500 11 x 10 1
X60(†)120 120,000 96,000 45-75 56,500 11 x 10 1
NOTE: Factory set fan only speed (always set on T1).
* = Factory set cooling speed
** = Factory set heating speed
(†) C = 208/230 Volt Units, D = 460 Volt Units
25
Page 26

GAS INFORMATION
CAPACITY OF BLACK IRON GAS PIPE (CU. FT. PER HOUR)
FOR NATURAL GAS (SPECIFIC GRAVITY - 0.60)
NOMINAL BLACK
IRON PIPE
DIAMETER (IN.)
1/2 130 90 75 65 55 50 45 40
3/4 280 190 150 130 115 105 95 90
1 520 350 285 245 215 195 180 170
1 1/4 1,050 730 590 500 440 400 370 350
1 1/2 1,600 1,100 890 760 670 610
The cubic feet per hour listed above must be greater than the cubic feet per hour of gas fl ow required by the equipment.
To determine the required cubic feet per hour of gas fl ow, divide the input rate of the unit by the heating value (from gas
supplier) of the gas.
10 20 30 40 50 60 70 80
LENGTH OF PIPE RUN (FT)
NOTES
TIME FOR
ONE REVOLUTION
(SECONDS)
10 360 1,800 3,600 66 55 273 545
12 300 1,500 3,000 68 53 265 529
14 257 1,286 2,571 70 51 257 514
16 225 1,125 2,250 72 50 250 500
18 200 1,000 2,000 74 49 243 486
20 180 900 1,800 76 47 237 474
22 164 818 1,636 78 46 231 462
24 150 750 1,500 80 45 225 450
26 138 692 1,385 82 44 220 439
28 129 643 1,286 84 43 214 429
30 120 600 1,200 86 42 209 419
32 113 563 1,125 88 41 205 409
34 106 529 1,059 90 40 200 400
36 100 500 1,000 92 39 196 391
38 95 474 947 94 38 191 383
40 90 450 900 96 38 188 375
42 86 429 857 98 37 184 367
44 82 409 818 100 36 180 360
46 78 391 783 102 35 176 353
48 75 375 750 104 35 173 346
50 72 360 720 106 34 170 340
52 69 346 692 108 33 167 333
54 67 333 667 110 33 164 327
56 64 321 643 112 32 161 321
58 62 310 621 114 32 158 316
60 60 300 600 116 31 155 310
62 58 290 581 118 31 153 305
64 56 281 563 120 30 150 300
Cubic Feet Per Hour Required =
Input To Furnace (Btu/hr)
Heating Value of Gas (Btu/Cu. Ft.)
Table 11. Black Iron Gas Pipe Capacities
GAS FLOW RATES (CUBIC FEET PER HOUR)
CUBIC FEET PER REVOLUTION
OF GAS METER
1 5 10 1 5 10
TIME FOR
ONE REVOLUTION
(SECONDS)
CUBIC FEET PER REVOLUTION
OF GAS METER
26
Table 12. Gas Flow Rates
Page 27

FOR YOUR SAFETY READ BEFORE OPERATING
SWITCH
(INTERRUPTEUR)
POUR VOTRE SÉCURITÉ. À LIRE AVANT L’EMPLOI
WARNING: If you do not follow these instructions
exactly , a fi re or explosion may result causing property
damage, personal injury, or loss of life.
A. This appliance does not have a pilot. It is equipped with
an ignition device which automatically lights the burner.
Do not try to light the burner by hand.
B. BEFORE OPERATING smell all around the appliance
area for gas. Be sure to smell next to the fl oor because
some gas is heavier than air and will settle on the fl oor.
WHAT TO DO IF YOU SMELL GAS
• Do not try to light any appliance.
• Do not touch any electrical switch; do not use any phone
in your building.
• Immediately call your gas supplier from a neighbor’s
phone. Follow the gas supplier’s instructions.
• If you cannot reach your gas supplier, call the fi re
department.
C. Use only your hand to push in or turn the gas control
knob. Nev er use tools. If the knob will not push in or move
by hand, do not try to repair it, call a qualifi ed service
technician. F orce or attempted repair may result in a fi re
or explosion.
D. Do not use this appliance if any part has been under water.
Immediately call a qualifi ed service technician to inspect
the appliance and to replace any part of the control system
and any gas control which has been under water.
OPERATING INSTRUCTIONS
1. STOP! Read the safety information above on this label.
2. Set the thermostat to the lowest setting.
3. Turn off all electrical power to the appliance.
4. The appliance’s ignition device automatically lights the
burner. Do not try to light burner by hand.
5. Remove the control access door/panel (upper door if
two-door model).
6. Move the gas control switch to the “OFF” position. (See
Figure 1)
7. Wait fi ve (5) minutes to clear out any gas. Then smell
for gas, including near
the fl oor. If you smell
gas, STOP! Follow “B”
in above information. If
you don’t smell gas, go
to the next step.
8. Move the gas control
switch to the “ON”
position. (See Figure)
9. Replace the control
access door/panel
(upper door if two-door model).
10. Turn on all electrical power to the appliance.
11. Turn the thermostat to a desired setting.
12. If the appliance will not operate, follow the instructions
“To Turn Off Gas To Appliance” and call your service
technician or gas supplier.
Figure
ATTENTION! L ’inobservation de ces instructions peut
entraîner un incendie ou une explosion pouvant causer
des dam mages à votre propriété à votre personne, ou
la mort.
A. Cet appareil ménager n’a pas de veilleuse. II est doté
d’un système d’allumage automatique. Ne pas essayer
d’allumer le brûleur manuellement.
B. AVANT L’USAGE. Attention à une possible odeur de gaz
surtout au niveau du plancher où les gaz les plus lourds
ont la tendance de se concentrer.
EN CAS D’ODEUR DE GAZ.
• Ne mettre en marche aucun appareil électrique.
• Ne toucher à aucun commutateur électrique, ne pas
employer le téléphone.
• Quitter le bâtiment immédiatement et av ertir la compagnie
du gaz en utili sant le téléphone d’un voisin.
• A défaut de la compagnie du gaz, avertir le service des
pompiers.
C. Enfoncer ou faire tourner le robinet à gaz à la main
seulement. Ne jamais utiliser d’outils. S’il n’est pas possible
de faire tourner ou d’enfoncer le robinet à la main, ne pas
essayer de le réparer. F aire appel à un spécialiste . Forcer
ou tenter de réparer le robinet pourrait être à l’origine d’une
explosion ou d’un incendie.
D. II est déconseillé d’utiliser cet appareil en contact prolongé
avec l’eau. Faire inspecter ou remplacer toute commande
par un technicien qualifi é si un des systèmes de contrôle
du gaz s’est trouvé sous l’eau.
MODE D’EMPLOI
1. ATTENTION! Lire d’abord la liste des mesures de sécurité
ci-dessus.
2. Mettre le thermostat à la position minimale.
3. Couper le courant électrique qui mène à l’appareil.
4. Cet appareil ménager étant doté d’un système d’allumage
automatique, ne pas essayer d’allumer le brûleur
manuellement.
5. Retirer le panneau/volet d’accès de commande (panneau
supérieur s’il s’agit d’un modèle à deux panneaux).
6. Règlez I’nterrupteur de commande du gaz à la position
“OFF” (Arrêt) (Voir Figure).
7. Attendre cinq (5) minutes pour s’assurer de la dissipation
du gaz.
En cas d’odeur, ARRÊTER LE PROCÉDÉ. Suivre les
instructions ci-dessus (Section B). En l’absence de toute
odeur de gaz, avancer à l’étape suivante.
8. Règlez I’nterrupteur de commande du gaz à la position
“OFF” (Arrêt) (Voir Figure).
9. Remettre le panneau/volet d’accès de commande en
place (panneau supérieur s’il s’agit d’un modèle à deux
panneaux).
10. Rebrancher l’appareil sur le réseau électrique.
11. Ajuster le thermostat à la position désirée.
12. Si l’appareil ne fonctionne pas, suivre les “Directives
d’arrêt” cidessous et appeler le technicien de service.
TURNING GAS OFF TO THE APPLIANCE
1. Set the thermostat to the lowest setting.
2. T urn off all electrical power to the appliance if service is
to be performed.
3. Remove the control access door/panel (upper door if
two-door model).
4. Move the gas control knob switch to the “OFF” position.
Do not use force. (See Figure)
5. Replace the control access door/panel (upper door if
two-door model).
Figure 11. R6GD Gas Valve Label
DIRECTIVES D’ARRÊT
1. Mettre le thermostat à la position minimale.
2. Débrancher l’appareil en prévision de la réparation.
3. Retirer le panneau/volet d’accès de commande (panneau
supérieur s’il s’agit d’un modèle à deux panneaux).
4. Règlez I’nterrupteur de commande du gaz à la position
“OFF”. Ne forcez pas. (Voir Figure).
5. Remettre le panneau/volet d’accès de commande en
place (panneau supérieur s’il s’agit d’un modèle à deux
panneaux).
27
Page 28

1. Couper le courant avant de faire letretien.
2. Employez uniquement des conducteurs en culvre.
9. Ne convient pas aux installations des plus de 150V
208/230 V olt ZH06 esahP eerhTrenoitidnoC riA cirtcelE/taeH saG egatS elgniS degakcaP
C
GAS
VALVE
BLUE
T3
T4
T2
G
BLUE
N
WHITE
T5
RED
ORANGE
C
L
BLACK
L1
X13 COM
X13 COOL
BLOWER OFF
XFMR
3 AMP FUSE
X13 FAN
X13 HEAT
FLAMESTATUS
TI
GREEN/YELLOW
a la terre.
INDUCER
R
C
1
2
-
2
21
2
BLACK
BLACK
BROWN
BROWN
4
1
HUM
5
2
6
3
NEUTRALS
1
4
7
2
5
8
3
6
9
W
G
Y
C
R
24V
COM
BROWN
YELLOW
1
IGNITOR
WHITE
RED
ORANGE
FLAME
PRESSURE
SWITCH
GREEN
ORANGE
SENSOR
BLUE
GROUND
FLAME ROLL-OUT
SWITCH
BLUE
ON
1 FLASH
2 FLASH
STATUS LIGHT (RED)
FAULT CONDITION
LIMIT CIRCUIT OPEN
PRESURE SWITCH STUCK OPEN
WITH INDUCER ON
PRESURE SWITCH STUCK CLOSED
POWER ON
Y2YCW1G
LIMIT
SWITCH
BLUE
3 FLASH
4 FLASH
5 FLASH
230 VAC & NEUTRAL REVERSED OR
NO GROUND
IGNITION FAILURE (CHECK GROUND)
FALSE FLAME OR GAS RELAY
WITH INDUCER OFF
ON
OFF
CONTINUOUS FLASH
CONTINUOUS FLASH
FAULT CONDITION STATUS LIGHT (YELLOW)
POWER OFF
LOW FLAME SENSOR SIGNAL
FLAME PRESENT
SHORTED
R
TO THERMOSTAT
7107410
RED
RED
RED
4. If any of the original wire as supplied with the furnace
must be replaced, it must be replaced with wiring material
having a temprature rating of at least 105C.
5. For supply wire ampacities and overcurrent protection,
see unit rating plate.
TO 208/230 VAC
POWER SUPPLY
BLACK
BLACK
BLACK
L1L2L3
COMPRESSOR
CONTACTOR
BLACK
CCH
24V
COM
PRESSURE
208V
240V
WHITE
ORANGE
BLACK
BLACK
SWITCH (40)
YELLOW
R
C
YELLOW
S
BLUE
YELLOW
BLUE
GREEN
GREY
BLACK
YELLOW
OUTDOOR FAN
CAPACITOR
MOTOR
YELLOW
8
7654329
8
7654329
1
1
PLUG E
ECONOMIZER
ACCESSORY PLUG
T3
T1
T3 T2
BLACK
T1
RED
RED
RED
RED
BLUE
BLACK
COMPRESSOR
T2
BLACK
BLACK
ORANGE
8
7654329
8
7654329
YELLOW
GREY
YELLOW
GREEN
HARNESS ASSY.
ECONOMIZER JUMPER
1
1
8 WIRE
28
WIRING DIAGRAM
NOTES:
1. Disconnect all power before servicing.
2. For supply conections use copper conductors only.
3. Not suitable on systems that exceed 150v to ground.
Figure 12. Wiring Diagram for 208/230V / 3 Phase / 60 Hz Unit
TO DISCHARGE
AIR SENSOR
ECONOMIZER
ACCESSORY PLUG
Page 29

C
FAULT CONDITION STATUS LIGHT (RED)
nOnO rewoP
hsalF 1nepO tiucriC timiL
Pressure Switch Stuck Open
with Inducer On
2 Flash
Pressure Switch Stuck Closed
with Inducer Off
3 Flash
Ignition Failure (Check Ground) 4 Flash
230 VAC & Neutral Reversed or
No Ground
5 Flash
False Flame or Gas Relay
Shorted
Continuous Flash
Power Off
Off
FAULT CONDITION
STATUS LIGHT (YELLOW)
Low Flame Sensor Signal
Continuous Flash
Flame Present
On
R
1
2
1
2
BROWN
BROWN
HUM
XFMR
1
2
3
24V
3 AMP FUSE
COM
WHITE
BLACK
INDUCER
1
4
5
2
6
3
NEUTRALS
7
4
8
5
6
9
RCYGW
WHITE
YELLOW
BLACK
IGNITOR
BROWN
HIGH
SWITCH
PRESSURE
R
ORANGE
BLACK
T1
COMPRESSOR
RED
YELLOW
WHITE
GREEN
YELLOW
BLACK
C
YELLOW
T2
GAS VALVE
ORANGE
BLUE
GREEN
RED
YELLOW
OUTDOOR
FAN MOTOR
S
T3
FLAME
ROLL-OUT
YELLOW
BLACK
SWITCH
BLUE
LOW
PRESSURE
YELLOW
BLUE
SWITCH
PRESSURE
GROUND
SWITCH IF
EQUIPPED
YELLOW
FLAME
SENSOR
LIMIT
SWITCH
BLUE
ORANGE
987654321
987654321
RED
RED
RED
RED
987654321
987654321
AIR SENSOR
TO DISCHARGE
T3
T4
T2
T1
1. Couper le courant avantaire letretien.
2. Employez uniquement des conducteurs en cuivre.
T5
C
G
L
N
BLOWER MOTOR
BLACK
GREEN-YELLOW
BLUE
X13 FAN
RED
X13 HEAT
X13 COOL
1
1
BLACK
ORANGE
X13 COM
2
2
BLACK
L1
460 V olt Three Phase 60Hz
FLAME STATUS
RED
RED
BLUE
WHITE
3. If any of the original wire as supplied with the furnace
must be replaced, it must be replaced with wiring material
having a temperature rating of at least 105 C.
4. For supply wire ampacities and overcurrent protection,
see unit rating plate.
WHITE
Packaged Single Stage Gas Heat/Electric Air Conditioner
NOTES:
1. Disconnect all power before servicing.
2. For supply connections use copper conductors only.
BLACK
BLACK
FUSE
BLACK
RED
BLOWER OFF
460V
L1
L2
L3
24V
COM
240V
208V
COM
230V
CCH
BLACK
T1
T2
T3
Y2
BLOCK
TERMINAL
BLUE
BLUE
ORANGE
YELLOW
LEGEND:
FIELD WIRING
C
Y
G
W1
GREY
BLACK
GREEN
YELLOW
GREY
BLACK
GREEN
YELLOW
LOW VOLTAGE
HIGH VOLT A GE
R
PLUG
ECONOMIZER
ECONOMIZER JUMPER
HARNESS ASSY 8-WIRE
PLUG
ECONOMIZER
7108600
Figure 13. Wiring Diagram for 460V / 3 Phase / 60 Hz Unit
29
Page 30

R6GD CHARGING CHARTS
Liquid Pressure (psig)
Liquid Temperature (° F)
Remove refrigerant when above curve
Liquid Pressure (psig)
Liquid Temperature (° F)
Remove refrigerant when above curve
R6GD-X36 Charging Chart - Cooling
600
580
560
540
520
500
480
460
440
420
400
380
360
340
320
300
280
260
240
220
200
75 80 85 90 95 100 105 110 115 120 125 130 135
Add refrigerant when below curve
Figure 14. Charging Chart for 3 Ton Units
R6GD-X48 Charging Chart - Cooling
600
580
560
540
520
500
480
460
440
420
400
380
360
340
320
300
280
260
240
Add refrigerant when below curve
220
200
75 80 85 90 95 100 105 110 115 120 125 130 135
30
Figure 15. Charging Chart for 4 Ton Units
Page 31

R6GD CHARGING CHARTS - CONTINUED
Liquid Pressure (psig)
Liquid Temperature (° F)
Remove refrigerant when above curve
R6GD-X60 Charging Chart - Cooling
600
580
560
540
520
500
480
460
440
420
400
380
360
340
320
300
280
260
240
220
200
75 80 85 90 95 100 105 110 115 120 125 130 135
Add refrigerant when below curve
Figure 16. Charging Chart for 5 Ton Units
31
Page 32

FRENCH TRANSLA TIONS
AVERTISSEMENT:
RISQUE D’INCENDIE OU D’ EXPLOSION
• Le non-respect des avertissements de
sécurité pourrait entraîner des blessures
graves, la mort ou des dommages matériels.
• L’installation et l’entretien doivent être
effectués par un installateur qualifi é, un
organisme de service ou le fournisseur de
gazstaller, service agency or the gas supplier.
• Ne pas entreposer ni utiliser de l’essence ni
d’autres vapeurs ou liquides infl ammables
dans le voisinage de cet appareil, ni de tout
autre appareil.
QUE FAIRE S’IL Y A UNE ODEUR DE GAZ
• Ne pas tenter d’allumer aucun appareil.
• Ne toucher à aucun interrupteur électrique;
n’utiliser aucun téléphone dans le bâtiment.
• Évacuer l’immeuble immédiatement.
• Appeler immédiatement le fournisseur de
gaz en employant le téléphone d’un voisin.
Respecter à la lettre les instructions du
fournisseur de gaz.
• Si personne ne répond, appeler le service des
incendies.
AVERTISSEMENT:
RISQUE D’INCENDIE ET D’EXPLOSION
Risque de blessures graves ou de mort.
Ne pas entreposer ni utiliser de l’essence ni
d’autres vapeurs ou liquides infl ammables dans le
voisinage de cet appareil, ni de tout autre appareil.
Le fait d’entreposer ou d’utiliser de l’essence
ou d’autres liquides ou vapeurs infl ammables à
proximité de cet appareil ou de tout autre appareil
peut causer des blessures graves ou la mort.
AVERTISSEMENT:
RISQUE DE CHOC ÉLECTRIQUE, D’INCENDIE
OU D’EXPLOSION
Le non-respect des avertissements de sécurité
pourrait entraîner un fonctionnement dangereux
de l’appareil, des blessures graves, la mort ou
des dommages matériels.
Un entretein incorrect pourrait entraîner un
fonctionnement dangereux de l’appareil, des
blessures graves, la mort ou des dommages
matériels.
• Couper toute alimentation électrique au
générateur d’air chaud avant de pr odéder aux
travaux d’entretein.
• Au moment de l’entretien des commandes,
étiquetez tous les fi ls avant de les débrancher .
S’assurer de les raccorder correctement.
• S’assurer que l’appareil fonctionne
adéquatement aprés l’entretien.
AVERTISSEMENT:
Le non-respect des avertissements de sécurité
pourrait d’entraîner des blessures graves, la mort
ou des dommages matériels
Ne jamais utiliser une flamme nue por
vérifi er la présence des fuites de gaz. Pour la
vérifi cation de tous les joints, utiliser plutôt une
solution savonneuse commerciale fabriquée
spécifi quement pur la détection des fuites de gaz.
Un incendie ou une explosion peut entraîner des
dommages matériels, des blessures ou la mort.
32
Page 33

333435
Page 34

Page 35

Page 36

INSTALLATION/PERFORMANCE CHECK LIST
INSTALLATION ADDRESS:
CITY ________________________ STATE ________________
UNIT MODEL # ________________________________________
UNIT SERIAL # _______________________________________
Unit Installed Minimum clearances per
Figure 2 (page 7)?
INSTALLER NAME:
CITY _______________________ STATE ________________
Has the owner’s information been
reviewed with the customer?
Has the Literature Package been left
with the unit?
ELECTRICAL SYSTEM:
Electrical connections tight? YES NO
Line voltage polarity correct? YES NO
Rated Voltage: ___________________________________VOL TS
L1-L2 Volts: _____________________________________VOL TS
YES NO
YES NO
YES NO
GAS SYSTEM:
Gas Type: (circle one)
Gas pipe connections leak-tested? YES NO
Gas Line Pressure: ____________________________ (in - W.C.)
Is there adequate fresh air
supply for combustion and
ventilation?
Installation Altitude: ______________________________ (FT.)
Deration Percentage: ______________________________(%)
Furnace Input: _________________________________(Btuh)
Supply Air Temperature: __________________________ (° F)
Return Air Temperature: __________________________ (° F)
Temperature Rise: _______________________________ (° F)
During Furnace Operation:
Low fi re manifold pressure: ______________________ (in - W.C.)
High fi re manifold pressure: ______________________ (in - W.C.)
Natural
Gas
YES NO
Propane
L1-L3 Volts: _____________________________________ VOLTS
L2-L3 Volts: _____________________________________ VOLTS
Avg. V olts: ______________________________________ VOLTS
Max. deviation of voltage from avg. volts: ______________ VOLTS
% Volt imbalance: ________________________________ VOLTS
Blower Motor HP: ________ Sheave Setting ___________# Turns
Has the thermostat been calibrated? YES NO
Is the thermostat level? YES NO
Is the heat anticipator setting correct? YES NO
VENTING SYSTEM:
Is the vent hood installed? YES NO
Is vent hood free from restrictions YES NO
Filter(s) secured in place? YES NO
Filter(s) clean? YES NO
REFRIGERATION SYSTEM:
Was unit given 24 hr warm up period
for crankcase heaters?
Stage-1 Liquid Pressure (high side) ________________________
Stage-1 Suction Pressure (low side) ________________________
Stage-2 Liquid Pressure (high side) ________________________
Stage-2 Suction Pressure (low side) ________________________
IMPORTANT - This product has been designed and manufactured to
meet ENERGY STAR criteria for energy effi ciency. However, proper
refrigerant charge and proper air fl ow are critical to achieve rated
capacity and effi ciency. Installation of this product should follow the
manufacturer’ s refrigerant charging and air fl ow instructions. Failure to
confi rm proper charge and airfl ow may reduce energy effi ciency and
shorten equipment life.
YES NO
O'Fallon, MO
¢7091479¤
7091470
Specifi cations and illustrations subject to change
7091470 (Replaces 7089850)
without notice or incurring obligations.
Printed in U.S.A. (01/10)
 Loading...