

REVELL Ultima Studio User Manual

Revel Ultima Studio™ Loudspeaker

TABLE OF CONTENTS
INTRODUCTION...............................................3
ABOUT THE MANUAL AND WARRANTY.................................3
DESCRIPTION .................................................4
WOOFERS ........................................................................4
MIDRANGE .......................................................................4
TWEETERS........................................................................5
CROSSOVER NETWORK .....................................................5
CABINET...........................................................................5
UNPACKING....................................................6
PLACEMENT ...................................................8
ROOM ACOUSTICS.............................................................9
ROOM TREATMENT..........................................................10
INSTALLING SPIKES.......................................11
CONNECTIONS..............................................12
SINGLE-WIRED SYSTEM CONNECTIONS ............................13
BI-WIRED SYSTEM CONNECTIONS ....................................14
BI-AMPLIFIED SYSTEM CONNECTIONS...............................15
SYSTEM OPTIMIZATION..................................17
CABINET CARE..............................................18
LOUDSPEAKERS AND POWER........................18
PANEL REPLACEMENT...................................19
SPECIFICATIONS............................................21
SERVICE INFORMATION..................................23
REVEL ULTIMA STUDIO
Owner’s Manual
2
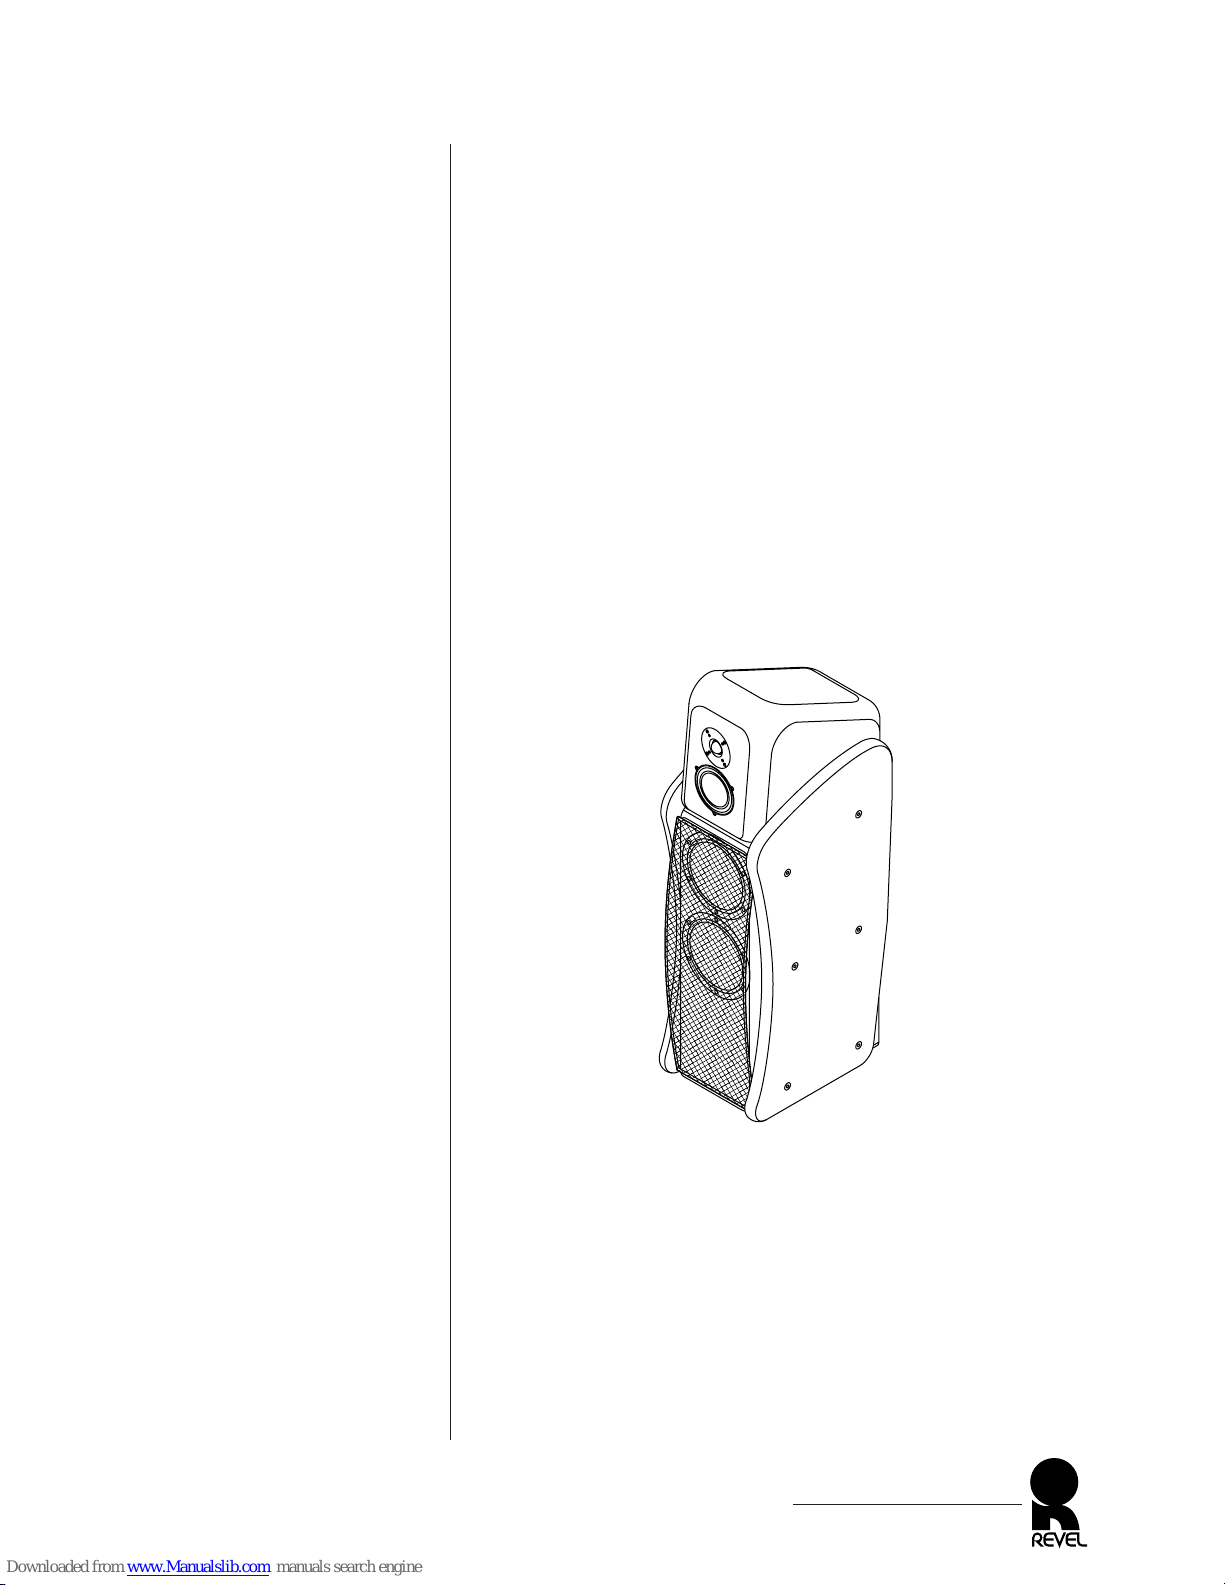
Figure 1. The REVEL ULTIMA
STUDIO loudspeaker.
INTRODUCTION
The REVEL ULTIMA STUDIO™ sets an entirely new performance and value reference in floorstanding loudspeakers. It champions our hallmark of remarkable musical precision and imaginative
industrial design. While REVEL ULTIMA STUDIO’s artistic sculpt
is unique, its visual performance can only begin to tell the story of
the achievement yielded by our unique development process.
Our advanced psychoacoustic research into the interaction of loudspeaker and various placement options has resulted in “real-world”
performance unmatched by any loudspeaker. For example, to
insure compression-free operation during the most demanding passages, the REVEL ULTIMA STUDIO includes large voice coils in
each transducer, judiciously selected crossover points, and true
24 dB per octave networks. While the true test of any loudspeaker
is the sound it reproduces, we think you’ll agree that this “clean
slate” approach has yielded a truly exceptional outcome.
ABOUT THE MANUAL AND WARRANTY
To begin enjoying your new loudspeakers, first read and then perform
the instructions in this owner’s manual. Maximum performance
depends on following all instructions described here, as well as those
found in the owner’s manuals of associated components in your audio
system. Save these instructions for future reference.
REVEL ULTIMA STUDIO loudspeakers are covered by a limited
5-year warranty, so save the bill of sale to protect your purchase
and aid in any service-related questions.
REVEL ULTIMA STUDIO
Owner’s Manual
3
,,,,,,
,
Figure 2. The REVEL ULTIMA
STUDIO transducer and connection locations.
DESCRIPTION
REVEL ULTIMA STUDIO features a transducer complement (see
Figure 2) of two 8-inch woofers, a 5.25-inch midrange driver, and
1.1-inch tweeter. A second 0.75-inch tweeter (on the rear) provides
added high-frequency energy to enhance overall “room response.”
Combined with an individually-optimized crossover network, this
transducer arrangement results in an extraordinary off-axis
response that provides a large “listening window” and an uncolored
in-room response, even in the presence of strong wall reflections.
WOOFERS
For uncompressed dynamic range, each REVEL ULTIMA STUDIO
uses two 8-inch mica/carbon-filled co-polymer dome woofers with:
• A radiating surface made of an injection-molded polymer material with incredible stiffness and internal damping.
• Optimized magnetic circuits to minimize harmonic distortion.
• Oversized 1.5-inch diameter voice coil with flat aluminum wire
offer higher power handling and long excursion capability.
MIDRANGE
The 5.25-inch titanium-dome midrange features:
• A radiating surface made of titanium for true pistonic behavior
throughout its operating range.
REVEL ULTIMA STUDIO
Owner’s Manual
4
Remove straps
for bi-wire
or bi-amp
Low Frequency Input High Frequency Input
+1-1
0
+.5
-.5
Serial Number
xxxx
Front Tweeter Level
Rear Tweeter Level
Revel Corporation
Northridge, California
Made in U.S.A.
-3
0
Off
REVEL ULTIMA STUDIO Front
(without grilles)
REVEL ULTIMA STUDIO Rear
Tweeter
Woofer Port
Rear Tweeter
Level Control
Front Tweeter
Level Control
Midrange
Woofer
Woofer
Connectors (with
shorting straps)
Tweeter

• A motor system that utilizes neodymium magnets and a large
voice coil for exceptional performance.
• Oversized 2-inch diameter voice coils with flat aluminum wire
offer higher power handling than average-sized coils for greater
accuracy at high volume levels and during extended crescendos.
• The cast magnesium frame provides optimum voice coil cooling
and minimum reflections, while offering excellent rigidity.
TWEETERS
Each REVEL ULTIMA STUDIO also includes a pair of
high-performance tweeters with these features:
• True pistonic behavior throughout its entire operating range for
a new level of freedom from coloration.
• A front aluminum-alloy dome tweeter with a large voice coil and
oversized surround roll for higher power handling and longer
excursion capability with extraordinarily low-harmonic distortion.
• A rear textile dome tweeter that flattens the “in-room” response,
resulting in superior “air” and detail.
CROSSOVER NETWORK
Each REVEL ULTIMA STUDIO has an individually-optimized
crossover network with:
• A 3-way, 24 dB per octave crossover at 220 Hz and 2.2 kHz to
optimize the on- and off-axis response of the system.
• Hand-wired filter networks with air-core inductors and film capacitors to match each loudspeaker to the reference standard.
• Provision for bi-amplified and bi-wired applications via removable external shorting straps on the gold-plated binding posts.
• External level controls for both the front and rear tweeters via
calibrated switched precision resistors for ideal imaging.
CABINET
The cabinet offers exquisite appearance and aids in overall system
performance. The main enclosure and internal bracing are
designed to act as an acoustically-inert platform for sound-wave
generation. Interchangeable side panels are available in a full array
of optional finishes when updating home decor (see Panel
Replacement on page 19).
REVEL ULTIMA STUDIO
Owner’s Manual
5
WARNING
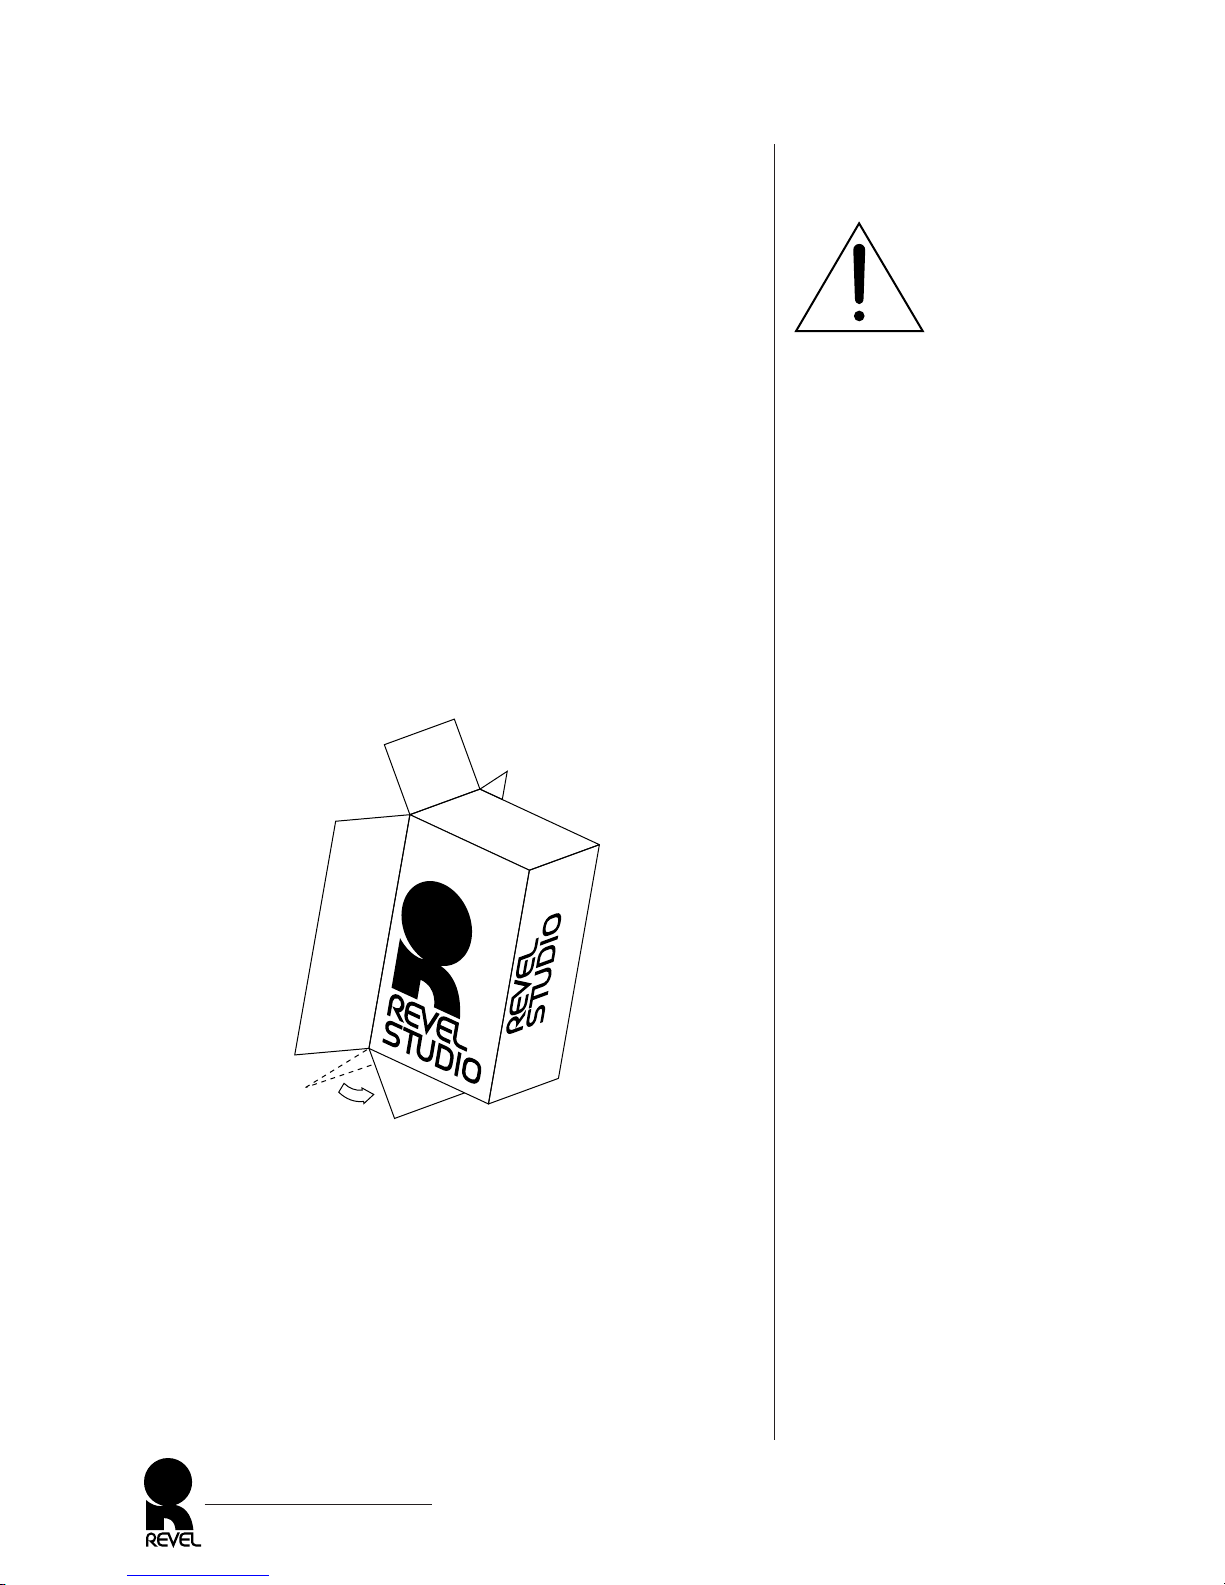
Figure 3. Unpacking a REVEL
ULTIMA STUDIO carton.
UNPACKING
IMPORTANT! Do not attempt to lift a REVEL ULTIMA
STUDIO from its packing carton alone – use at least two strong
people to unpack the product properly. To avoid injury, use
extreme care during unpacking. Always stand as straight as possible and use your leg muscles to lift the REVEL ULTIMA
STUDIO. Do not lift it while bending from the waist.
Each REVEL ULTIMA STUDIO is packed in its own carton with
a shipping weight of 164 pounds (74.5 kg). To avoid personal
injury and possible product damage, we strongly urge you to enlist
additional help before unpacking either carton.
To unpack a loudspeaker, perform the following steps:
1. Stand a REVEL ULTIMA STUDIO in an upright position.
2. Carefully remove all staples from rear flaps. Open the flaps and
tilt the unit forward so that the bottom flap can be positioned
under the carton, as shown in Figure 3.
3. Lay the unit on its back with all flaps open. Lift carton off the
unit and set it aside.
4. Place the REVEL ULTIMA STUDIO in an upright position
and then remove the four (4) foam packing strips from the
sides, as shown in Figure 4 (on the next page).
5. Tilt the cabinet forward and remove bottom rear end pad, using
caution to avoid touching the front tweeter or midrange.
6. Tilt the cabinet backward and remove bottom front end pad,
using caution to avoid touching the front tweeter or midrange.
REVEL ULTIMA STUDIO
Owner’s Manual
6
Tilt carton forward and
tuck bottom flap under
This end up
Front
This end up
Rear
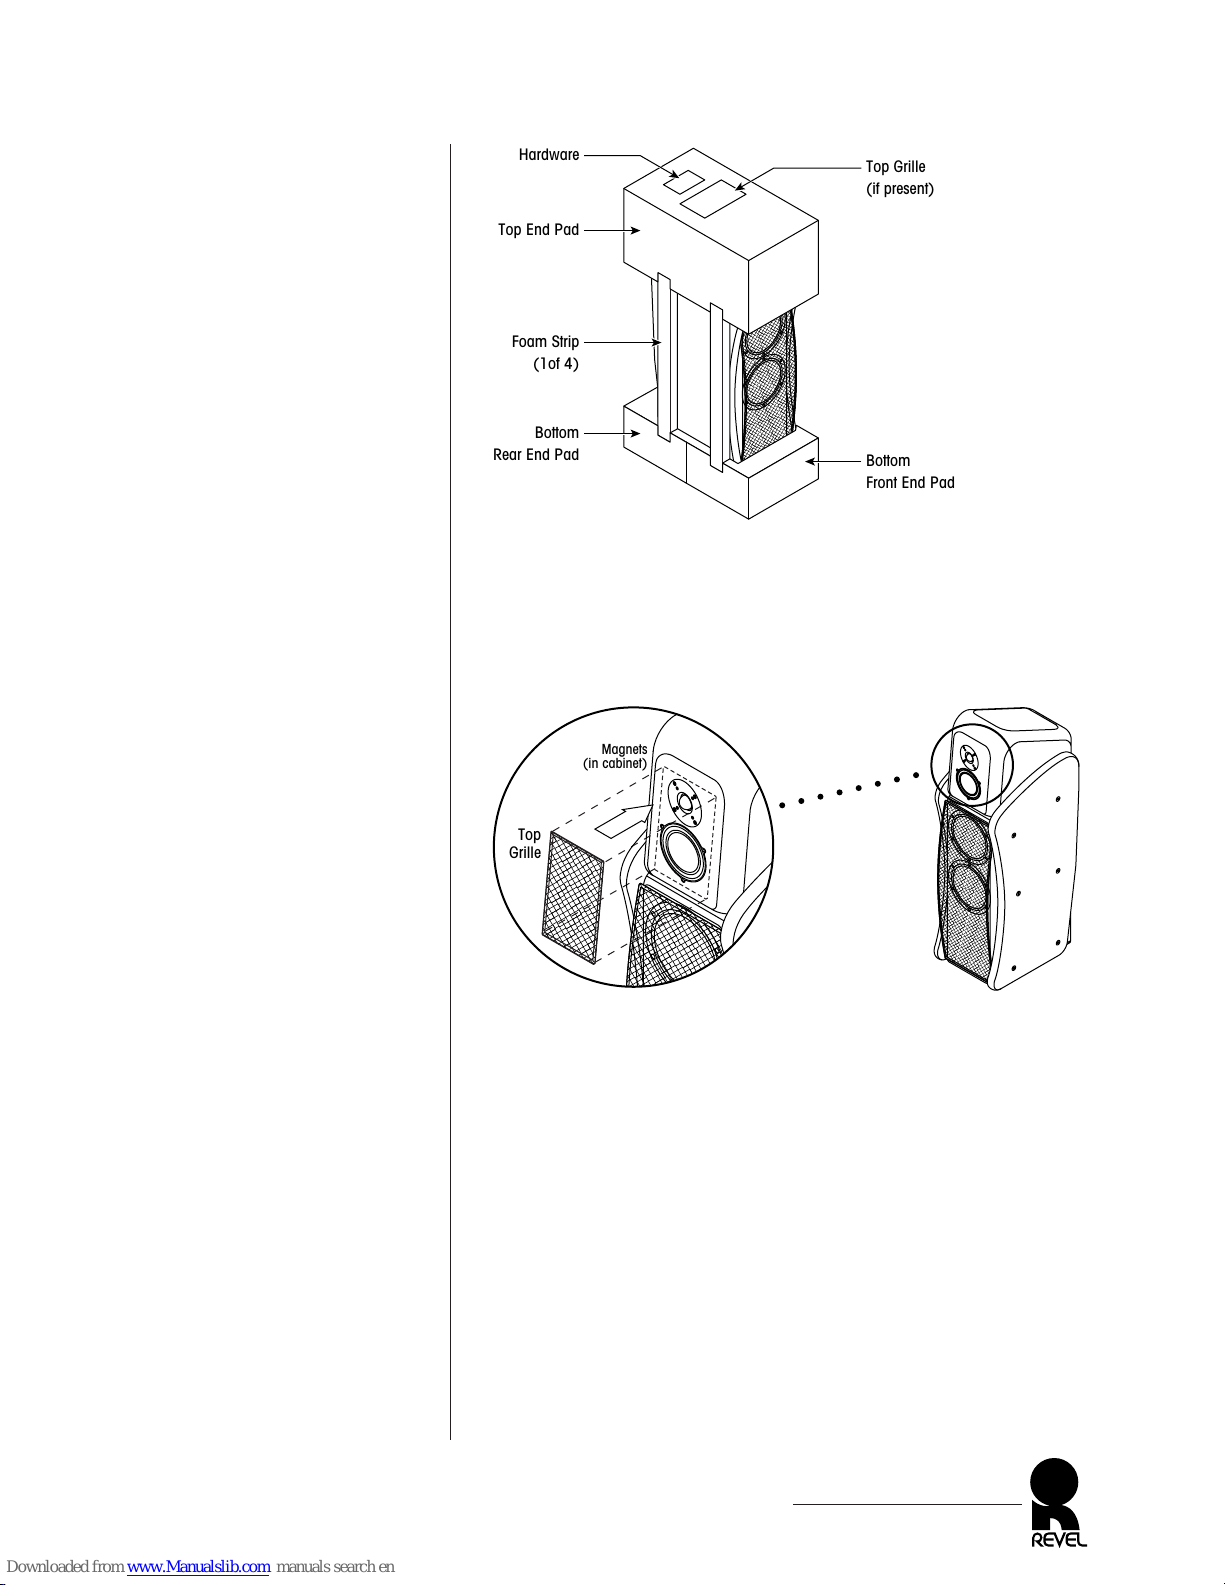
Figure 4. A REVEL ULTIMA
STUDIO with its inner
packing materials.
Figure 5. Installing the
optional top grille.
7. Remove top end pad, fabric sock, and plastic bag from the grille,
using caution to avoid touching the front tweeter or midrange.
8. Remove enclosed hardware and optional top grille (if present)
from recessed pockets in the top end pad. Install the top grille,
as shown in Figure 5.
9. Repeat steps 1 through 8 for the other loudspeaker.
NOTE: We recommend installing spikes after determining final
speaker placement (see discussion starting on next page).
After unpacking both units, carefully inspect each one for possible
damage due to shipping. If you discover any damage, immediately
contact your Revel dealer for further assistance. To move an
unpacked REVEL ULTIMA STUDIO (e.g., when experimenting
with placement), rock it side-to-side into place, using caution to
avoid touching the front tweeter and midrange.
Keep all packing materials for future shipping. In the unlikely
event a product will need repair, Revel will only accept a unit in its
original shipping carton. Using any other packing materials may
result in damage to the product and is not covered by the warranty.
See Service Information on page 23 for additional details.
REVEL ULTIMA STUDIO
Owner’s Manual
7
,,,,,
,
,,
Top
Grille
Magnets
(in cabinet)
,,,,,
,,,,,,
,,,,,,
,,,,,,
,,,,,,,
,,,,,,,
,,,,,,
,,,,,,
,,,,,,,
,,,,,,
,,,,,,
,,,,,,,
,,,,,,,
,,,,,,
,,,,,,
,,,,,,,
,,,,,
,
Top End Pad
Hardware
Top Grille
(if present)
Foam Strip
(1of 4)
Bottom
Rear End Pad
Bottom
Front End Pad
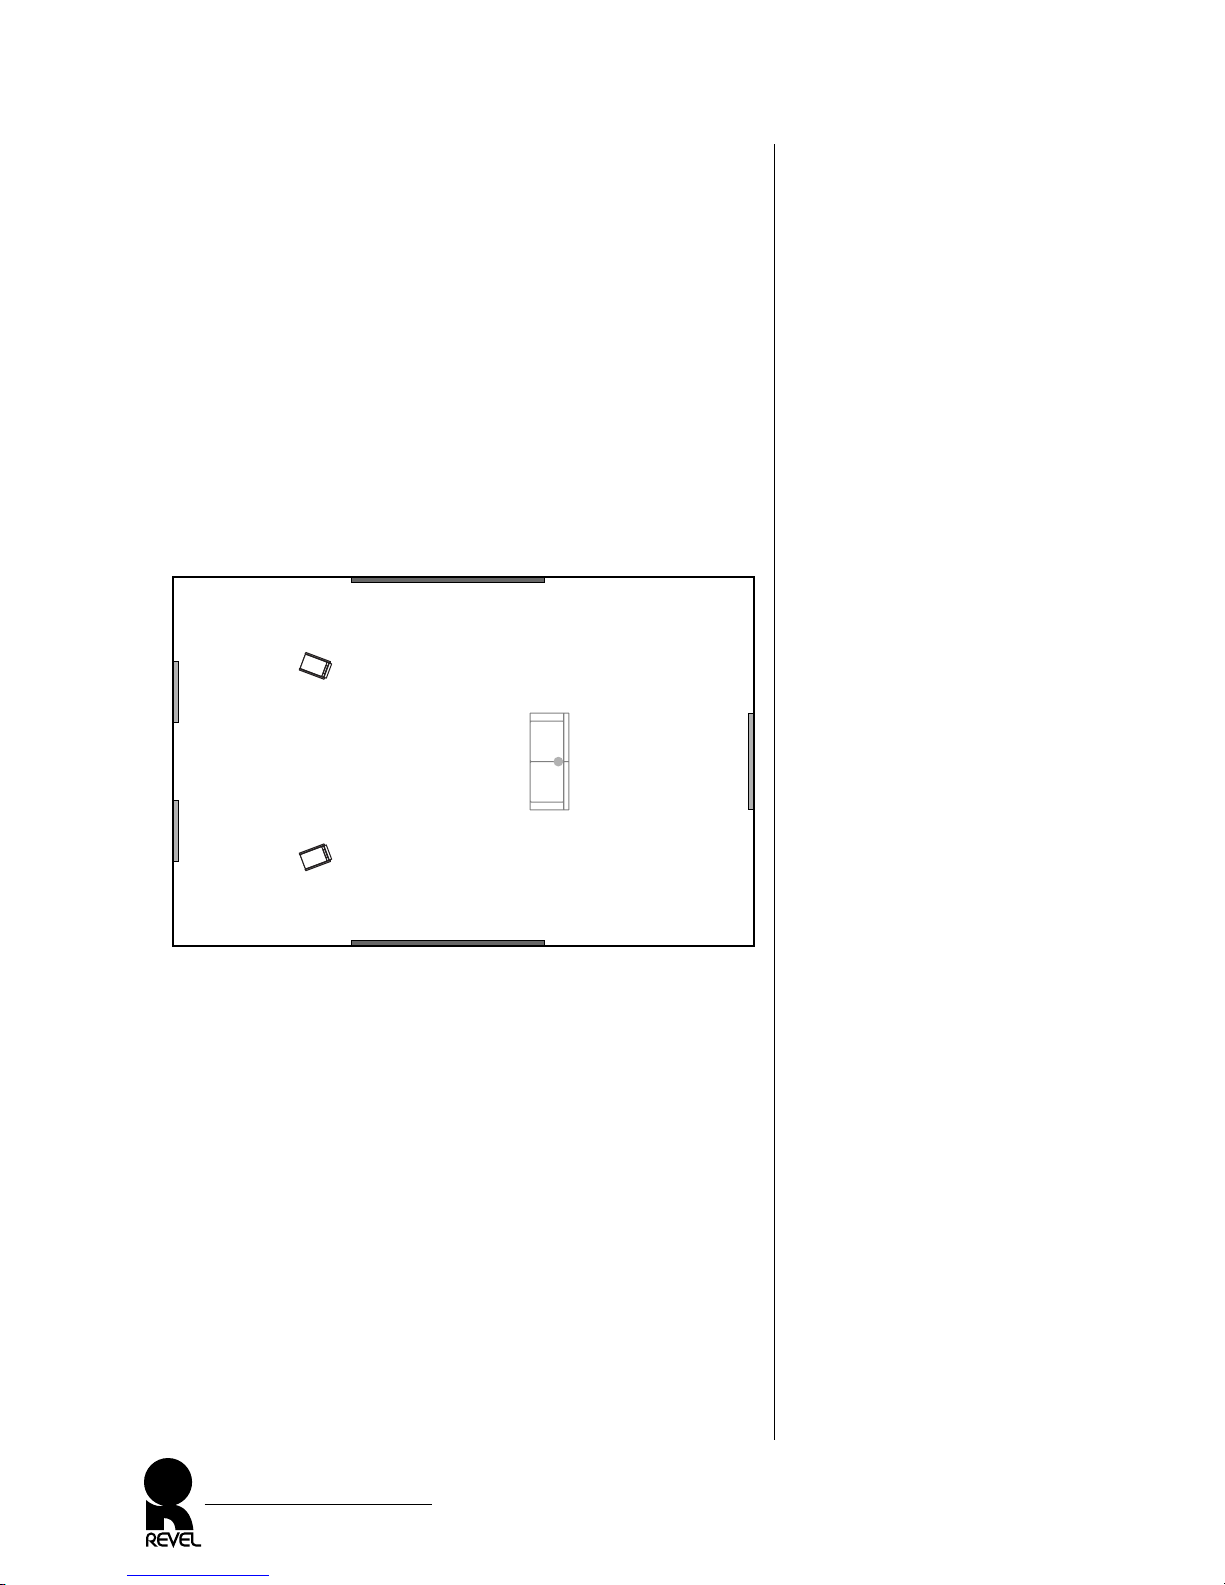
Figure 6. Typical placement of
REVEL ULTIMA STUDIO
loudspeakers for stereo. Note suggested room treatments due to the
primary reflection points.
PLACEMENT
Sound quality is heavily dependent on the accuracy of your loudspeakers, their placement in the listening room, and the acoustics of the
room itself. Since the REVEL ULTIMA STUDIO loudspeakers are
extremely accurate, experimenting with their placement is the most
significant way to optimize their performance in a given environment.
The following guidelines will help you obtain the best results:
NOTE: Set all loudspeaker controls to “zero” position during placement experimentation. If needed, refer to Figure 13 on page 17.
• For best stereo imaging, place the REVEL ULTIMA STUDIO
loudspeakers at equal distances from the main listening position
and in symmetry with the room, as shown in Figure 6.
• Optimum timbre and imaging precision is obtained with the
loudspeakers pointing almost directly toward the prime listening position. Some listeners prefer a wider “soundstage,” which
is achieved by reducing the toe-in angle, perhaps to the point of
aiming the loudspeakers straight ahead.
• Imaging and a sense of spaciousness will improve as the
loudspeakers are moved away from the wall behind the loudspeakers and the side walls.
NOTE: You may then need to move the listening position back to
maintain the best stereo image.
• For more bass reinforcement, try moving the loudspeakers closer
to the back wall or corners (also see Room Acoustics on next page).
NOTE: You may then need to move the listening position forward
to maintain an acceptable stereo image.
REVEL ULTIMA STUDIO
Owner’s Manual
8
Listening Position
(e.g., on couch)
Diffusion Panel
Preferred
(Absorption OK)
Absorption Panel
Absorption Panel
Absorption or
Diffusion
Panel
Absorption or
Diffusion
Panel
R REVEL ULTIMA STUDIO
L REVEL ULTIMA STUDIO
 Loading...