

Page 1
LA9014
Page 2
Quick Guide
1.Insert a SIM card (not included) into the SIM card slot located beside the case
(Press yellow button to release).
Note:4G SIM cards are acceptable to use with this device however the unit
only operates on a 2G band.
This unit requires data to be activated on your pre-paid or contract SIM card.
(Recommend order 20-30M/Month data package)
2.Insert the tracker into the OBDII socket (mostly located under the car
panel,12V or 24V vehicle compatible ), the tracker will power on automatically.
3.Contact your mobile service provider to obtain the APN name in order to
view the location on the tracking website. APN s vary depending on your SIM
card s plan (i.e. pre-paid or contract)
4.Enter the following command via SMS on your the tracker to set the APN"name":
Send SMS "APN*123456*apnname"(123456 refers to the default password)
For example:
Plan: Vodafone Pre Paid
APN Name : live.vodafone.com
Send SMS: APN*123456*live.vodafone.com
If the APN "Name" has been entered correctly, you will receive a SMS stating
"APN:live.vodafone.com"(example)
Note: The APN name needs to be entered correctly otherwise the location
may show up in China, Africa, etc.
5.Login to the tracking website (www.responsegps.com) using the last 7 digits
of the serial number for the username and password which is located in the
battery compartment of the tracker.
For example:
Serial number: CC2014012345678
Username: 2345678
Password: 2345678
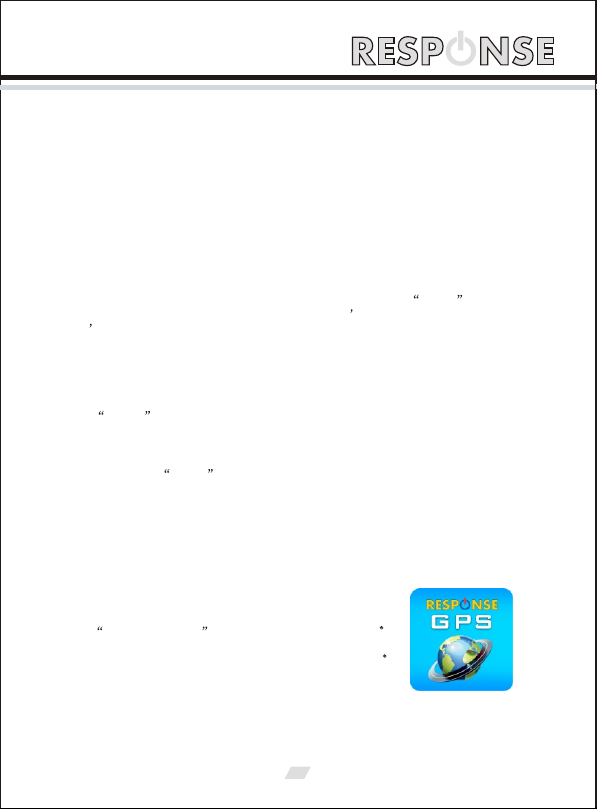
6.Free Response GPS app is available on iTunes
and www.responsegps.com tracking platform to
easily view the current tracking location on your iOS
or Android smart phone or tablet.
App name:
ResponseGPS
1
Page 3

Basic Functions:
GPS Tracker
Power Indicator Light
OBD Interface
SIM Card Slot
Specification
OBD interface, no installation charge
Diagnostic Car Status (reply by SMS)
Auto download & configuration setting for APN & GPRS
SMS balance checking for Tracker SIM card
App (Android? & iPhone?) / WeChat / Web / SMS / Wap locate
Built in backup battery with power down alarm
Built in Shock Sensor to detect car movements with shock alarm
Shock Sensor controls uploading to save car battery power
Online Air Upgrade From Internet Server by GPRS
Cell ID locate when GPS is not available (Indoor or underground)
Universal 4 GSM Band with Global & wide working voltage: 9-45V DC
LED indicator
GREEN LED Flash once: GSM & GPS working well
GREEN LED Flash twice: GSM working well but no GPS signal
GREEN LED Flash three times: GSM & GPS working well but battery is low
GREEN LED Flash four times:GSM working well,battery low and no GPS signal
GREEN LED ON continuously: GSM searching network
GREEN LED OFF continuously: Power off
GREEN LED Flash fast: incoming call or sending SMS
RED LED Flash once: uploading the current tracking
RED LED Flash twice: cannot upload the current tracking
RED LED Flash slowly: the tracker is being charged
2
Page 4
Before Using
1.Power ON / OFF
Insert the tracker to the OBD socket and then the tracker will switch on auto
matically.
Unplug the tracker from the OBD socket. Then you have up to 1 hour till the
built in battery runs out of power and the tracker will switch off automatically.
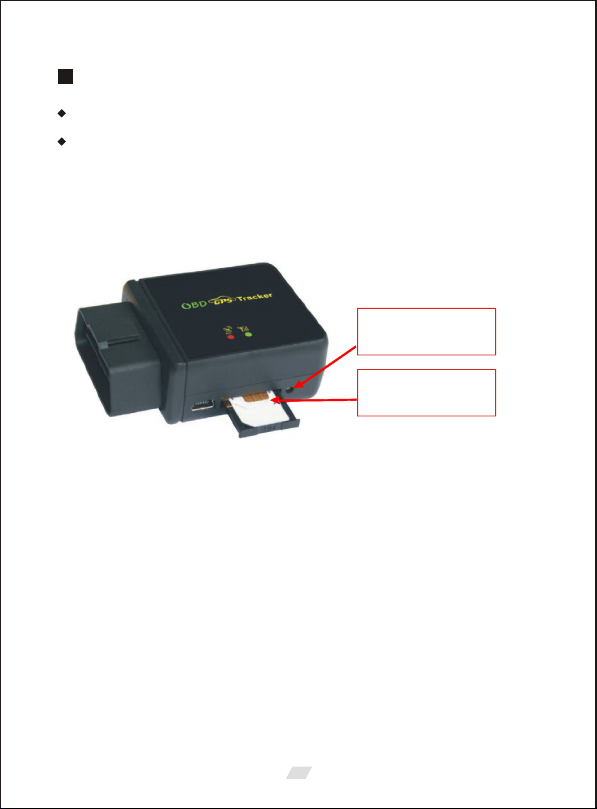
2.Install SIM card
Press the push button beside the SIM car slot, the SIM card holder will
pop out as shown in the image. Place the SIM card in the holder by leaving the
metal pin side face up and then push the holder back into the tracker.
SIM Card Release
(Push)
SIM Card Metal Pin
Face Up
Note:
1>This tracker use 2G GSM network, and it upload tracking only through
GPRS, it cannot work in CDMA network or 3G(WCDMA or CDMA2000)
network. (Many 3G SIM card can use 2G GSM network, this 3G SIM card
can be used in this tracker).
2>Enable the SIM card GPRS data service, order a GPRS data package (20 30M/month)can save data charge (Normally the tracker will use about 20M
GPRS data every month )
3> Please confirm the PIN code of the SIM card is disabled.
4> Before installing or uninstalling the SIM card, please power off the tracker.
3
Page 5

3.ANTENNA
The GSM and GPS Antennas are built-in with the tracker.
The GSM and GPS signals may be reduced if the tracker is enclosed by the
large metals panels.
4.Using Condition
The operating temperature range for this tracker is from -20 C to 60 C.
5.Back to factory setting (Default configuration)
Send SMS (factory*123456) to the tracker will delete all user settings
and restore back to factory configuration.
Note: after the default configuration, IP / APN / GPRS / Language / Time zone
/ Alarm Setting etc. are deleted and back to factory setting. All the authorized
phone numbers are deleted and the password will change to 123456. You will
need to reset the IP/APN/GPRS name & password again by SMS.
oo
Installation
1. Obtain a 2G GSM phone SIM card that needs SMS service, incoming caller
ID display, and GPRS function. Please disable the PIN code of the SIM card,
this SIM card phone number is the tracker number and all other operations
(calling and sending SMS) for the tracker.
2. Plug the tracker into the OBDII socket. The OBDII socket is normally under
the car panel, if you cannot find the OBDII socket, check the car manual or
call your car manufacturer to confirm the location of the OBDII interface
(Please confirm that your vehicle has the OBDII interface before you
purchase this tracker).
3. After plug in the tracker to the OBDII socket, the tracker will switch on
automatically. The built-in rechargeable battery will start charging
automatically. The tracking is triggered by the shock sensor. So if the vehicle
starts to move, the tracker will begin to upload its location and the tracker s
status will be shown on the online platform immediately. If the vehicle stops
moving, the tracker will stop uploading its location and switch to sleep mode
and a few minutes later the tracker status on the platform also will change to
offline. If you would like to keep the tracker online at all times, send SMS
(keeponline*123456) to turn off the automatic sleep mode. This function will
use more data and battery power.
4
Page 6

How to Use
After installing the SIM card and insert the tracker into OBD socket, you
can send SMS to locate and change tracker settings. The tracker uses
password (default is 123456) to control,every SMS command needs to include
the password.If you have set the authorized phone number,some commands
do not need include the password.However, for better security please change
the default password before using.
1. After installation of the tracker, park the car in the open place (indoor or
underground cannot receive the GPS signal), send SMS (LOCATE*123456)
to the tracker number ( SIM car number ), the tracker will reply via SMS
message with a Google map link. Click the link to visit the map,the vehicle
location will be displayed on the map. And this determines the tracker is
working.
2. This tracker can download & configure the GPRS & APN settings auto
matically. If the APN or GPRS user name & password are not correct for
some reason, you can set the APN and GPRS username & password by
sending SMS. You can check the APN & GPRS username password by
sending SMS CHECK*123456 to tracker, Send SMS "APN*123456*
apnname" to the tracker can set the APN, and send SMS "USERNAME*
123456*username*password" to the tracker can set the GPRS username
& password, please see the following setting descriptions for detail.
3. Visit the website www.responsegps.com or www.999gps.net and logon
with the given username and password. The username is the last 7 digits
of the trackers serial number and the default password is the same as the
username. For example, if the serial number is CC8301412345678, the
default logon name and password should be 2345678.The serial number is
printed on the label on the back of the device. The password and user
information can be changed after logon, but the user name cannot be
changed. After logon, click on the vehicle that you wish to check and the
current location will displayed on the Google map. If the time and the
location are correct, then you have installed the tracker and set the tracker
properly.
4. For the iPhone and Android App please see the platform using guide.
5. If you have more than one vehicle that you wish to track, we can create a
username that allows you to see all of your trackers at once. Ask your
retailers for further information.
6. The data & time of the tracker upload to the website is GMT time (Greenwich
Mean Time,add or minus a fixed digit is your local time),you can change the
display time to your local time by setting the time zone to your local time
zone in My Account menu after logon the platform (For example; New York
time zone is -05), please refer the platform operation guide.
,
Page 7

Setting Instruction
1. Check Tracker ID:
The tracker ID is print on the label of the tracker, the S/N number on the
label is the ID, Also if the label is missing, send SMS "ID*123456" to tracker,
in which, "ID" is the fixed command and "123456" is the password. Having
it done successfully, there will be a SMS "ID: CC8301412345678", in which,
"CC8301412345678" is the ID and every tracker has its unique ID number.
The last 7 digits of the tracker ID is the username and password of the tracker
on the platform, for example the tracker ID is: CC8301412345678, and then
the user name on the platform for this tracker is 2345678 and the password is
also 2345678. The password can be changed once login the platform, but the
username cannot be changed.
2. Set Server IP
Send SMS "IP*123456*58.64.155.133,8011" to the tracker,in which,"IP"
is the fixed command, "123456" is the password and "58.64.155.133,8011"
is the IP address of the server computer of our website.Once it is successfully
done, there will be a SMS "IP: 58.64.155.133, 8011". However, the IP address
may be changed with the upgrade of our server, please see the notices on our
website.
Notice: The tracker IP address is set to default: 58.64.155.133,8011 in factory,
it is not necessary to set it again, unless our IP address or the uploading
location has changed.
3. Set APN
This tracker can download & configure APN & GPRS username password
automatically after power on. If the APN & GPRS username & password are
incorrect for some reason, then you need to send SMS to tracker to change
them. If the tracker cannot upload location to platform (Red LED flash twice),
please confirm the auto configuration of the APN & GPRS username &
password are correct. For the APN and GPRS username & password, please
call the SIM card service provider to find out. To check the auto configuration
APN & GPRS of the tracker please sending SMS CHECK*123456 to the
tracker number.If the APN & GPRS are not correct,please set by the following
the instructions below.
Send SMS "APN*123456*apnname" to the tracker, in which, "APN" is
the fixed command, "123456" is the password and "apnname" is the APN
name of the service provider. Having successfully done, there will be a SMS
"APN: apnname".
Send SMS "USERNAME*123456*username*password" to the tracker,
"USERNAME" is a command, "123456" is the password of the tracker;
"username" is the mobile company GPRS user name, "password" is the
mobile company GPRS password, once it is successful, the tracker will send
back the information "Username: username, Password: password", if the
password is not correct and the operation was failed and you will receive an
SMS "Wrong Password".
5
Page 8

4. Tracker SIM Card balance and Data usage Checking
Most SIM card can send an SMS or call a specified USSD command
number to get an SMS with SIM card money or data balance,for example PCCW
mobile phone SIM card, call ##121#, Union mobile phone send SMS CXYE to
10010, the mobile phone company will send back the SMS with money & data
balance.For this kind of SIM card,after set by the following step, sending SMS
to tracker can check the tracker SIM card money or data balance.
Set sending SMS or call USSD number to check balance:
Send SMS BALANCEMODE*123456*SMS to the tracker, it means
sending SMS to check balance, in which, BALANCEMODE is the fixed
command, 123456 is the password and SMS means sending SMS.
Having successfully done, there will be a SMS Balance Mode: SMS .
Send SMS BALANCEMODE*123456*CALL to the tracker, it means
calling USSD command number to check balance, in which,
BALANCEMODE is the fixed command, 123456 is the password and
CALL means calling USSD number. One it is successfully done, there will
be an SMS Balance Mode: CALL .
Set sending SMS number or call USSD number:
Send SMS BALANCEPHONE*123456*NUMBER to the tracker, in
which, BALANCEPHONE is the fixed command, 123456 is the
password, NUMBER is phone number or USSD command number, for
example: PCCW is calling ##121# to trigger replying SMS with balance, then
the NUMBER is ##121#, Union mobile phone is sending CXYE to 10010 to
trigger replying SMS with balance, then the NUMBER is 10010. Once it is
successfully done, there will be an SMS Balance Phone: ##121# or
Balance Phone: 10010 .
Set sending SMS content:
For balance checking via SMS, you need to set the sending SMS content,
if the balance checking is calling USSD number, then it is not necessary to set
this. Send SMS BALANCESMS*123456*sms to the tracker, in which,
"BALANCESMS" is the fixed command, "123456" is the password, "sms"
is the sending SMS content to check balance, for example: Union mobile
phone is sending CXYE to 10010 to trigger replying SMS with balance, then
the sms is CXYE.Once it is done,there will be an SMS "Balance SMS: CXYE".
Trigger to Check Balance:
Once the above settings are done, send SMS BALANCE*123456 to
the tracker, in which, BALANCE is the fixed command, 123456 is the
password, the tracker will check the balance and reply SMS with balance to
sender, reply SMS is different for each mobile phone company.
If the authorized number has been set,use the authorized phone number
to send SMS "BALANCE#" to the tracker also can trigger the tracker to check
balance.
Notice: After finish the above setting, it is not necessary to set it again unless
the service provider has been changed or the tracker settings have been
changed to factory default.Sending SMS "BALANCE#" or "BALANCE*123456"
will be able to trigger the tracker to check balance.
6
Page 9

5. Add / Delete / Check Authorized Phone Number:
The authorized phone number is used to send alarm information by SMS,
or use mobile phone to locate the tracker without platform, if the authorized
phone number is not set, then the alarm information can not send to user by
SMS (alarm information, battery low, SOS, etc).
5.1. Add authorized phone number by SMS
Send SMS "ADDPHONE*123456*A*number" (Not including the quotation
marks " ", number means the telephone number you want authorized, the
following is same) to tracker is OK, "ADDPHONE" is a command; "123456" is
password; "A" is authorized number location,every tracker have 3 authorized
phone number, A and B, and C, so you can set 3 phone numbers, if the add
operation is success, the tracker will send back the information Add
Authorized Phone OK , if the password is not right, the operation is fault, the
tracker will send back information Wrong Password .
5.2. Delete authorized phone number by SMS
Send SMS"DELETEPHONE*123456*A" to the tracker, "DELETEPHONE"
is a command; 123456 is password; A is authorized phone number
location, there are 3 locations "A" and "B" and "C"; if the delete operation is
success, the tracker will send back the information "Delete Authorized Phone
OK", if the password is not right, the operation is fault, the tracker will send
back information Wrong Password .
5.3. Check authorized phone number by SMS
Send SMS CHECKPHONE*123456 to tracker, CHECKPHONE is
a command; 123456 is password; if the operation is success, the tracker
will send back the information Authorized Phone A: 13987654321
B 13876543210 C 13765432101, the phone number is just an example.
If the password is not right, the operation is fault; the tracker will send back
information or Wrong Password .
7
Page 10

6. Change / Check Password
6.1. Change tracker password
Send SMS CHANGEPASSWORD*123456*888888 to tracker,
CHANGEPASSWORD is a command; 123456 is old password;
888888 is new password; if the operation is success, the tracker will send
the information "New Password 888888" to every authorized phone number,
if the password is not right, the operation is fault, the tracker will send back
information Wrong Password .
Note: Only authorized phone can change the password.
6.2. Check tracker password
Send SMS CHECKPASSWORD to the tracker, CHECKPASSWORD
is a command, if the operation is success, the tracker will send back the
information Password 888888 ; 888888 is an example.
Note: Only authorized phone can check or change the password.
7. Set Alarm by Calling: ON/OFF
Send SMS "CALLON*123456" (Call to authorized number) or "CALLOFF
*123456" (No calling) to the tracker, "CALLON" or "CALLOFF" is a command,
"123456" is the tracker password, if the operation is success,the tracker will
send back the information "Alarm by calling: ON" or "Alarm by calling: OFF ,
if the password is not right, the operation is fault, the tracker will send back
information Wrong Password . If the alarm by calling is ON, then when the
alarm is triggered, the tracker will call the authorized number to notice the
alarm, the default setting is ON.
8. Set Alarm by SMS: ON/OFF
Send SMS SMSON*123456 (Sending SMS to authorized number) or
SMSOFF*123456 (No SMS) to the tracker, SMSON or SMSOFF
is a command, 123456 is the tracker password, if the operation is success,
the tracker will send back the information Alarm by SMS : ON or Alarm
by SMS :OFF , if the password is not right, the operation is fault, the tracker
will send back information Wrong Password . If the alarm by SMS is ON,
then when the alarm is triggered, the tracker will send SMS to the authorized
number to notice the alarm. By default it is ON.
9. Set Power Down Alarm: ON/OFF
Send SMS "POWERALARMON*123456" (Power down will trigger alarm
to authorized number by calling or SMS) or POWERALARMOFF*123456
(No Alarm) to the tracker, POWERALARMON or POWERALARMOFF
is a command, 123456 is the tracker password, if the operation is success,
the tracker will send back the information "Power Down Alarm: ON" or "Power
Down Alarm:OFF",if the password is not right,the operation is fault,the tracker
will send back information Wrong Password . If the power down alarm is
ON, then when the tracker is removed or the power is removed, the alarm is
triggered; the tracker will call or send SMS to the authorized number to notice
the alarm. By default setting is ON.
8
Page 11

10. Set GPRS Mode: KEEPONLINE / SHOCKCONTROL
Send SMS KEEPONLINE*123456 (Keep online all the time even the
tracker stop moving) or SHOCKCONTROLGPRS*123456 (Turn off GPRS
after the tracker stop moving 2 minutes) to the tracker, KEEPONLINE or
"SHOCKCONTROLGPRS" is a command, "123456" is the tracker password,
if the operation is success, the tracker will send back the information "GPRS:
Keep Online" or GPRS: Shock Control , if the password is not right, the
operation is fault, the tracker will send back information Wrong Password .
The default setting is Shock Control, when the tracker begin to move, the
tracker begin upload the tracking, the tracker status on the platform will
change to online immediately. If the tracker stop moving, the tracker will stop
upload the tracking and turn off GPS & GPRS to go to sleep mode, a few
minutes later the tracker status on the platform also will change to offline.
If the tracker is always online, the tracker will send tracker status to
platform all the time, but this will exhaust more data charge and car battery
power, and if the car will park long time or the car battery is old, this maybe
cause the car battery power low and cannot start car engine, we do not
recommend this working mode.
11. Set GPS Mode: GPSON / SHOCKCONTROL
Send SMS "GPSON*123456"(GPS module Keep ON all the time even the
tracker stop moving) or "SHOCKCONTROLGPS*123456" (Turn off GPS after
the tracker stop moving 2 minutes) to the tracker, "GPSON" or "SHOCKCONT
ROLGPS" is a command,"123456" is the tracker password,if the operation is
success,the tracker will send back the information "GPS: Keep ON" or "GPS:
Shock Control", if the password is not right, the operation is fault, the tracker
will send back information "Wrong Password". The default setting is Shock
Control, when the tracker begins to move, the tracker turn on GPS, if the
tracker stops moving, the tracker will turn off GPS to save car battery power.
The GPS module keep ON can get better signal and can locate very fast,
but this will exhaust more car battery power, and if the car will park long time
or the car battery is old, this maybe cause the car battery power low and
cannot start car engine, we do not recommend this working mode.
12. Set Upload Time Interval
Send SMS INTERVAL*123456*xxx to tracker, INTERVAL is a
command, 123456 is password, xxx is the interval time, which can
be set from 30 to 999 seconds. The tracker will send back information Set
Interval xxx OK ,if the password is not right,the operation is fault,the tracker
will send back information Wrong Password . 30 seconds is the default
interval time. Longer upload interval time can save battery and GPRS data
cost, but this will make the total mileage to more error.
9
Page 12

13. Set Car Plate Name
Send SMS PLATE*123456*PlateName to tracker, PLATE is a
command,"123456"is password,"PlateName"is the car plate number or name,
after setting the car plate,the reply to tracker SMS will add car plate to indicate
which car reply this message.The tracker will send back information"Car Plate:
PlateName", if the password is not right, the operation is fault, the tracker will
send back information "Wrong Password".
14. Check Car OBD Information
Send SMS "OBD*123456" to tracker, "OBD" is a command, "123456" is
password, the tracker will send back OBD & car status information , if the
password is not right, the operation is fault, the tracker will send back
information Wrong Password .
OBD information example:
Number of DTCs: 1, P0340, Car voltage: 13V, GPS battery 66%.
The detail information of the DTC please see the car owner book, the
different model car has different DTC, the 4S or fixing factory can diagnostic
your car by mobile phone.
15. Check tracker setting
Send SMS "CHECK*123456" to tracker, "CHECK" is the fixed command,
123456 is password. The tracker will send back information including
software version, ID S/N number, IP address, authorized phone number, GPS
and GSM signal etc. if the password is not right, the operation is fault, and the
tracker will send back information Wrong Password . The following is an
example:
V Mar 03 2014,TQ,CC0830C00820800,58.64.155.133,8011,30,
A:13987654321, B:13876543210, GPS OK,+00,ShockControlGPS,
-95dBm,ShockControlGPRS, CMNET,User,Password,46000,e1d/2
4a0,93%
V Mar 03 2014: Software version date
TQ: TCP/IP Protocol name
CC0830C00820800: ID S/N number
58.64.155.133,8011: Server IP and Port
13987654321: Authorized number (A/B/C)
GPS OK: GPS status
+00 : Time Zone (00 means GMT time)
ShockControlGPS: GPS module shock control
-95dBm: GSM signal strength
ShockControlGPRS: GPRS is controlled by shock sensor
CMNET: APN name
User: GPRS user name
Password: GPRS password
46000: Sim Card MCC+MNC
e1d/24a0: Current Cell ID
Battery: 88%: Battery
10
Page 13

Note: This command is usually used to check the tracker current status &
configuration, if the tracker cannot work well, this command can check what
the problem is.
16. Re-power on tracker
Send SMS RESET*123456 to tracker can make the tracker power off
and power on again, "RESET" is the fixed command, "123456" is password.
The tracker will send back information "Cancel all alarm setting and re-power
on",then the tracker will power off and power on automatically,if the password
is not right, the operation is fault, and the tracker will send back information
"Wrong Password". Some time the tracker cannot work properly, send the
reset command, the tracker will re-power on a few minutes later.
17. Restore to factory setting (Back to Default)
Send SMS FACTORY*123456 to tracker can make the tracker power
off and power on again, FACTORY is the fixed command, 123456 is
password. The tracker will send back information Setting back to factory
default , then the tracker will delete all user setting, and restore all setting to
factory mode, just like a new tracker, then the tracker will re-power on after
delete user setting. If the user have changed the setting, such as APN, IP,
authorized number, etc, you need set this again after back to factory mode.
If the password is not right, the operation is fault; the tracker will send back
information Wrong Password .
18. Upgrade Software by GPRS (Air Update)
Send SMS UPGRADE*123456*FileName*69.195.124.168*21 to
tracker can upgrade the software built in the tracker, "UPGRADE" is the fixed
command, "123456" is password, "FileName" is upgrade file name, "69.195.
124.168*21" is server IP and port. The tracker will send back information
"Software File Name: FileName, IP:69.195.124.168,Port:21,start upgrading",
please do not move the tracker so that the tracker can have better signal to
download the new software, after finished downloading, the tracker will
upgrade the software automatically, then re-power on the tracker and send
back information Upgrading Finish. Ver: Mar 08 2014 , after upgrading all
the setting will back to factory. If the password is not right, or the downloading
is interrupt, the operation is fault; the tracker will send back information
Wrong Password or upgrading fails for read file data via FTP error,
please try later .
When the upgrade is ready, we will notice on the website, the upgrade
file name & server IP and port please contact us or dealer.
11
Page 14

Locate Operation Instruction
1. Calling trigger locating by text description location
Using authorized phone call the tracker, after ring 3 times, the tracker
will hang up the call automatically and locate immediately, a few seconds later
the tracker will send back the location information with text description by
SMS to the caller. If the tracker has not authorized number, any phone calling
can trigger the tracker to locate immediately, if the tracker has authorized
number, then only authorized phone calling can trigger the tracker to locate
immediately.
The SMS information sample is as follow:
Send SMS "LOCATE*123456" to the tracker, "LOCATE" is a command,
"123456" is password. If the operation is success, the tracker will send back
the information as above.
If the authorized number have been set,use the authorized phone number
to send SMS "123#" to the tracker also can trigger the tracker locate and reply
the location with text description.
If the tracker cannot get the location in text description, it will reply the
location with Google? map link as follow.
12
Page 15

2. Sending SMS trigger locating by Google? map link
Send SMS "URL*123456" to the tracker, "URL" is a command, "123456"
is password. If the operation is success, the tracker will send back the
location information with Google map link to the sender. User click the link,
the location in Google? map will display, the SMS example is as follow:
https://maps.google.com/maps?q=22.67680N,114.15188E
Battery: 88%
13
Page 16

3. Cell ID Locate with Google map link
After sending SMS or calling the tracker to trigger locate, if the tracker
cannot receive GPS signal or GPS signal weak (Underground Park or indoor
etc),the tracker will change to Cell ID locate,and reply a location with Google
map link to the caller or sender. User click the link, the location in Google
map will display like above, the SMS example is as follow:
No GPS signal, Just Cell ID Location:
http://maps.google.com/maps?q=N22.6775,E114.1518
Note: this location is locate by GSM base station ID, the precision is not
very high, in the city maybe 30-50 metres, in the country may be over 1 km, so
the location is only used for reference.
If the cell ID cannot get the location either, the tracker will reply Cannot
get location, please try again later .
4. Arm (Shock Alarm) by sending SMS
Send SMS "SHOCKALARMON*123456" to tracker, "SHOCKALARMON
is a command,"123456" is password,the tracker will send back the information
"Set Shock Alarm ON" to indicate the operation is success and go to arm state,
if the password is not right, the operation is fault, the tracker will send back
information Wrong Password .
Go to shock alarm state, the system will check shock sensor, if the shock
sensor is trigger (only continuously shock can trigger the shock alarm to
avoid trigger by mistake), the tracker will send alarm and location
information by SMS to the authorized phone number, and send the alarm
information to the website server, also the tracker will call the authorized
number A first, if no answered then B and C, if 3 authorized all no answered,
then stop calling, If the tracker is triggered continually, every authorized
phone will receive max 3 alarm SMS per hour.
If the authorized number has been set, use the authorized phone number
to send SMS ARM# to the tracker also can trigger the tracker to enter arm
state.
The shock alarm SMS is as follow: Shock Alarm
https://maps.google.com/maps?q=22.67680N,114.15188E
Battery: 88%
Page 17

5. Disarm (Shock Alarm) by sending SMS
Send SMS SHOCKALARMOFF*123456 to tracker, SHOCKALARM
OFF is a command, 123456 is password, the tracker will send back the
information Set Shock Alarm OFF to indicate the operation is success and
disable the shock alarm, if the password is not right, the operation is fault, the
tracker will send back information Wrong Password .
After disable the shock alarm, the system will not check shock sensor
again. Also send SMS CANCELALARM*123456 to the tracker can cancel
this alarm setting.
If the authorized number has been set, use the authorized phone number
to send SMS DISARM# to the tracker also can trigger the tracker to enter
arm state.
6. Set Move Alarm by Sending SMS
Send SMS "MOVEALARMON*123456" (Enable move alarm) or "MOVEA
LARMOFF*123456" (Disable move alarm) to the tracker, "MOVEALARMON"
or "MOVEALARMOFF" is a command, "123456" is password, the tracker will
send back the information "Set Move Alarm ON" or "Set Move Alarm OFF" to
indicate the operation is success, if the password is not right, the operation is
fault, the tracker will send back information Wrong Password .
After enable move alarm, the system will locate tracker and get the
current location, and then set the current location as original point, later the
tracker will check new the location distance from the original point, if the
distance between is bigger than 500 meters, the move alarm will be trigged
and the tracker will send alarm and location information by SMS to the
authorized phone number. If the tracker is triggered continually, every
authorized phone will receive max 3 alarm SMS per hour.
The move alarm SMS is as follow: Move Alarm
https://maps.google.com/maps?q=22.67680N,114.15188E
Battery: 88%
After disable the move alarm, the system will not check distance again.
Also send SMS CANCELALARM*123456 to the tracker can cancel this
alarm setting.
14
Page 18

7. Set Geo-fence Alarm by Sending SMS
Send SMS GEOFENCEALARMON*123456*yyy (Enable break geofence alarm yyy km) or GEOFENCEALARMOFF*123456 (Disable break
geo-fence alarm) to the tracker, GEOFENCEALARMON or GEOFENC
EALARMOFF is a command, 123456 is password, yyy is the radius
of the geo-fence (yyy is from 001 to 999, unit is km),the tracker will send back
the information Set Break Geo-fence Alarm ON or Set Break Geo-fence
Alarm OFF to indicate the operation is success, if the password is not right,
the operation is fault,the tracker will send back information"Wrong Password".
After enable geo-fence alarm, the system will locate tracker and get the
current location, and then set the current location as original point, later the
tracker will check new the location distance from the original point, if the
distance between is bigger than yyy km, the geo-fence alarm will be trigged
and the tracker will send alarm and location information by SMS to the
authorized phone number. If the tracker is triggered continually, every
authorized phone will receive max 3 alarm SMS per hour.
The geo-fence alarm SMS is as follow: Geo-fence Alarm
https://maps.google.com/maps?q=22.67680N,114.15188E
Battery: 88%
After disable the move alarm, the system will not check distance again.
Also send SMS CANCELALARM*123456 to the tracker can cancel this
alarm setting.
8. Set Over Speed Alarm by Sending SMS
Send SMS OVERSPEEDALARMON*123456*xxx (Enable over speed
alarm xxx km/h) or OVERSPEEDALARMOFF*123456 (Disable over speed
alarm) to the tracker, OVERSPEEDALARMON or OVERSPEEDALARM
OFF is a command, 123456 is password, xxx is the setting speed limited ,
the tracker will send back the information Set Over Speed Alarm ON or
Set Over Speed Alarm OFF to indicate the operation is success, if the
password is not right, the operation is fault, the tracker will send back
information Wrong Password .
After enable over speed alarm, the system will check the real time speed
when the car is running. If the current speed is higher than the setting speed
limited, the tracker will send alarm and location information by SMS to the
authorized phone number. If the tracker is triggered continually, every
authorized phone will receive max 3 alarm SMS per hour. The over speed
alarm SMS is as follow:
Over Speed Alarm, current speed: XXX km/h
After disable the over speed alarm, the system will not check speed again.
Also send SMS CANCELALARM*123456 to the tracker can cancel this
alarm setting.
15
Page 19

9. Check Alarm setting
Send SMS "ALARM*123456" to tracker,"ALARM" is a command,"123456"
is password, the tracker will send back the information Shock Alarm: OFF,
Move Alarm: OFF, Geo-fence: OFF, Over Speed Alarm: OFF, Power Down
Alarm: ON, Alarm calling: ON, Alarm SMS:ON to indicate all the alarm
setting, if the password is not right, the operation is fault, the tracker will send
back information Wrong Password . This command is used for check the
tracker alarm setting.
10. Cancel All Alarm Setting
Send SMS "CANCELALARM*123456" to tracker, "CANCELALARM"is a
command, 123456 is password, the tracker will send back the information
All Alarm setting Canceled , this command will cancel all the alarm setting
include Shock Alarm / Move Alarm / Geo-fence Alarm / Over Speed Alarm, if
the password is not right, the operation is fault, the tracker will send back
information Wrong Password .
11. Monitor Sound in Car
Send SMS "MONITOR*123456*13987654321" to tracker, "MONITOR" is
a command, "123456" is password, "13987654321" is the number that the
tracker will call back, if the operation is success, the tracker will call back
immediately to the number you set (13987654321), user pick up the call and
then can hear the voice in car. If the password is not right, the operation is
fault; the tracker will send back information Wrong Password .
16
Page 20

Platform Operation
The platform operation please refer the platform operation guide, scan
the following QR code or click the website link to download the platform
manual, visit website www.responsegps.com or www.999gps.net and click
the Manual icon also can download the platform manual.
Platform User Guide
Word Version
iPhone iOS App
Download & Install
Platform User Guide
Word Version
Android App
Download & Install
17
Page 21

Notes:
1. This tracker use 2G GSM network, and it upload tracking only through 2G
GPRS, it cannot work in CDMA network or 3G (WCDMA or CDMA2000)
network, Some 3G card can work in 2G GSM network, then this kind of 3G
SIM card can be used in this tracker, please call mobile phone company to
confirm the SIM card support 2G GSM network or not.
2. Please confirm that the SIM card PIN code has been disabled, otherwise
the tracker cannot find GSM network, and the Green LED will keep ON.
3. Also please confirm the SIM card has enable GPRS service(Some SIM card
need send SMS to enable the GPRS data service), the tracker will cost 20 30M GPRS data every month, order a GPRS data package can save money.
4. The antenna of GSM and GPS is built in tracker, please note that the install
location of the tracker can receive the GPS signal, if the OBD socket place
cannot receive GPS, please add an external OBD wires to install the tracker
to other place. Please leave away the tracker from big metal, and keep away
from the magnetic components.
5. The tracker built in backup rechargeable Li battery, the battery can be used
1-2 hours after the power supply is disconnected.
6. The tracker built in GSM and GPS module,so please power off the tracker at
the special place that restrict using mobile phone,such as on the plane,etc.
7. The GPS need 10-200 seconds to locate the position, when the GSM signal
is weak or the network is very busy, the SMS maybe delay to send by the
GSM network, this is normal.
8. The tracking data on our server will keep 6-12 months; the old data will be
deleted.
18
Page 22

Trouble Shooting:
1. The tracker auto power off: please confirm the tracker is installed in the
OBD socket firmly.
2. After power on the tracker, the tracker GREEN LED keep on, and it has not
any repose, and no ring, please confirm the SIM card has been installed
properly, the SIM card PIN code is disable, and the SIM card has enough
charge,and the mobile phone can work well in that place.If the tracker work
well the Green LED will flash once every 4 seconds.
3. If the tracker cannot upload location to website, please confirm the SIM
card has GPRS function, and the APN or GPRS auto configure is right,
(Send SMS CHECK*123456 to check auto configure,and call the mobile
phone hot line to confirm APN & GPRS). if the tracker do not move, the
tracker will not upload tracking, try moving the tracker.
4. If the tracker cannot send back information by SMS,please confirm the SIM
card has ID caller display function and SMS service function, and please
read the SMS information of the tracker sending back, and check the
instruction & password is right or not.
5. When call the tracker, it has ringing,but it will not hang up the calling,please
check the tracker has set the authorized phone number, use the authorized
phone call the tracker, or delete the authorized phone number.
6. Cannot login the platform: send SMS to check the ID of the tracker,then try
again, if not success please contact your supplier.
7. After go out the underground park,some tracking maybe lost, the GSM and
GPS module will take a few minutes to receive signal and re-locate, some
tracking maybe lost, this is normal.
8. Some time some location point is lost,this is normal,in the transmit process,
some point maybe lost,but this will not happen very often.
19
Page 23

Specifications:
GSM Module
GSM Frequency
GSM / GPS
Antenna
GPS Cold Start
Time
Working Voltage
Standby Current
Battery
Absolute
Temperature
SIMCOM
850/900/1800/
1900Mhz(4 Band)
Built in
36 seconds
9-40V DC
< 10 mA
180mAh
O
O
-35 C to +70 C
GPS Module
GPS channel
Locate precision
GPS Hot Start Time
Recharging Current
Uploading Current
Working
Temperature
Storage
Temperature
u-Blox or MTK
24 channels
10-20 Meters
1 second
< 5V/100mA
<100mA / 12V
OO
-20 C to +55 C
OO
-40 C to +80 C
20
Page 24

Distributed by:
Electus Distribution Pty. Ltd.
TechBrands
320 Victoria Rd, Rydalmere
NSW 2116 Australia
Ph: 1300 738 555
Int l: +61 2 8832 3200
Fax: 1300 738 500
www.techbrands.com
 Loading...