

Page 1
RGA22G scale guide
Scale applicator tool for RGH22 readhead installations
The RGA22G scale guide is mounted in place of any Renishaw RGH22 readhead and
uses the motion of the axis to apply RGS-S tape scale parallel to the guideway whilst
simultaneously removing the backing paper - a one man, one hit operation.
● Prepare scale and surface
● Ensure scale is cut to correct length and mounting surface has been prepared (refer to
RGS-S scale installation guide for details)
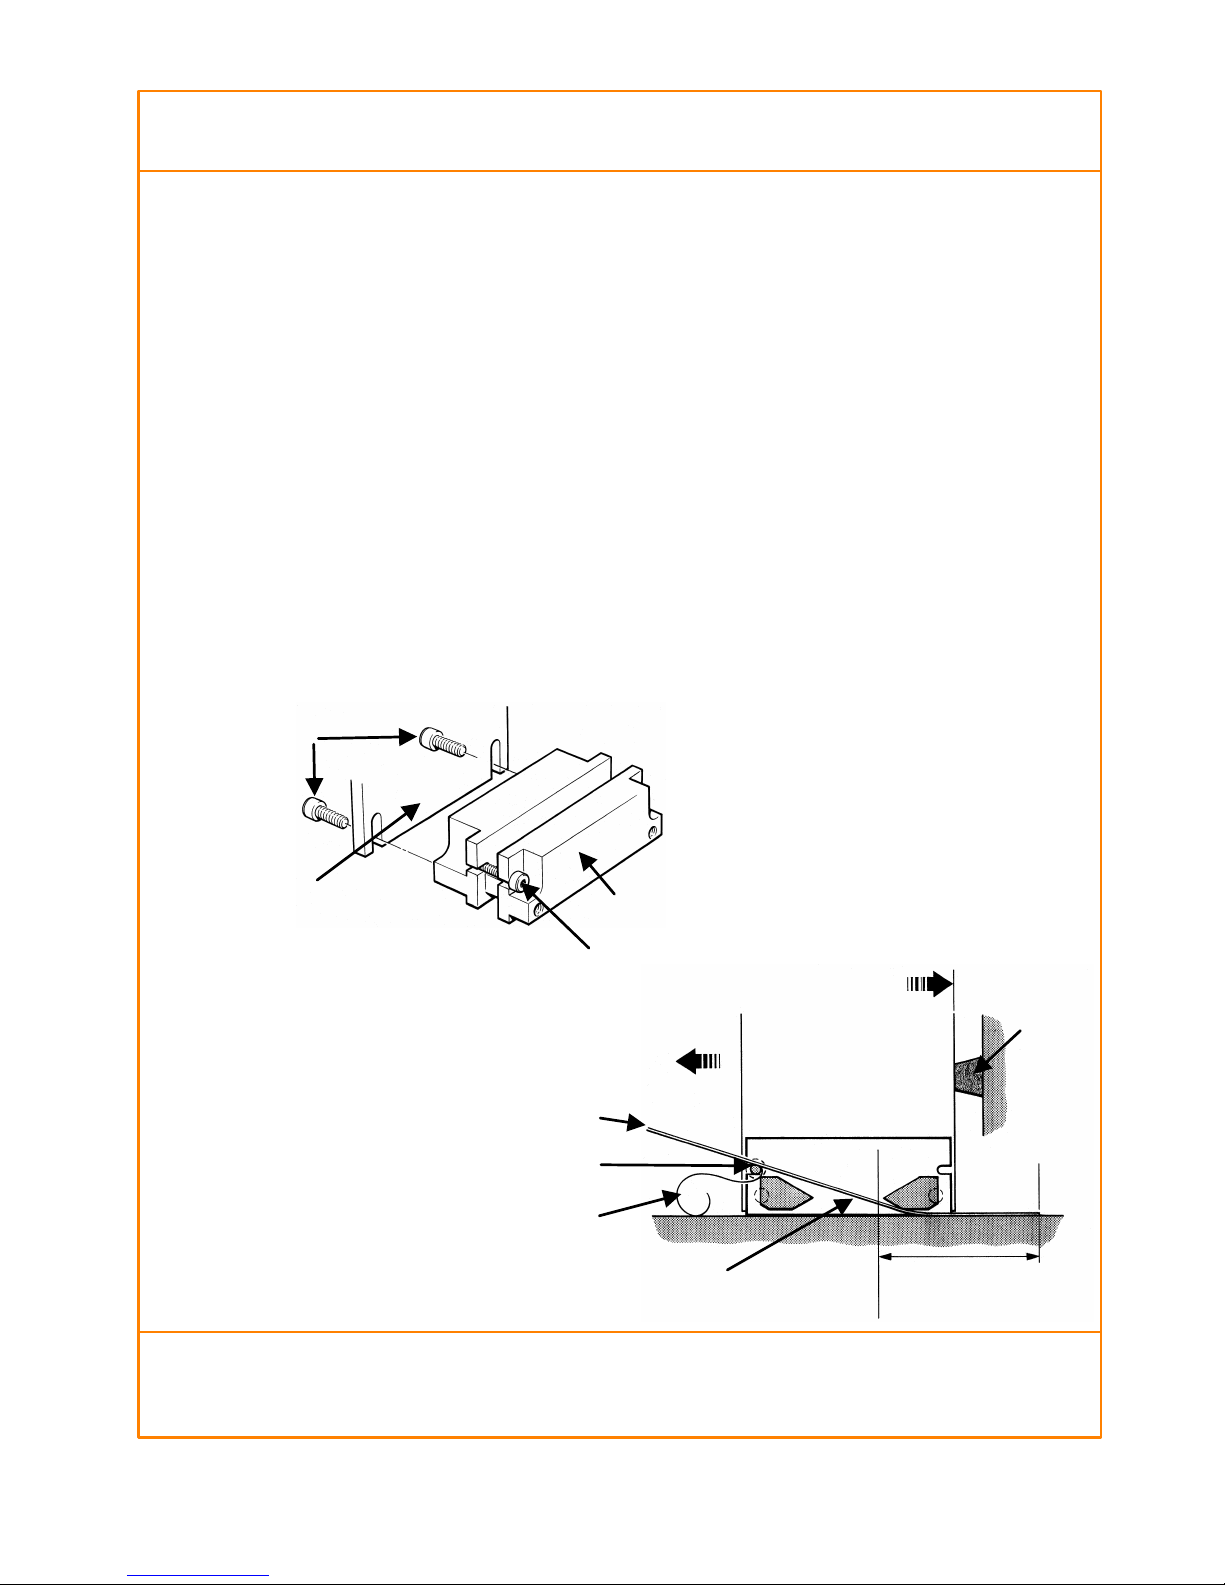
● Install the scale guide
● Mount the scale guide to the readhead bracket as shown in figure 1
● Be careful to check that the readhead and the scale guide have the same orientation, as
the readhead does not lie centrally over the scale
● Move the guide to the start of axis travel. Note the direction of scale application as shown
in figure 2
● The design of the RGA22G allows scale application in either direction
(continued overleaf)
Scale installation
Part No. M-9531-1281
abcdh
I N S T A L L A T I O N I N S T R U C T I O N S H E E T
efg
Limit of travel
20mm
Figure 2
Direction of scale
application
Backing paper
RGA22G scale guide
Limit stop
Start of measuring length
Splitter screw
RGS-S tape scale
Mounting screws
Readhead
mounting
bracket
RGA22G scale guide
Figure 1
Splitter screw
Page 2
● Load the scale into the scale guide
● Remove the splitter screw (see figure 1) from the scale guide body
● Separate the backing paper from the first 40mm of scale and feed it into the scale
guide as shown in figure 2
● Relocate the splitter screw behind the backing paper as shown in figure 2
● Push the scale carefully through to the end of scale mark, ensuring that it does not
stick to the mounting surface until it is in position. NOTE to prevent the scale sticking
to the mounting surface during this operation it may be necessary to re-apply
approximately 20mm of backing paper to the end of the scale before inserting through
scale guide. This can then be removed before to fitting end clamps.
● Attach the end of the scale to the mounting surface with light finger pressure
● Apply the scale
● Traverse the axis through its full travel at a slow, steady speed
● While moving the axis
● Apply a light finger pressure to the scale behind the scale guide to
attach it to the mounting surface
● Gently pull the backing paper away from in front of the scale guide as it
is separated
● Remove the scale guide
● When the axis has reached the limit of its travel, lock the axis in place and unbolt the
scale guide from the readhead mounting bracket
● Withdraw the scale guide along the scale whilst applying the remaining scale using
light finger pressure
● Ensure complete adhesion of the scale to the mounting surface by applying firm finger
pressure along the full length of the scale from the centre outwards to each end
● Fit RGC-F end clamps (refer to RGS-S scale installation guide for details)
DO NOT remove the scale for refitting or use elsewhere once it has been applied to the mounting surface.
The scale can be applied once only.
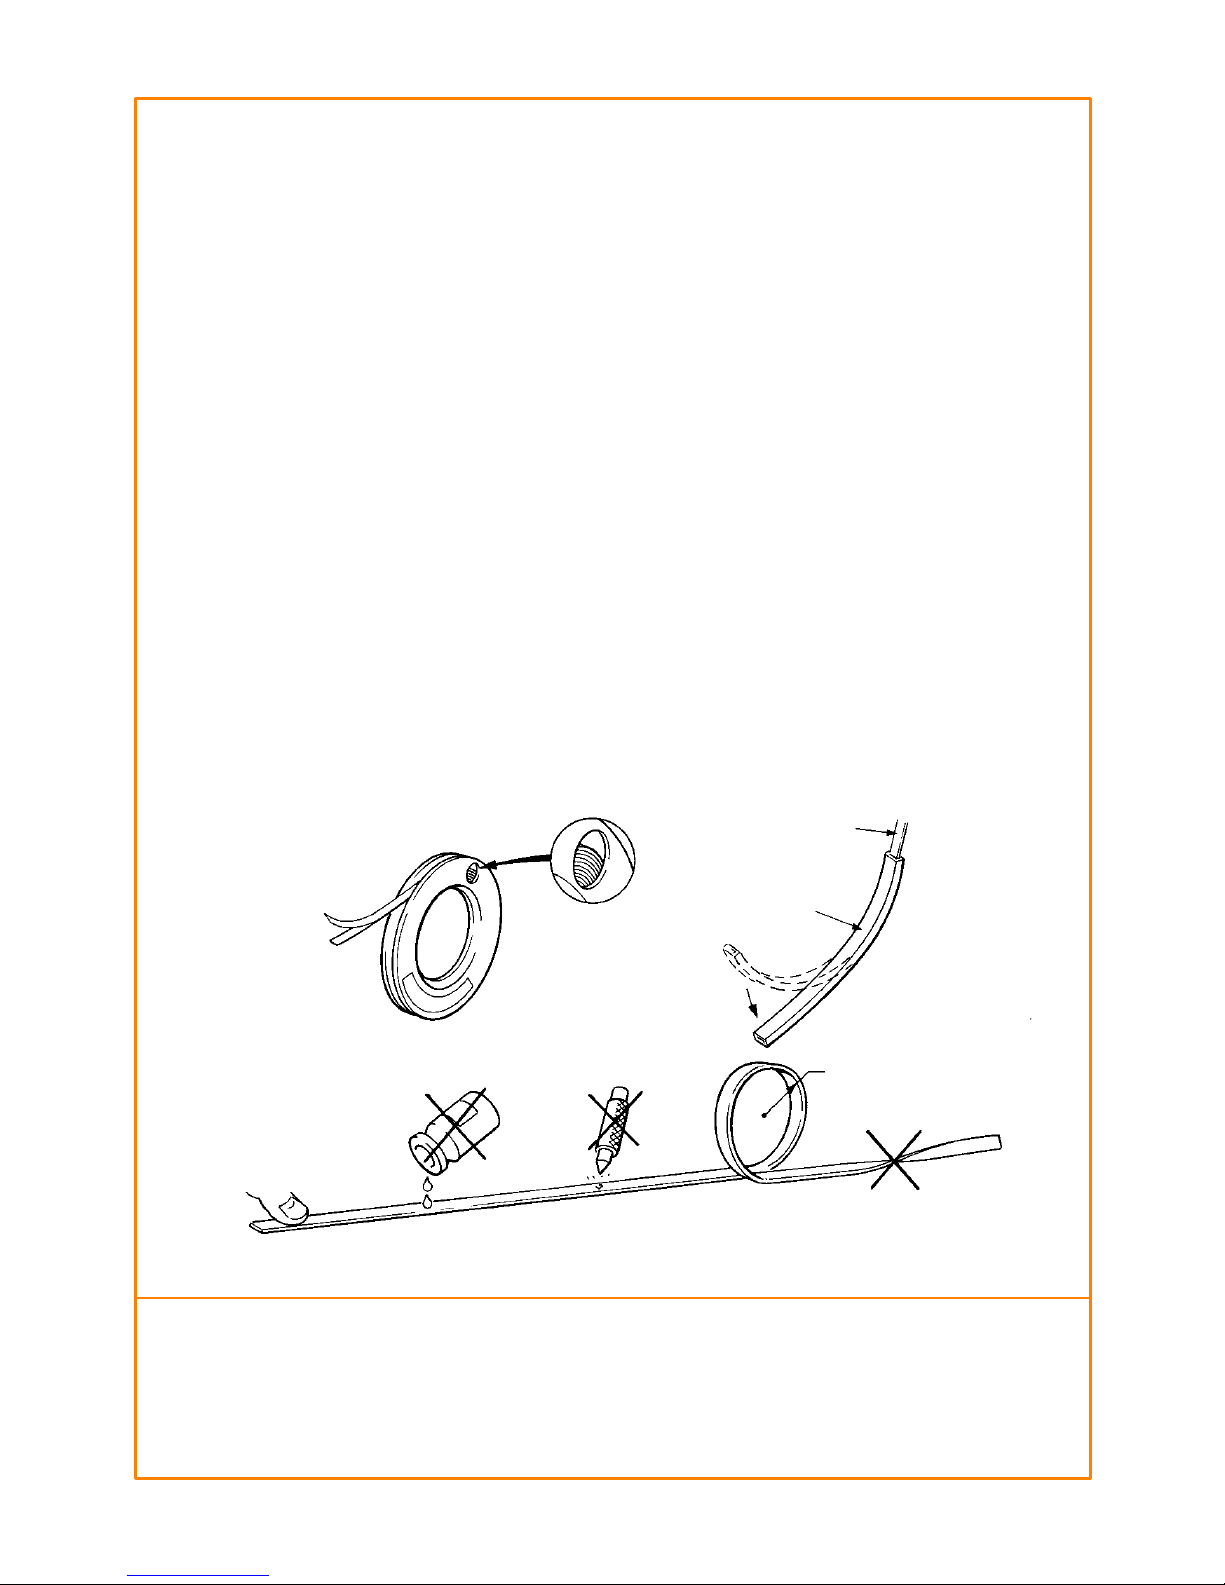
Plastic extrusion for
lengths under 6m
Scale
Keep coils tight
during storage
Straighten coils to
withdraw scale
Avoid alcohol and
solvents
Do not twistNo sharp objects
Reel for lengths
over 6m
Scale surface
is immune to
handling
>100mm
Scale handling precautions
abcdh
Renishaw reserves the right to change specifications without notice © 1999 Renishaw plc
Printed in England 499 Part No M-9531-1281-02
Renishaw plc
Encoder Products Division
New Mills, Wotton-under-Edge
Gloucestershire GL12 8JR, UK
Tel: +44 (0)1453 523 634
(07000 RENISHAW)
Fax: +44 (0)1453 523 760
E mail encoder.products@renishaw.com
Internet http://www.renishaw.com
USA, Renishaw Inc
Tel +1 847 843 3666
Fax +1 847 843 1744
Japan, Renishaw KK
Tel +81 3 5350 2201
Fax +81 3 5350 2207
Germany, Renishaw GmbH
Tel +49 712 797 960
Fax +49 712 788 237
France, Renishaw SA
Tel +33 1 64 61 84 84
Fax +33 1 64 61 65 26
Italy, Renishaw SpA
Tel +39 11 9 66 10 52
Fax +39 11 9 66 40 83
Spain, Renishaw Iberica SA
Tel +55 11 7295 2866
Fax +55 11 7295 1641
Switzerland, Renishaw AG
Tel +41 55 410 66 66
Fax +41 55 410 66 69
Hong Kong, Renishaw (Hong Kong) Ltd
Tel +852 2753 0638
Fax +852 2756 8786
Brazil, Renishaw Latino America Ltda
Tel +55 11 7295 2866
Fax +55 11 7295 1641
Renishaw’s Representative Offices
People’s Republic of China, Beijing
Tel +86 10 6461 2689
Fax +86 10 6461 2687
Singapore
Tel +65 438 2778
Fax +65 438 4780
Indonesia, Jakarta
Tel/fax +62 21 424 3934
India, Bangalore (liaison office)
Tel/fax +91 80 224 3223
 Loading...