How it Works
Log In / Sign Up
Buy Points
How it Works
FAQ
Contact Us
Questions and Suggestions
Users
Reliable
Loading...
D
DDX-LP PrePak
Digital Steam Press
Digital Velocity Compact Vapor Generator
Digital Velocity V95
DL-04
DREAMSTITCHER 600SO
Dreamstitcher Portabl 787
E
E3
2
E40
E5
EB250
Empressa S330
2
Empressa S500
2
Empressa S550
End Cutter With 96"" Track & Lifter Set XD-510L
Enviromate E3
Enviromate E5
EnviroMate Flex EF700
EnviroMate GO E20
EnviroMate PROEP1000
2
EnviroMatePRONTO P7
2
Enviromate T630
2
Enviromate T730A
2
EnviroMate TANDEM EV1
EnviroMate VIVA E40
EP1000
EV1
F
F1
3
F1FR 300 QREC
F1FR QREC
F1-FTR
F1 Res 30 LL
F1 Res 44 LL
F1 Res 49 LL
F1 Res 58 LL
F1 RES LL Series
F3
2
F5
2
G
G4
2
G4m
2
GXLO
I
i30
3
i300
3
i38
i400
2
i500
3
I500A
3
i500B
3
i500 Series
I60
2
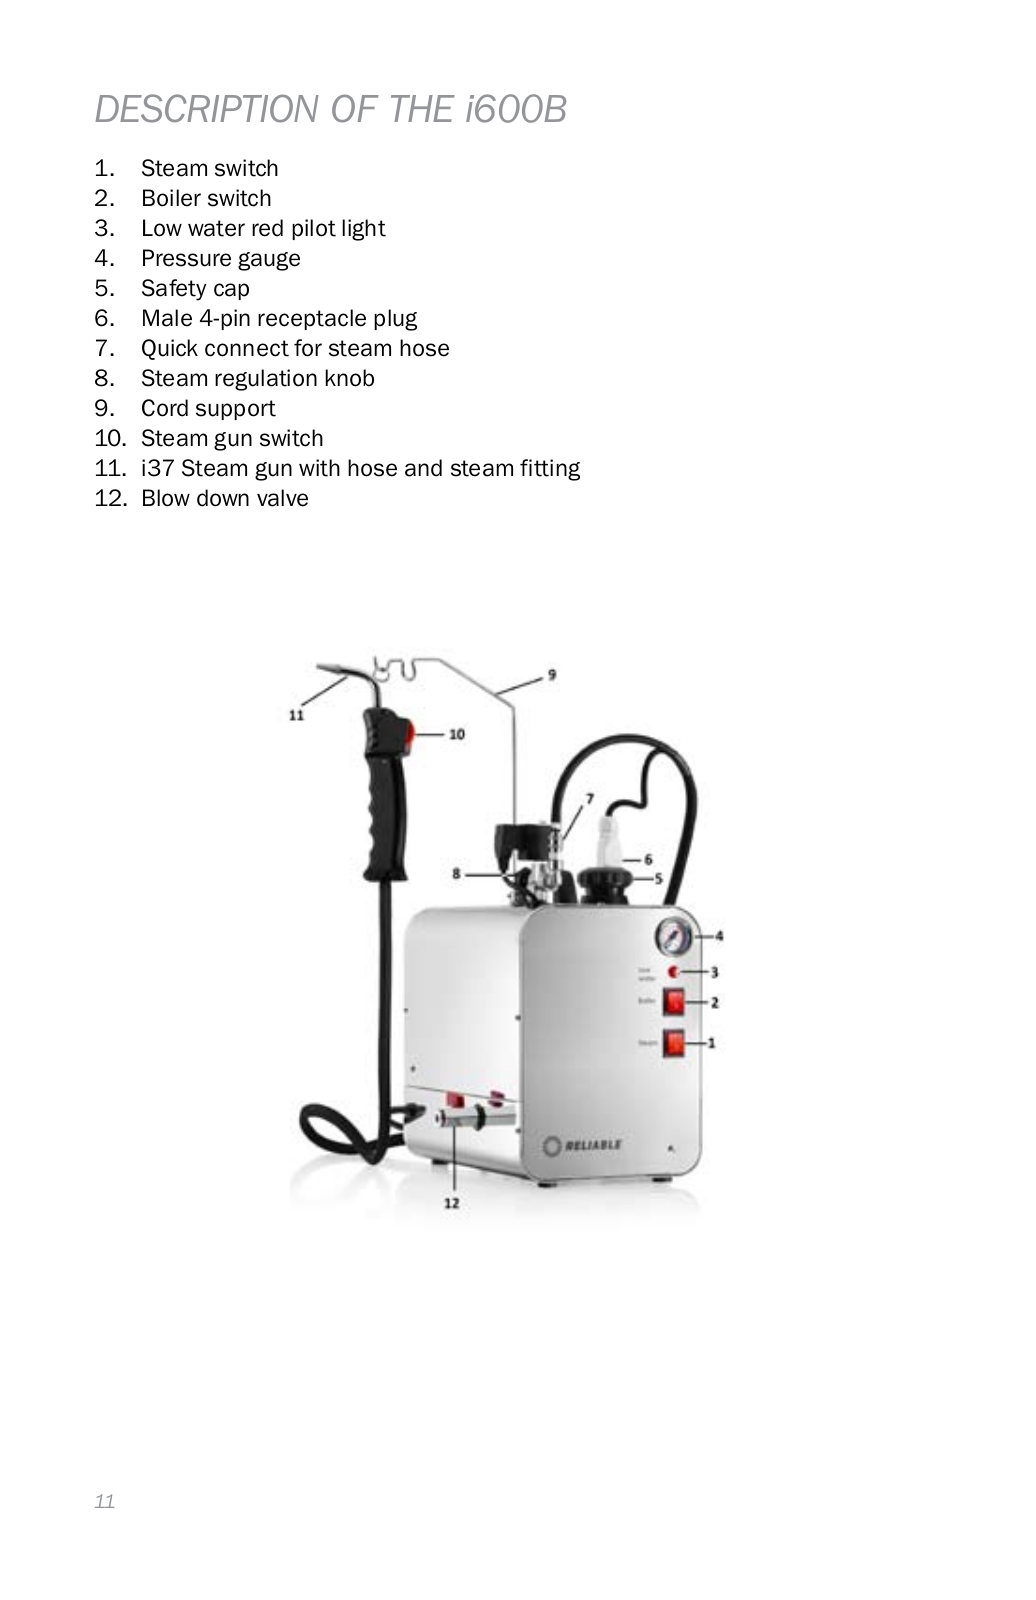
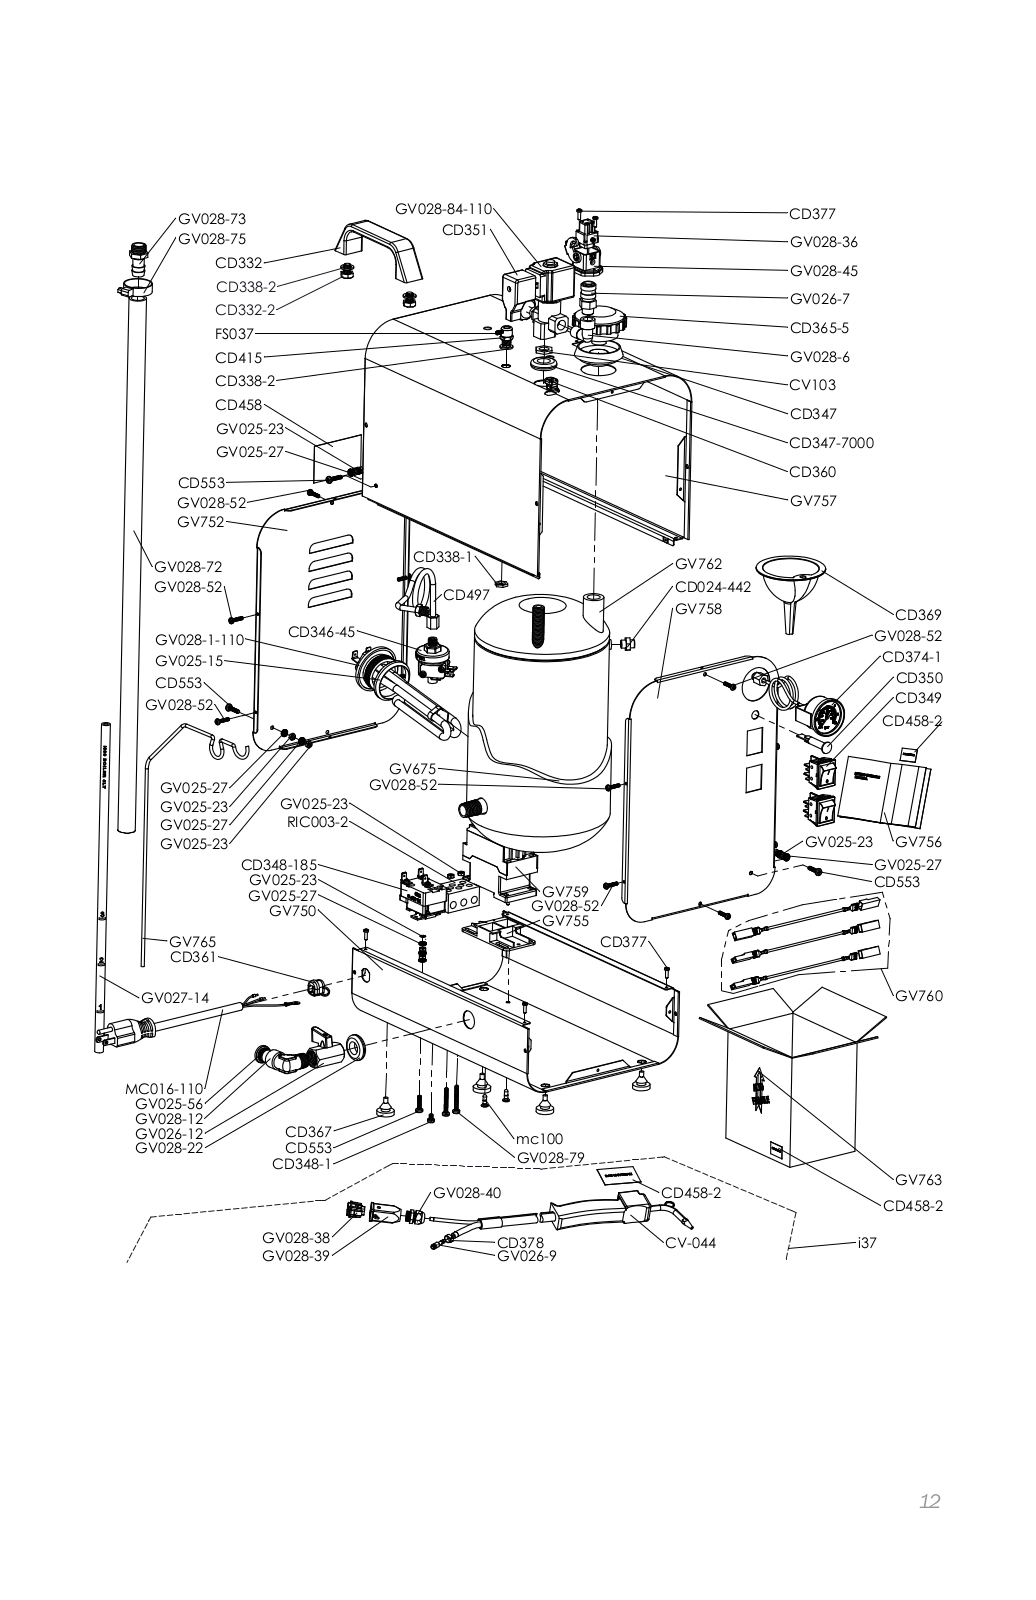
i600
i700
3
i700A
2
i700B
2
i702
2
i702C
2
i800 Series
IronMaven J490A
J
J168
J420
J490A
2
L
Longboard C55LB
M
MAESTRO 600SB
MAVEN 100IS
Model C
MSK-1341B
2
MSK-146B
2
MSK-146BL-4
MSK-1541S
2
MSK-3314N
MSK-3314N-CF7-40H
MSK-3316N
MSK-3316N-GG7-40H
MSK-335B
2
MSK-341B
MSK-373N
MSK-441
MSK-555
MSK-588
2
MSK-755
2
MSK-755H
MSK-8210M
MSK-8220B
MSK-8400B
2
MSK-8400BL-18
MSK-8420B
2
MSK-8420BL-18
2
MSK-8600B
2
MSK-8900H
MSK-8900M
2
N
Nitrogen Regulator
NS-ASAM
NS-Pak
O
OVO 150GT
P
Pantman F1
2
Pantman F5
Professional Stainless Steel Jewelry Steam Cleaner i700A
PRONTO 100CH
2
PROT3
PSP-S300
Loading...
Loading...
Nothing found
i600
User Manual [en, es, fr]
60 pgs
3.23 Mb
0
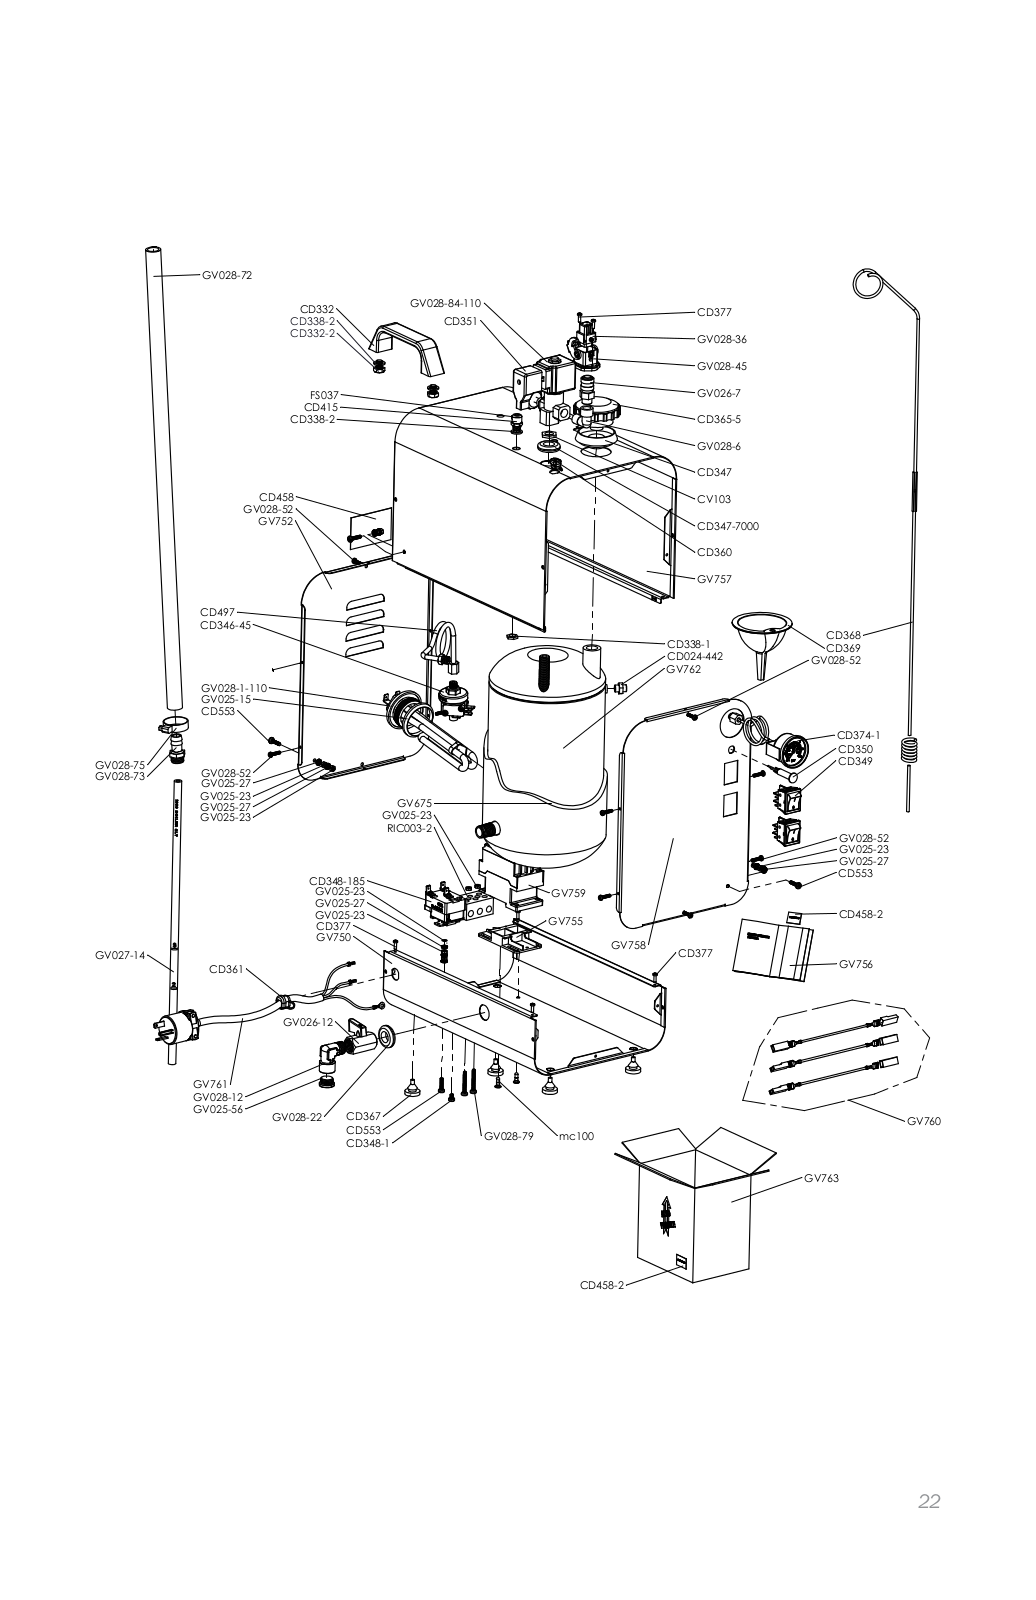
Table of contents
Loading...
Reliable i600 User Manual [en, es, fr]
...
Reliable User Manual [en, es, fr]
Download
Specifications and Main Features
Frequently Asked Questions
User Manual
Download
Loading...
+
hidden pages
Unhide
You need points to download manuals.
1 point = 1 manual.
You can buy points or you can get point for every manual you upload.
Buy points
Upload your manuals