

Rega Research P-1 Owners manual
Your Rega P1 turntable has been designed
to effectively reproduce music whilst being
easy to use. We have omitted all the usual
gimmicks; concentrating the manufacturing
costs on the high quality and design necessary to reproduce records accurately.
Using a manual speed change (for the odd
occasion you may want to play a 45 RPM
record) rather than an automatic mechanism, eliminates speed inconsistencies
and possible damage to the drive belt. The
money we save with this method is spent
on an expensive low vibration motor which
would normally be used on a turntable
costing two or three times the amount. The
simplistic design of the Rega P1 and the
use of extremely high quality components
ensure that your turntable should last for
many years. The tips we give may help
increase the longevity of your TT-1 and
give you maximum musical enjoyment
combined with ease of use.
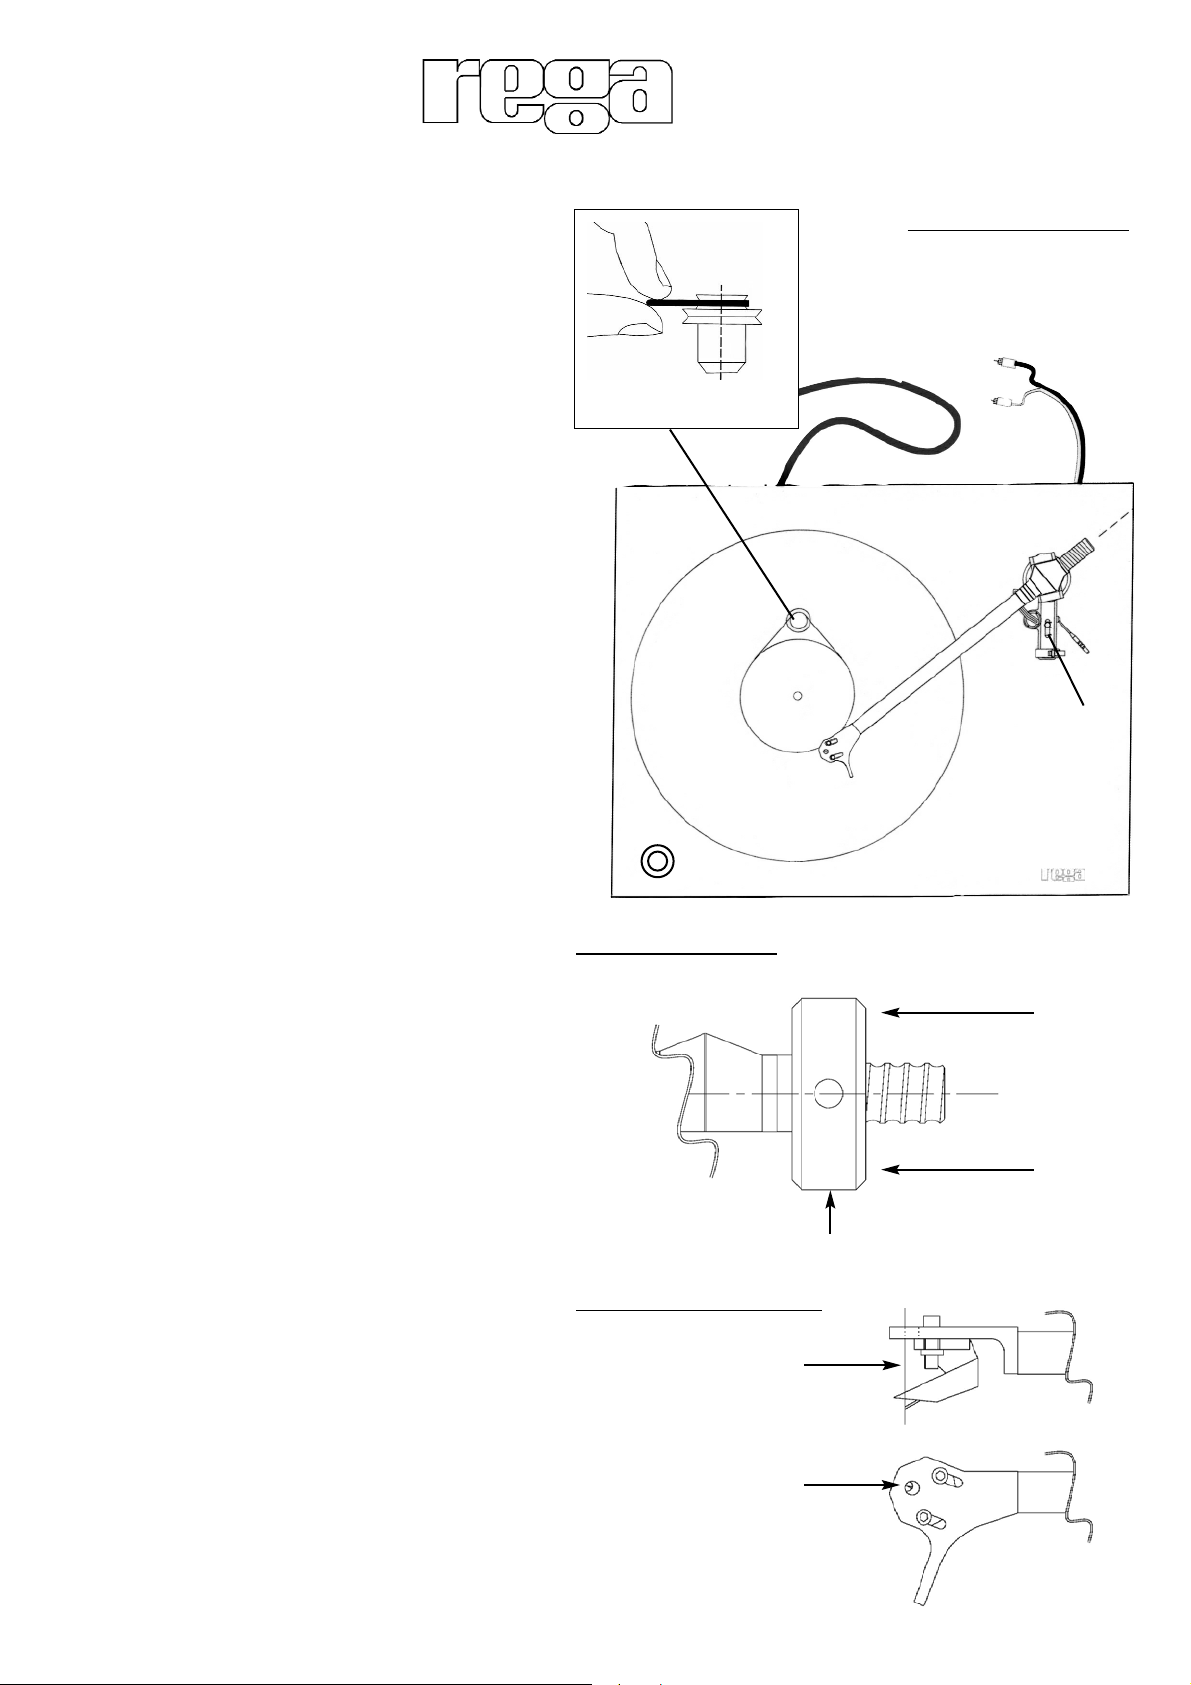
Quick set up (factory fitted cartridge only)
Your turntable has been designed to be
very simple to set-up and use.
We have designed this turntable so that
correct tracking weight can be achieved by
simply moving the balance weight as close
to the pivot point as possible. Fig 1.
This will automatically set the arm to within
the recommended tracking range for the
factory fitted stylus. (1.5g - 2.0g)
The Bias slider should be set to the same
figure as the tracking weight.
Advanced Set-up (for use when fitting different cartridges)
Align the cartridge as shown in fig 2.
Ensure the cartridge is sitting square in the
headshell before fully tightening. Make
sure the bias adjustment slider is set to
zero. Screw the balance weight along its
shaft until the stylus is "floating" just 1mm
clear of the record.
The recommended tracking force can now
be applied by rotating the balance weight
so that it moves towards the front of the
arm. A half turn gives 1g tracking force.
Always use a force which corresponds to
the upper limit of the cartridge maker's recommended range. Set the bias adjustment
slider to the same number as the tracking
force control - i.e. 1.5g tracking force = 1.5
on the bias slider.
Quick set up guide (fig 1.)
Balance weight
Push balance
weight on as far
as the shaft will
allow.
Advanced set up guide (fig 2.)
Stylus must line up
with the front edge
of the hole
Power
Red (Right channel)
White (Left channel)
Bias
Adjustment
Slider
Top view of turntable
P1
P1

Hints and Tips using your Turntable
Mount the turntable on a rigid, level surface. A light shelf or
turntable support screwed to a wall or in an alcove is ideal.
Avoid mounting on hollow or heavy cabinets or anything
mounted on a wooden floor.
Try to keep the lid closed while playing the records. This will
prevent dust falling on to the records and make cleaning
unnecessary. There may also be a sonic improvement.
Don't use any record cleaner that works while the record is
playing or any cleaners that use water or solvents. If you
keep your records stored in their sleeves, avoid touching the
playing surfaces, play with the lid down and keep all water
and fluids away, cleaning should not be necessary. Don't
worry about visible dust on the record surface, this is
brushed aside by the stylus and any that collects on the stylus can be easily blown away. In general, record cleaning is
overdone and one should not believe all the claims made by
record cleaner manufacturers.
Leave the turntable running during a record playing session.
Switch on before the session and only switch off after you
have finished.
Don't lift the centre hub out from the main bearing. The bearing is factory assembled with a film of special thick lubricant.
If the centre hub is removed this film may be disturbed.
Rega turntables are designed to optimise performance for
music reproduction and therefore no compromises have been
made to give quick start times. The normal time taken for full
speed to be reached is between 2-5 seconds.
The arm earth (or ground) is automatically connected
through the arm cable screening. No other earthing should
be necessary.
Save the original packing in case you ever need to transport
the turntable.
Don't use any polishes on the turntable or lid. To clean or
dust, wipe gently with a soft cotton duster (slightly damp only
if necessary).
Should you experience any problem with your turntable or
wish to enquire about servicing please contact your Rega
dealer.
1
2
3
4
5
6
7
8
9
10
Warning: Any attempt to adjust or repair this product by persons other
than Rega personnel may invalidate the guarantee.
 Loading...